Invoicing from App
An invoice is maintained to have a detailed clarification of the cost required to complete a job. Technicians can create, fill, preview, and manage invoices directly from the DreamzFSM mobile app using multiple access points.
Overview
The Invoicing feature in DreamzFSM allows technicians to generate detailed invoices on the go, directly from the mobile app. Invoices can be accessed via the Jobs panel, the footer plus icon, or the More menu. They can include all relevant job cost details such as services, miscellaneous costs, customer information, and attachments, and can be previewed before saving to avoid errors.
Here are some reference videos:
How to Create an Invoice from the App
Invoices can be accessed and created in various ways from the DreamzFSM mobile app.
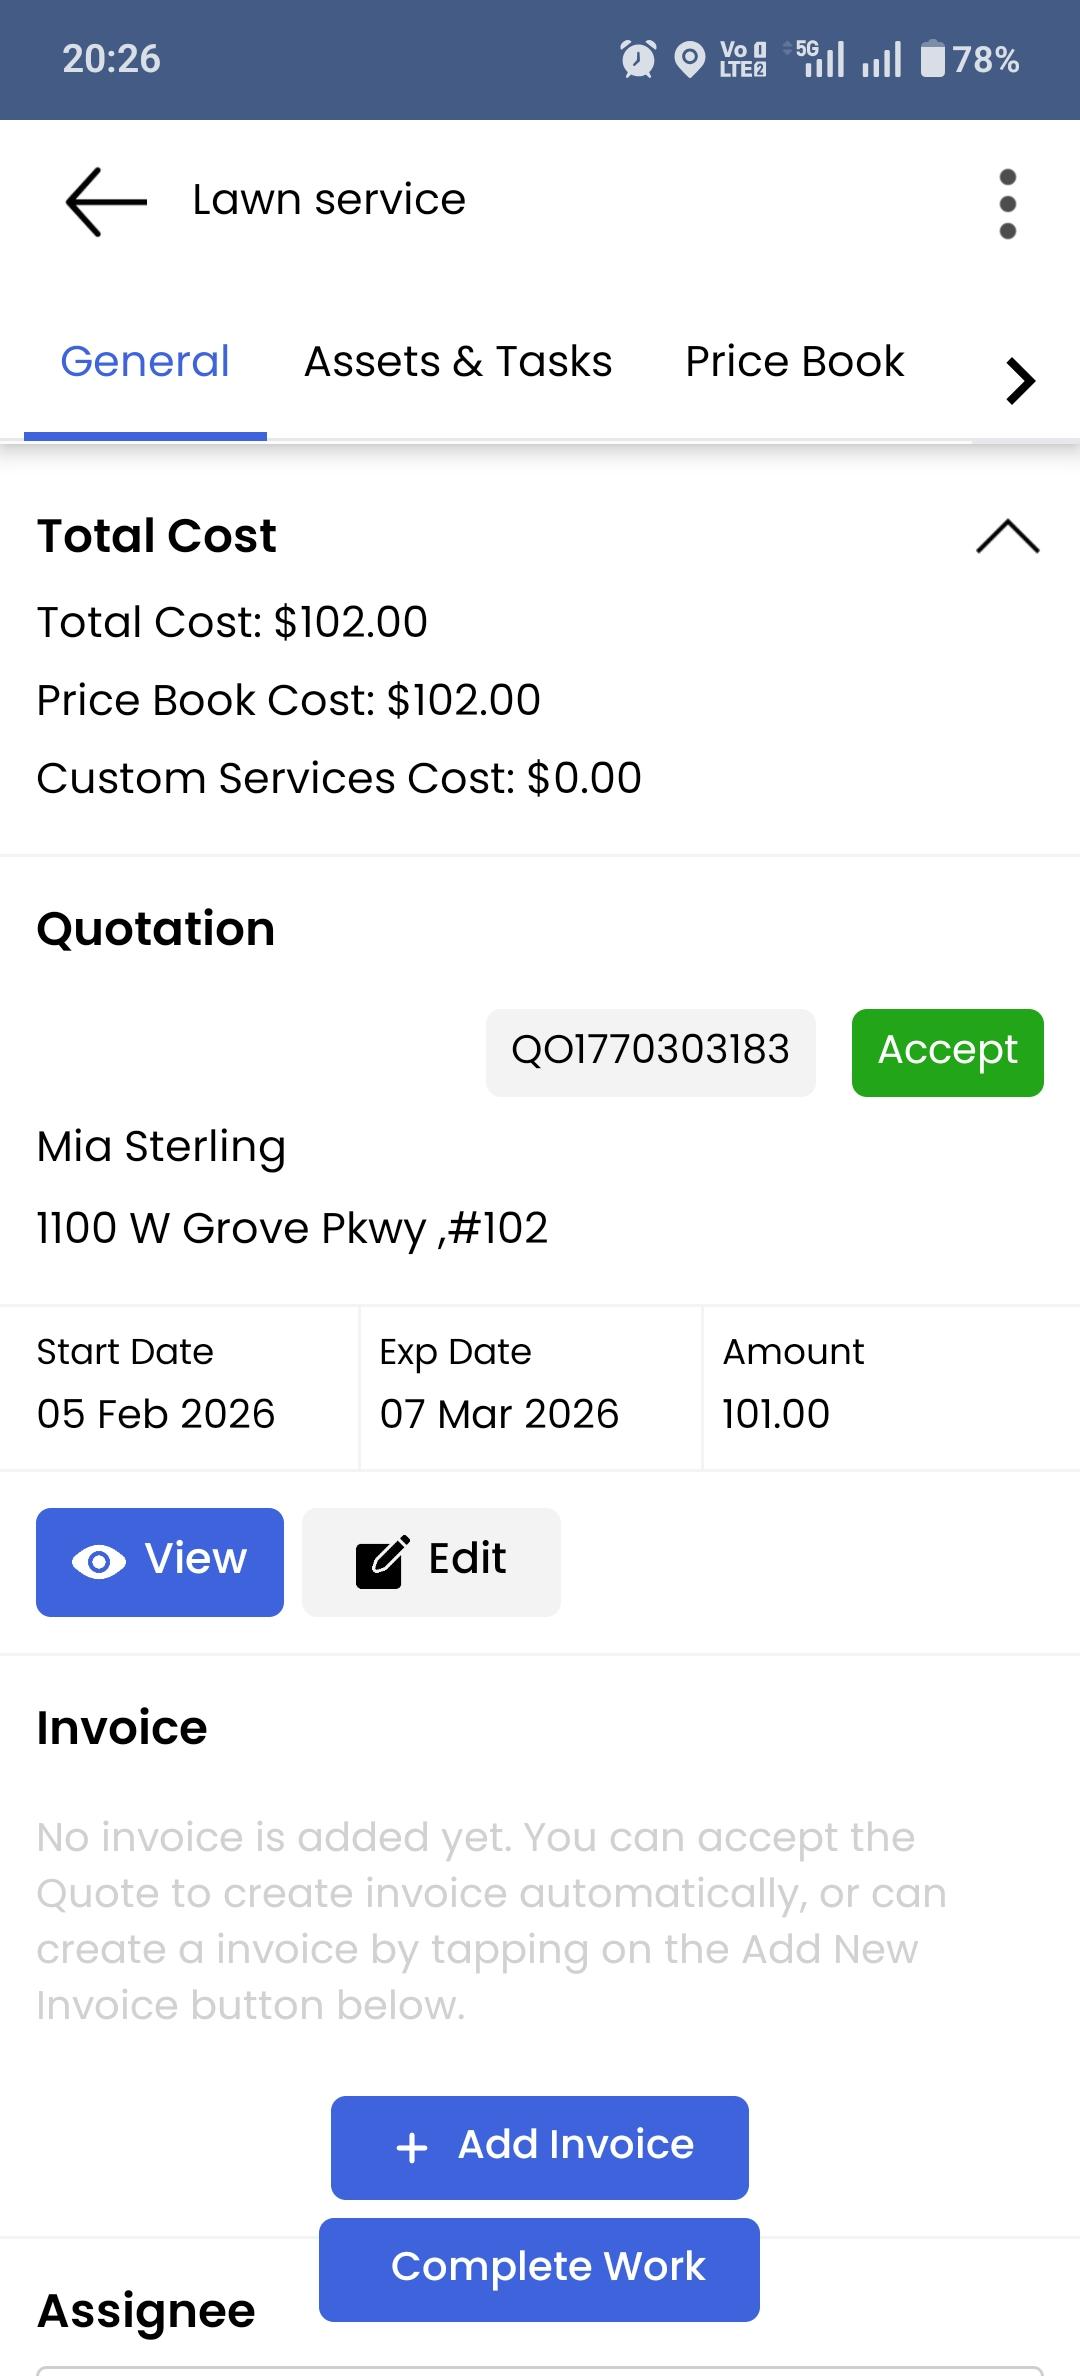
Step 1 – Access Invoice from the Jobs Panel
In the bottom panel, navigate to Jobs. Tap on any job and select Add Invoice to open the invoice form for that job.
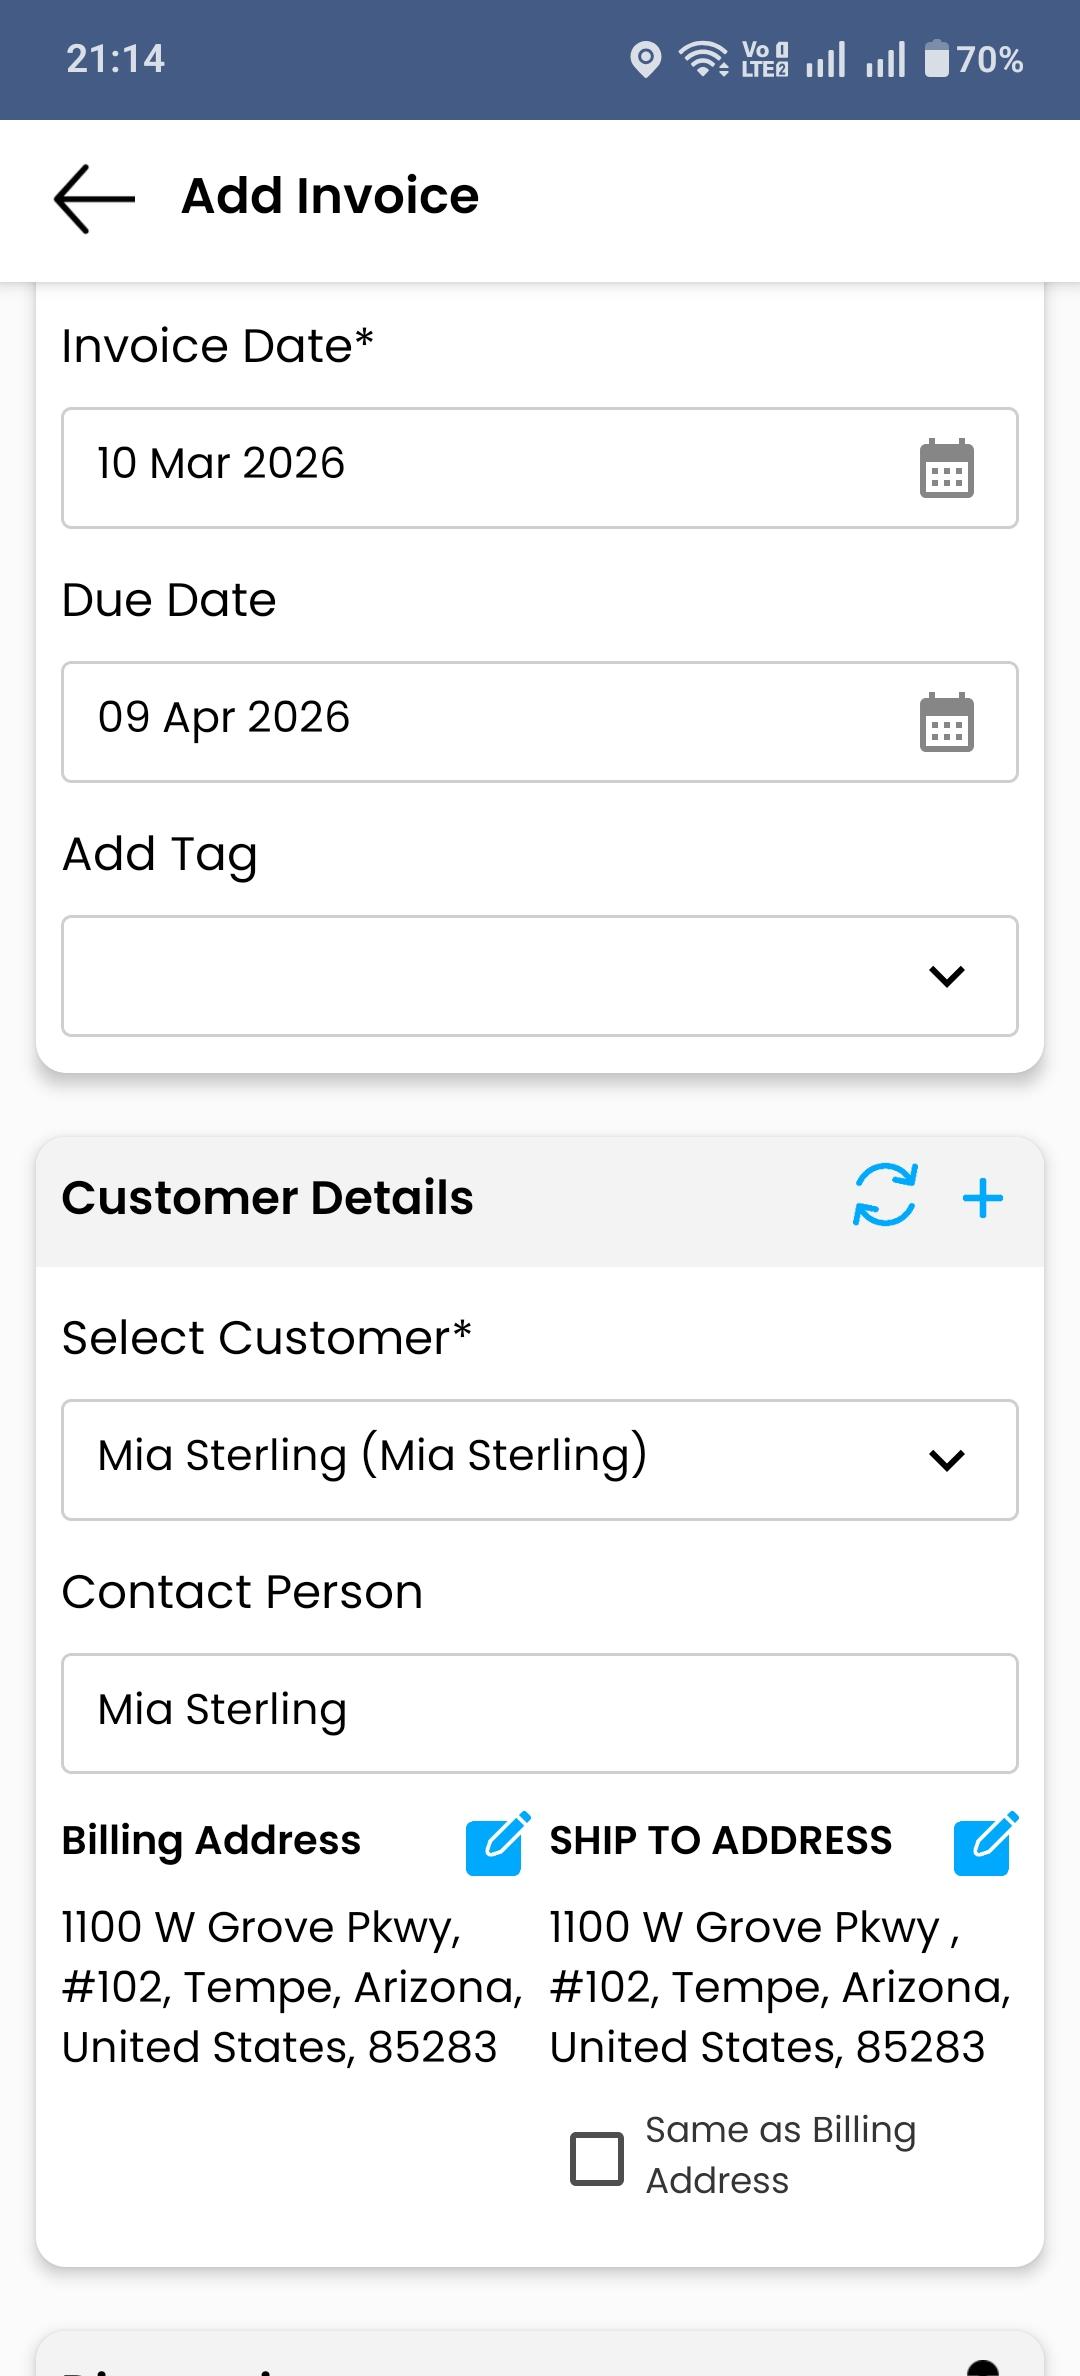
Step 2 – Fill in the Invoice Details
Fill in all the necessary details for the invoice, including:
- Invoice Date
- Due Date
- Currency
- Customer Details
- Services
- Miscellaneous Cost
- Address Search
- Customer Search
You can also attach files to the invoice if required.
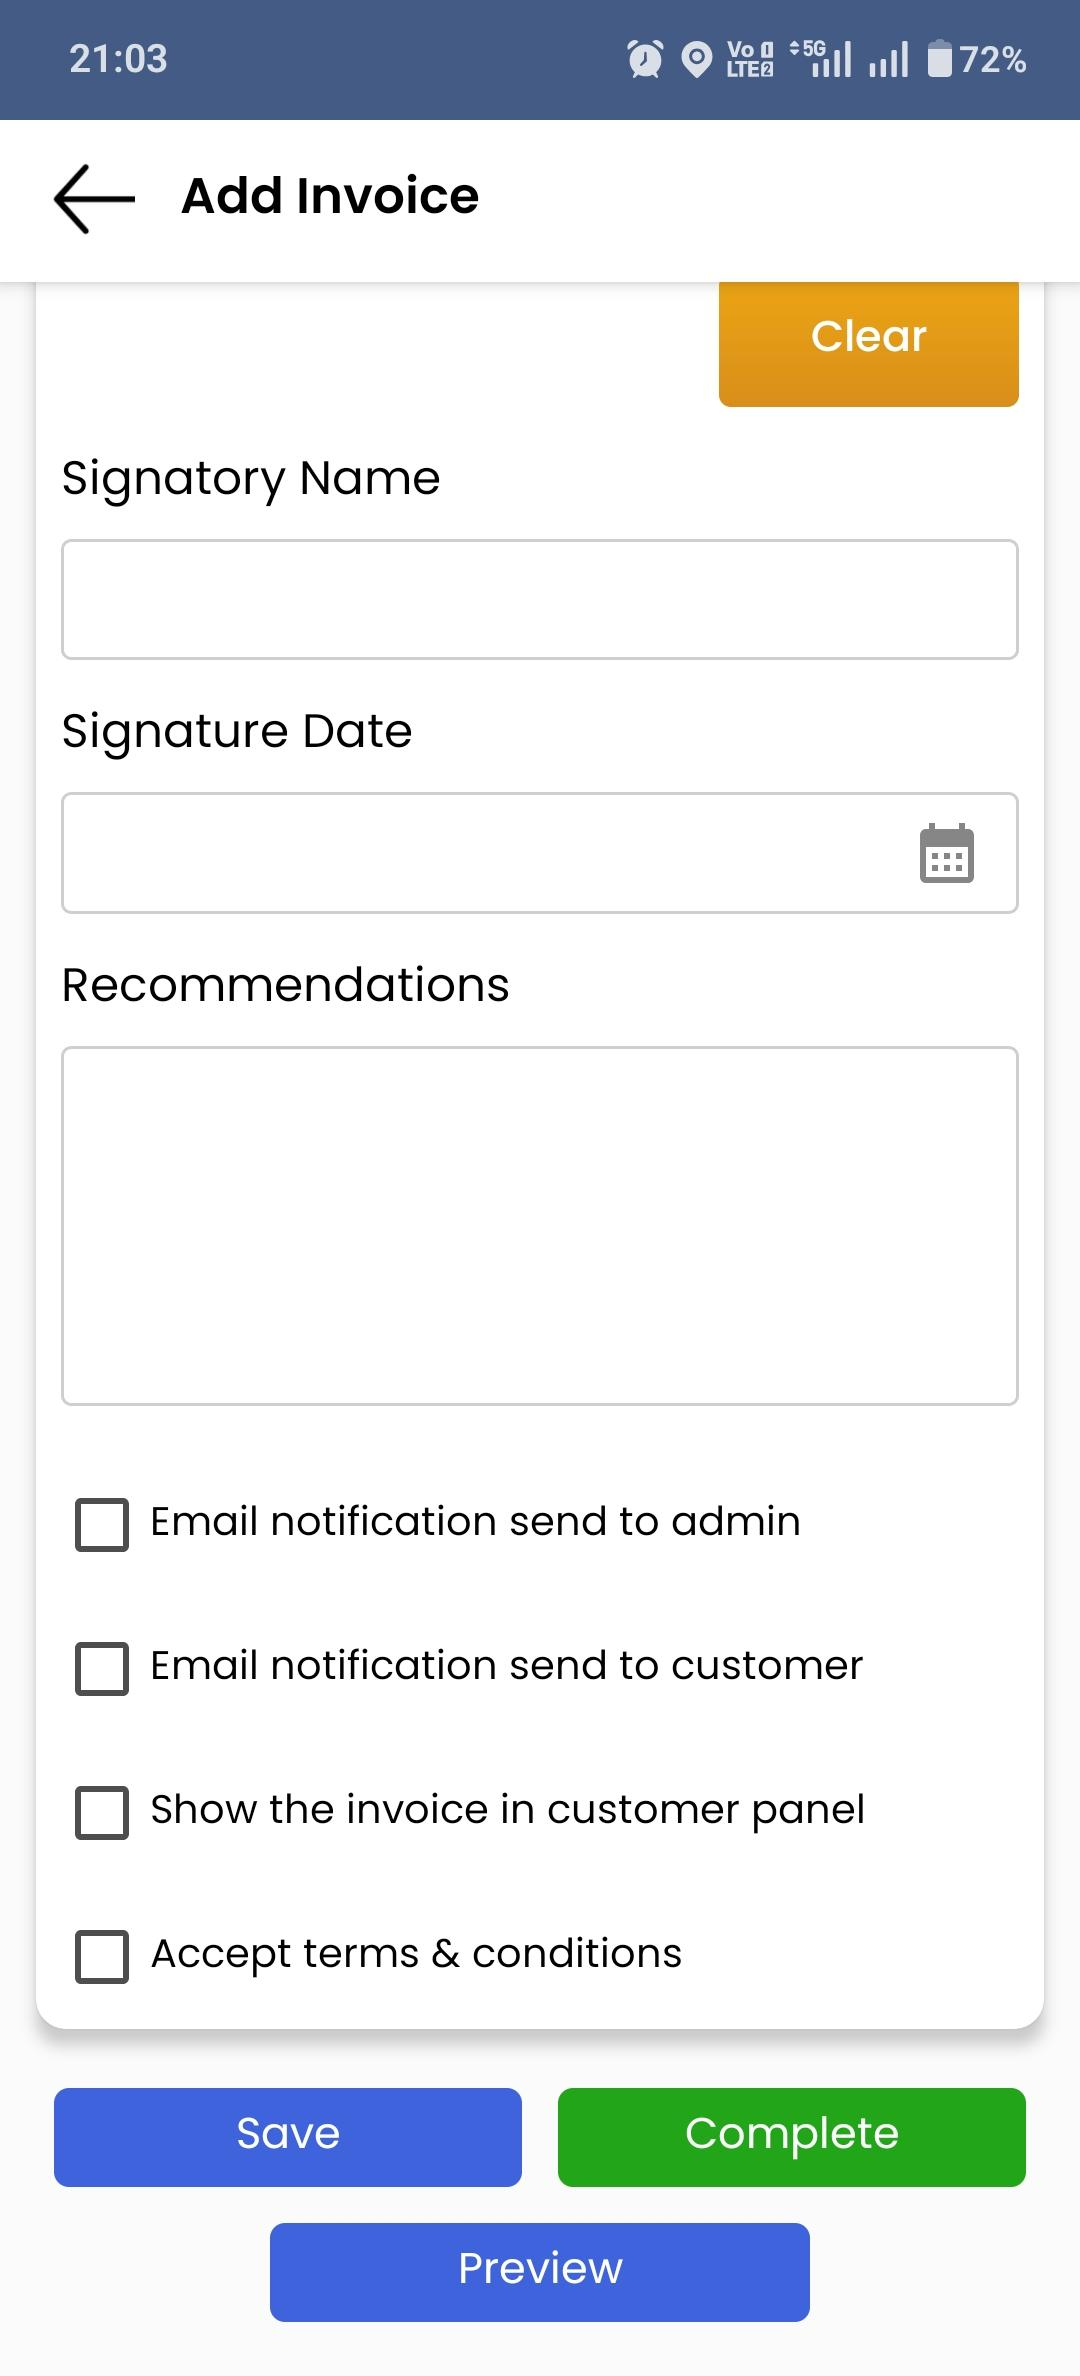
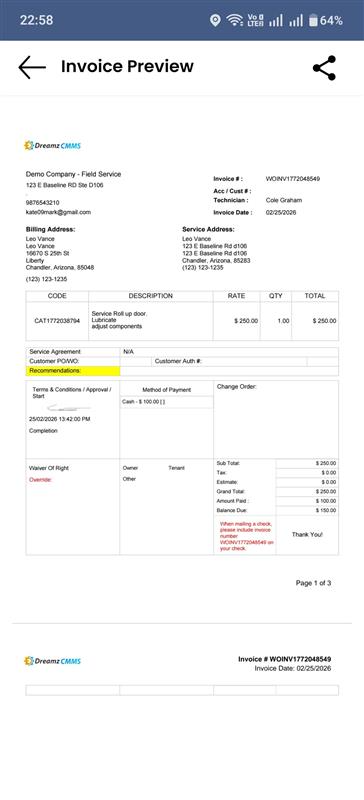
Step 3 – Preview the Invoice Before Saving
Preview the invoice before saving to avoid any mistakes. This allows you to review all details and confirm they are correct before the invoice is stored in the system.
Step 4 – Additional Ways to Access Invoicing
You can also add and view invoices through these additional access points in the app:
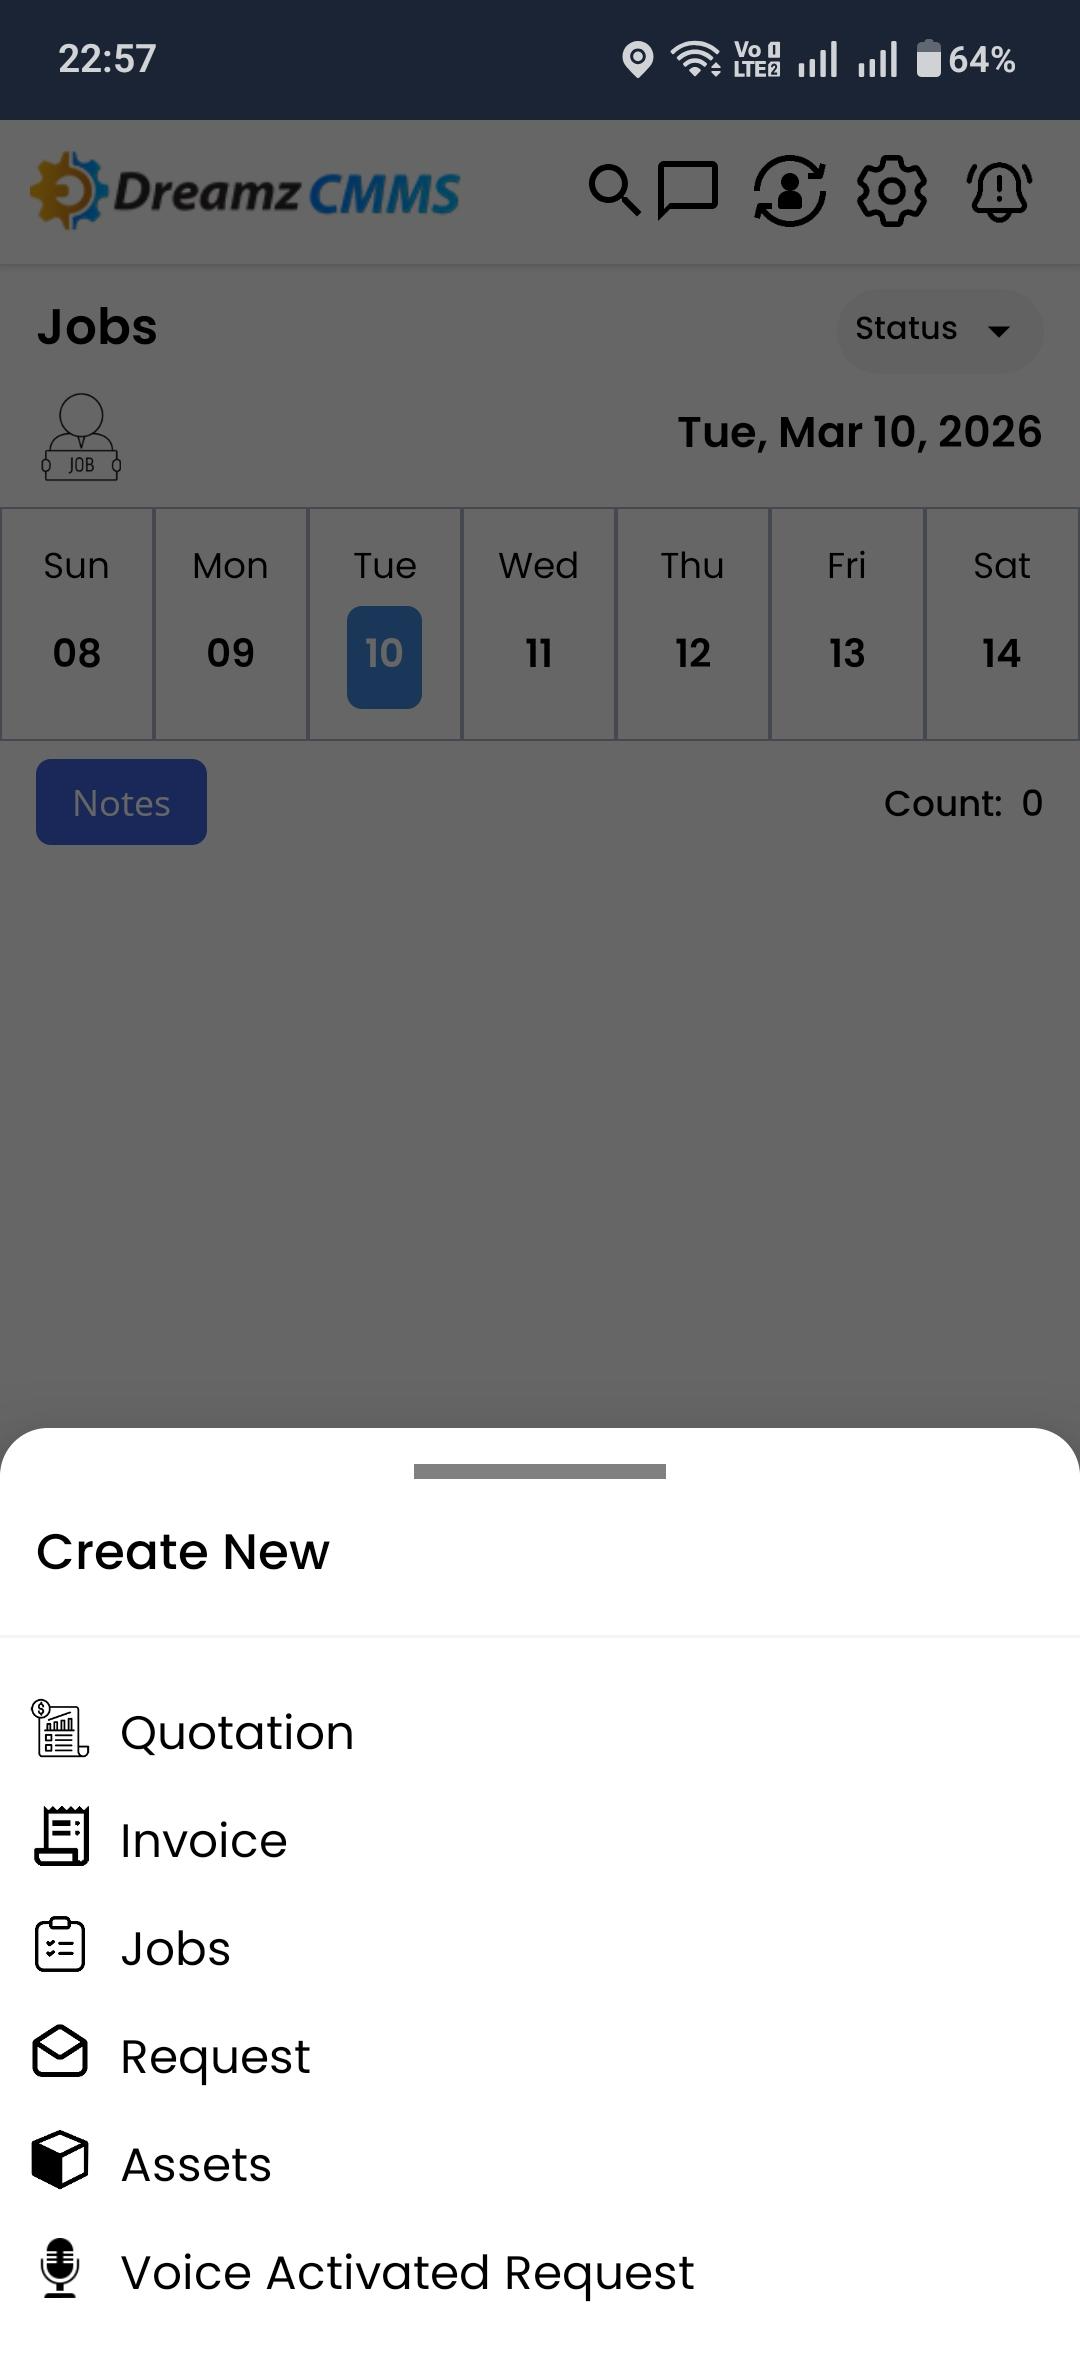
- Tap the plus (+) icon from the footer menu and select Invoice to create a new invoice directly.
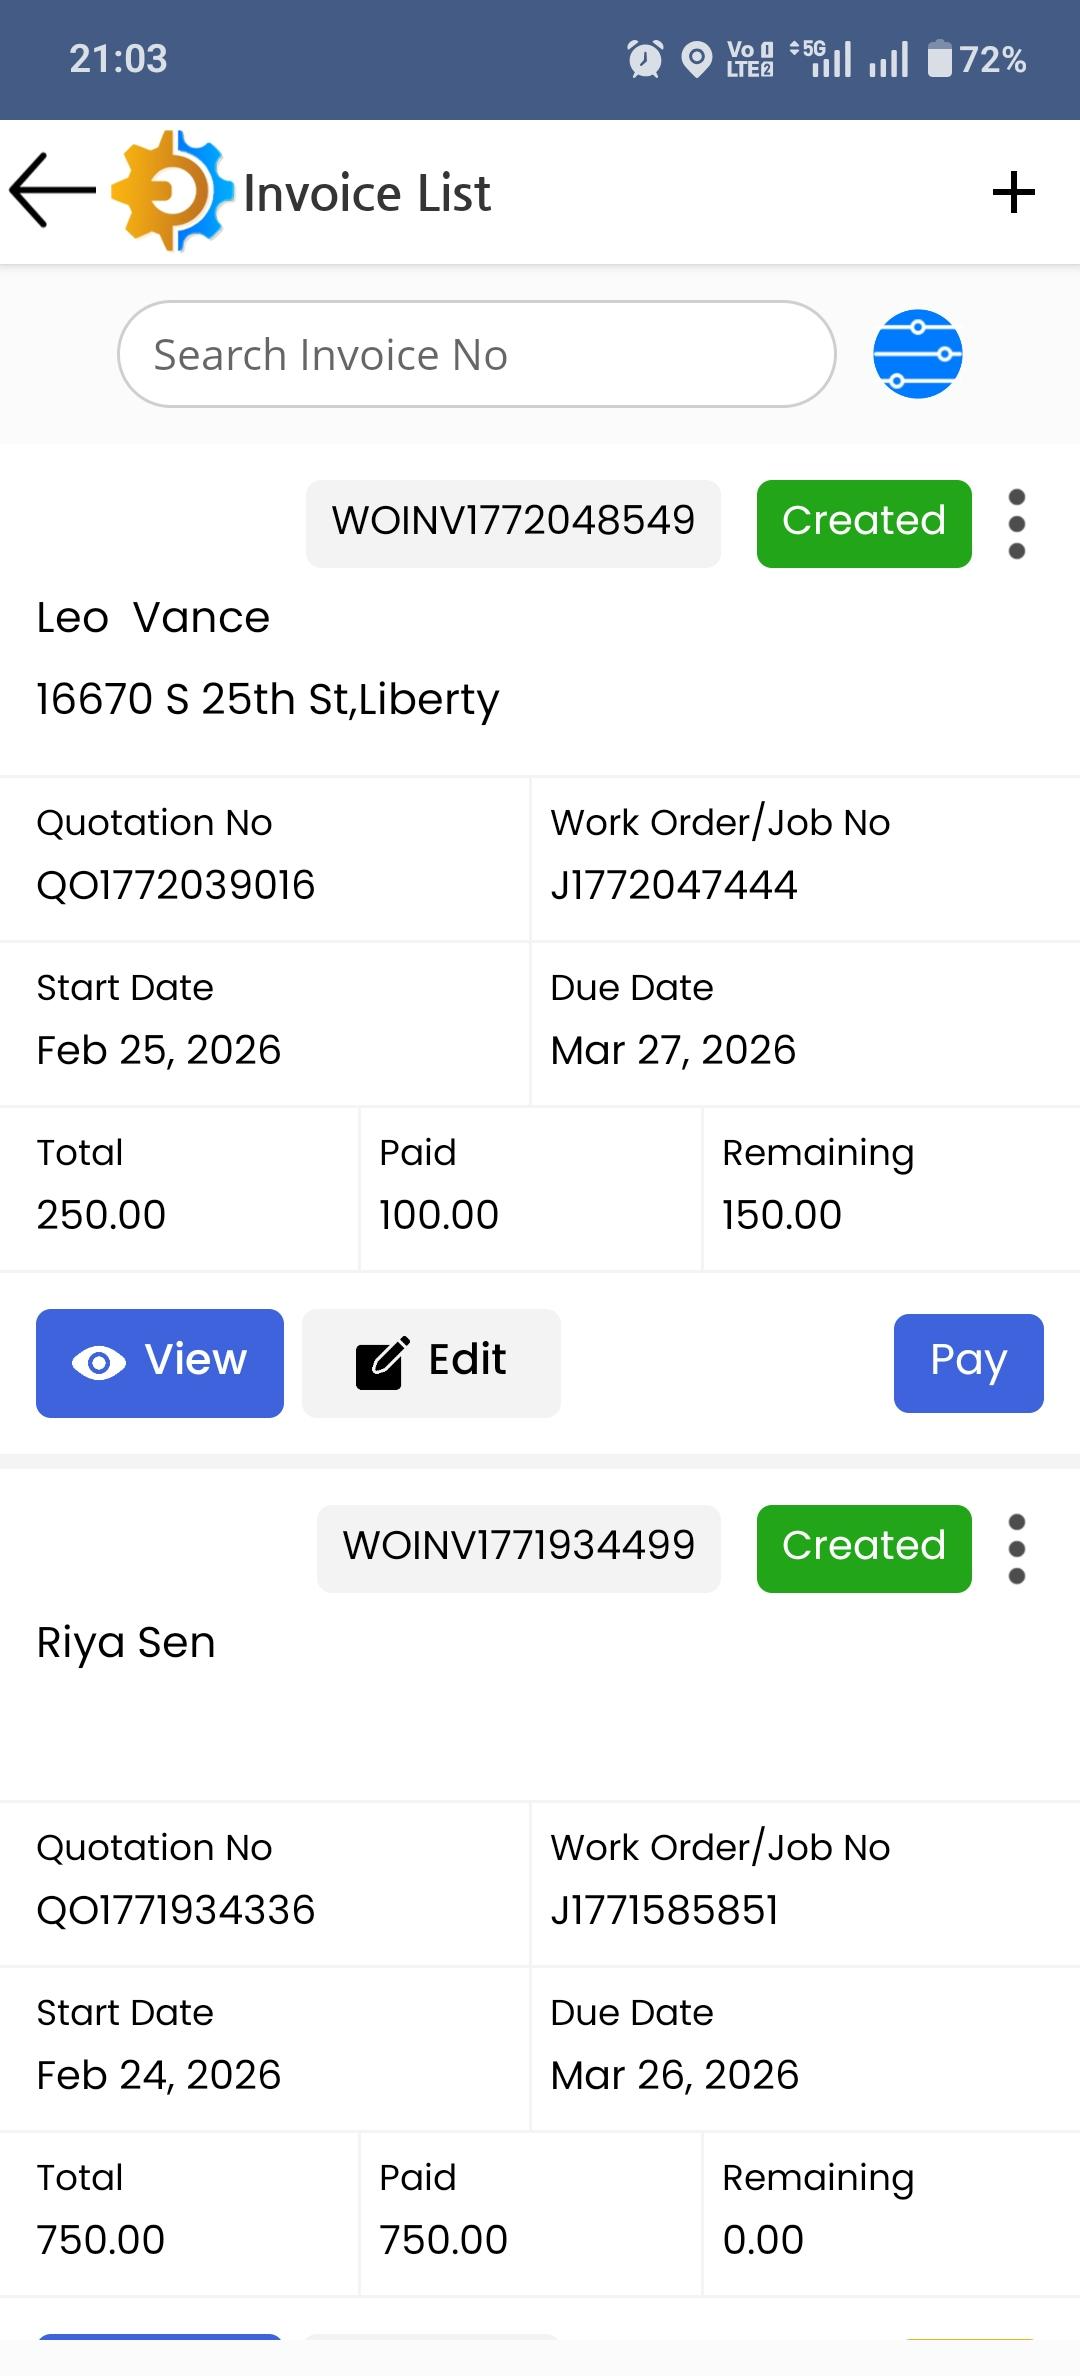
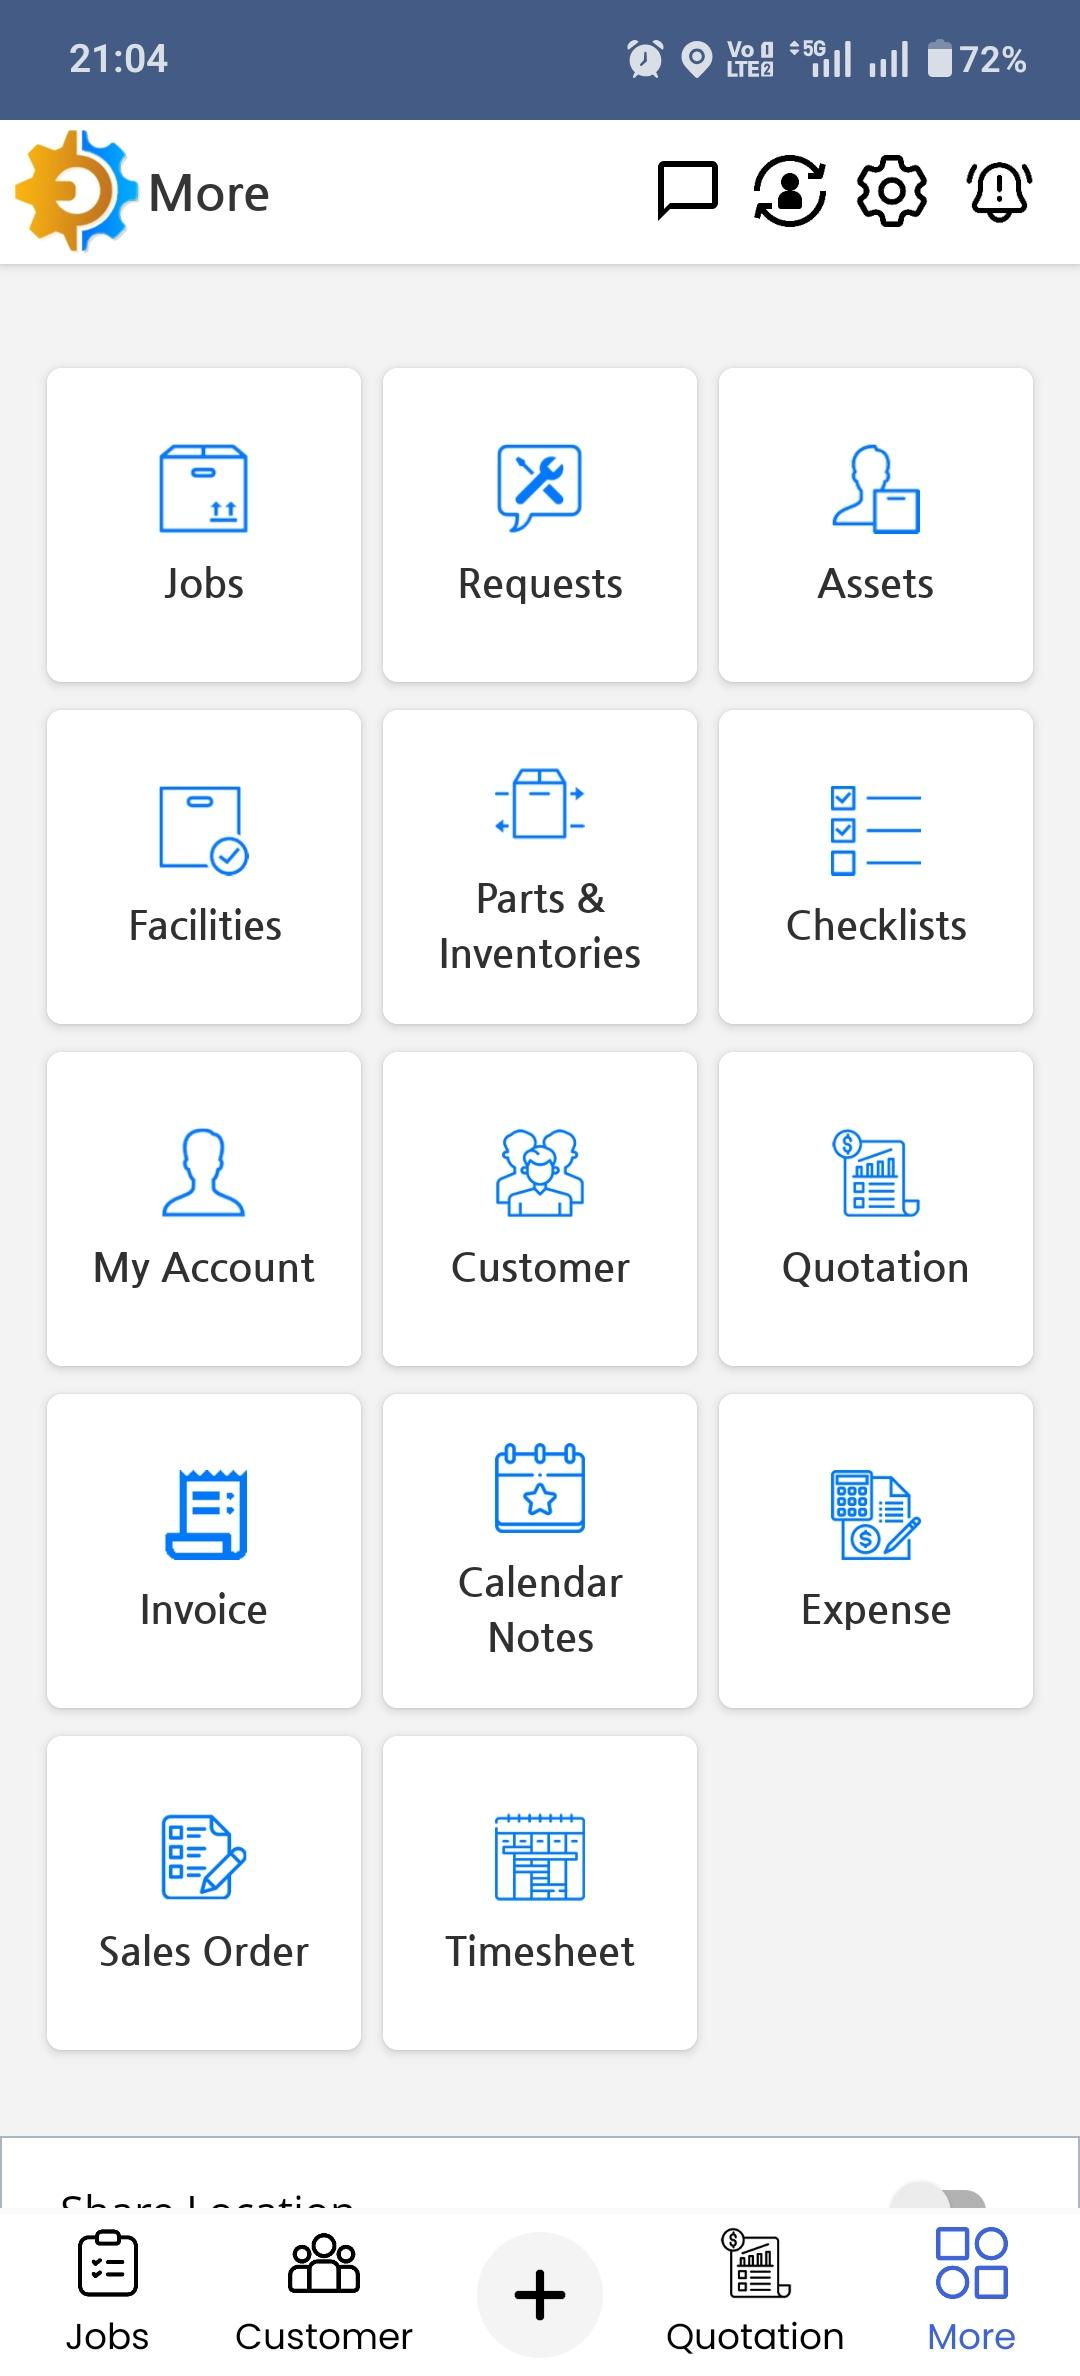
- Tap More from the footer menu to find the Invoice option, where you can view the full list of invoices.
Tips for Invoicing from the App
- Always use the Preview option before saving an invoice to catch any errors in pricing, customer details, or services listed before it is finalised.
- Use Add Invoice from the three-dot menu on a specific job to ensure the invoice is automatically linked to the correct job record.
- Attach any relevant files or documents to the invoice at the time of creation to keep all supporting evidence in one place for the customer and admin.
- Use More > Invoice regularly to review outstanding invoices and follow up on any that are pending payment or approval.
- Ensure the correct currency is selected when creating an invoice, especially for international customers, to avoid billing discrepancies.
Frequently Asked Questions
How do I create an invoice from the mobile app?
You can create an invoice in several ways: via the three-dot menu on a job in the Jobs panel, by tapping the plus (+) icon in the footer and selecting Invoice, or by navigating to More > Invoice from the footer menu.
What details do I need to fill in when creating an invoice?
An invoice requires details such as the invoice date, due date, currency, customer details, services provided, miscellaneous costs, and address. You can also attach supporting files if needed.
Can I preview an invoice before saving it?
Yes. The Preview option is available after filling in all invoice details, allowing you to review the complete invoice layout and confirm all information is accurate before saving.
Can I attach files to an invoice?
Yes. When filling in the invoice details, you have the option to attach files such as photos, documents, or receipts to the invoice for additional reference and documentation.
Where can I view all invoices from the app?
Navigate to More from the footer menu and tap Invoice to view the full list of all invoices, including those created from jobs and those added via the plus icon.
Related Articles
- Create New Quotations/Job Estimations
- View and Update Assigned Jobs
- Job Calendar View on Mobile
- Schedule Jobs and Kanban View
- How to use the Timesheet Option?