Product Fields Configuration
Product Fields Configuration allows administrators to standardize how product and item data are captured across DreamzCMMS. By controlling which fields are required, optional, or hidden, and choosing which columns appear in the product listing, you ensure your team enters consistent, complete, and audit-ready product information every time.
Overview
The Product Configuration settings give admins control over two key areas:
- Field Configuration — Define how each field on the product form behaves (Required, Optional, or Hidden), and manage grouping, identity, and file attachment settings.
- Product Columns Configuration — Choose which columns appear in the Products listing page and set their display order for a cleaner, more focused view.
These settings are applied system-wide, so any changes you make here will affect all users creating or viewing products in DreamzCMMS.
Before You Begin
- Only users with Admin permissions can access and modify System Configuration settings.
- Plan your field requirements before making changes — setting a field to Required means users will not be able to save a product without filling it in.
- Communicate any configuration changes to your team before applying them to avoid confusion.
How to Access Product Fields Configuration
Step 1 – Go to Settings
From the left-hand navigation menu, click on Settings.

Step 2 – Open System Configuration
Under the Configuration section, click on System Configuration.

Step 3 – Click the Product Configuration Tab
On the System Configuration page, click the Product Configuration tab. This is where all product field and column settings are managed.
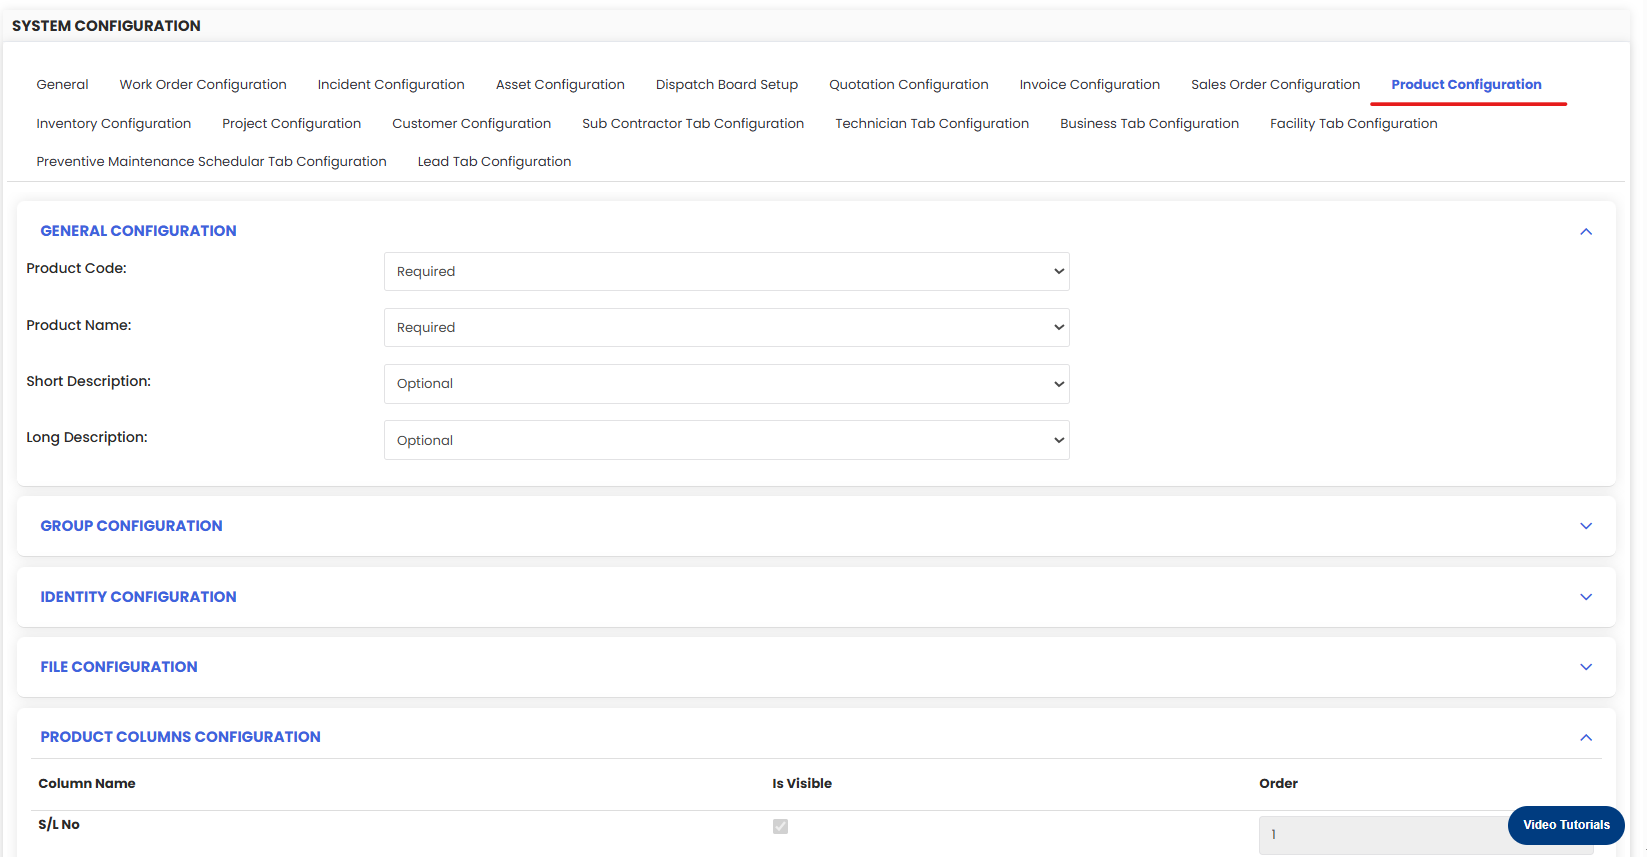
Field Configuration Options
For each product form field, you can set one of three visibility states:
- Required — The field must be filled in before a product can be saved. Use this for fields critical to your operations, such as Product Code or Product Name.
- Optional — The field is visible but not mandatory. Users can choose to fill it in or leave it blank.
- Hidden — The field is not visible to users on the product form. Use this to remove fields that are not relevant to your workflow and keep the form clean and focused.
Configuration Panels
Group Configuration
Controls how products are mapped into your organizational and financial hierarchy. You can assign items to:
- Main Group — The top-level category (e.g., Mechanical, Electrical, Civil).
- Group — A sub-category within the Main Group (e.g., Bearings, Filters, Cables).
- Account Group — Used for financial reporting and pricing alignment (e.g., linking to cost centers or GL accounts).
Setting up Group Configuration correctly ensures your product reports and pricing structures are organized and meaningful.
Identity Configuration
Controls how products are identified and tracked in the system. This includes managing identifiers such as:
- SKU / Part Code — Your internal or supplier reference number for the product.
- Barcode / RFID — Used for scanning and physical tracking of items in the field or warehouse.
You can control the visibility of each identifier — show only the ones relevant to your workflow and hide the rest.
File Configuration
Controls whether file attachments on product records are Optional or required. This is useful for enforcing documentation standards, for example:
- Making a datasheet attachment is required for all new parts
- Requiring an MSDS (Material Safety Data Sheet) for hazardous consumables
Product Columns Configuration
The Product Columns Configuration section lets you choose which columns appear in the Products listing page and control their display order. Available columns include:
- Code
- Name
- Groups
- Asset Class
- Status
- Asset Qty
- Total Asset Valuation
- Facility
Show only the columns your team needs day-to-day to keep the product list clean, scannable, and easy to work with. Drag or reorder columns to match your team's workflow priorities.

Saving Your Configuration
Once you have finished configuring all fields and columns, click the Save button to apply your changes. The updated configuration will take effect immediately for all users.
Tips for Configuring Product Fields
- Start with Required fields sparingly — only make a field required if its absence would genuinely cause problems. Too many required fields slow down product creation.
- Hide fields that don't apply to your business — a cleaner form means fewer errors and faster data entry.
- Use Group Configuration for reporting — a well-structured group hierarchy makes filtering and financial reporting significantly more useful.
- Enable Barcode/RFID if your team does physical inventory scanning — this unlocks faster stock counts and asset tracking in the field.
- Review column configuration periodically — as your team's needs evolve, the most useful columns in the listing may change.
Frequently Asked Questions
Who can access Product Fields Configuration?
Only users with Admin permissions can view and modify System Configuration settings.
Will changing a field to Required affect existing products?
No. The Required setting applies to new products being created or edited going forward. Existing products already saved will not be retroactively affected.
Can I revert my configuration changes?
Yes, as long as you haven't clicked Save yet. If you have already saved, you can return to the Product Configuration tab and manually revert the settings.
What happens if I hide a field that already has data in it?
The data is not deleted — it is simply hidden from the product form. If you make the field visible again, the existing data will reappear.
Can I configure fields differently for different user roles?
Product Fields Configuration applies system-wide to all users. Role-based field visibility is not available at this level. For role-specific access controls, refer to your User Permissions settings.
Related Articles
How to Manage Various Asset Information