Preventive Maintenance (PM) scheduling is one of the most powerful features in DreamzCMMS. Instead of waiting for equipment to break down, a PM scheduler automatically generates work orders at defined intervals — keeping your assets serviced on time, reducing unexpected failures, extending equipment lifespan, and lowering overall maintenance costs.
Overview
A Preventive Maintenance Scheduler in DreamzCMMS is a recurring rule that automatically creates work orders for a specific asset or location at a frequency you define. Once set up, the scheduler runs in the background and generates work orders without any manual intervention — ensuring nothing falls through the cracks.
You can schedule maintenance based on:
- Time intervals — Daily, weekly, monthly, or a fully custom schedule.
- Meter/usage thresholds— Triggered when an asset reaches a defined usage reading (e.g., every 500 hours). See How to Add Meter Readings and Event Details of an Equipment for setup details.
Before You Begin
- You must have Admin or Manager permissions to create PM schedulers.
- The asset or location the scheduler applies to must already exist in DreamzCMMS. See How to Manage Various Asset Information or Create Asset Locations
- Have your maintenance schedule details ready — frequency, assigned technician, task description, and any required parts or checklists.
- If you are unfamiliar with creating work orders, review Create and Manage Work Orders first, as the PM scheduler uses the same work order fields.
Here is a reference video:
How to Create a Preventive Maintenance Scheduler
Step 1 – Navigate to Scheduled Maintenance
From the left-hand navigation menu, click on Scheduled Maintenance, then select Scheduled Maintenance from the submenu. This will take you to the list of all existing PM schedulers.

Step 2 – Click "Add New Scheduler
On the top-right corner of the page, click the Add New Scheduler button to open the scheduler creation form.

Step 3 – Enter the Scheduler Name and Order Type
- Scheduler Name — Enter a clear, descriptive name for this scheduler (e.g., "Monthly HVAC Filter Replacement", "Weekly Generator Inspection", "Quarterly Pump Lubrication"). This name will be used to auto-fill the work order title.
- Order Type — Select Work Order from the dropdown to specify that this scheduler will generate standard work orders.
Note: The work order title is automatically populated from the scheduler name. You can adjust it in the work order details section below if needed.

Step 4 – Set the Scheduling Frequency
This is where you define how often the scheduler generates work orders. There are two options:
Option A — Default Frequency
Use this for standard recurring intervals. Select from:
- Daily — Work orders are generated every day.
- Weekly — Select the day(s) of the week.
- Monthly — Select the date each month.
- Quarterly, Half-Yearly, Yearly — For less frequent scheduled maintenance.
After selecting the interval, set the Start Time — the time of day the work order should be generated.
Option B — Custom Frequency
Use this for non-standard intervals that don't fit the default options. For a custom schedule:
- Enter the Start Date — the date the first work order should be generated.
- Enter the Interval — the number of days between each subsequent work order generation (e.g., every 45 days, every 90 days).
This gives you full flexibility to match any maintenance schedule requirement.


Step 5 – Configure Overdue Settings
Set the overdue settings for work orders generated by this scheduler. This defines when a generated work order is flagged as overdue if it has not been completed. For example:
- Flag as overdue after 2 days of the due date.
- Notify assigned personnel when overdue status is triggered.
Setting overdue thresholds ensures that time-sensitive maintenance tasks are not missed or delayed without visibility.

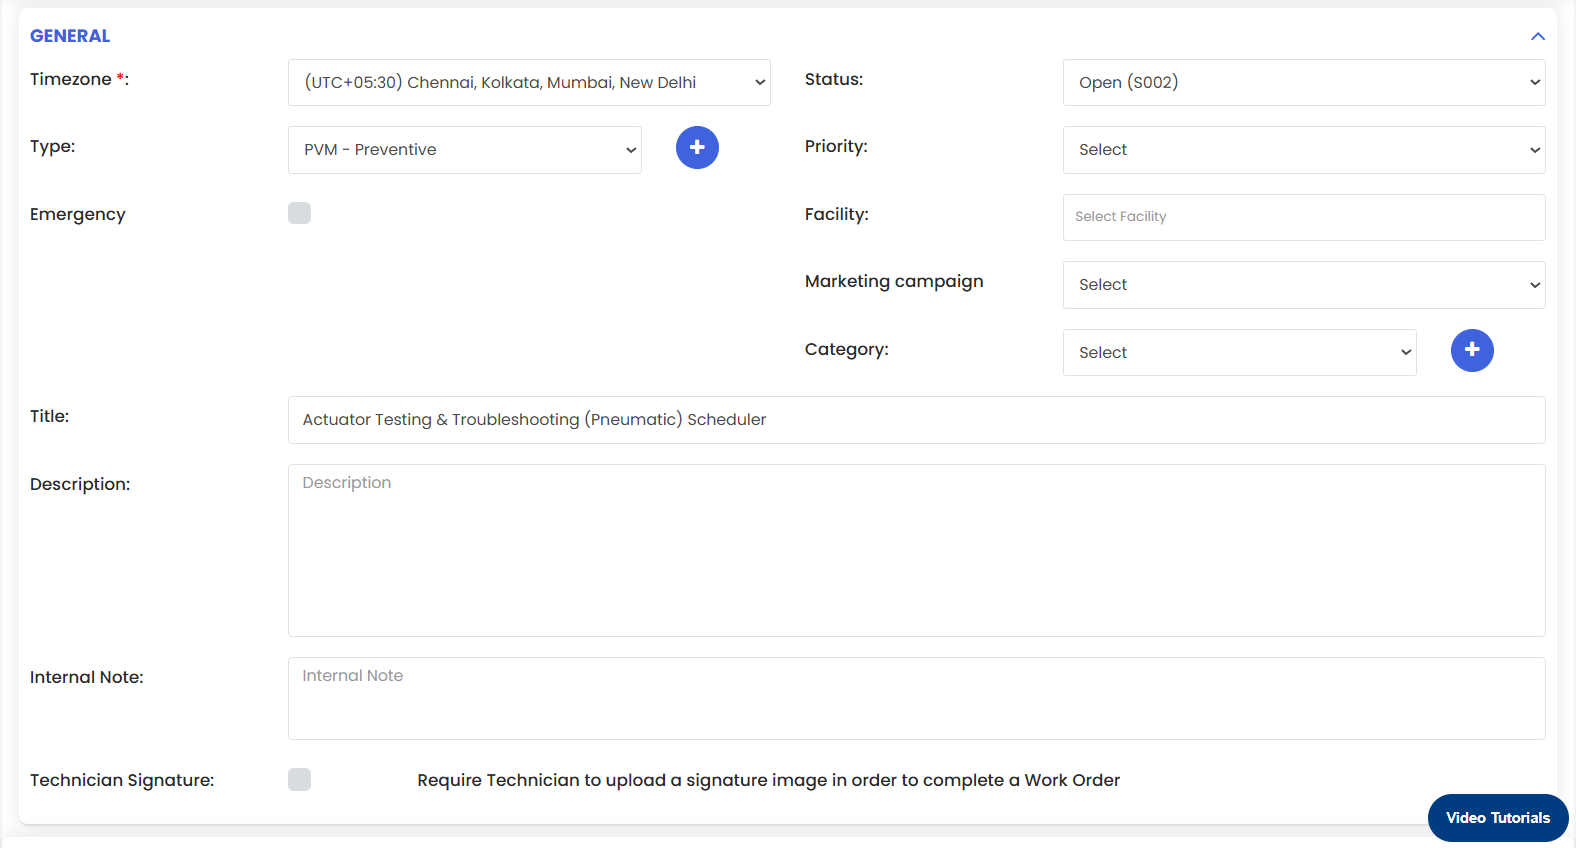
Step 6 – Fill in the Work Order Details
The remainder of the scheduler form mirrors the standard work order creation page. Complete the relevant fields including:
- Description— Describe the maintenance task in detail so technicians know exactly what needs to be done.
- Asset / Location — Assign the specific equipment or facility this scheduler applies to.
- Assigned To — Select the technician or team responsible for completing the generated work orders.
- Priority — Set the priority level (e.g., Low, Medium, High, Critical).
- Checklist — Attach a task checklist if specific steps need to be followed during the maintenance.
- Parts / BOM — Link any parts or materials required for the maintenance task.
Estimated Duration — Enter the expected time to complete the task.
For a full breakdown of work order fields, see Create and Manage Work Orders.
Step 7 – Click Save
Once all details are complete, click the Save button. The scheduler will be activated and will begin generating work orders automatically at the defined frequency from the start date.
Tips for Setting Up PM Schedulers
- Name schedulers clearly and consistently — Include the asset name, task type, and frequency in the scheduler name (e.g., "Monthly – Pump A – Oil Change") so generated work orders are immediately identifiable.
- Start with your most critical assets — Prioritize PM schedules for high-value, high-risk, or compliance-critical equipment first.
- Use checklists for complex tasks — Attaching a step-by-step checklist to a PM scheduler ensures technicians follow the correct procedure every time, regardless of experience level.
- Set realistic overdue thresholds — Don't set overdue periods too tight or too loose. A reasonable window (e.g., 1–3 days) gives technicians flexibility while maintaining accountability.
- Review your PM schedulers quarterly— Equipment maintenance requirements change over time. Regular reviews ensure your schedules remain appropriate and nothing is over- or under-maintained.
- Combine time-based and meter-based PMs - For assets where both are relevant (e.g., service every 3 months OR every 500 hours, whichever comes first).
Frequently Asked Questions
What is the difference between a PM Scheduler and a regular Work Order?
A Work Order* is a one-time maintenance task created manually. A PM Scheduler is a recurring rule that automatically generates work orders at defined intervals — eliminating the need to manually create repeat tasks.
Can I pause or deactivate a scheduler without deleting it?
Yes. You can deactivate a scheduler to stop it from generating new work orders without losing its configuration. Reactivate it when needed. Check the scheduler's settings for the active/inactive toggle.
Can I assign a PM scheduler to multiple assets at once?
Each scheduler is typically assigned to a specific asset or location. To cover multiple assets, create a separate scheduler for each. This ensures each asset's work orders are tracked independently.
What happens to in-progress work orders if I edit a scheduler?
Editing a scheduler only affects future work orders generated after the change. Any work orders already created and in progress are not affected.
Can I use both Default and Custom frequency options in the same scheduler?
No. You select either Default or Custom frequency for each scheduler. If your needs change, you can edit the scheduler and switch the frequency type.
How do I know if a generated work order is overdue?
Overdue work orders are flagged in the Work Orders listing page and will trigger notifications based on your overdue settings configured in [Step 5] (how-to-create-a-preventive-maintenance-scheduler).
Related Articles
- Create and Manage Work Orders
- How to Add Meter Readings and Event Details of an Equipment
- How to Manage Various Asset Information
- Create Asset Locations
- How to Add BOM to a Facility/Location