DreamzCMMS for Municipal Asset and Customer Billing Management
Every month, a municipality processes thousands of water and electricity readings, customer accounts, and service requests across every ward. When a customer's details are incomplete or incorrect — a wrong address, an outdated account number, or a meter never linked to the right property — billing breaks down, and that's real revenue walking out the door. DreamzCMMS connects assets, customers, and field teams onto one platform so every reading, bill, and request ties back to the exact property and meter it belongs to.
Overview
DreamzCMMS is built around a simple three-layer design: asset management at the base, customer management in the middle, and a mobile app on top. Locations, products, and assets are set up first, customer records connect directly to those same locations, and allocating a meter to a customer means every reading is automatically tied to that account. Billing is generated directly against a specific meter or asset, customers can view and pay bills, raise requests, and submit their own meter readings through a web portal or mobile app, and push notifications, SMS, and WhatsApp keep everyone informed regardless of what device they have. Municipal dashboards sit on top of all of it, built directly on the same location, asset, customer, and billing data, so reporting always reflects what's actually happening on the ground.
Here is a reference video:
Before You Begin
- You must have a DreamzCMMS account with access to the modules your role covers, such as Locations, Products, Assets, Customers, Billing, and Reports.
- Your wards, properties, and meters should already be set up (or ready to import from Excel) so customer accounts and billing can be linked to the correct records.
- If you plan to offer the customer portal or mobile app, make sure your payment gateway and SMS or WhatsApp integration are configured in advance.
Introduction and Why DreamzCMMS
Step 1 – Municipality Data Overview
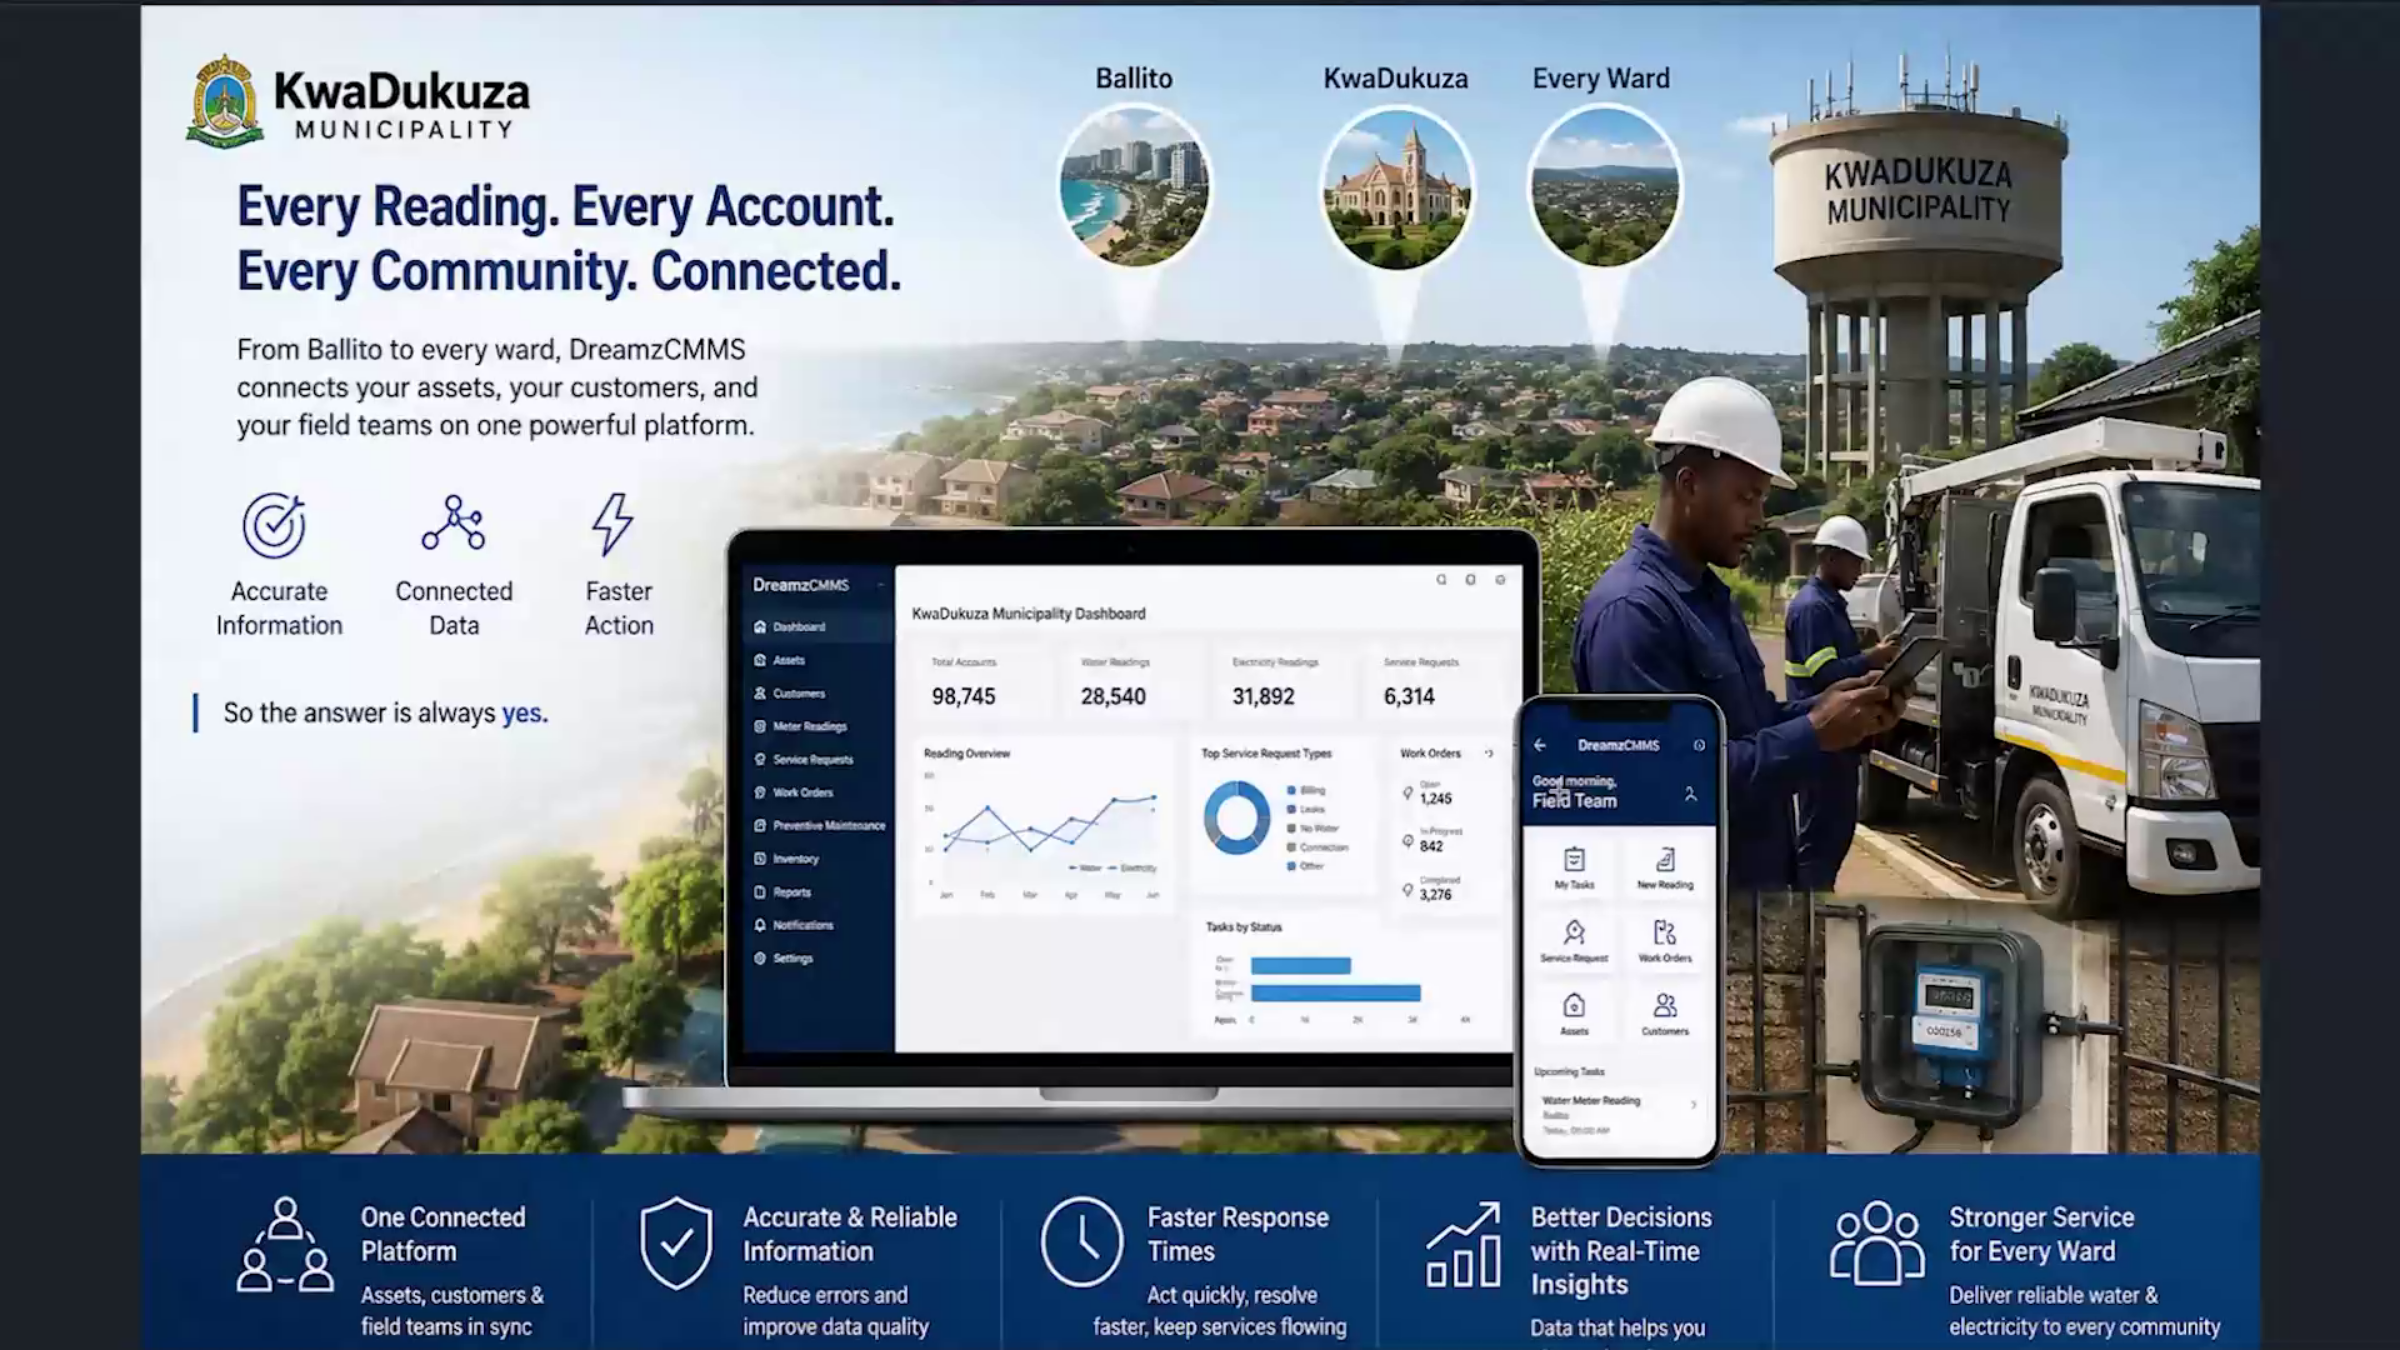
Every month, a municipality like KwaDukuza processes thousands of water and electricity readings, customer accounts, and service requests across every ward. Behind every one of those transactions sits a simple question: is the information accurate, is it connected, and can your teams act on it quickly?
Step 2 – DreamzCMMS Platform Introduction
DreamzCMMS is built to bring your assets, your customers, and your field teams onto one connected platform. The answer to that question is always yes.
Step 3 – Billing Challenges Explained
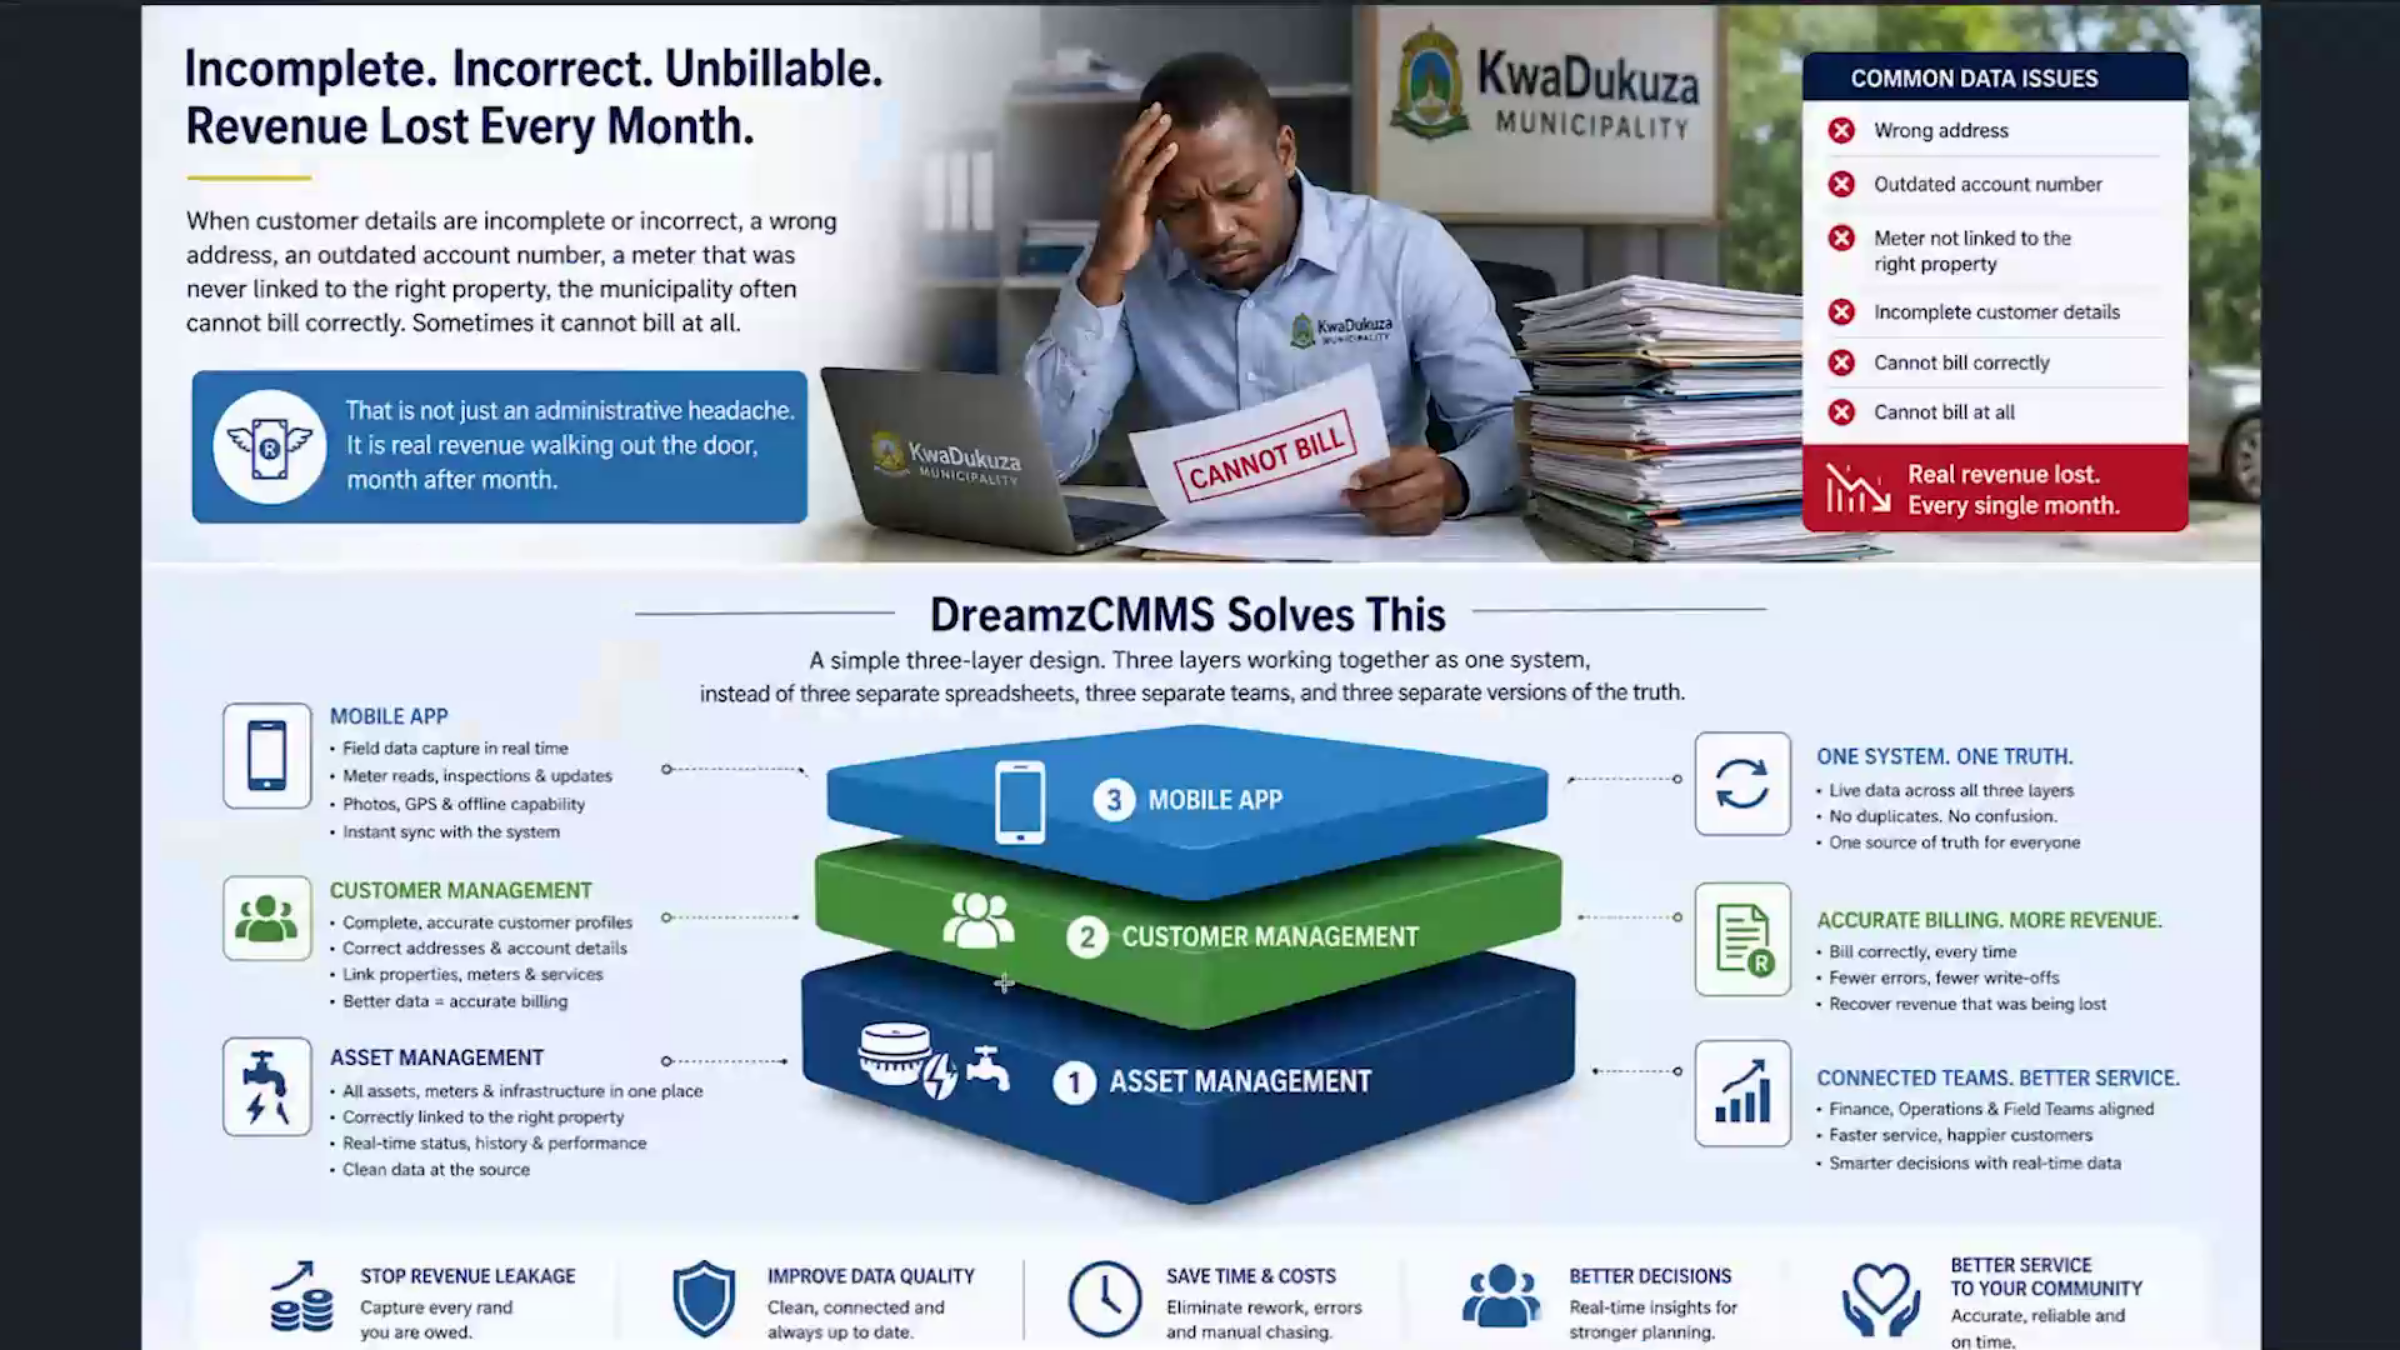
Right now, when a customer's details are incomplete or incorrect — a wrong address, an outdated account number, or a meter that was never linked to the right property — the municipality often cannot bill correctly, and sometimes cannot bill at all. That's not just an administrative headache. It's real revenue walking out the door, month after month.
Step 4 – DreamzCMMS Three-Layer Design
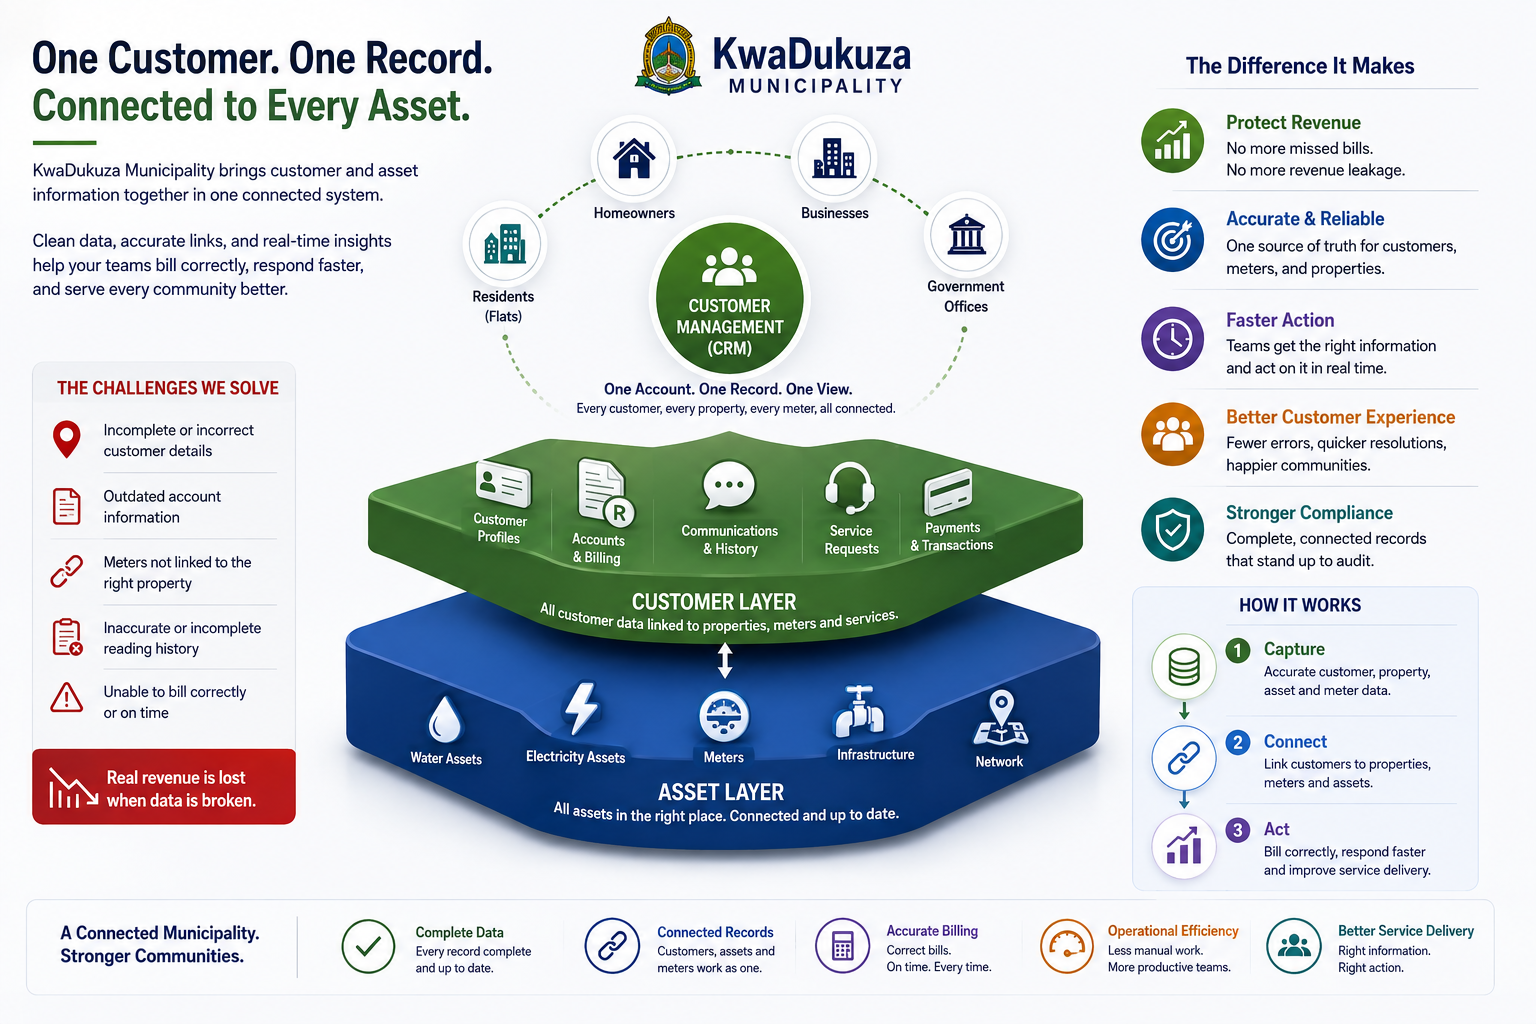
DreamzCMMS solves this with a simple three-layer design: asset management at the base, customer management in the middle, and a mobile app on top — three layers working together as one system, instead of three separate spreadsheets, three separate teams, and three separate versions of the truth.
Setting Up Locations
Step 5 – Location Setup Basics
Starting at the base with how everything is set up, everything begins with the location list — every ward office, pump station, fleet depot, and property already in the system, from the civic center down to a single flat. Adding a new one is a single New Location button with a short form to fill in.
Step 6 – Editing Location Details
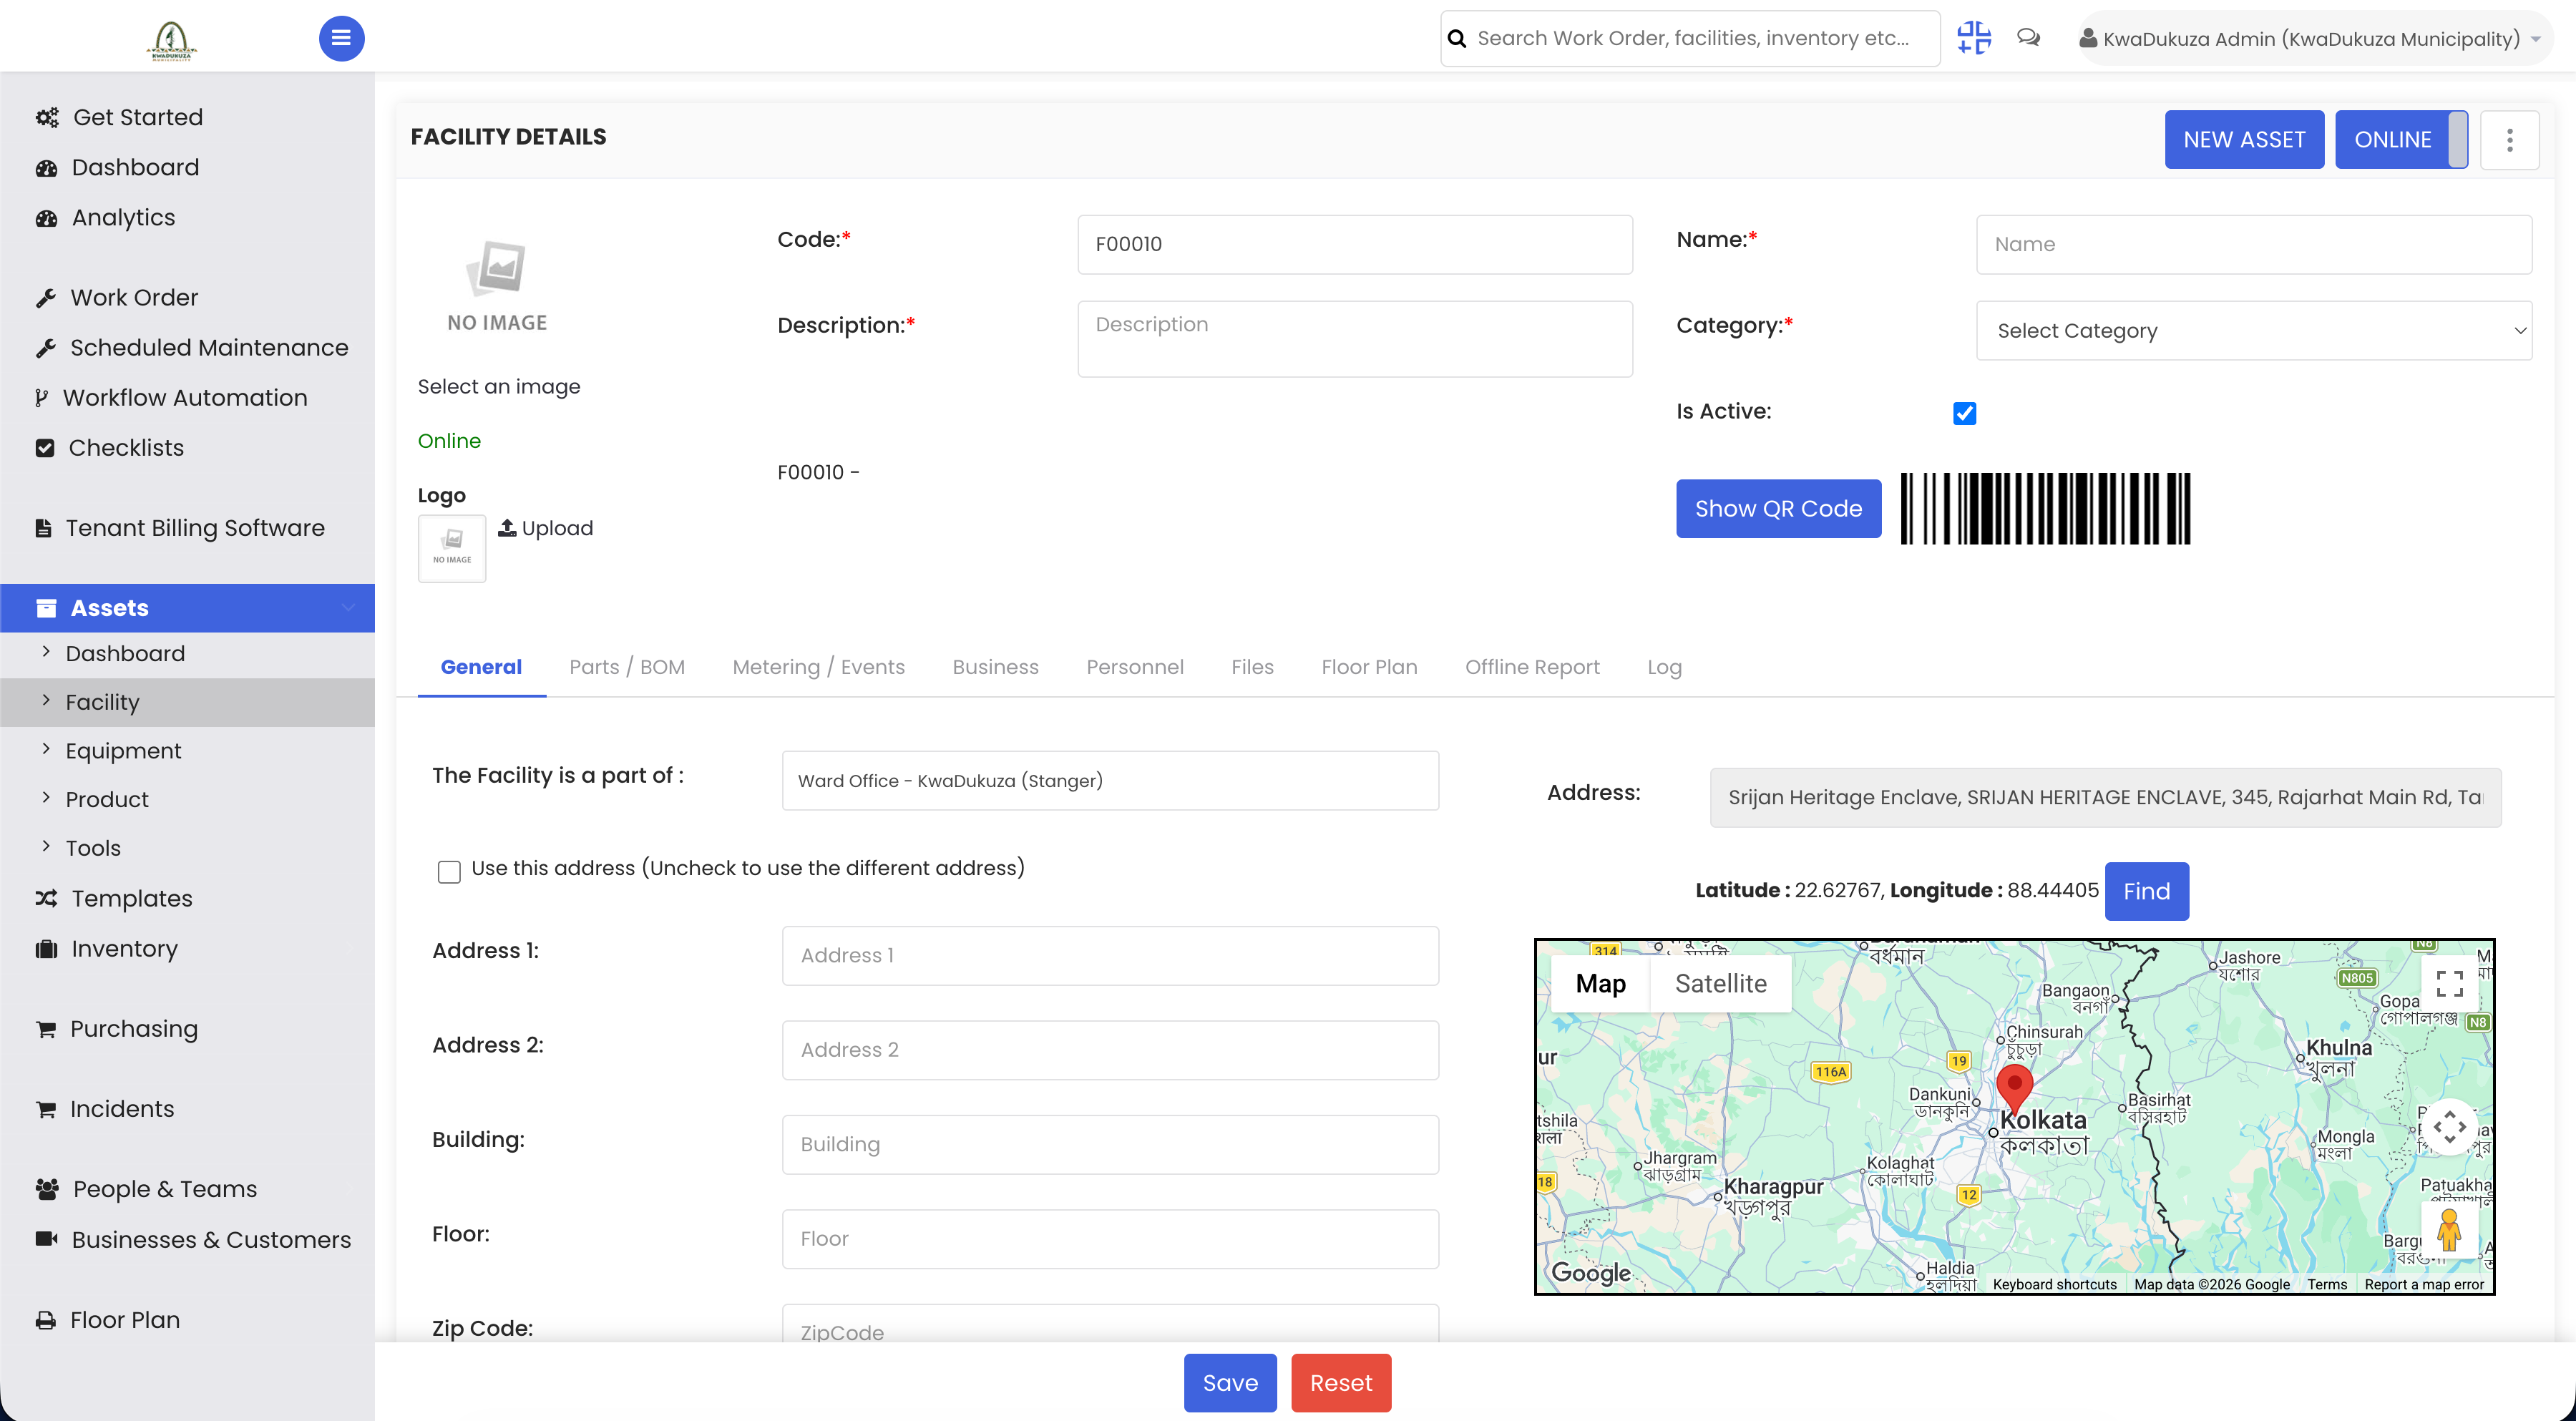
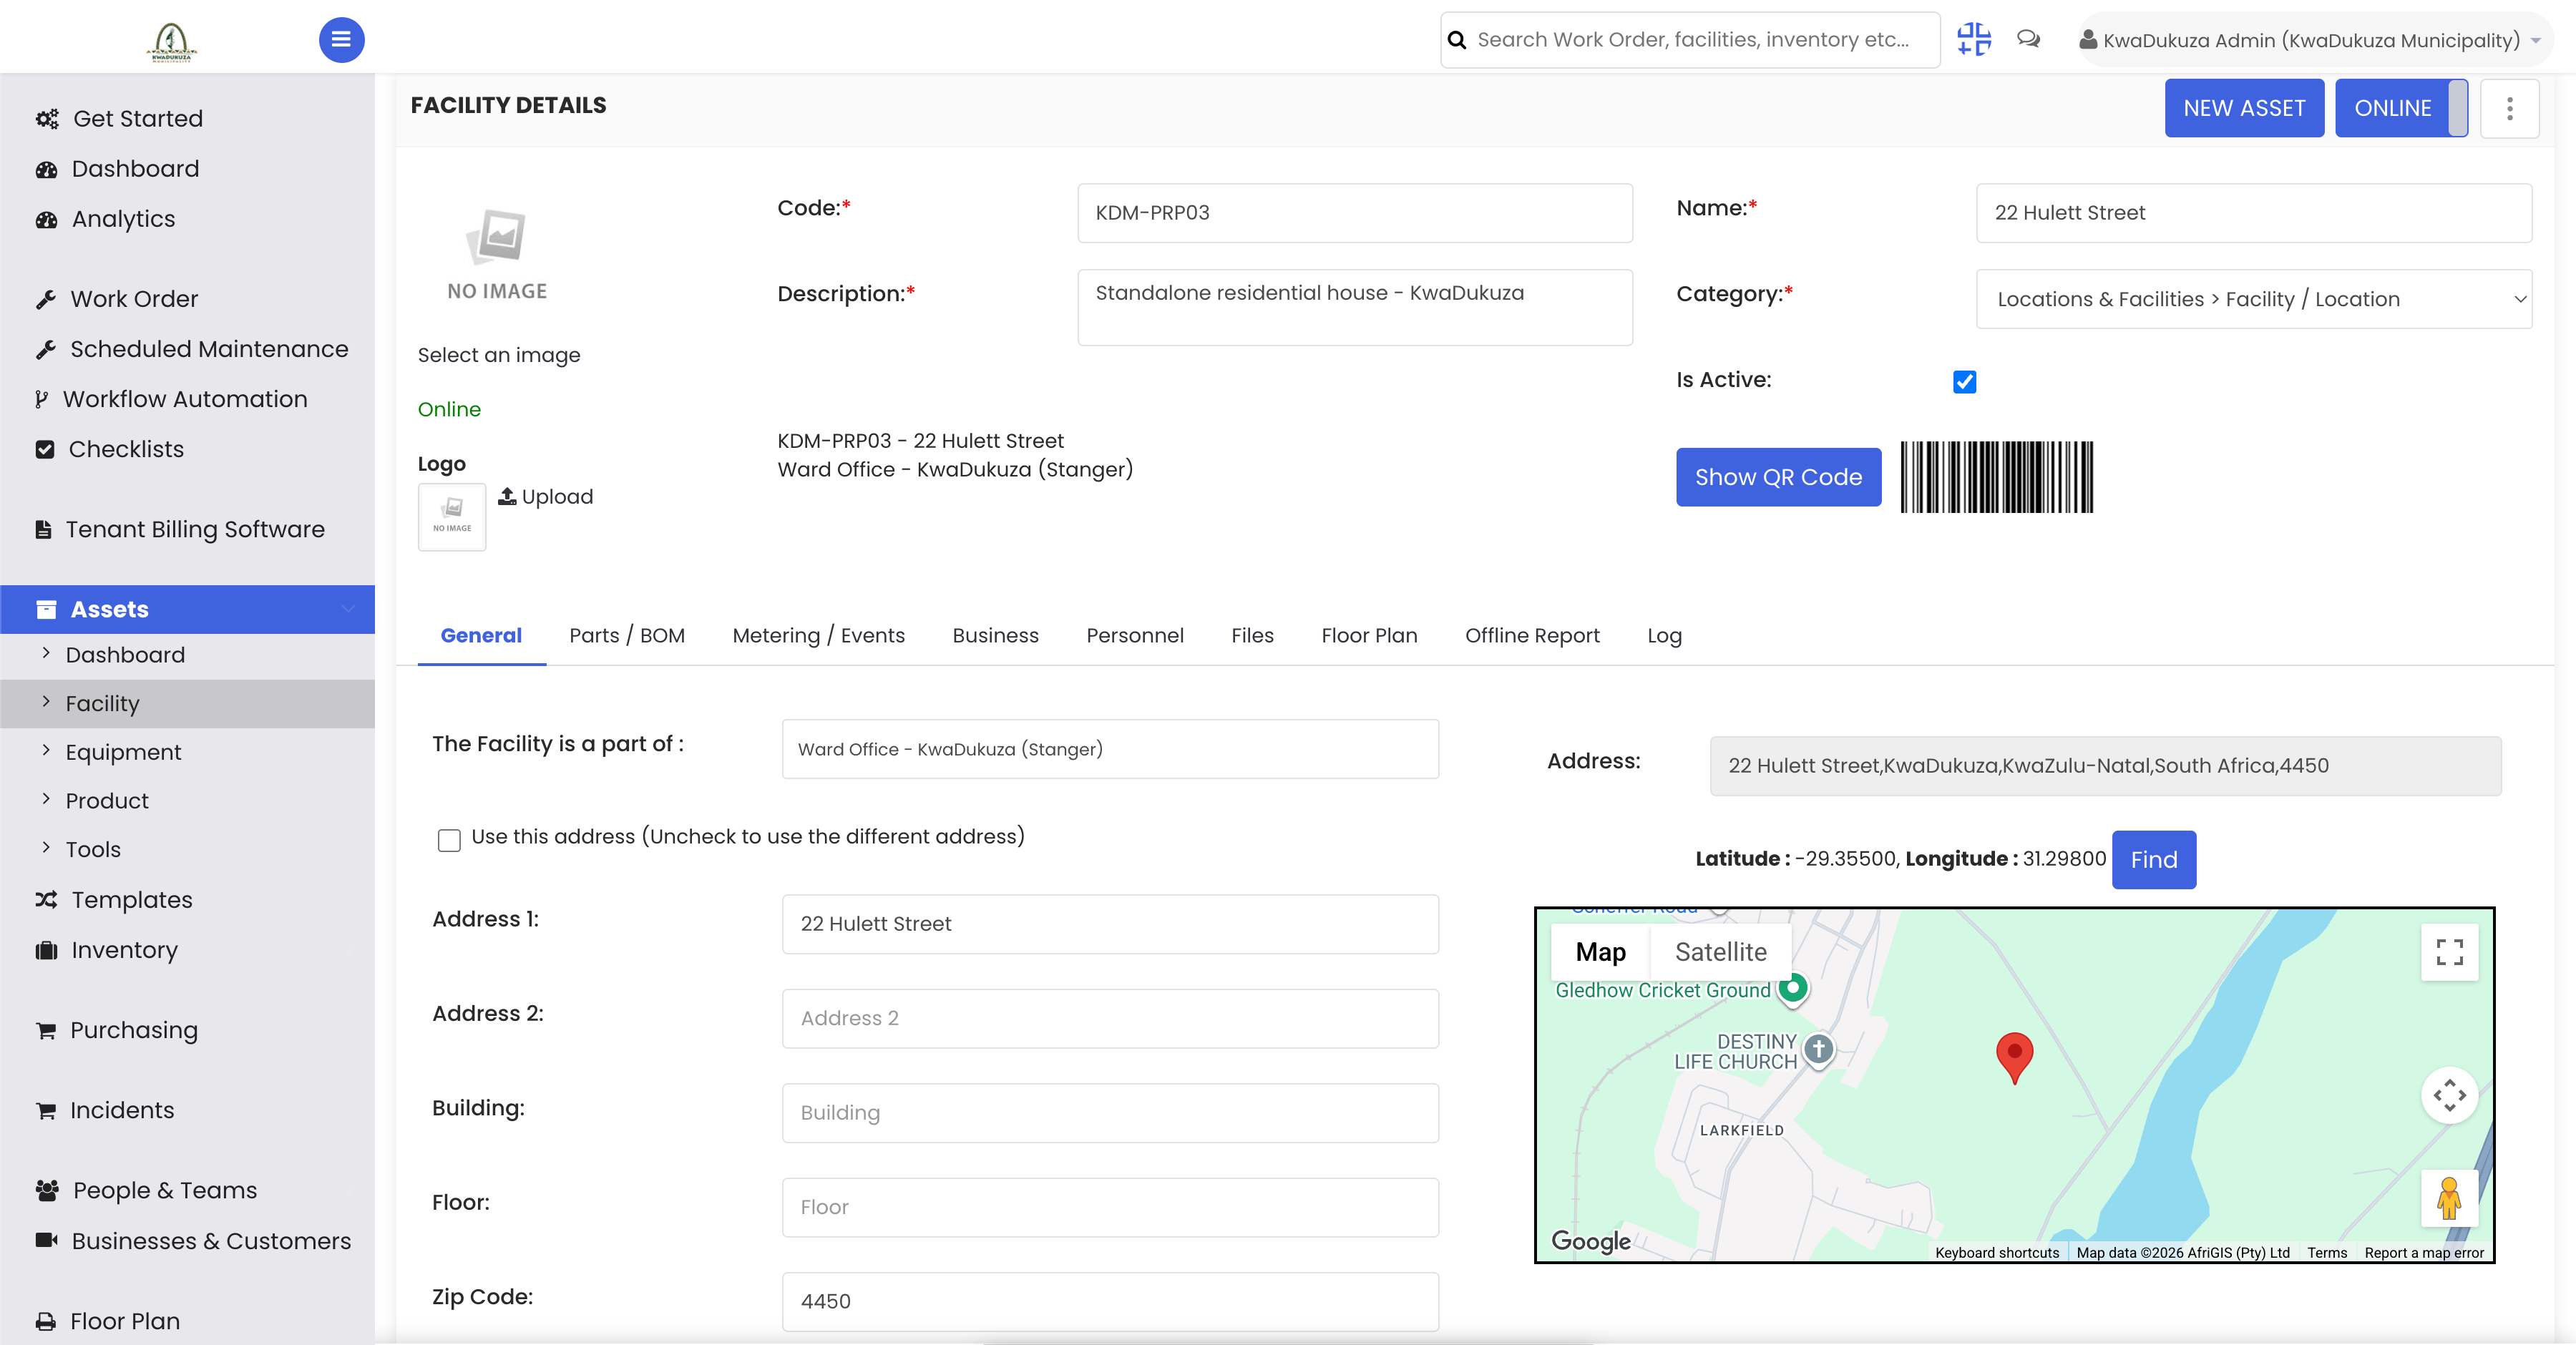
Opening an existing location instead lets you edit it — a name, a code, a category, and an address, all editable right here, whether that's a water pump station or a flat inside a residential complex.
Step 7 – Location Hierarchy Structure
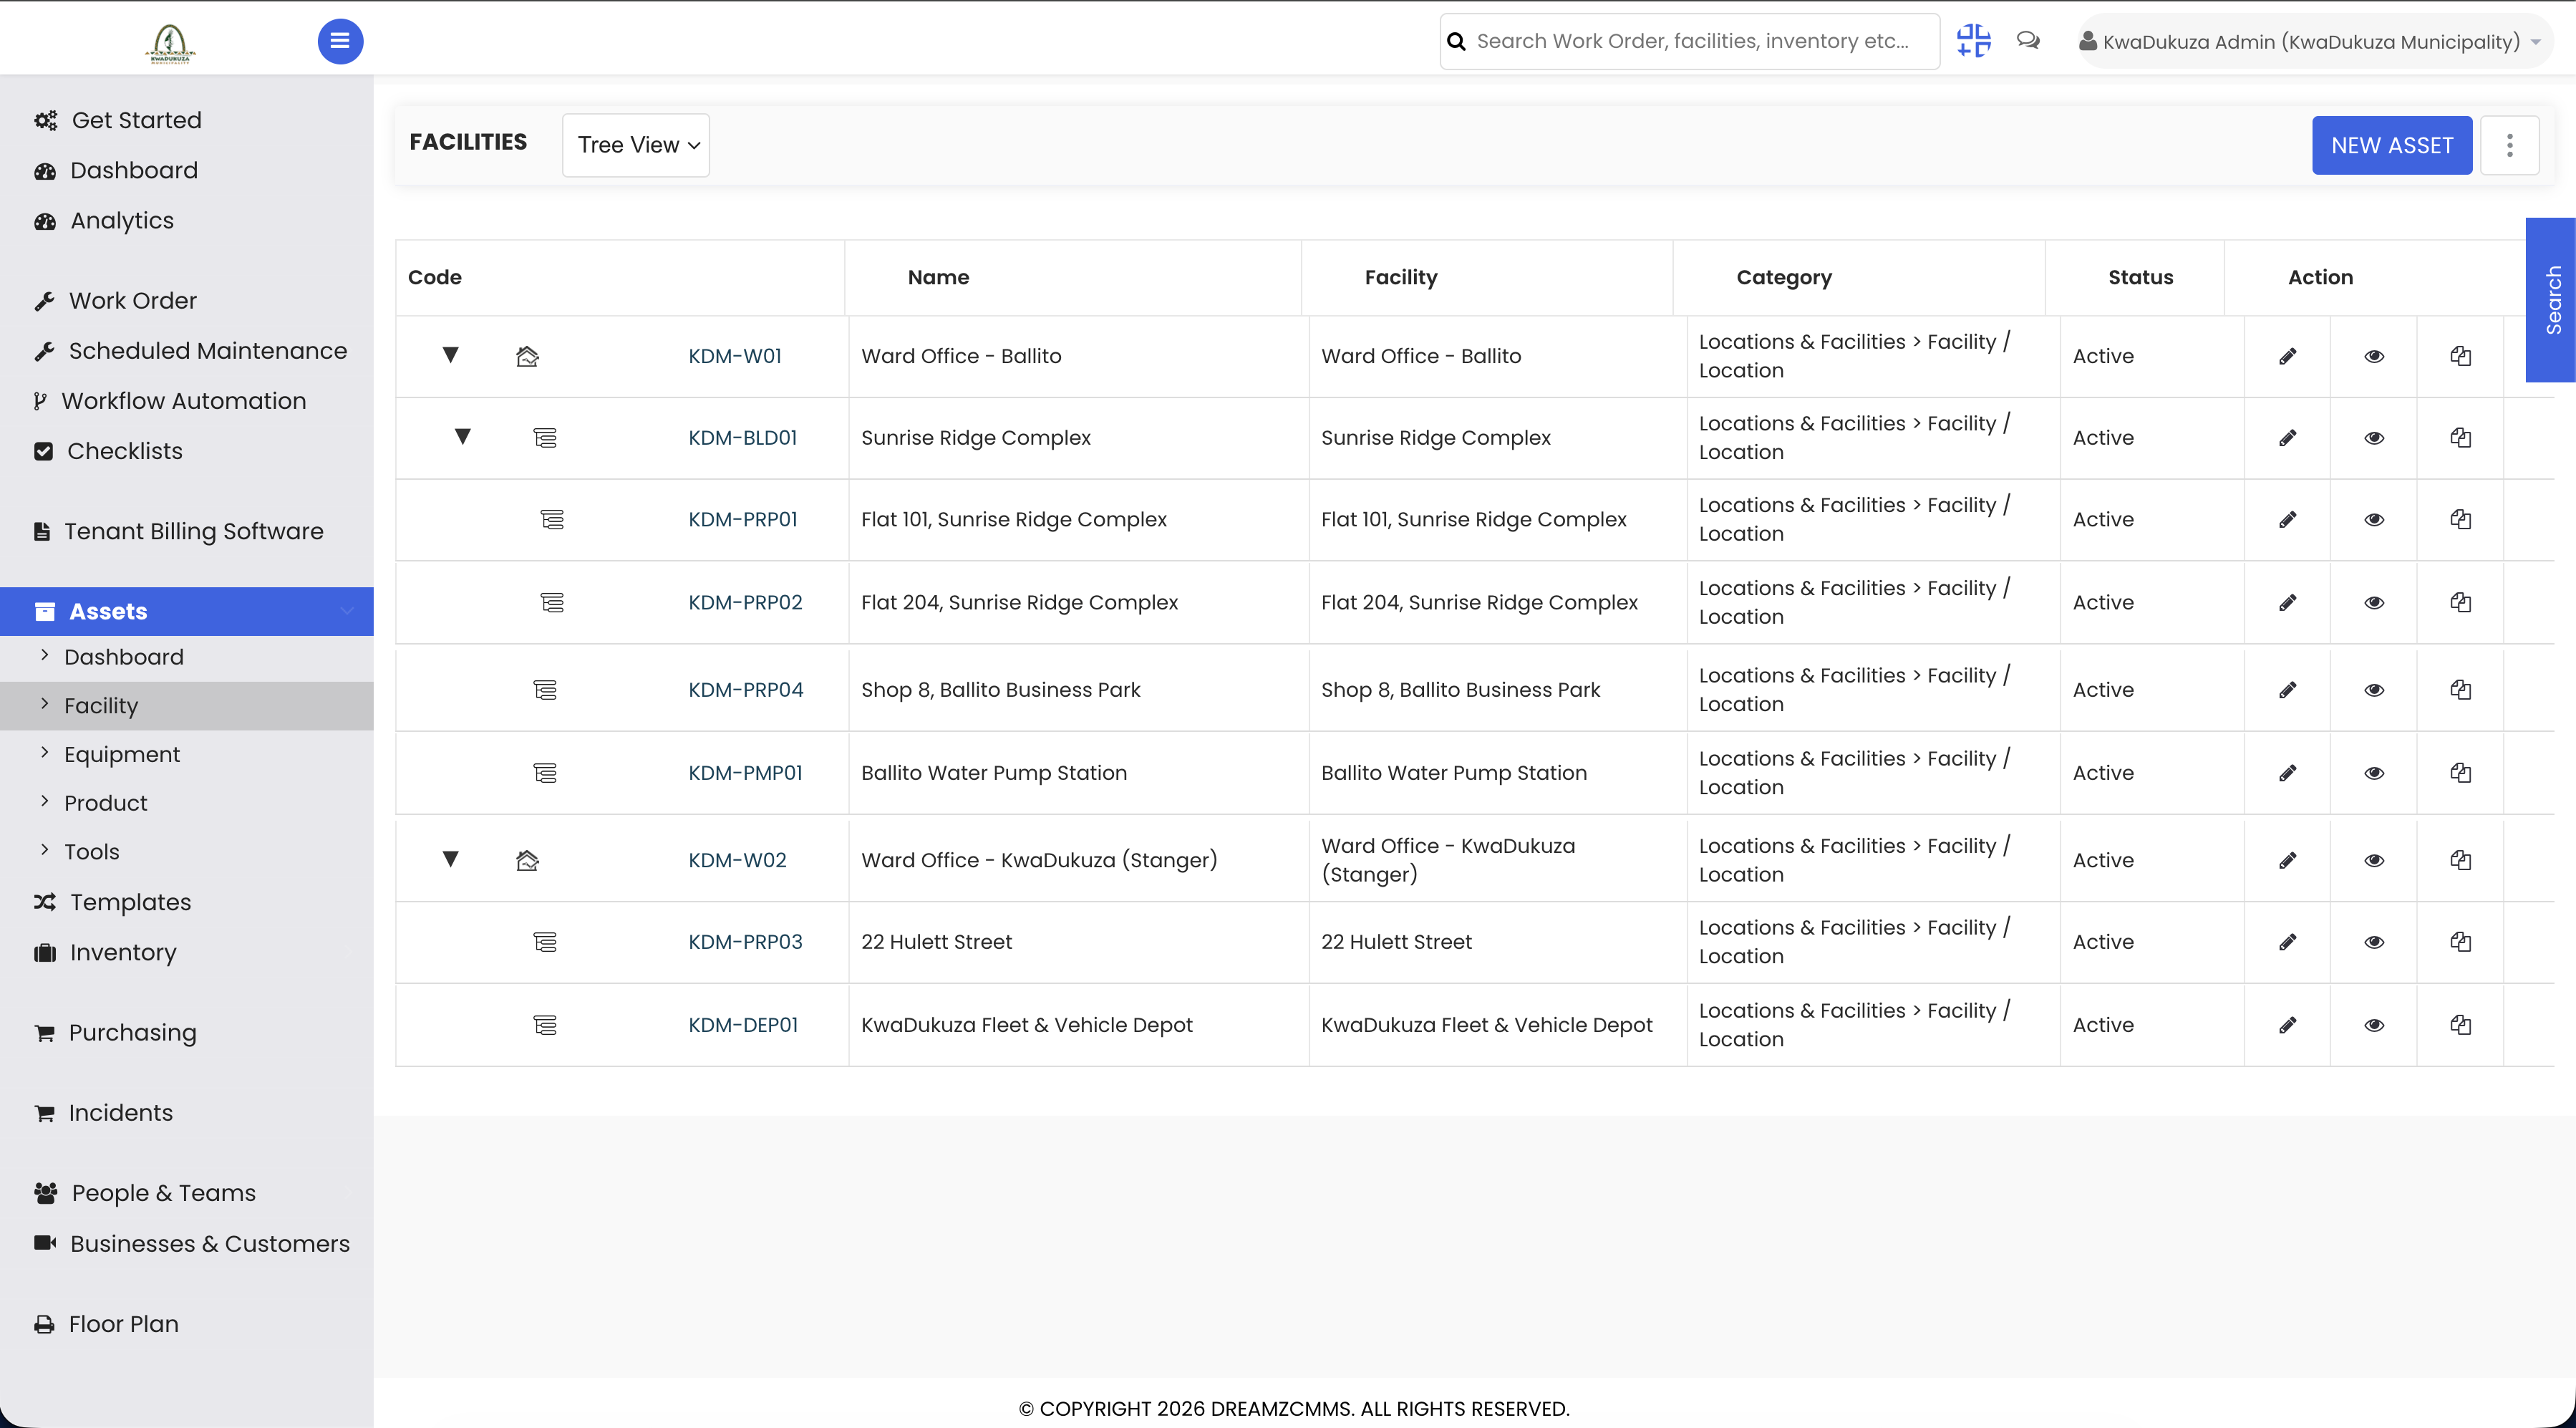
The tree view shows the same locations nested into a hierarchy: a ward, with a residential complex underneath it, and individual flats underneath that, expandable level by level. A flat, a house, or a business property isn't a separate module elsewhere in the system — it's simply another location, sitting deeper in the same hierarchy as the ward and building above it.
Step 8 – Location Import from Excel
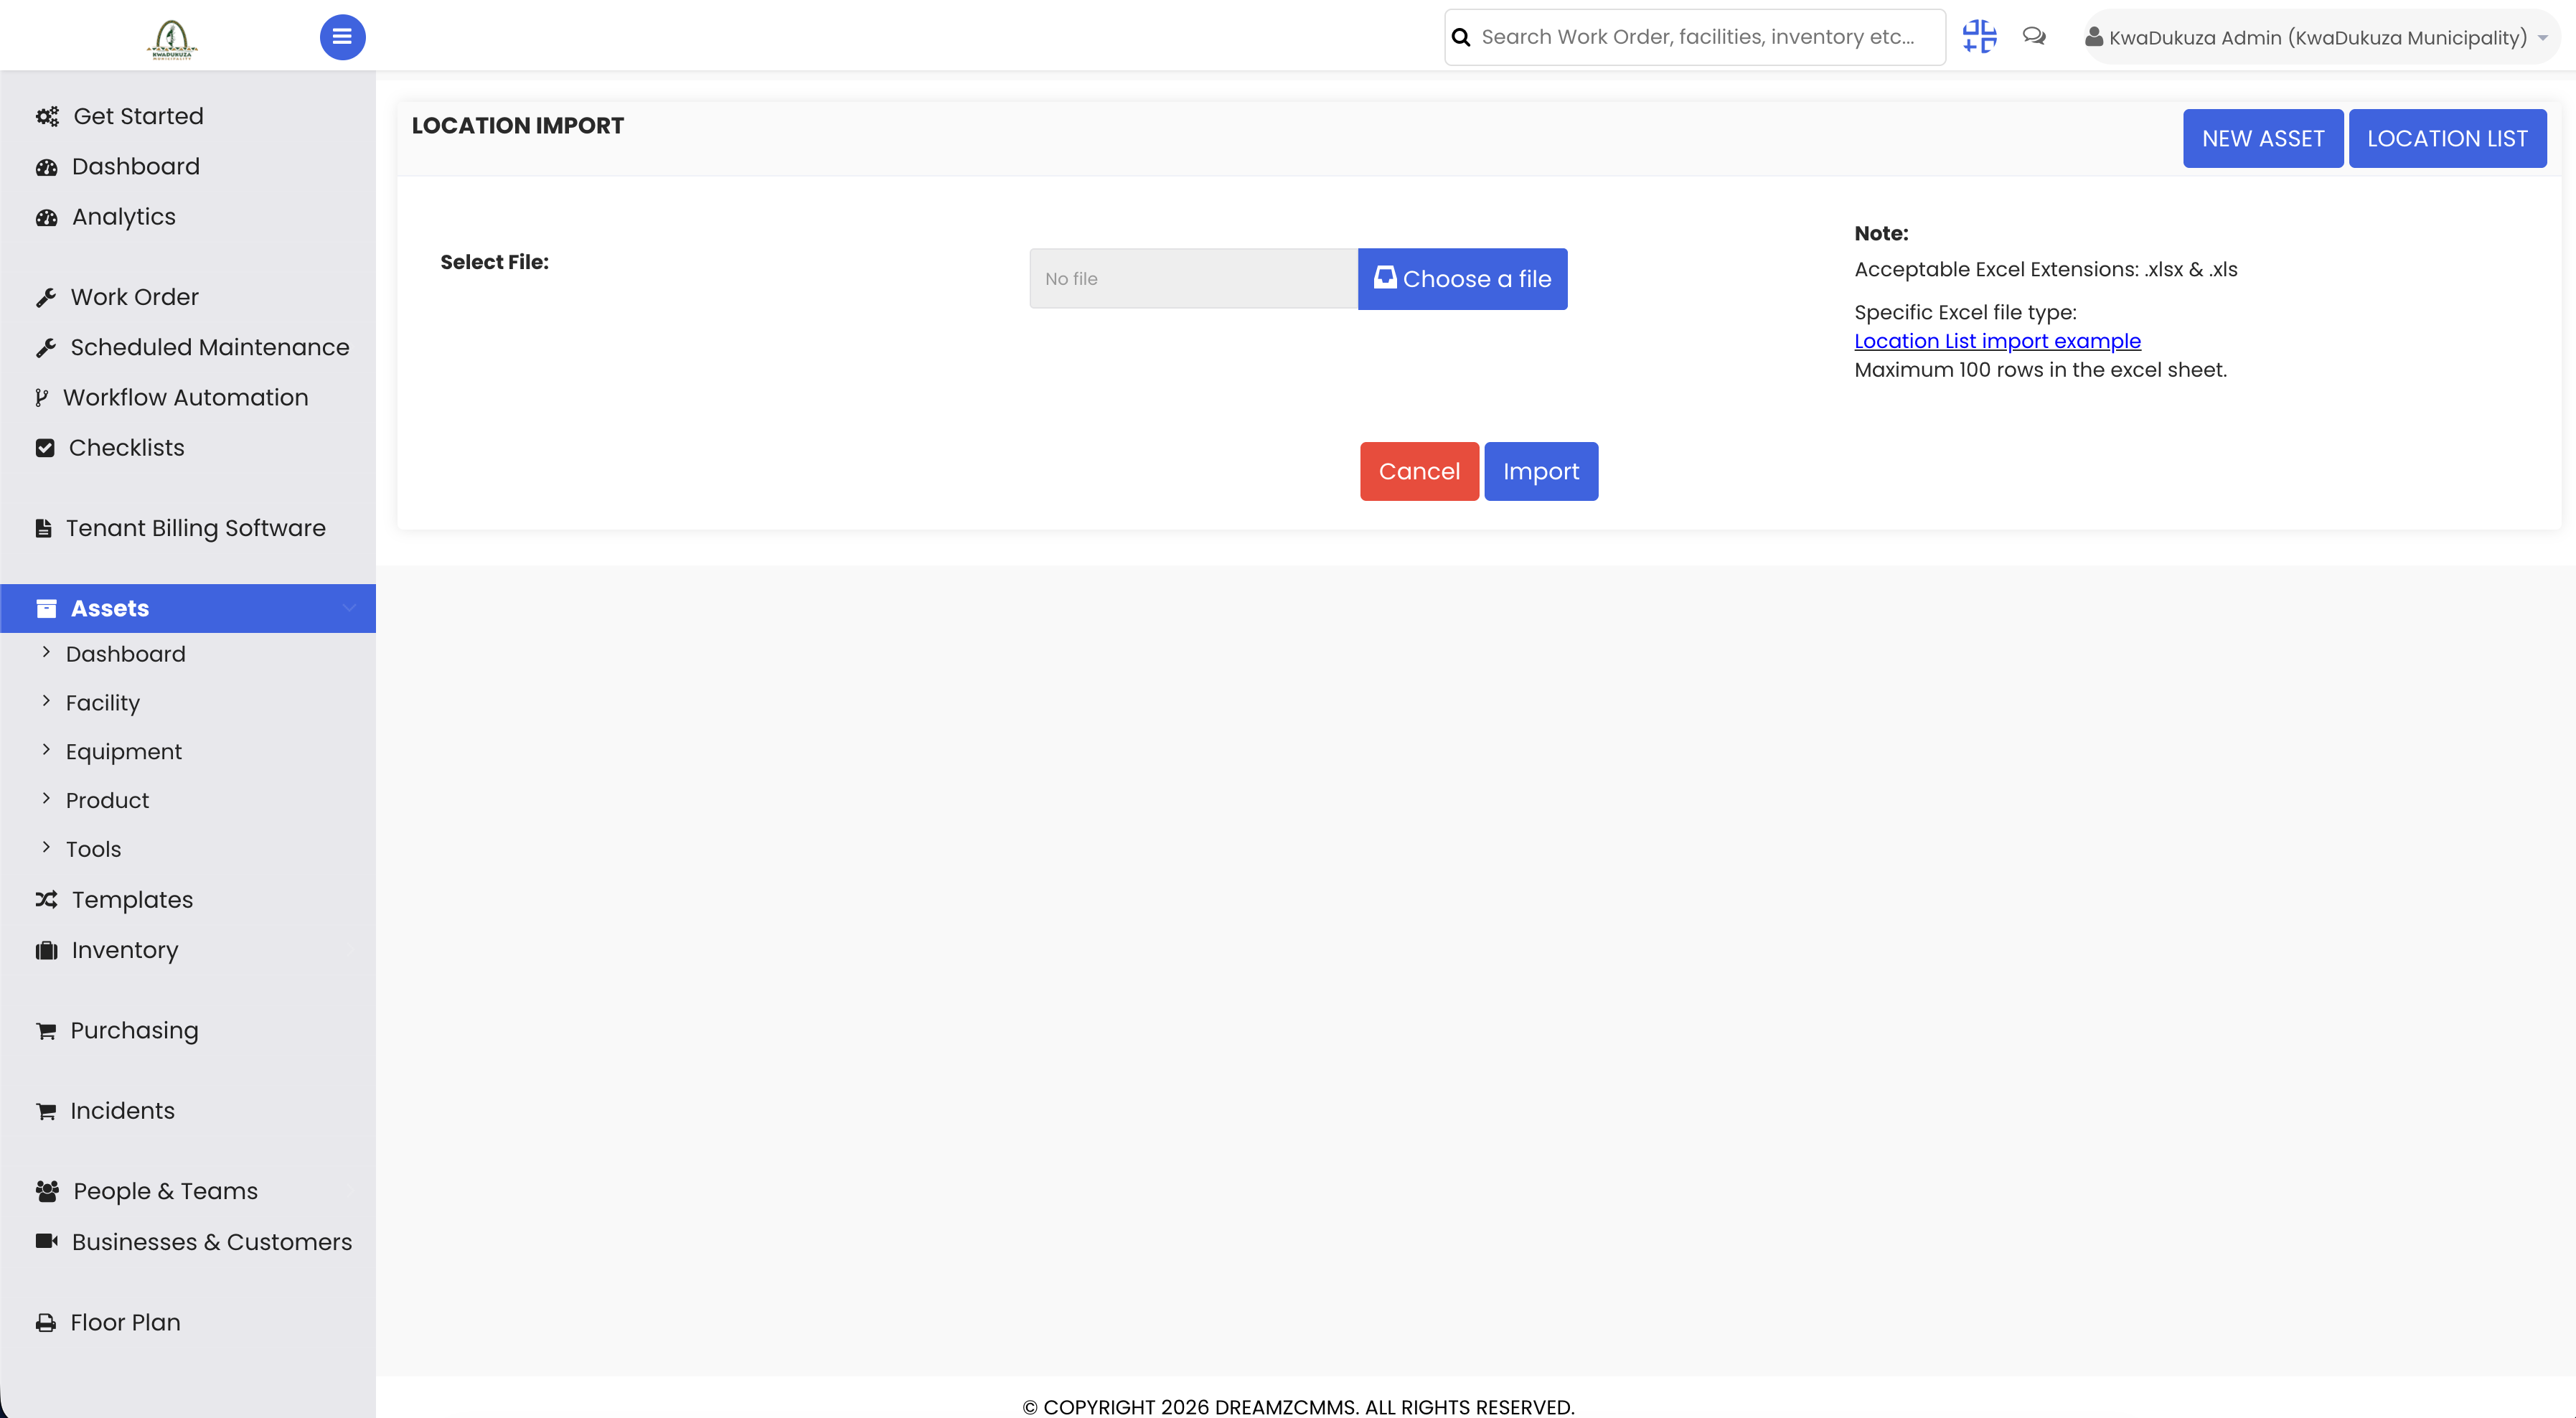
Location Import brings a full list of sites from Excel in one upload instead of adding them one at a time — useful when loading every ward, every complex, and every property across the municipality in one go rather than typing each one in by hand.
Setting Up Products and Assets
Step 9 – Product List Management
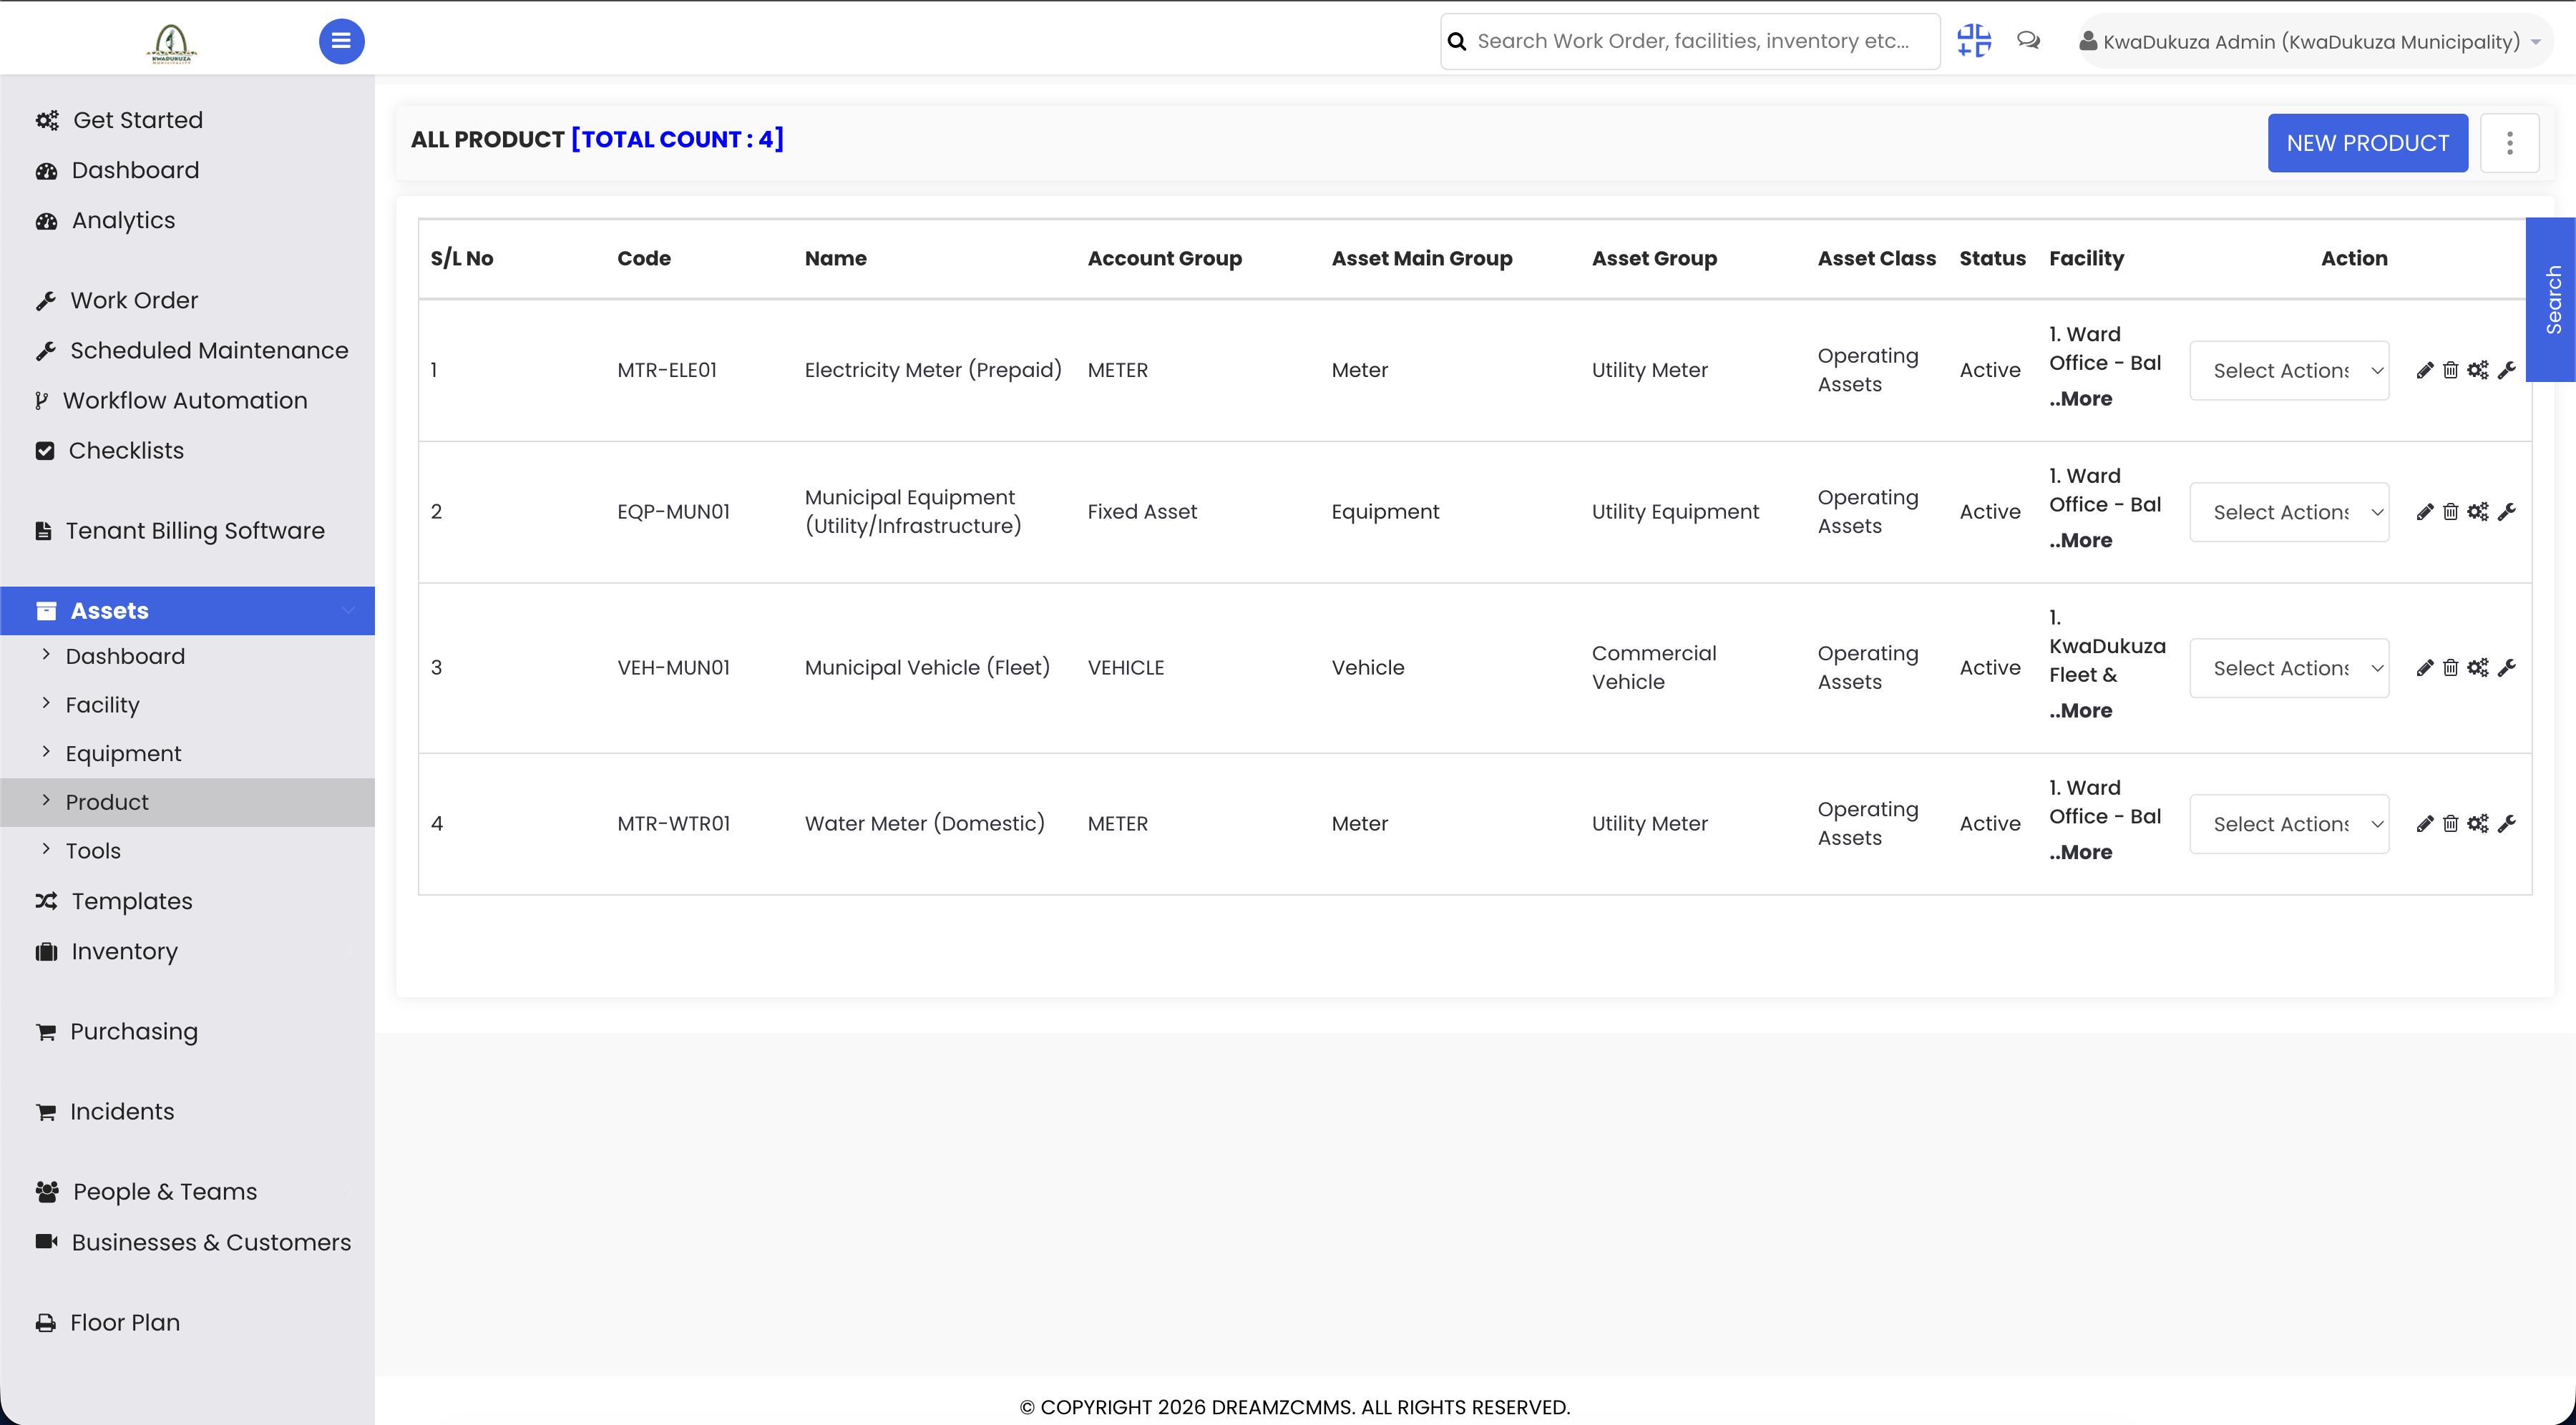
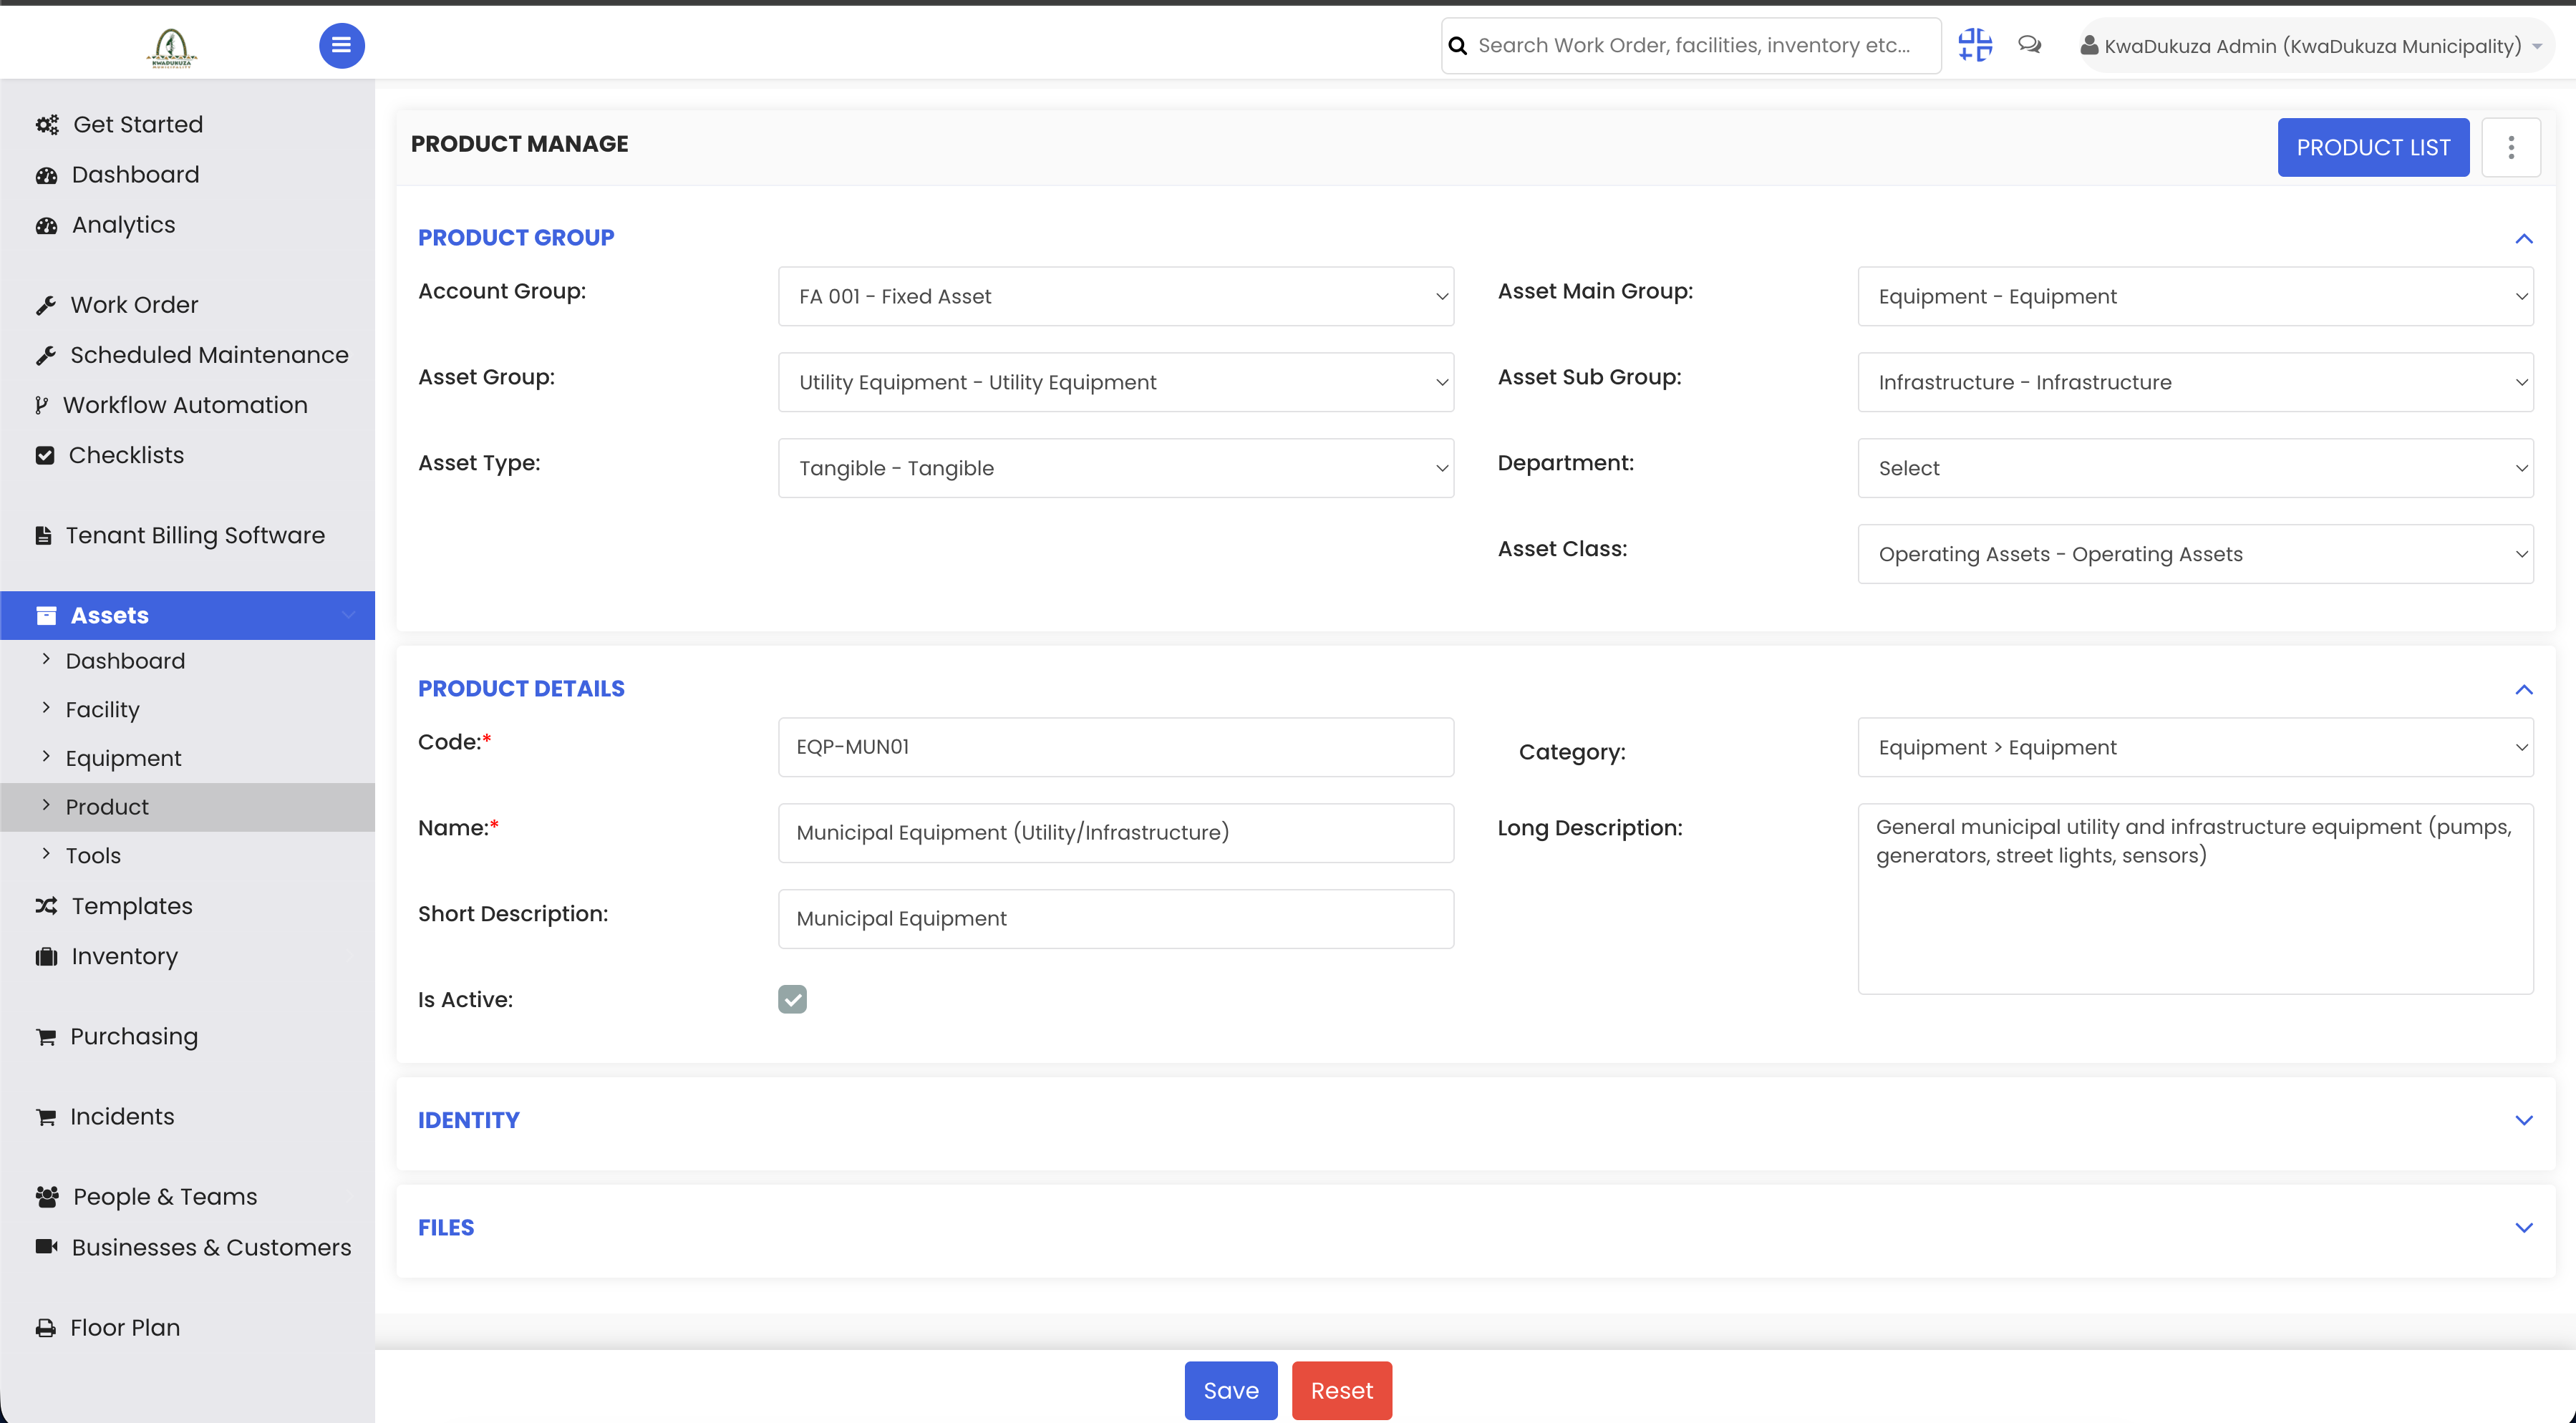
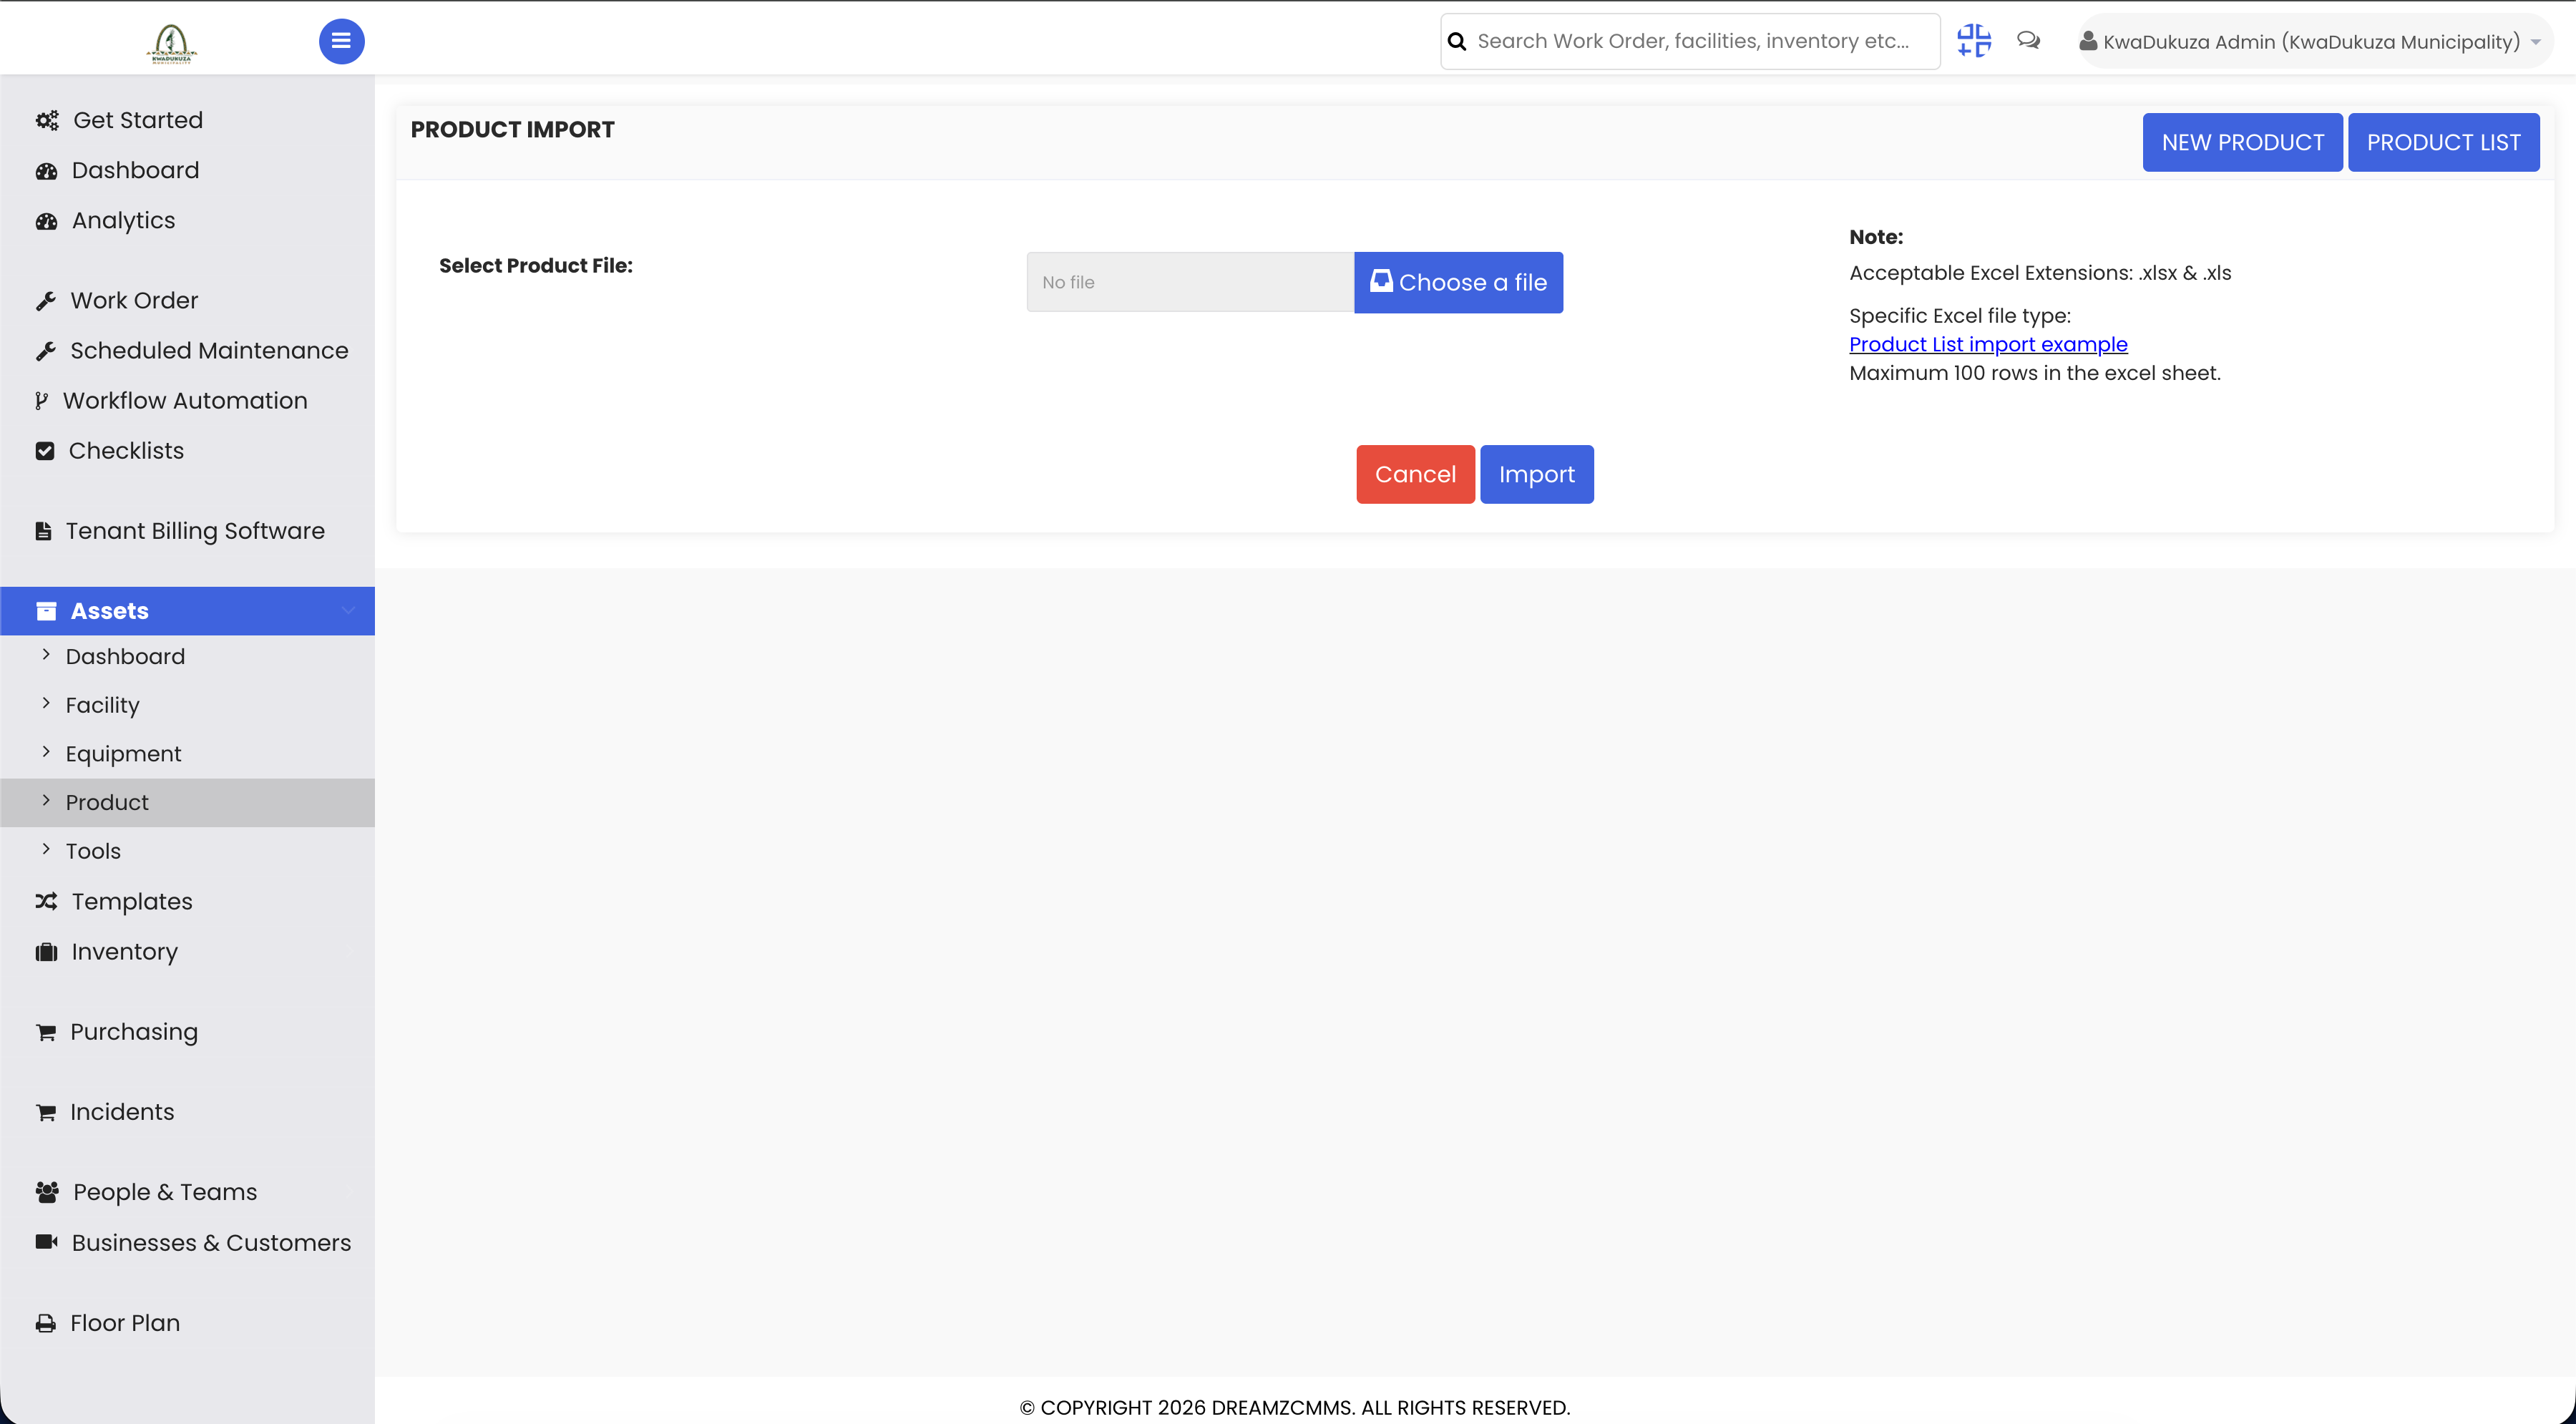
Opening an existing product shows its classification, grouping, and cost — the template for anything you'll eventually tag, whether that's a water meter, an electricity meter, or a refuse compactor truck, set up once no matter how many individual units you track. Product Import works the same way: your whole catalog comes in from Excel in one go.
Step 10 – Asset Creation and Bundling
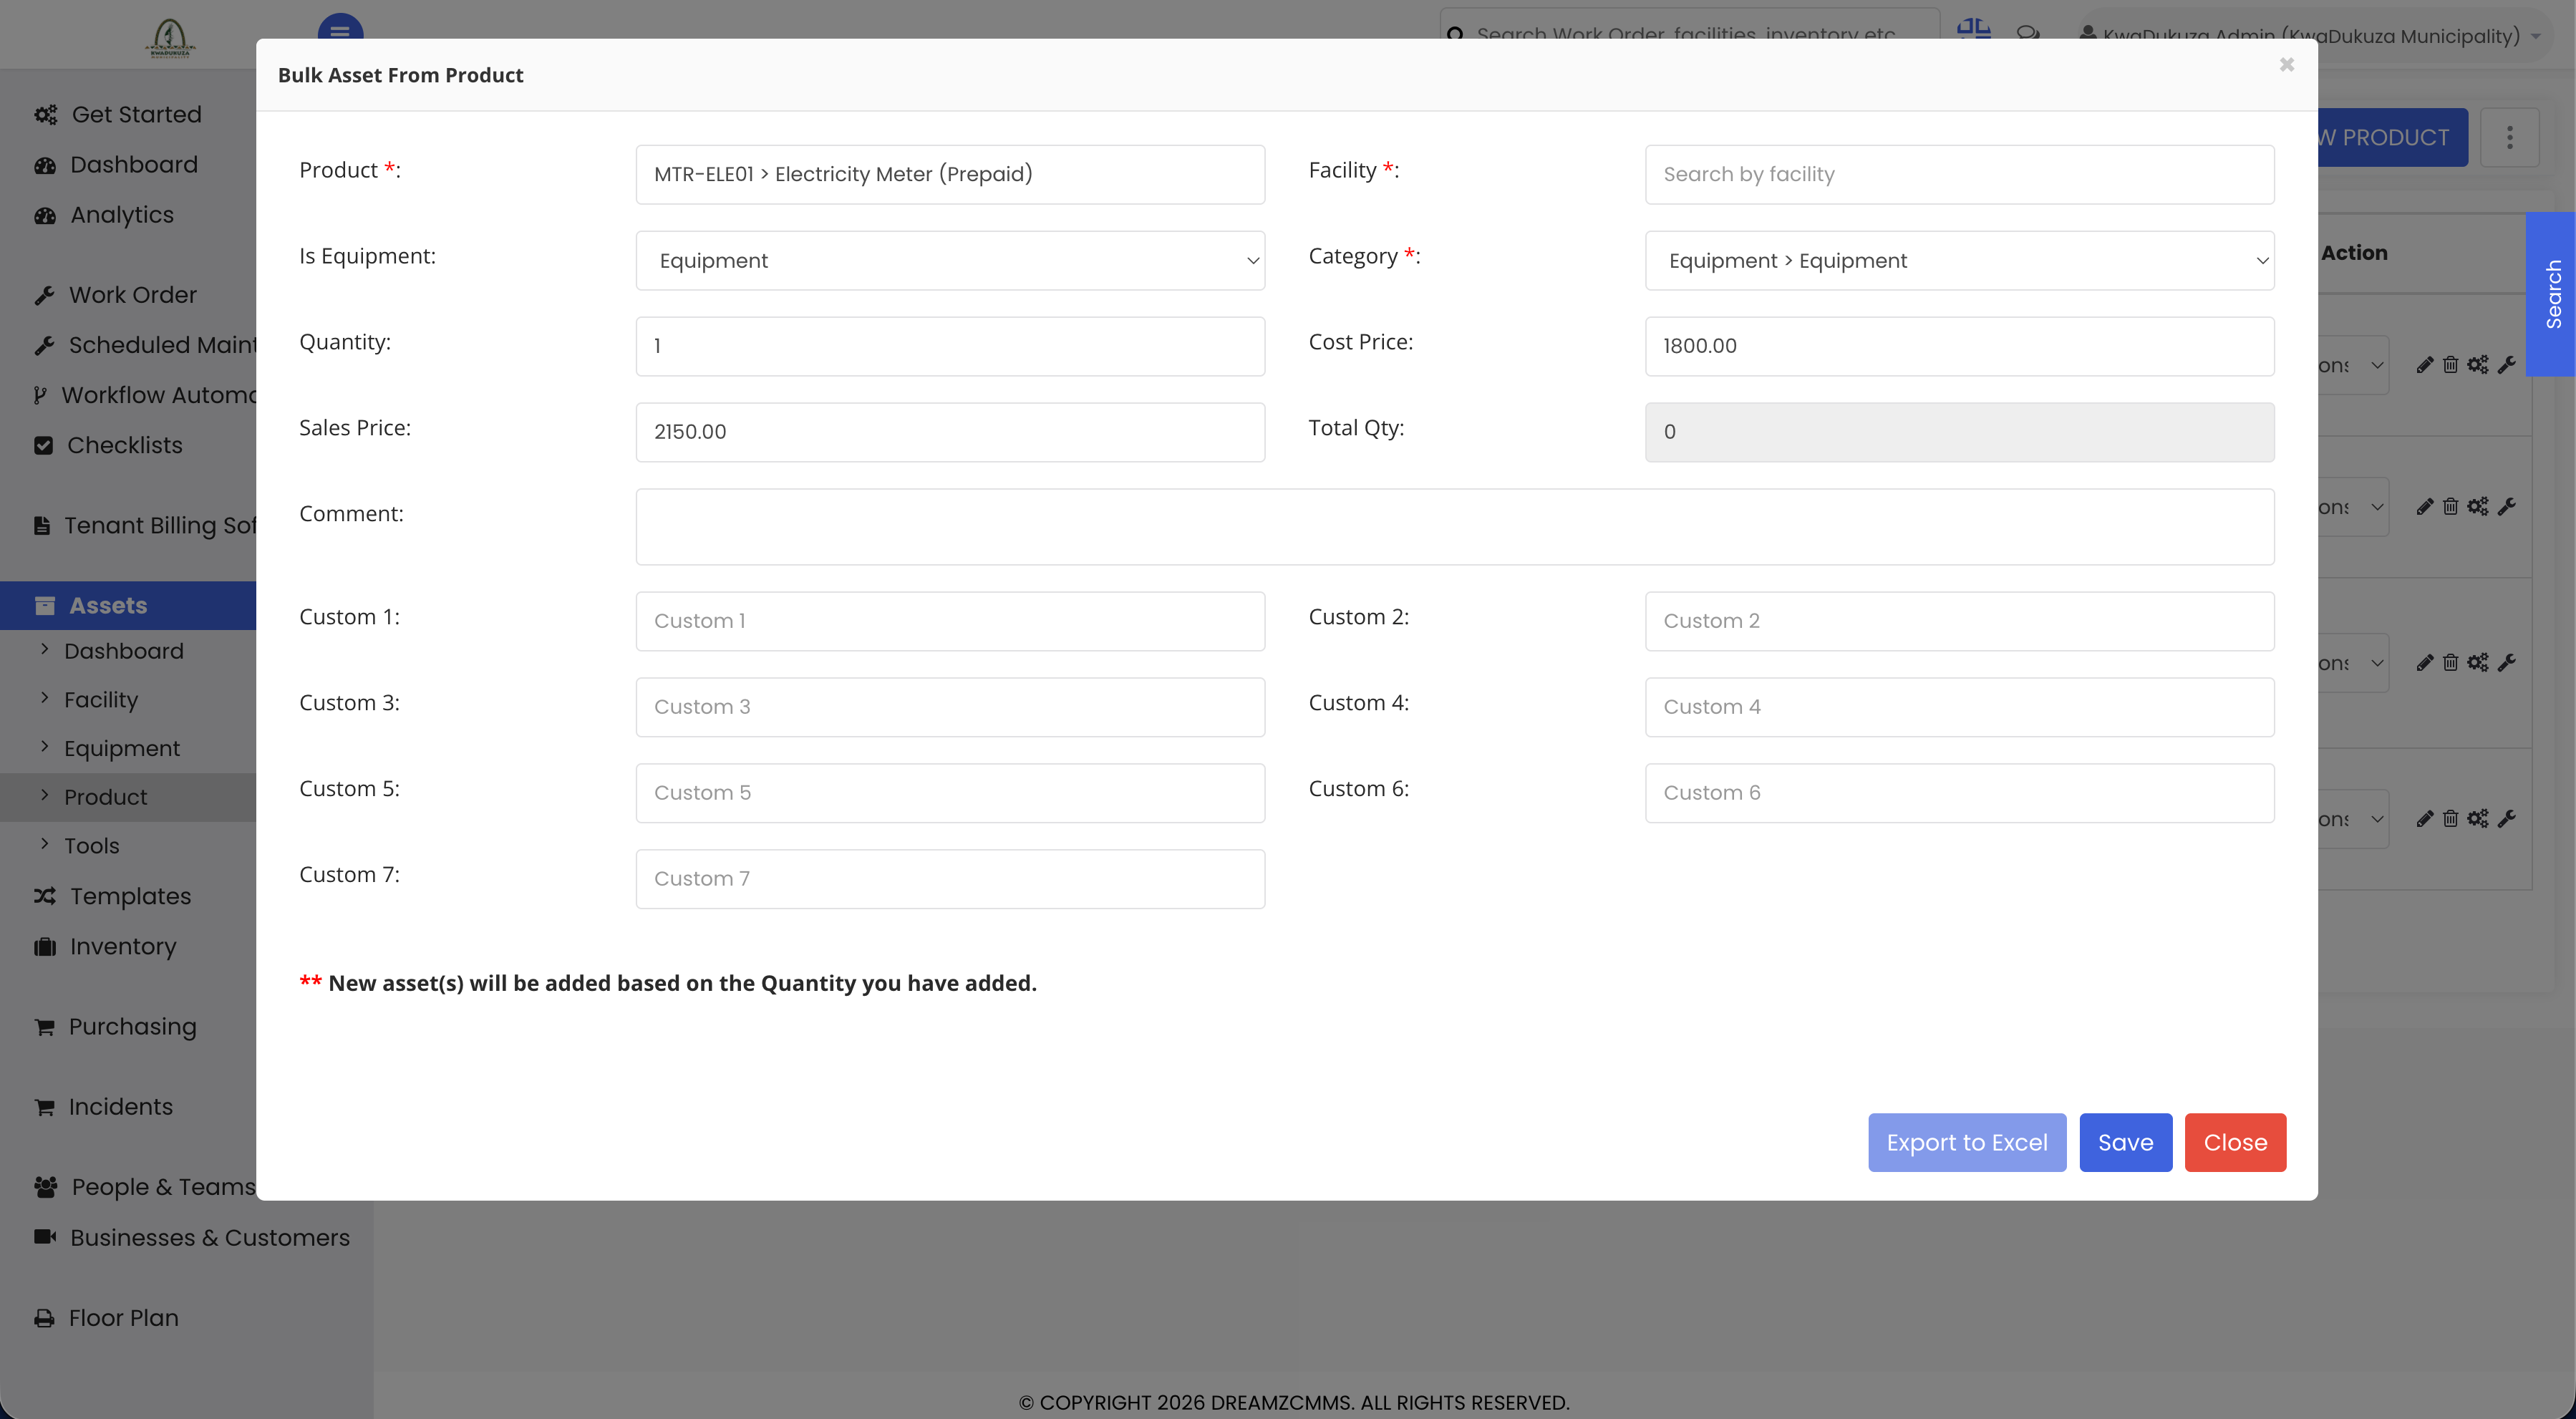
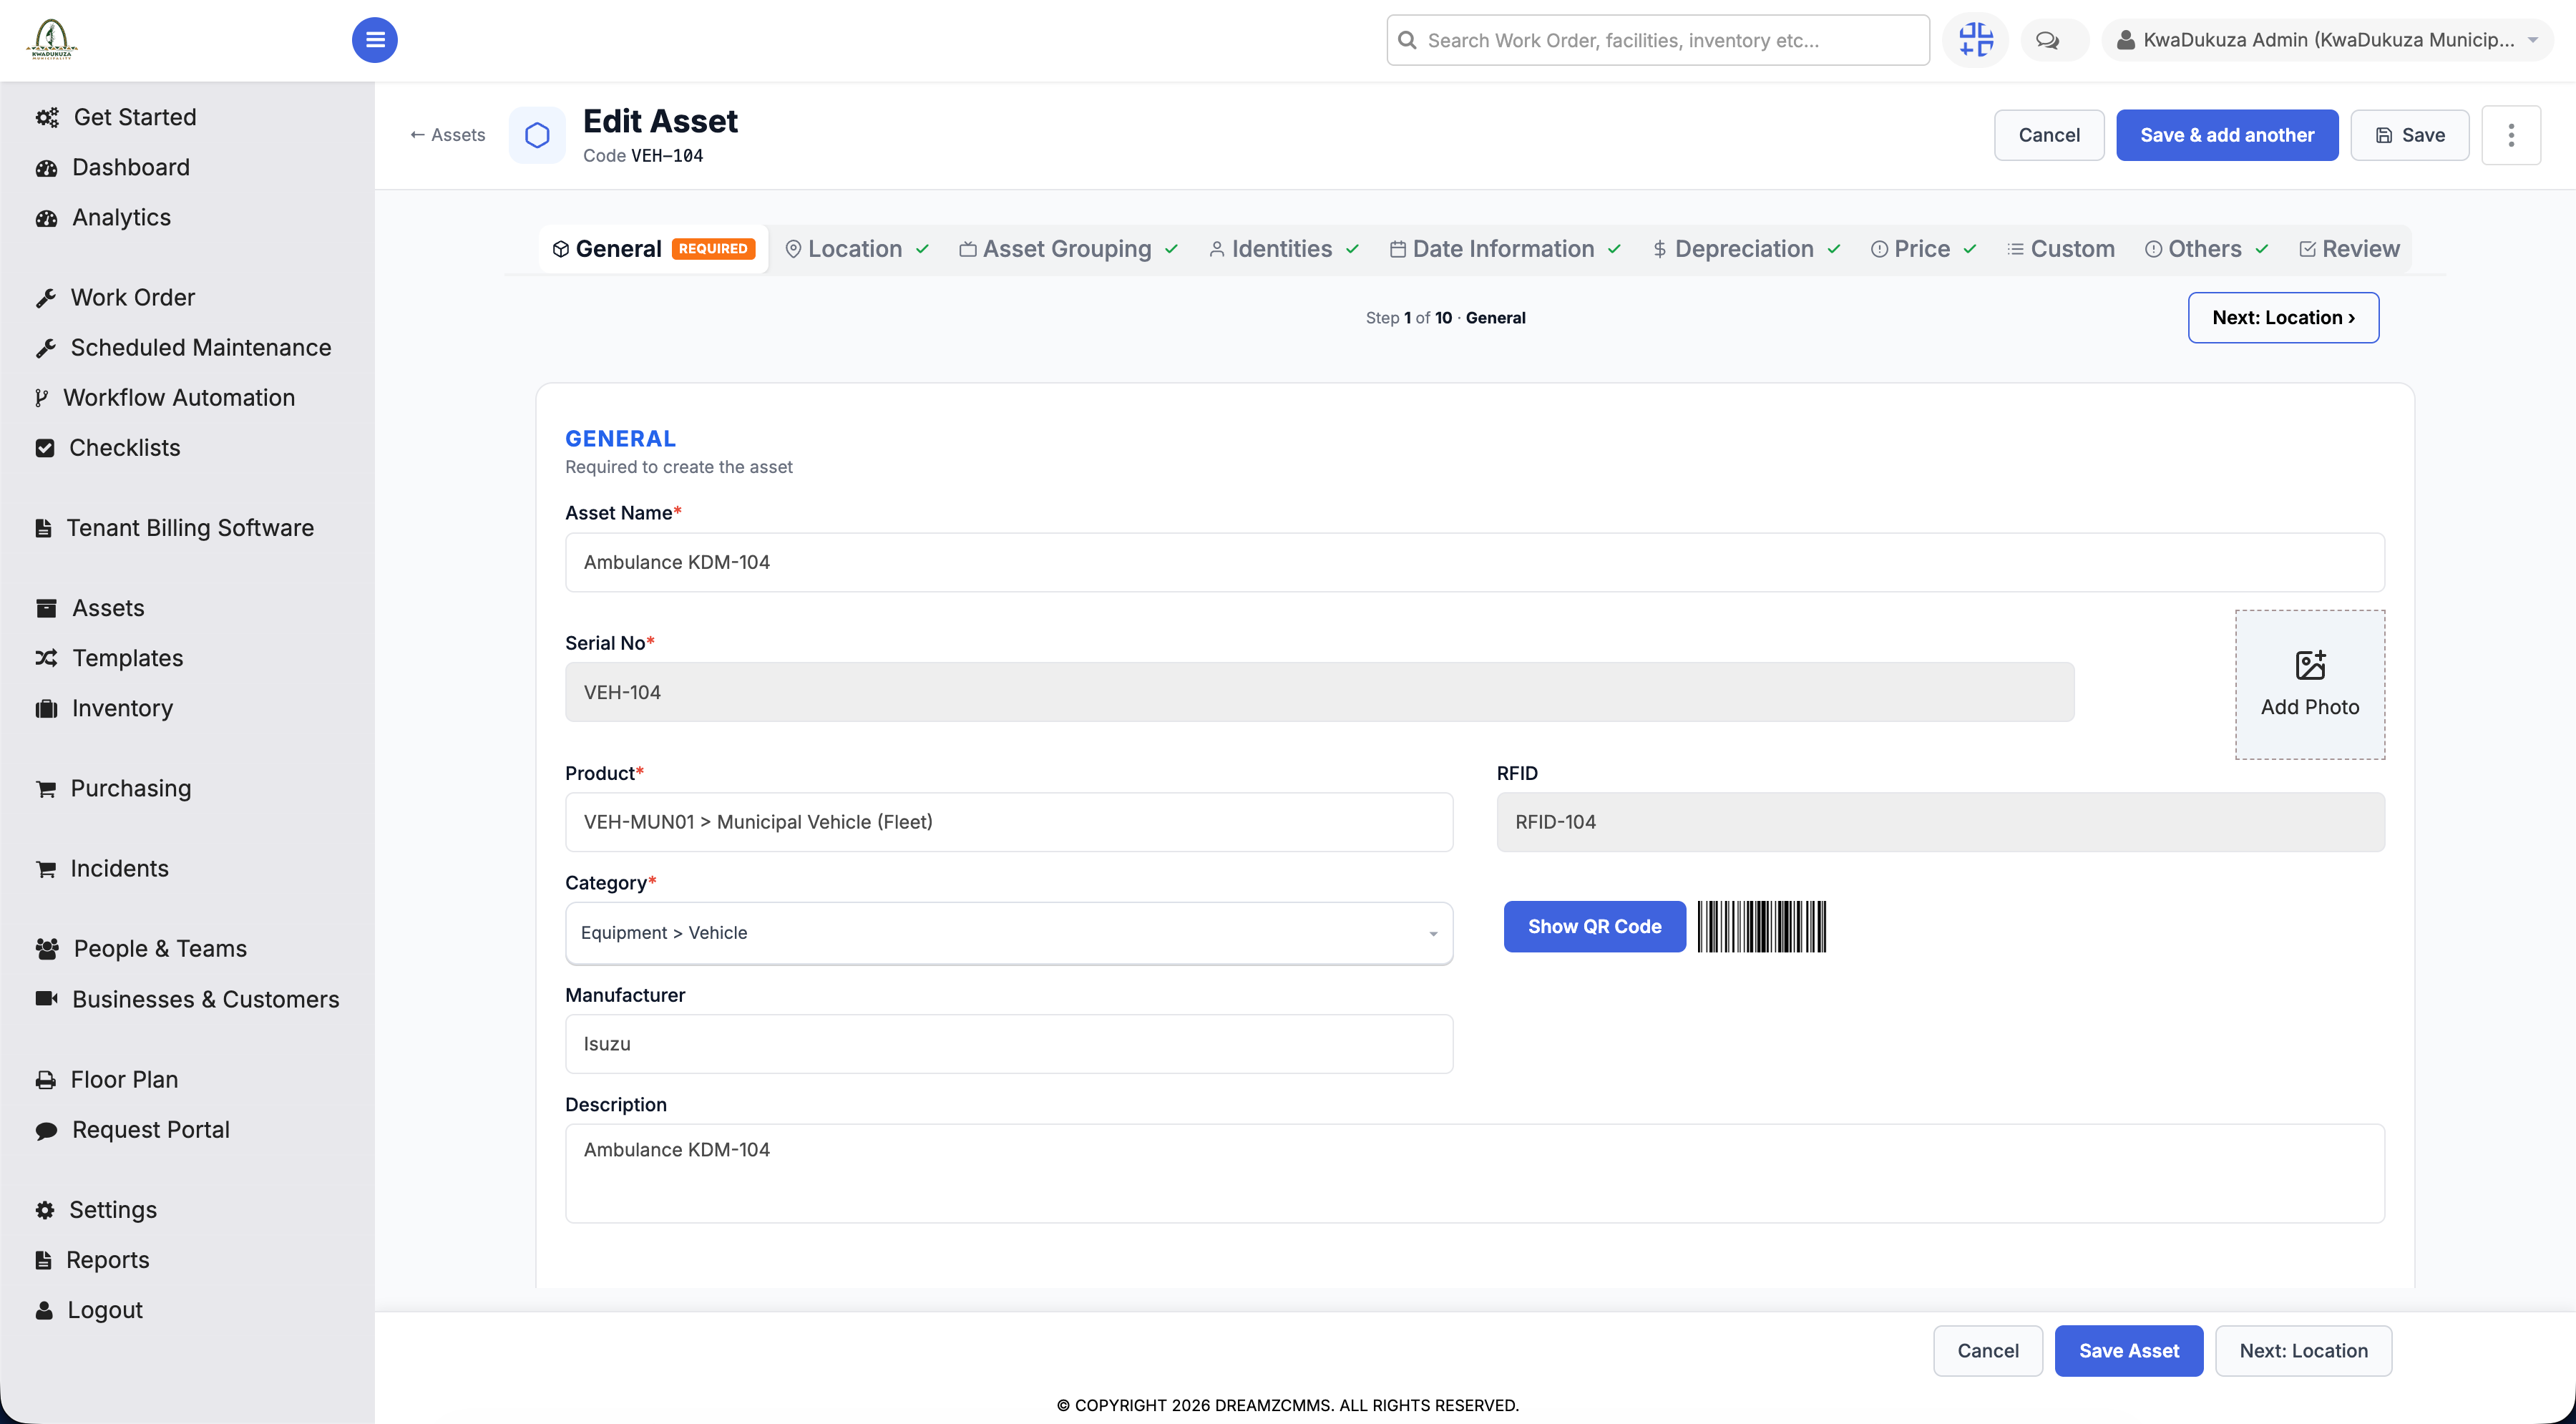
Assets are the individual physical units themselves. Before opening the asset list, bulk asset creation from a product is worth showing first: if a fresh batch of water meters just came in, you don't create each unit by hand — pick the product, set the facility, enter a quantity, and the system generates that many individual assets automatically. The asset list creates one at a time the same way as locations and products, and opening an existing asset shows its serial number, RFID tag, category, and condition. This is also where bundling happens: set one asset as the parent and its child assets populate automatically, so the whole group scans and moves as a single bundle — useful for something like a generator set tracked together with its control panel and fuel tank.
Step 11 – Asset Tree and Import
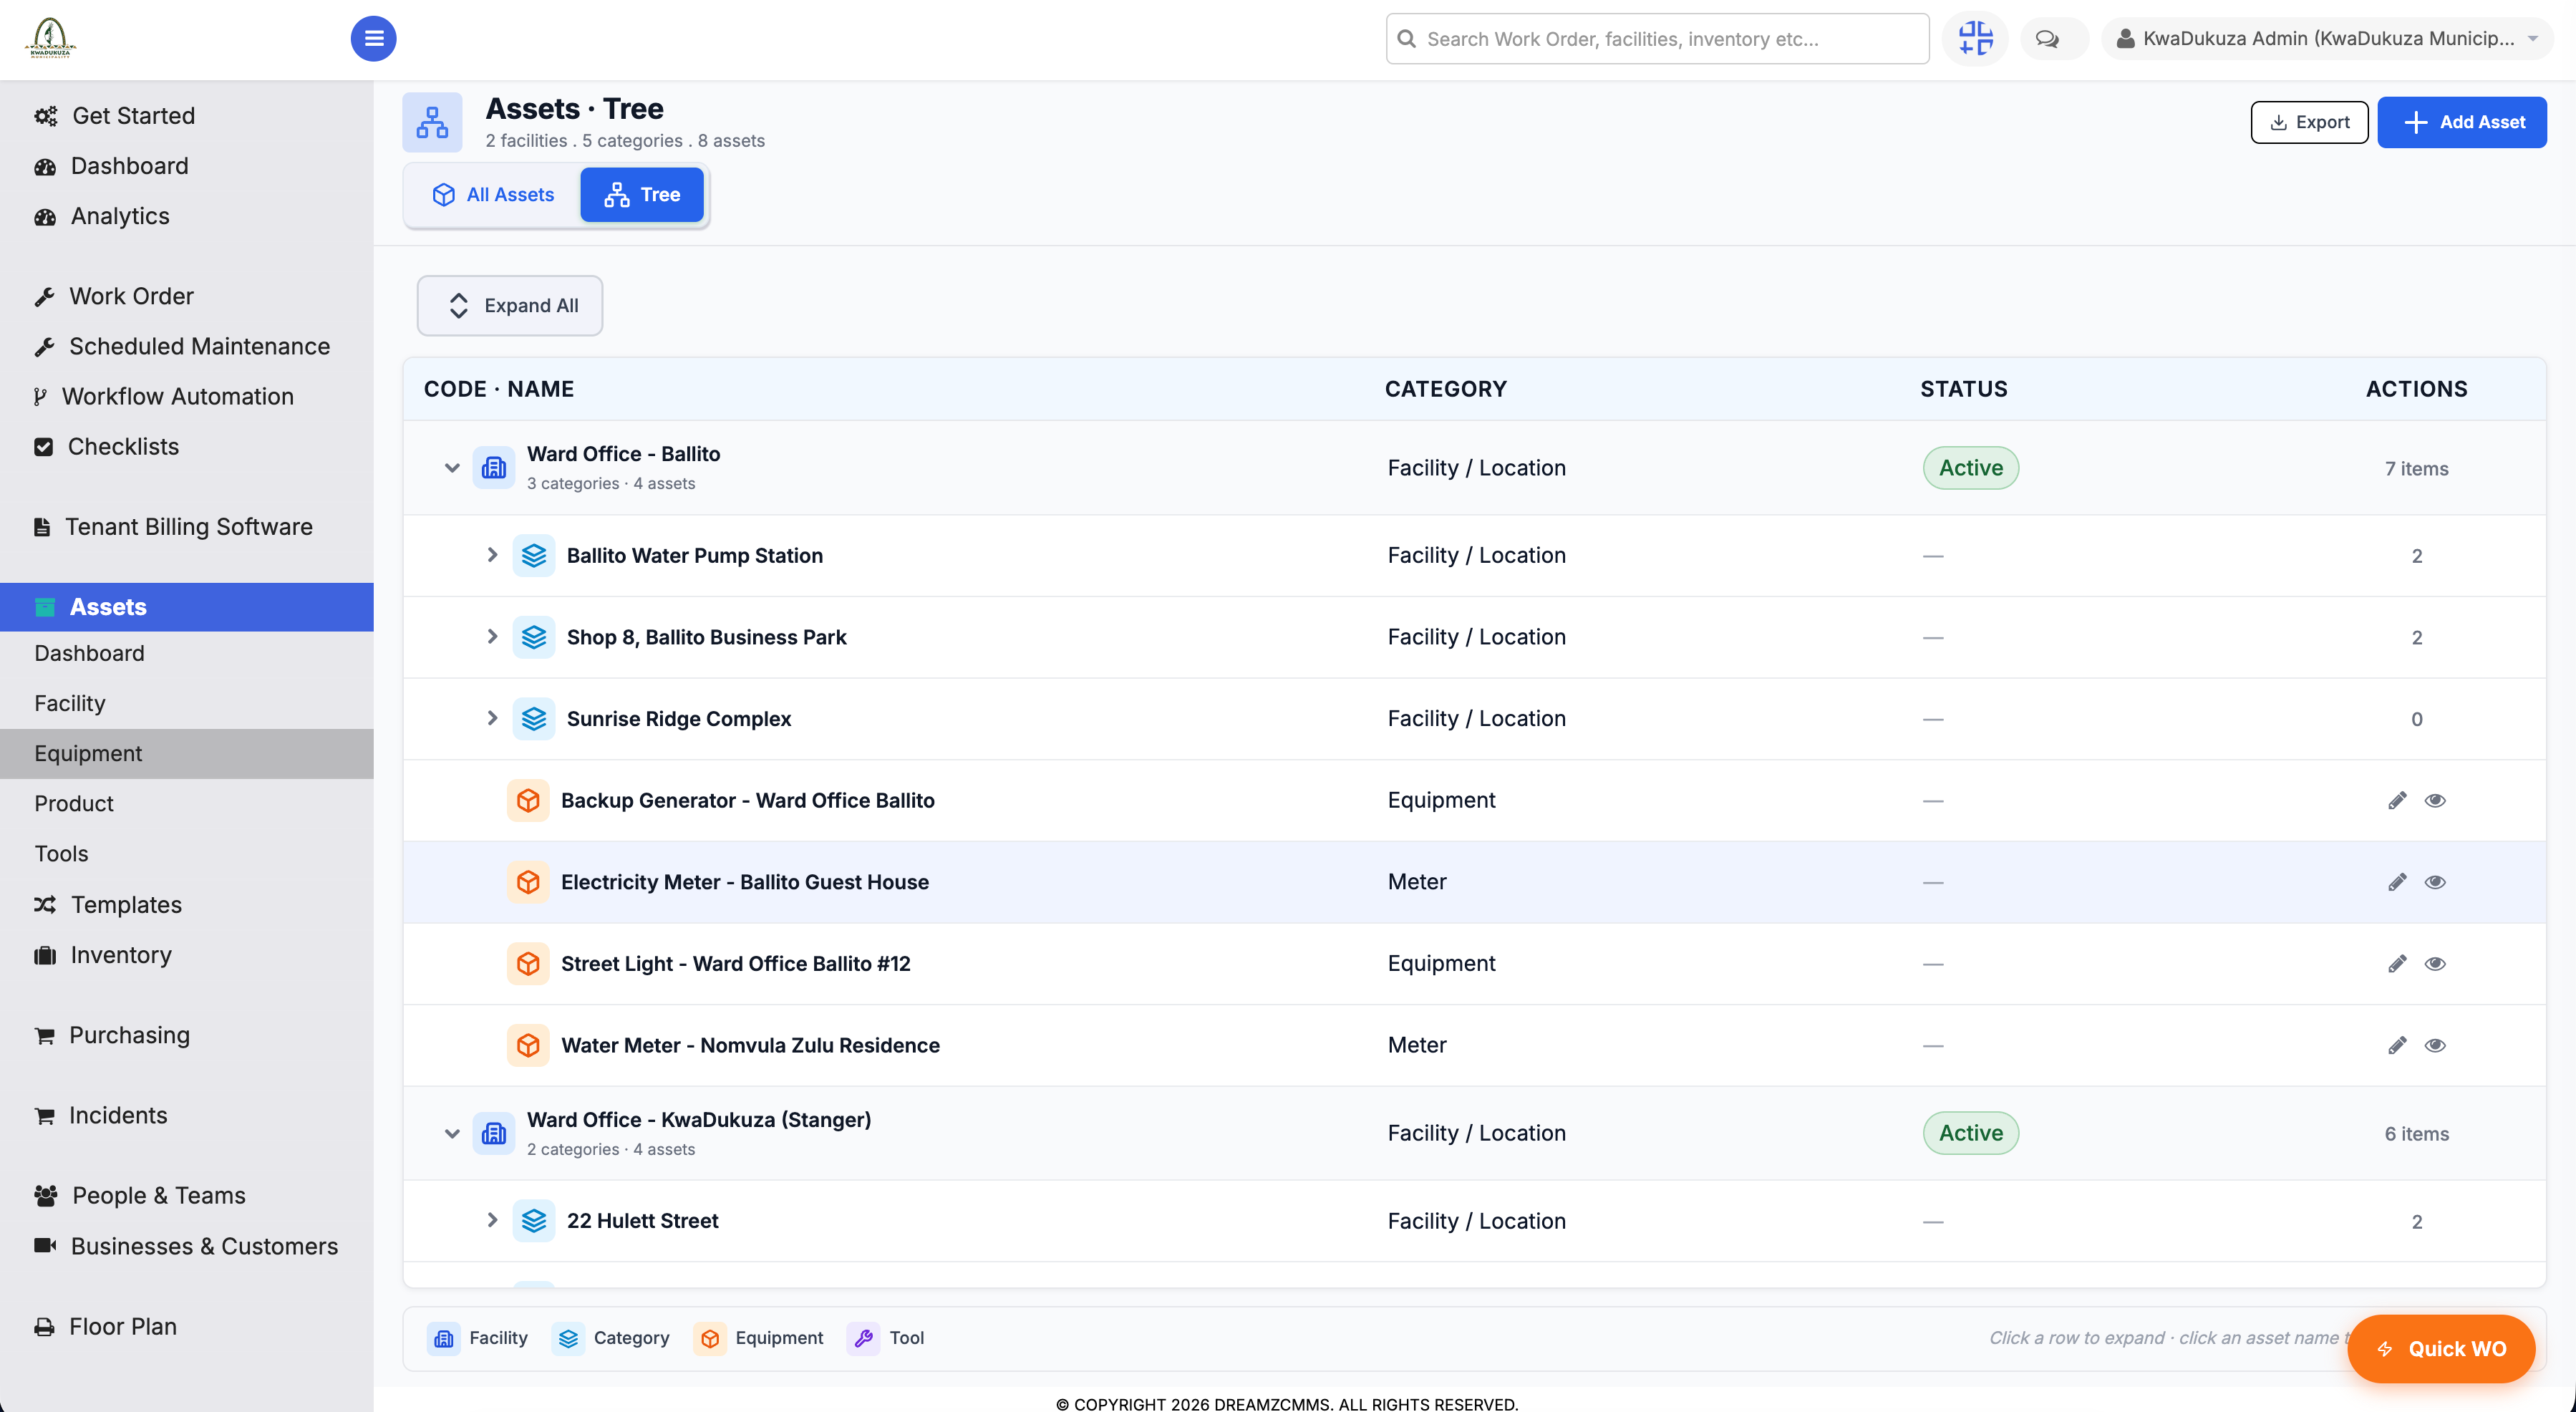
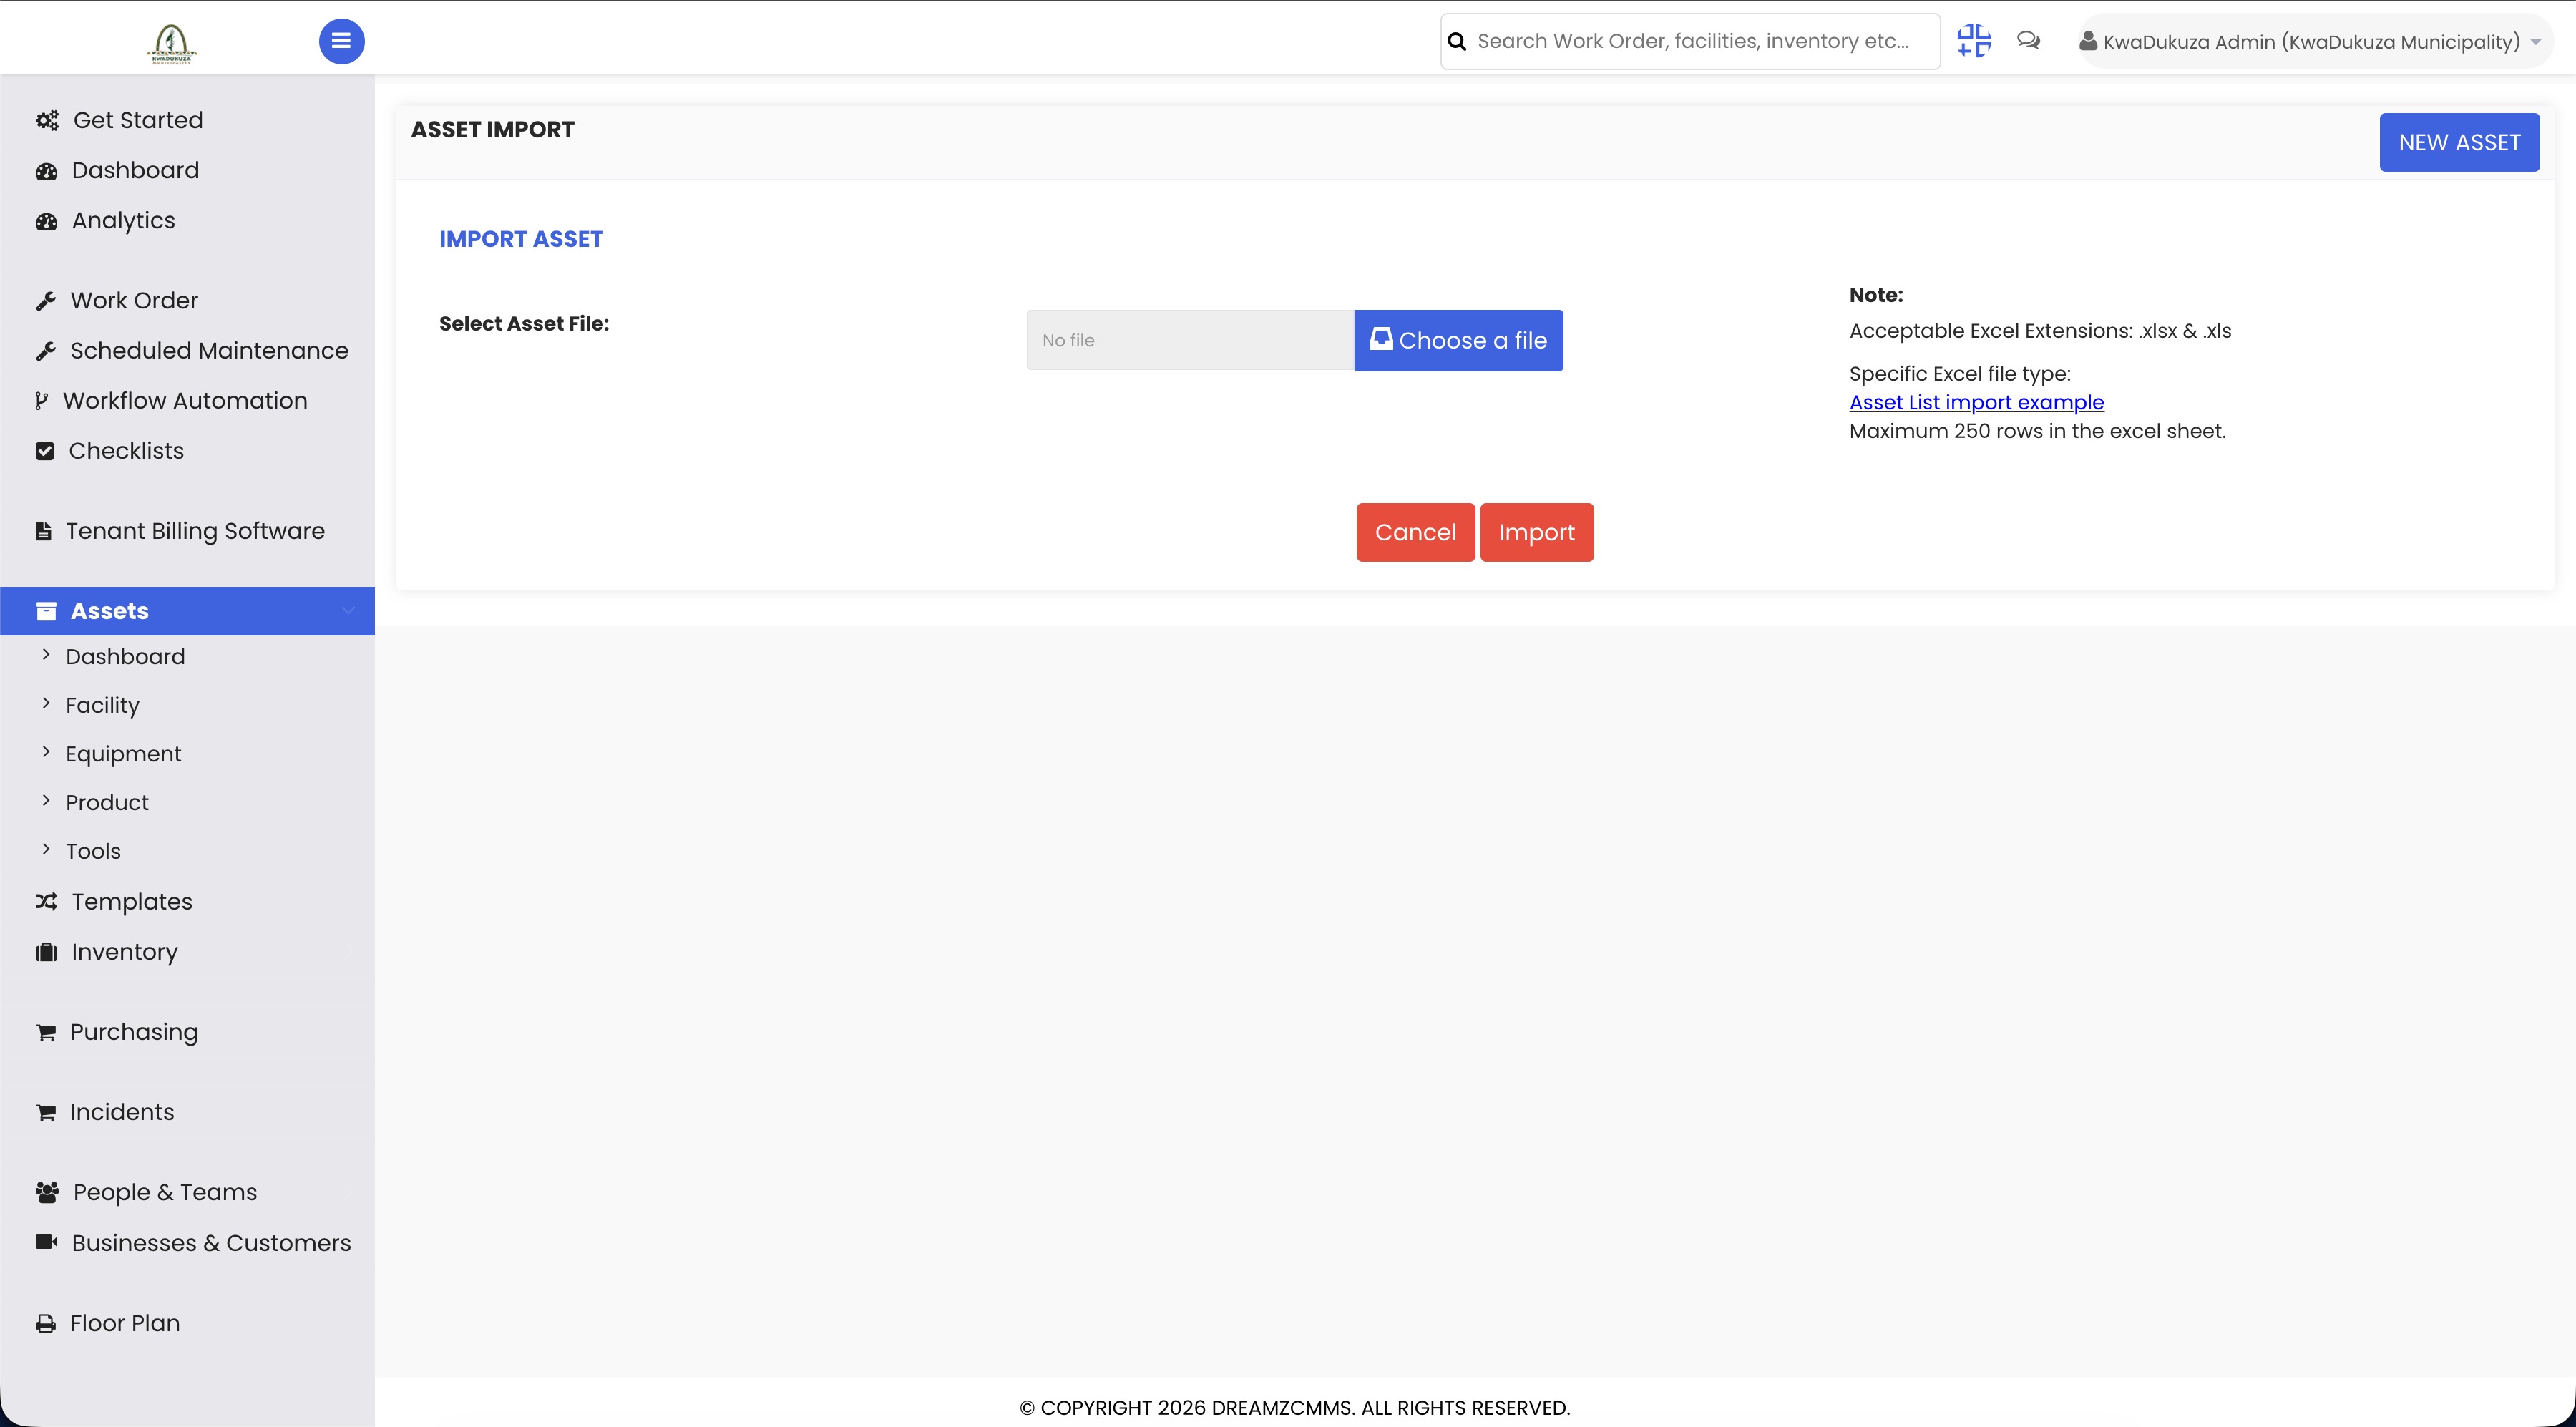
The asset tree groups assets by facility and category, and Asset Import brings in a full batch from Excel — exactly how the meters, vehicles, and equipment throughout this walkthrough got loaded into the system in the first place. That's the setup complete: every location, product, and asset in place before anything else in the system moves.
Customer Records and Property Links
Step 12 – Customer Records Overview
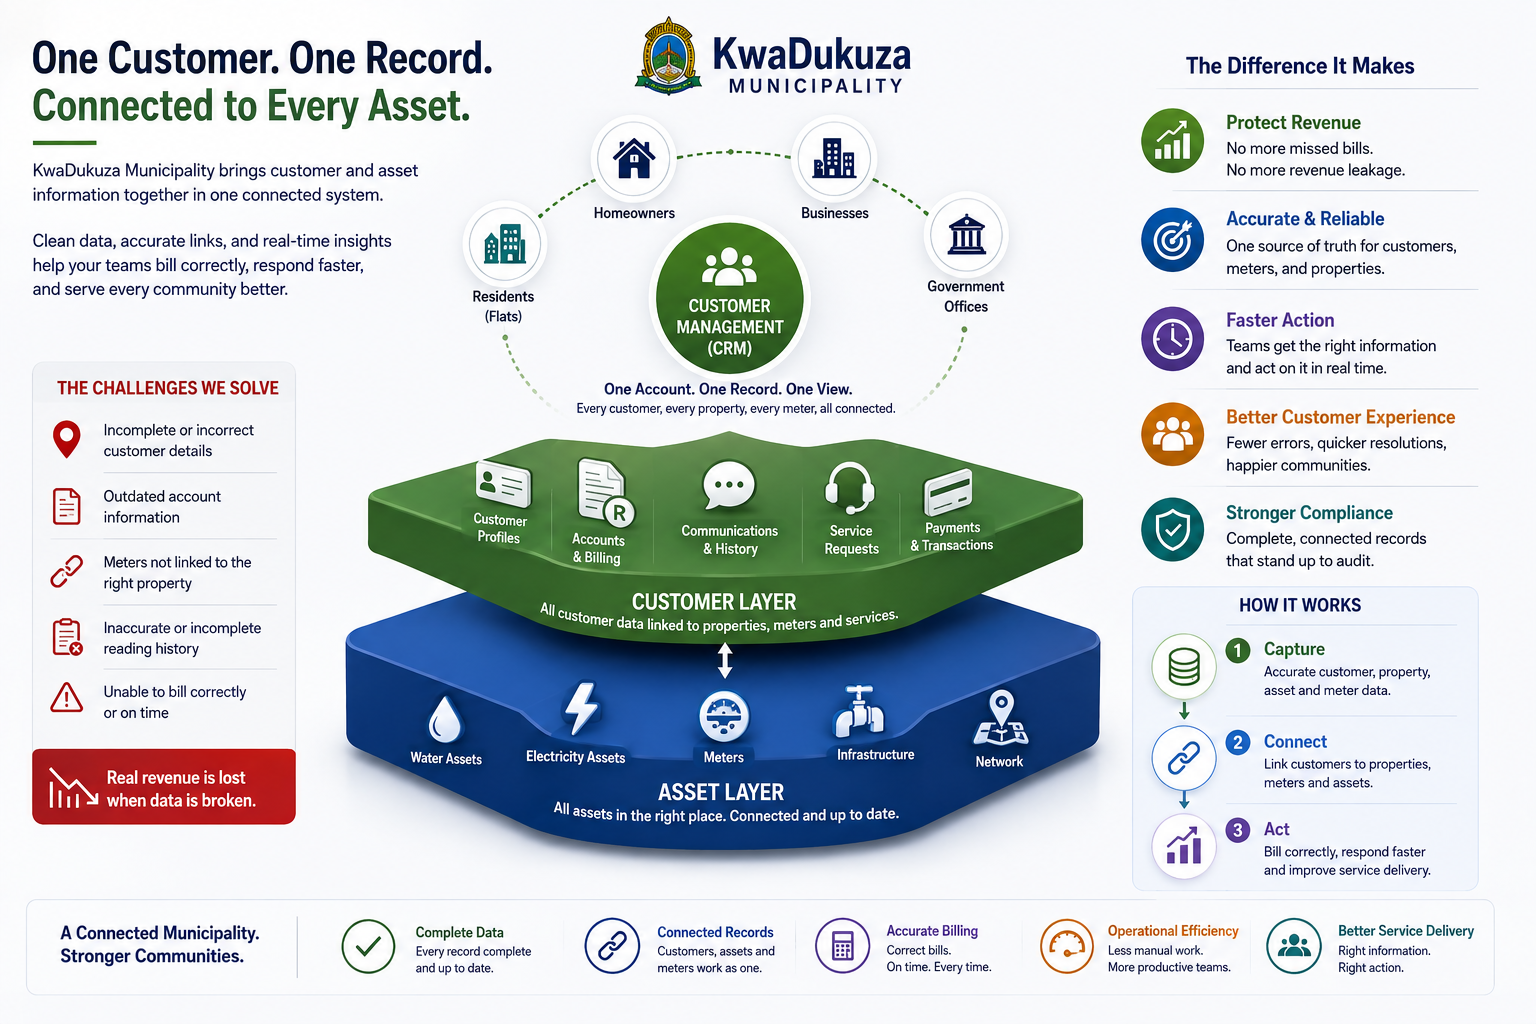
With that foundation in place, customer records connect directly to it. Sitting above the asset layer is the CRM, the customer layer, which works on exactly the same pattern. This is where every account lives, whether that's a resident in a flat, a homeowner, a registered business, or a government office. New Customer works the same way as everything else — one button, a short form.
Step 13 – Customer Profile Details
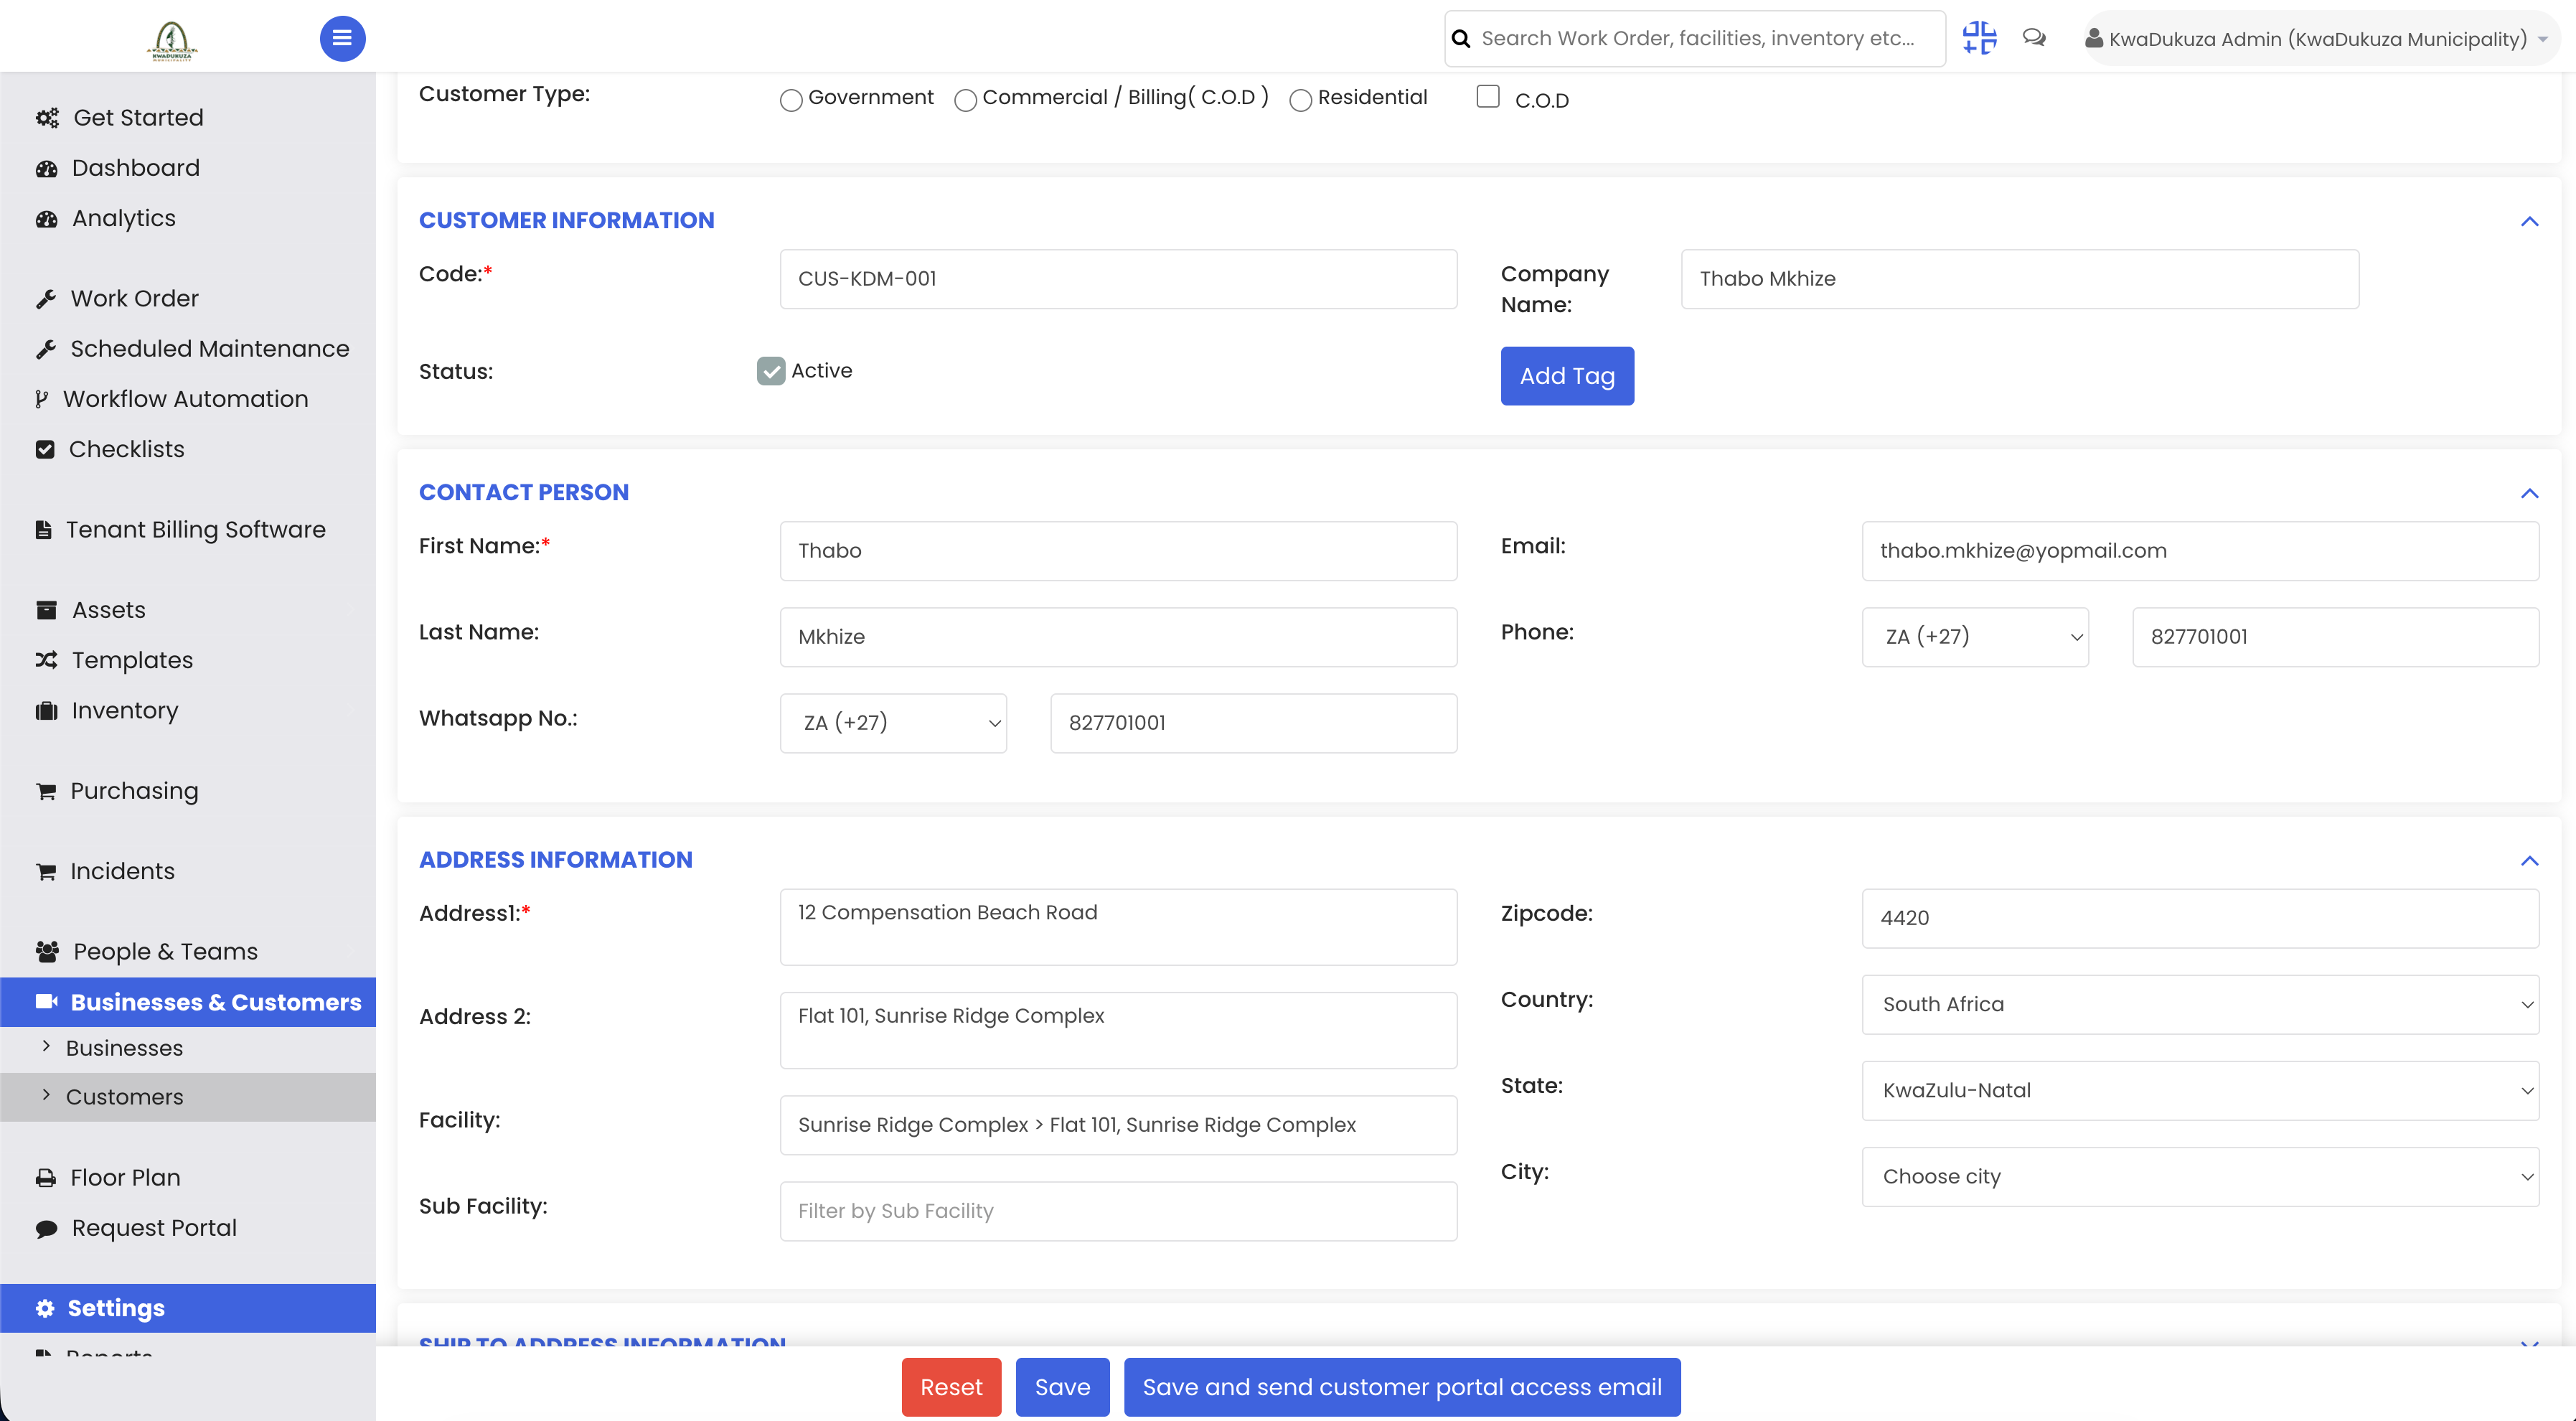
A customer's record shows their name, contact details, account type, and critically, the property they're linked to — the exact same location set up earlier in the location tree. A customer is never just a name and phone number here; they're tied directly to a physical location in the system.
Step 14 – Customer Import Process
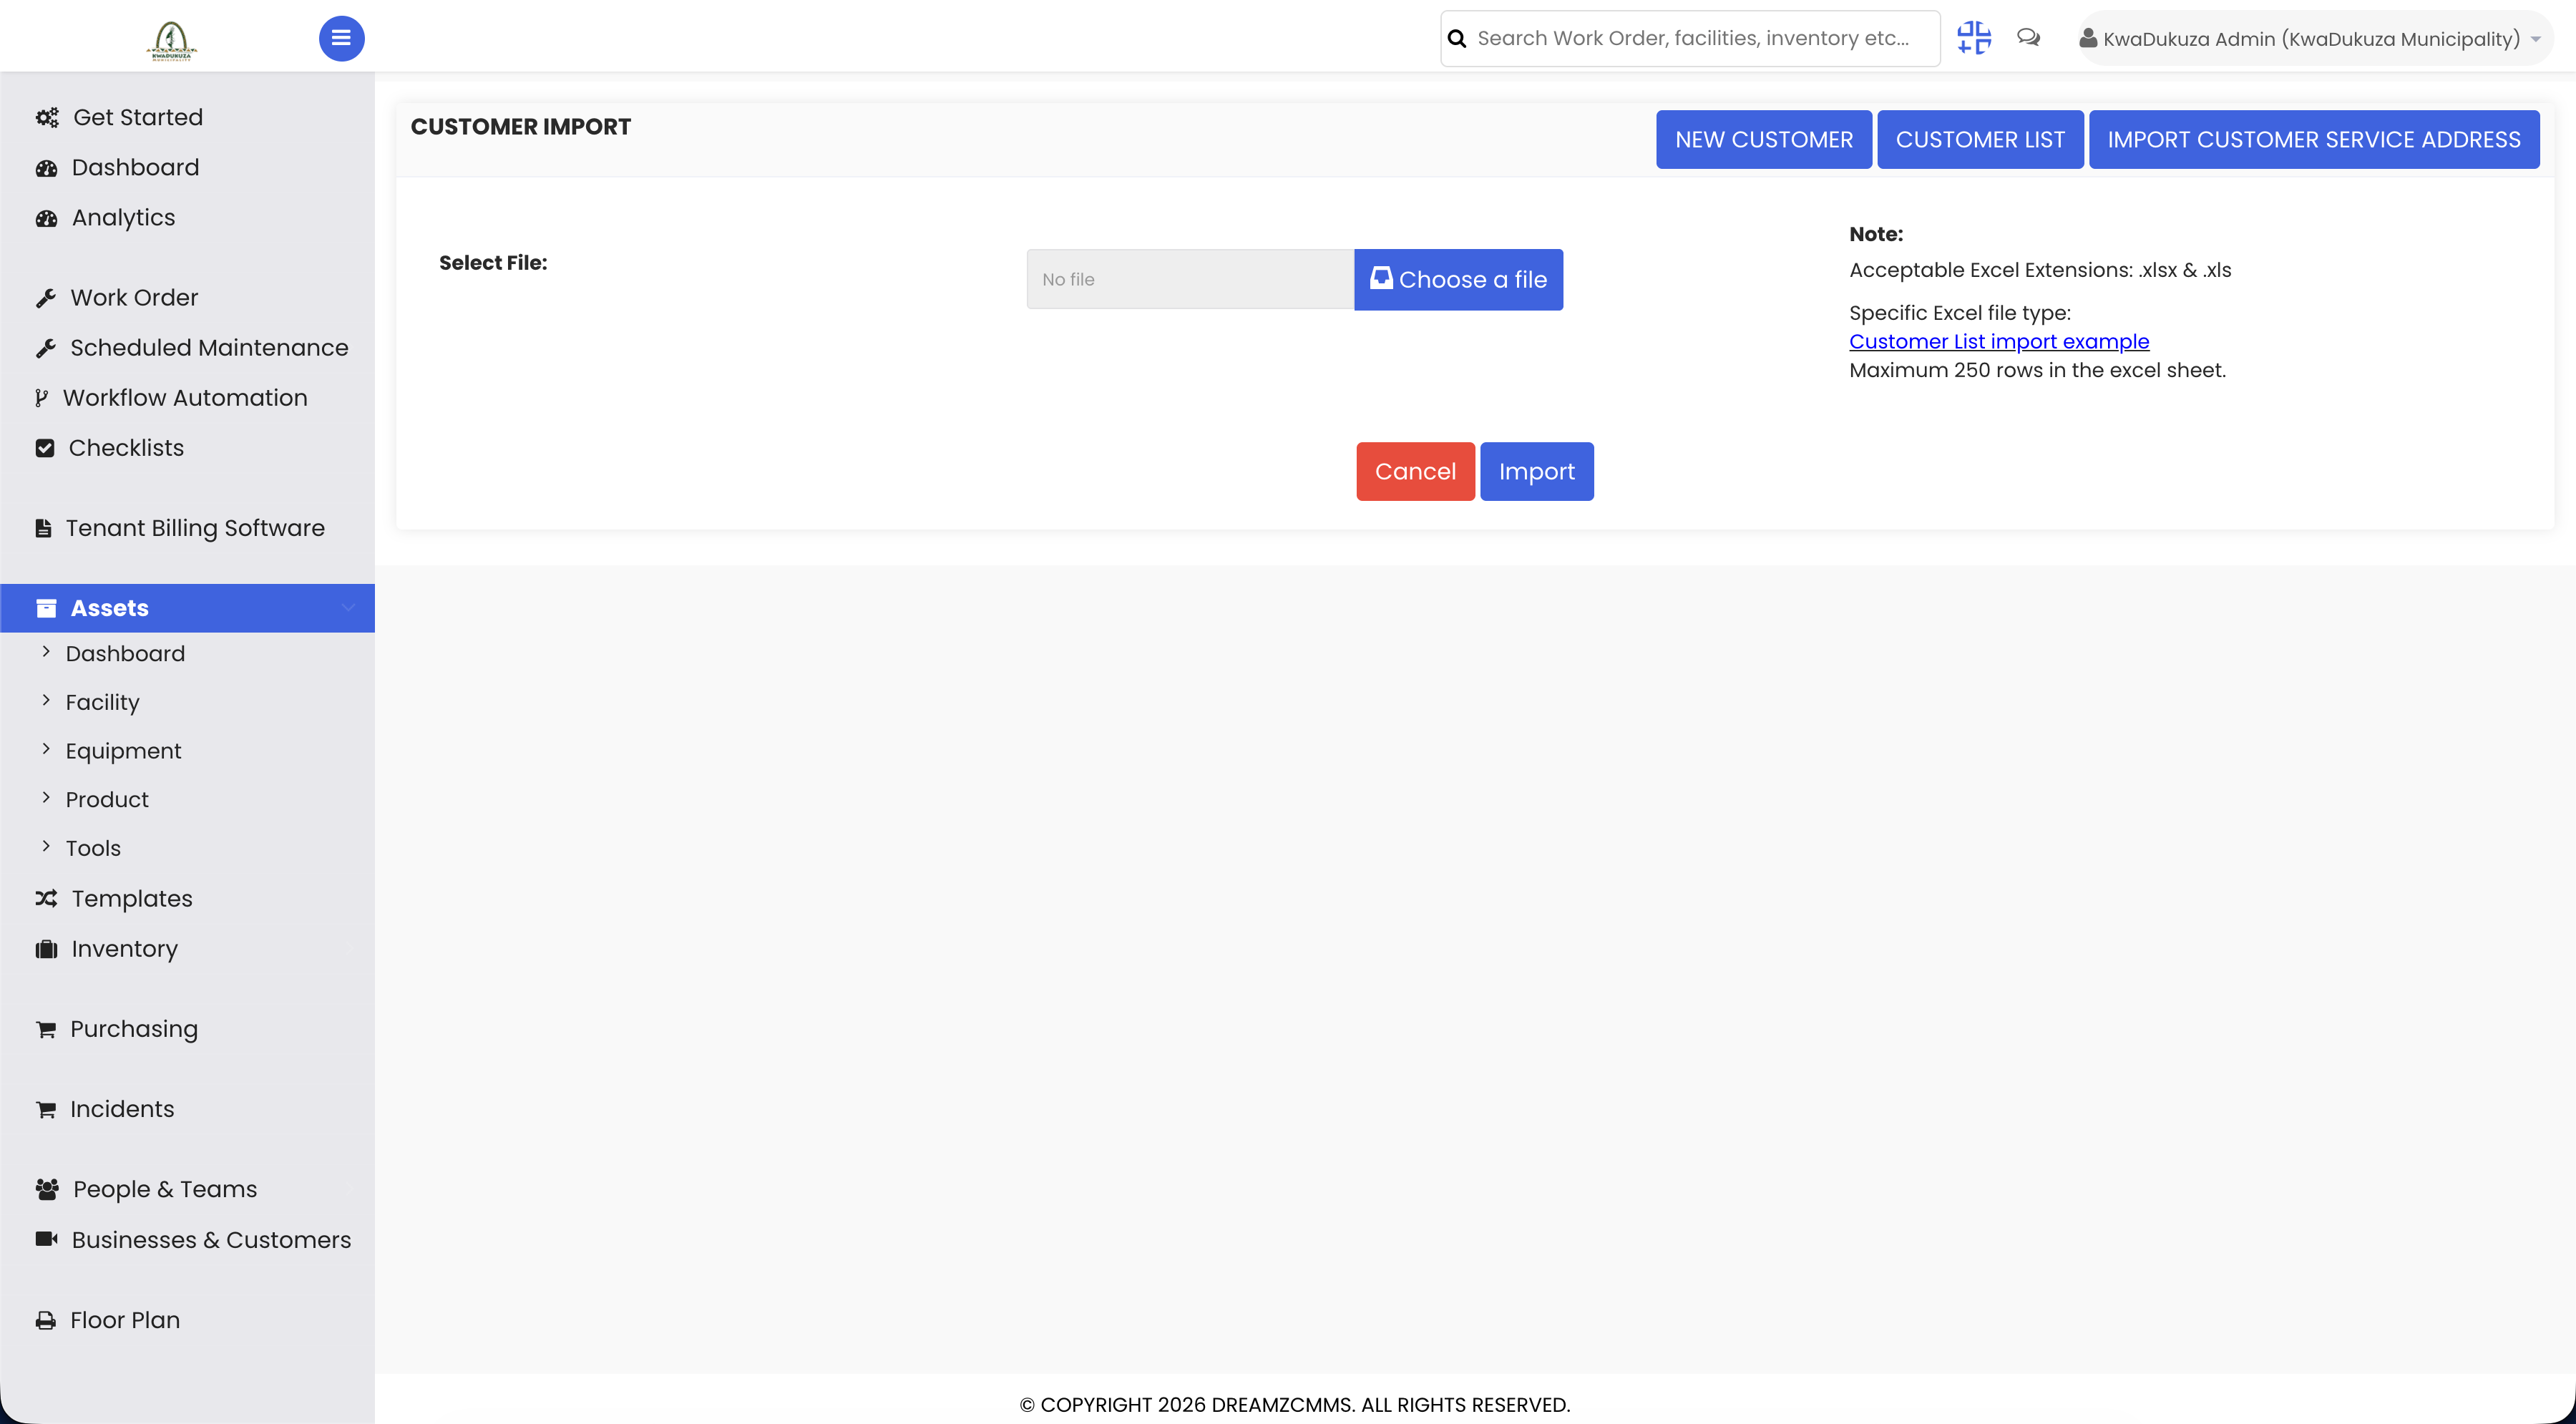
Customer Import works the same way as everything else: bring in your full customer base from Excel in one upload, instead of capturing every resident, business, and government account one at a time.
Allocating Assets to Customers
Step 15 – Asset Allocation to Customers
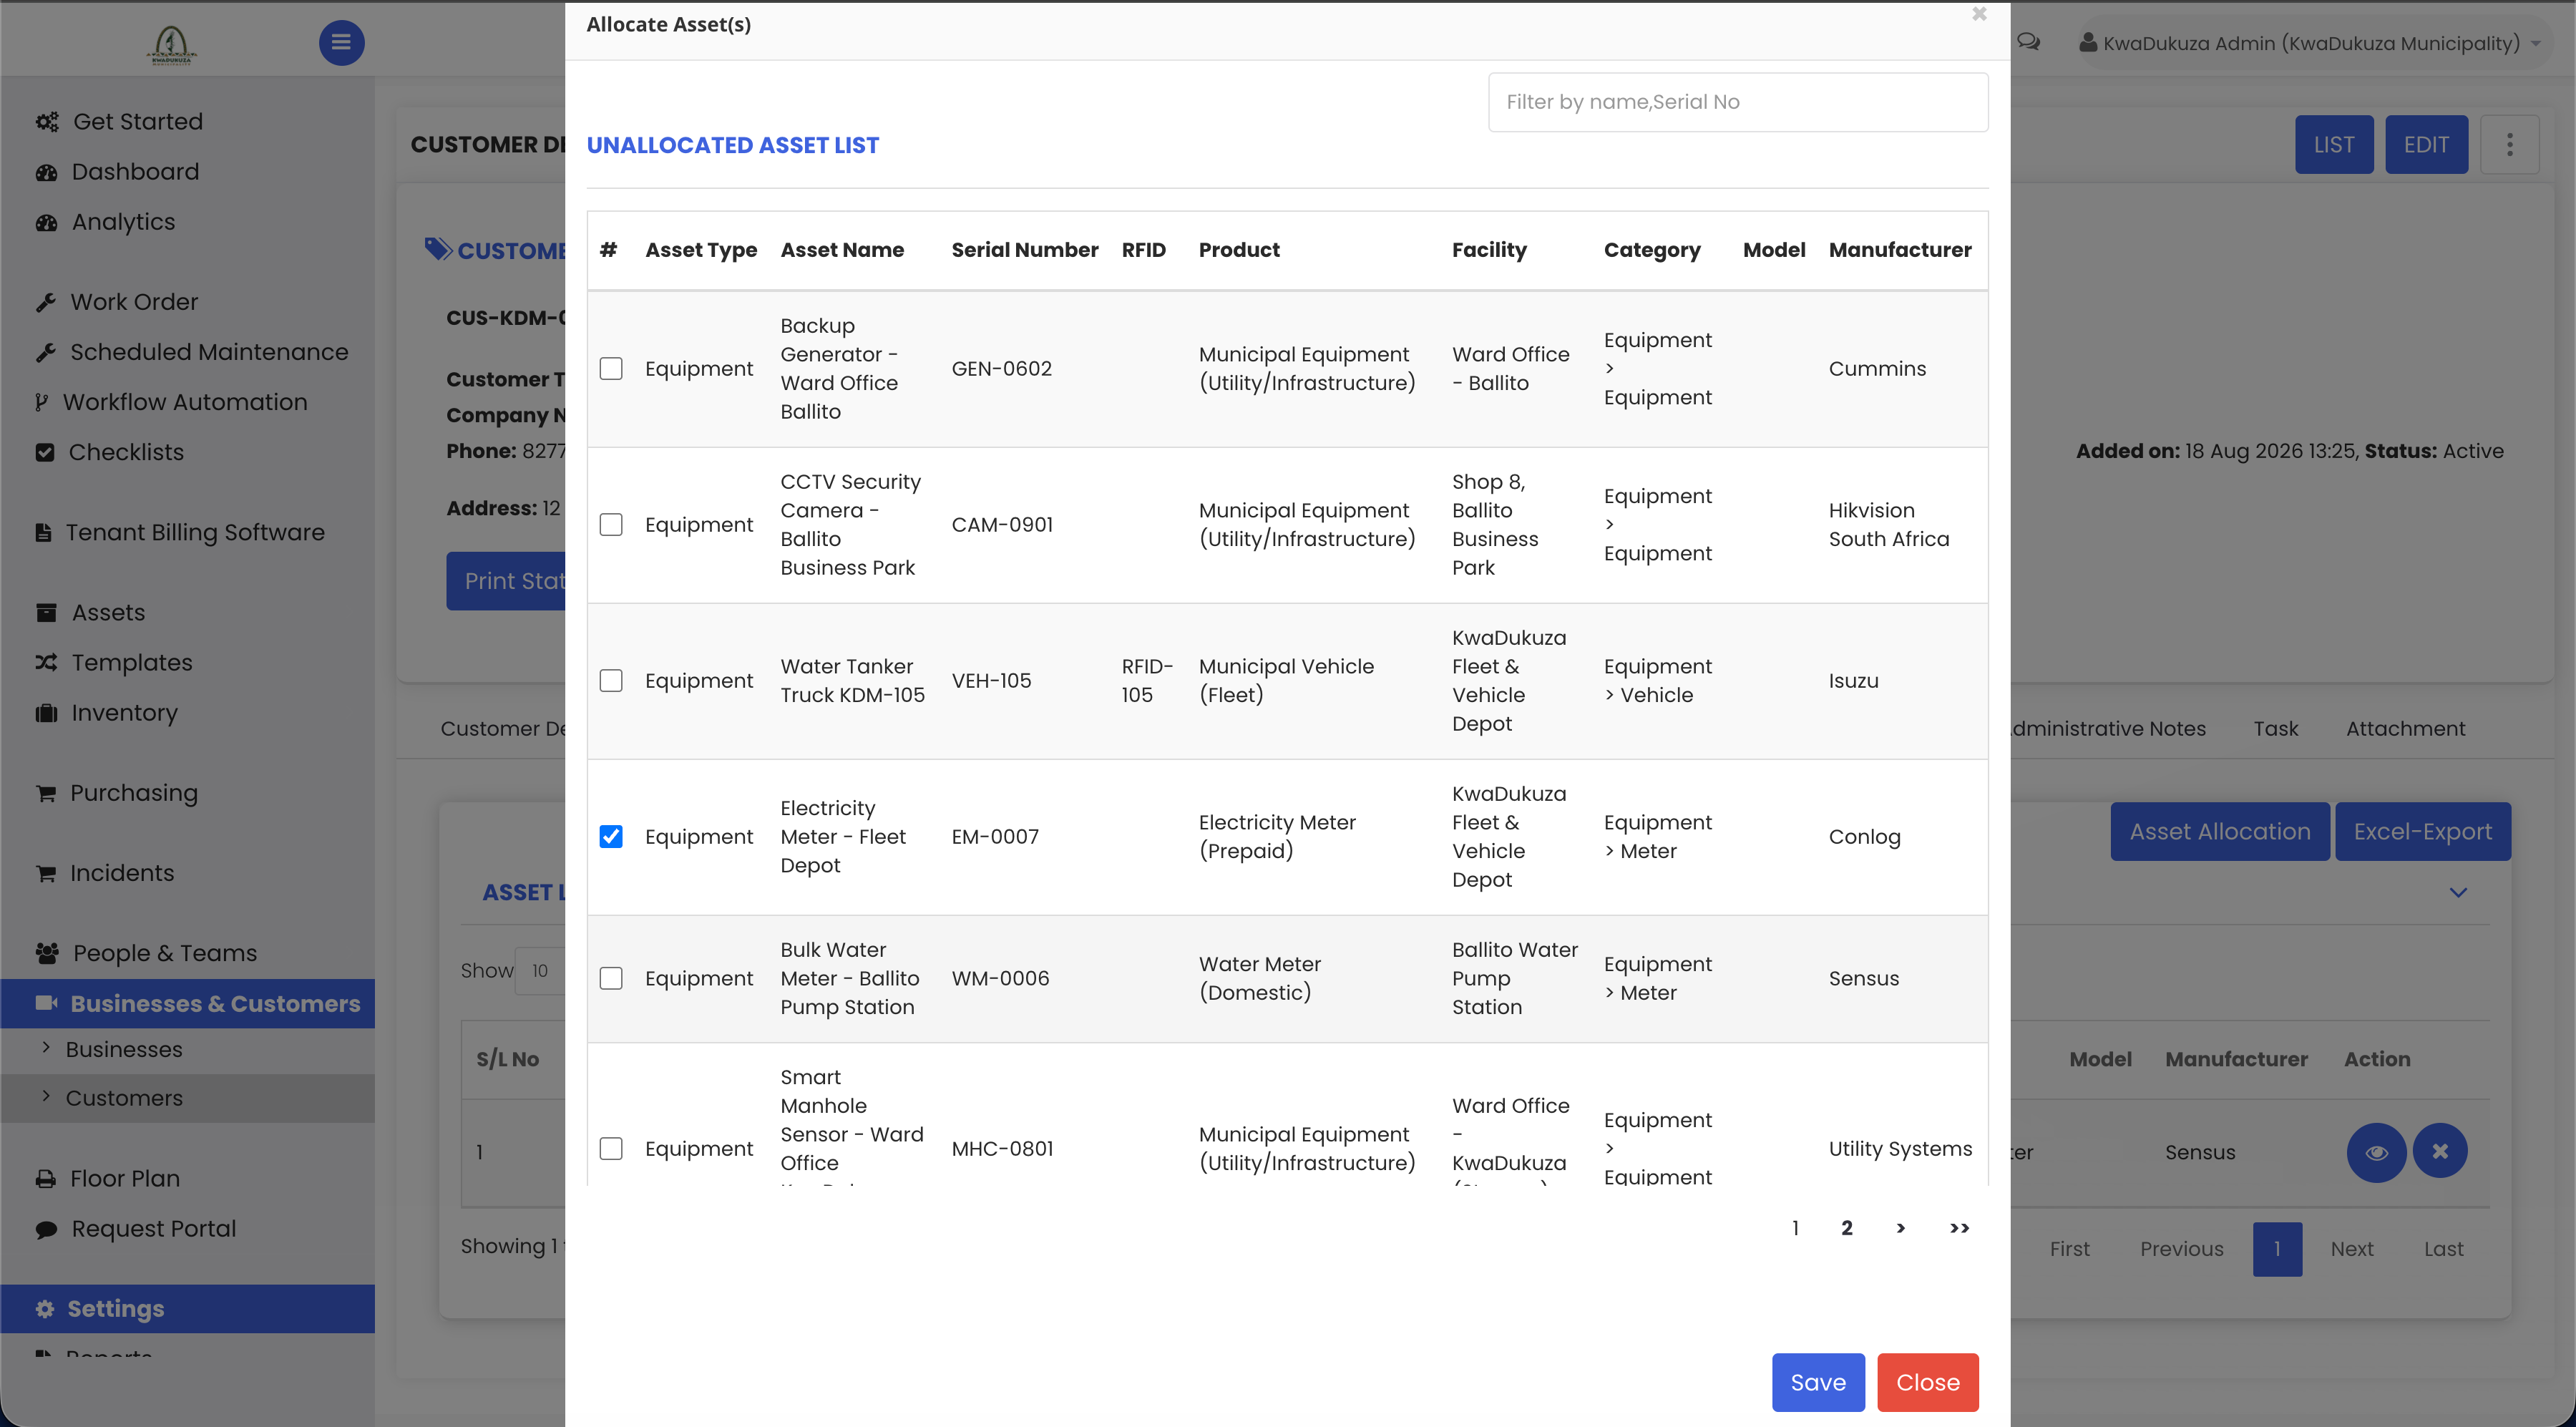
Once a customer and a property both exist, the next step is Allocation — linking a specific asset, in most cases a meter, to that customer. A water meter allocated directly to an account means every reading tied to that meter is automatically tied to the customer.
Step 16 – Asset Delocation Explained
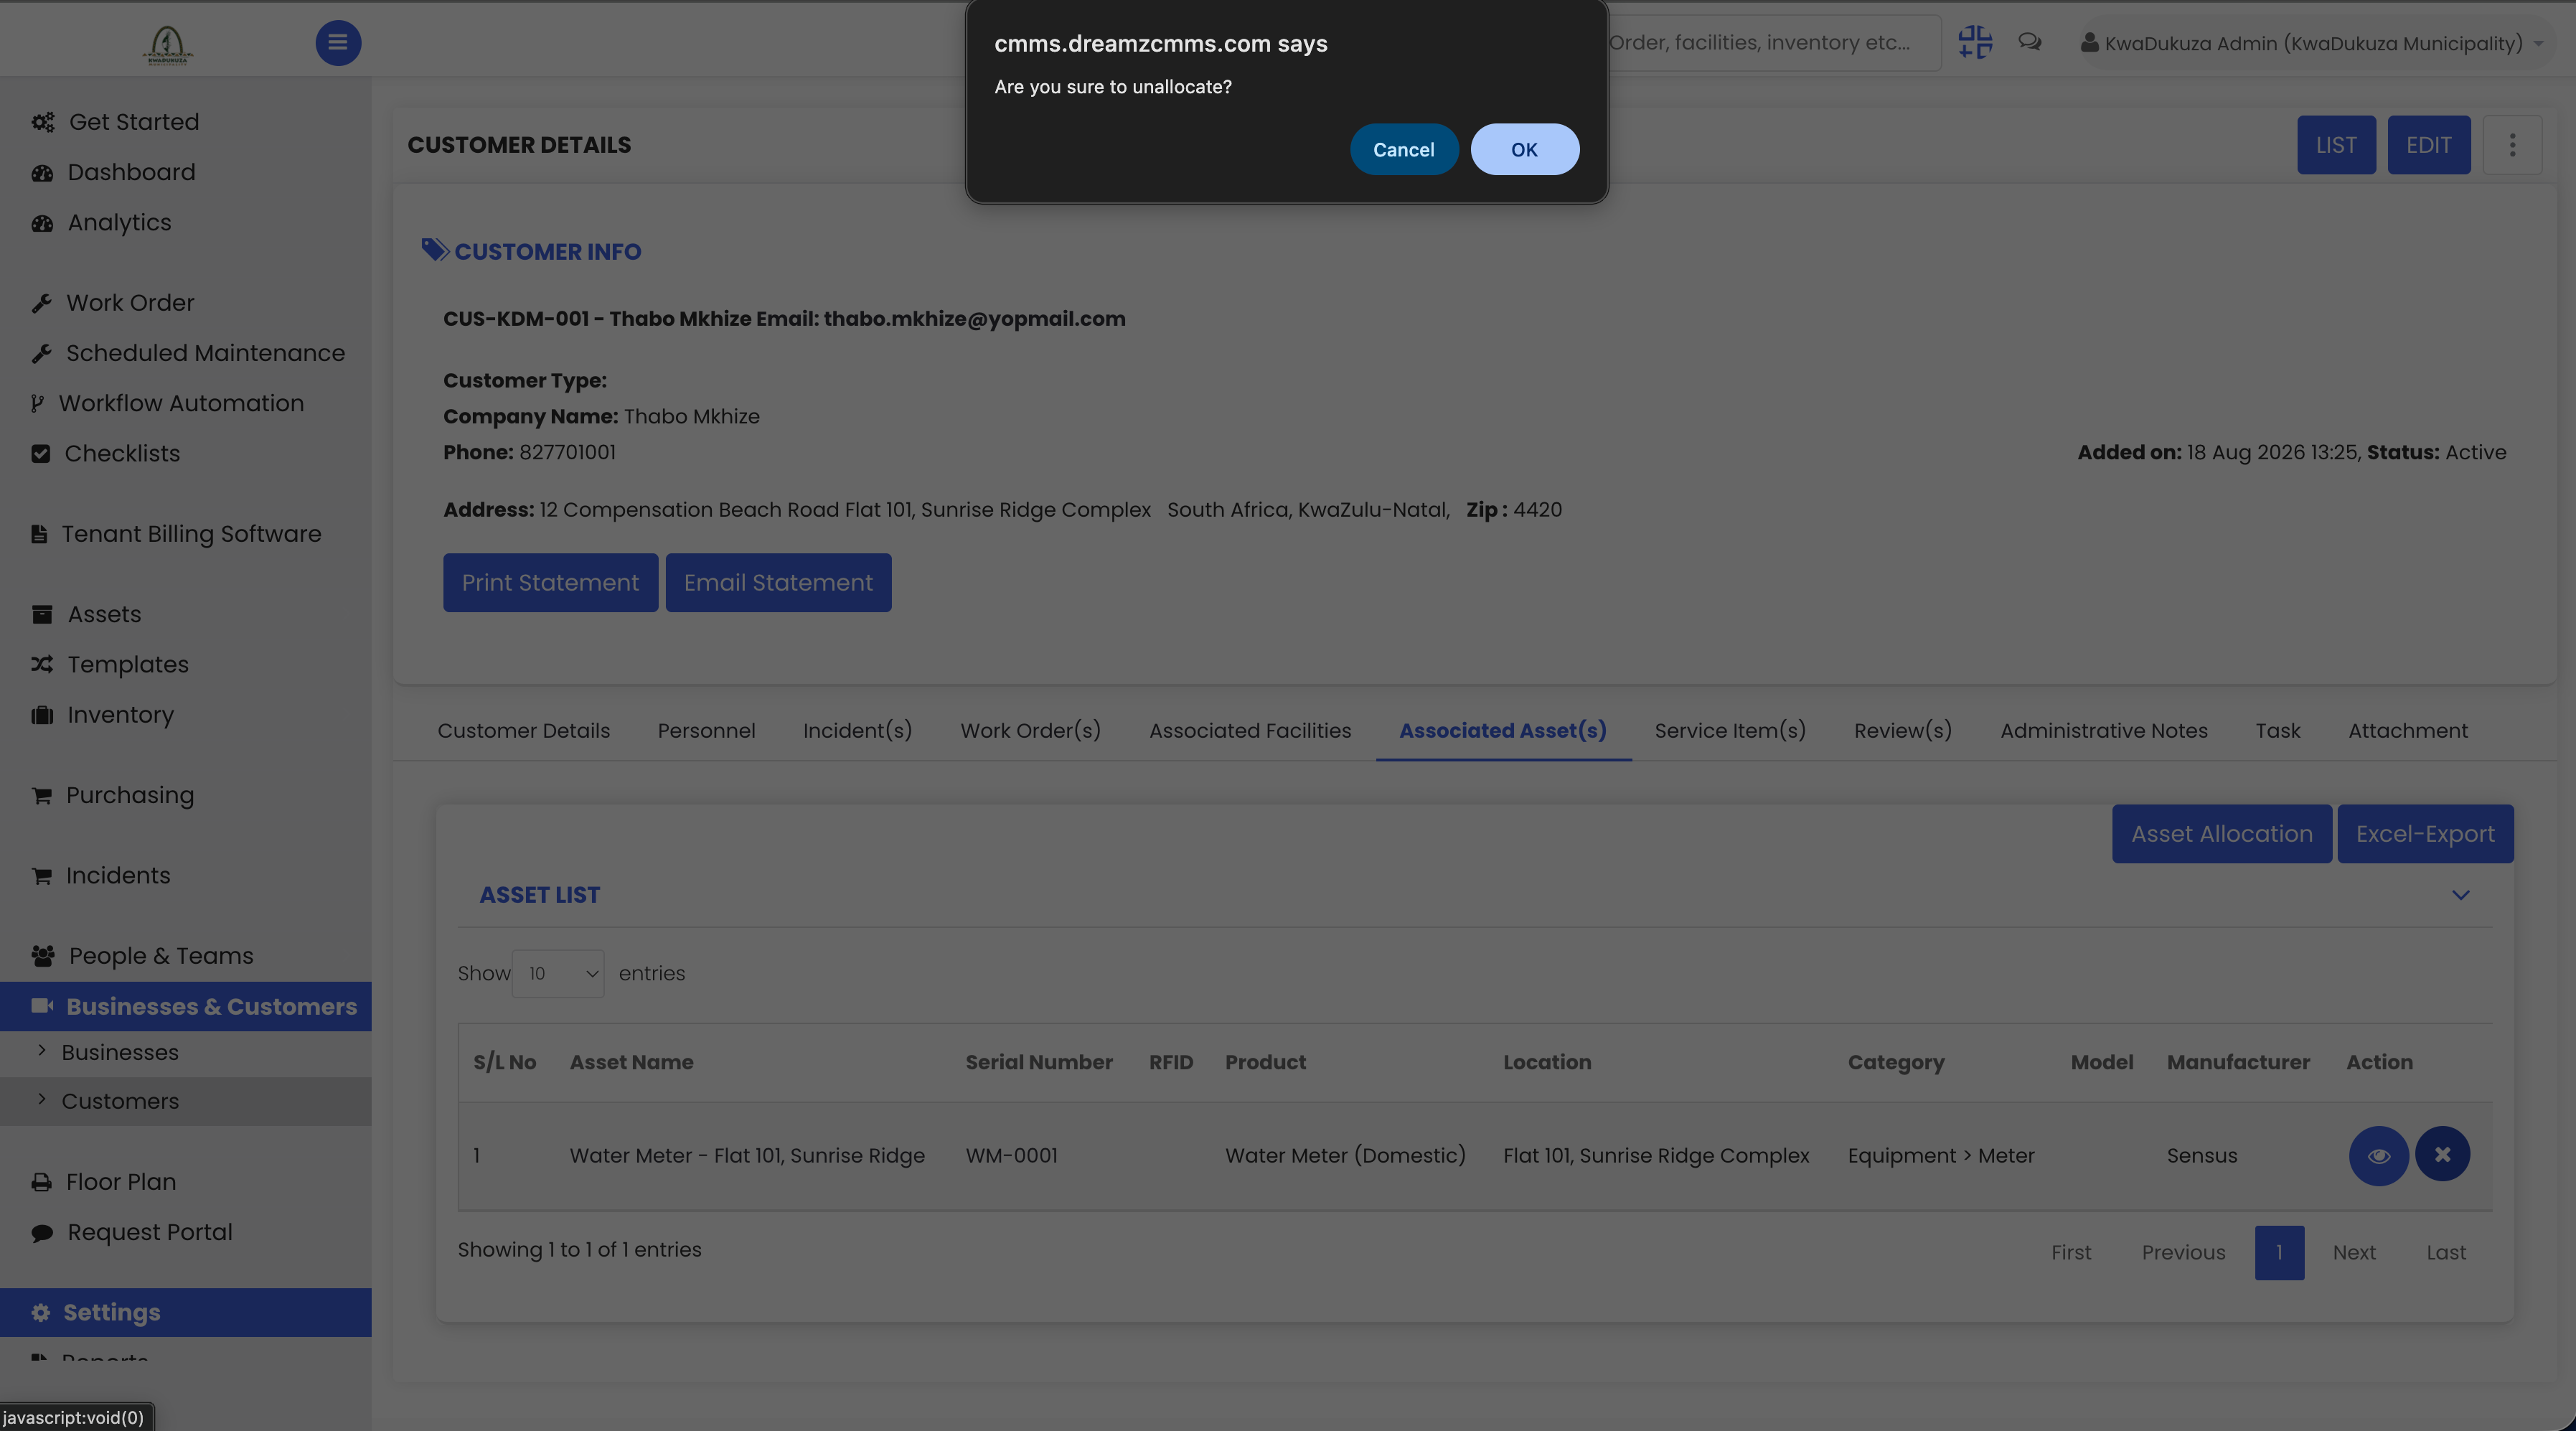
Note: If a tenant moves out or a meter gets replaced, Delocation unlinks that asset from the customer without deleting the asset itself, so its full history is preserved and it's ready to be reallocated to whoever moves in next.
Step 17 – Customer Asset Connections
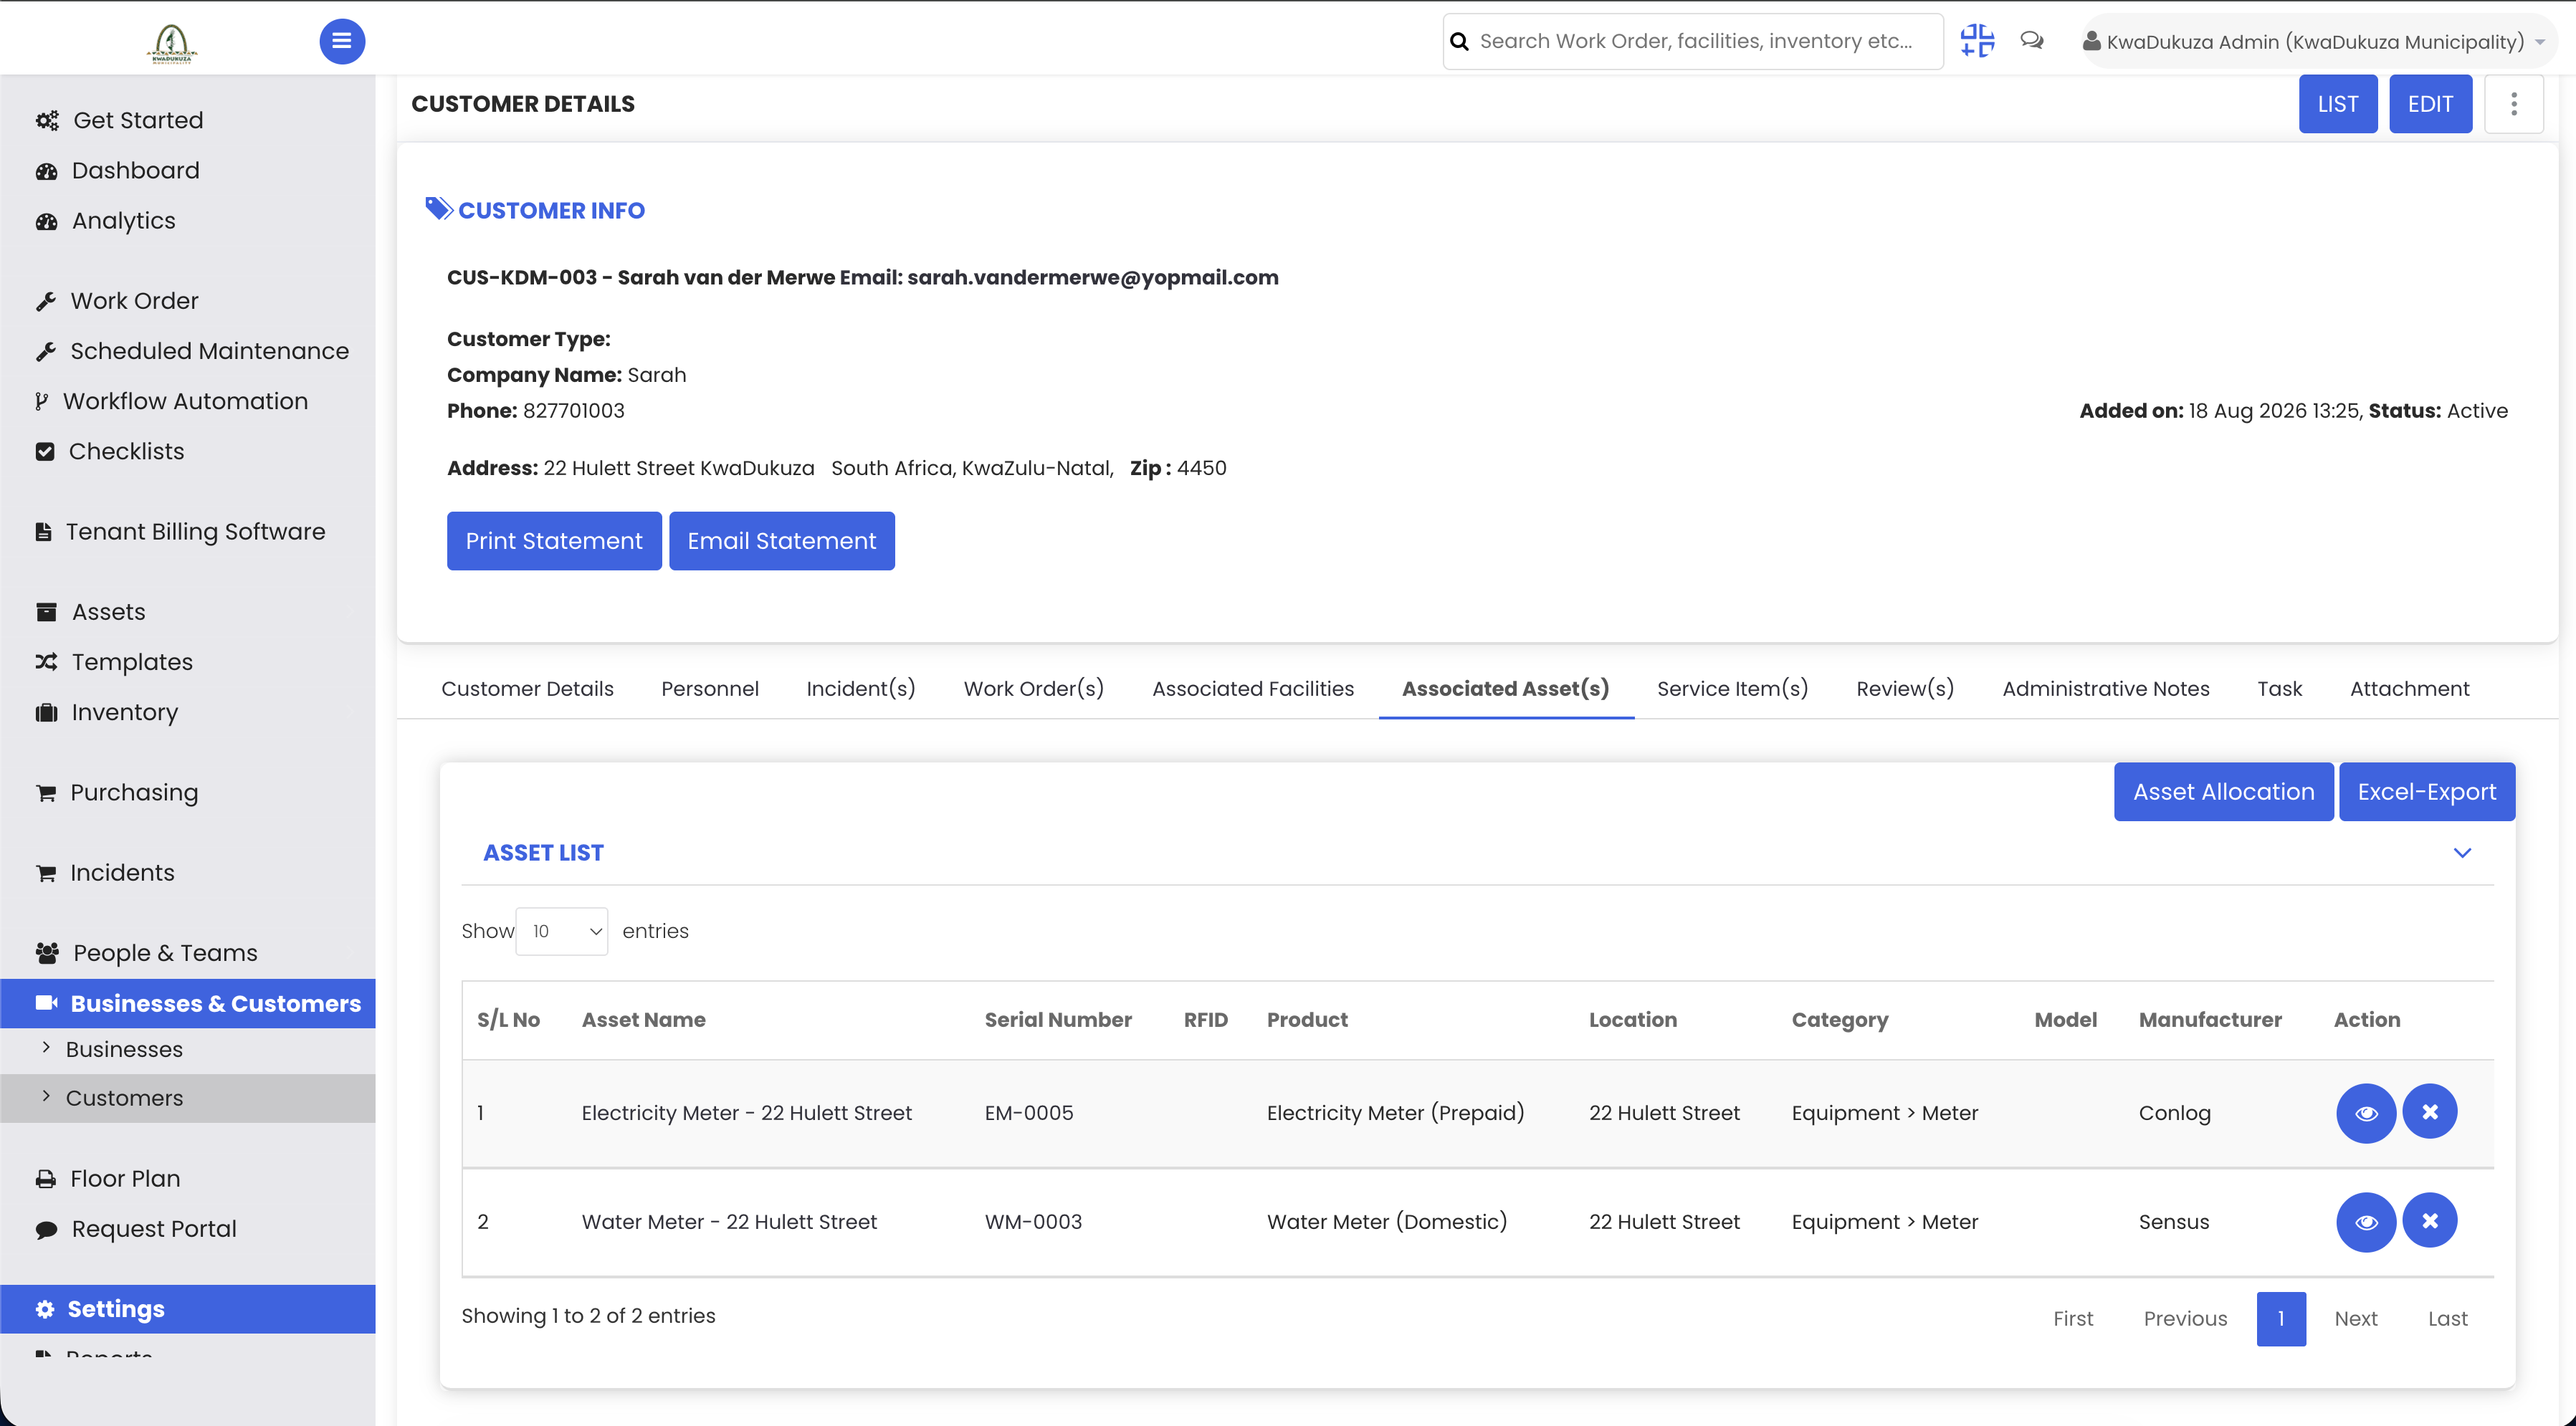
Opening any customer record reflects this directly — a customer's profile shows their property and both assets allocated to them, such as their water meter and electricity meter, right there on their customer page, with no jumping between screens to work out what belongs to whom.
Billing and Payments
Step 18 – Billing Process Simplification
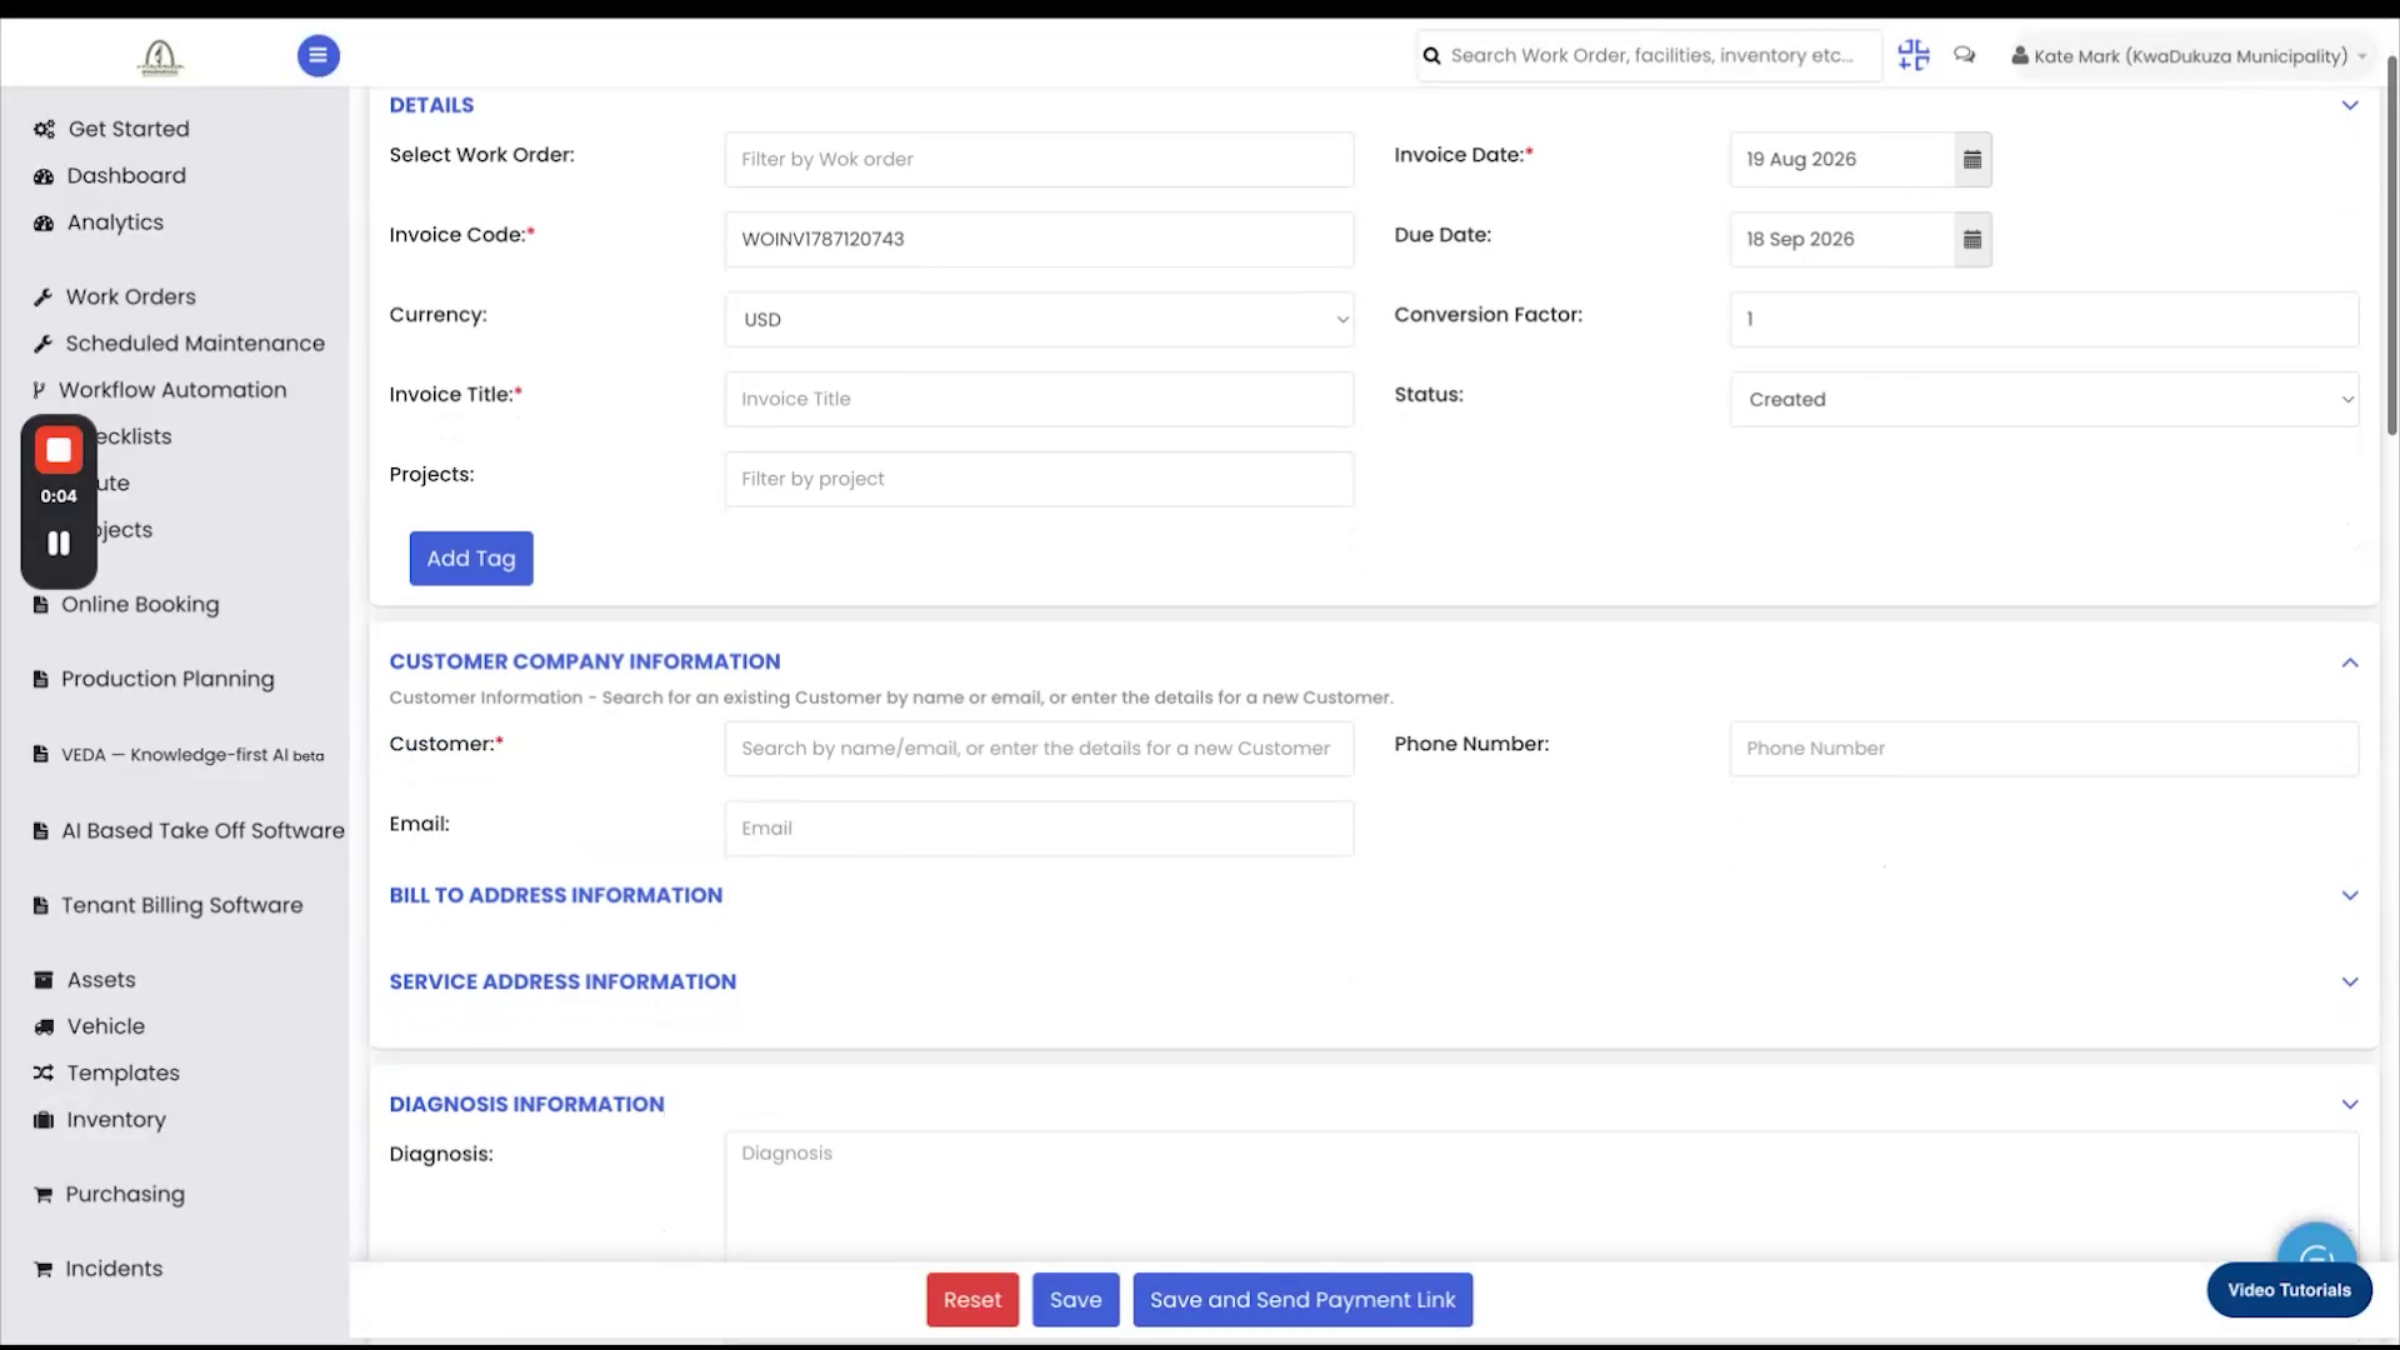
With customers, properties, and meters all connected, billing becomes straightforward. From the admin side (the tenant portal), staff can create a bill directly against a specific meter or asset: pull up the meter, enter the reading period and consumption, and the system generates a bill tied to that exact meter and, by extension, to the customer's account.
Step 19 – Customer Billing Portal Features
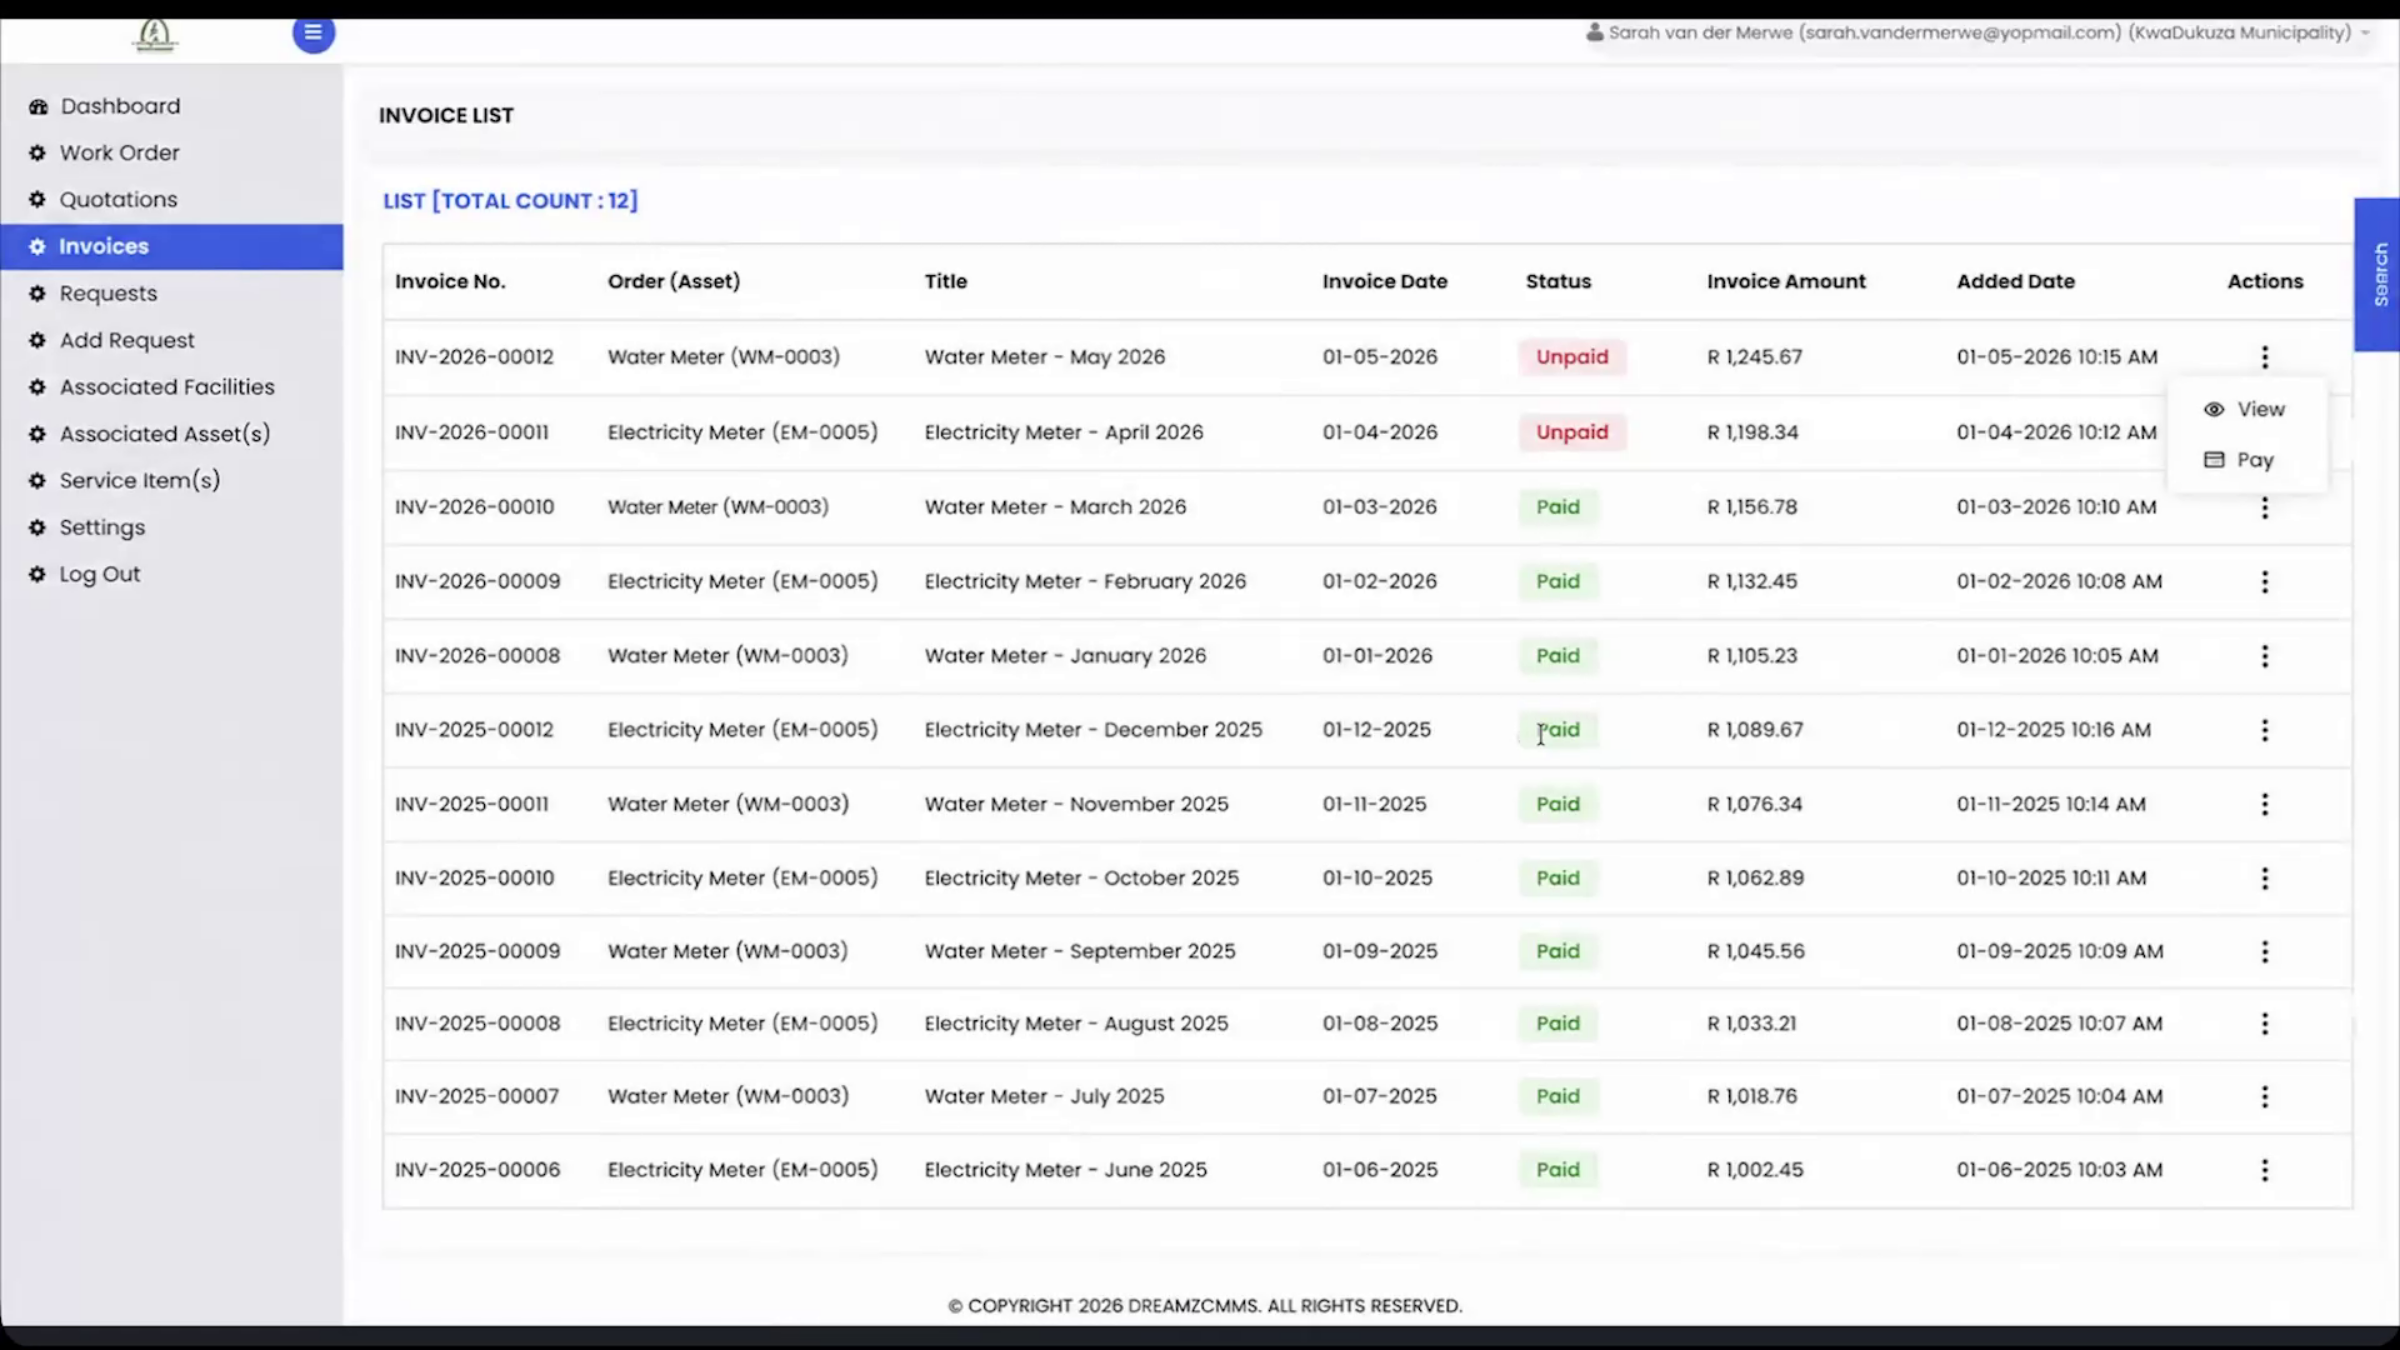
On the other side, the customer has their own portal where they can log in and see every bill and invoice issued to them, along with the facility and asset each one is tied to — a bill clearly shows exactly what it's for.
Where a payment gateway is connected, customers can pay that bill directly from the same screen.
Customer Requests and Meter Reading
Step 20 – Customer Support Requests Portal
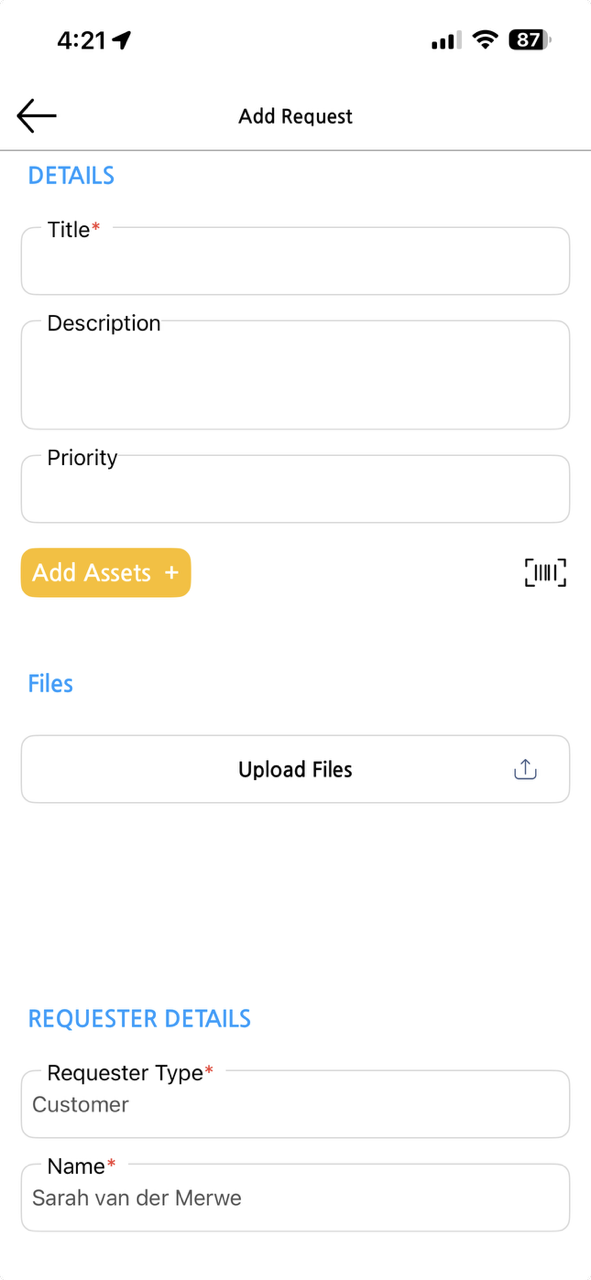
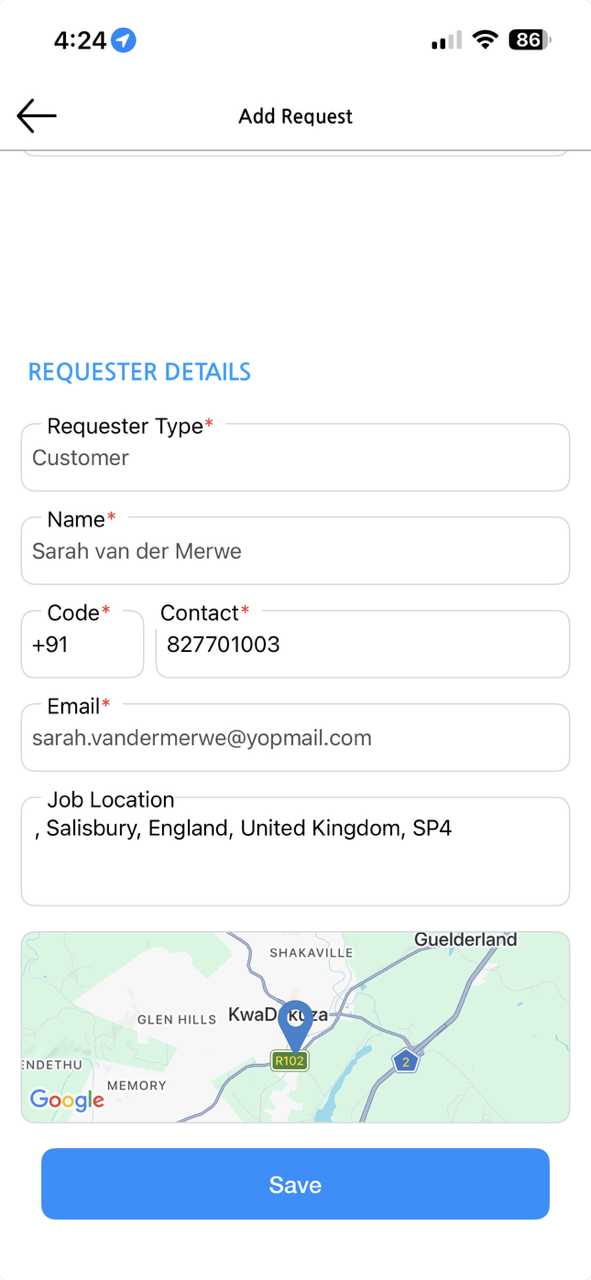
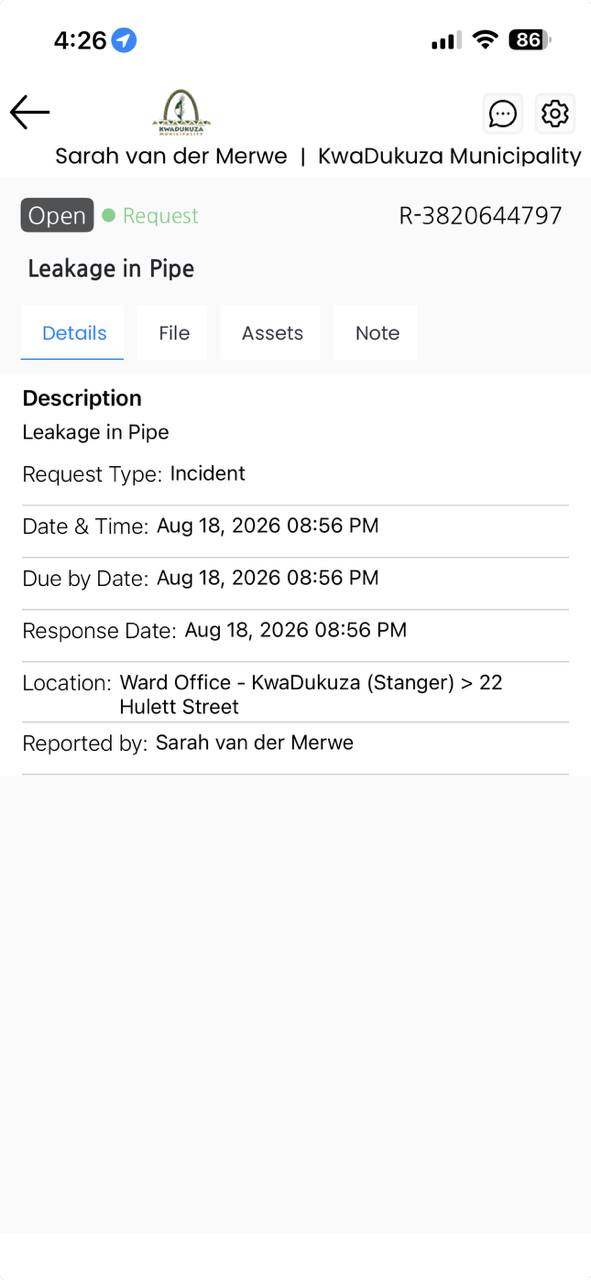
The same portal lets customers raise a request or log a support ticket directly — a burst pipe, a suspected faulty meter, or a billing query — without needing to phone in. On the admin side, every request lands in a queue that staff can see and act on, so nothing submitted through the portal gets missed.
Step 21 – Meter Reading via Mobile App
Where physical access is the issue — a locked gate, an absent tenant, a gated complex — the customer can step in directly through the app: they open it, take a photo of their meter, and submit the reading themselves, and that reading flows straight back into the asset record, photo included. Bills, requests, and meter submissions are all available to customers both ways, through a web portal on a computer or through the mobile app on their phone, whichever suits them.
Communication Channels
Step 22 – Communication Channels Overview
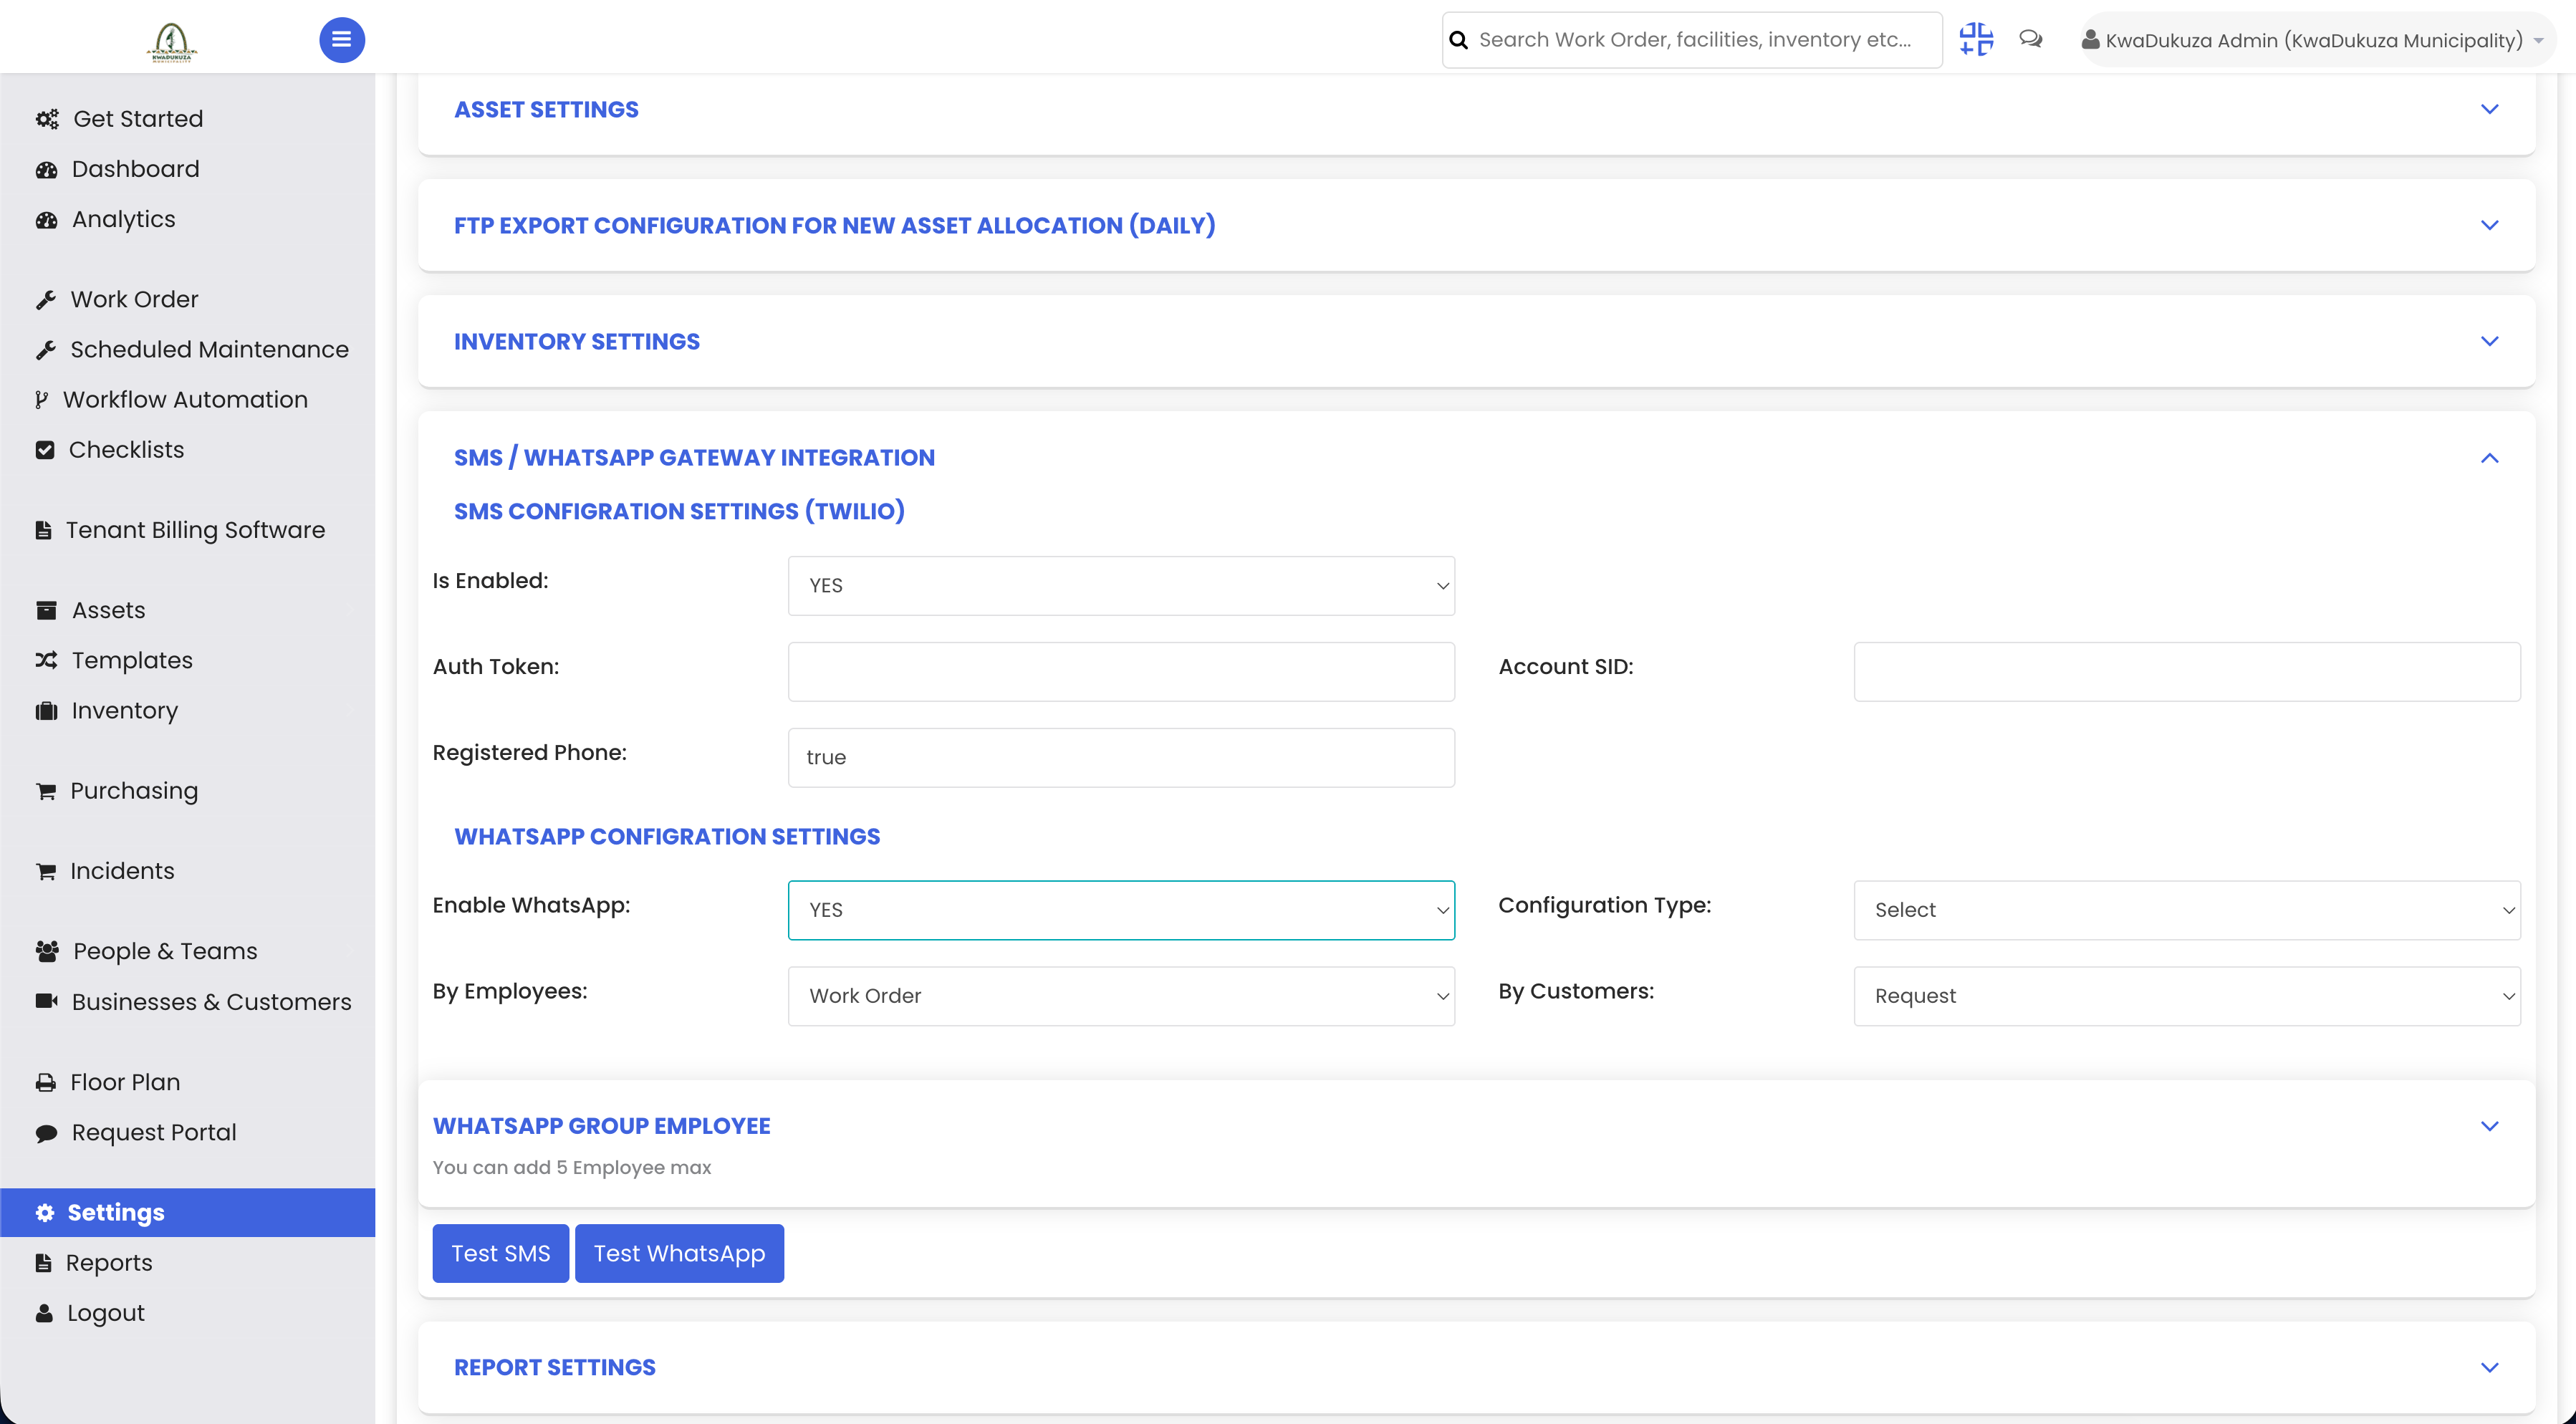
Not every customer has a smartphone, and not every phone can comfortably run a full app. That's why DreamzCMMS doesn't stop at the portal and app alone: push notifications keep app users informed of outages, billing updates, or service changes; SMS reaches customers without smartphones; and WhatsApp gives everyone else, especially those with limited phone storage, a lightweight, familiar way to stay connected with the municipality without needing to install anything new.
Dashboards, Reporting, and Summary
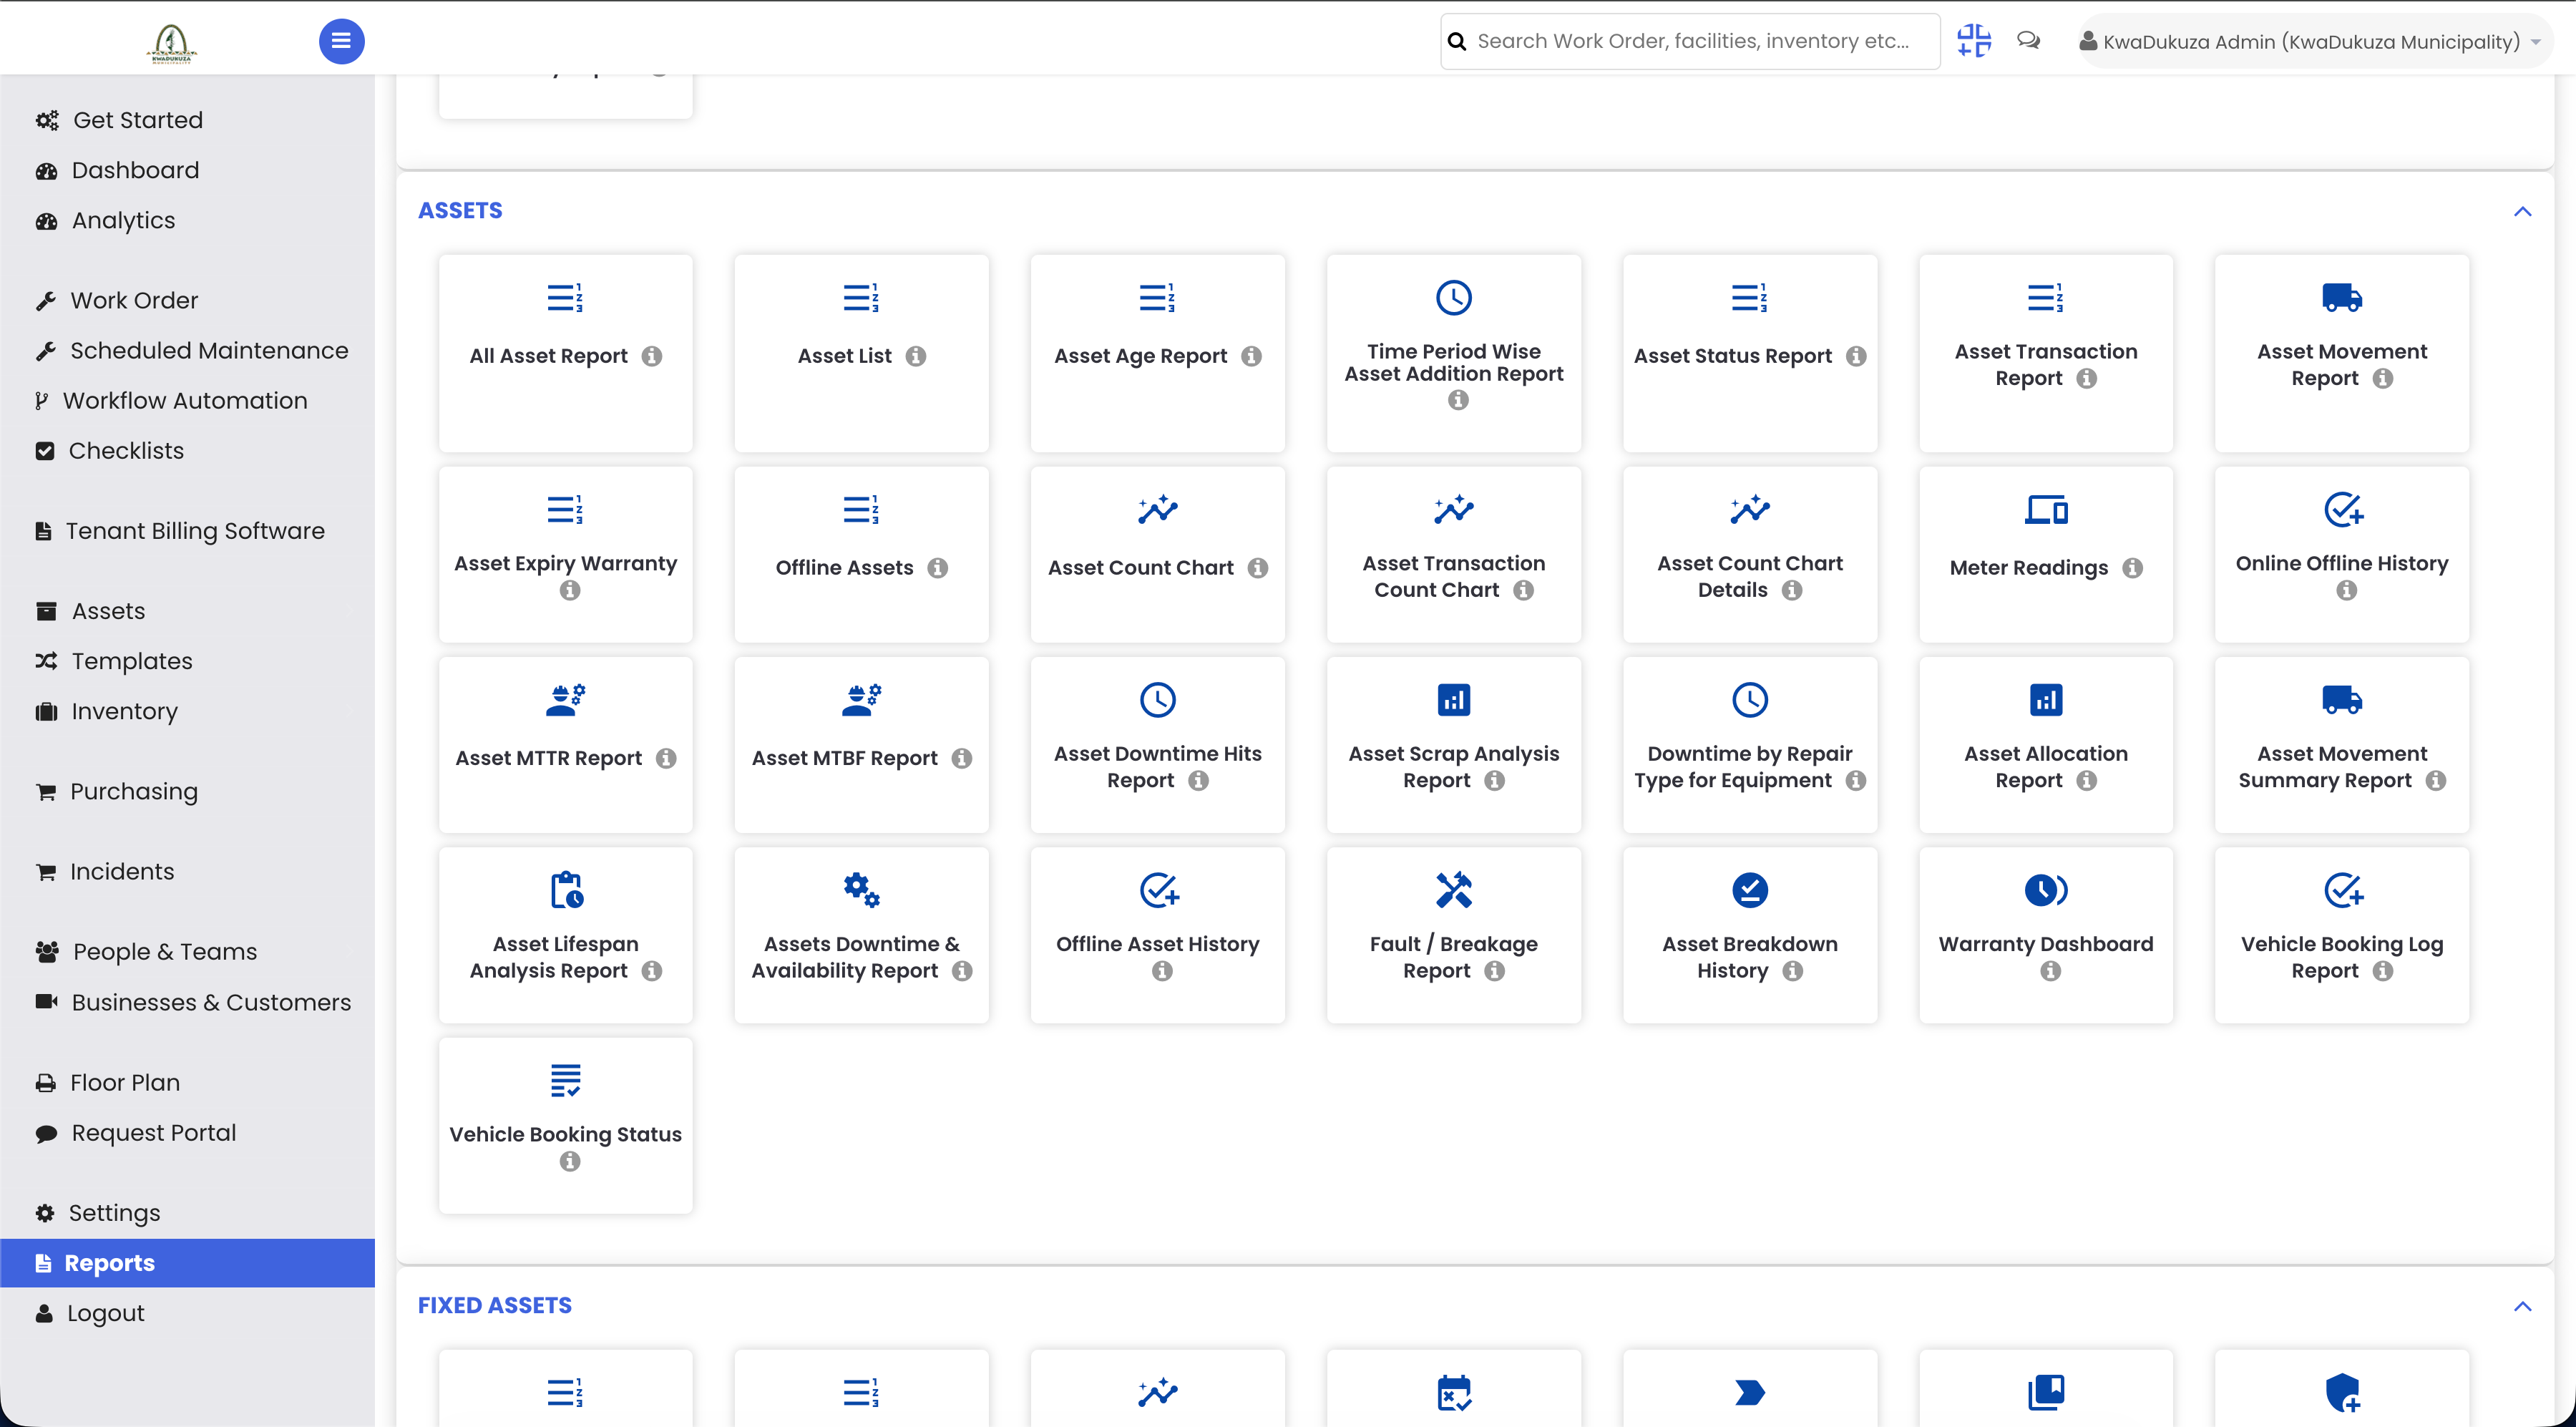
Step 23 – Municipal Dashboards and Reporting
Behind all of this sits a set of dashboards built for municipal decision makers. Ward councillors and department heads can see asset health, billing activity, open requests, and revenue-linked customer data at a glance, without waiting for someone to compile a spreadsheet. If a ward is generating an unusual number of support requests, or a piece of equipment is approaching the end of its expected lifespan, that shows up before it becomes a bigger problem. Reporting is built directly on top of the same location, asset, customer, and billing data already in the system, so what you report on is always what's actually happening on the ground.
Step 24 – DreamzCMMS System Summary
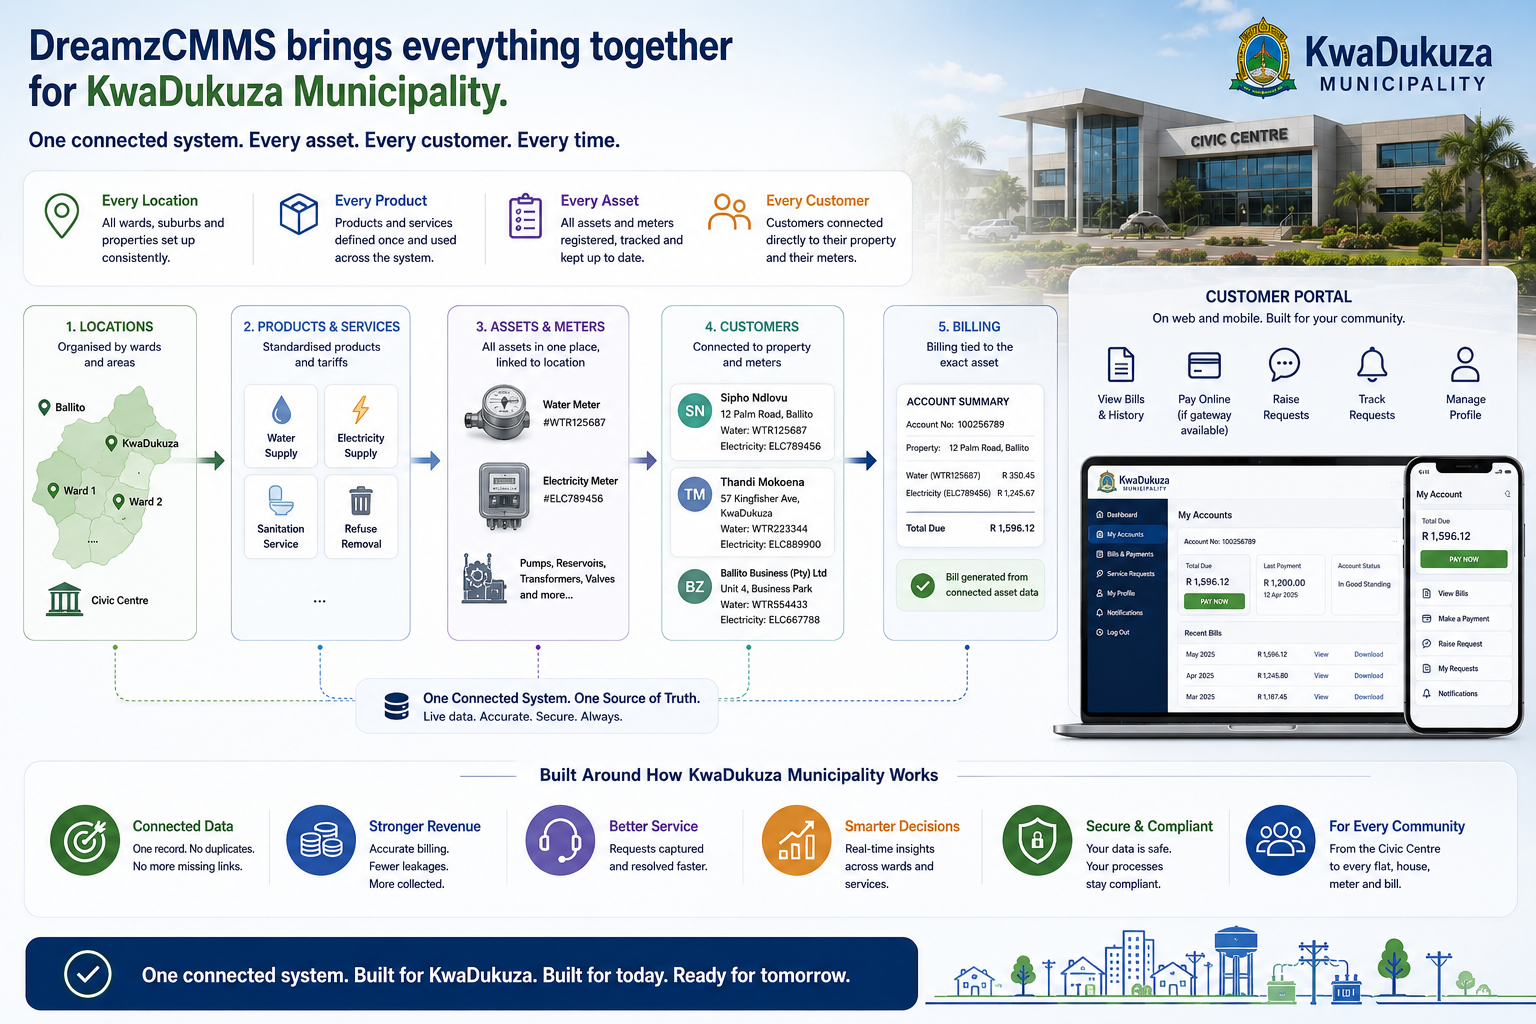
This is what DreamzCMMS brings to a municipality: every location, product, and asset set up consistently, and customers connected directly to their property and their meters.
Billing ties straight back to the asset it's for. A customer portal on web and mobile lets residents and businesses view their bills, pay where a gateway is available, and raise a request without needing to call in.
One connected system, built around how a municipality actually works, from the civic center down to every flat, house, meter, and bill across the wards.
After the Overview — What's Next?
DreamzCMMS ties locations, products, assets, customers, billing, and reporting into one connected system built around how a municipality actually works. Once your setup is complete, you can:
- Allocate every meter to the correct customer account so billing generates accurately from day one.
- Promote the customer portal and mobile app so residents can submit meter readings and pay bills without calling in.
- Review municipal dashboards regularly to catch unusual request volumes or aging equipment before they become bigger problems.
Ready to see DreamzCMMS for municipal asset and billing management in action? Contact DreamzTech to schedule a personalized demonstration.
Tips for Municipal Administration Teams
- Set up your location hierarchy accurately first — wards, complexes, and individual properties — since customer and billing accuracy both depend on it.
- Use Delocation instead of deleting an asset when a tenant moves out, so the asset's full history is preserved for the next allocation.
- Offer SMS and WhatsApp alongside the app and portal so residents without smartphones or app storage stay informed too.
- Encourage customers to submit meter readings with a photo through the app when a property has restricted physical access.
Frequently Asked Questions
How does a bill get tied to the right customer?
A meter or asset is allocated directly to a customer's account, so every reading and bill generated against that meter is automatically tied to that customer.
What happens to a meter when a tenant moves out?
Delocation unlinks the asset from the customer without deleting it, preserving its history so it can be reallocated to the next resident.
Can customers submit their own meter readings?
Yes. Where physical access is difficult, customers can open the app, take a photo of their meter, and submit the reading themselves, which flows straight back into the asset record.
How do customers without a smartphone stay informed?
SMS reaches customers without smartphones, and WhatsApp offers a lightweight alternative for those with limited phone storage, alongside push notifications for app users.
Related Articles
- Setting Up Locations, Products, and Assets in DreamzCMMS
- Allocating and Delocating Meters and Assets to Customers
- Configuring the Customer Portal and Payment Gateway
- Create and Manage Work Orders