DreamzCMMS Construction Inventory and Material Management
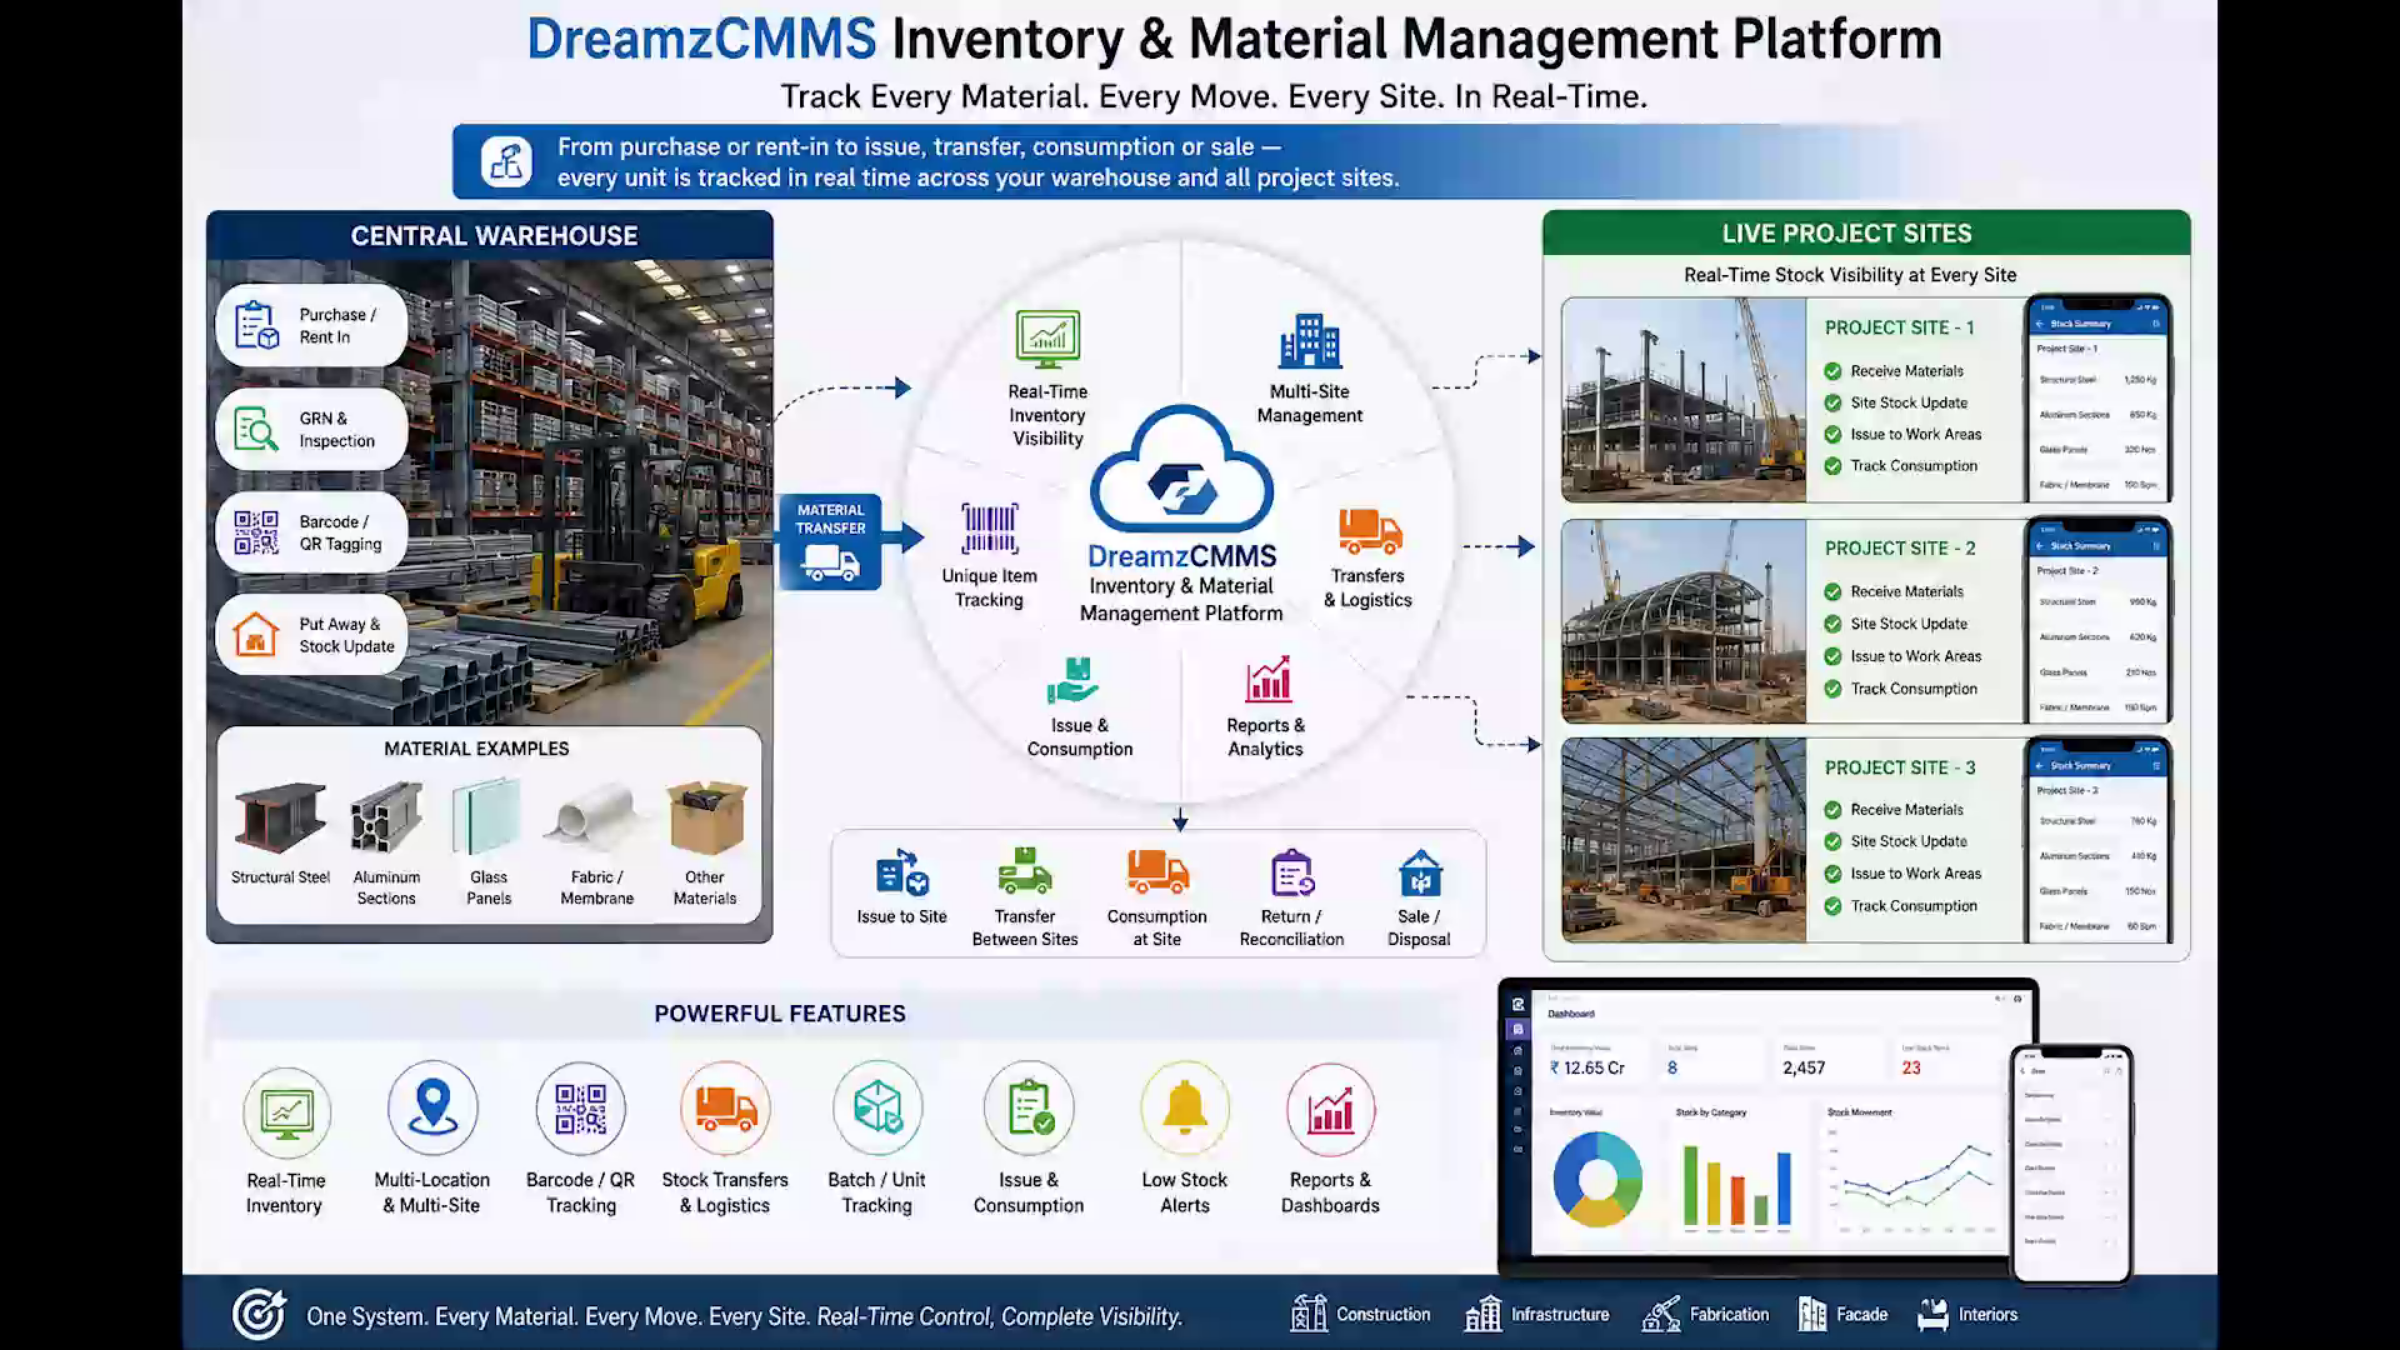
On a construction operation, material moves constantly between a central warehouse and multiple live project sites — structural steel, aluminum sections, glass panels, fabric, and everything else your projects use. DreamzCMMS tracks every unit individually from the moment it's purchased or rented in, right through issue, transfer, consumption, or sale, all from one real-time system across every site.
Overview
DreamzCMMS's Inventory and Material Management Platform starts with setting up locations, products, and assets, then covers parts and supplies, purchasing from request through receipt, stock transfers between locations, and stock issue and return tracked to exactly who received it. Workflow automation and AI-generated checklists turn incidents into work orders automatically, and guests or staff can report issues with no login required through a QR code or the mobile app. Work orders are scheduled and tracked in table, map, calendar, Gantt, or Kanban views, technicians work from a dedicated mobile app that decrements stock in real time, and a handheld RFID app makes scanning, tagging, and locating assets fast even out on site. Rentals and sales run through the same estimate-to-invoice flow as purchasing, and a full reports library covers maintenance, assets, purchasing, incidents, and inventory, with bulk Excel upload and a full audit log behind everything.
Here is a reference video:
Before You Begin
- You must have a DreamzCMMS account with access to the modules your role covers, such as Locations, Products, Assets, Purchasing, Work Orders, and Reports.
- Your warehouse and site locations, product catalog, and existing assets should be set up (or ready to import from Excel) before purchasing, transfers, or issues can be recorded against them.
- If you plan to use RFID tagging and the handheld app, make sure tags and handheld devices are provisioned and configured in advance.
Setting Up Locations, Products, and Assets
Step 1 – DreamzCMMS Overview
This walkthrough covers how the DreamzCMMS Inventory and Material Management Platform works, built for construction operations where material moves constantly between a central warehouse and multiple live project sites. Whether it's structural steel, aluminum sections, glass panels, fabric, or any other material your projects use, every unit is tracked individually from the moment it's purchased or rented in, right through issue, transfer, consumption, or sale, all from one real-time system across every site.
Step 2 – Setup Locations Overview
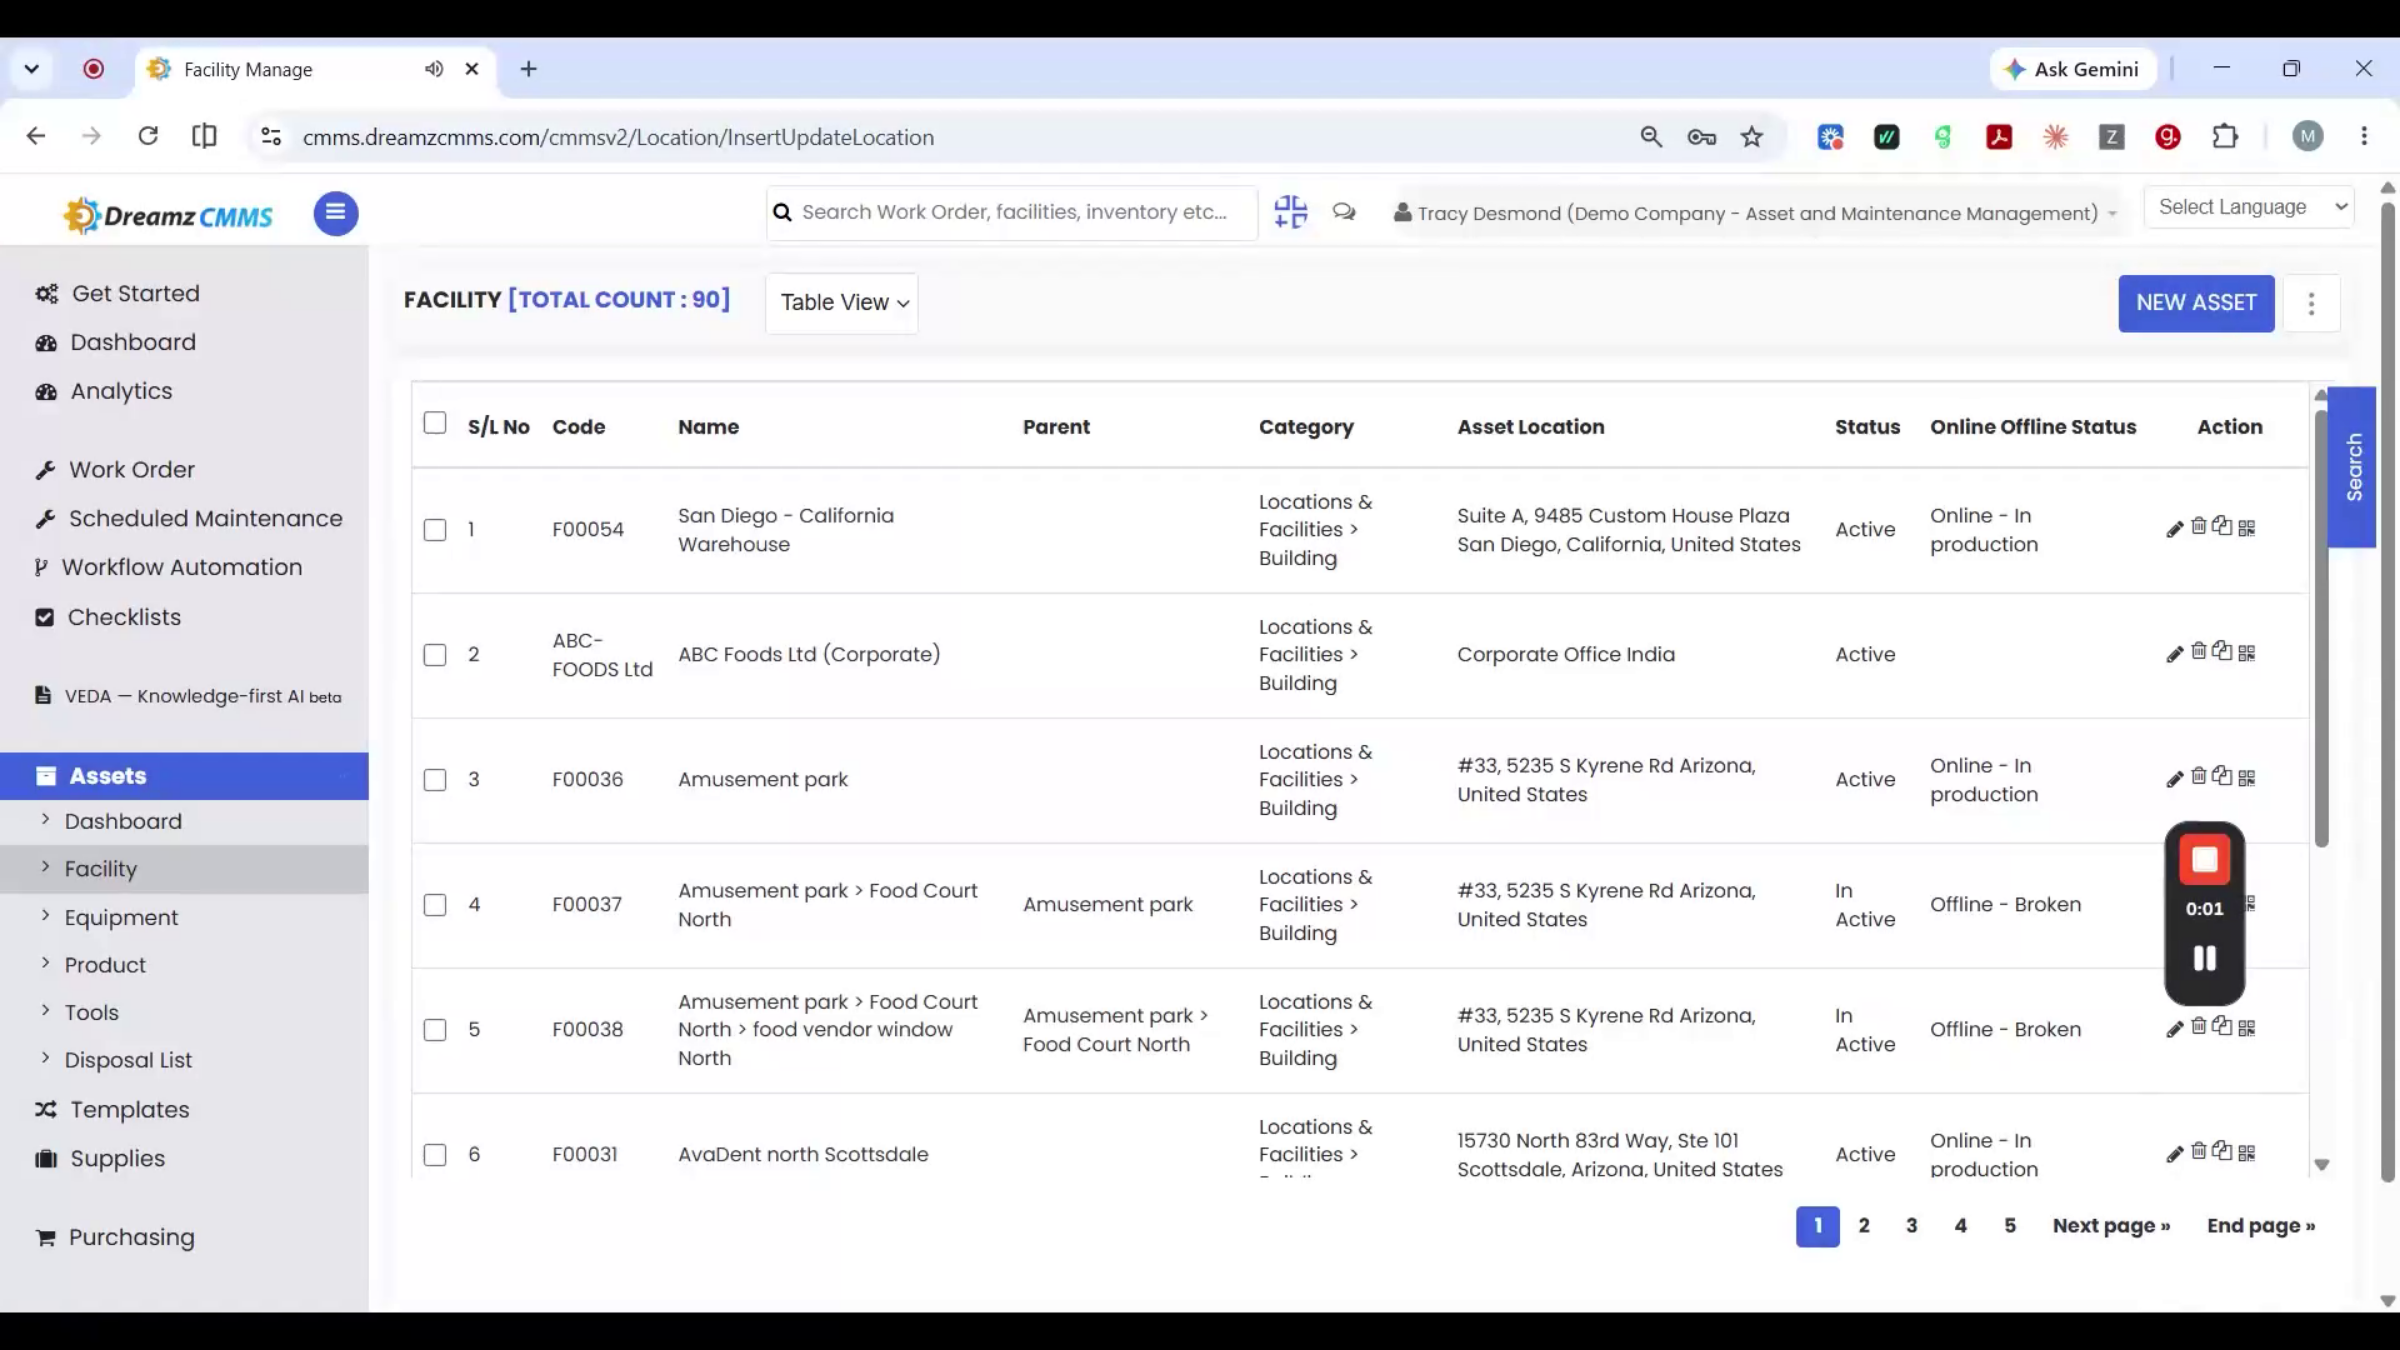
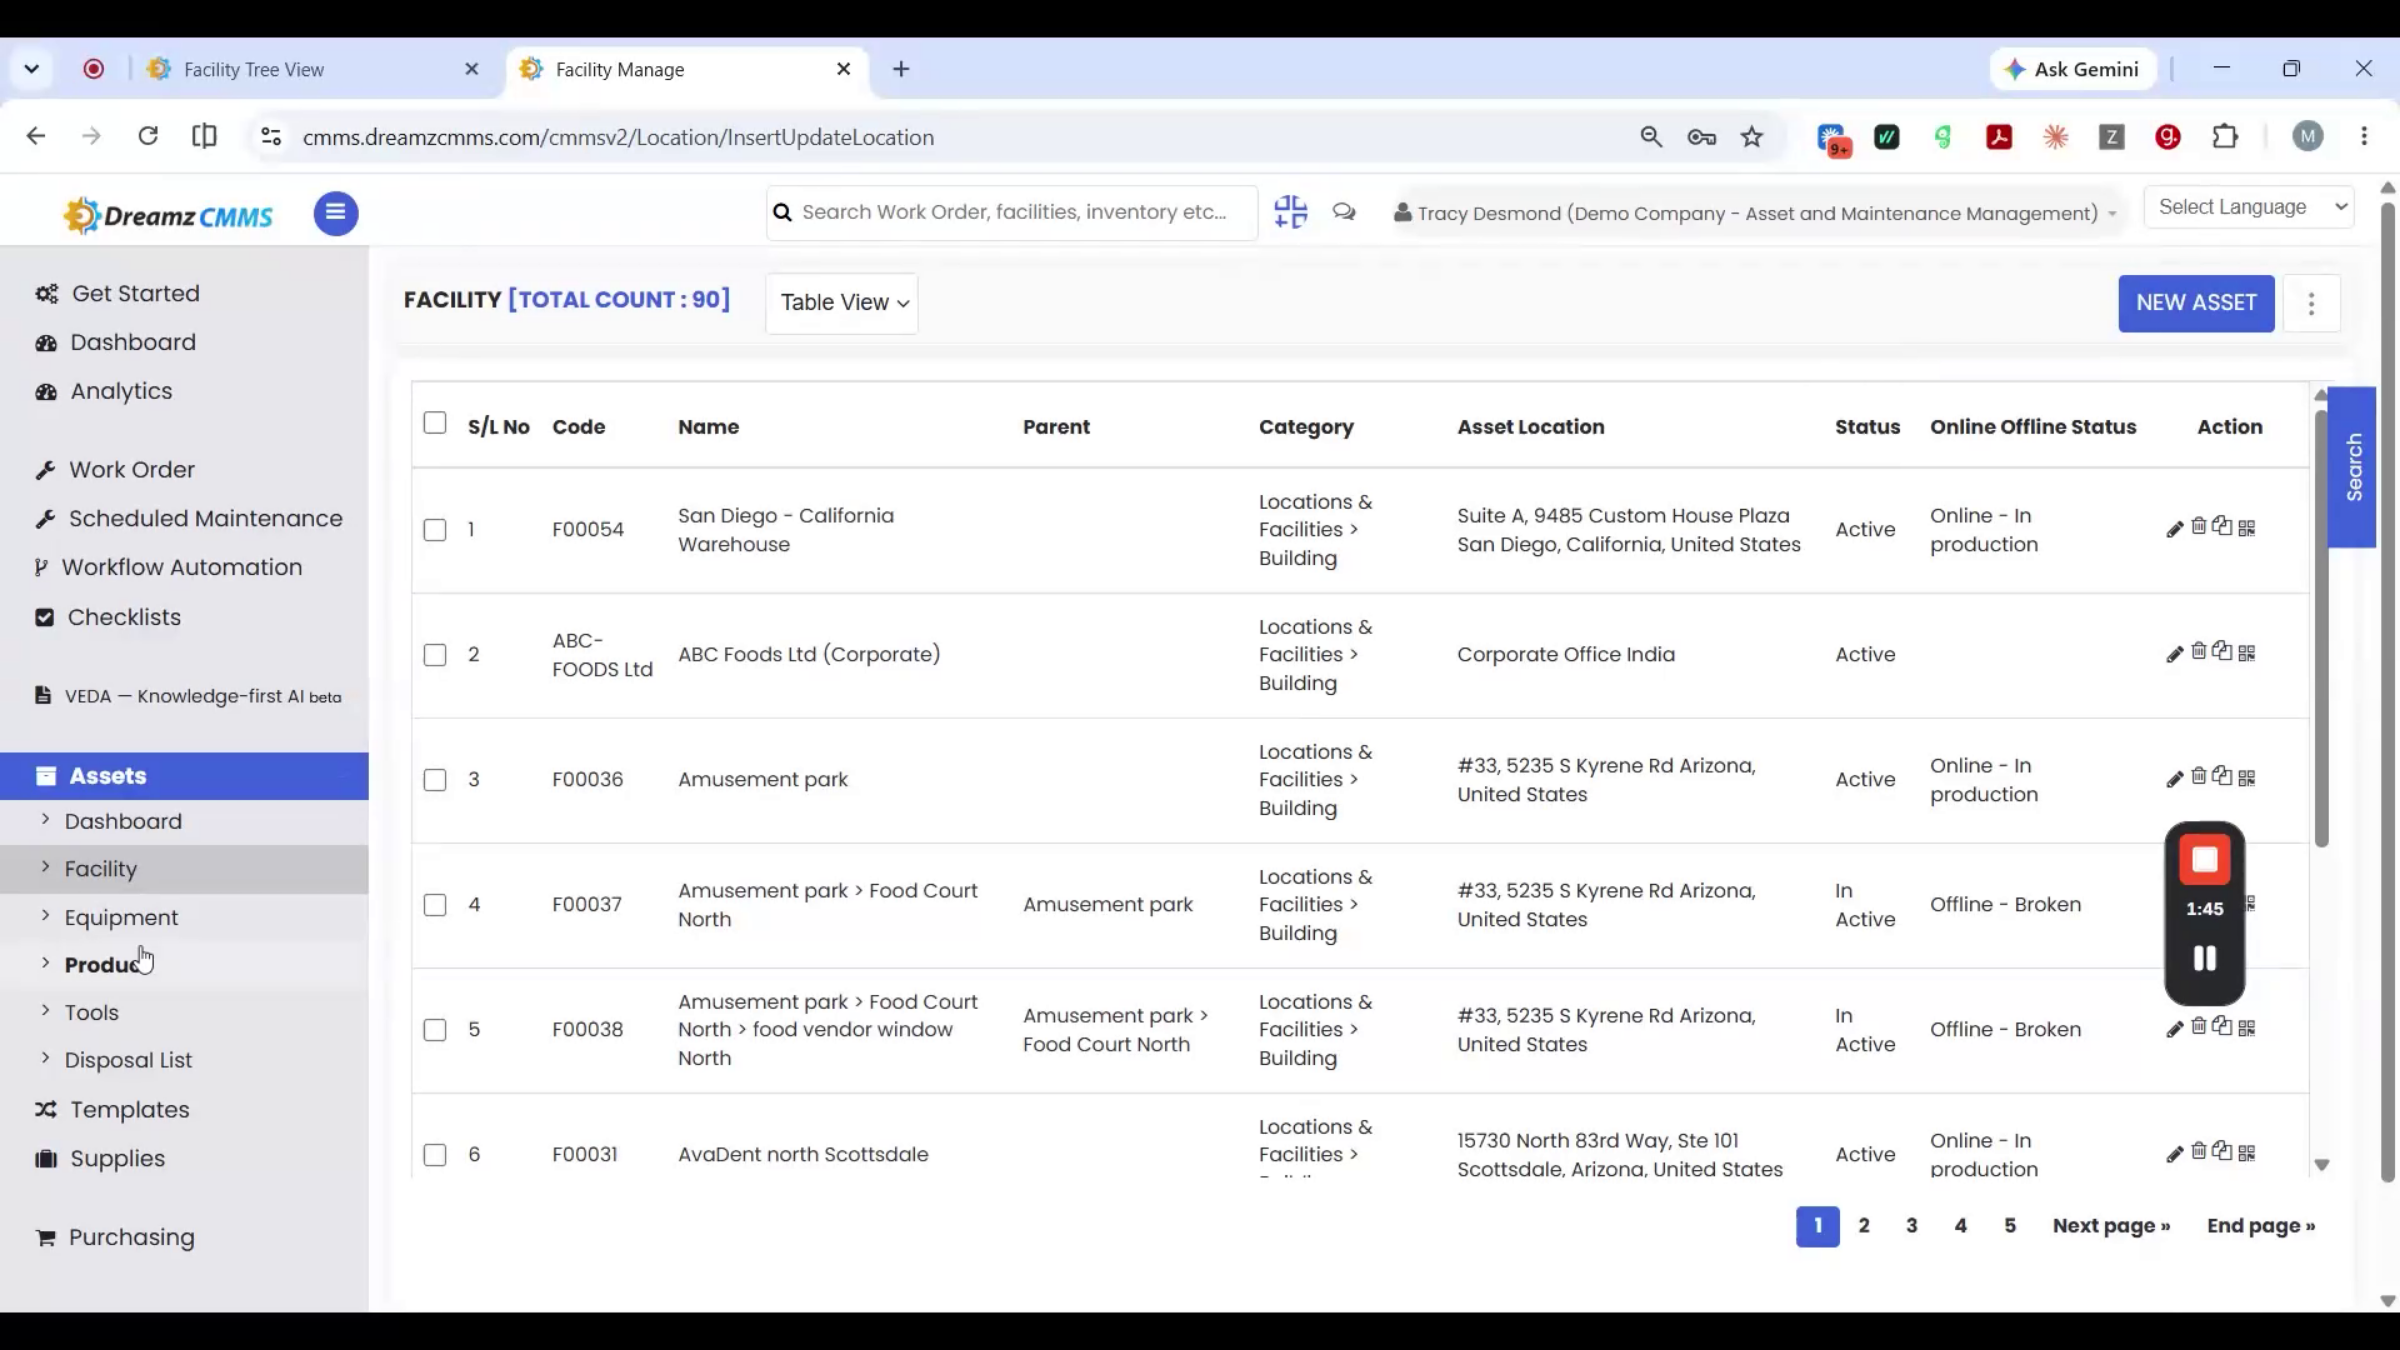
Before anything moves through a purchase or a transfer, the system needs to know your locations, products, and assets. Start with the location list, which shows every warehouse, store, or site already in the system.
Step 3 – Editing Location Details
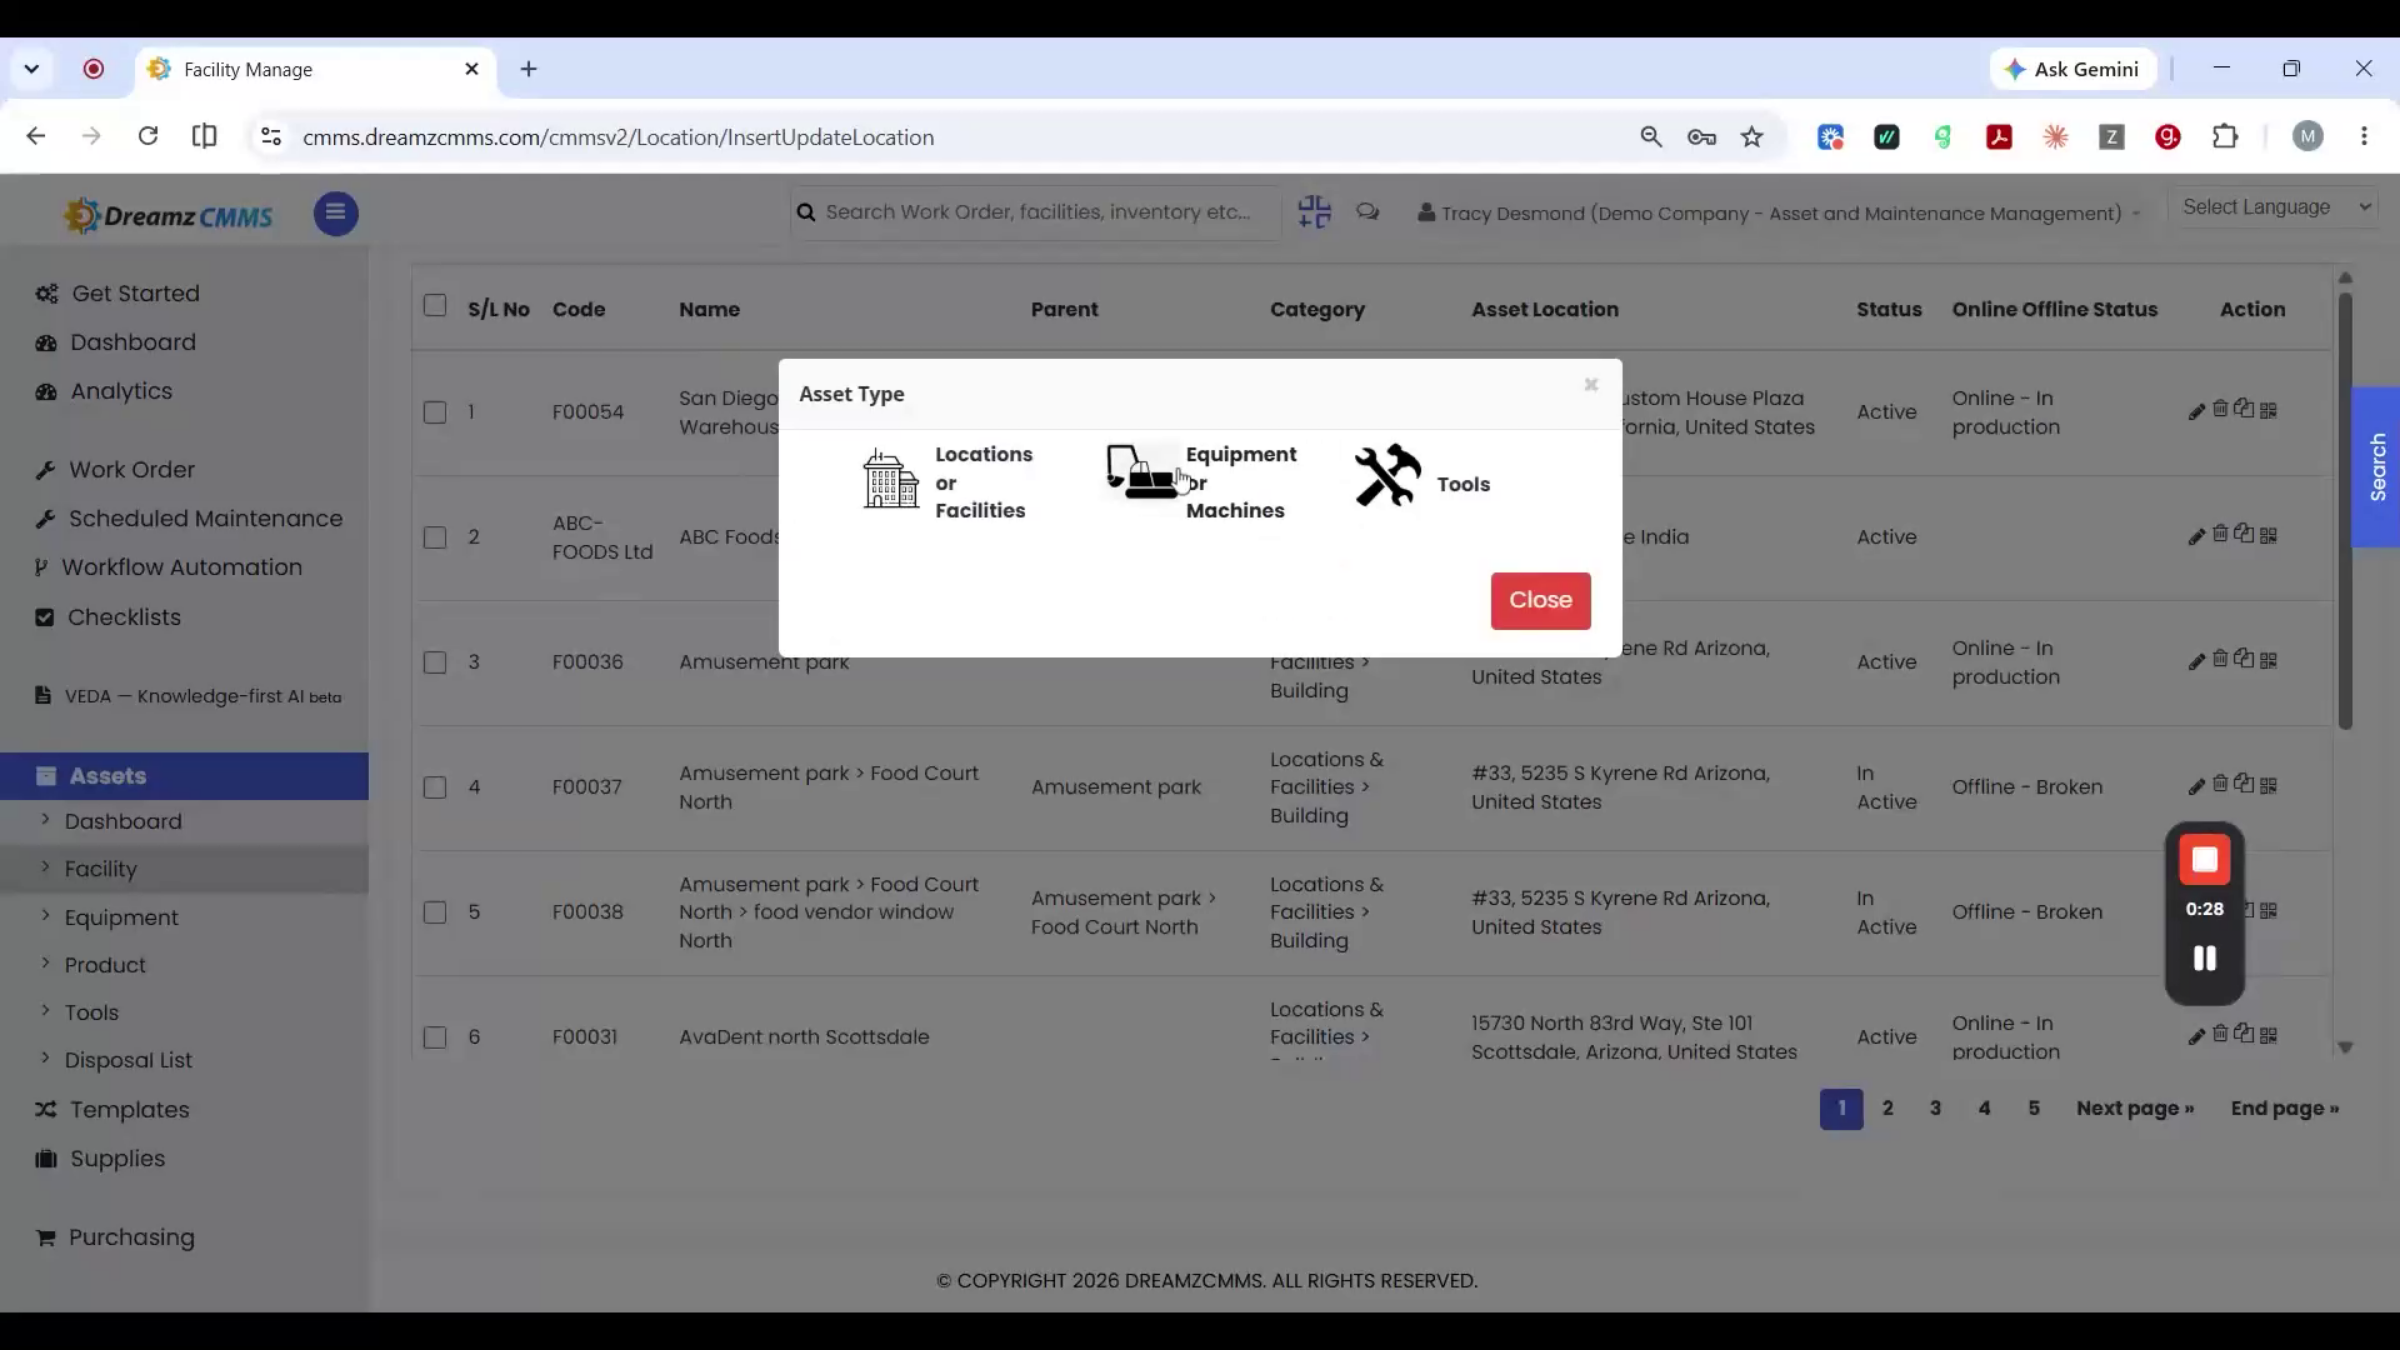
Adding a new location is a single New Location button with a short form. Opening an existing location instead lets you edit its name, code, category, and address directly.
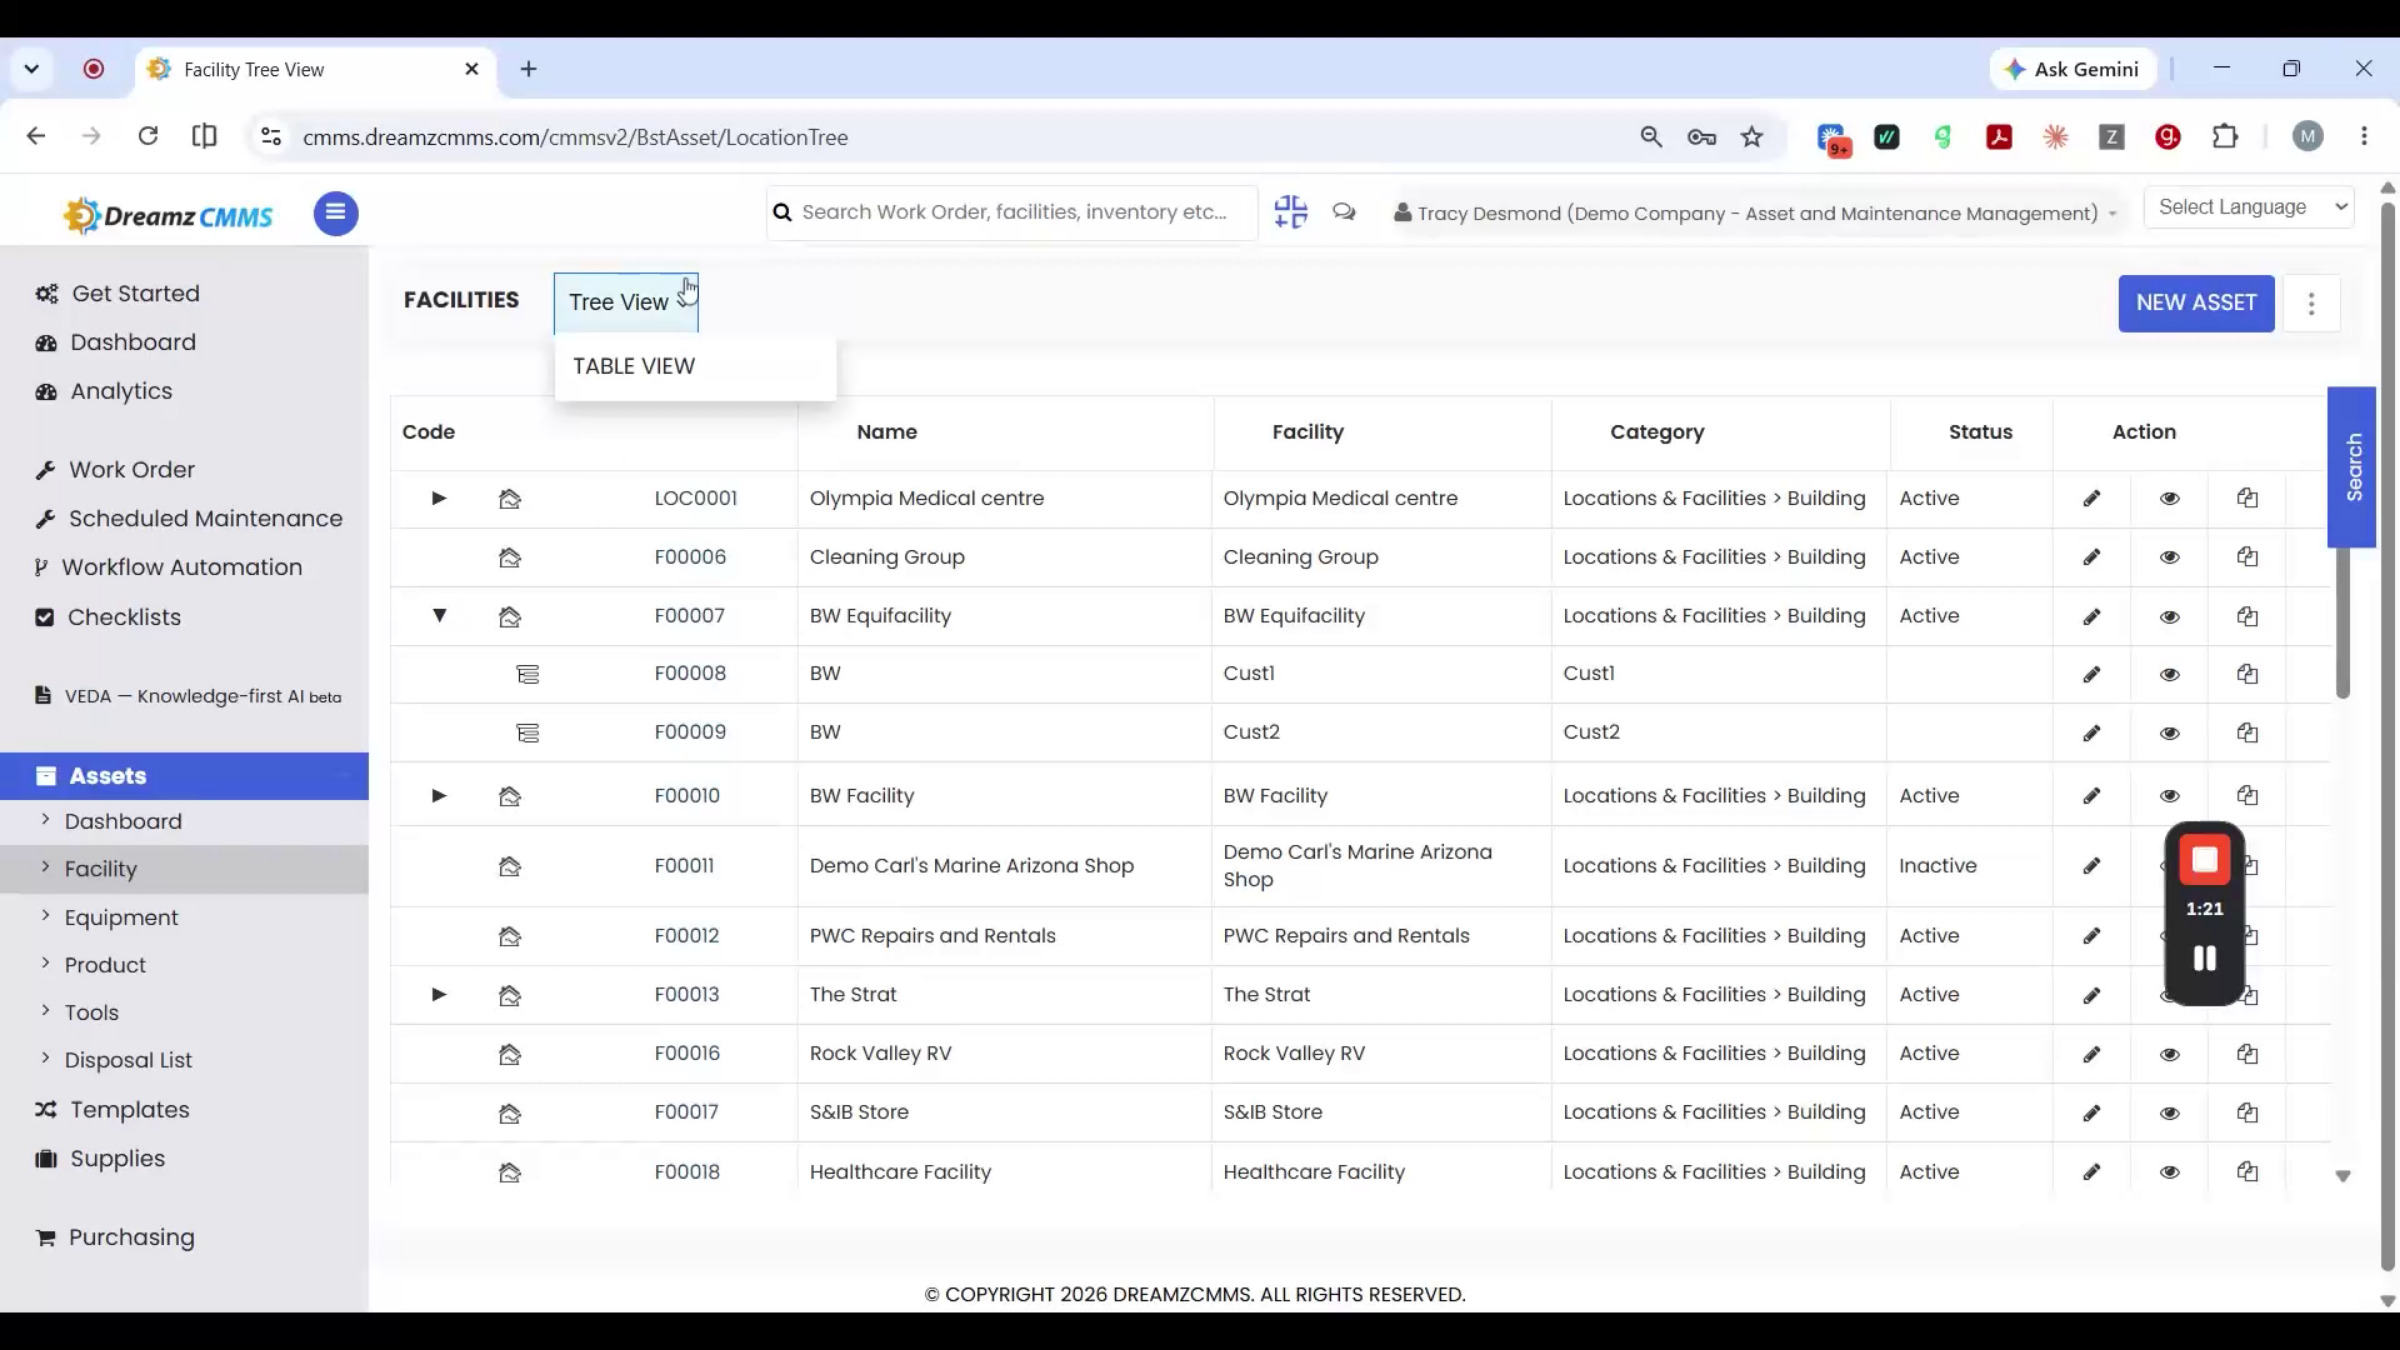
Step 4 – Location Tree View Explained
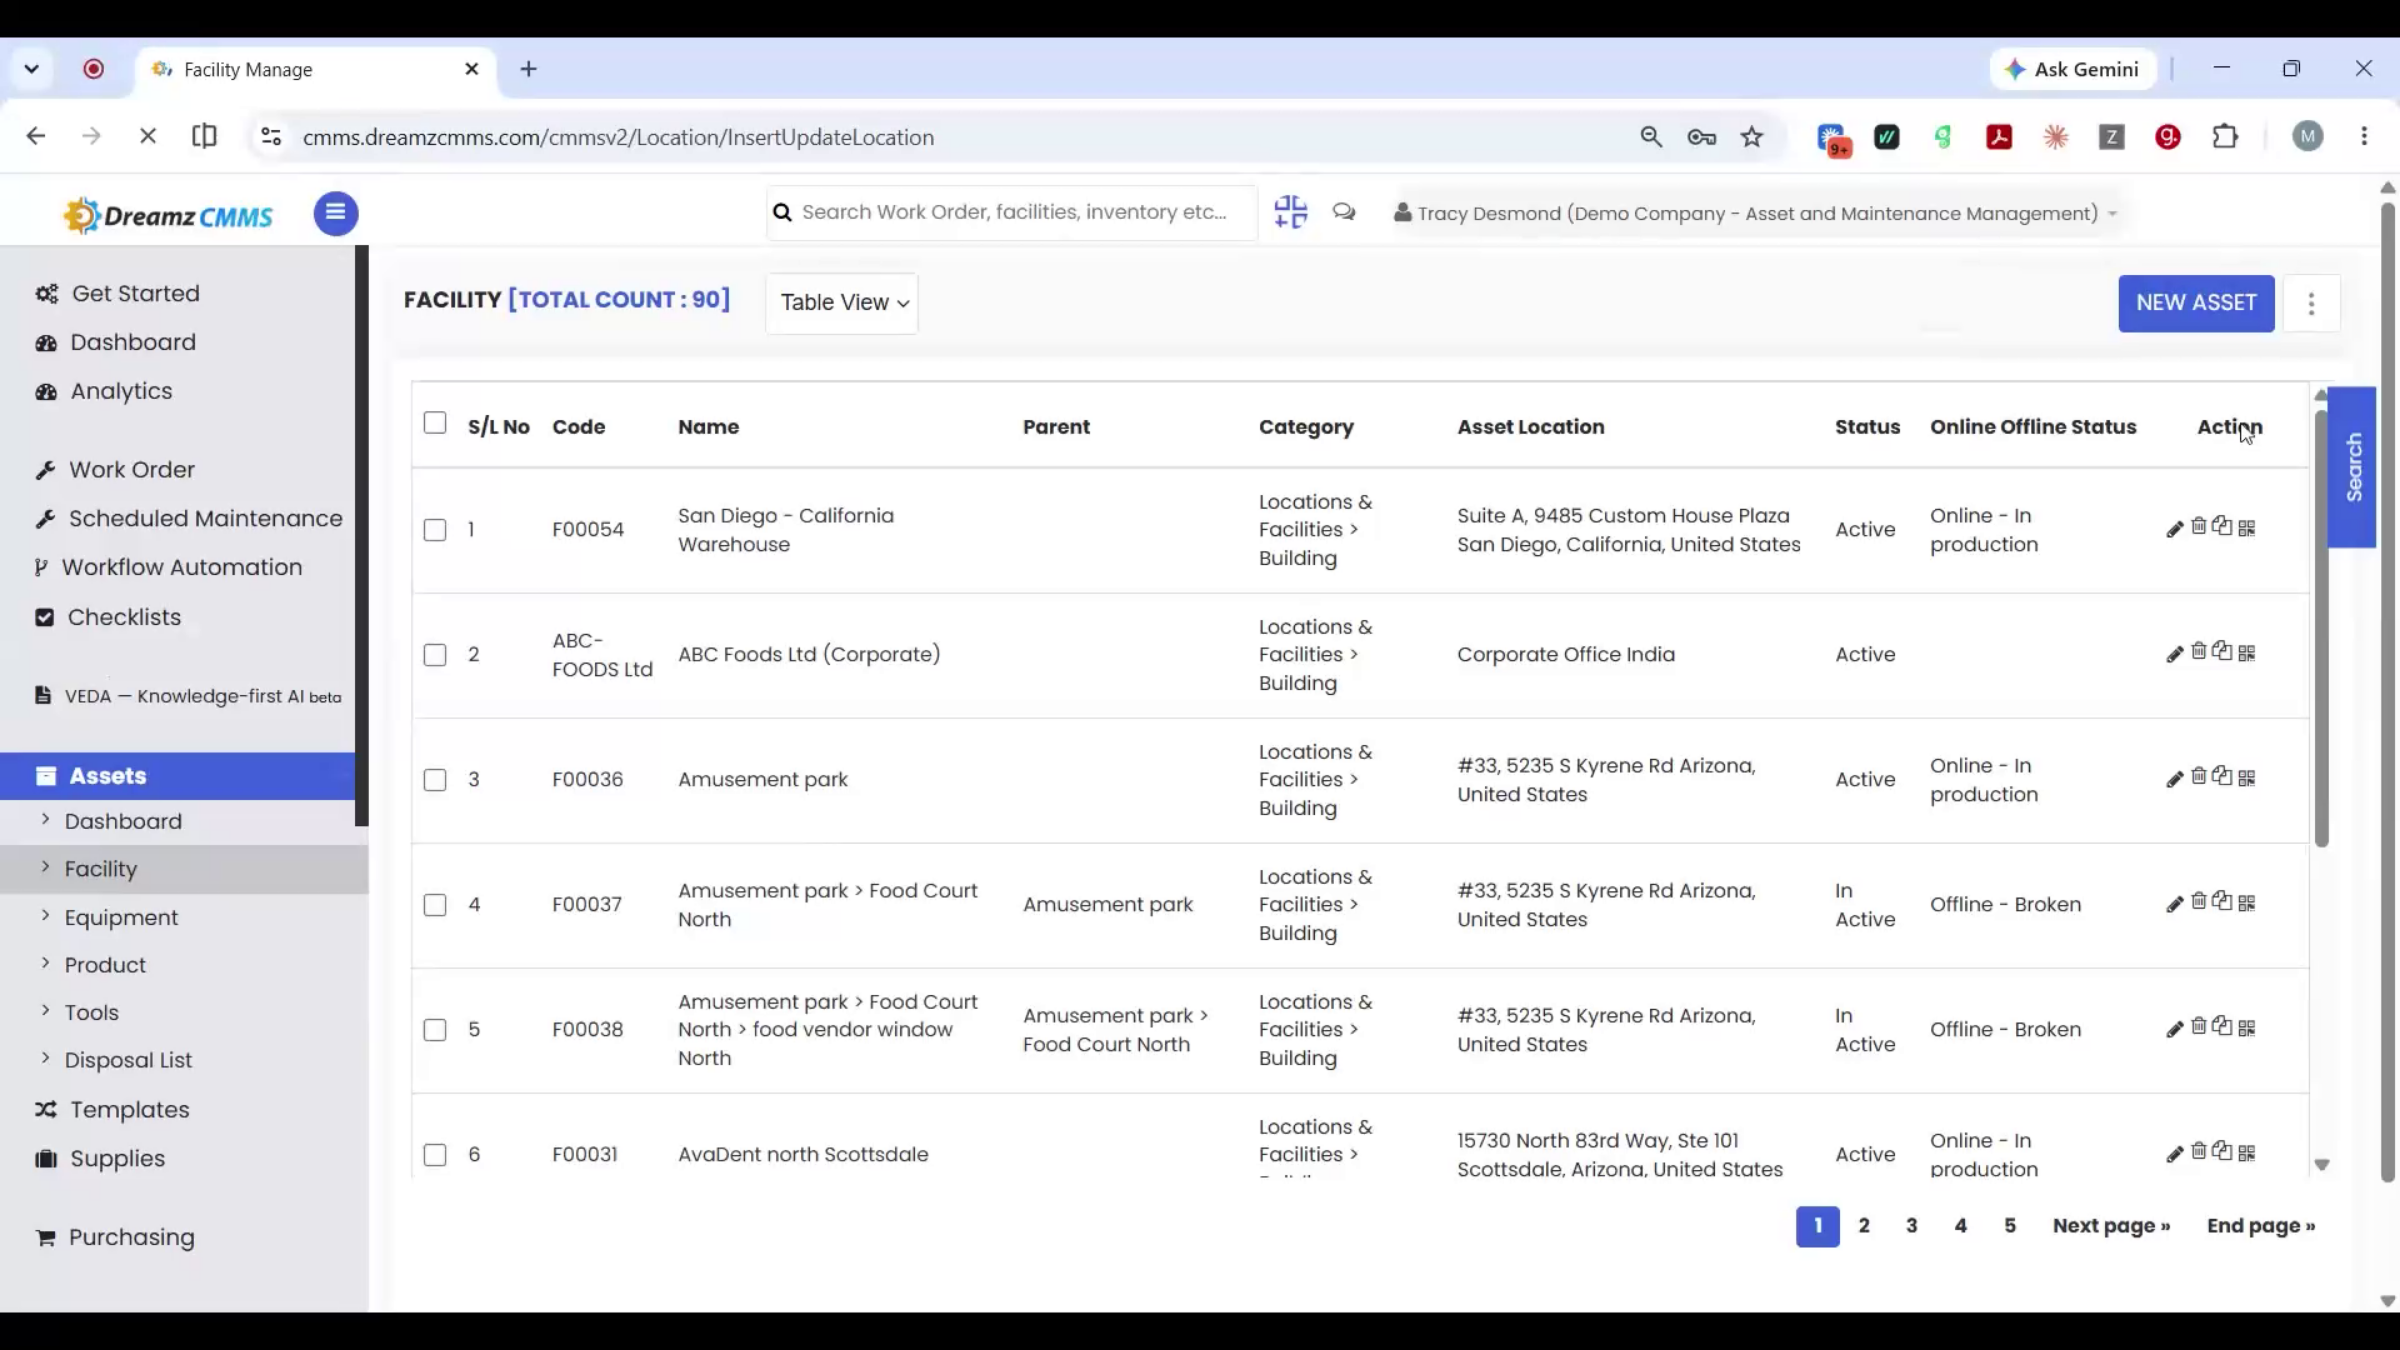
The tree view shows the same locations nested into a hierarchy — a warehouse with its racks and bins underneath, expandable level by level.
Step 5 – Location Import from Excel
Location Import brings in a full list of sites from Excel in one upload instead of adding them one at a time.
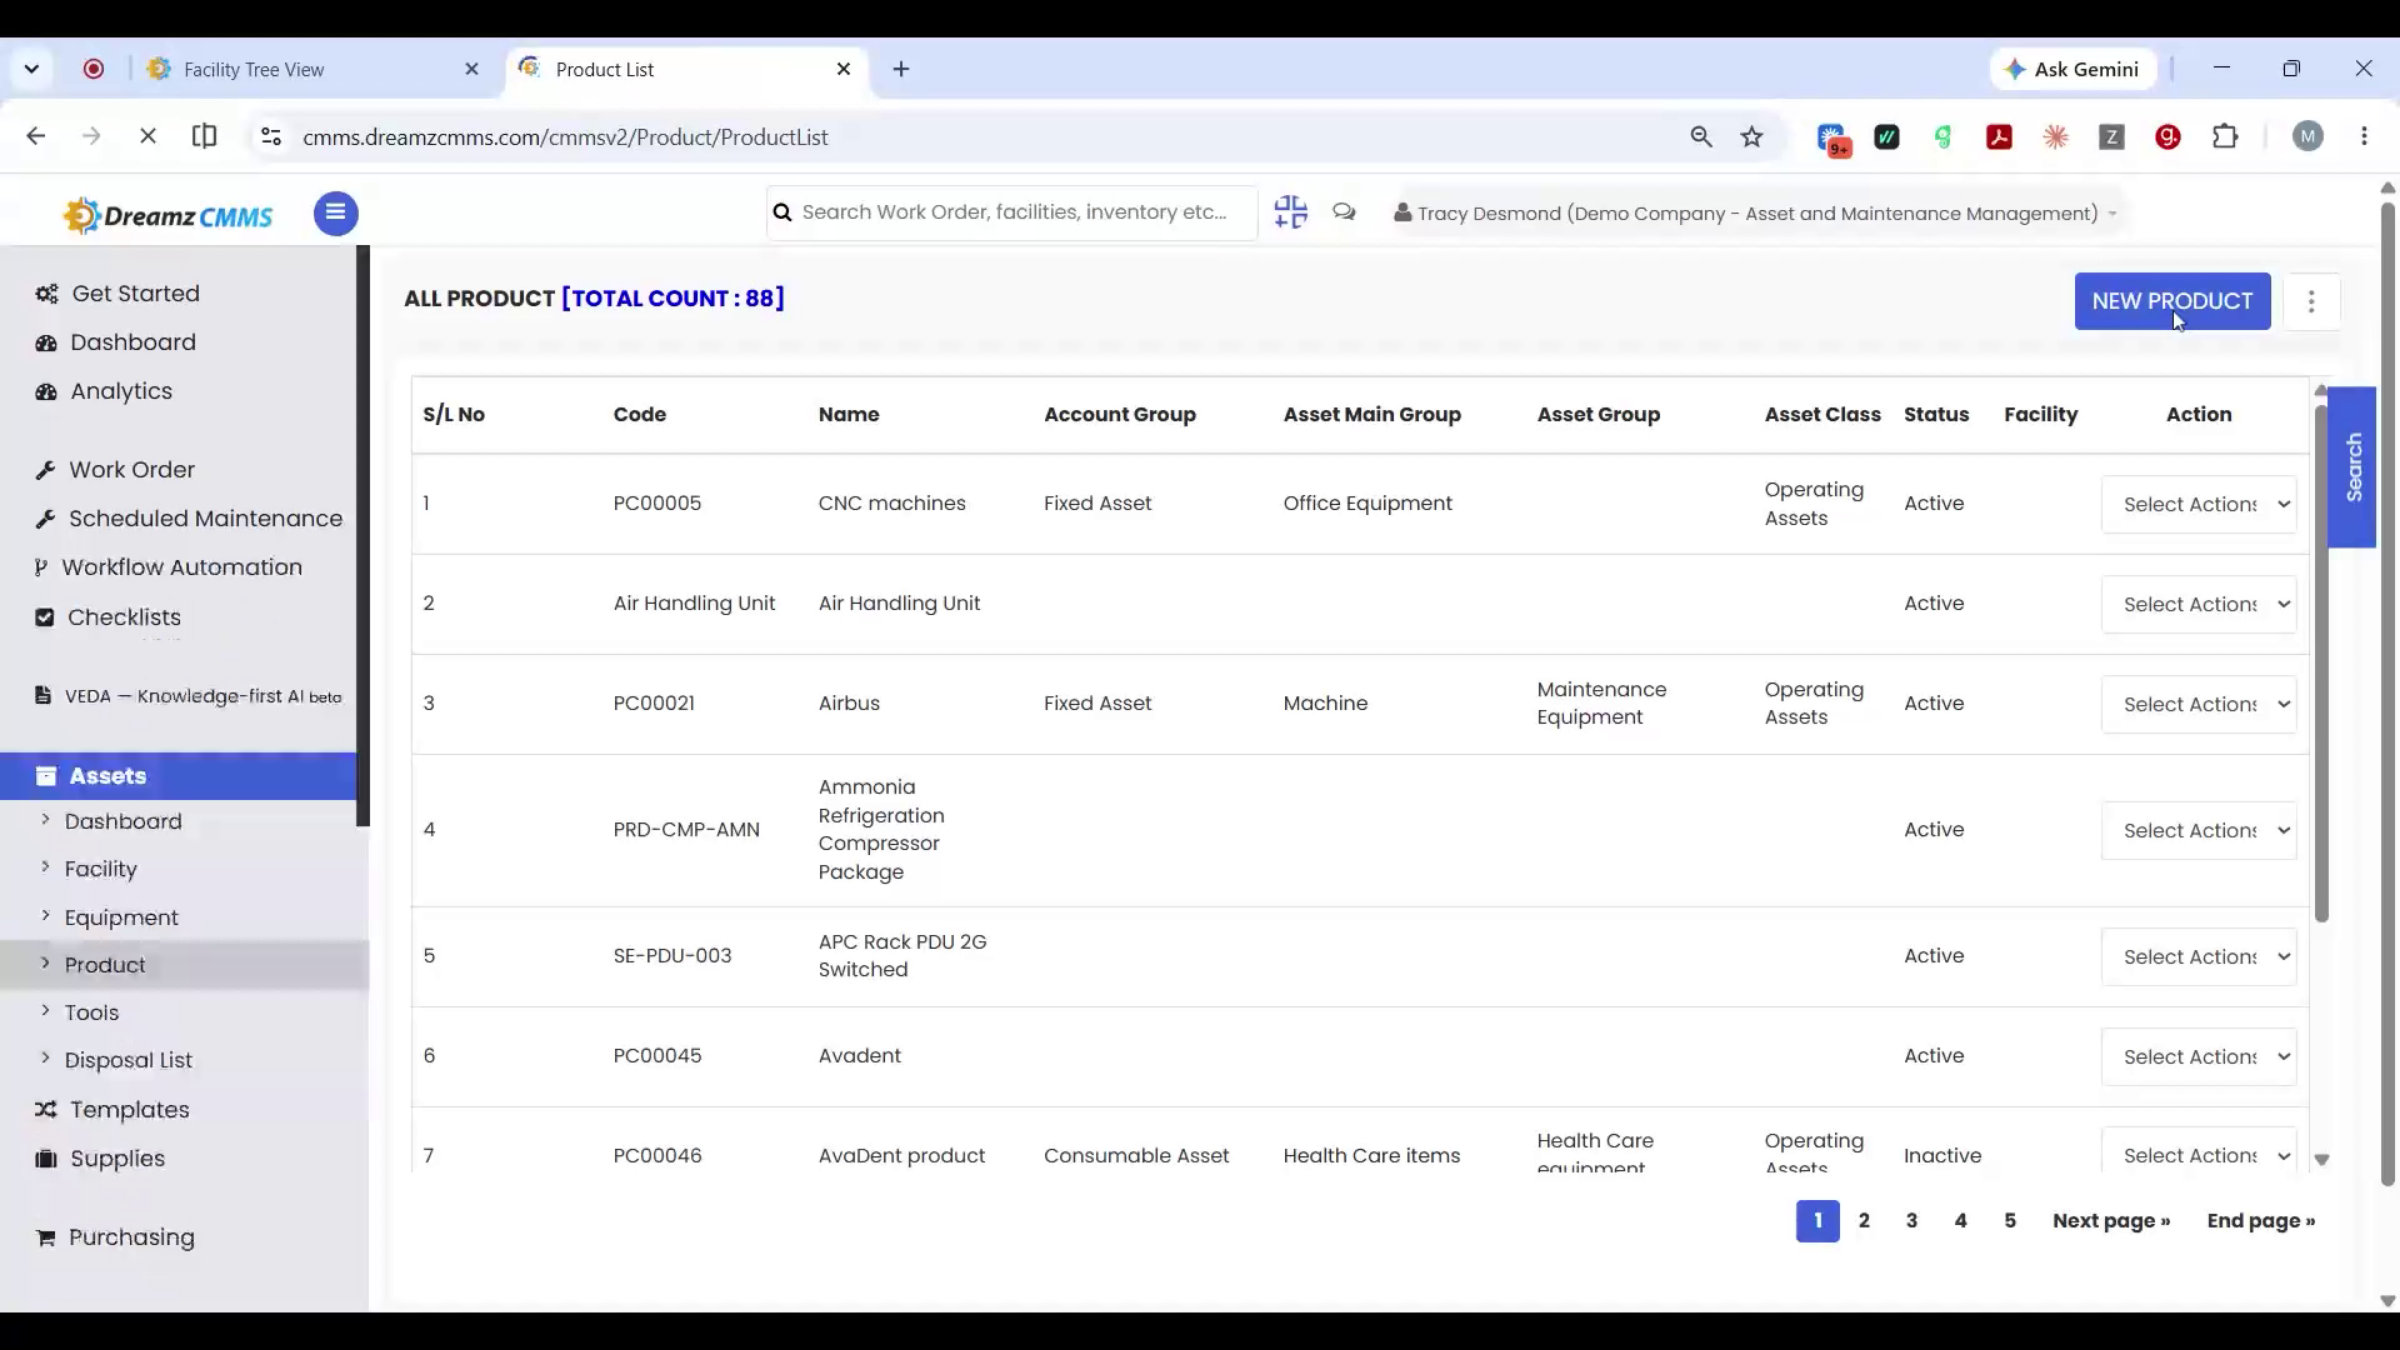
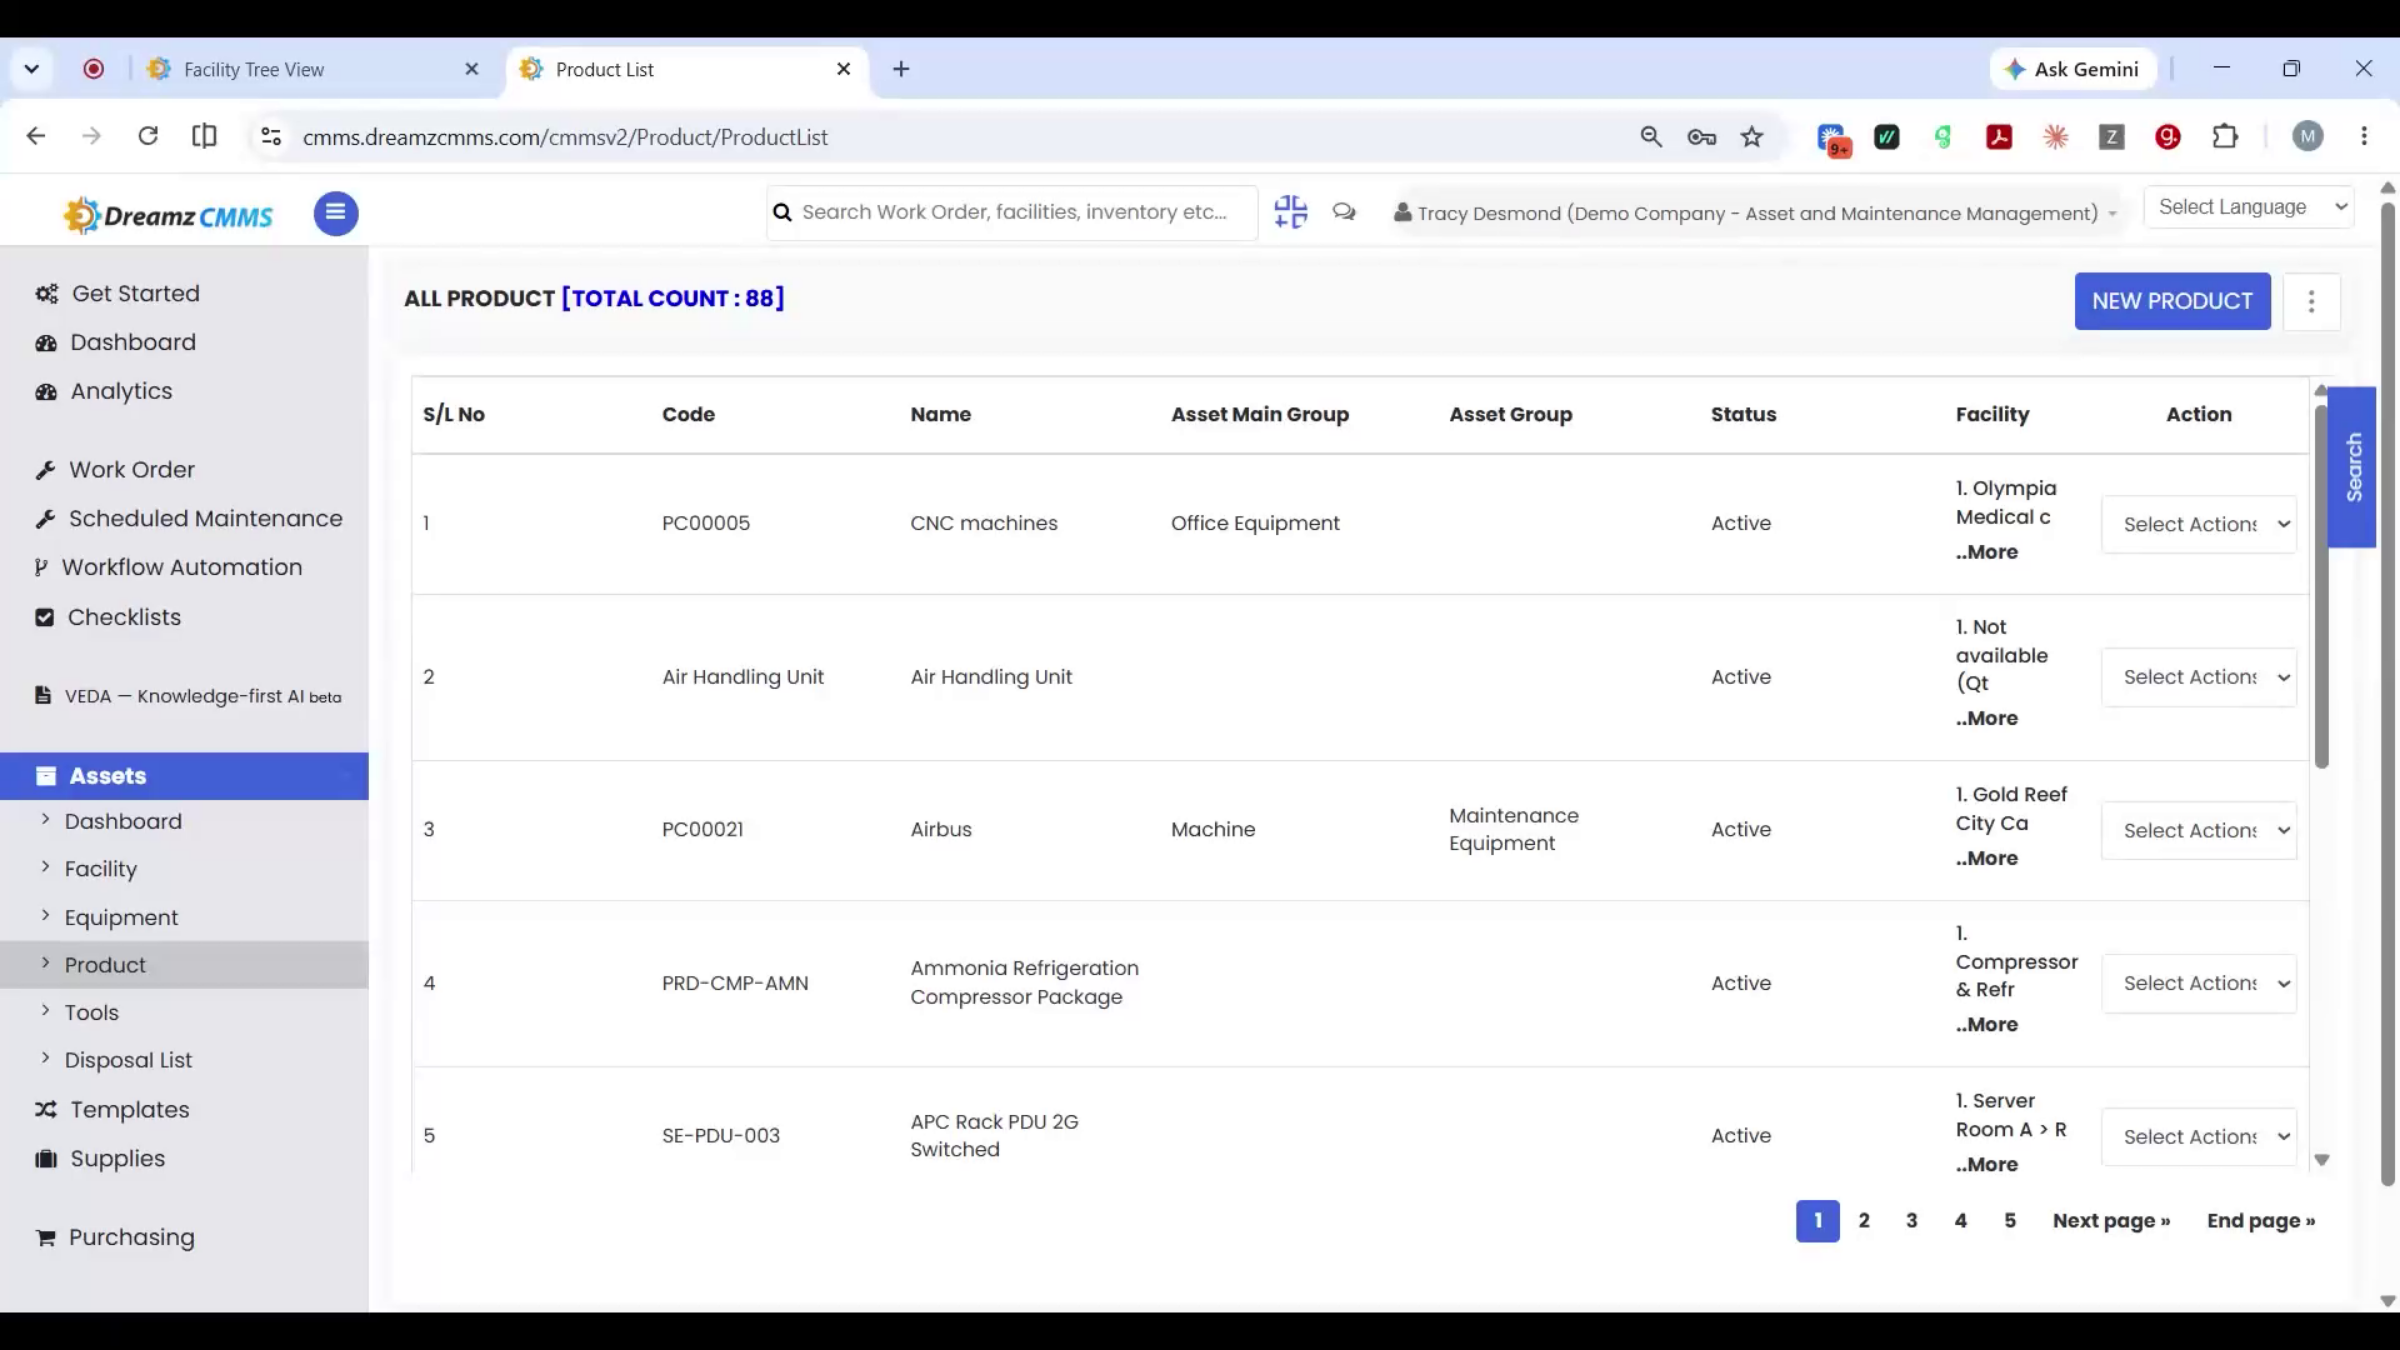
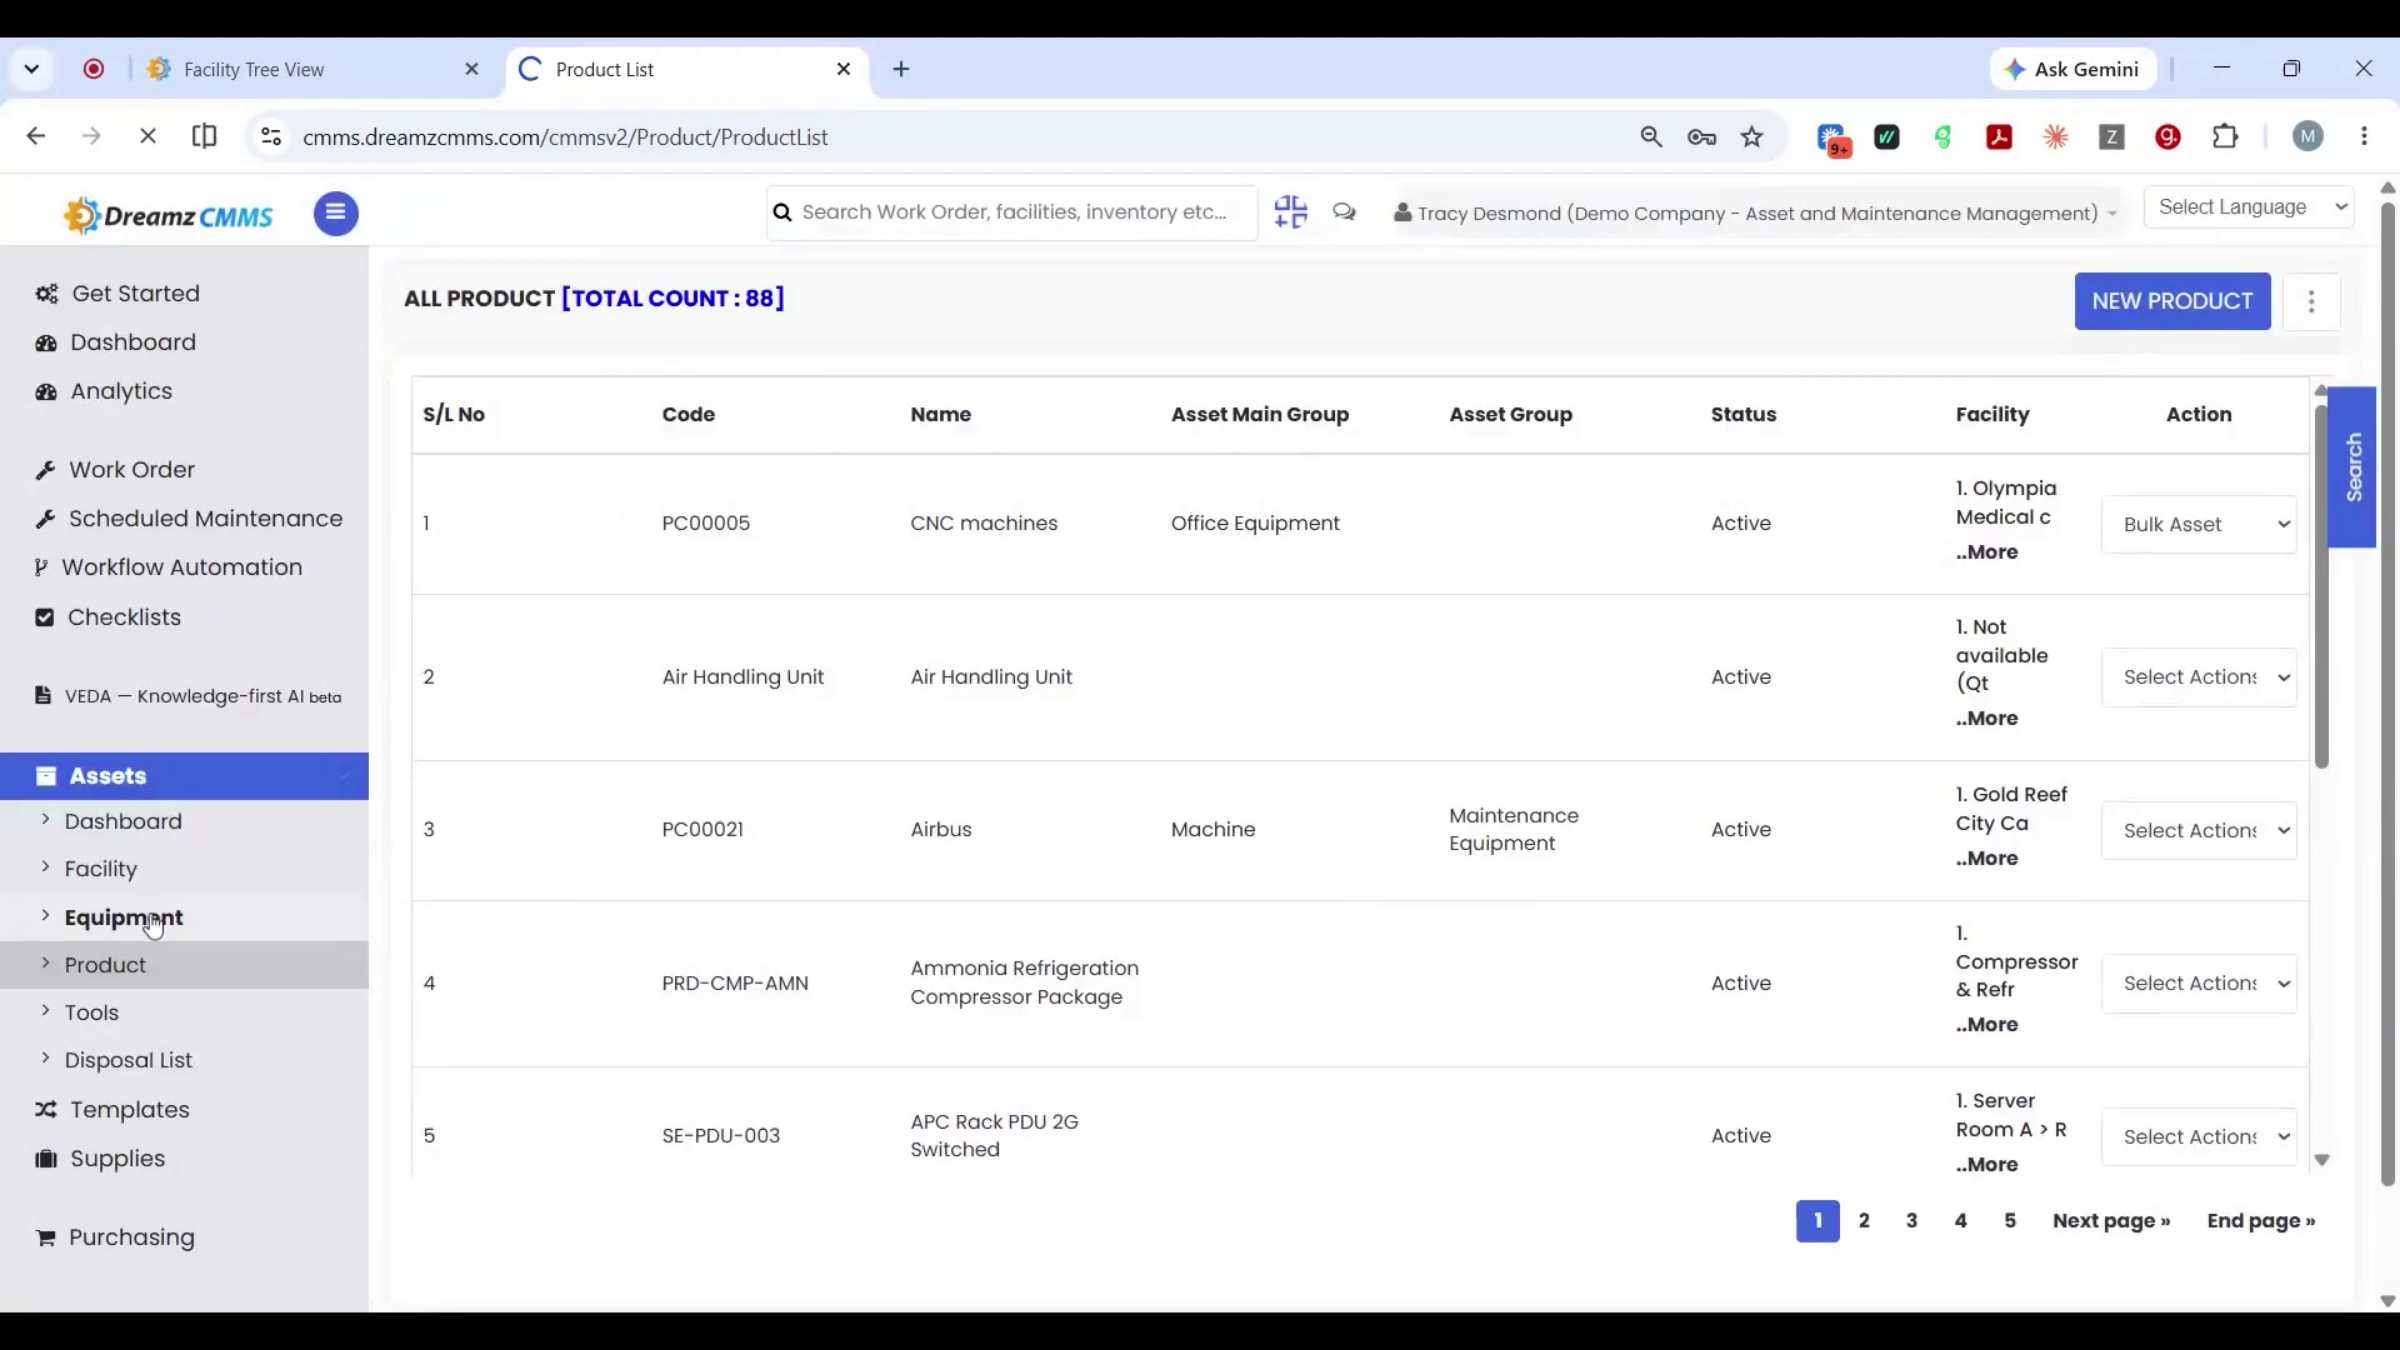
Step 6 – Product List Setup
The product list works the same way as locations. New Product is a single button and a short form. Opening an existing product shows its classification, grouping, and cost — the template for anything you'll eventually tag, set up once no matter how many units you track.
Step 7 – Product Import Process
Product Import brings your whole catalog in from Excel in one go.
Step 8 – Bulk Asset Creation
Before opening the Asset List, it's worth showing bulk asset creation from a product first. If a fresh shipment just came in, you don't create each unit by hand — pick the product, set the facility, enter a quantity, and the system generates that many individual assets automatically.
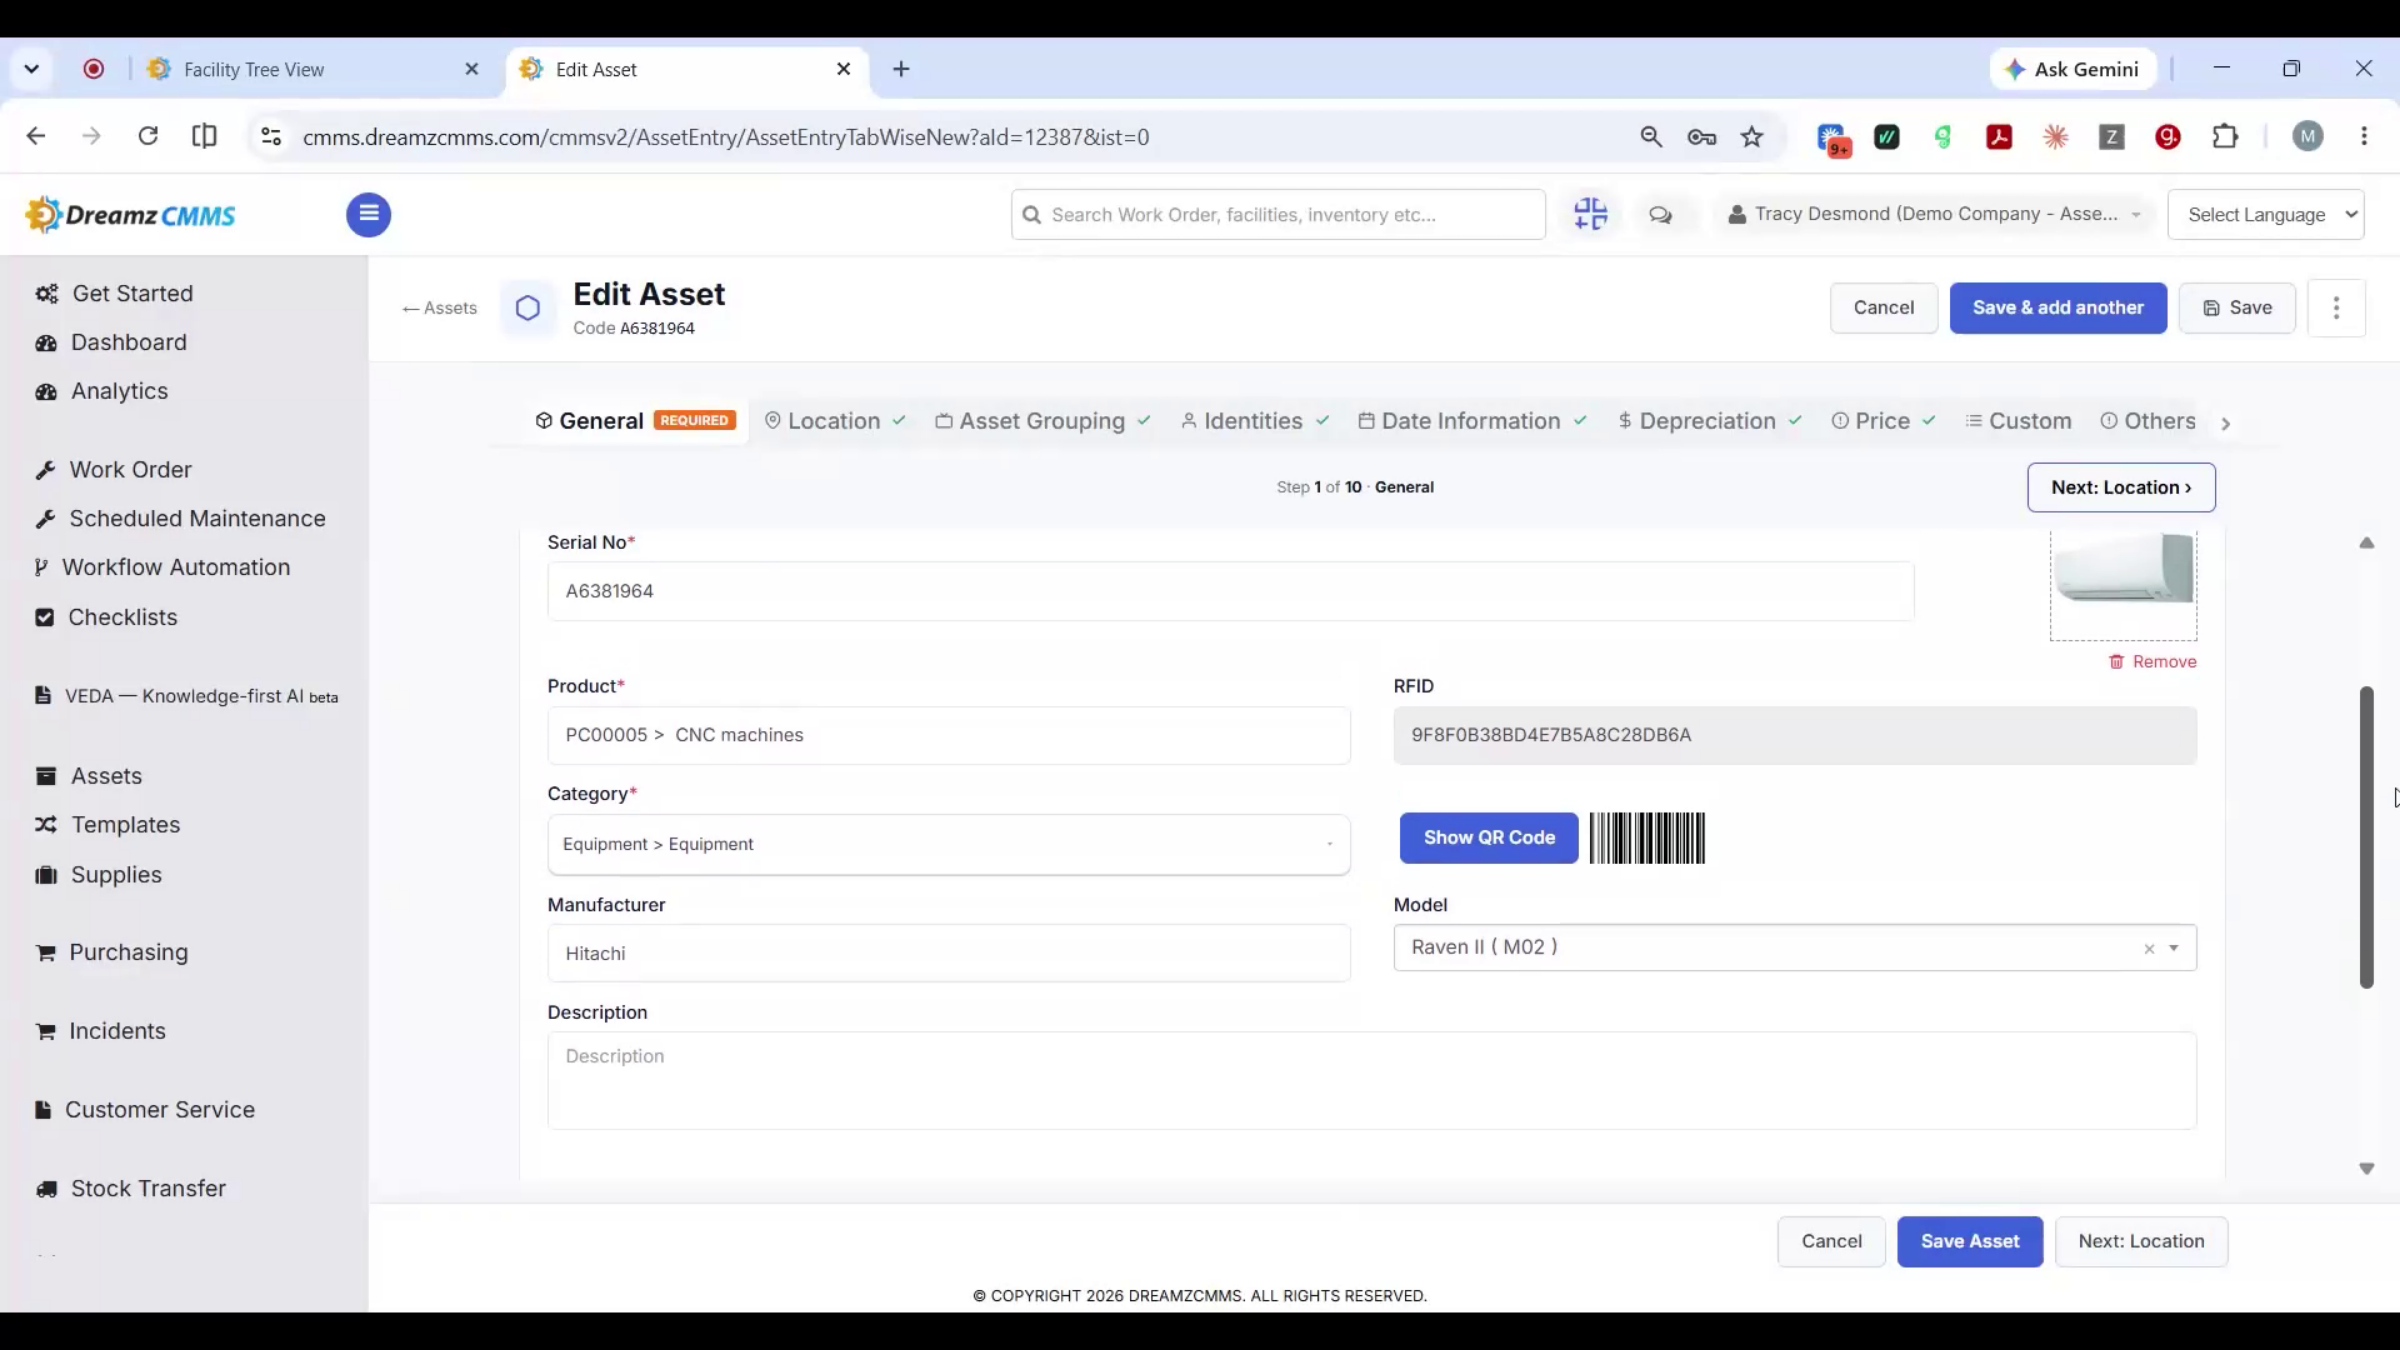
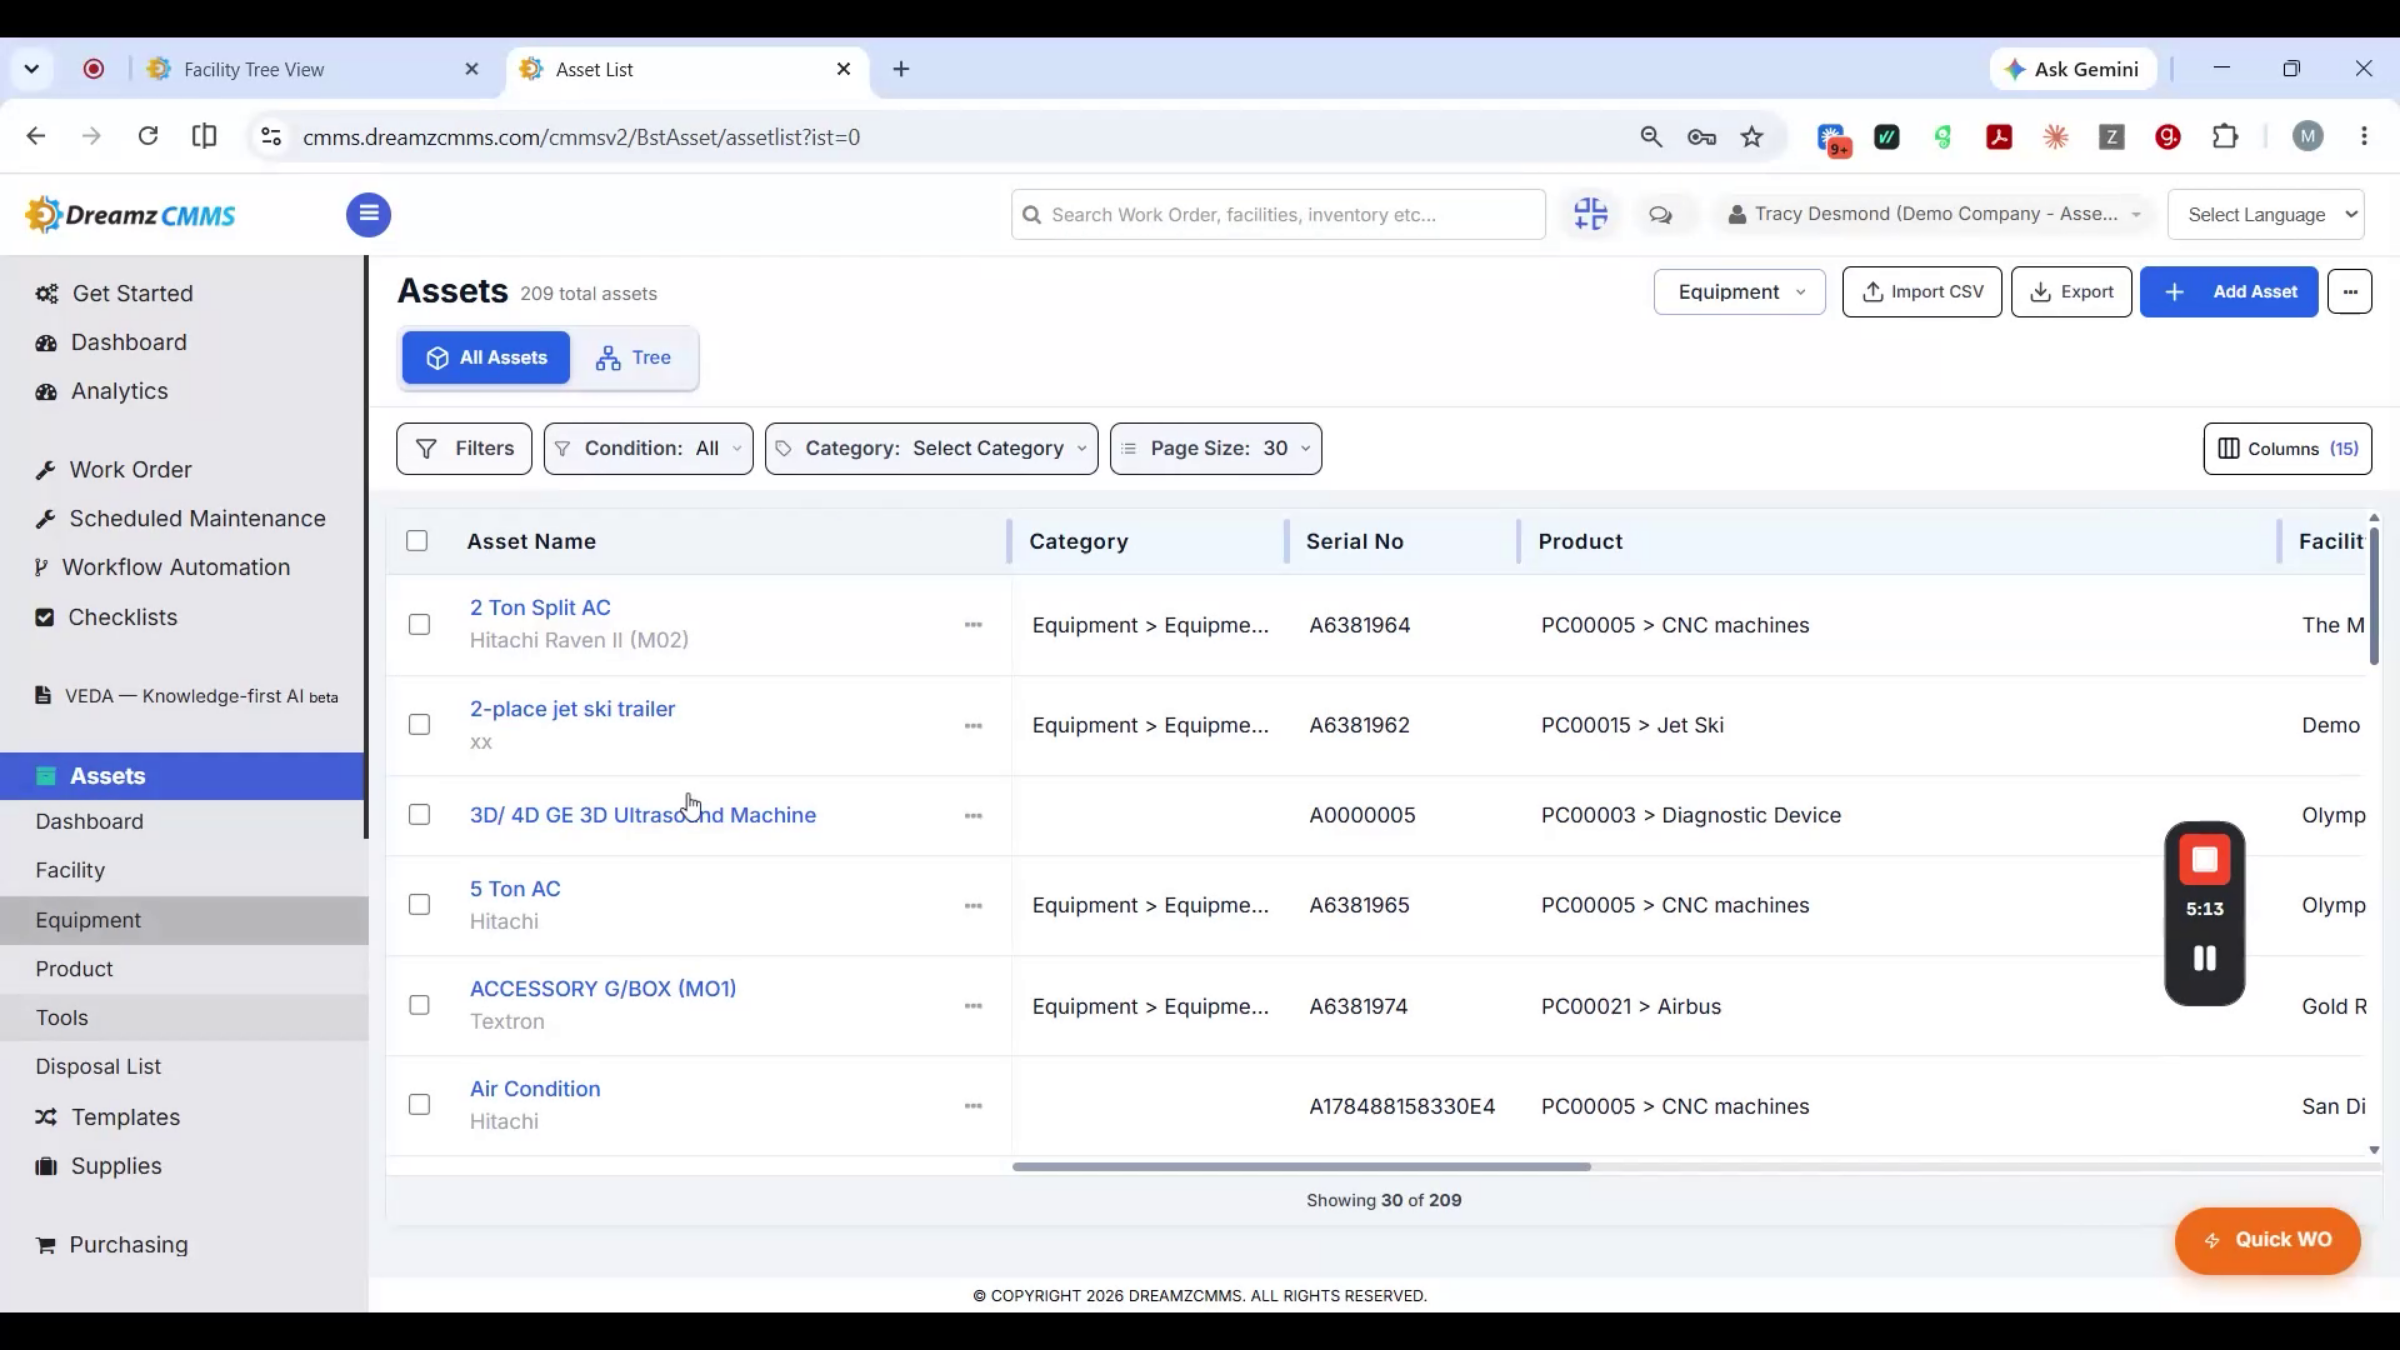
Step 9 – Asset List and Details
The asset list works the same way as locations and products for creating one at a time. Opening an existing asset shows its serial number, RFID tag, category, and condition.
Step 10 – Asset Bundling Feature
This is also where bundling happens. Set one asset as the parent and its child assets populate automatically, so the whole group scans and moves as a single bundle.
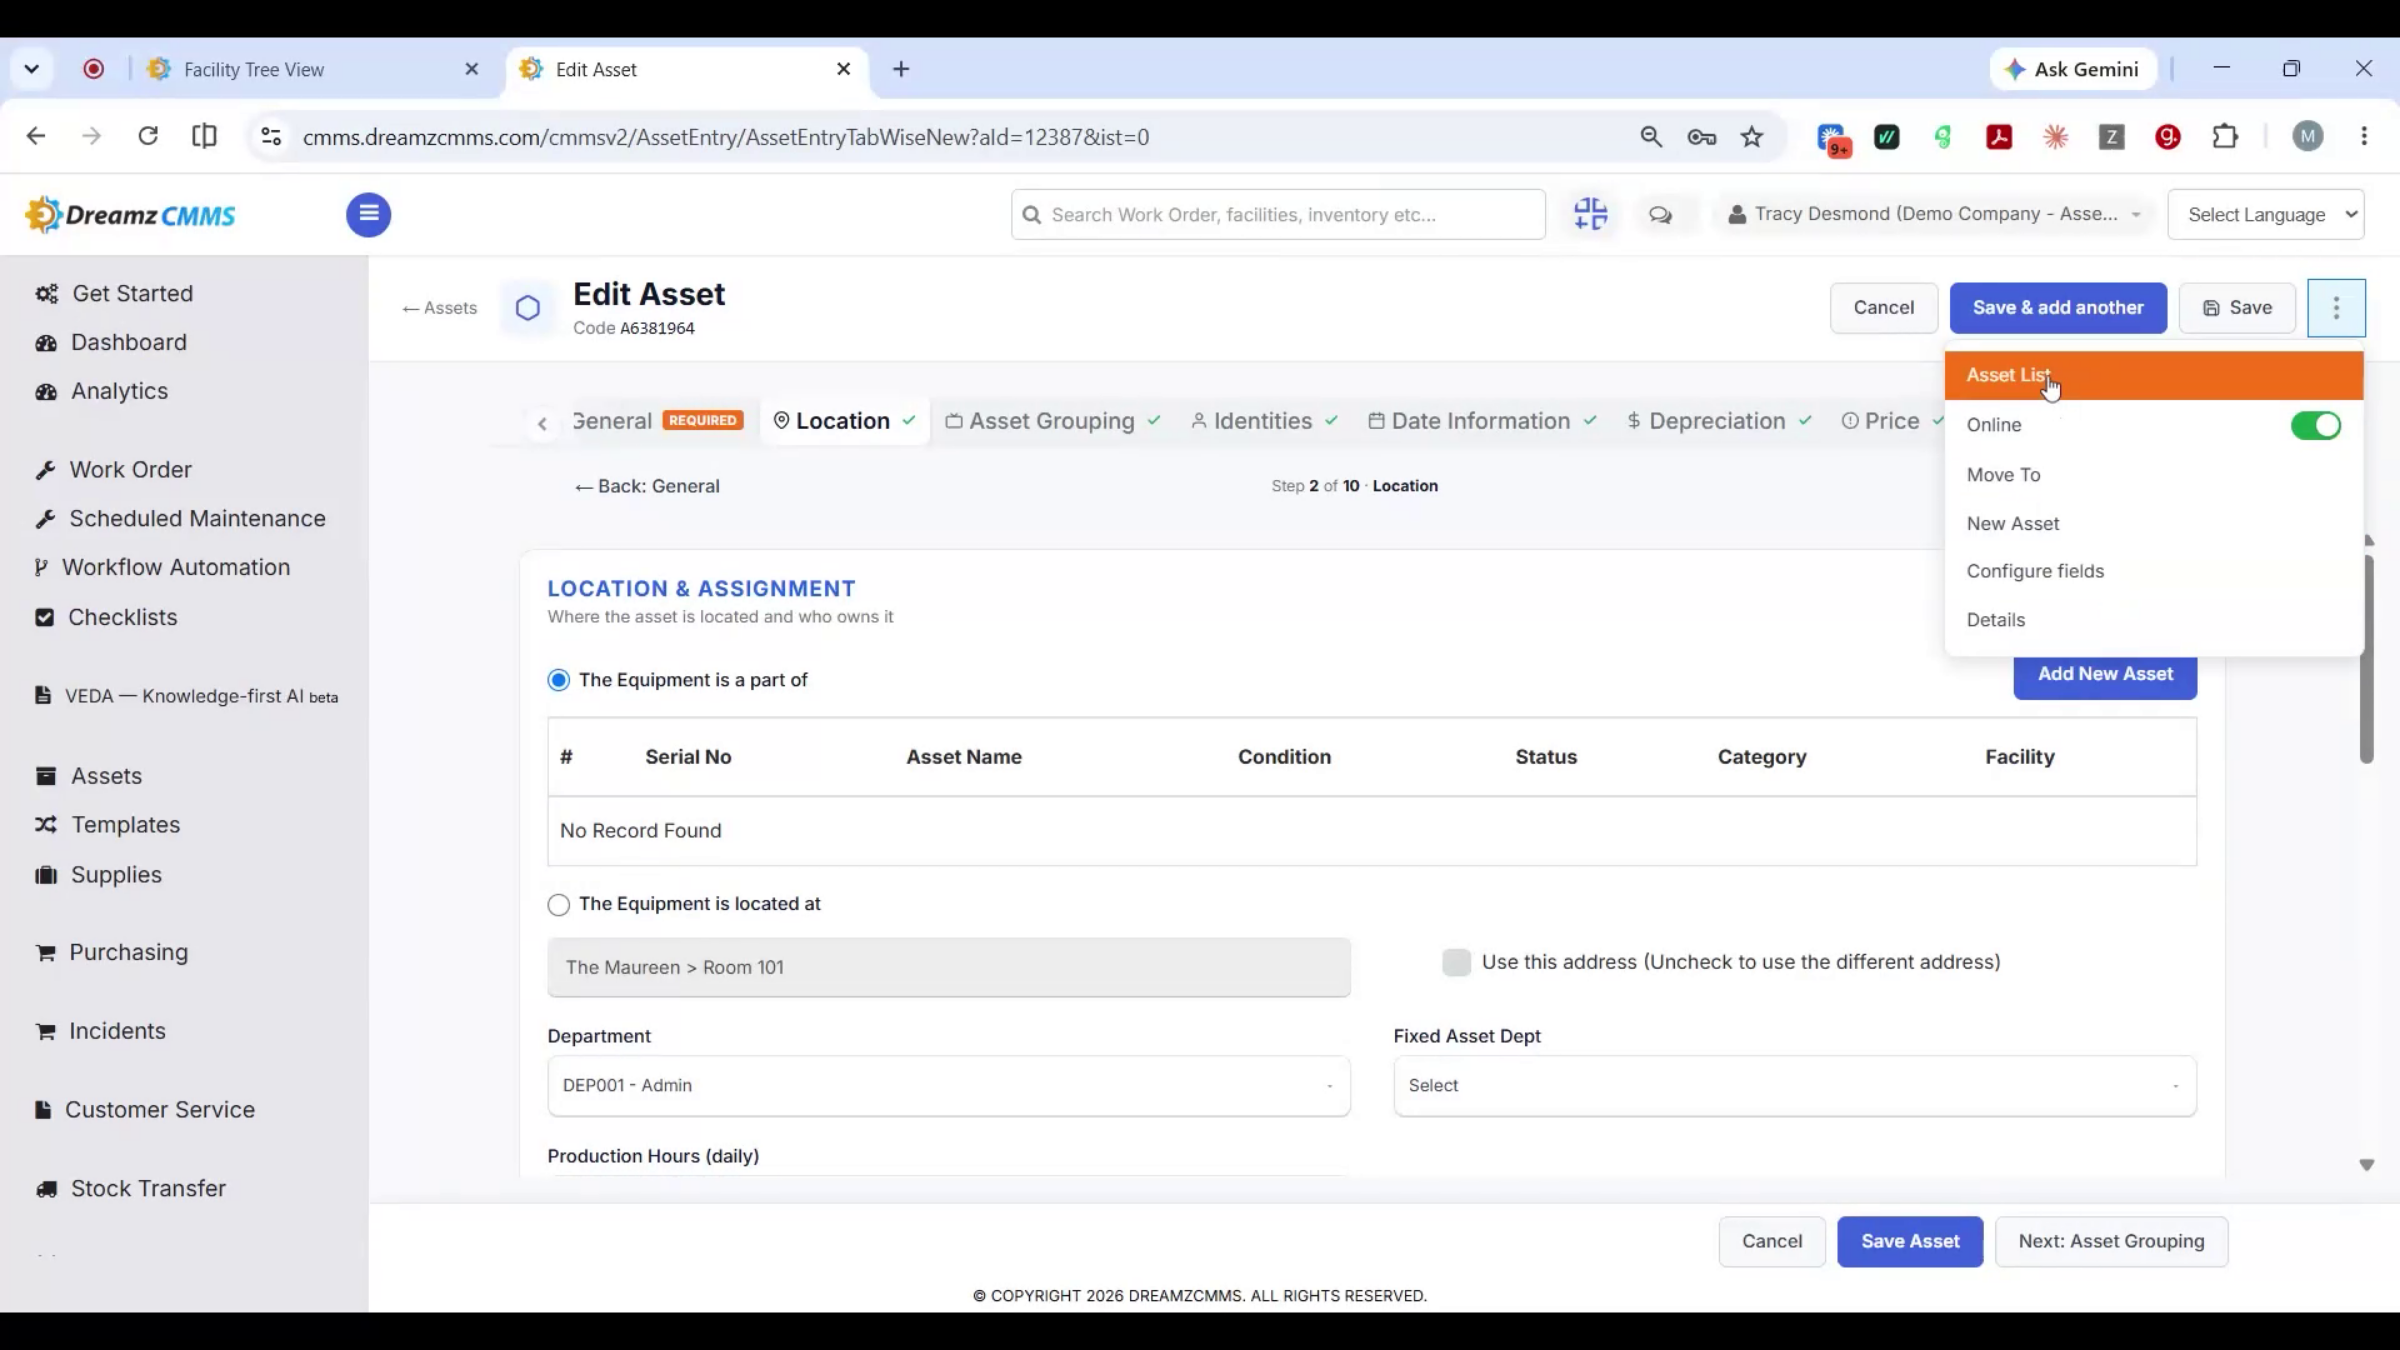
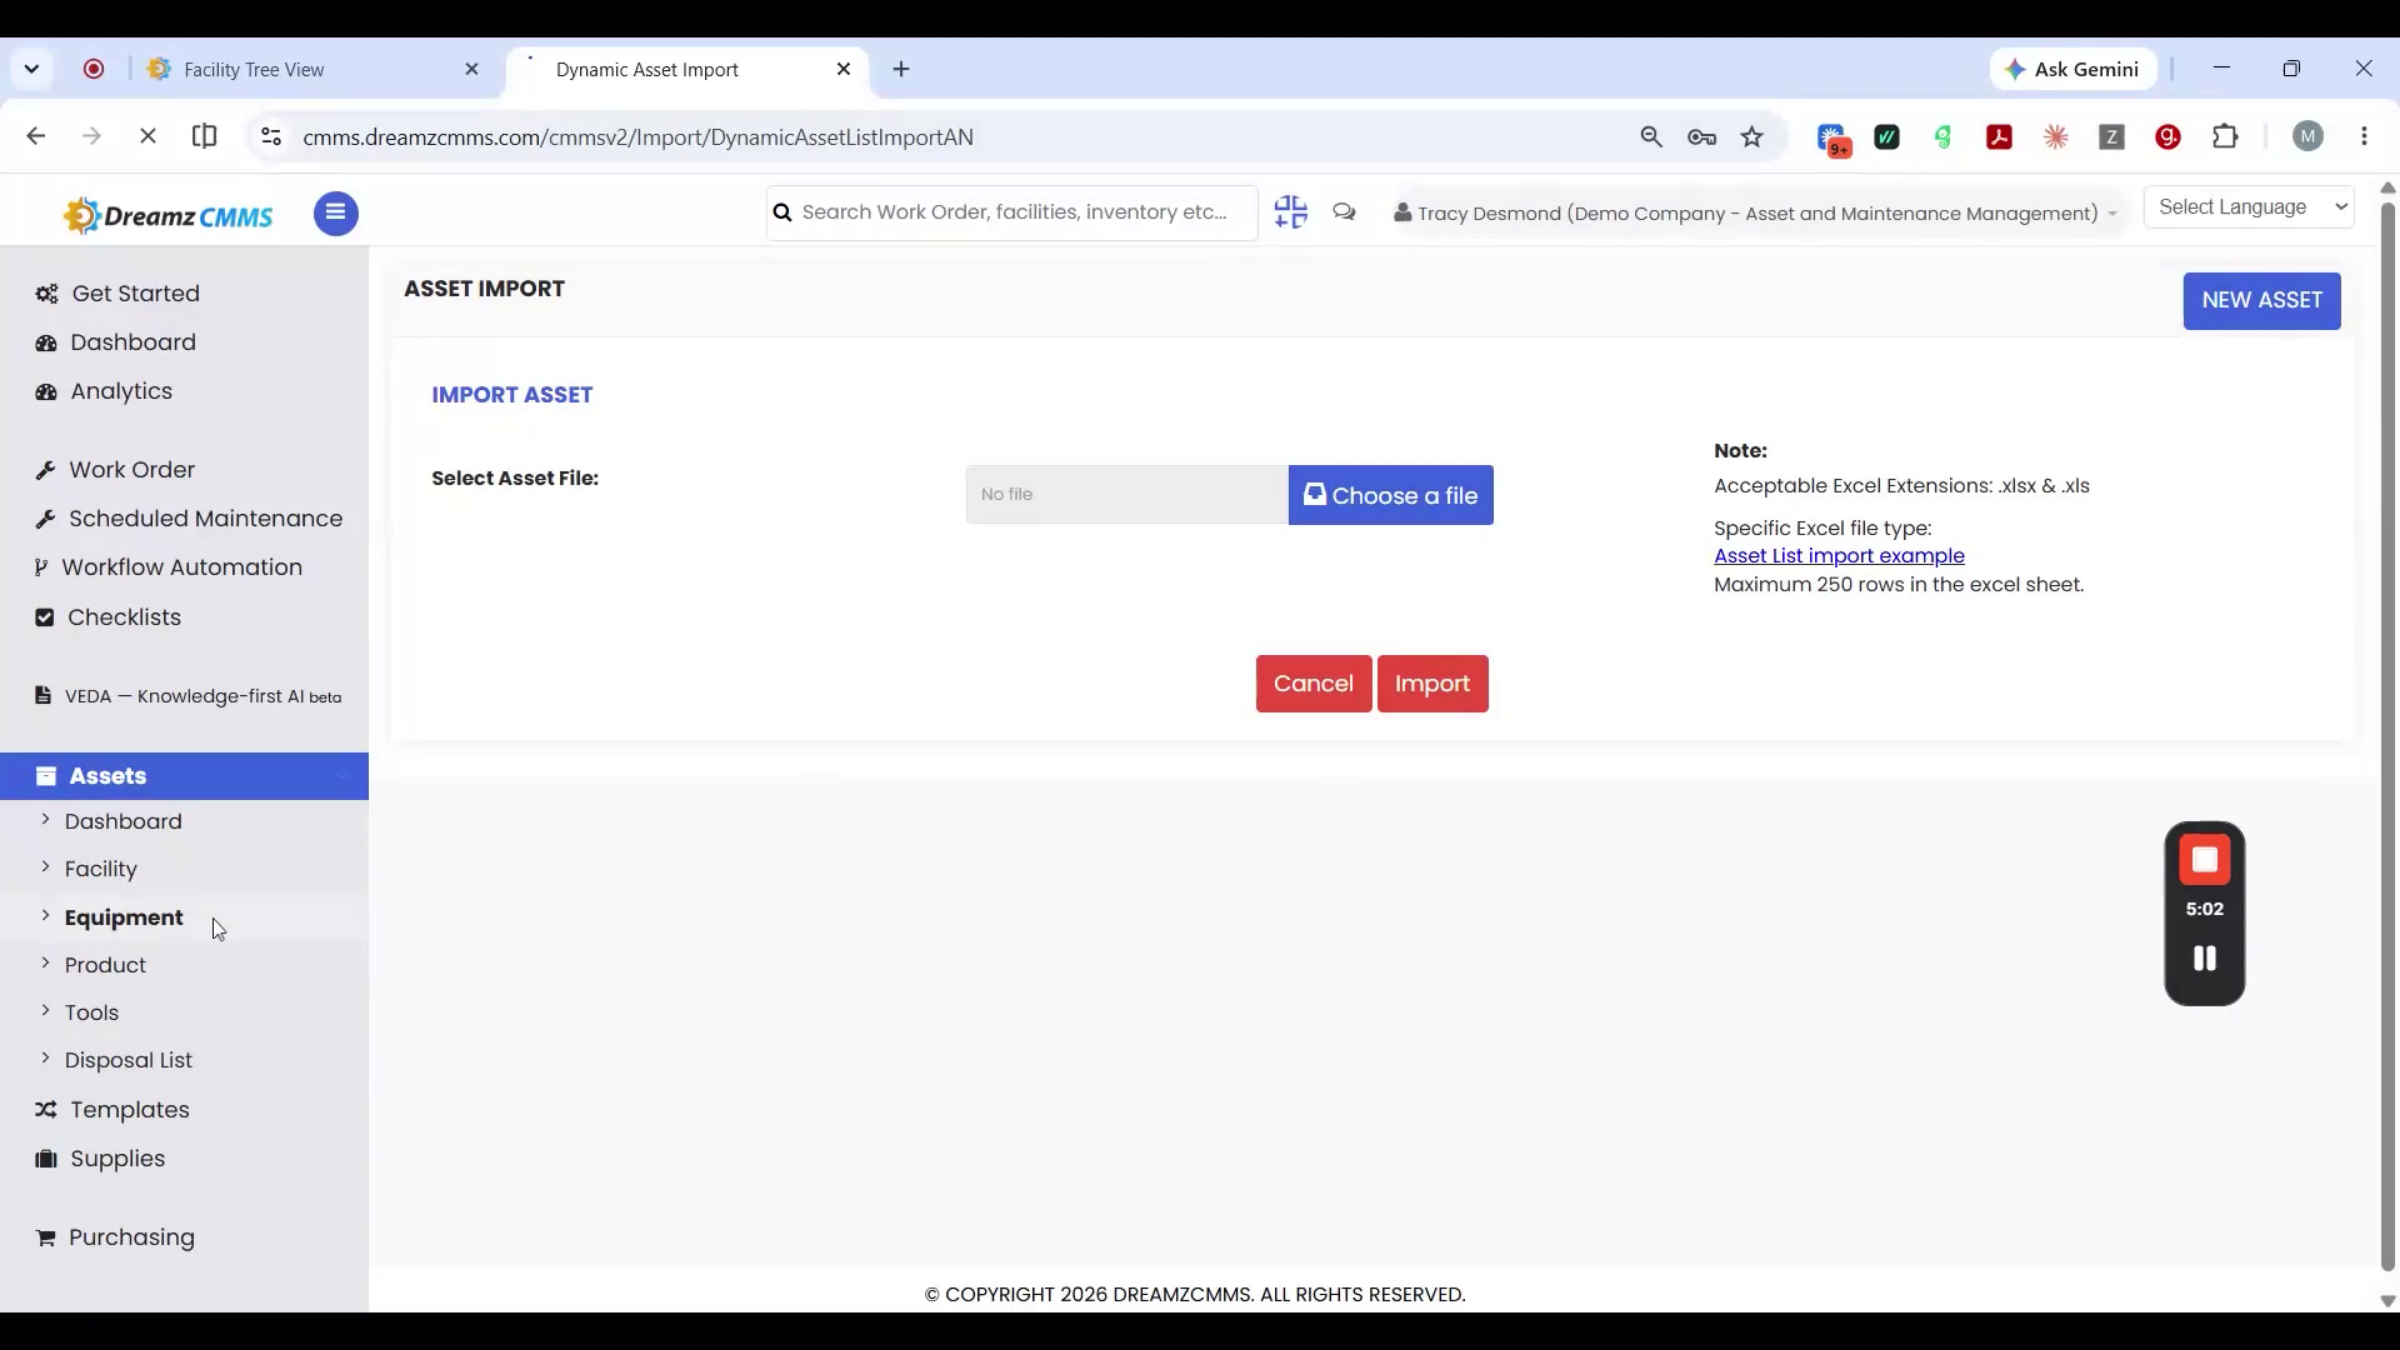
Step 11 – Asset Tree and Import
The asset tree groups assets by facility and category, and Asset Import brings in a full batch from Excel.
Step 12 – Setup Completion Summary
That's the setup complete — every location, product, and asset in place before anything else in the system moves.
Parts and Supplies
Step 13 – Parts and Supplies Introduction
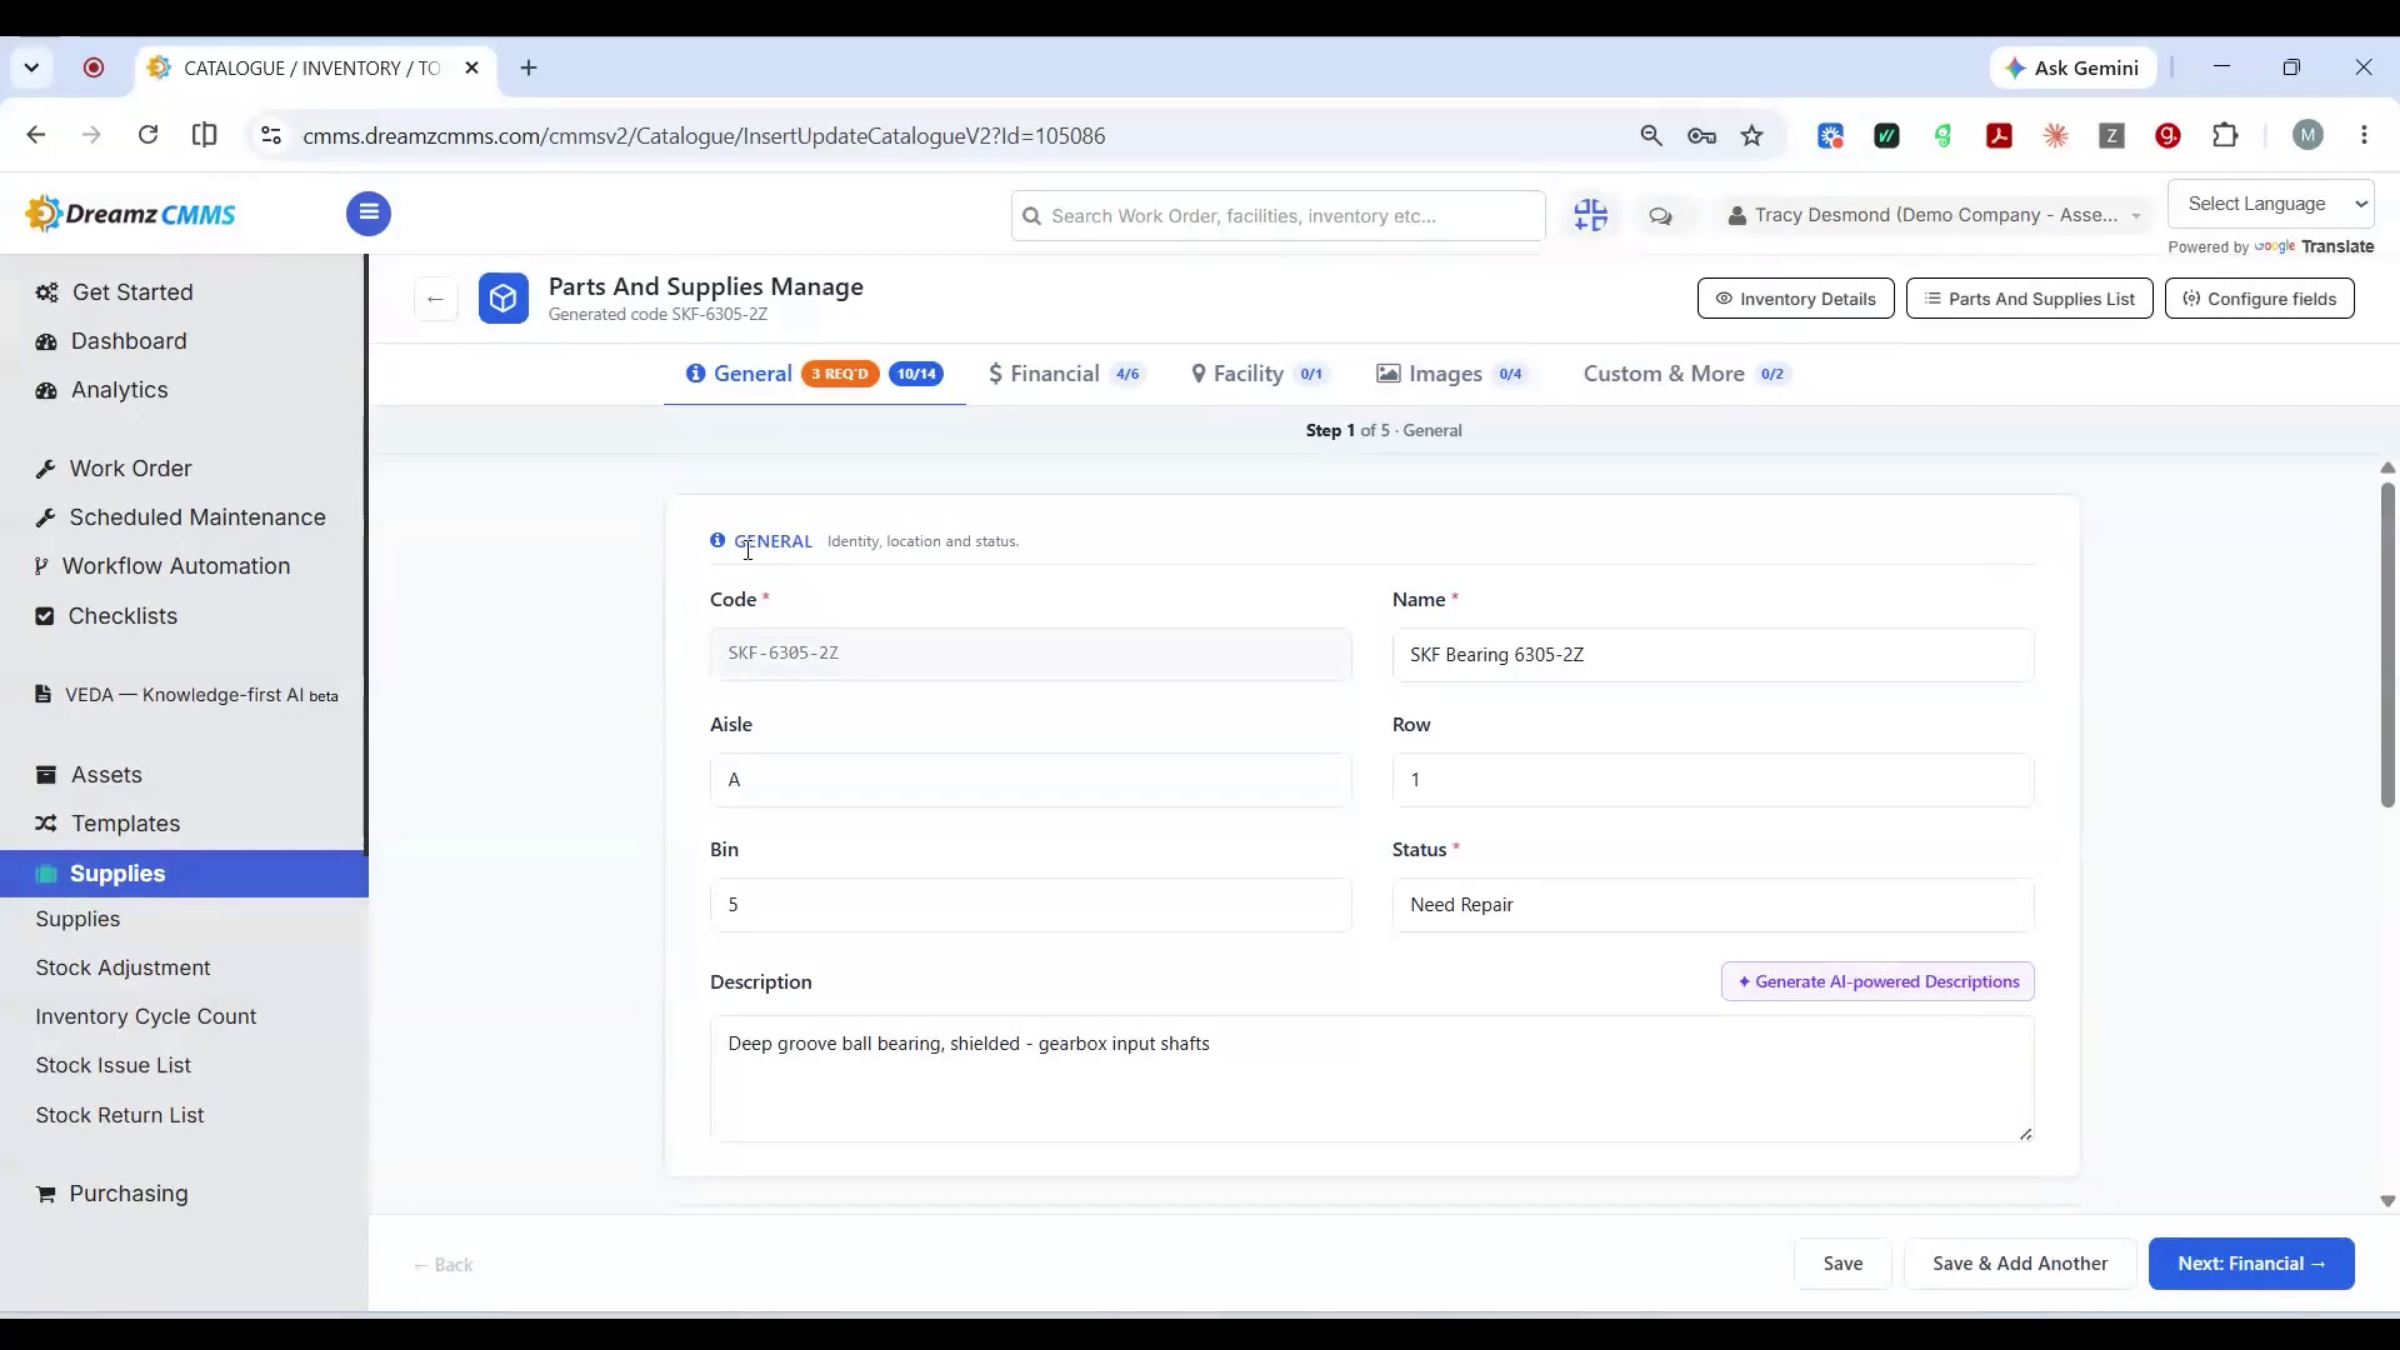
Parts and Supplies covers the consumable stock behind everything else — spares, materials, and items that get used up rather than tracked as individual assets. The Parts and Supplies list shows everything currently stocked, and an existing item can be opened and edited directly.
Step 14 – Parts and Supplies Details
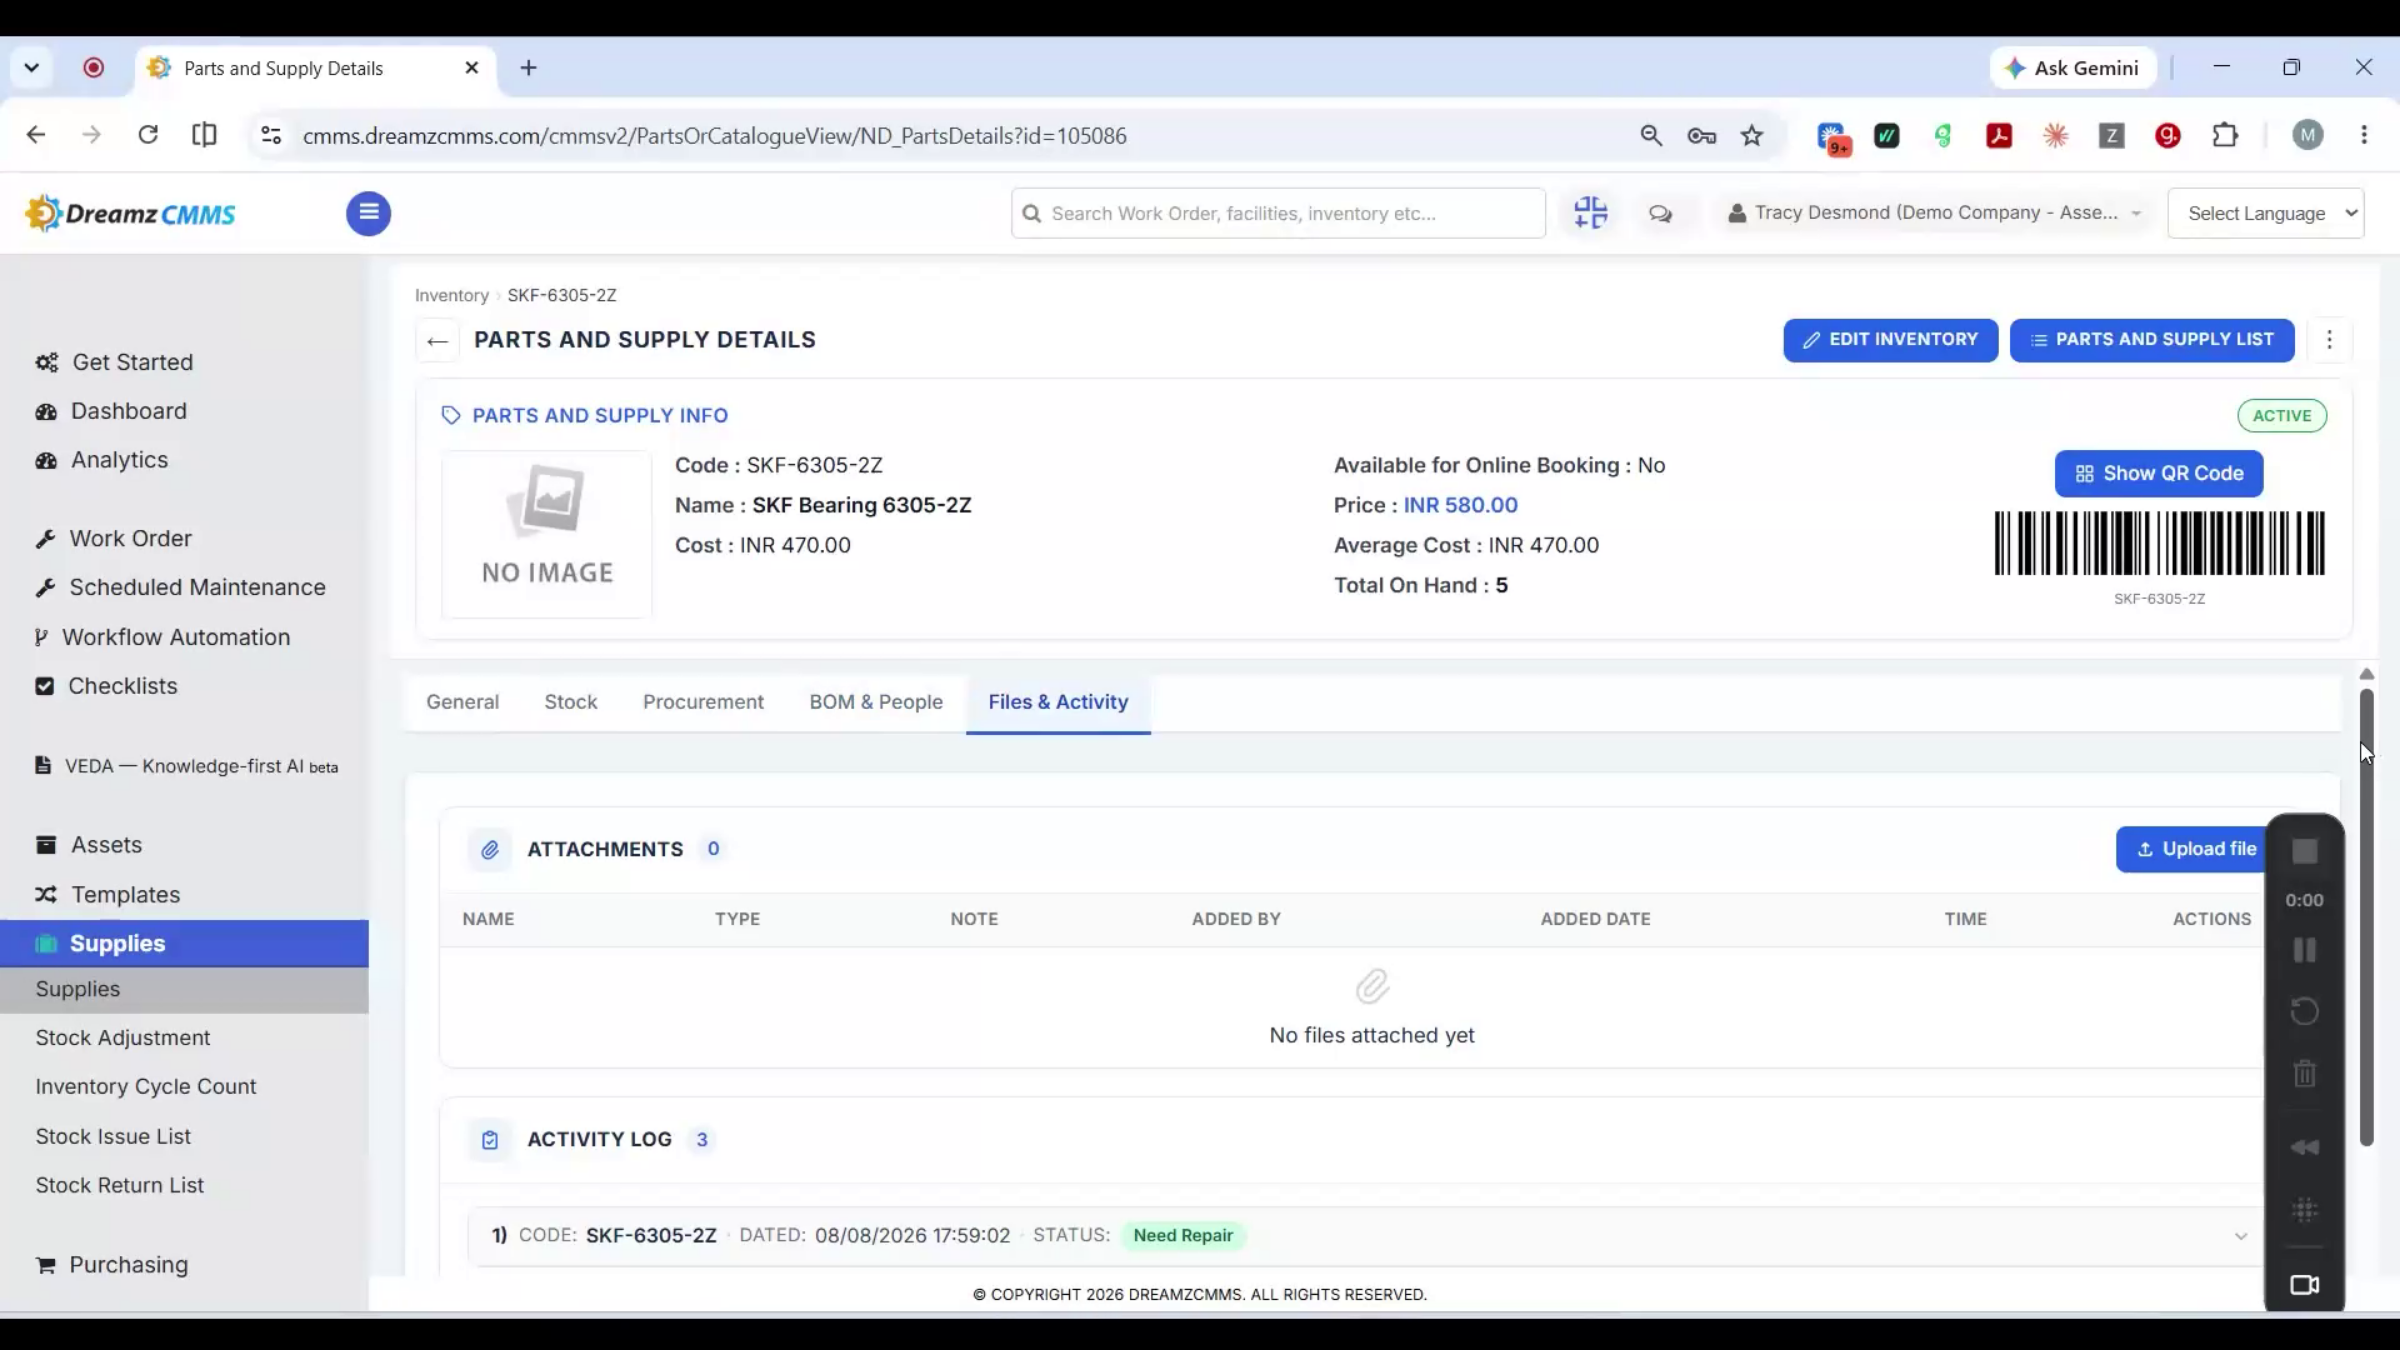
Each item's record includes its code, description, category, unit, reorder level, and cost. The details view shows the full picture for that item: where it's stocked, what's on hand, and its movement history.
Step 15 – Inventory Readiness
With inventory in place, everything is ready to draw from the moment a work order needs a part, or stock gets issued or transferred.
Purchasing: From Request to Receipt
Step 16 – Material Inward Process
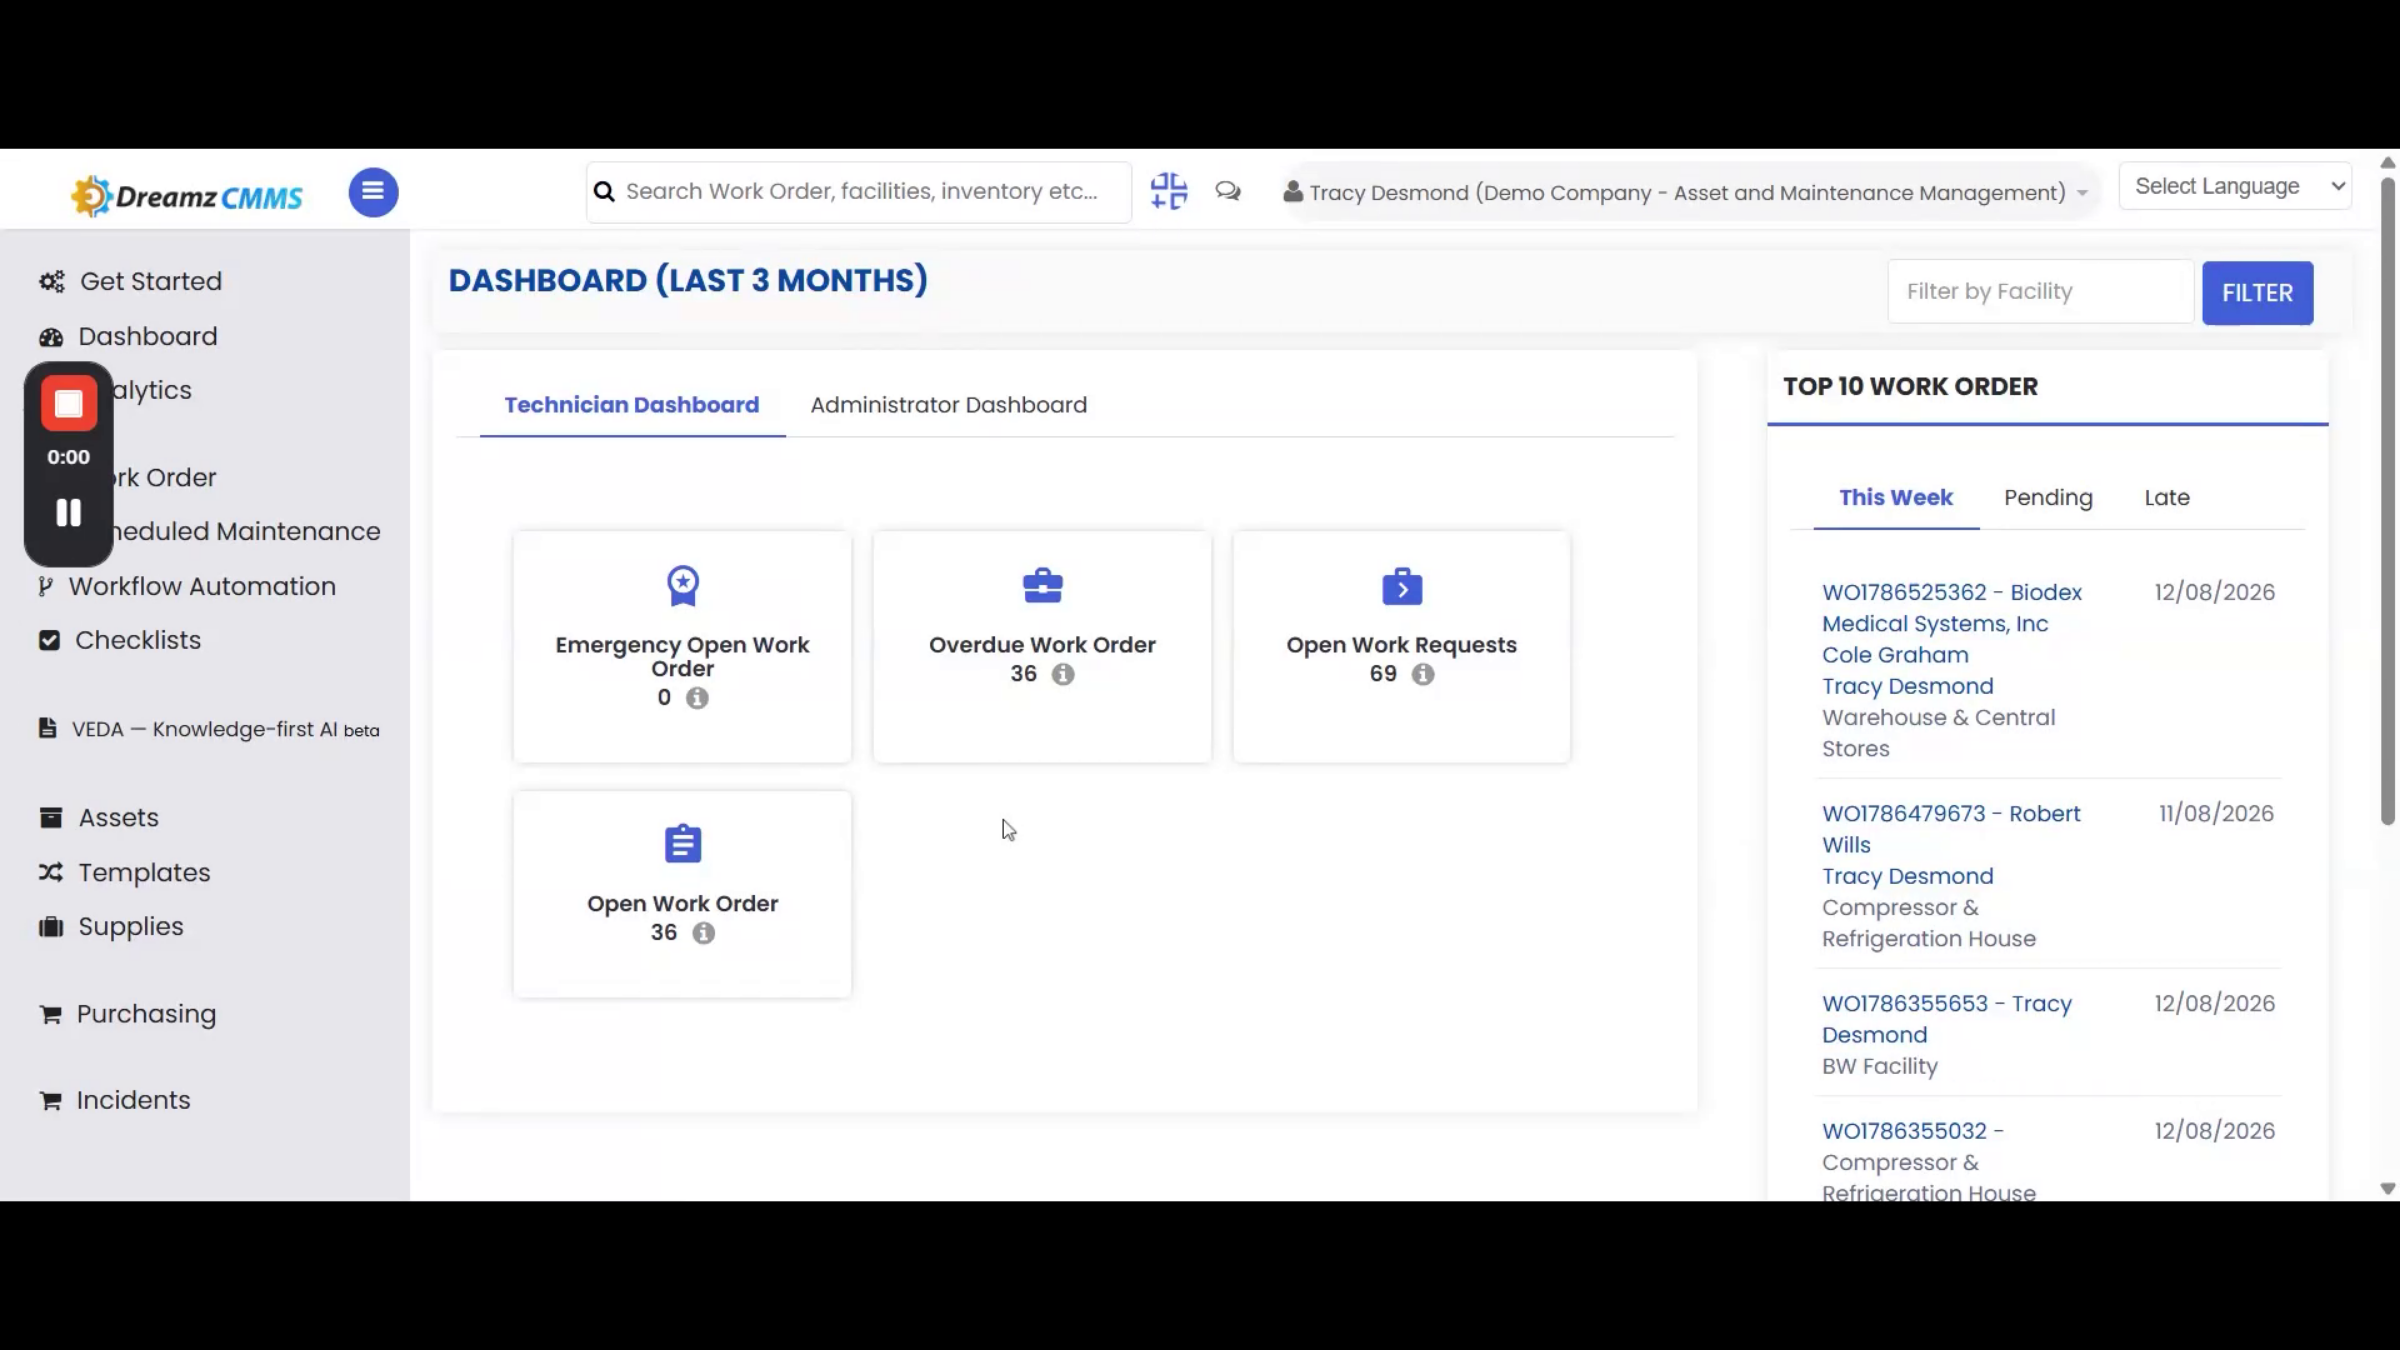
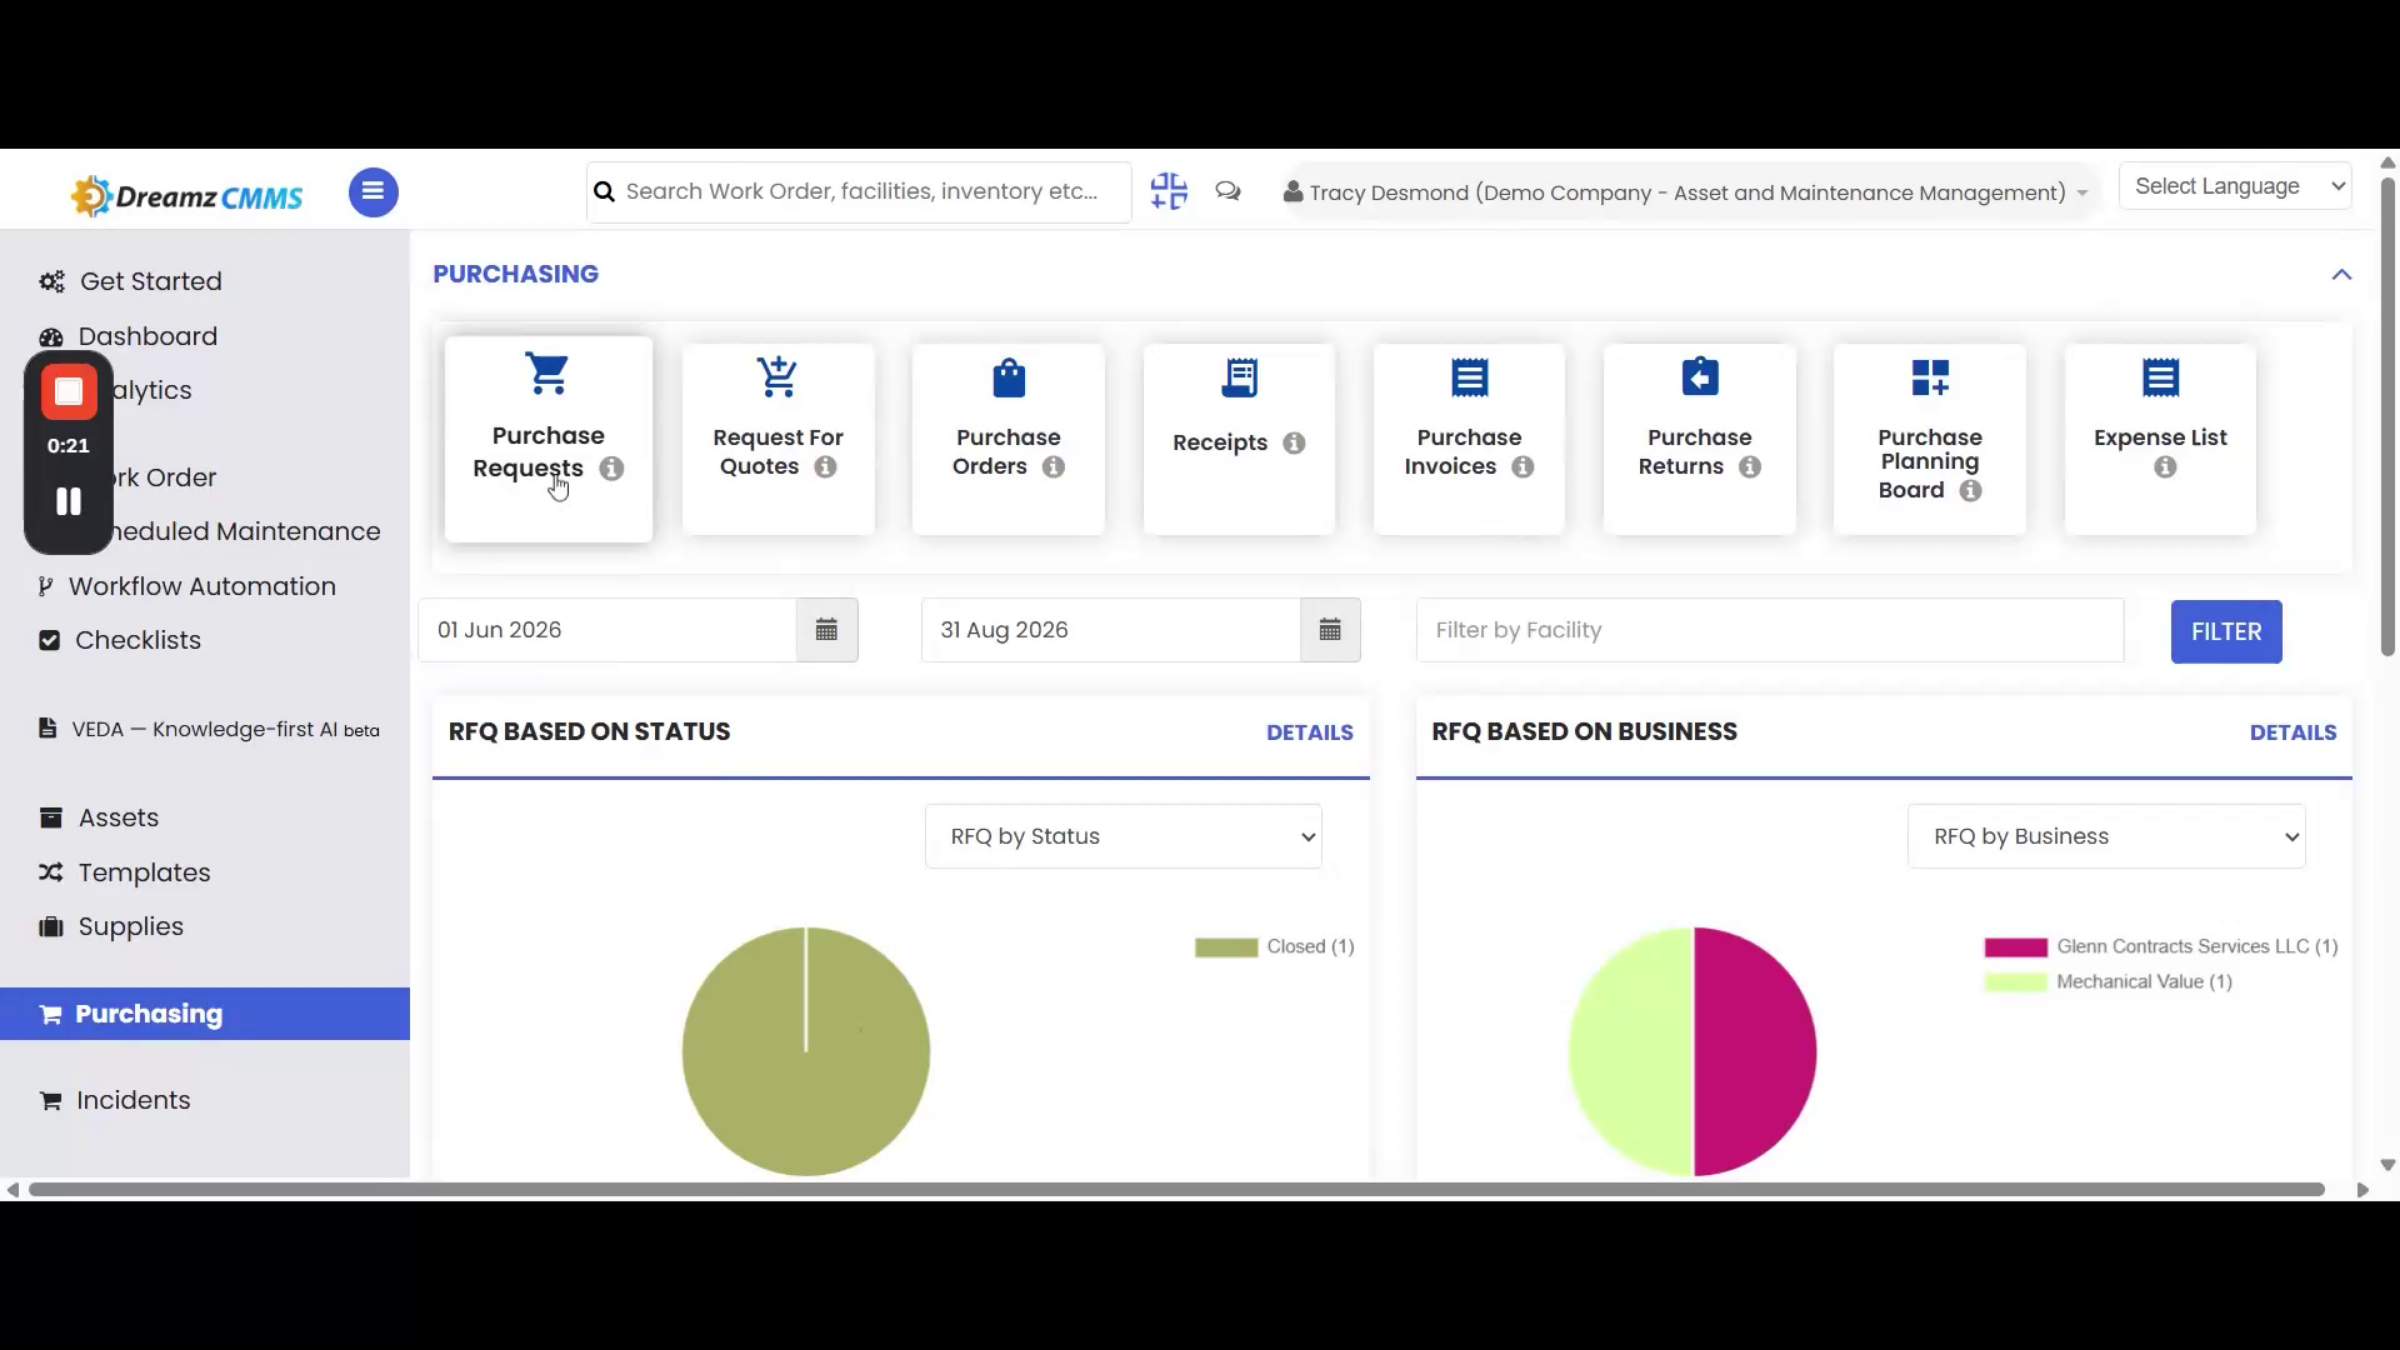
Every item's journey starts with material inward, which covers both outright purchases and rented-in equipment or material. To create a purchase request, click Purchasing from the left menu to open the purchase dashboard.
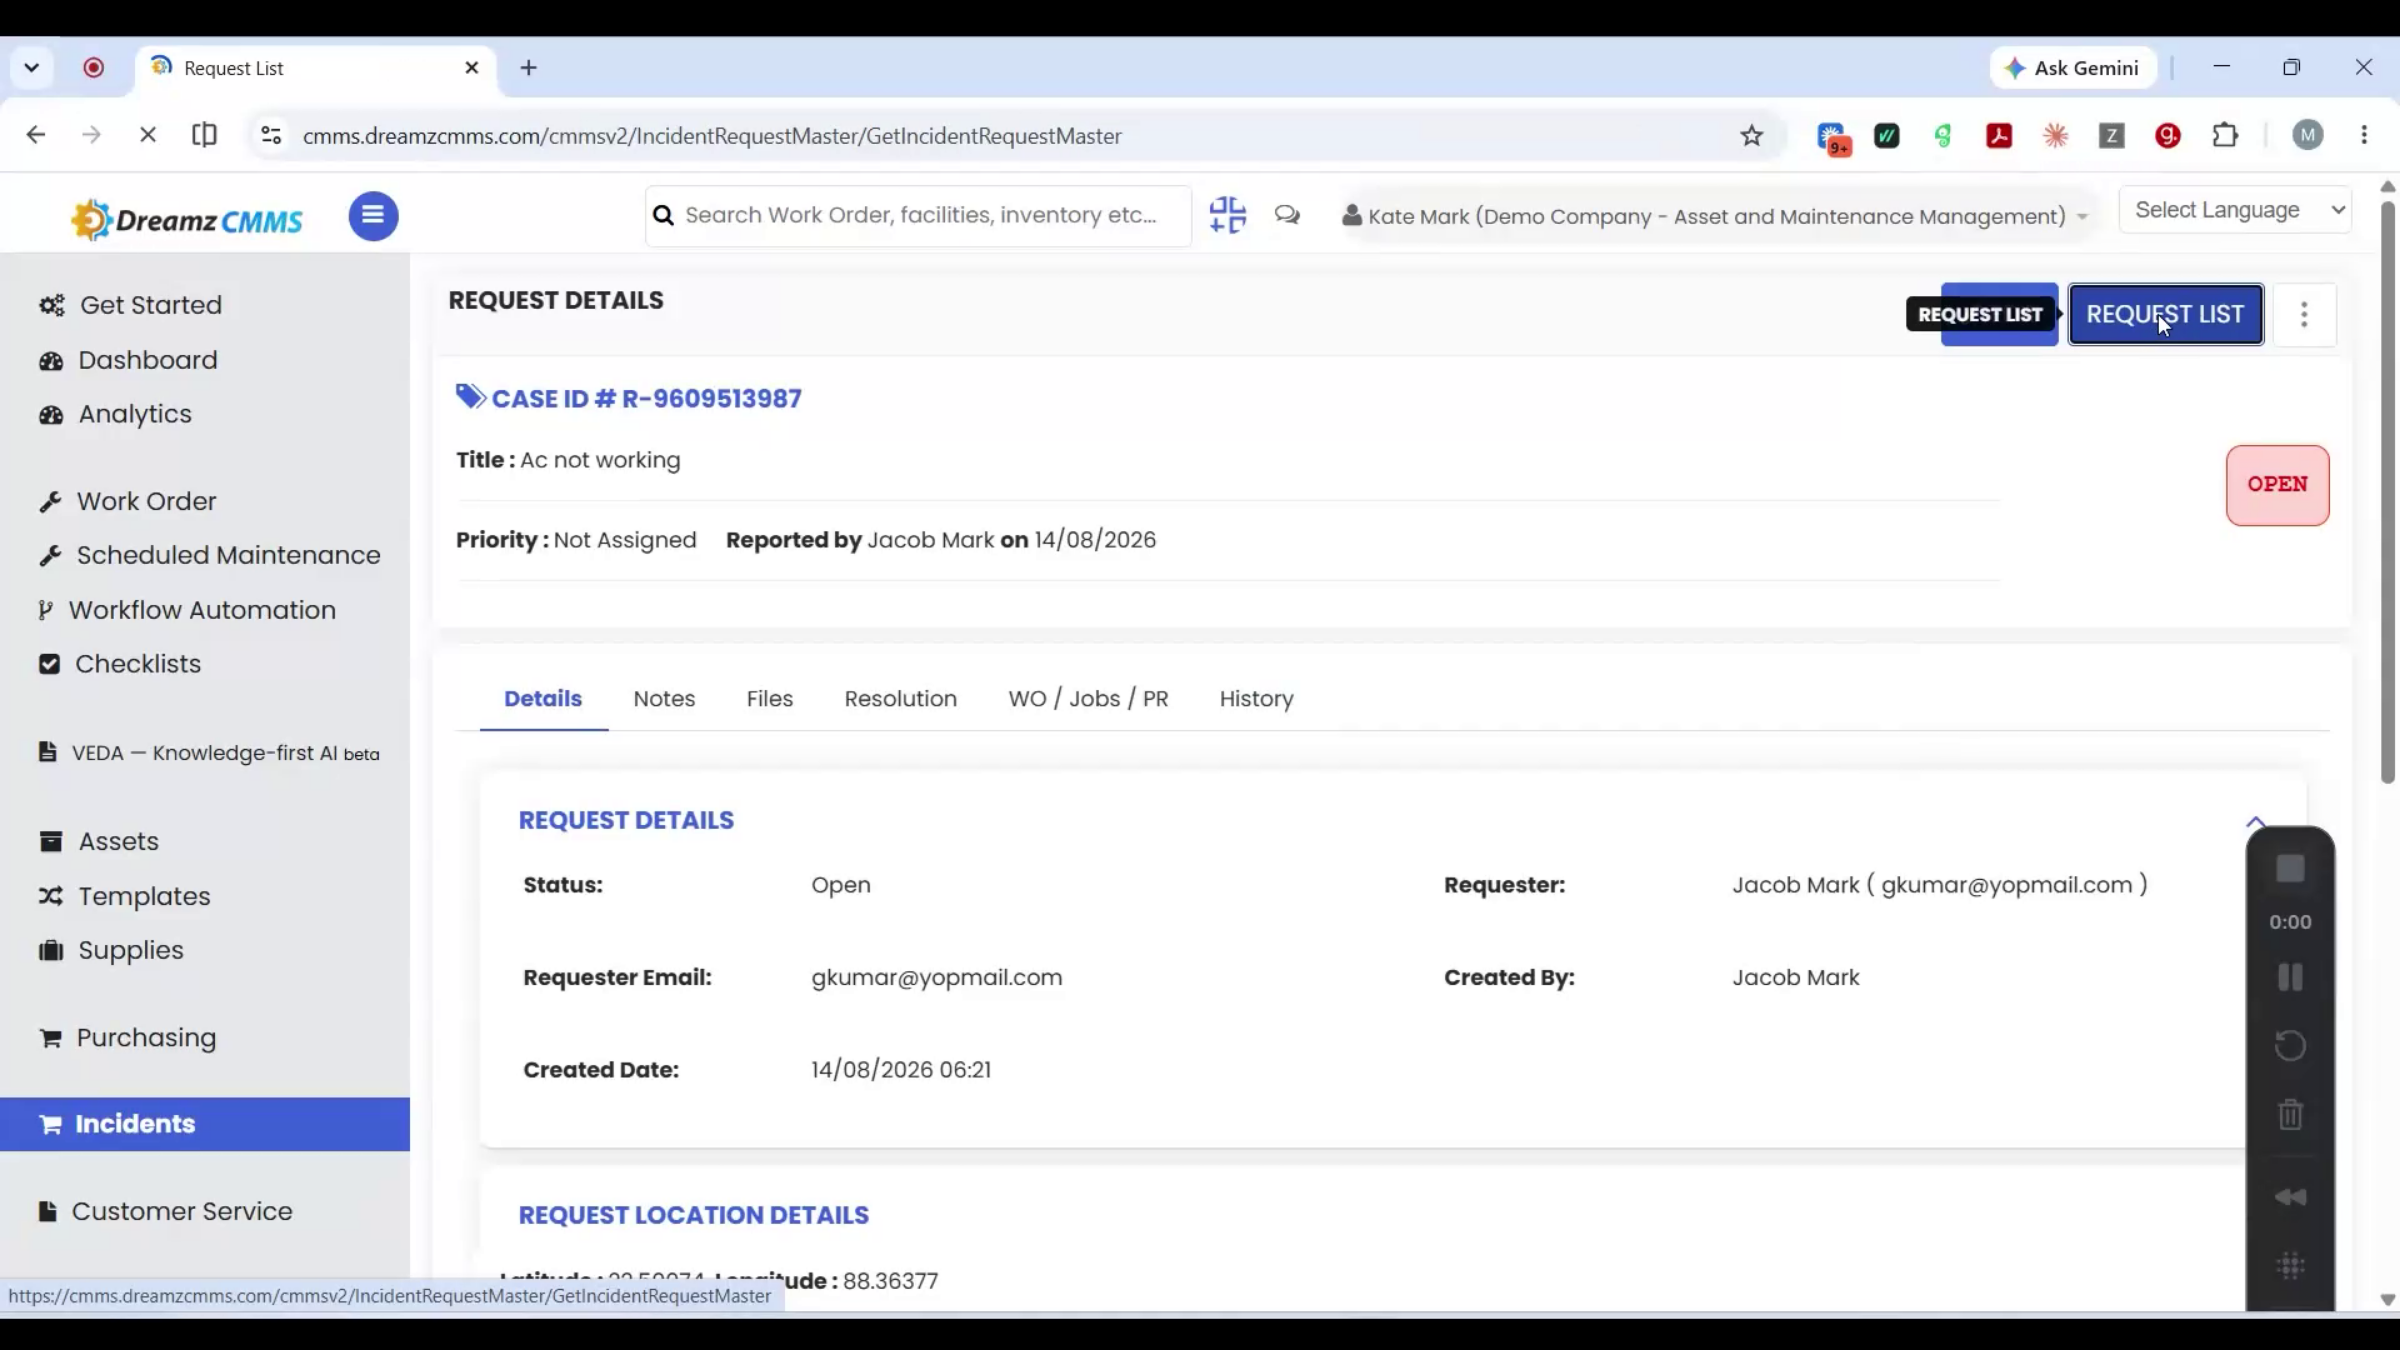
Step 17 – Starting Purchase Request
On the purchase dashboard, click the Purchase Request card to get started. On the purchase request list page, click New Purchase Request to create one — the request code, required date, and status auto-fill.
Step 18 – Purchase Request Approval
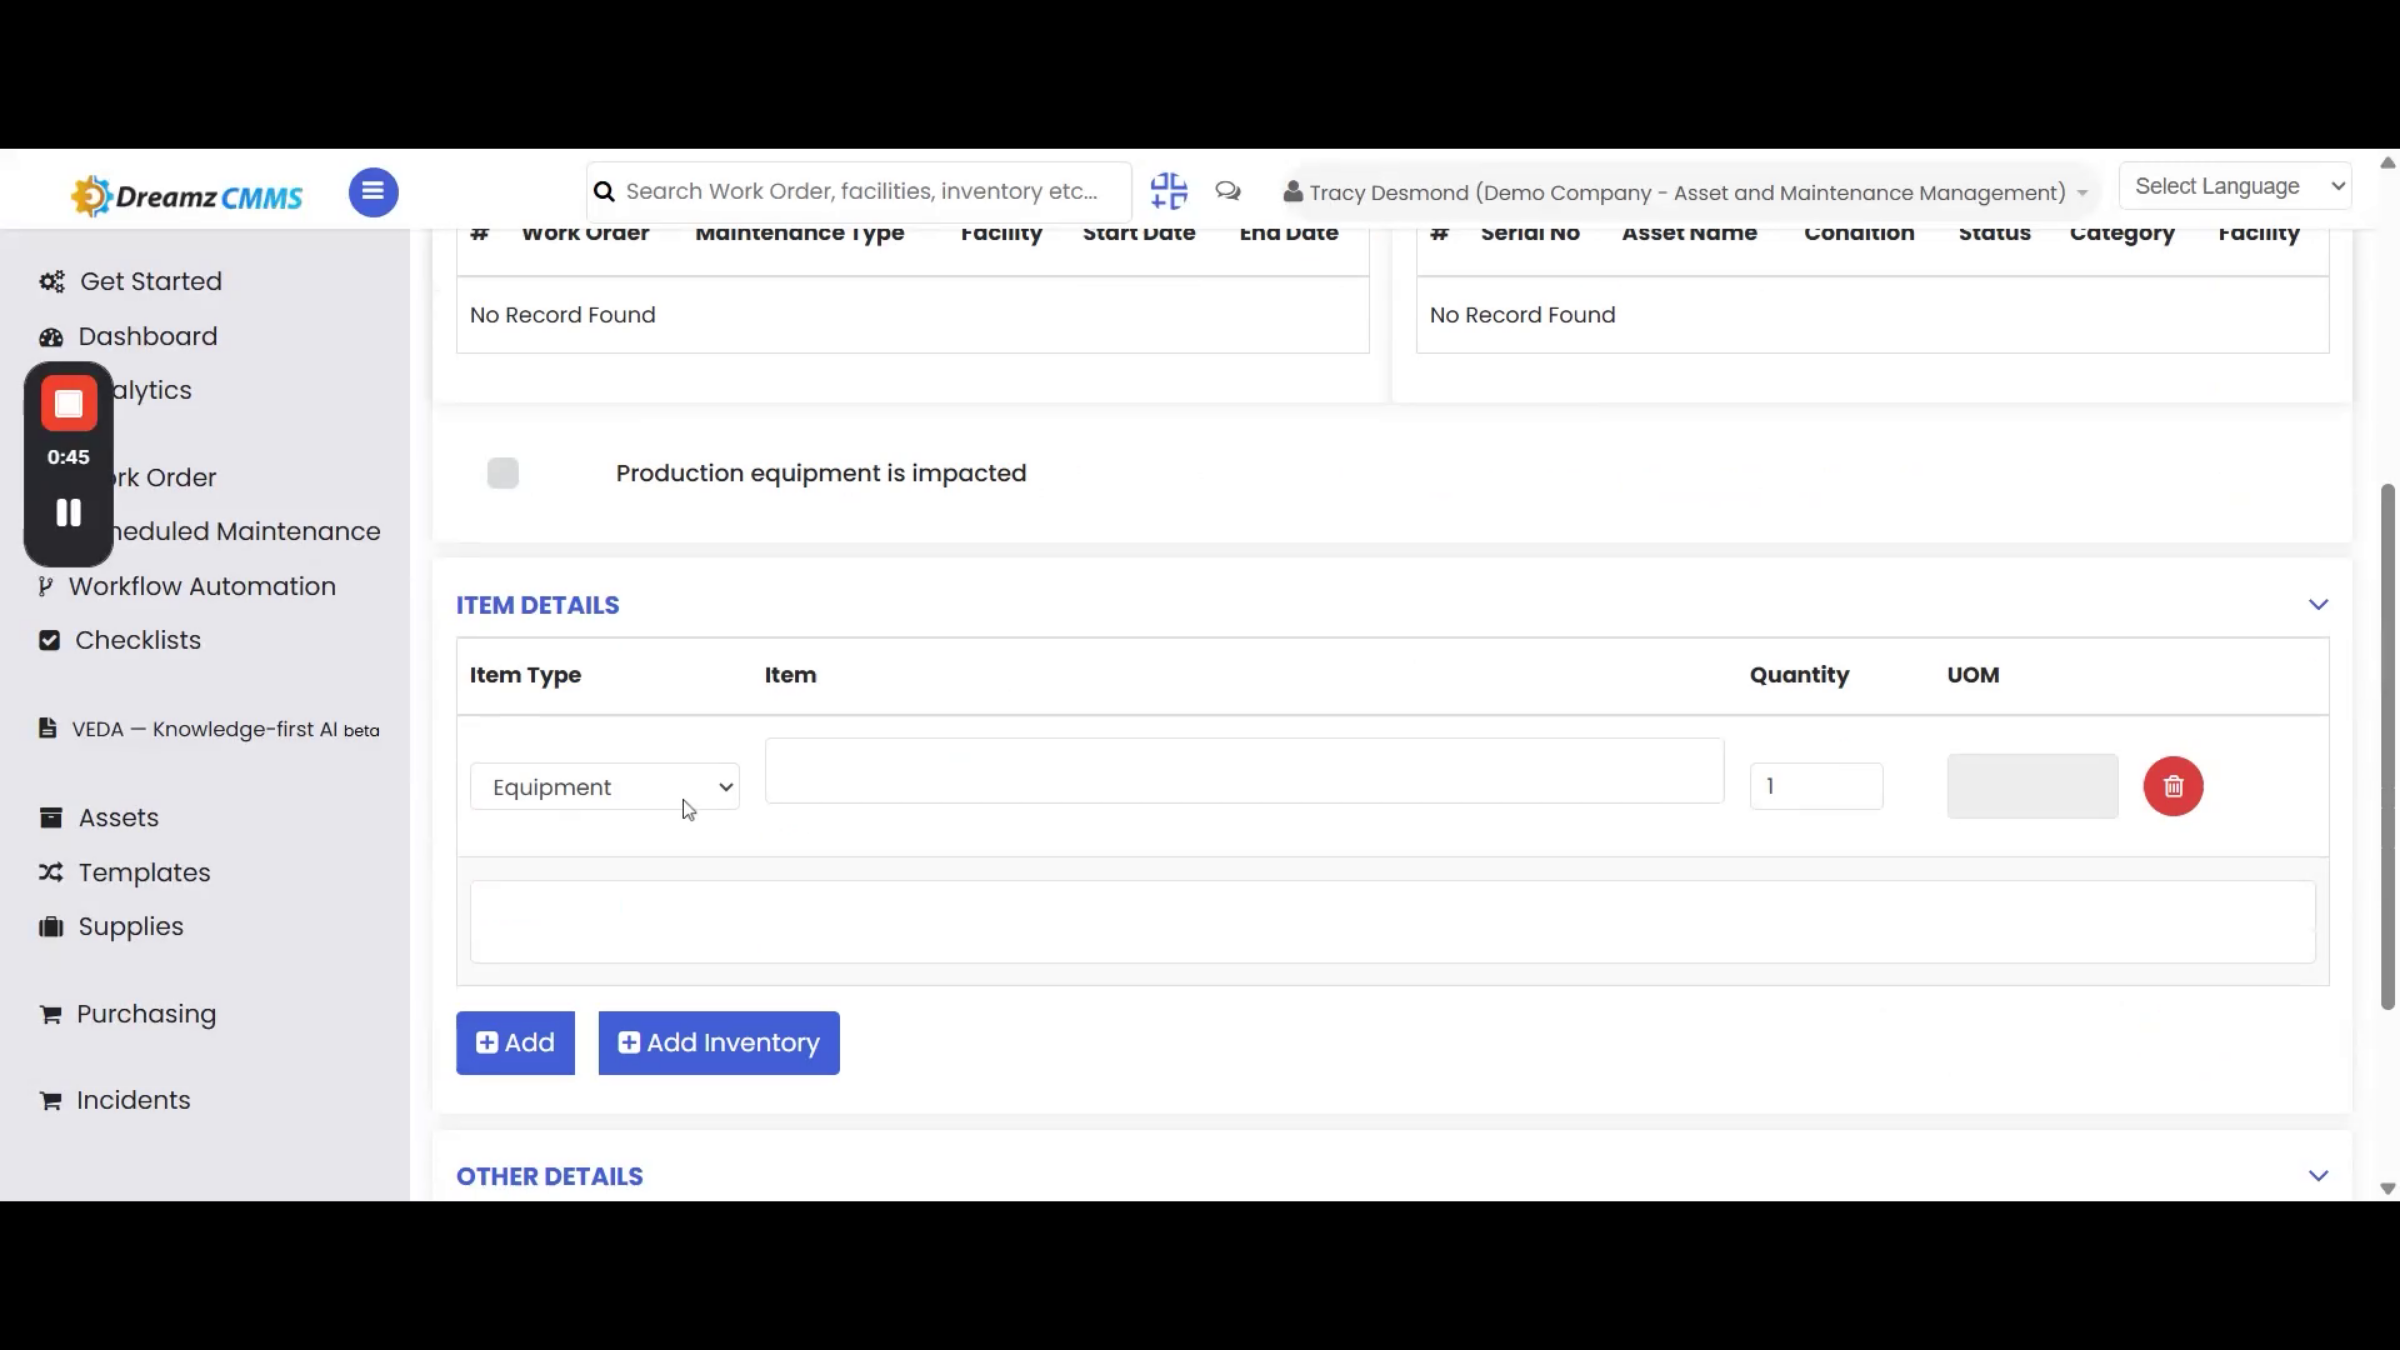
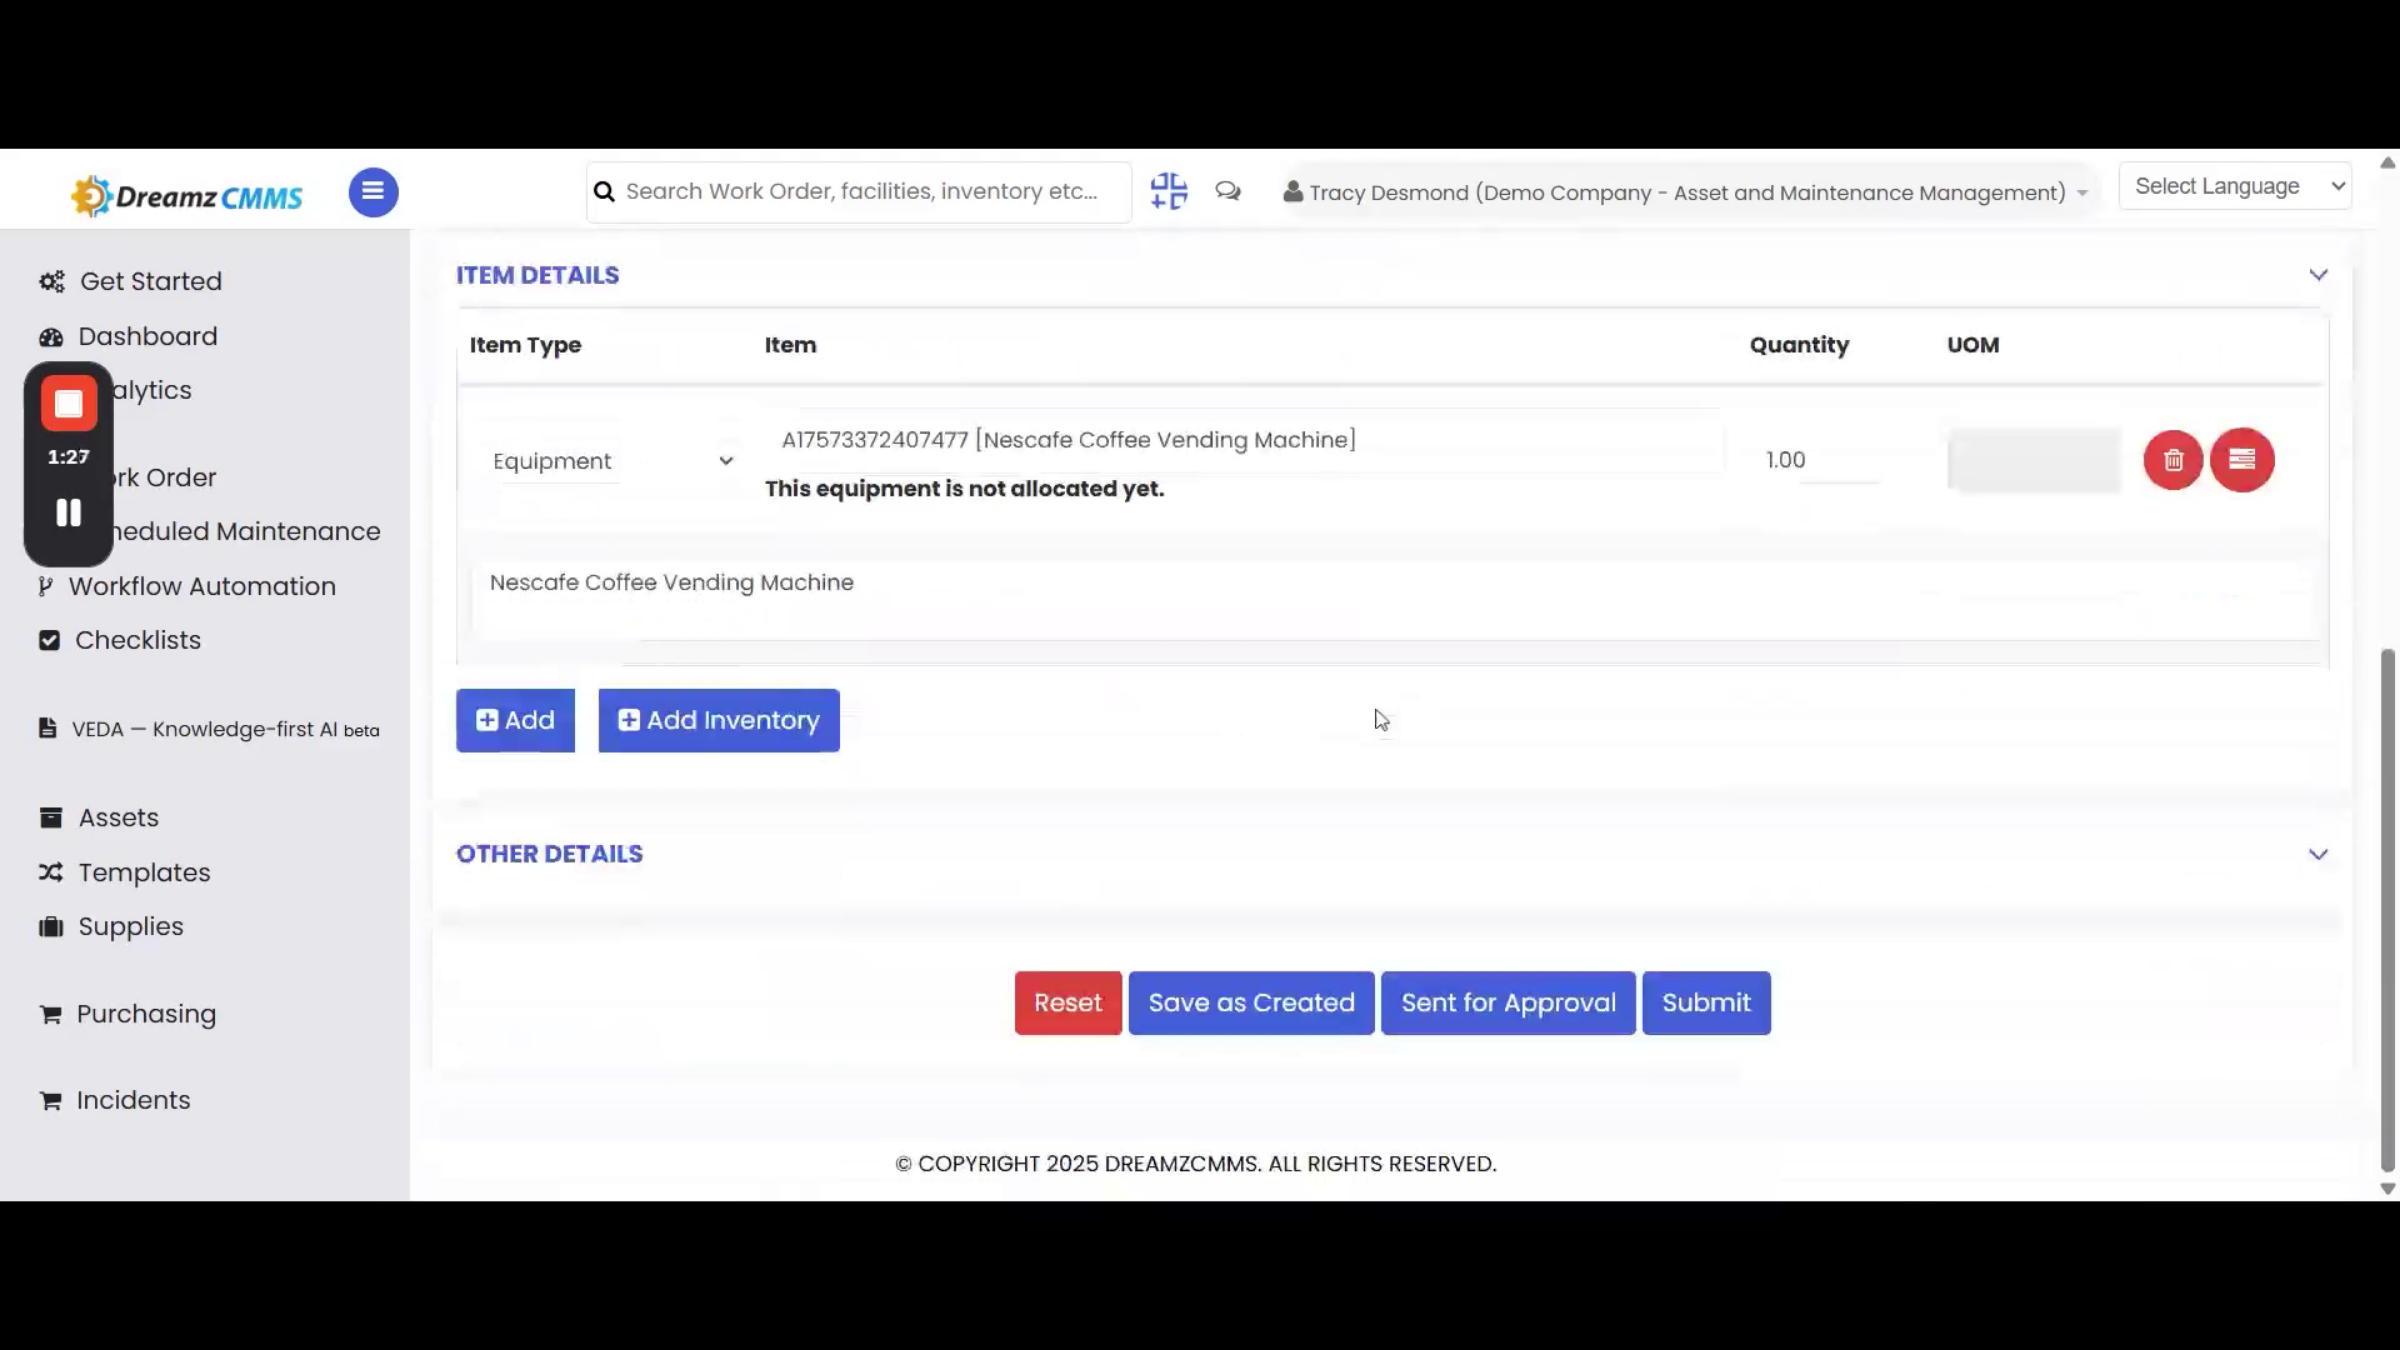
Add the location for the purchase request, select the item type (equipment, tools, product, or inventory) you want to purchase, and send the request for approval. It then shows as sent for approval on the list page. To approve it, the inventory manager edits the request, sets the status to Approved, and submits.
Step 19 – Adding Purchase Order
Once the purchase request is approved, it shows as Approved, and you can add a purchase order against it by selecting Add PO from the Action dropdown.
Step 20 – Purchase Order Creation
On the Purchase Order Creation page, all the information auto-populates based on the purchase request. Verify the details and send the purchase order for approval.
Step 21 – Purchase Order Approval
On the Purchase Order List page, the newly created order shows as Waiting for Approval. To approve it, the inventory manager edits the purchase order, sets the status to Created, and approves it.
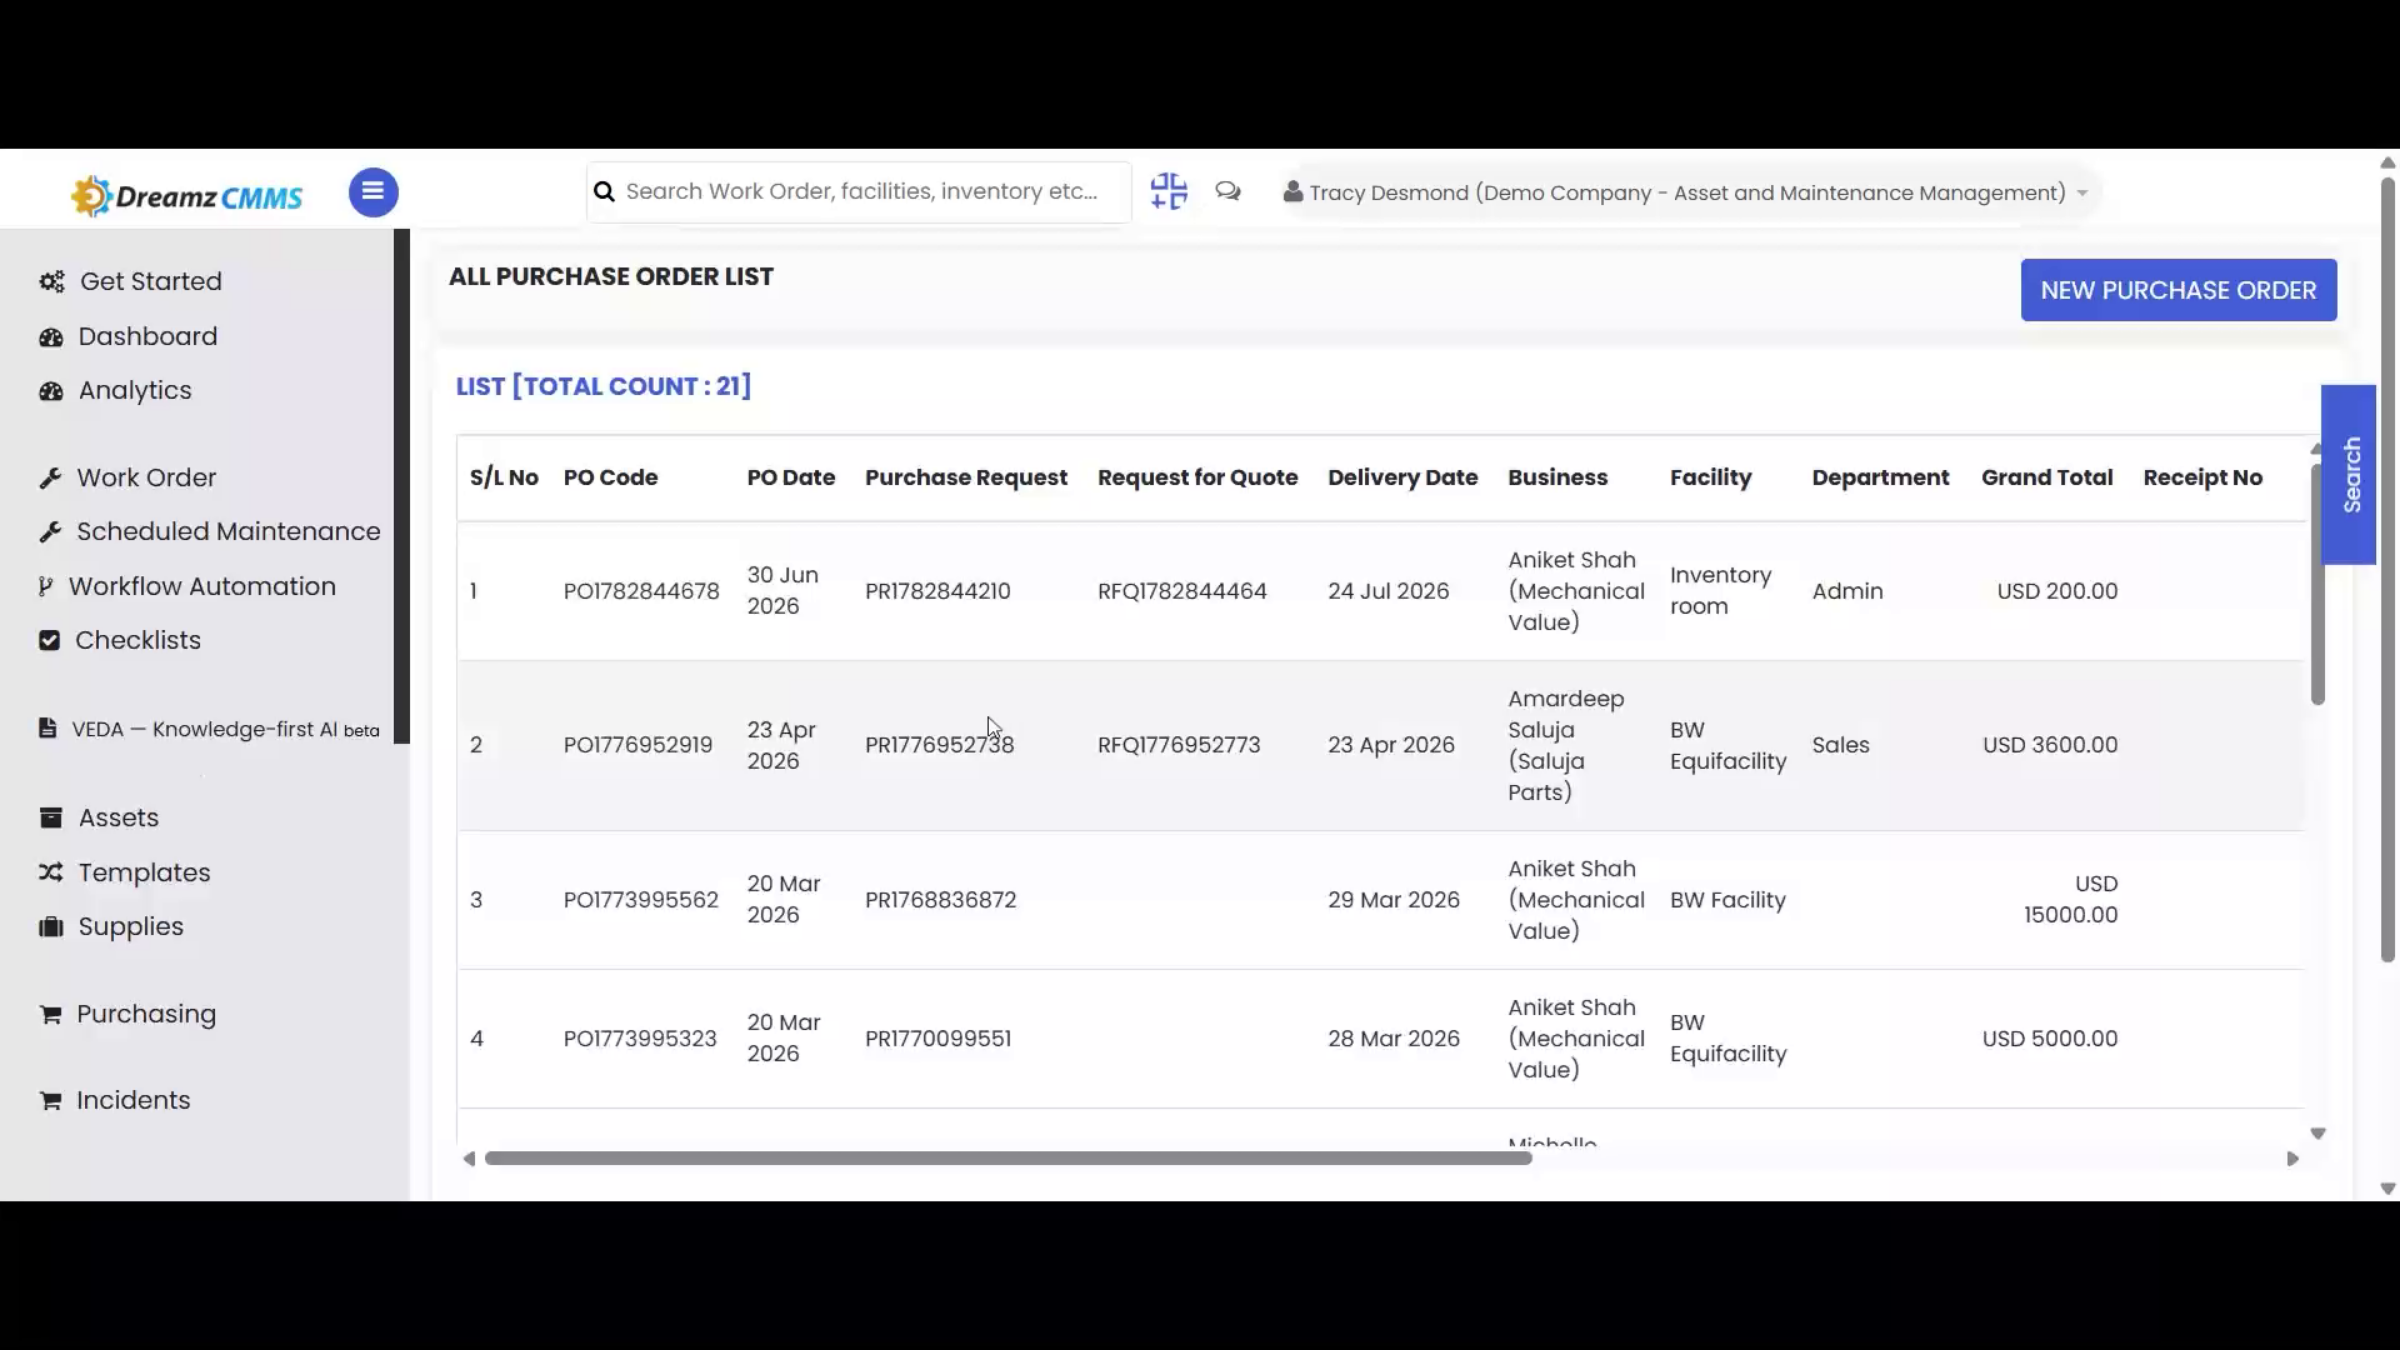
Step 22 – Receipt of Purchase Order
After approving, you can receipt any approved purchase order from the Purchase Order list by clicking the Receipt option.
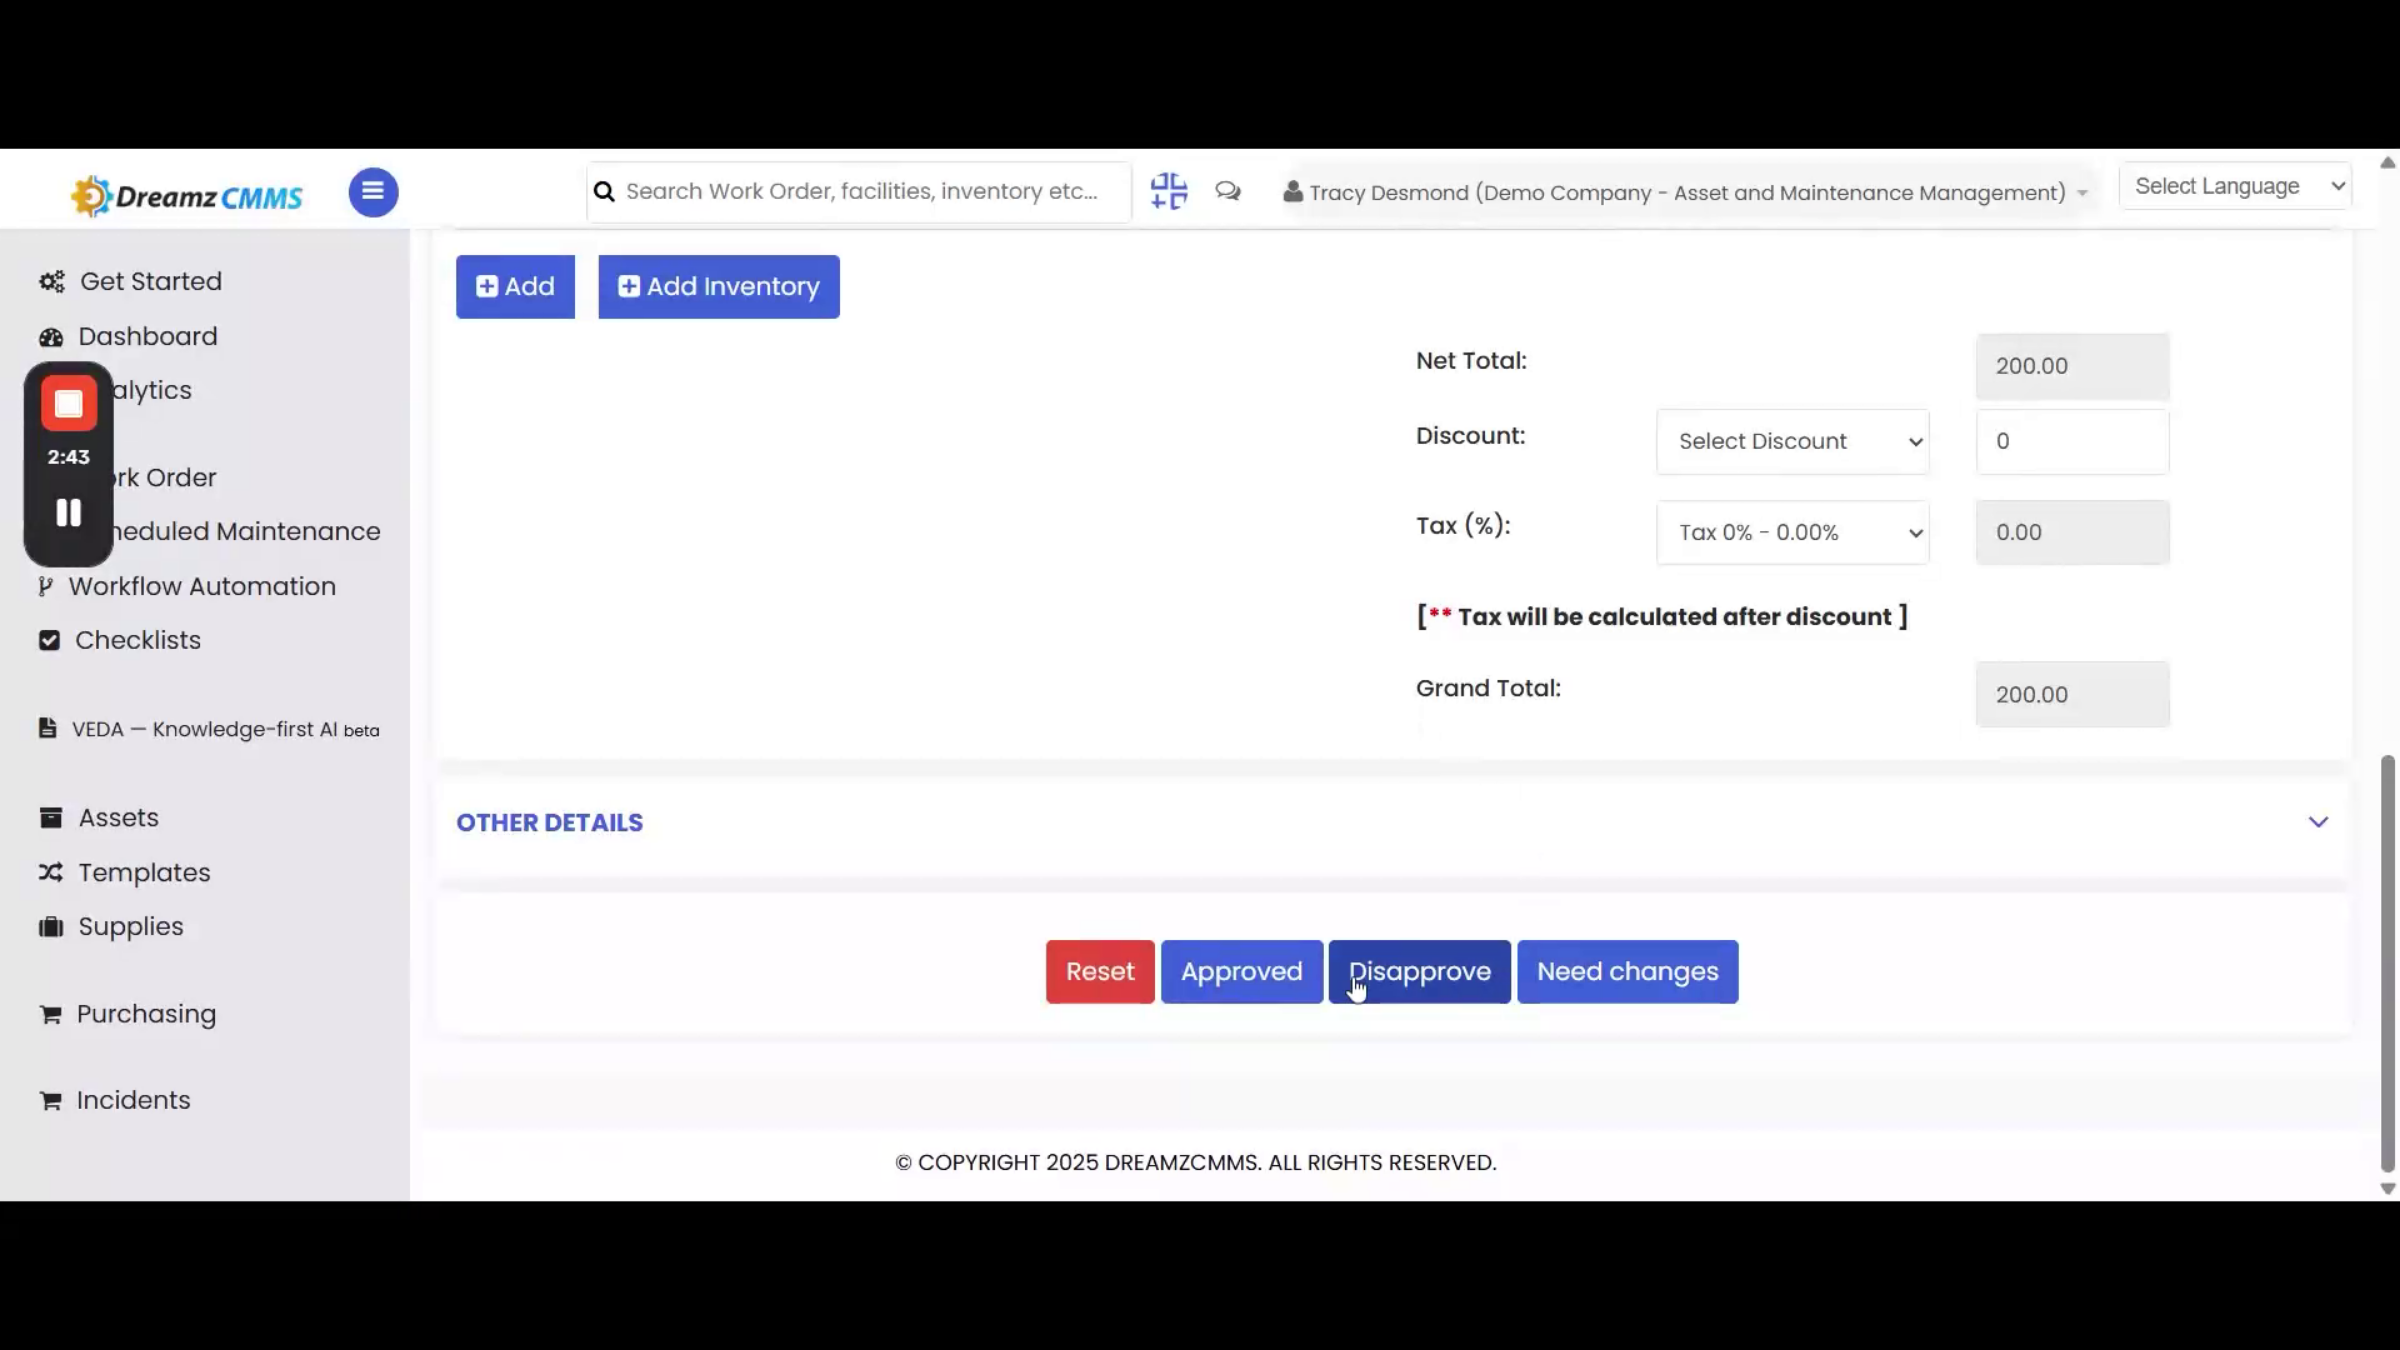
Step 23 – Submitting Purchase Receipt
On the receipt page, all information auto-populates based on the purchase order. Verify it once more and click Save to submit the receipt — the item quantities are then added to inventory.
Step 24 – Invoice from Purchase Receipt
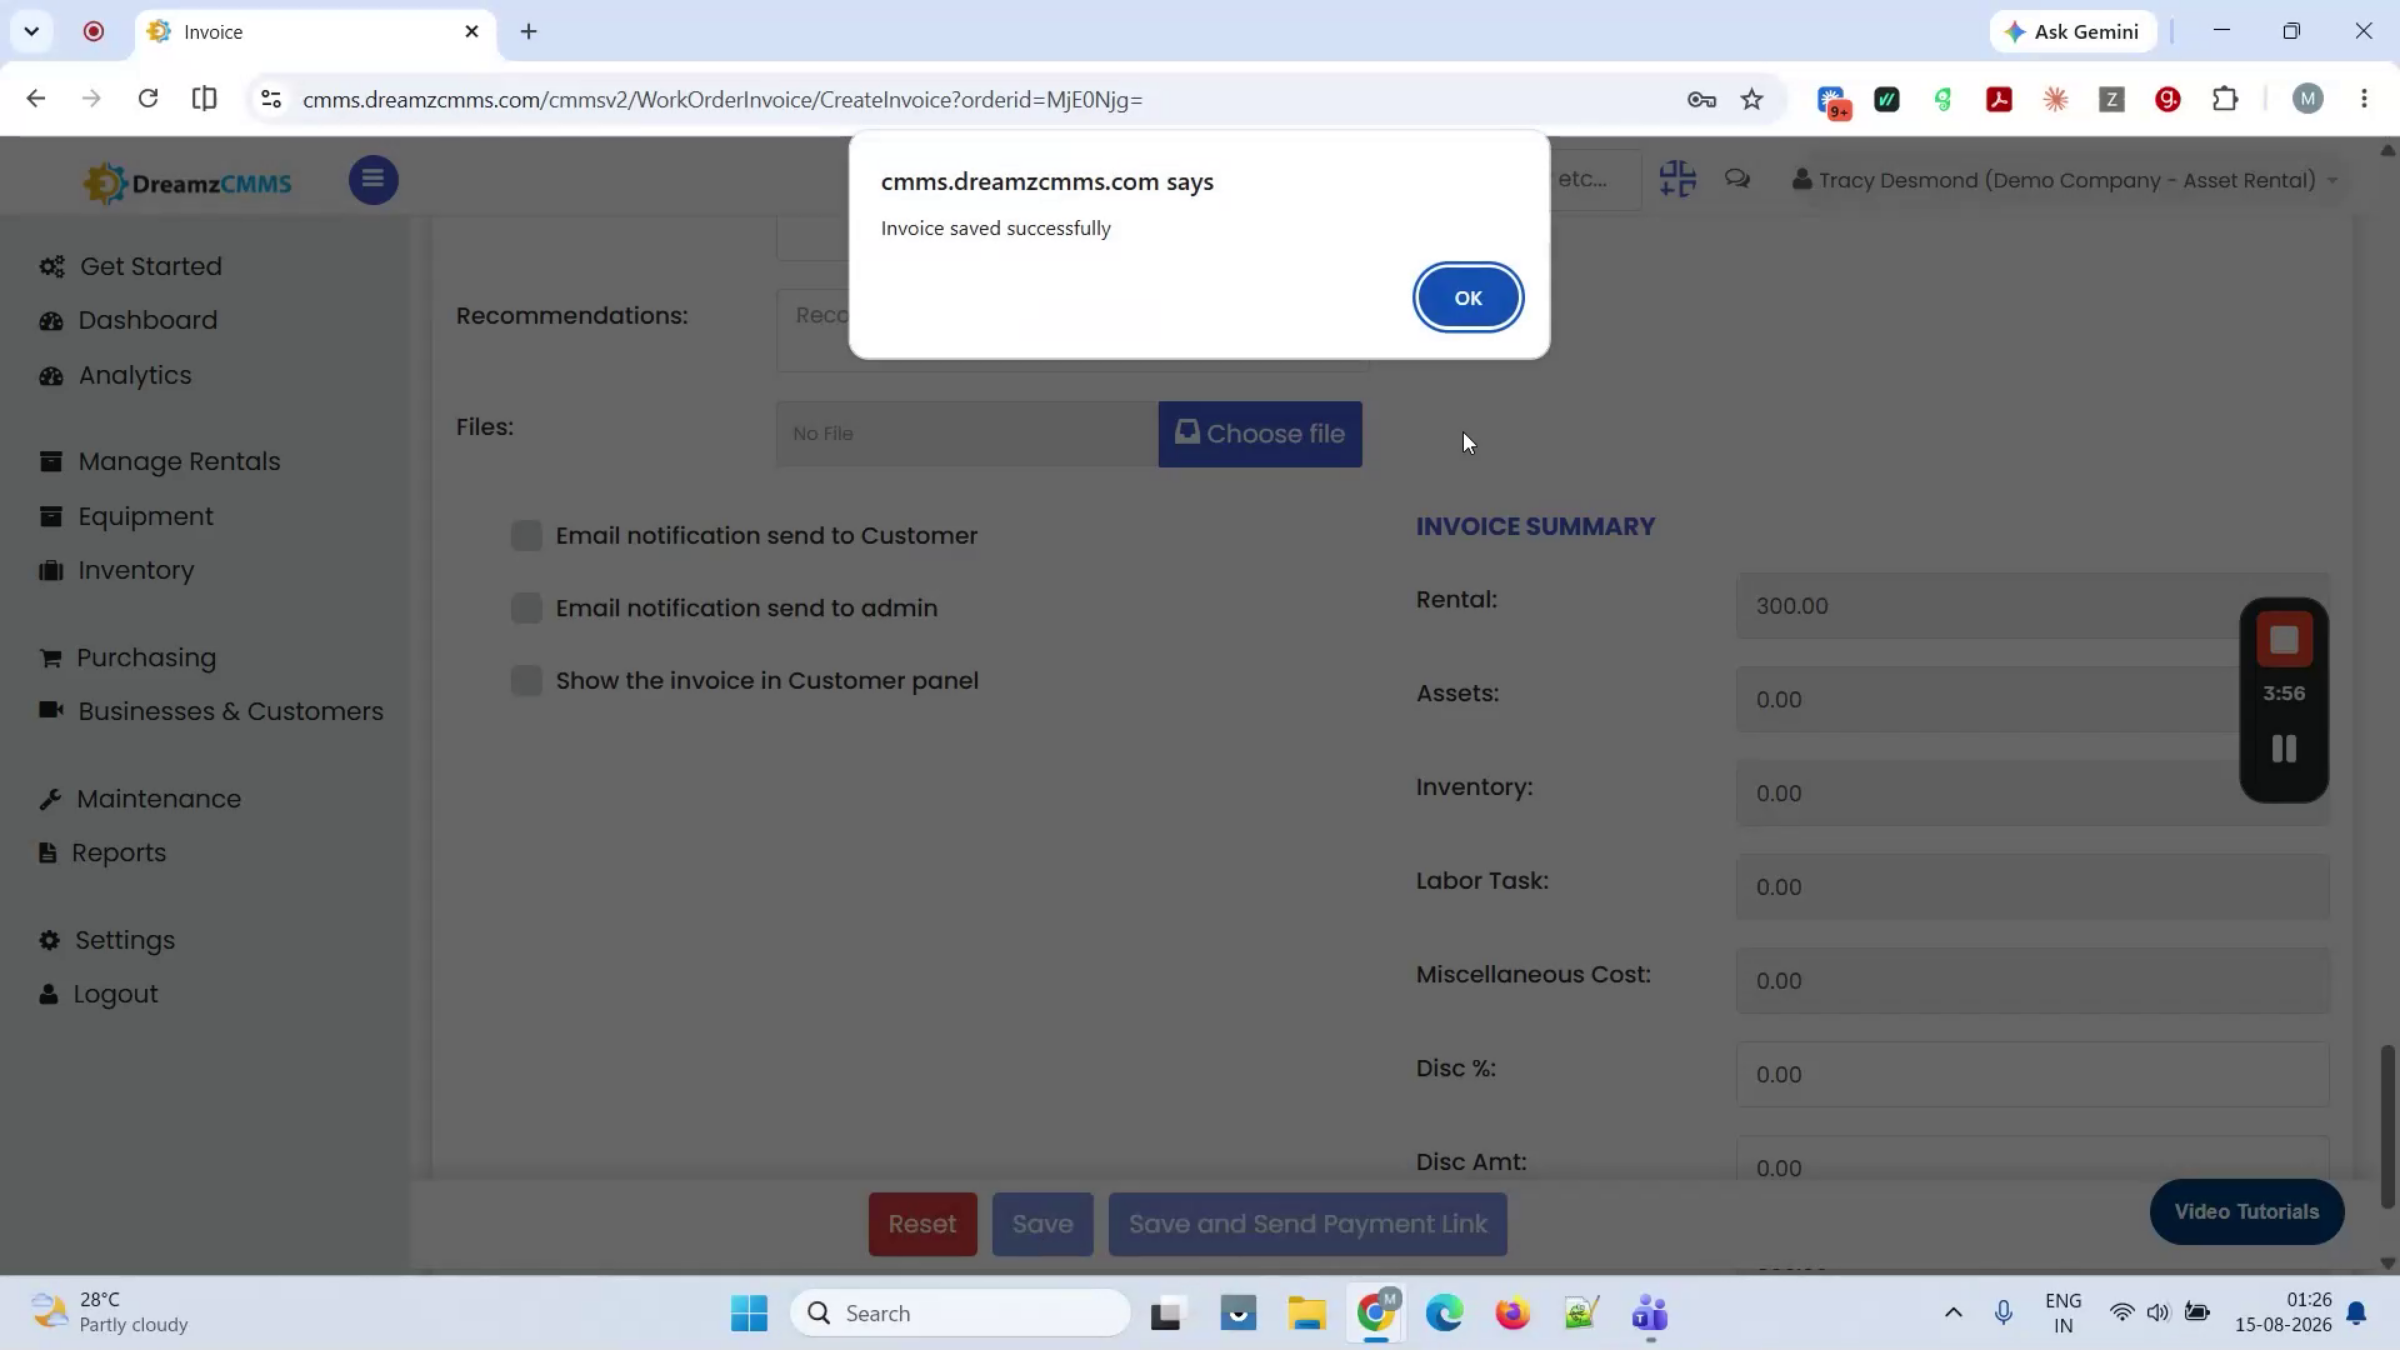
Once the purchase receipt is created, you can raise an invoice directly from it to confirm billing details against what was ordered and received. From the purchase return section, you can send back any items received in error, that don't meet quality standards, or that were received in excess, directly against the original purchase invoice — keeping inventory accurate and supporting any credit note or refund process with the supplier.
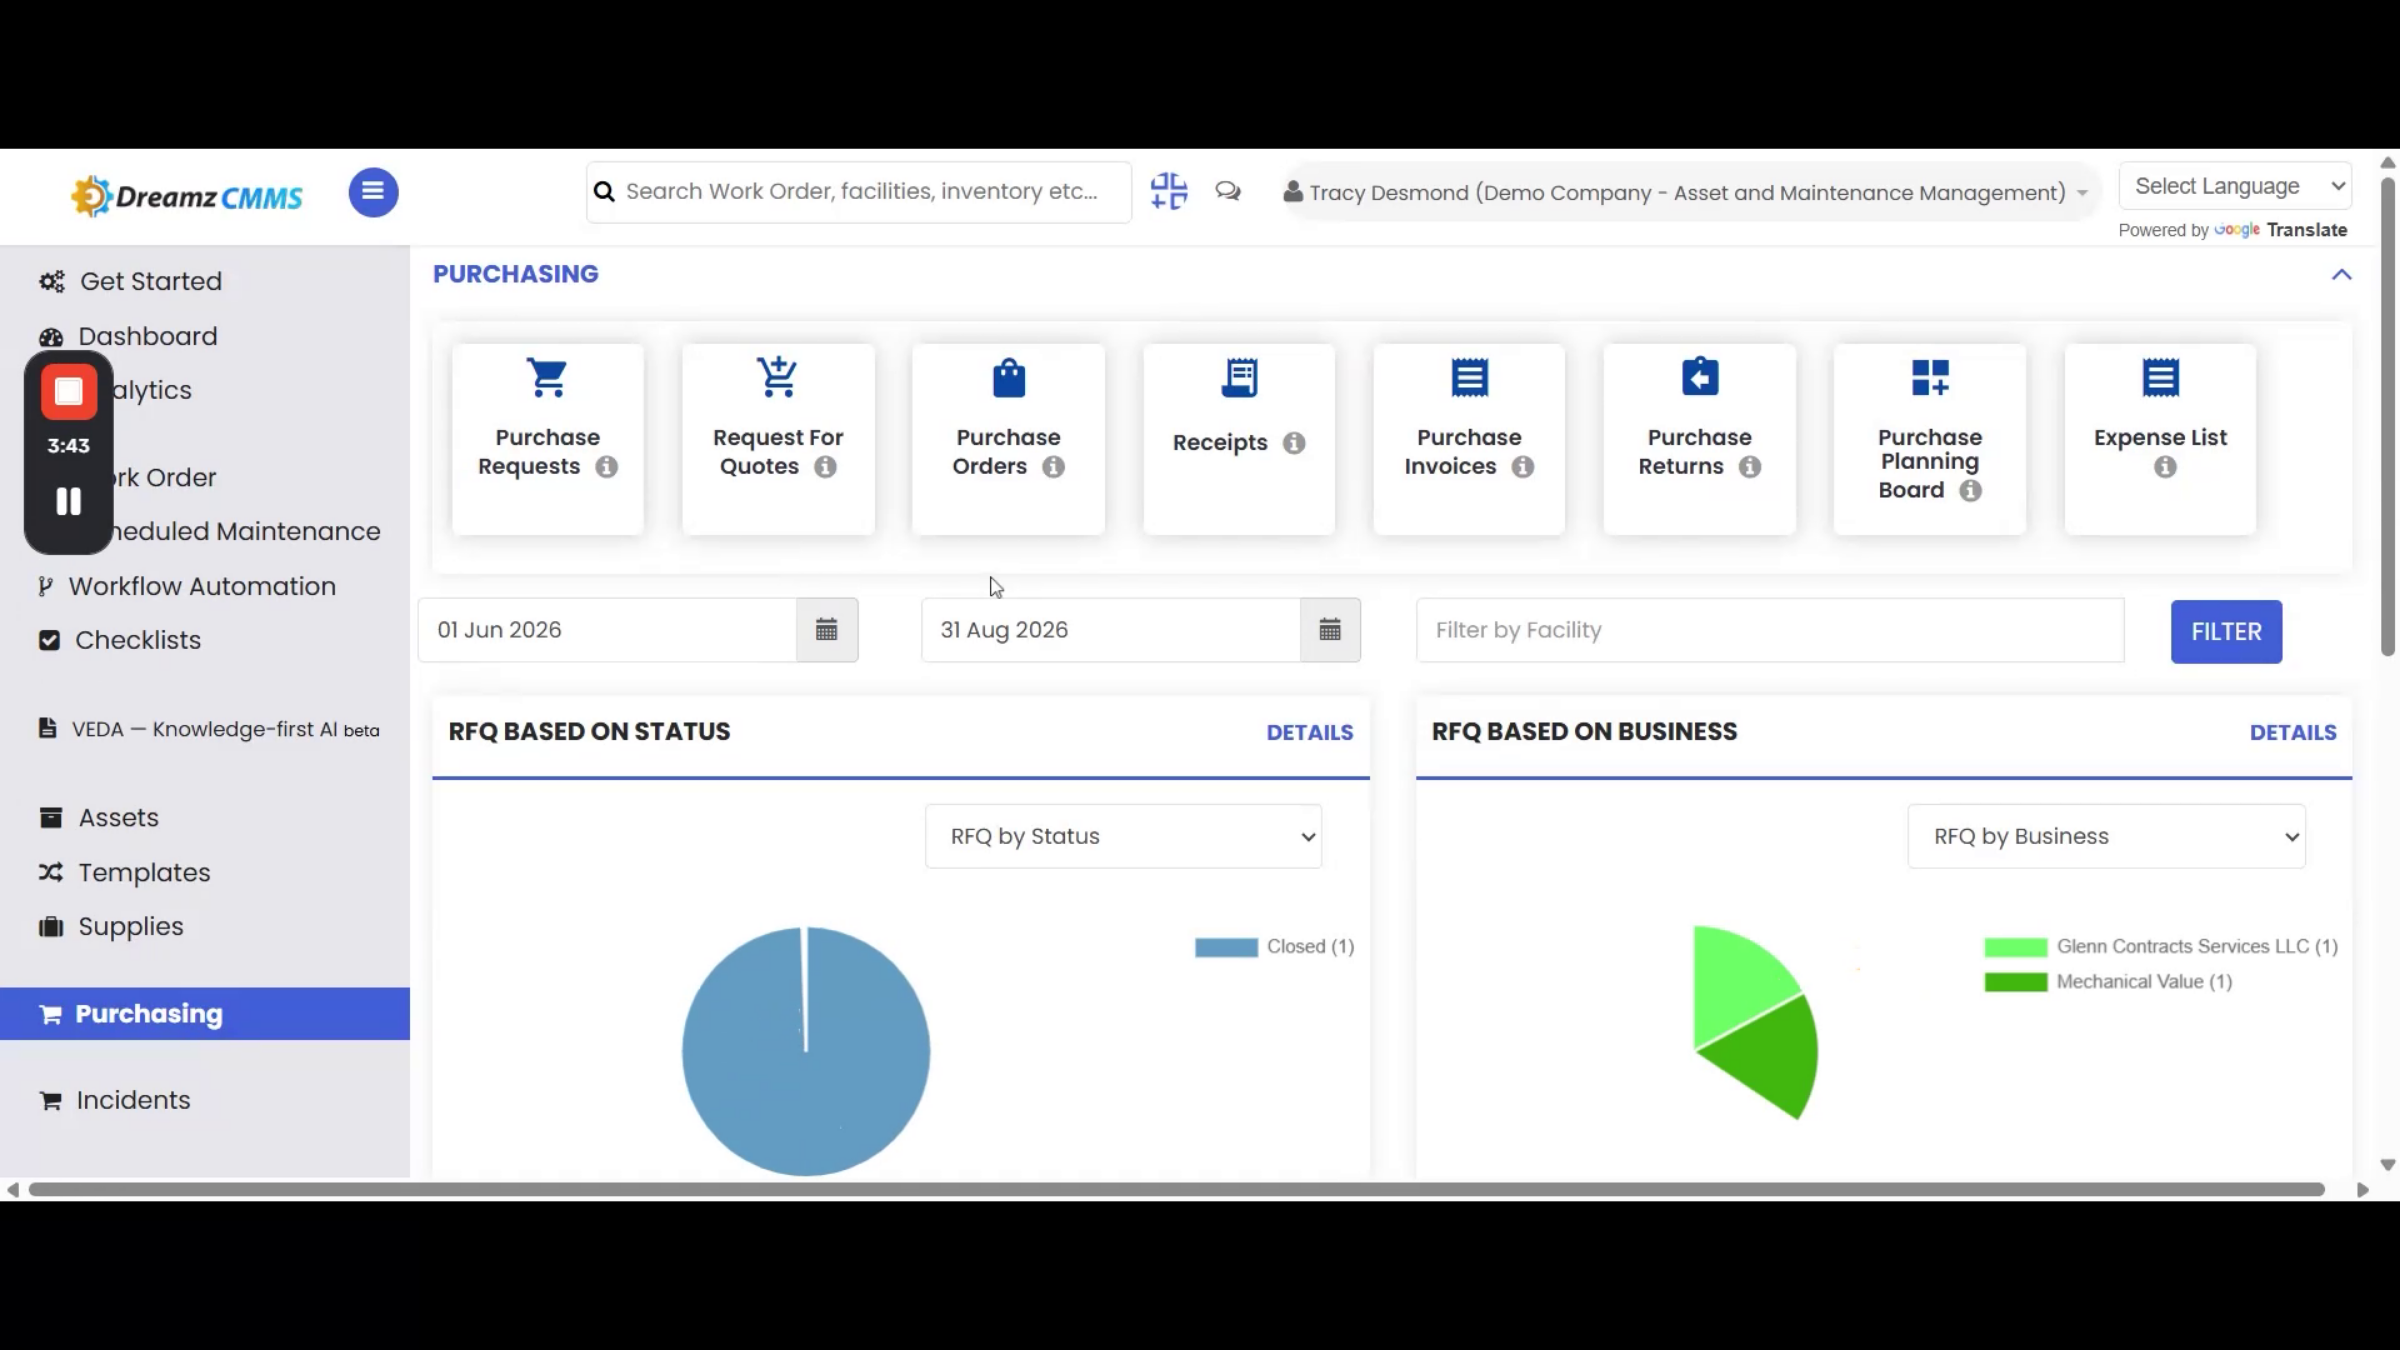
Stock Transfers
Step 25 – Stock Transfer Types
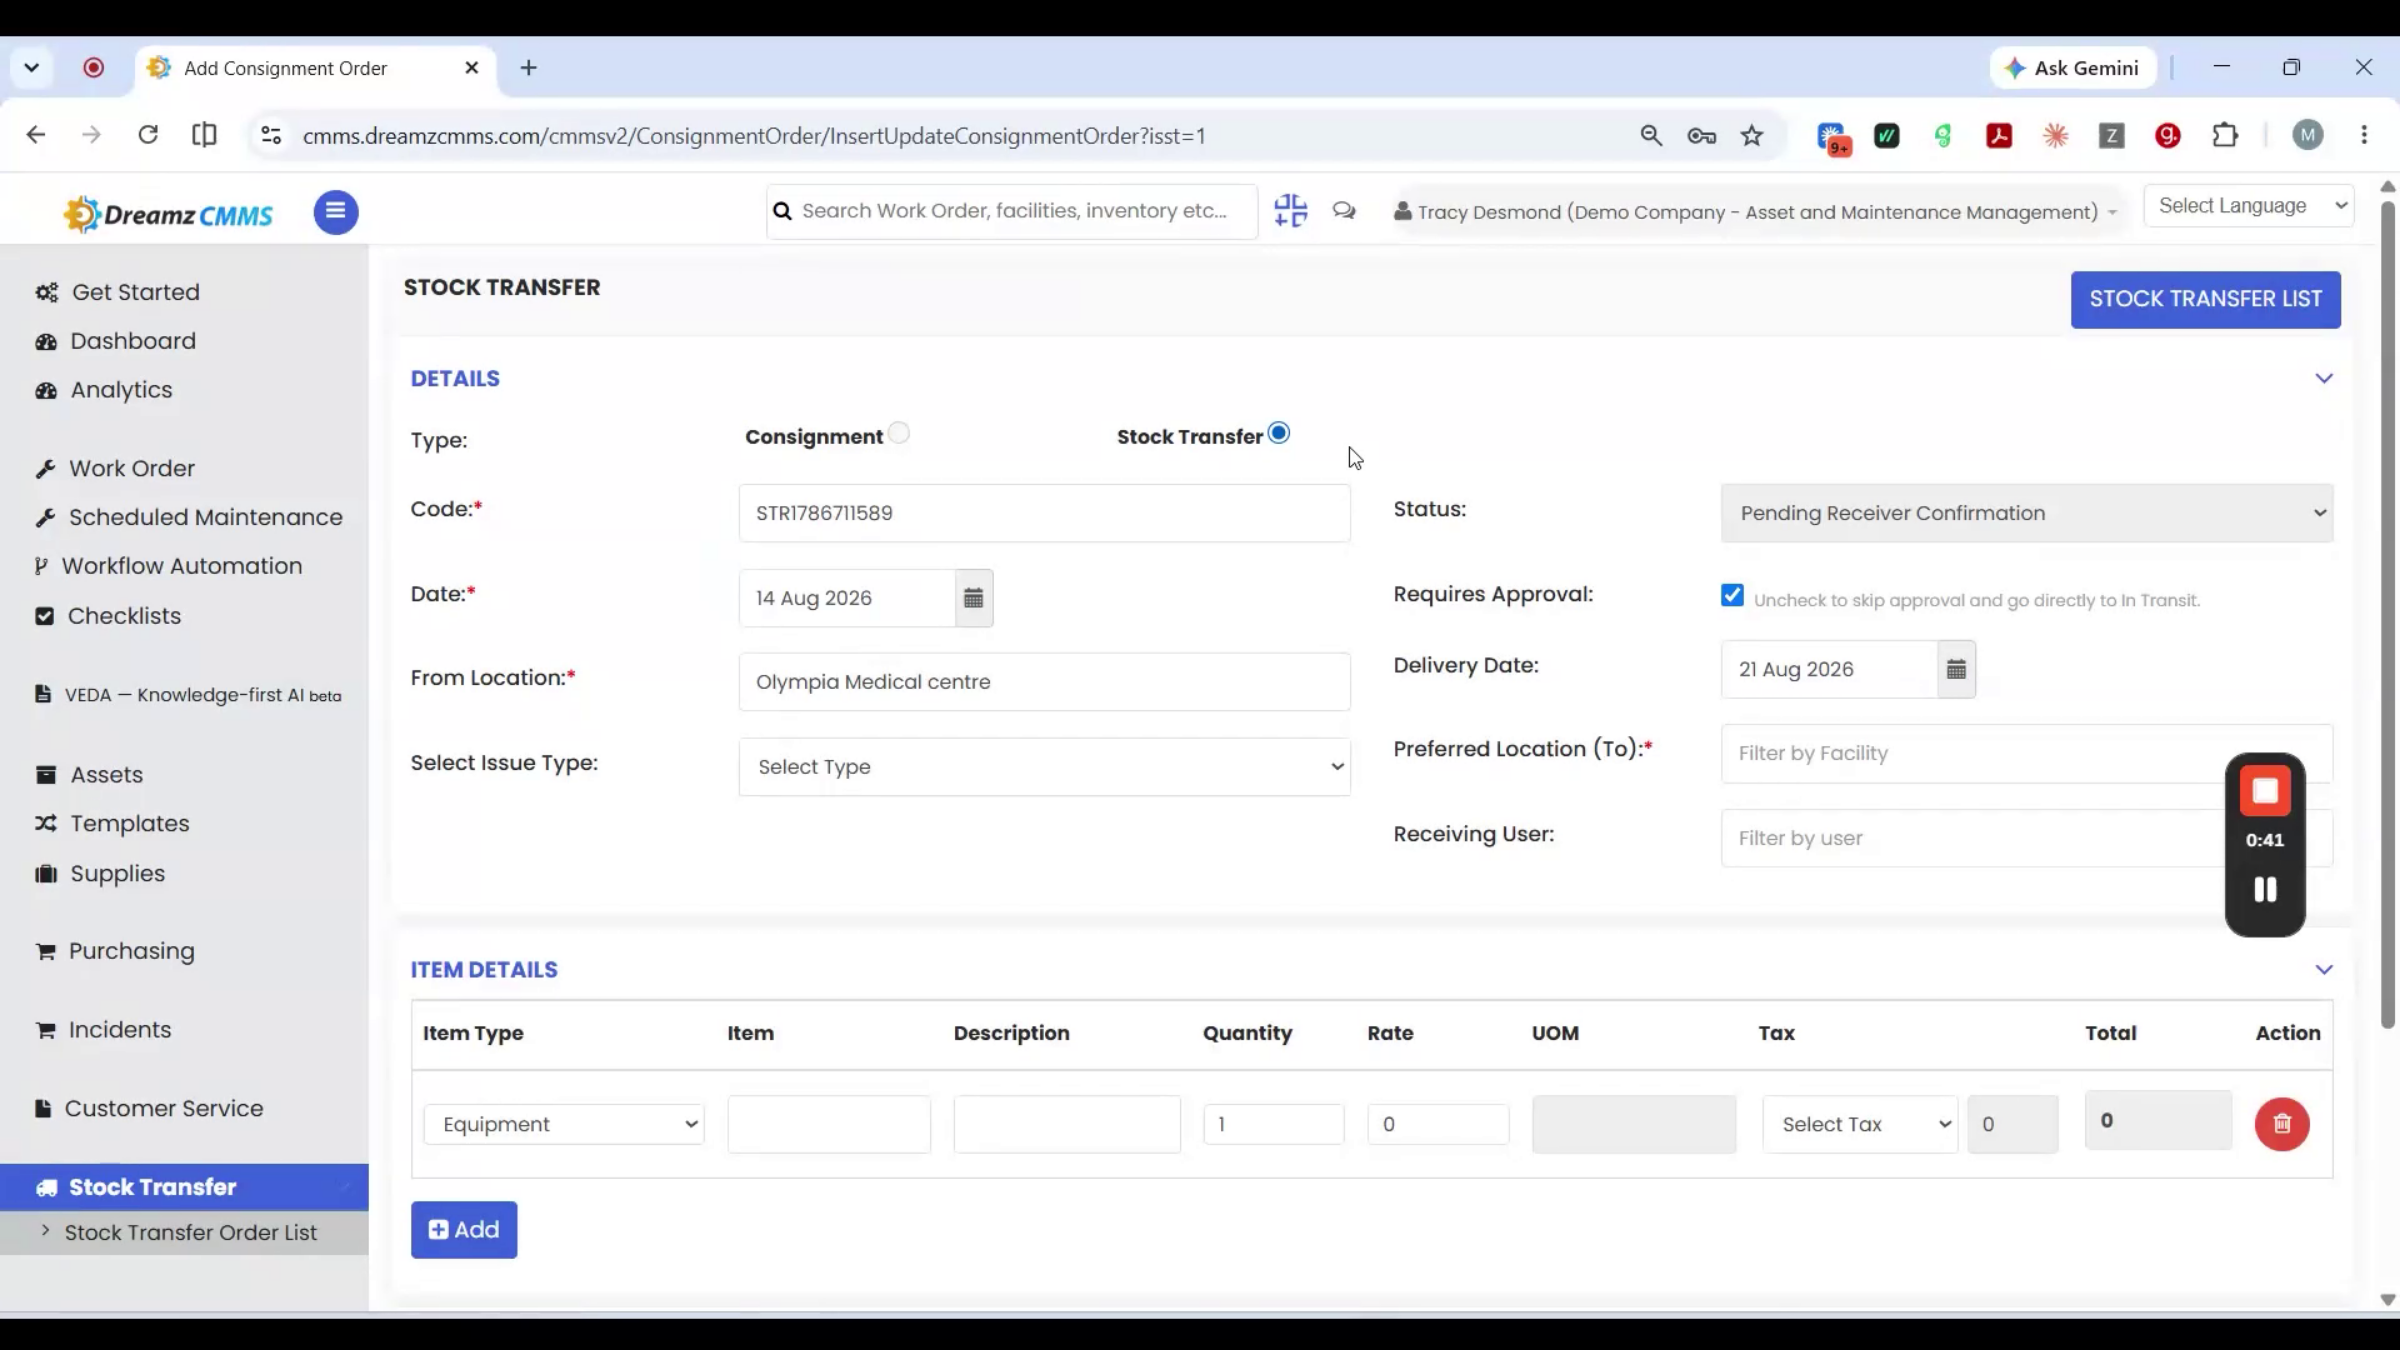
Stock Transfer means moving material from one location to another. Creating one starts by choosing the type: Consignment is for sending material out to a consignee or customer, so it asks who that is; Stock Transfer is purely internal, location to location, with no consignee needed.
Step 26 – Stock Transfer Details
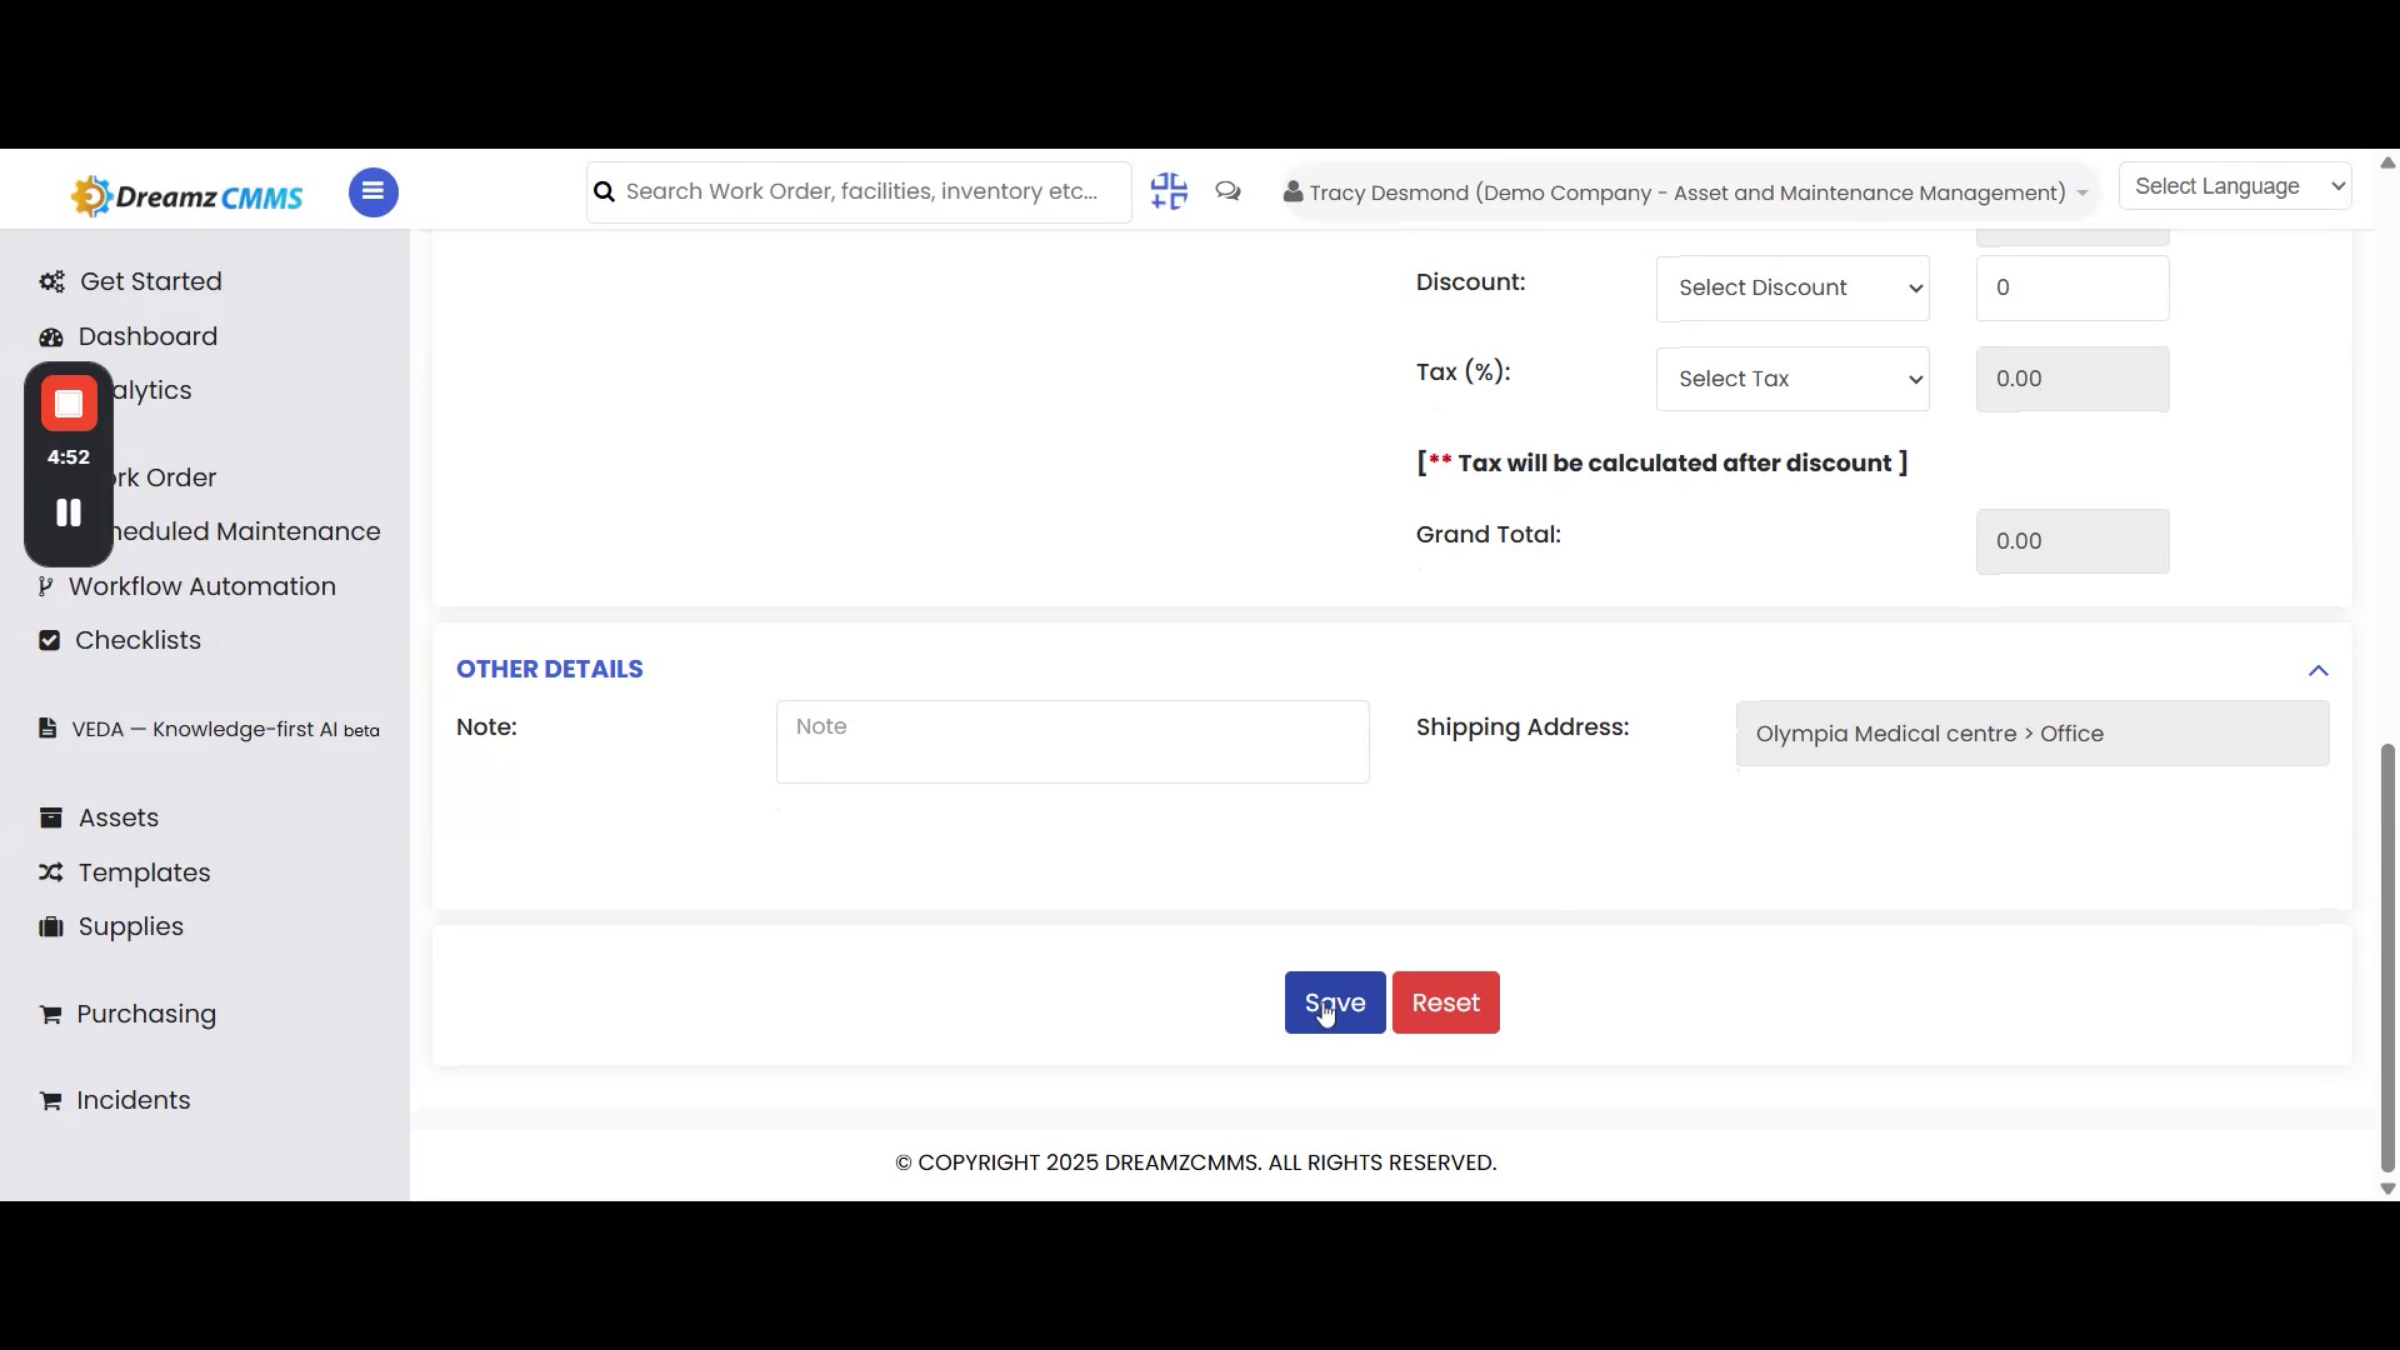
Note: Everything else on the form works the same either way. Set the From location and the destination it's headed to, and add the items — equipment, tools, or parts and supplies — with a quantity each. There's also an approval toggle: leave it checked and the transfer waits for the receiver to confirm, or uncheck it and it goes straight to In Transit.
Step 27 – Stock Transfer Actions
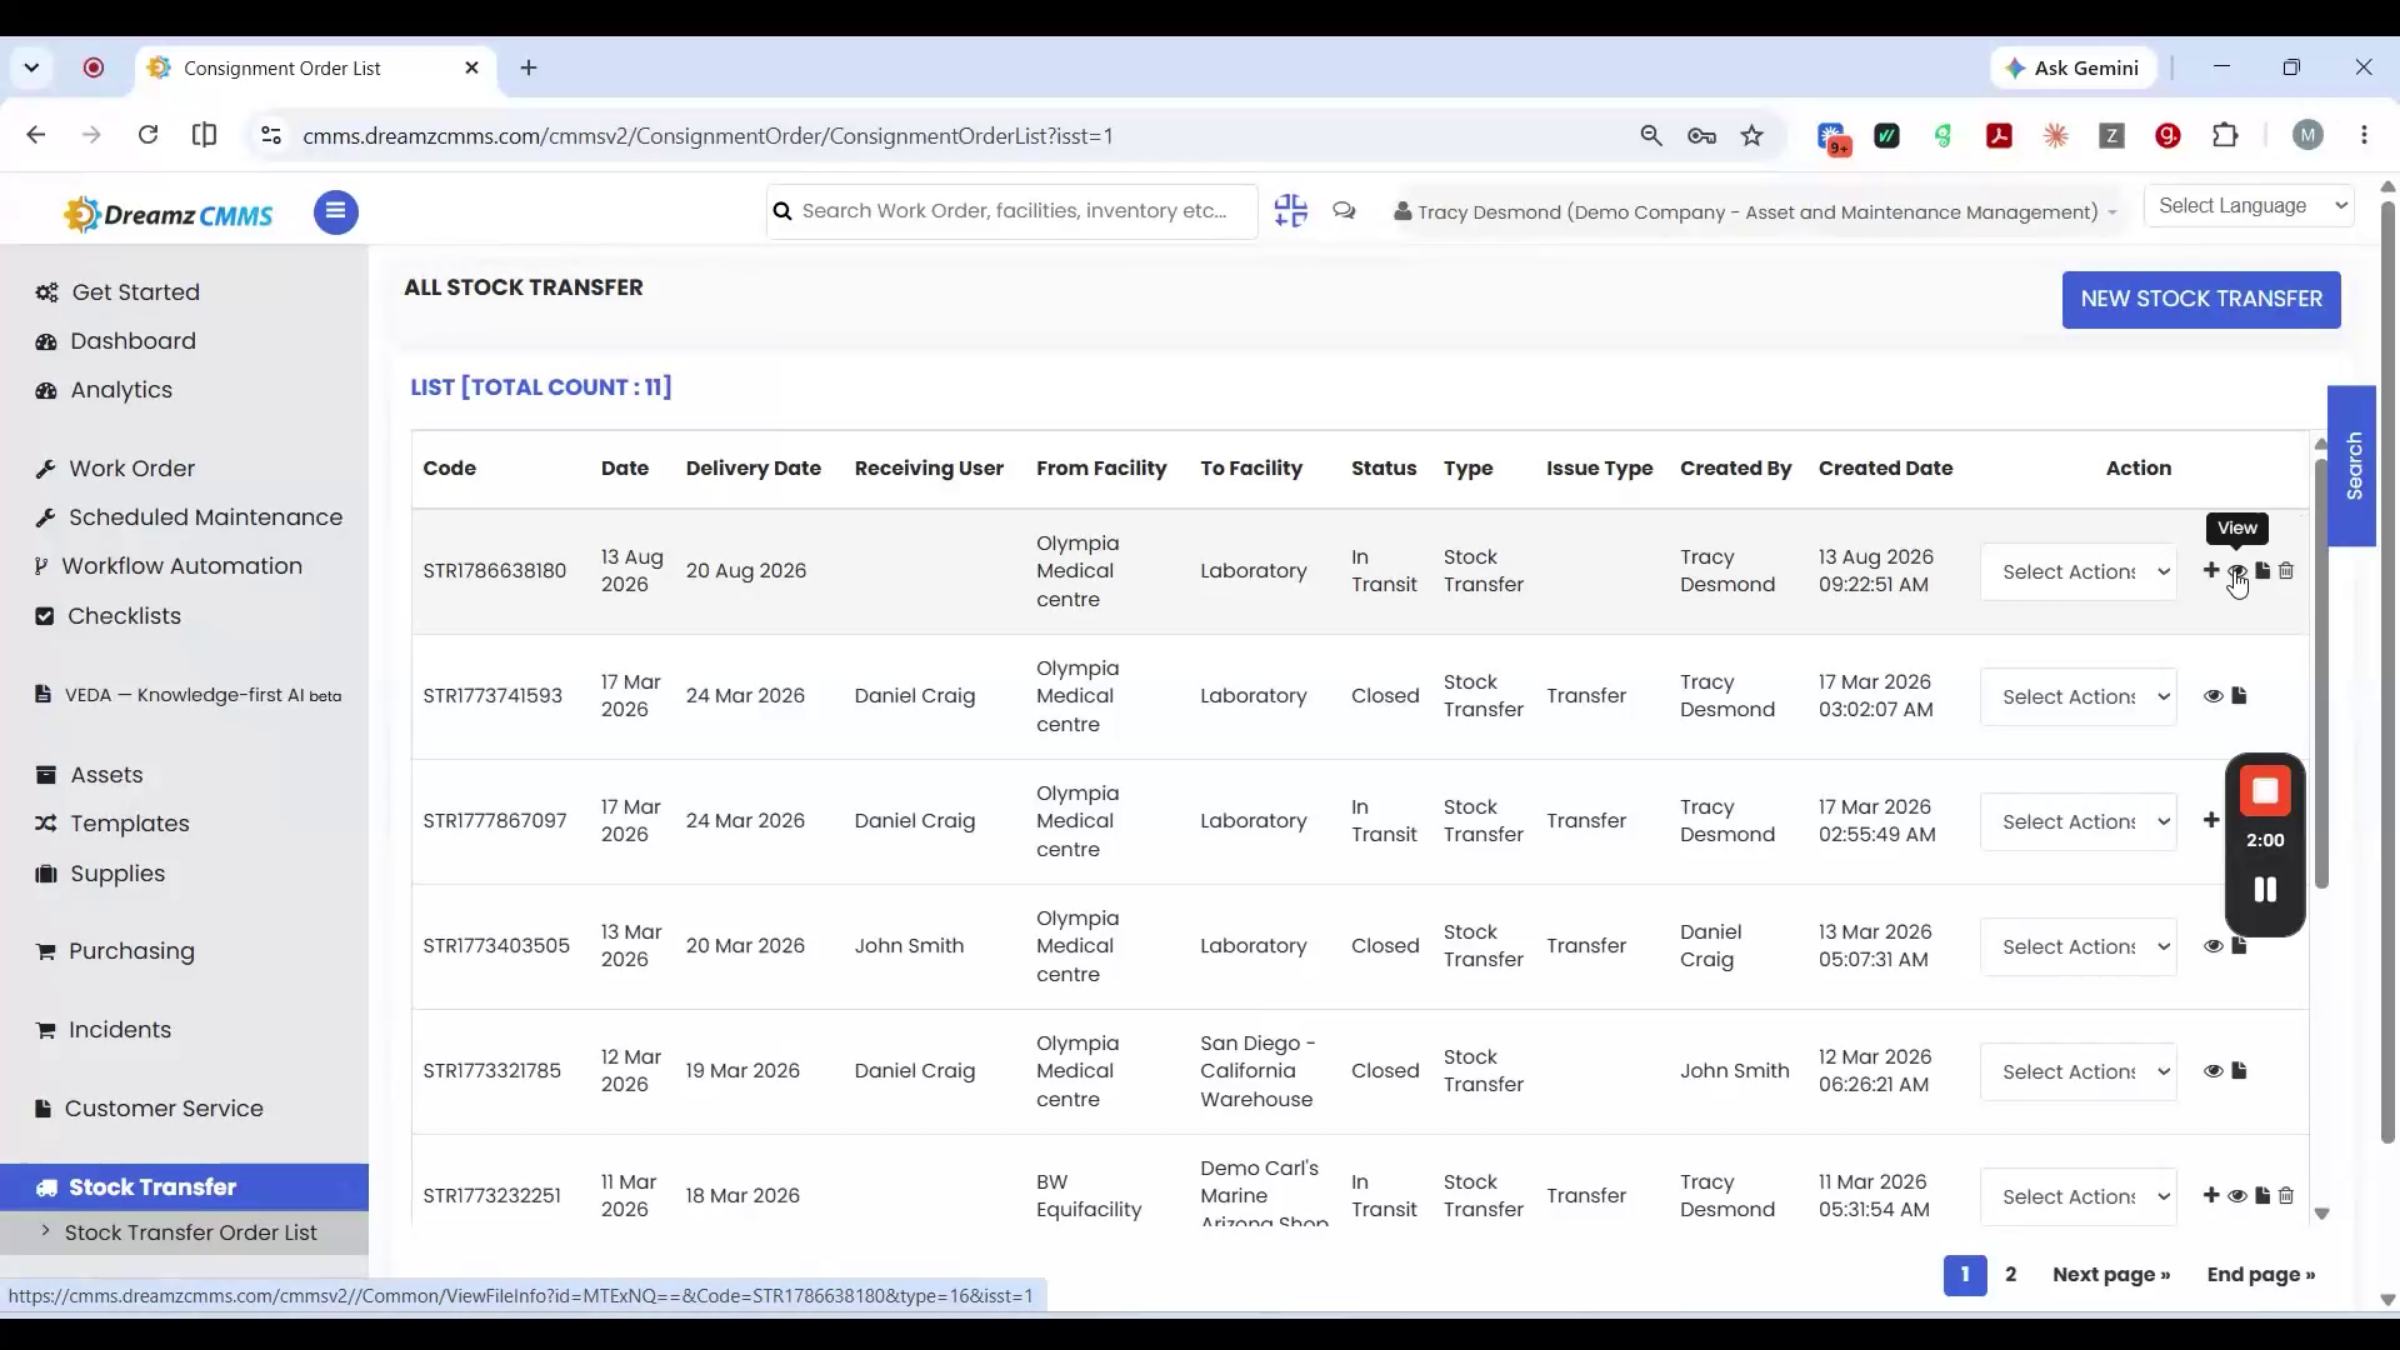
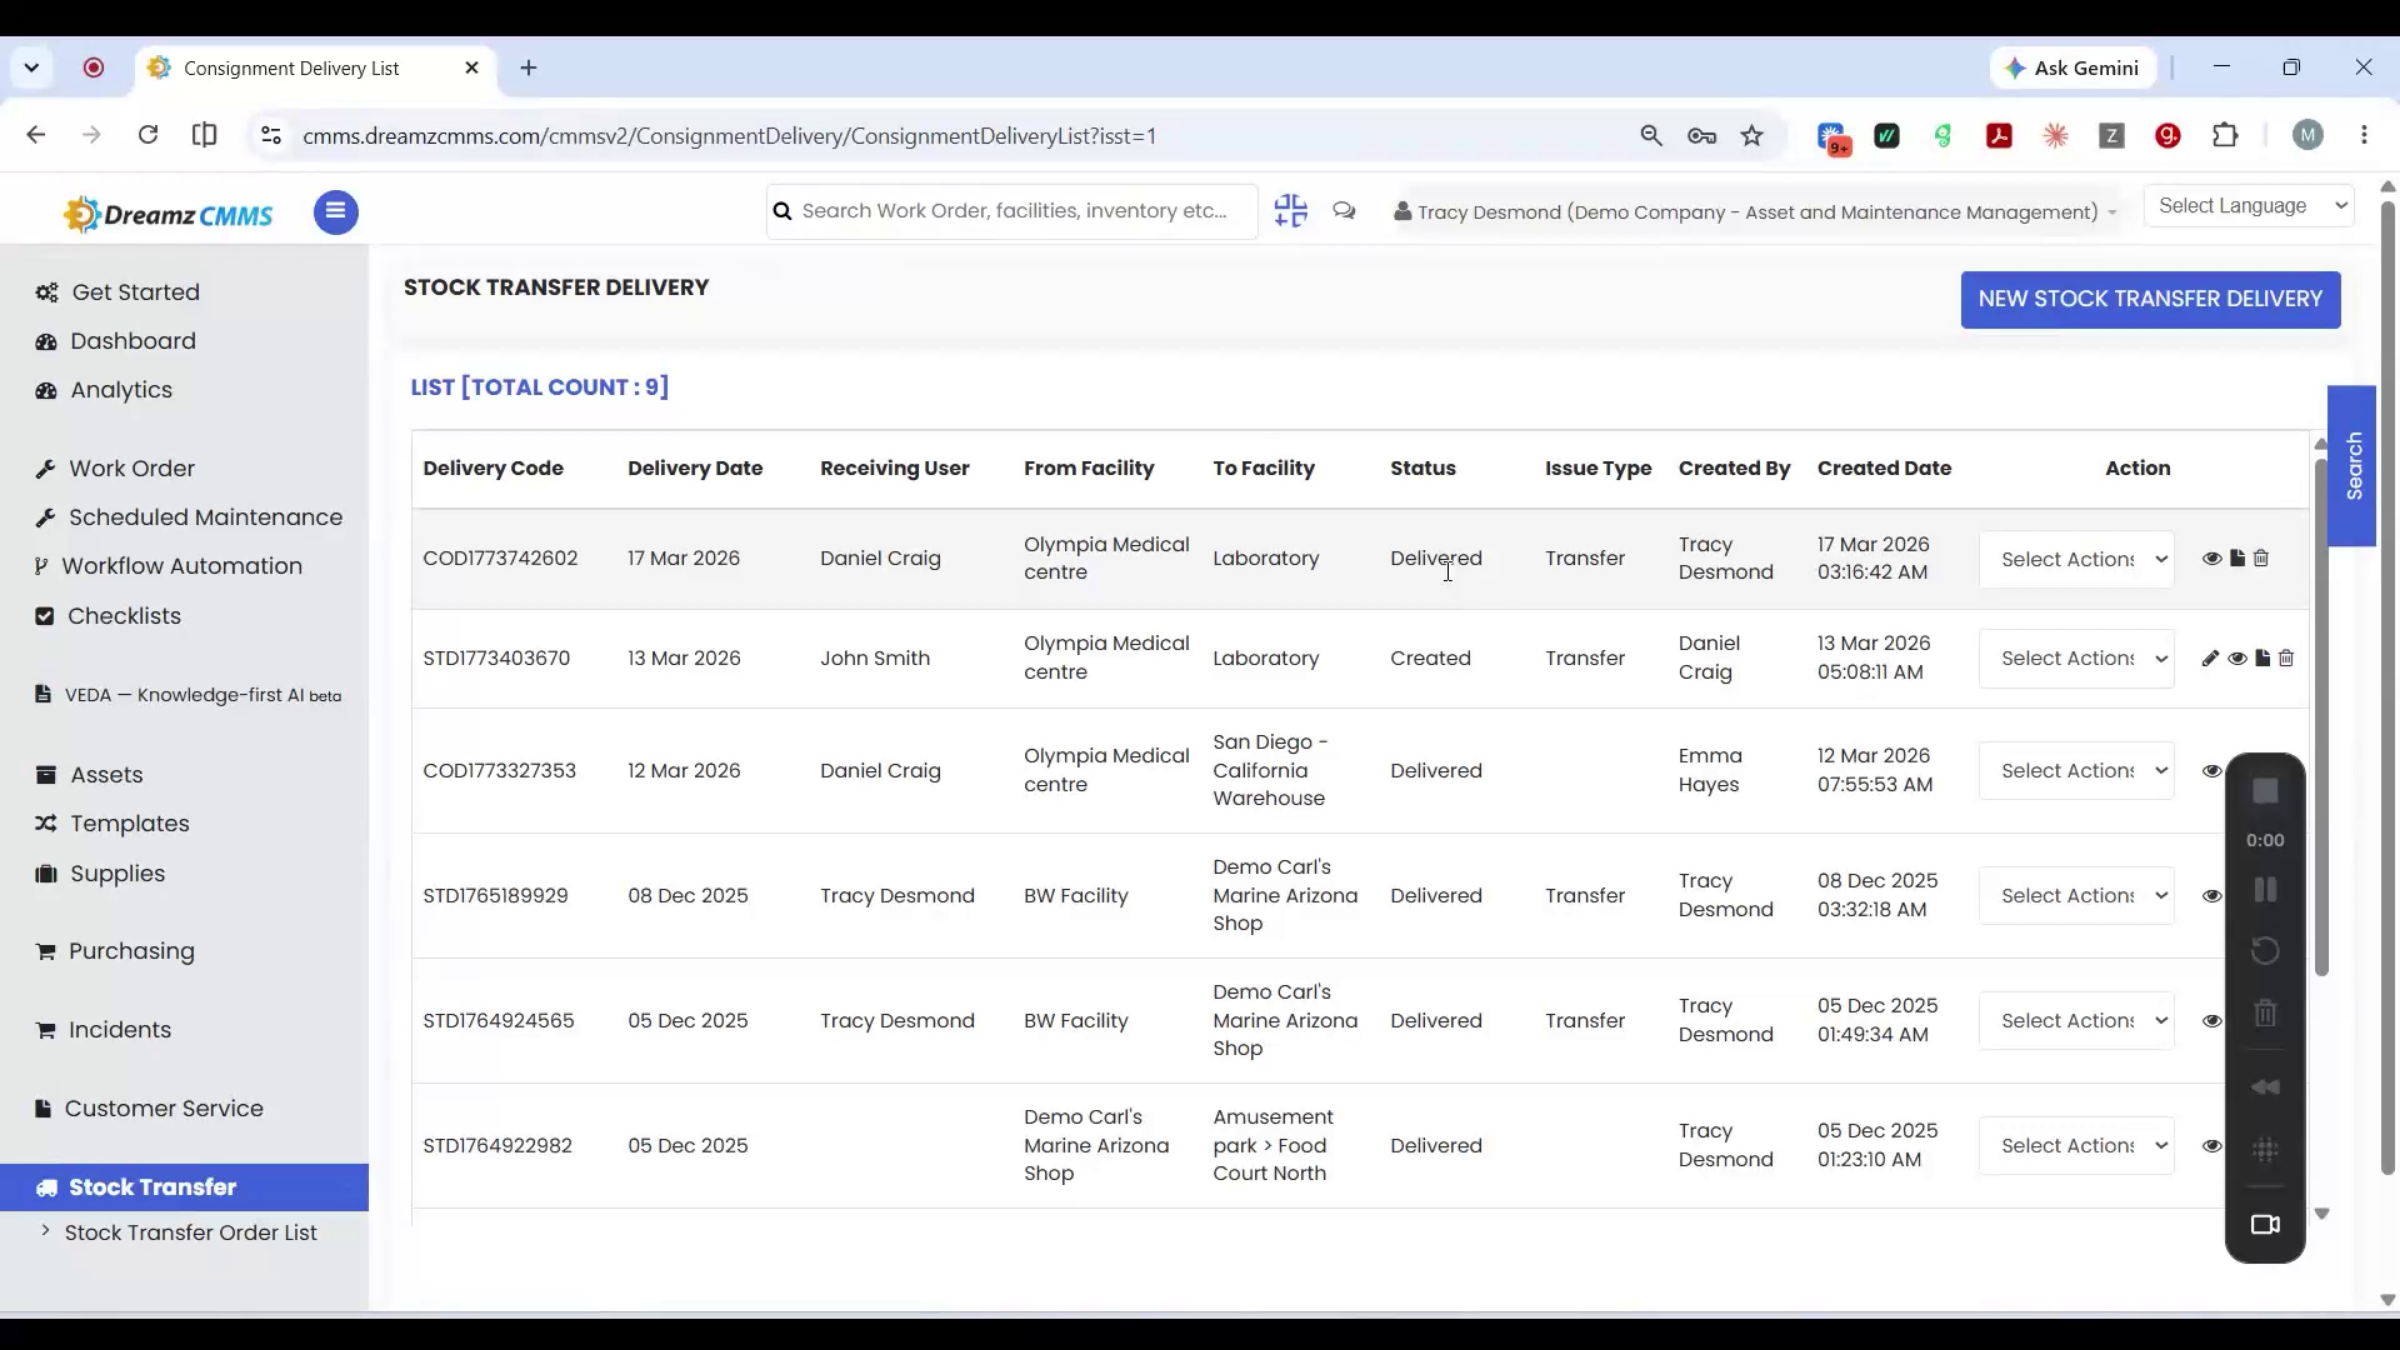
Back on the list, that transfer now shows as In Transit, with an action menu to add a delivery, check its history, or view the full record.
Step 28 – Confirming Stock Delivery
Adding the delivery opens a linked form with the same kind of details — location to location, item, and quantity — tied back to the original transfer order. Saving it confirms the delivery, and the status updates to Delivered on the delivery list, closing the loop on that transfer.
Step 29 – Stock Transfer Summary
That's a stock transfer end-to-end: created, tracked in transit, and confirmed on delivery, all in one connected record.
Stock Issue and Return
Step 30 – Stock Issue Creation
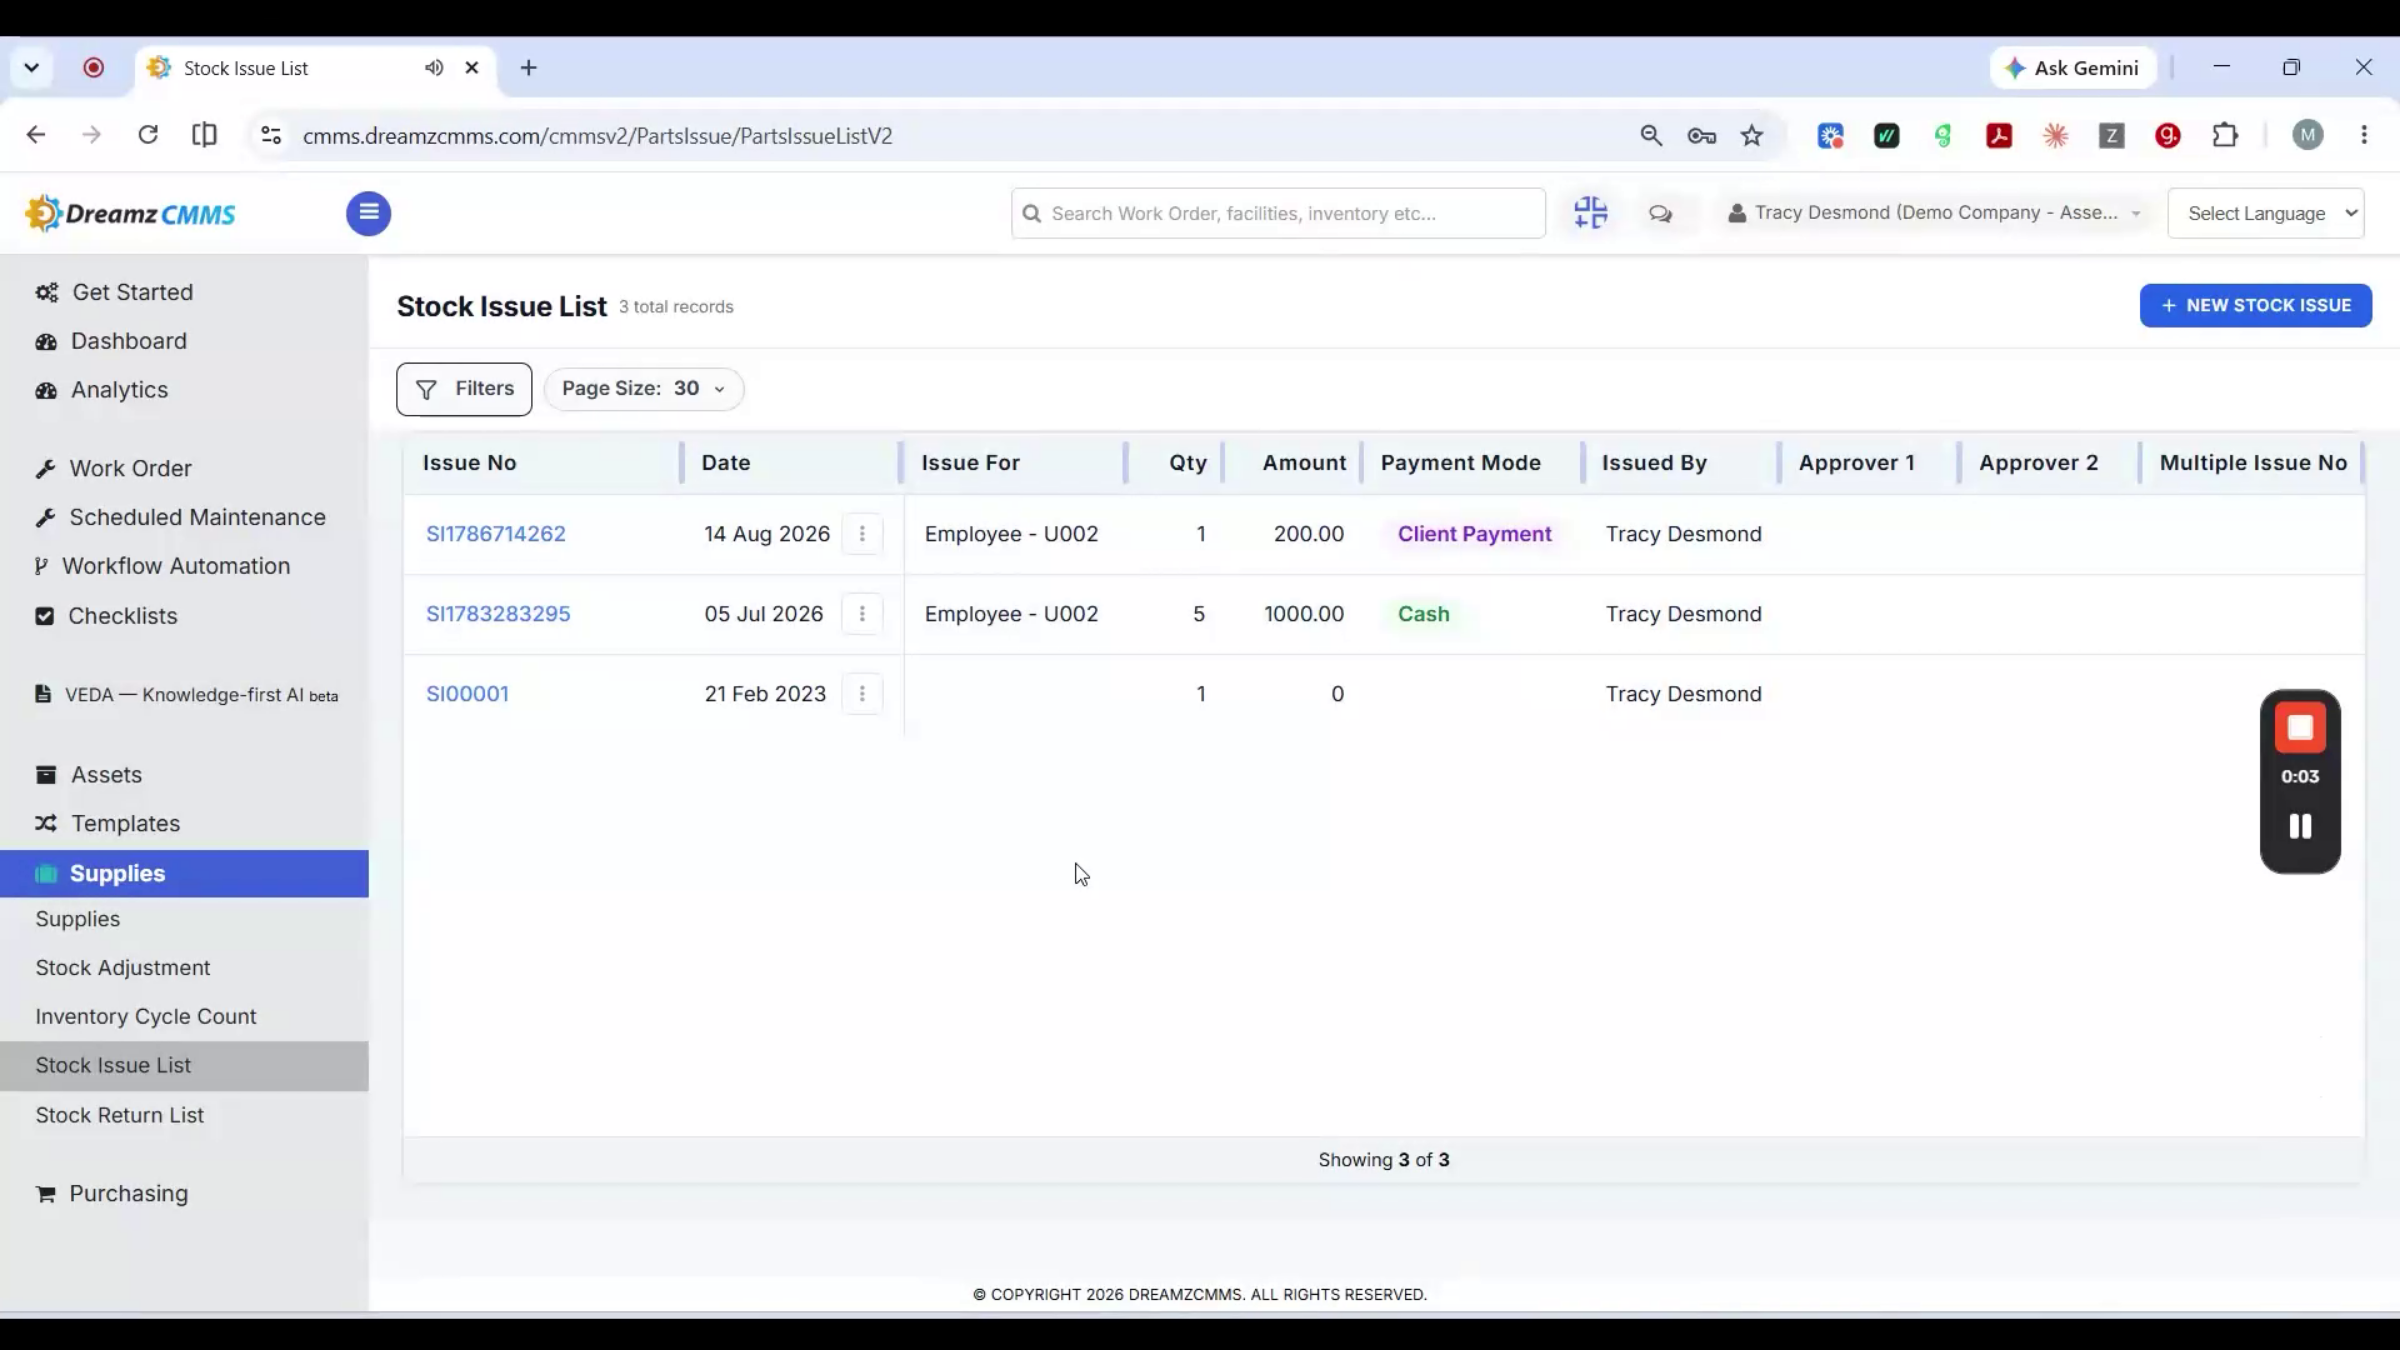
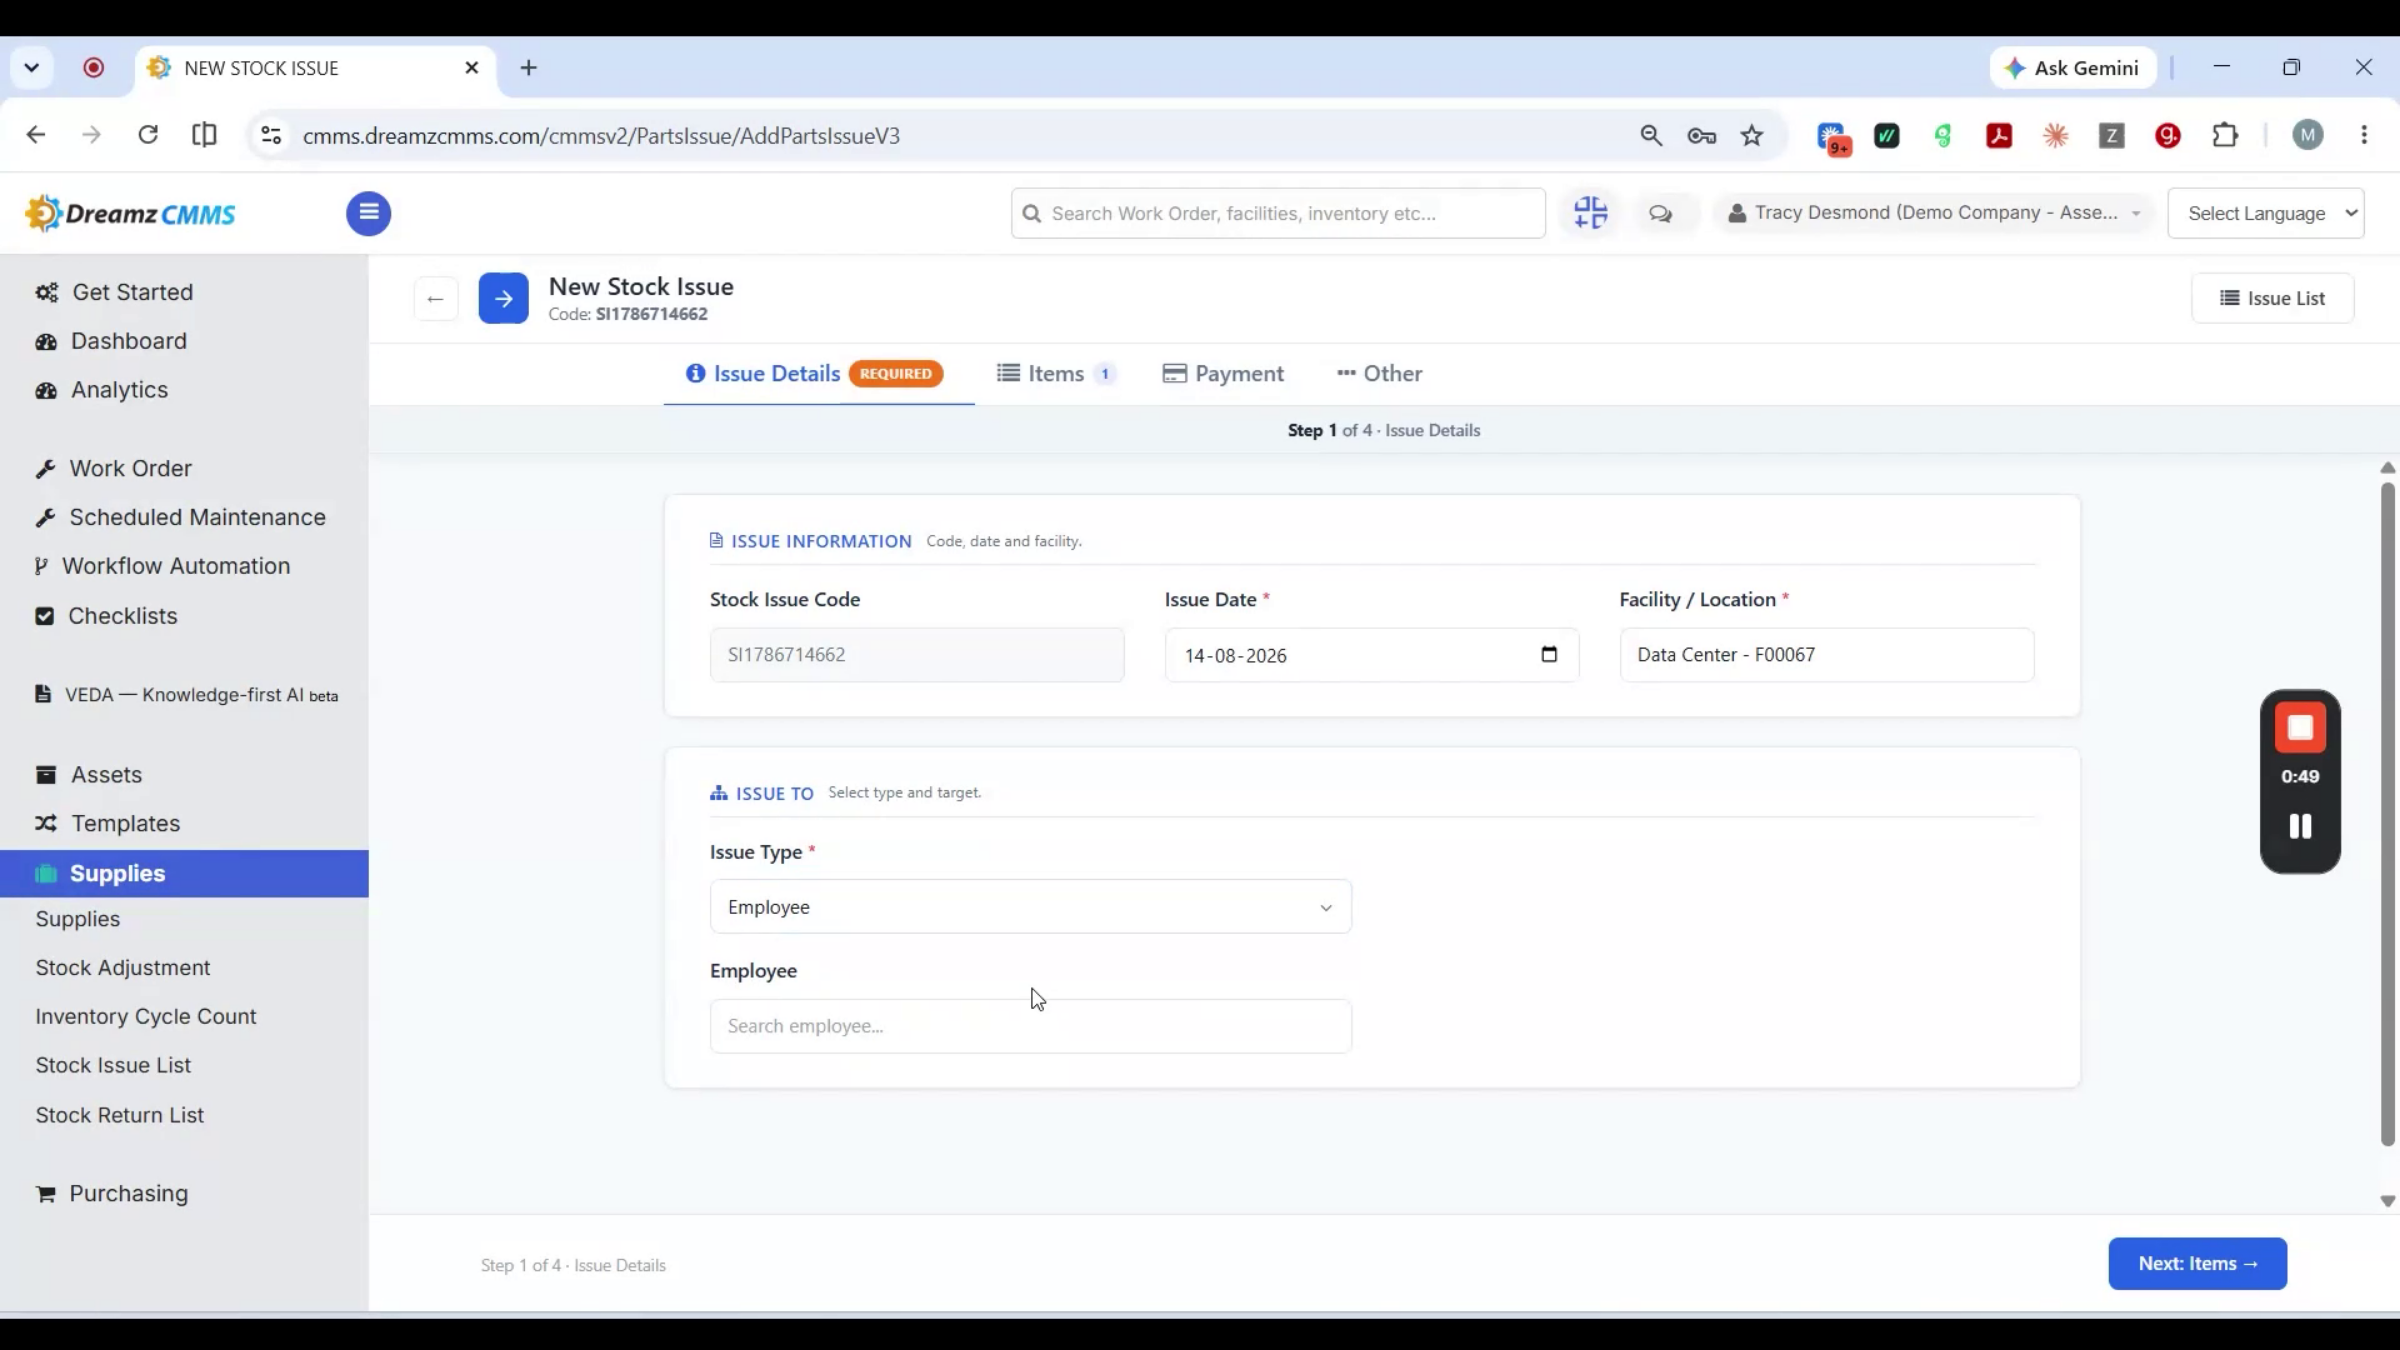
Stock Issue and Return covers material issued to an employee, a department, a work order, or a job or project, and returned once it's no longer needed. Creating a stock issue steps through four parts, starting with Issue Details — the code, date, facility, and who it's issued to (a work order, employee, department, or job/project).
Step 31 – Selecting Issue Recipient and Items
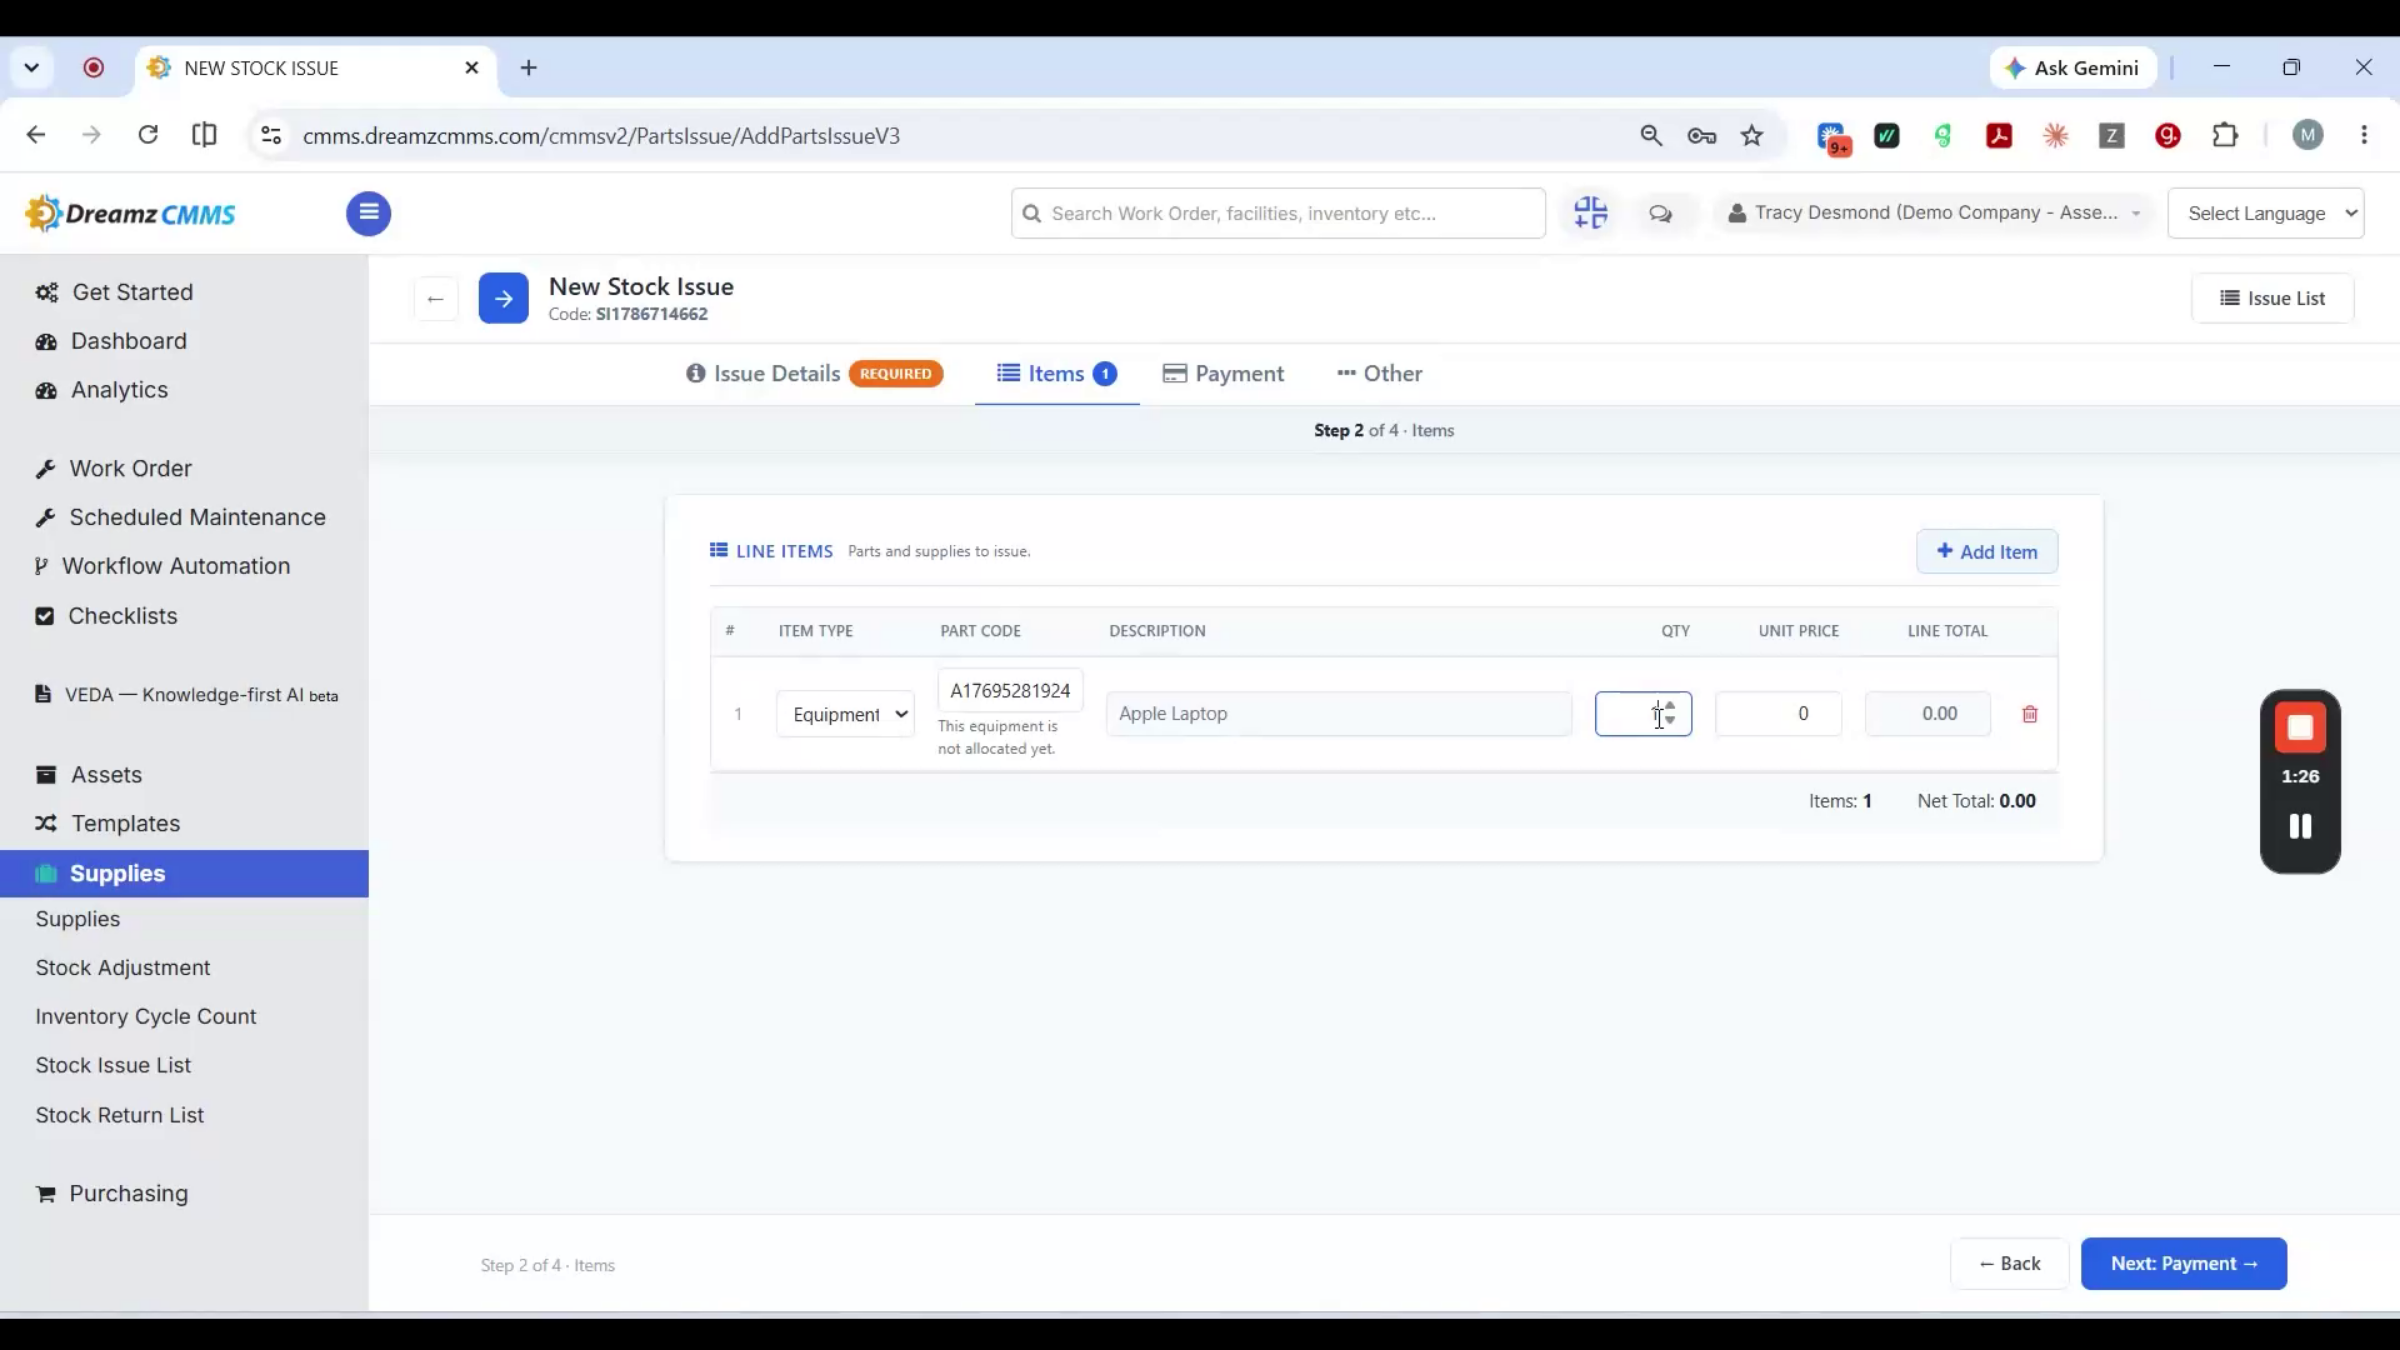
Choosing Employee brings up a search field to pick exactly who's receiving it. Next is Items — equipment, tools, or parts and supplies — each with a quantity and unit price rolling up into a line total.
Step 32 – Payment and Remarks in Issue
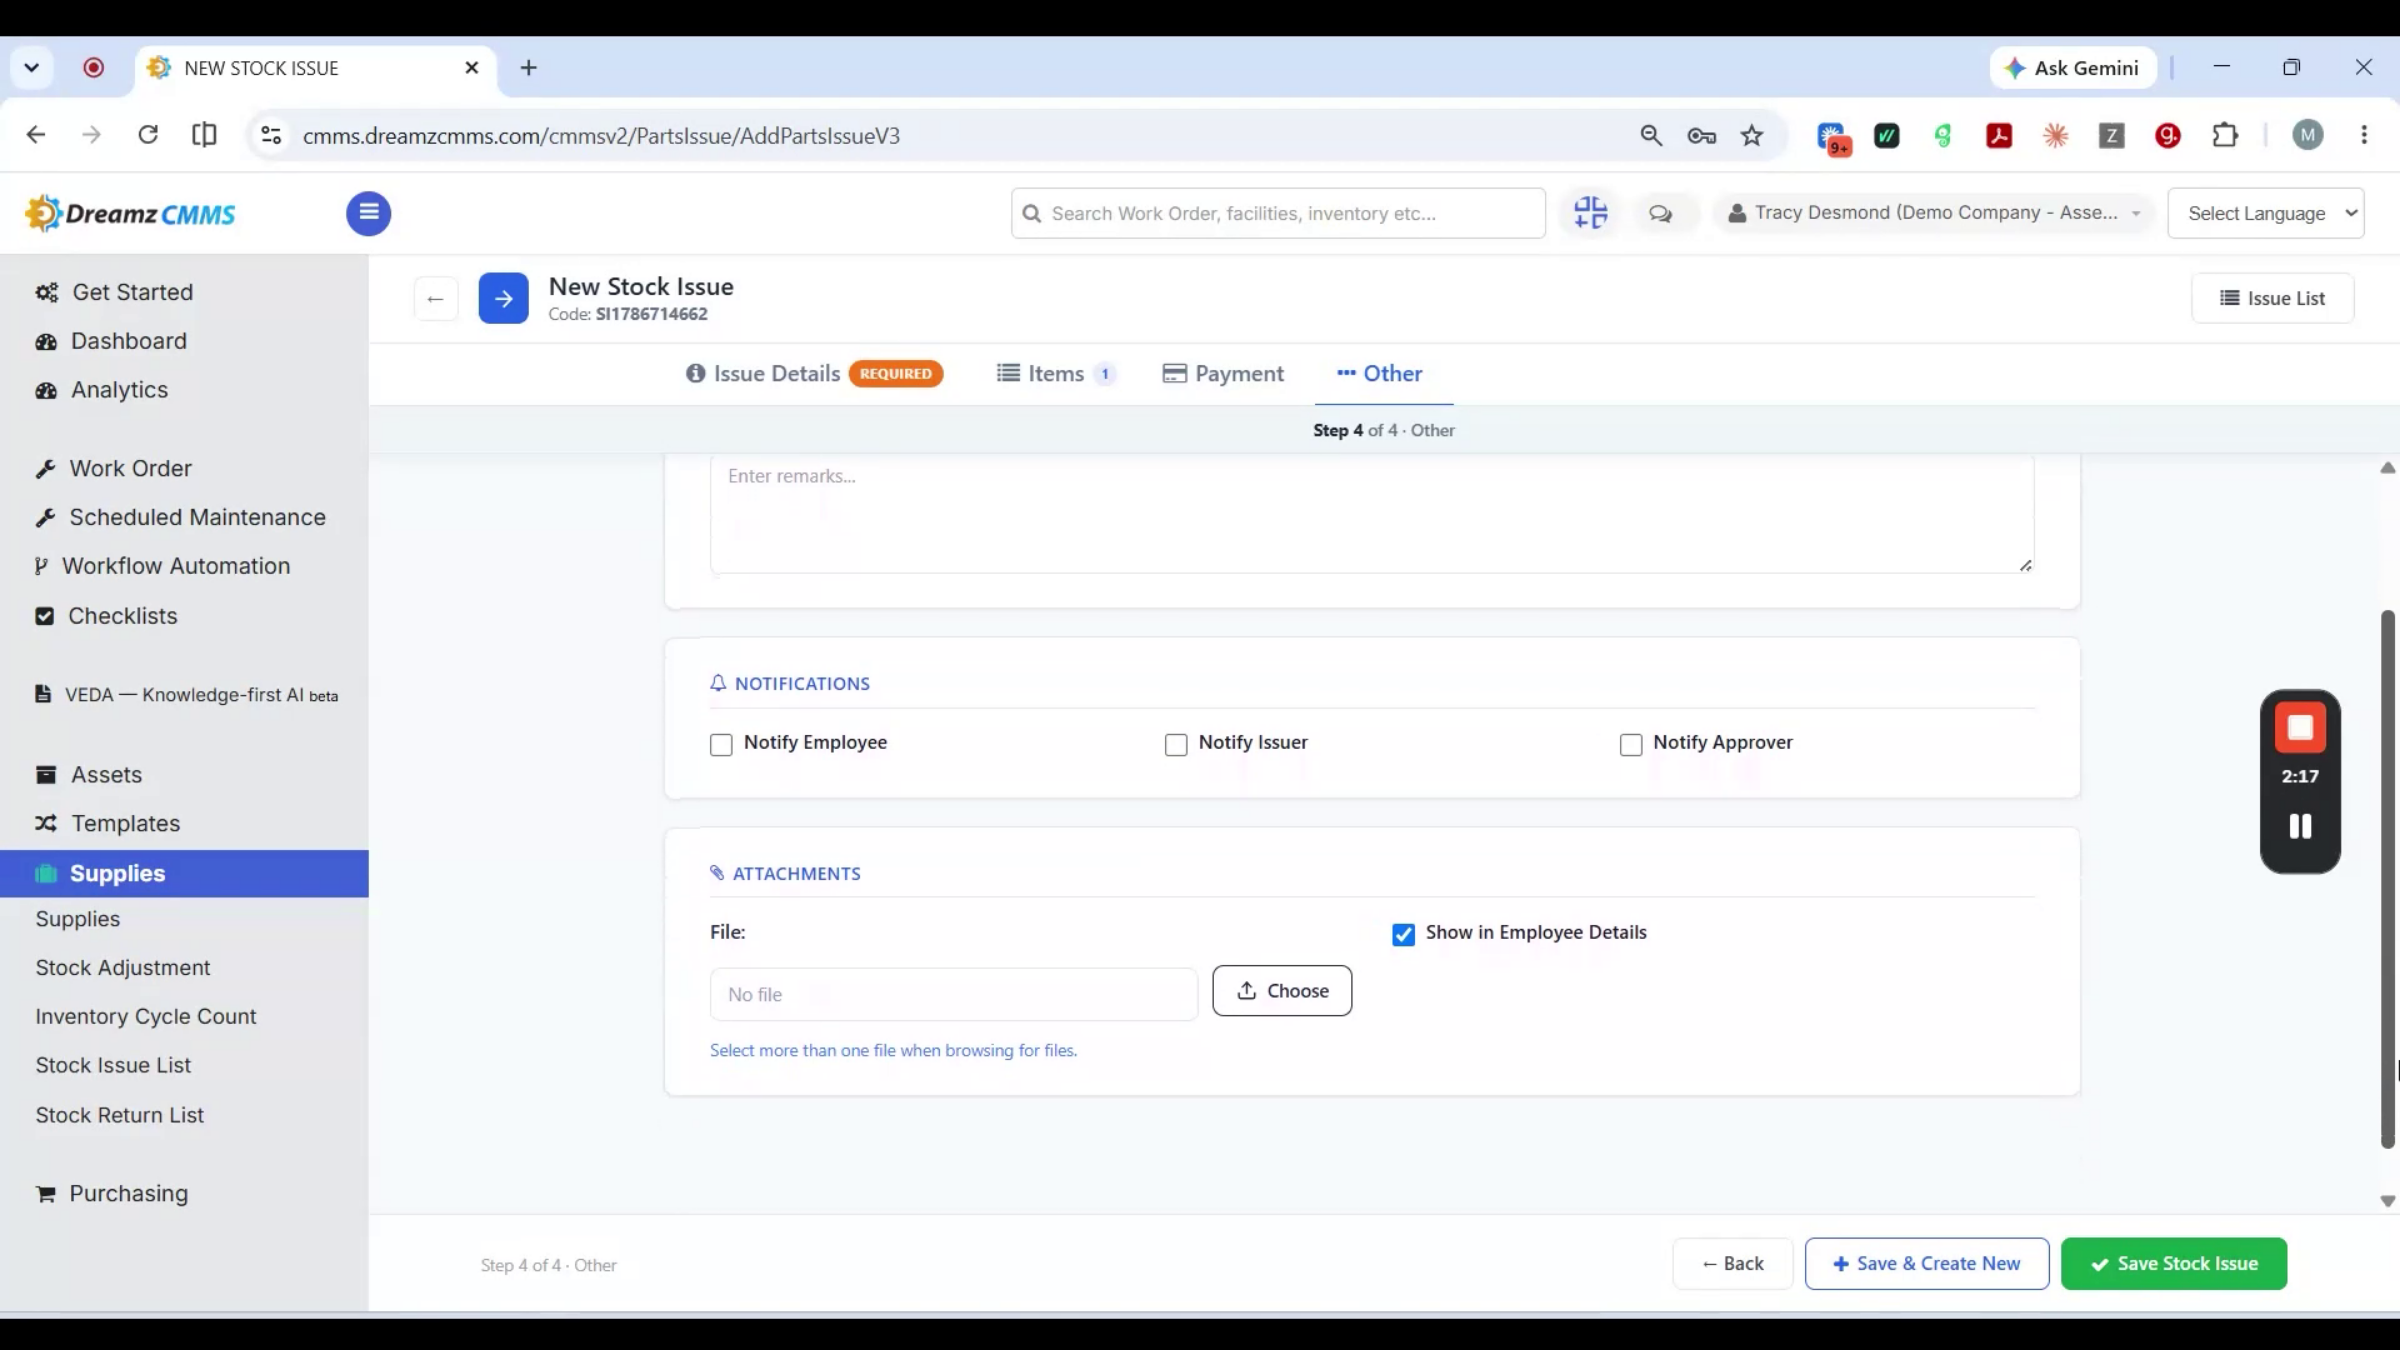
Then Payment — cash, client payment, advance, or waived off — with the subtotal, tax, and net total worked out automatically. Finally, Other covers a remarks field, notifications to the employee, issuer, or approver, and an attachment if there's a file to include.
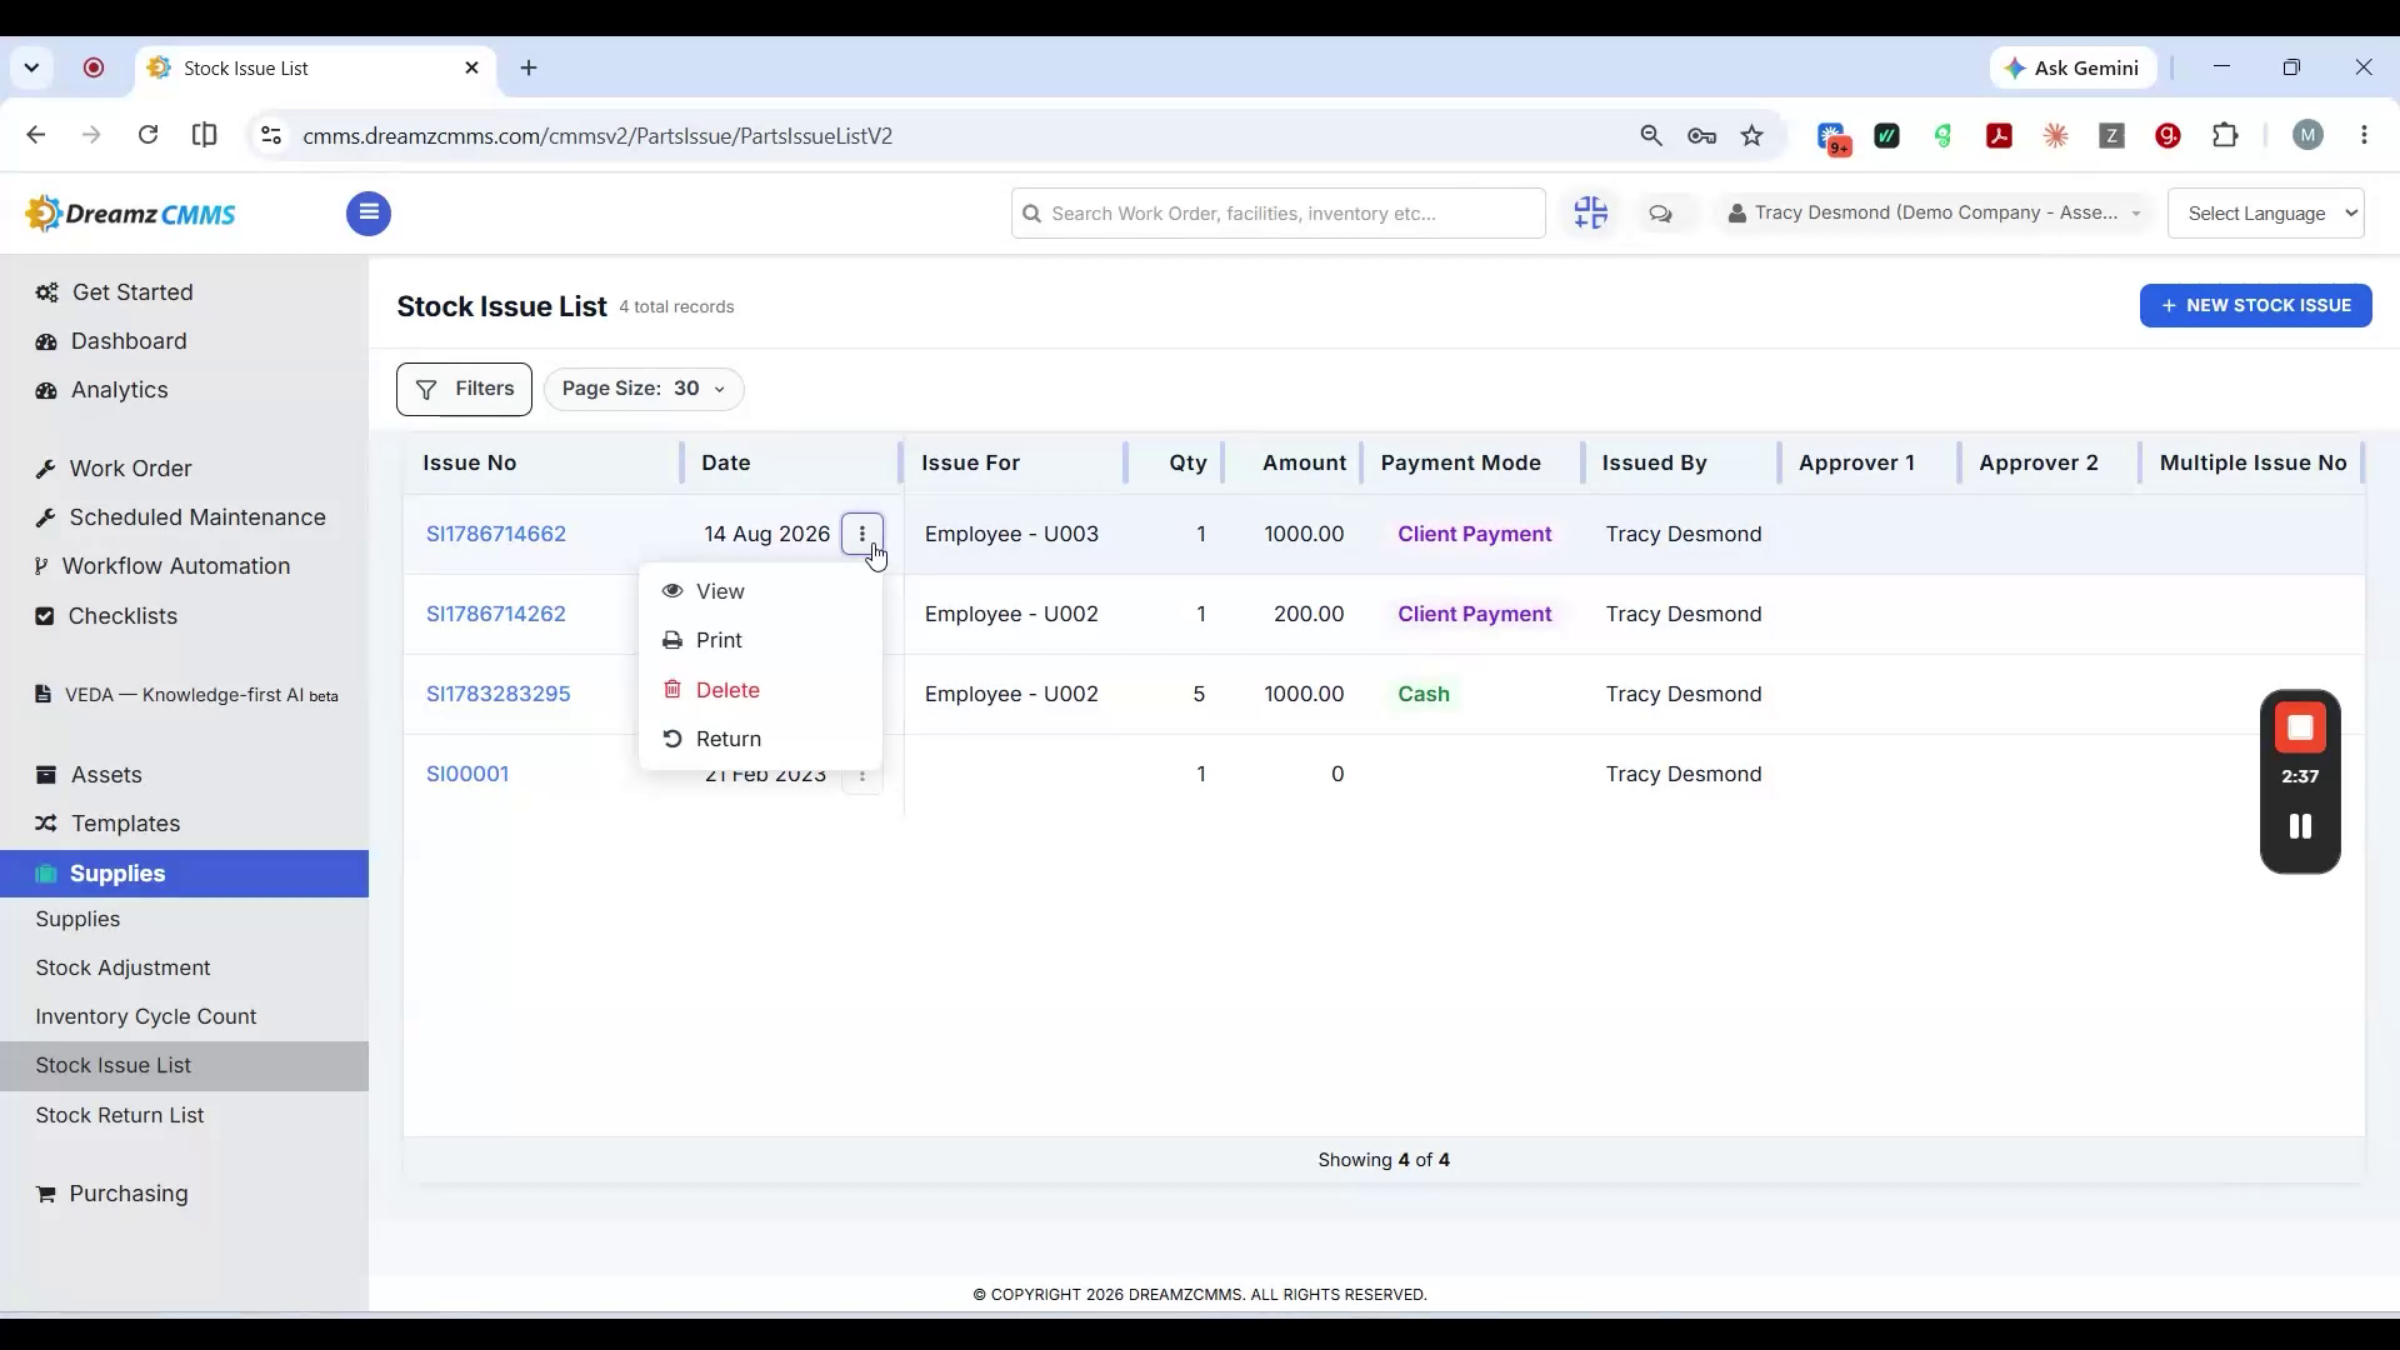
Step 33 – Saving Issue and Return Start
Saving the issue returns you to the stock issue list. Returning it works the same way from that same list.
Step 34 – Return Details and Saving
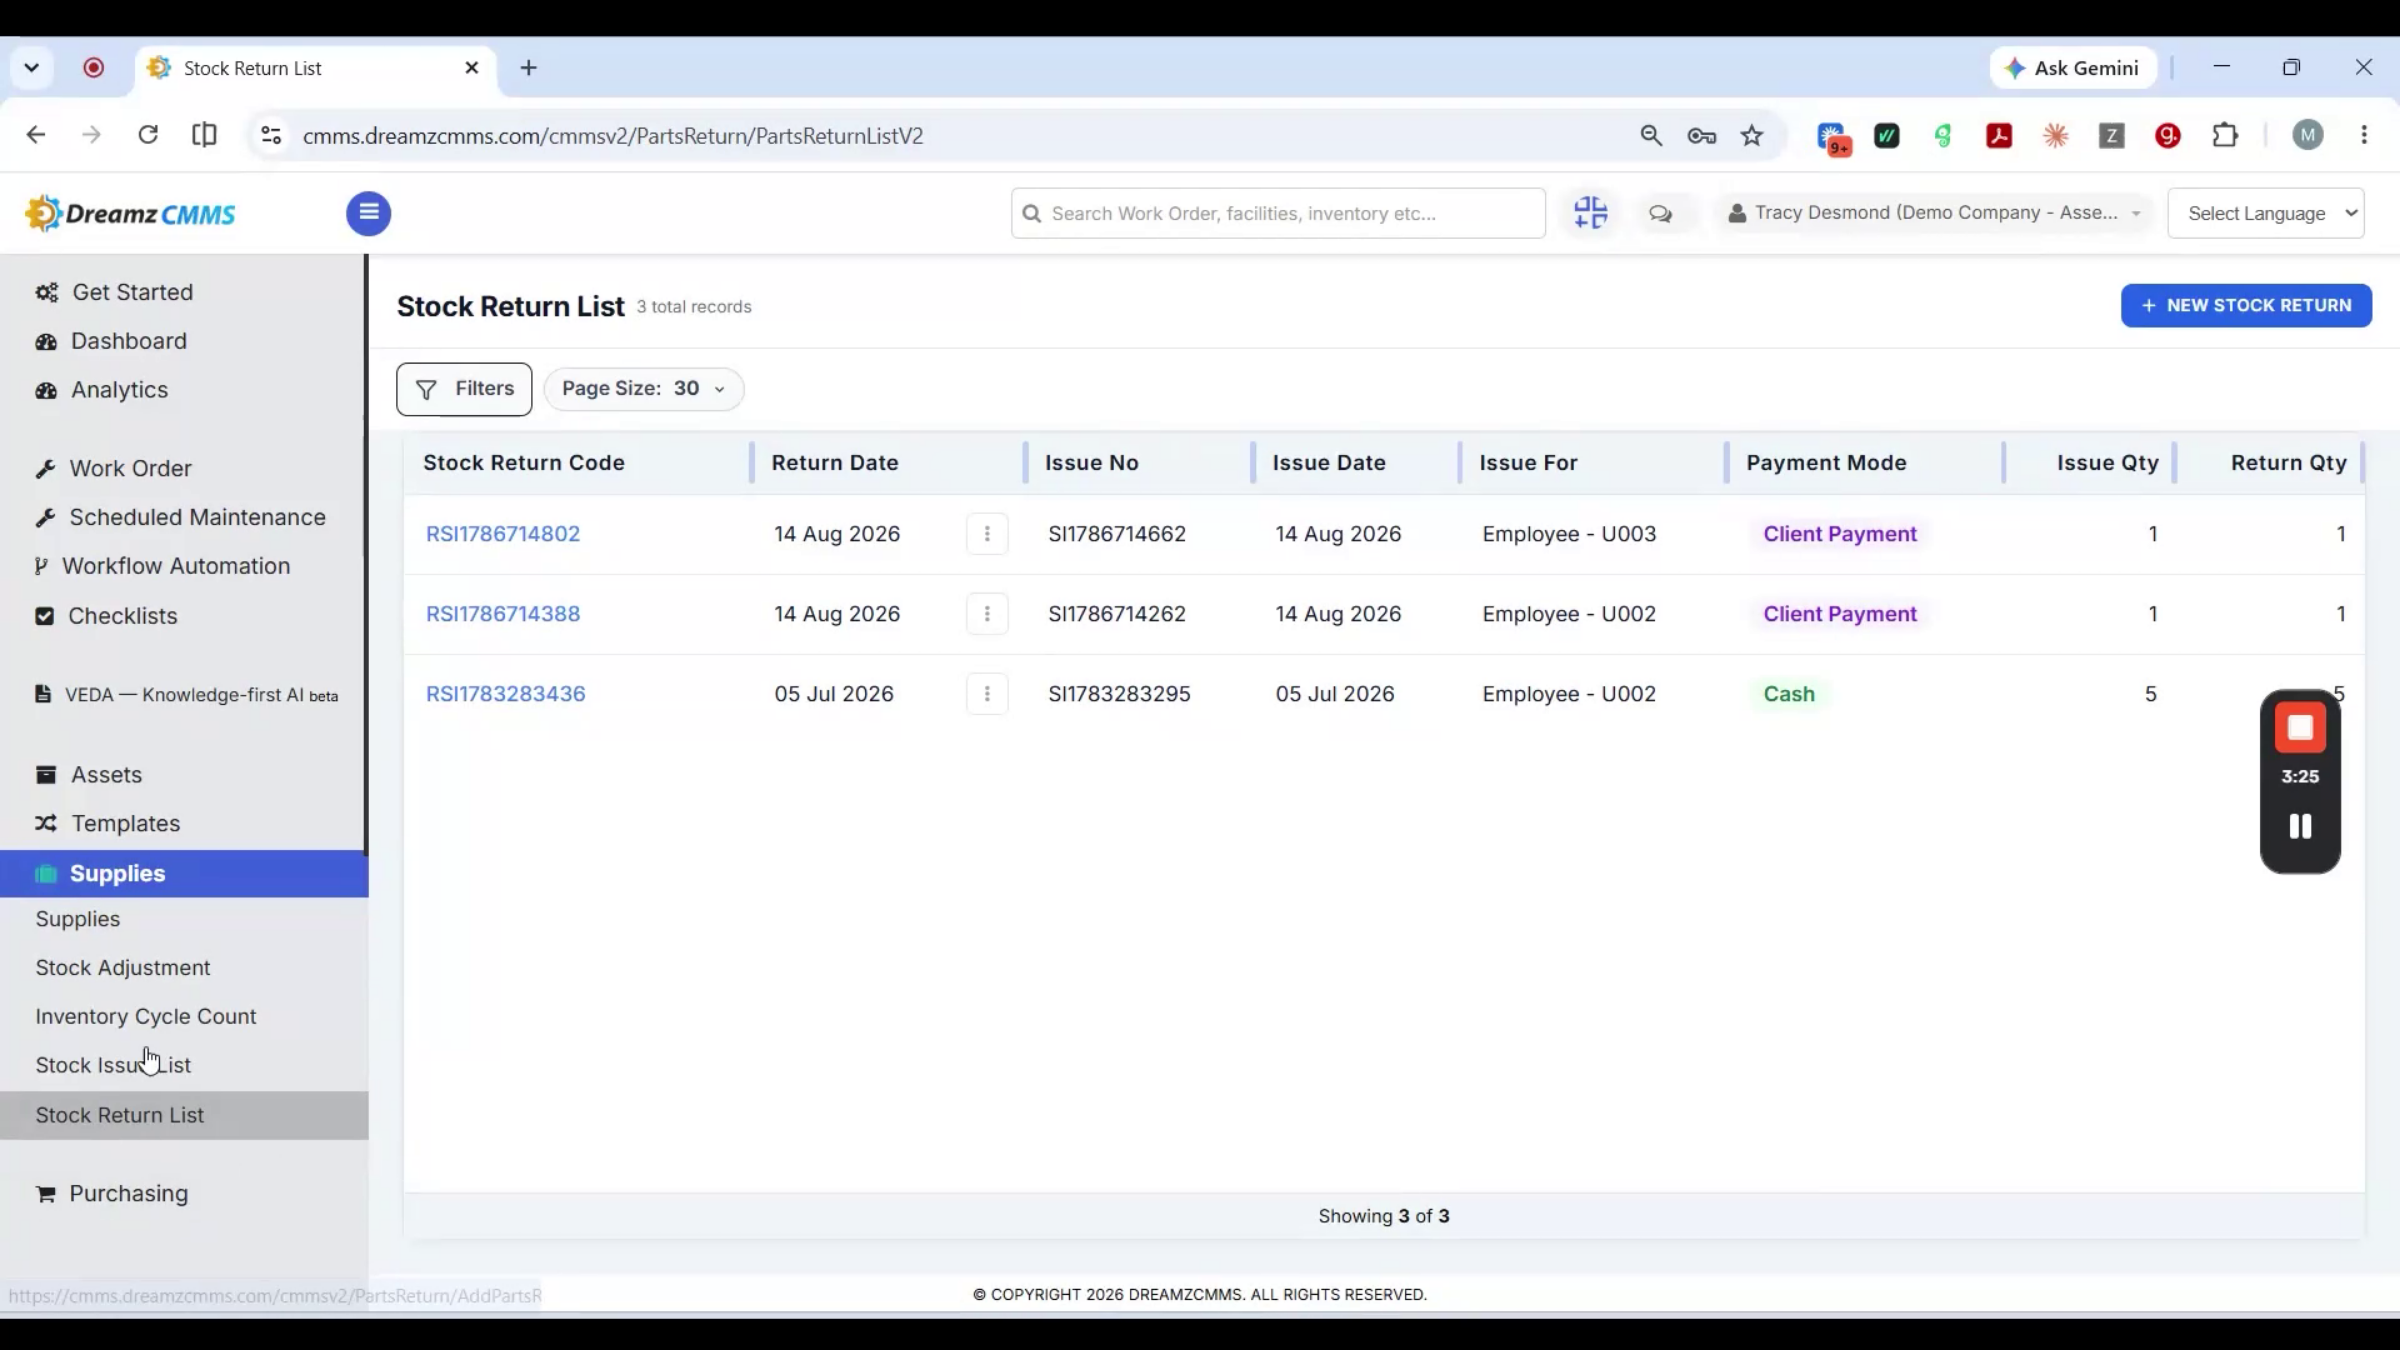
Return Details captures the return code and date, the facility, and a reference back to the original issue, along with a reason for the return and any remarks. Saving it lands the return on the stock return list, linked to that same issue.
Step 35 – Stock Issue Return History
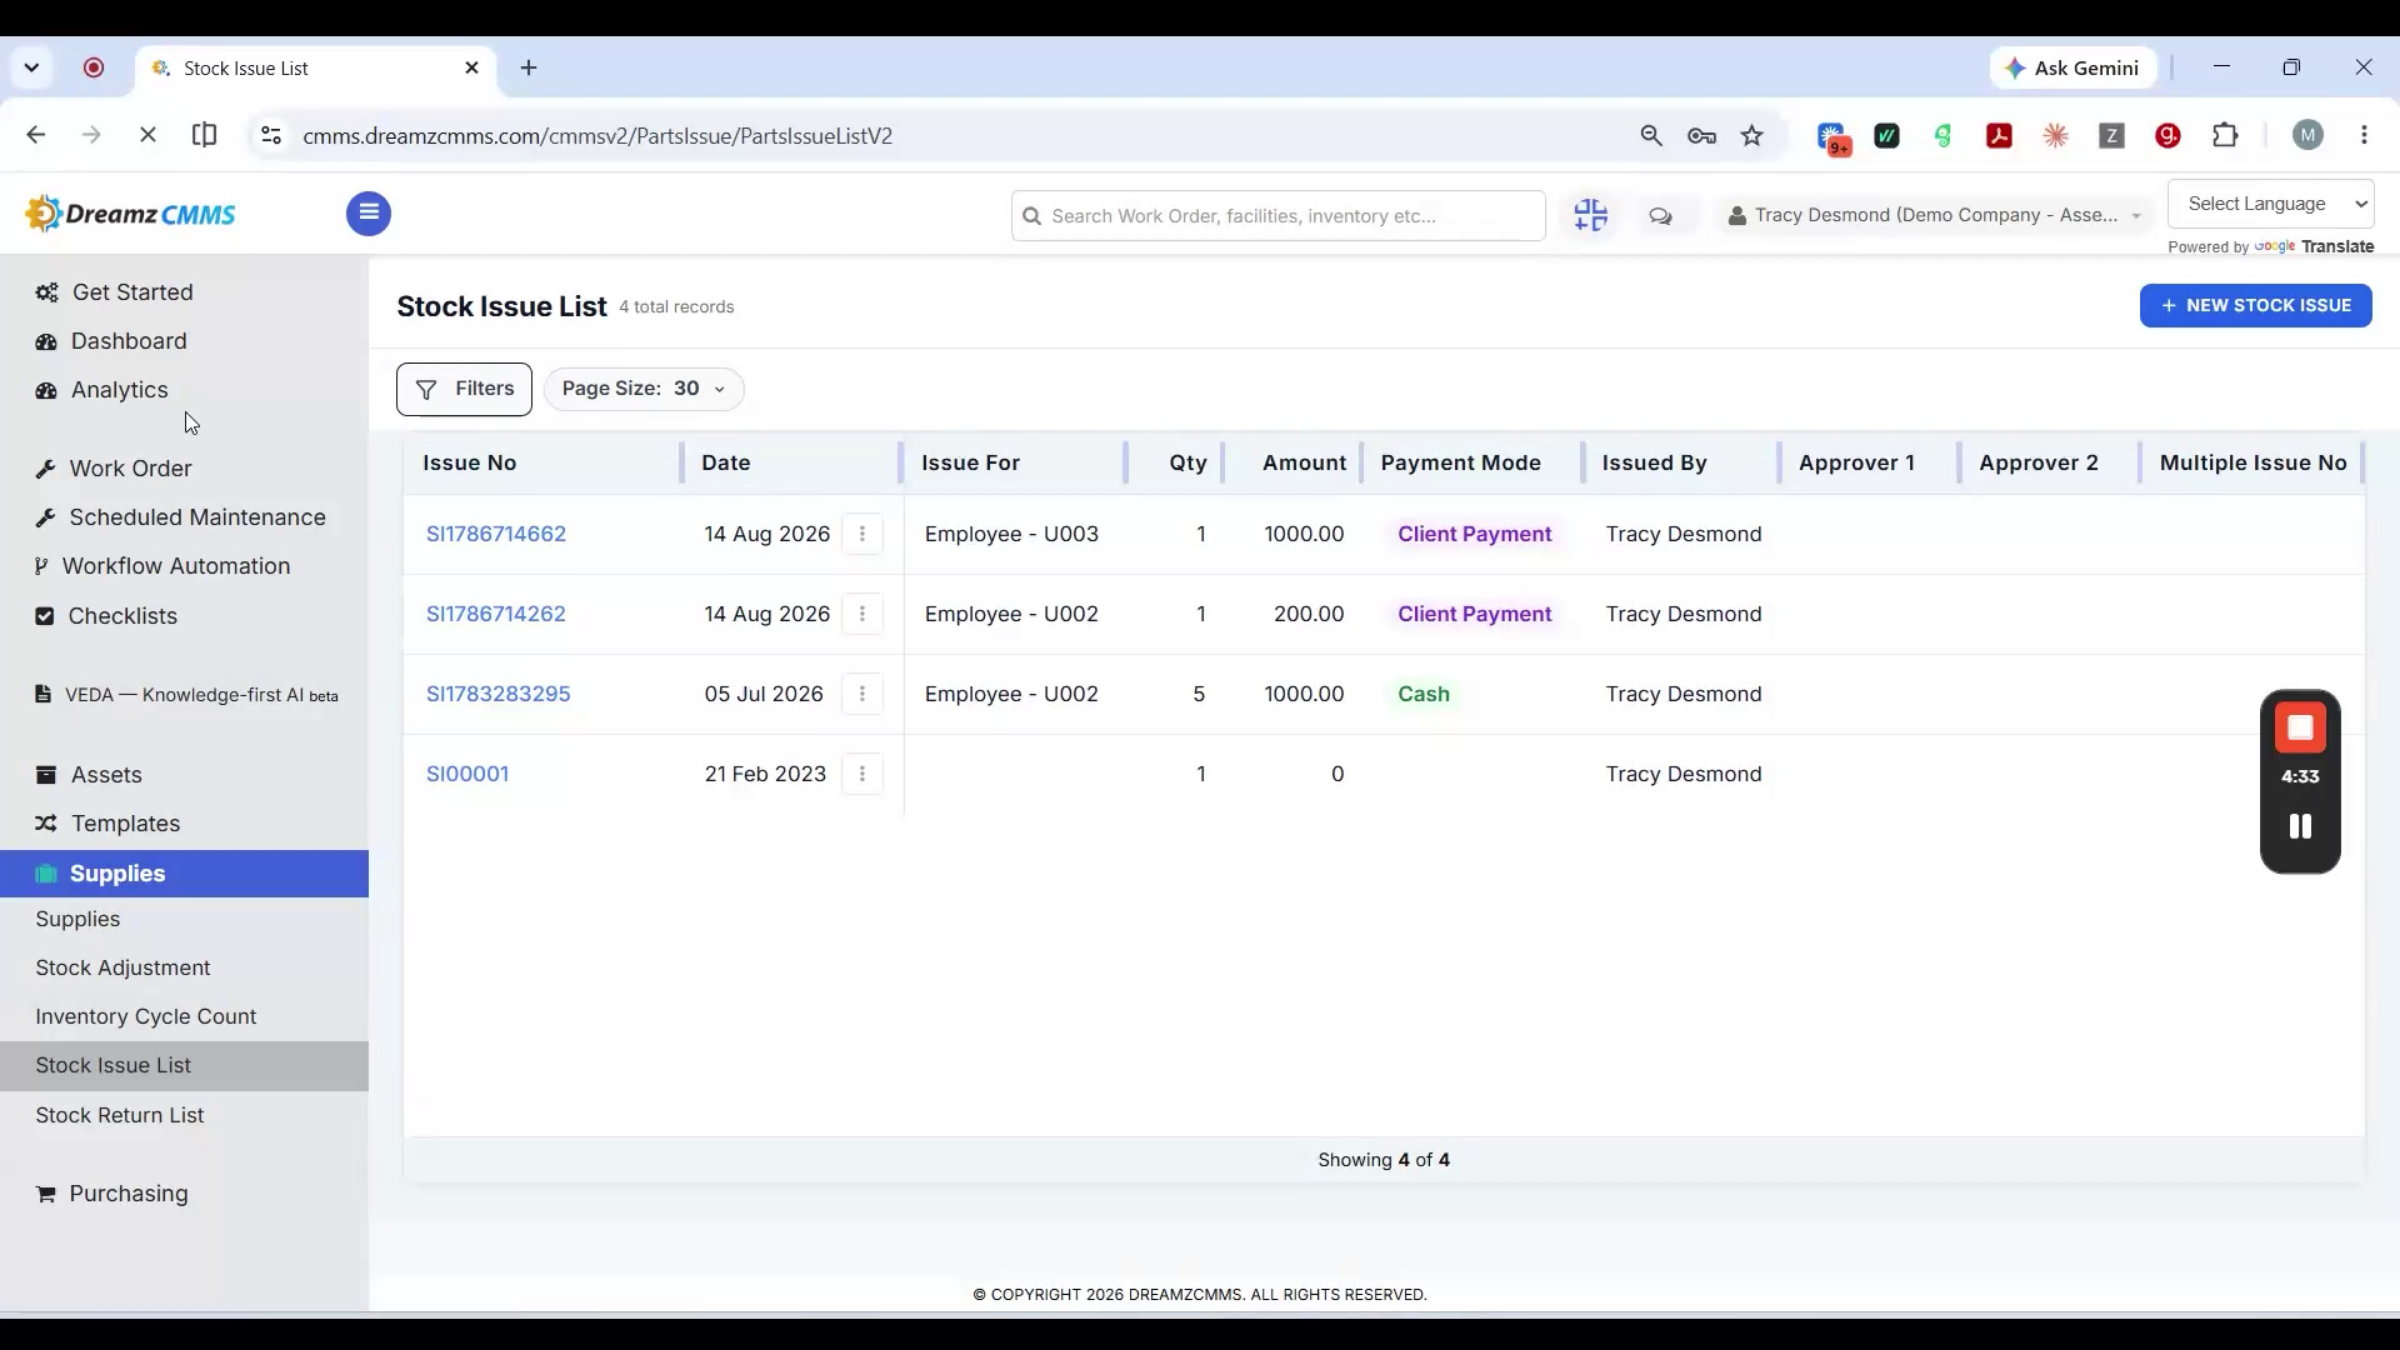
Back on the stock issue list, the loop is complete. When something is issued to an employee, it also shows up on their own record — an employee's Stock Issue tab lists everything ever issued to them, and their Stock Return tab shows everything they've brought back, giving a full history against that person rather than a transaction floating on its own.
Workflow Automation and Checklists
Step 36 – Workflow Automation Setup
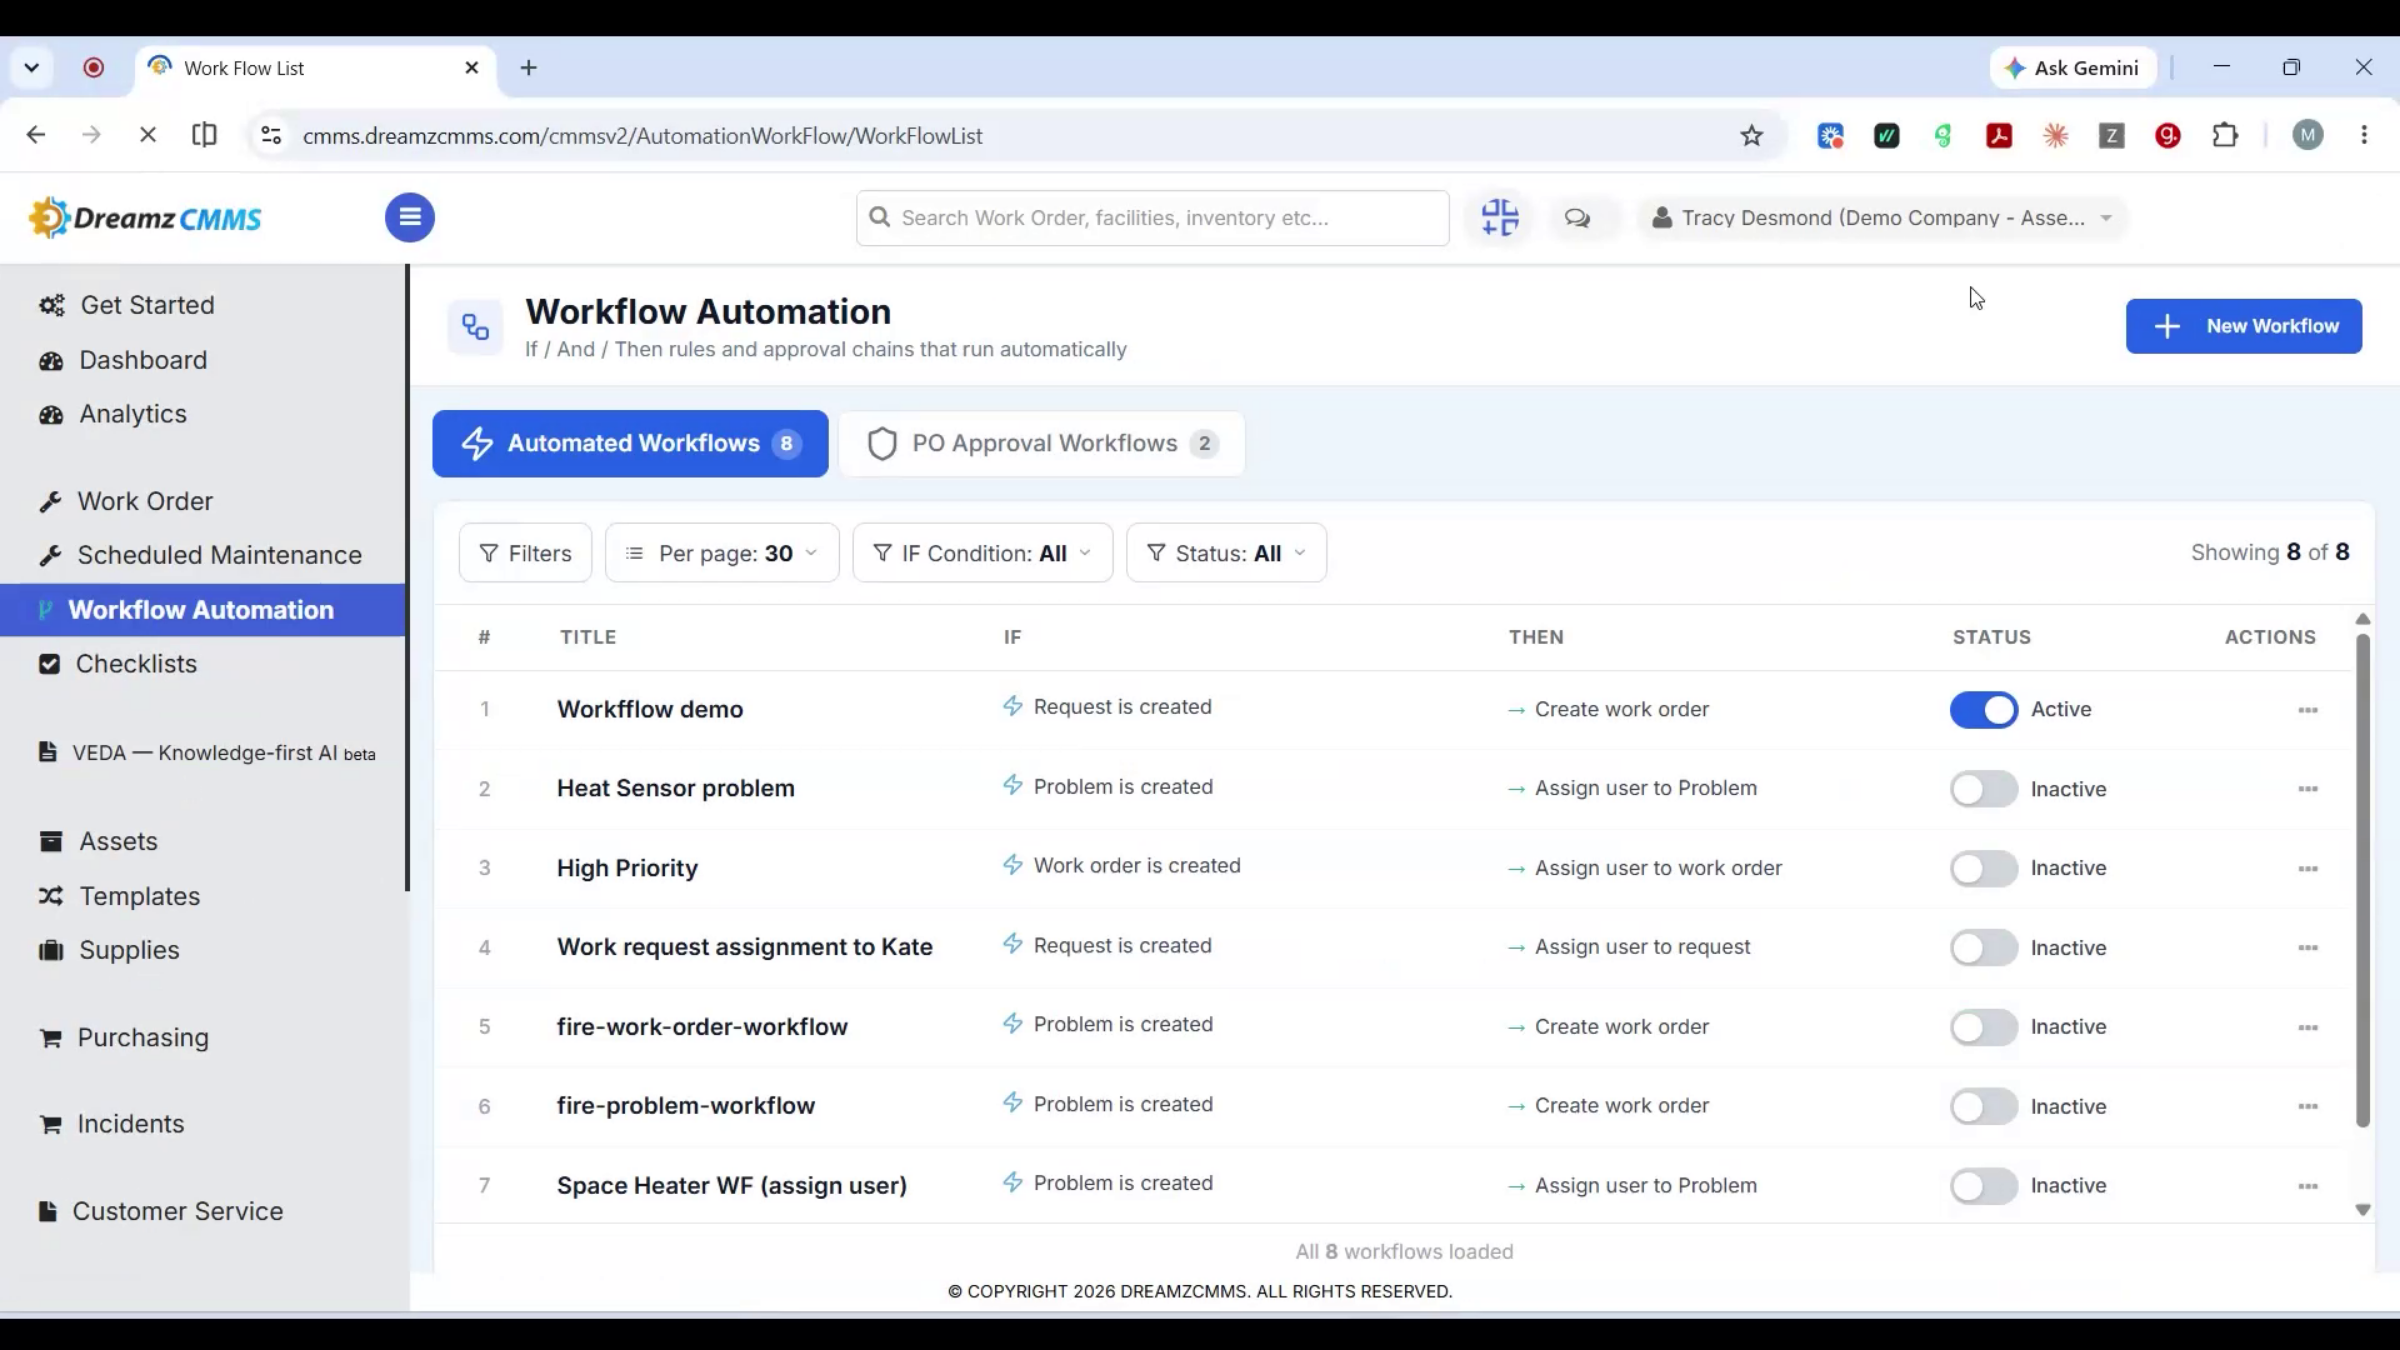
Workflow rules automate what happens next, so turning an incident into a work order doesn't need a person to trigger it every time. The workflow list shows every automation already set up and what it does. Creating one defines a trigger and an action — for example, a new incident of a certain type automatically creates a work order and assigns it.
Step 37 – Checklist Templates and AI
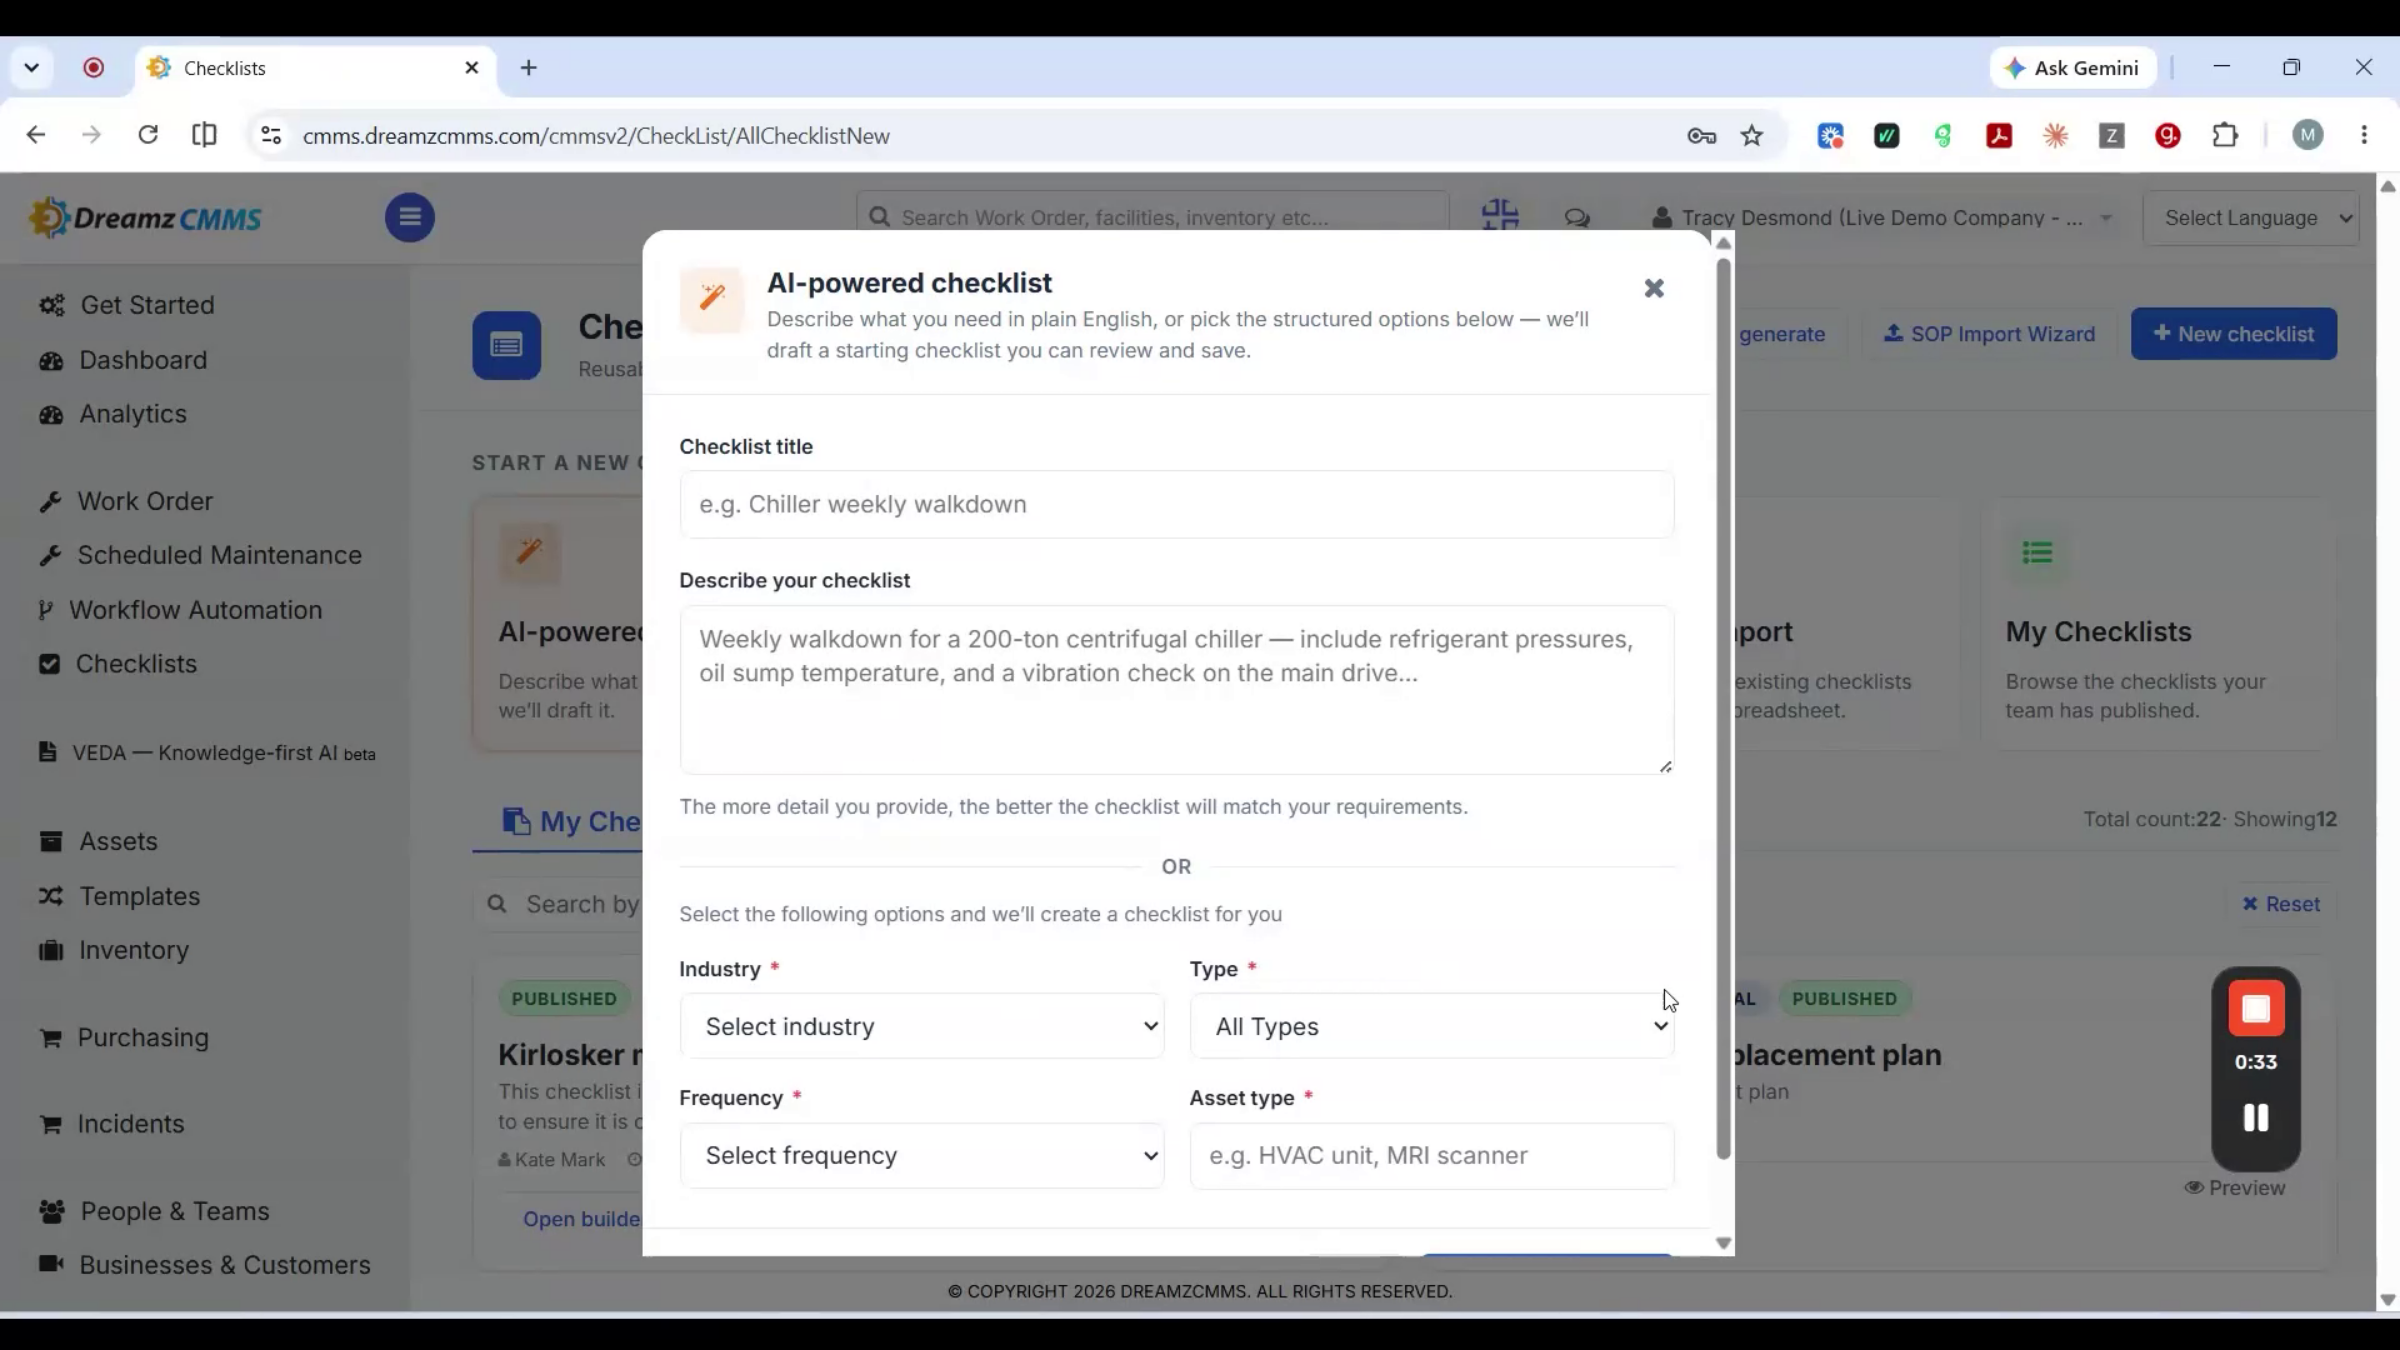
Checklist templates populate the Tasks tab on a work order once one's raised. The Checklist list shows every template already built, and checklists can also be generated with AI — describe the job, and a starting set of tasks gets drafted for you instead of being built line by line.
Step 38 – Editing and Previewing Checklist
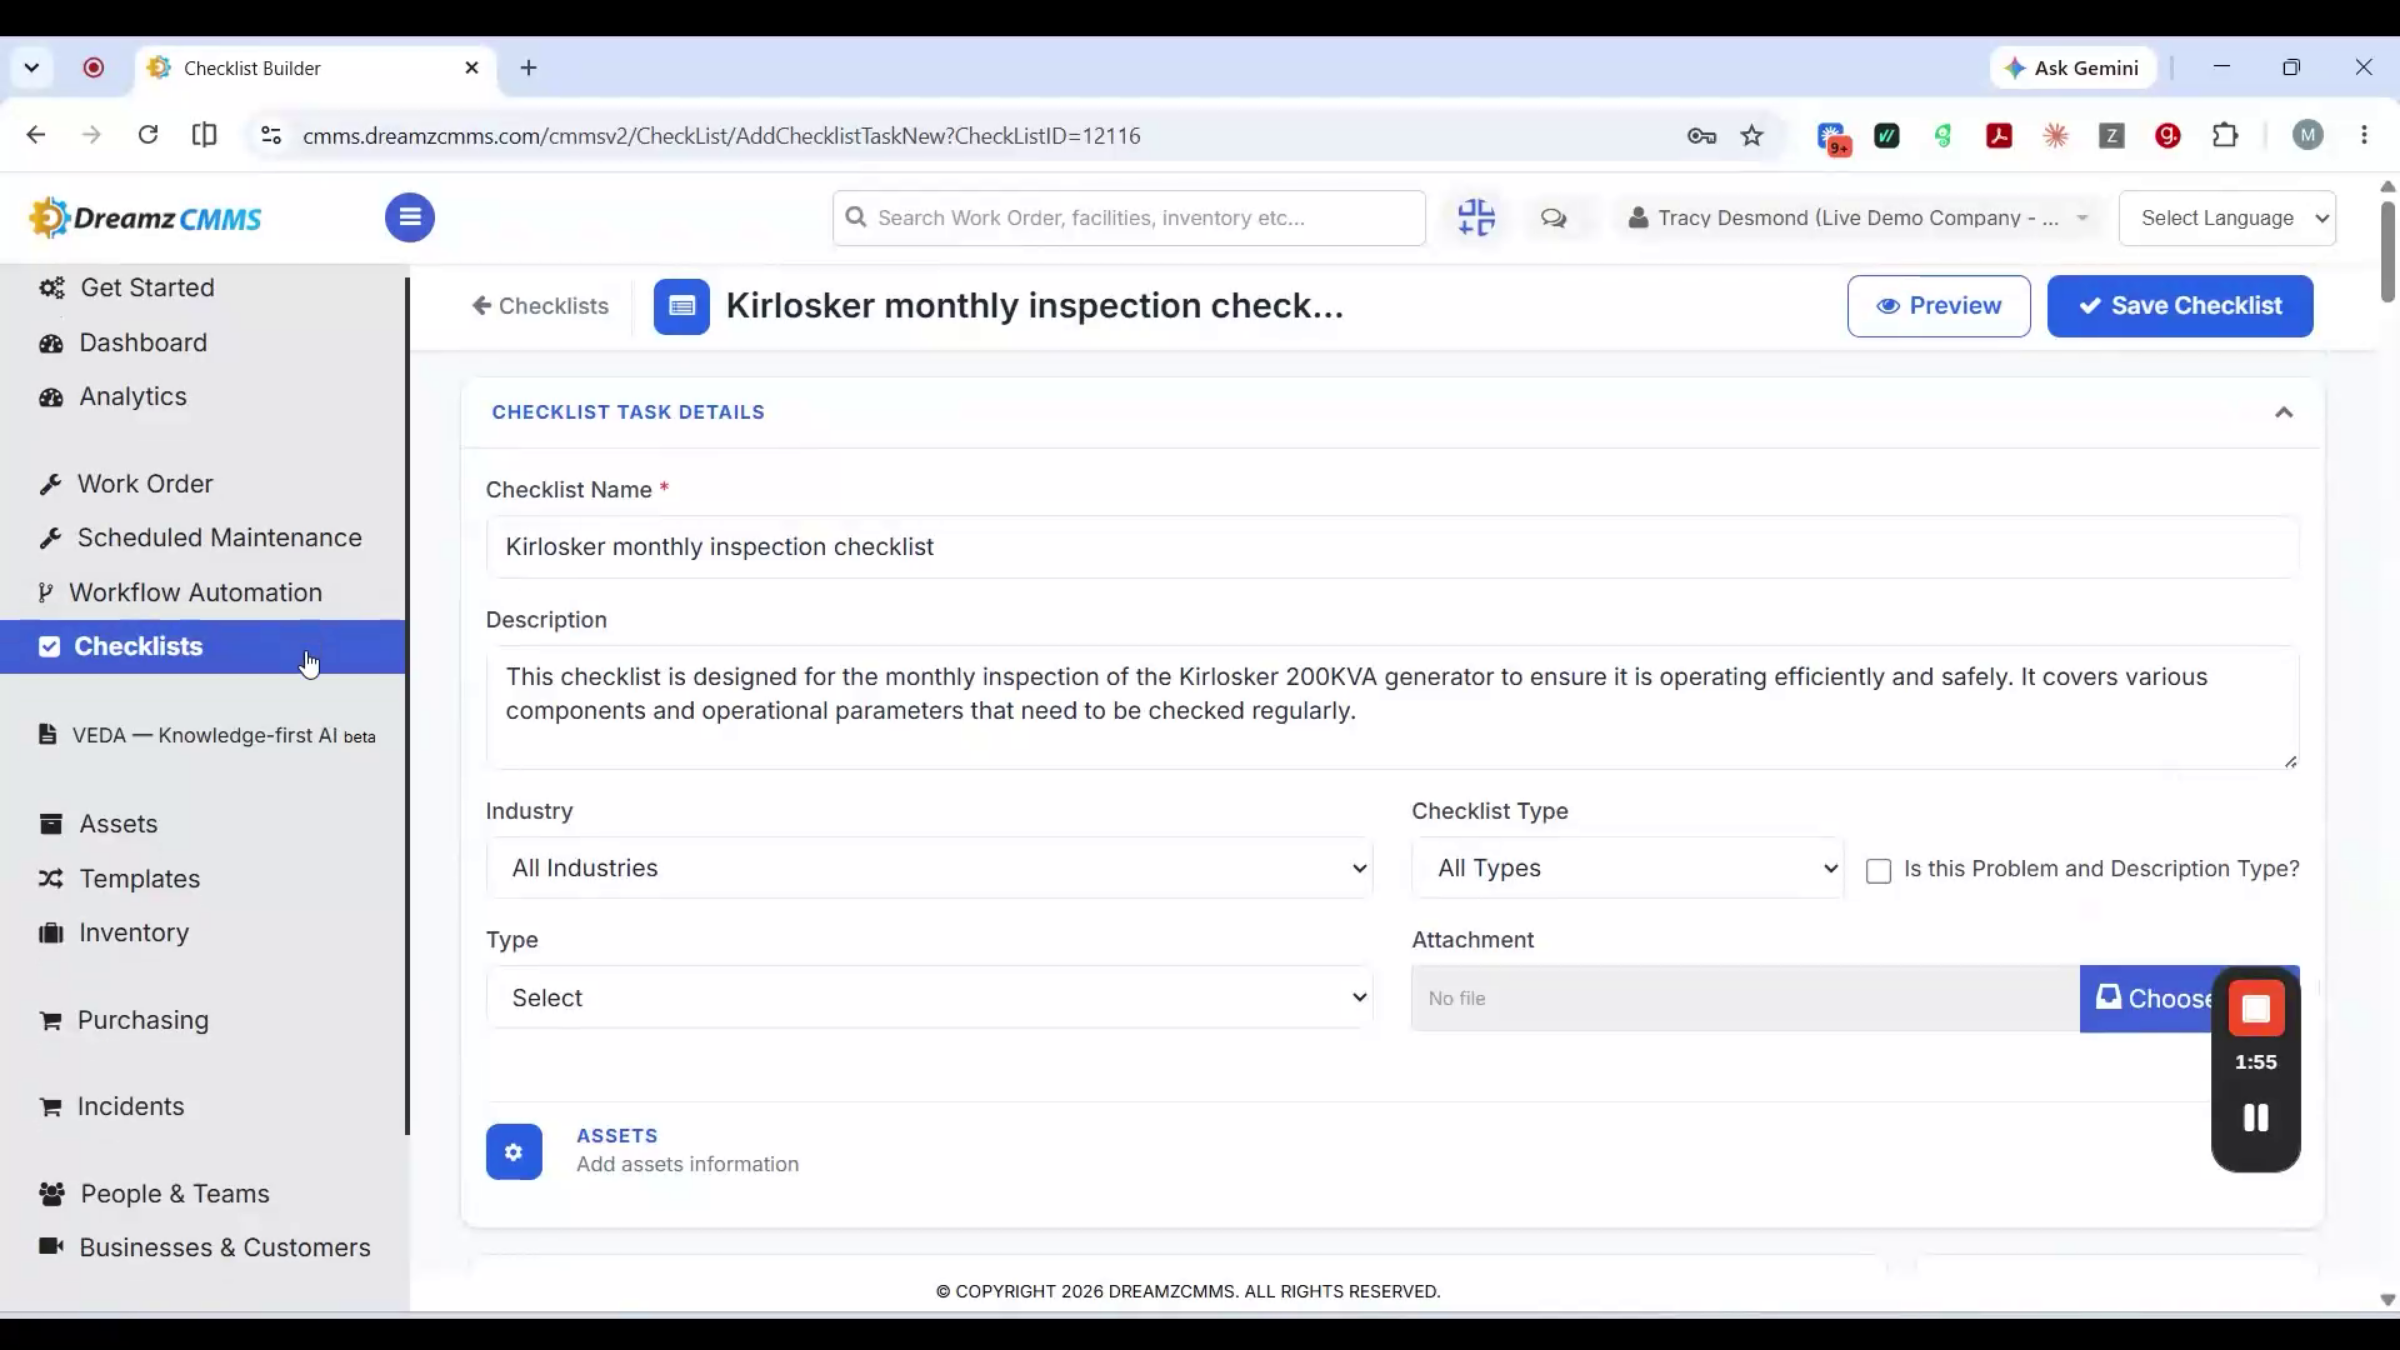
Editing an existing template lets you add, reorder, or remove tasks, and the preview shows exactly how it will look to whoever is completing it on the job.
Step 39 – Global Checklist Library
You can also use the global checklist library — copy a template from it directly, or import an Excel file to build a checklist. My Checklist shows the checklist list for whatever has been created in the system.
Incident Reporting
Step 40 – Incident Reporting Introduction
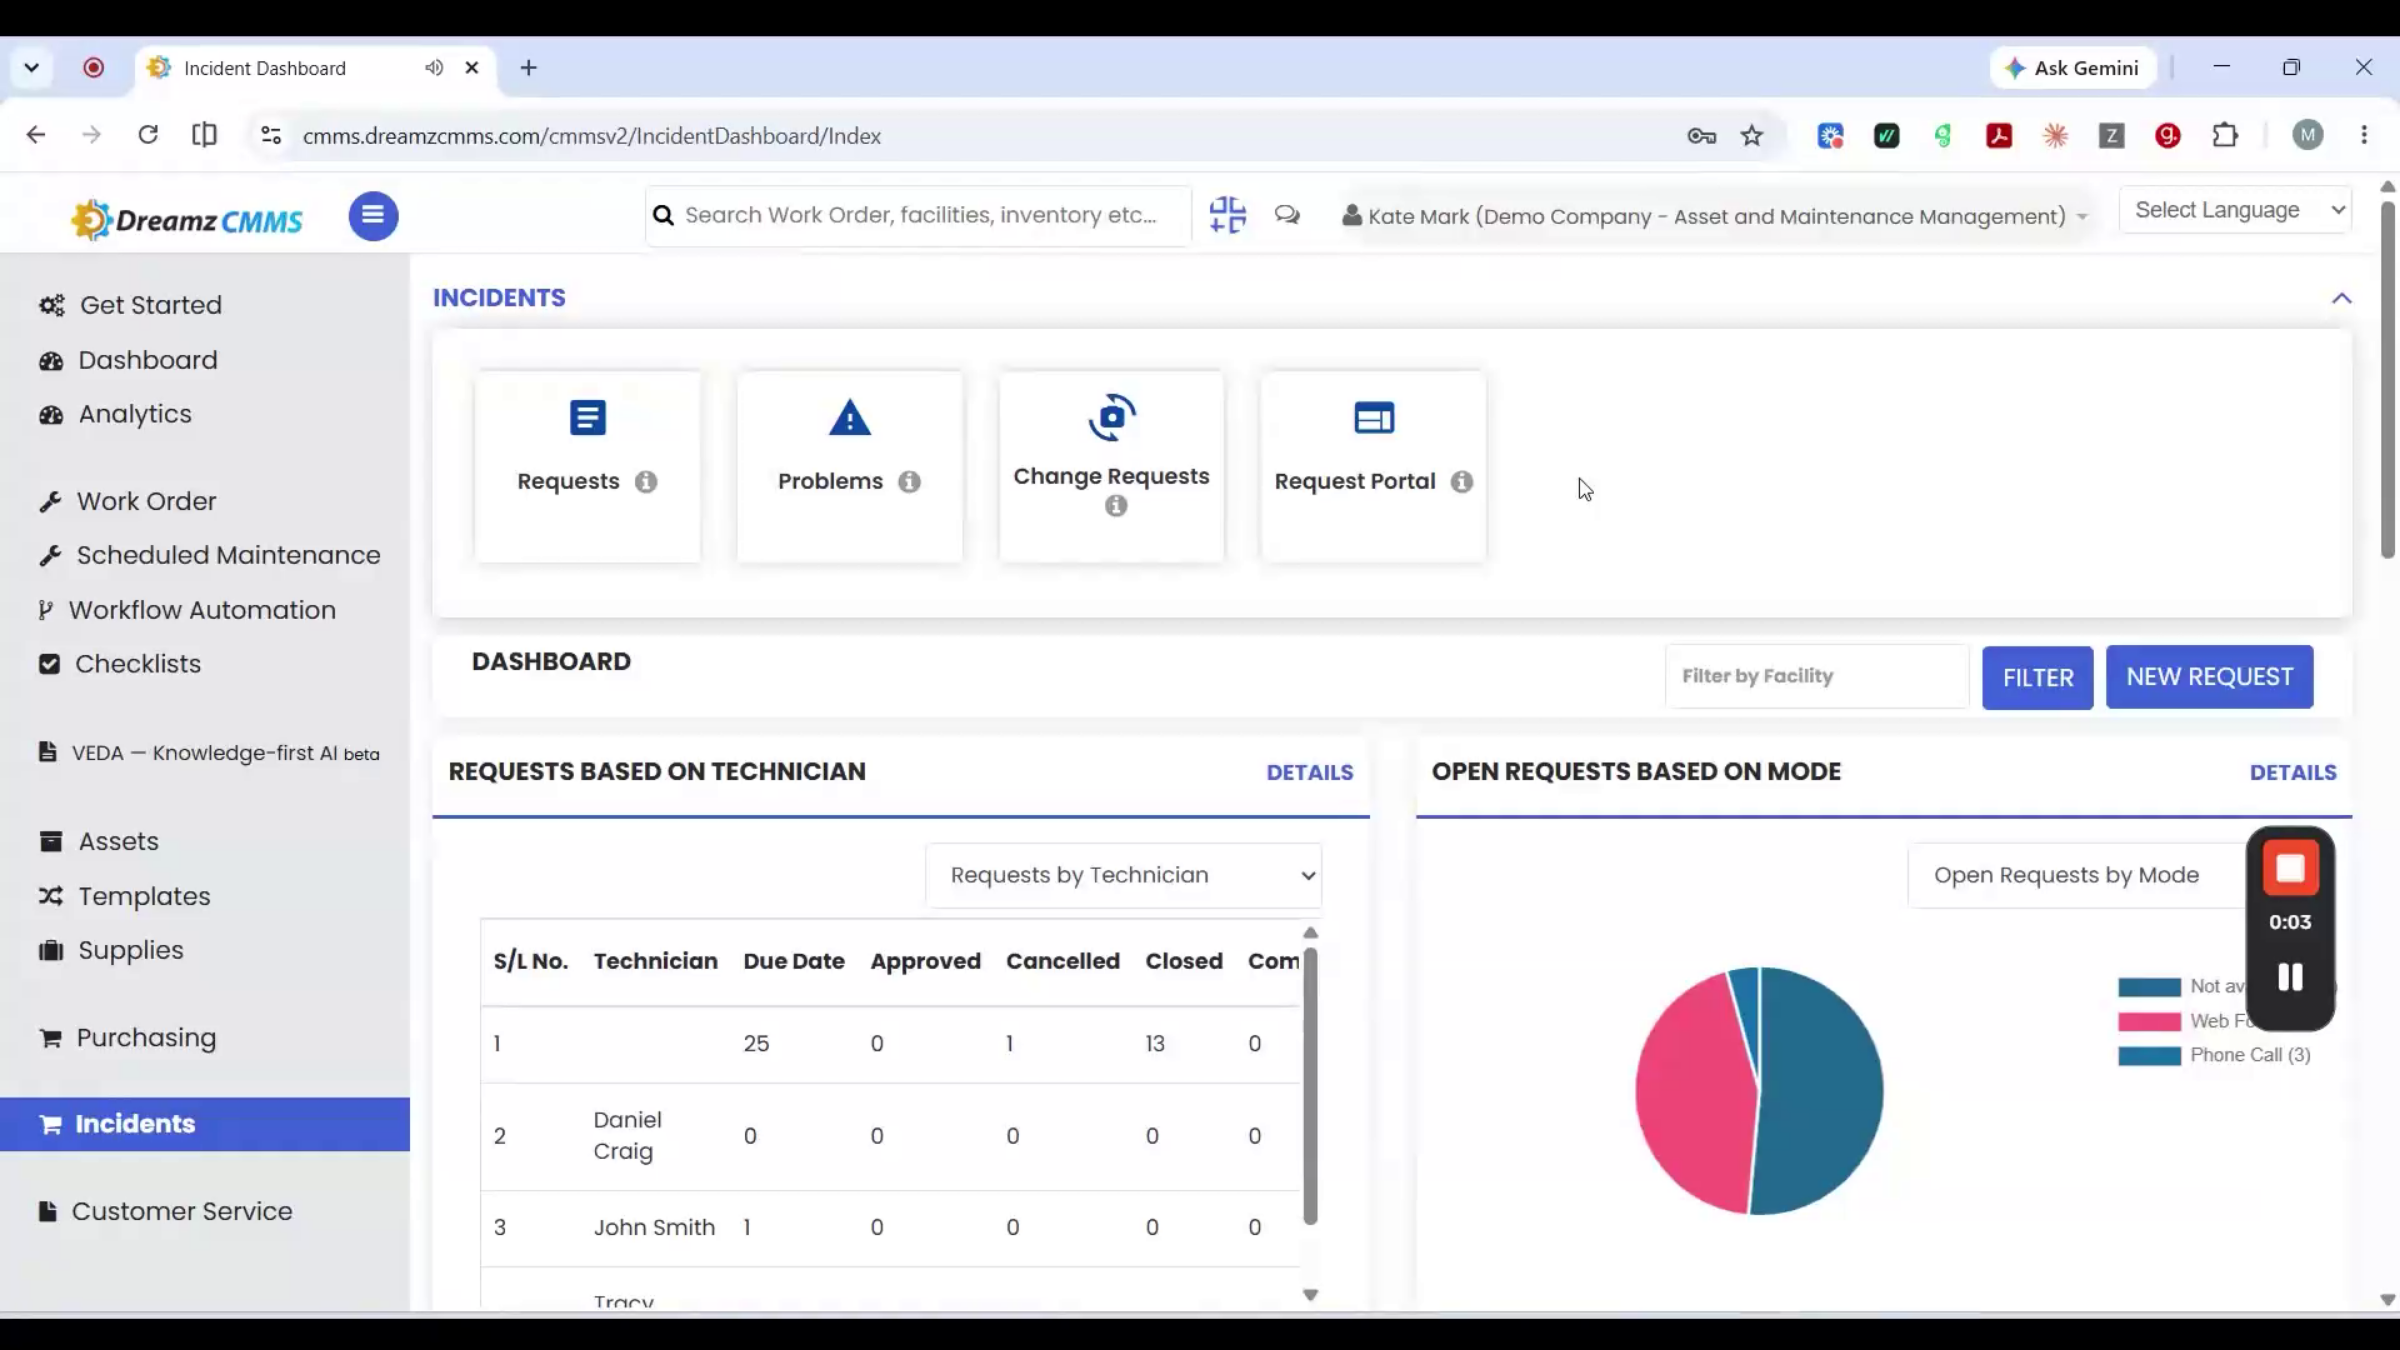
Incident reporting lets you log a request, problem, or change straight from wherever the issue actually is, with no login required to raise it. There's more than one way in — starting from the location list, you can request a QR code for any location, tied directly to that place.
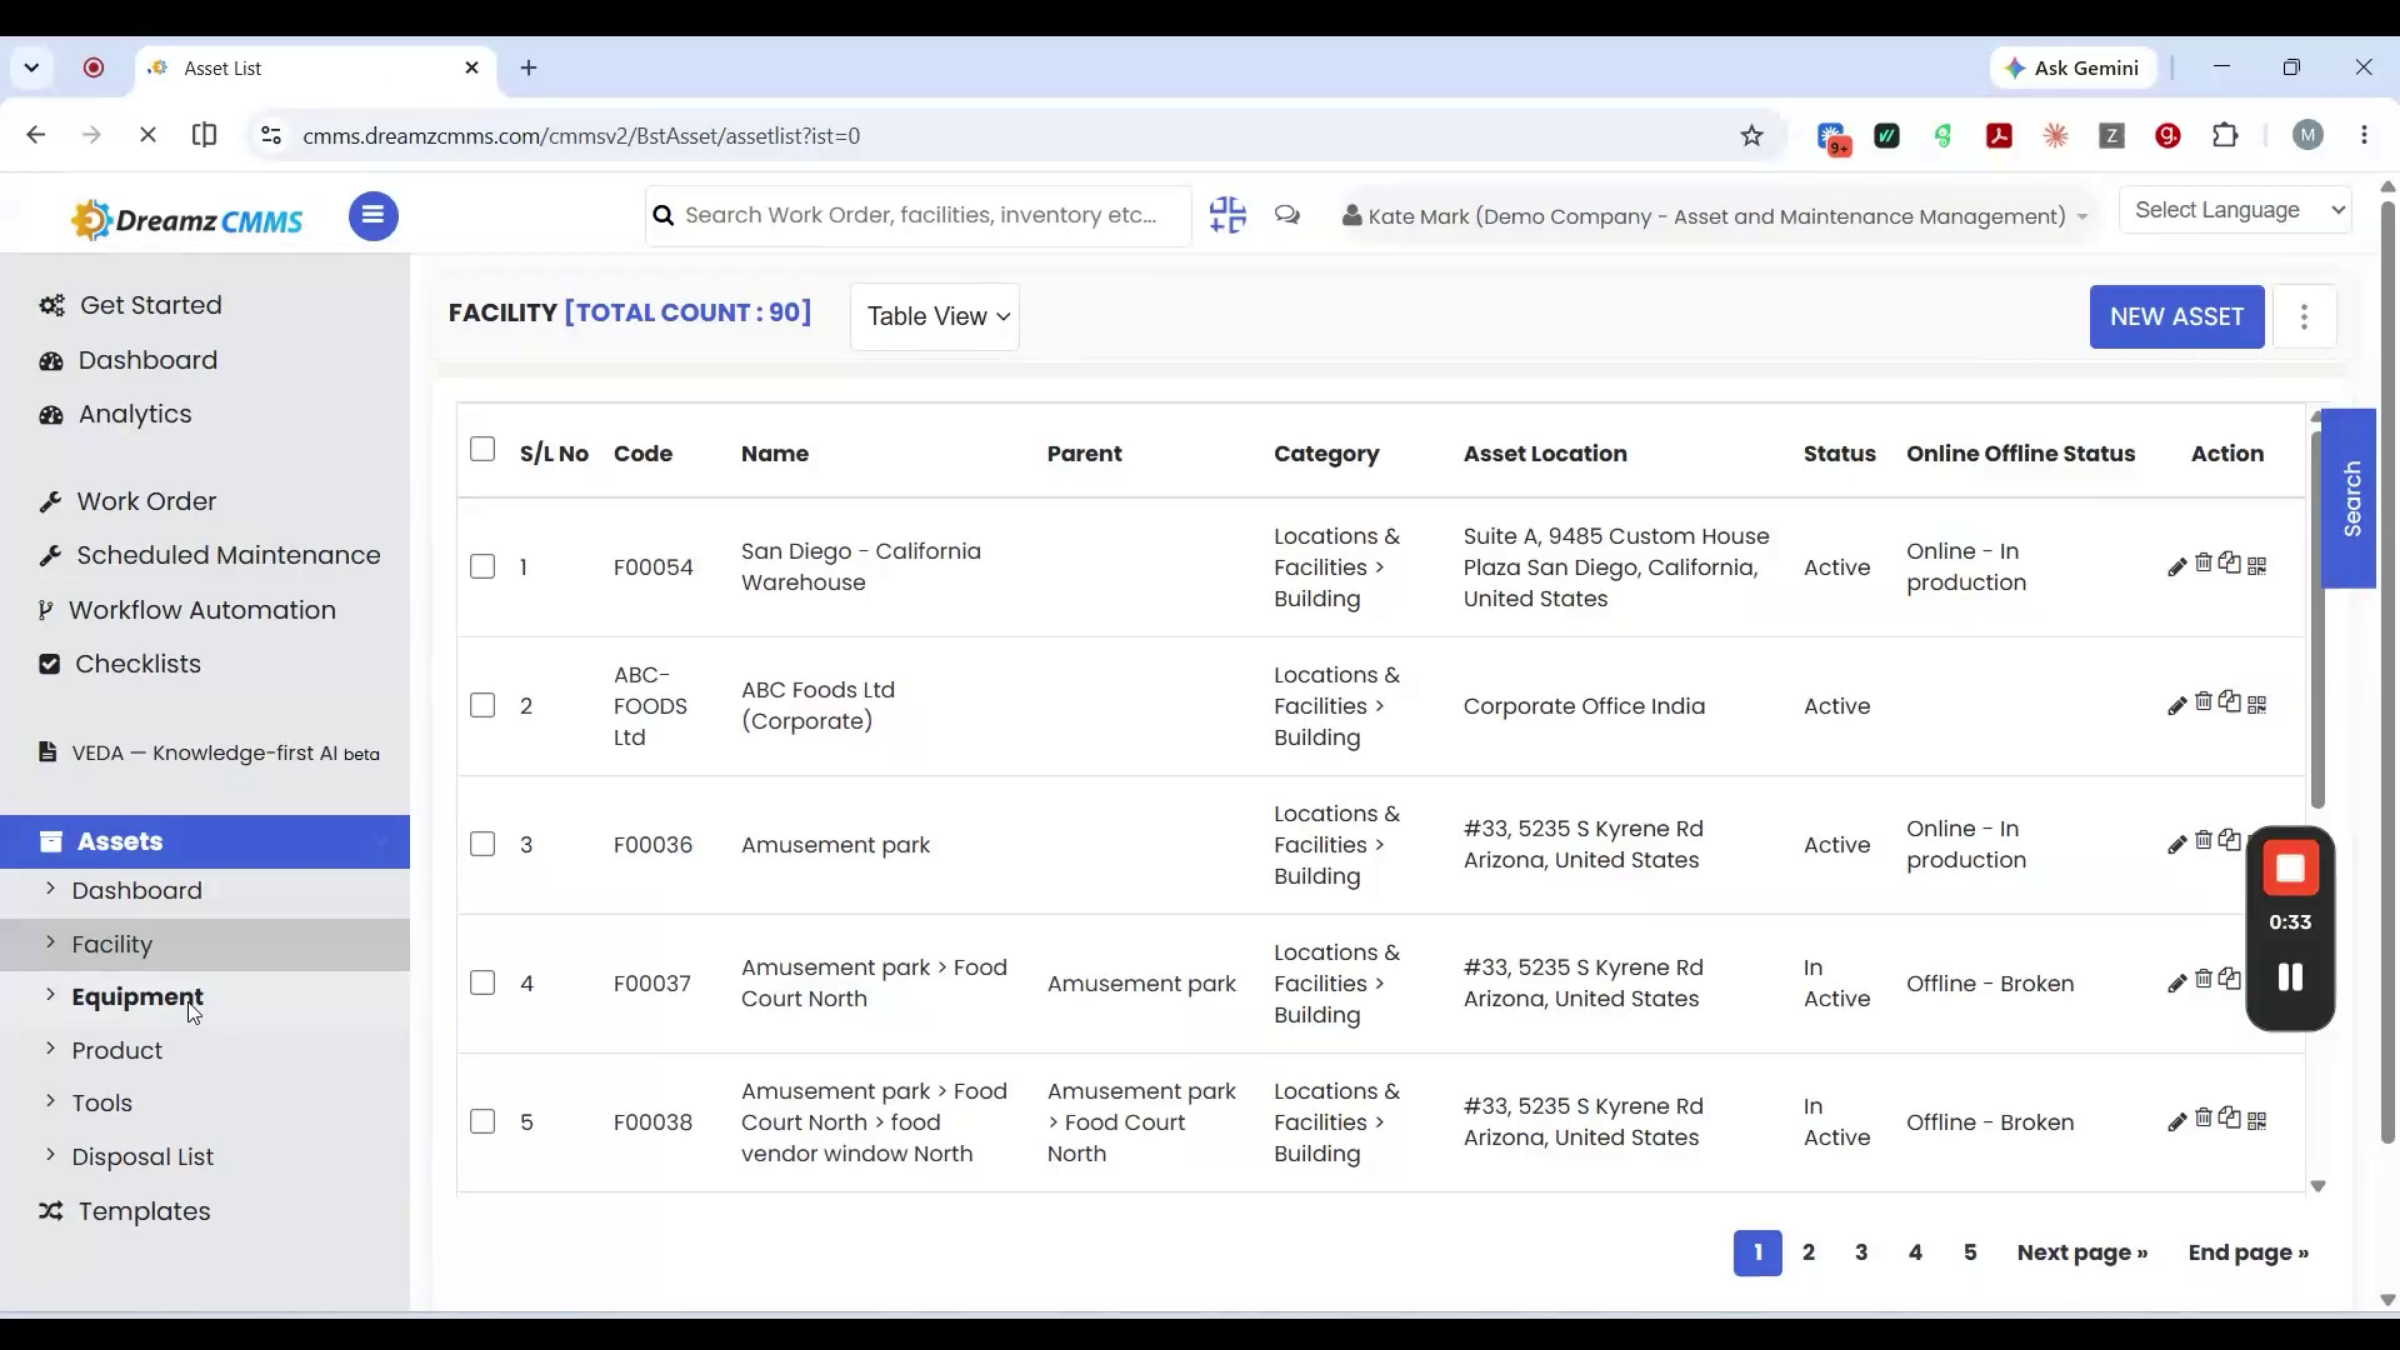
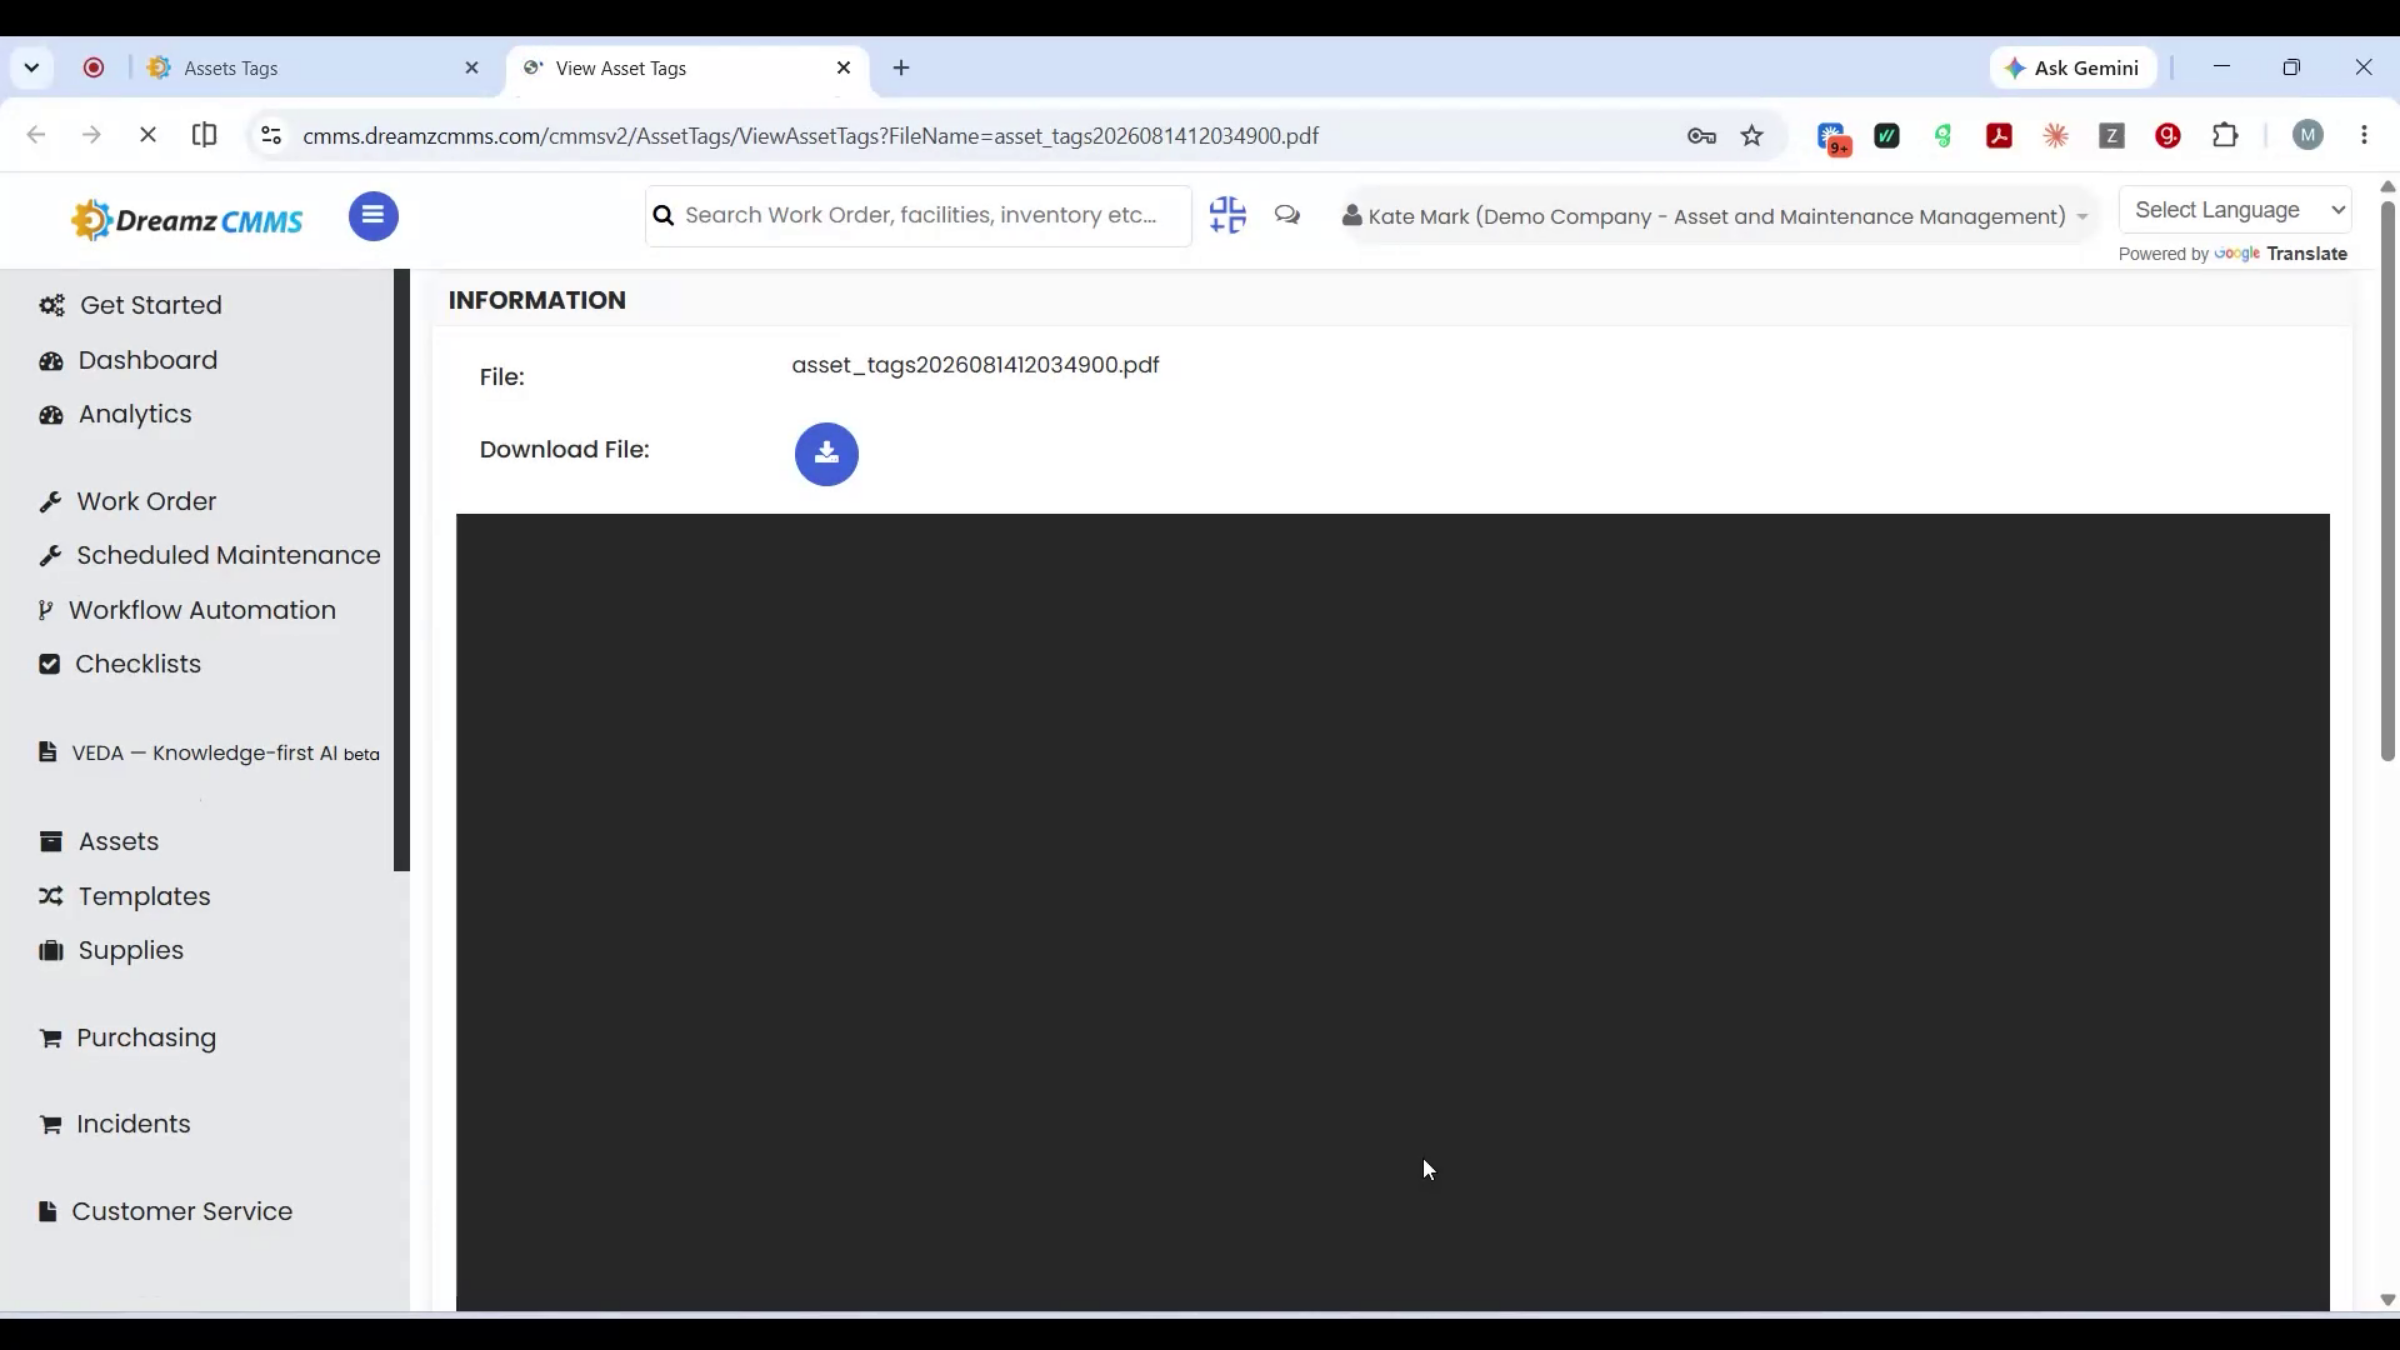
Step 41 – QR Codes for Locations and Assets
From the asset list, you can request a QR code for a specific piece of equipment or print the tag directly. Select the asset, print, and the physical QR code is ready to stick on.
Step 42 – Request Portal Access
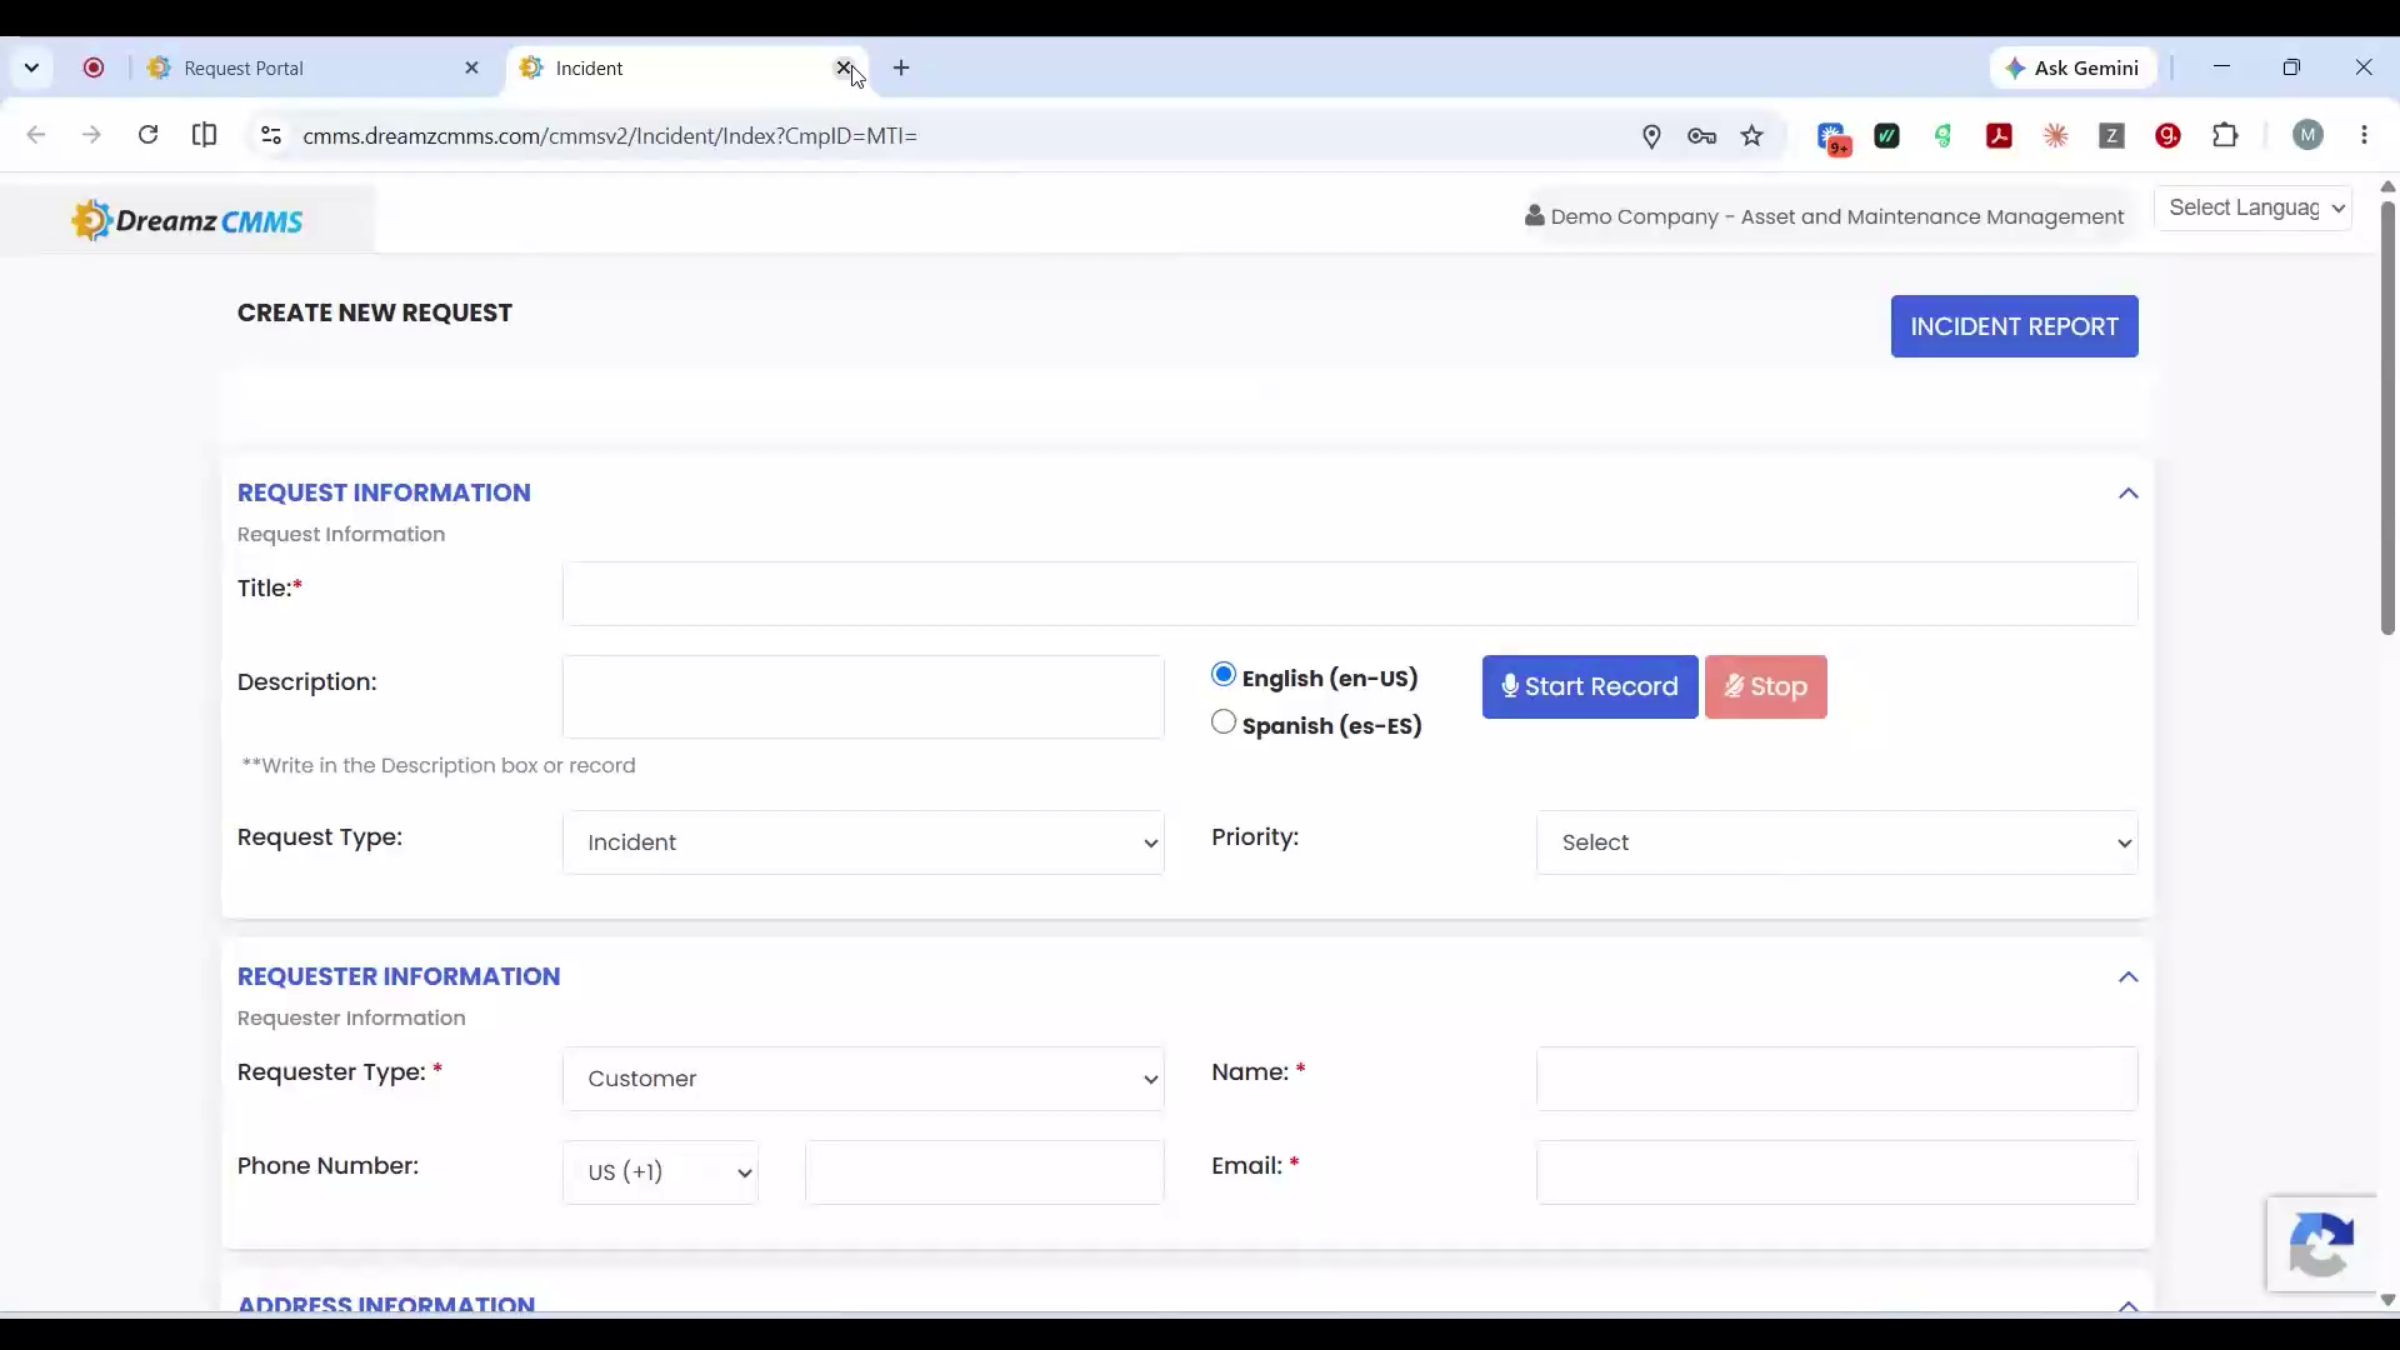
The request portal itself also has its own QR code to print if you'd rather post one general code somewhere central. Scanning any of those, or opening the portal link directly, opens straight in with no login needed at all.
Step 43 – Submitting Incident Request
From there, whoever found the issue fills in the request and submits it.
Step 44 – Incident List and Work Order Creation
The same request can also be raised from the mobile app directly if that's quicker than scanning a code. Every request lands on the incident list. Because of the workflow set up earlier, a work order gets created automatically — or, without one, creating it and assigning it to a technician is just an option right there on the list. That's incident reporting end-to-end: no account needed, no barrier to reporting something, and it's already on its way to becoming a tracked, assigned work order.
Work Orders
Step 45 – Work Order List and Views
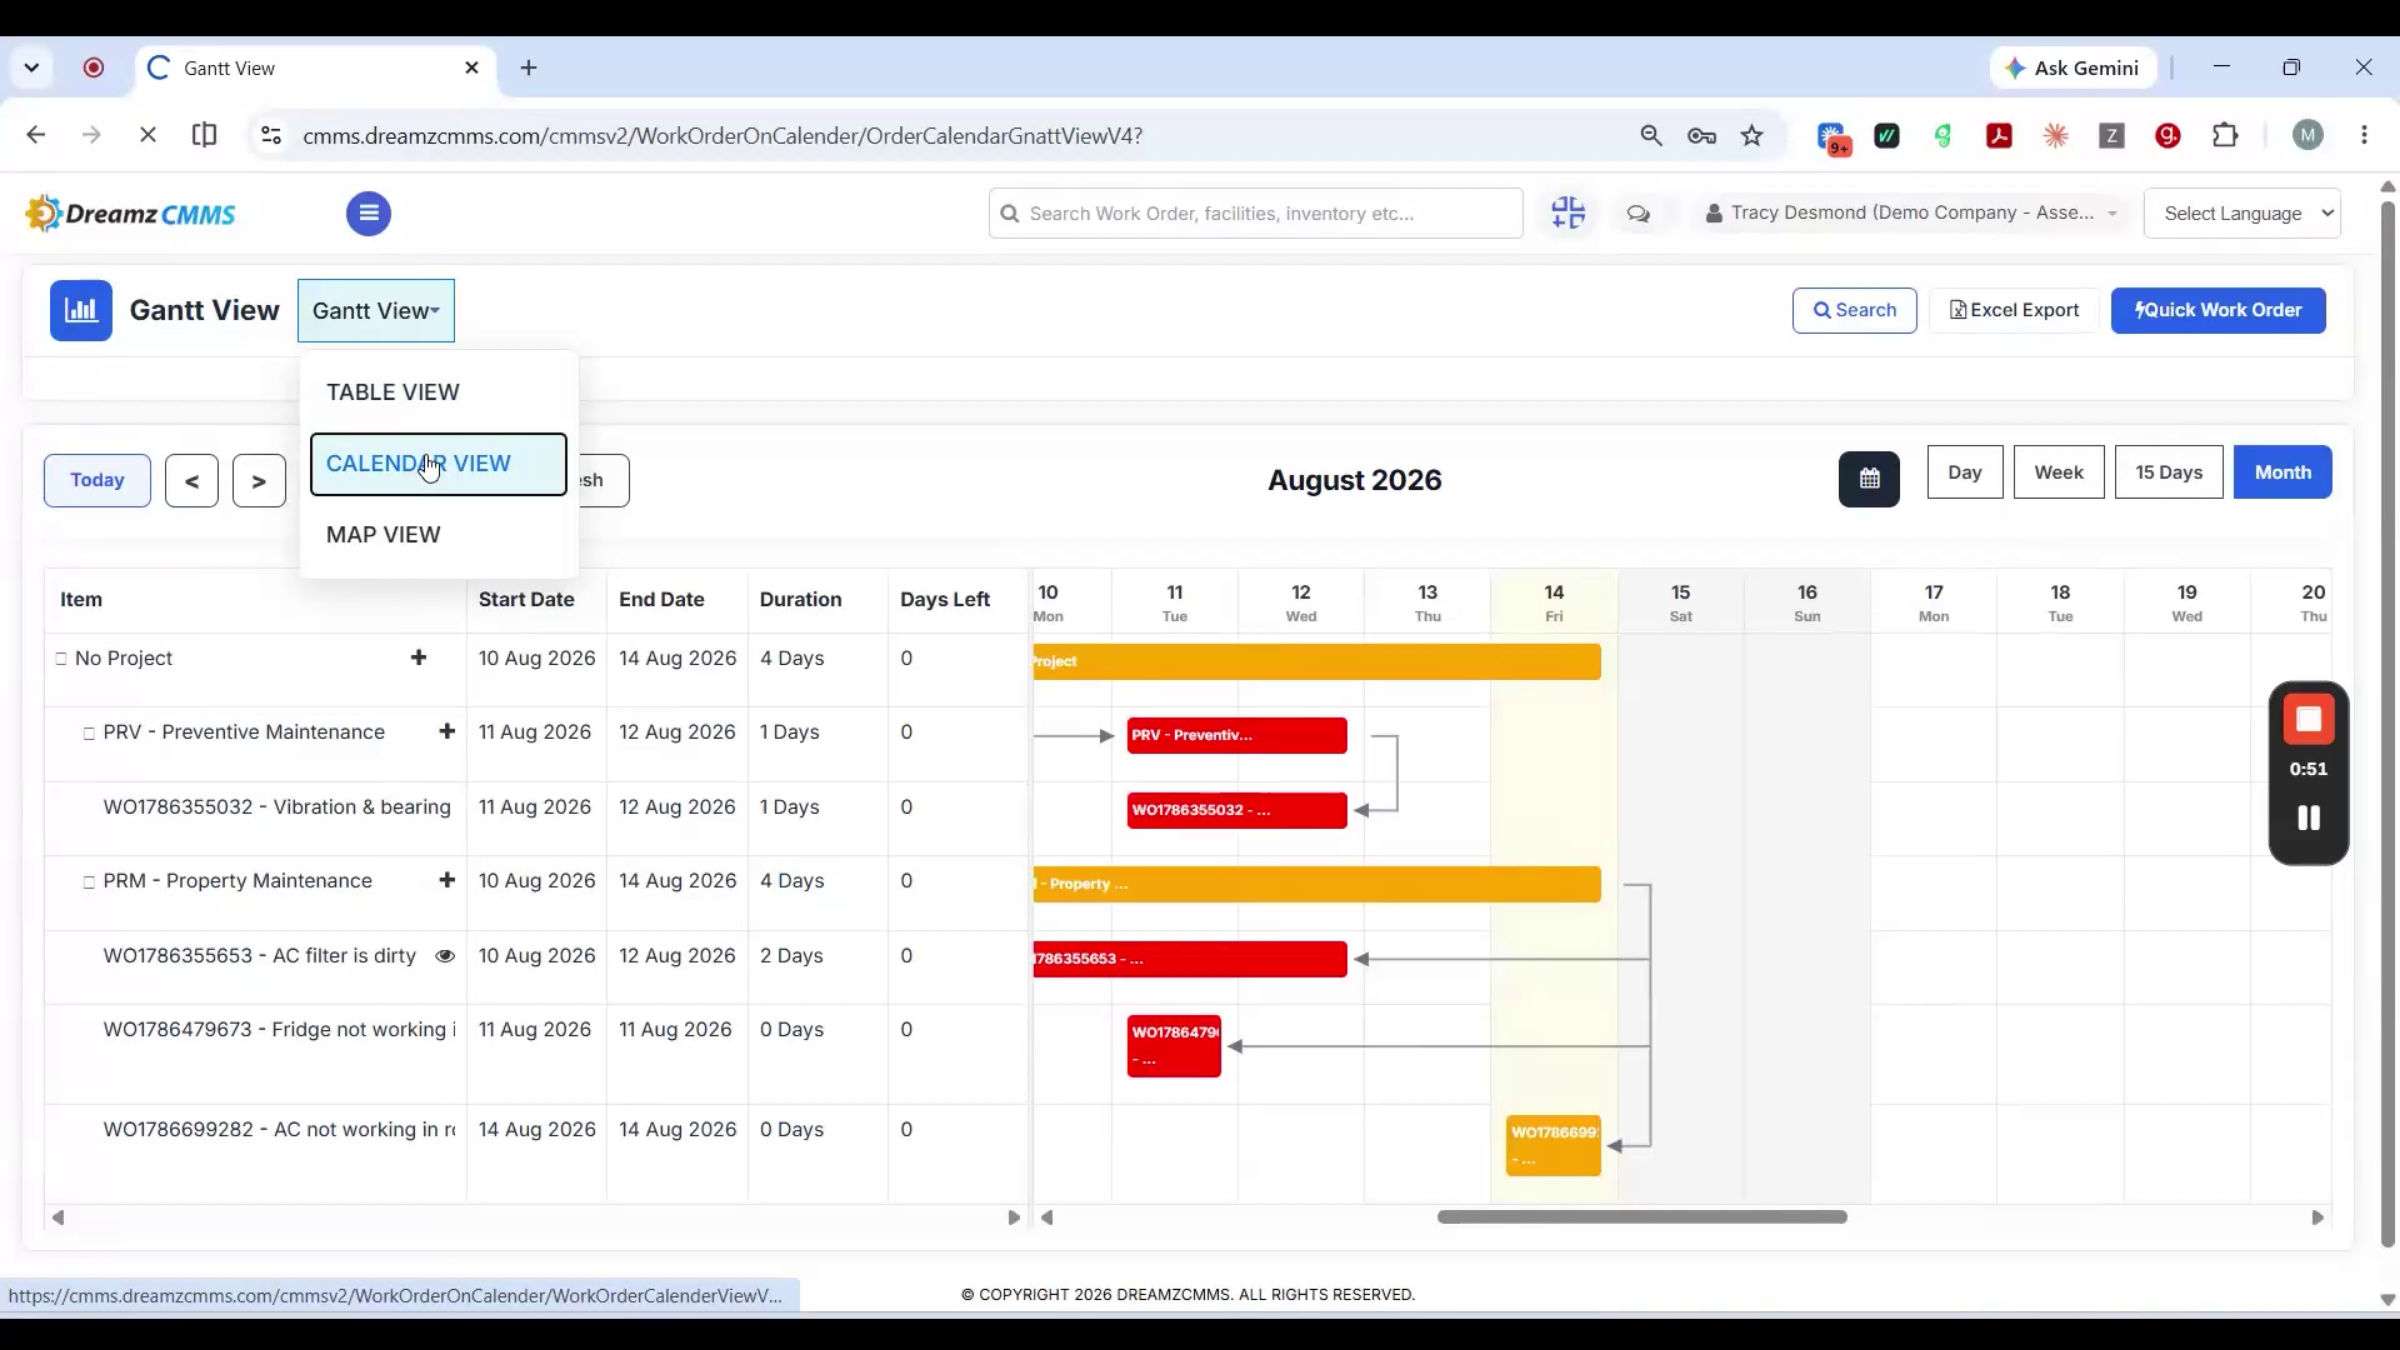
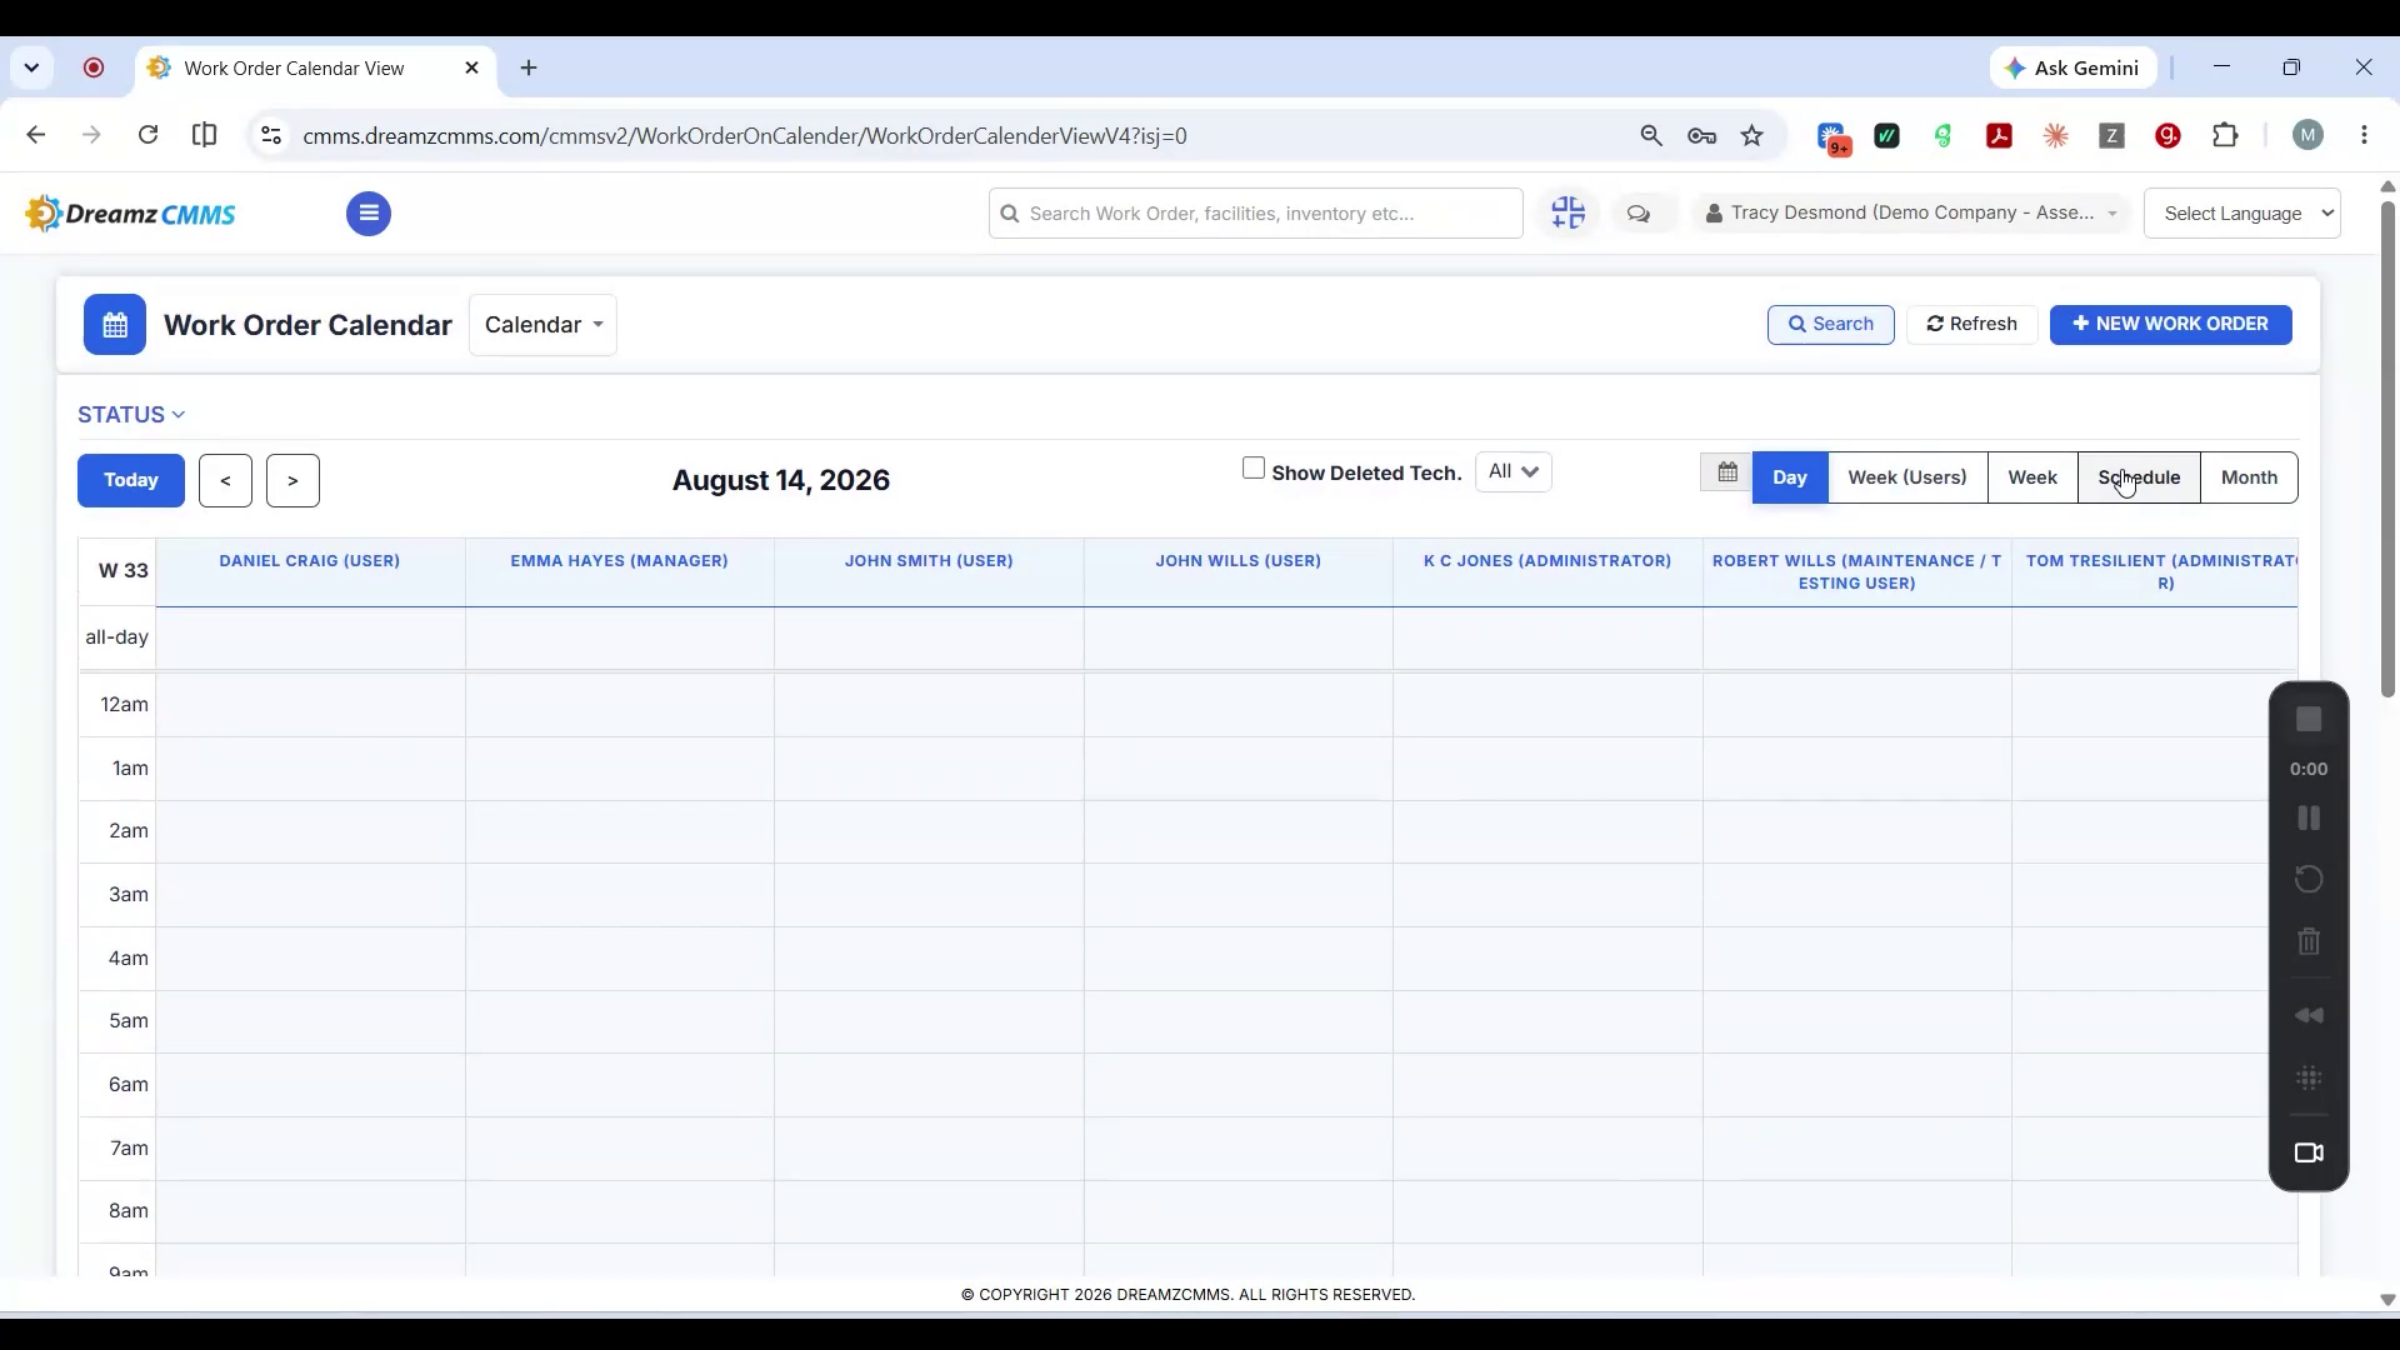
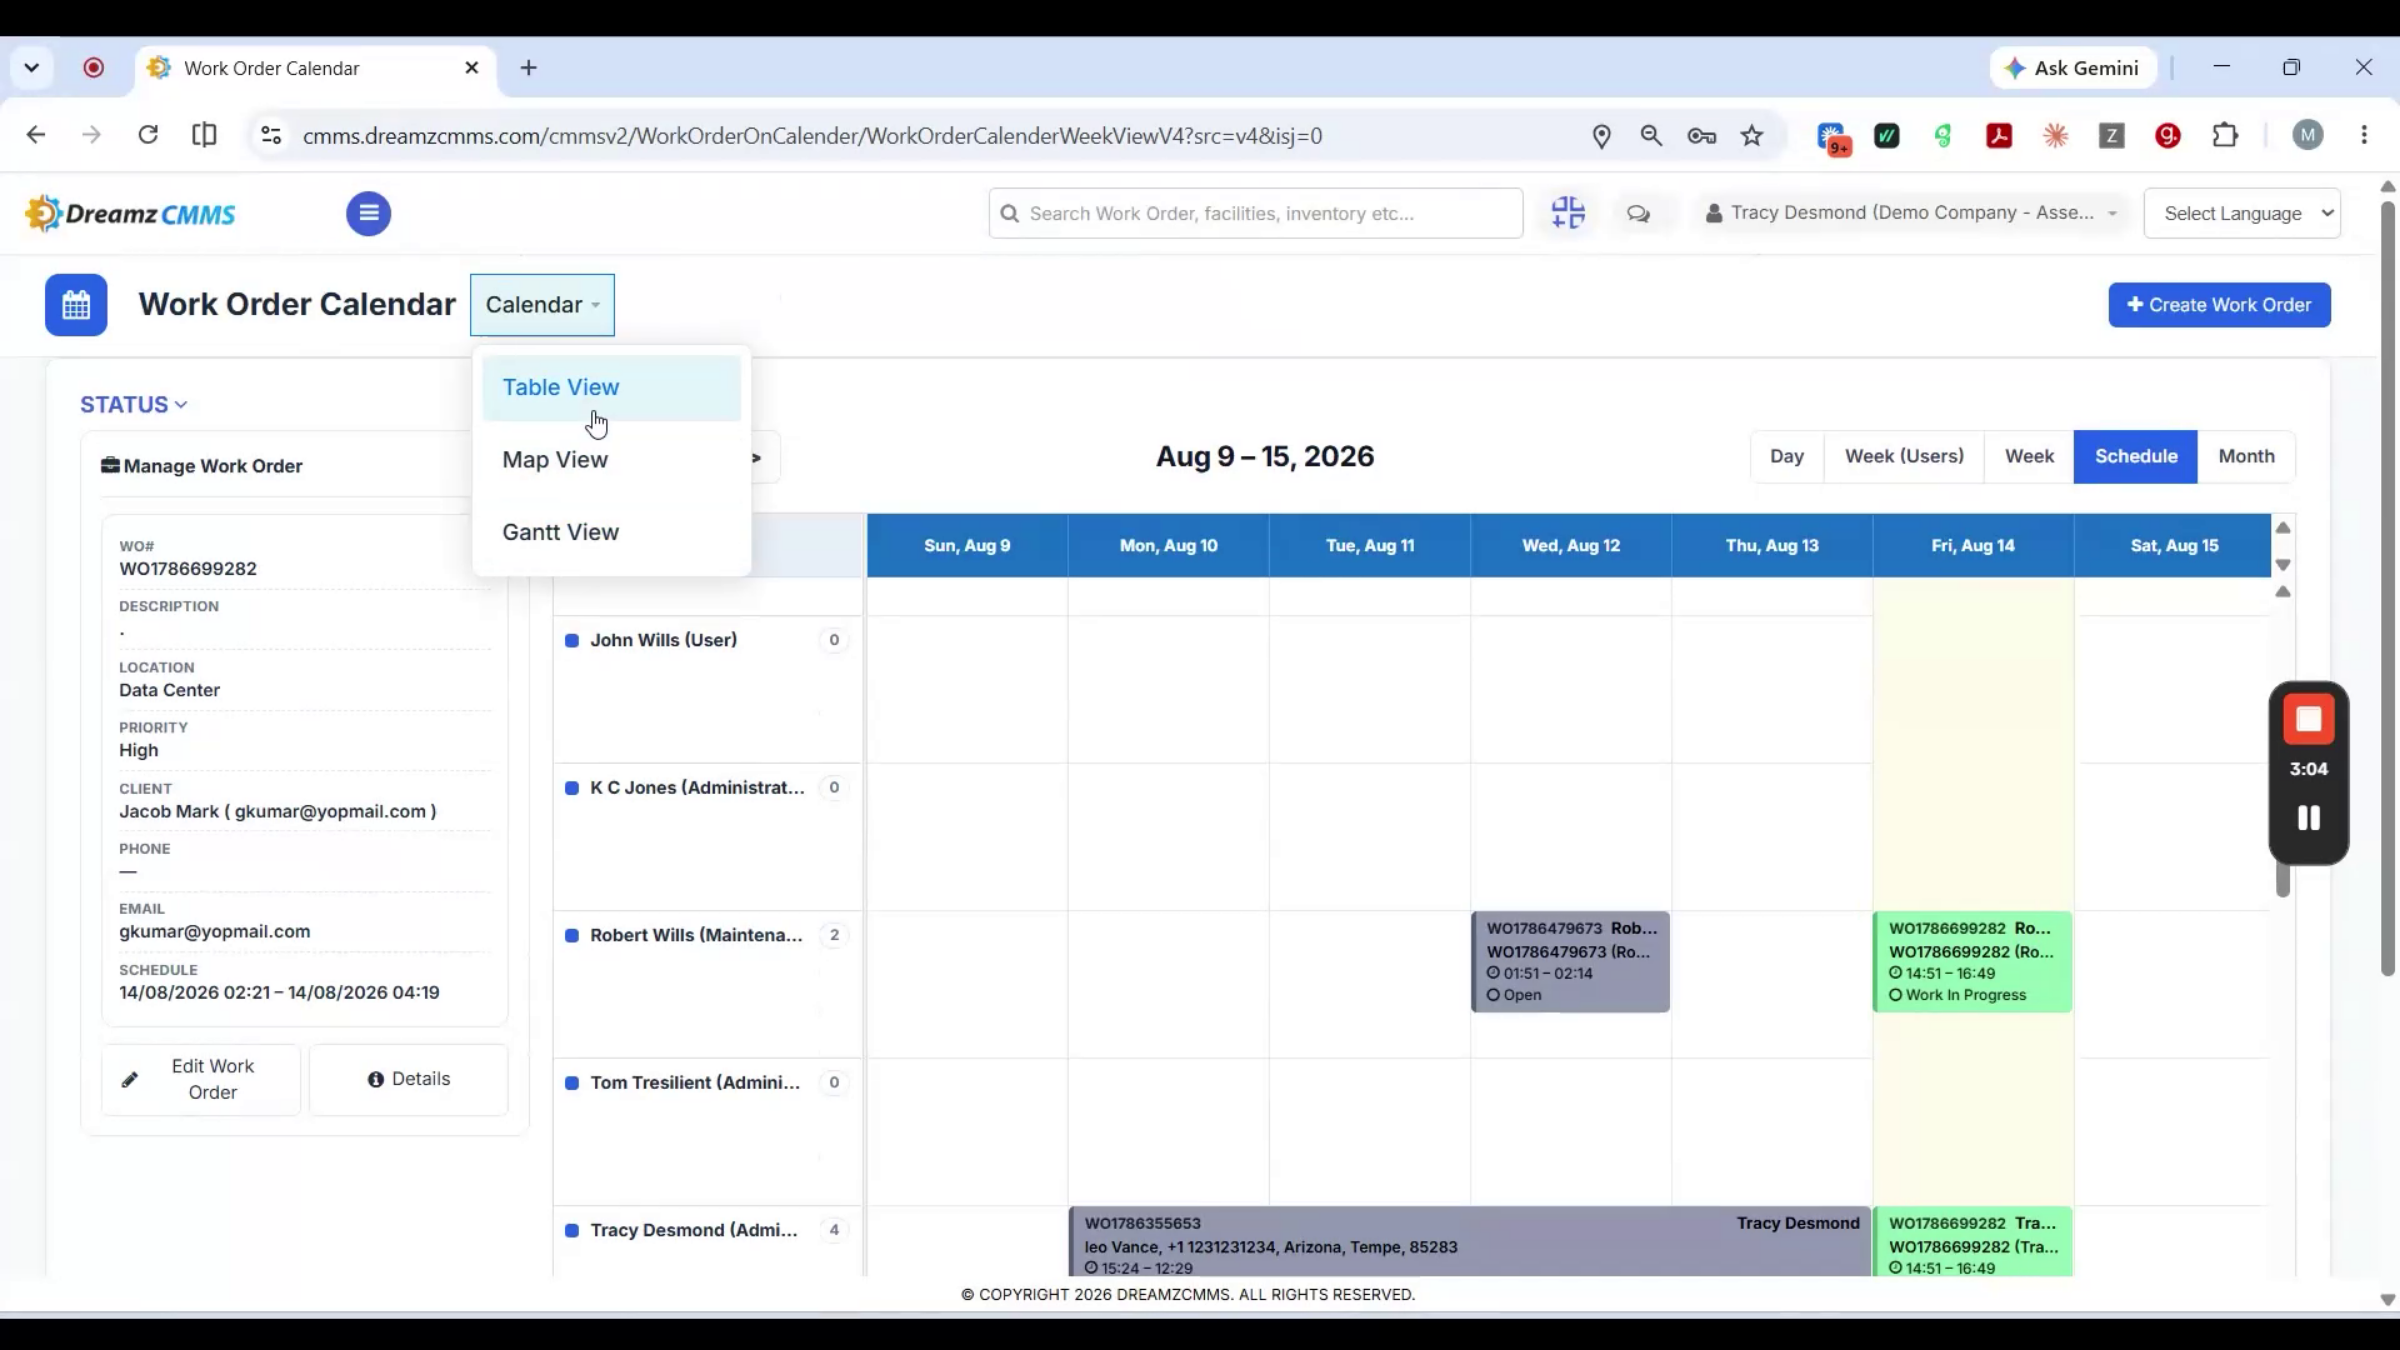
Work Order is where a job, whether it came from an incident or was raised directly, gets scheduled, worked, and tracked through to completion. The work order list shows every job, its priority, status, due date, and who it's assigned to. Across the top, the same jobs switch between a table, a map, a calendar, a Gantt chart, or a Kanban board, whichever view fits what you're doing.
Step 46 – Quick Work Order Creation
From the calendar, you can block a slot, add a schedule note, or raise a work order right on the spot with Quick Work Order — just a title and a facility to get it dispatched, with the option to open the full form if you need more detail. This is the direct path for something corrective or reactive, spotted and logged in the moment rather than coming through an incident or a schedule.
Step 47 – Schedule View and Details Panel
The schedule view lays the same jobs out, technician by technician, day by day, so you can see exactly who's booked and when. Clicking one opens a quick details panel with the work order number, description, location, client, and priority, with an edit button to jump straight into it.
Step 48 – Work Order Tabs Overview
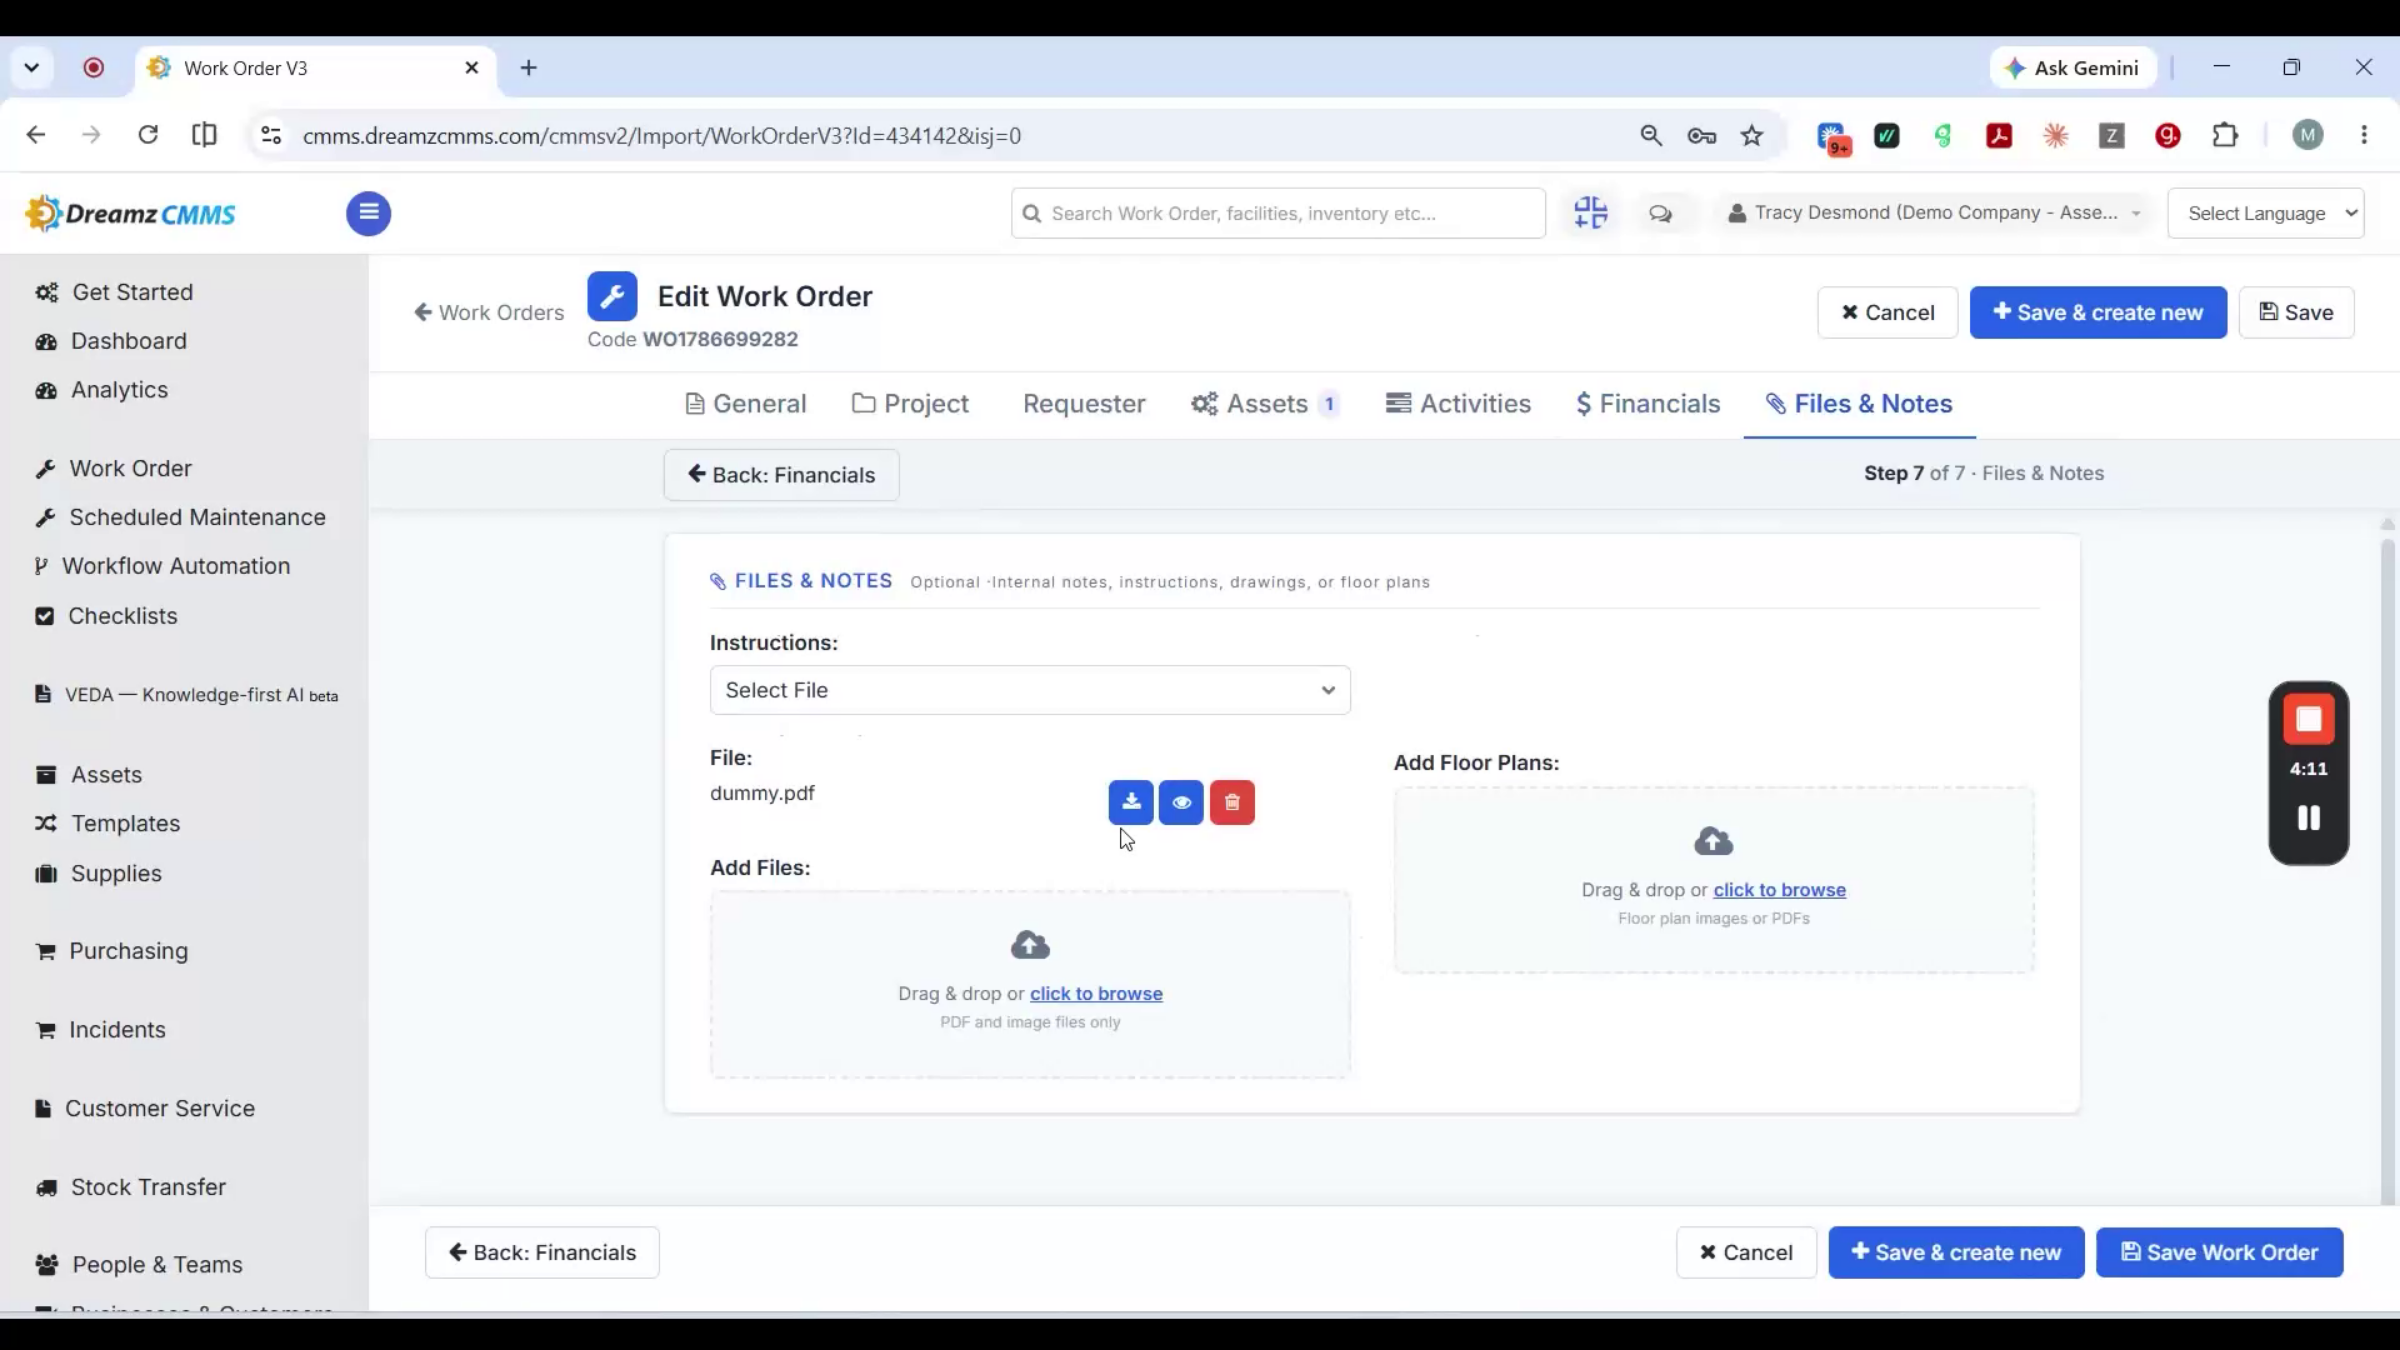
Opening an existing job steps through its tabs: General for the title, dates, priority, and type; Project for linking it to a project; Requester for who raised it; equipment for the asset the job relates to; Activities for the checklist; Financials for cost tracking; and Files and Notes for anything attached.
Step 49 – Work Order Full Details and Tabs
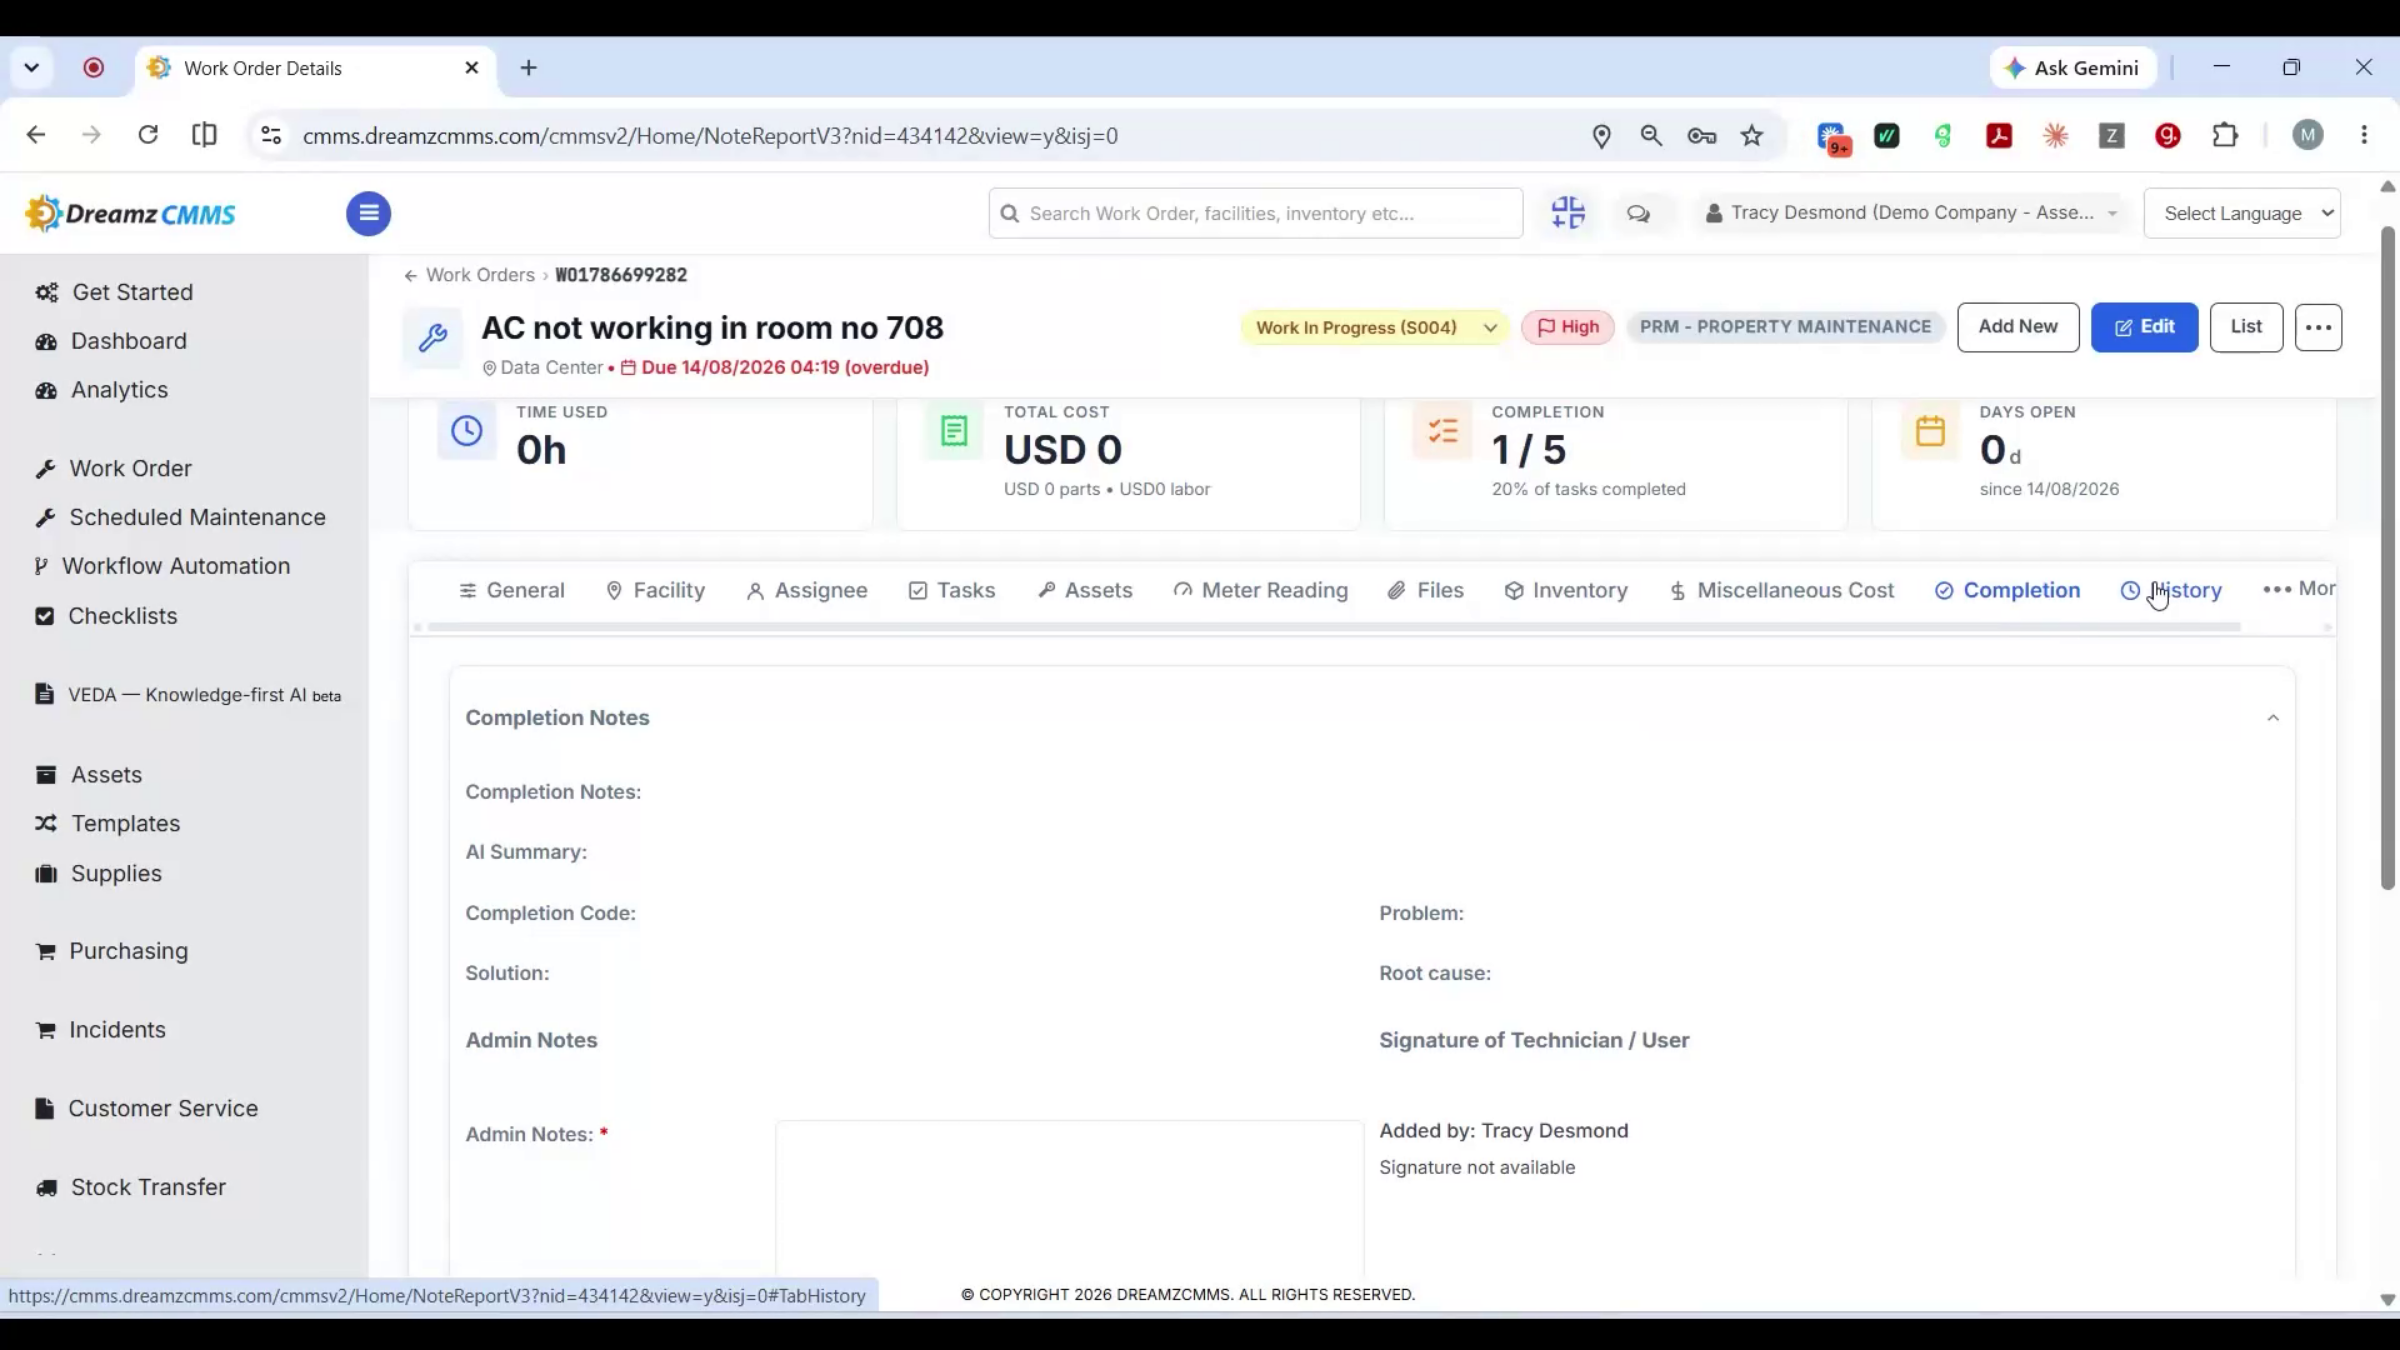
Opening the full details view for a job shows time used, total cost, task completion, and days open at a glance, and the status at the top can be updated directly without going into edit mode. The tabs cover the same ground but let you work directly from most of them: Inventory lets you add an inventory item and set the quantity used against the job; Tasks is where the checklist gets processed, ticking off each step as it's done; Miscellaneous Cost covers anything beyond parts and labor. Alongside those, General, Facility, Assignee, Assets, Meter Reading, Files, Completion, and History round out the full record of everything that happened on the job.
Step 50 – Work Order End-to-End Summary
That's a work order end-to-end: from an incident or a corrective issue raised on the spot to a scheduled, assigned job with the asset, checklist, and assignee all tied to the same record. Once a work order's raised, it doesn't just sit on a screen somewhere.
Technician App and Work Assignment
Step 51 – Technician App Usage
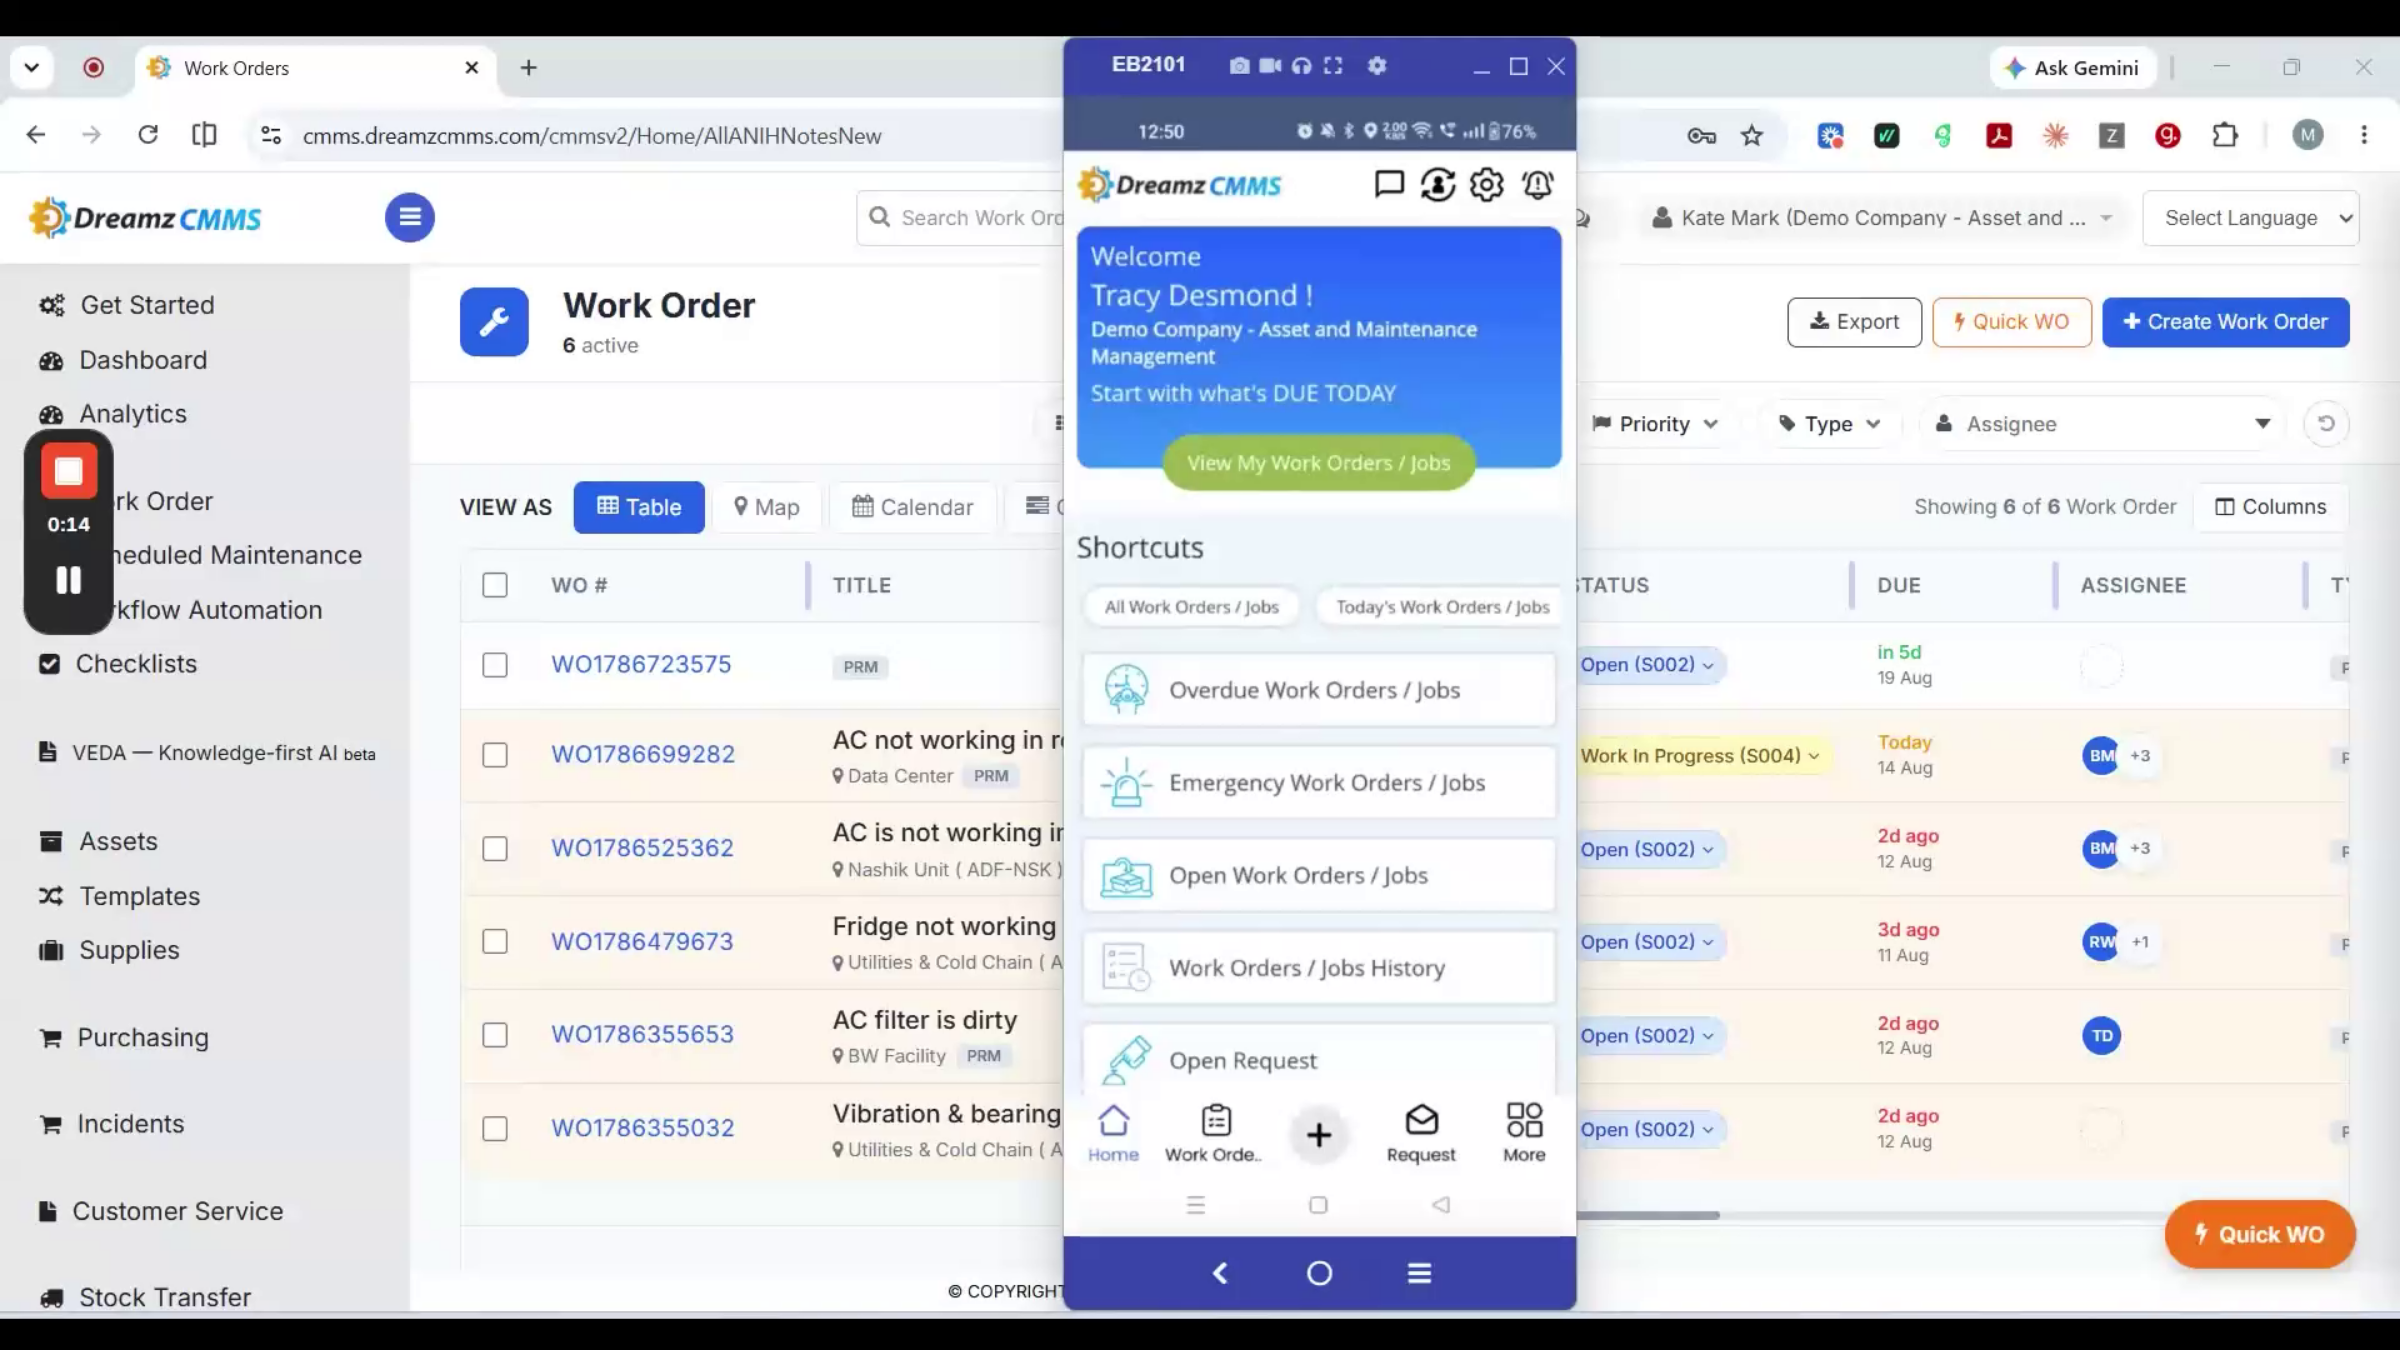
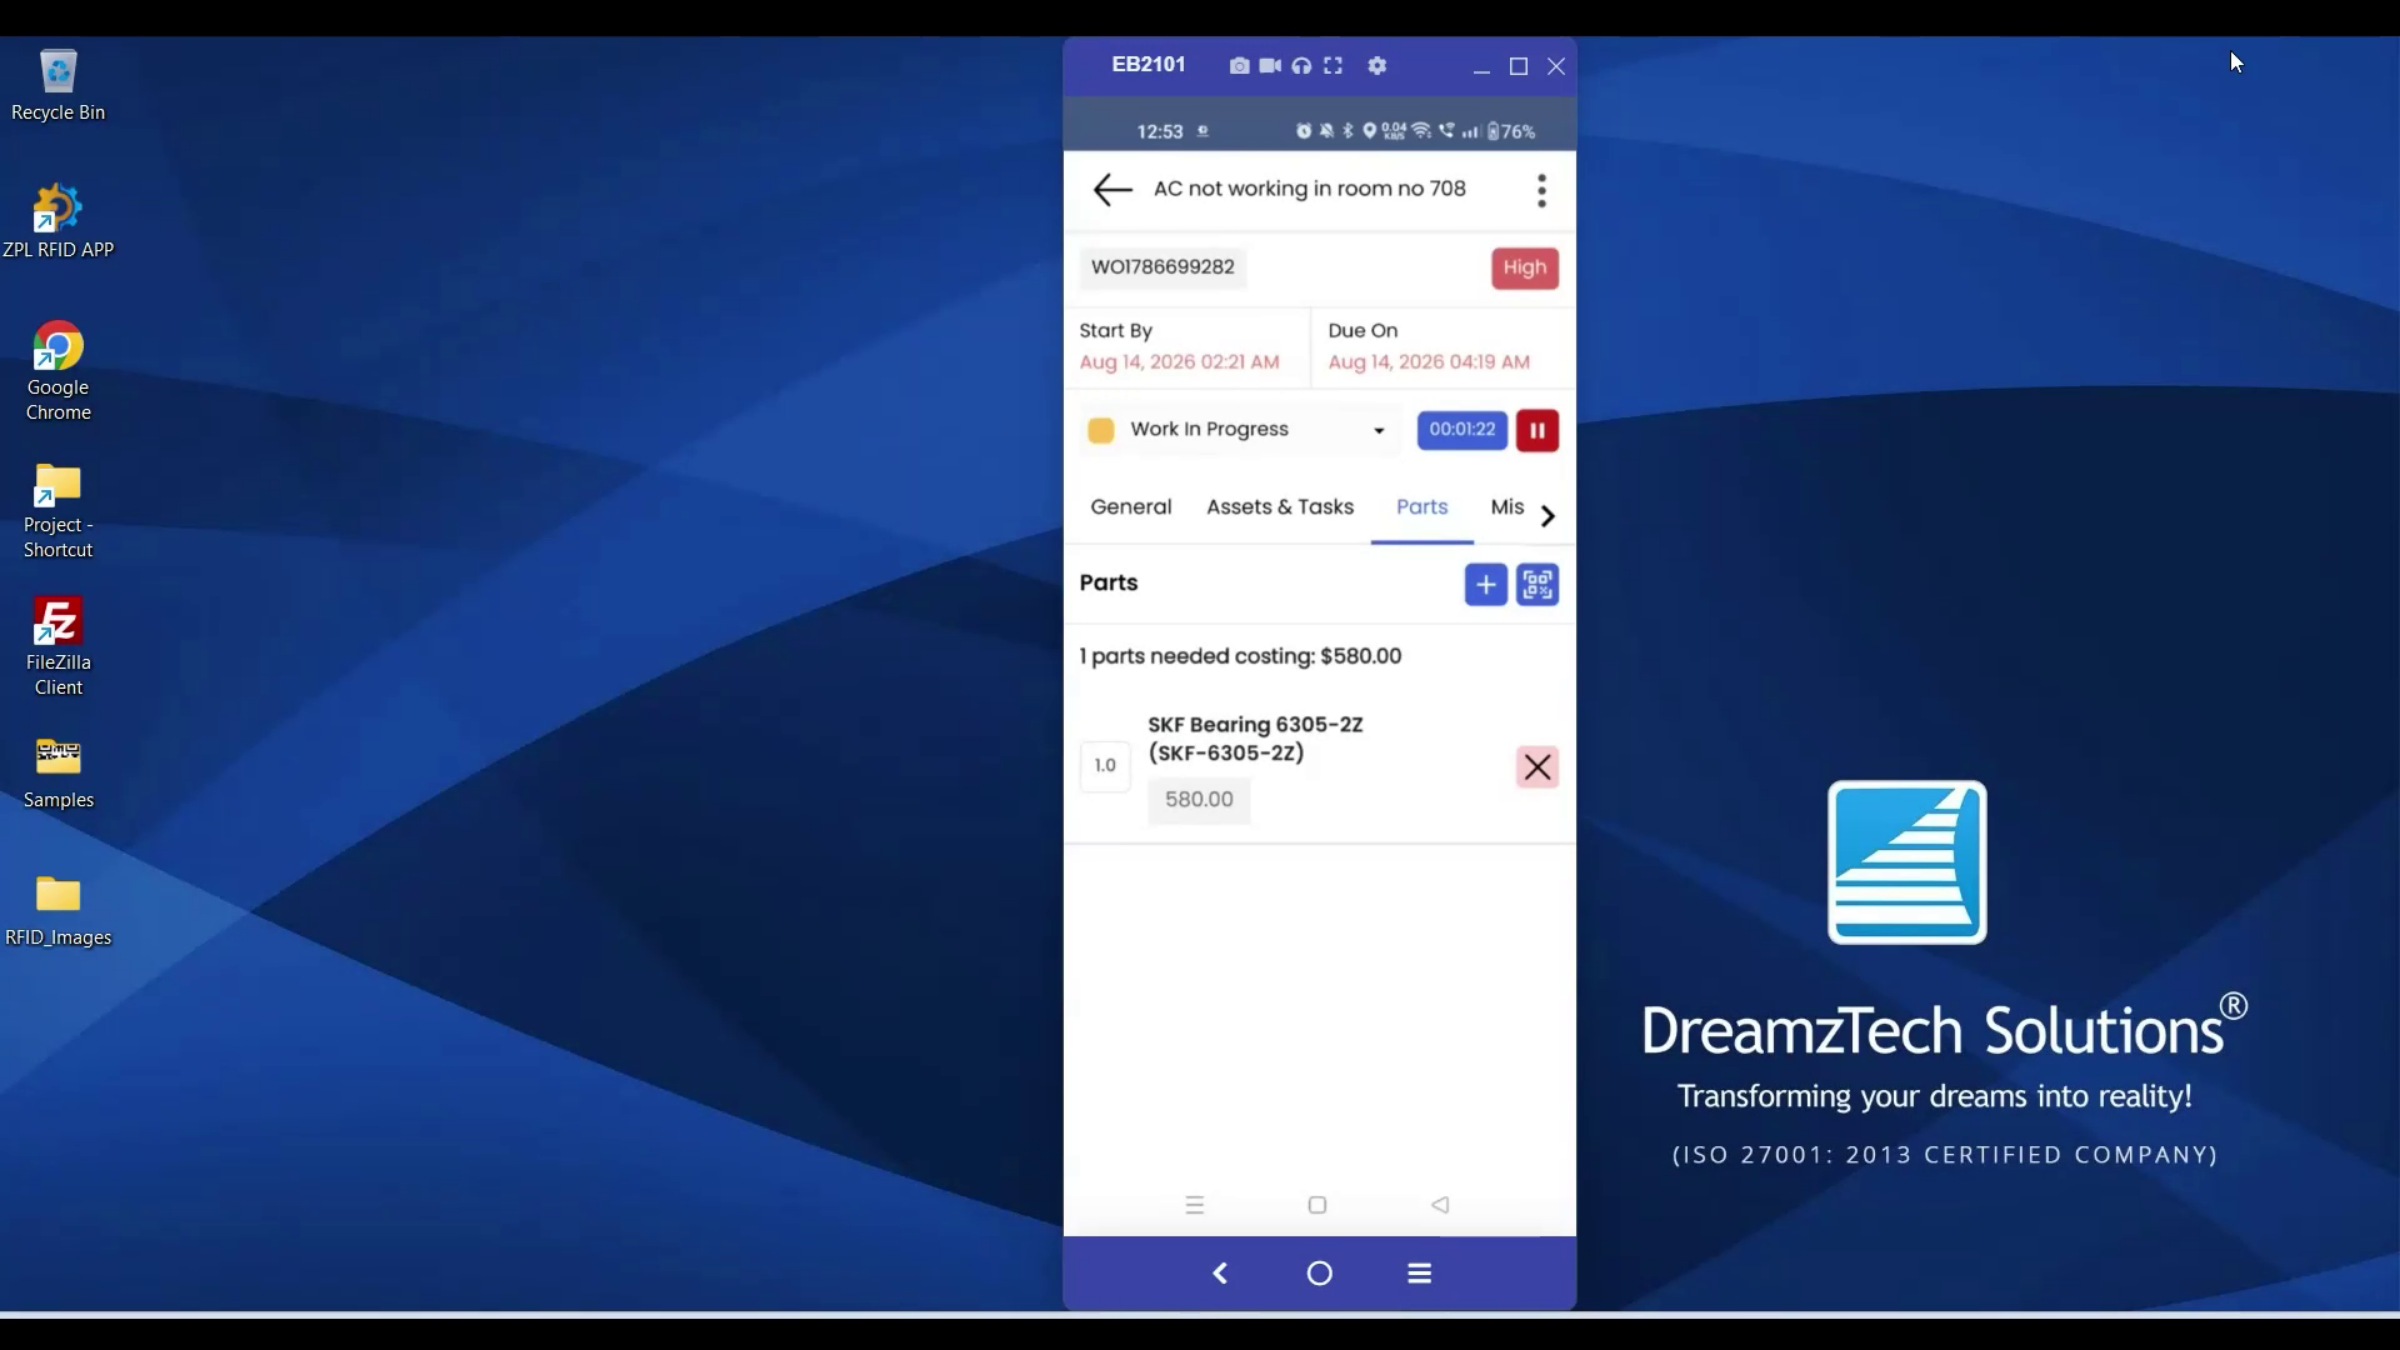
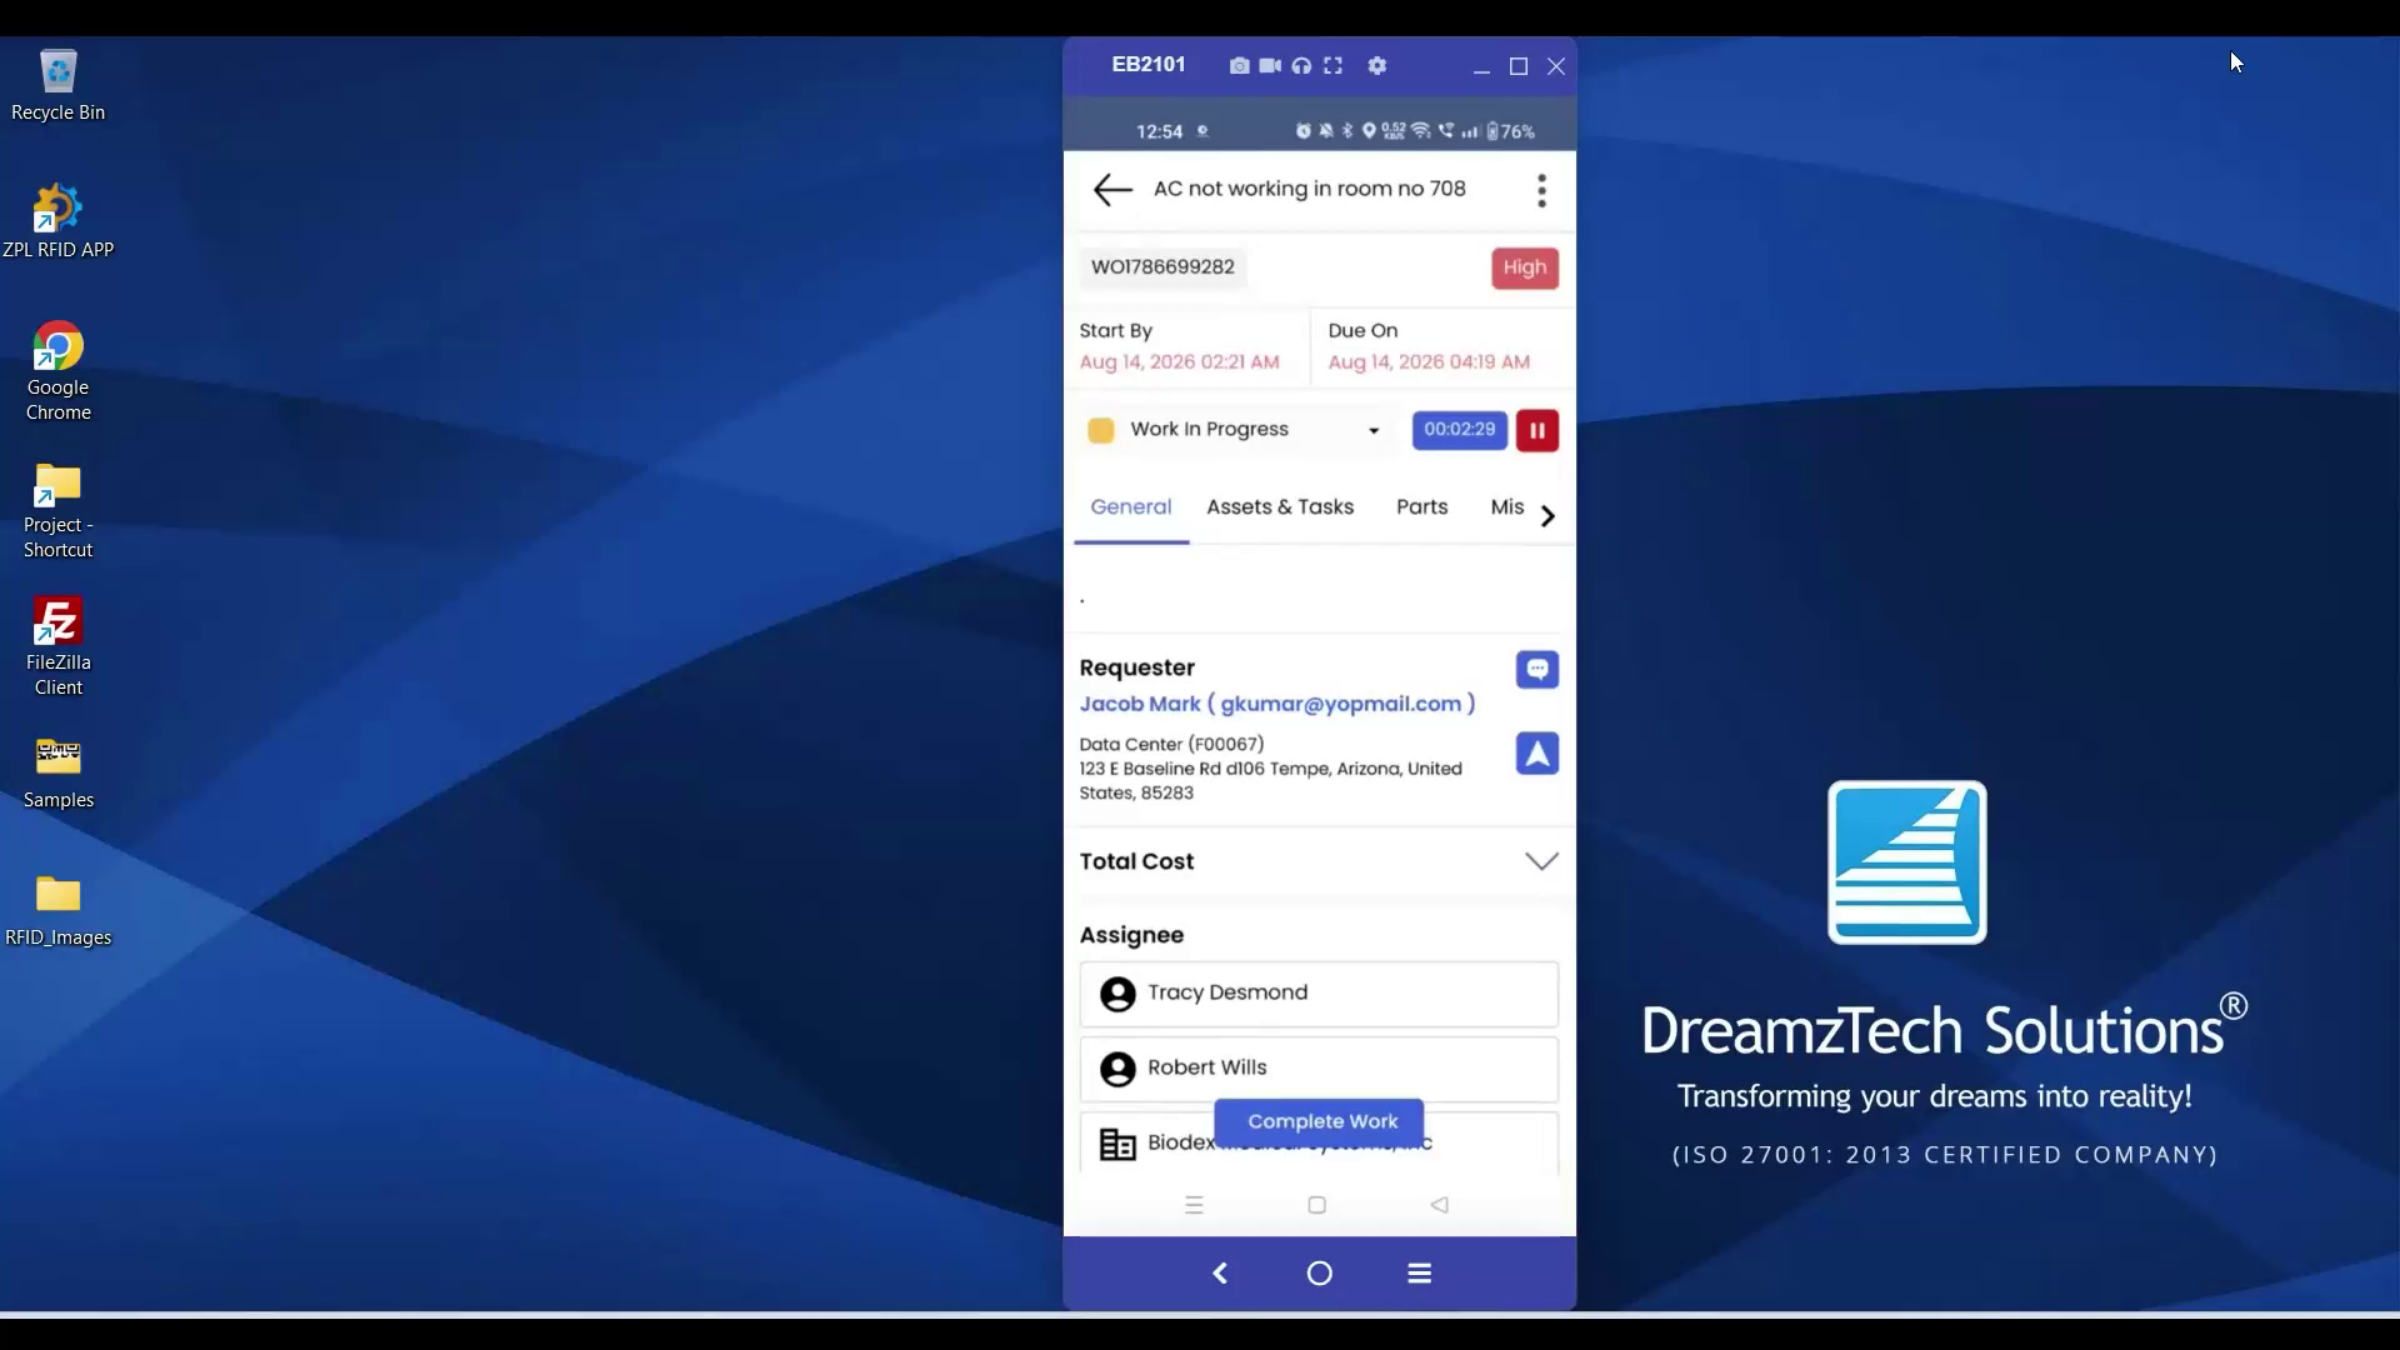
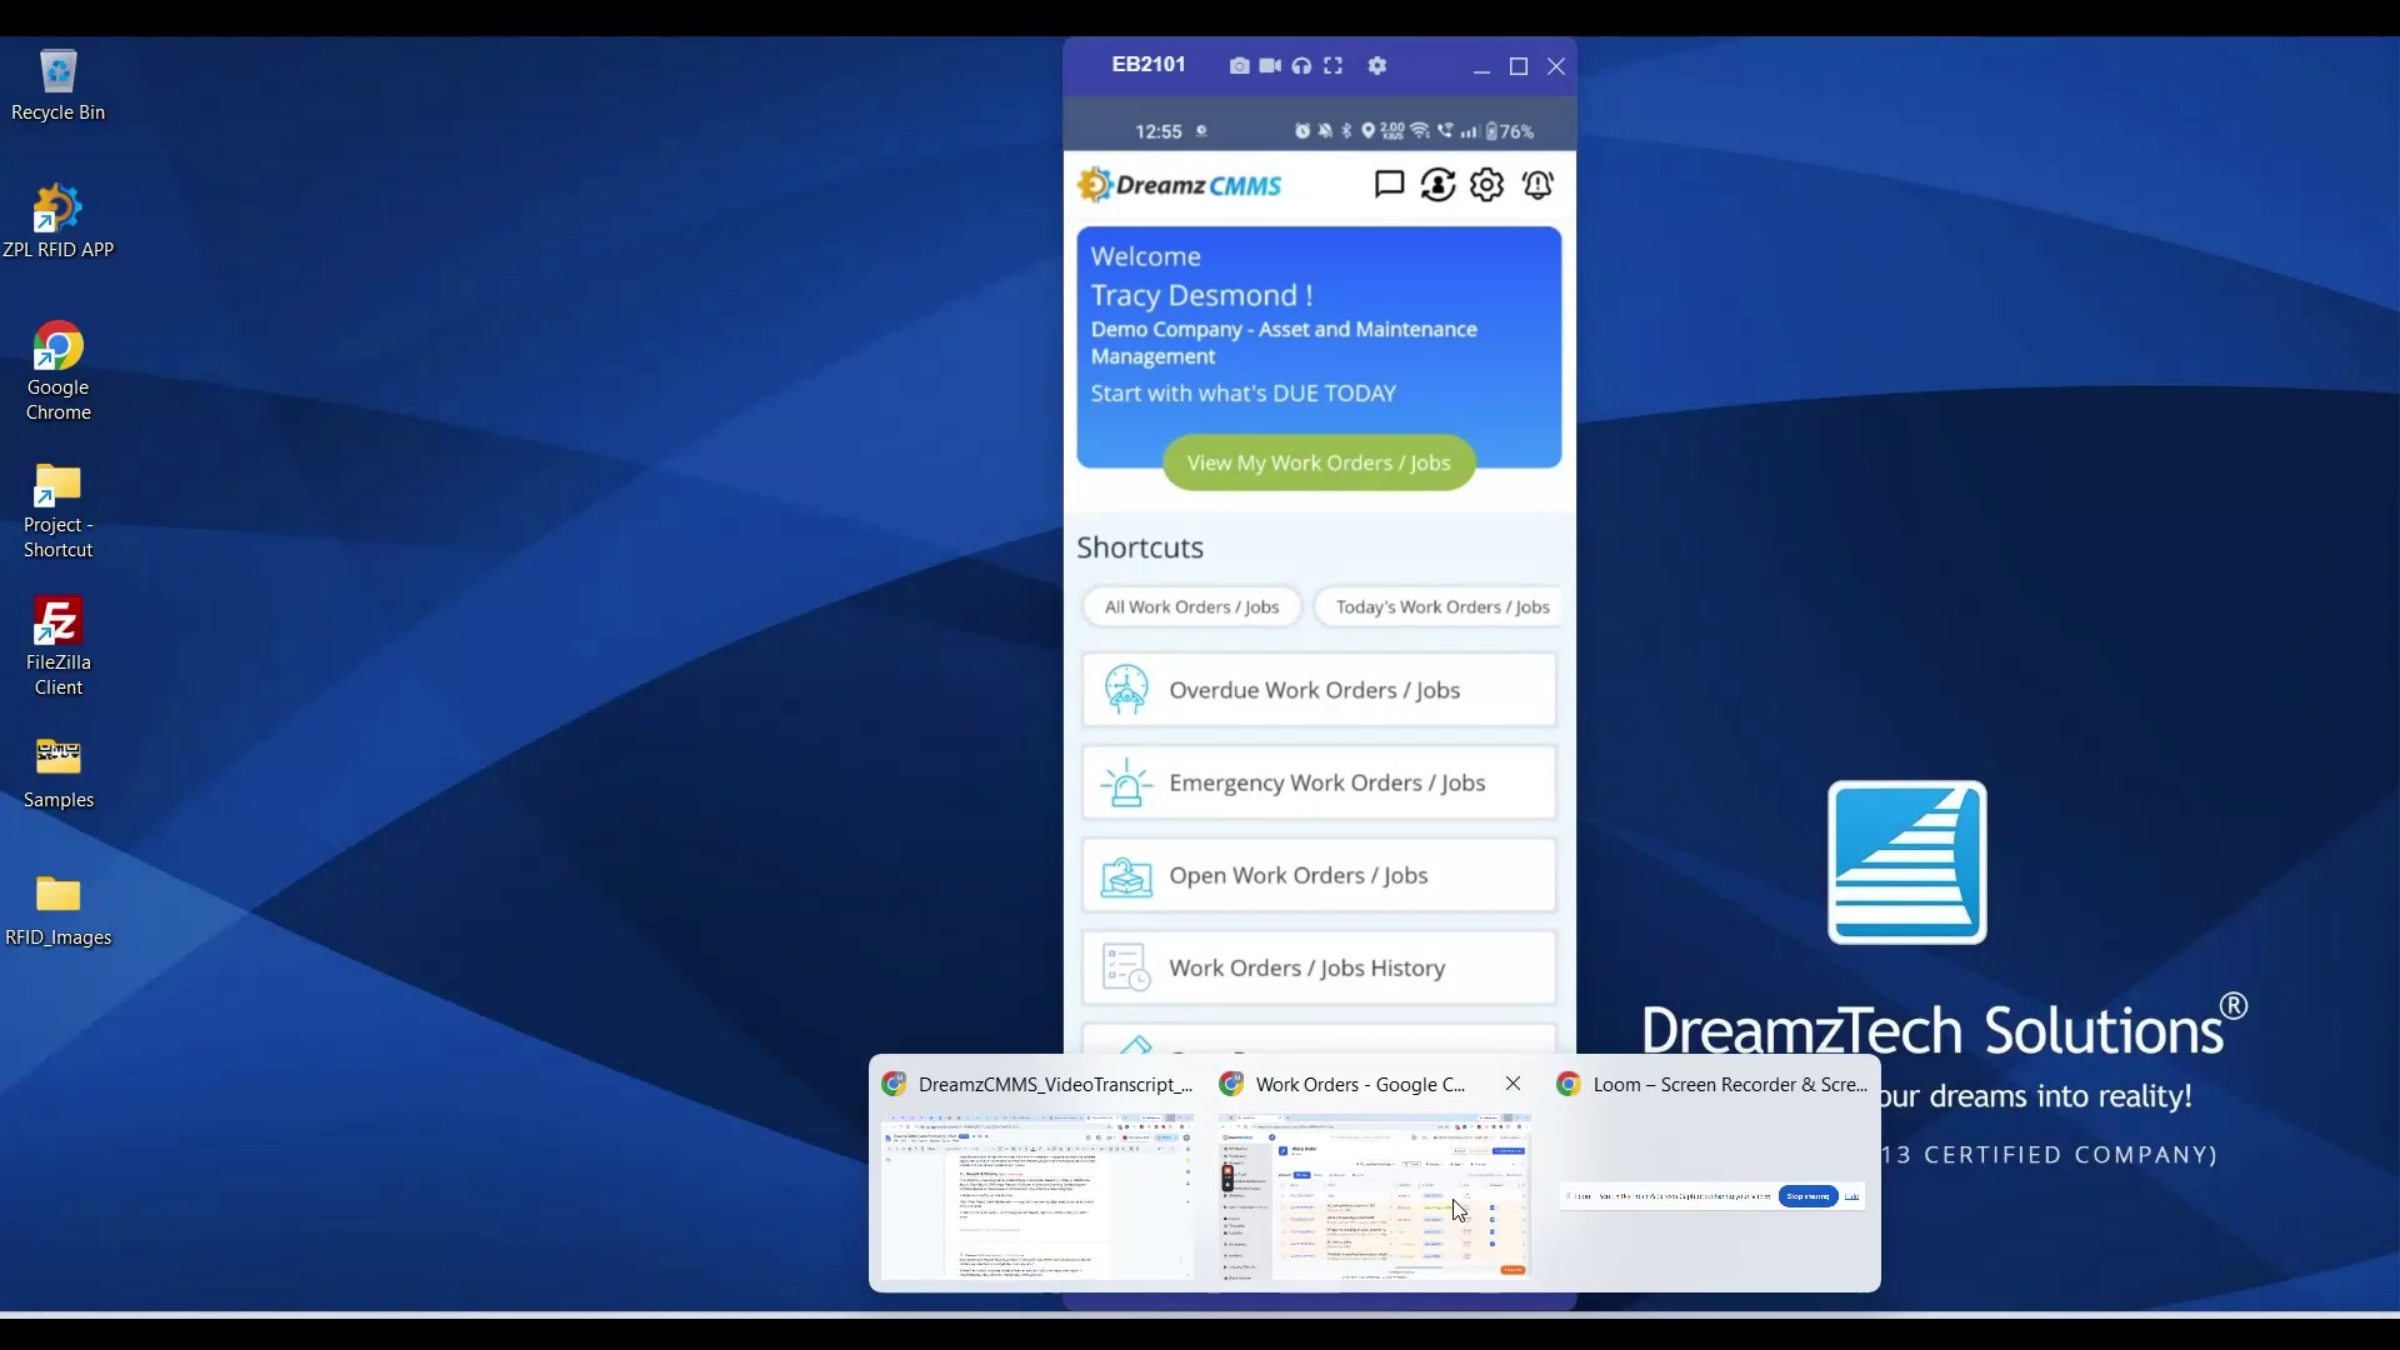
A technician picks up the job directly on the DreamzCMMS Technician app on their own phone. They see the work order details, scan the asset involved to confirm they're on the right one, and log their time against it as they go. If parts are needed, they withdraw them straight from the app against that work order, and stock automatically decrements in the background, so there's no separate step to update inventory afterward.
Step 52 – Work Assignment Tracking
Work can be assigned to an internal technician or an outside vendor, and either way, the same record tracks who did the work, how long it took, and what it used.
Step 53 – Job Completion and Real-Time Sync
Once the job's done, the technician closes it out from the same app — no paper job sheet, no separate update back at a desk. It's the same real-time link between production and inventory as the work order module itself, just carried in a technician's pocket.
RFID App
Step 54 – RFID App Advantages
The RFID app runs the actual scanning and tagging from a handheld device in the warehouse or out on site. Because a tag doesn't need to be seen or lined up to be read, dozens of items can be scanned in seconds instead of checked one by one by hand — faster and far more accurate than a manual count. This is what makes everything set up so far usable where the work actually happens: no laptop, no manual lookup, just a scan.
Step 55 – RFID App Core Functions
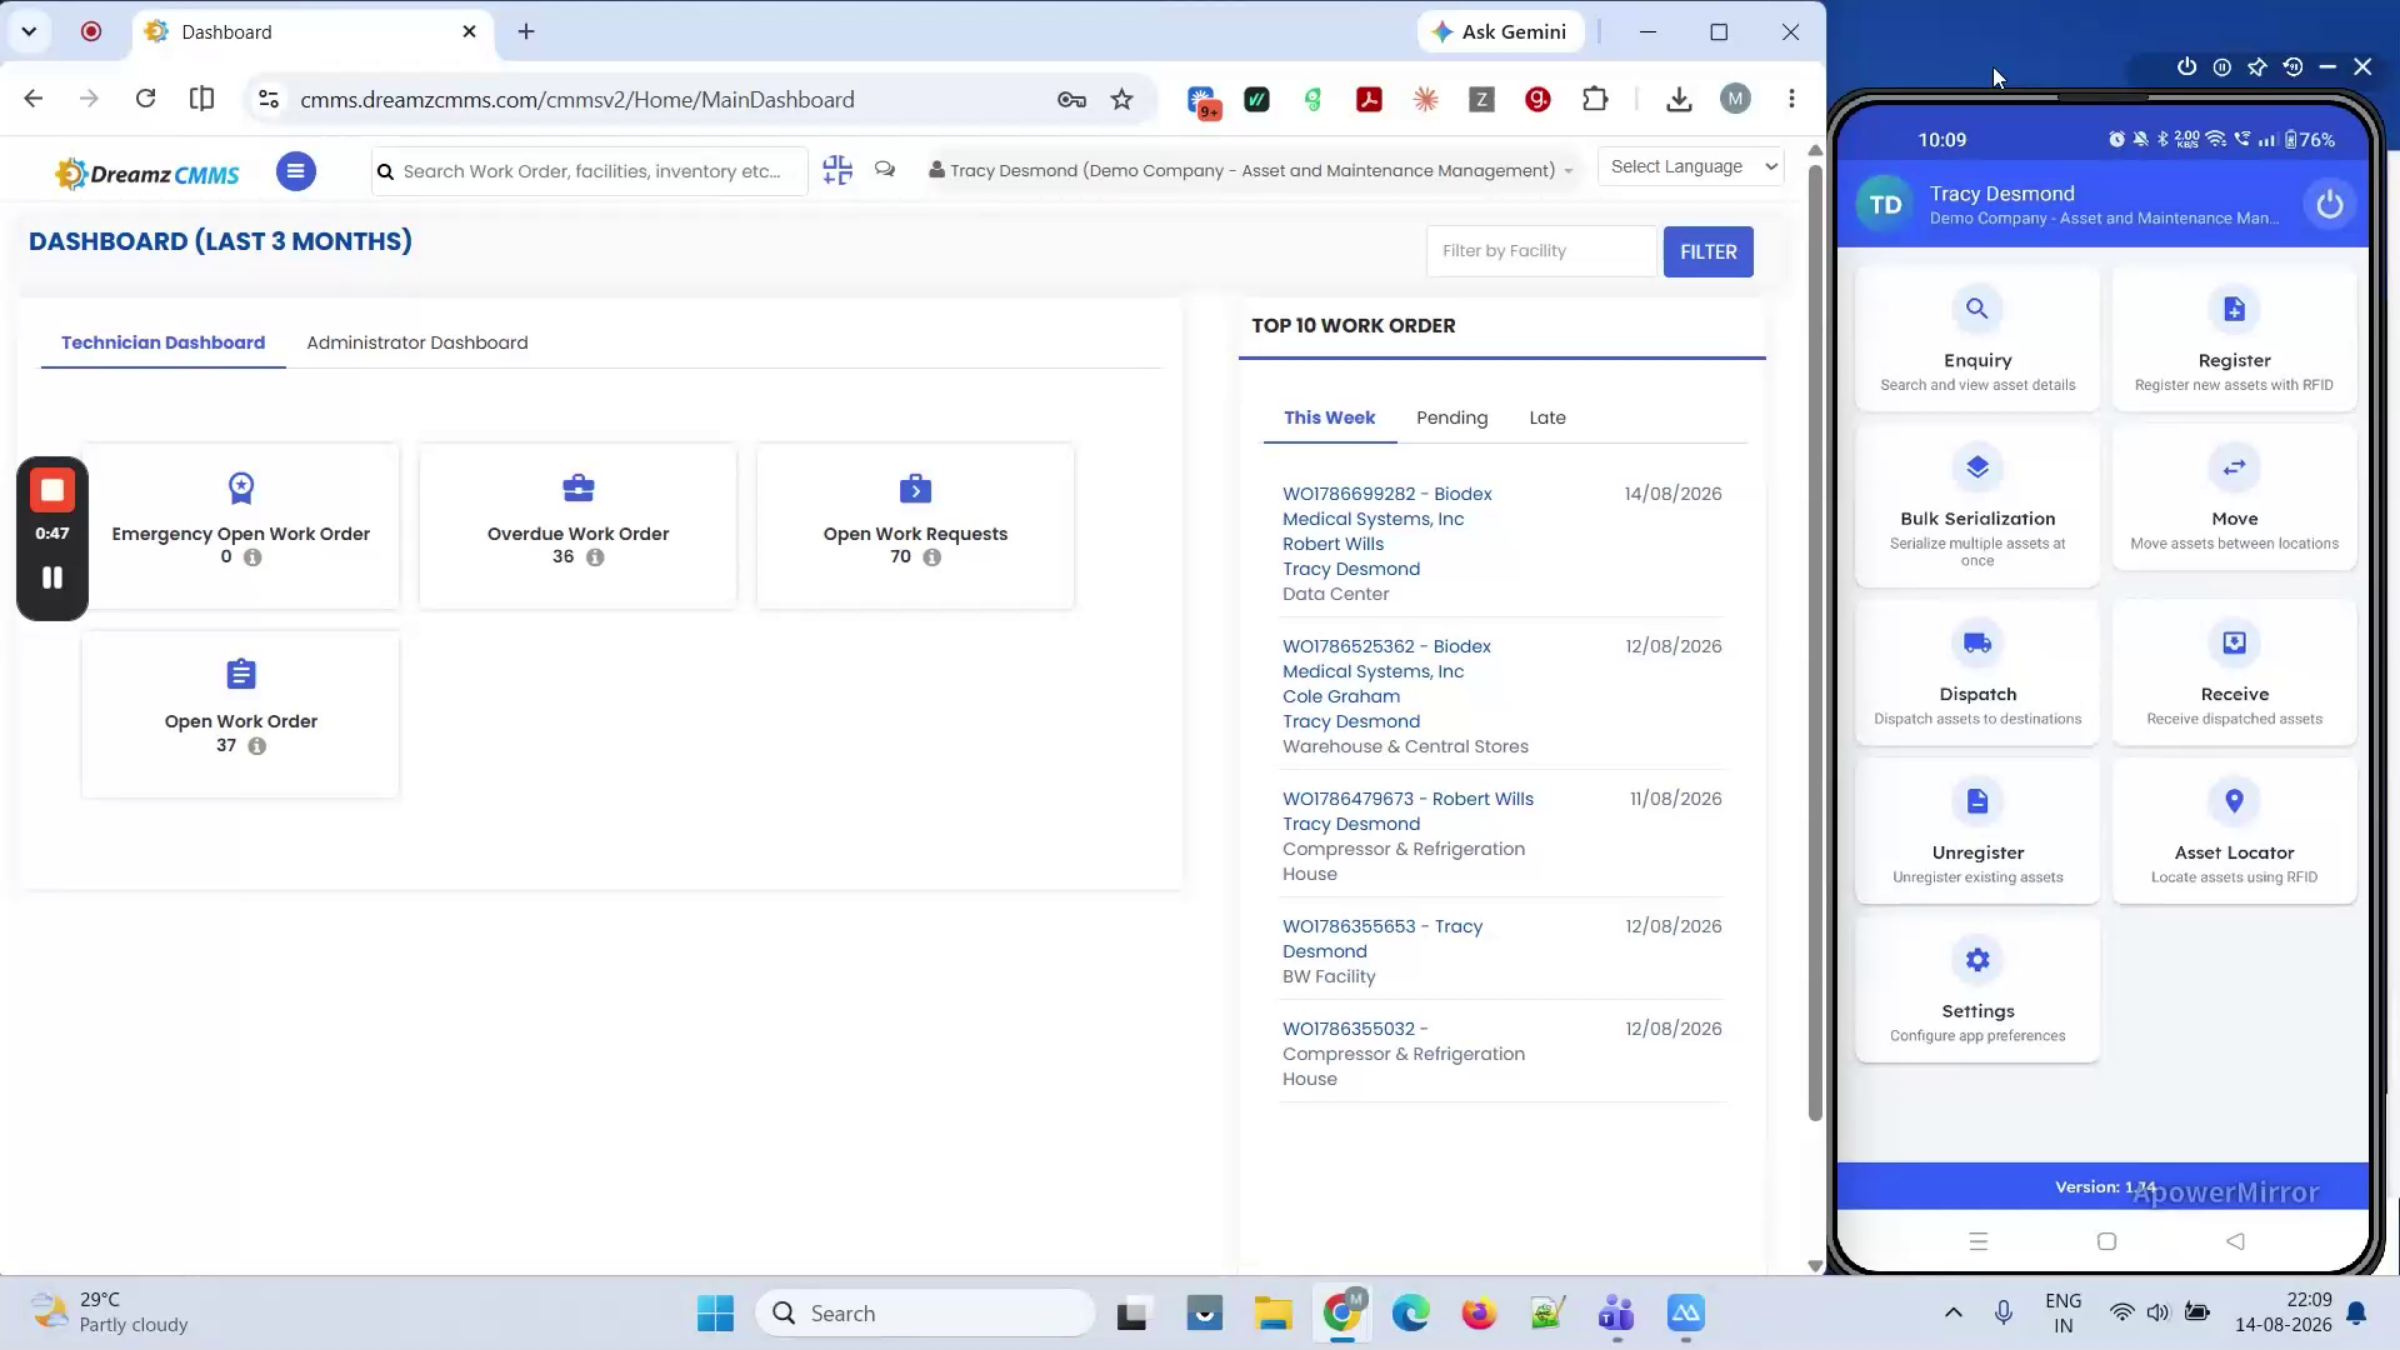
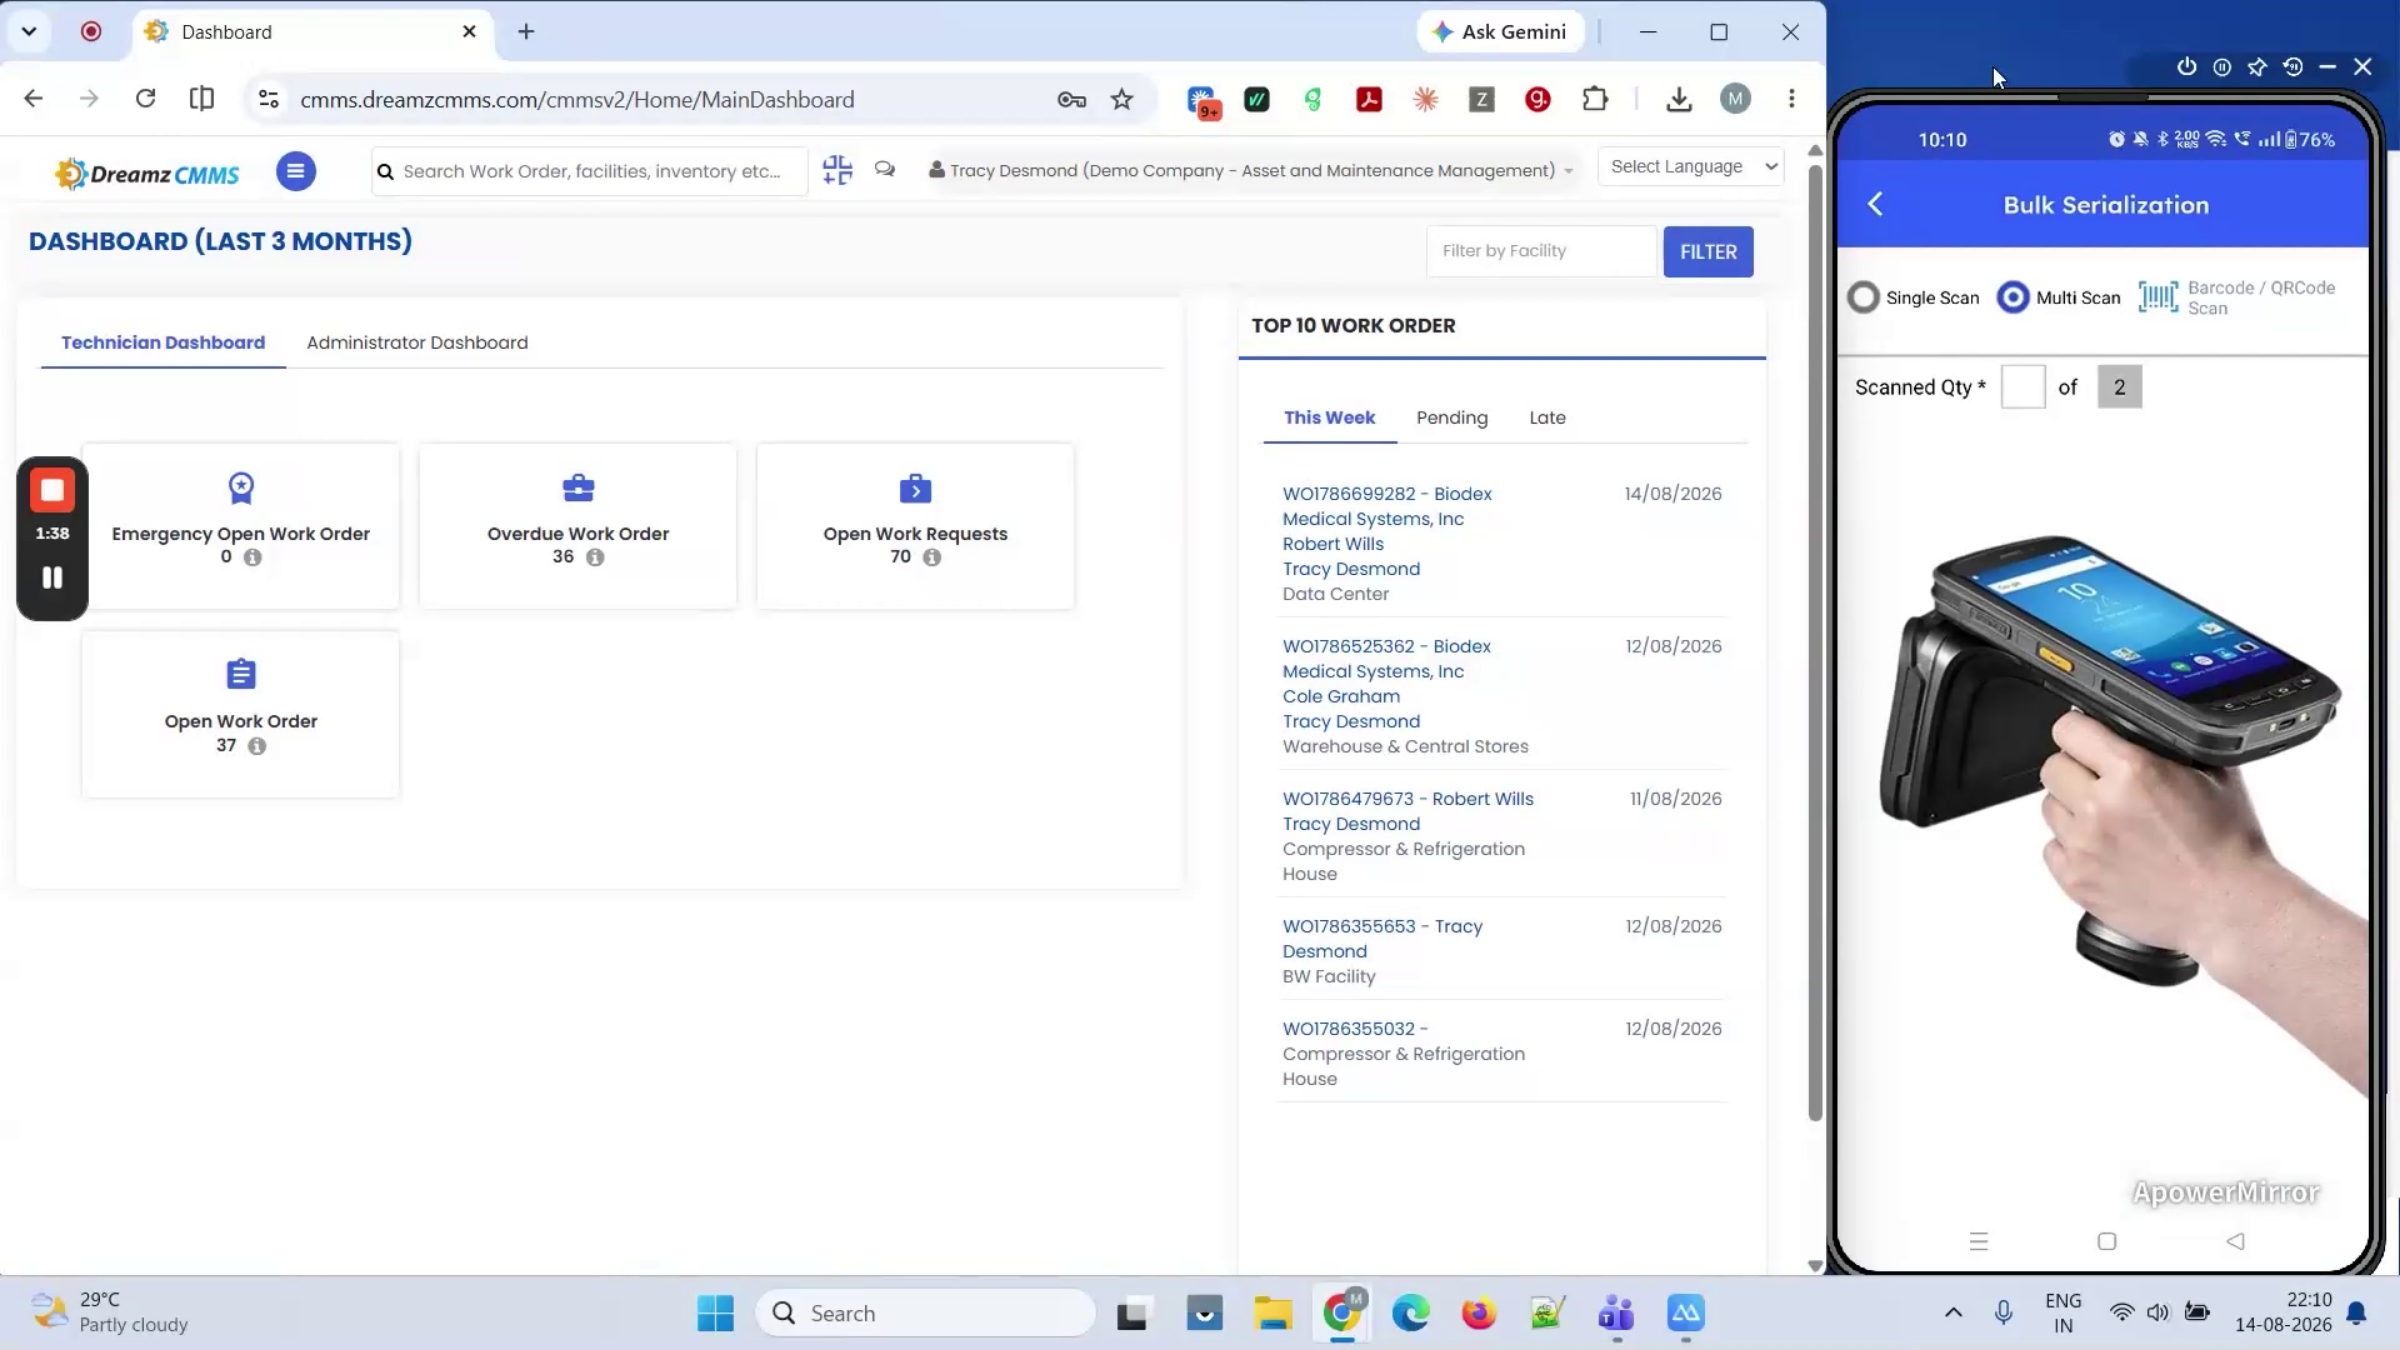
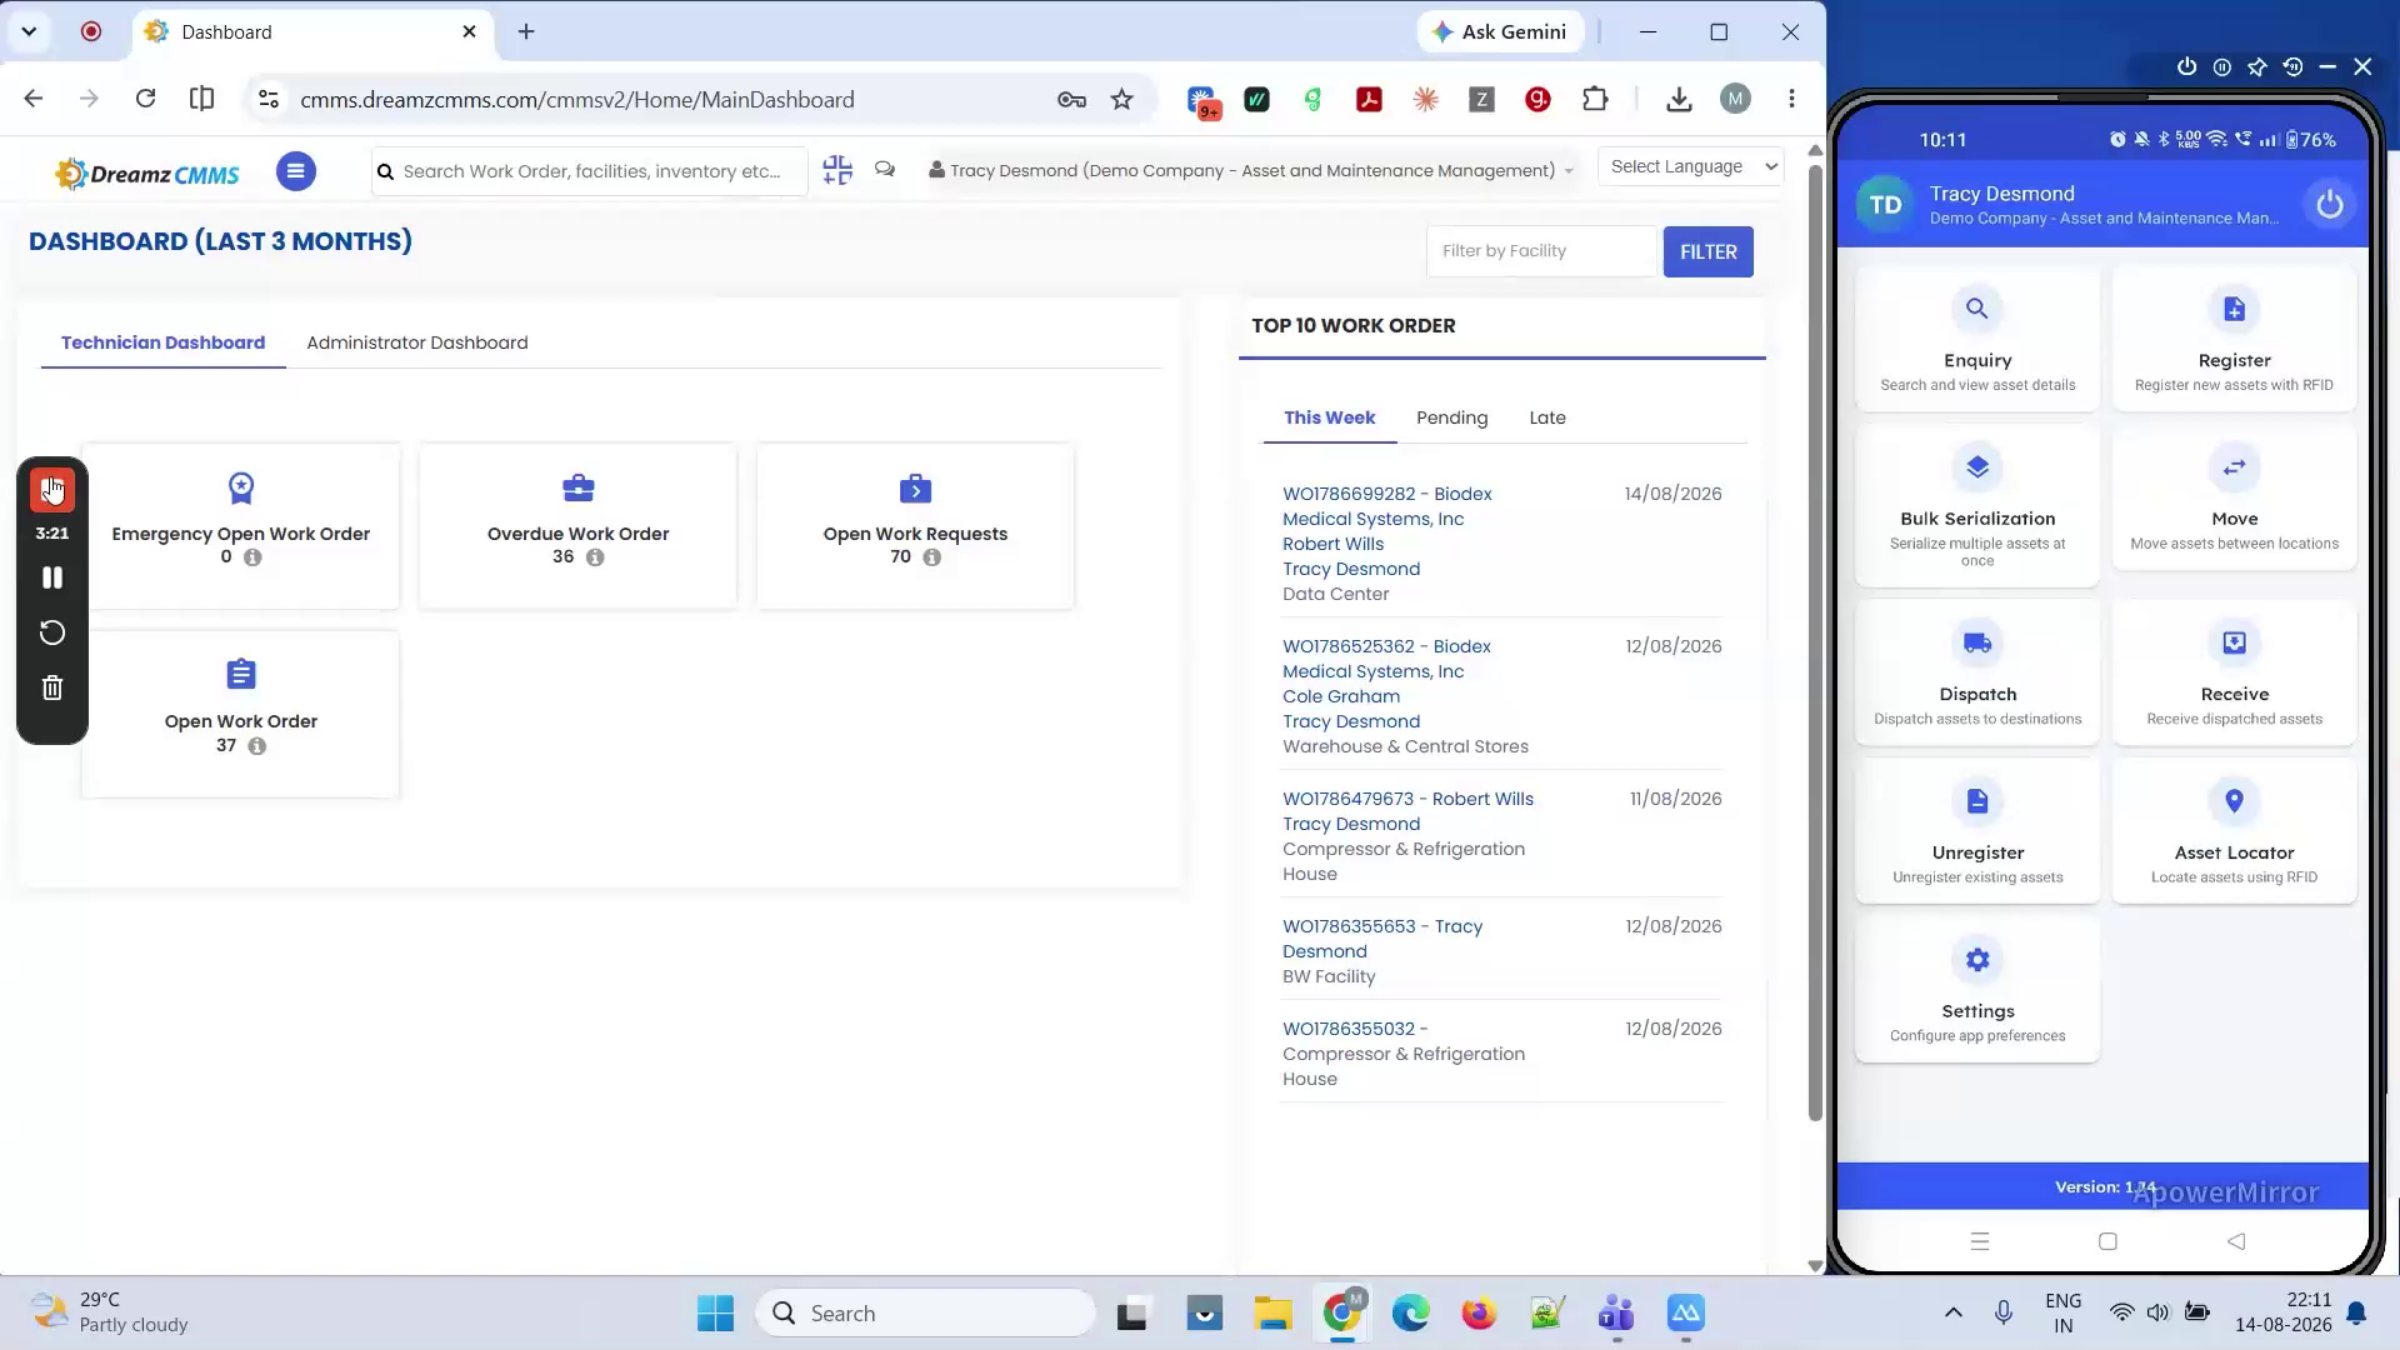
From the dashboard, one home screen gives access to every module. Inquiry lets you pick a location, scan single or multi, and reconcile stock instantly against what's expected. Register lets you scan a new tag, link it to a product, and have it under tracking in seconds. Bulk Serialization lets you set a quantity, then scan continuously to tag a whole batch of identical items in one pass.
Step 56 – RFID Item Movement and Dispatch
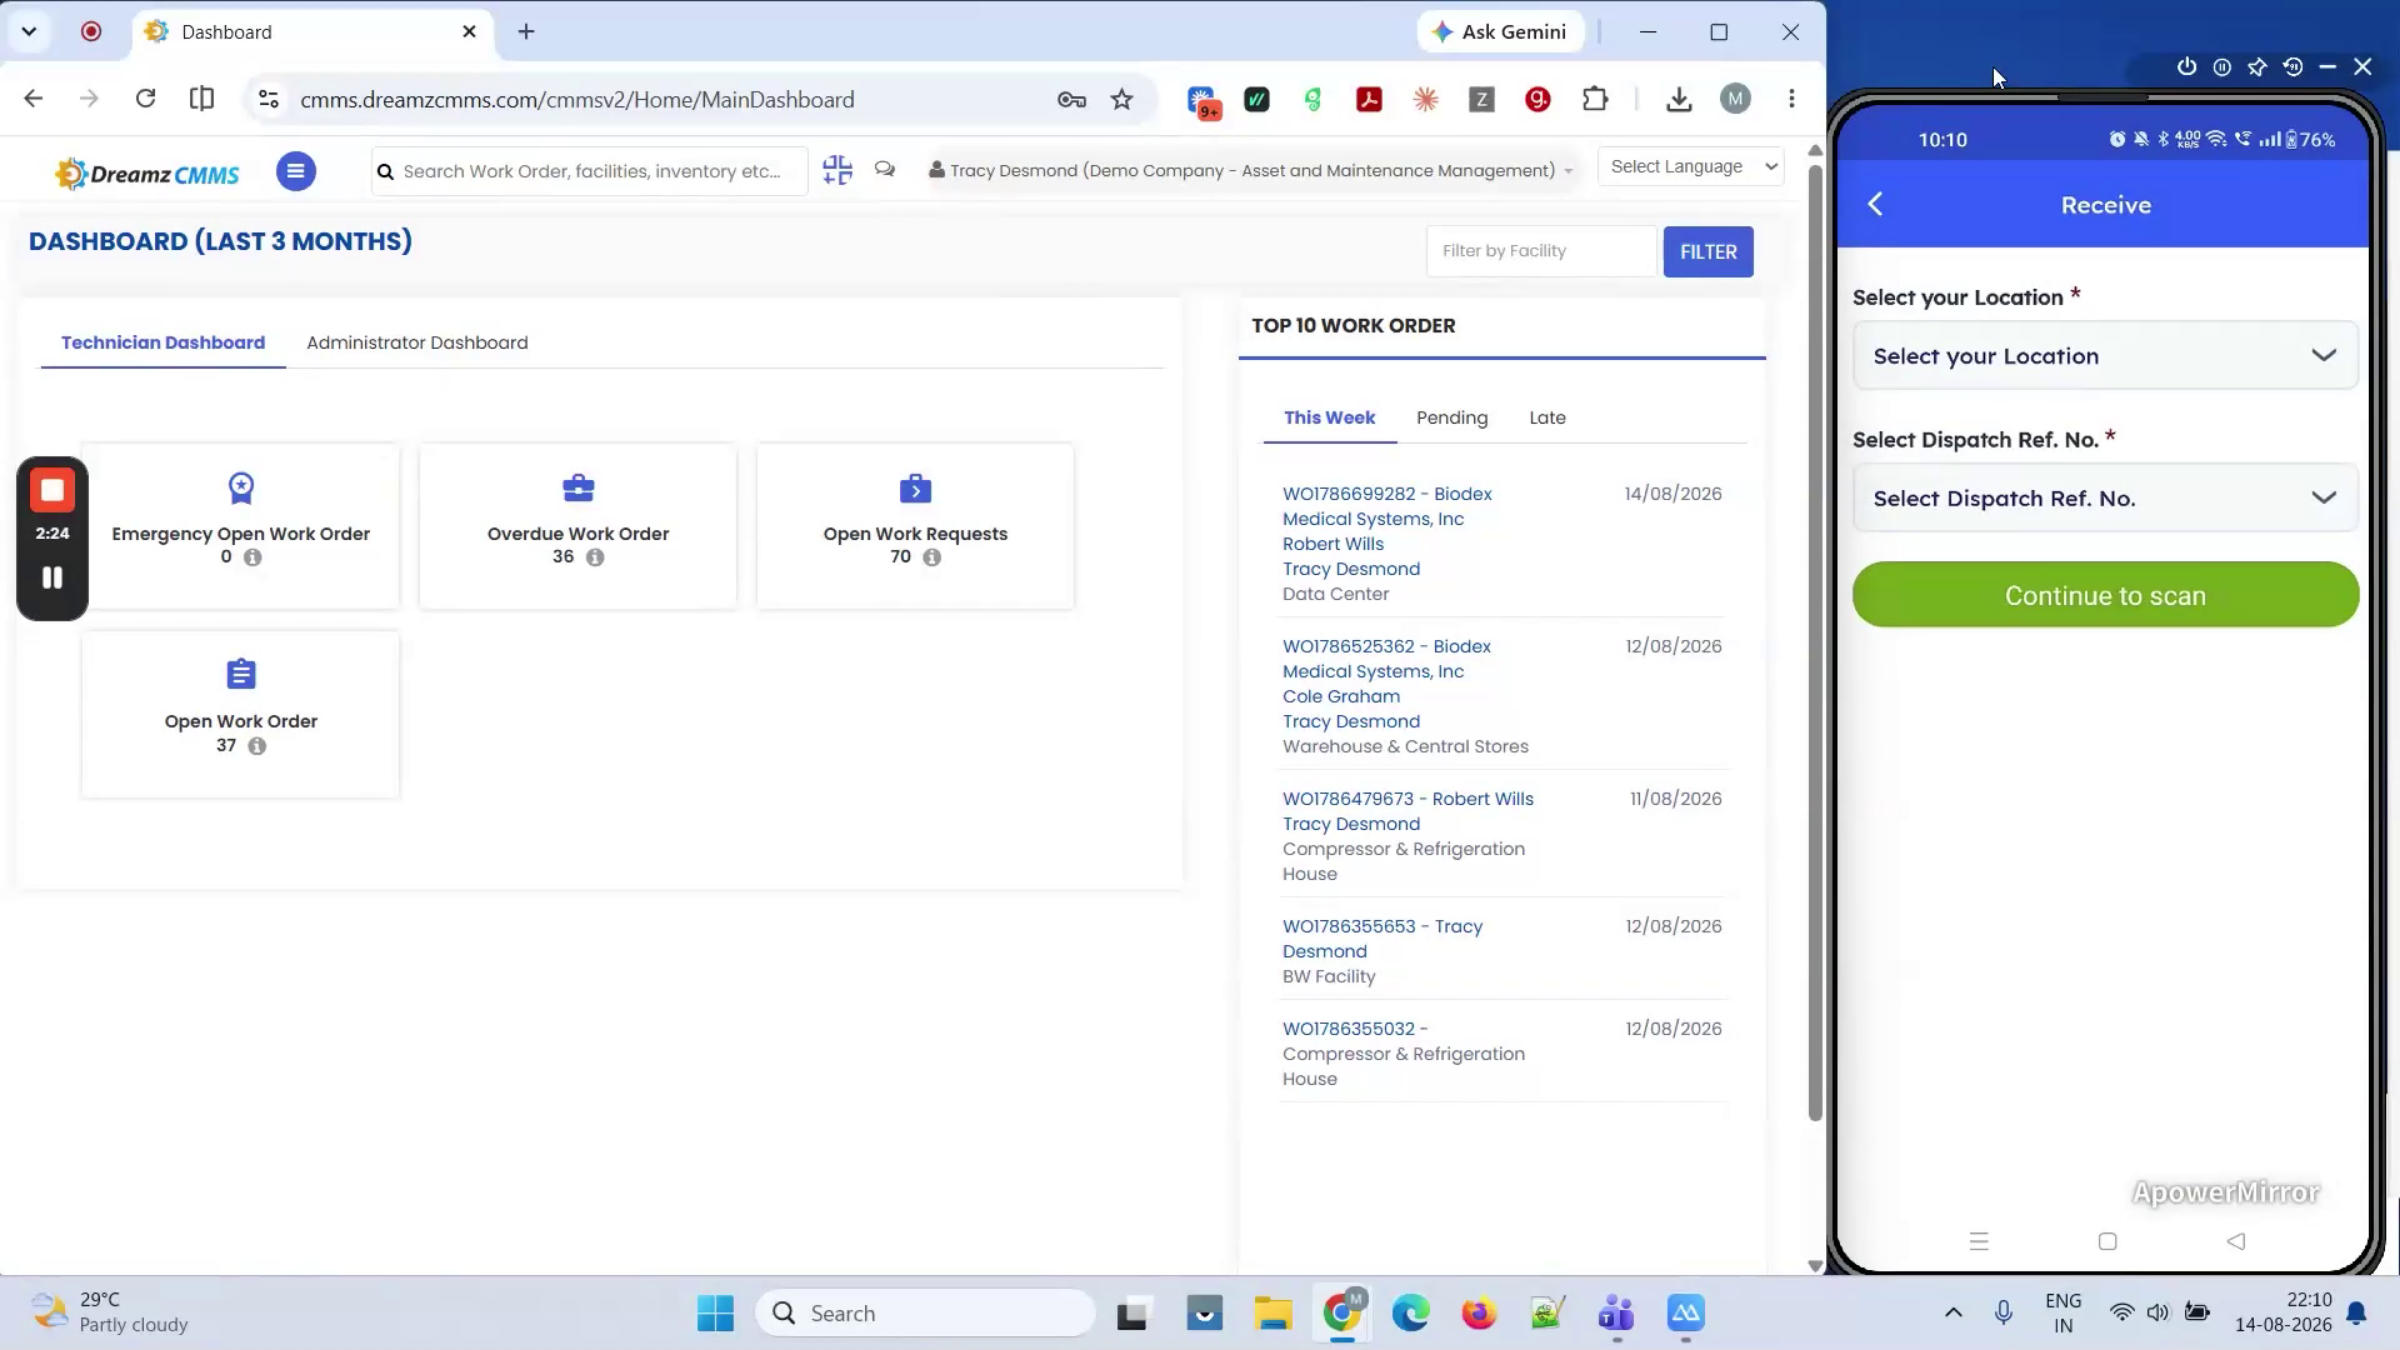
Move lets you pick a destination and scan the items moving between bins or locations. Dispatch lets you select a destination facility and scan what's going out, creating an outbound record. Receive lets you scan what's arrived against that dispatch, confirming everything showed up.
Step 57 – RFID Unregister and Locator
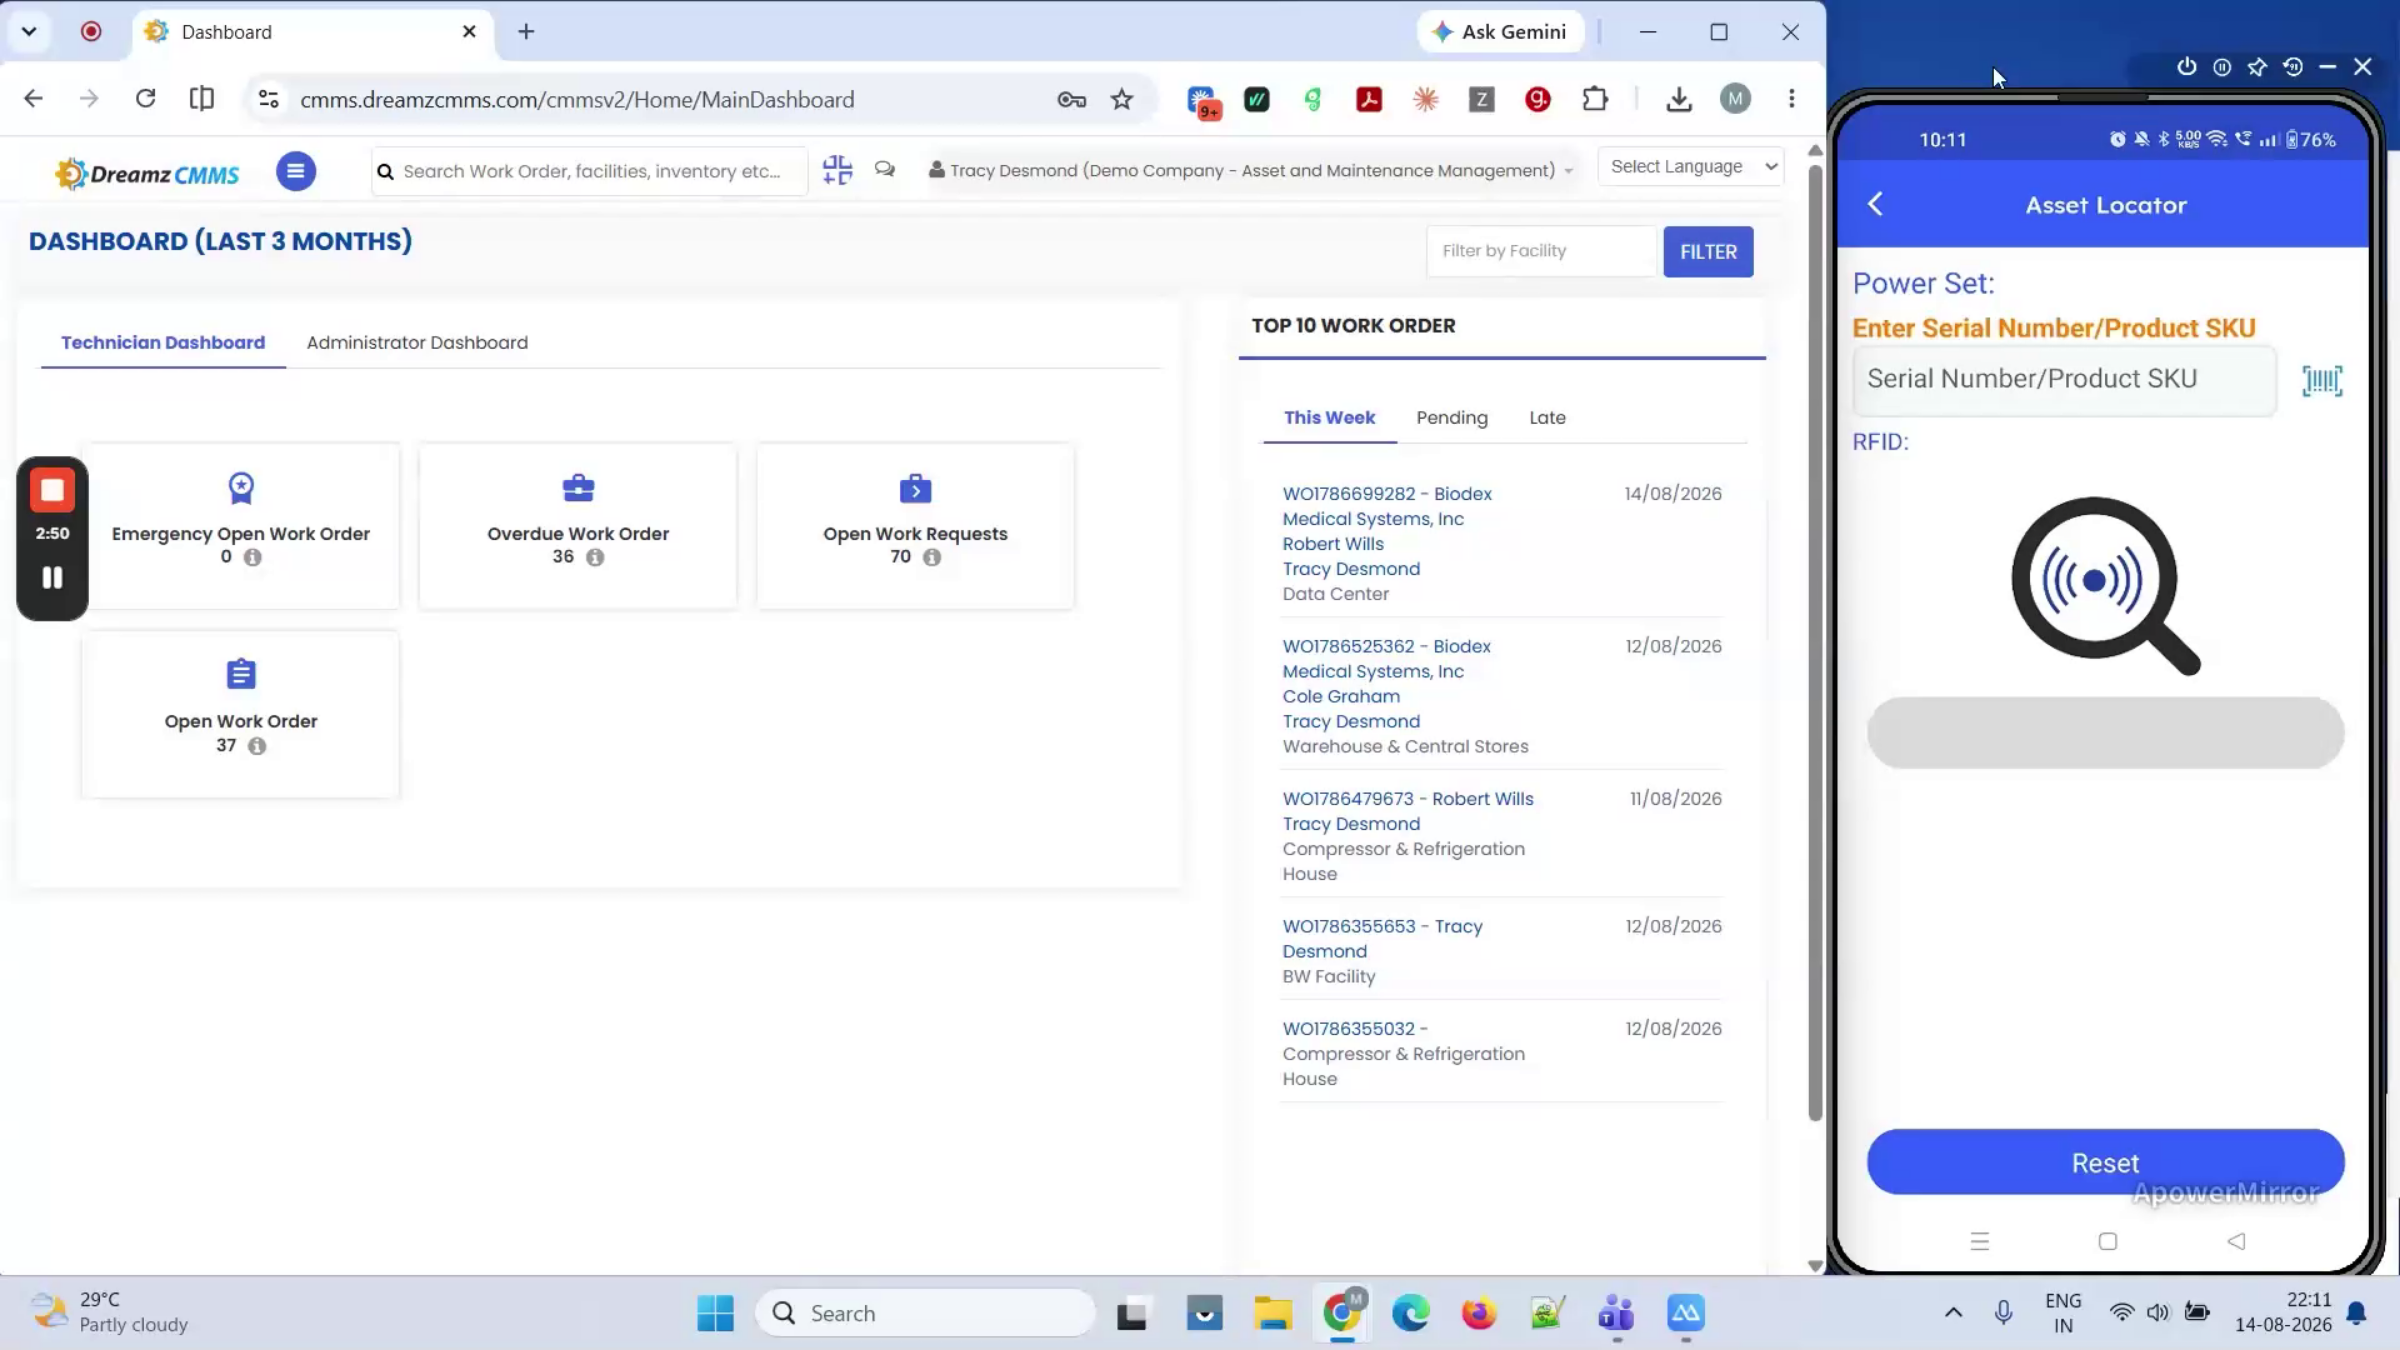
Unregister lets you scan a tag to free it up when an asset is retired or resized. Asset Locator lets you search by serial number, then walk the floor as signal strength gets stronger, straight to the item.
Step 58 – RFID App Settings
Settings include Tune Read Power for tight storage versus open yards, plus sync and language preferences — the same data, assets, and locations as the web portal, just accessed with a scan in your hand instead of typing it in at a desk.
Rentals and Sales
Step 59 – Rental and Sales Transactions
Not everything comes in through a purchase order, and not everything that leaves is scrapped or issued internally. Sometimes material is rented in, and sometimes it goes back out the door as a sale — both run through the same flow.
Step 60 – Estimate to Sales Order
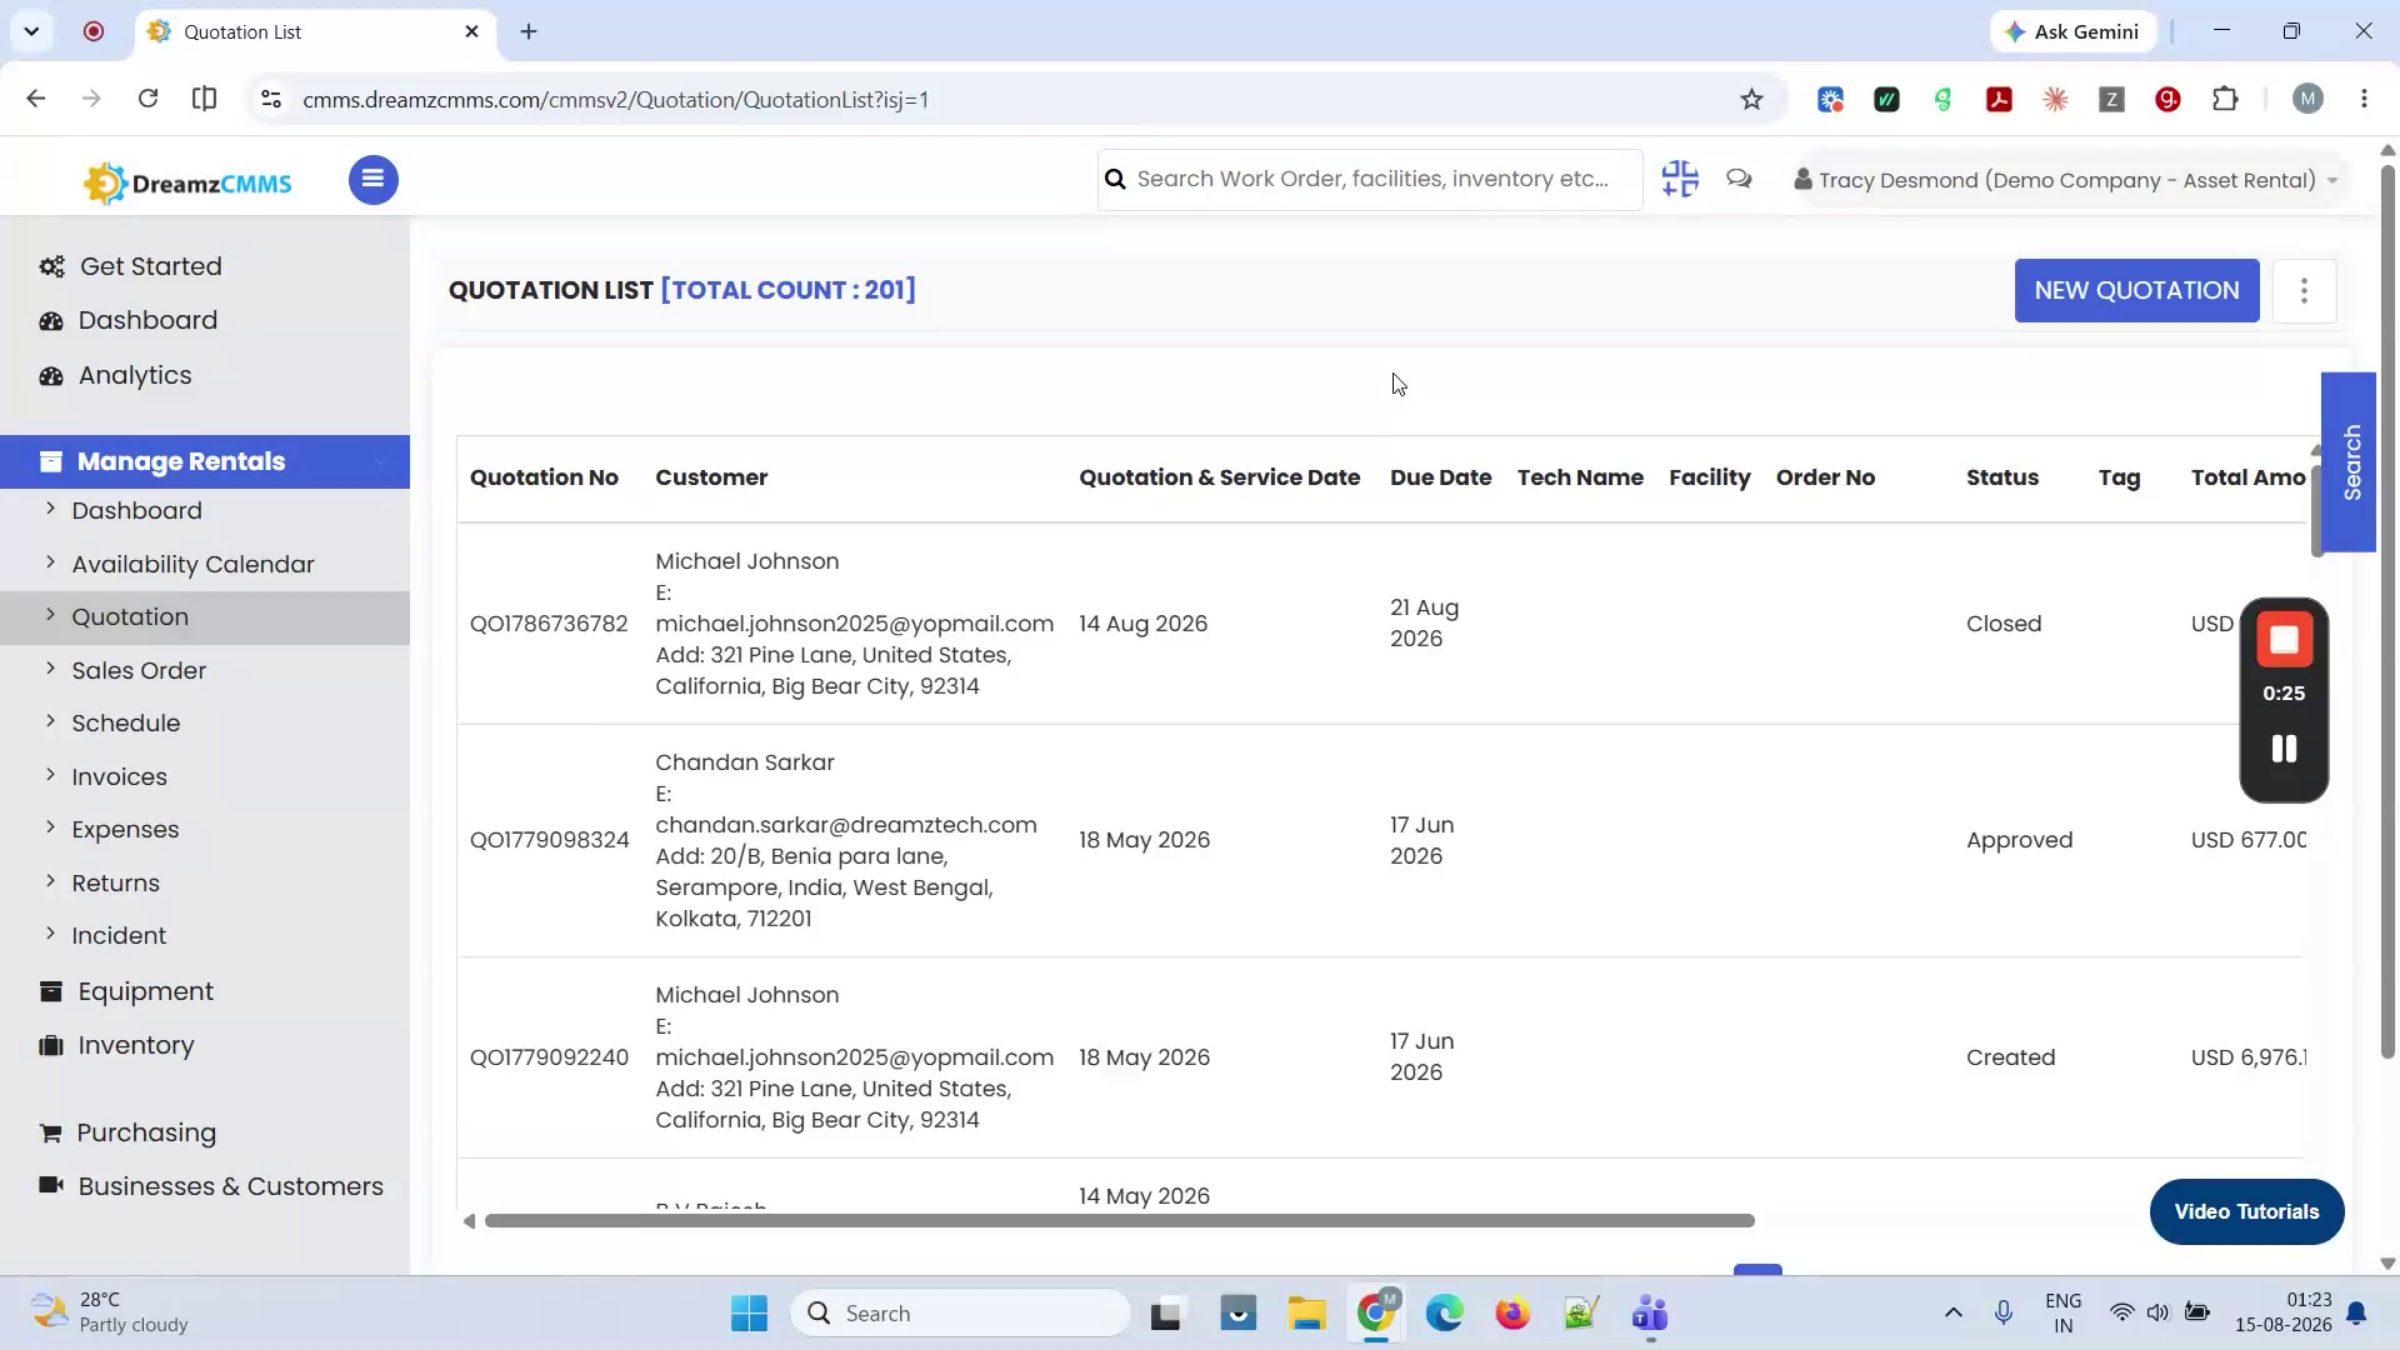
It starts with an estimate or a quote. Once that's confirmed, it converts into a sales order, and from there an invoice is generated.
Step 61 – Rental and Sales Invoice Process
For rented equipment, that invoice covers the rental period; for a sale, it's the transaction itself — either way, it's the same three steps (estimate, sales order, invoice) just applied to a different kind of transaction. When rented equipment is no longer needed, the return closes out that rental record. If material needs to come back for any other reason, such as damage, oversupply, or handing rented equipment back to the renting company, that's handled as a sales return with a remark field so the reason is on record, not just the transaction itself.
Reports
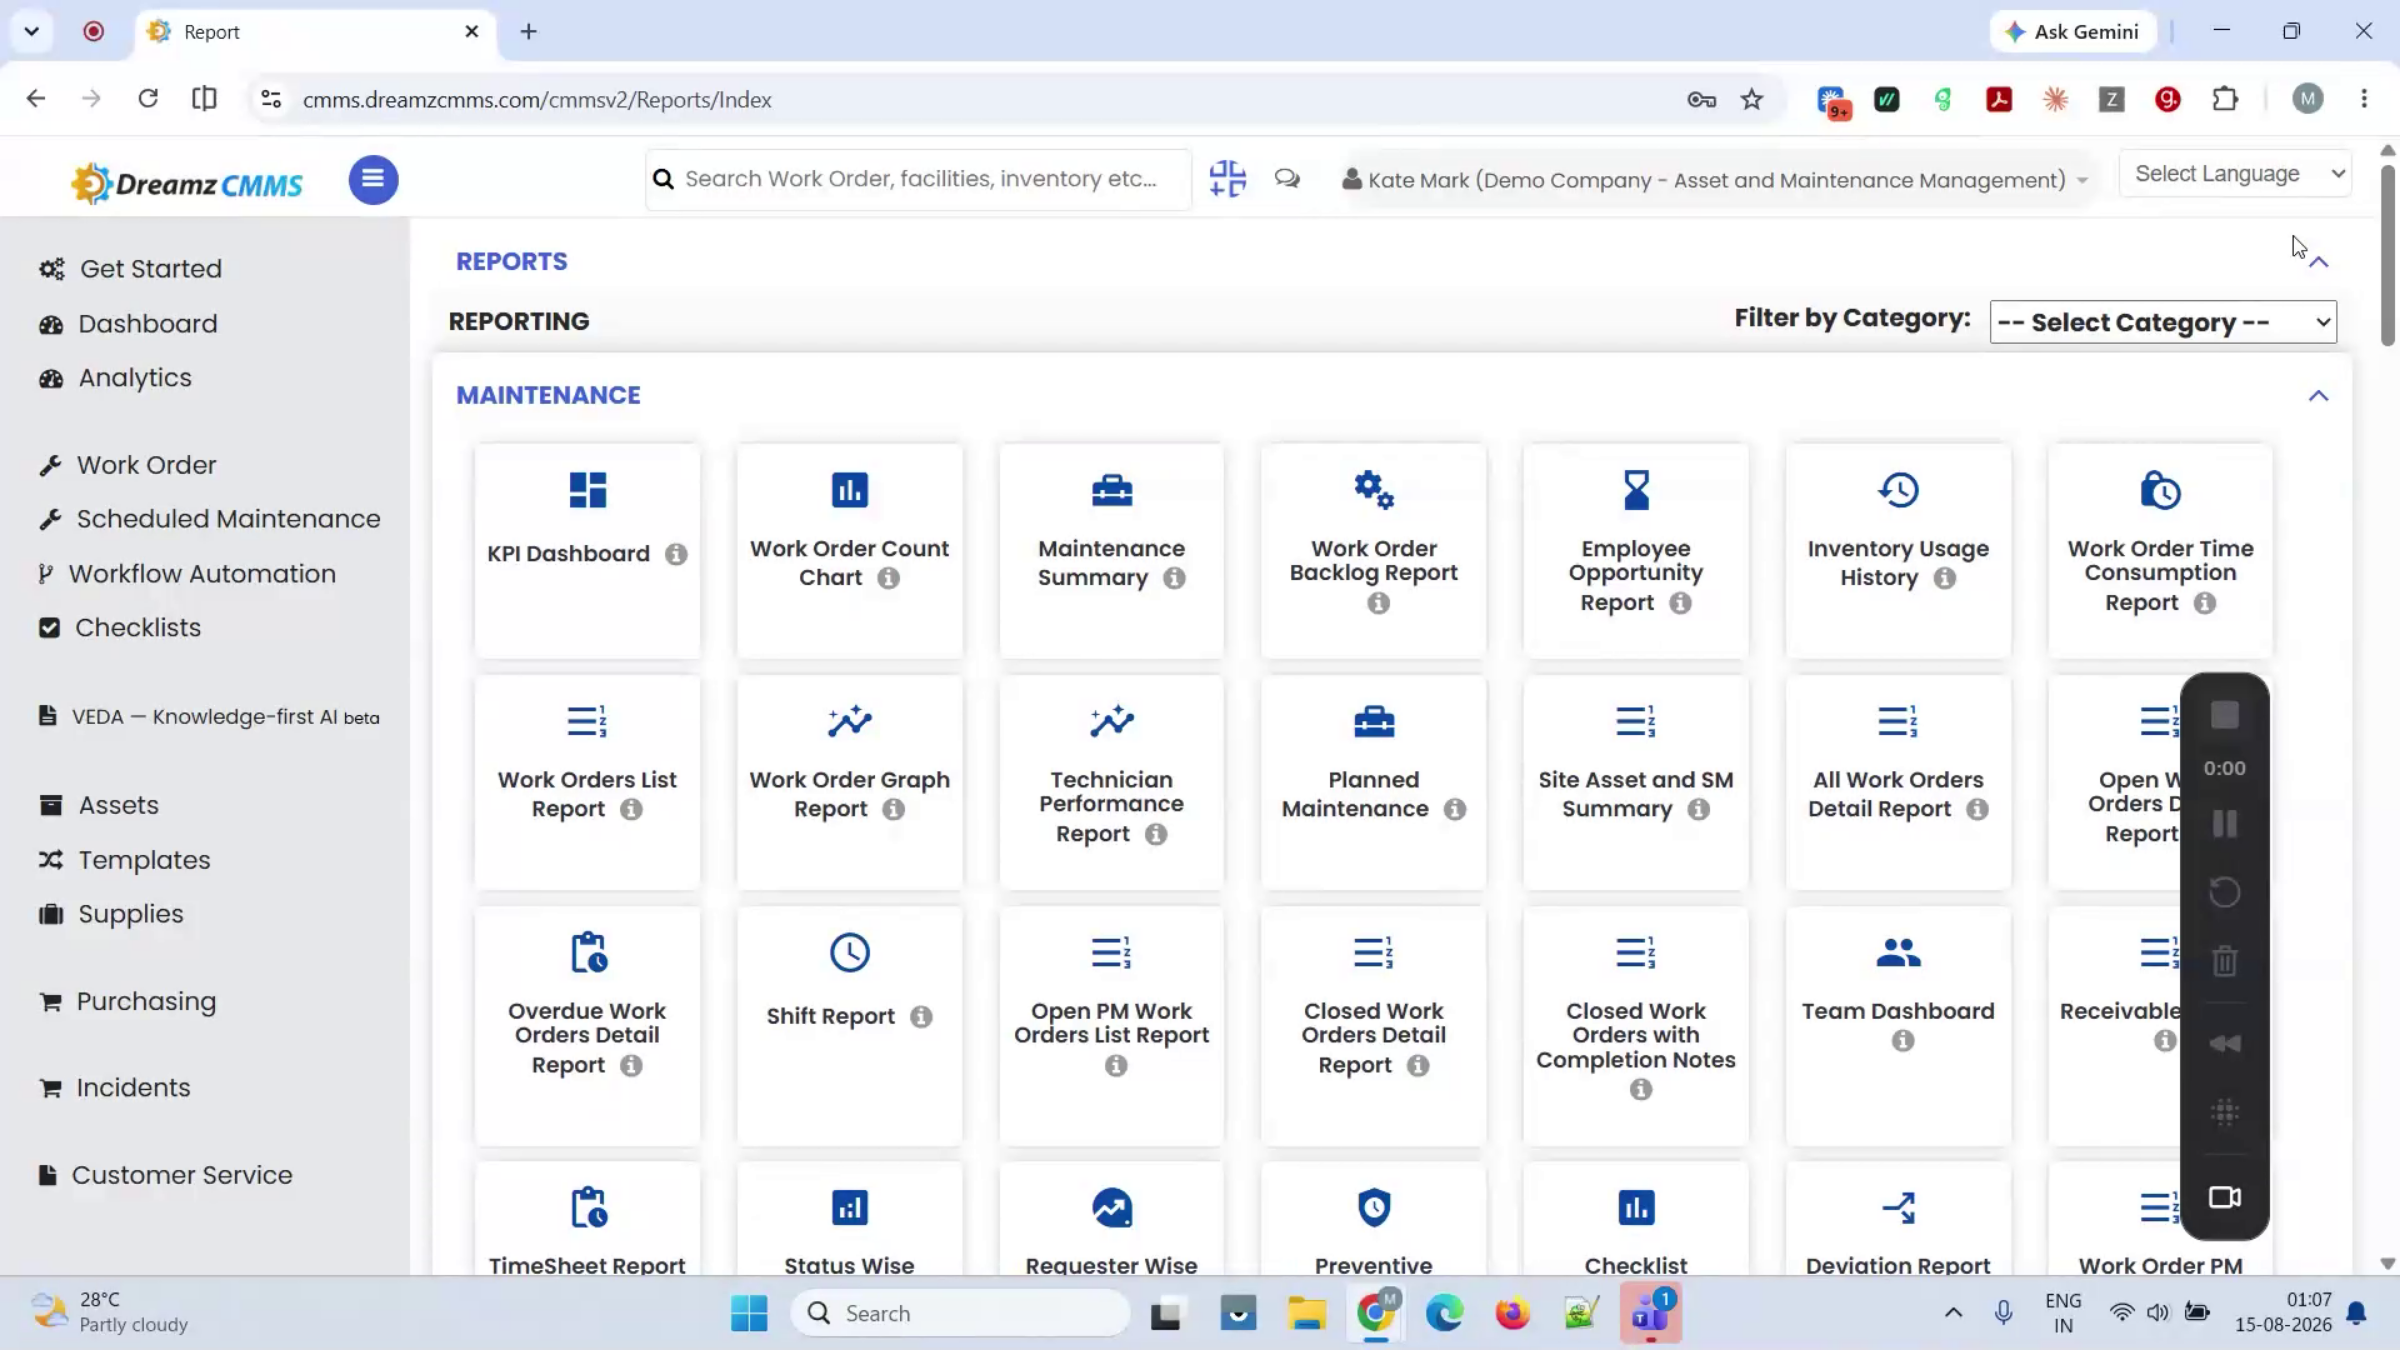
Step 62 – Reports Overview
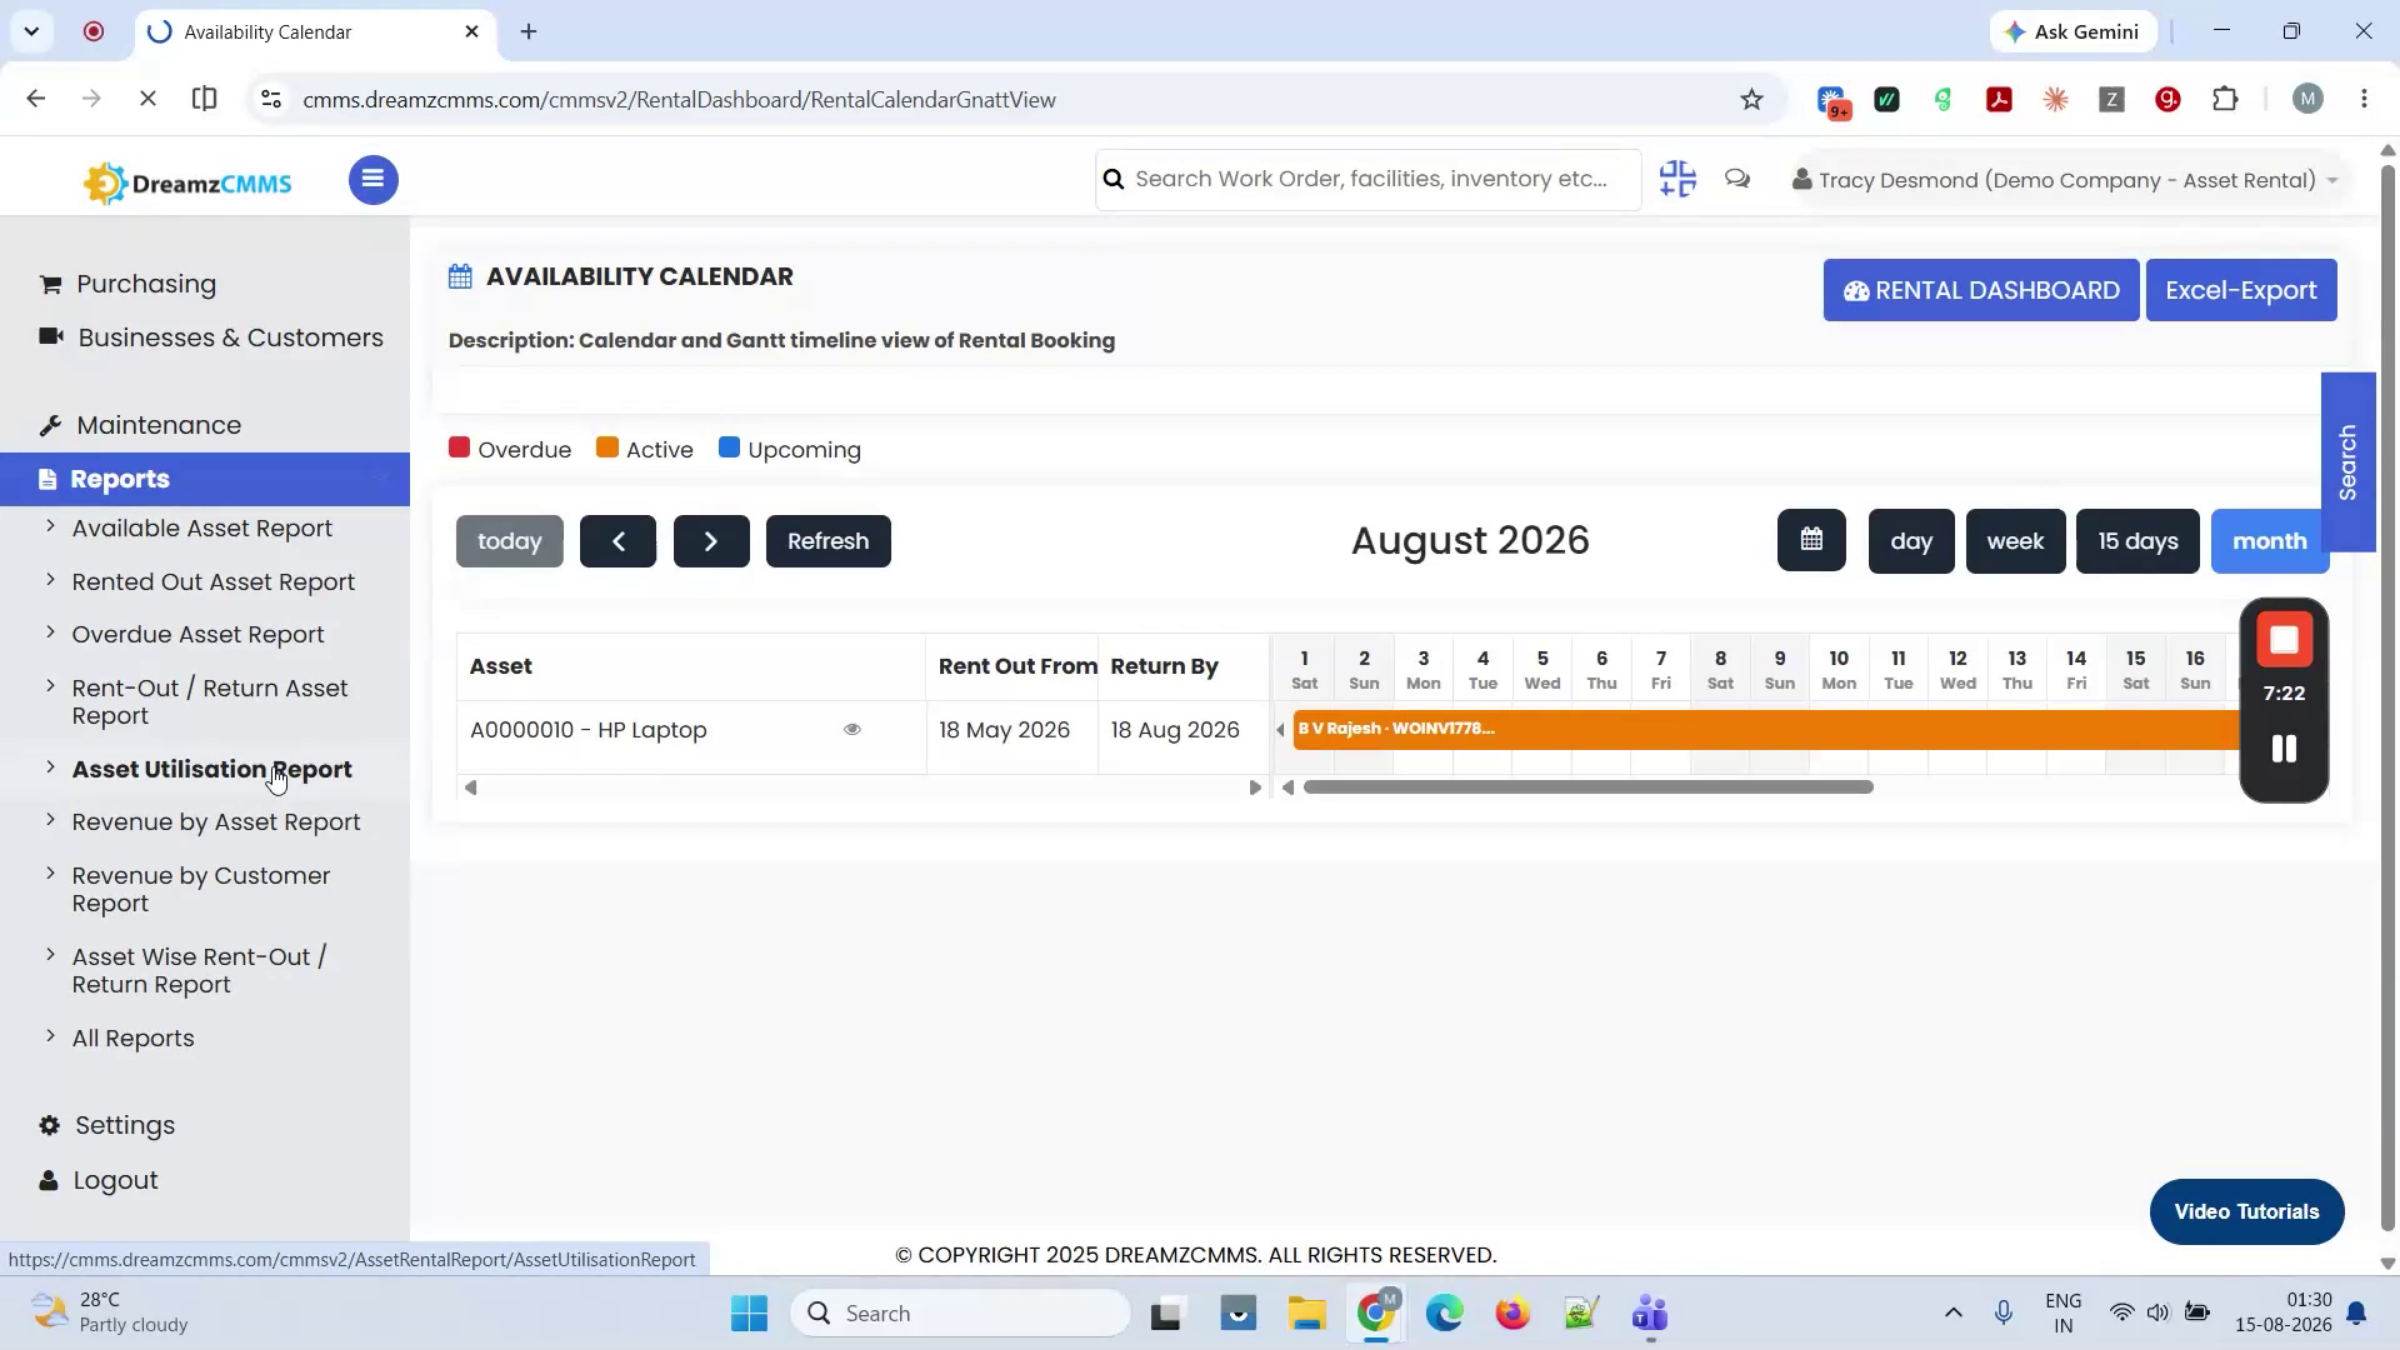
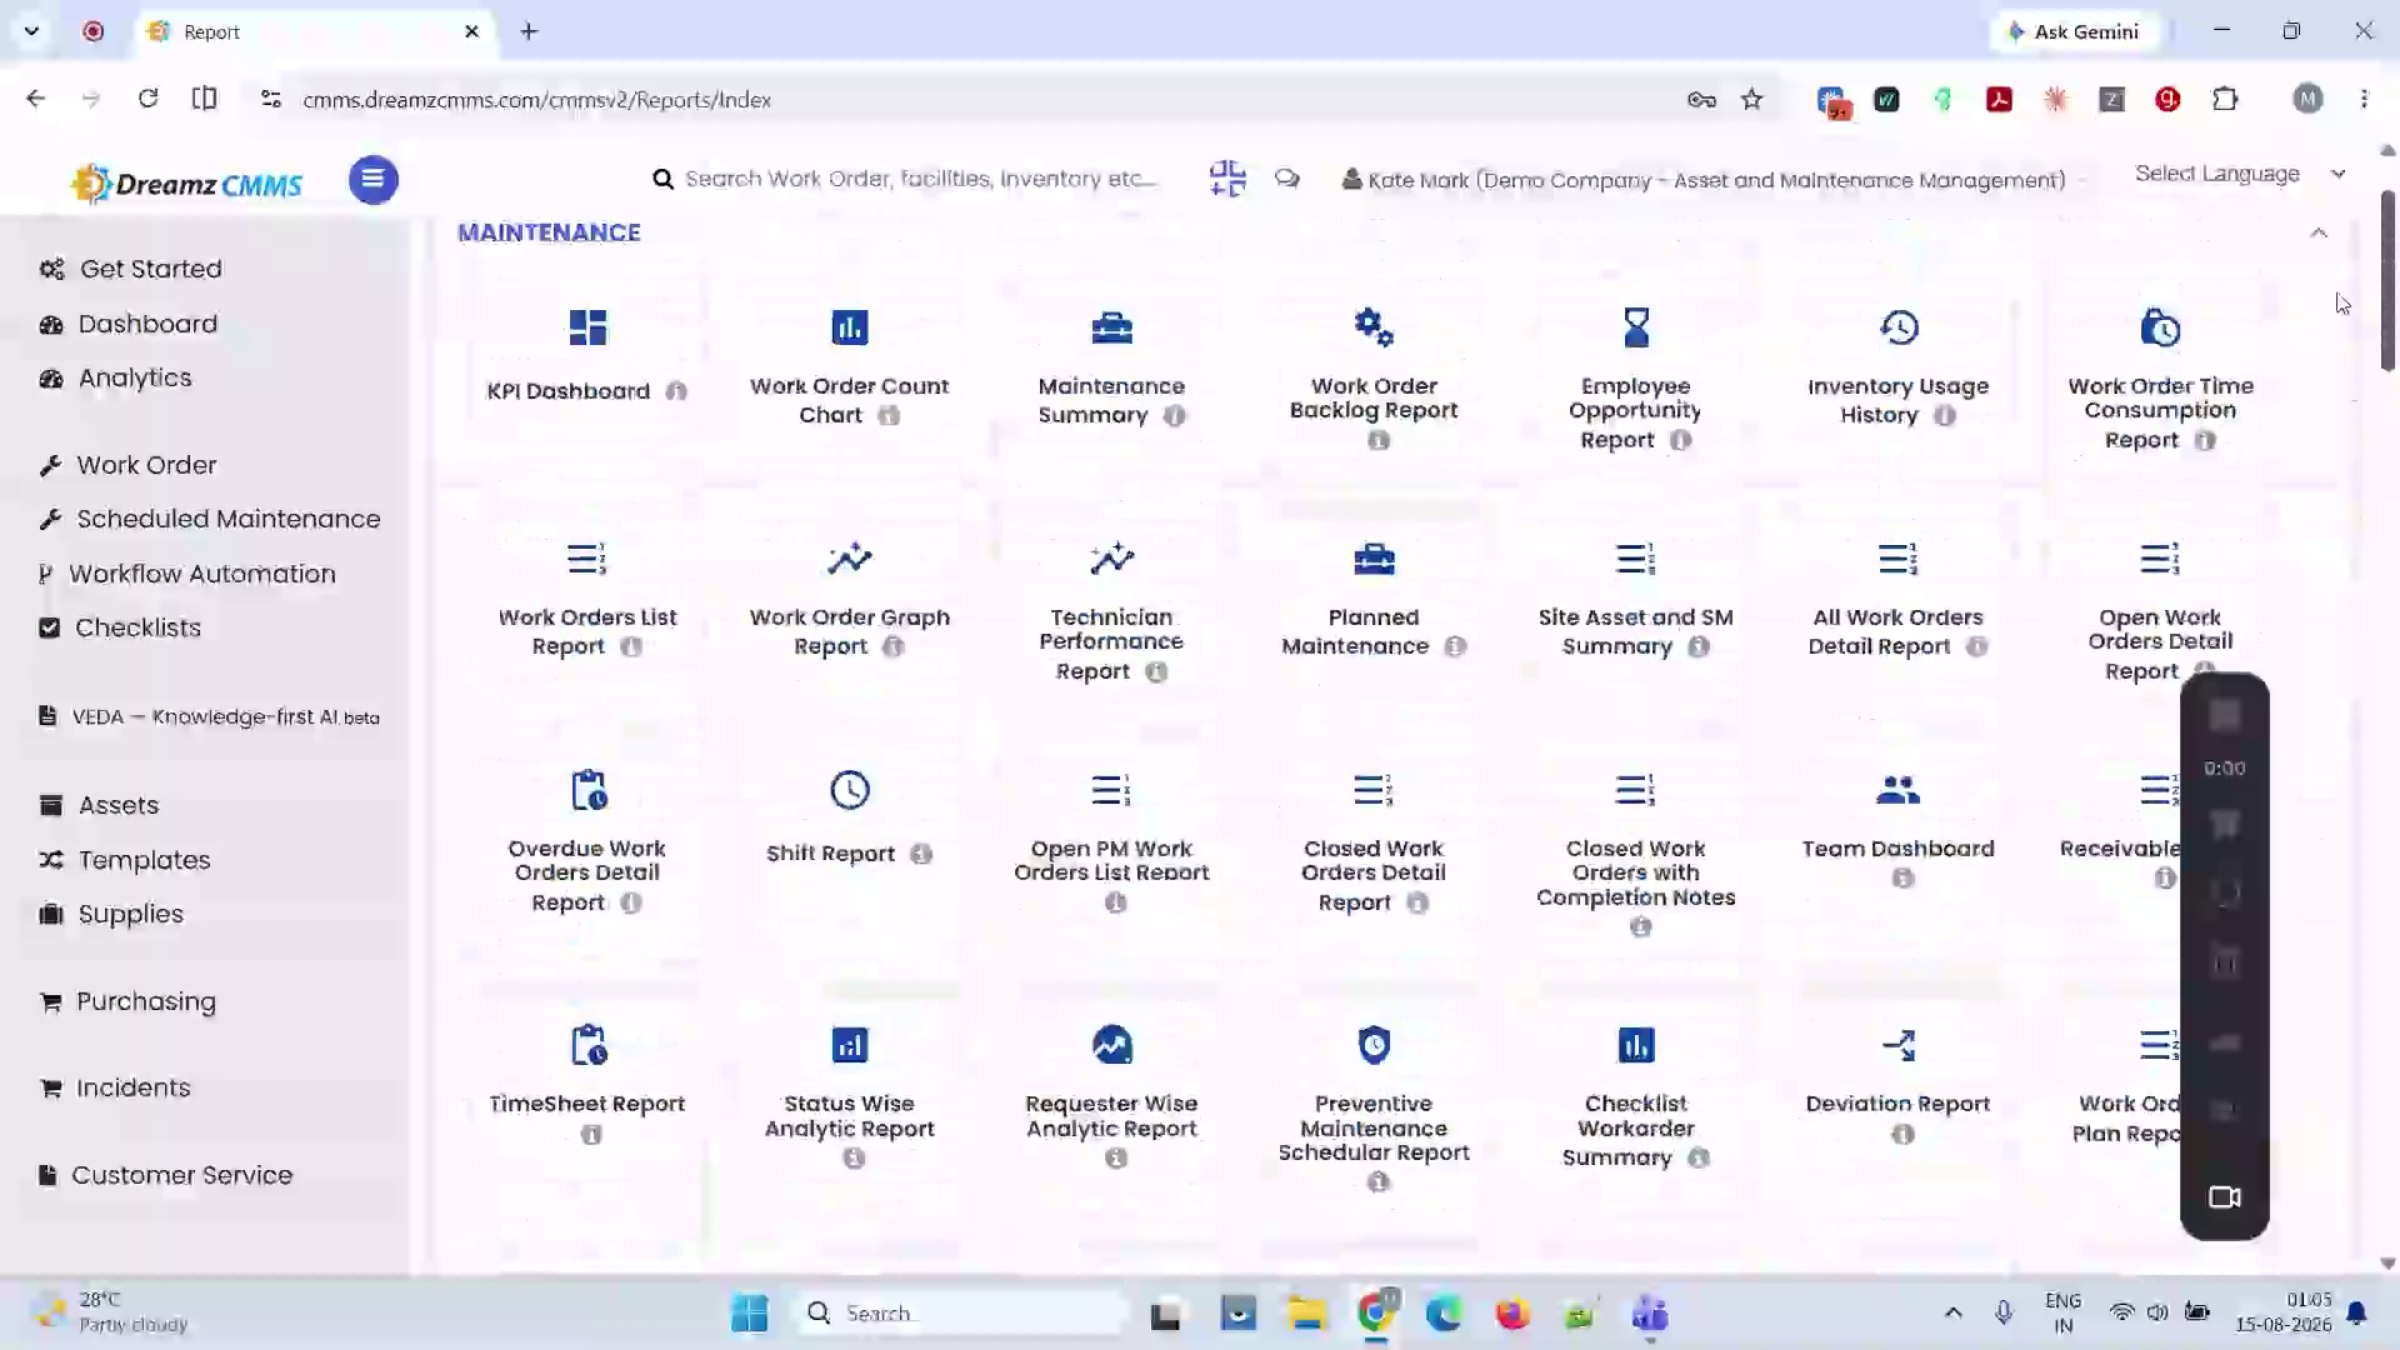
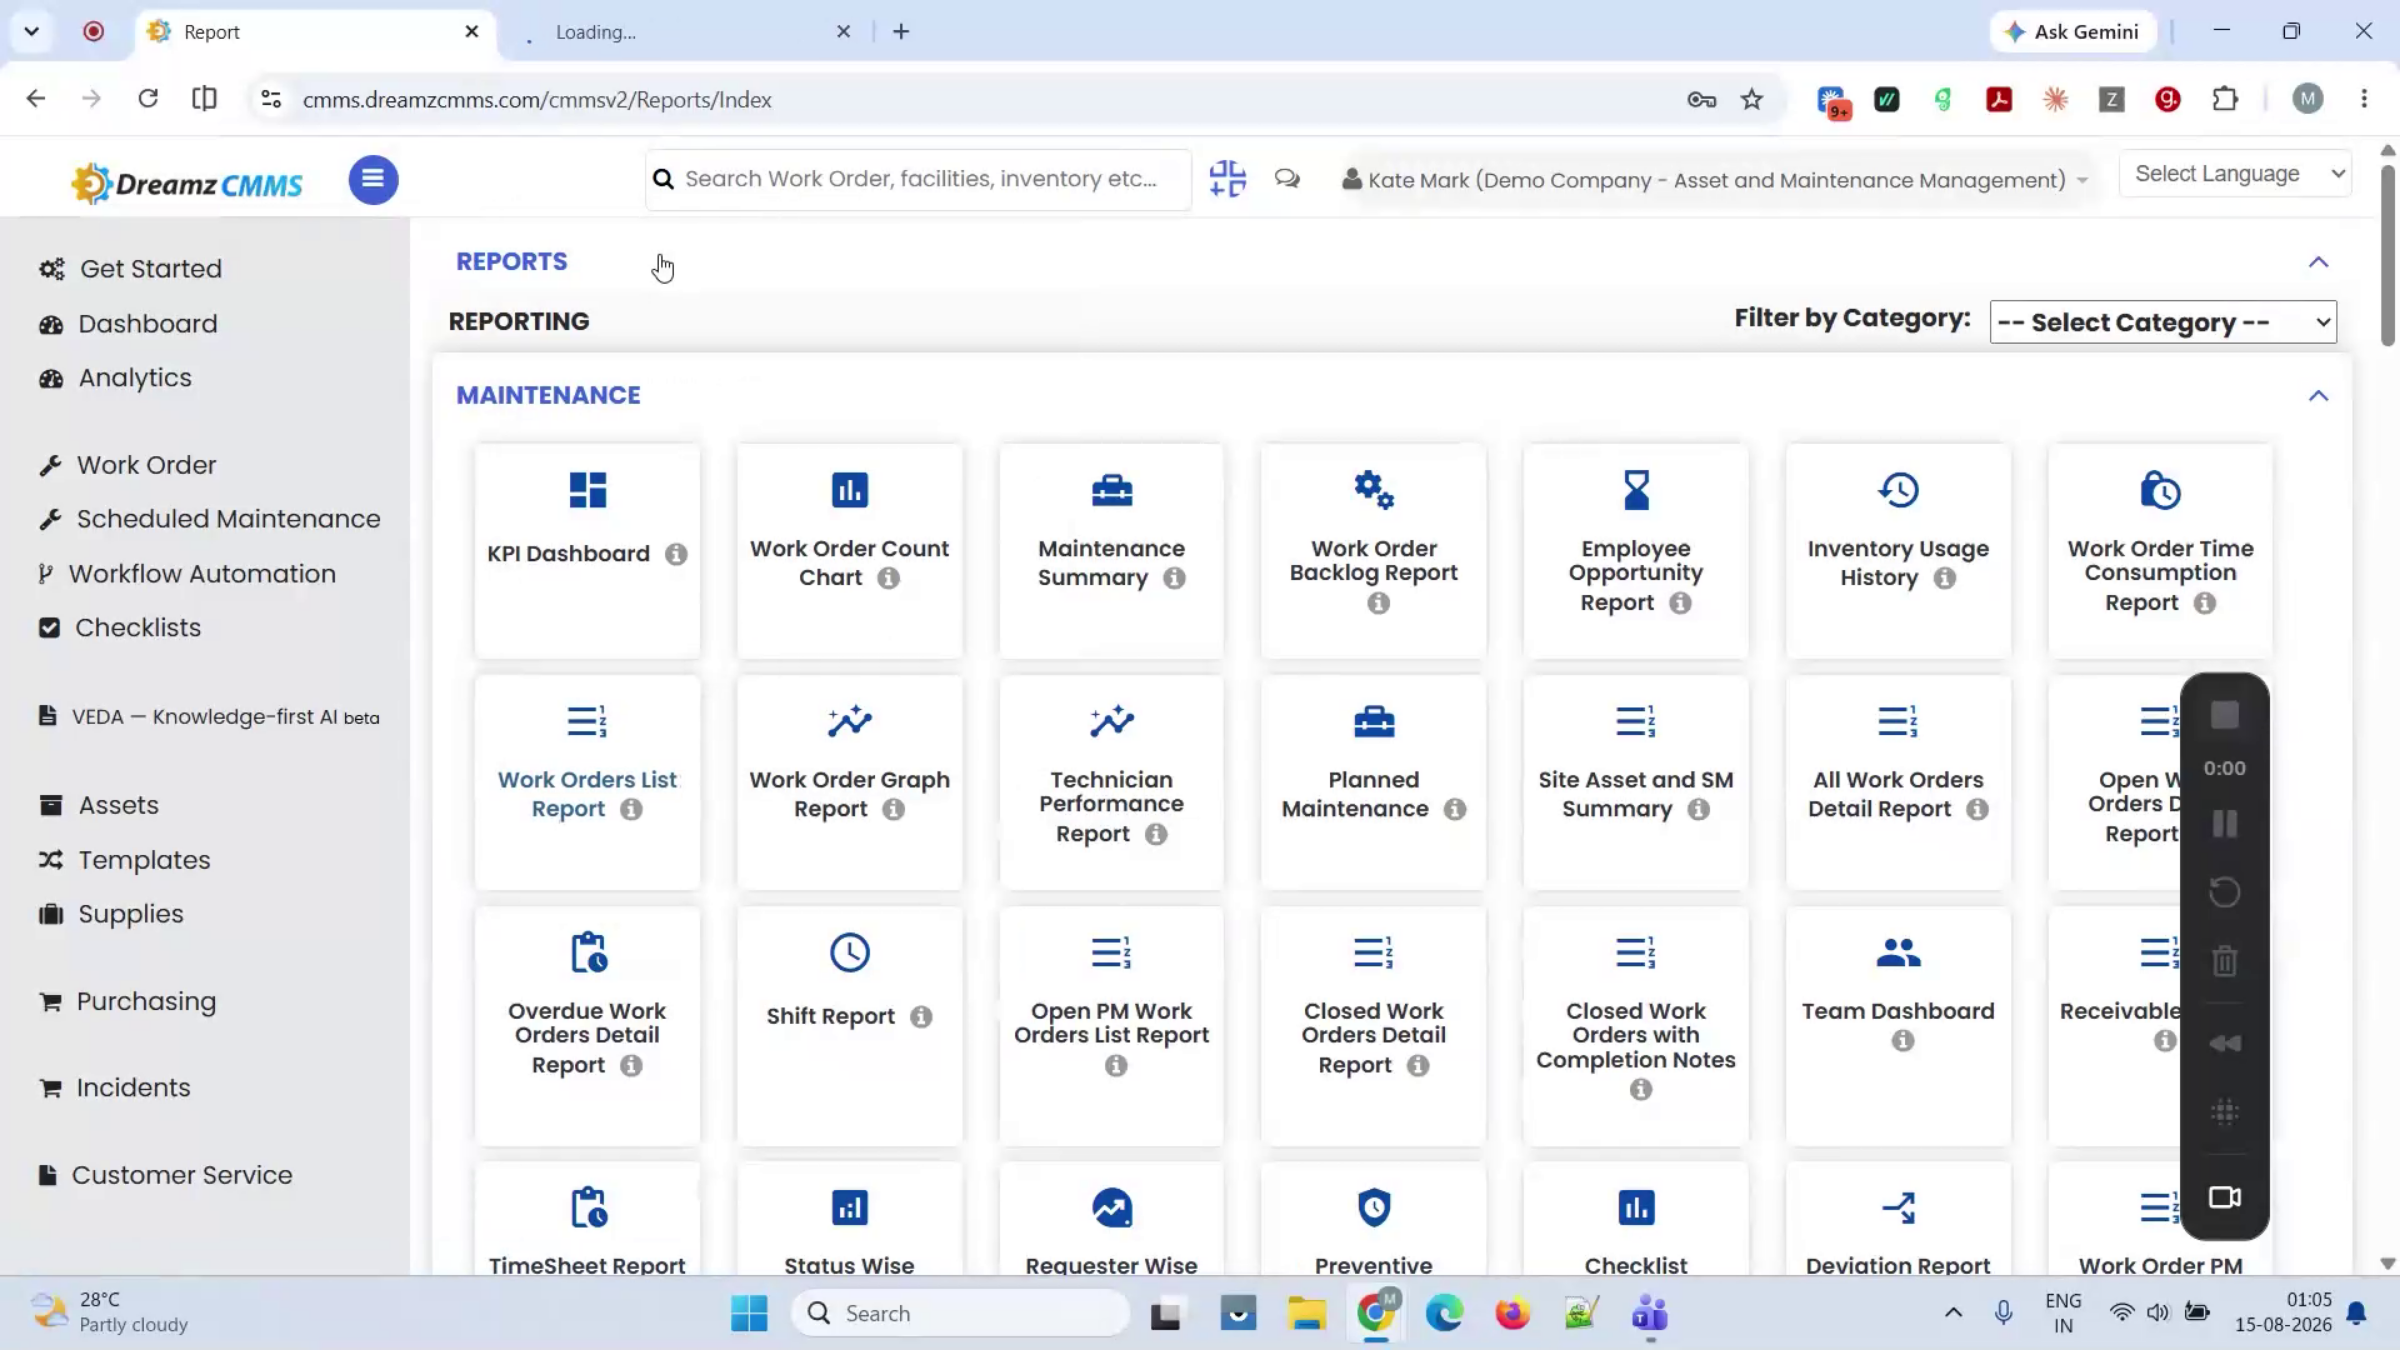
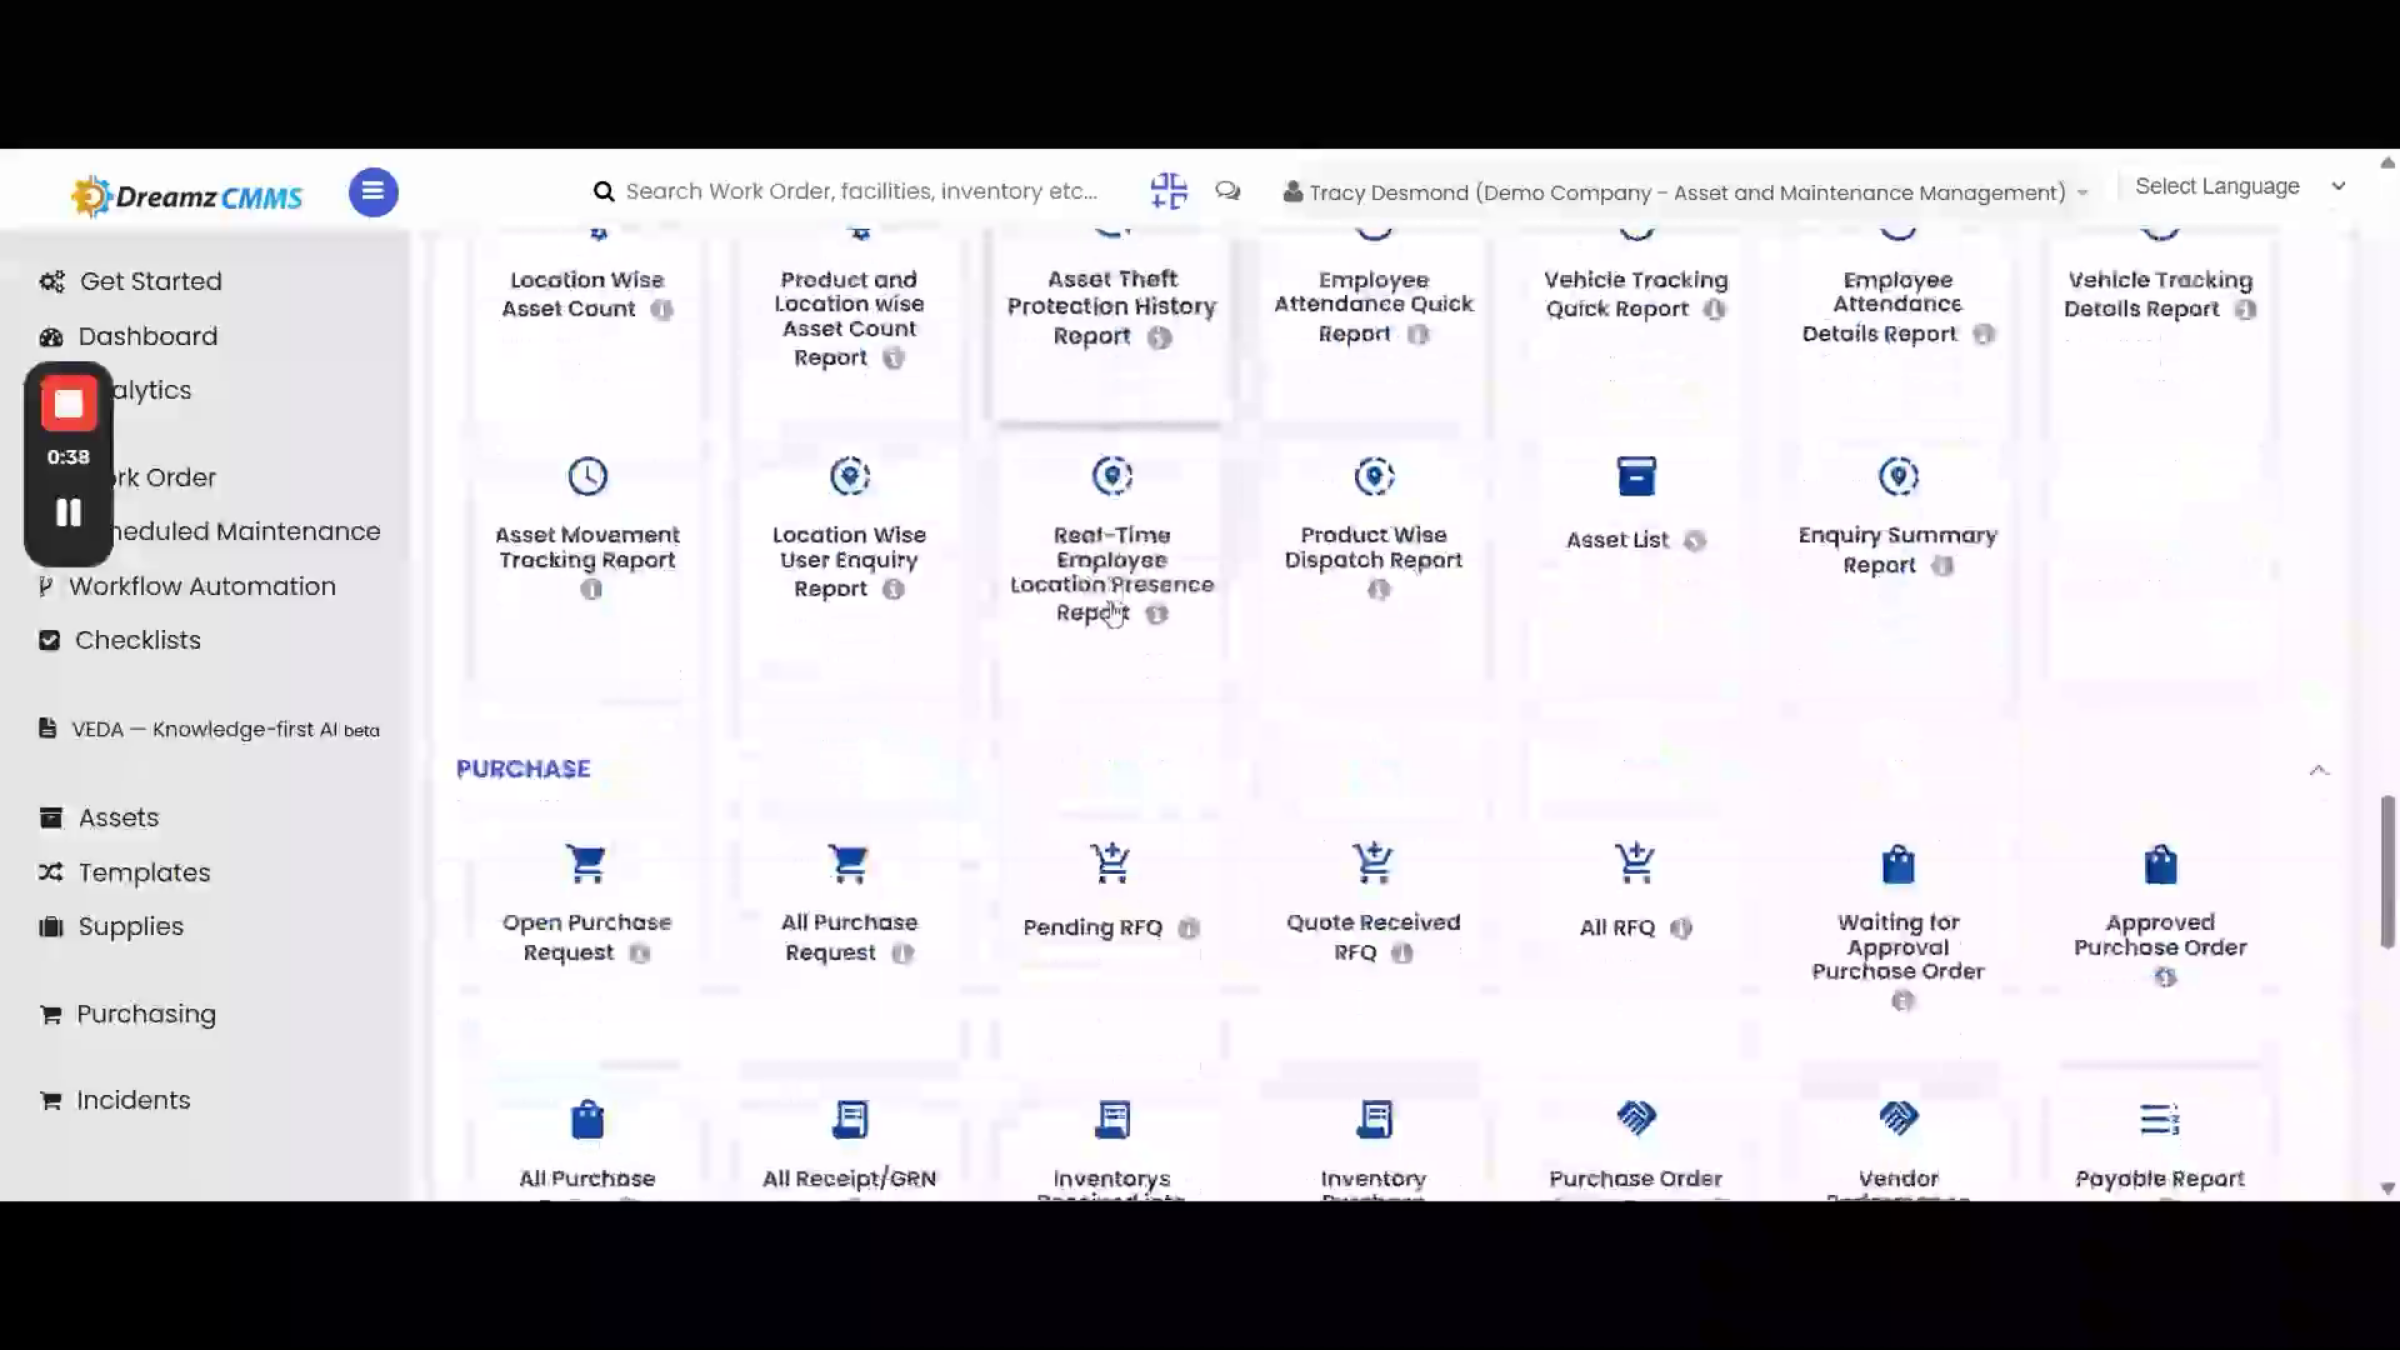
Reports bring everything walked through so far into one place, filterable by category: Maintenance, Assets, Fixed Assets, RFID Asset Tracking, Purchase, Incident, and Inventory.
Step 63 – Report Automation Benefits
Instead of pulling numbers together by hand whenever someone asks, the answer is already sitting here. A few reports are worth calling out individually.
Step 64 – Work Order Report Details
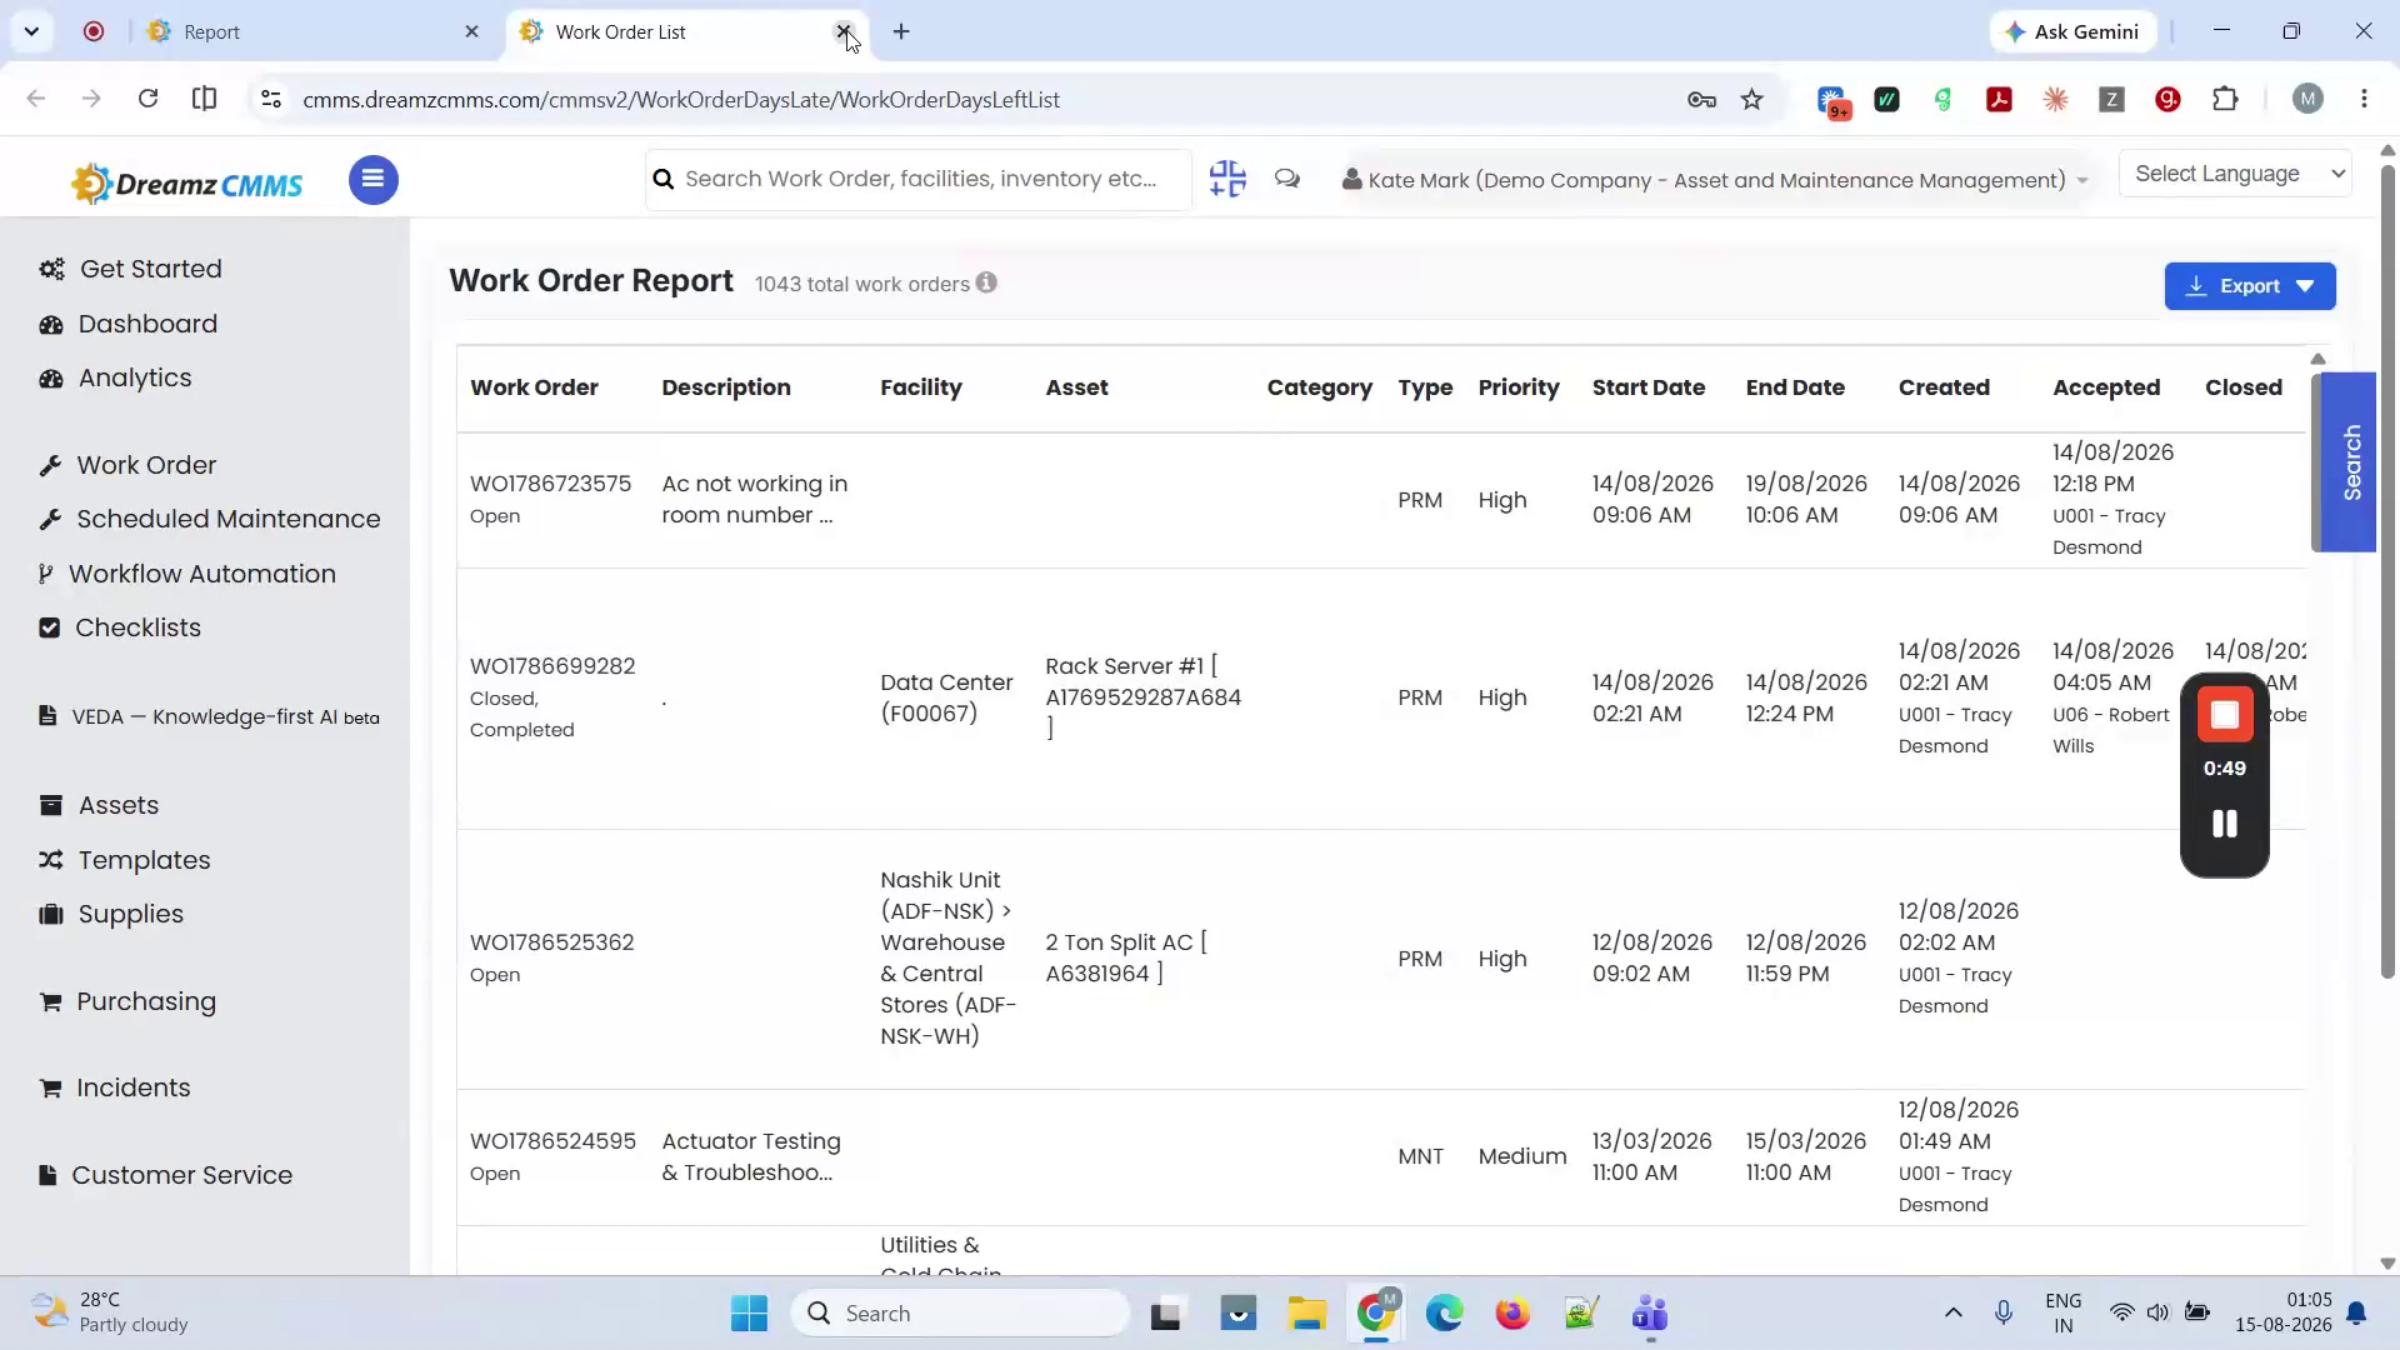
The Work Order Report under Maintenance shows every job in one view, so status doesn't have to be chased down over email.
Step 65 – Location Asset Count
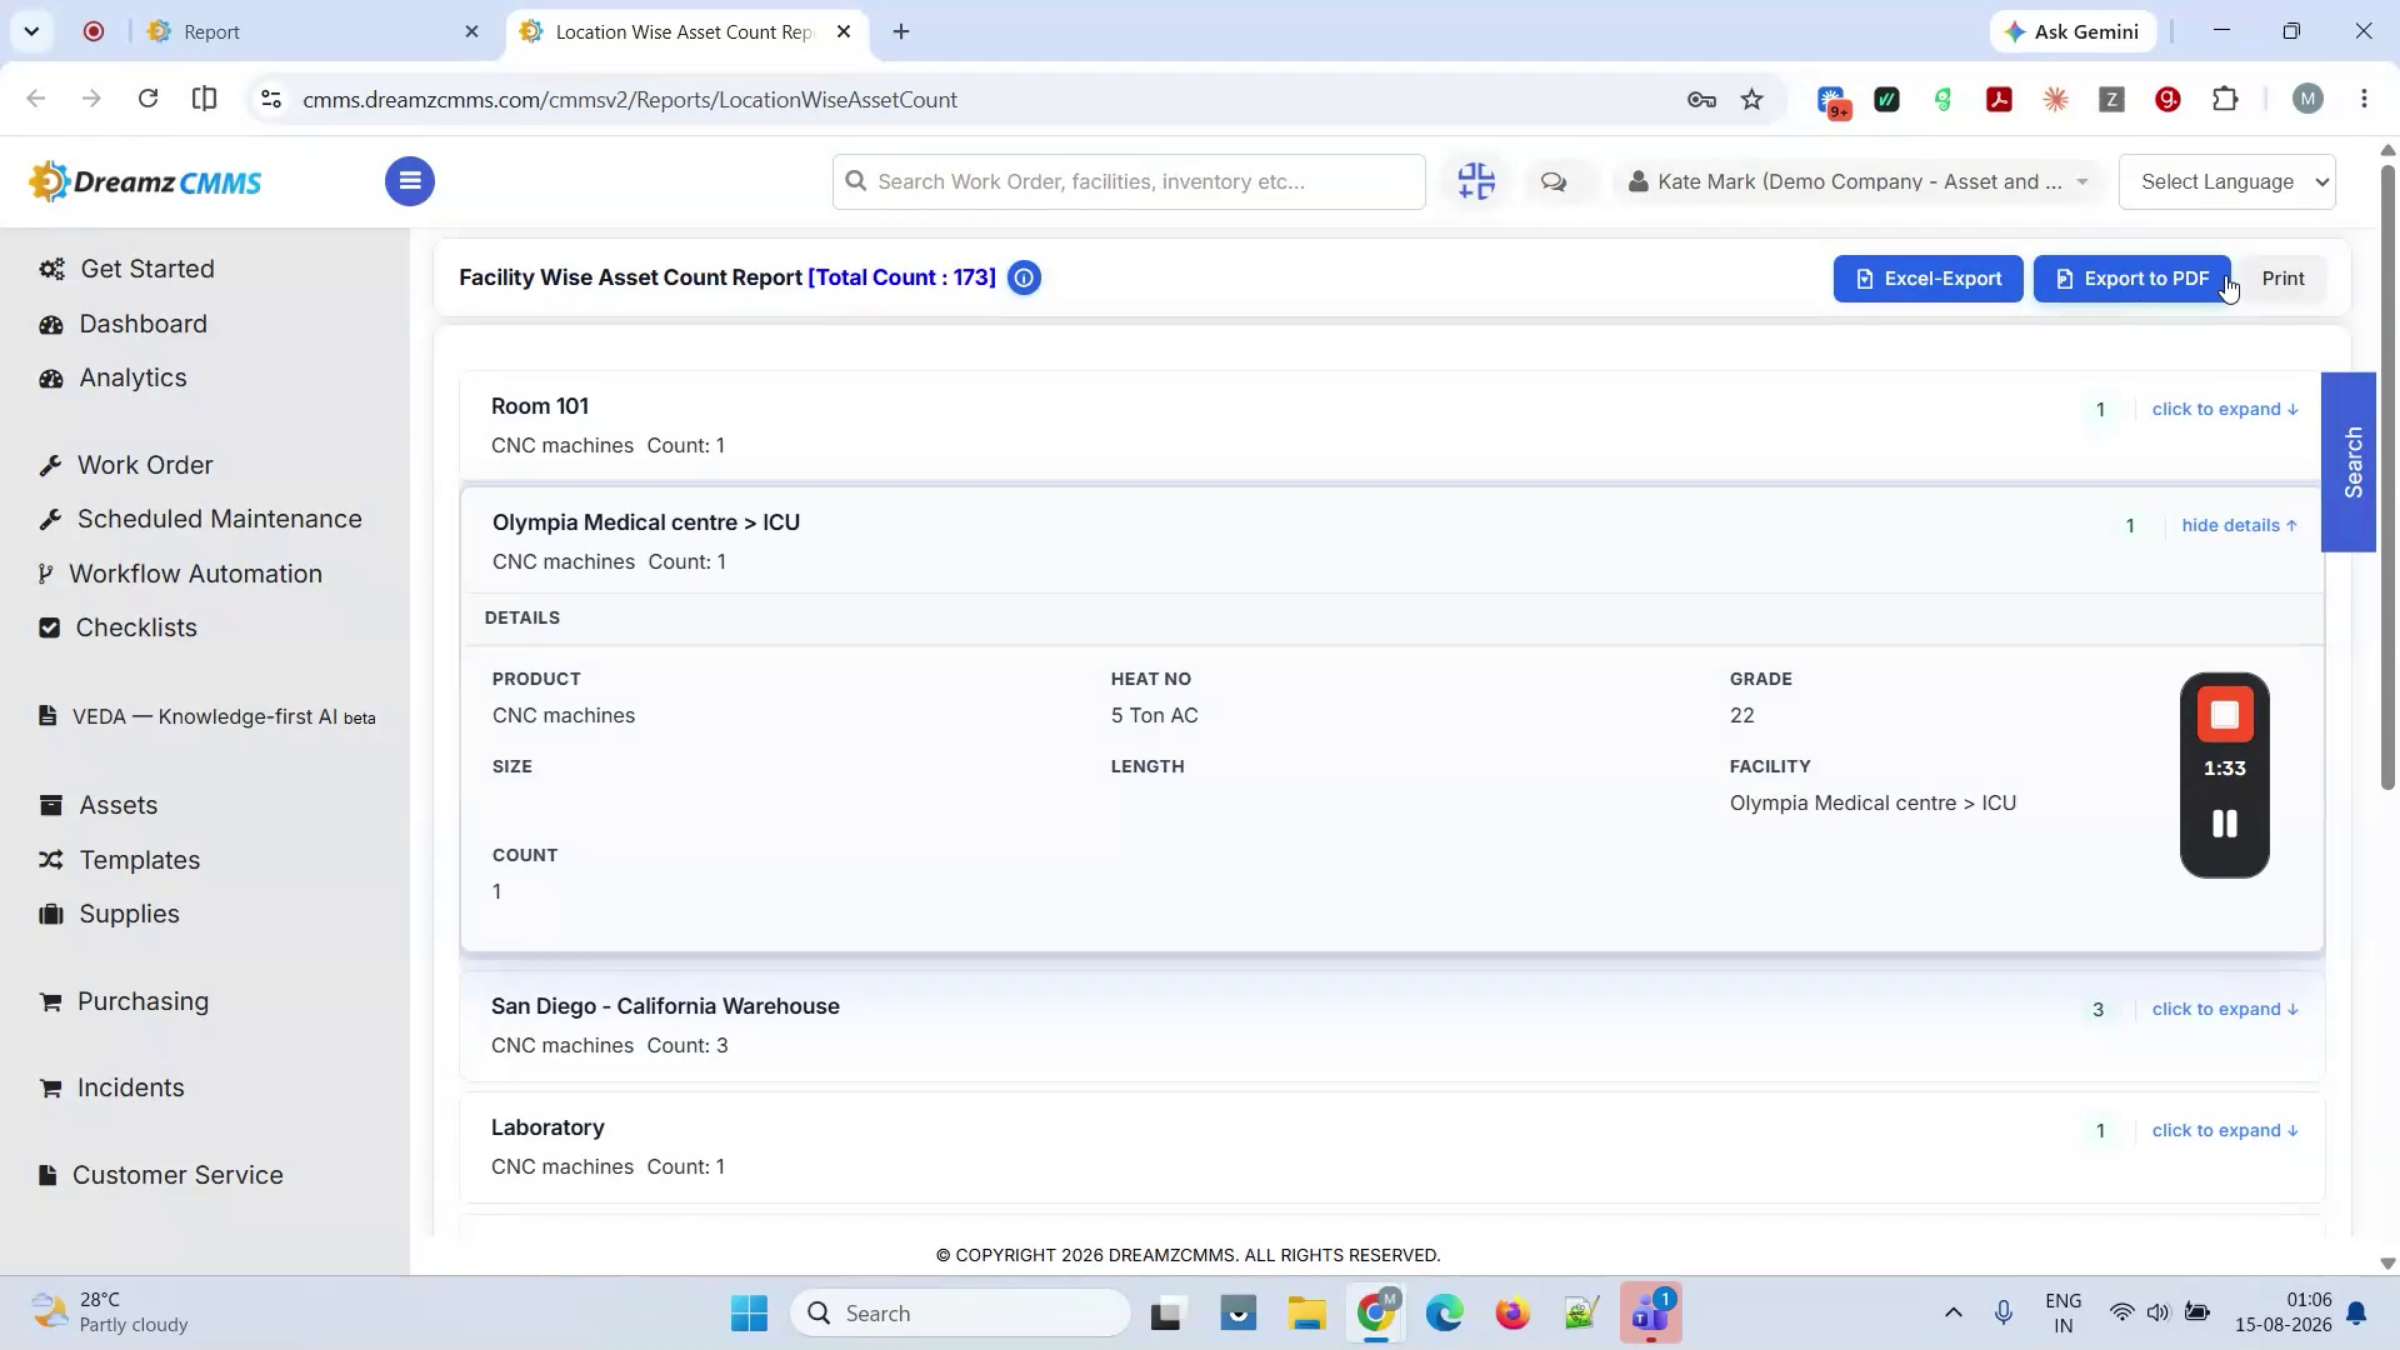
The location-wise asset count shows what's sitting at each location right now, without walking the floor to check.
Step 66 – Product-Wise Asset Count
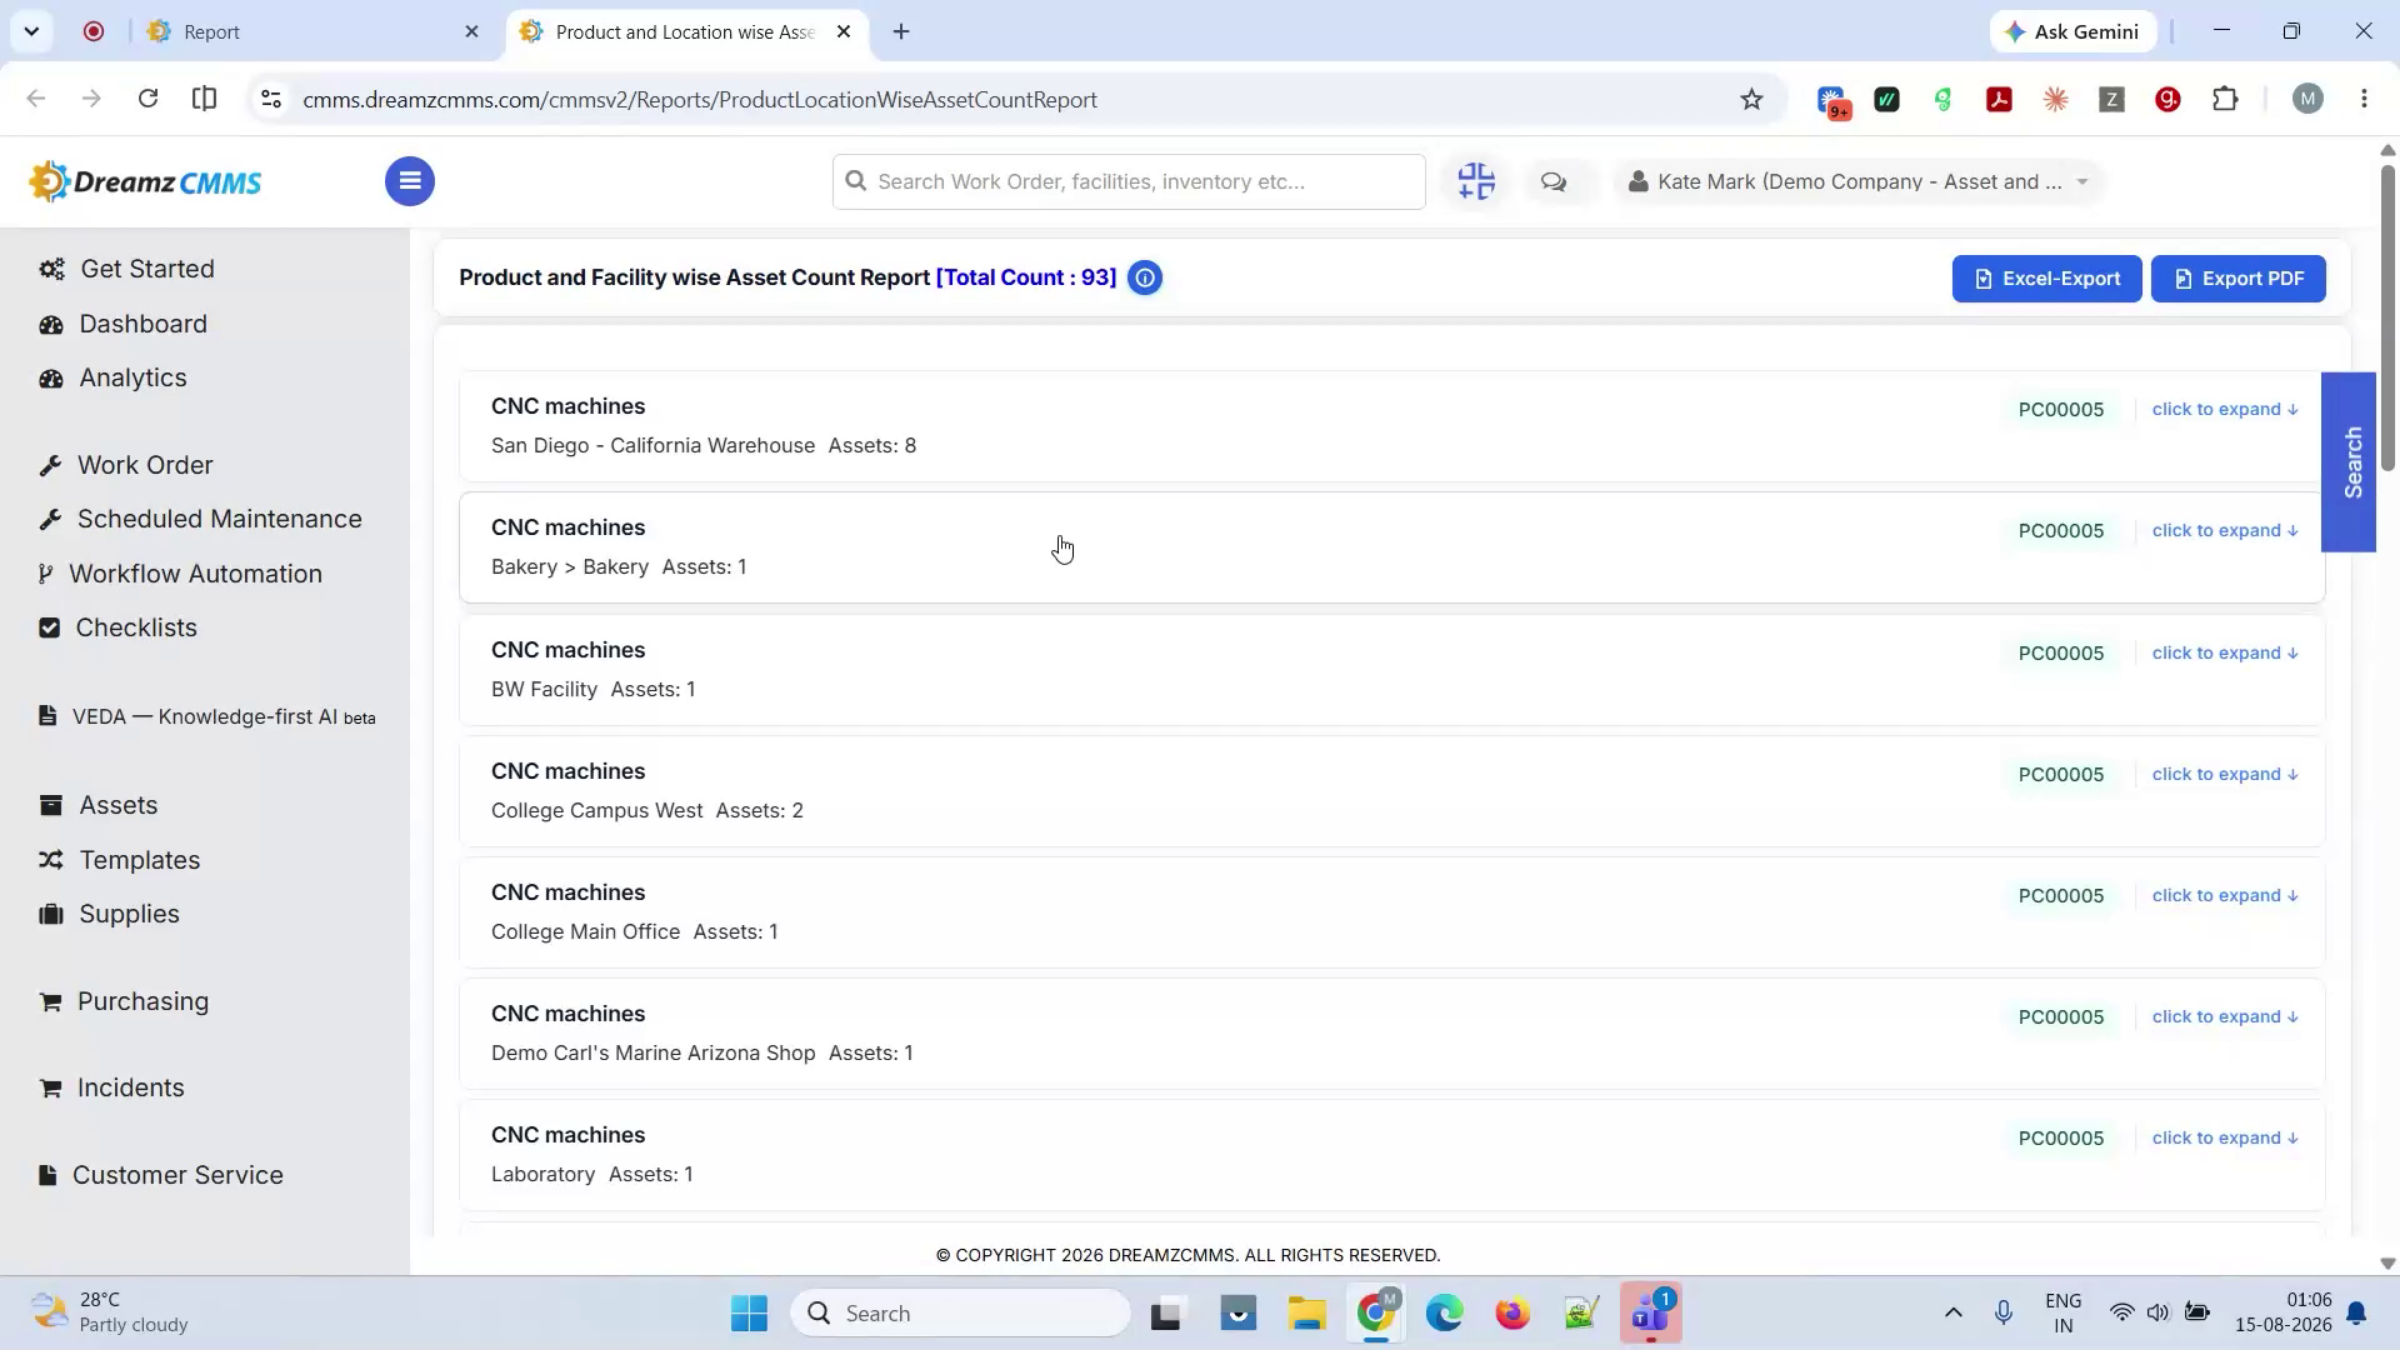
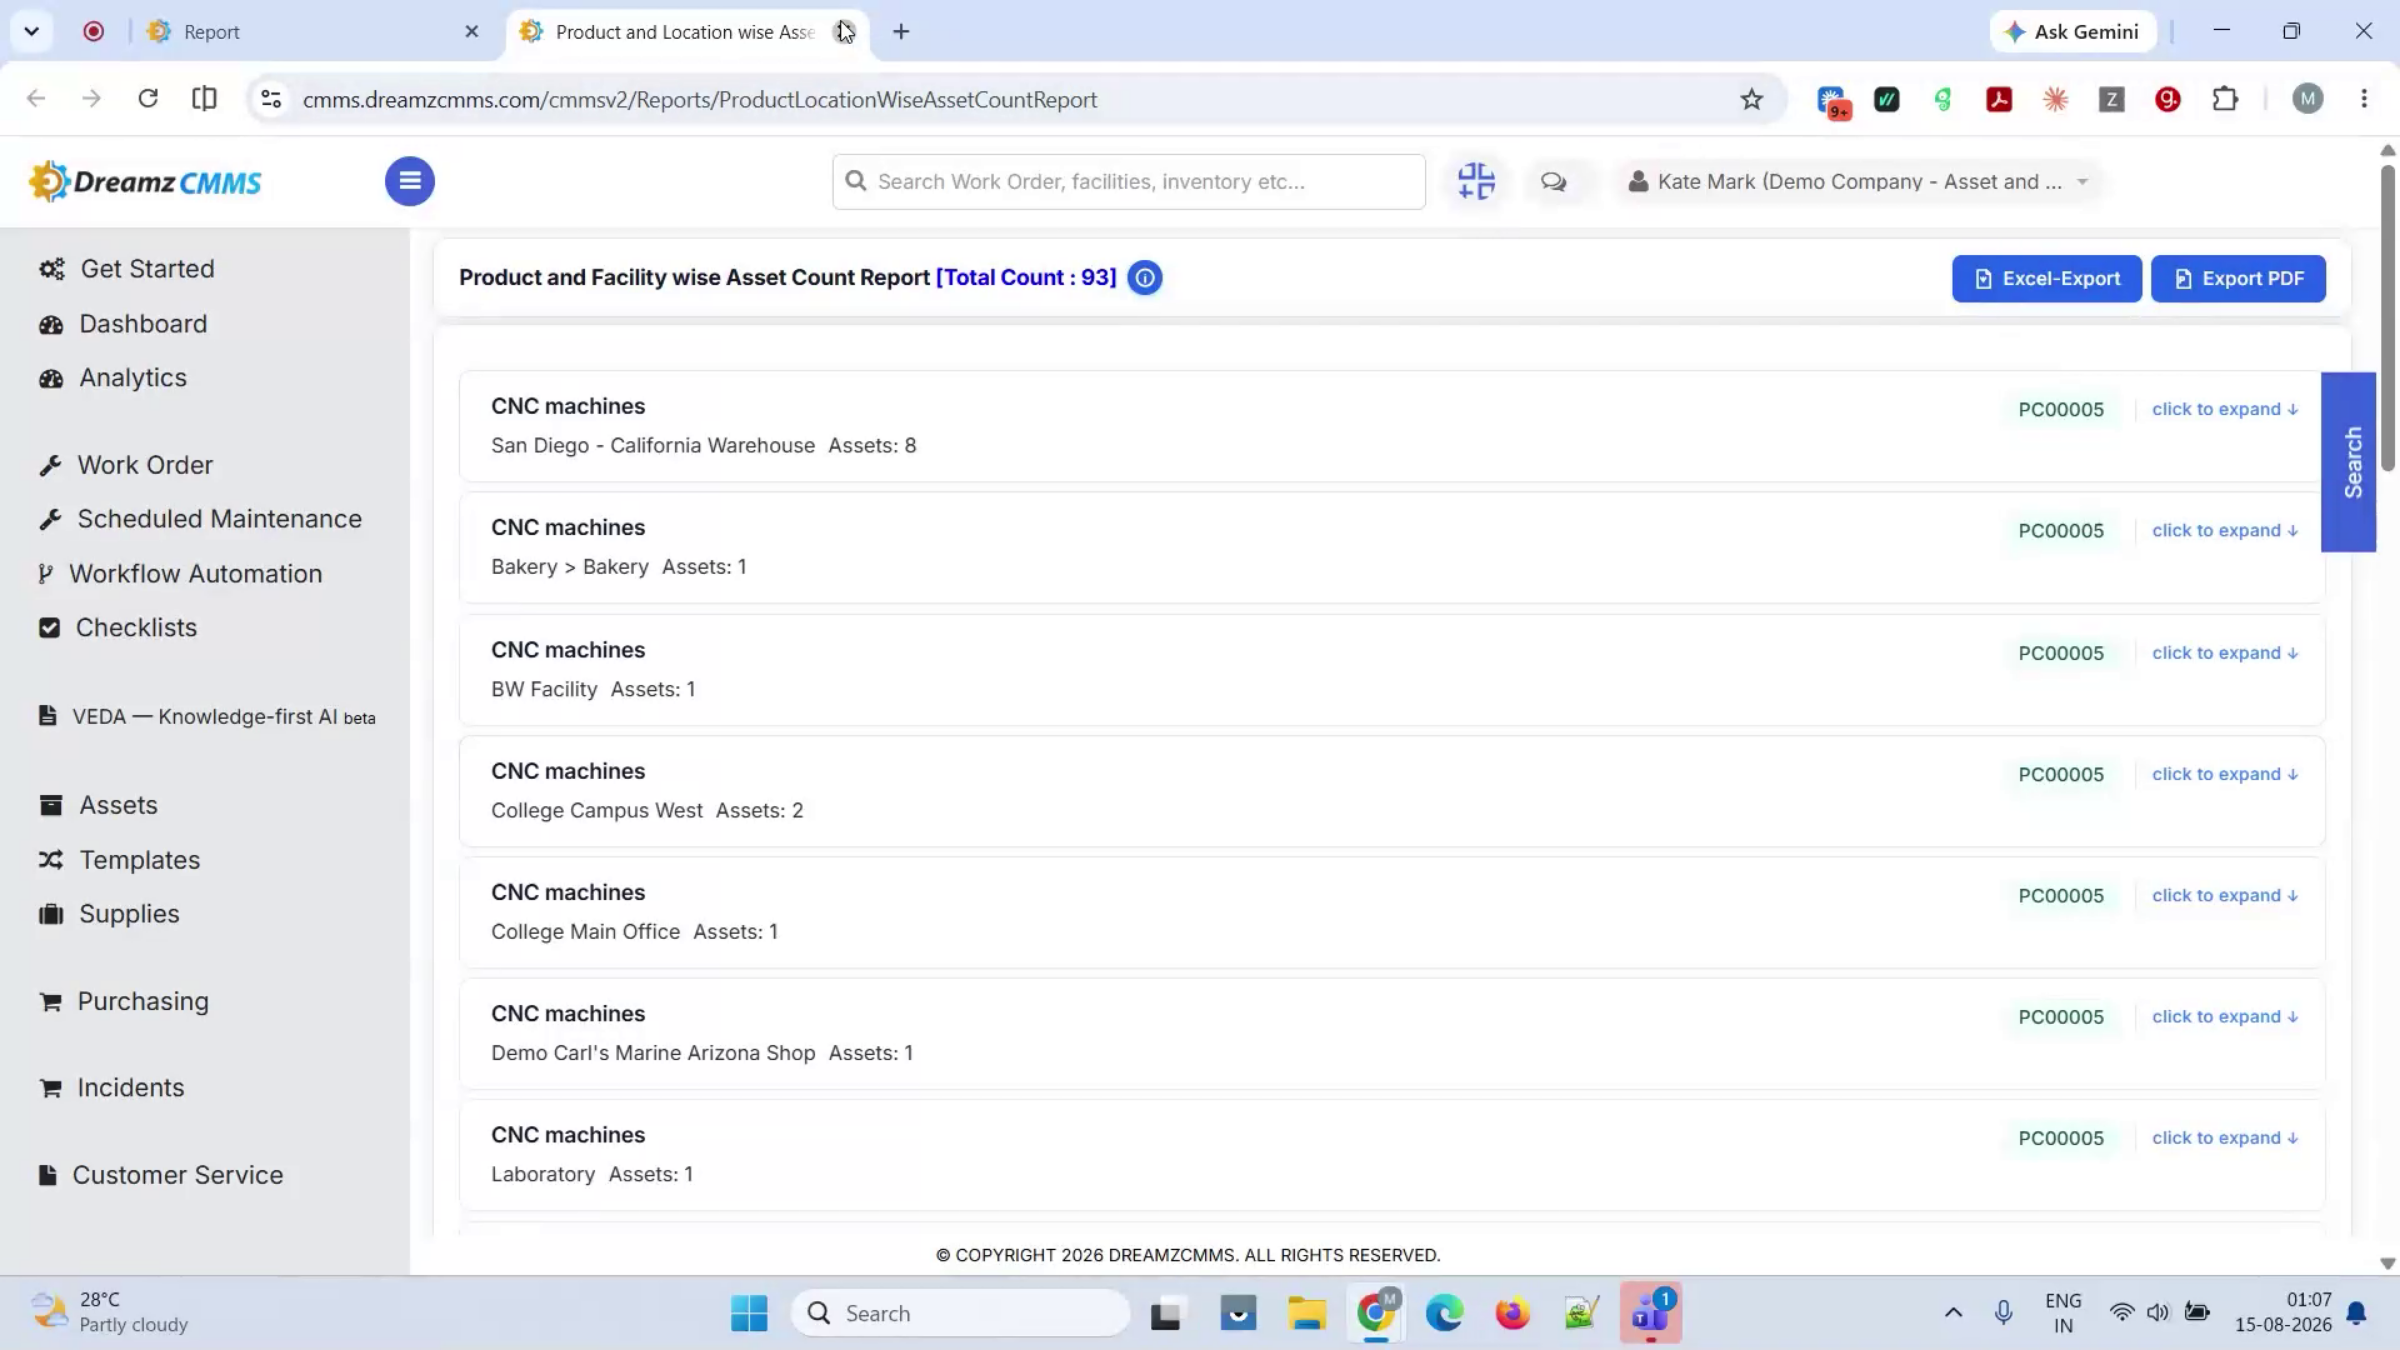
The location and product-wise asset count breaks the same view down by product, for when you need to know not just how much, but which.
Step 67 – Bulk Upload and Audit Log
Behind it all, bulk Excel upload replaces manual entry, and a full audit log covers every action — keeping onboarding fast and every change defensible later.
Step 68 – Inventory Usage Reports
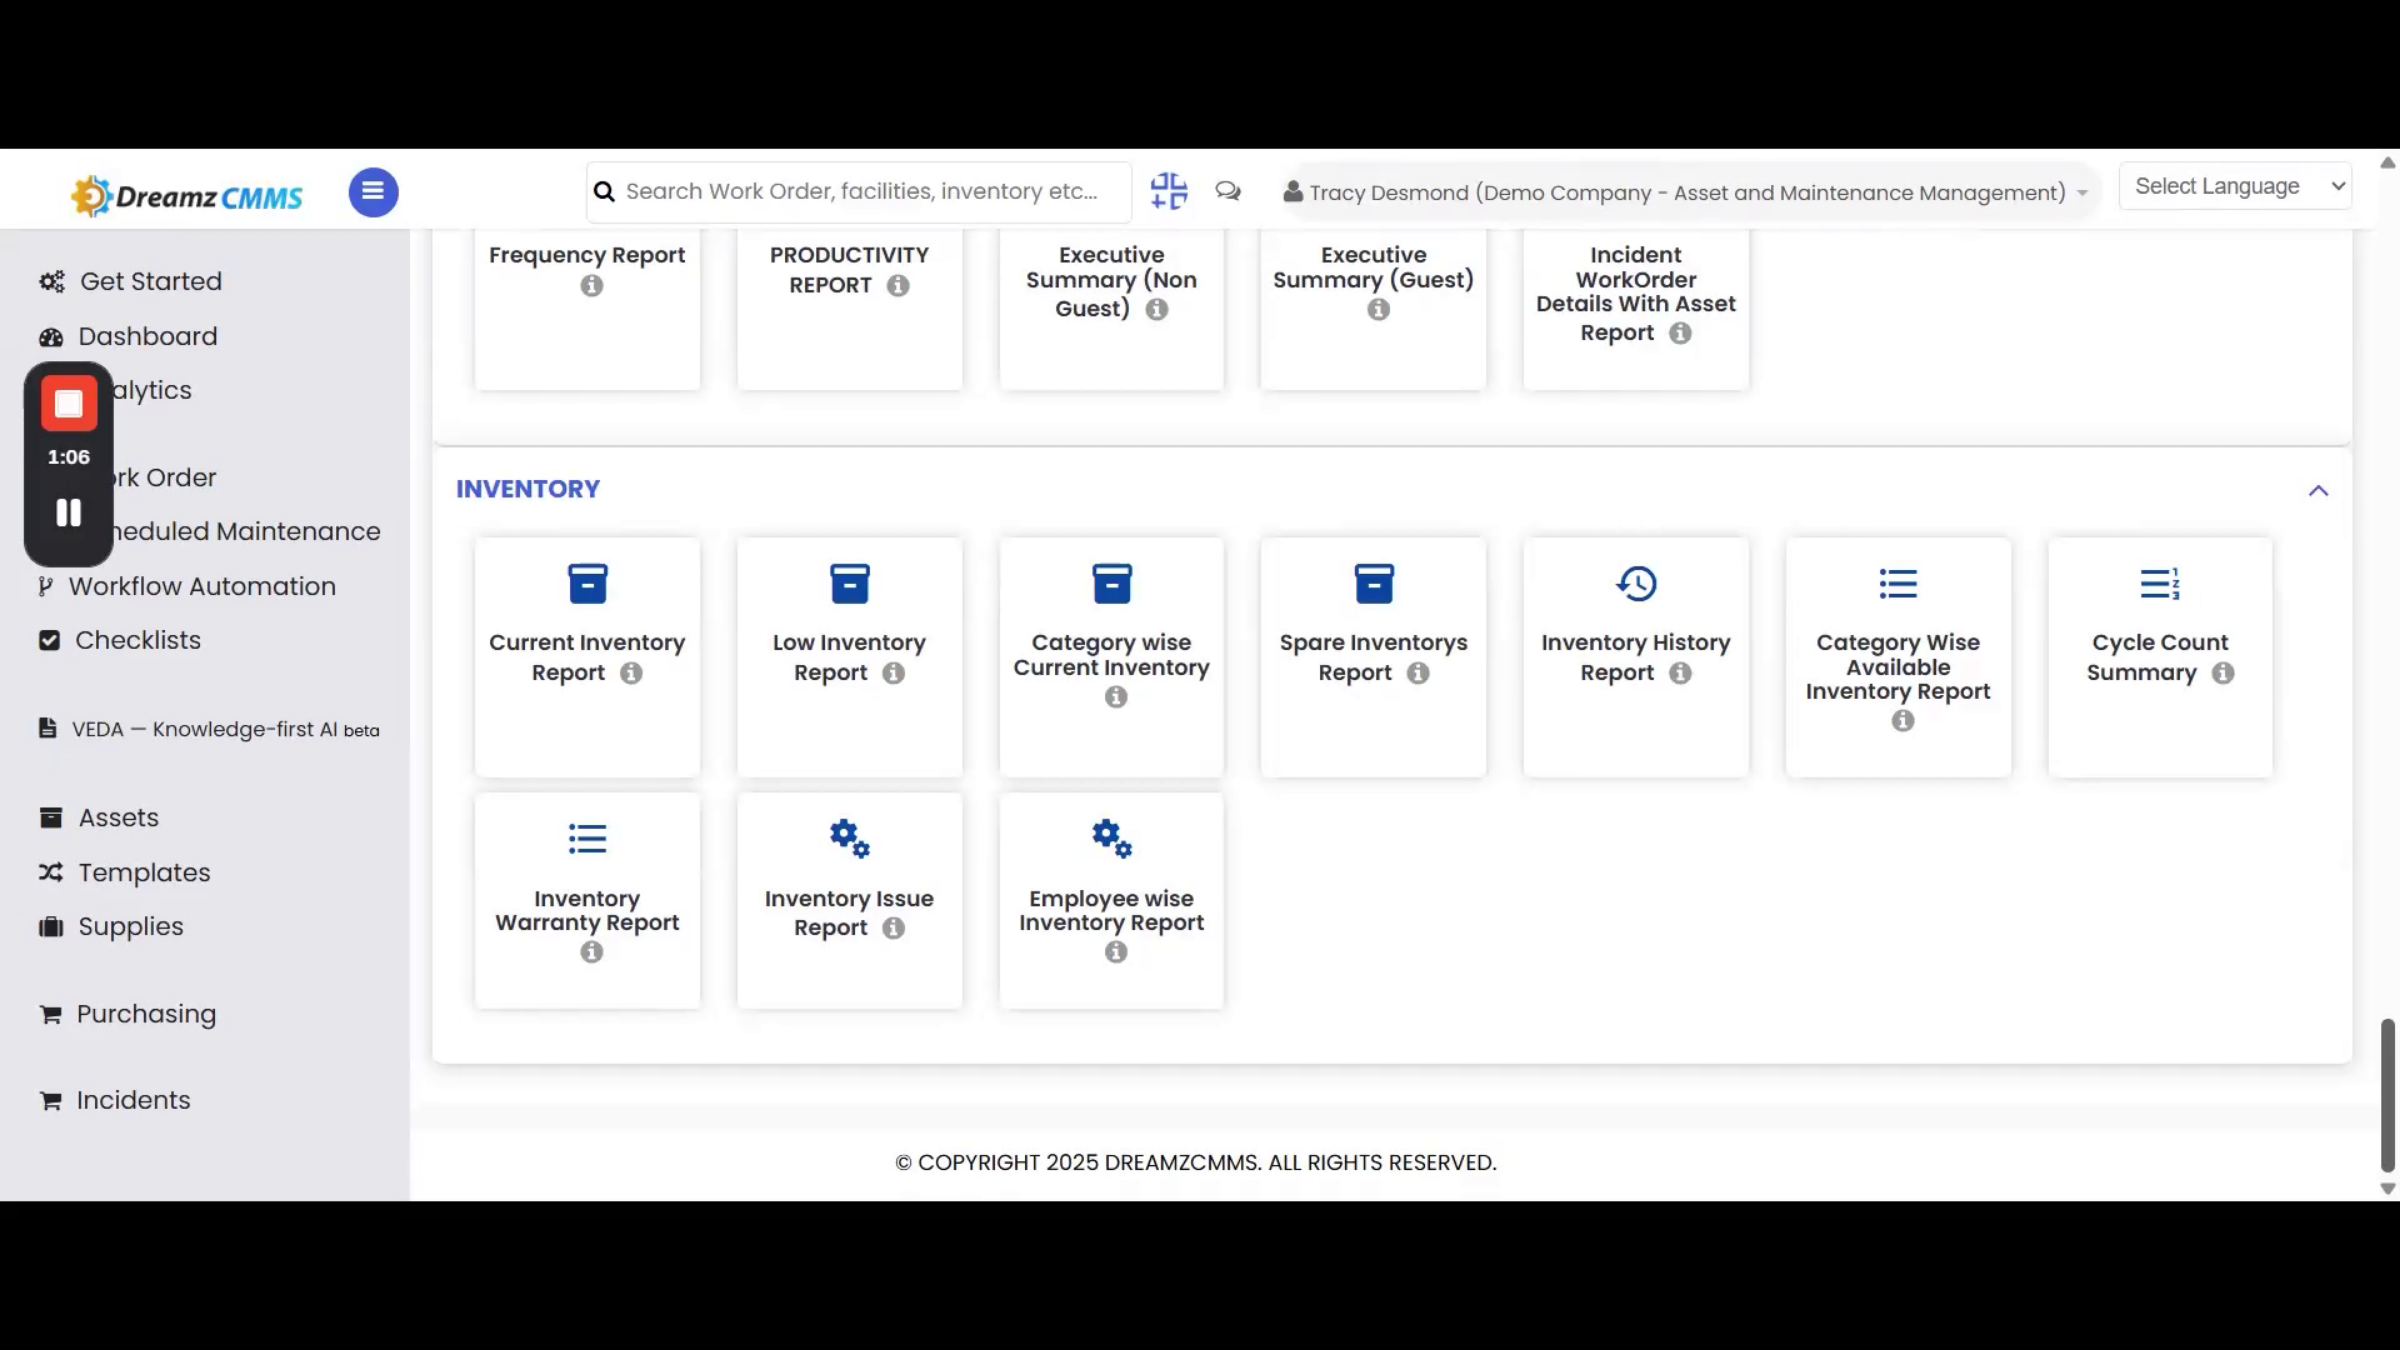
To check inventory usage history on a work order, look under the Inventory Usage History report in the Maintenance section. Other inventory-related reports are found under the Inventory section.
Step 69 – Current Stock Report Filters
The Current Stock report helps you monitor location-wise current available stock levels, filterable by location, category, department, status, and other criteria.
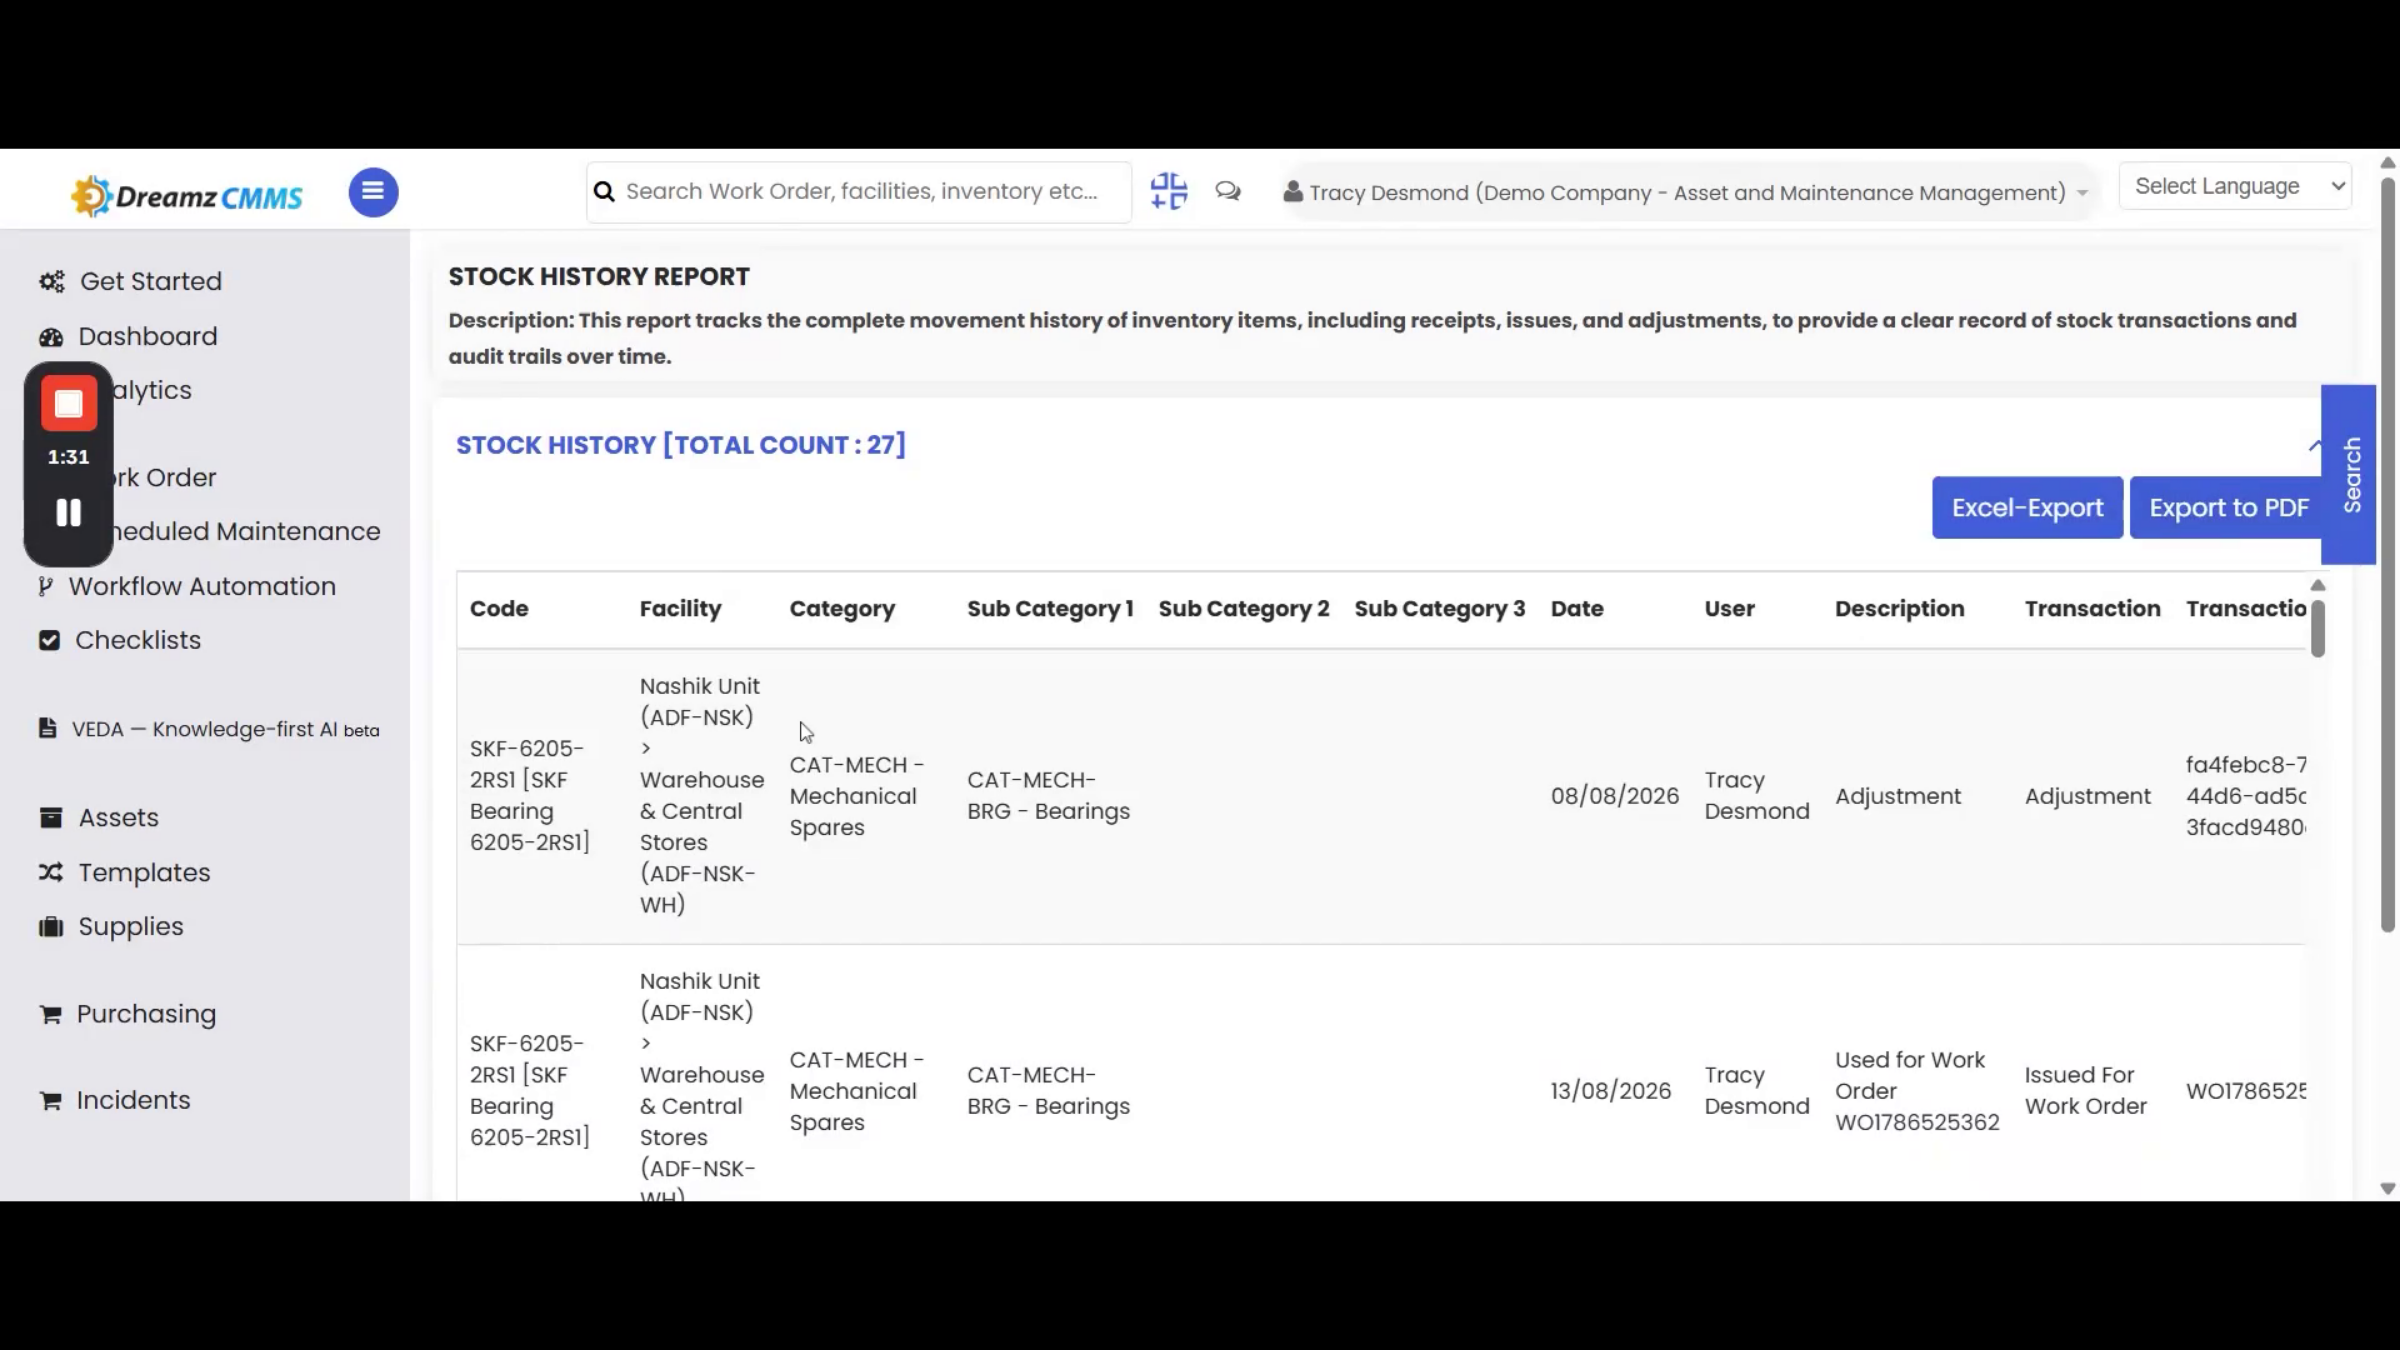
Step 70 – Inventory History Report
The Inventory History report helps you track the complete movement history of inventory items. Every report can be exported to Excel or PDF format.
Step 71 – Platform End-to-End Summary
That's the platform end-to-end: an issue raised at a QR code, automated into a work order, checked off against a checklist, tagged and moved with a scan, purchased, and reported on, all in one connected system.
Step 72 – Call to Action
If this fits what your team needs, DreamzTech is happy to talk through what it would take to get it running for you.
After the Overview — What's Next?
DreamzCMMS ties locations, products, assets, purchasing, transfers, issues, incidents, work orders, RFID tracking, rentals and sales, and reporting into one connected system. Once your setup is complete, you can:
- Print and post QR codes at key locations and on high-value assets so incidents can be reported instantly, with no login required.
- Build out workflow rules and AI-generated checklists so recurring incidents turn into work orders automatically.
- Provision handheld RFID devices for your warehouse and site teams to speed up stock checks and material movement.
Ready to see DreamzCMMS for construction inventory in action? Contact DreamzTech to schedule a personalized demonstration.
Tips for Inventory and Site Teams
- Set up locations, products, and assets first — every purchase, transfer, and issue depends on that data being accurate.
- Use bulk asset creation and Excel import whenever a shipment or catalog update is large, rather than entering items one at a time.
- Double-check the approval toggle on a stock transfer before saving — it determines whether the receiver must confirm or the transfer goes straight to In Transit.
- Have technicians withdraw parts directly from the mobile app against a work order so inventory stays accurate without a separate update step.
Frequently Asked Questions
Do guests or staff need an account to report an issue?
No. Scanning a QR code tied to a location or asset, or opening the request portal link directly, opens straight into the request form with no login needed.
How does an incident turn into a work order automatically?
A workflow rule defines a trigger and an action — for example, a new incident of a certain type automatically creates and assigns a work order, without anyone needing to do it manually.
What's the difference between a Stock Transfer and a Consignment?
Stock Transfer is purely internal, location to location, with no consignee needed, while Consignment is for sending material out to a consignee or customer and asks for who that is.
How does the RFID app speed up stock checks compared to a manual count?
Because an RFID tag doesn't need to be seen or lined up to be read, dozens of items can be scanned in seconds instead of checked one by one by hand, making it faster and more accurate than a manual count.
Related Articles
- Setting Up Locations, Products, and Assets in DreamzCMMS
- Configuring Workflow Rules and AI Checklists
- Using the RFID App for Stock Checks and Transfers
- Create and Manage Work Orders