DreamzCMMS Scheduled Maintenance: From Recurring Schedulers to Work Orders
Reactive maintenance is expensive — by the time something breaks, you've already lost uptime. DreamzCMMS lets you get ahead of it with scheduled maintenance: recurring schedulers that automatically generate work orders or future maintenance plans at whatever frequency your equipment demands, so preventive tasks never slip through the cracks.
Overview
Scheduled Maintenance in DreamzCMMS revolves around the scheduler: a reusable definition of what needs to happen, how often, and who's responsible. When you create one, you set its name and frequency, decide whether it should book a work order onto your calendar right away or sit as a future plan instead, assign a requester and technician, attach the assets, projects, and checklists it covers, and configure budget and notification settings. Work-order schedulers show up immediately in your Work Order list and mobile app for technicians to start on; plan schedulers wait quietly in the Plan List until you're ready to generate a work order from them. Either way, the result is the same predictable, checklist-driven maintenance job landing in front of the right technician.
Here is a reference video:
Before You Begin
- You must have access to the Scheduled Maintenance, Work Order, and Plan List modules in DreamzCMMS.
- Have your assets, projects, and checklist library already set up, since schedulers reference them directly when you build one.
- Technicians who'll work generated jobs should have the DreamzCMMS mobile app installed and be logged in.
Setting Up a New Scheduler
Step 1 – DreamzCMMS Scheduler Overview
DreamzCMMS lets you set up recurring schedulers that automatically generate work orders or maintenance plans at whatever frequency you define, taking the guesswork out of preventive maintenance.
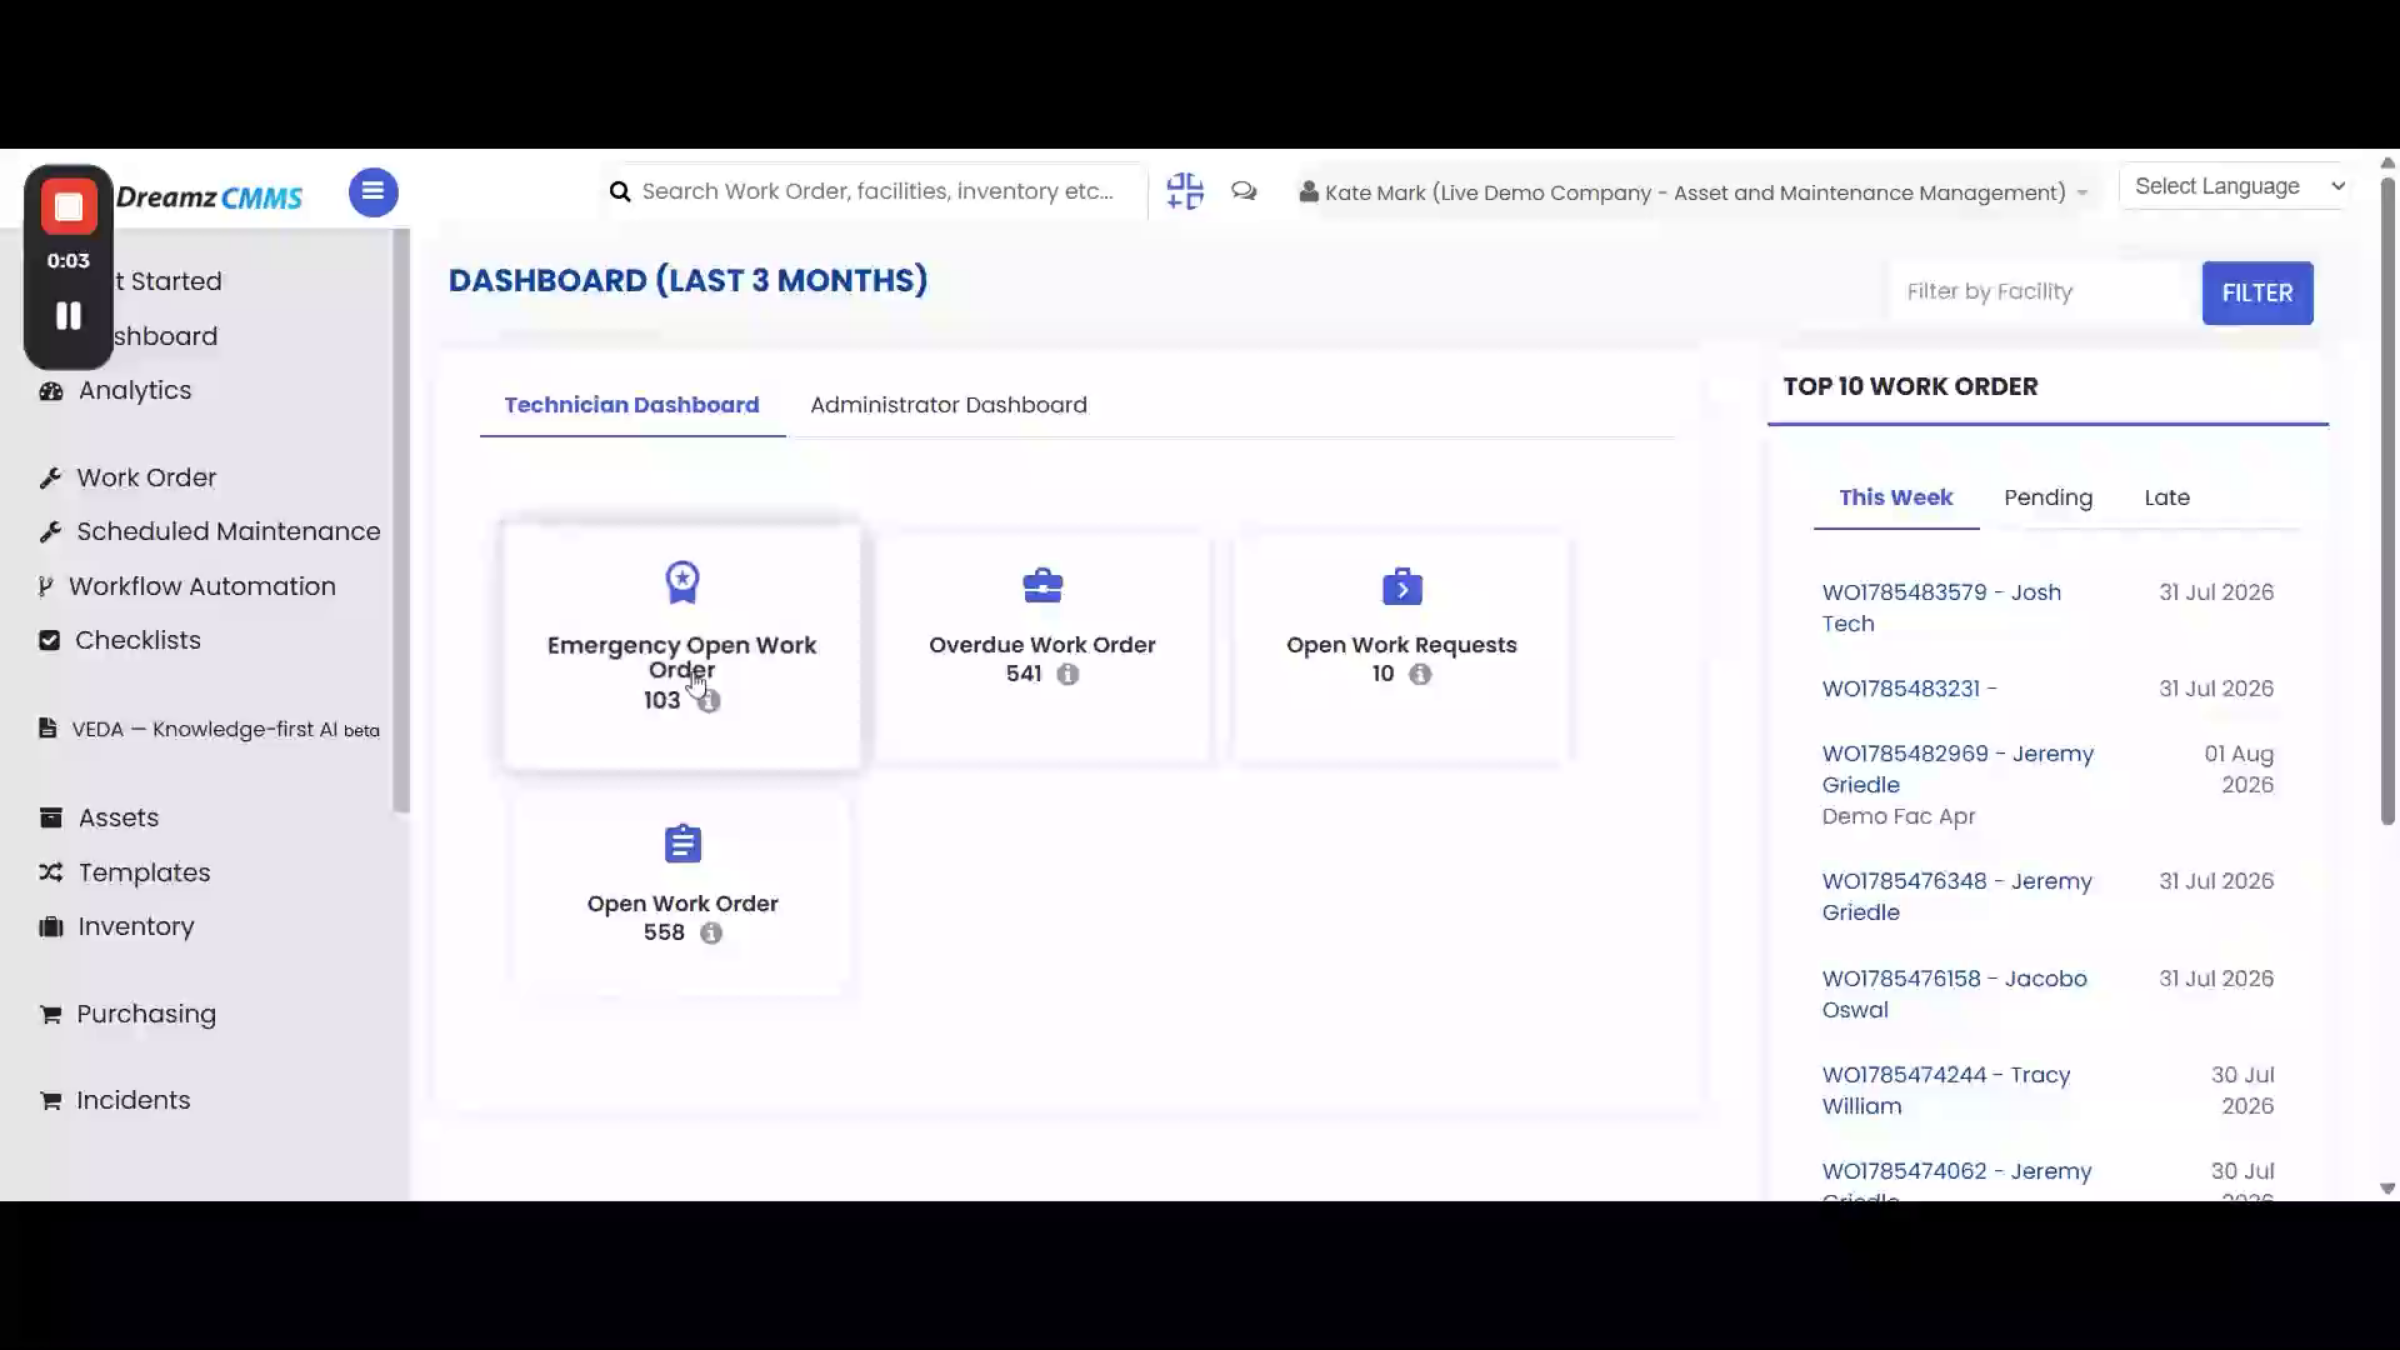
Step 2 – Navigating to Scheduled Maintenance
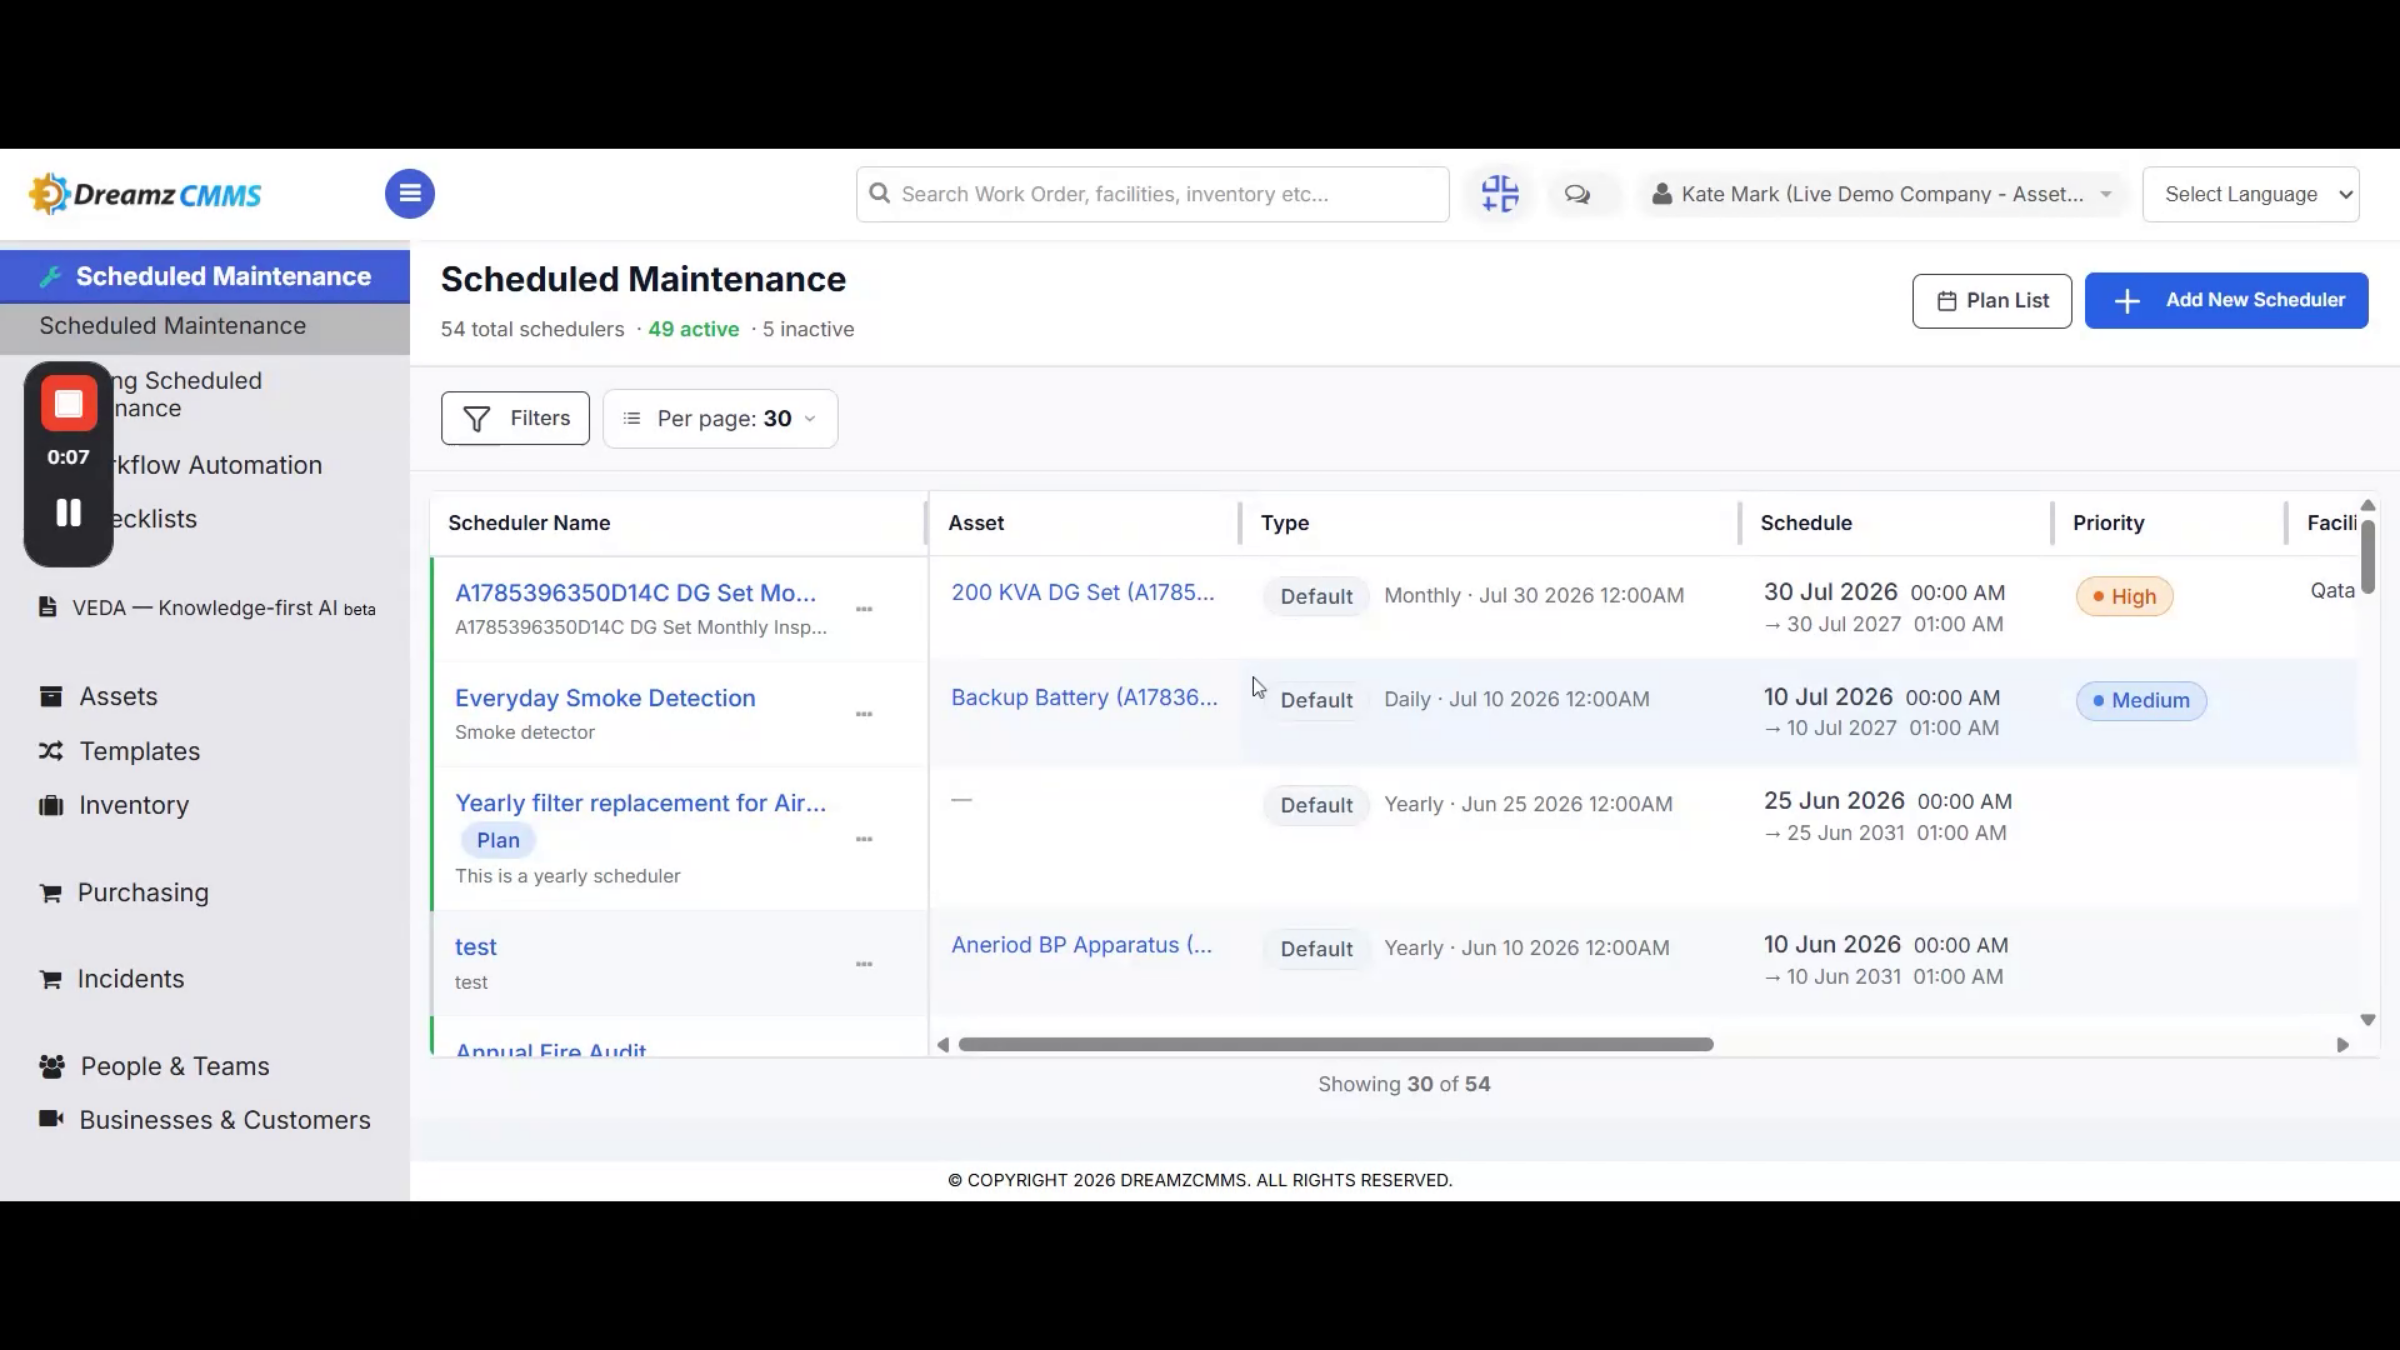
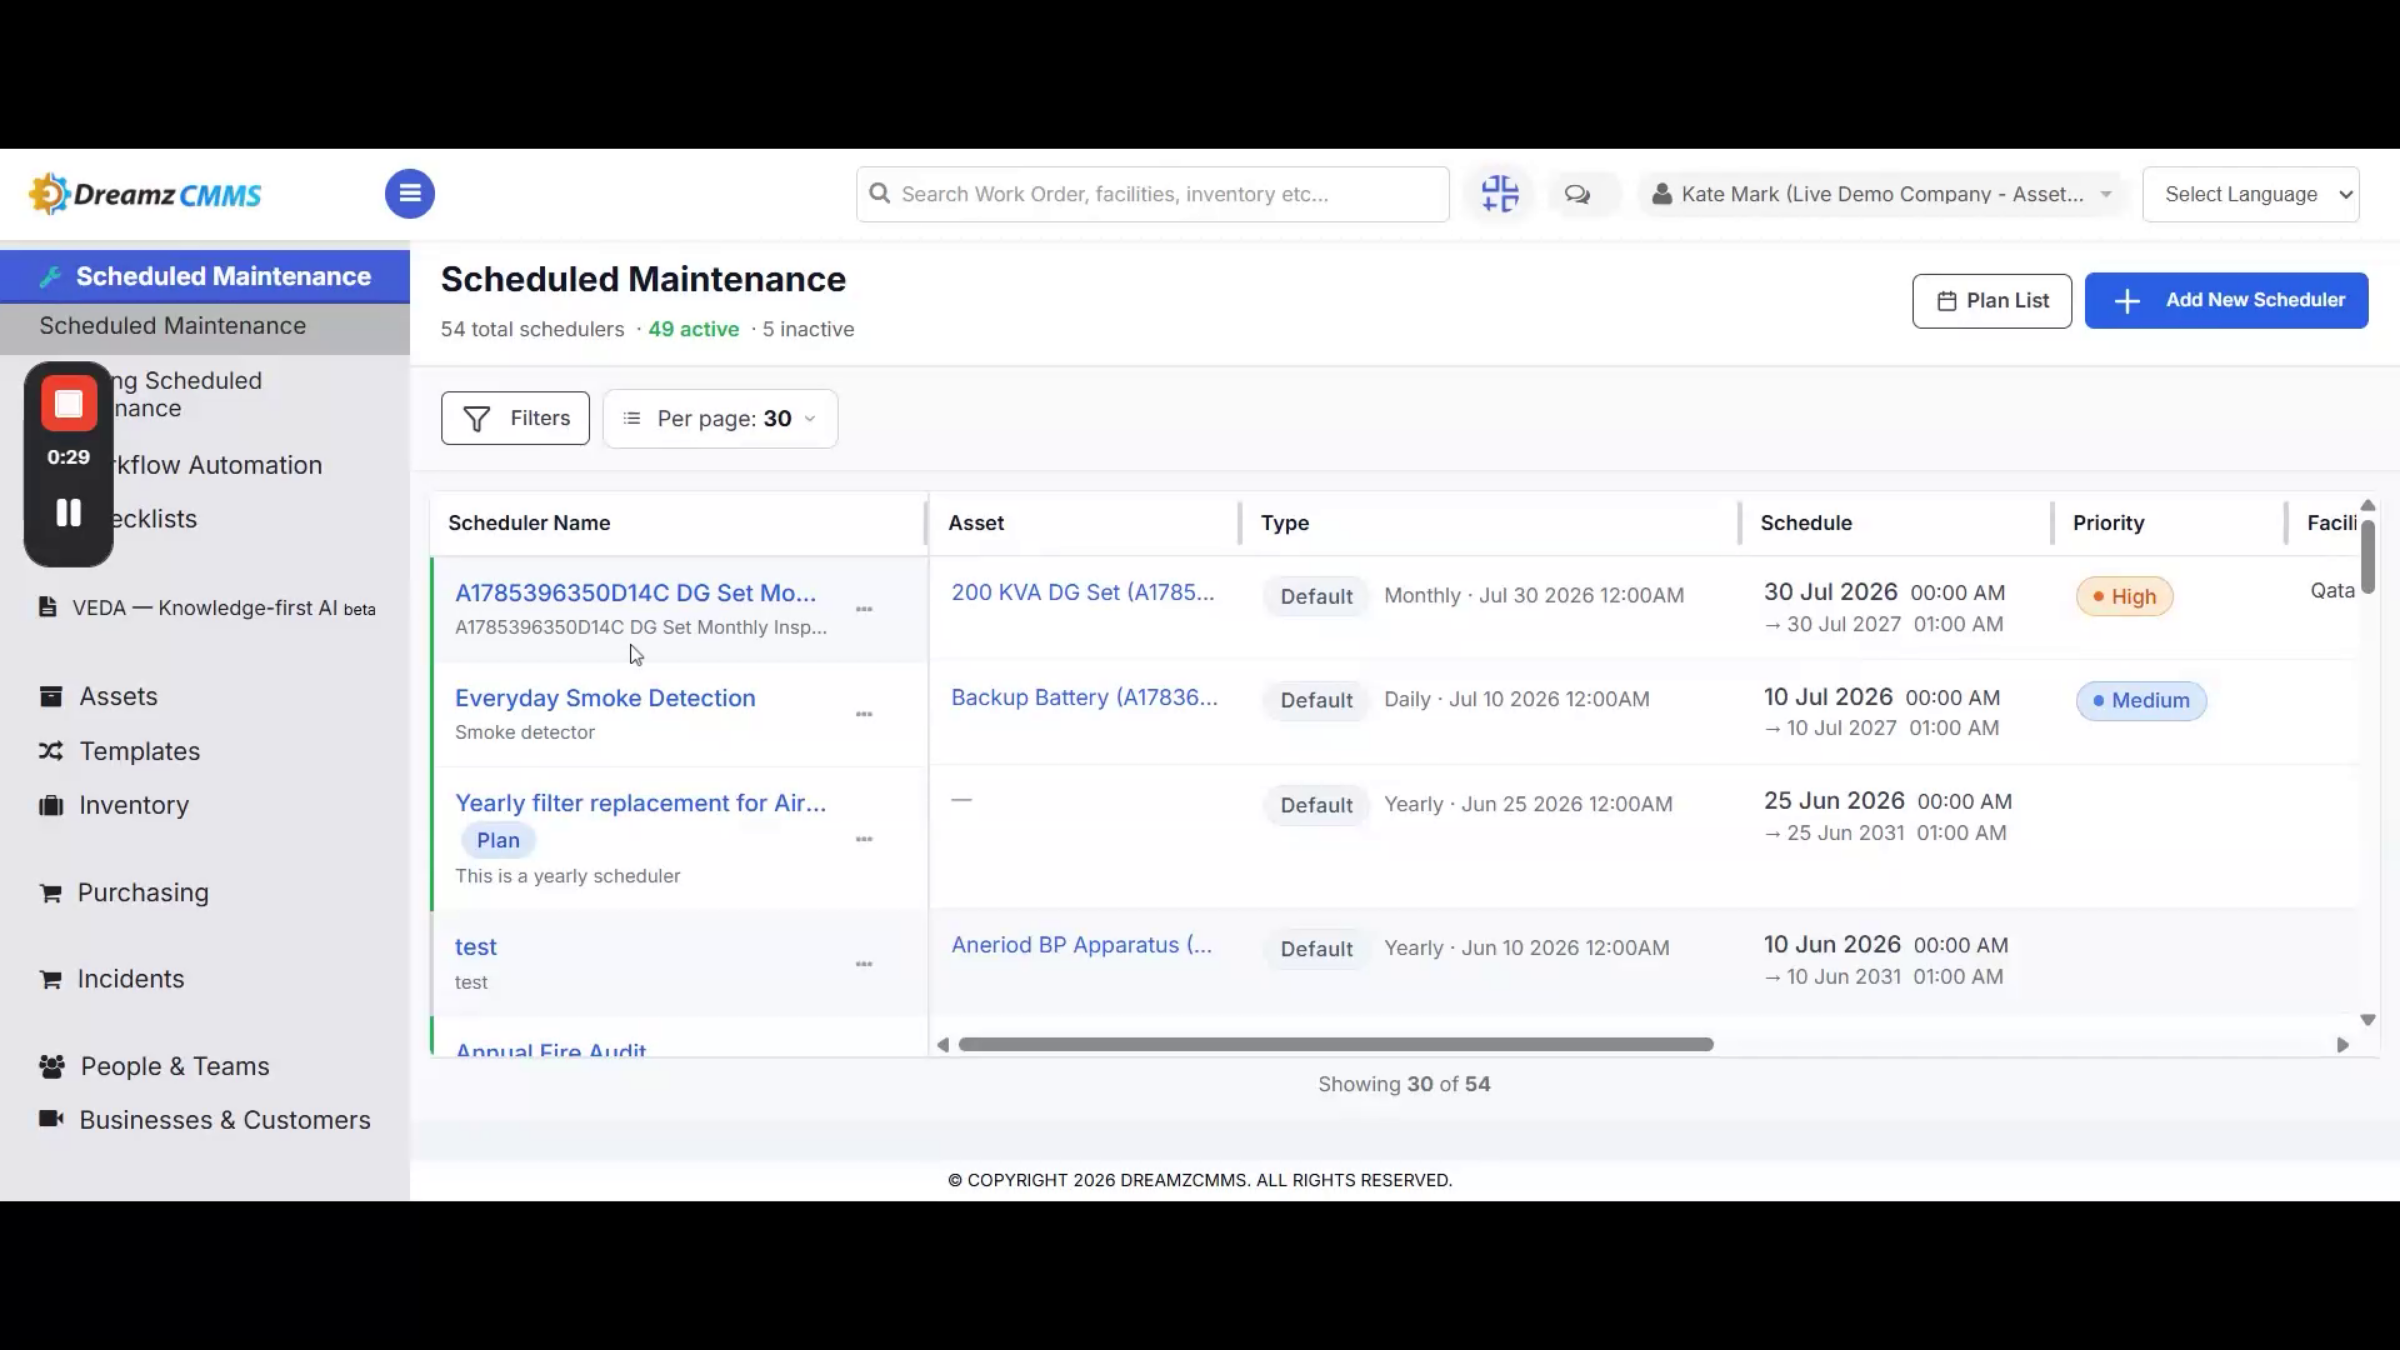
Click Scheduled Maintenance from the left menu to open the Scheduled Maintenance listing page, then click Add New Scheduler to start creating one.
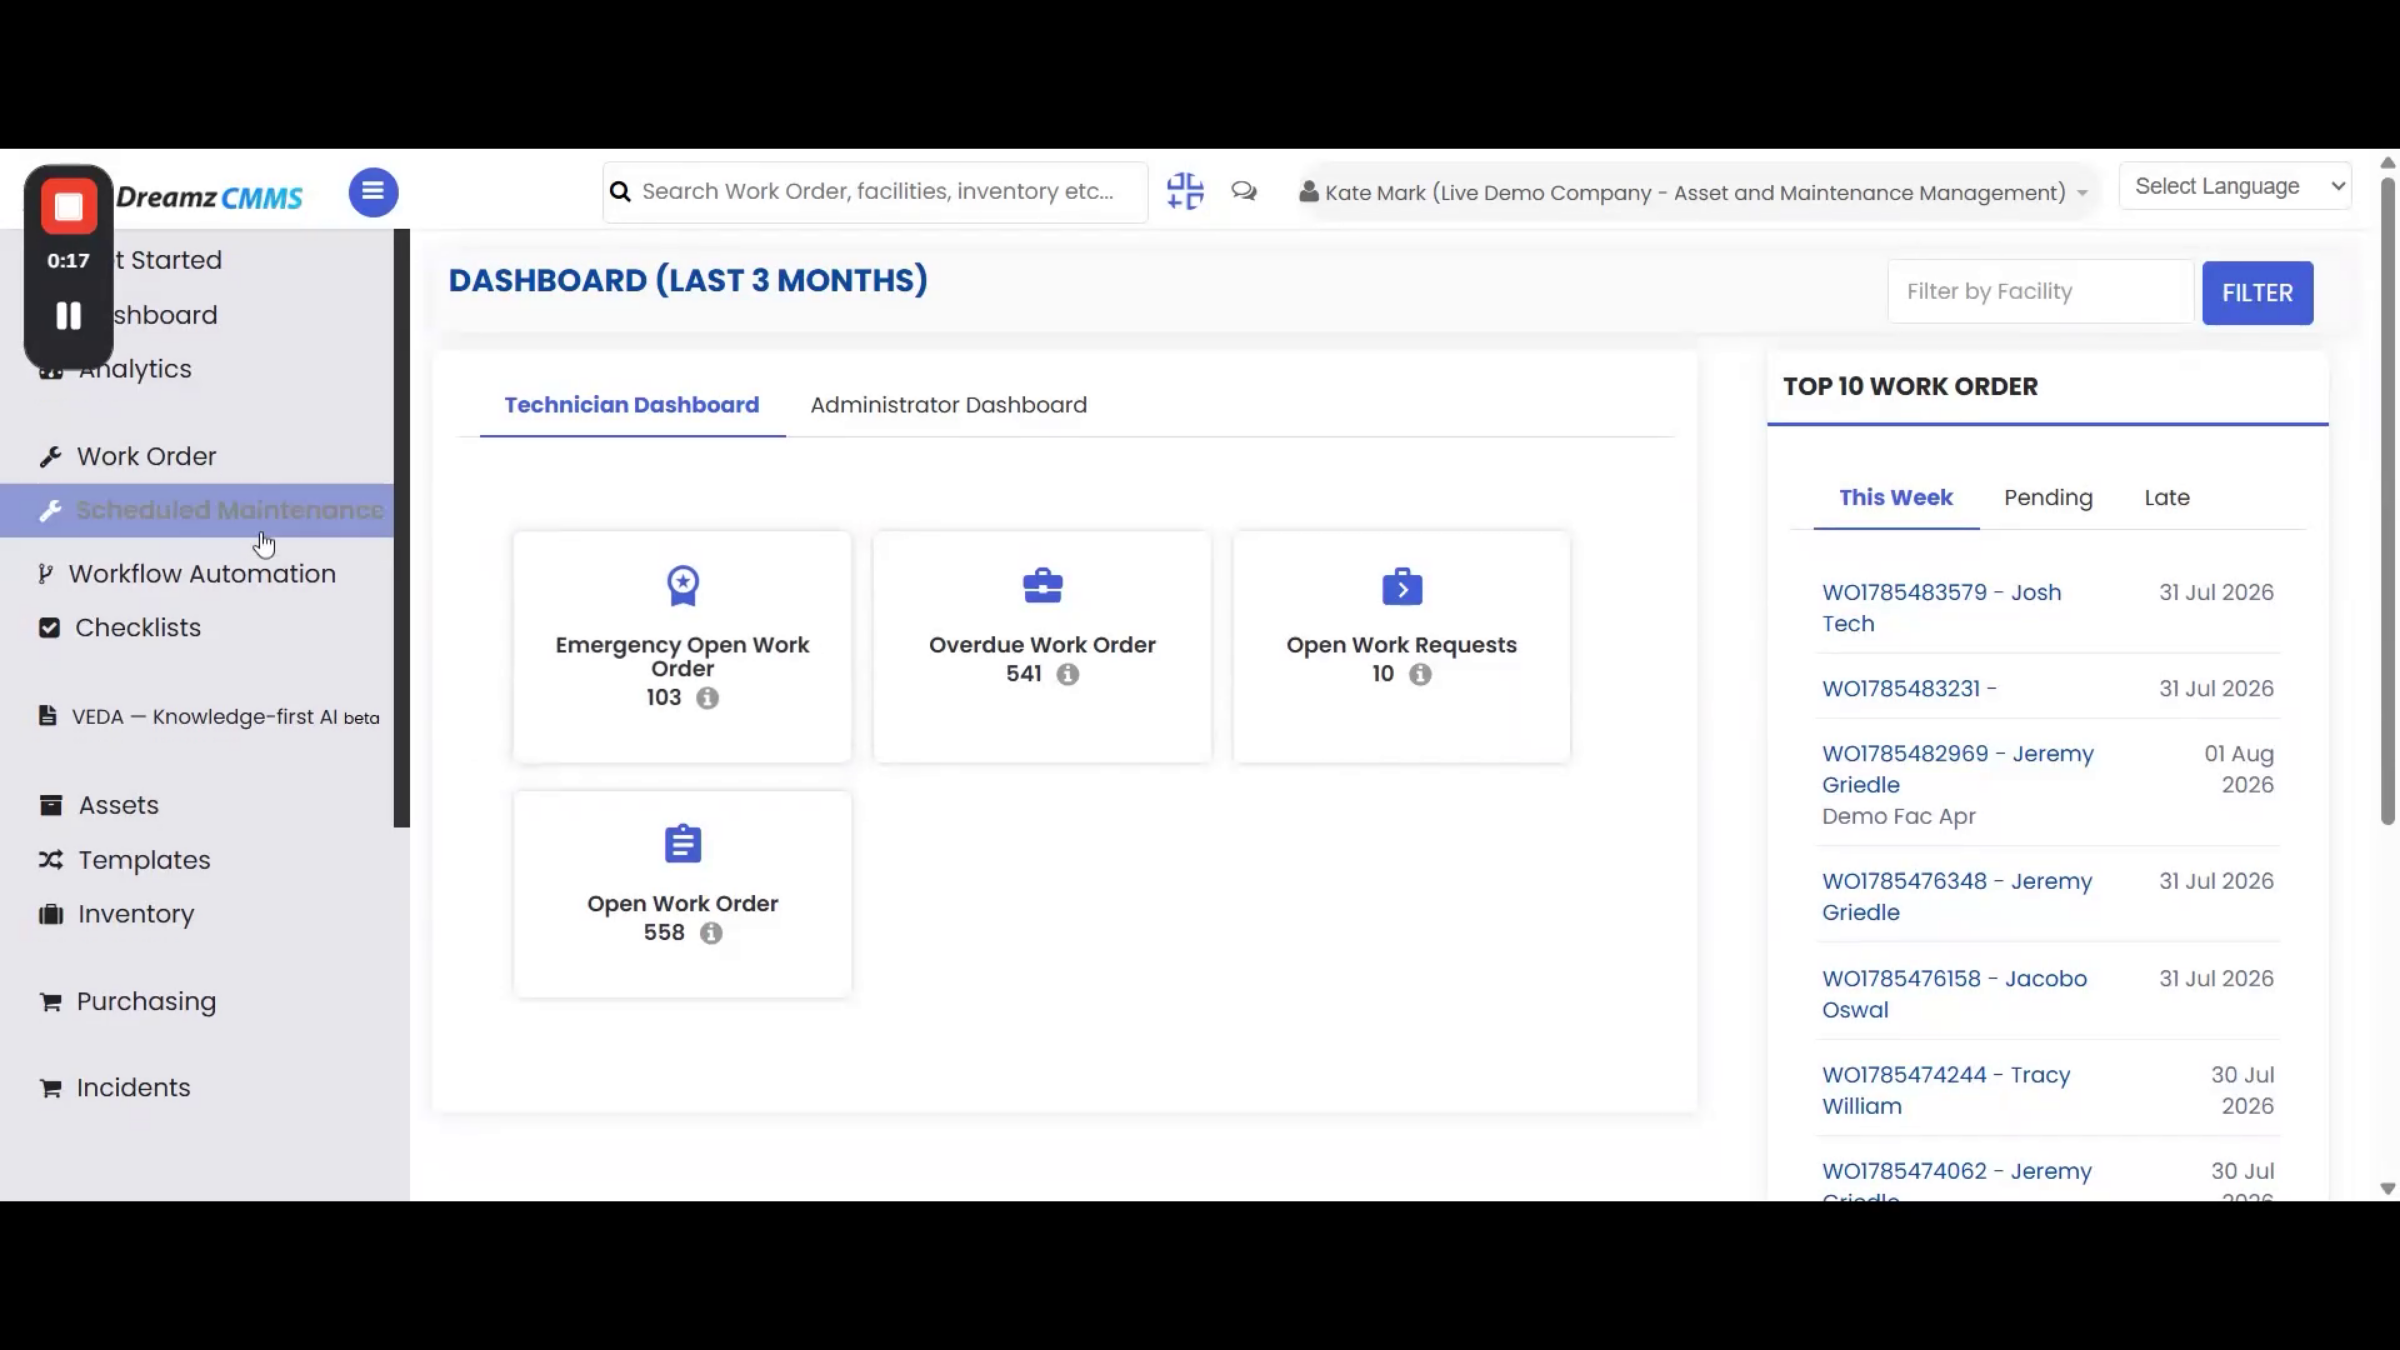
Step 3 – Creating New Scheduler Basics
Provide a name for your scheduler, then go to the Schedule tab to define its timing and frequency.
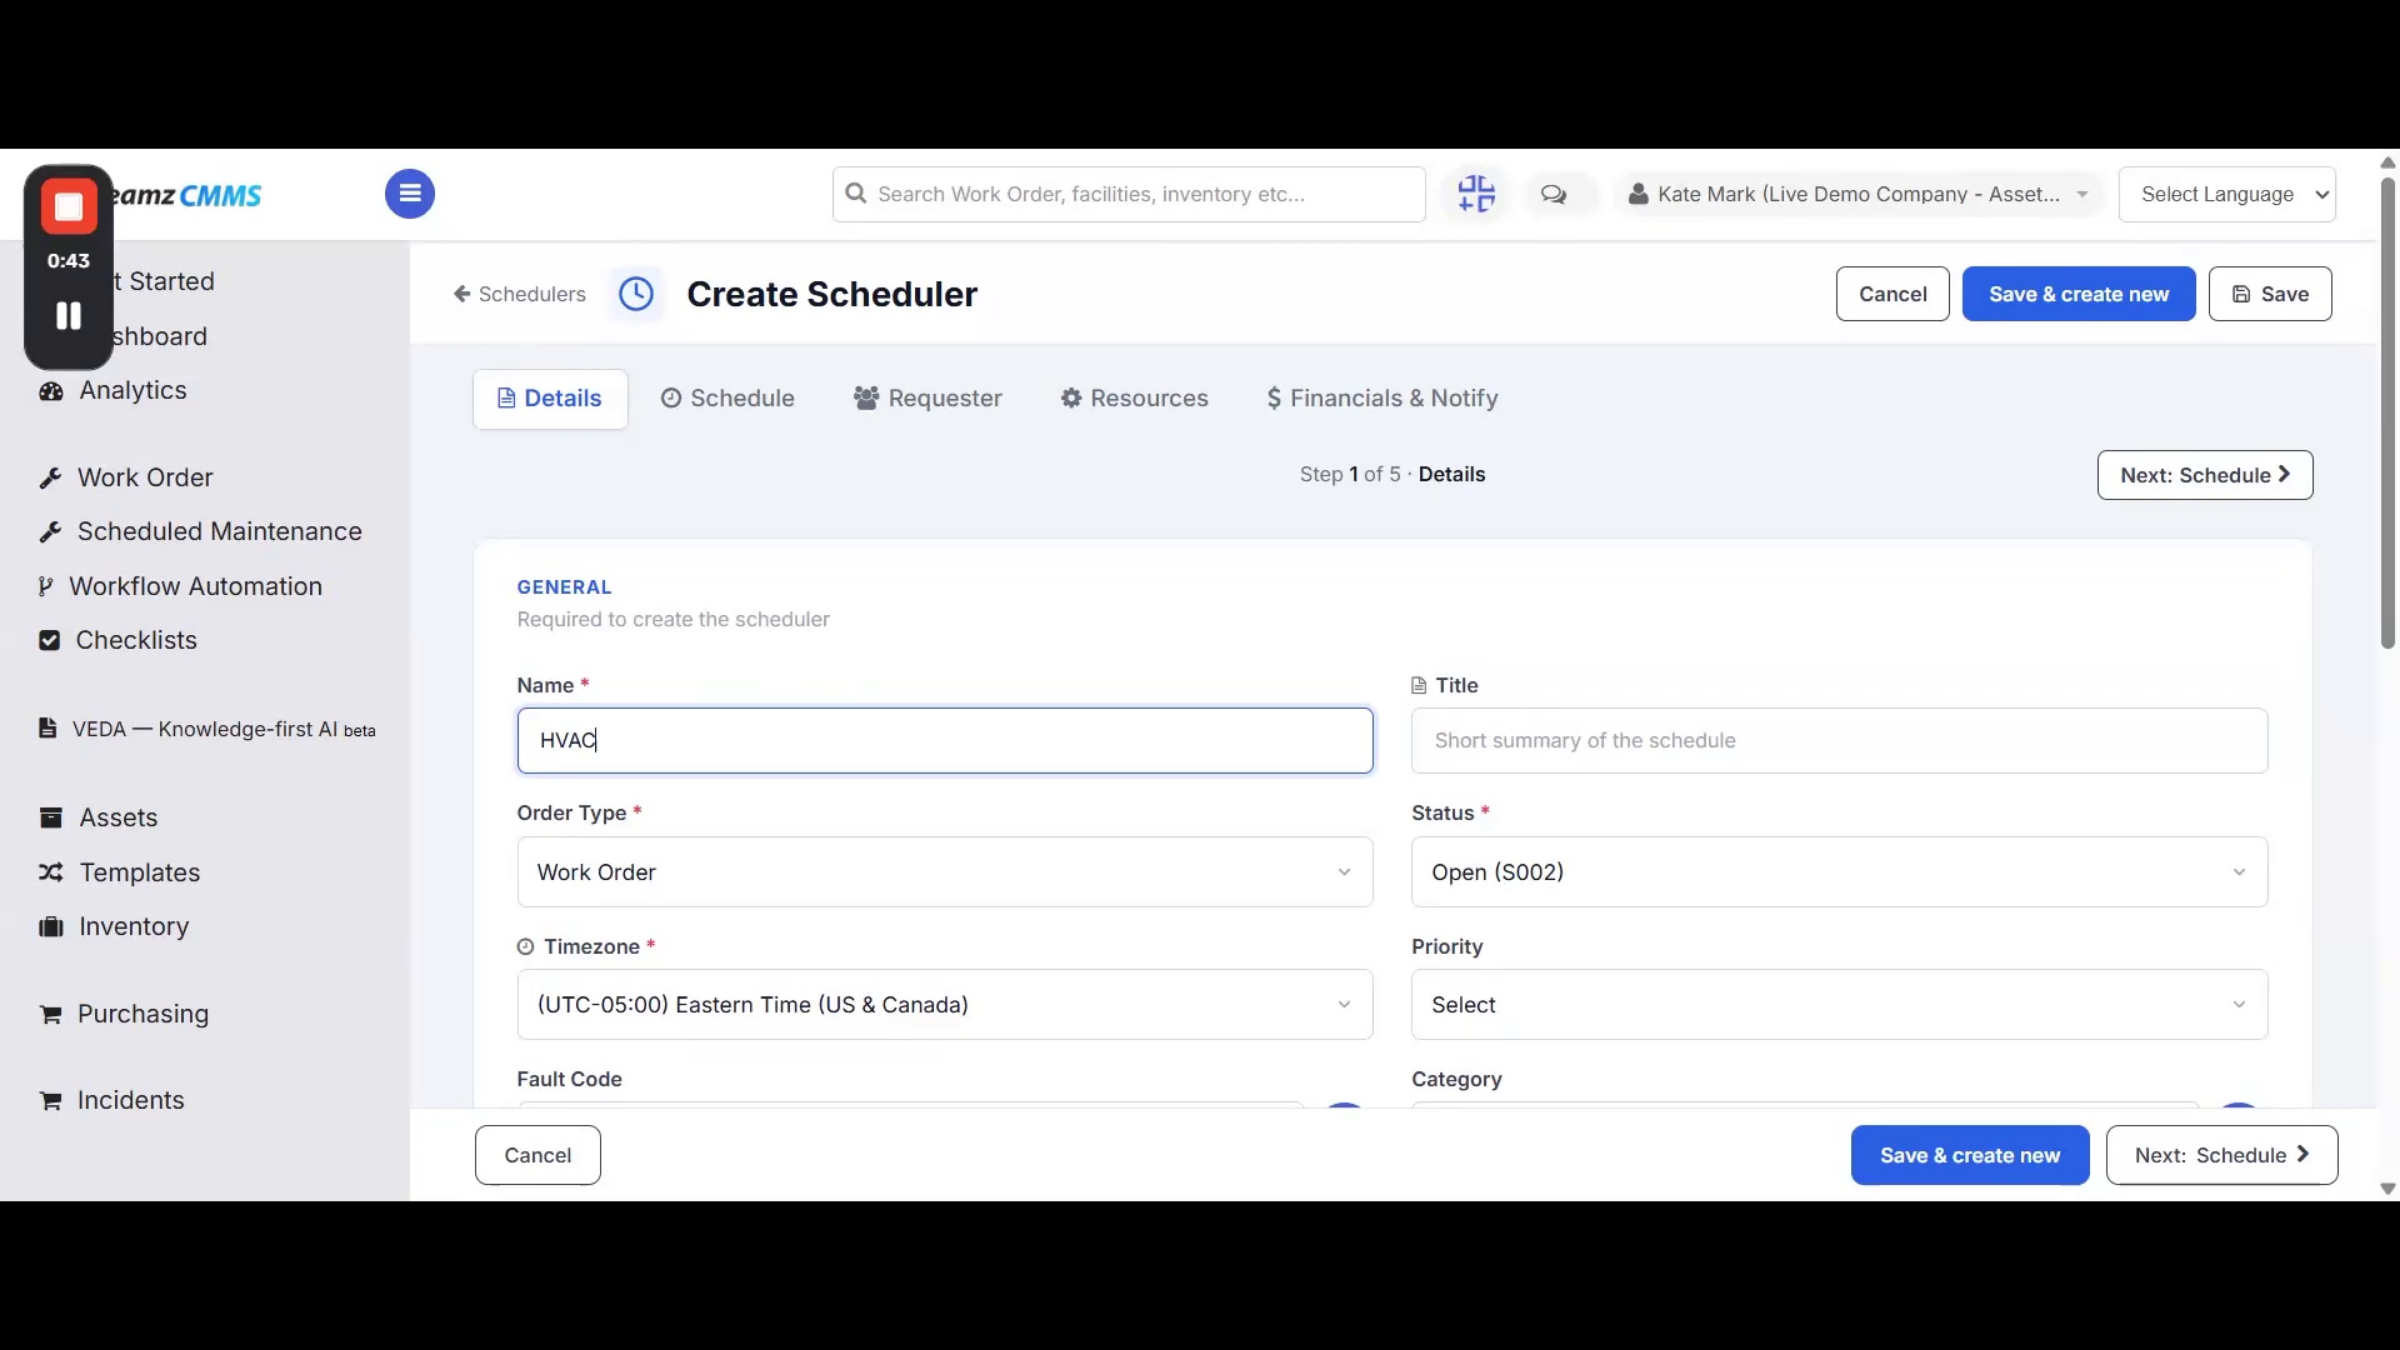
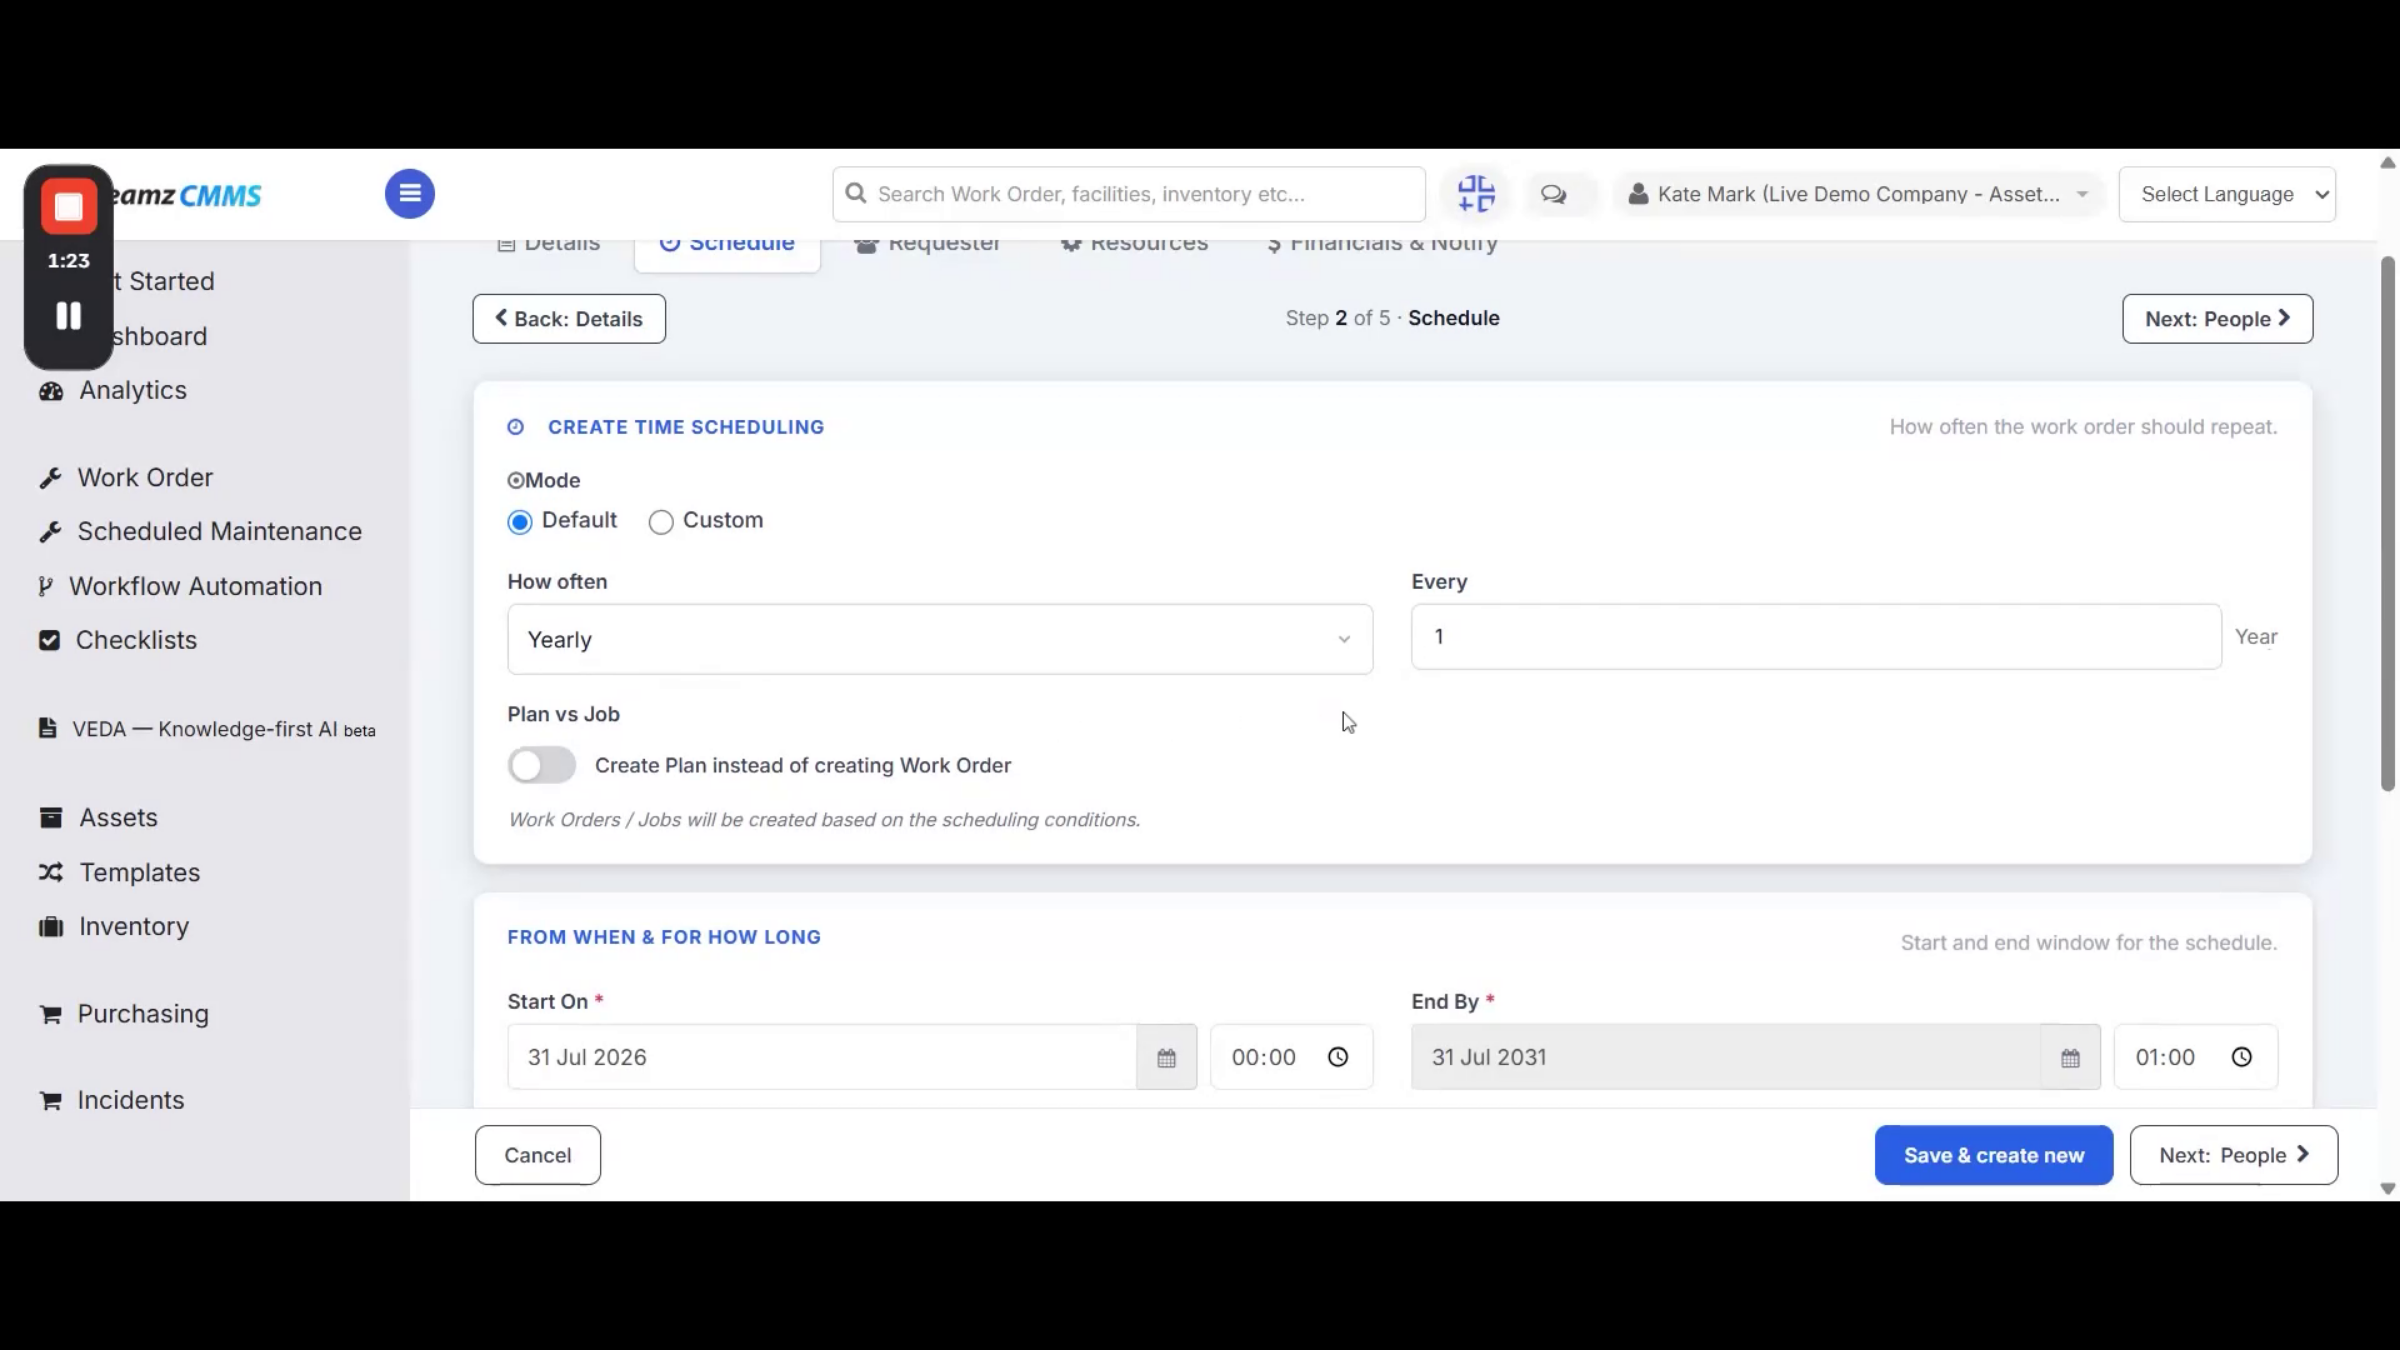
Step 4 – Scheduling Frequency Options
Use the default settings or configure your own custom schedule — choose from daily, weekly, monthly, quarterly, or yearly options depending on how often the task needs to happen.
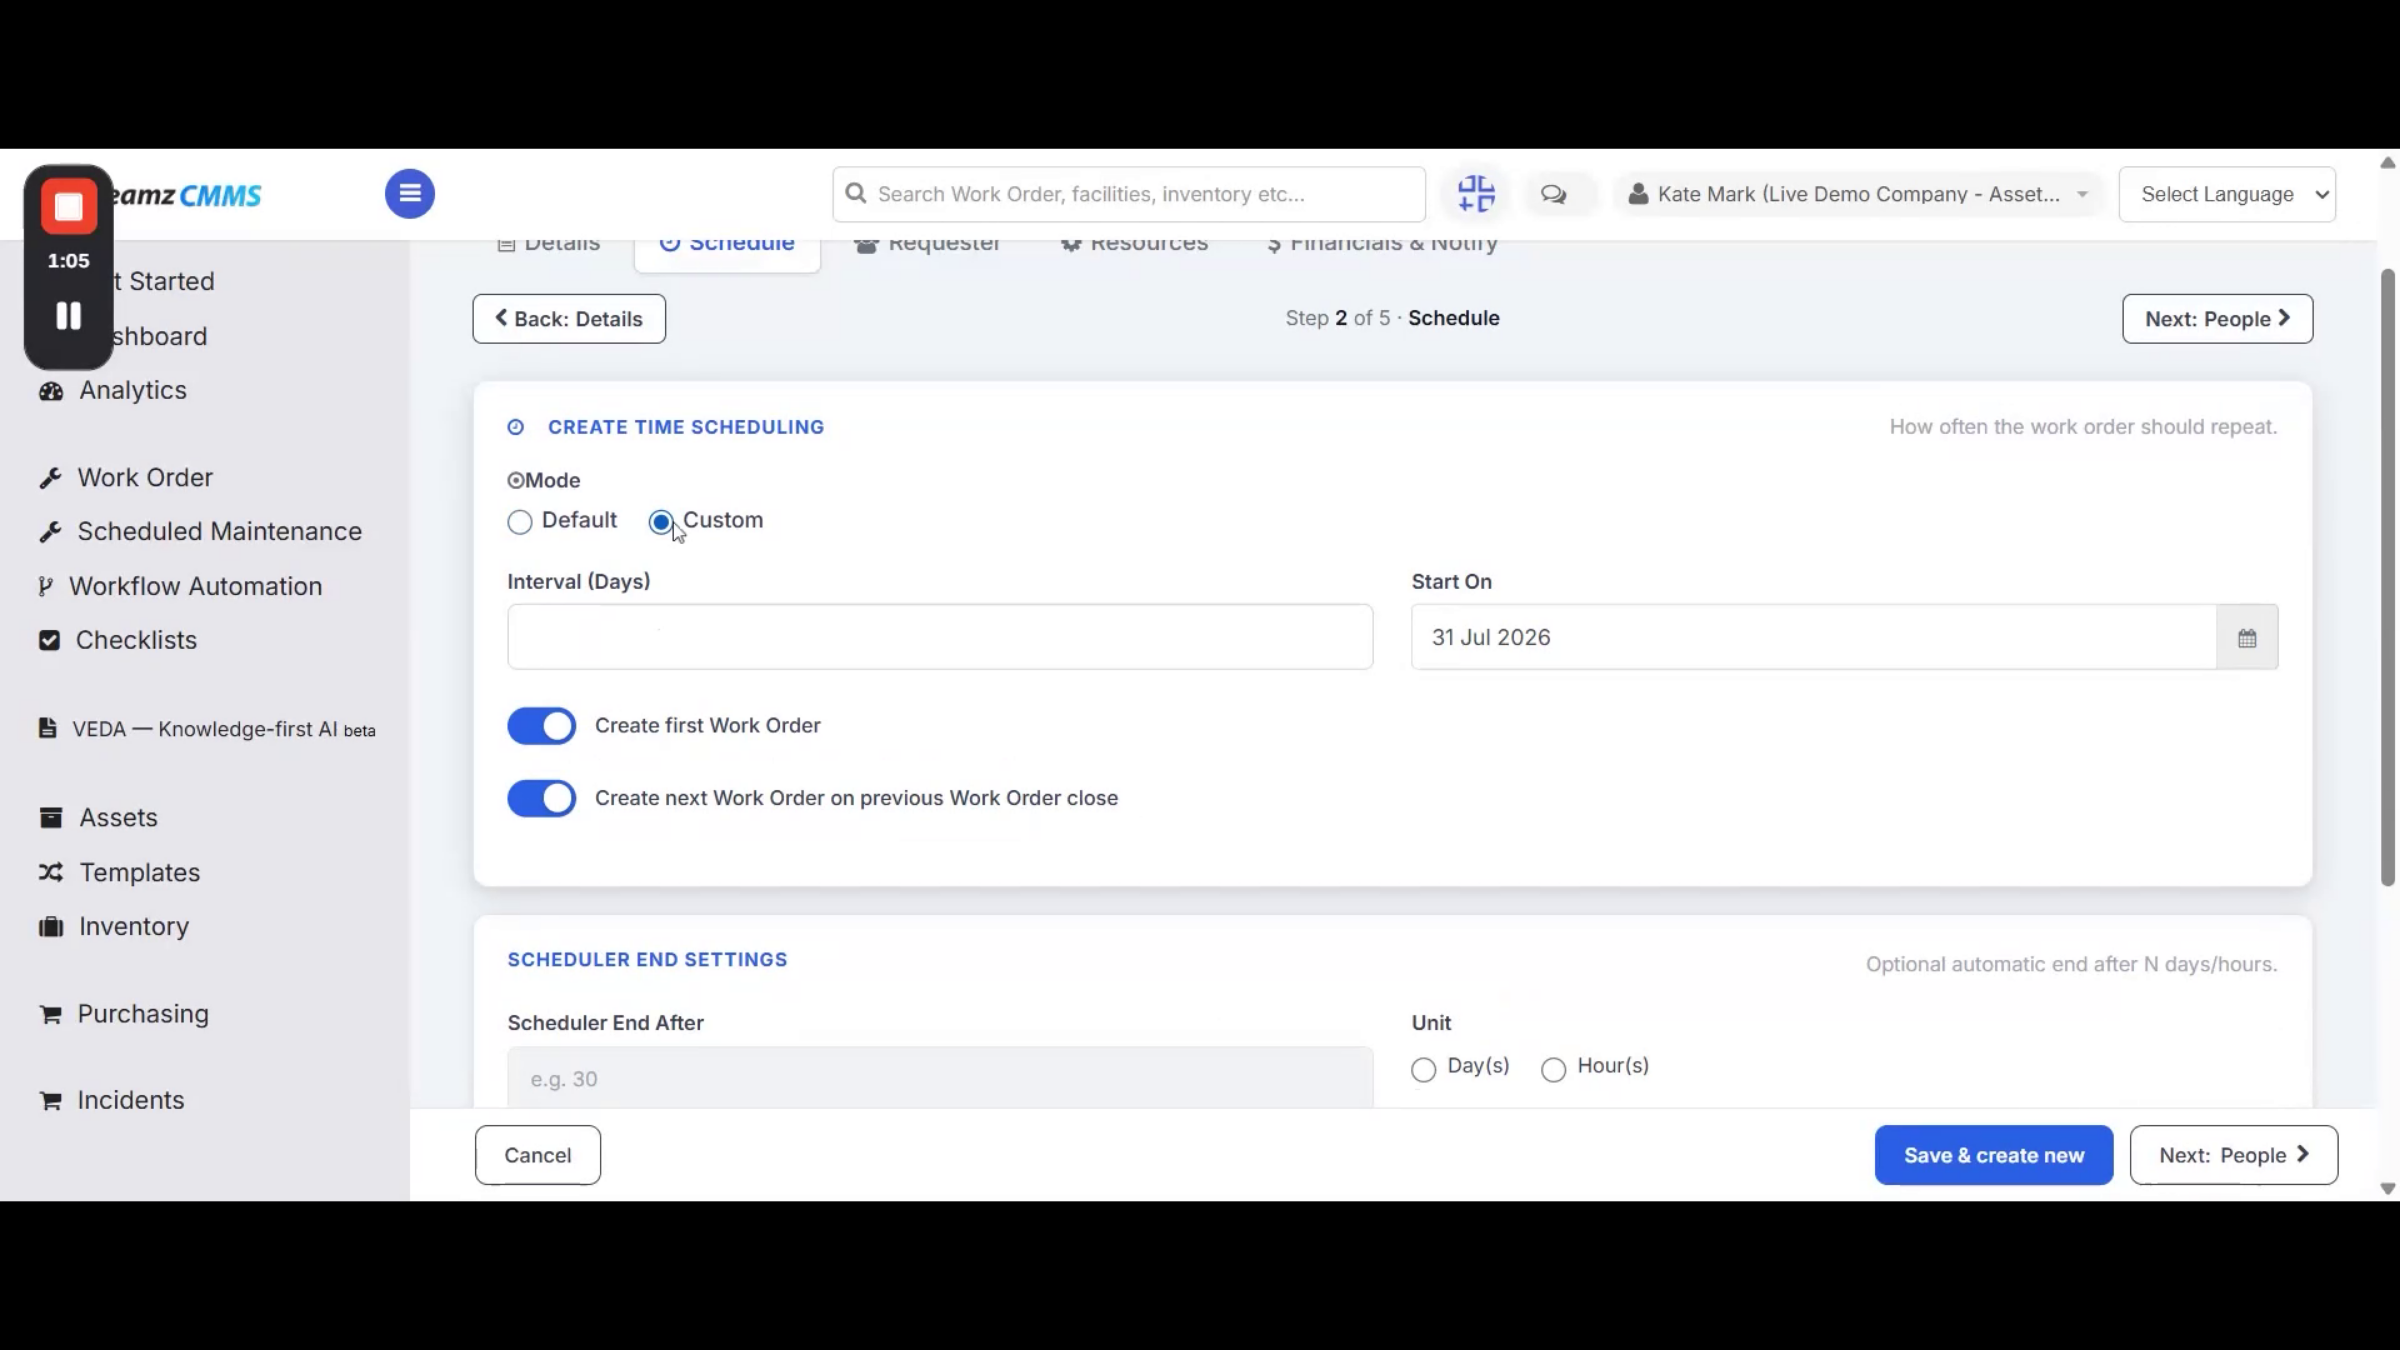
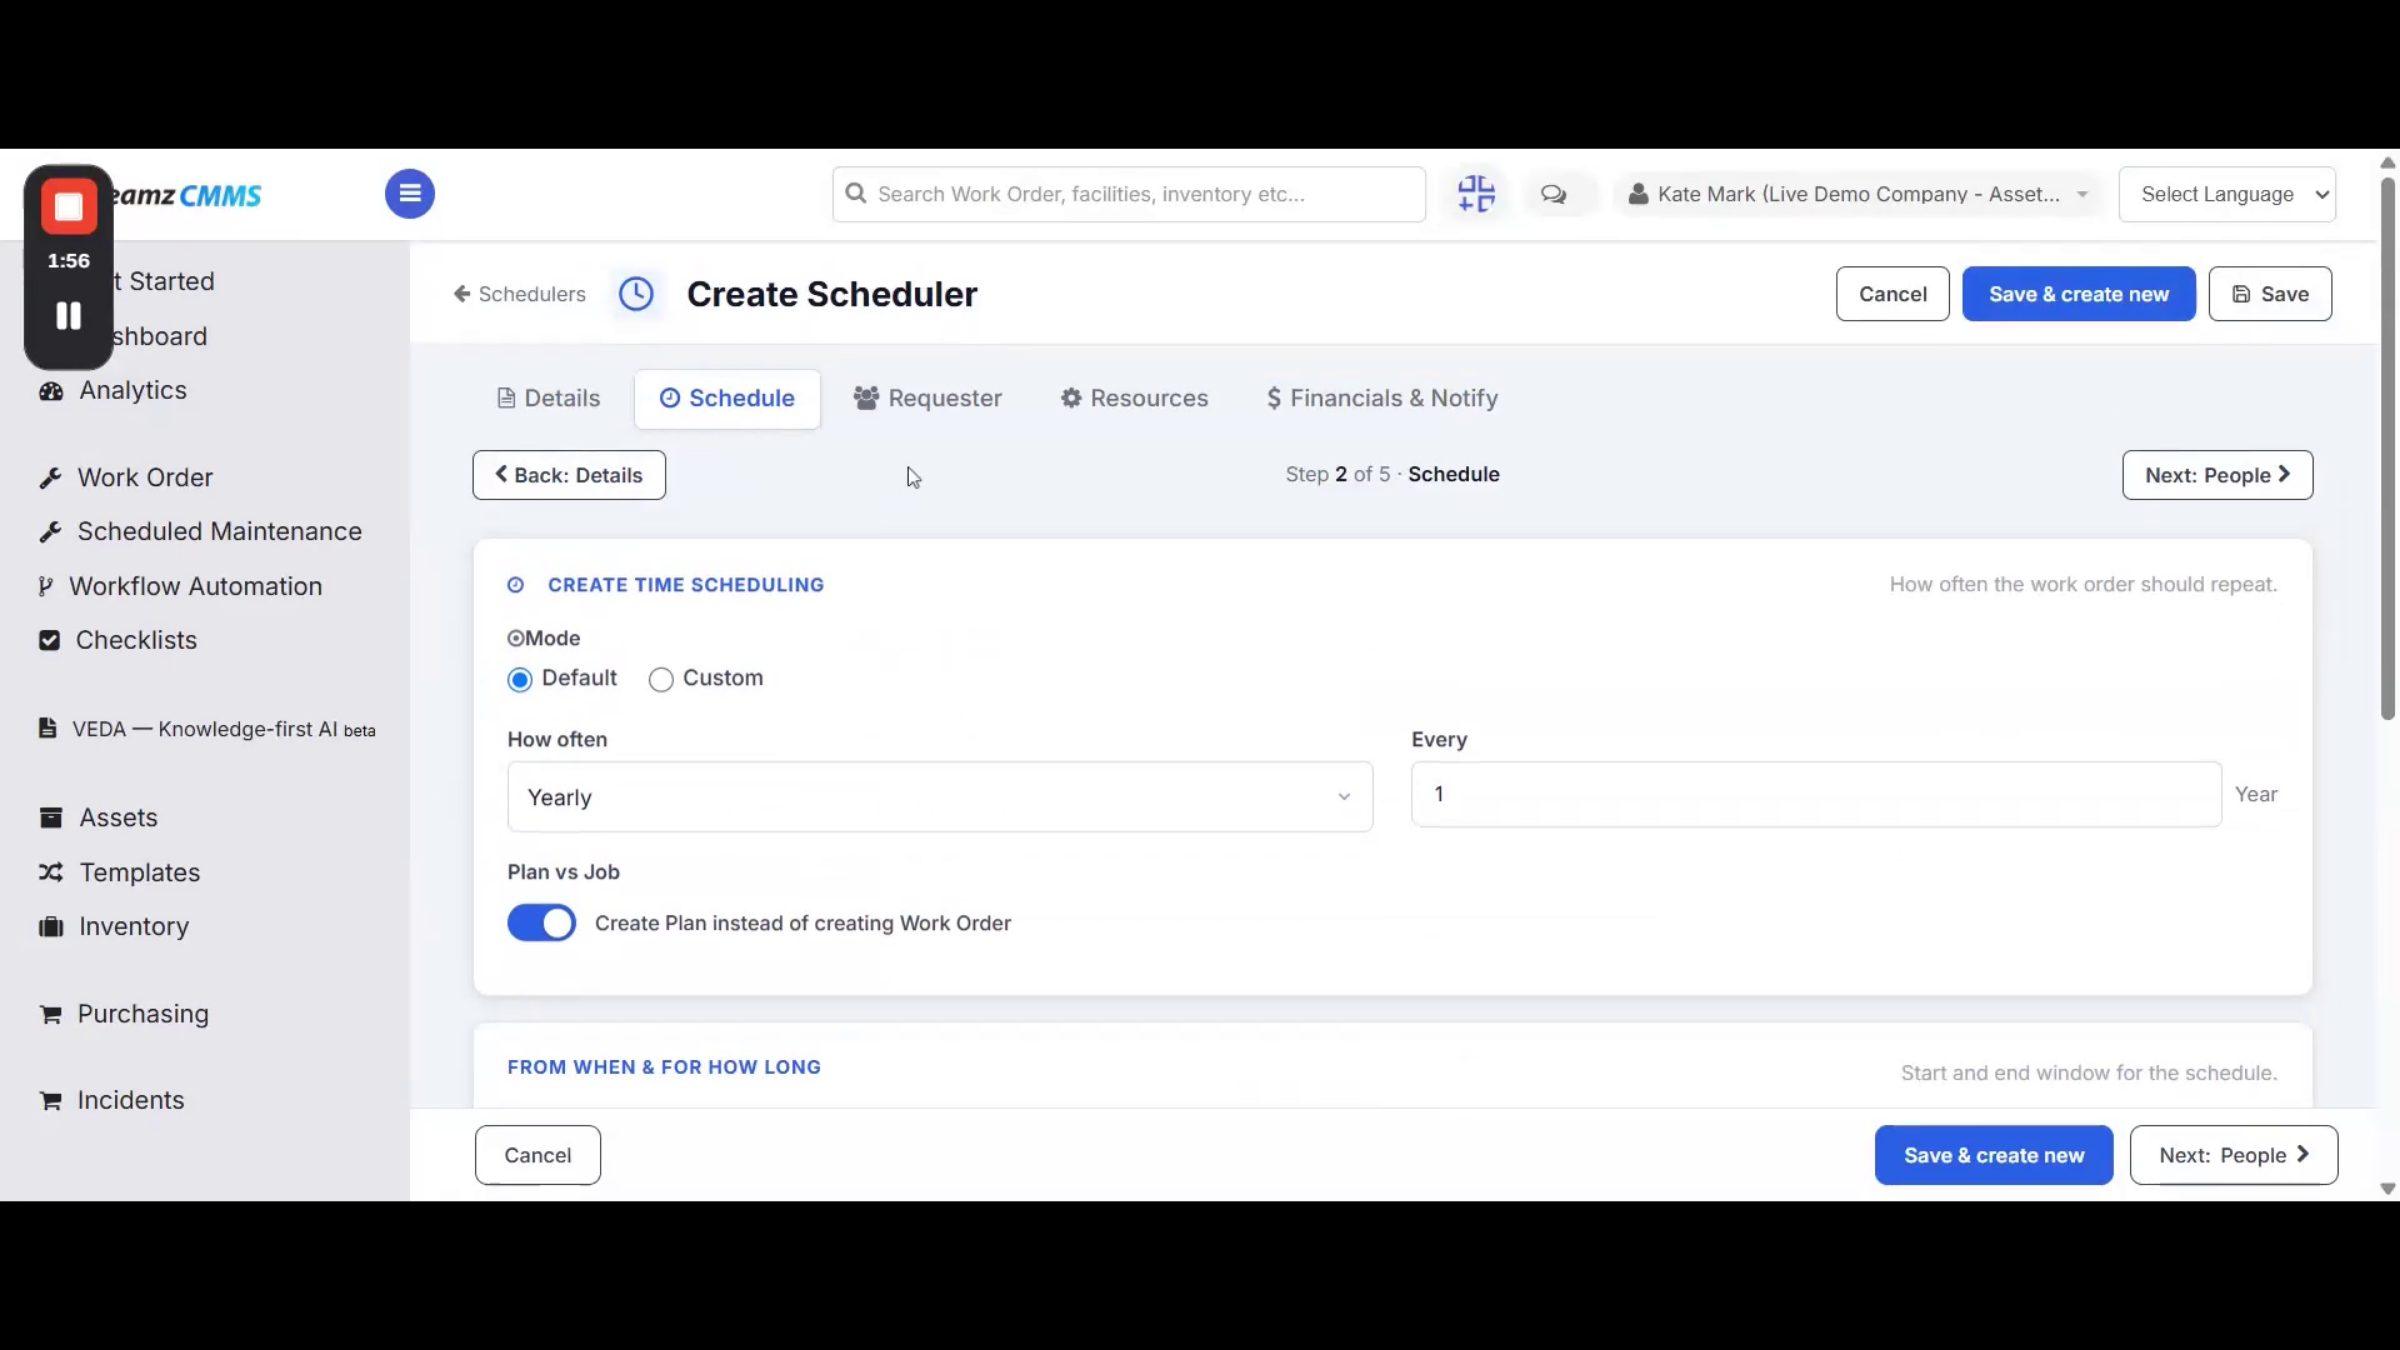
Step 5 – Work Order vs. Maintenance Plan
Note: After setting how often the scheduler triggers, you must choose one of two paths: create a work order for this schedule, which books it directly onto your calendar and work order list, or create a future plan, which does not book your current work order calendar and instead waits in the Plan List until you generate a work order from it manually. Set the time duration for the scheduler as well.
Step 6 – Requester Details Configuration
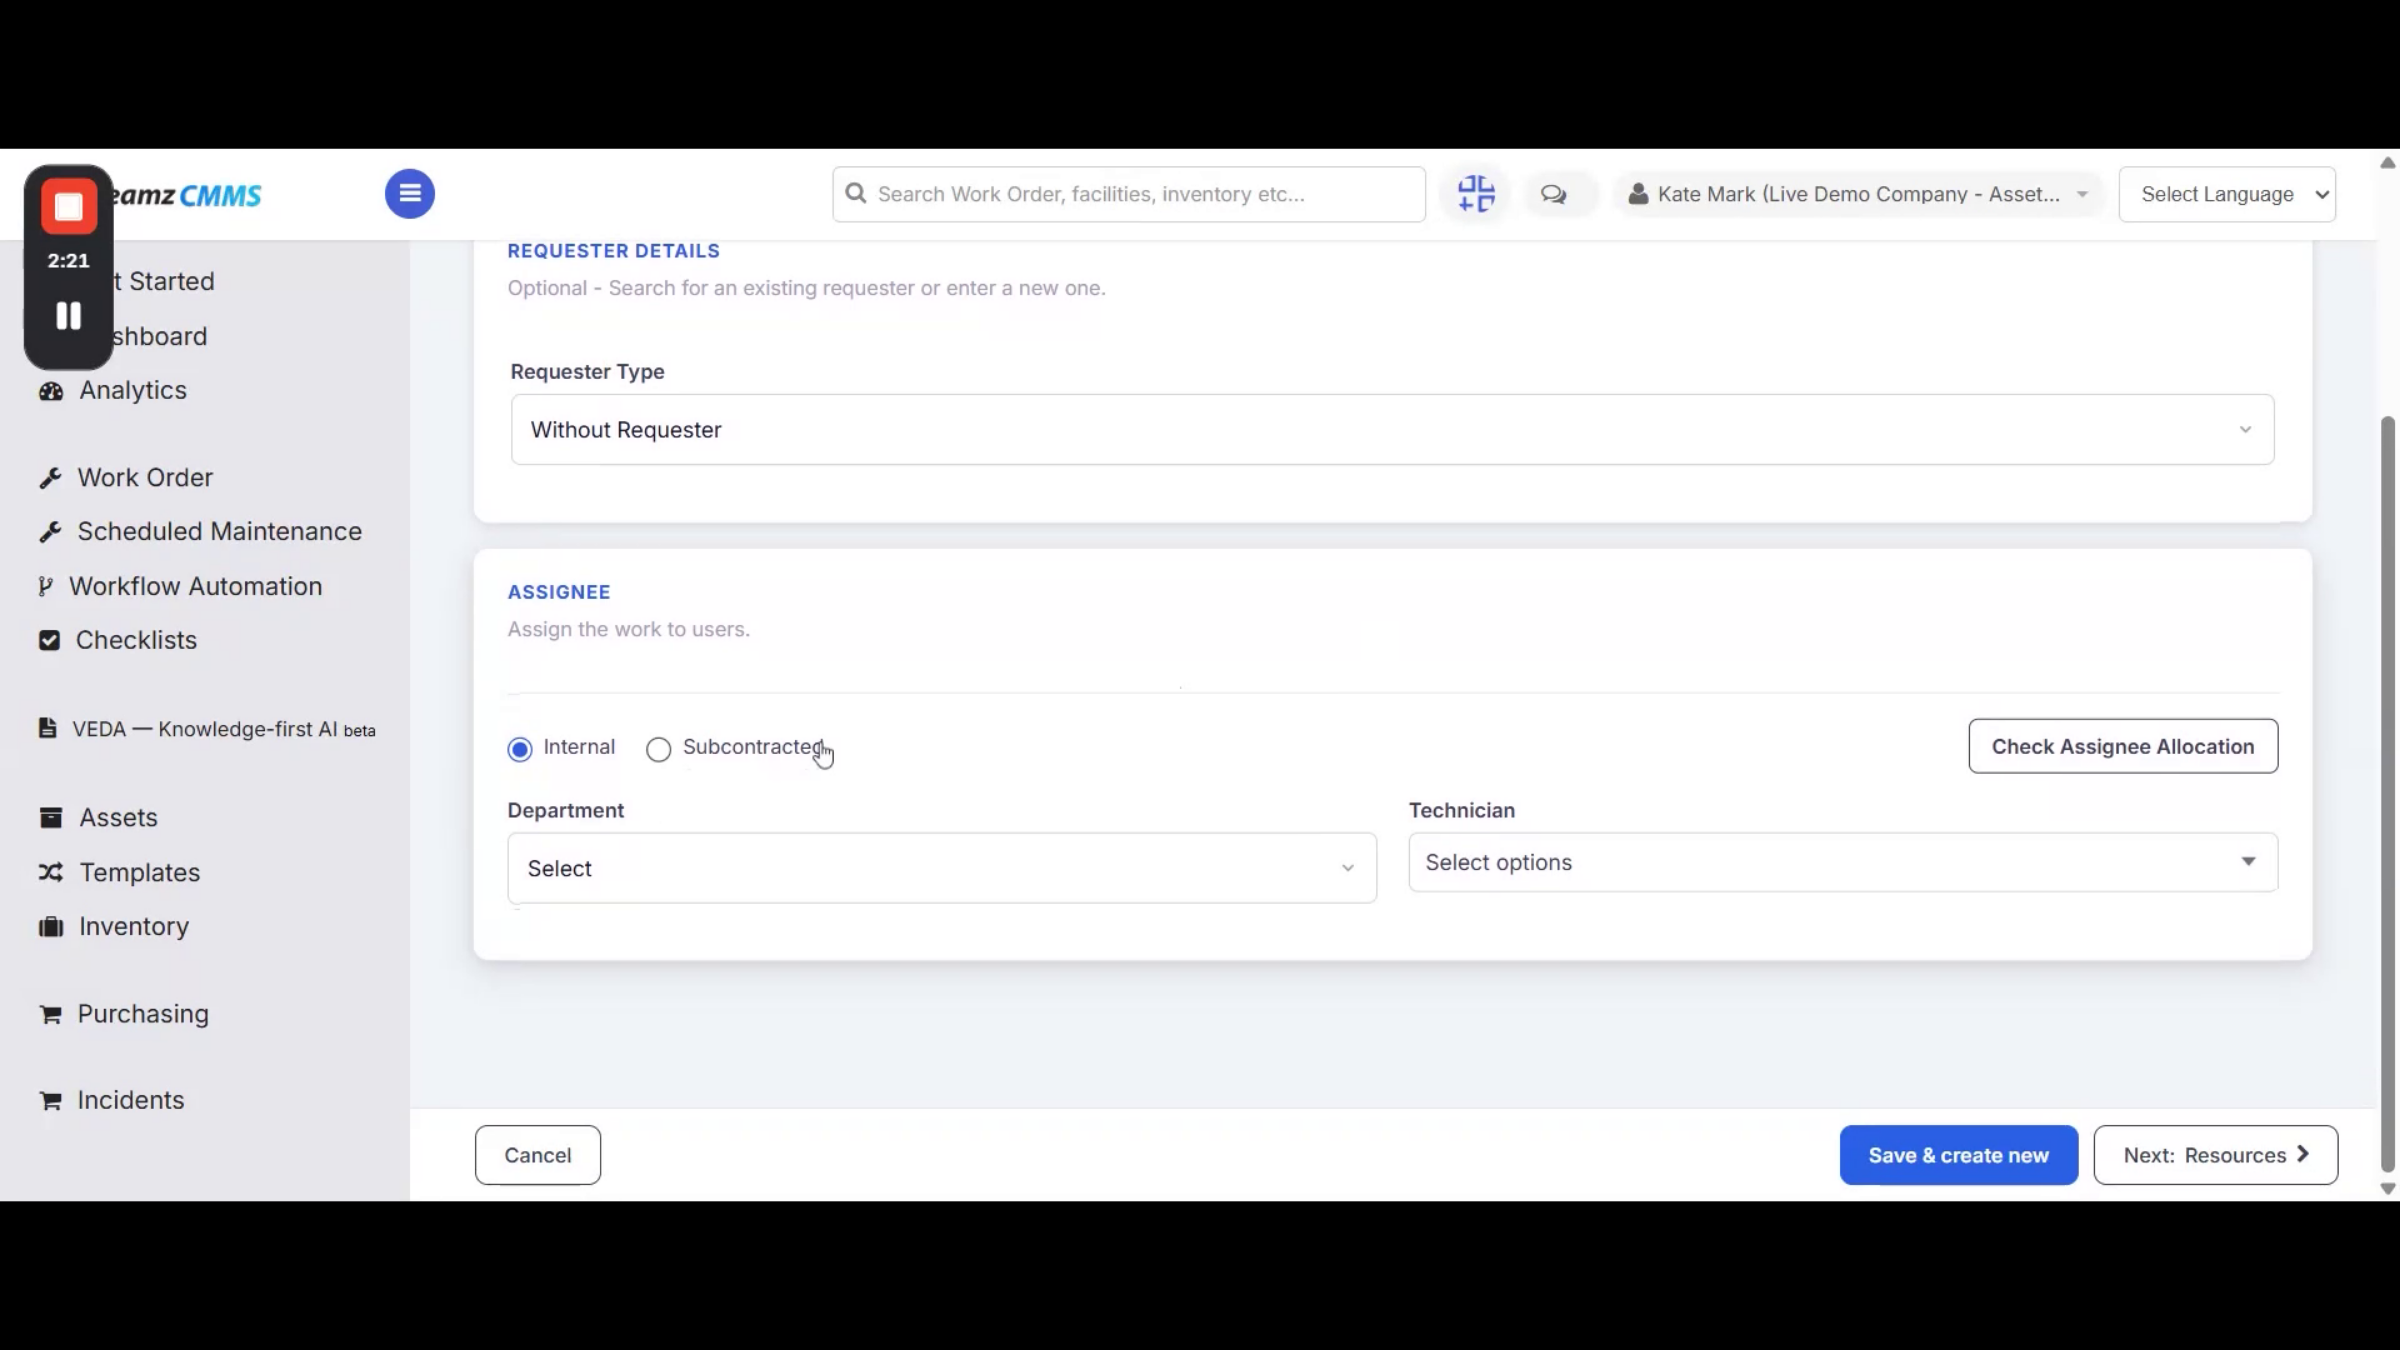
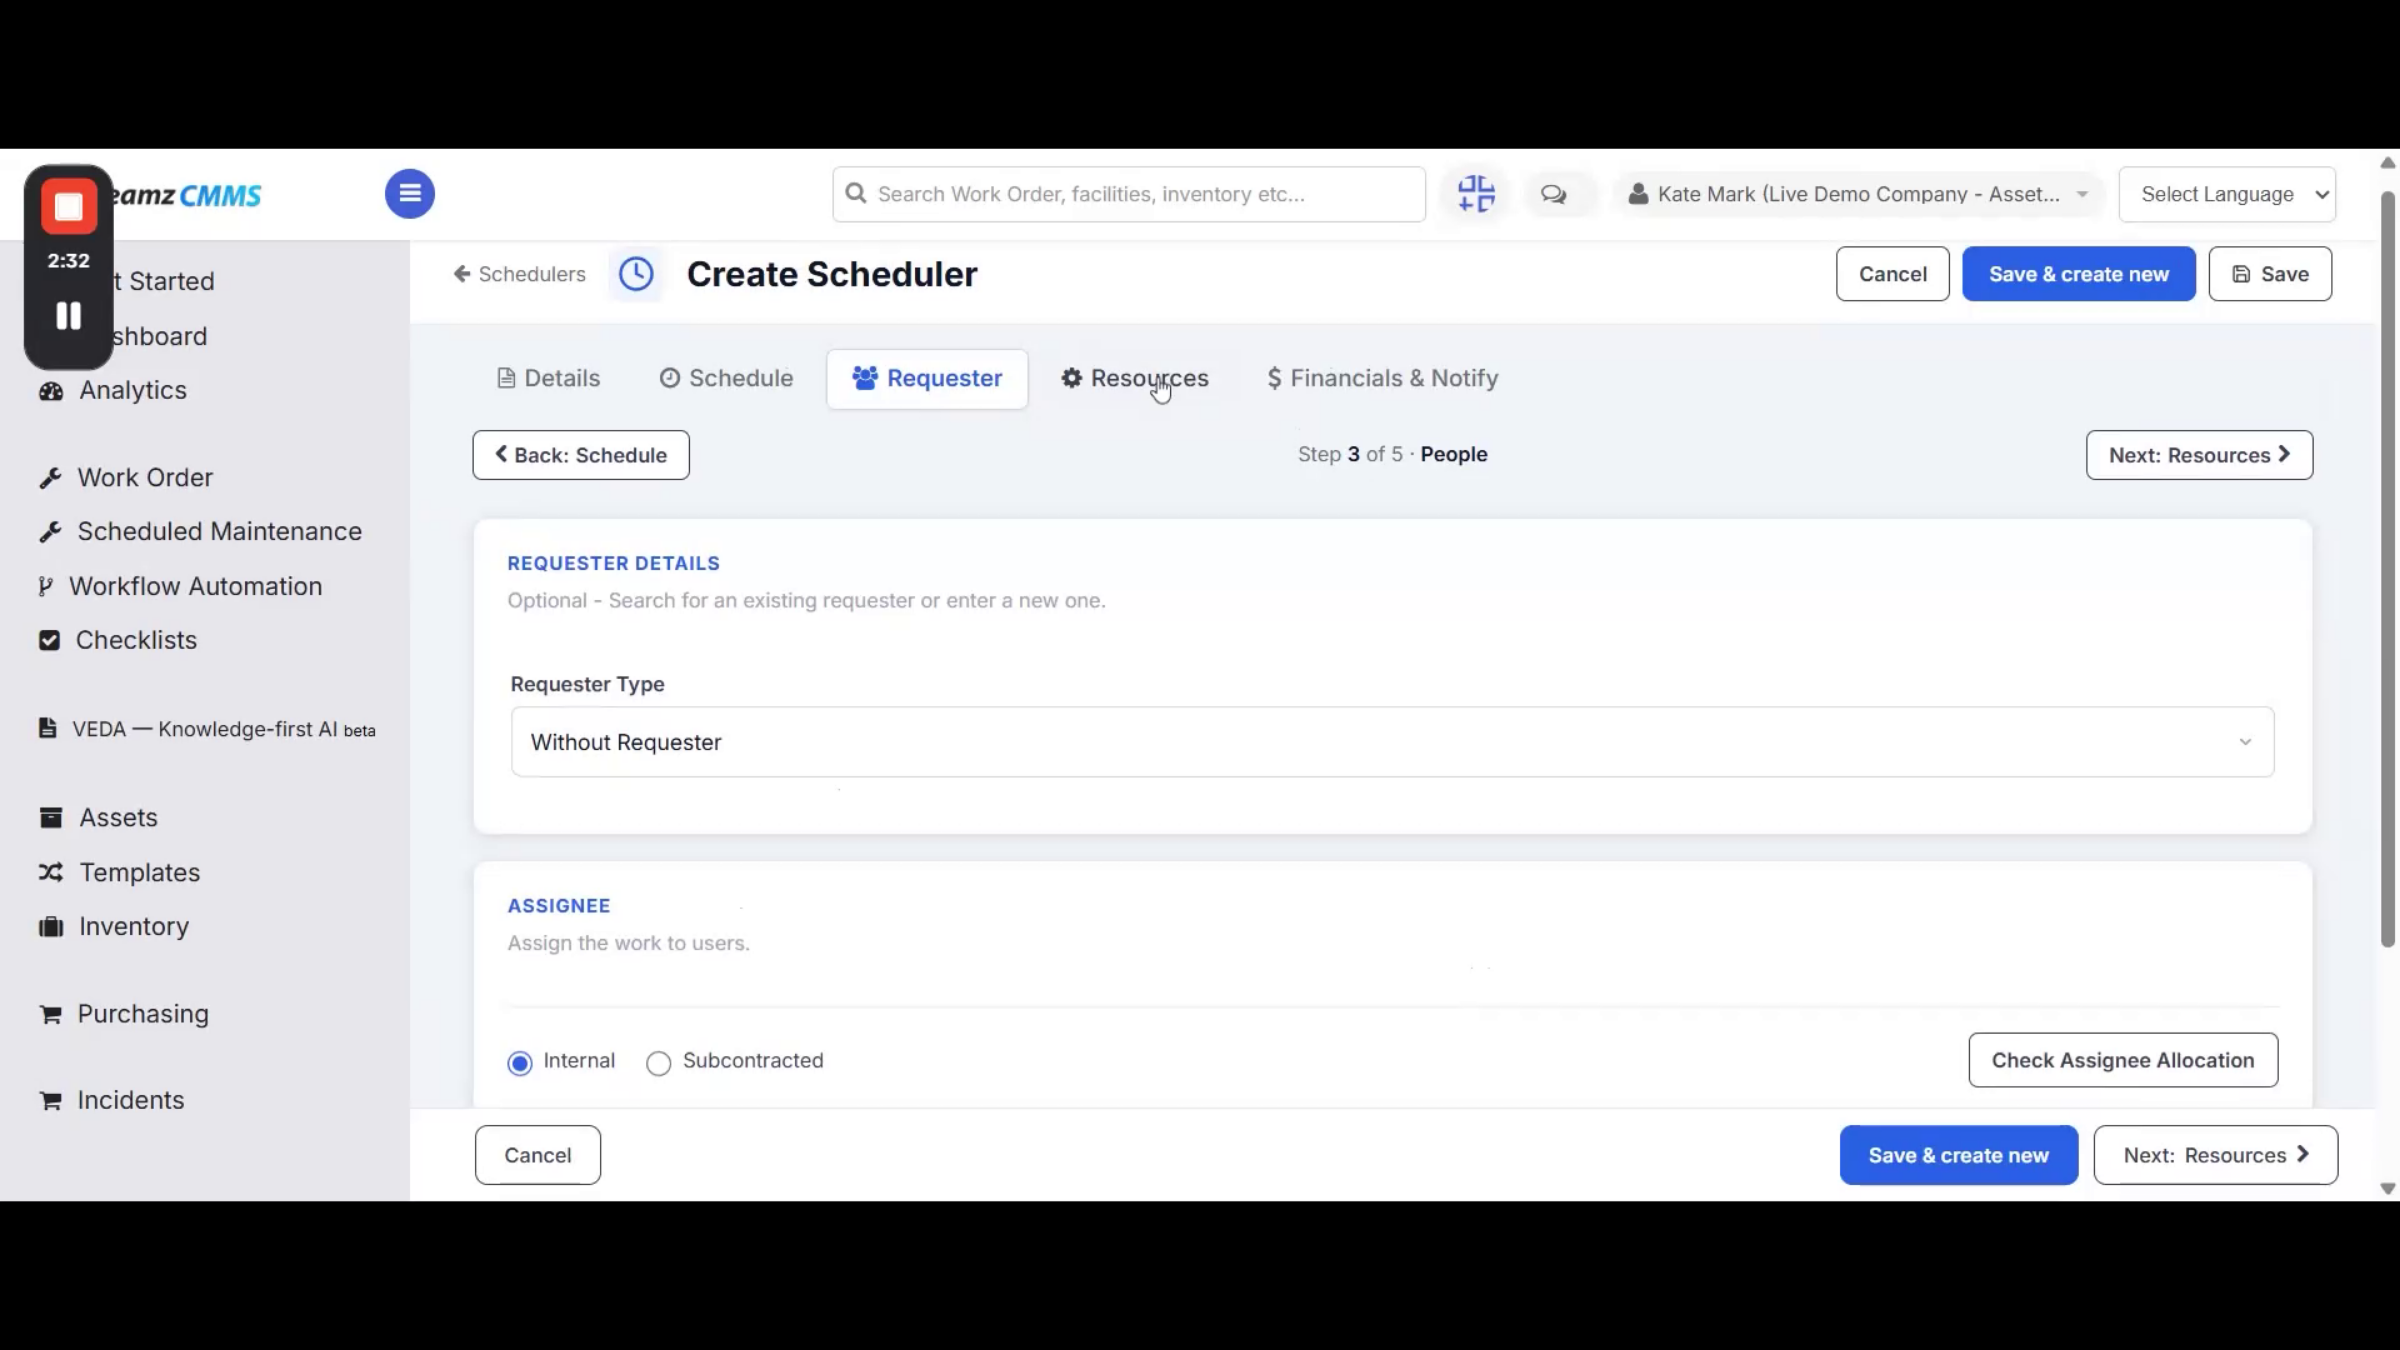
From the Requester tab, specify who is requesting the scheduler — select the requester type from Without Requester, Employee, Customer, or Subcontractor. Choose Without Requester if you'd rather proceed without assigning one.
Assigning Technicians and Resources
Step 7 – Assigning a Technician
From the Assignee section, assign a technician to the scheduler so generated jobs already have an owner.
Step 8 – Managing Scheduler Resources
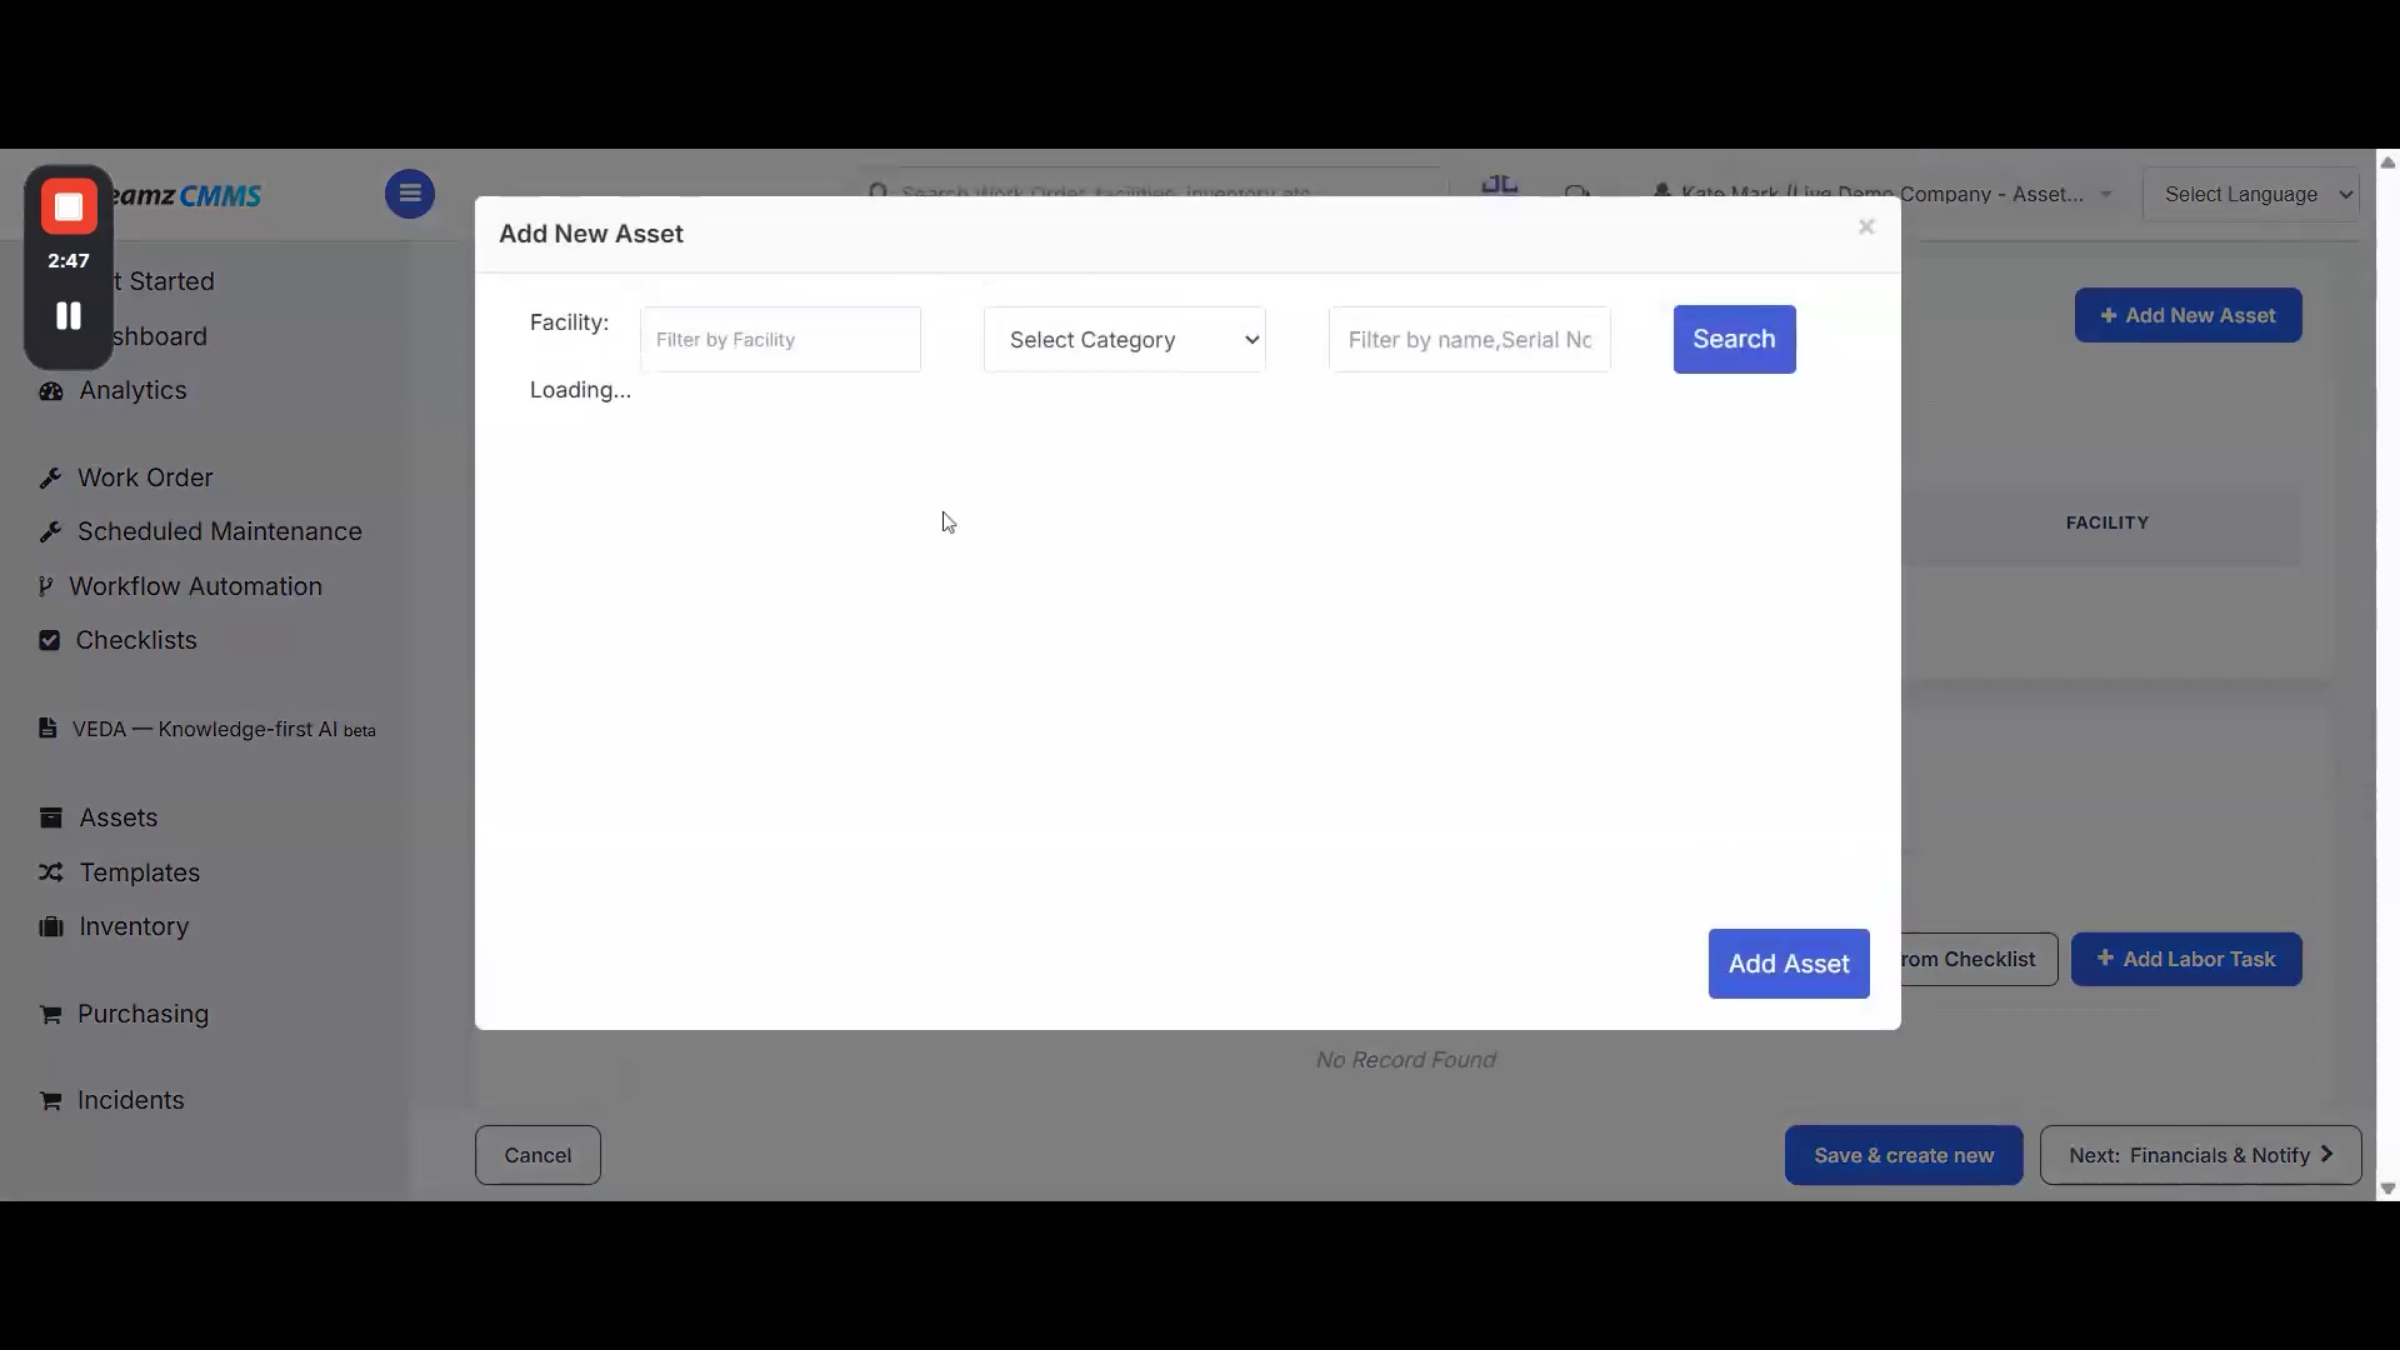
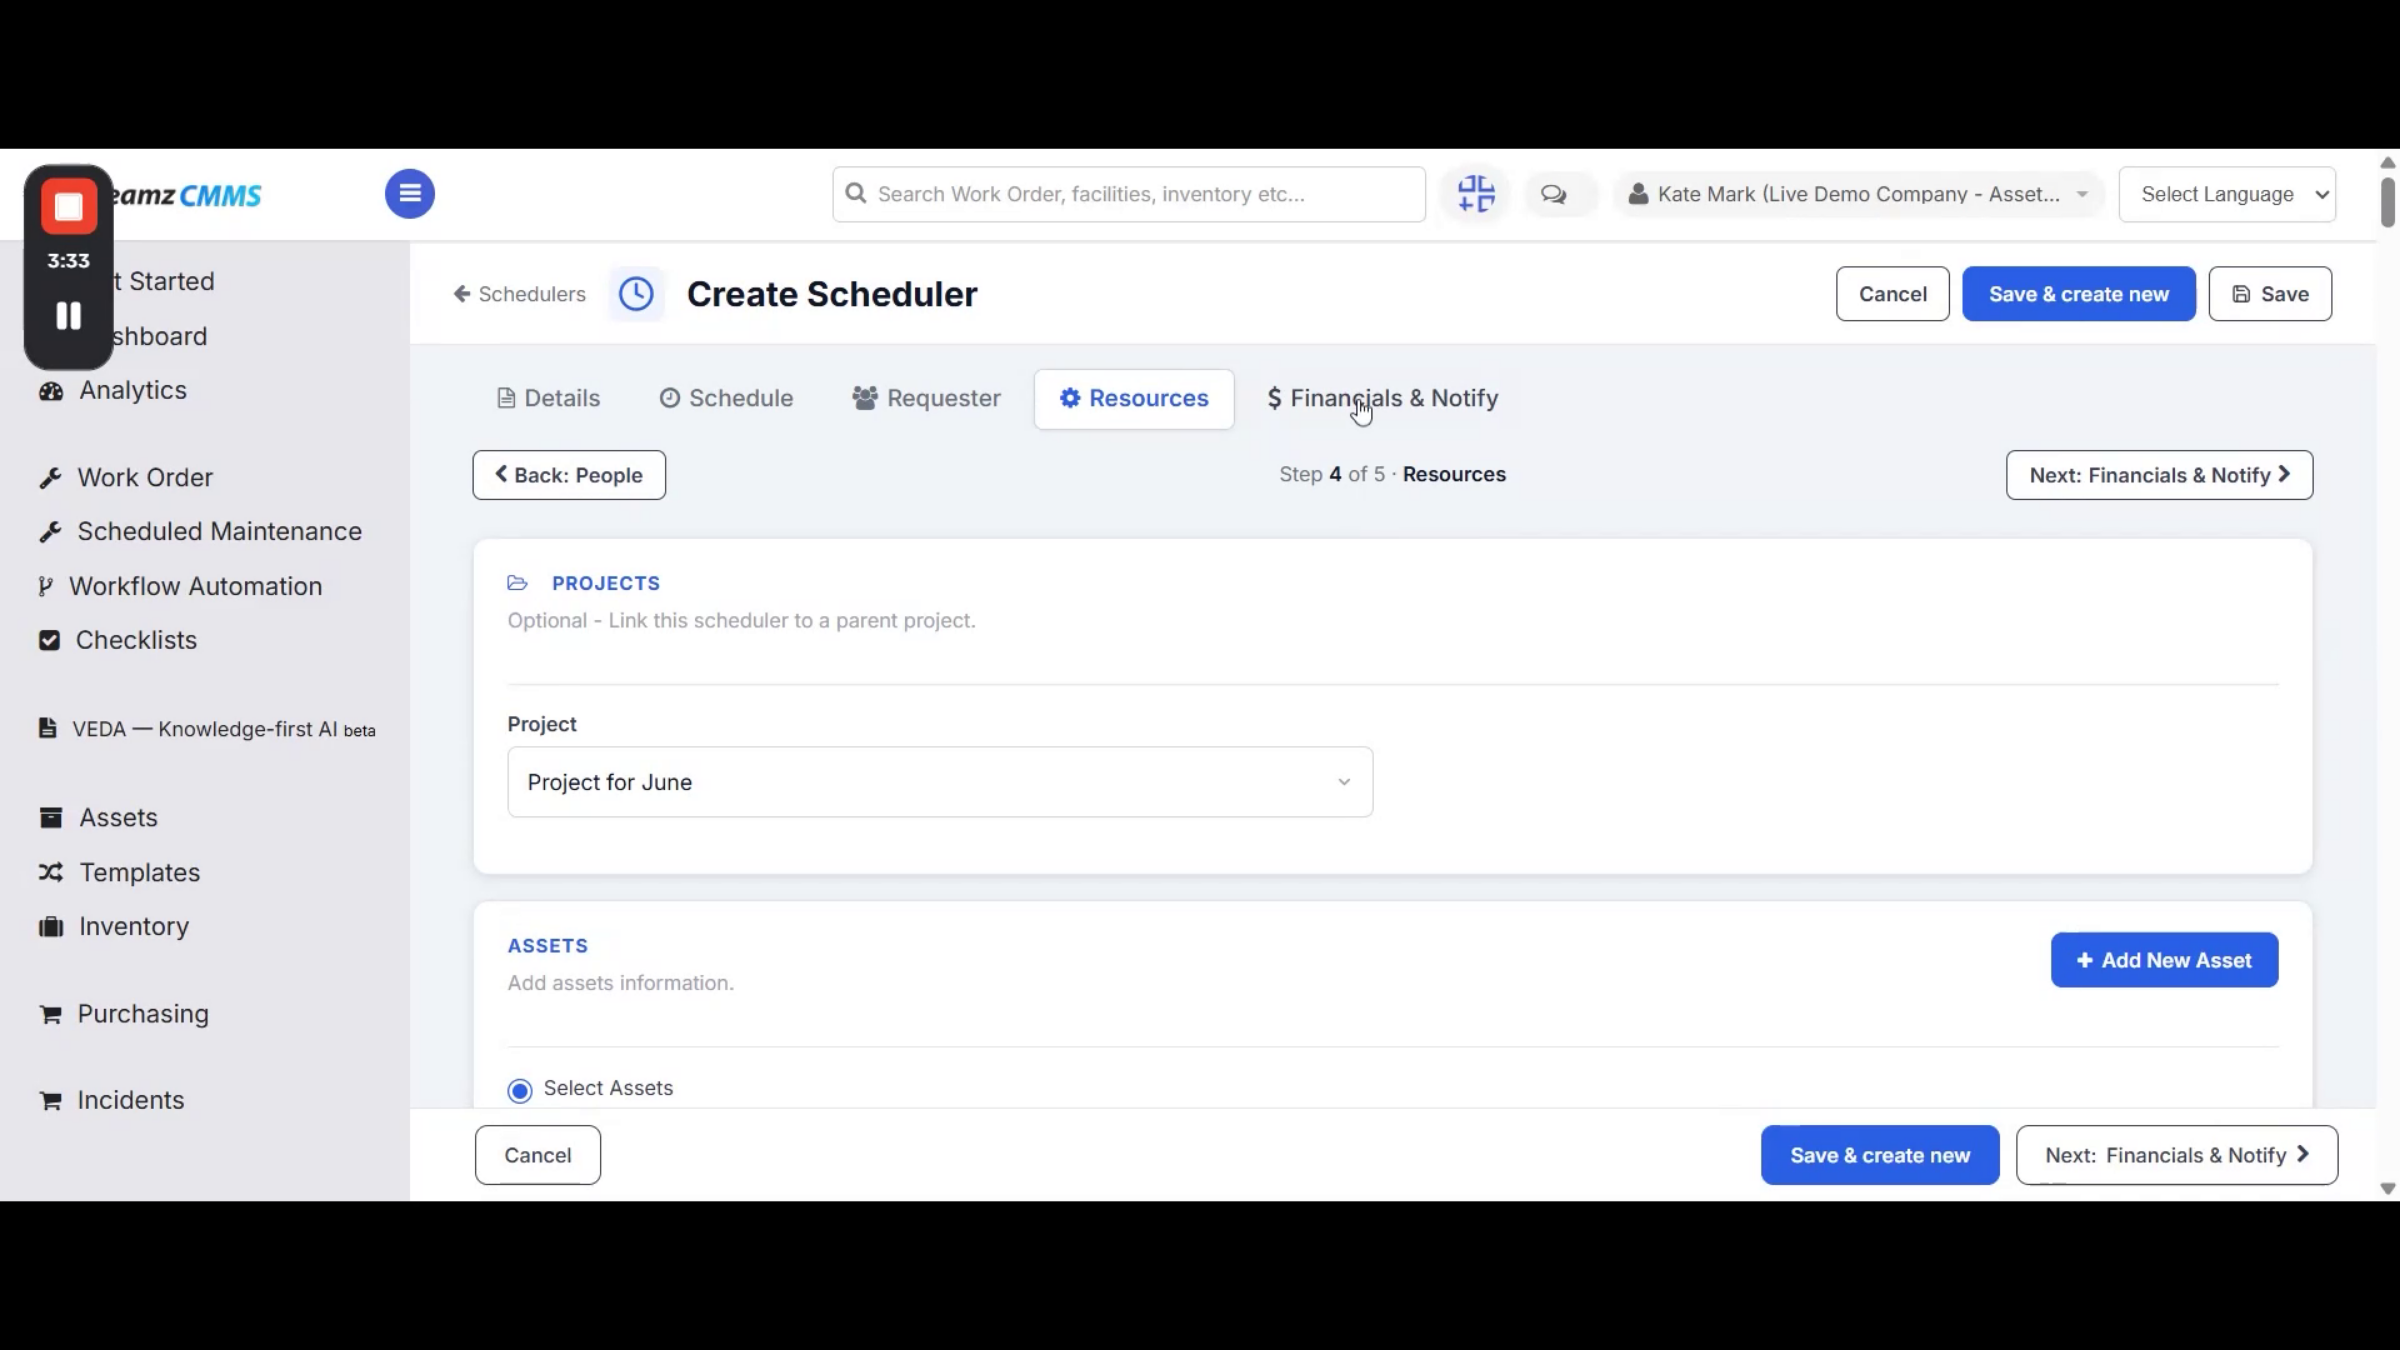
Go to the Resources tab to manage the projects, assets, and labor tasks linked to the scheduler.
Step 9 – Mapping Projects and Assets
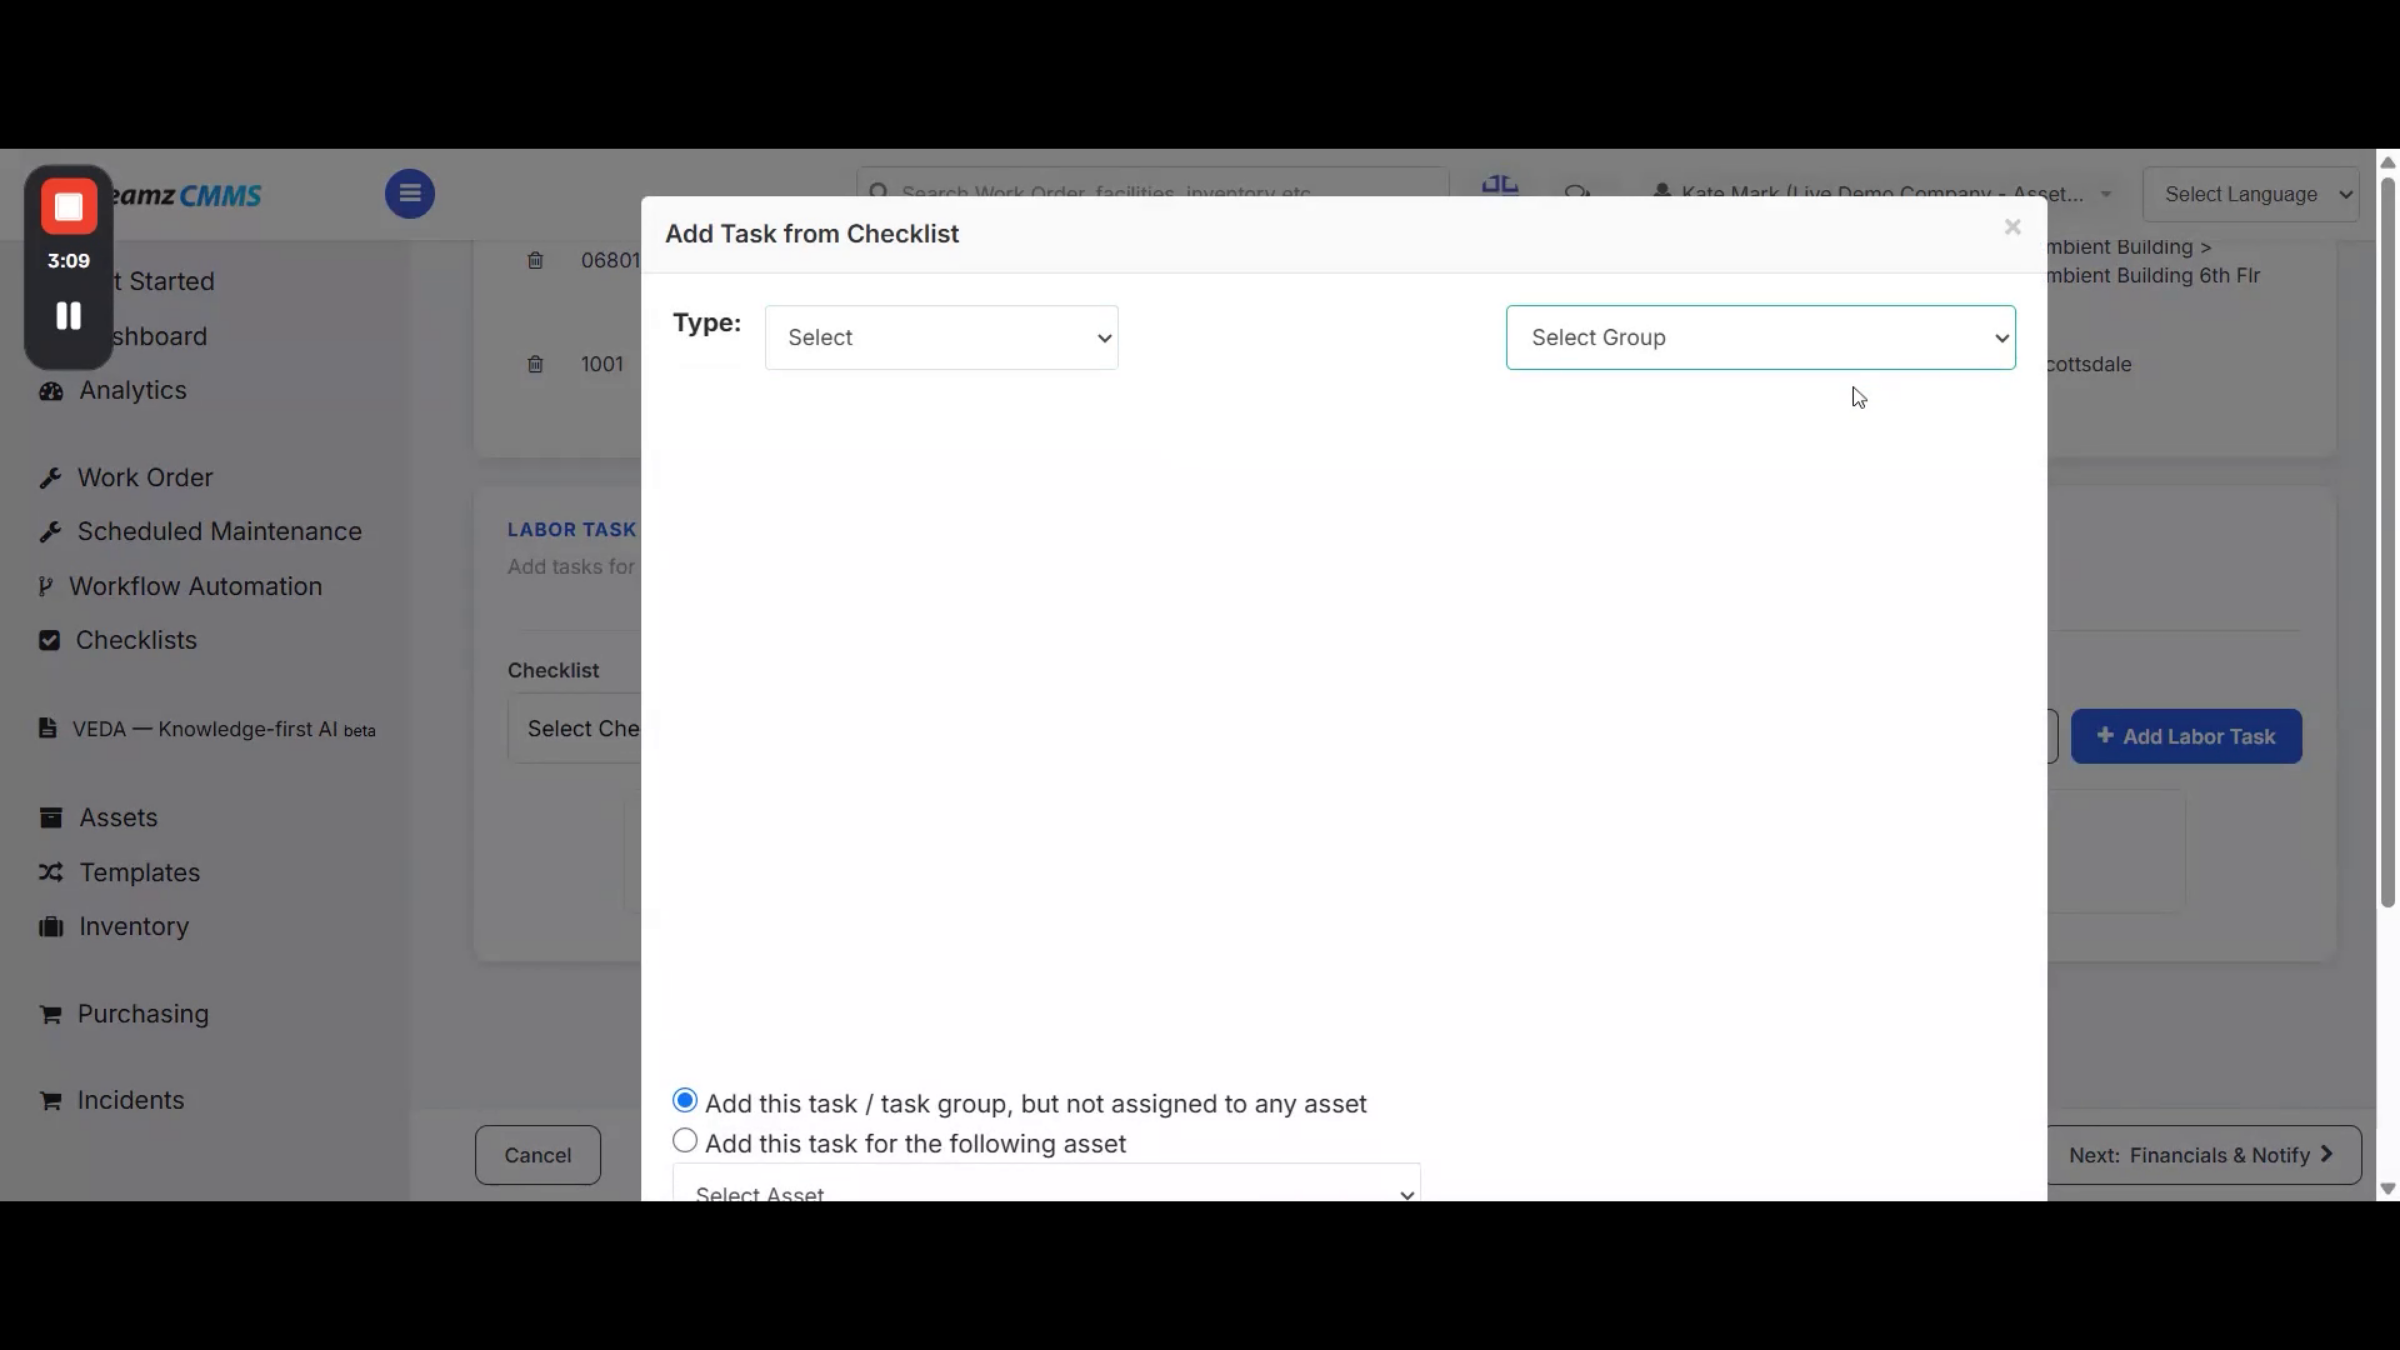
Map any project to the scheduler and choose multiple assets related to it. You can also select tasks from an existing checklist to attach to the scheduler.
Step 10 – Adding Checklist Tasks
From the available checklists, choose the one you want and add it to the scheduler so every generated work order comes with its task list already attached.
Step 11 – Financials and Notifications Setup
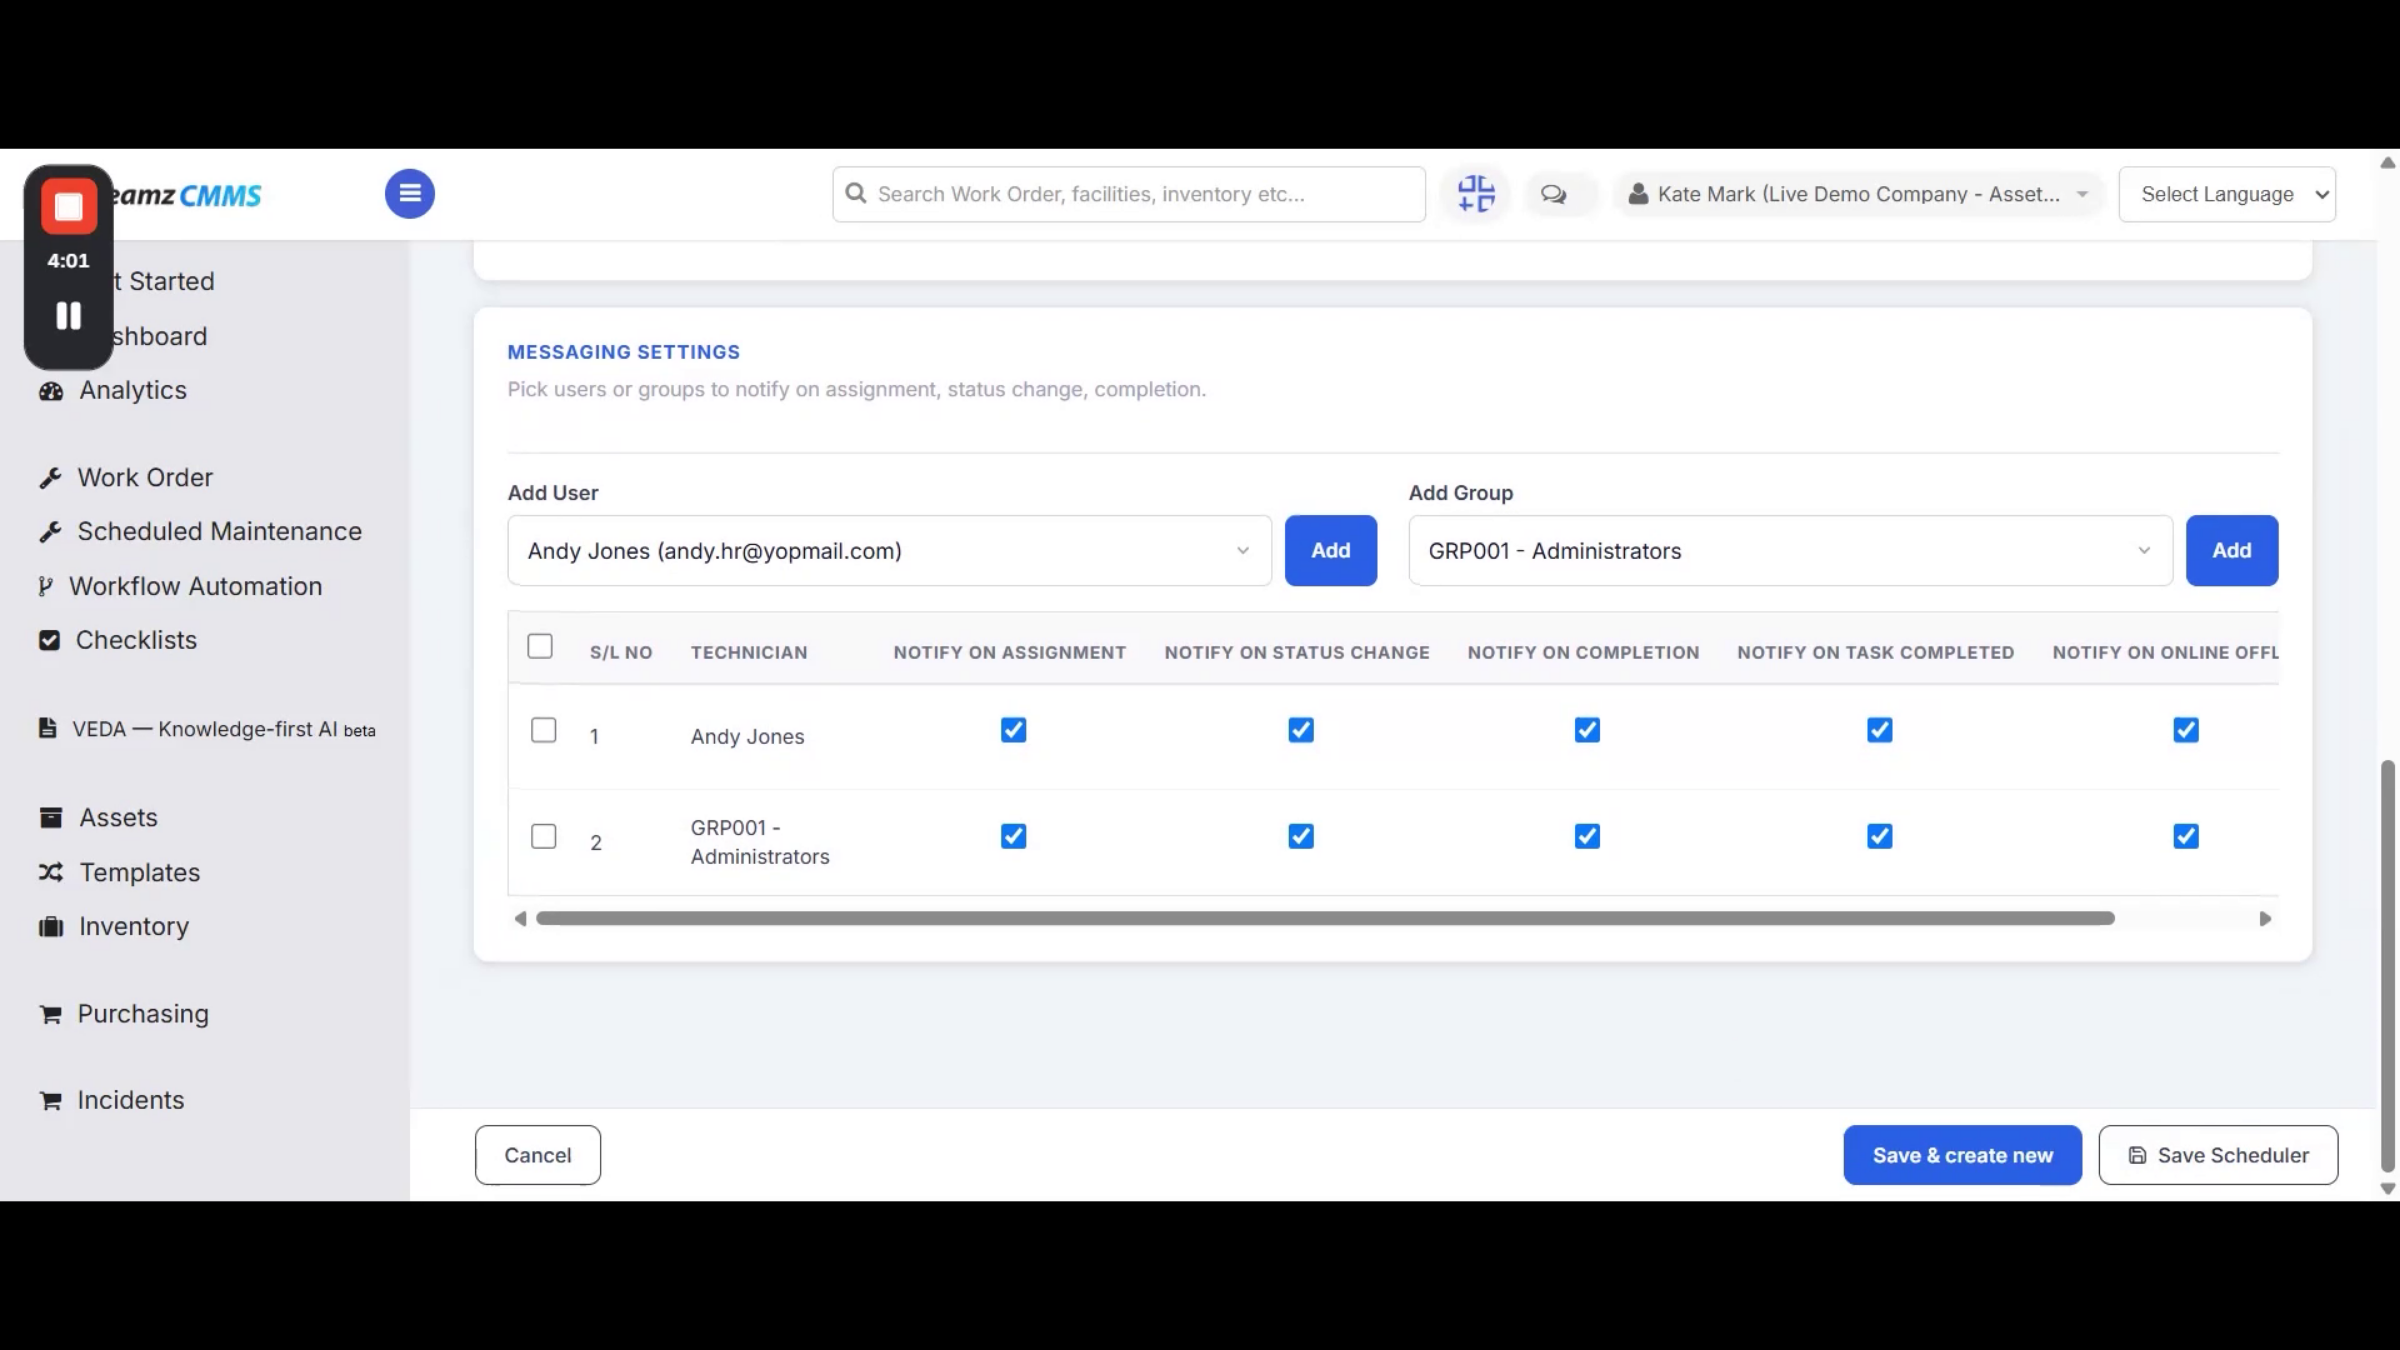
From the Financials & Notify tab, manage the budget, add relevant documents, and configure notification settings — you can add notifications for an individual user or a group of users.
Saving and Managing Schedulers
Step 12 – Saving and Locating the Scheduler
Click Save Scheduler to save it — it will then be available in the Scheduled Maintenance List, where you can find it again whenever you need to review or edit it.
Step 13 – Scheduler List Filtering
The list clearly marks whether each scheduler was created for a work order or as a maintenance plan. Filter the list by parameters such as scheduler name, facility, status, or date to find what you need quickly.
Work Order Schedulers in Action
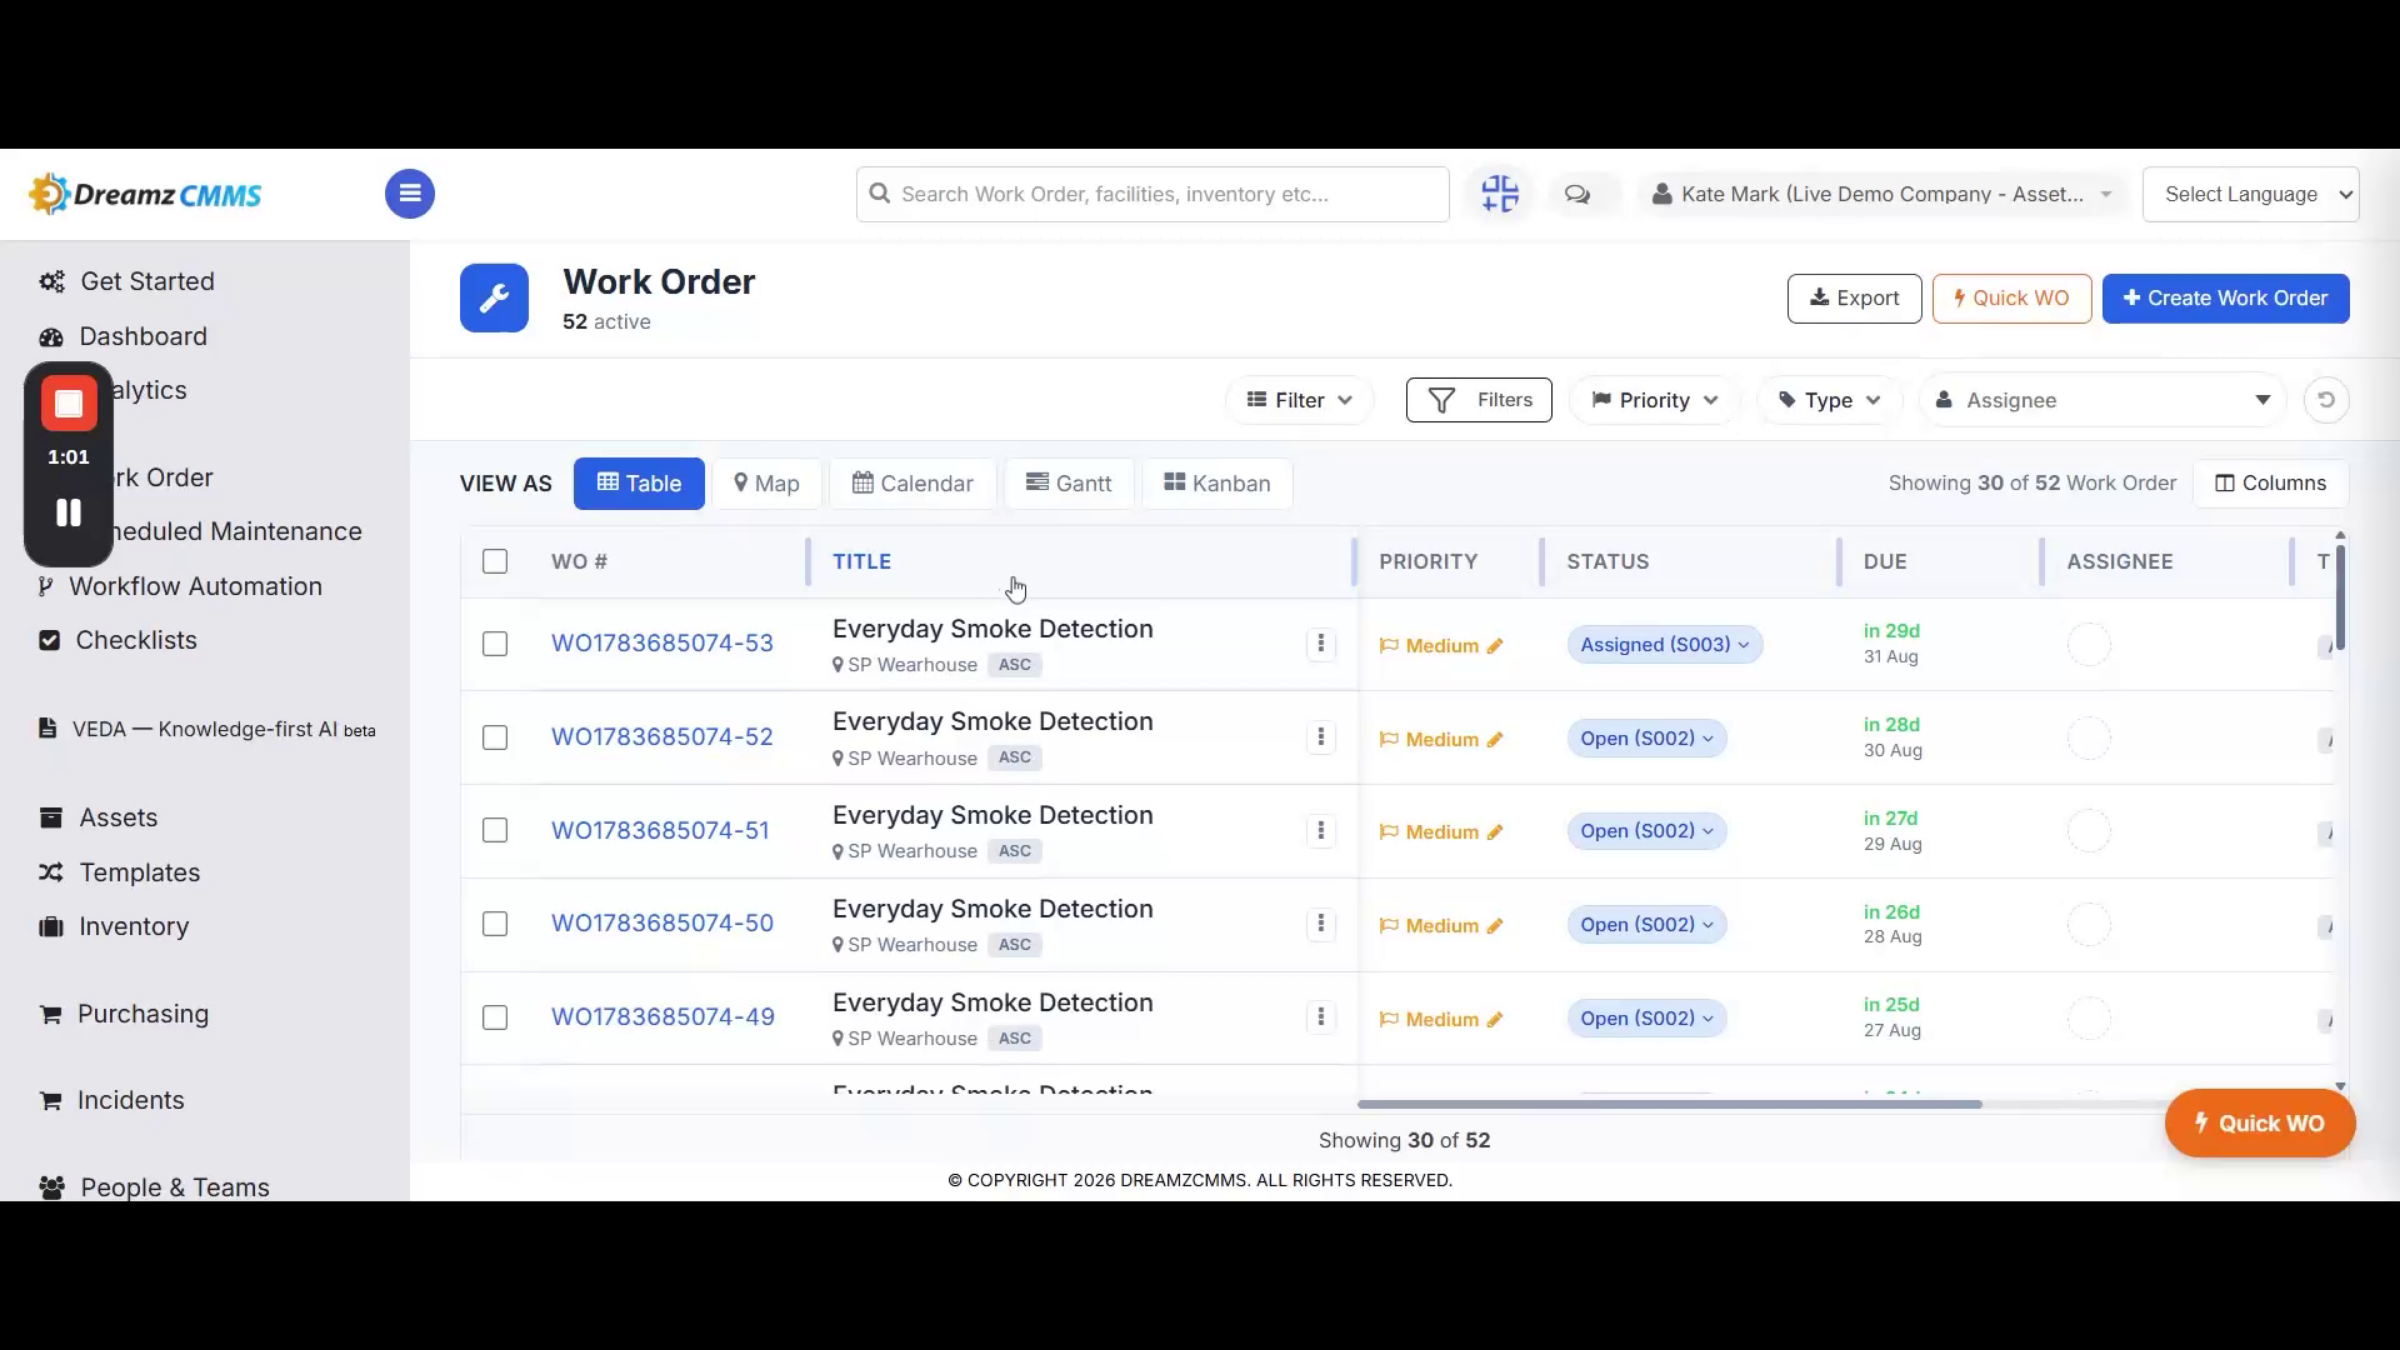
Step 14 – Work Order Scheduler Visibility
If a scheduler is created for a work order, it becomes available in the work order list automatically. Searching for the scheduled job — for example, "Everyday Smoke Detection" — shows it appearing right alongside your other scheduled work orders.
Step 15 – Assigning Work Orders to Technicians
From here you can assign the generated work order to any technician. Once assigned, the technician can access it from the DreamzCMMS mobile app and start working on it.
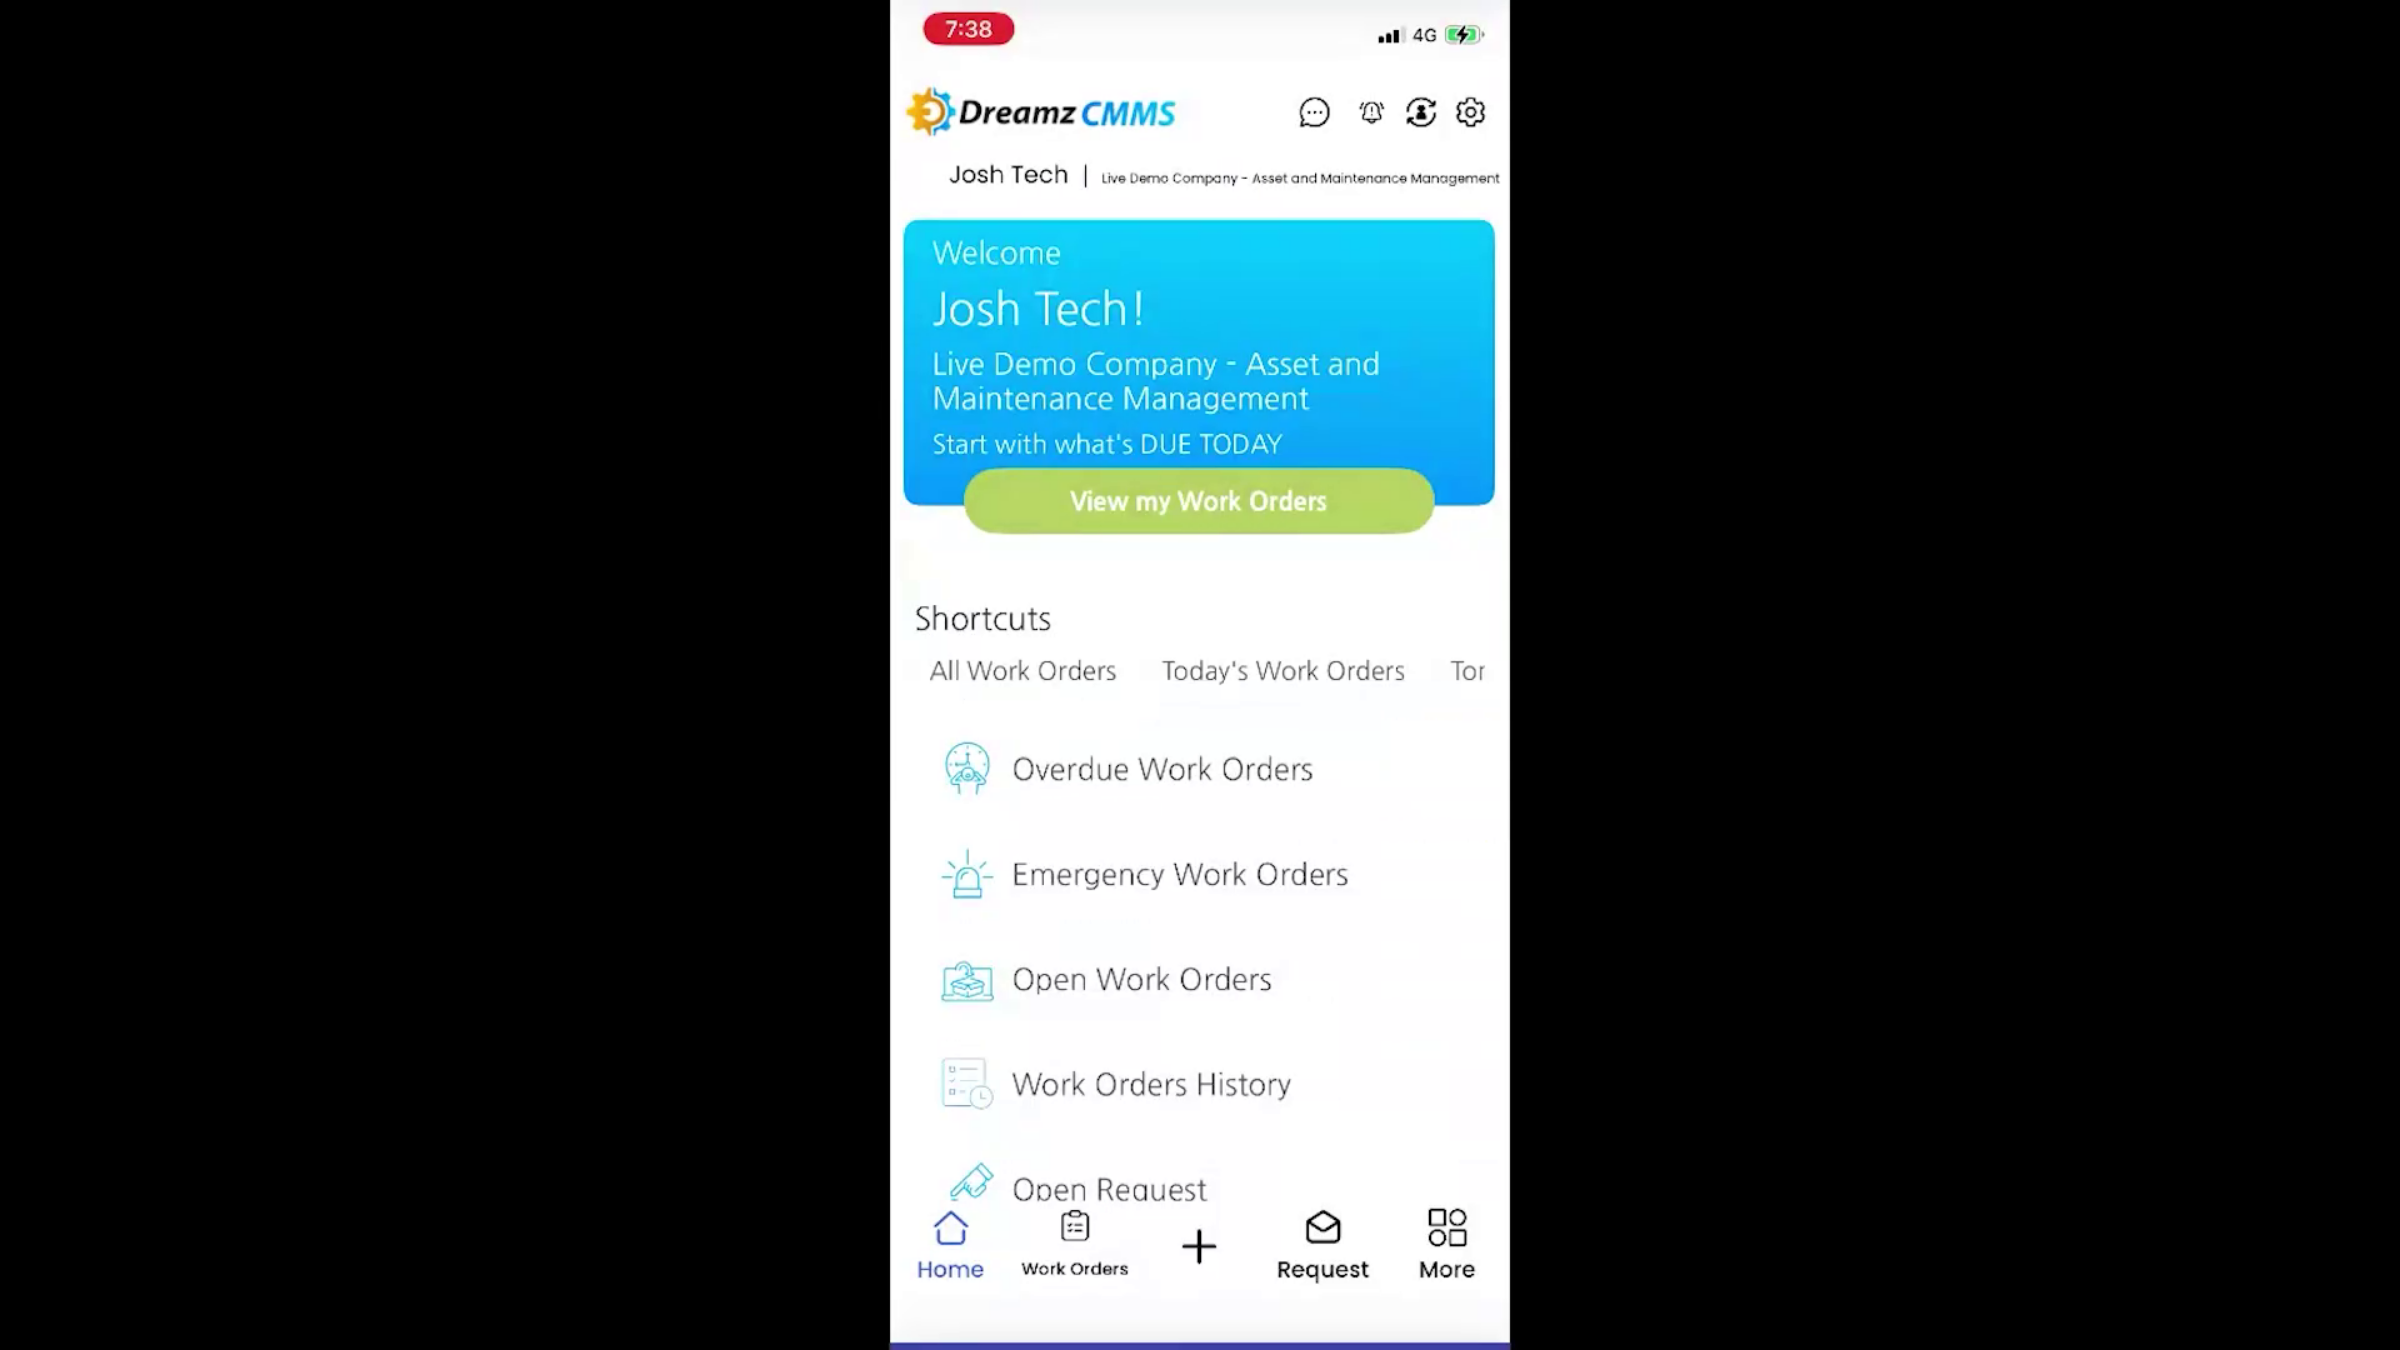
Step 16 – Accessing Work Orders on Mobile
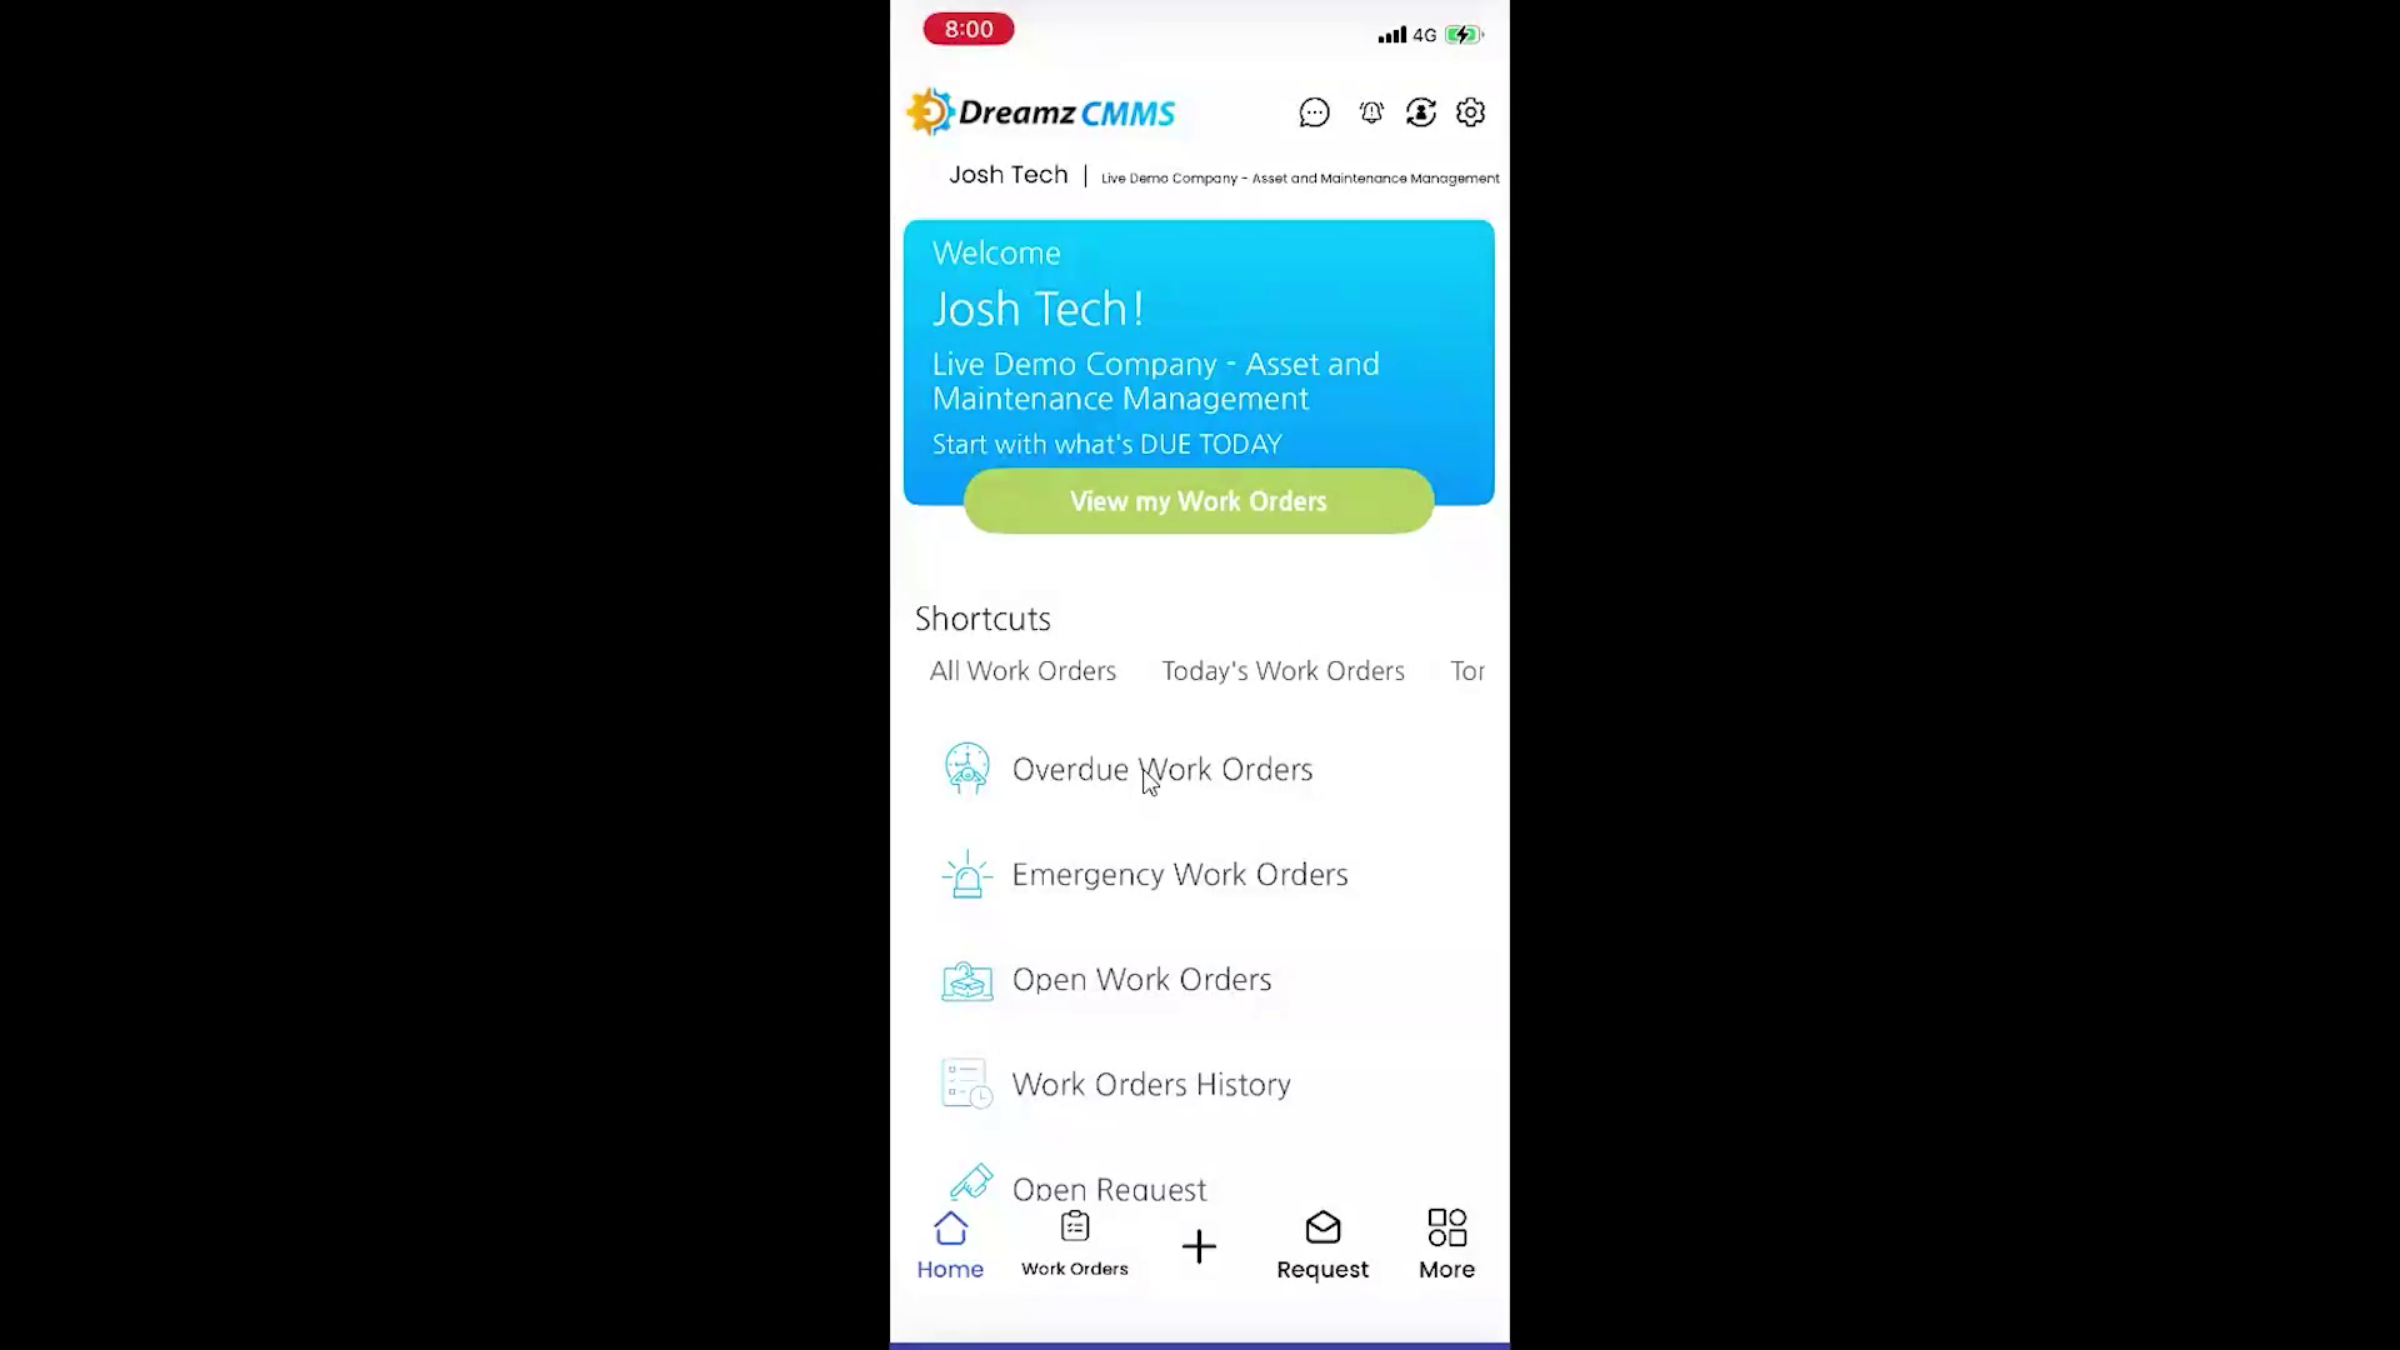
To access the work order on your device, log into the DreamzCMMS mobile app. From the home screen, tap Open Work Orders, search for your job (such as "Everyday Smoke Detection"), and tap it to view its details. Tap either the Play button or Start Working to begin the work order.
Maintenance Plan Schedulers
Step 17 – Maintenance Plan Scheduler Absence from Work Orders
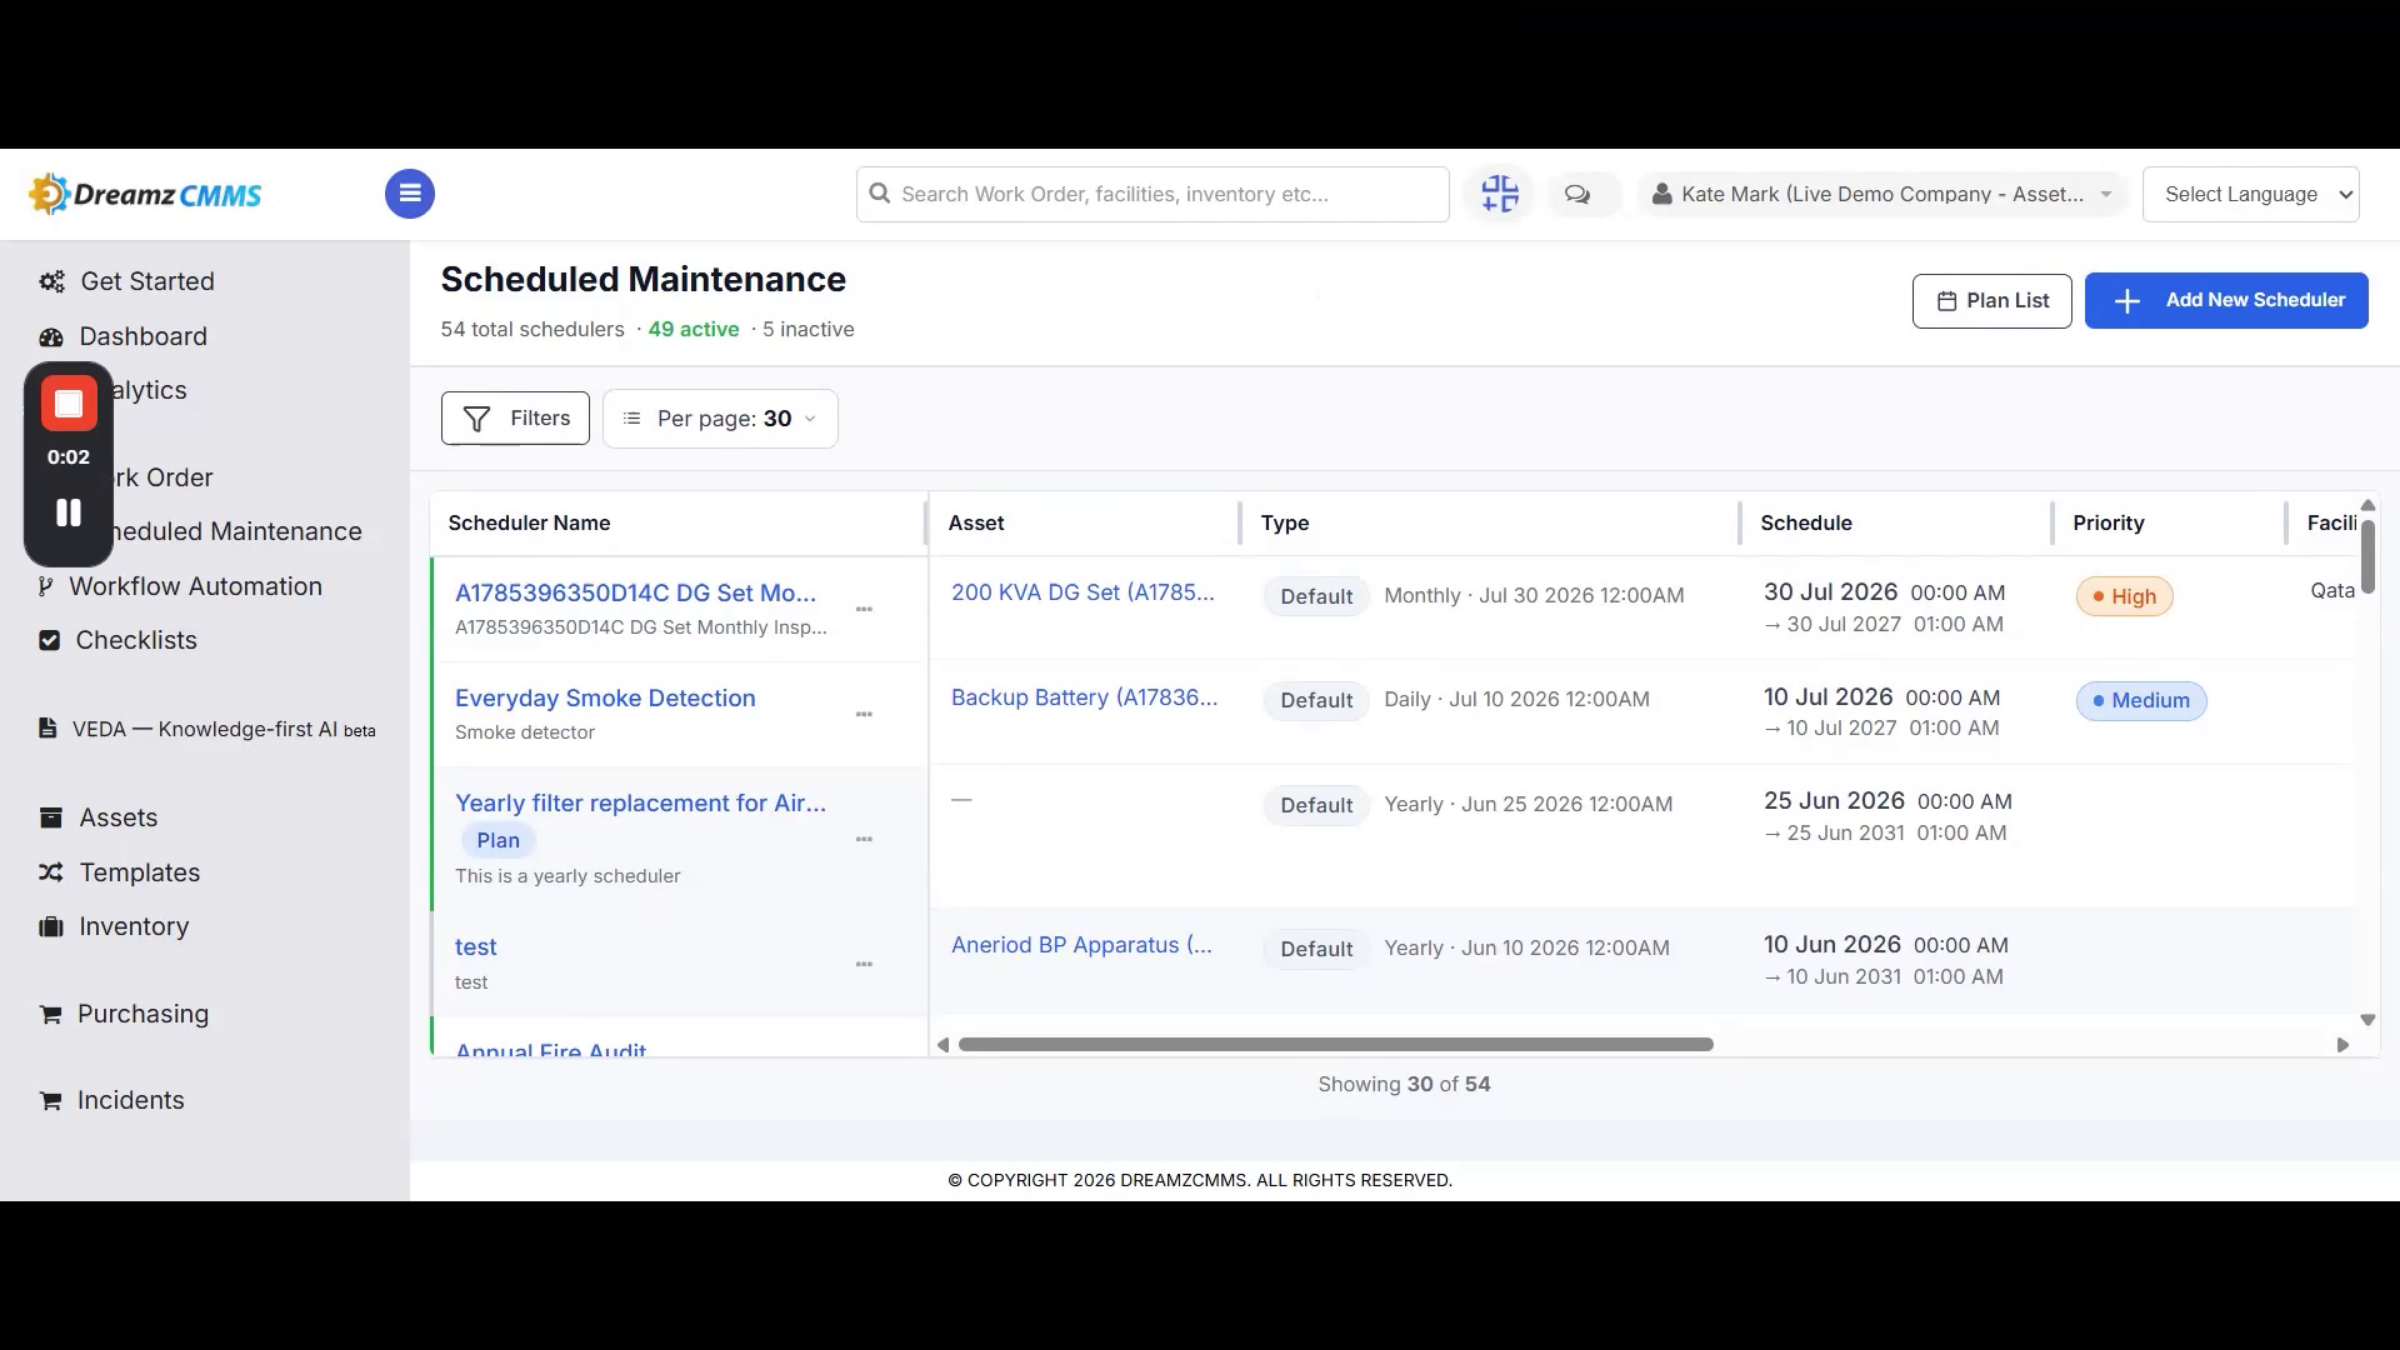
If a scheduler is created as a maintenance plan instead, it will not appear in your daily work order list. Searching for a plan scheduler among work orders returns no records, since a plan doesn't generate a job until you tell it to.
Step 18 – Plan List Section Overview
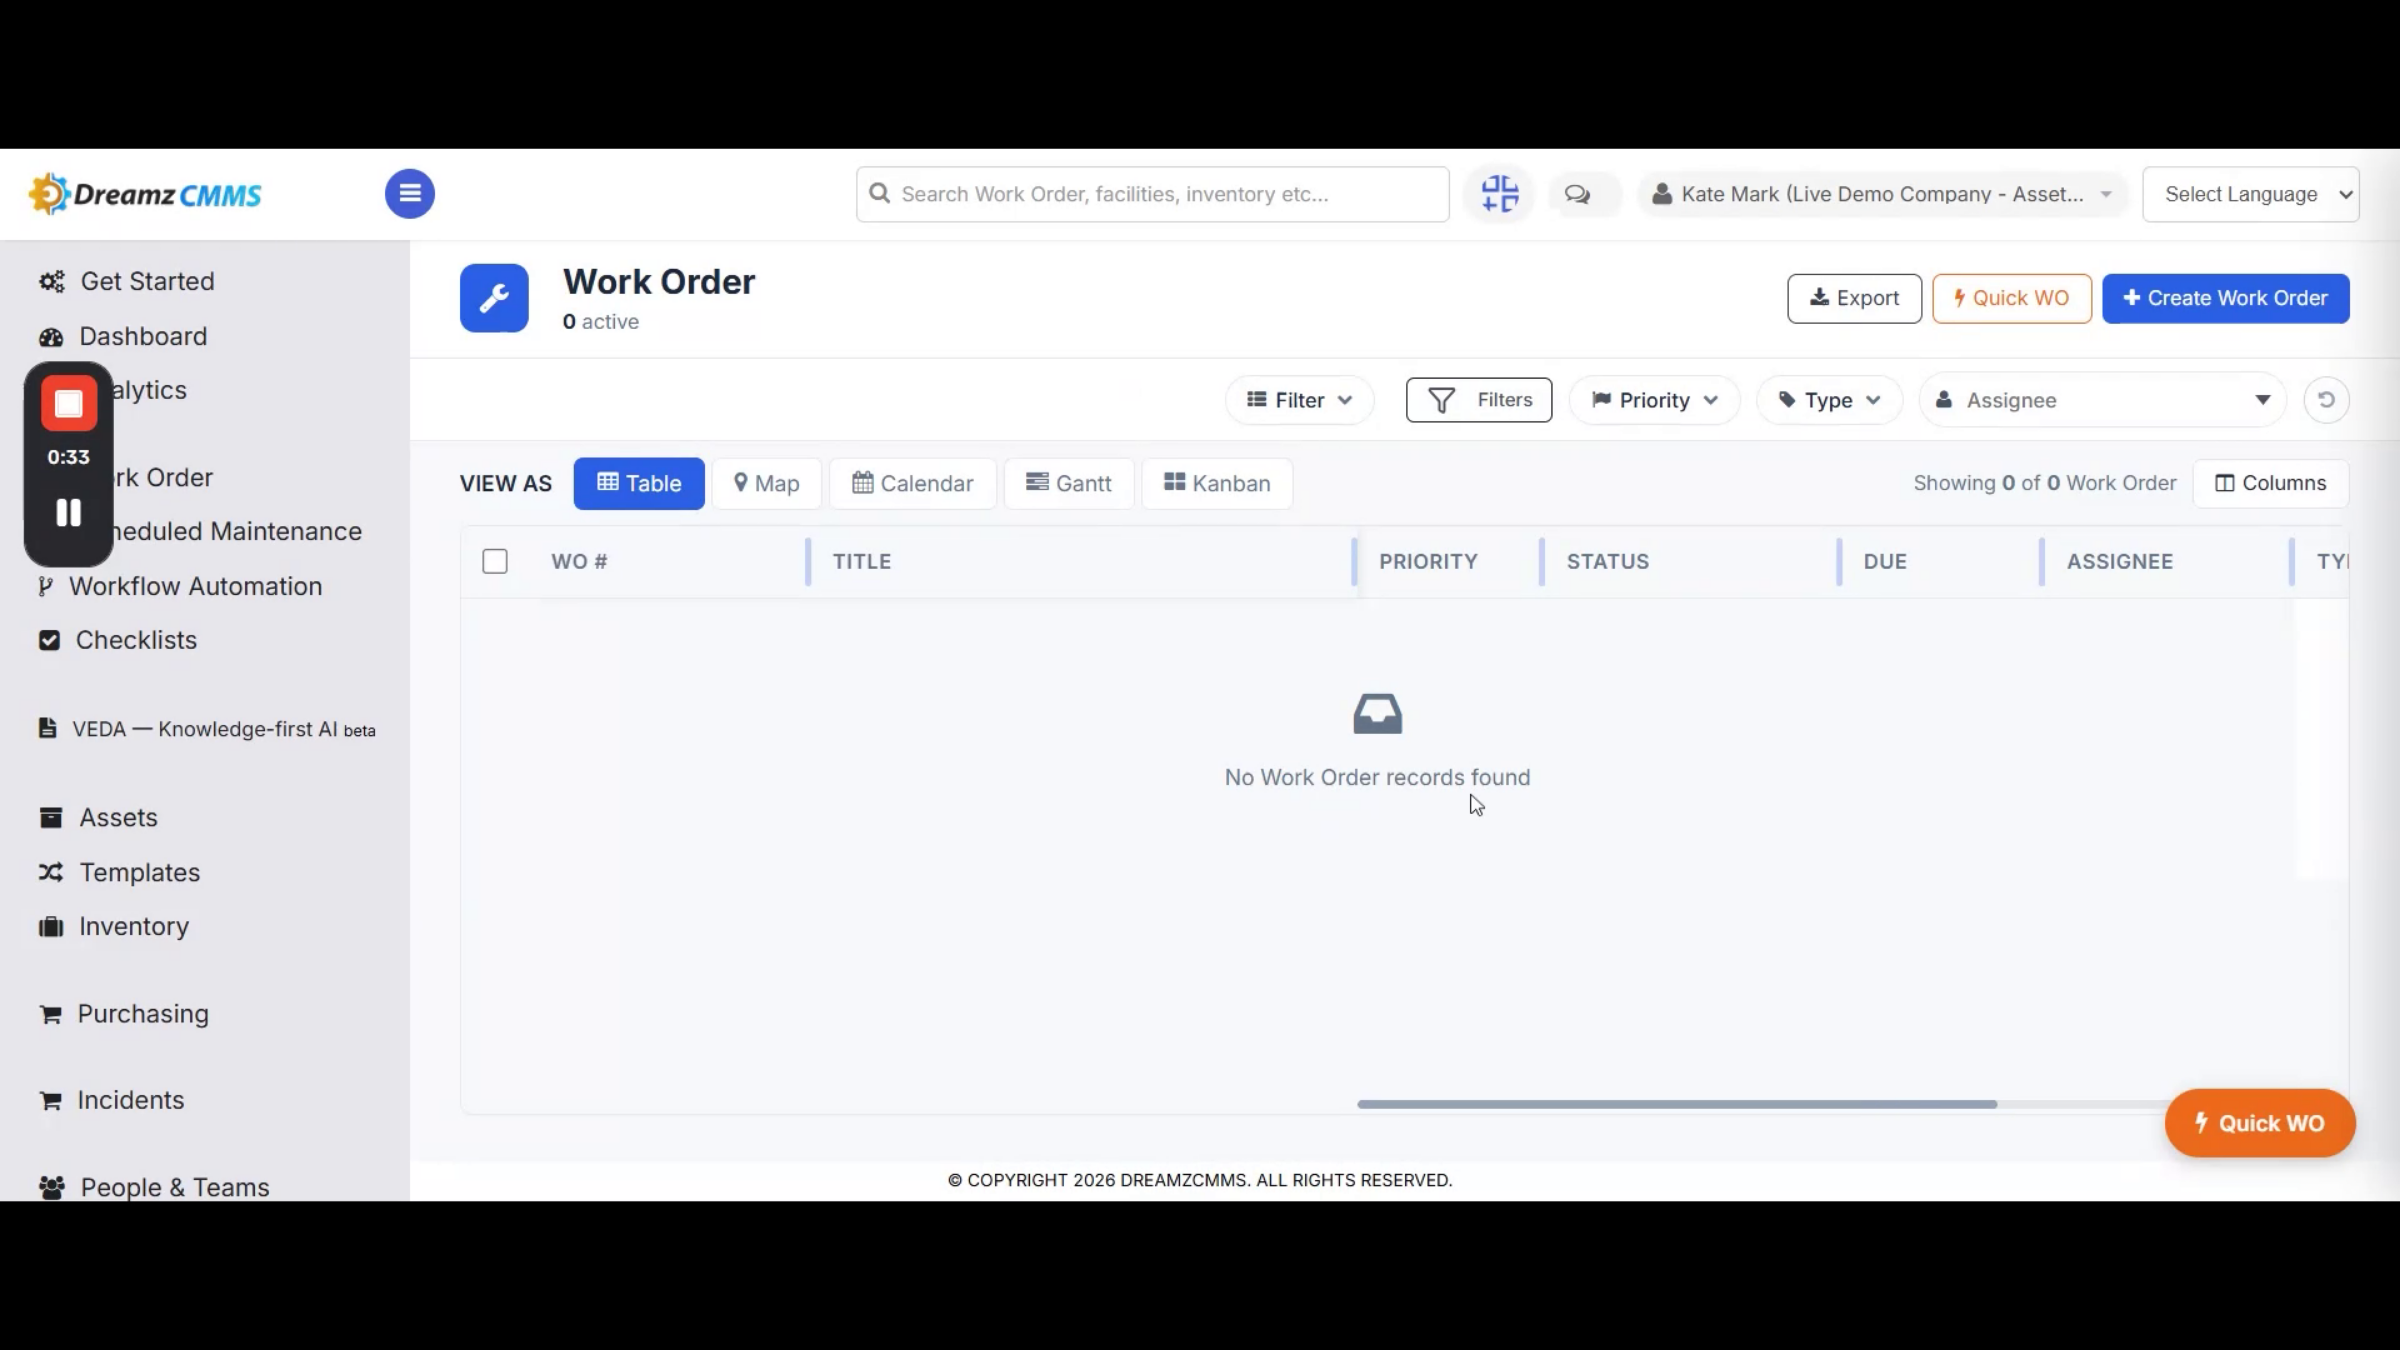
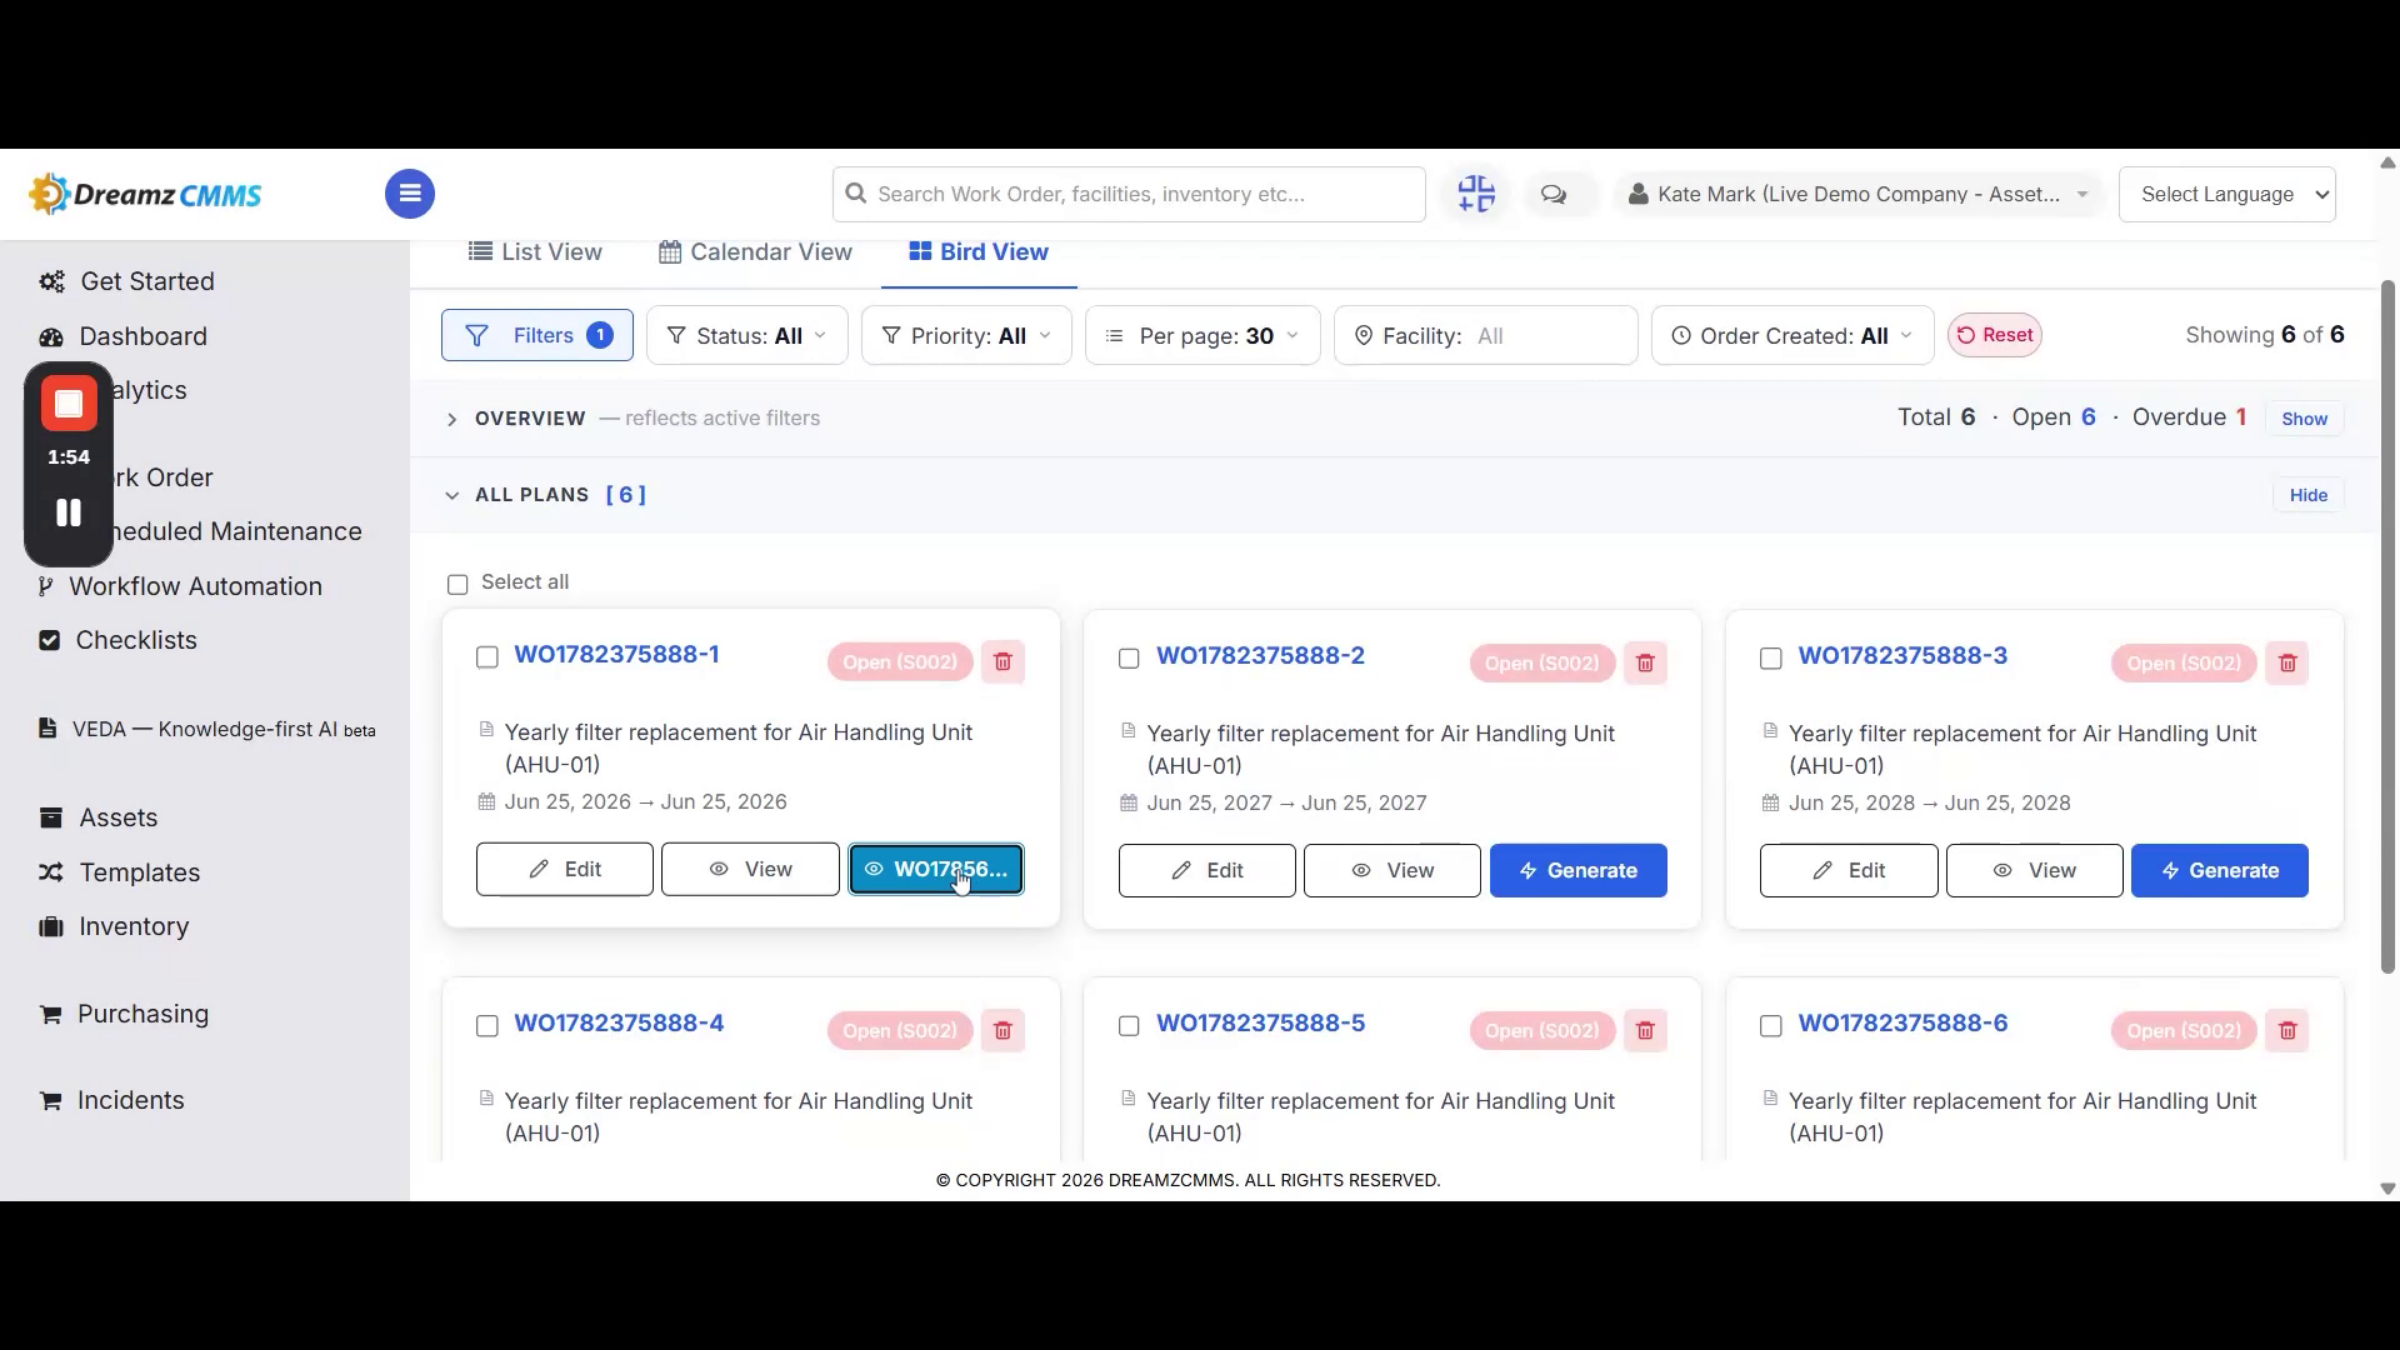
All plan schedulers appear in the Plan List section instead. Clicking Plan List redirects you to the Plan Listing page, where you'll find all your plans.
Step 19 – Plan List View Modes
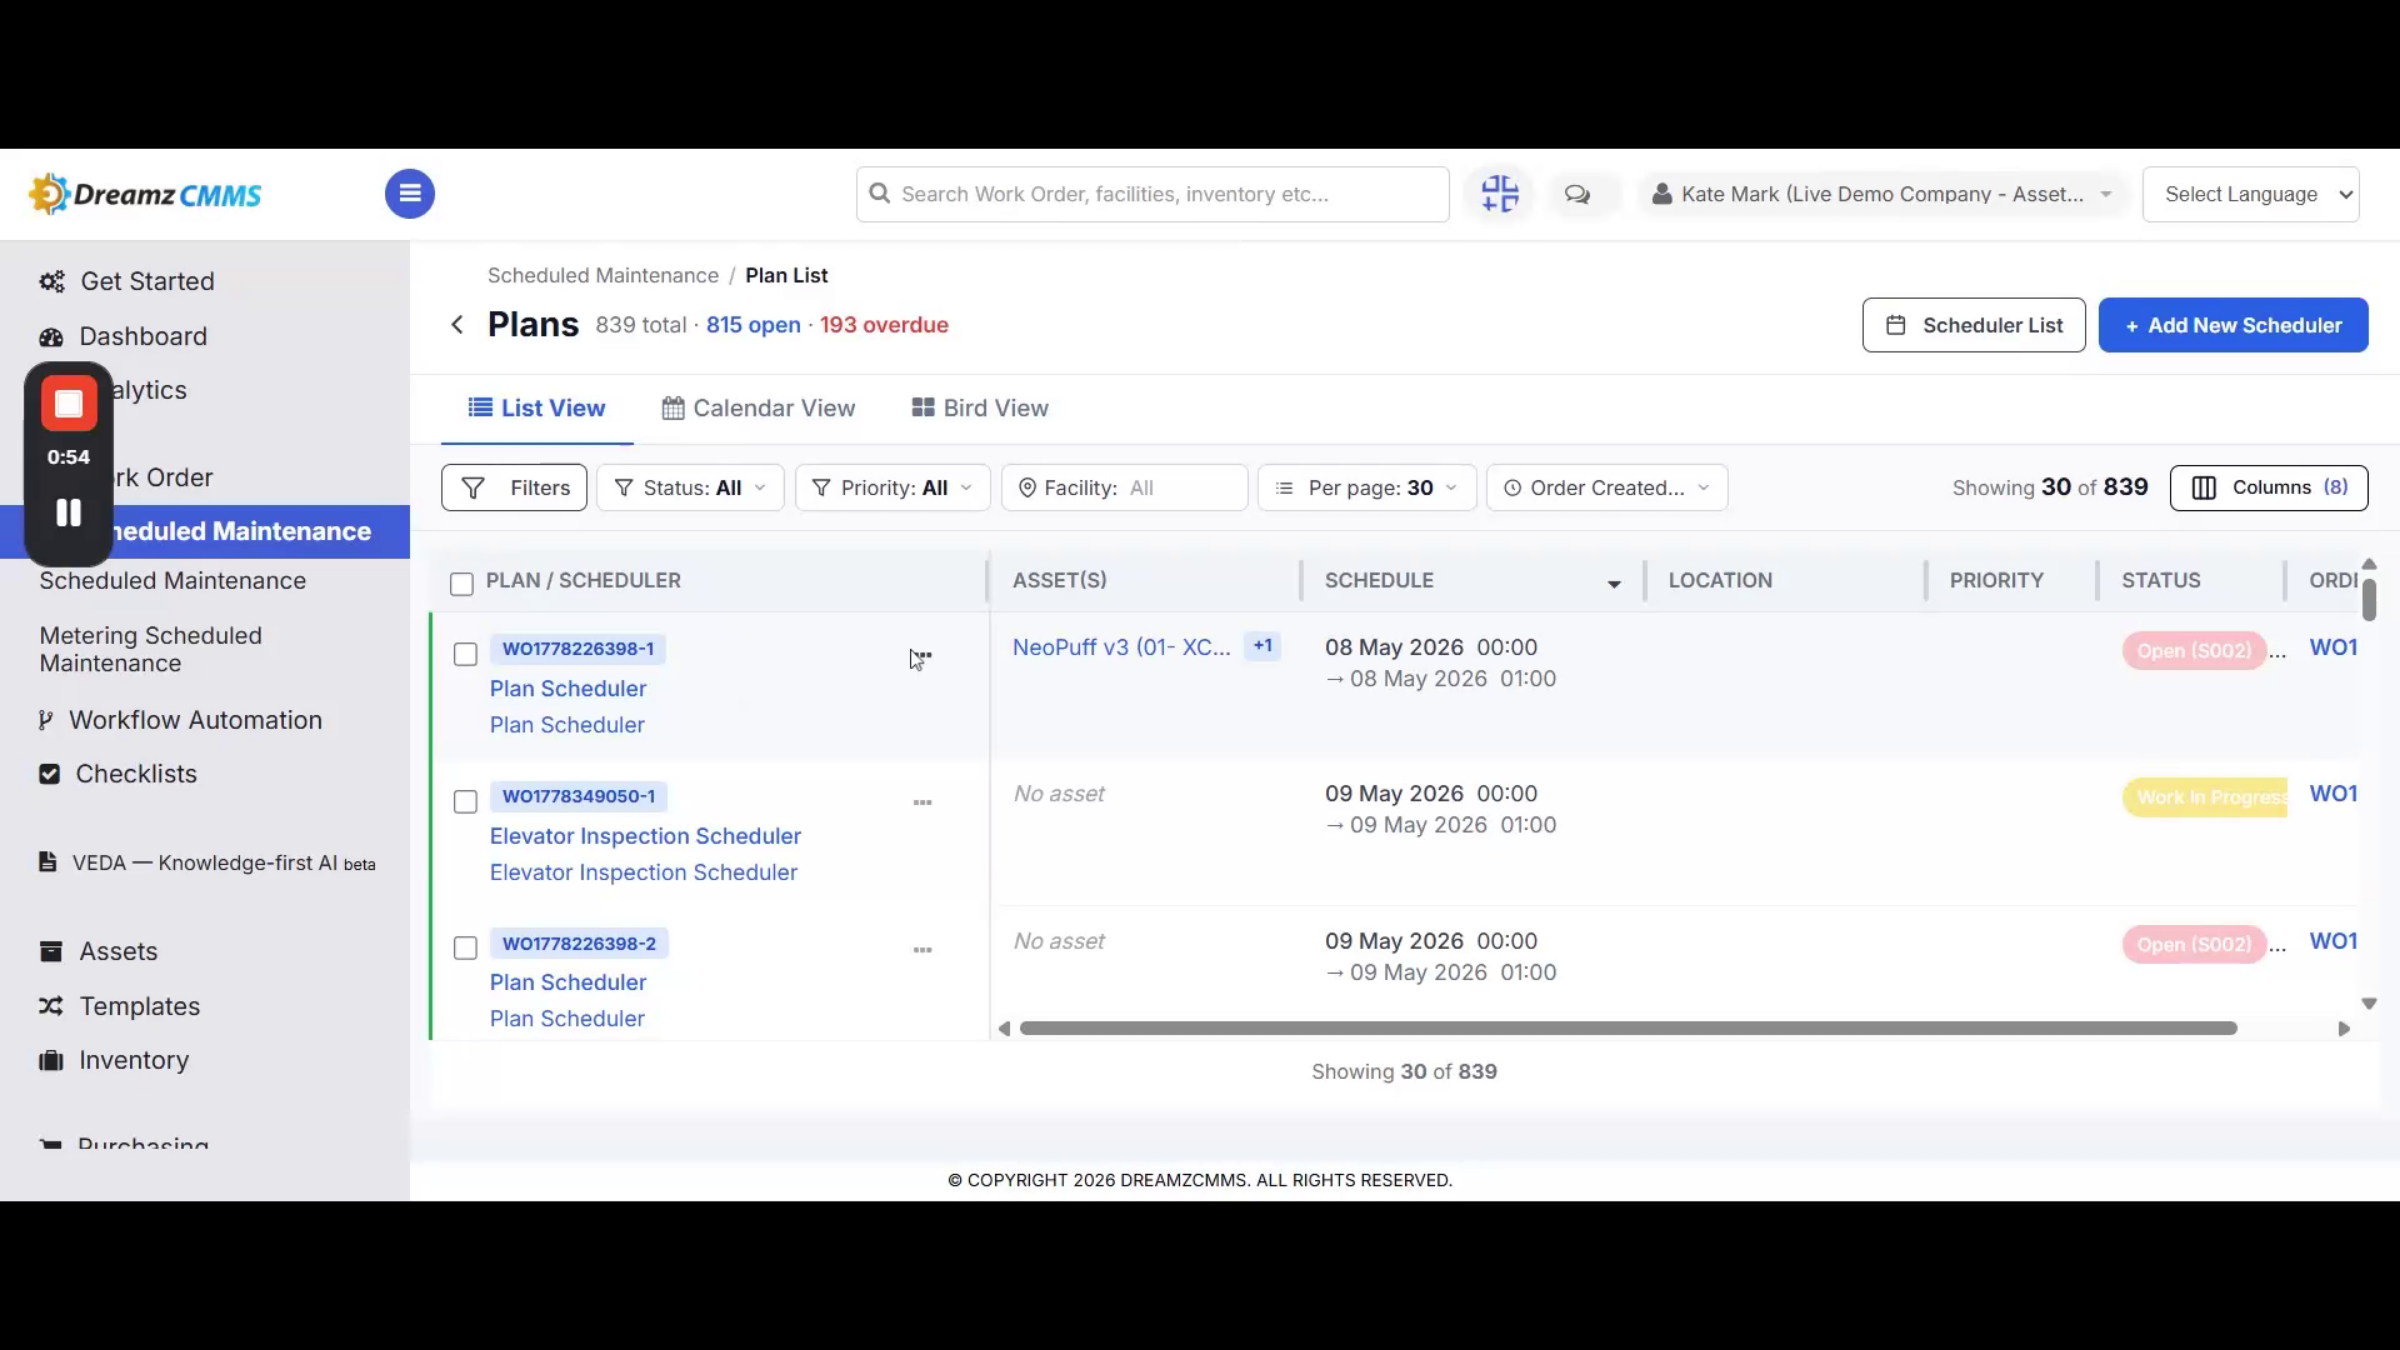
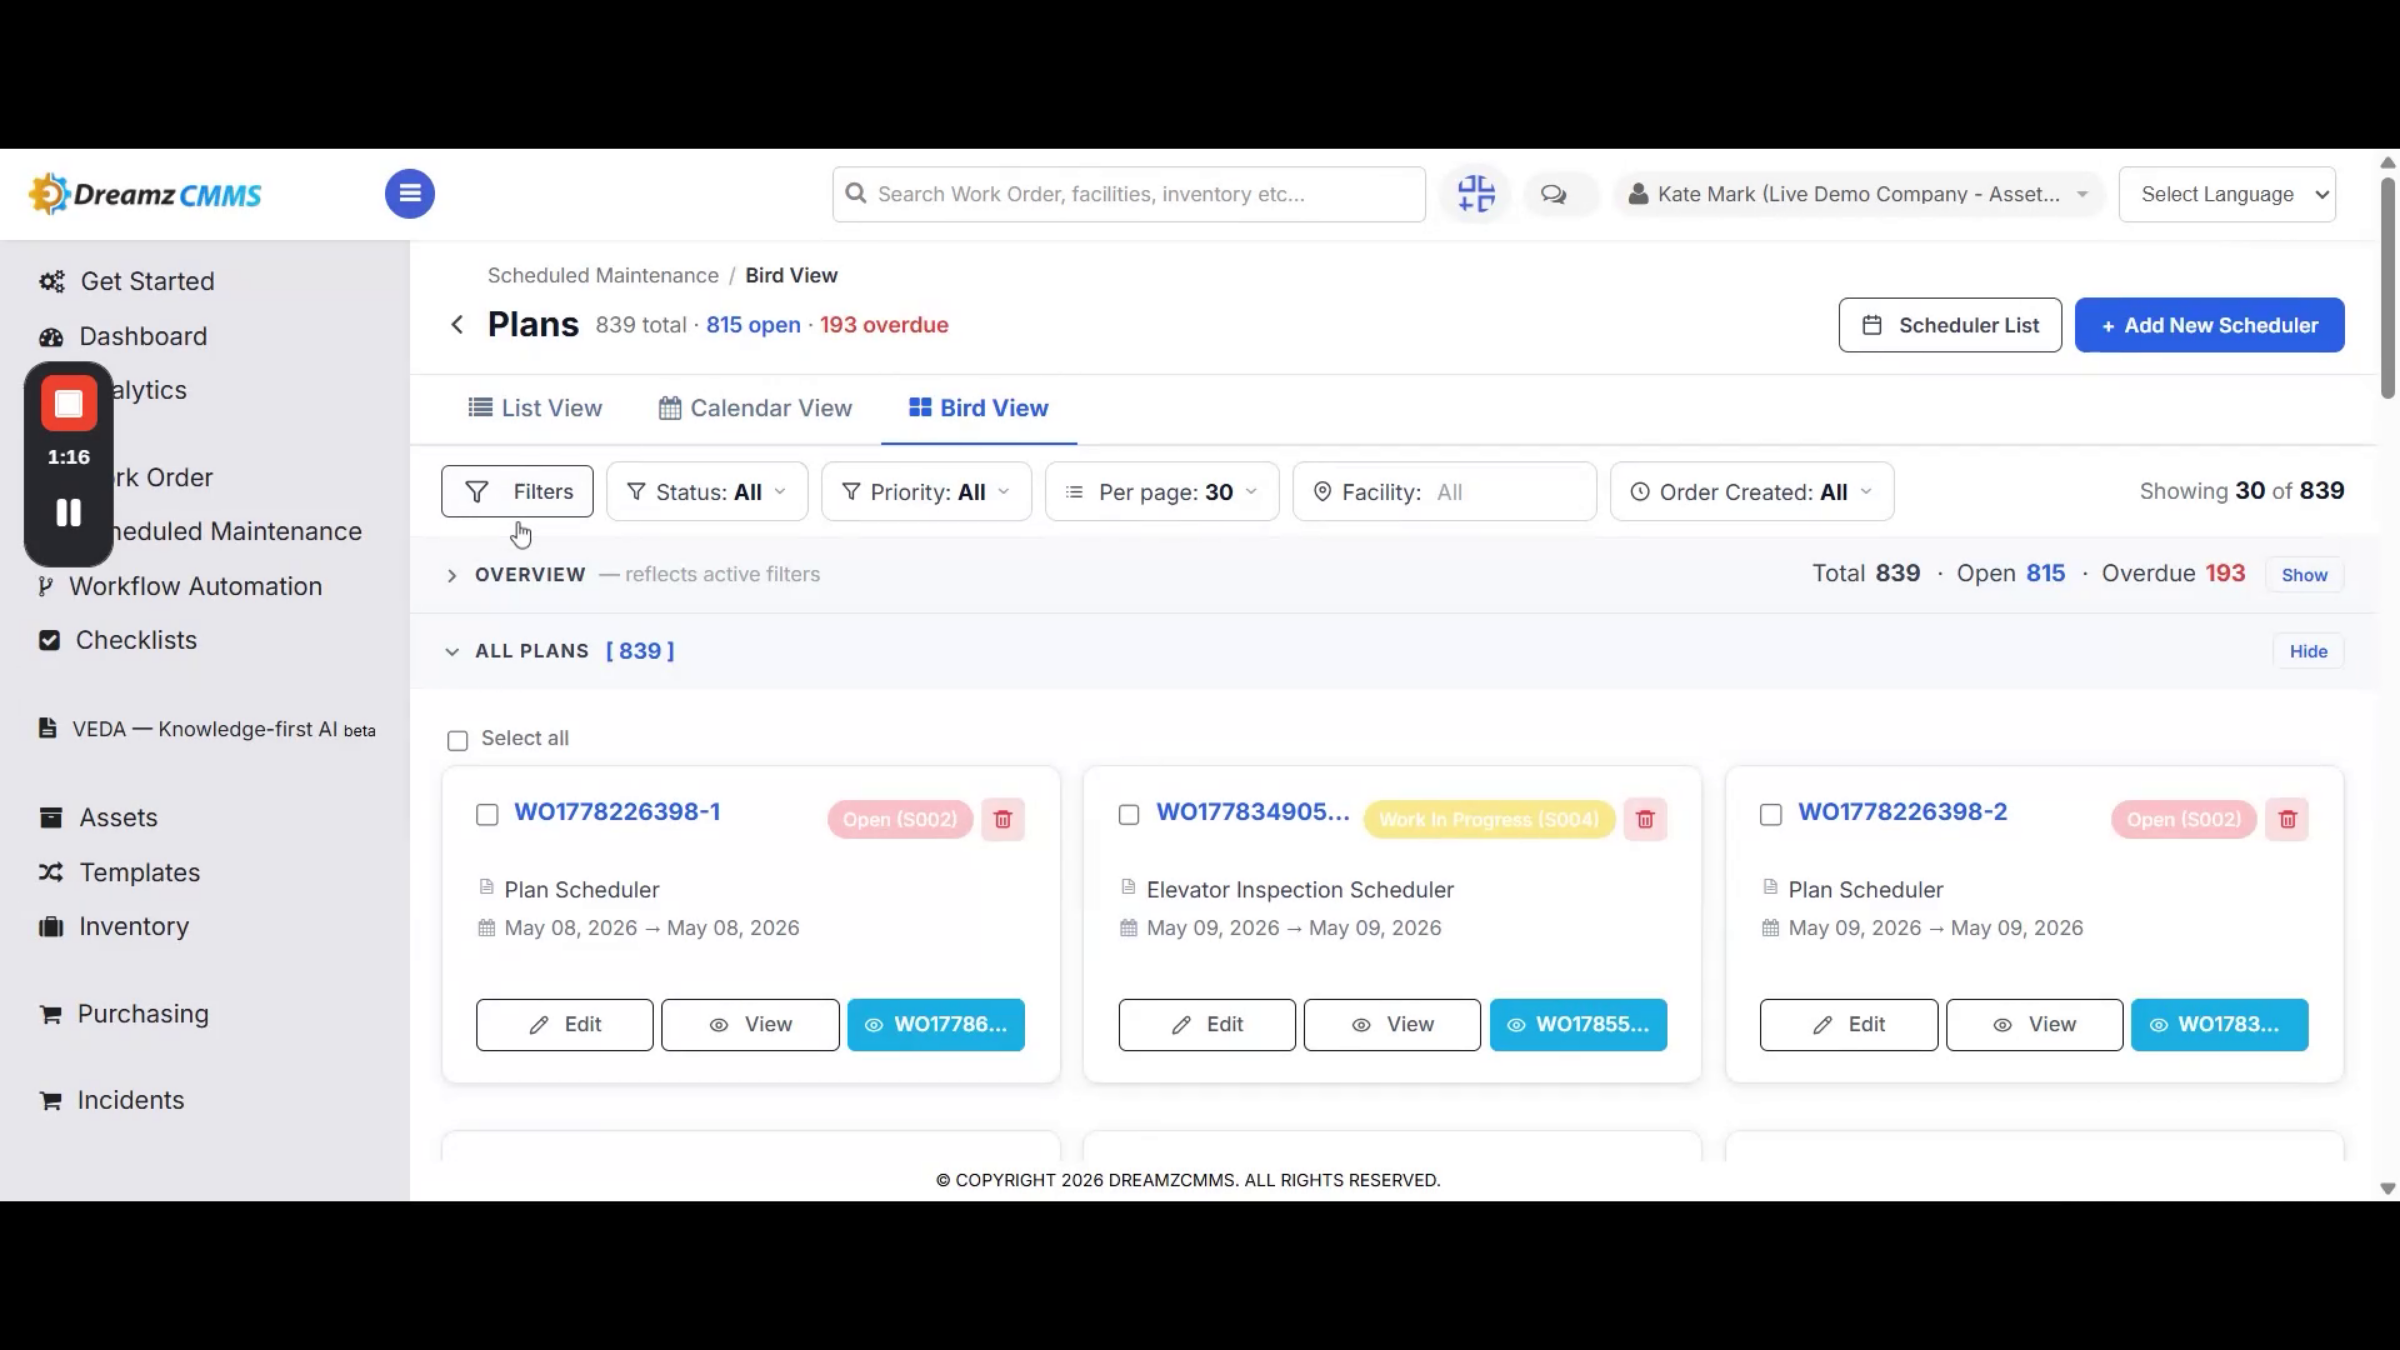
The Plan List offers three different views to browse your plans: List, Calendar, and Bird's Eye View.
Step 20 – Generating Work Orders from Plans
Search for a planned scheduler, then generate a work order from it by clicking the Generate button. Once the work order is created successfully, its work order number appears right there in the plan.
Step 21 – Assigning Generated Work Orders
Click the generated work order number to open it and assign it to any technician. Once assigned, the technician can access it from the DreamzCMMS mobile app to start working on it — log in to the app on your device to pick it up.
Step 22 – Completing the Scheduled Maintenance Workflow
From the home screen, tap Open Work Orders, search for your assigned job, and tap it to view its details. Tap either the Play button or Start Working to begin the work order. This completes the full scheduled maintenance workflow, from scheduler creation to a technician starting the job in hand.
After Setup — What's Next?
With schedulers in place for both immediate work orders and future maintenance plans, your team has a repeatable system for preventive maintenance that doesn't rely on anyone remembering to create a job manually. Once you're comfortable with the core workflow, you can:
- Build out a library of schedulers covering every recurring task across your facilities, from daily checks to yearly inspections.
- Use the Plan List's Calendar or Bird's Eye View to spot upcoming maintenance load before it becomes a bottleneck.
- Attach checklists to every scheduler so technicians always know exactly what the job requires.
Ready to see scheduled maintenance in action? Contact DreamzTech to schedule a personalized demonstration.
Tips for Maintenance Planners
- Use maintenance plans instead of work order schedulers for tasks that need review before they're dispatched — plans won't clutter your active work order calendar until you generate them.
- Attach a checklist to every scheduler so completed jobs are consistent no matter which technician picks them up.
- Set up notifications for a group of users on critical schedulers so coverage doesn't depend on one person seeing the alert.
- Use the Scheduler List filters (facility, status, date) regularly to catch schedulers that may need frequency or assignee updates.
Frequently Asked Questions
What's the difference between a work order scheduler and a maintenance plan?
A work order scheduler books the job directly onto your work order calendar and list. A maintenance plan does not book your calendar — it waits in the Plan List until you generate a work order from it manually.
Do I have to assign a requester when creating a scheduler?
No. The Requester tab lets you select Without Requester if you'd rather proceed without assigning one, alongside Employee, Customer, or Subcontractor options.
Can I attach an existing checklist to a scheduler?
Yes. From the Resources tab you can select tasks from an existing checklist and add it to the scheduler, so every generated work order includes it automatically.
How do I turn a maintenance plan into an actual job?
Find the plan in the Plan List and click Generate. Once the work order is created, its number appears in the plan, and you can open it to assign a technician.