Managing Asset Lifecycle with DreamzCMMS RFID App
Whether you run one warehouse or fifty, knowing exactly where every asset is — and who has it — is a constant challenge. DreamzCMMSRFID gives your team one app to track assets with complete accuracy and real-time visibility, from the moment an item arrives to the day it's retired.
Overview
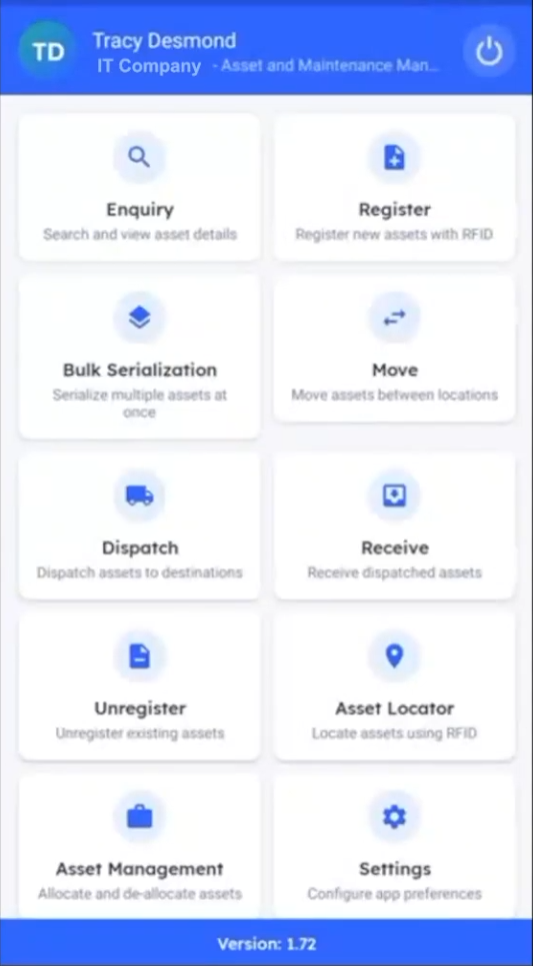
DreamzCMMSRFID tracks every stage of an asset's lifecycle in one centralized platform. New items are tagged individually through Register, or in bulk through Bulk Serialization when a full shipment arrives, using an RFID scanner's multi-scan mode or a barcode/QR fallback. Once tagged, staff can instantly check what's on hand with Inventory Inquiry or track down a specific item with Asset Locator. Assets can be moved internally between departments and rooms, or transferred between locations using Dispatch and Receive, which logs every item in transit against a unique reference number. When an item needs to be checked out for use rather than moved or sold, Allocation and Deallocation track who has it and why. Fixed RFID readers at exit points add an extra layer of protection, flagging any active asset that leaves without being allocated. Finally, when an asset reaches the end of its life, Unregister removes it from active inventory — giving you a complete, tamper-proof record of every asset from arrival to retirement.
Here is a reference video:
Before You Begin
- You must have the DreamzCMMSRFID app installed on a handheld RFID scanner or mobile device.
- Your locations, and (if you track at that level of detail) buildings, departments, and rooms should already be set up in the system.
- If your exit points use fixed RFID antennas for security monitoring, make sure they're installed and connected before assets start moving through the store or warehouse.
How to Manage the Asset Lifecycle with DreamzCMMSRFID
Step 1 – Register a Single Asset
Every asset's journey starts with getting it into the system. For a single item, use Register. Select the product and the location, and if you track assets at that level of detail, add the building, department, and room. Capturing this information at registration makes it easier to locate, manage, and maintain the asset throughout its entire lifecycle.
Step 2 – Bulk Serialize a Full Shipment
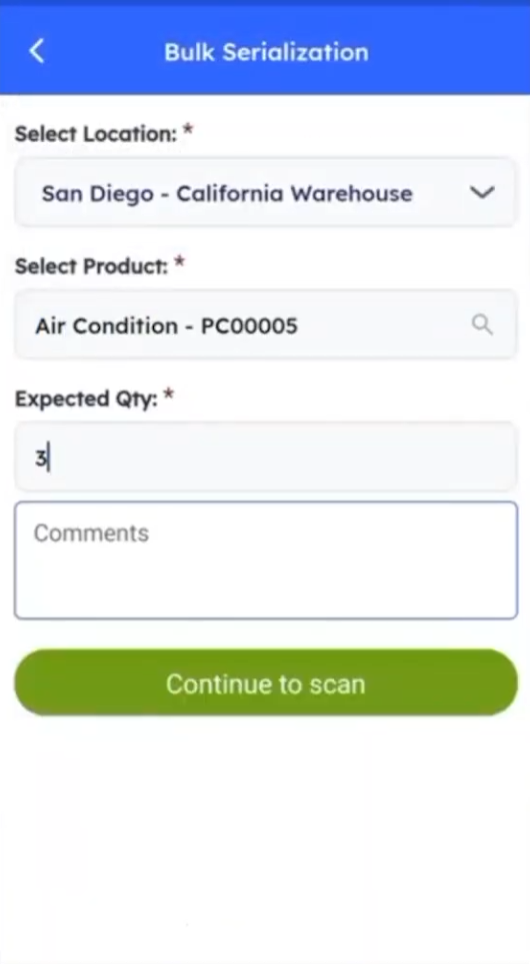
For a full shipment at once, use Bulk Serialization instead. Select the location, the product, and the expected quantity, then continue to scan. Point the handheld RFID scanner at the stock and switch to multi-scan to capture every tag within range in seconds, no matter how large the shipment is. For anything that hasn't been RFID tagged yet, the same scan screen also supports a quick barcode or QR code scan as a fallback, speeding up registration while cutting manual effort.
Step 3 – Check On-Hand Inventory
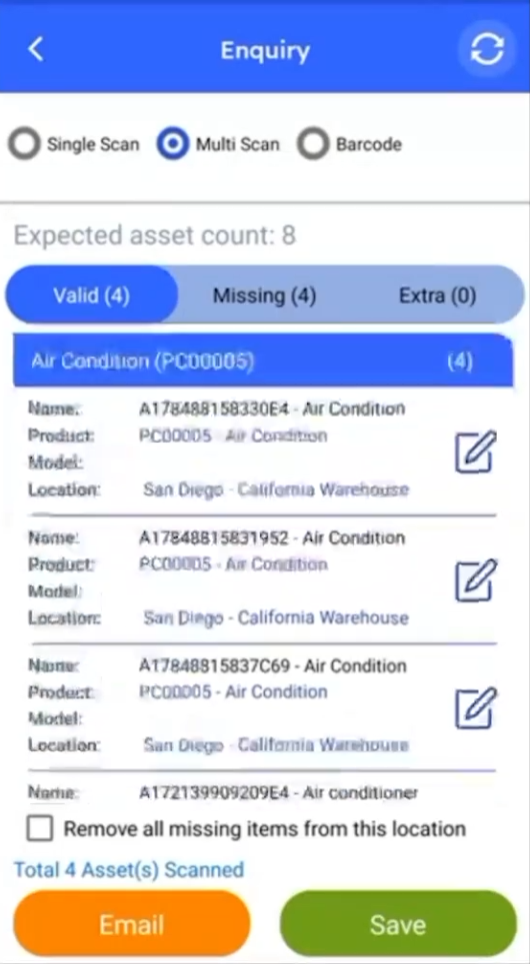
Once stock is registered, checking it is just as simple. Open Inquiry, select the location, and scan to instantly see everything on hand, right down to the individual item.
Step 4 – Locate a Specific Asset
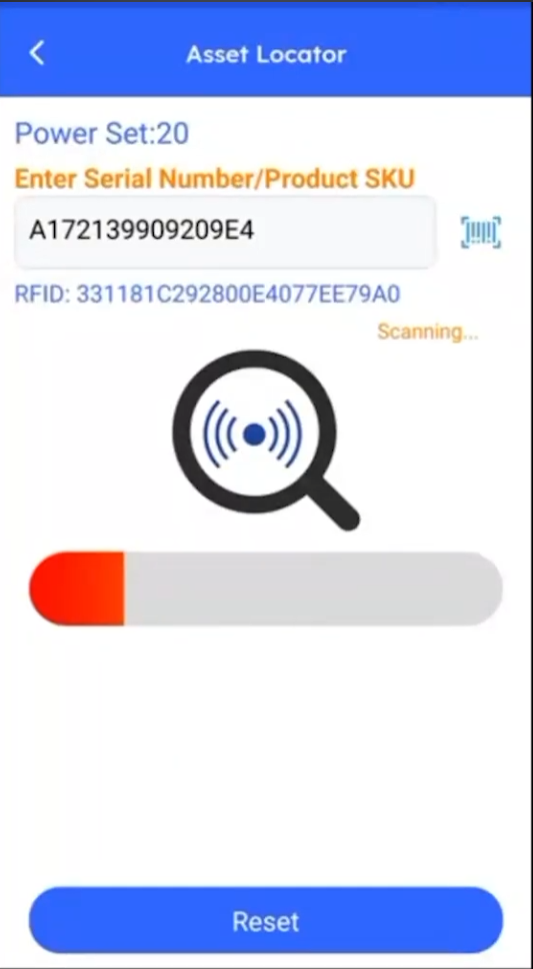
Need to find one specific item fast? That's where Asset Locator comes in. Type in the serial number or product number, or simply search by RFID, and the app guides you straight to it — no more hunting through the stock room.
Step 5 – Move Assets Between Departments
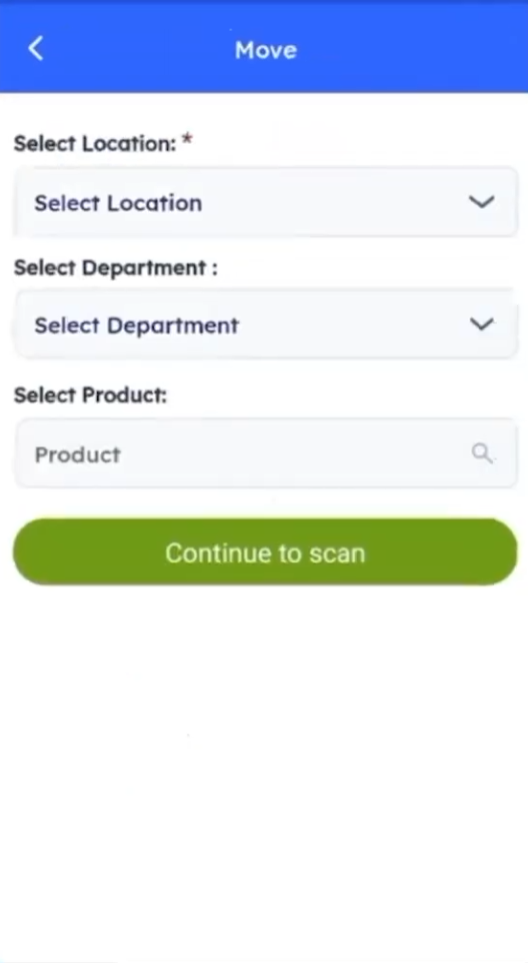
Moving stock between departments or rooms within the same location? The Move feature handles that. Select the location, the department, and the product, then scan to confirm the transfer. Every movement is recorded instantly, keeping asset tracking accurate.
Step 6 – Dispatch and Receive Between Locations
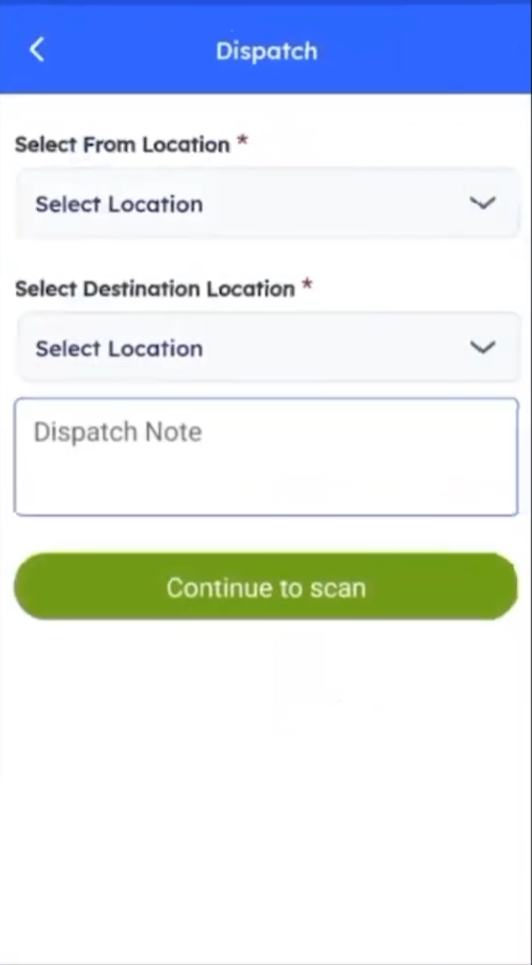
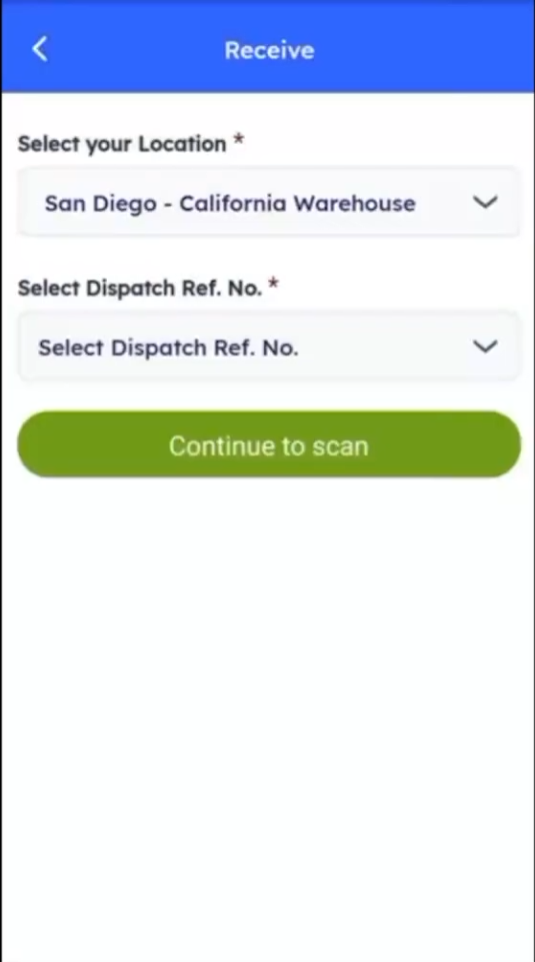
This is where the system becomes especially powerful for any business operating across multiple locations — say you're moving stock from a central warehouse to a store, or directly between two warehouses. From the sending side, open Dispatch, select the From Location and the Destination Location, add a dispatch note if needed, and scan every item being sent. Each item is logged as In Transit under a unique dispatch reference number. On the receiving side, open Receive, select your location, choose the matching dispatch reference number, and scan the incoming stock to confirm arrival — it's automatically added to that location's inventory, with no spreadsheets or phone calls needed to confirm what shipped.
Step 7 – Retire an Asset
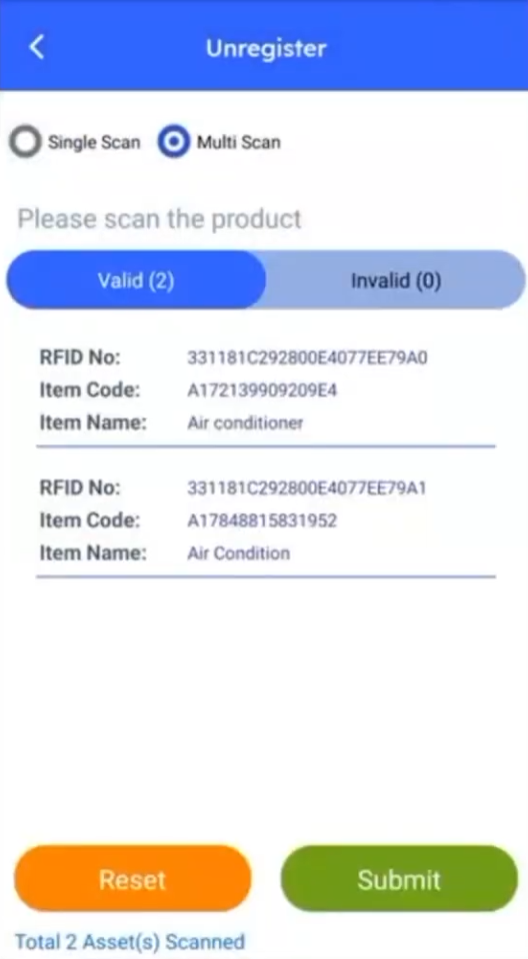
When an asset reaches the end of its lifecycle — whether it's damaged, lost, or retired — use Unregister to remove it from active inventory with the same quick scan, keeping your records accurate and up to date.
Step 8 – Monitor Exit Points for Unauthorized Removal
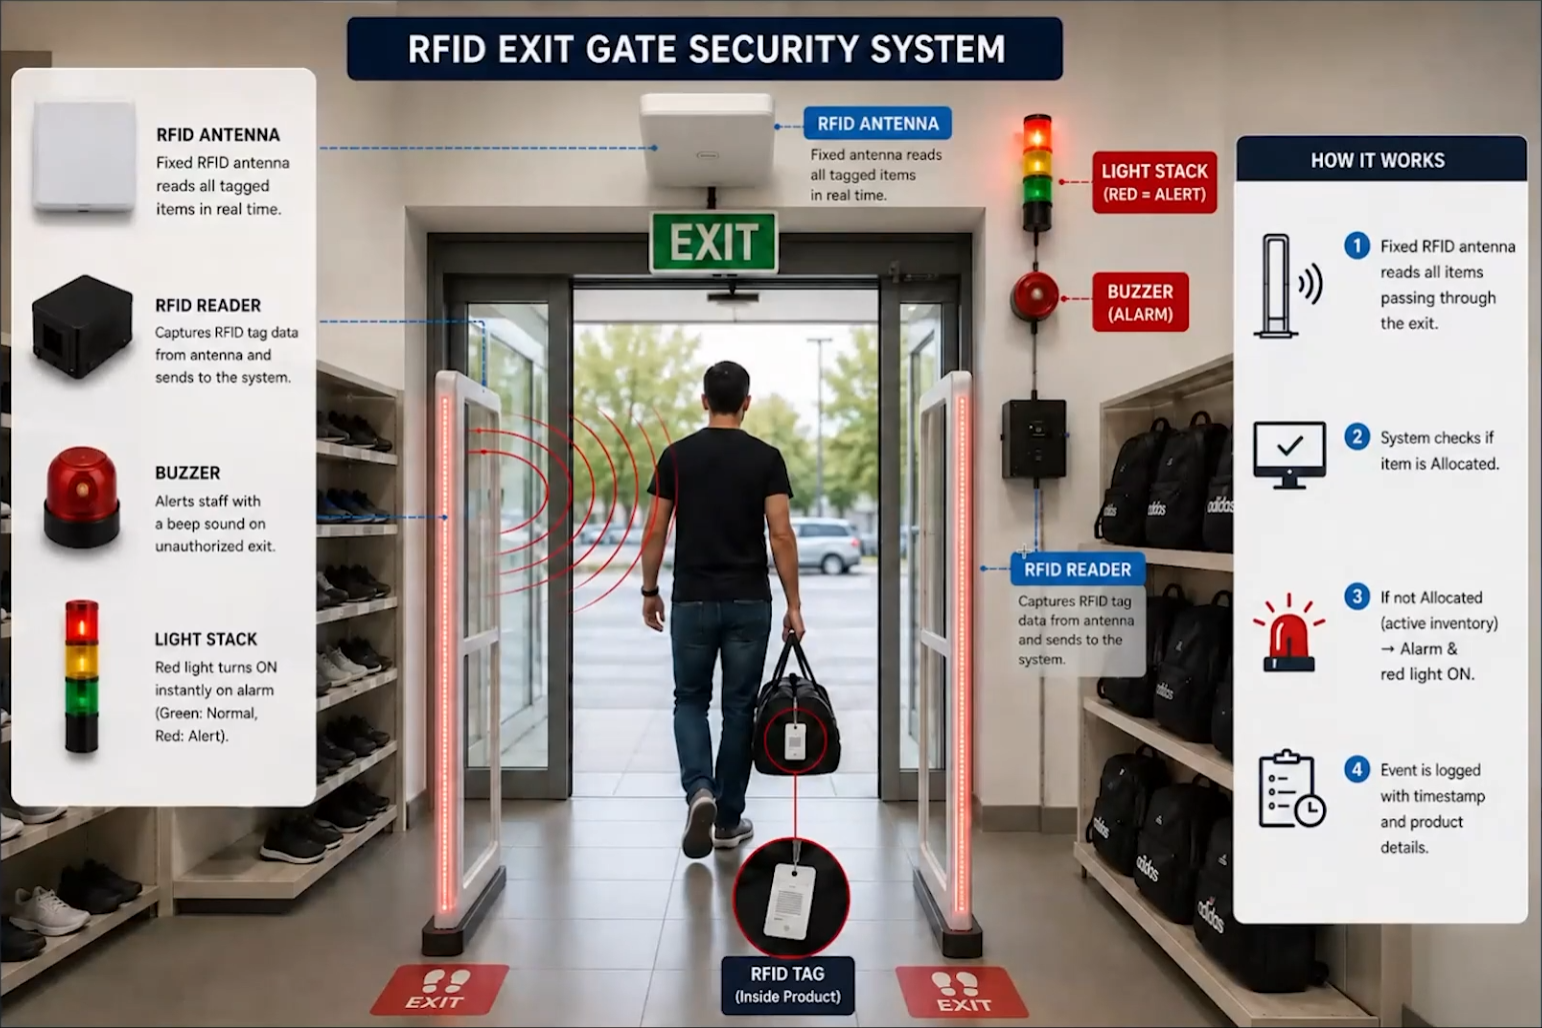
Once an asset is out on the shelf or floor, the system doesn't stop watching. A fixed RFID antenna at the exit reads every item passing through in real time.
Note: If an item that hasn't been allocated and is still marked active passes through the exit, the system instantly triggers an alarm and a red light at the gate. Every triggered event is logged with a timestamp and the asset details, and can be monitored across every store from the web dashboard.
Step 9 – Allocate an Asset to an Employee
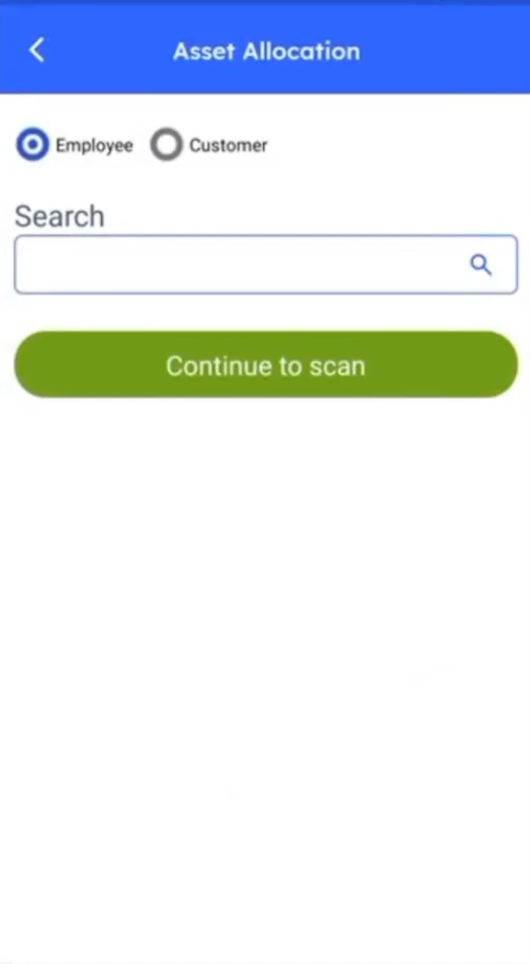
Whenever an item needs to be checked out for use rather than moved or sold, select the asset, choose the employee it's being issued to along with their department, and add a purpose or comment if needed. Scan to confirm, and the item is instantly marked as allocated, linked to that employee with a clear record of who has it, when it was issued, and why.
Step 10 – Deallocate an Asset
When an allocated asset is no longer needed, or the employee is returning it, Deallocation reverses the process. Search by employee or by the item itself, scan to confirm, and it's released back into available inventory, ready to be allocated again or moved as needed. Like every other transaction in the system, every allocation and deallocation is timestamped and logged for complete accountability.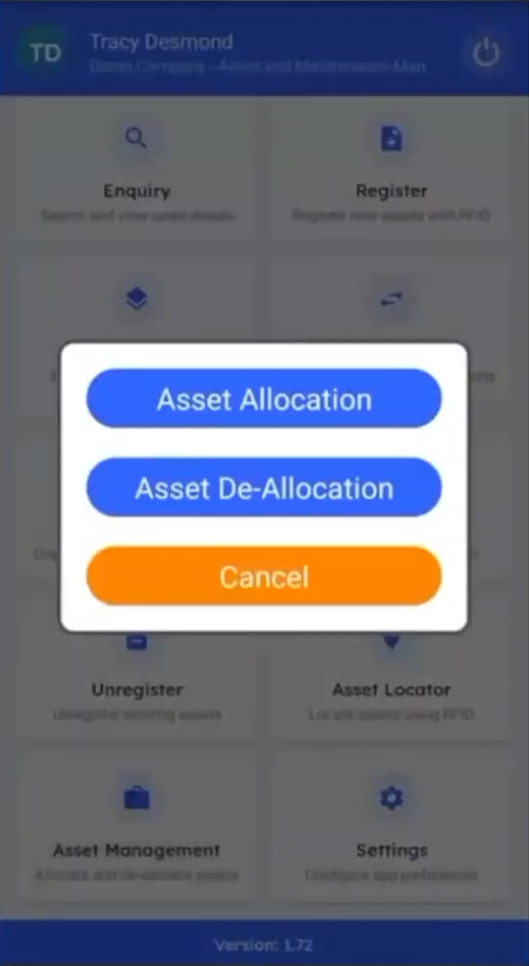
After Tracking Your Assets — What's Next?
With assets registered, checked, moved, transferred, allocated, and retired through the app, your team has full lifecycle visibility backed by a tamper-proof record of every transaction. Once you're comfortable with the core workflow, you can:
- Switch over to the web portal and dashboard, where your management team monitors every antenna across every location in real time.
- Review exit-gate alarm logs regularly to catch unauthorized removals before they become losses.
- Pull allocation and deallocation history for any employee or asset to confirm accountability at a glance.
Ready to see DreamzCMMSRFID in action? Contact DreamzTech to schedule a personalized demonstration.
Tips for Warehouse and Floor Teams
- Use Bulk Serialization with multi-scan for incoming shipments instead of registering items one at a time.
- Always confirm the matching dispatch reference number before scanning a receipt, so transfers reconcile cleanly on both ends.
- Allocate assets to a specific employee (not just a department) whenever possible — it makes deallocation and accountability much faster later.
- Treat an exit-gate alarm as an immediate action item — it usually means an asset needs to be allocated or unregistered before it leaves the building.
Frequently Asked Questions
What happens if an unallocated asset is carried past the exit?
A fixed RFID antenna at the exit detects it instantly, triggers an alarm and a red light at the gate, and logs the event with a timestamp and the asset's details.
What's the difference between Move and Dispatch/Receive?
Move handles transfers between departments or rooms within the same location, while Dispatch and Receive track transfers between two different locations, complete with a dispatch reference number.
How do I check out an asset to a specific employee?
Use Allocation — select the asset, choose the employee and department, add a purpose if needed, and scan to confirm. The asset is then linked to that employee with a full record of when and why it was issued.
What if an item hasn't been RFID tagged yet?
The same scan screen supports a quick barcode or QR code scan as a fallback, so untagged items can still be registered and tracked.