Integrating DreamzCMMS with Sage Intacct
If you're already running Sage Intacct, your fixed assets live on the ledger — but there's usually no live link back to the asset itself, its maintenance history, or its depreciation and actual condition. DreamzCMMS closes that gap with a native Sage Intacct integration, so your asset data and your accounting stay connected instead of living in two disconnected systems.
Overview
The Sage Intacct integration is a native feature of DreamzCMMS, not a custom build or a third-party connector. It covers three things that matter: how the integration is configured, how an asset syncs between the two systems, and what shows up in your fixed asset reporting. Setup starts with syncing master data — account groups, dimensions, and locations — then mapping those accounts to fixed assets, inventory, payables, and receivables. From there, every asset carries its Sage Intacct mapping, so commissioning dates, depreciation methods, revaluations, and disposals all post back to your ledger, and a full set of fixed asset reports gives you visibility into valuation, depreciation, and disposals across your portfolio.
Here is a reference video:
Before You Begin
- You must have an active Sage Intacct account and the DreamzCMMS Sage Intacct integration enabled on your account.
- Your chart of accounts, dimensions (locations, projects, employees, departments), and account groups should already be set up correctly in Sage Intacct, since DreamzCMMS pulls this data directly from there.
- You should have someone with financial/accounting knowledge available to confirm account mappings for fixed assets, inventory, payables, and receivables before you start syncing.
Why This Integration Matters
Step 1 – The Gap Between Your Ledger and Your Assets
If you're already running Sage Intacct, your fixed assets live on the ledger, but there's usually no live link back to the asset, its maintenance history, or its depreciation and actual condition.
Step 2 – What This Integration Covers
This integration closes that gap. It's a native feature of DreamzCMMS, not a custom build or a one-off connector, and it covers three things: how it's configured, how an asset syncs, and what shows up in fixed asset reporting.
Step 3 – Moving to the DreamzCMMS Platform
From here, the rest of the setup happens directly inside DreamzCMMS.
Syncing Master Data from Sage Intacct
Step 4 – Find the Sync Master Data Button
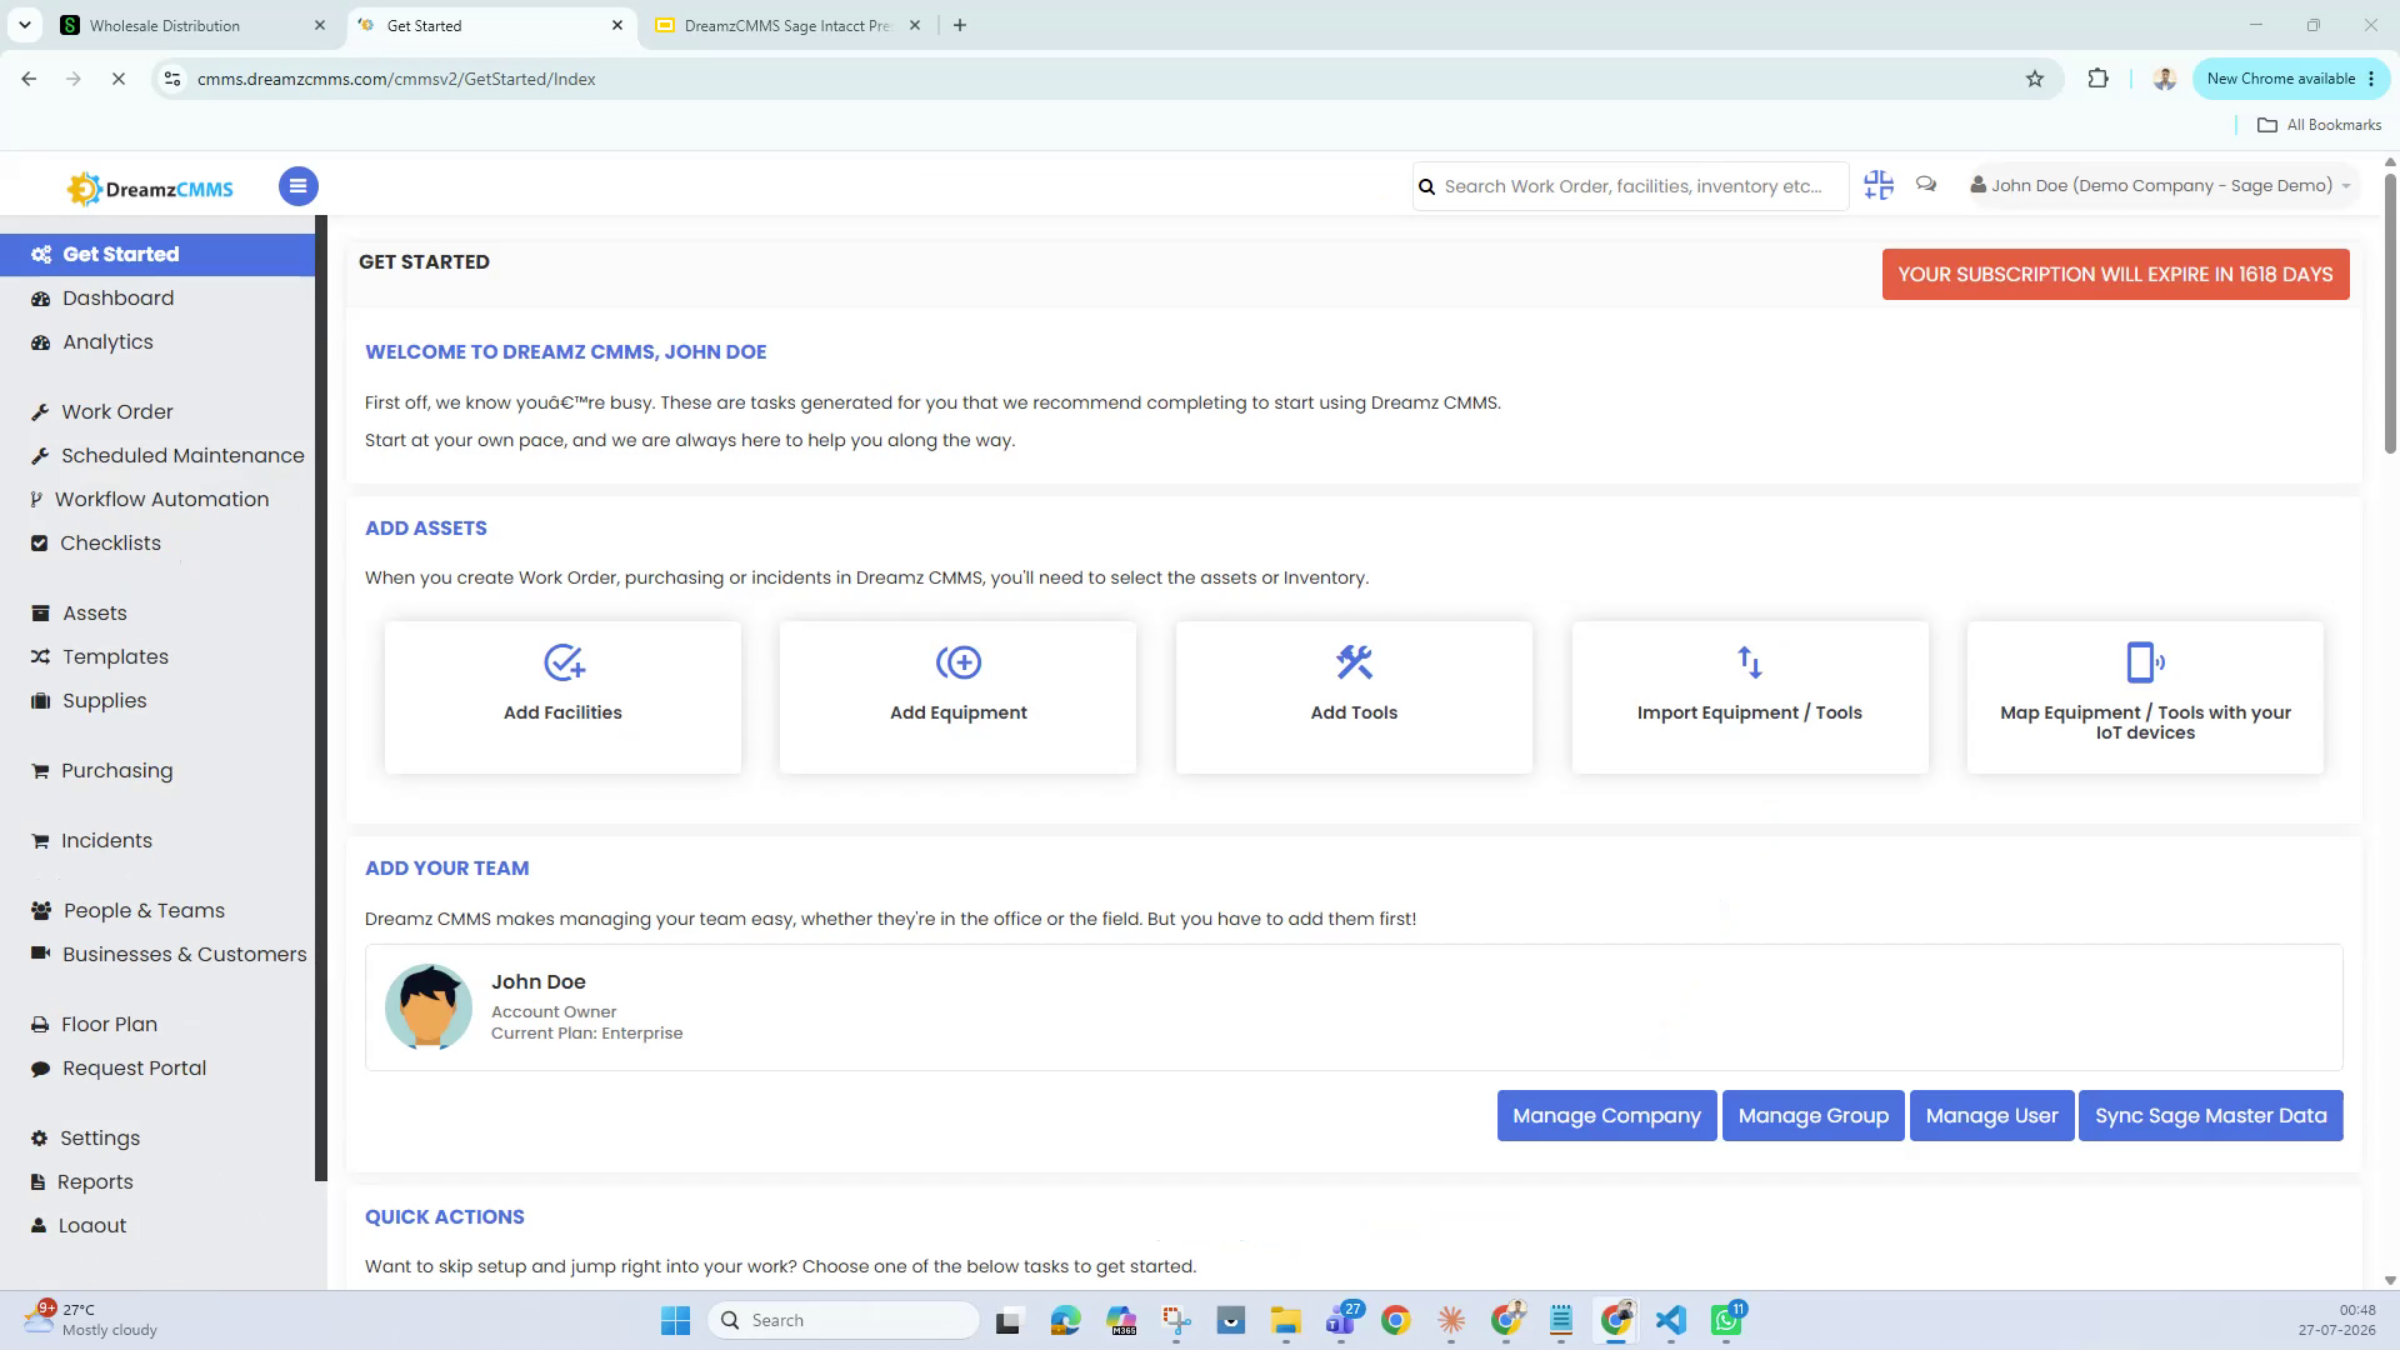
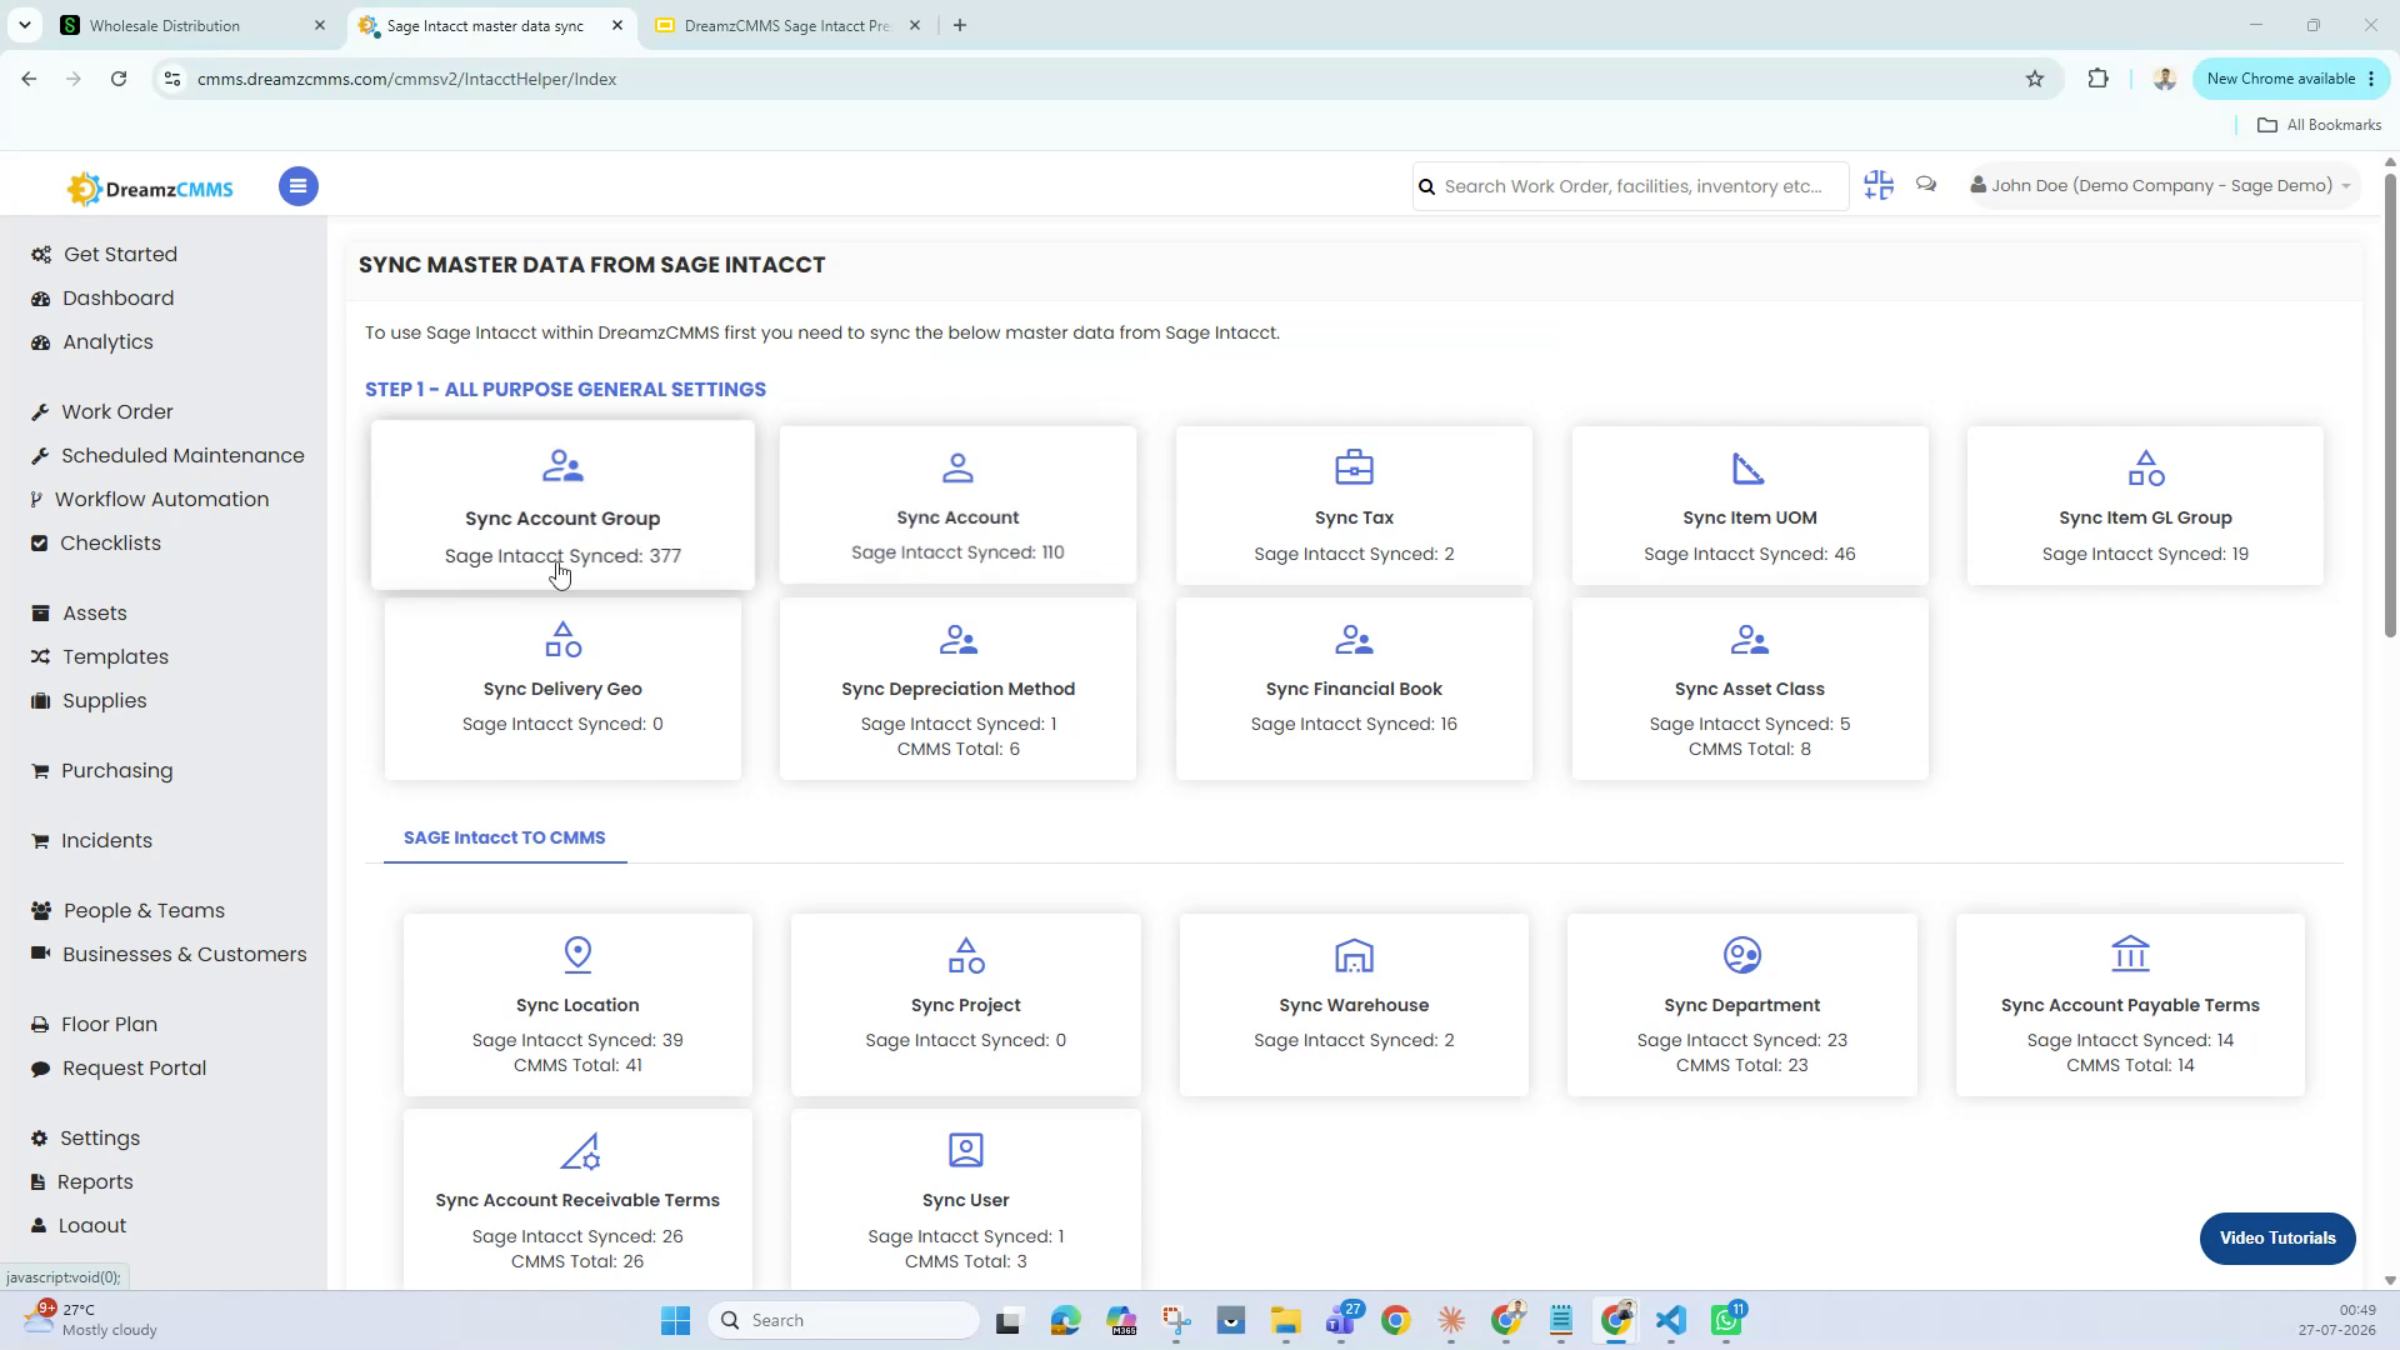
If your account has the Sage Intacct integration enabled, you'll see a Sync Master Data button. Clicking it takes you to a page listing every option you can sync.
Step 5 – Understand What Syncs First
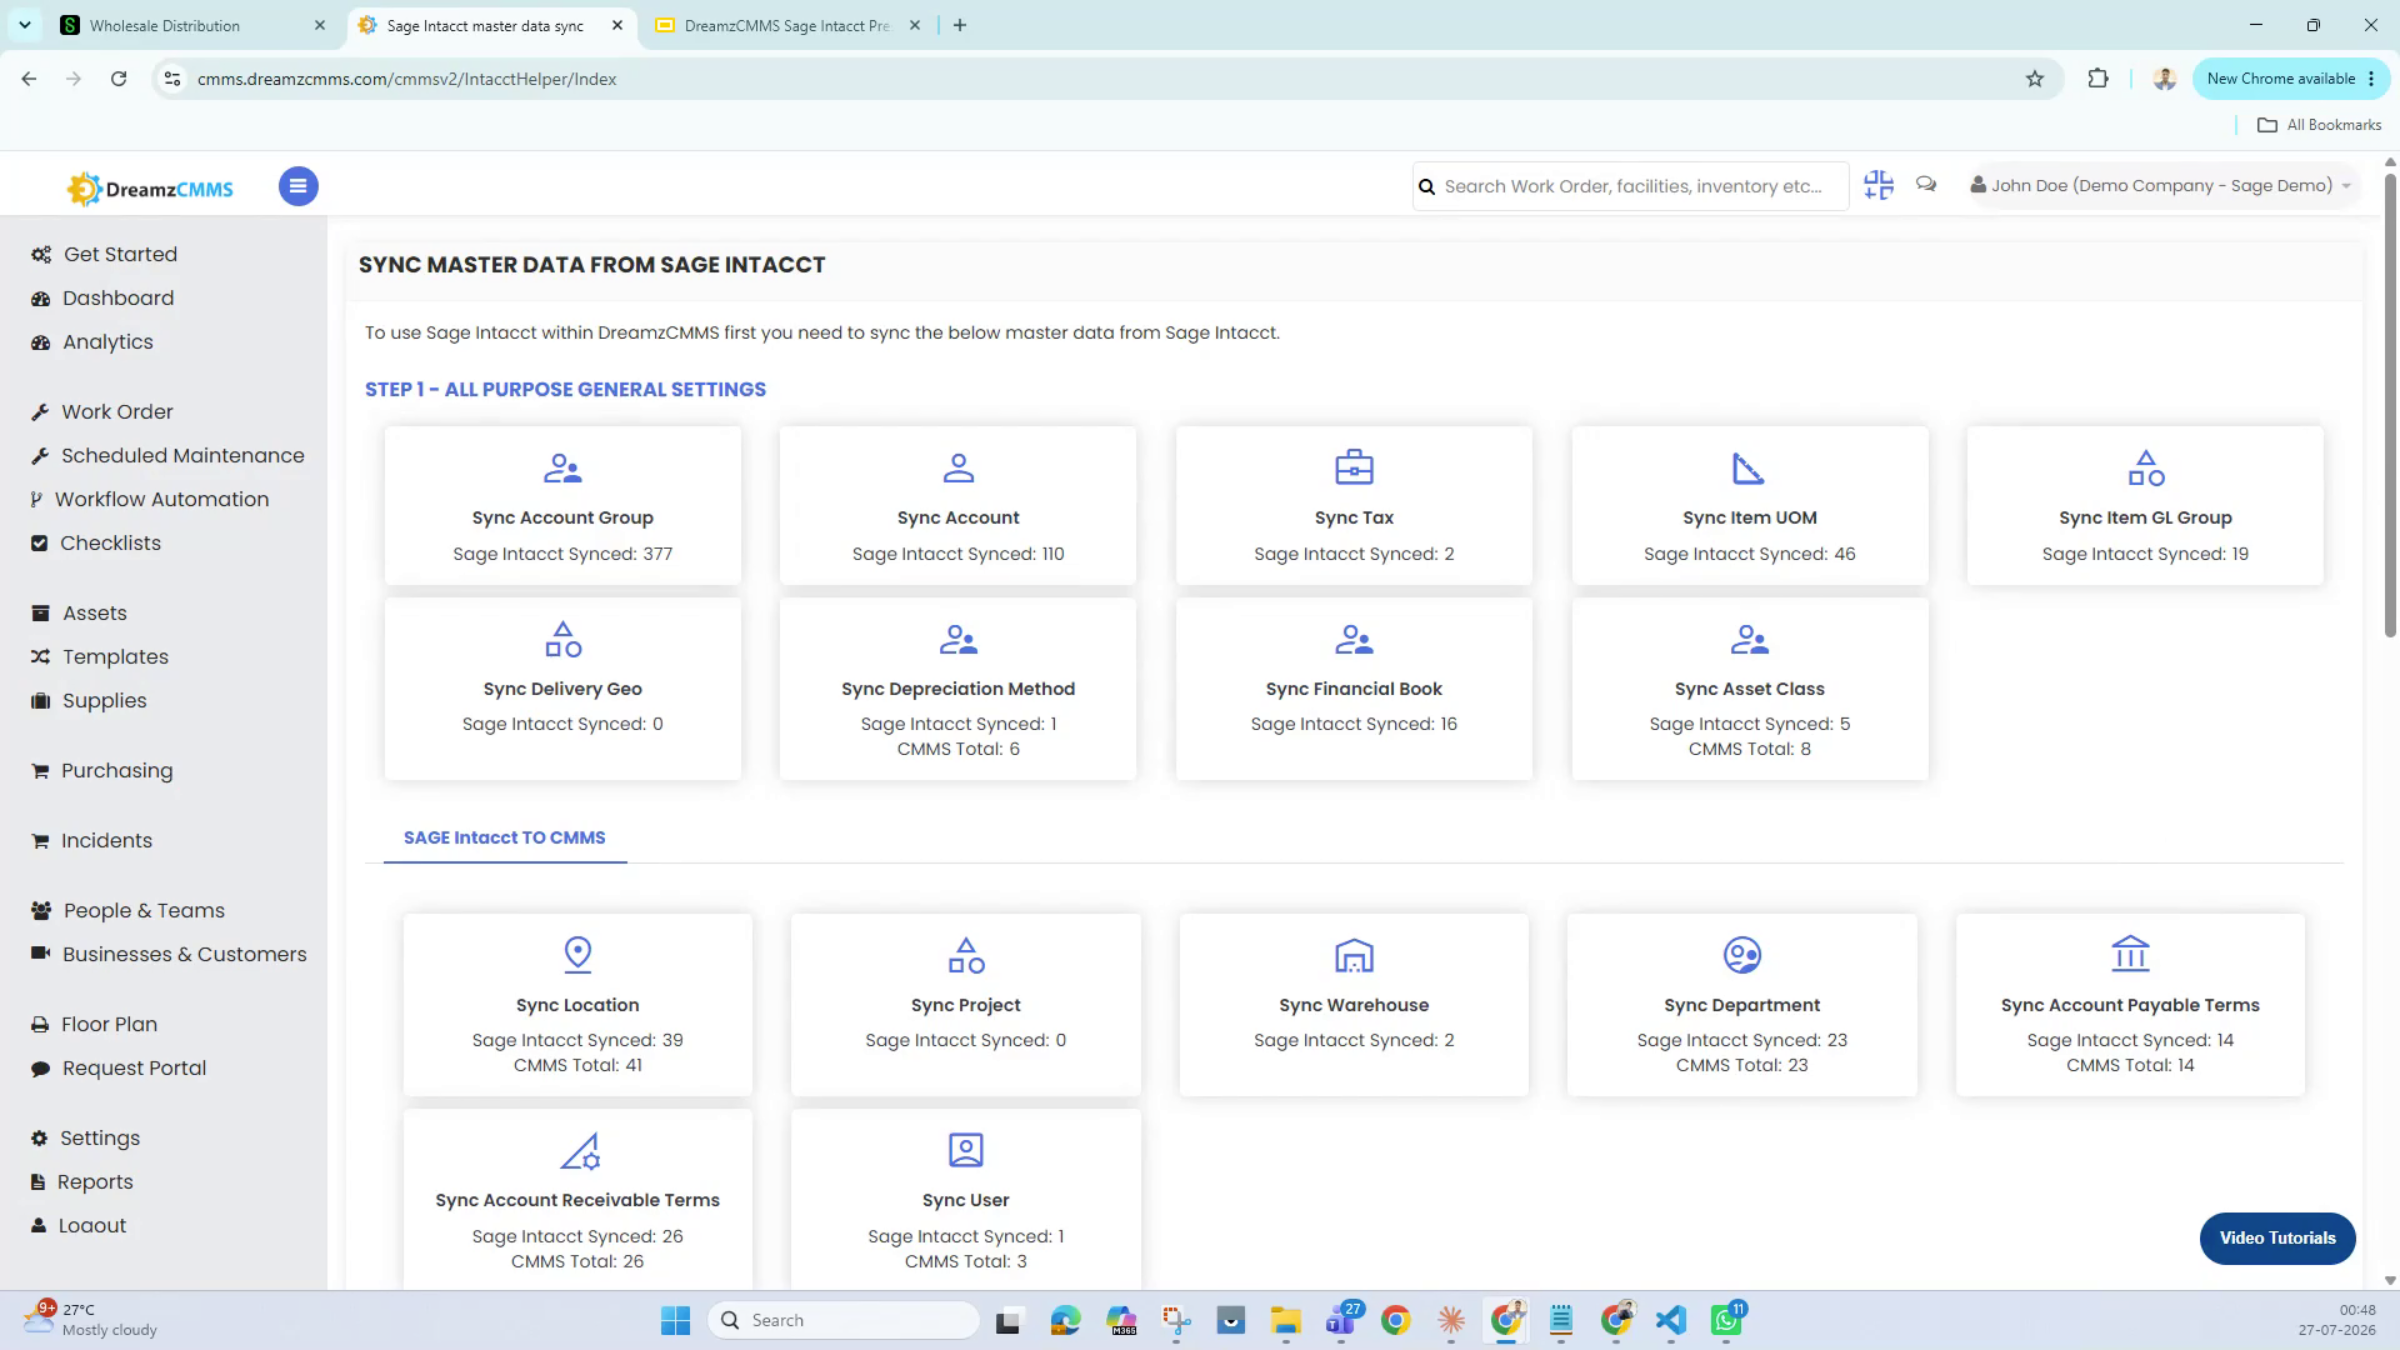
Everything on the DreamzCMMS side starts with group management. First, it pulls all your account groups from Sage Intacct, then accounts, taxes, measurements, geo groups, delivery geolocations, depreciation methods, financial books, and asset classifications. Delivery geolocations is a specific dimension, and if you use multiple dimensions in Intacct, those can be pulled too as part of a customized integration.
Step 6 – Run the Account Group Integration
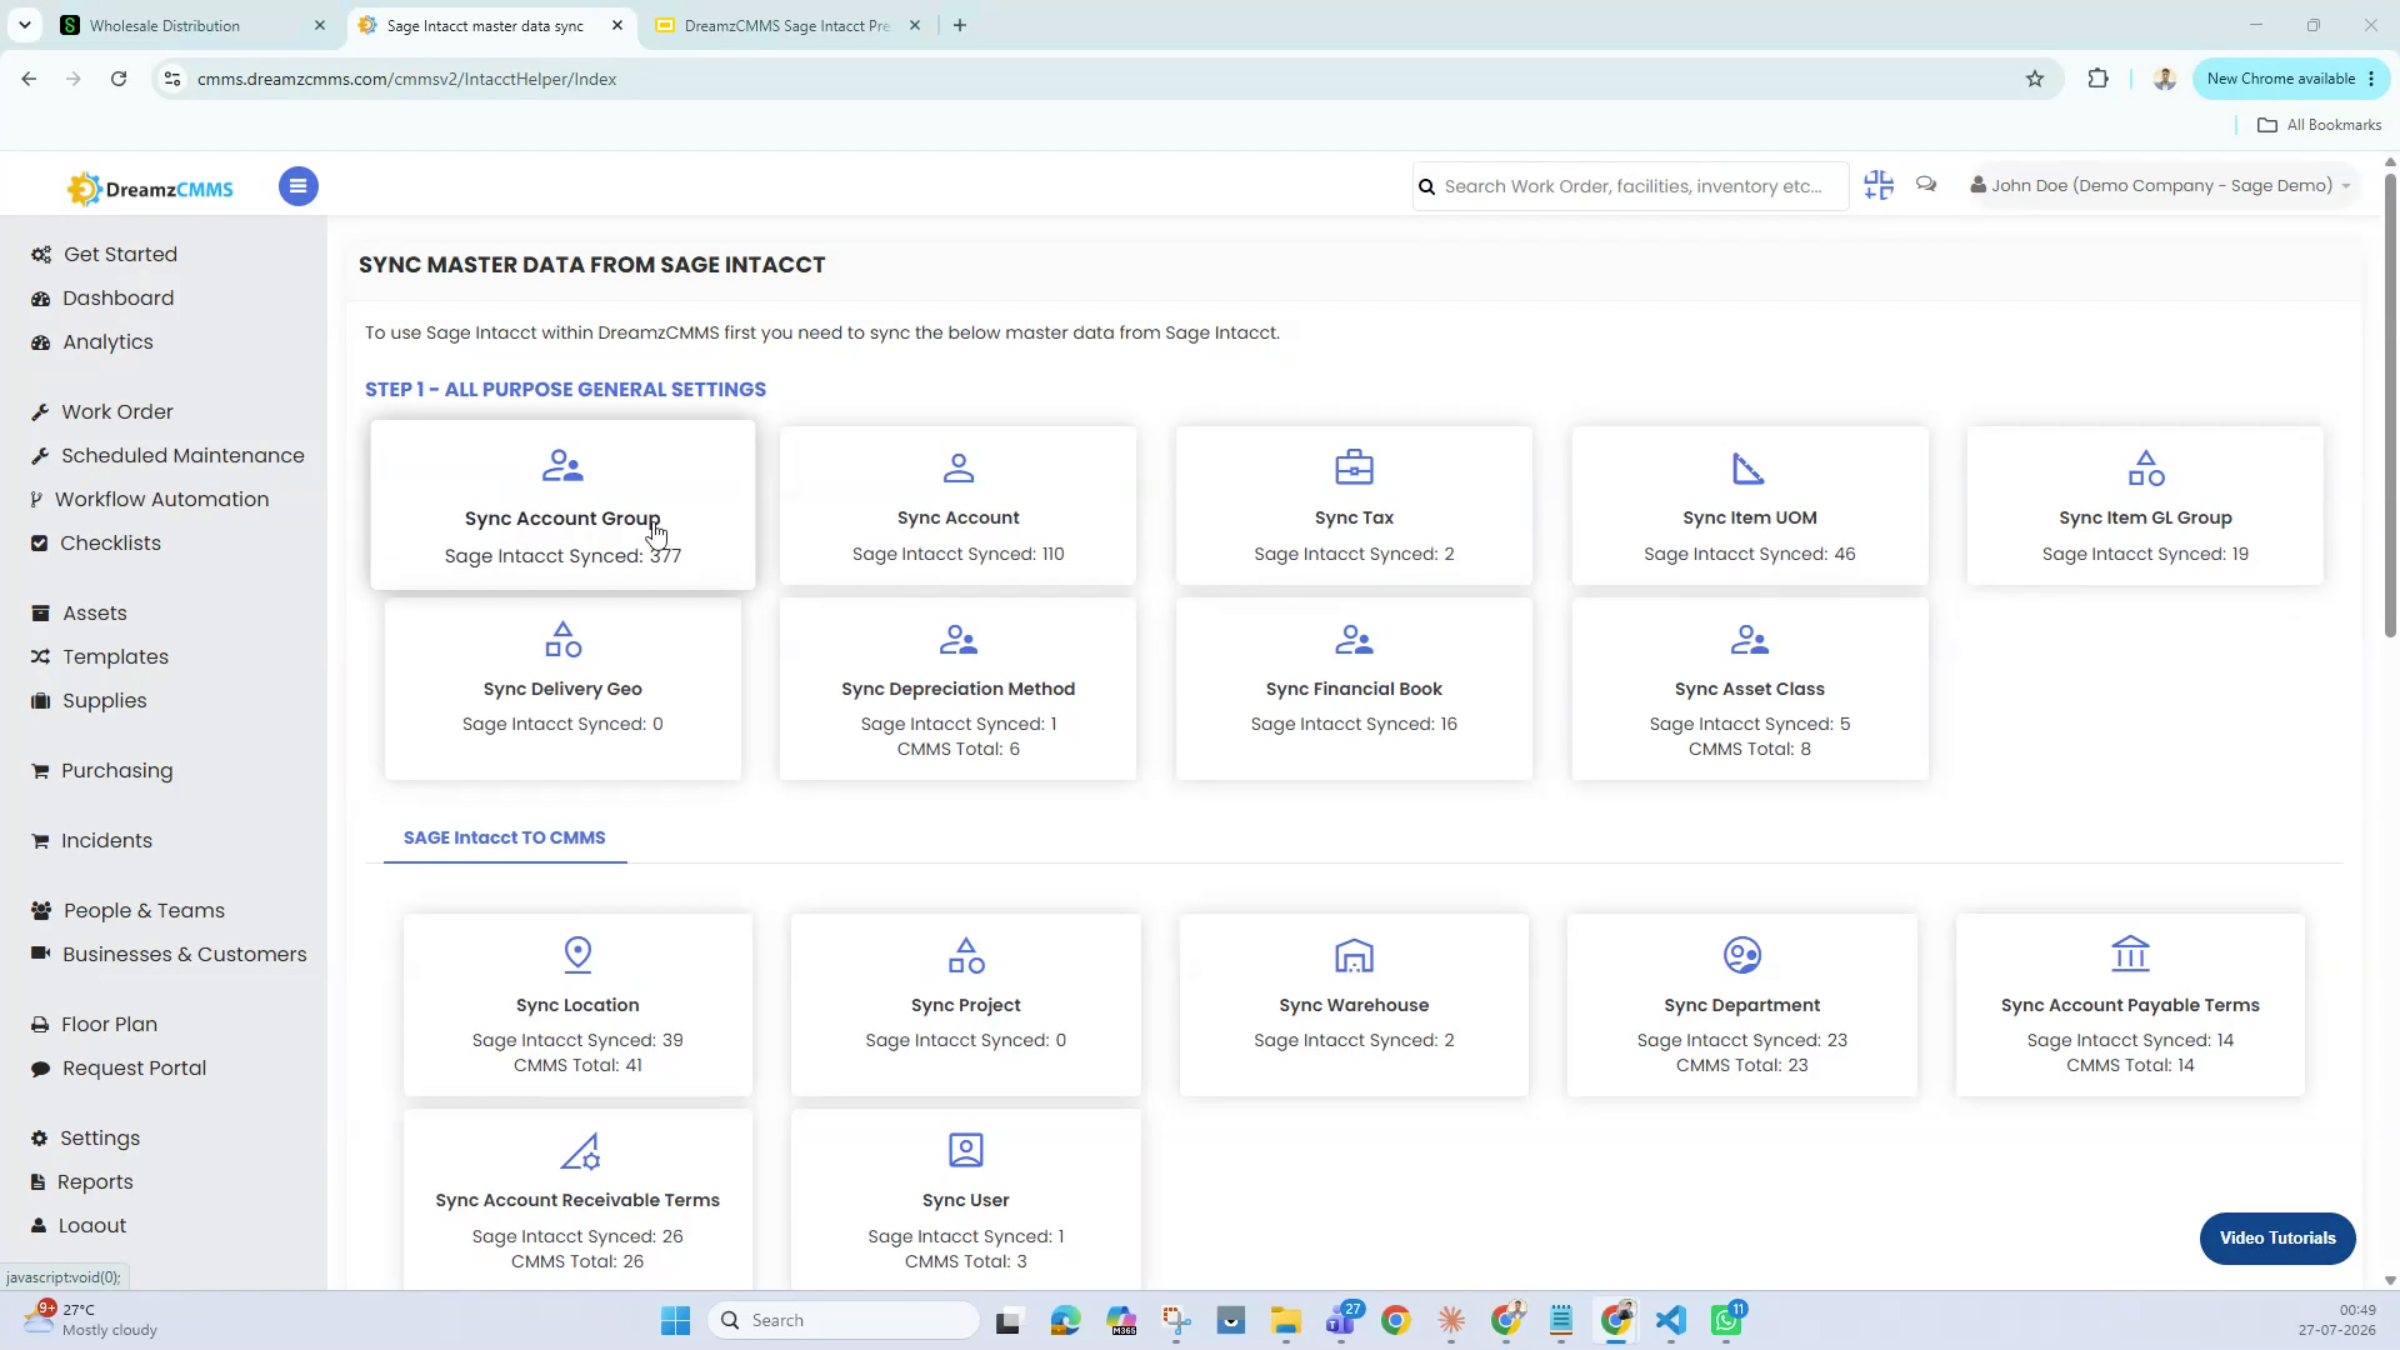
On the sync screen, click Account Group Integration first. This pulls all your account groups from the chart of accounts managed in Sage Intacct.
Step 7 – Pull Additional Dimensions
Once the pull finishes, you'll see the total number of records synced from Sage Intacct. Click each remaining item to keep pulling data the same way. This integration works both ways — data can flow from DreamzCMMS into Sage Intacct, though the core reference data originates in Intacct itself. If you use other dimensions, such as location, project, employee, or department, you can pull each of those individually as well.
Mapping Accounts for Fixed Assets and Transactions
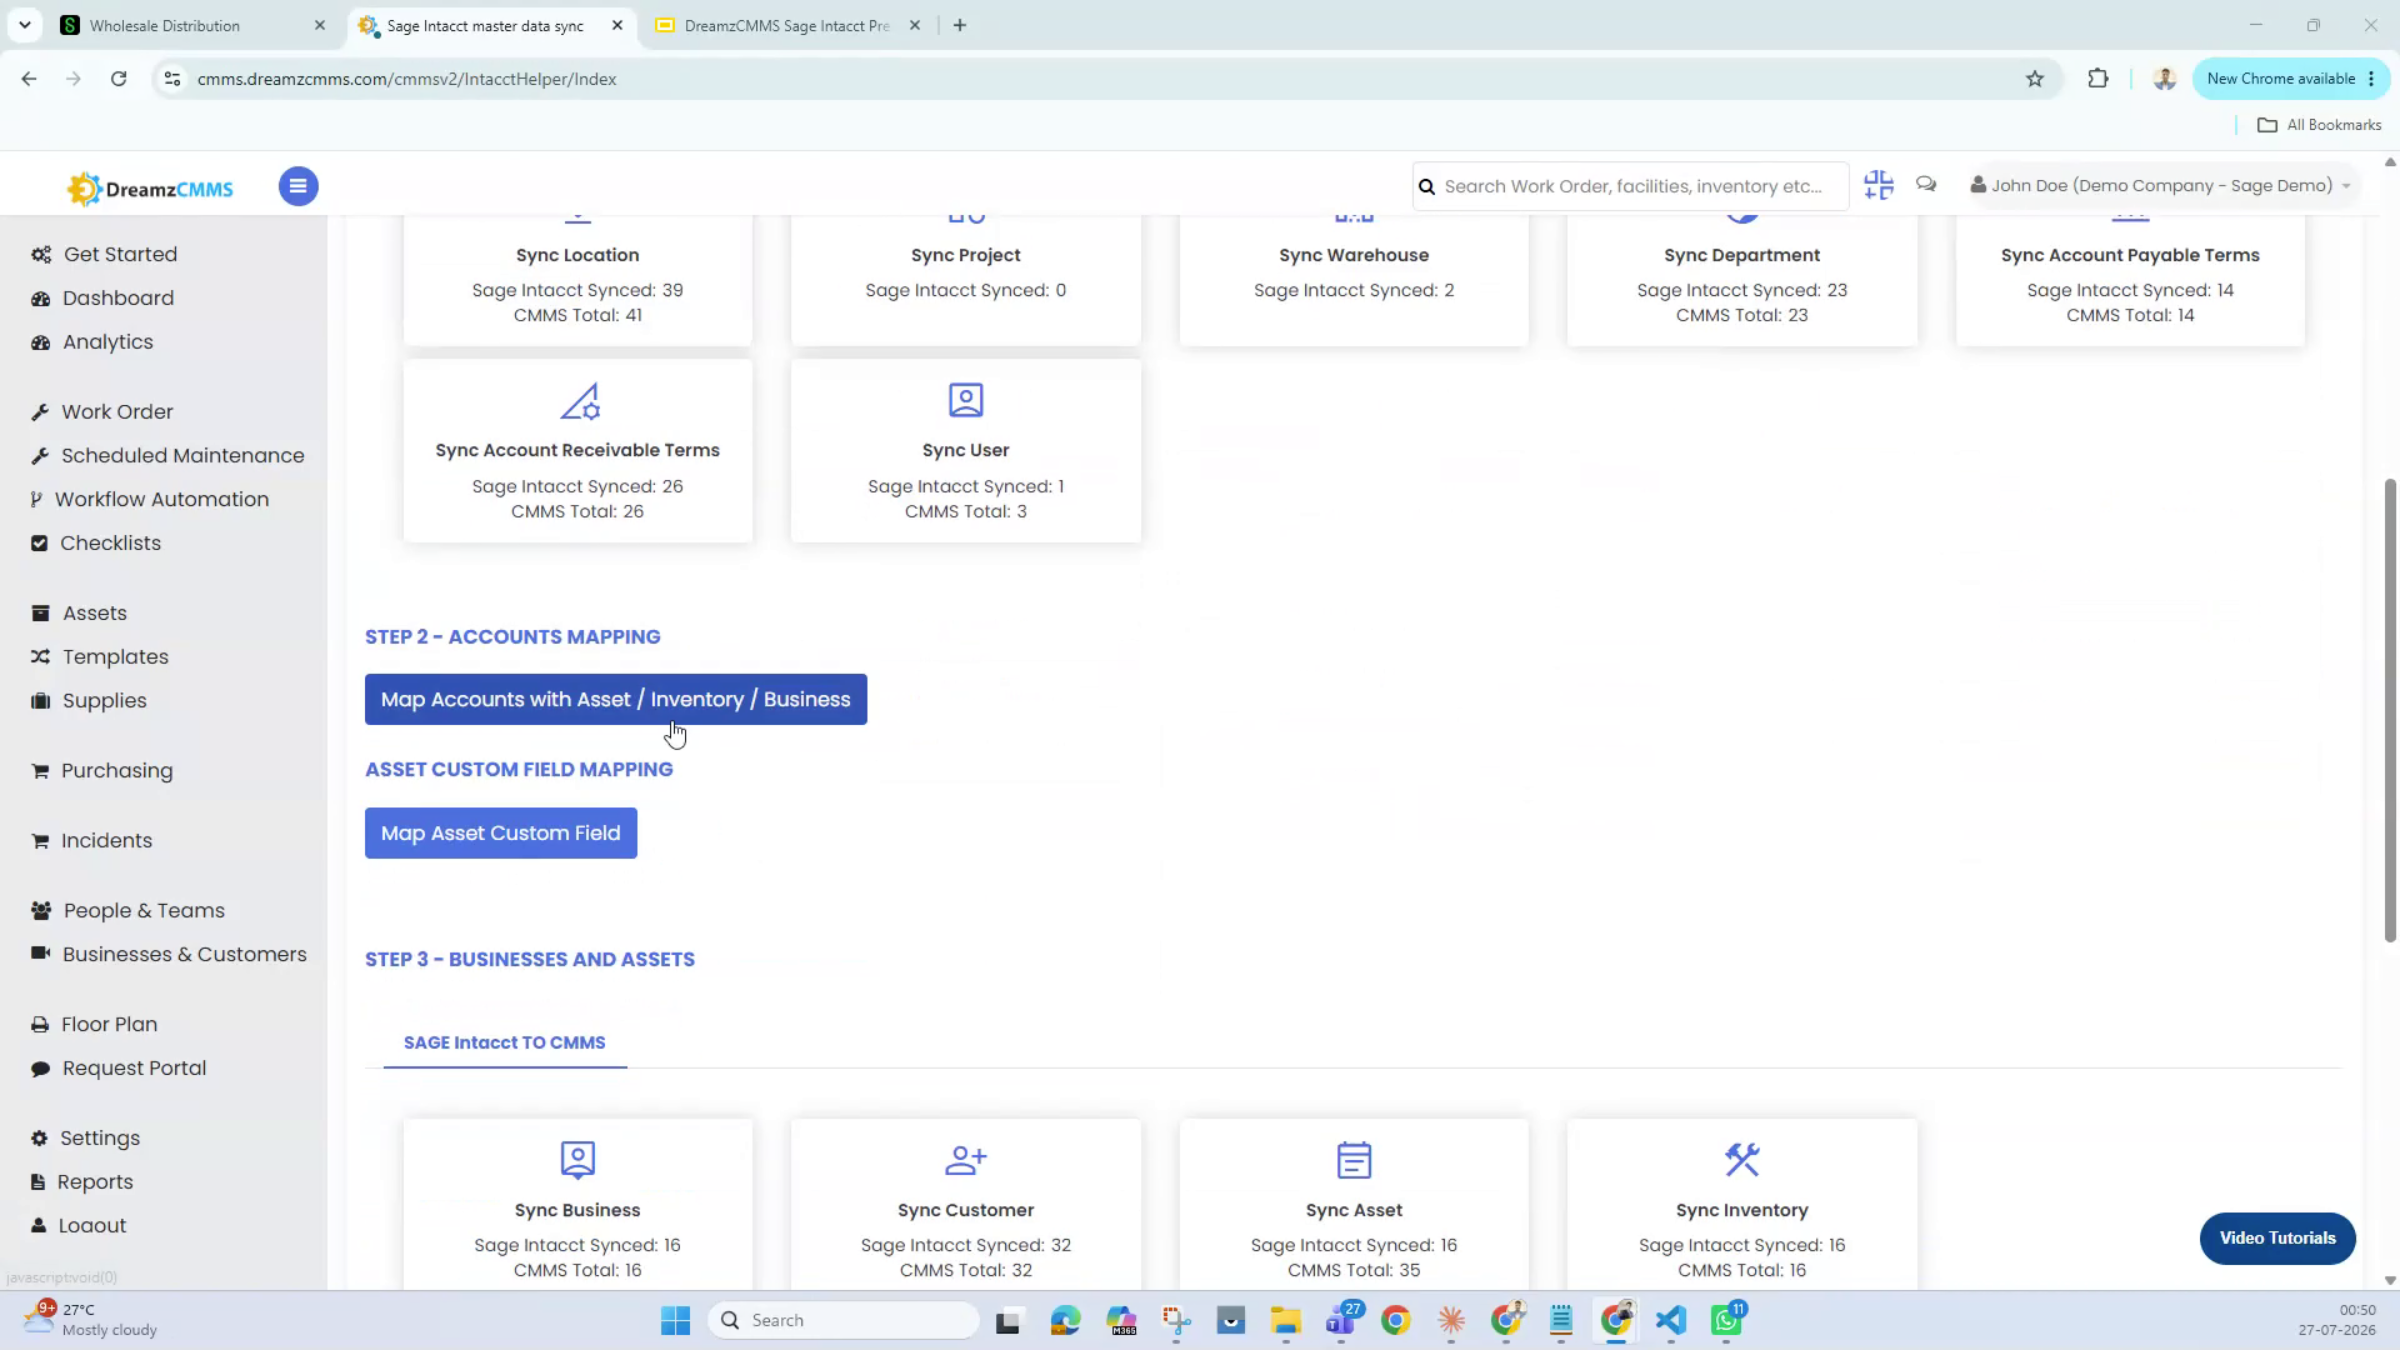
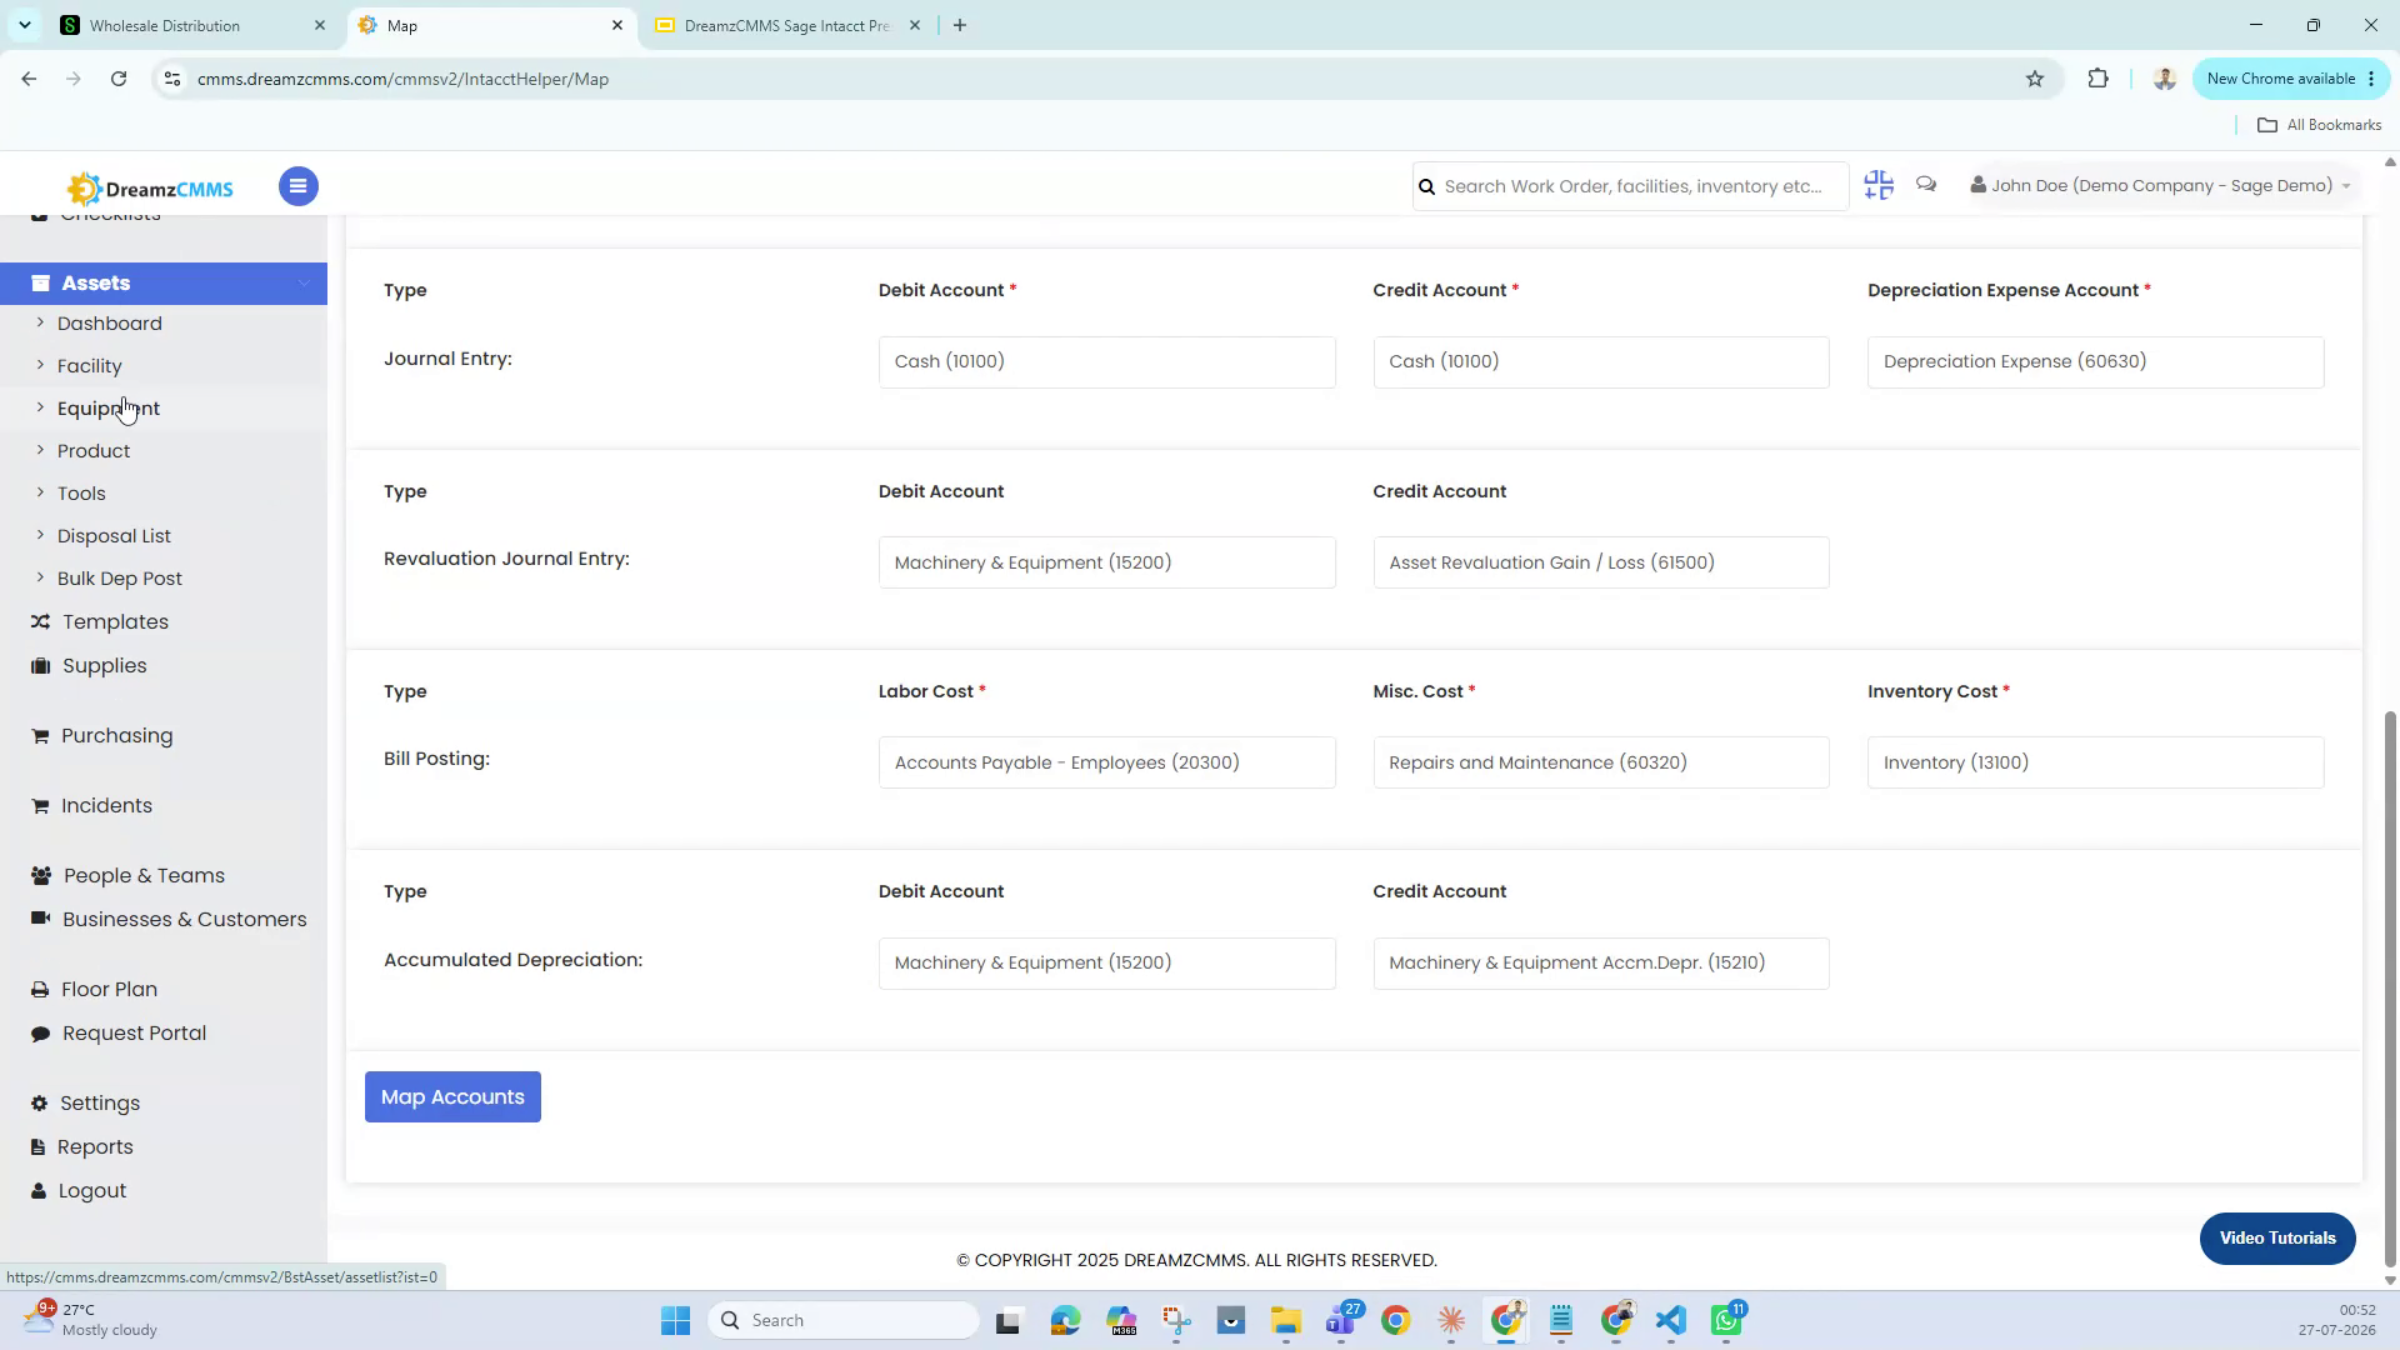
Step 8 – Map Fixed Asset Account Groups
Under Major Mappings, you connect Sage Intacct's account groups to DreamzCMMS. If your fixed assets are split into categories in Sage — buildings, machinery and equipment, furniture and fixtures — you select which account groups to bring into DreamzCMMS, and every machine tagged under those groups comes across with it. The same approach applies to inventory categories, depreciation, accounts payable for repair, maintenance, or purchasing vendors, and accounts receivable for customer invoicing, including their respective payment terms.
Step 9 – Map Accounts for Specific Transaction Types
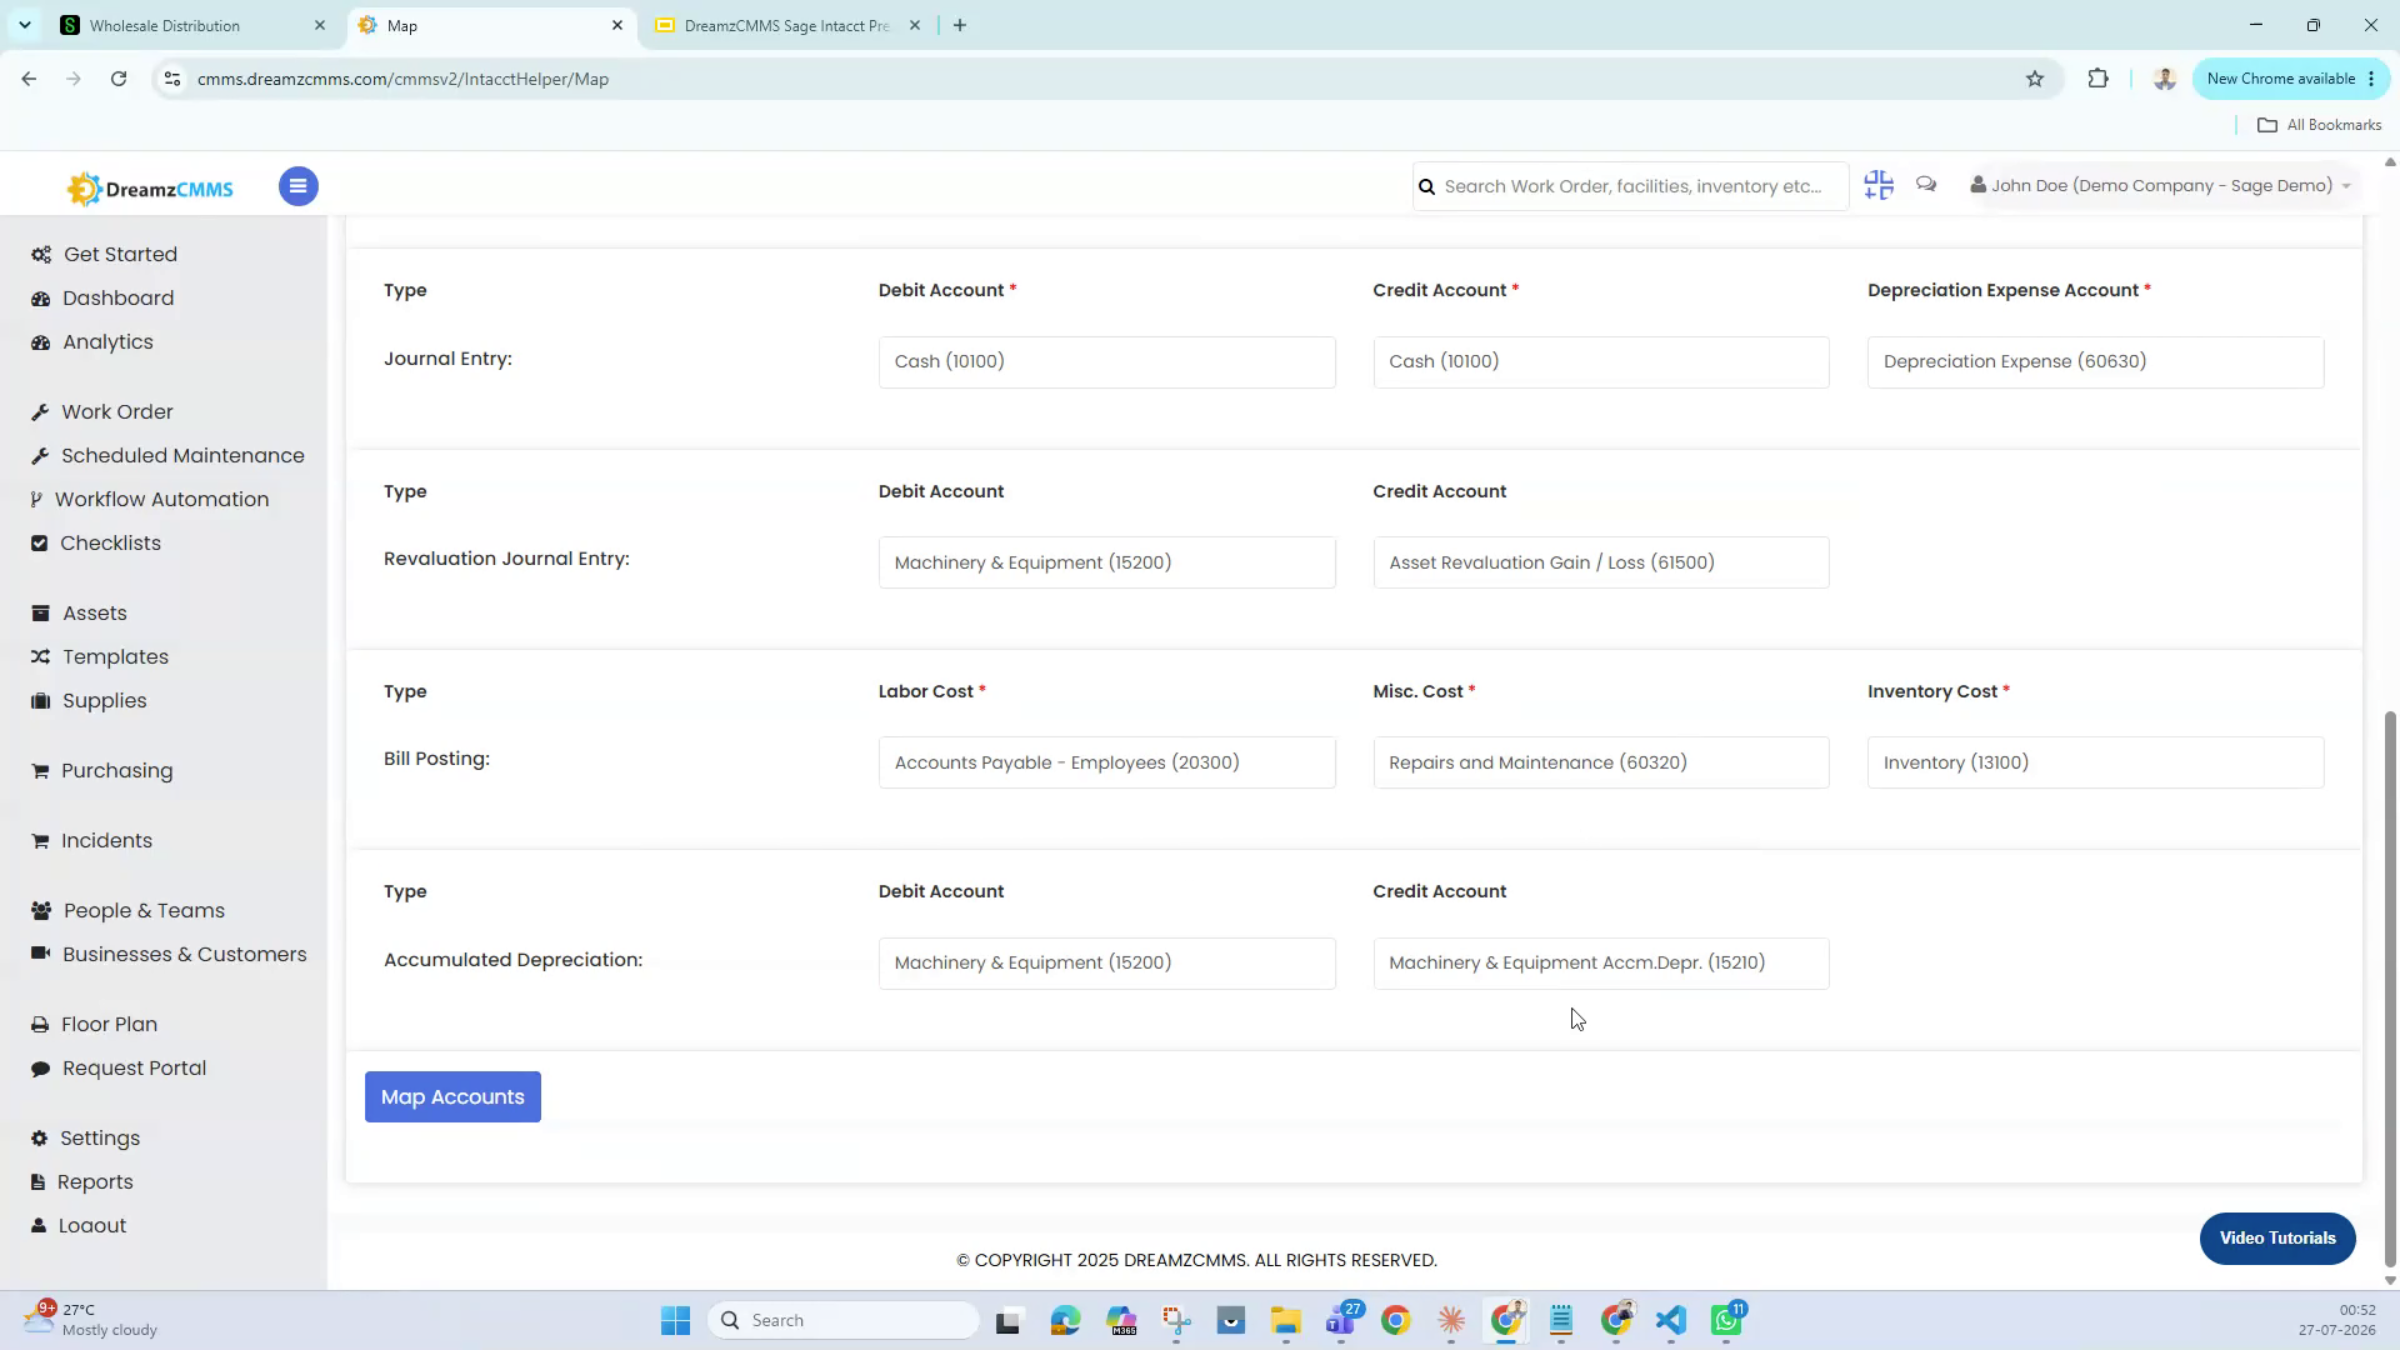
Different transaction types have their own mapping layer — for example, which account a cash transaction posts to, which account repair and maintenance expenses go to, and which account expense reimbursements go to.
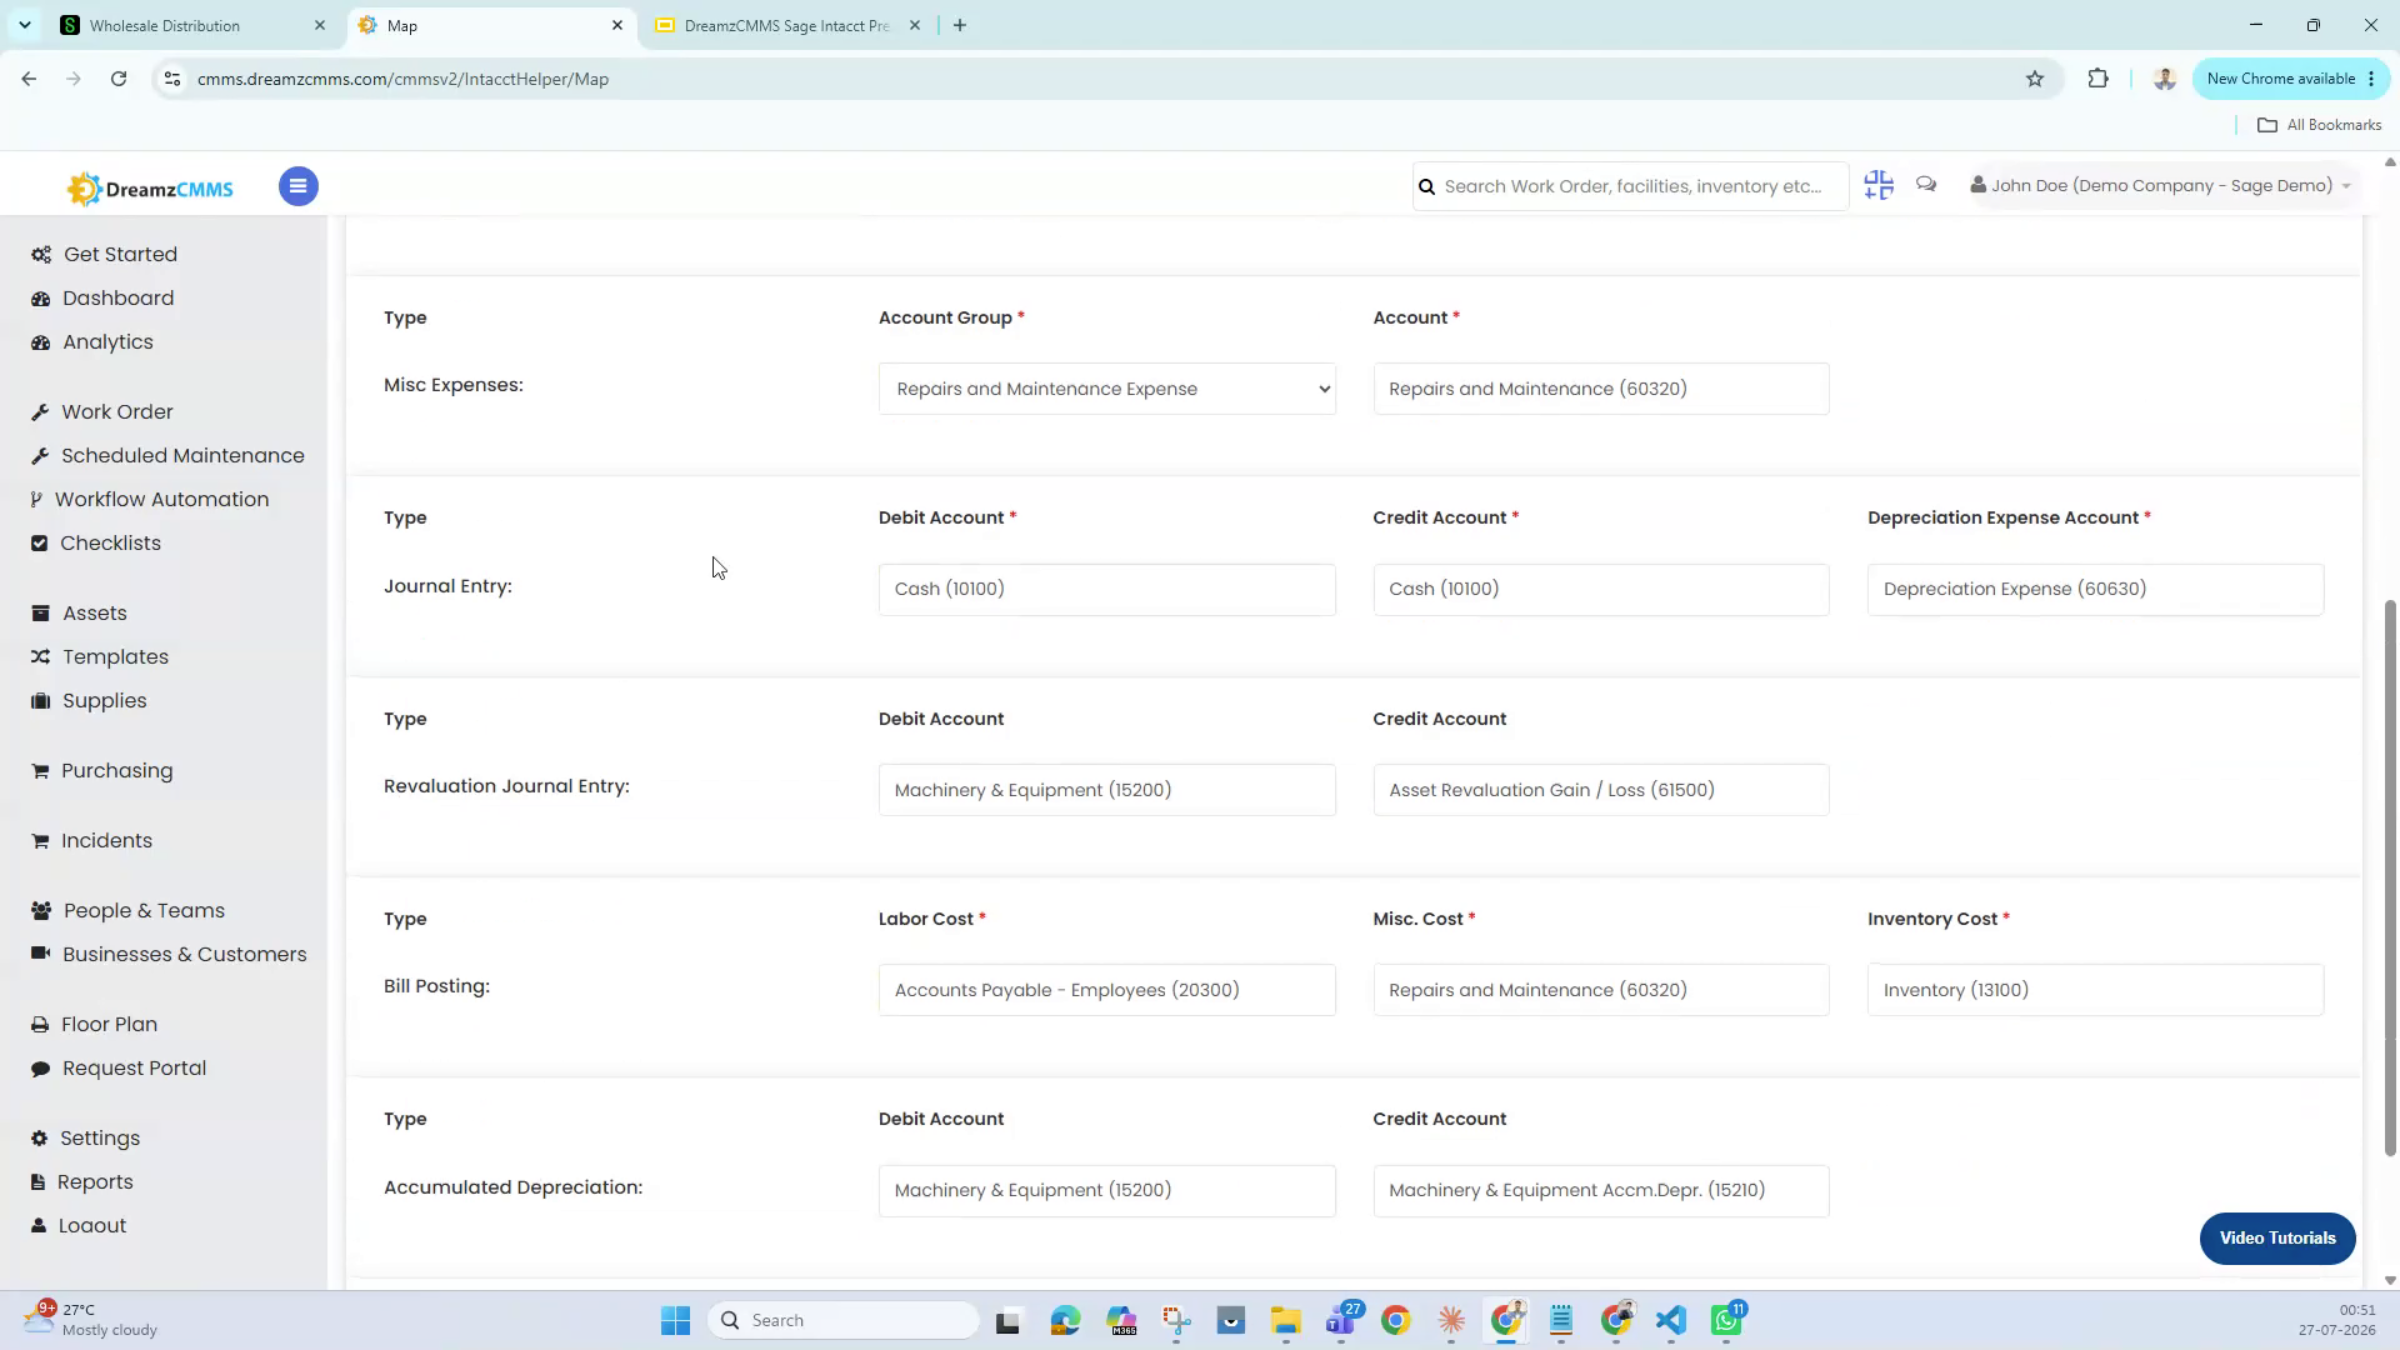
Step 10 – Confirm Transaction Posting
Once your account ledgers are mapped correctly here, transactions will start posting into the right accounts automatically.
Setting Up Assets, Products, and Locations
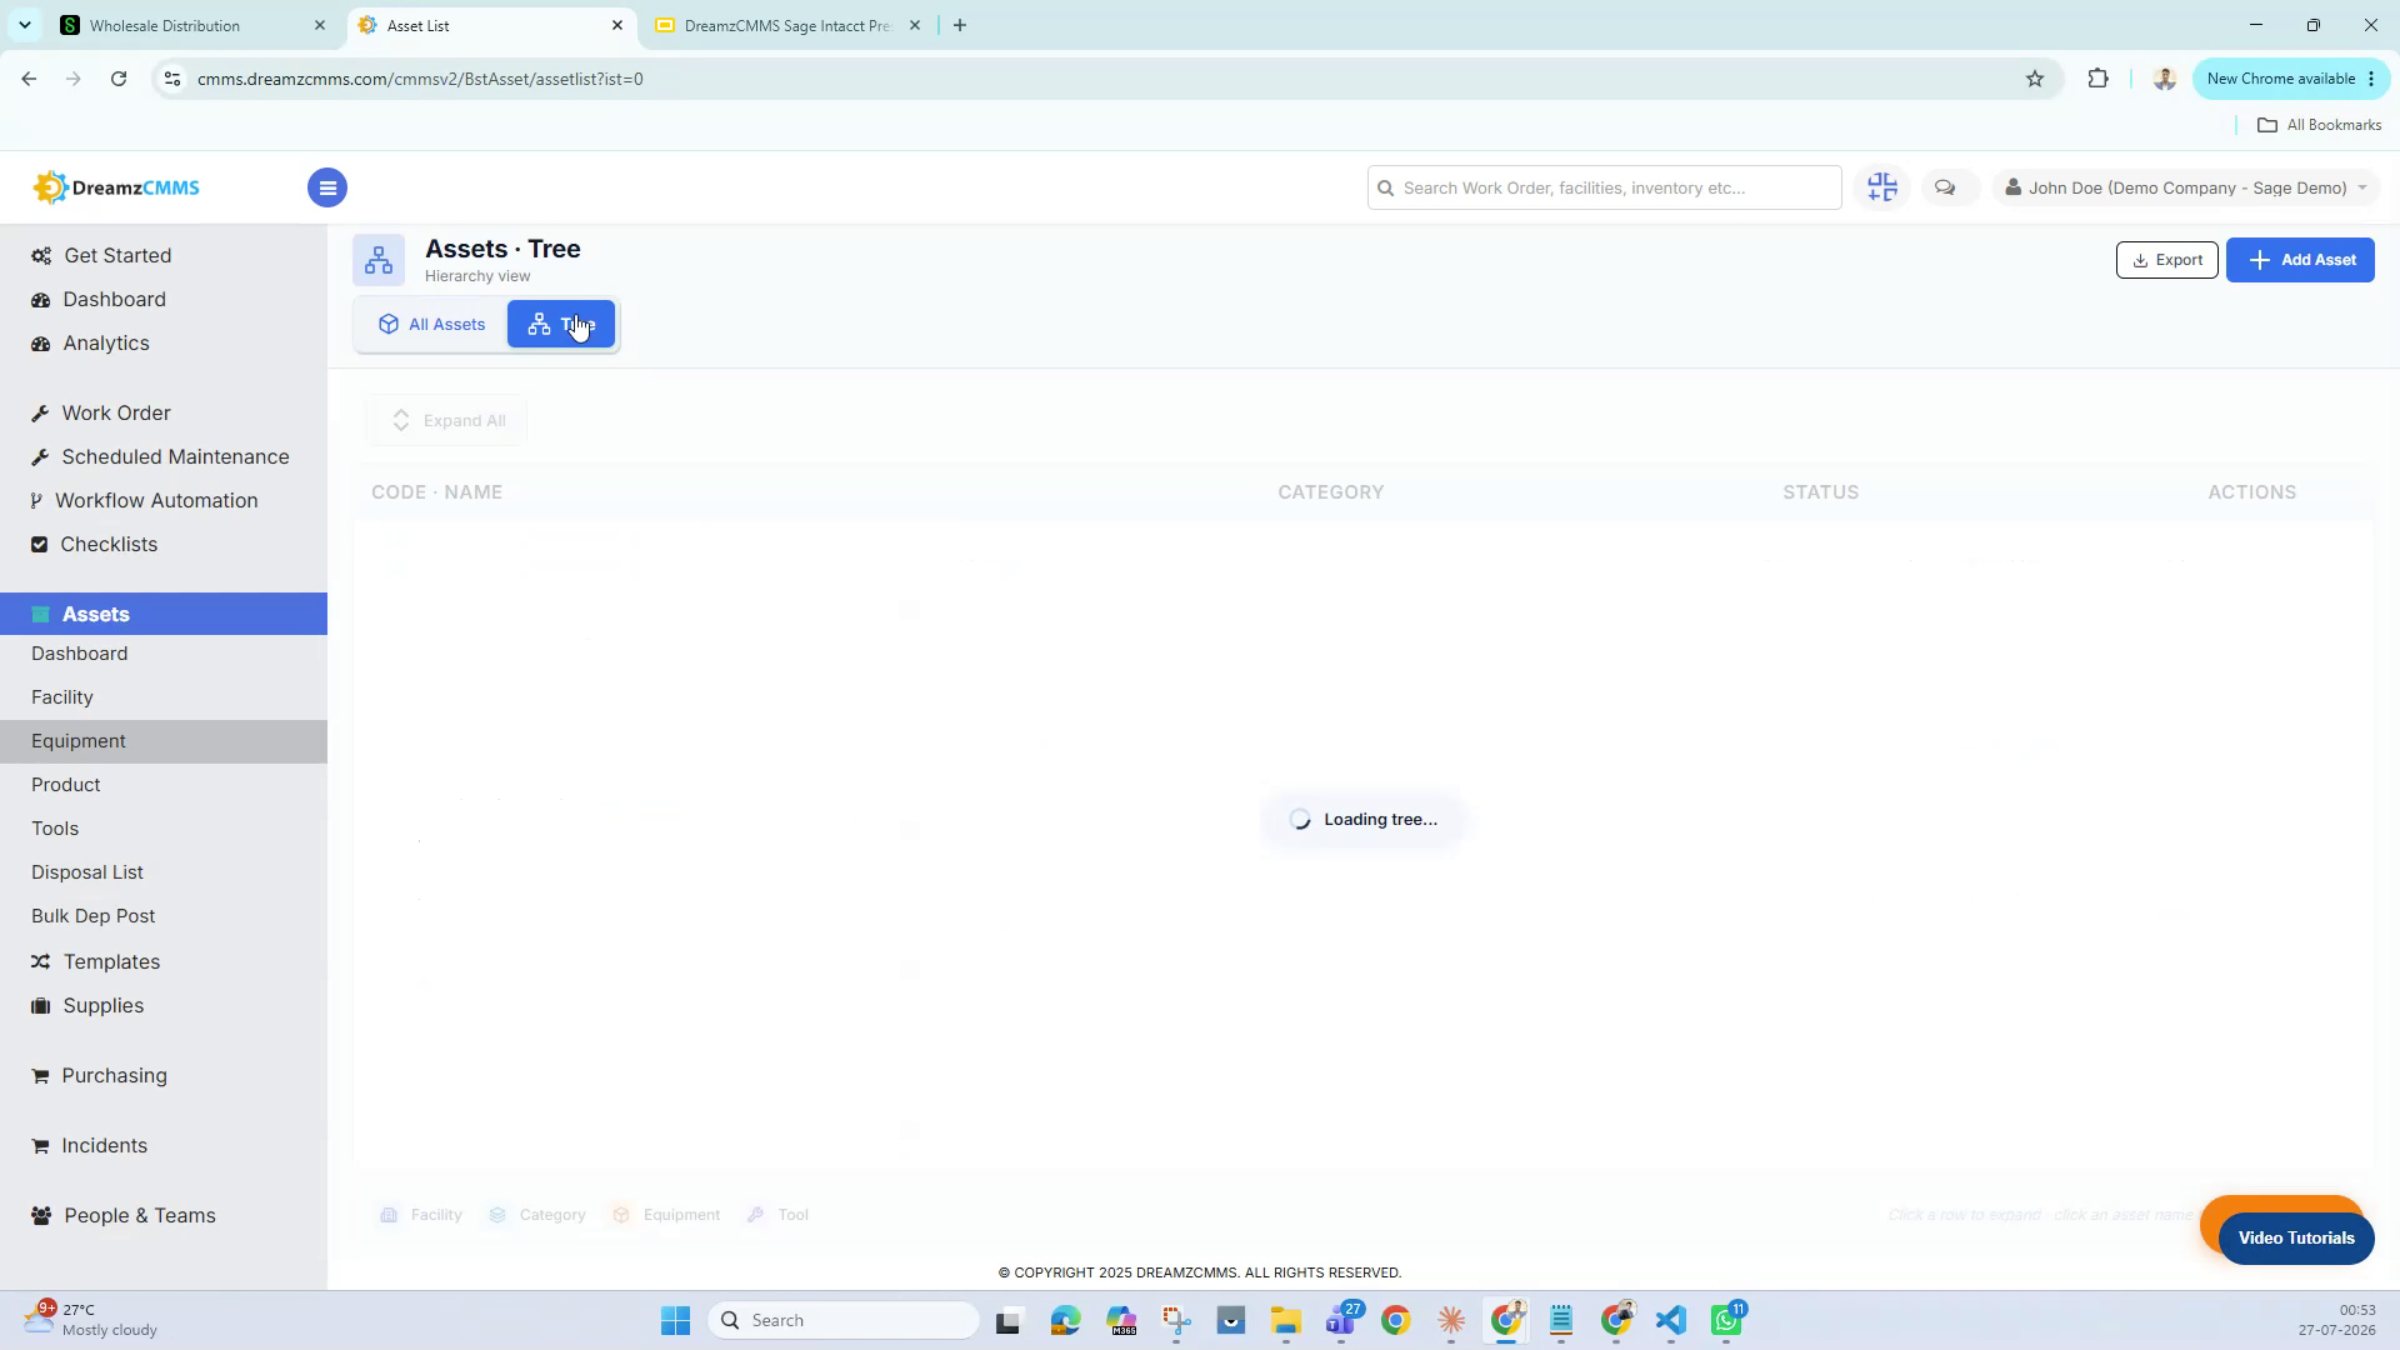
Step 11 – Equipment and Product Grouping
In the asset section, individual machines live under Equipment, while Products group those assets by type or manufacturer.
Step 12 – Set Up Locations and Entities
A preview shows the different locations configured in Sage Intacct, which can also represent separate entities. For multi-entity setups, you can pull each as an individual location in DreamzCMMS, or configure a specific entity integration. Within an entity, you can have multiple sub-locations, each with its own machines or assets underneath.
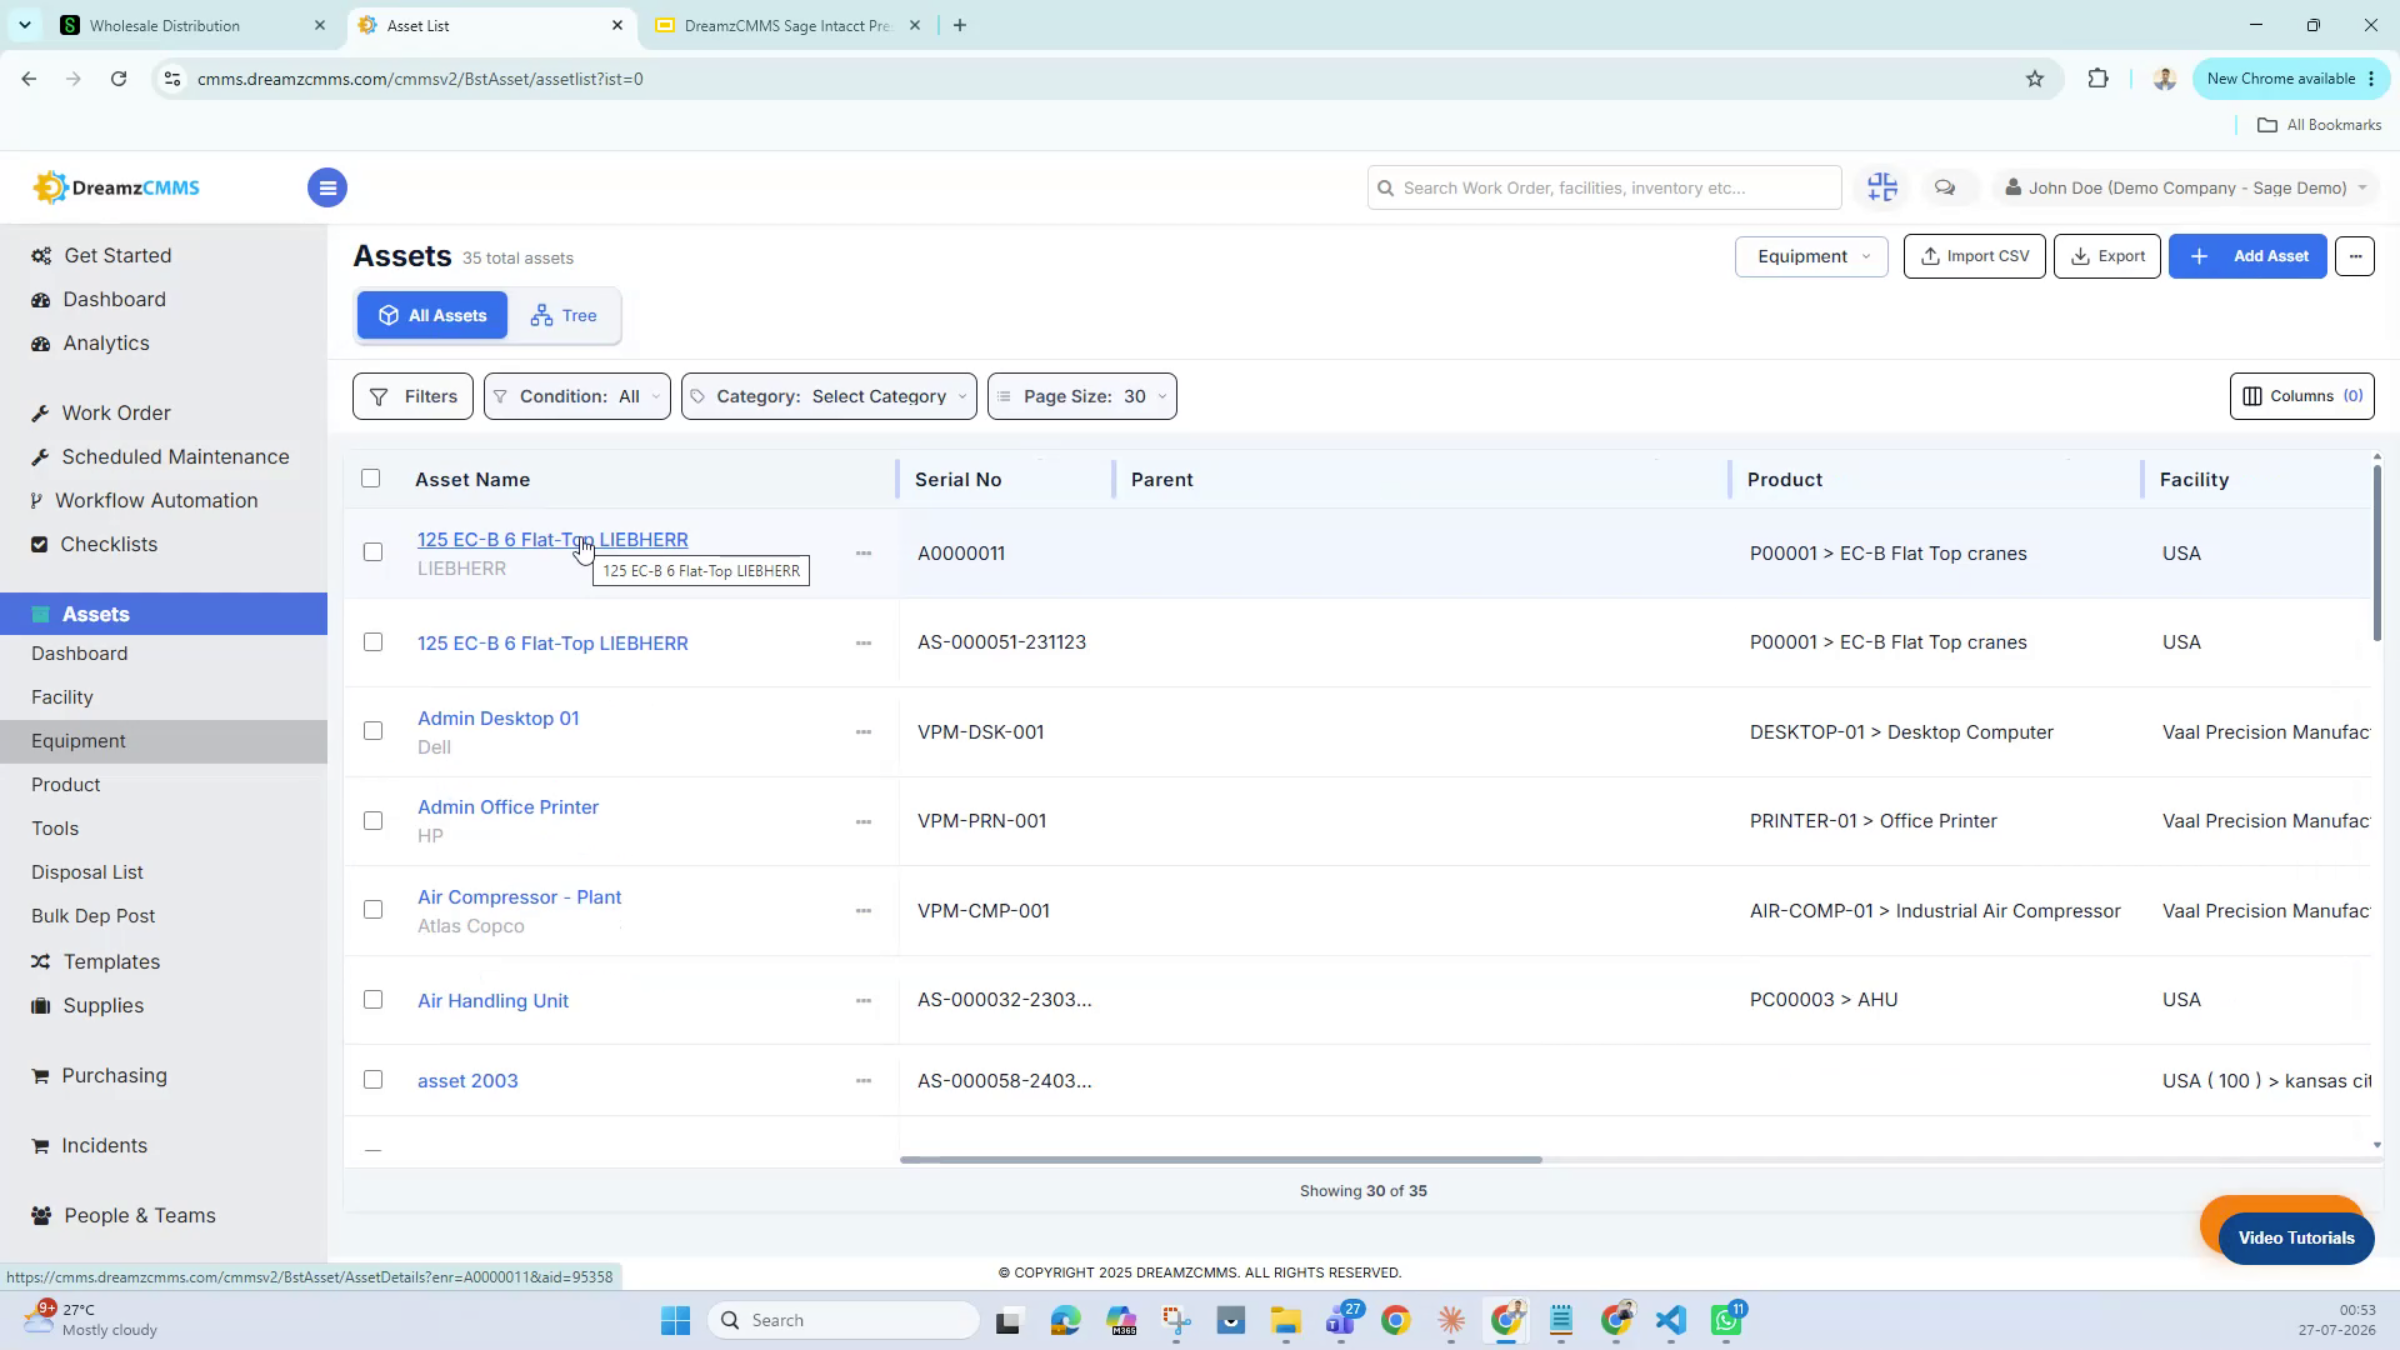
Step 13 – Review the Asset Listing and Its Sage Mapping
The asset listing shows every asset, each carrying information pulled from Sage Intacct. You can also add new machines directly in DreamzCMMS and push that information into Sage Intacct — for example, when an asset is capitalized after purchasing and moved to the asset register. Opening a record shows its Sage Intacct mapping at the bottom, including the account group, depreciation account, and the account mapped as its cost account.
Configuring Depreciation
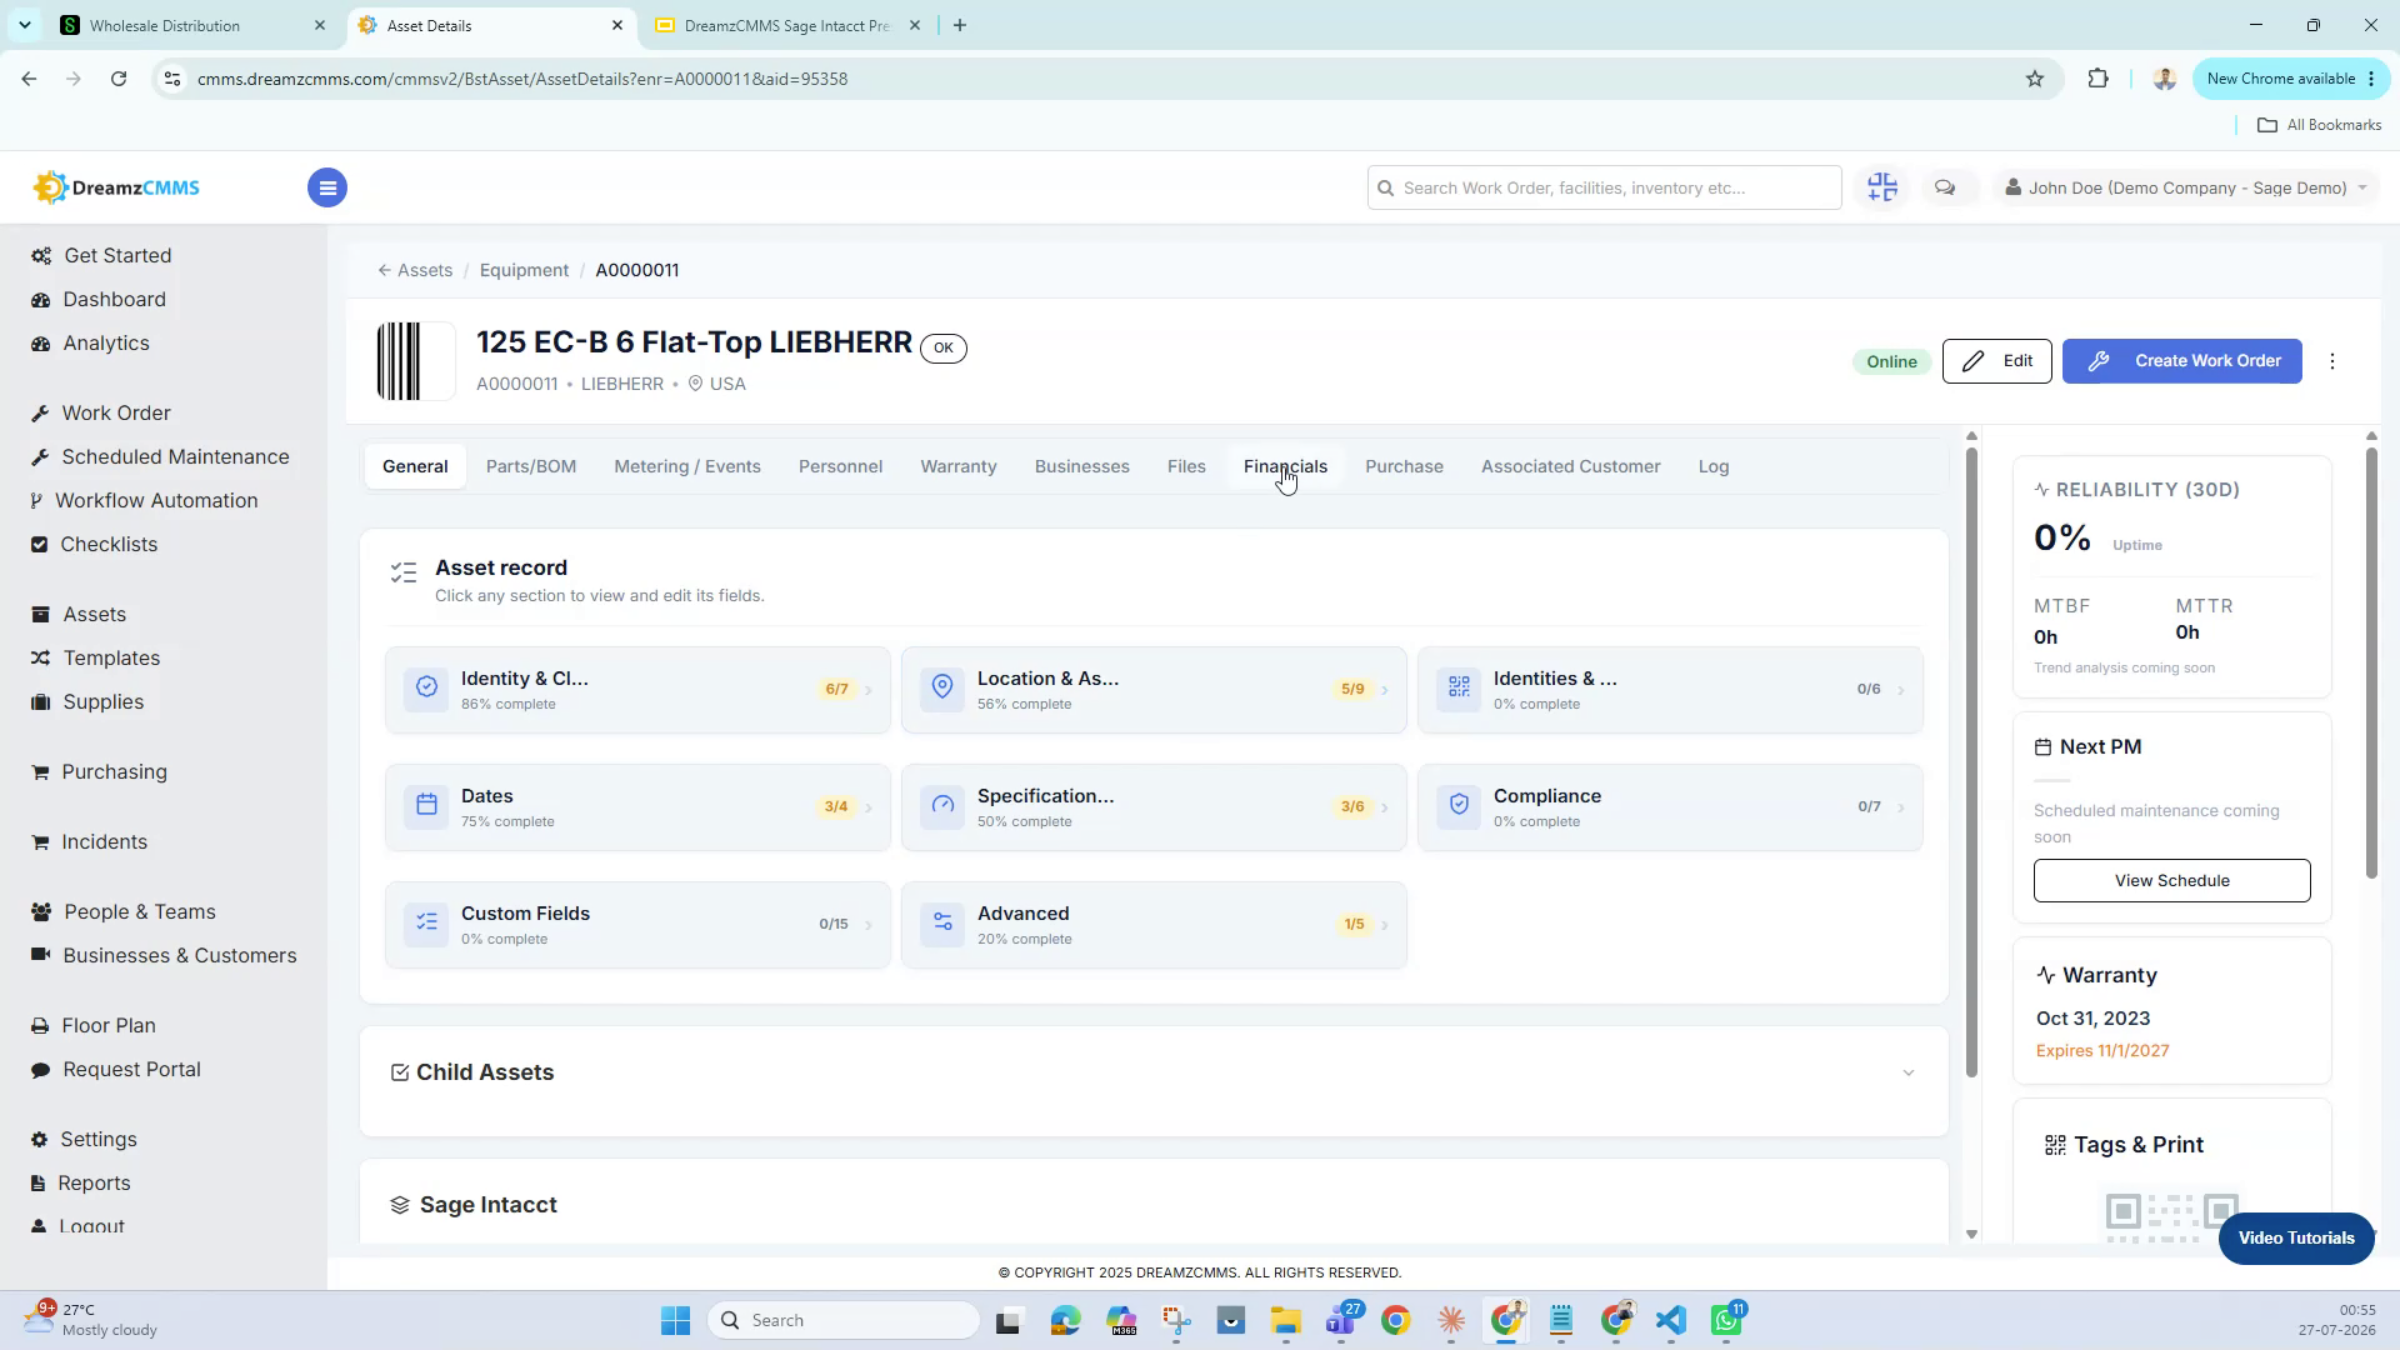
Step 14 – The Financial Tab and Commissioning Date
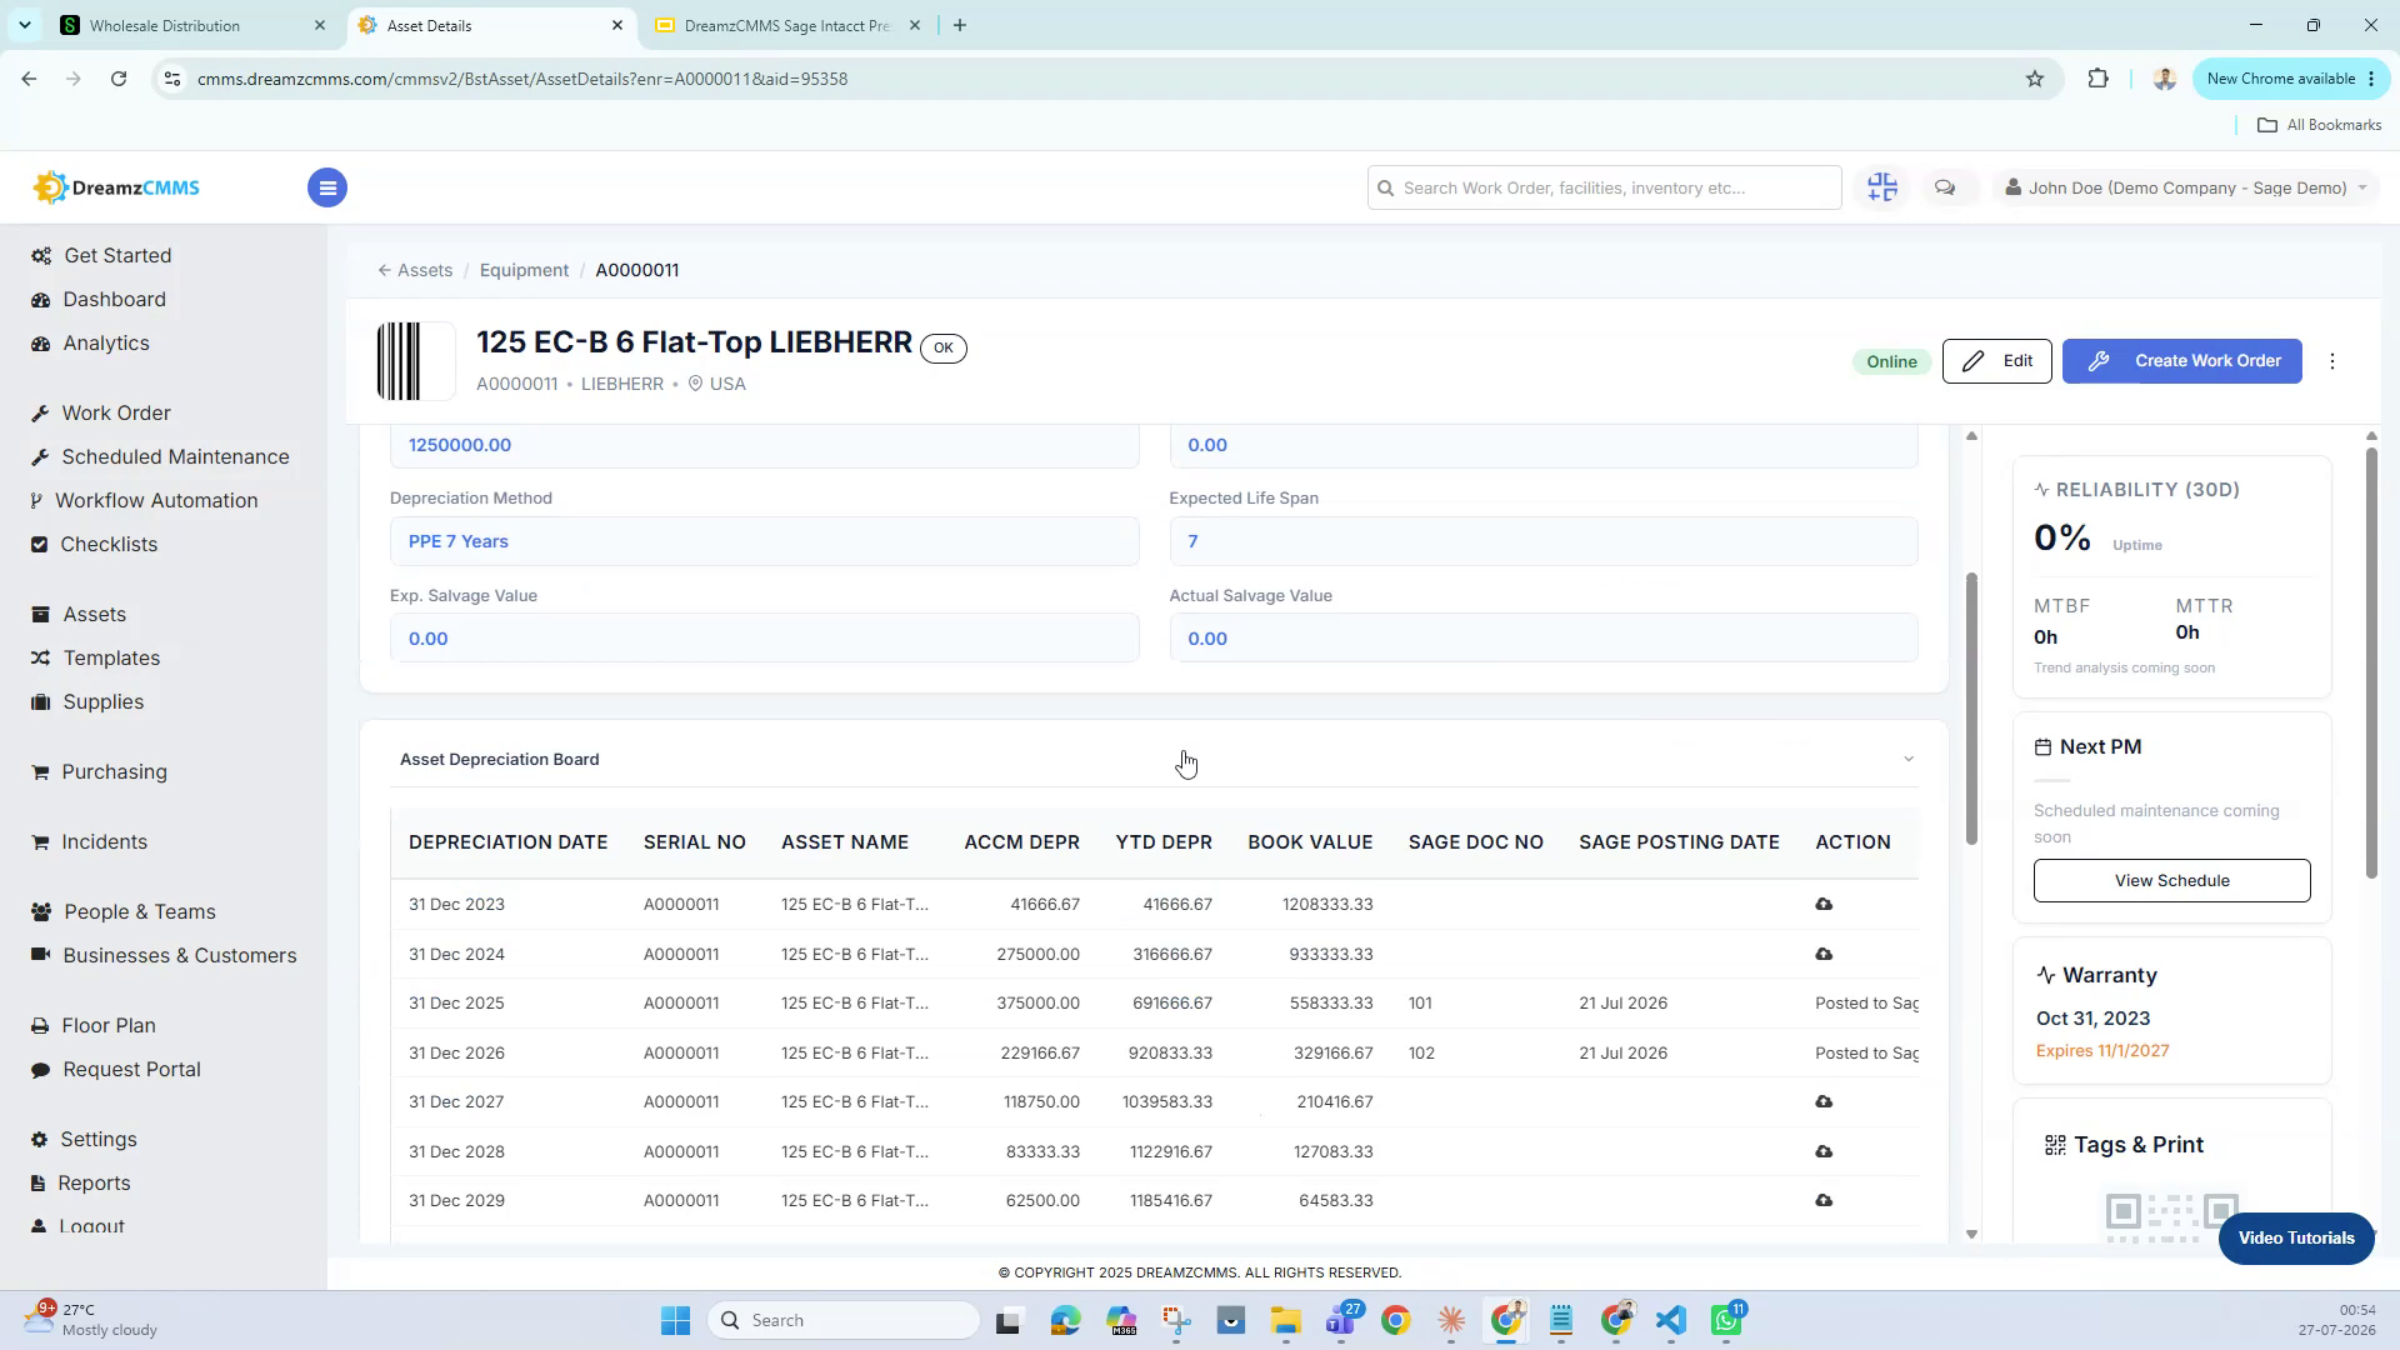
Each asset has its own Financial tab, where the depreciation board depends on a few key pieces of information — starting with the commissioning date, which is the date the asset is capitalized or placed into service. Depreciation begins from that date.
Step 15 – Asset Grouping and Classification
You can also set the asset's grouping and classification, defining what kind of asset it is and which asset class it belongs to.
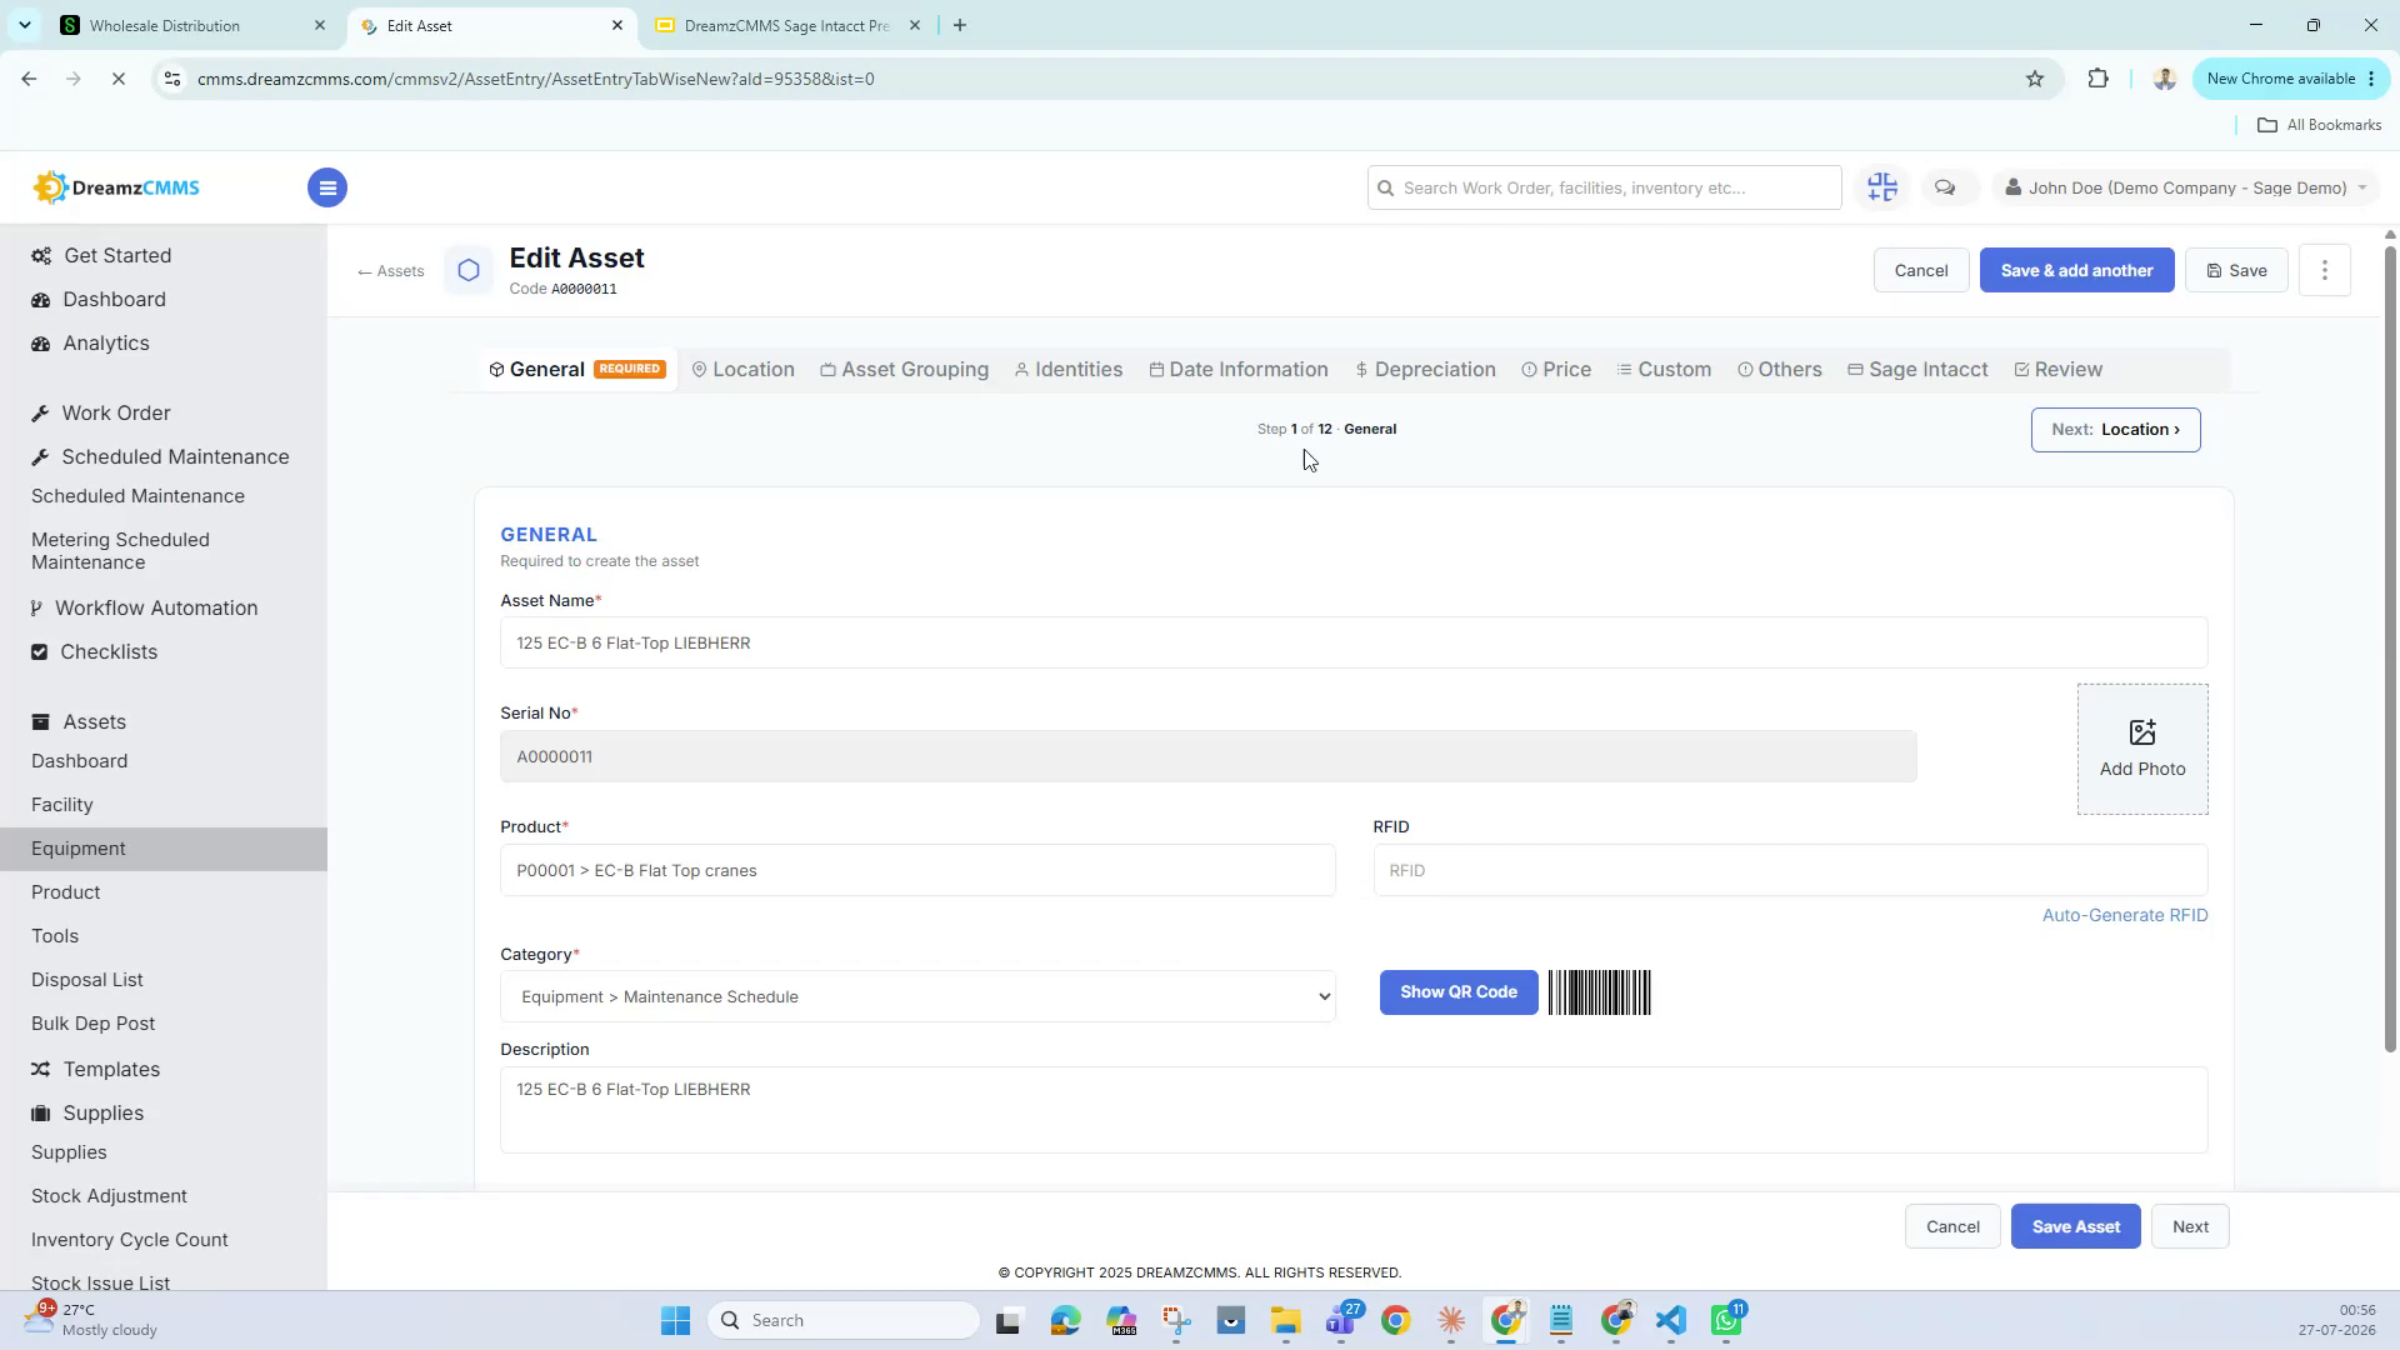
Step 16 – Configuration Flexibility
Note: The commissioning date captured here cannot be modified once depreciation has been posted for that asset, so double-check it before your first posting. Beyond that, configuration is flexible — you can tag each asset to different account groups and asset groups as needed.
Step 17 – How Depreciation Is Calculated
Depreciation is calculated based on the logged purchase cost and the depreciation method tagged to the asset. Depreciation methods themselves are managed entirely inside DreamzCMMS, under their own set of categories.
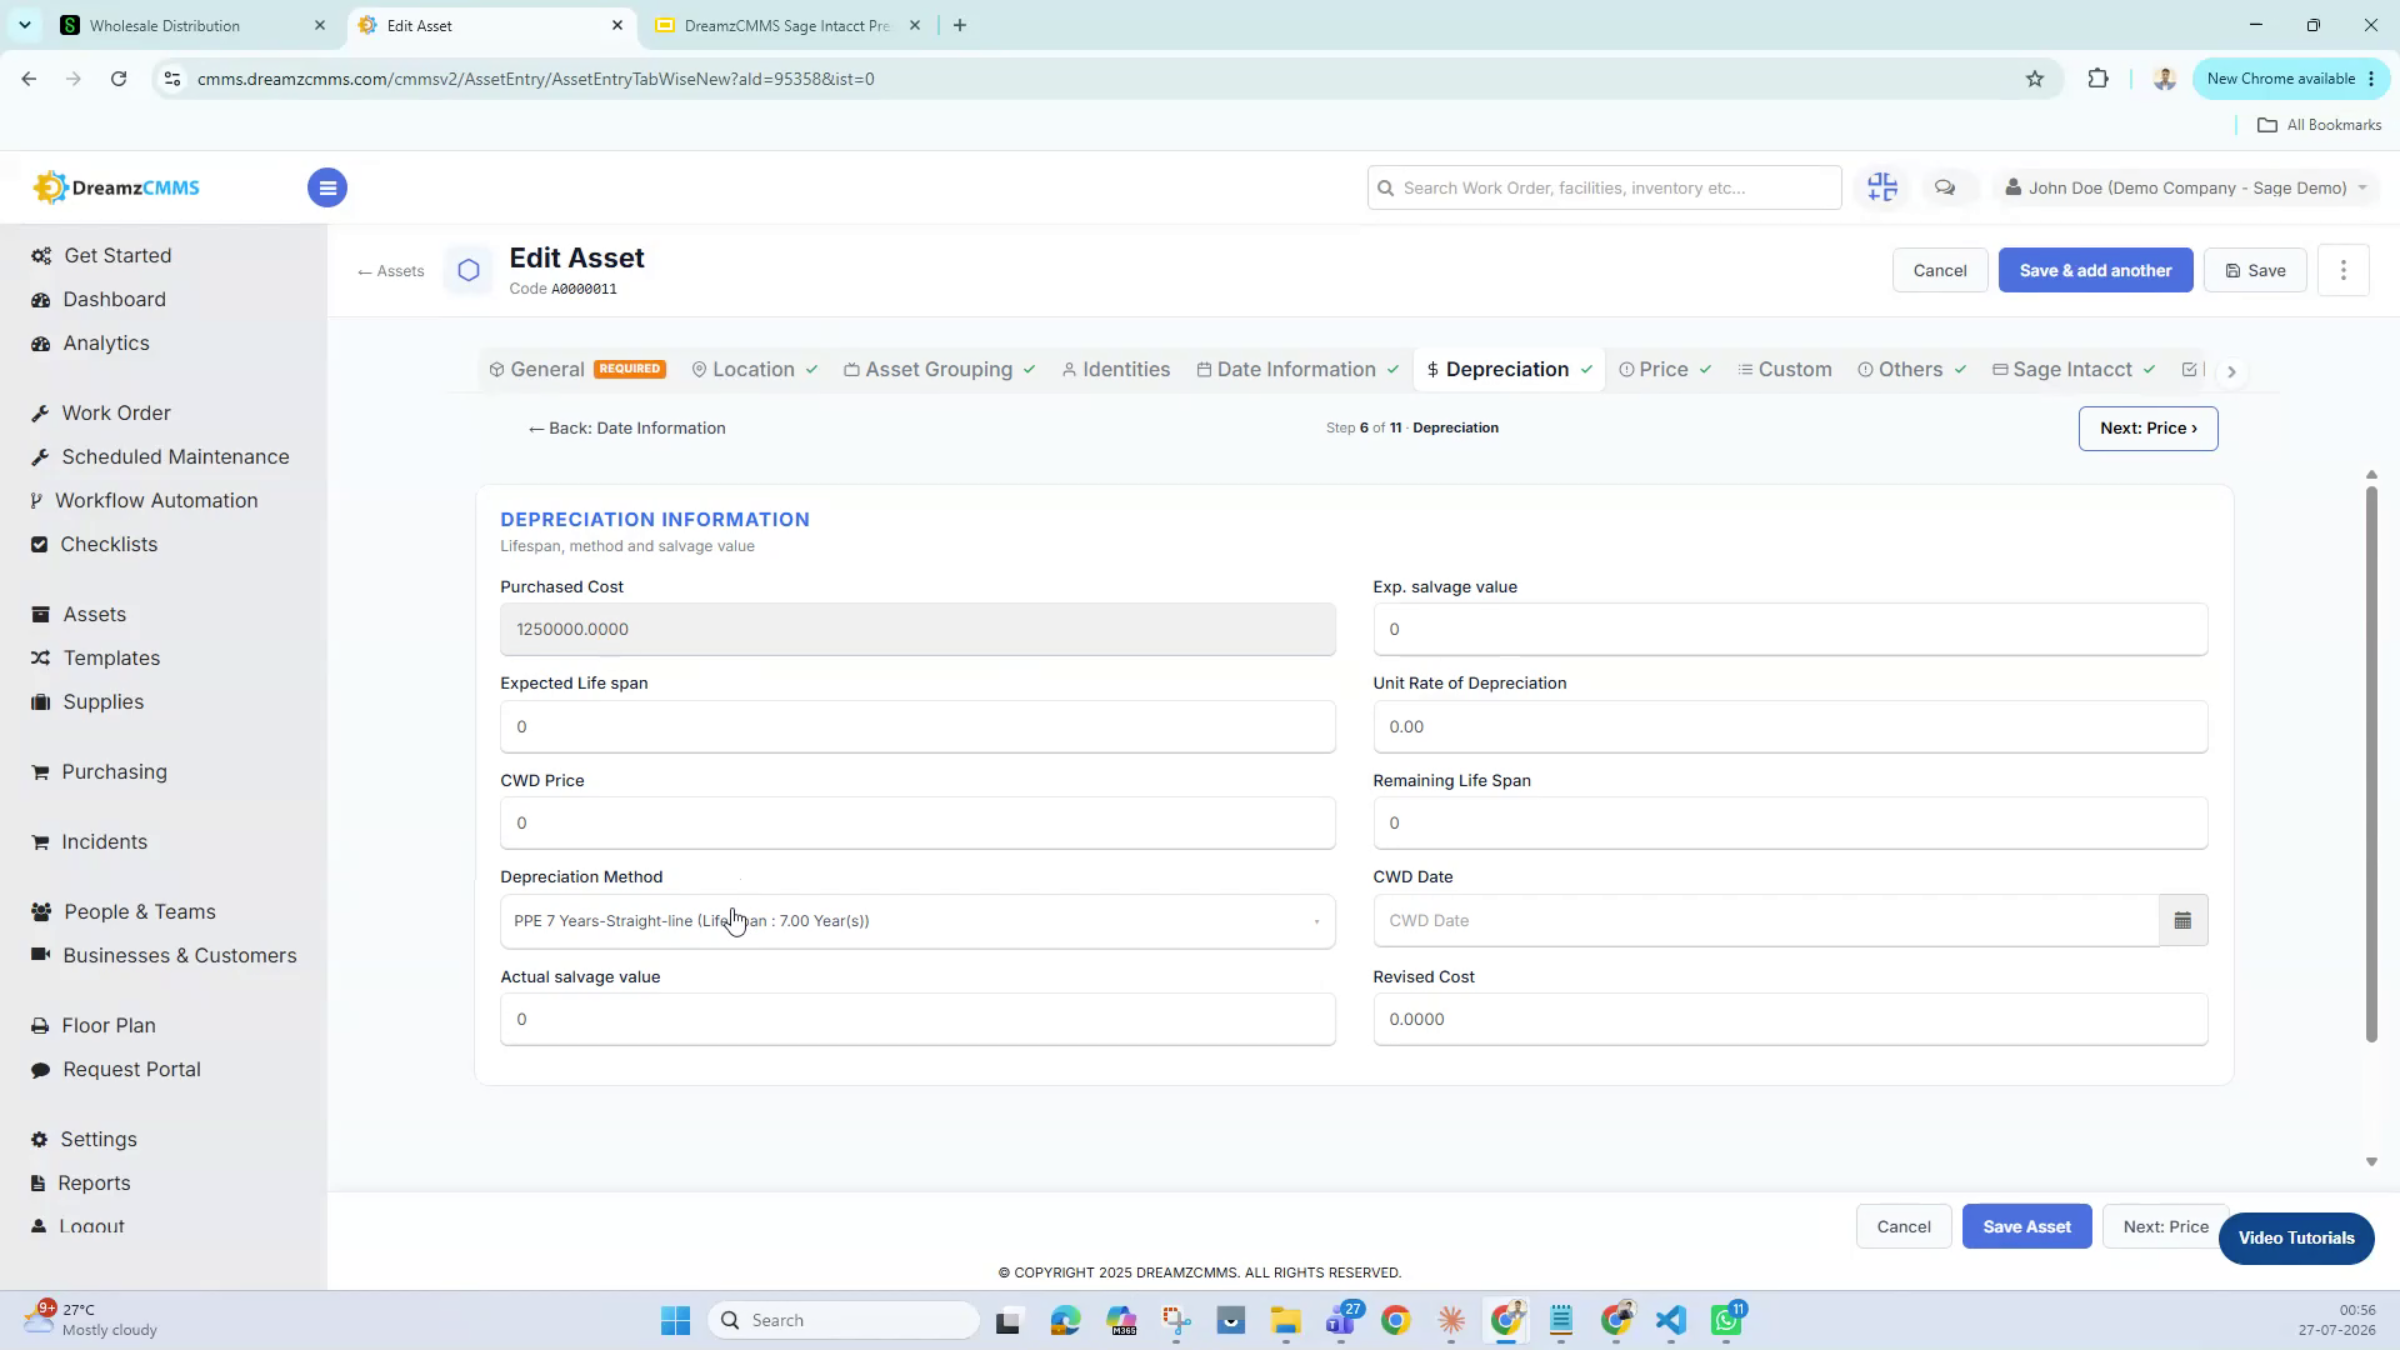
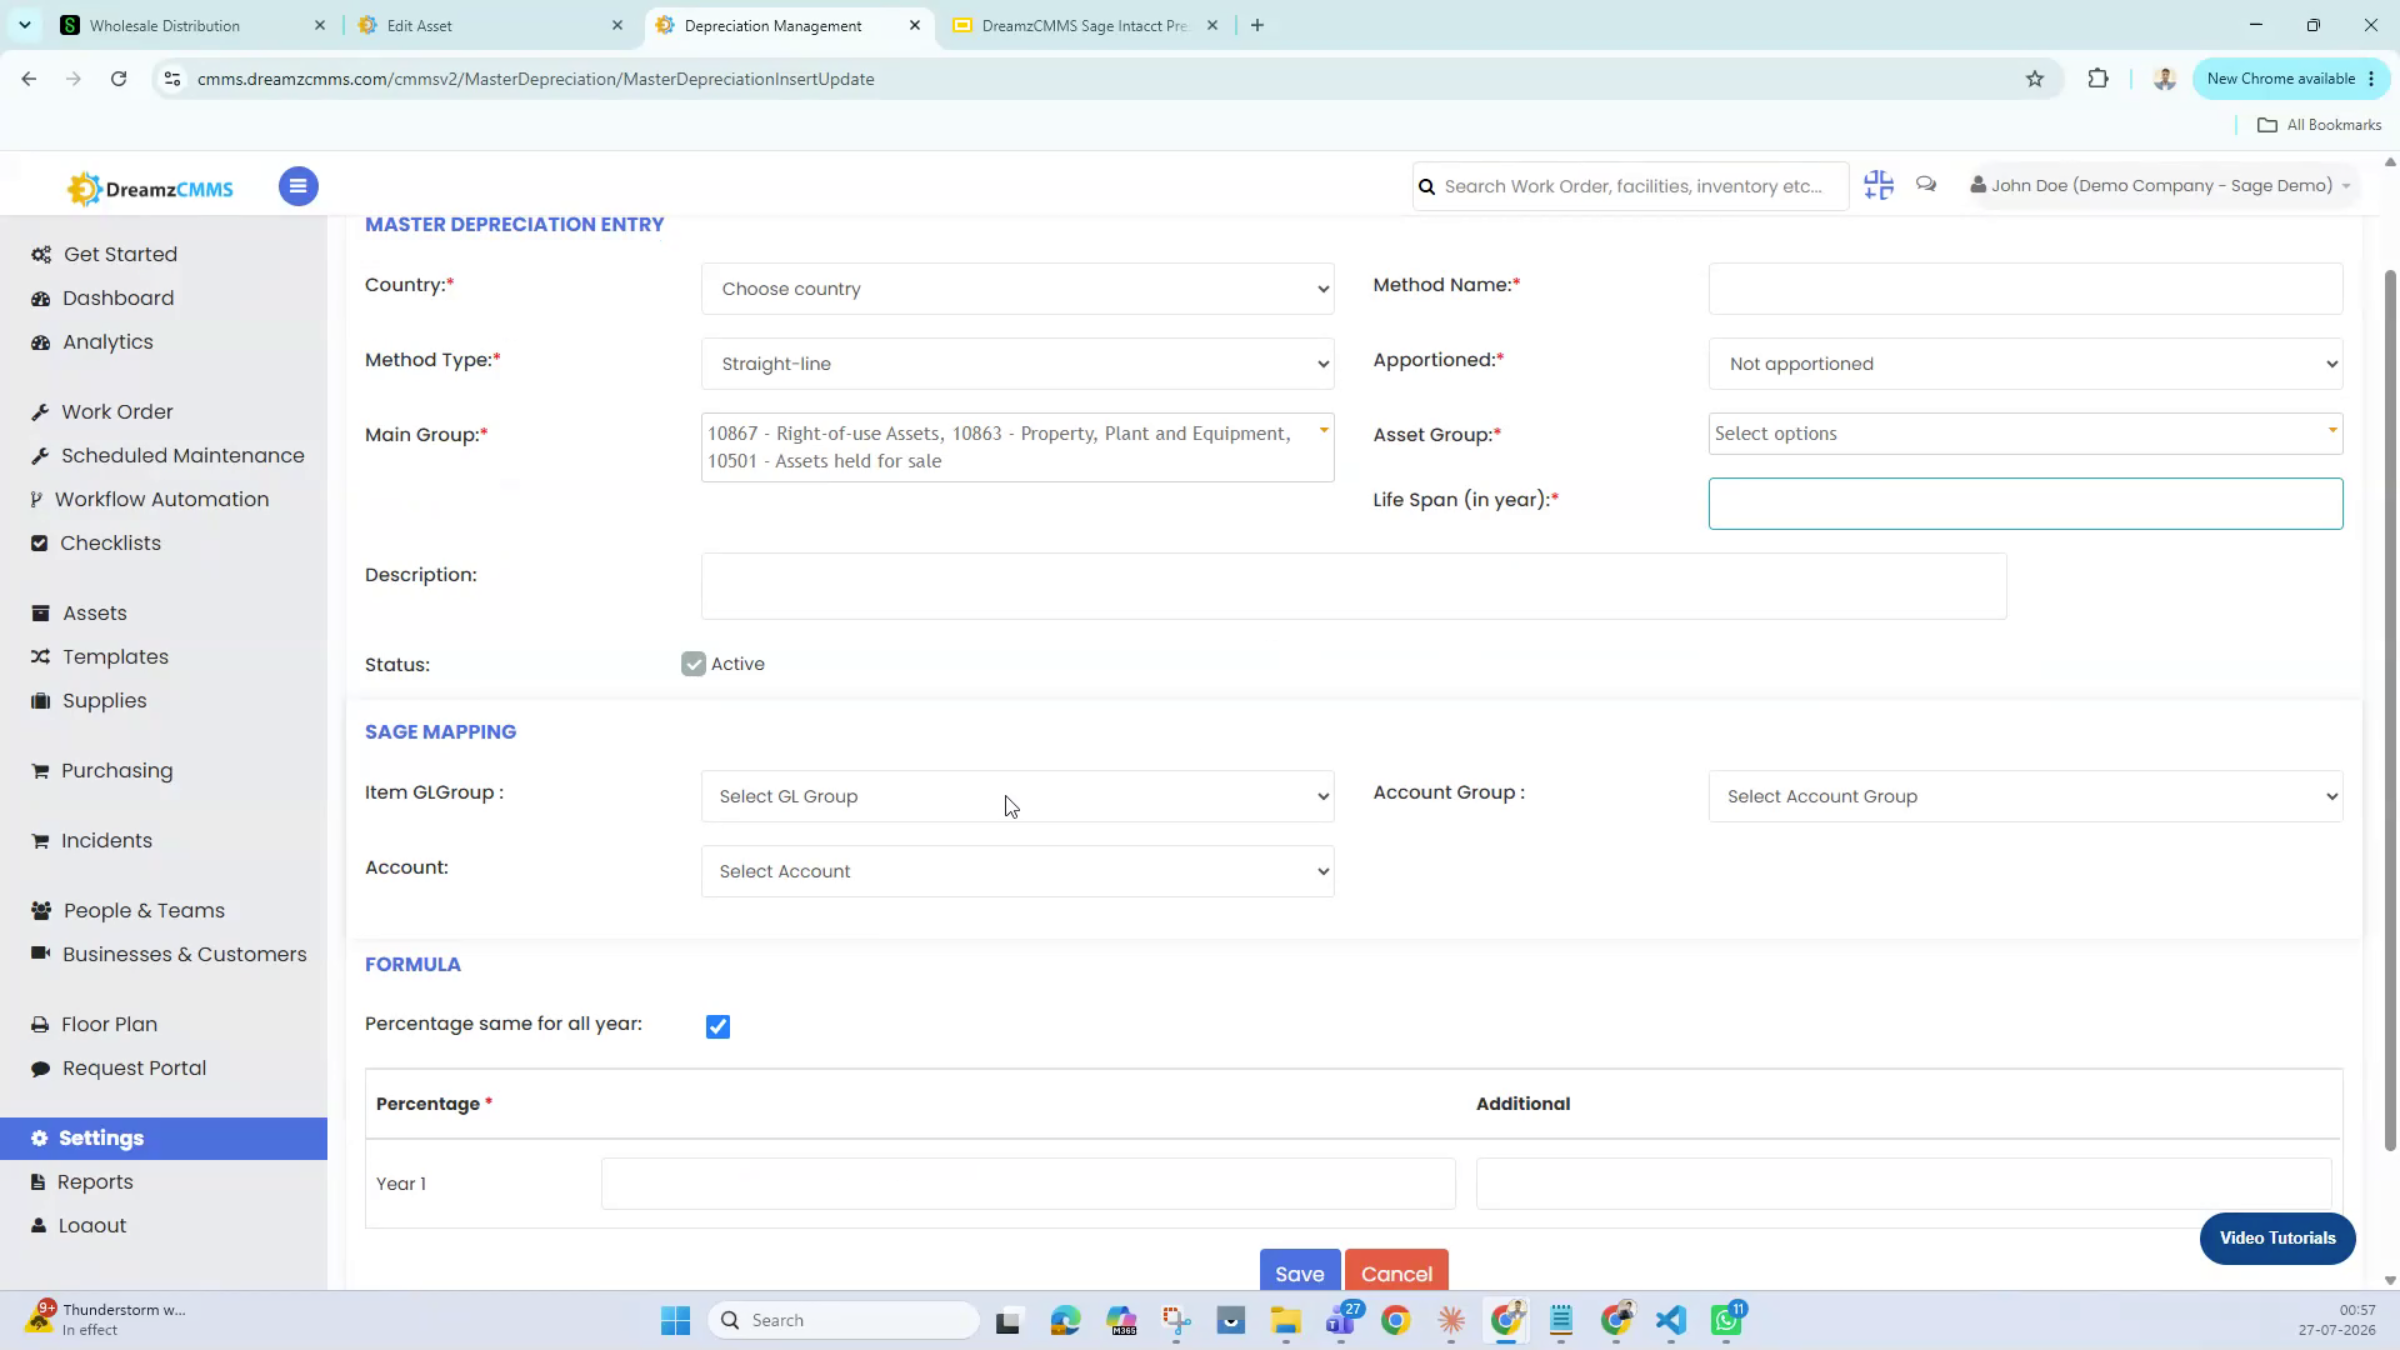
Step 18 – Configure Depreciation Methods
The grouping and depreciation lists you see on an asset are populated from this configuration screen. Choose the method you want to apply — for example, straight-line, and whether it's prorated monthly or applied as a full year if not prorated.
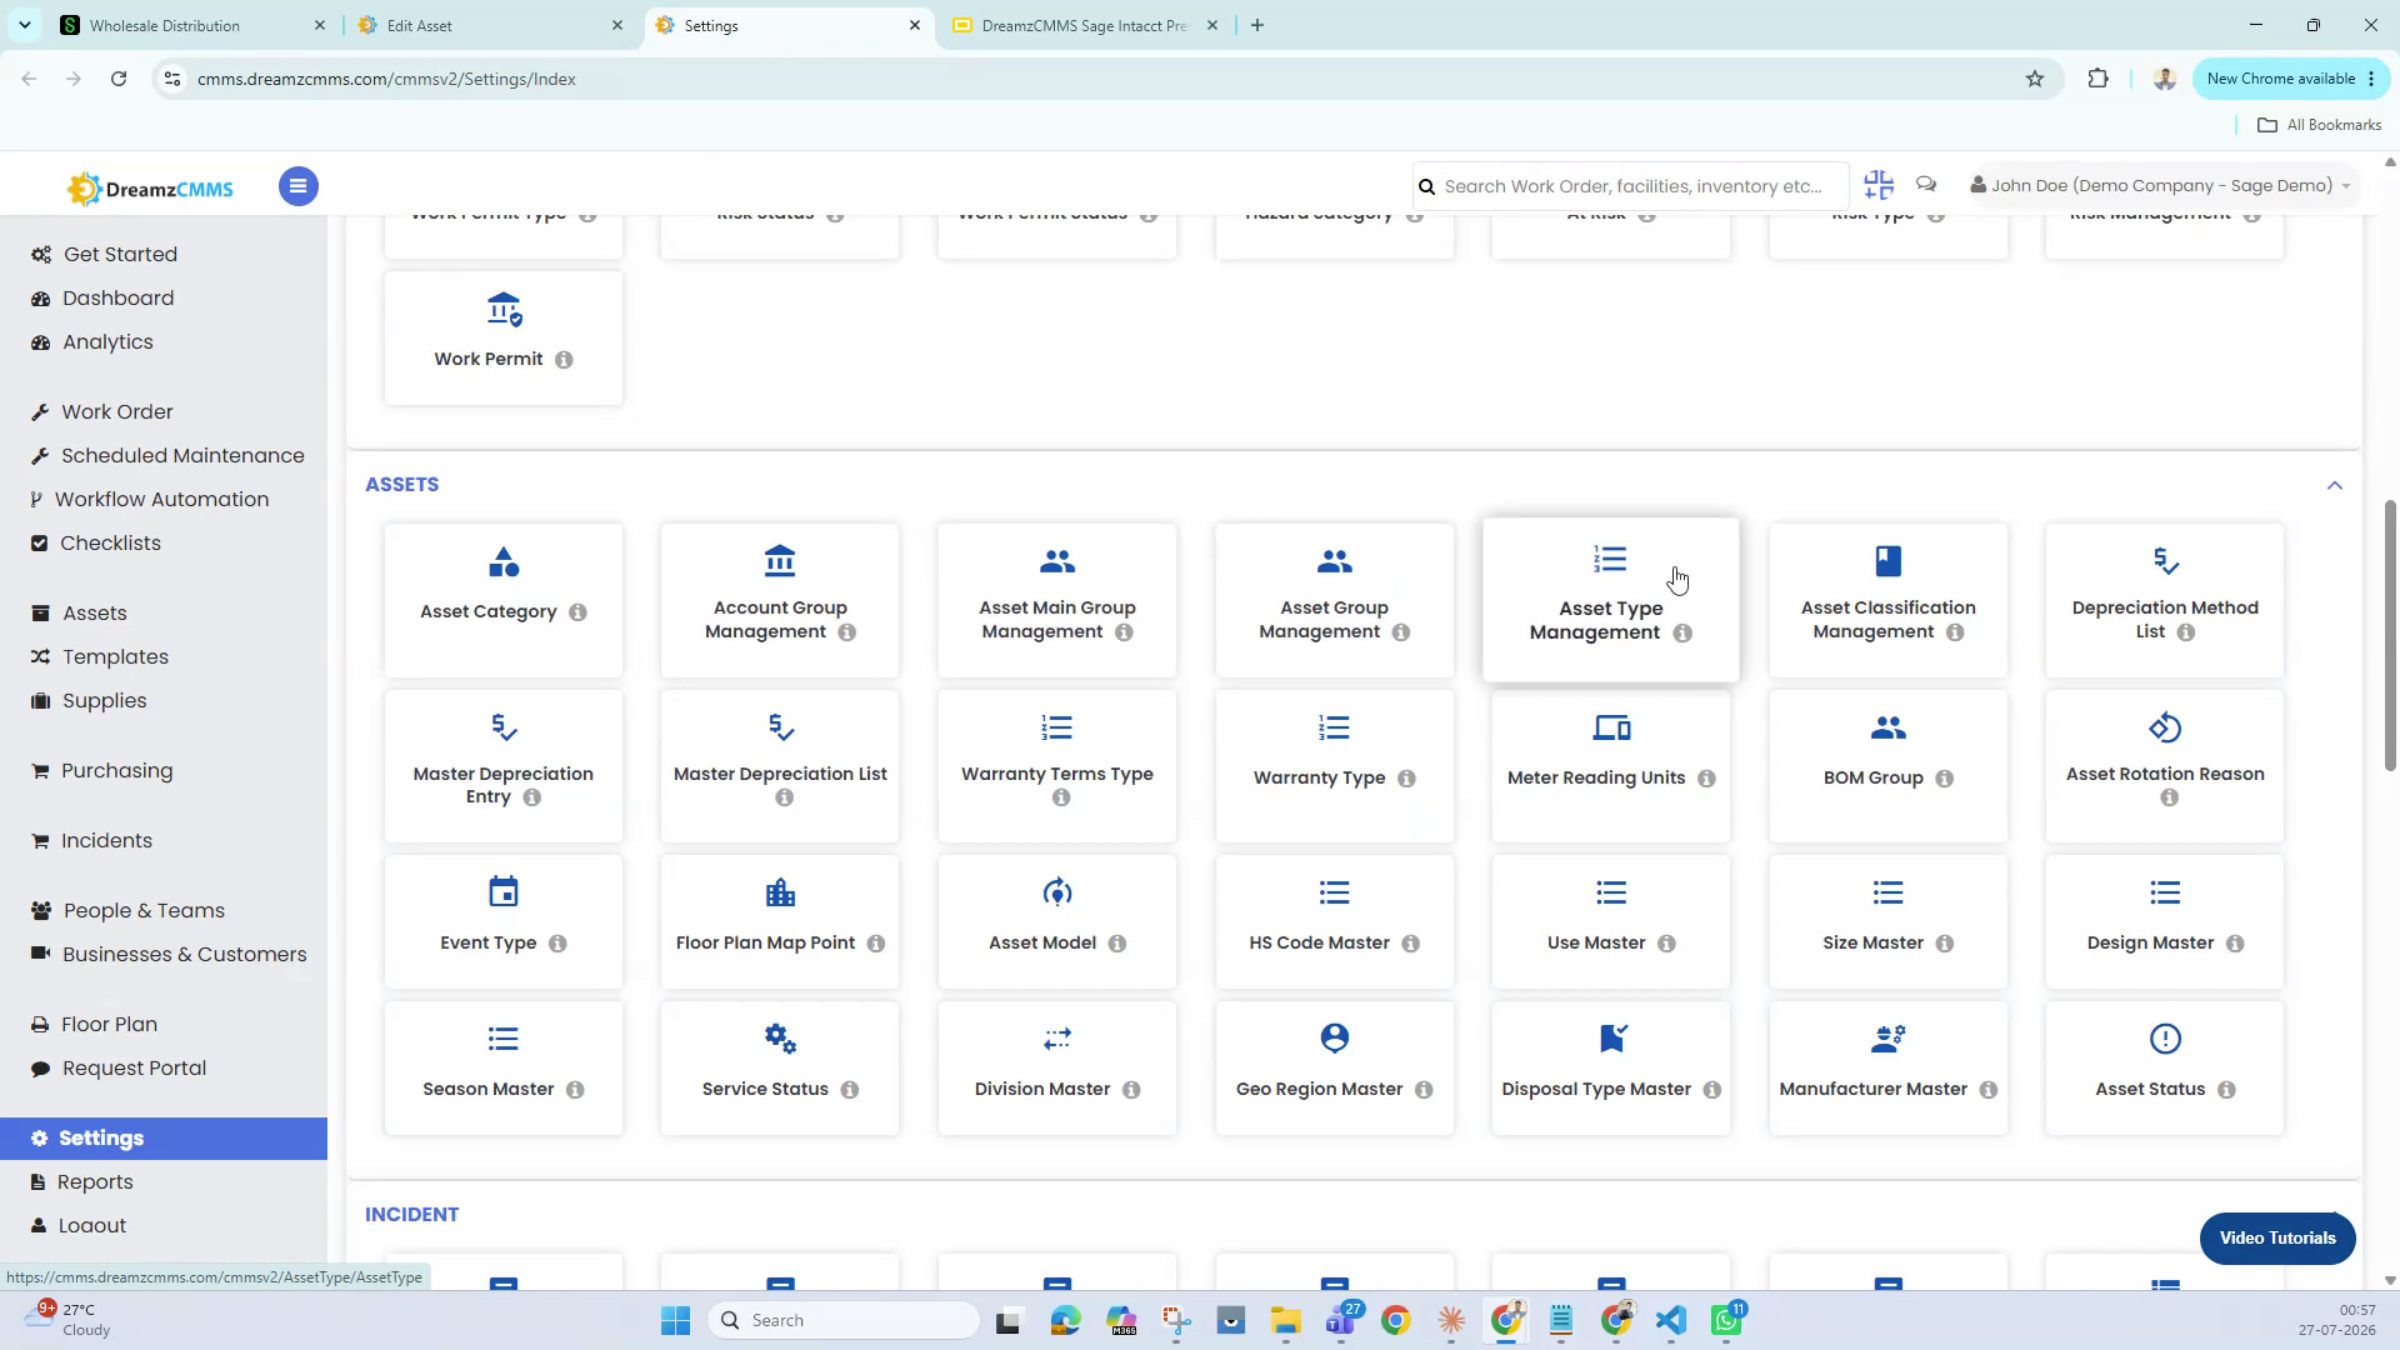
Step 19 – Set the Asset Group's Lifespan
The depreciation schedule also depends on the asset group's lifespan, which you set as part of this configuration.
Posting Depreciation, Revaluation, and Disposal
Step 20 – Post Depreciation to Sage Intacct
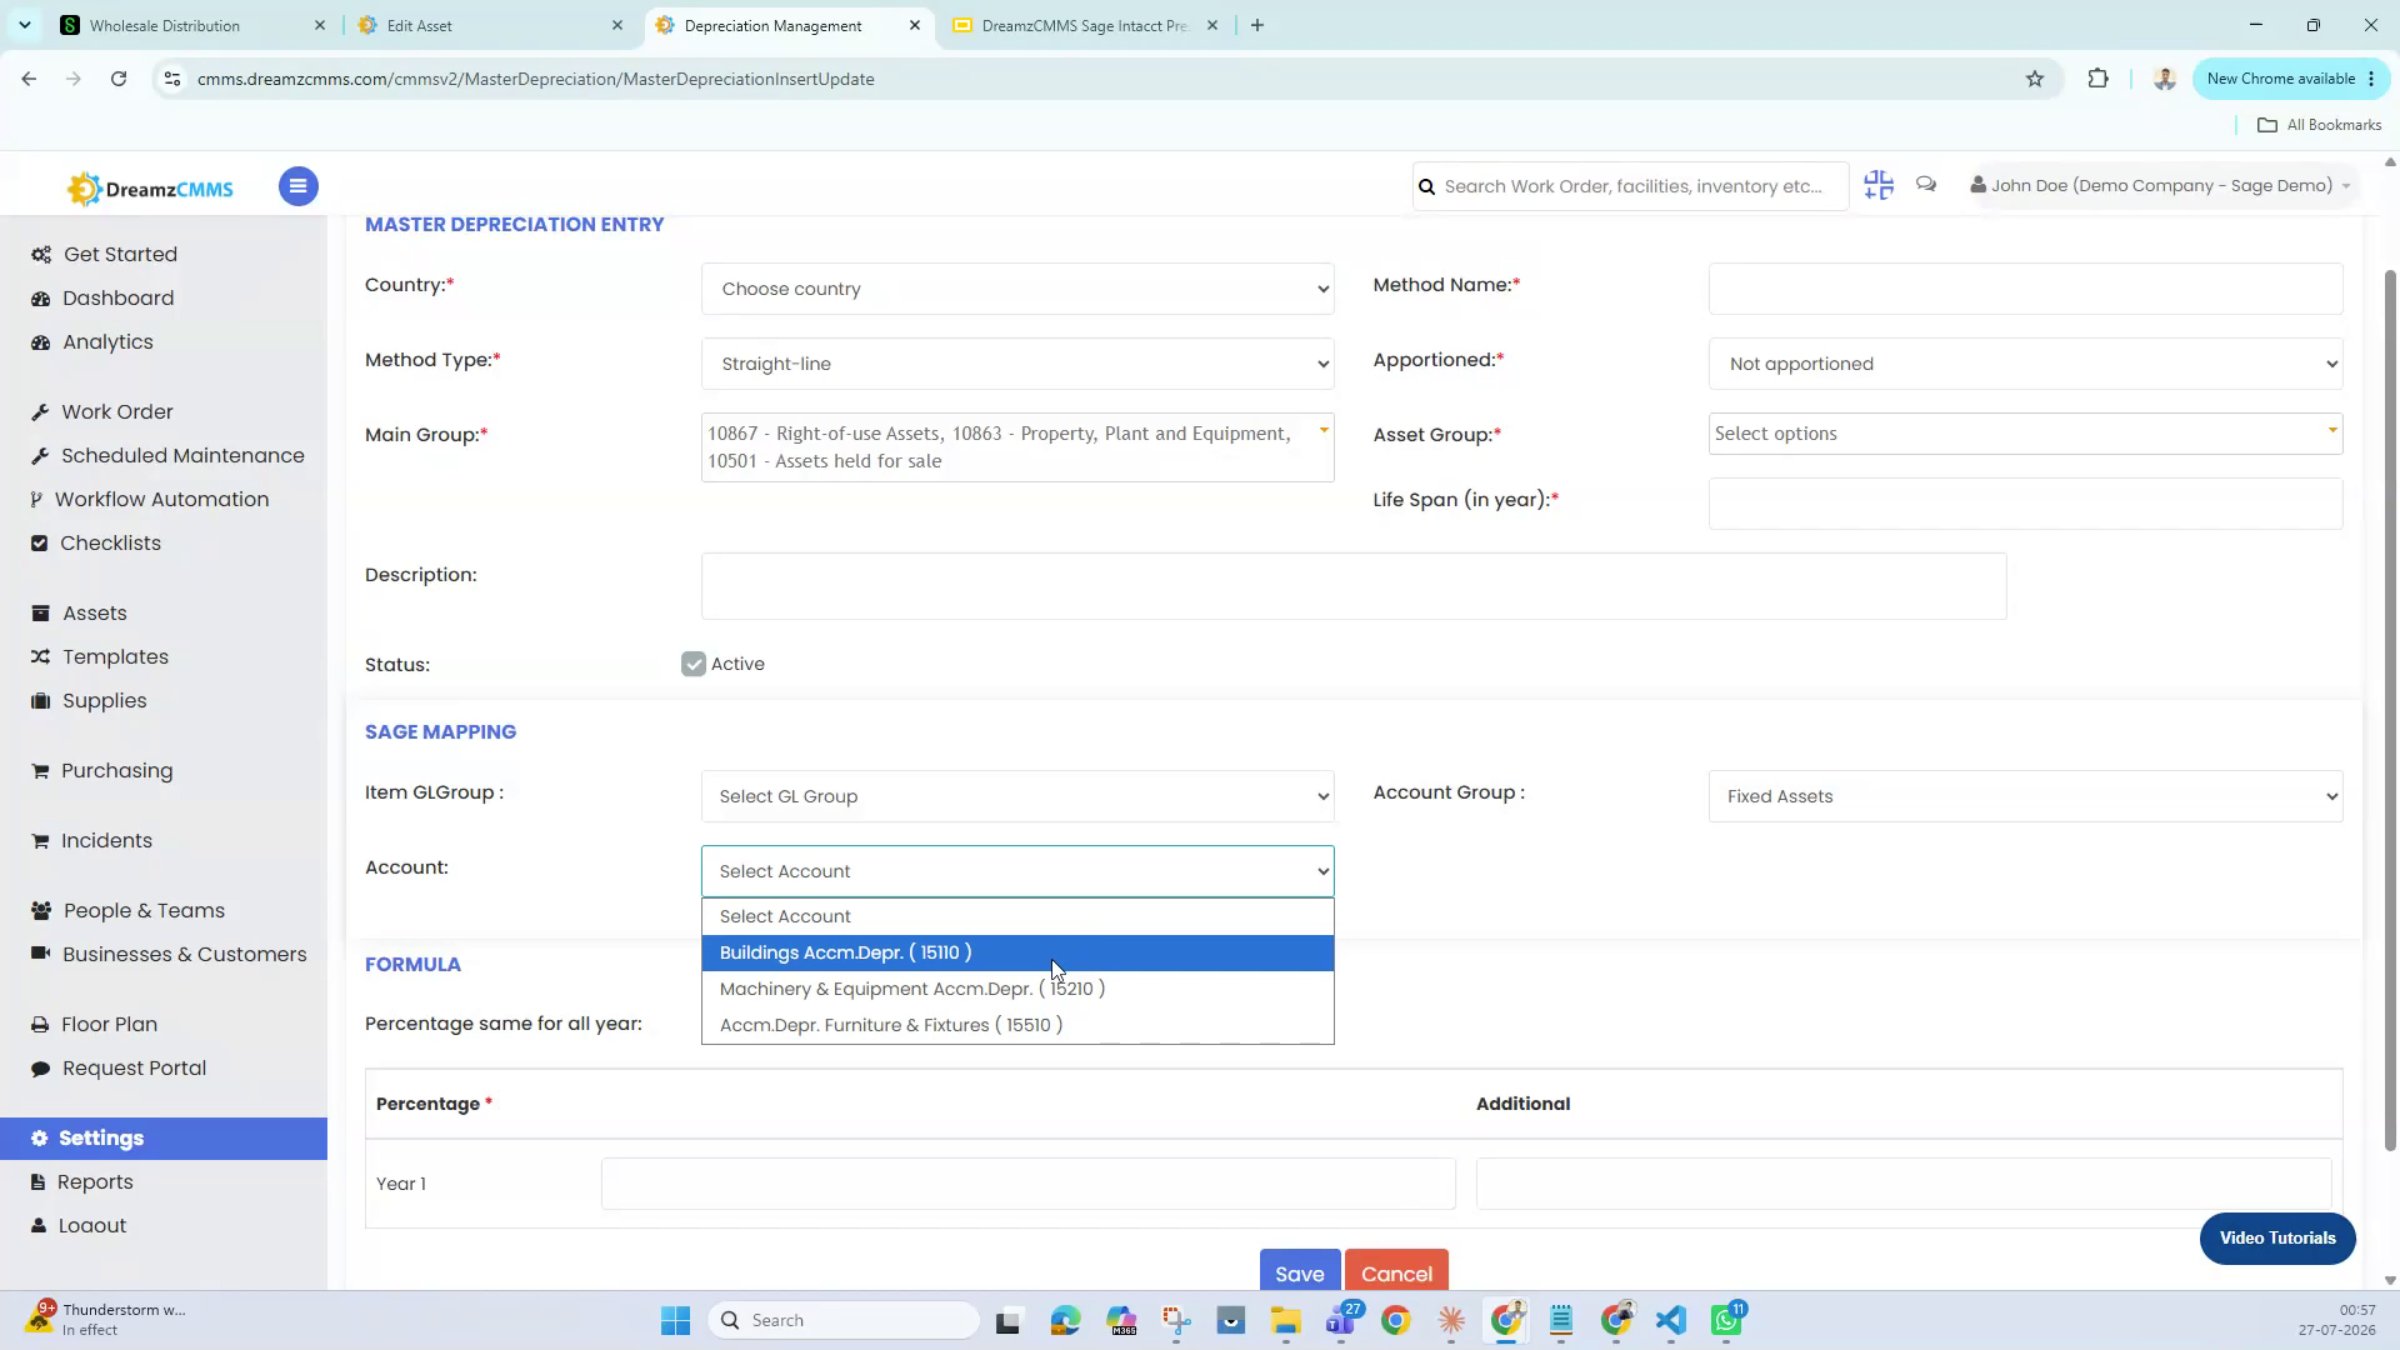
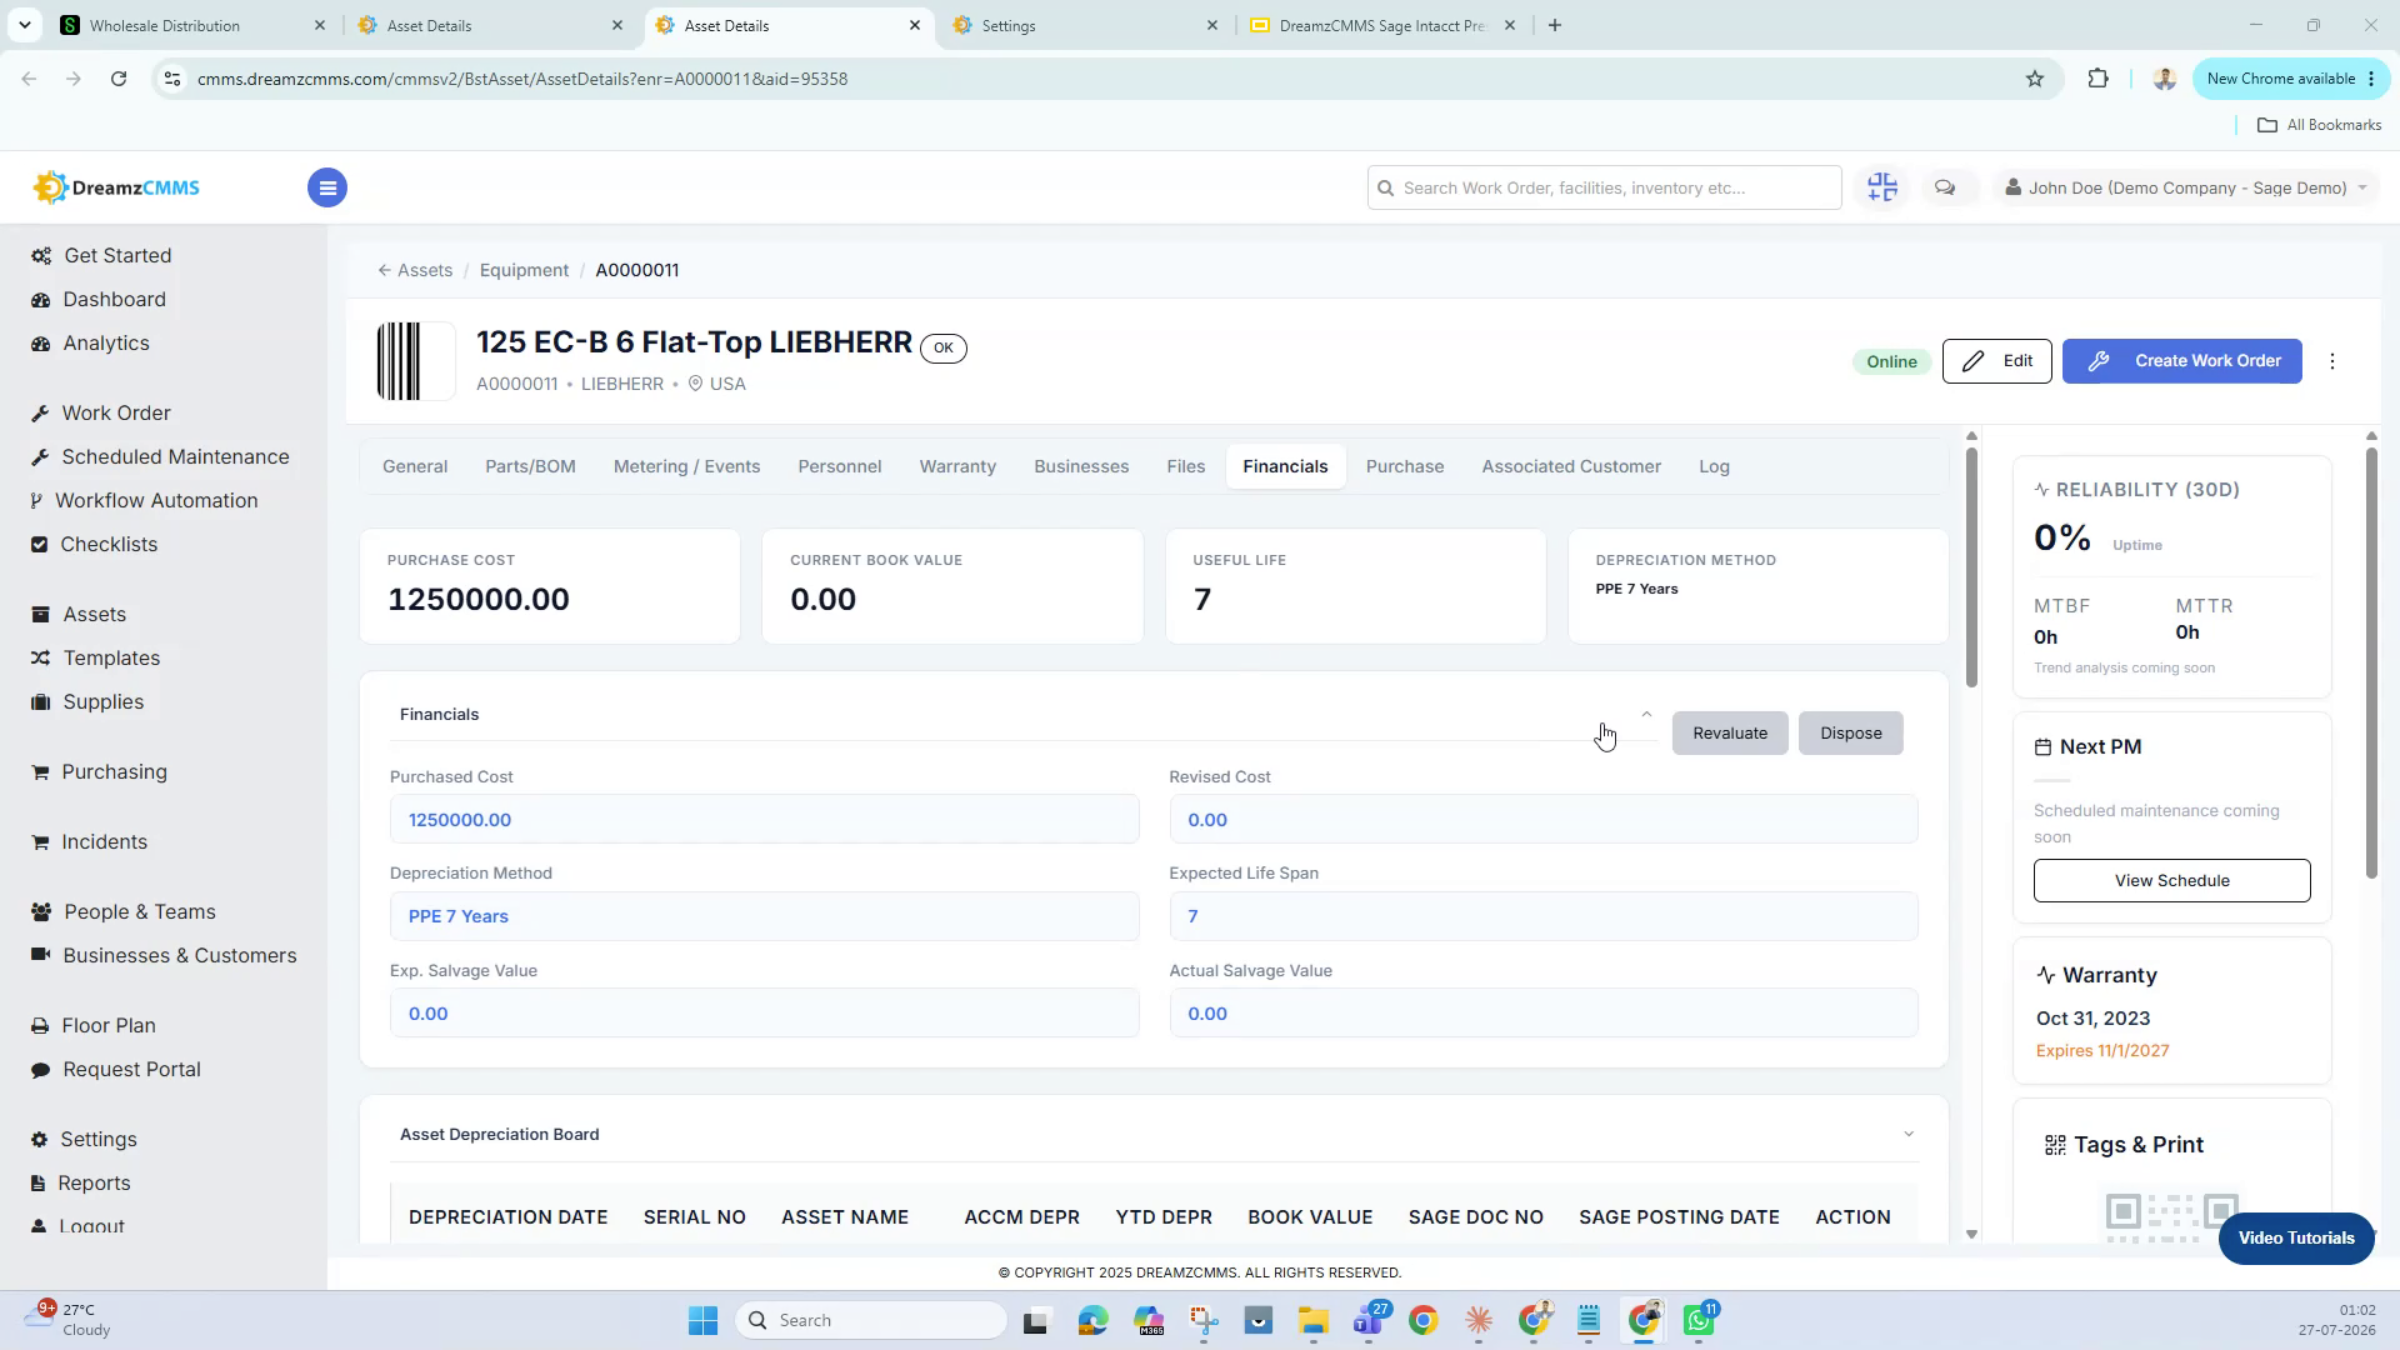
Fill in the depreciation percentage and specify which GL account or account group it maps to in Sage Intacct — for example, machinery and equipment — so every depreciation entry for that group attaches to the right account automatically. From the depreciation board, you can post the accumulated depreciation into Sage Intacct; once posted, the corresponding document or reference number from Sage appears back here. You can also revaluate an asset as of the current fiscal year, updating its book value and extending its useful life if needed.
Step 21 – Attach Documents and Save the Revaluation
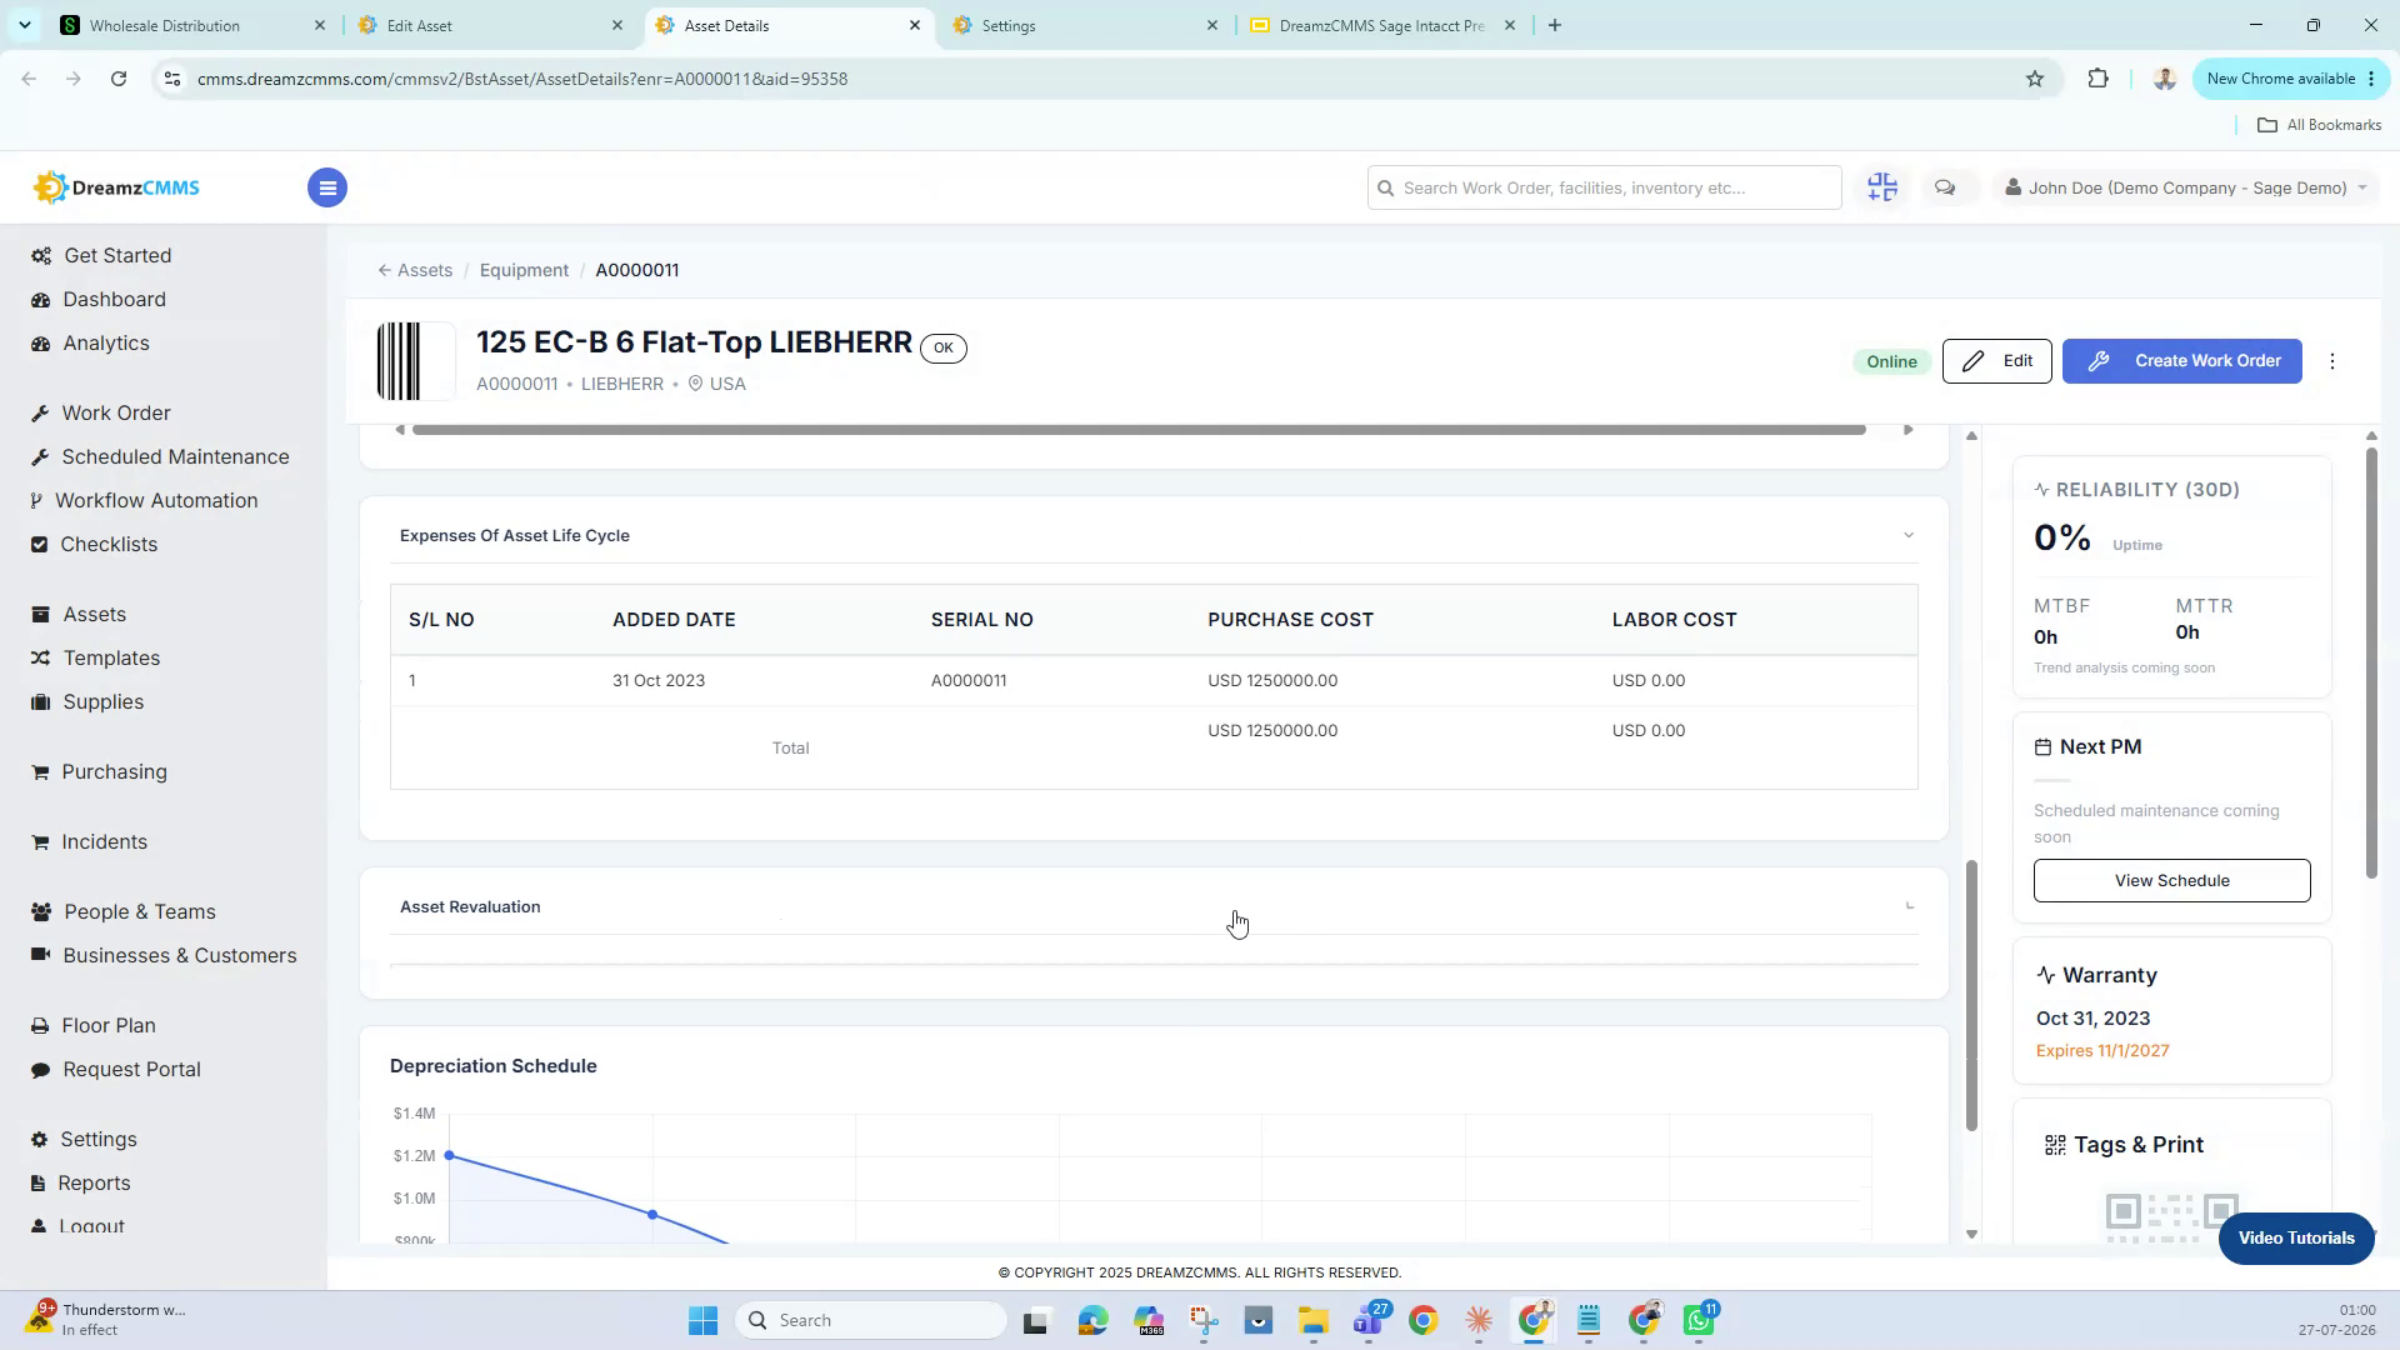
You can attach supporting documents to the revaluation before saving. Once saved, the depreciation schedule is revalued and updated accordingly.
Step 22 – Review Revaluation Records
Once a revaluation is completed, you'll see it listed alongside any others you've recorded.
Step 23 – See the Effect and Start a Disposal
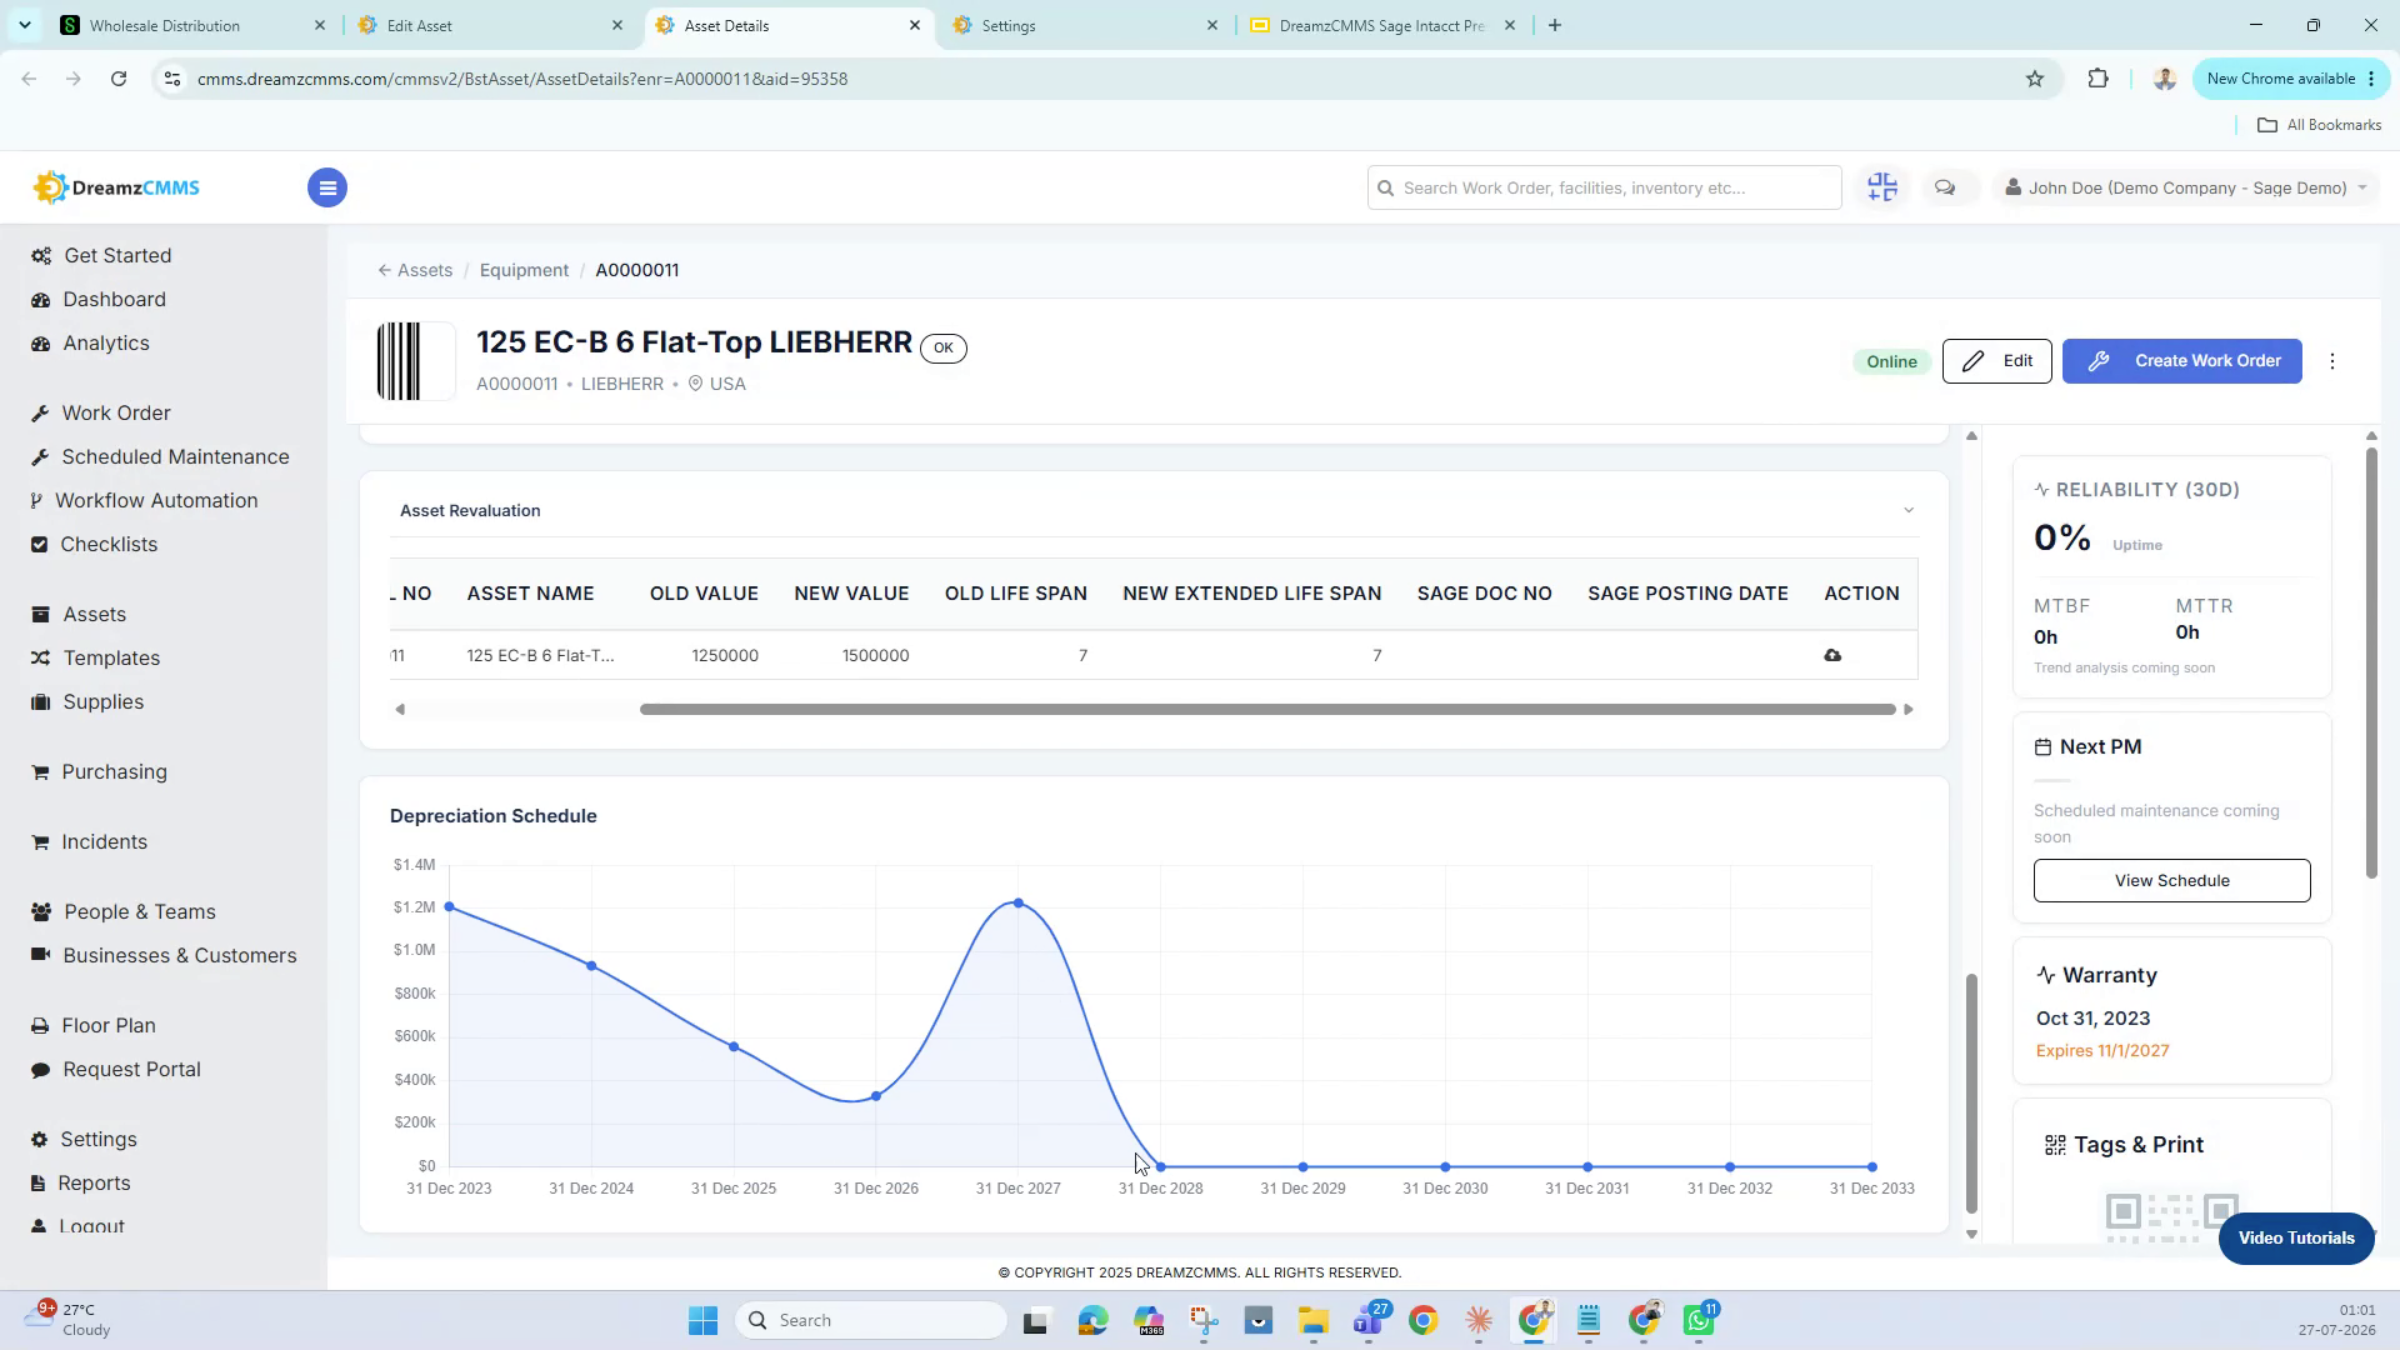
After a revaluation takes effect, you can compare the old and new book value alongside the extended useful life, and see how the depreciation schedule has changed. When an asset has worn off its useful life or is no longer in use, click Dispose and choose the disposal type — sale, theft, or casualty loss, all configurable. For a casualty loss, sale and proceeding values are zero, and the system calculates the proceeds based on the current book value; you then select the account where the disposal will post.
Step 24 – Complete the Disposal
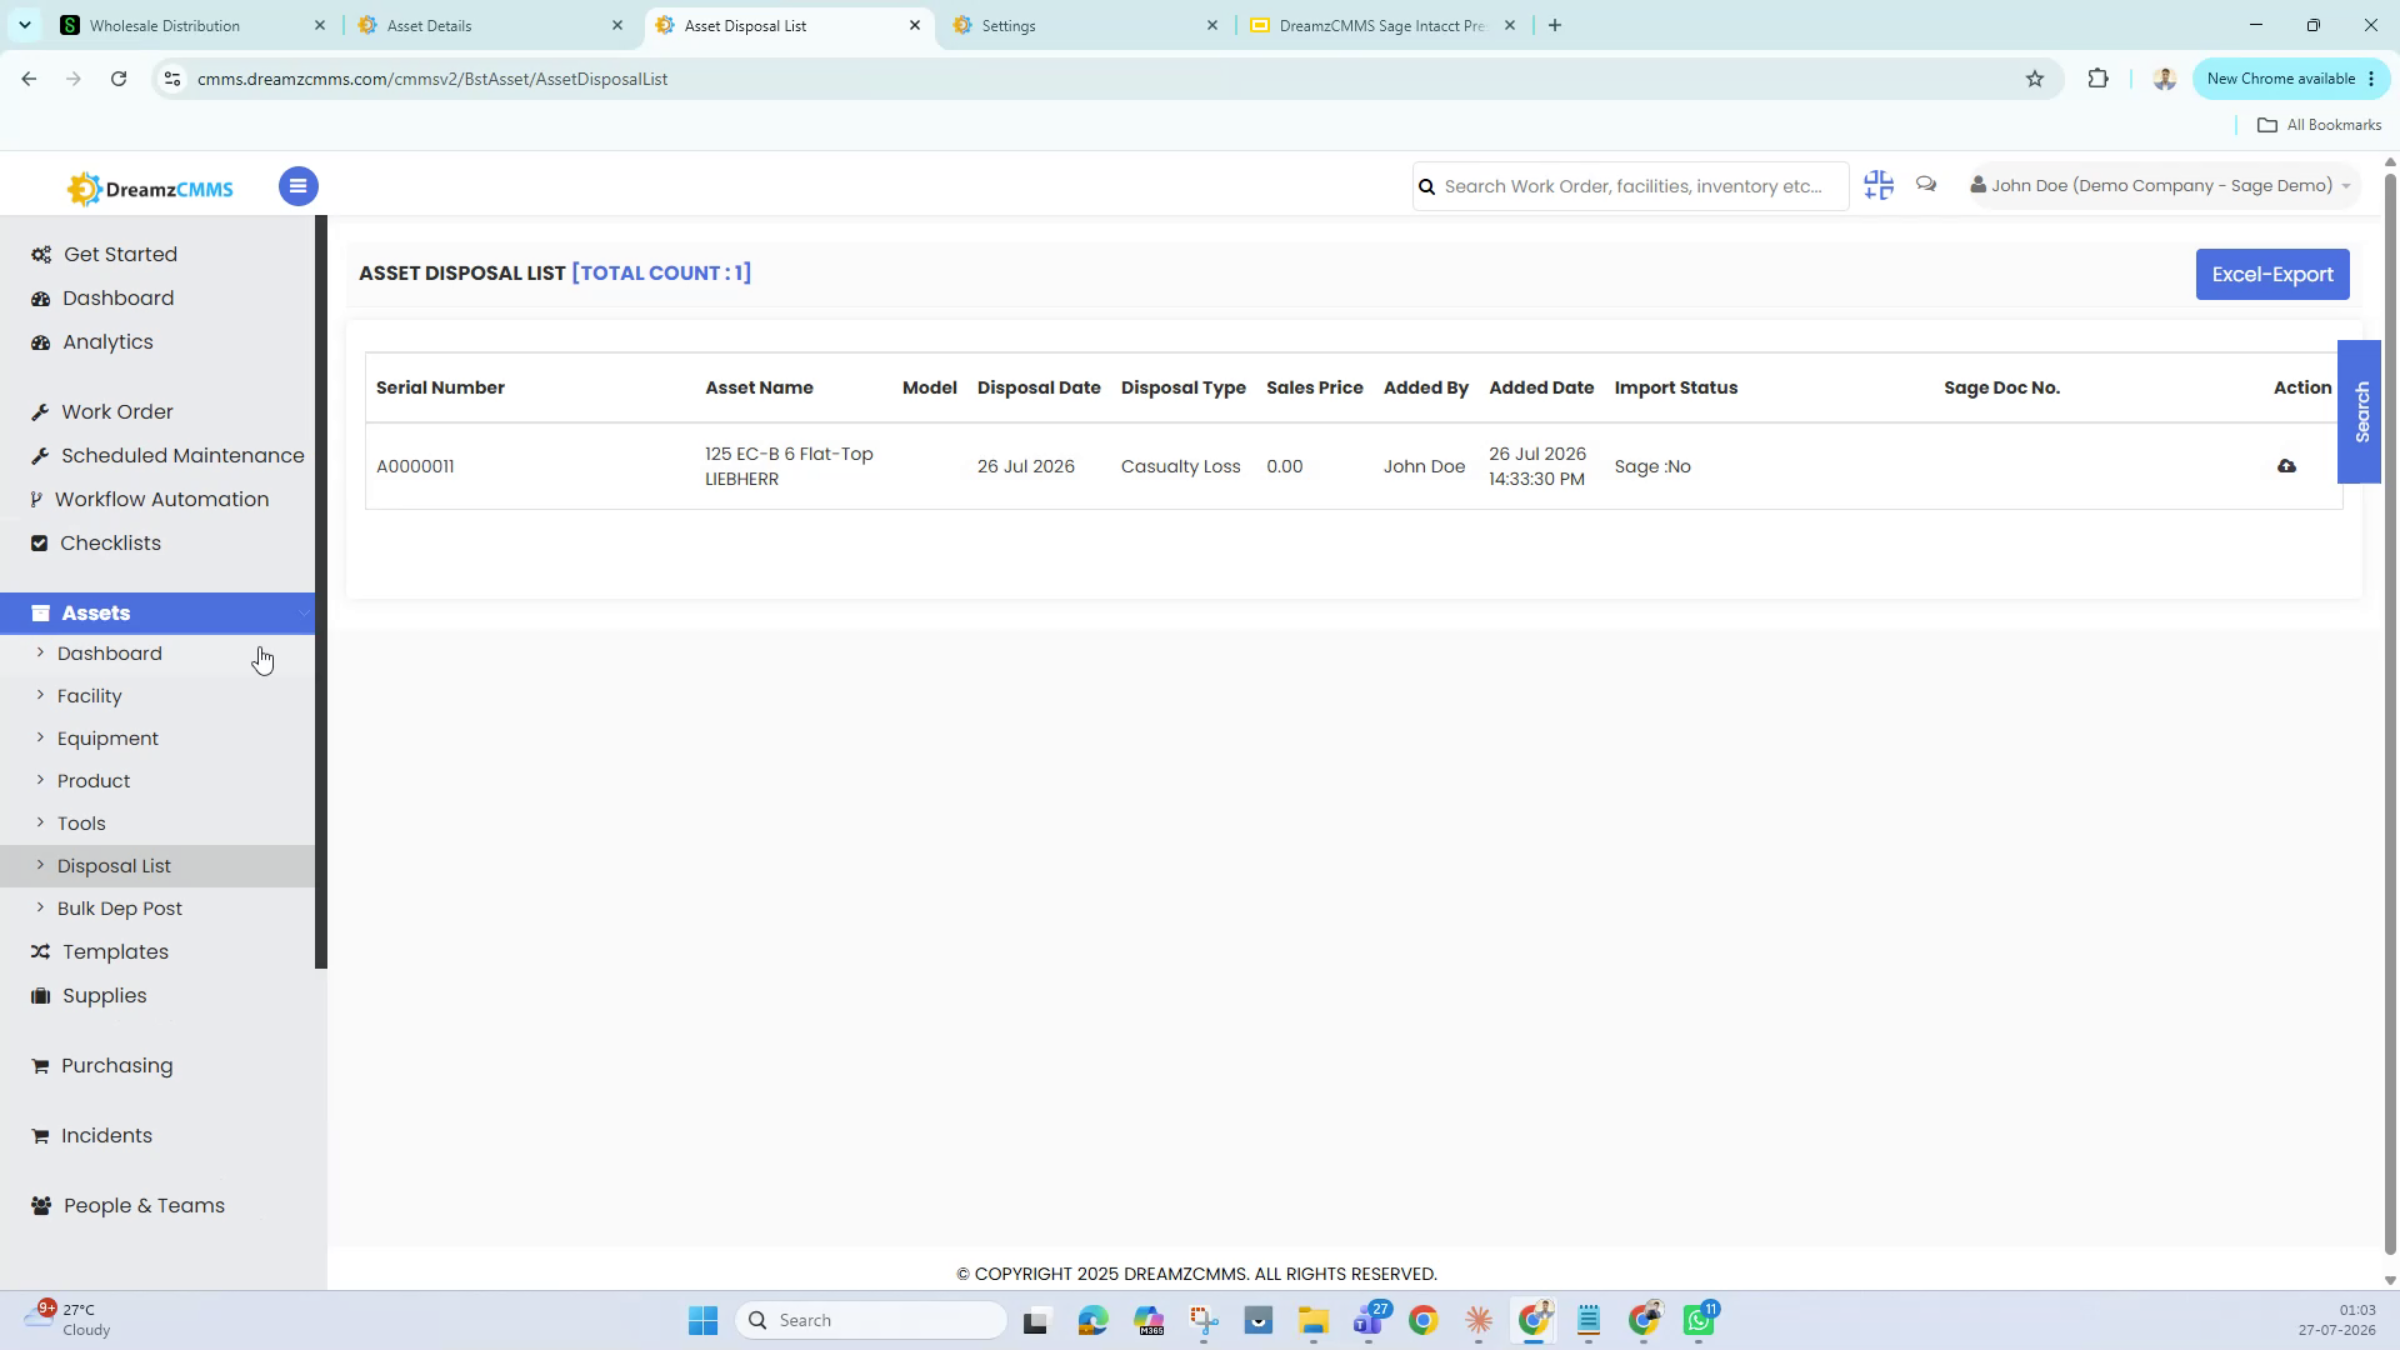
After choosing how the proceeds were received — for example, by cash — saving finalizes the disposal. Every disposal appears under the Disposal List on the left-hand side of the asset section.
Step 25 – Post Disposals and Bulk Depreciation
From here, you can post the disposal transaction into Sage Intacct, with any resulting profit or loss calculated automatically. Bulk depreciation posting is also available for handling multiple assets at once.
Fixed Asset Reporting
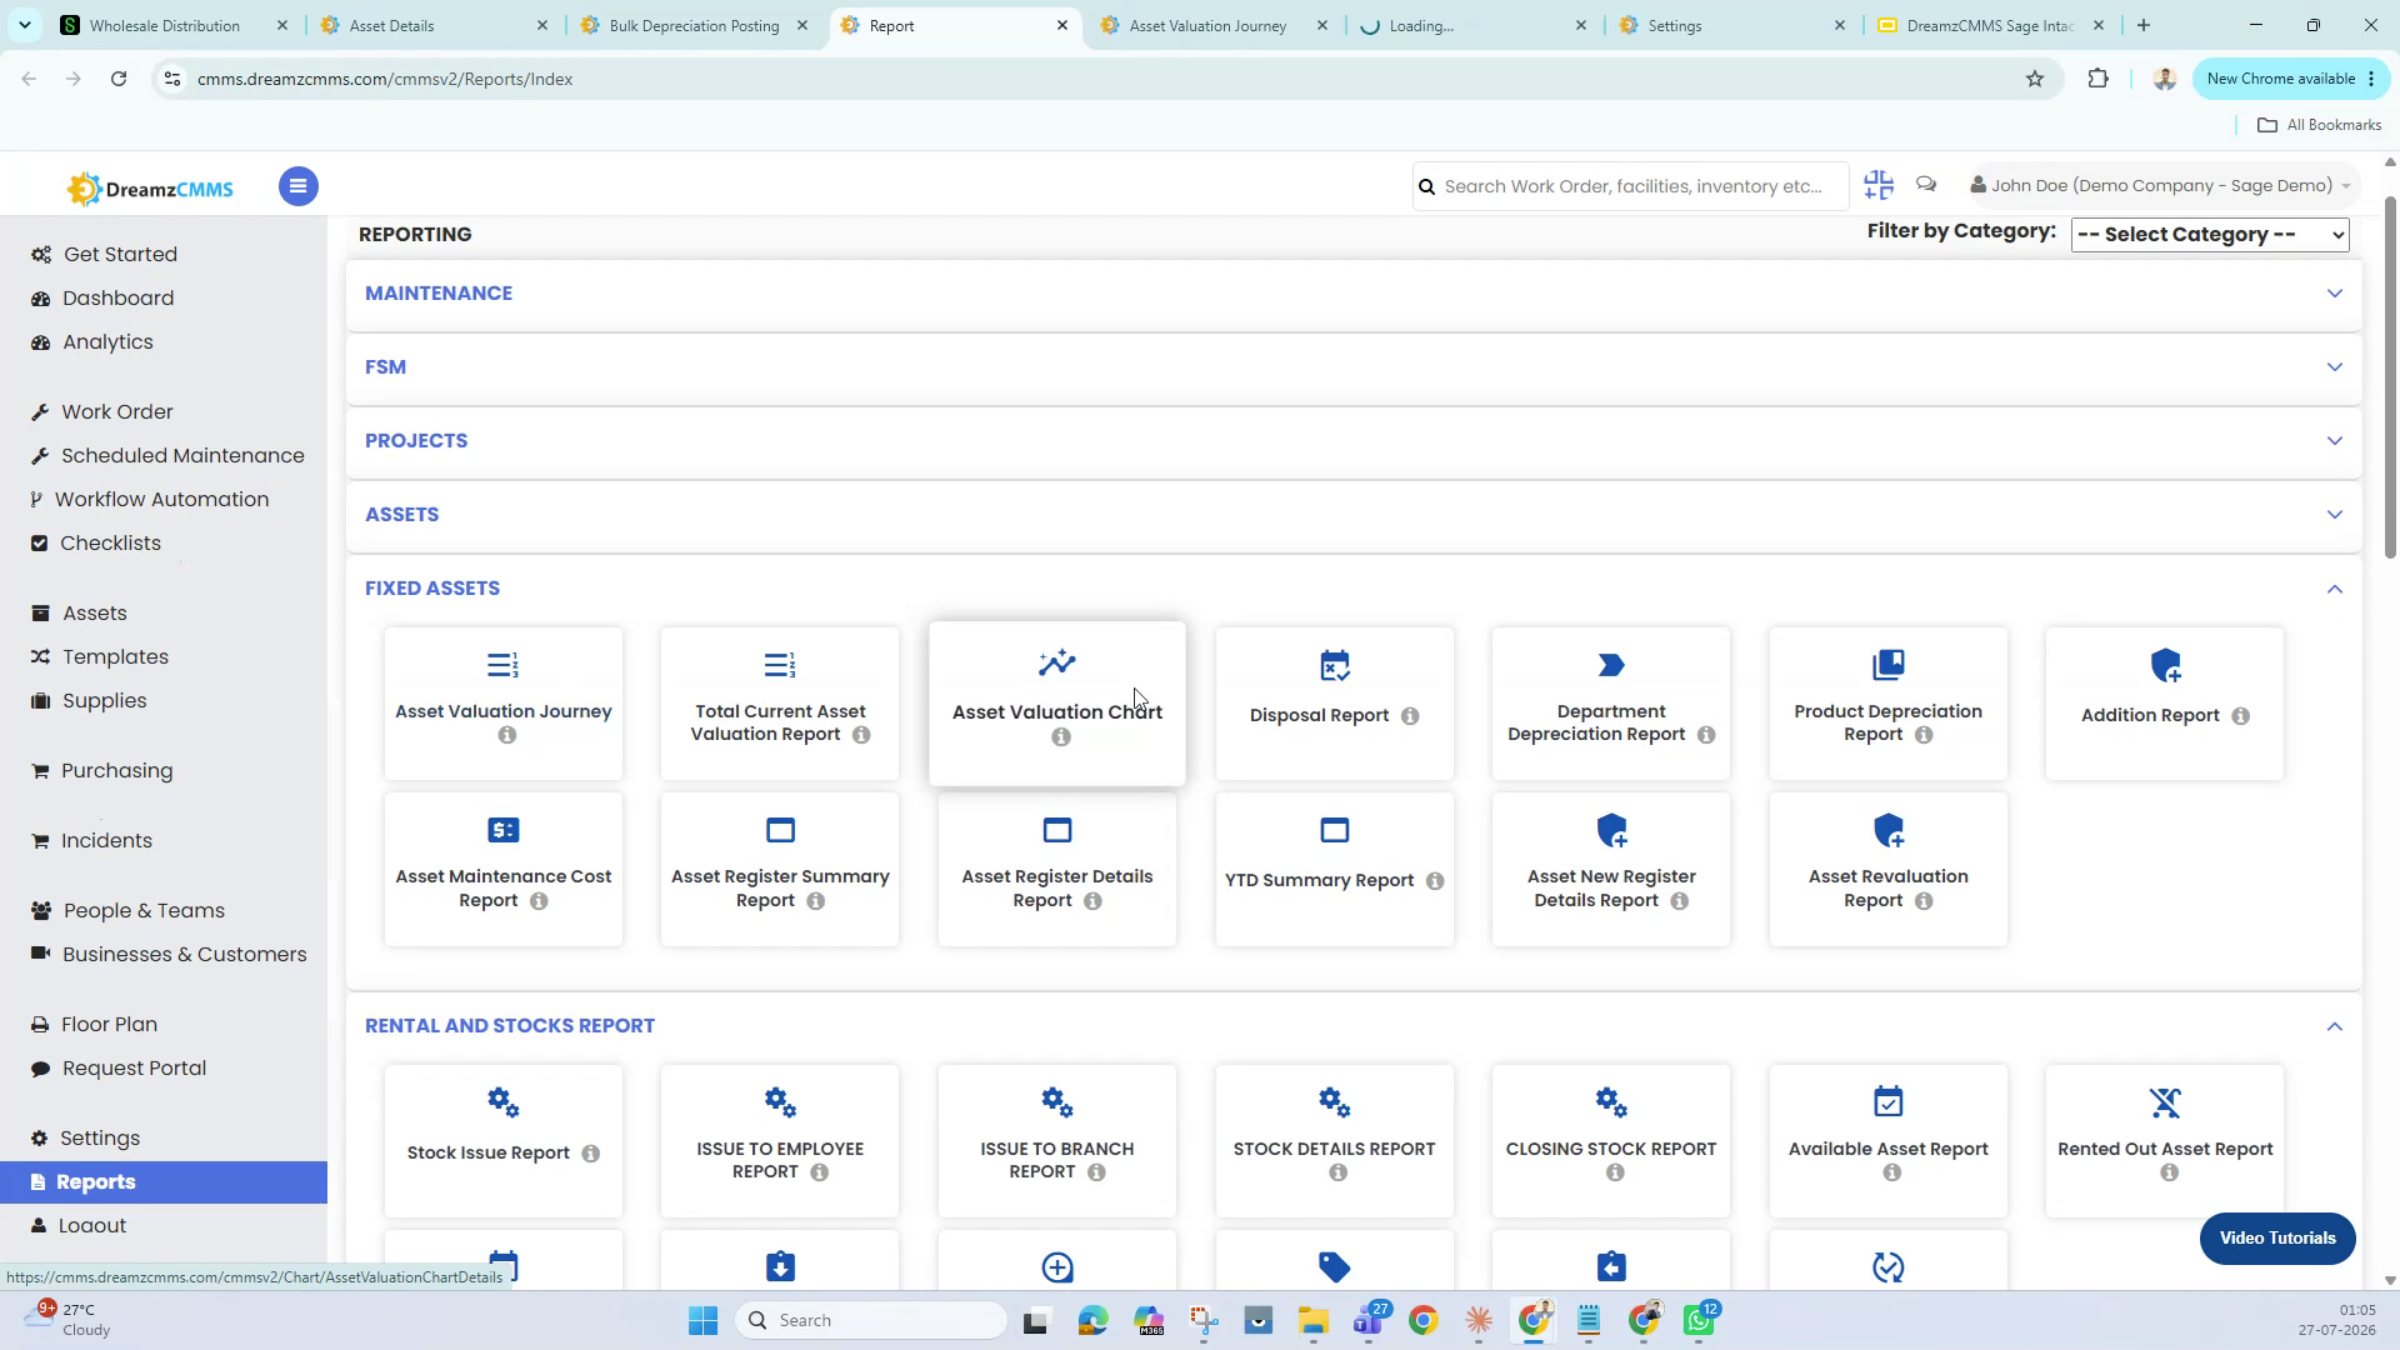
Step 26 – Explore the Fixed Asset Reports
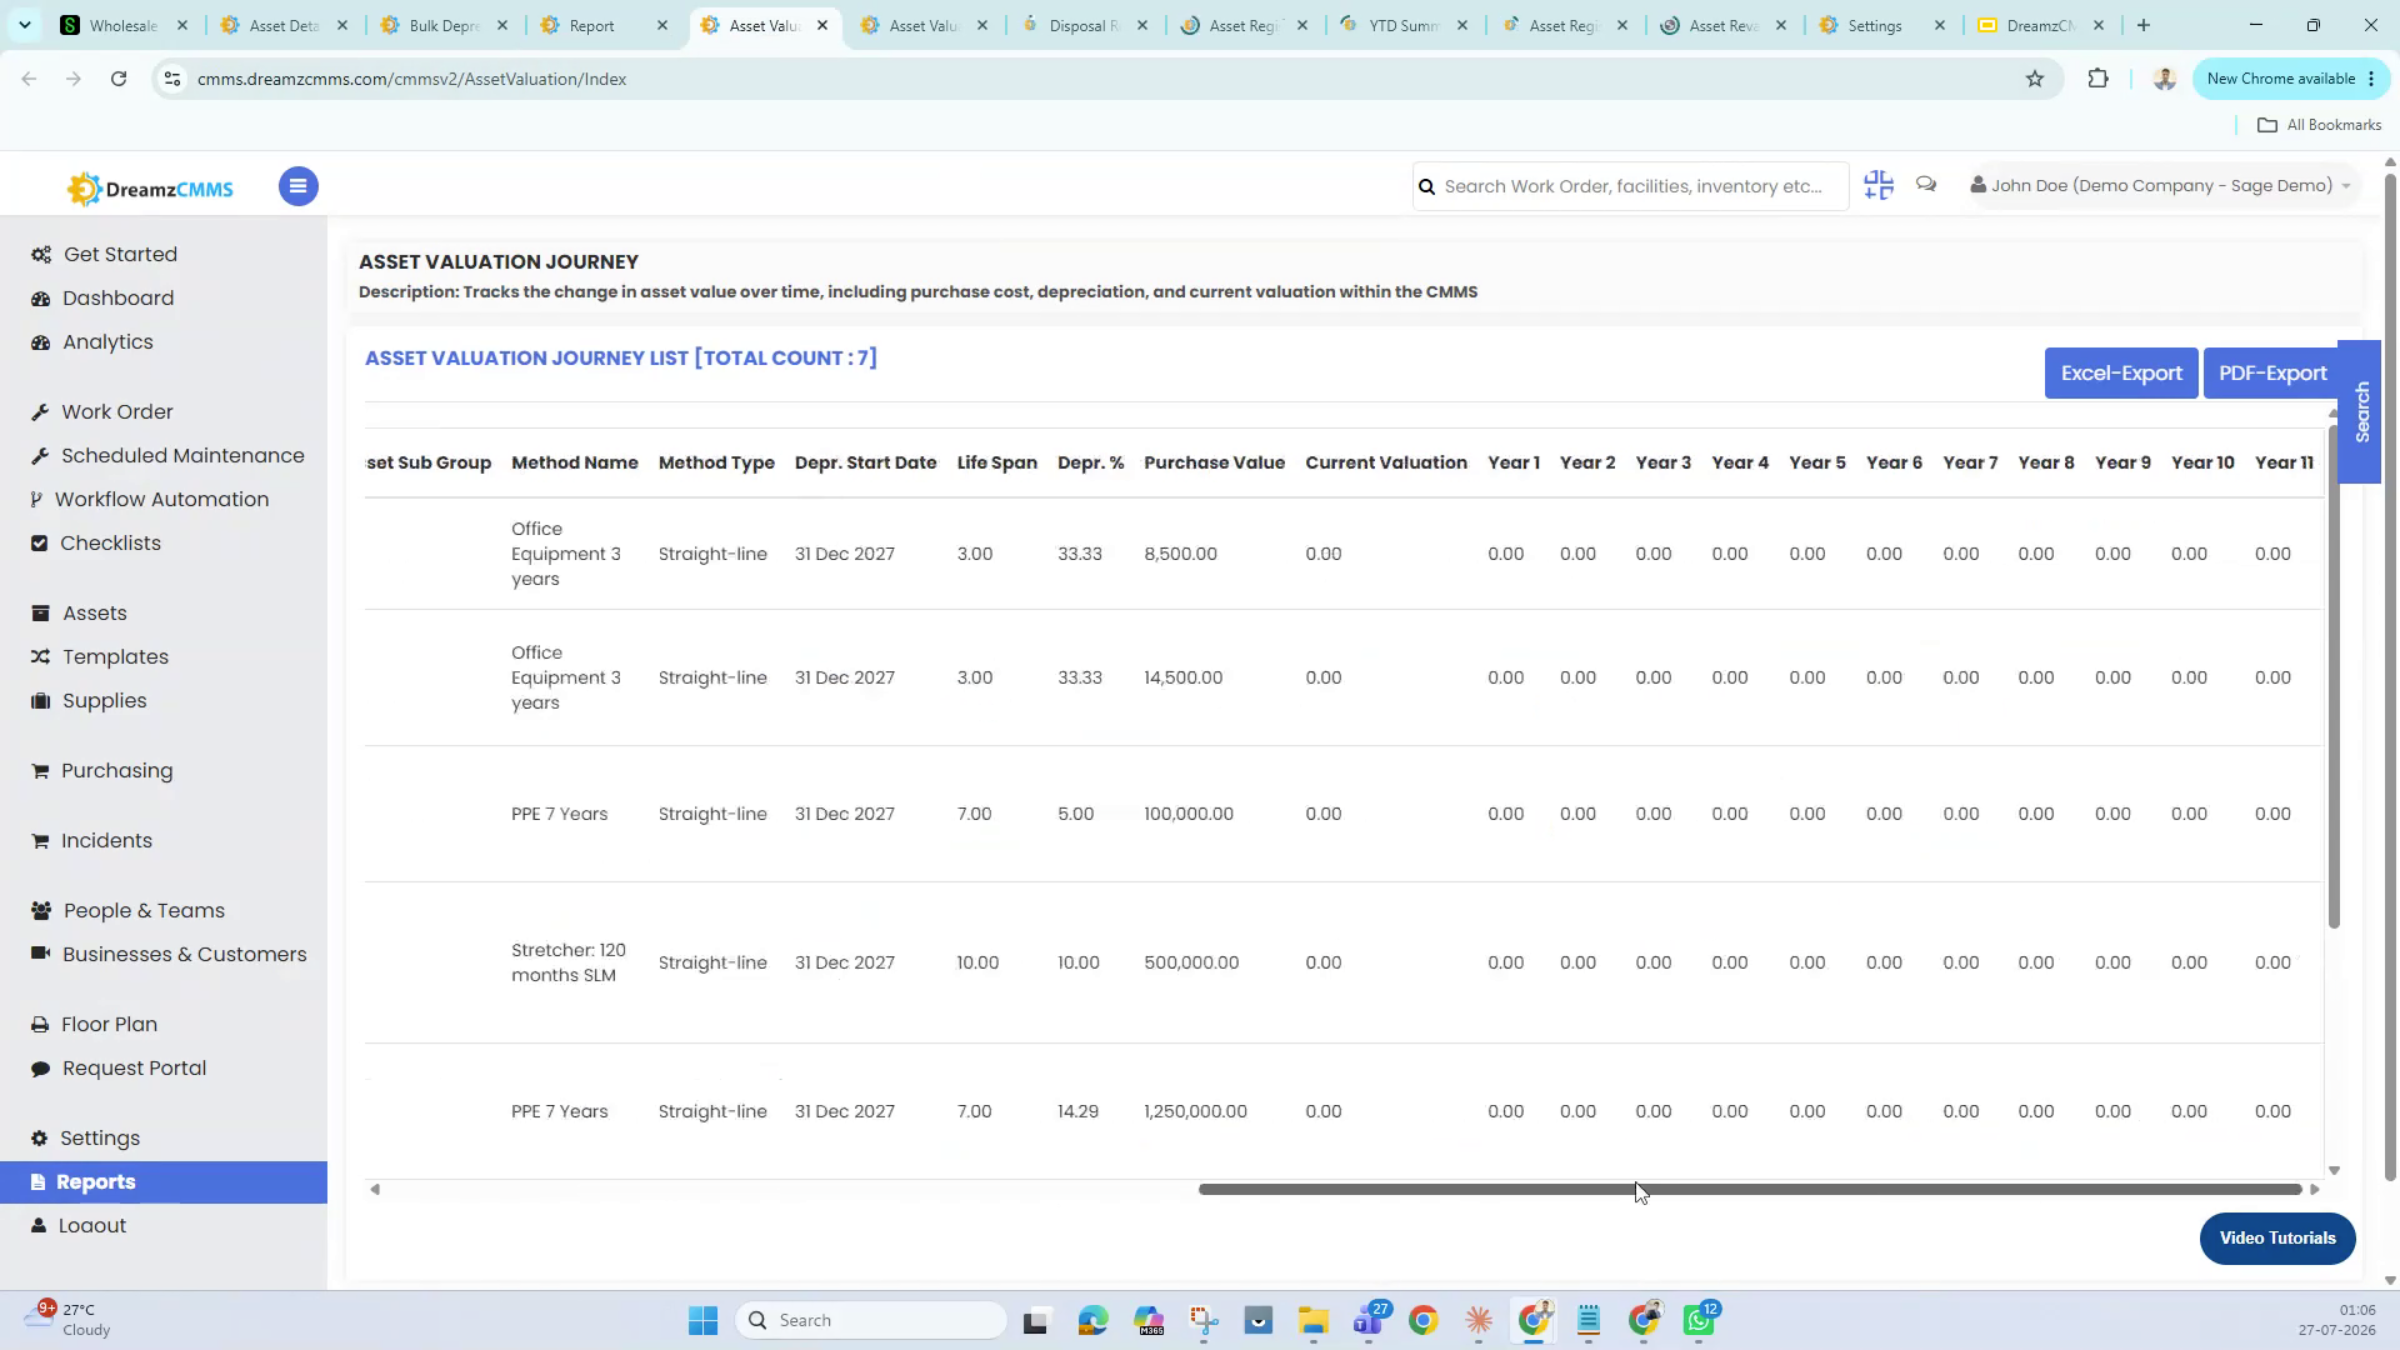
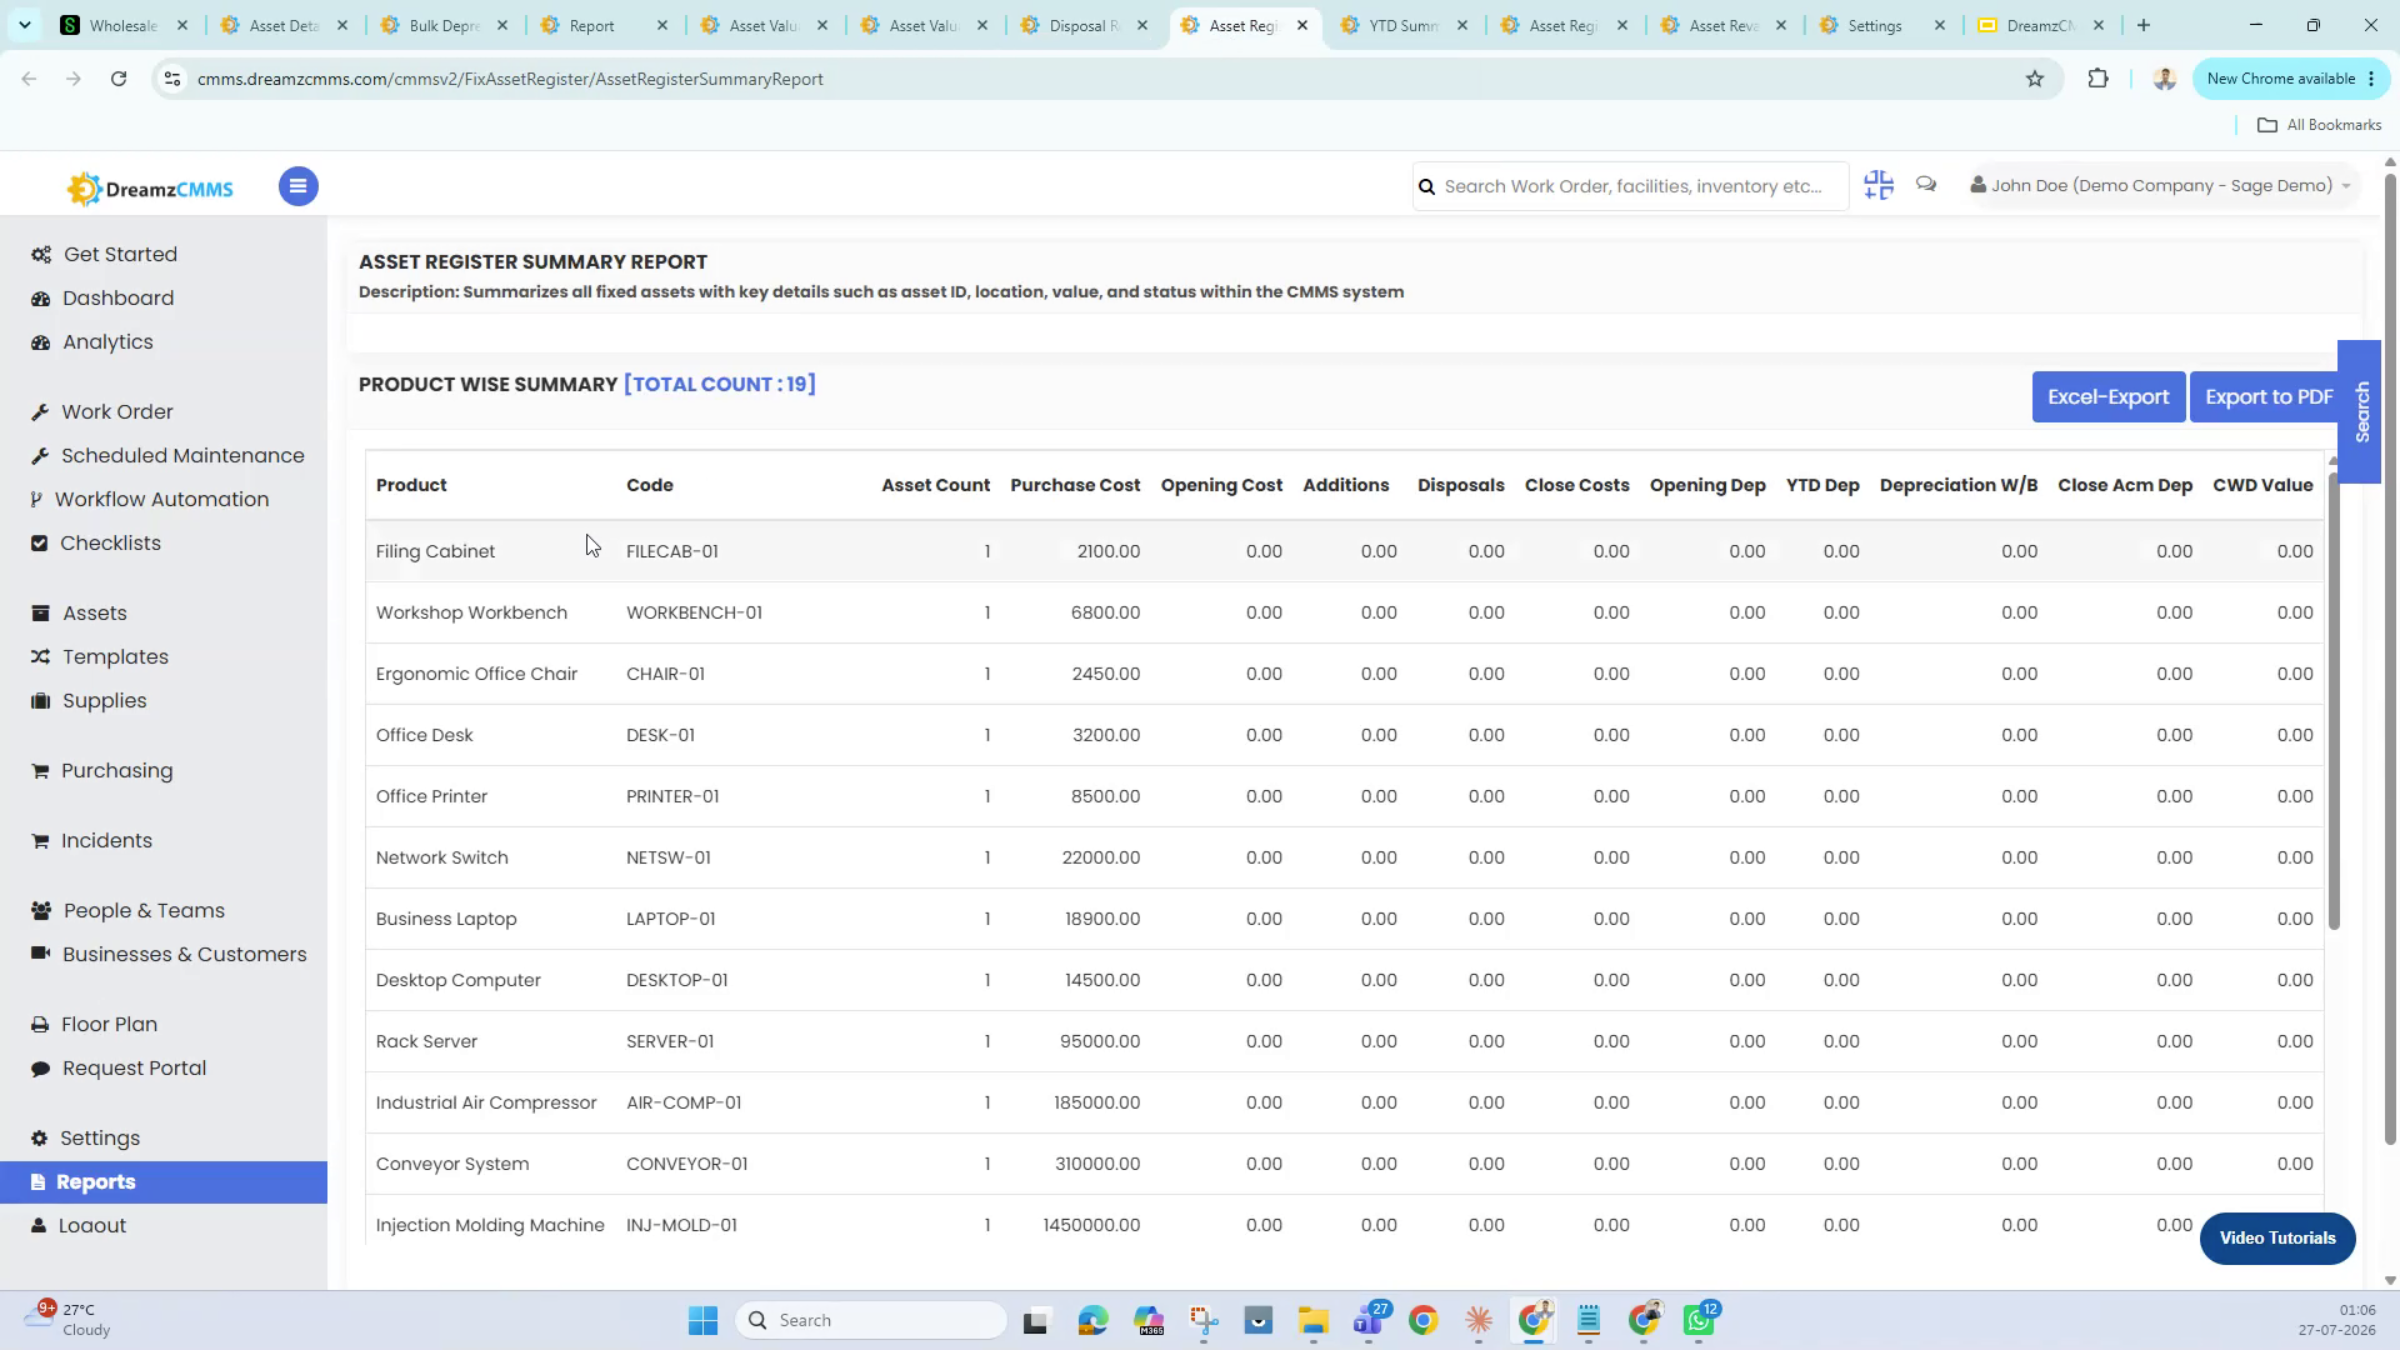
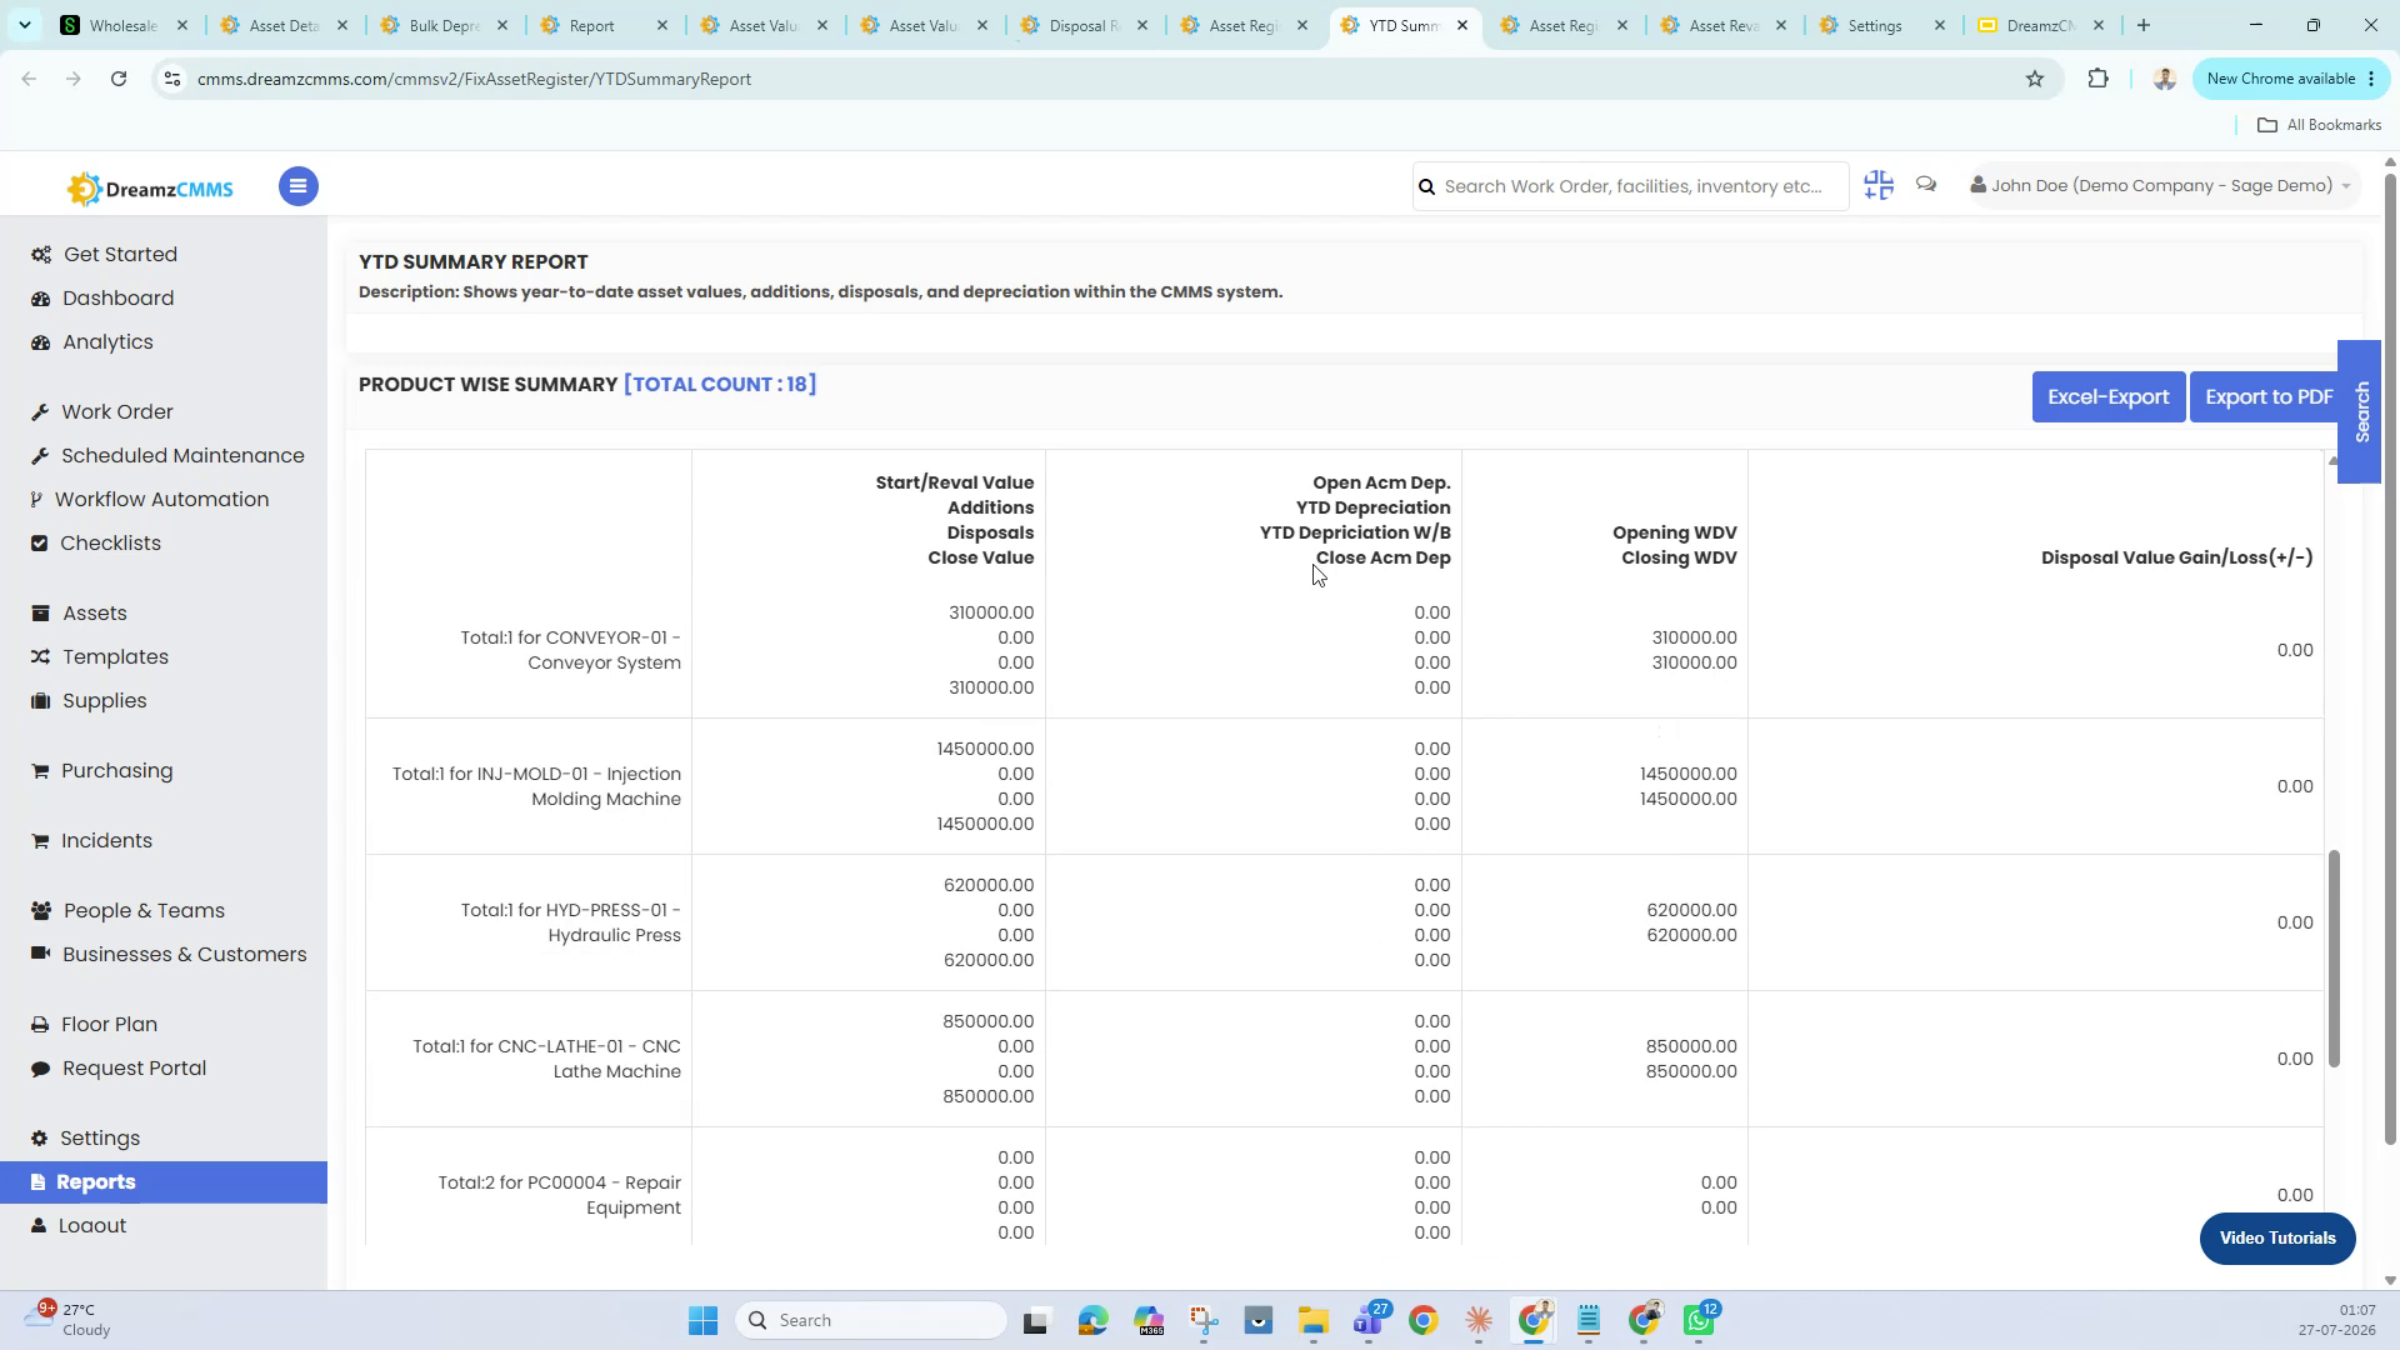
Fixed asset reporting includes current asset valuation, valuation charts by location, group, and category, disposal reports, and asset register summaries — both YTD and detailed. The asset valuation report shows which assets have been depreciating over time along with their current book value and yearly depreciation.
Step 27 – Filter Reports by Year, Department, or Category
Every report can be searched and filtered by financial year, department, group, or category to narrow down exactly what you need.
Step 28 – View Asset Value by Category
Asset value can also be broken down by category, asset classification, account group, product type, and location.
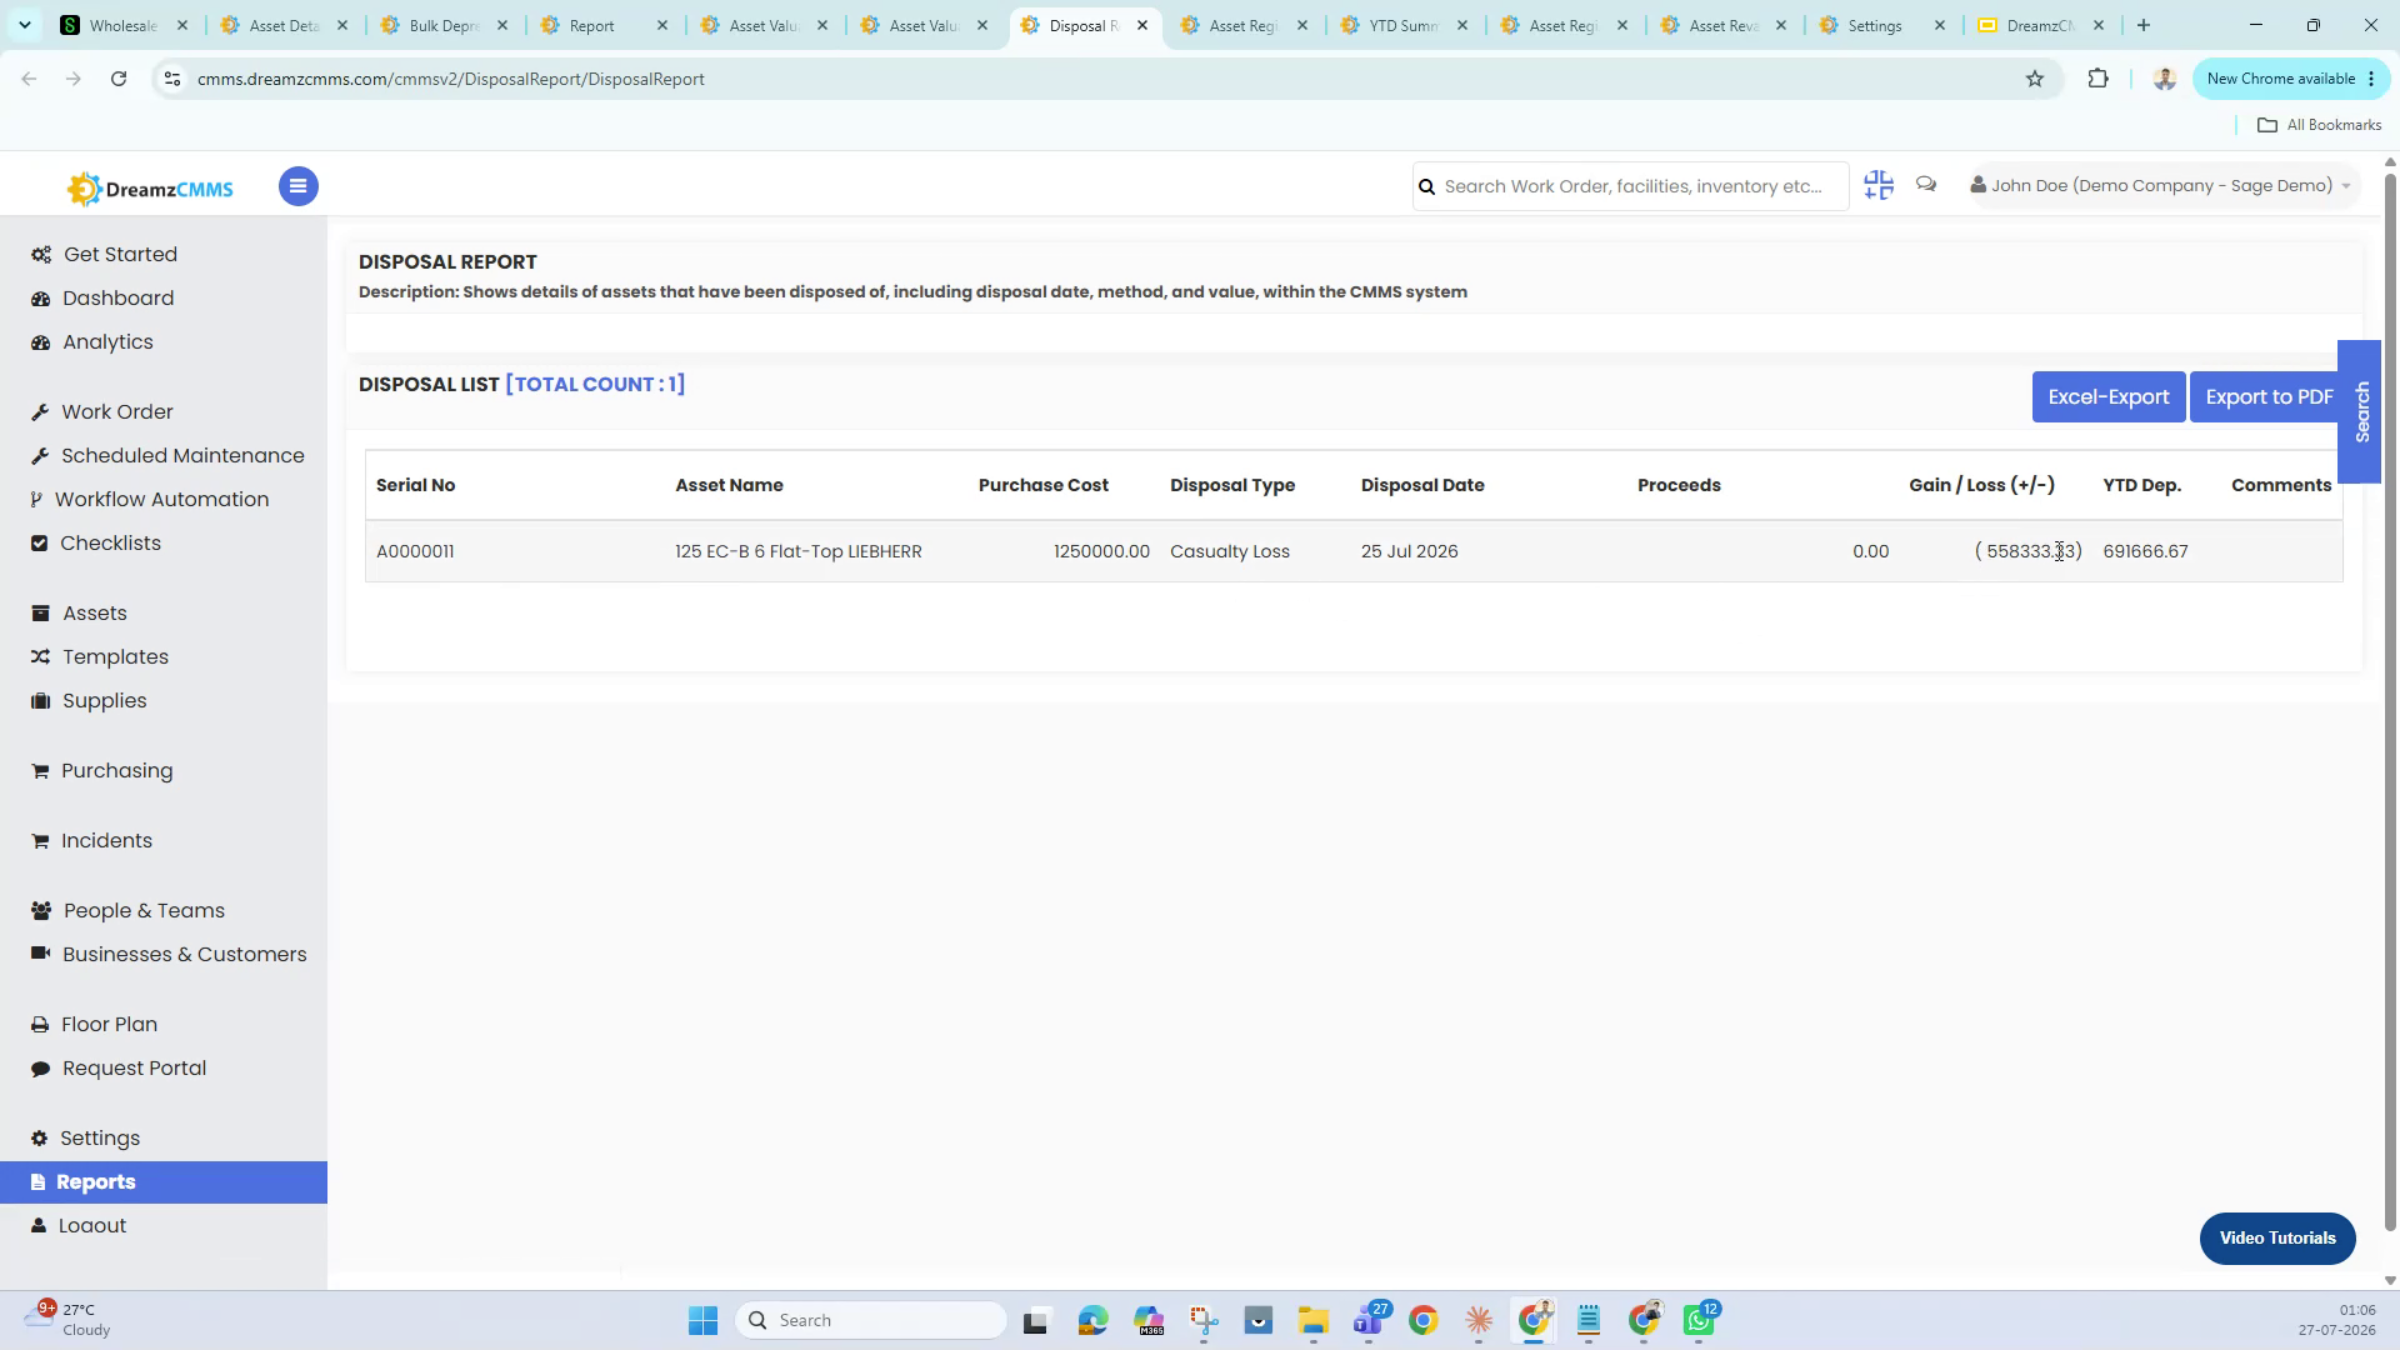
Step 29 – Review the Disposal Report
The disposal report shows the asset you just disposed of, listed with its disposal type — a casualty loss in this example — and the resulting loss compared to the proceeding value.
After Setup — What's Next?
With master data synced, accounts mapped, and depreciation configured, your fixed assets in DreamzCMMS now stay connected to your Sage Intacct ledger automatically. Once the core setup is in place, you can:
- Set up bulk depreciation posting on a regular schedule so accumulated depreciation goes to Sage Intacct without a manual push each time.
- Review your fixed asset reports periodically — especially valuation by location and category — to catch discrepancies early.
- Extend the integration to additional Sage Intacct dimensions, such as projects or employees, if your reporting needs grow.
Ready to see the DreamzCMMS and Sage Intacct integration in action? Contact DreamzTech to schedule a personalized demonstration.
Tips for Finance and Asset Teams
- Confirm your commissioning date is correct before your first depreciation posting — it can't be changed once depreciation has been posted for that asset.
- Set up account group mappings for fixed assets, inventory, payables, and receivables all at once during initial setup to avoid re-syncing later.
- Use the disposal type that matches reality (sale, theft, or casualty loss) rather than defaulting to one option, since it affects how the proceeds and loss are calculated.
- Filter fixed asset reports by financial year and department regularly instead of only pulling a full portfolio view, so discrepancies are easier to spot.
Frequently Asked Questions
Is this a custom integration or a built-in feature?
It's a native feature of DreamzCMMS, not a custom build or third-party connector, so it's available directly once enabled on your account.
Can I change an asset's commissioning date after depreciation has started?
No. The commissioning date can't be modified once depreciation has been posted for that asset, so it's worth confirming before your first posting.
Does the integration only pull data from Sage Intacct, or does it go both ways?
It works both ways — data can flow from DreamzCMMS into Sage Intacct, though core reference data like account groups originates in Sage Intacct itself.
What disposal types are supported?
Sale, theft, and casualty loss are all configurable disposal types, each calculating proceeds and any profit or loss differently based on the asset's current book value.