DreamzPMS Overview: AI-Powered Property Management from Lead to Lease to Payment
Property managers juggle a lot at once — leasing prospects, resident requests, vendor invoices, and rent collection, often across disconnected tools and spreadsheets. DreamzPMS brings all of it into one connected platform for multifamily, single-family, commercial, and HOA portfolios, with an AI workforce built in to handle the routine work alongside your team.
Overview
DreamzPMS connects three portals — Manager, Resident, and Vendor — around a single set of data. Managers work from a CRM, leasing, accounting, and maintenance suite; residents pay rent, submit requests, and stay informed from their own portal and app; vendors receive job assignments and submit invoices from theirs. AI runs throughout: a leasing assistant on your public listing site qualifies prospects and schedules showings, an AI Maintenance Agent reviews every open work order and recommends priorities and vendors, and a Finance AI agent drafts payment reminders and reads uploaded invoices automatically. Nothing is finalized without a human reviewing it first — AI is built to speed up the work your team already does, not replace the decisions they make.
Here is a reference video:
Before You Begin
- You'll need access to DreamzPMS with manager-level permissions across the CRM, leasing, maintenance, and accounting modules shown in this walkthrough.
- Your properties and units should already be set up in the system so the modules below reflect your own portfolio rather than sample data.
- If you want prospects and vendors to interact with the AI leasing agent and vendor portal, your public listing site and vendor accounts should be configured first.
Platform Overview
Step 1 – What Is DreamzPMS
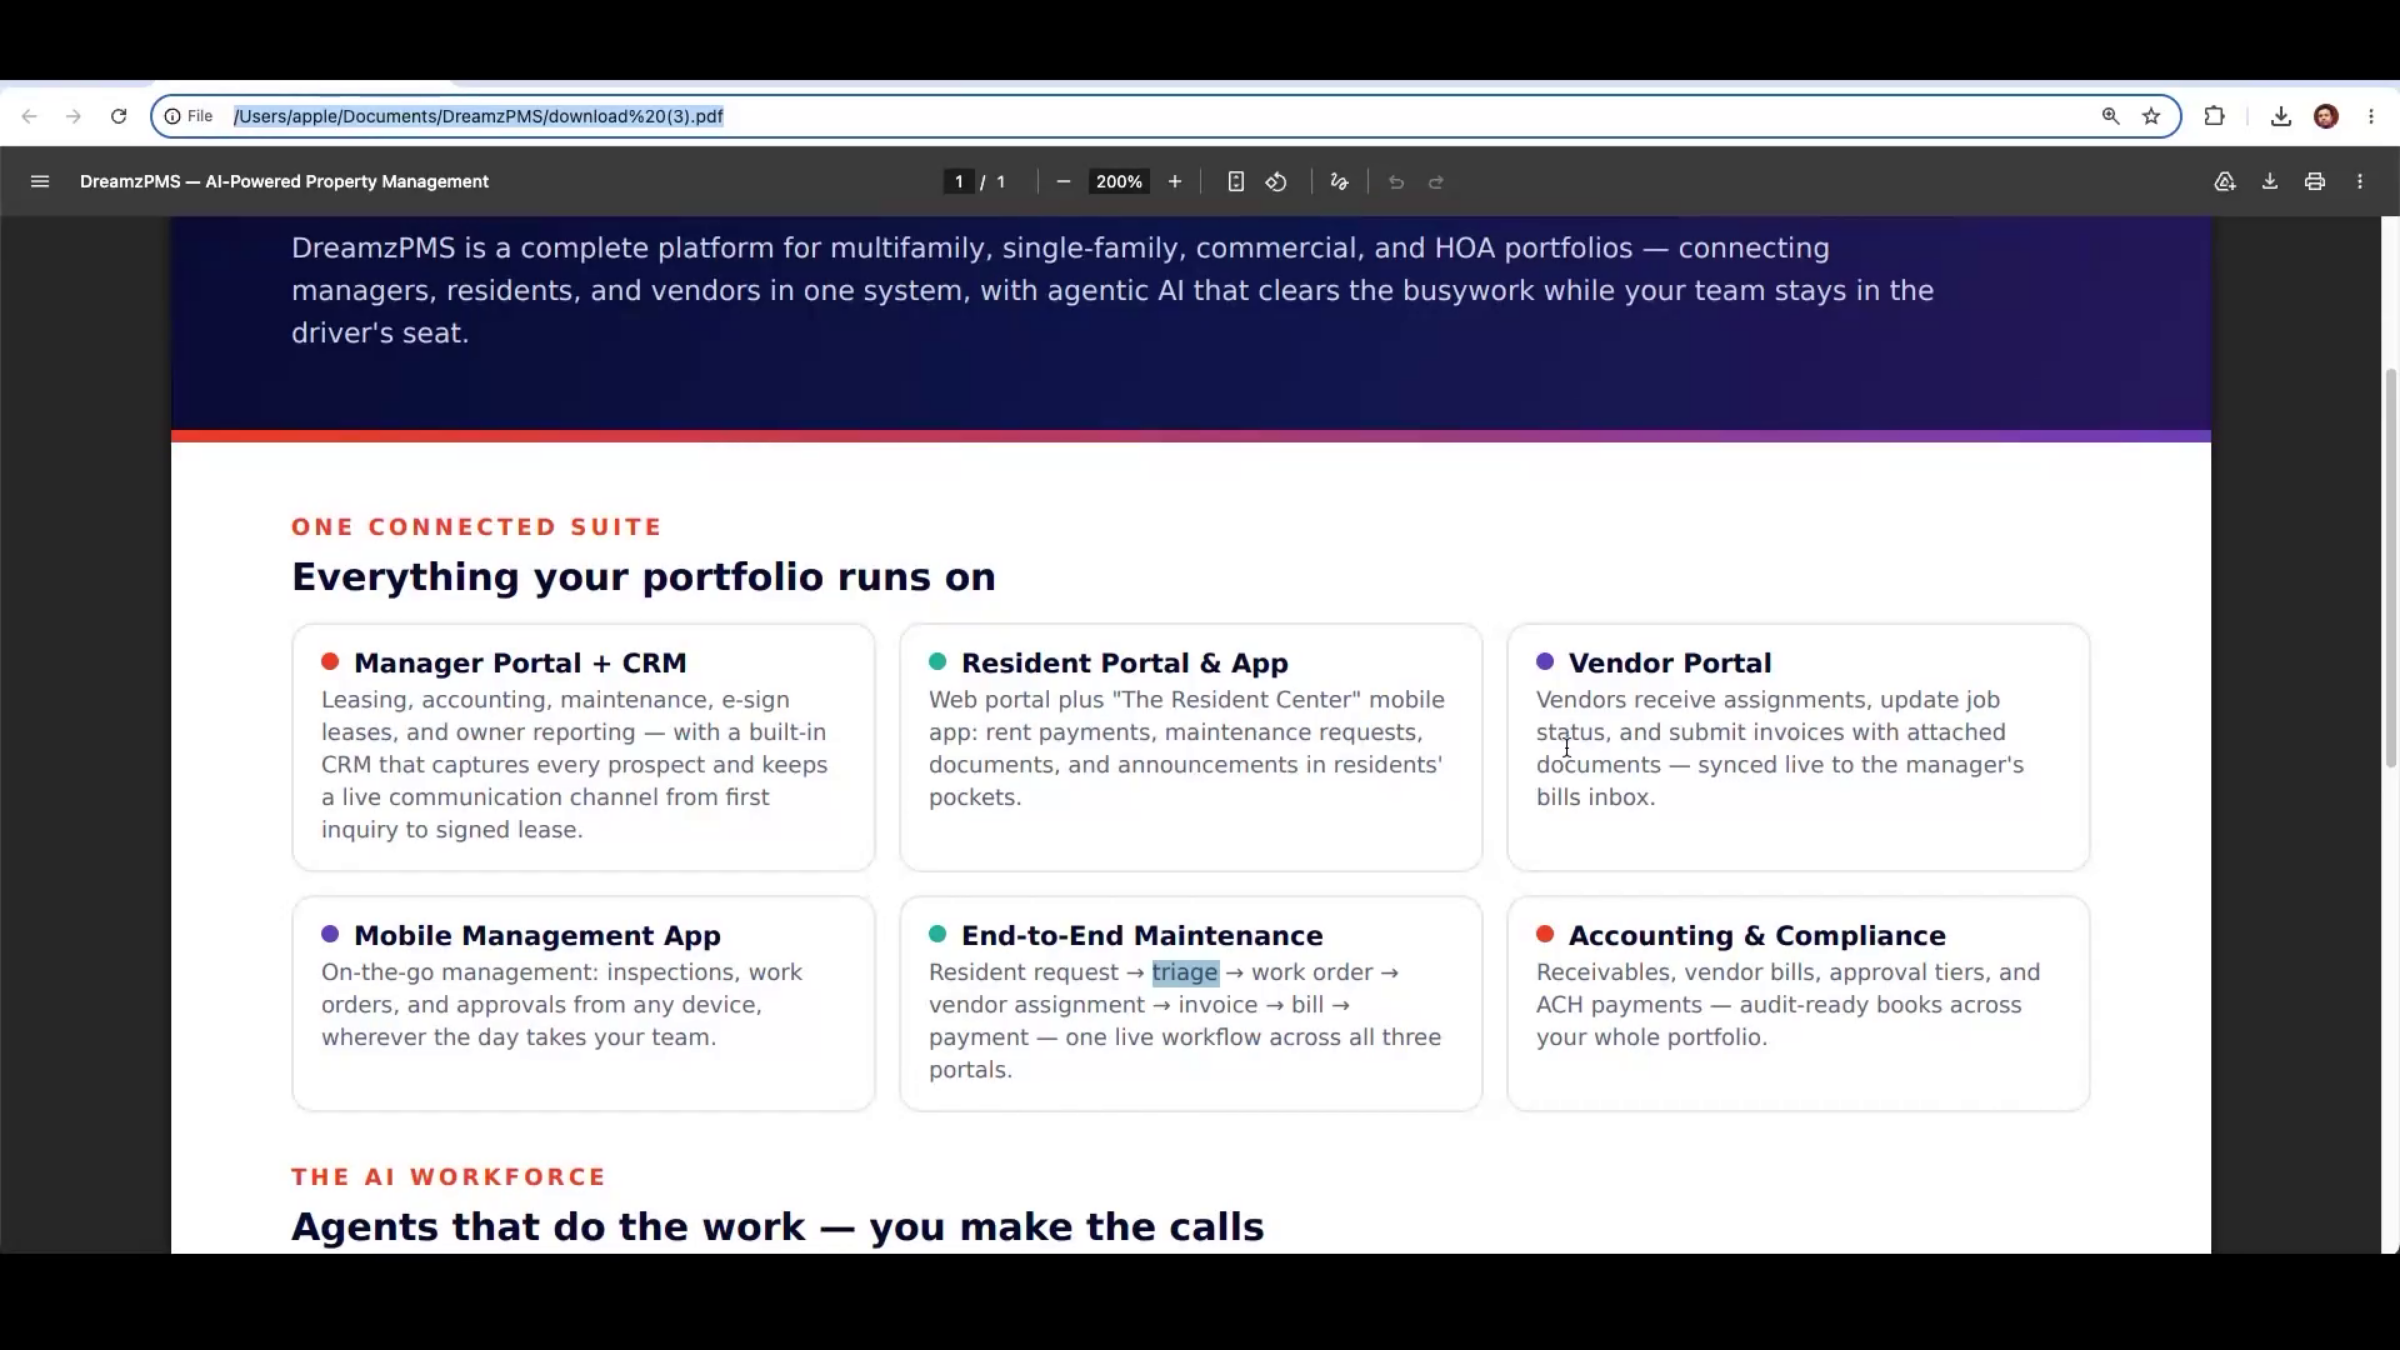
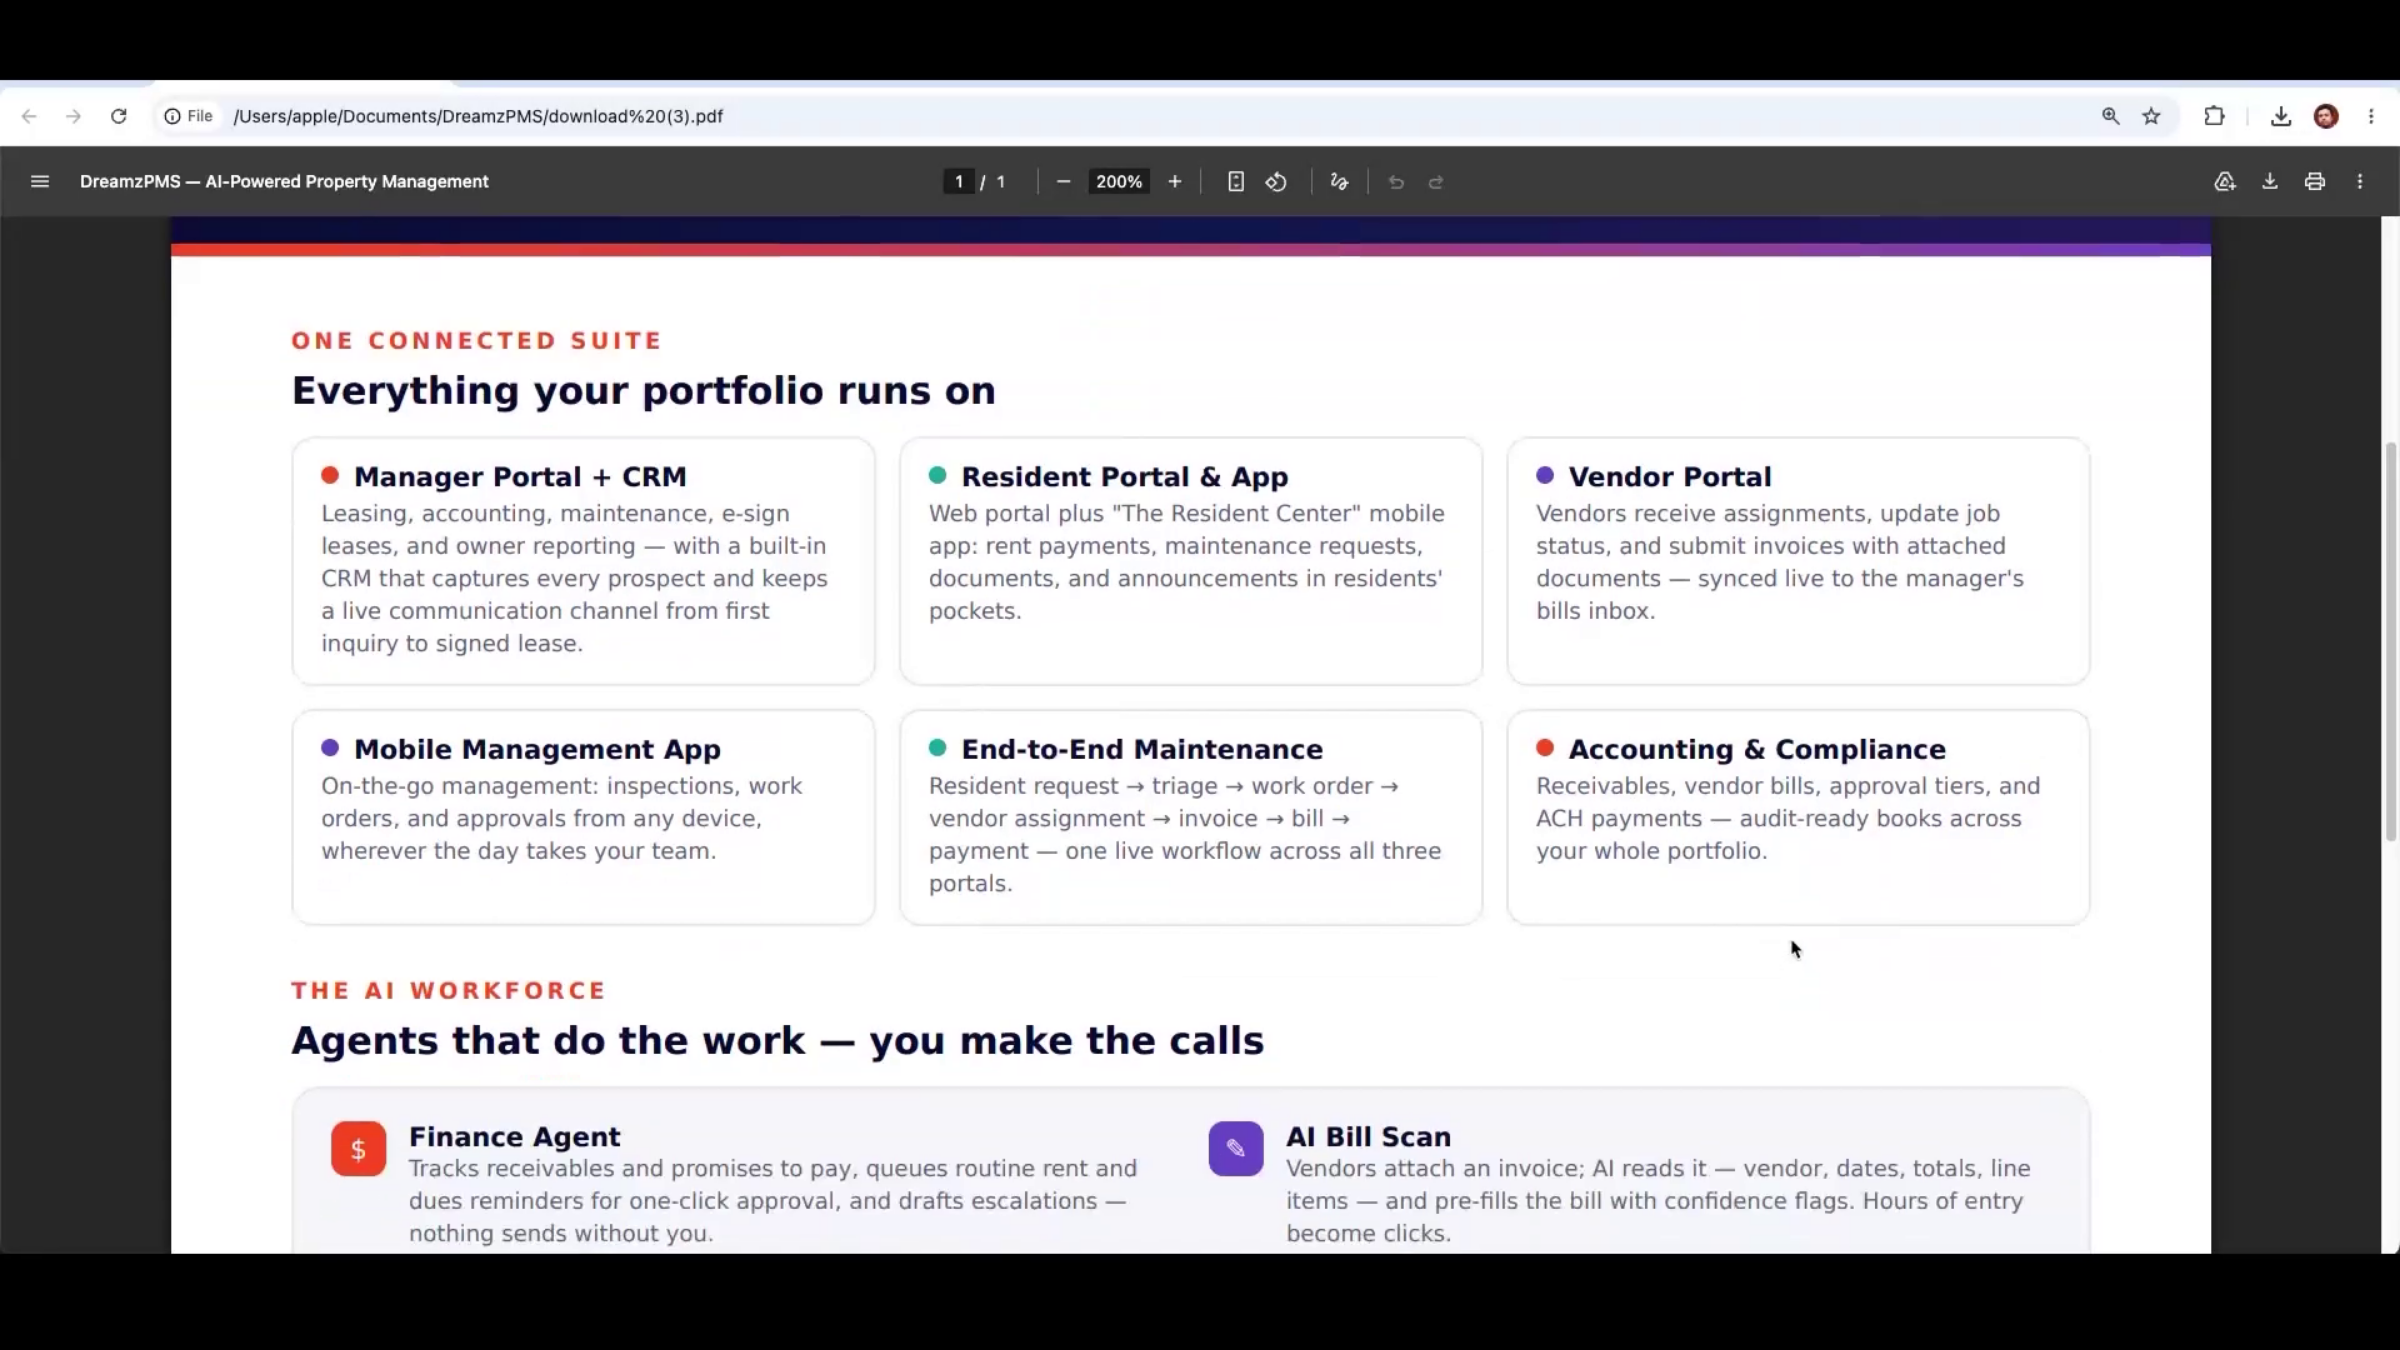
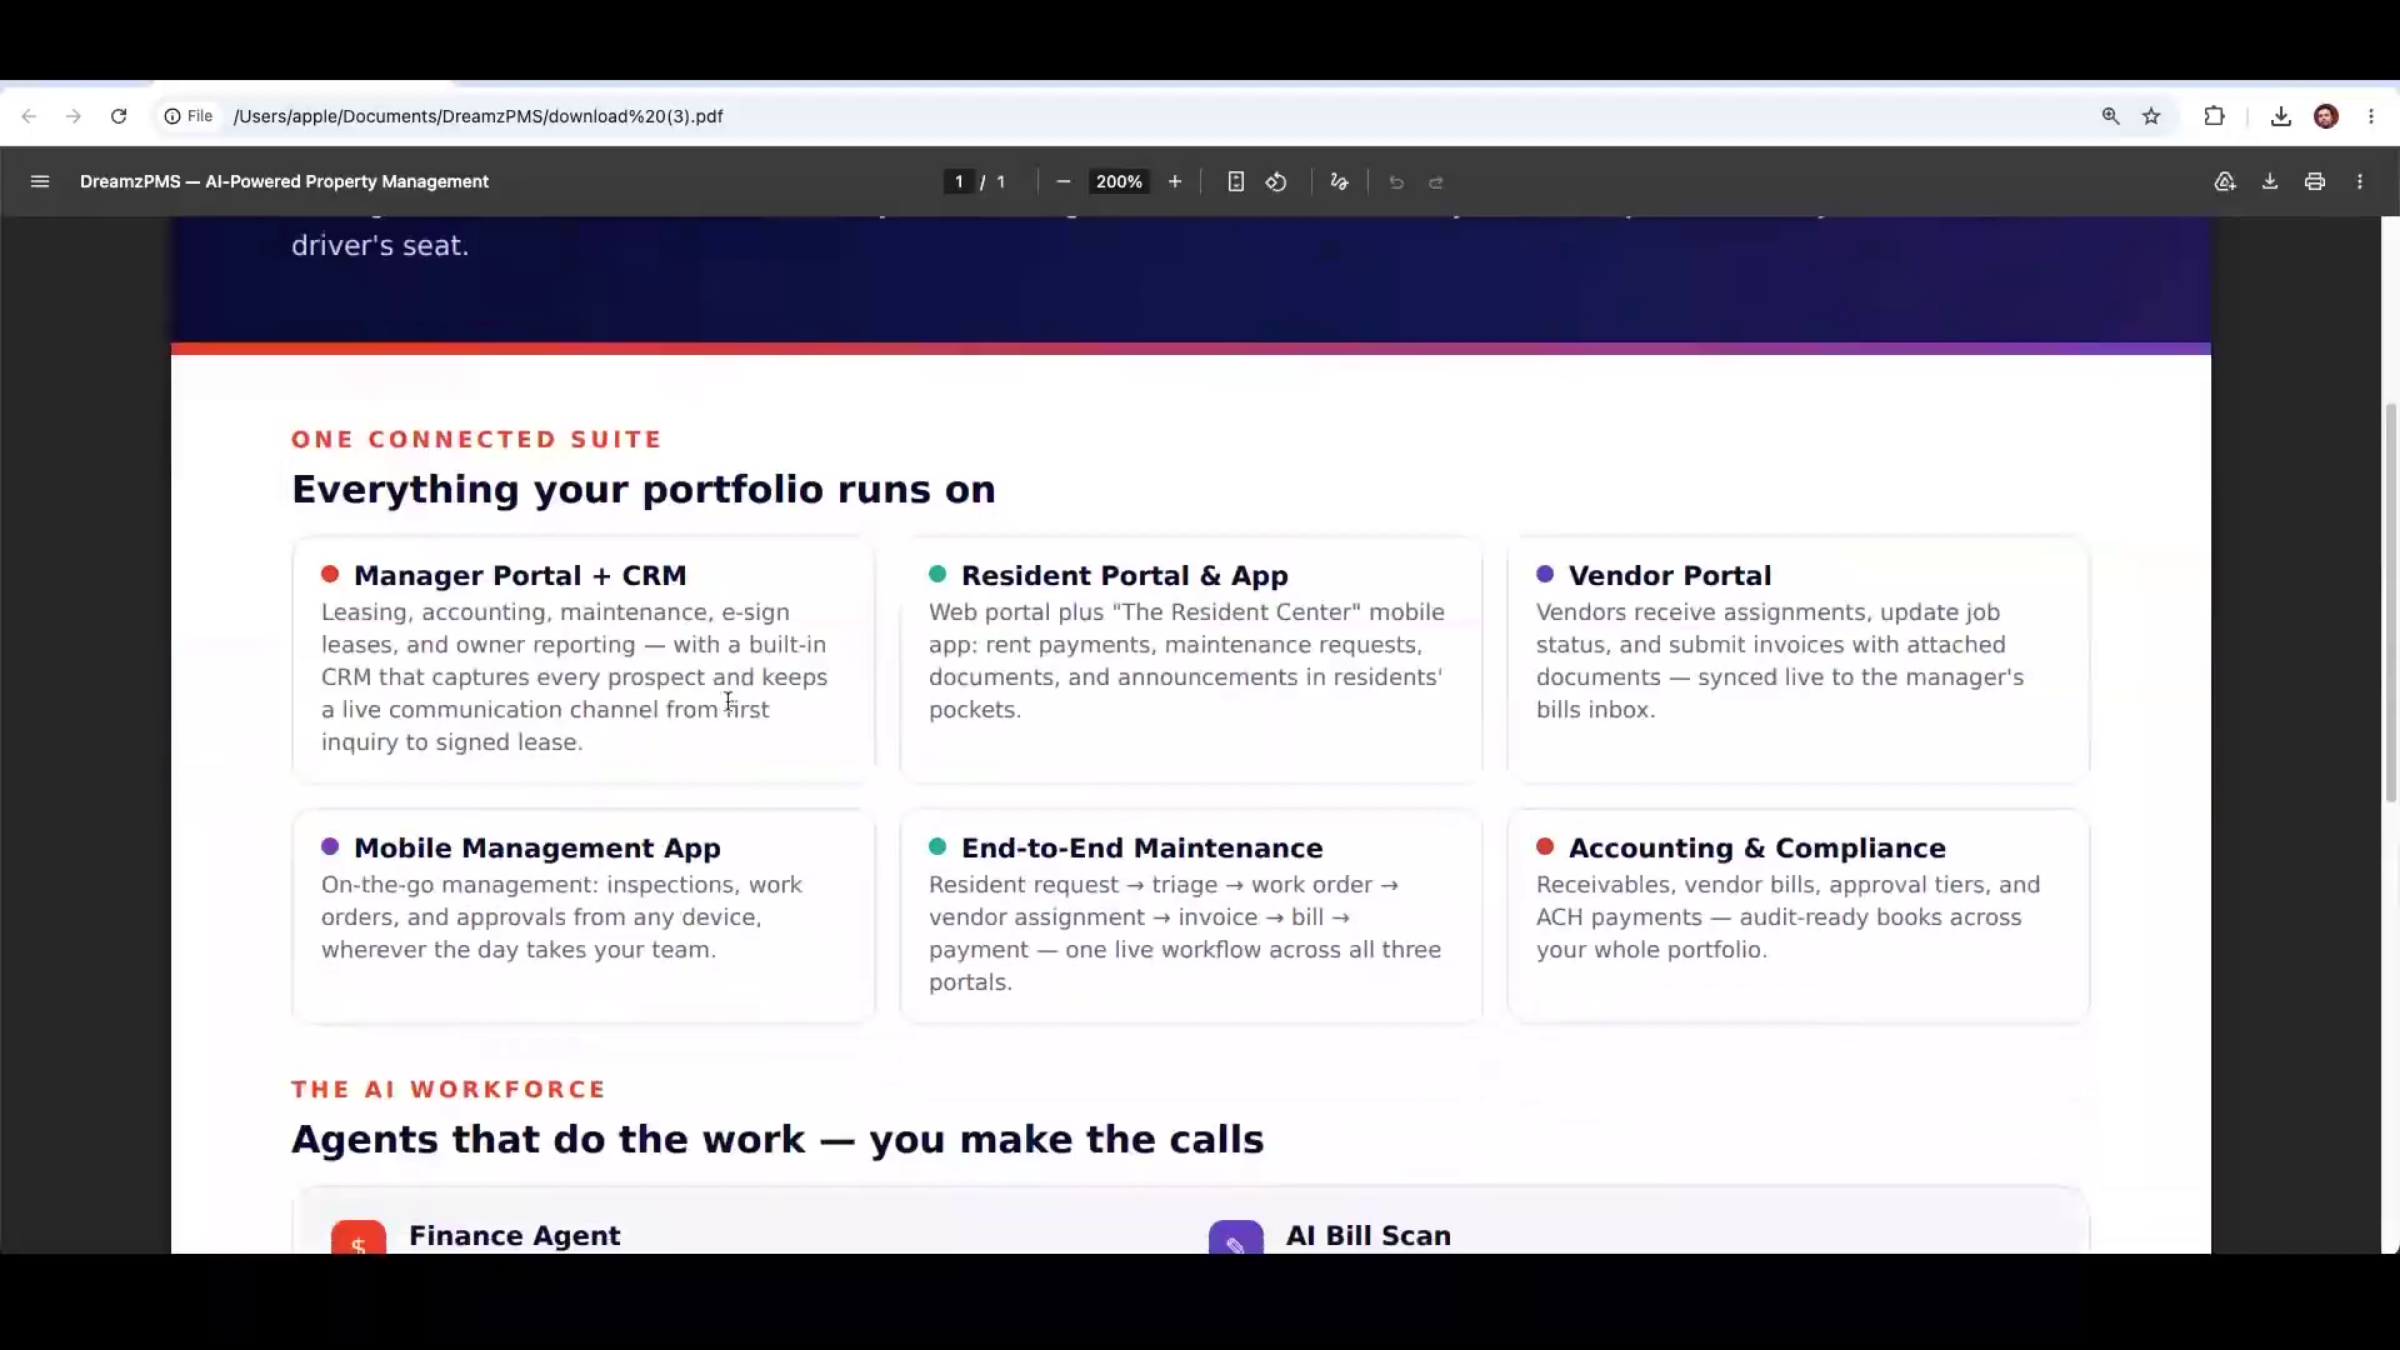
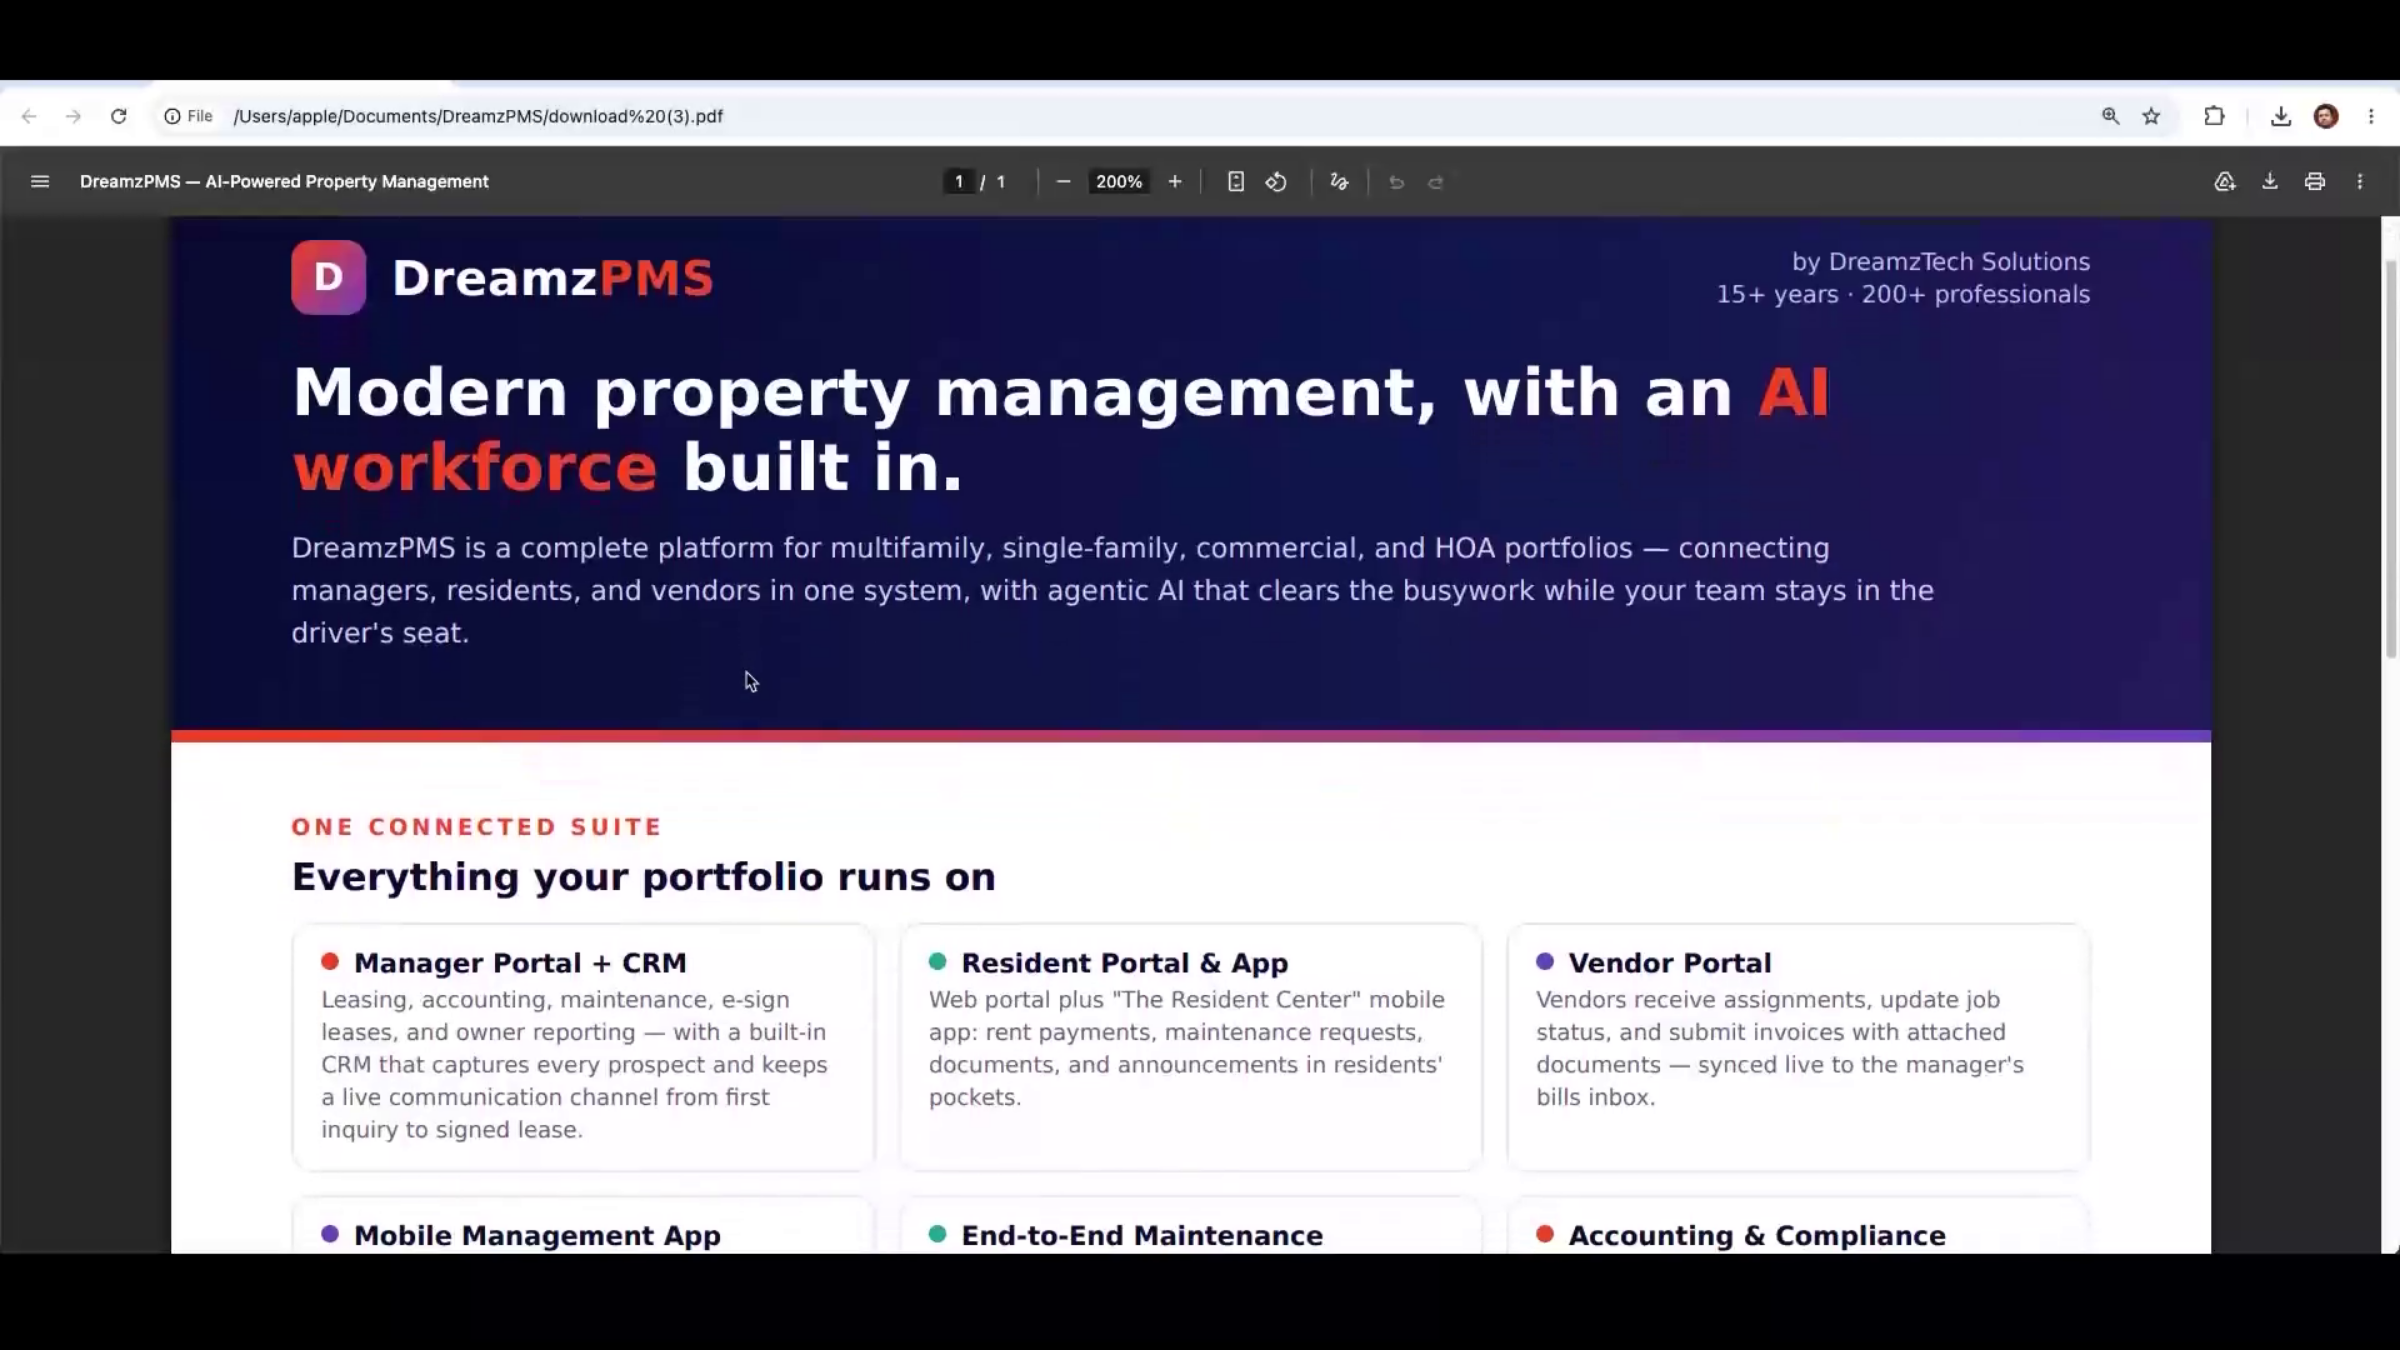
DreamzPMS is a complete property management platform for multifamily, single-family, commercial, and HOA portfolios. It connects property managers, residents, and vendors in one system, with an agentic AI workforce built in to support day-to-day operations.
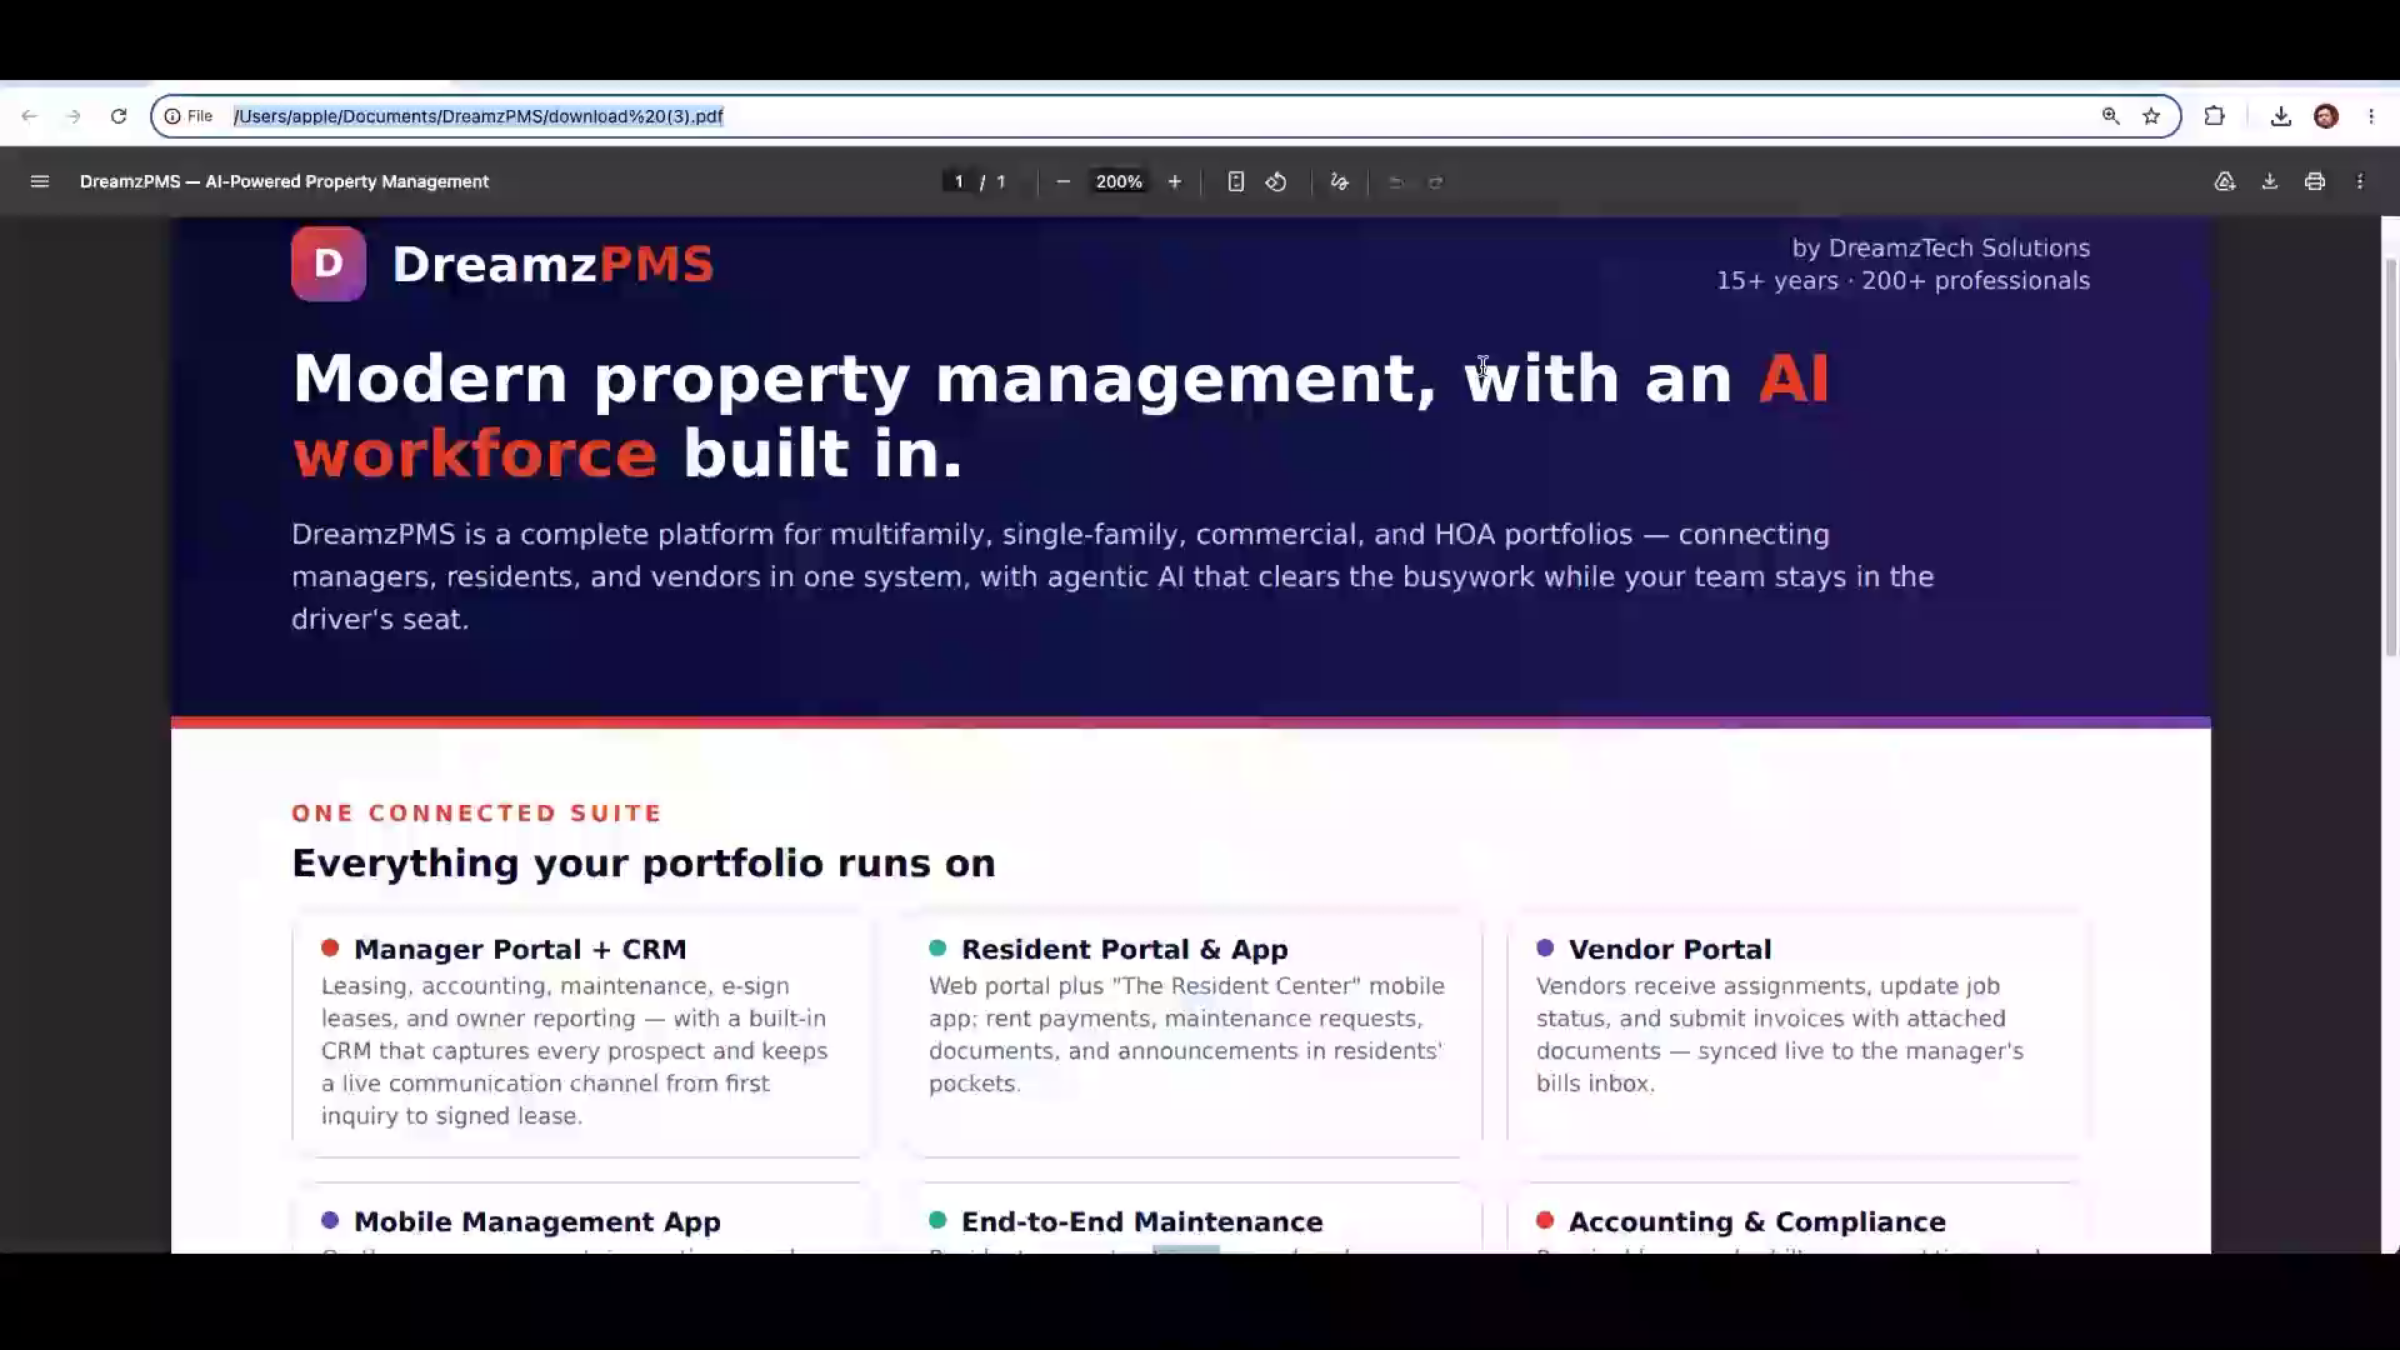
Step 2 – Manager Portal Basics
The Manager Portal includes CRM, leasing, accounting, and maintenance modules. The CRM captures every prospect from all your lead sources and gives you a single communication channel to manage them through the whole leasing journey.
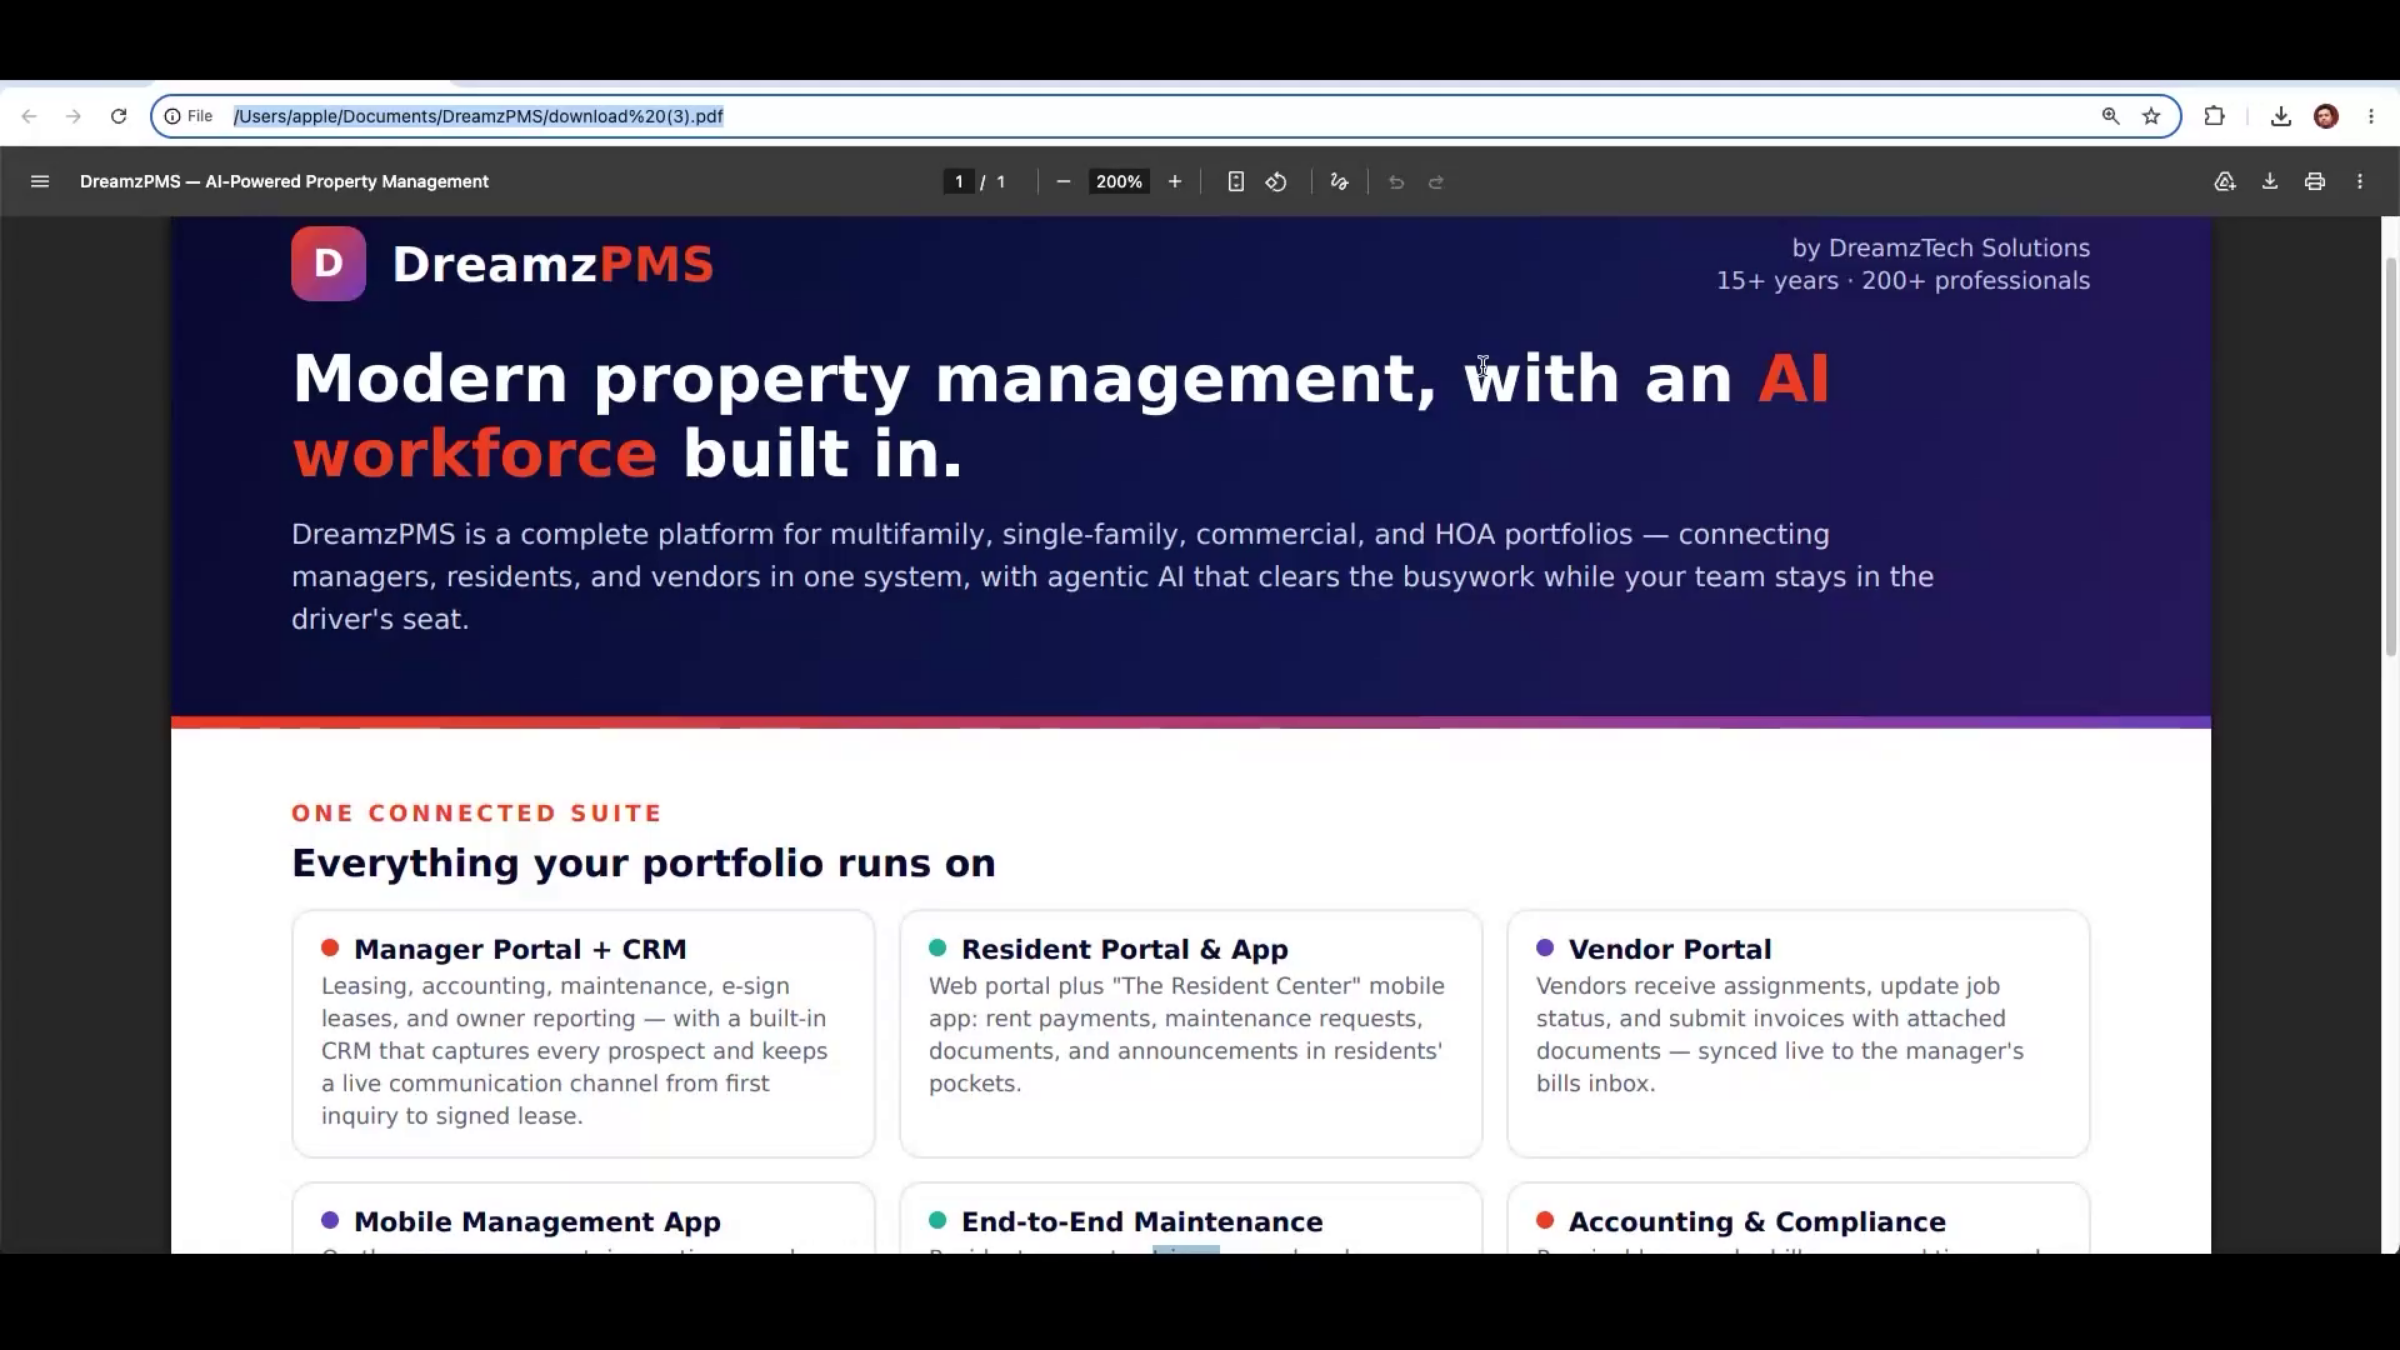
Step 3 – Resident Portal and App
Residents get their own web portal and dedicated mobile app, where they can pay rent, submit maintenance requests, and stay current on community announcements and communications.
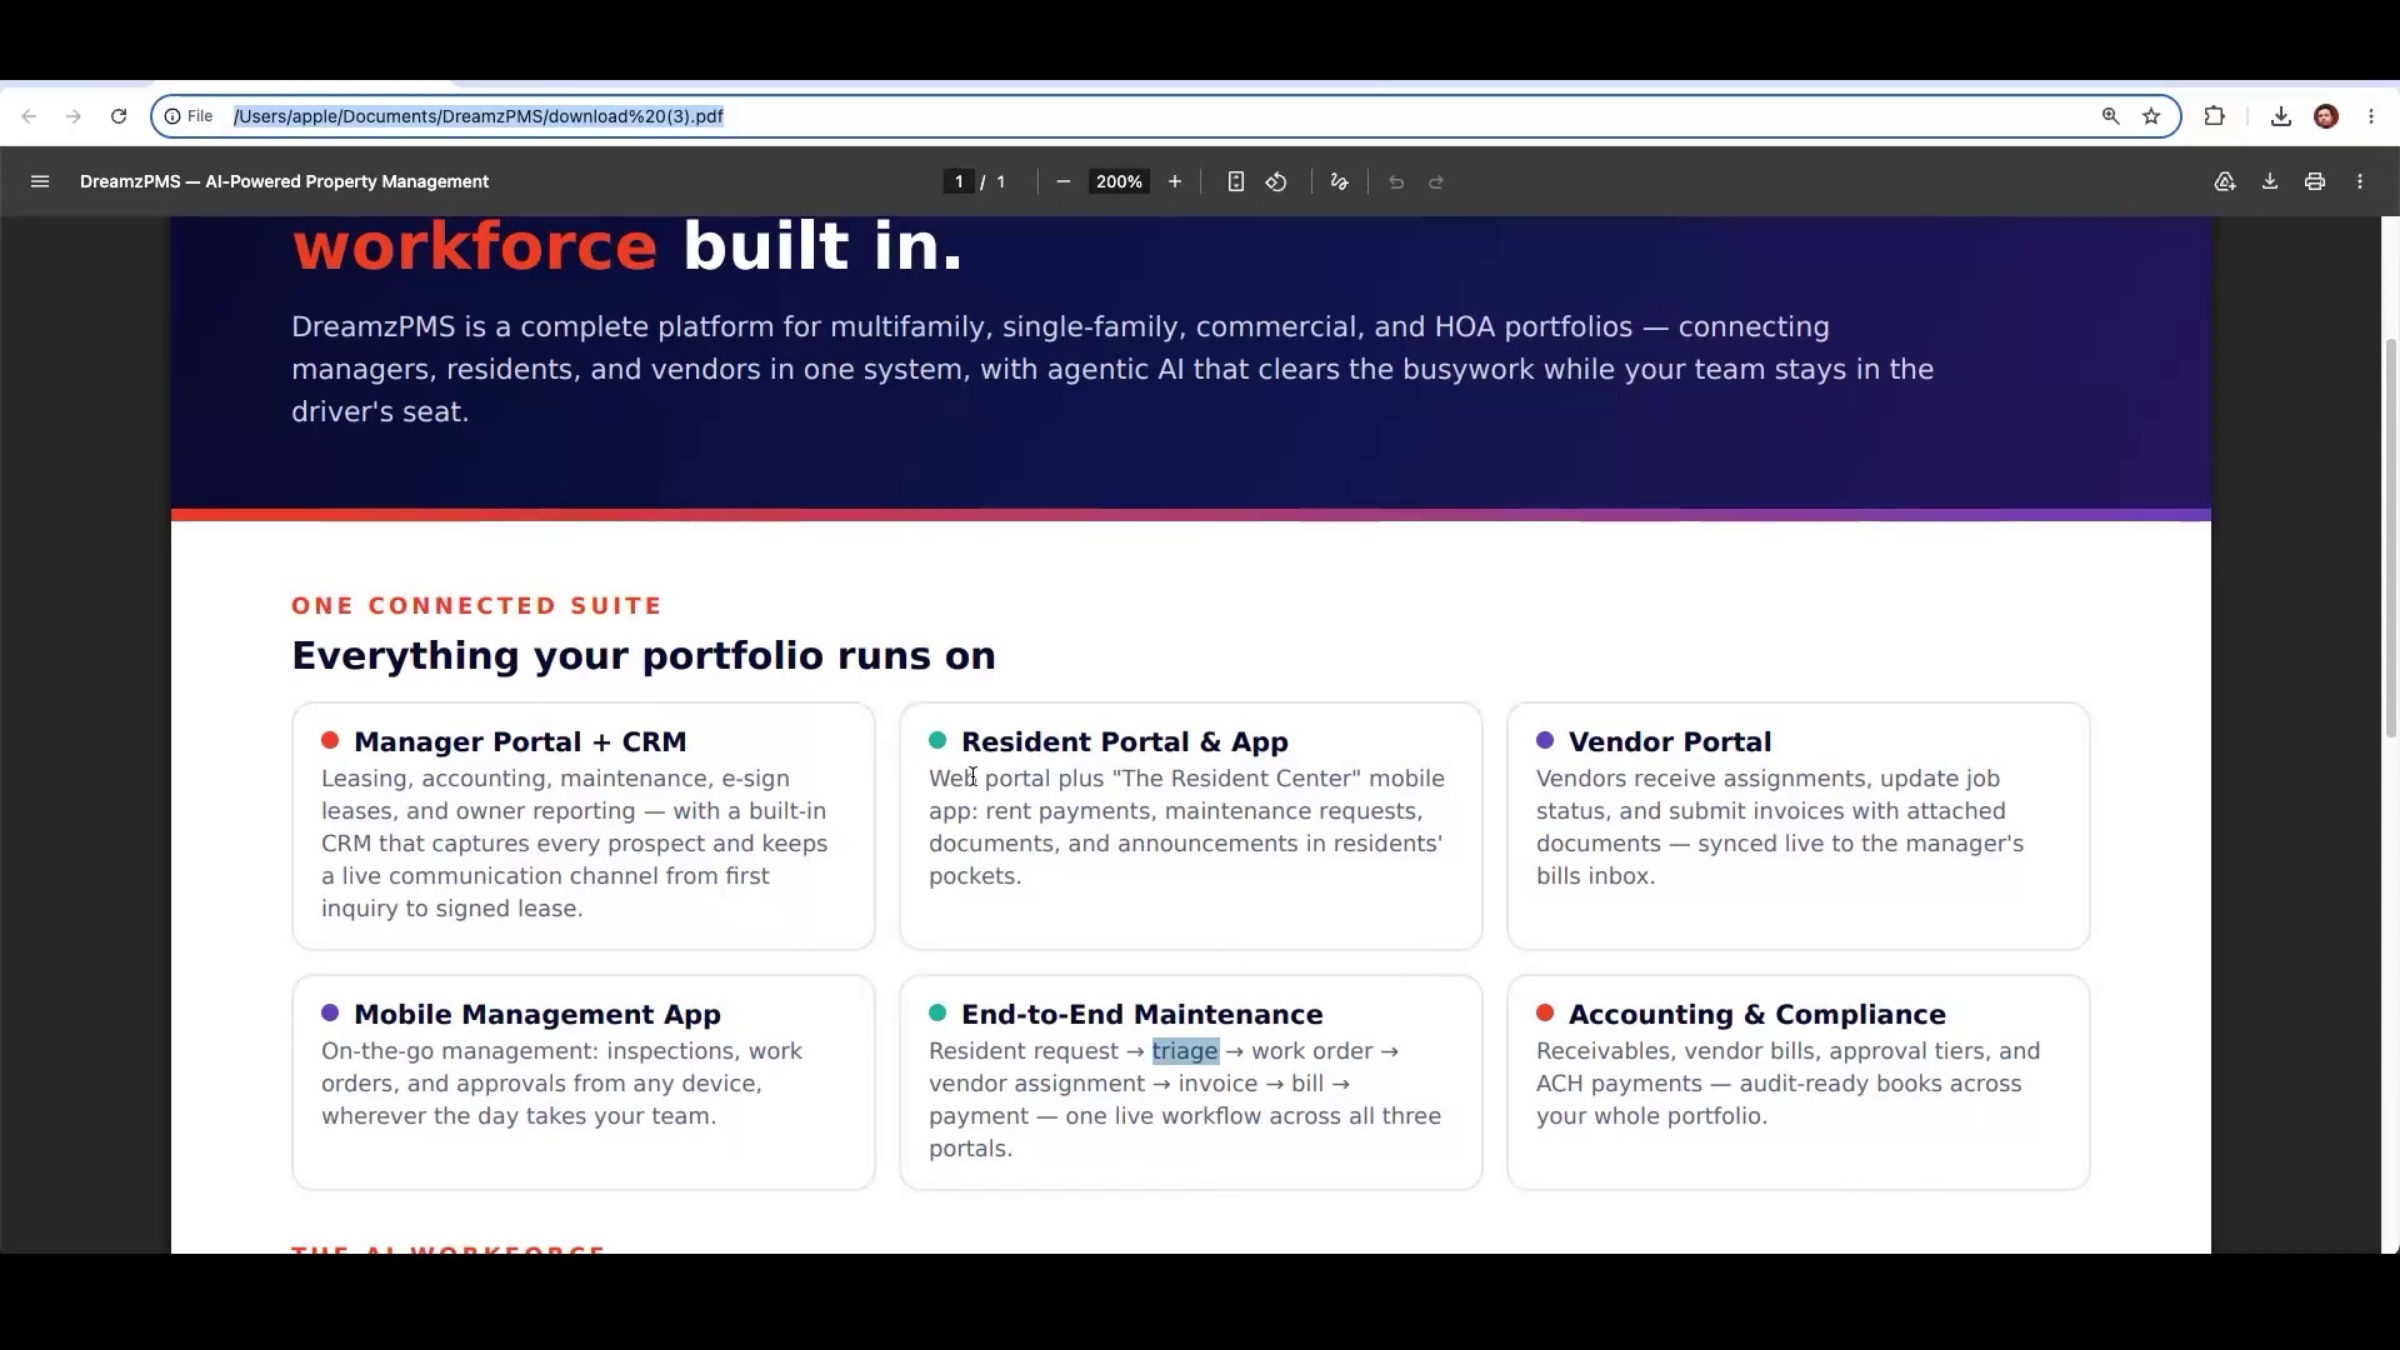
Step 4 – Vendor Portal
Vendors receive job assignments, update job status, and submit invoices and supporting documents directly — everything syncs back to the system automatically.
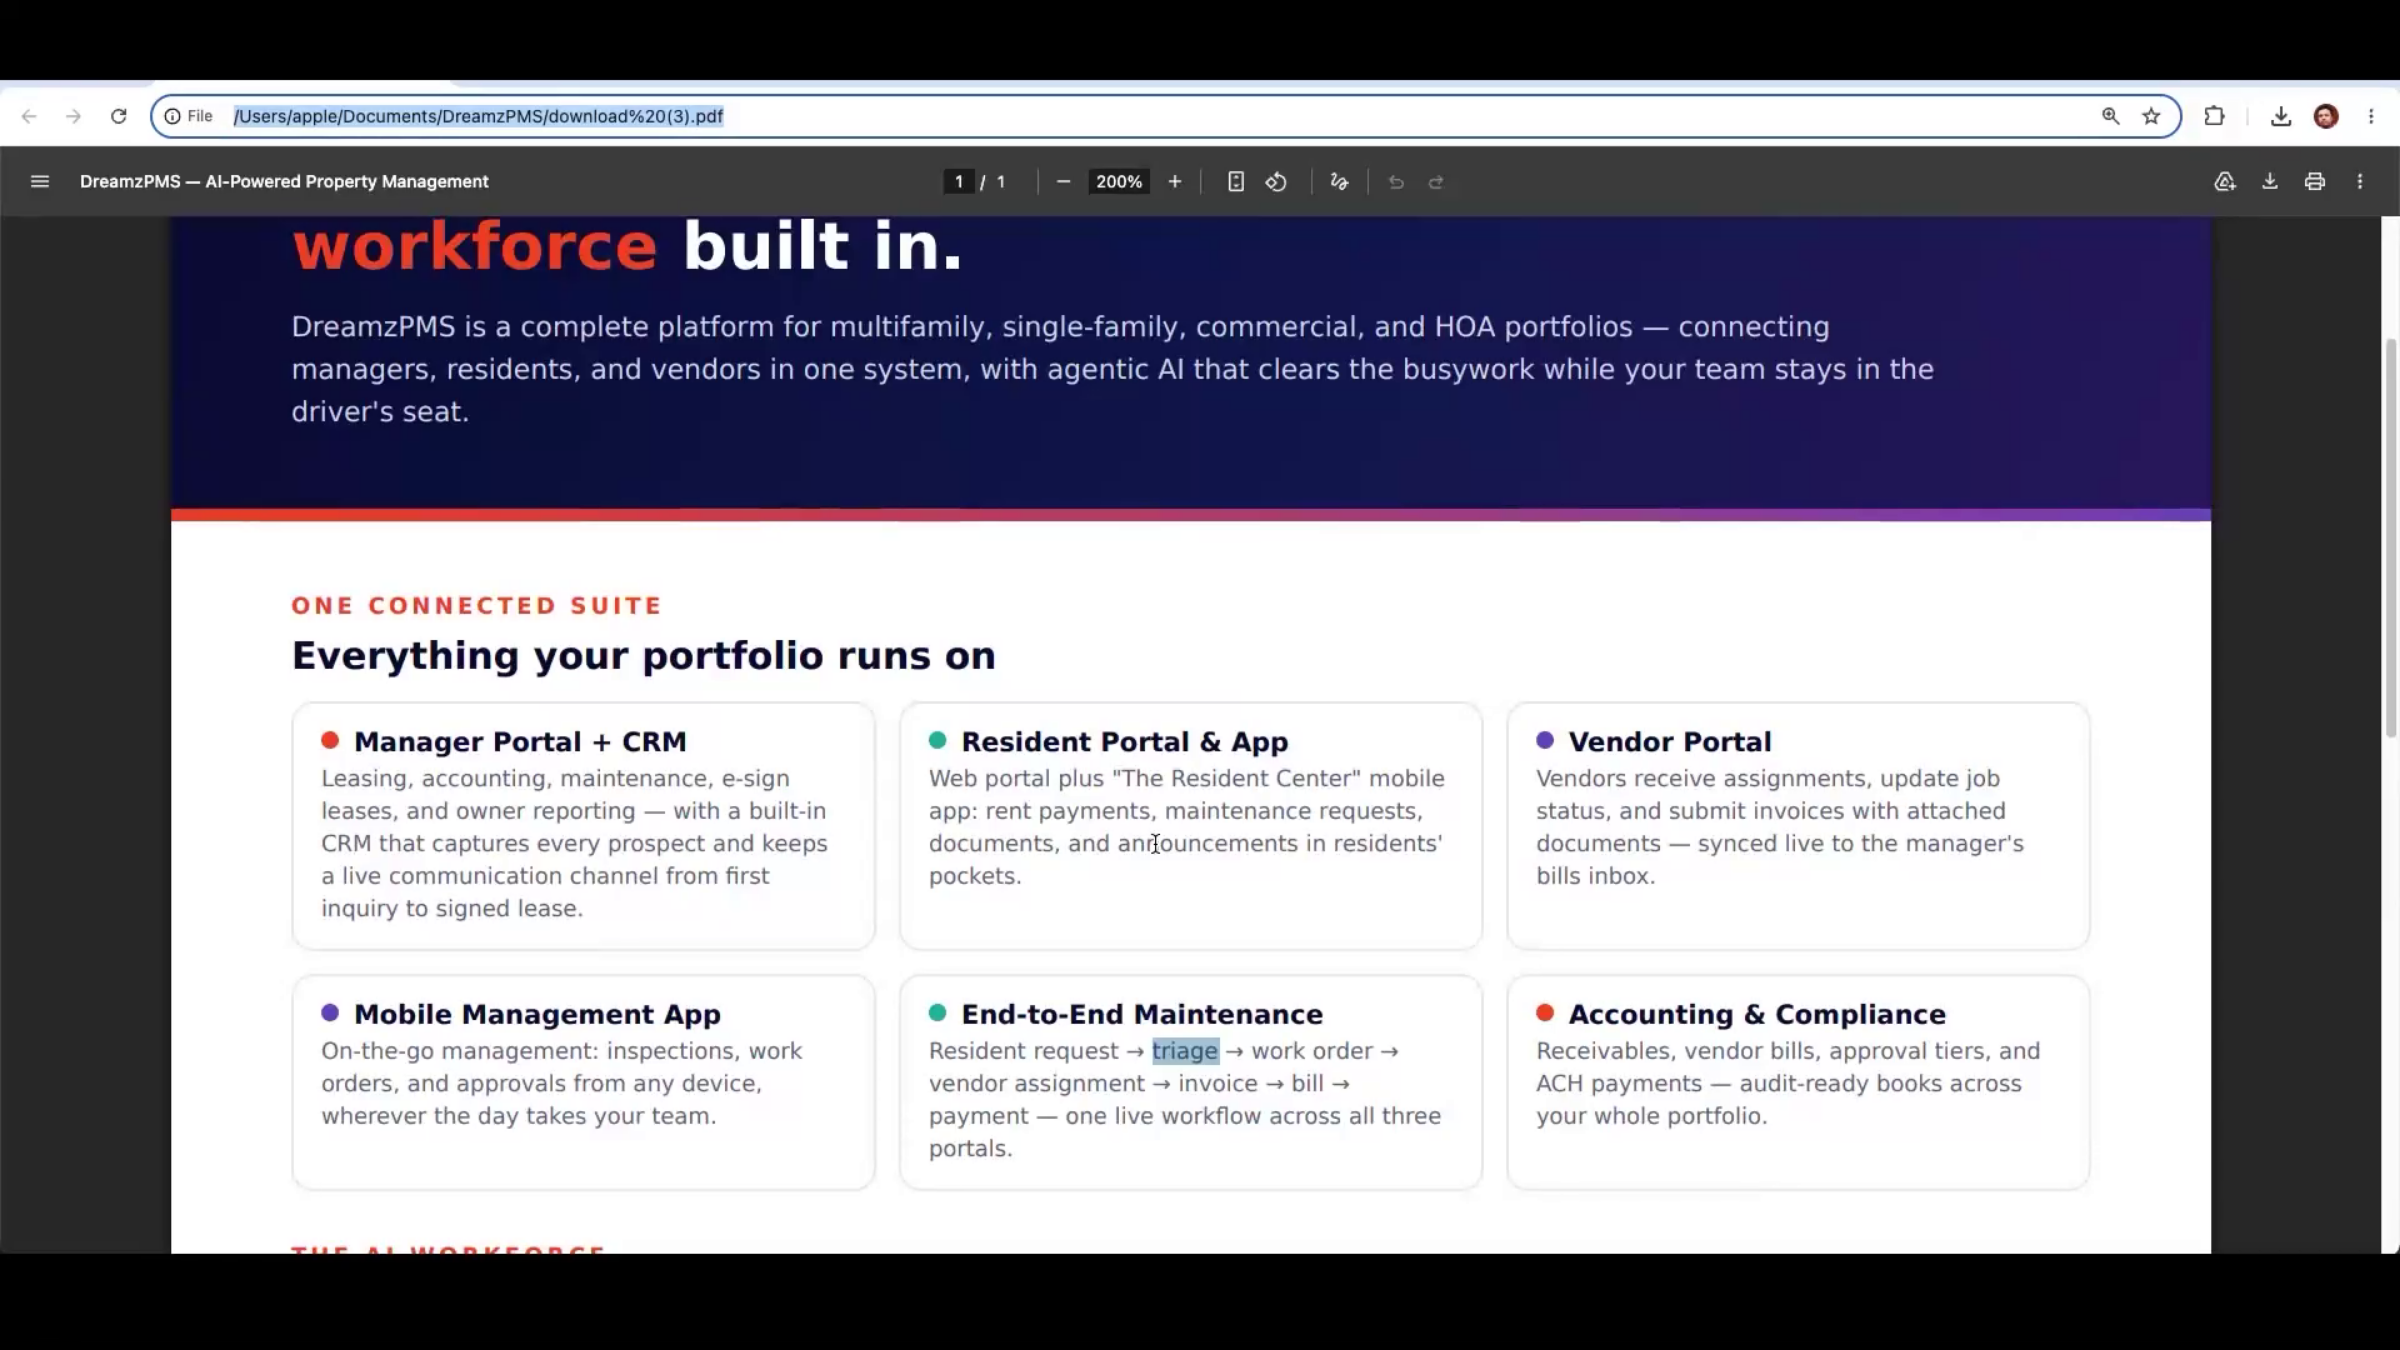
Step 5 – End-to-End Maintenance Workflow
Managers also have a mobile app for inspections, work orders, and task assignment on the go. Every resident maintenance request flows into a work order, gets assigned to a team or vendor, and moves through invoicing, approval, and payment — all inside one platform.
Step 6 – Built-In Accounting
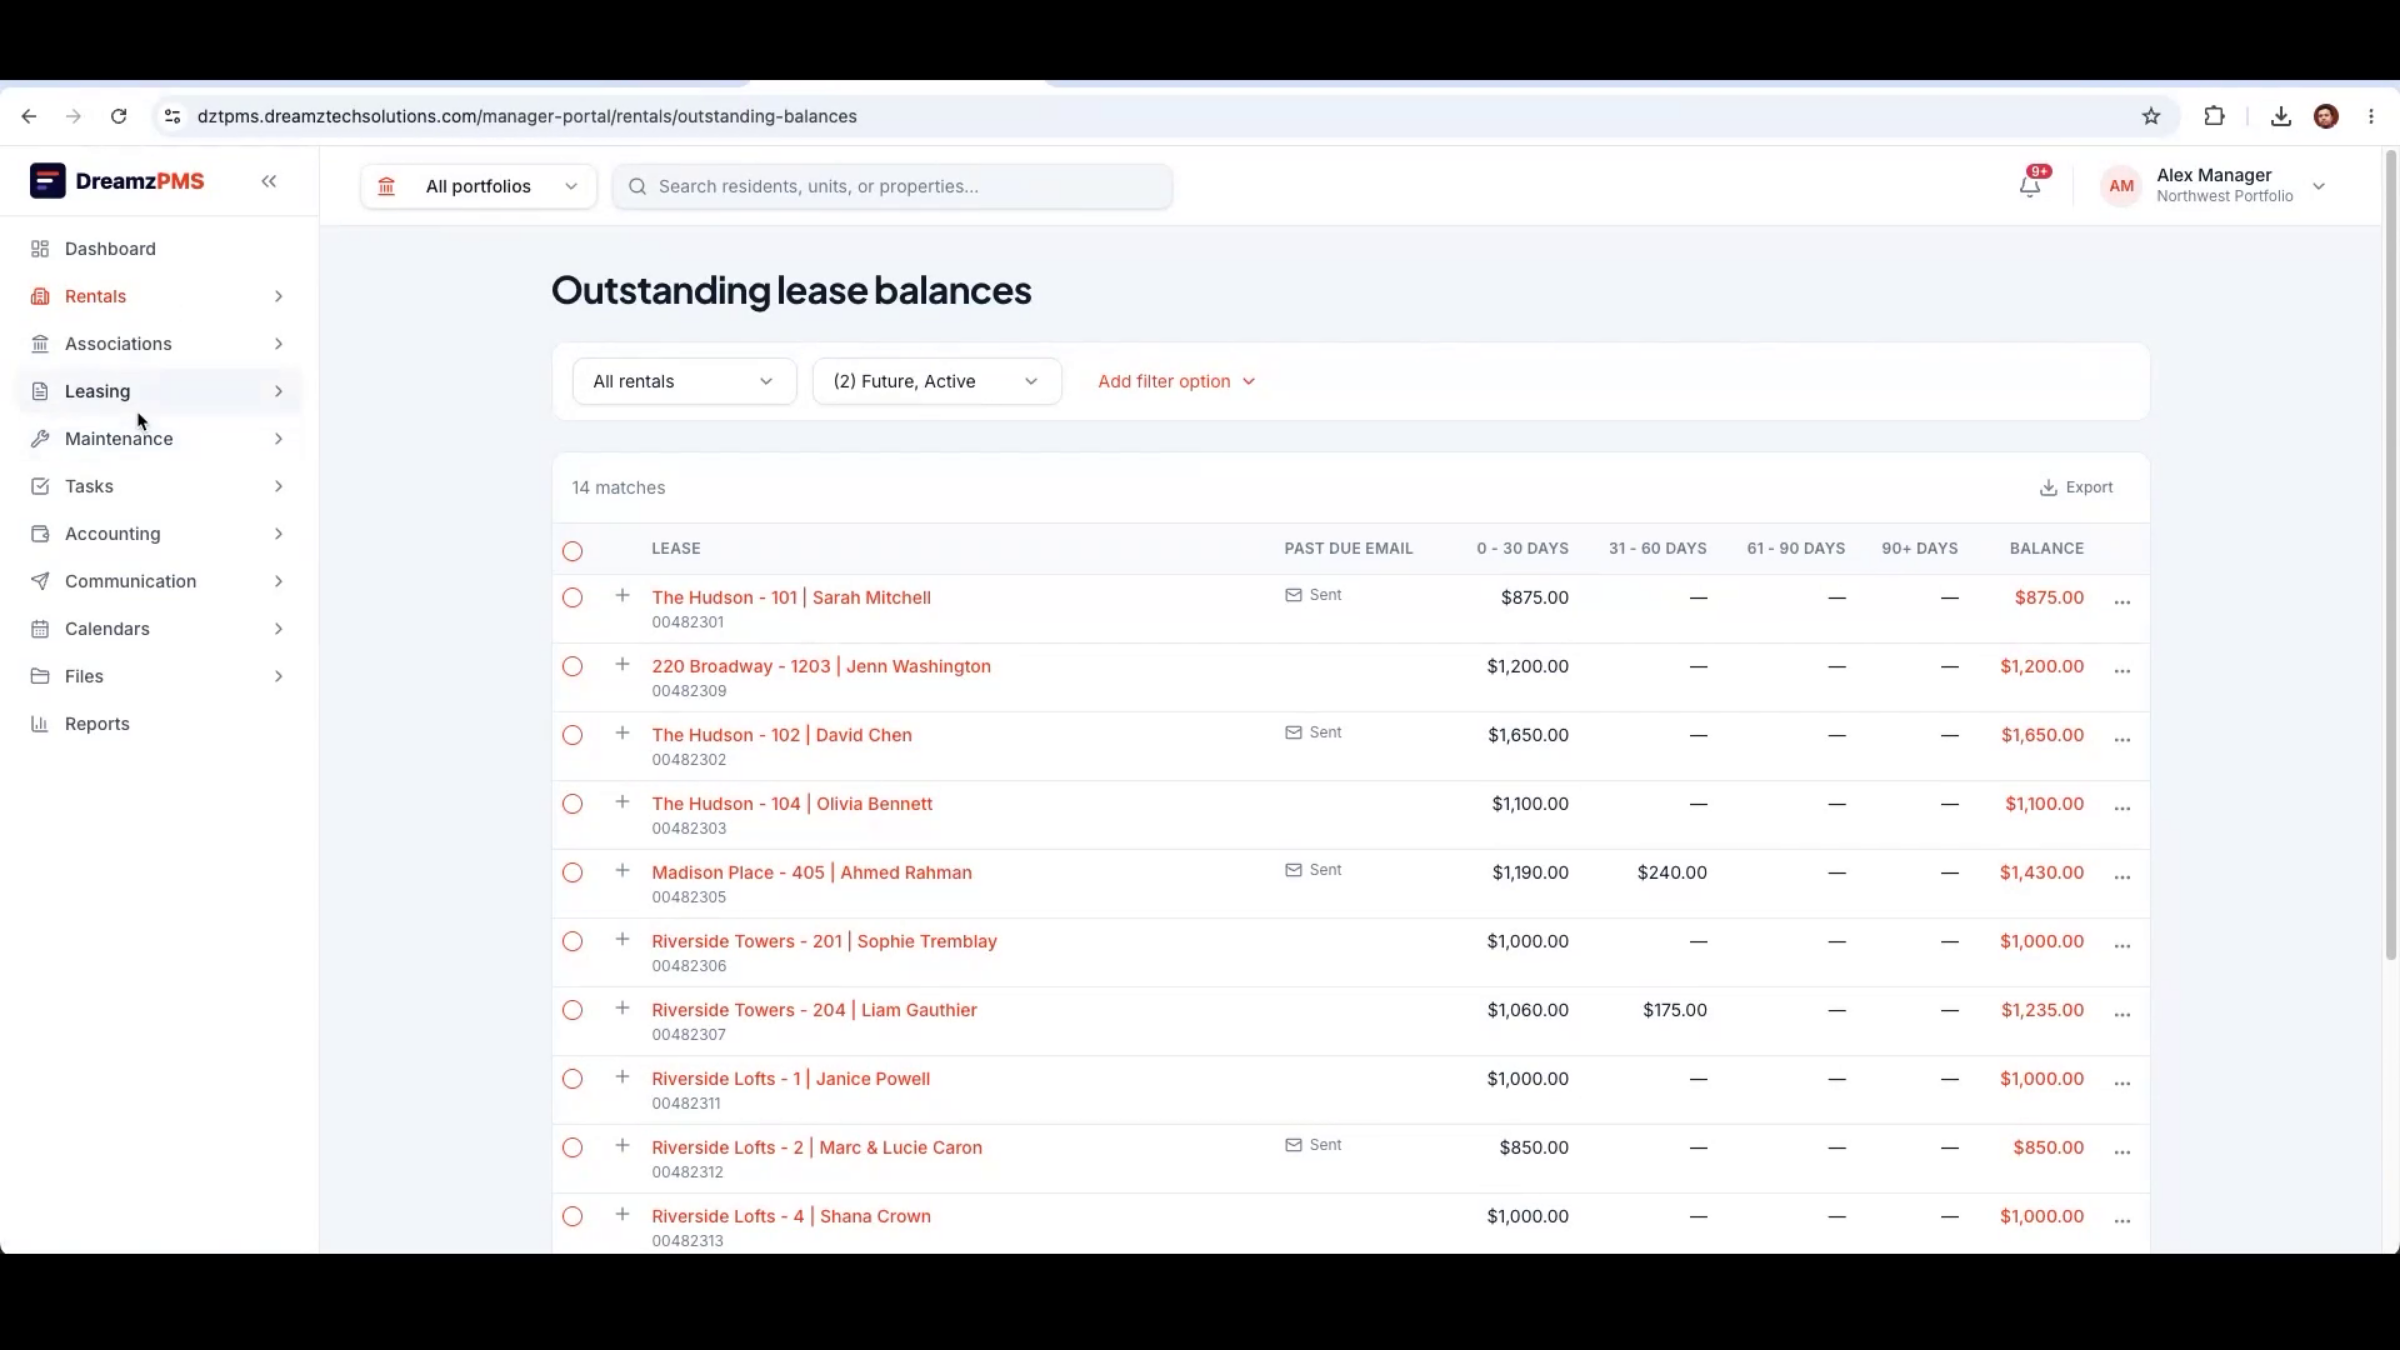
Because accounting is native to the platform, managers can process payments, manage bills, and monitor receivables and outstanding balances in real time, with the Manager, Resident, and Vendor portals all working from the same connected data.
Step 7 – The AI Workforce
A set of AI agents automates routine work across the platform: handling resident feedback, supporting finance, assisting maintenance, drafting notices and letters, scanning and processing bills, and moving leasing prospects toward applicants — all backed by AI chat and leasing assistants.
Manager Portal Walkthrough
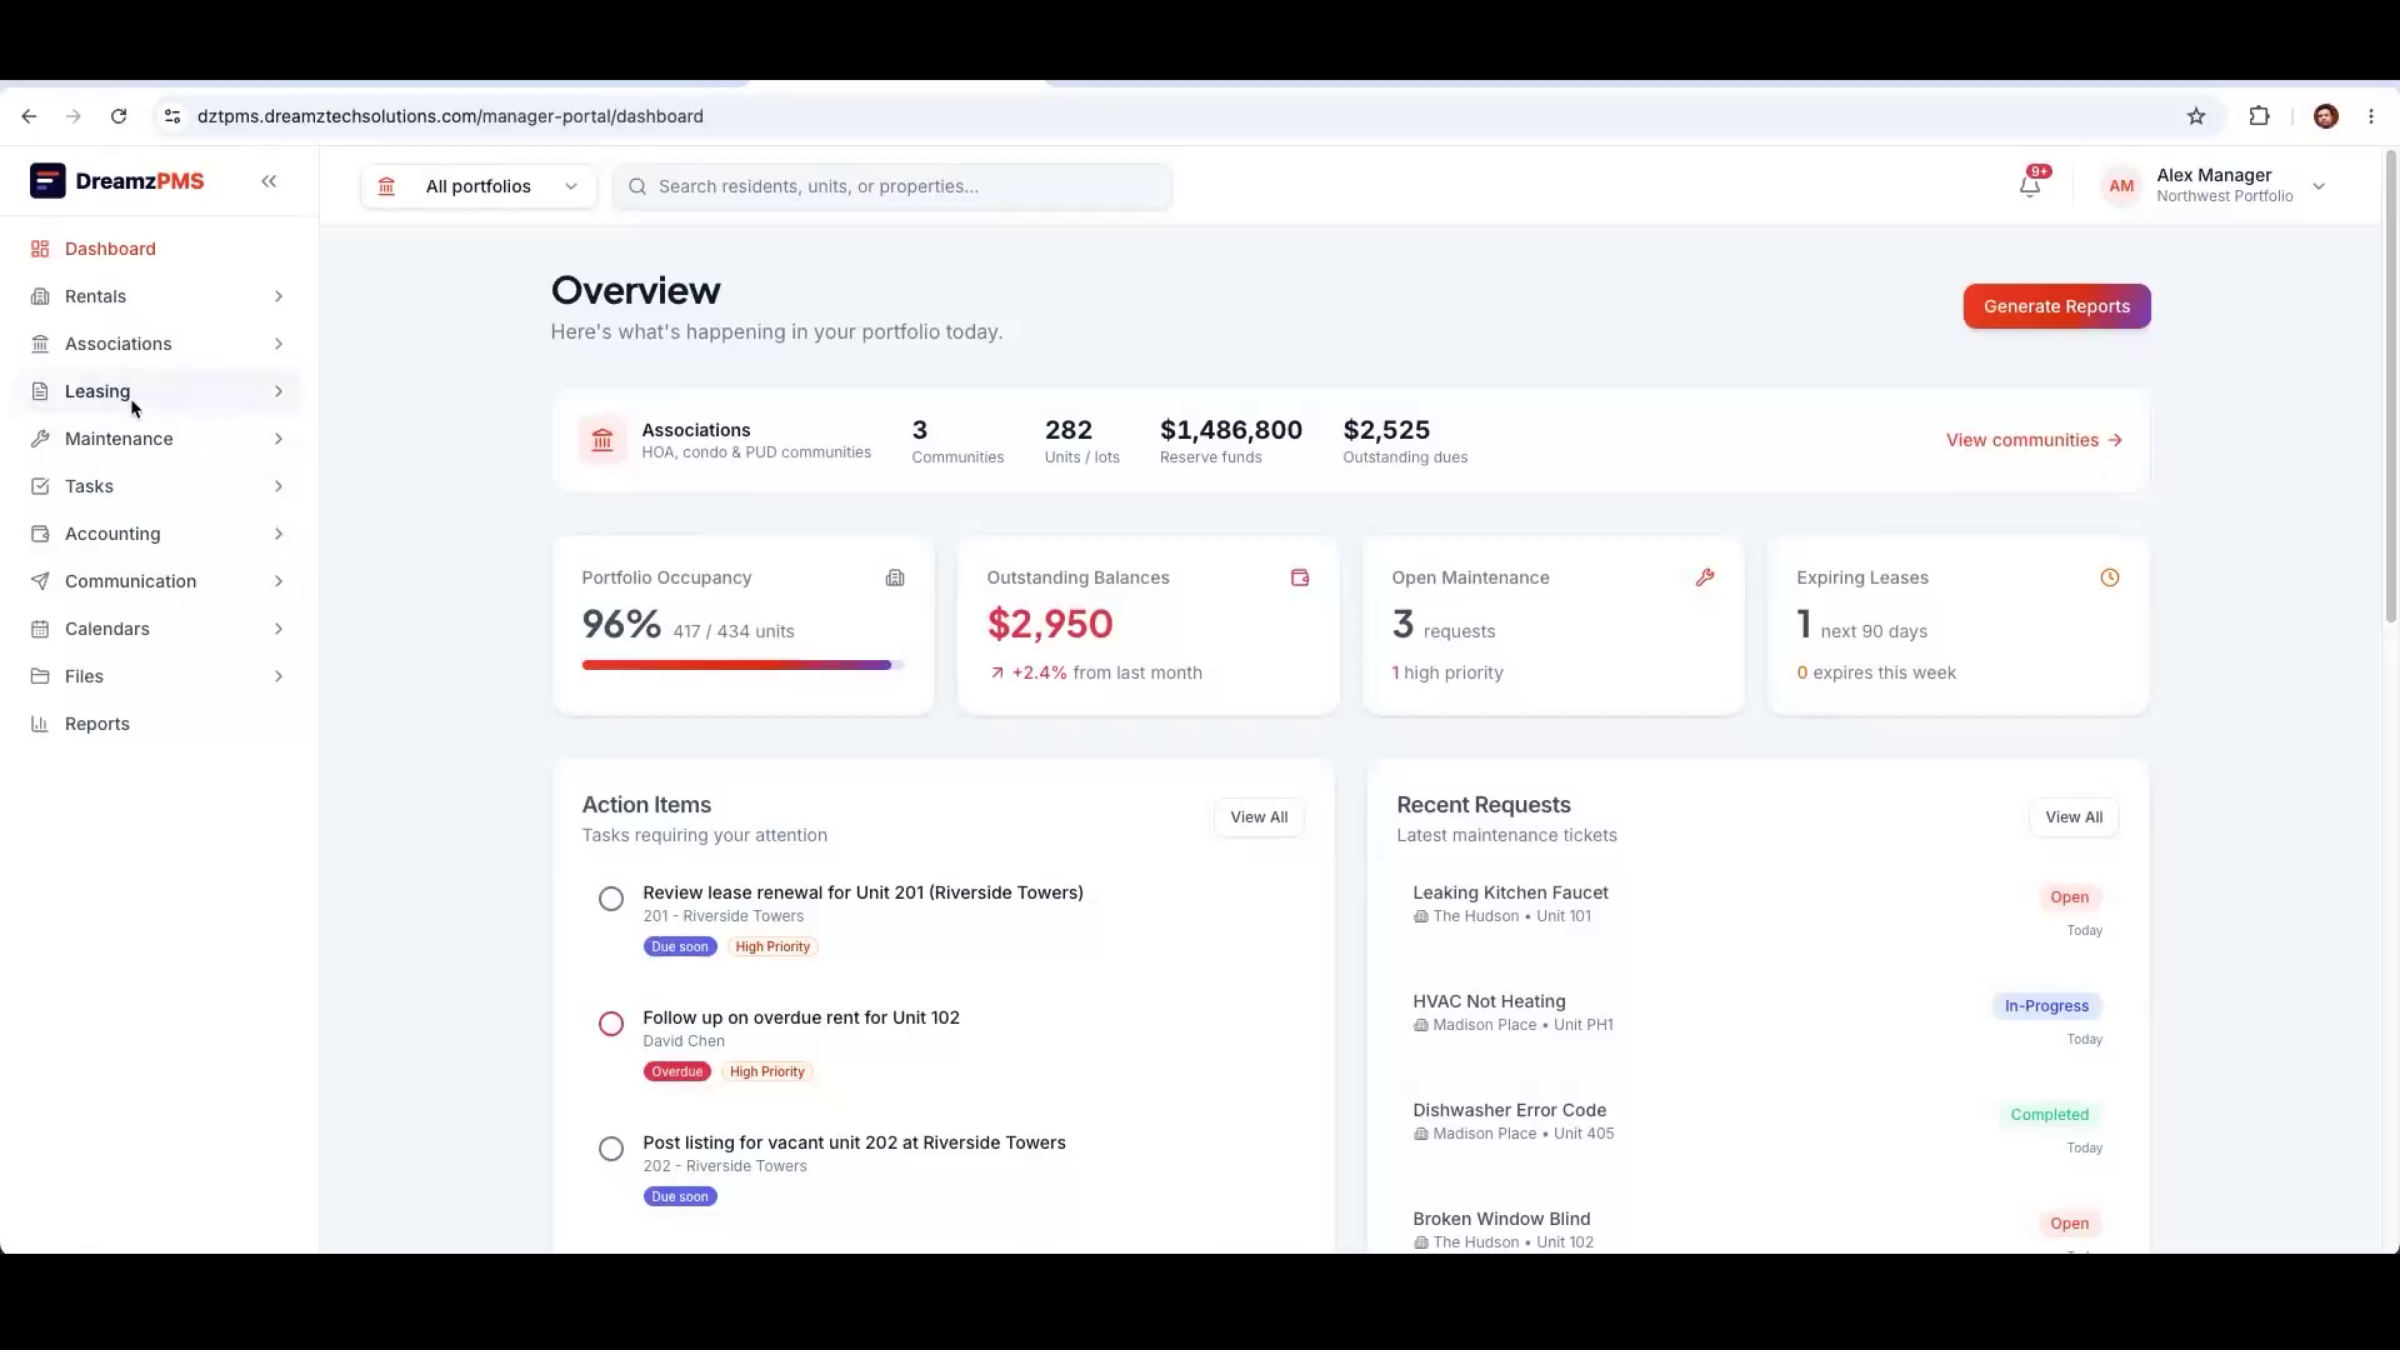
Step 8 – Dashboard
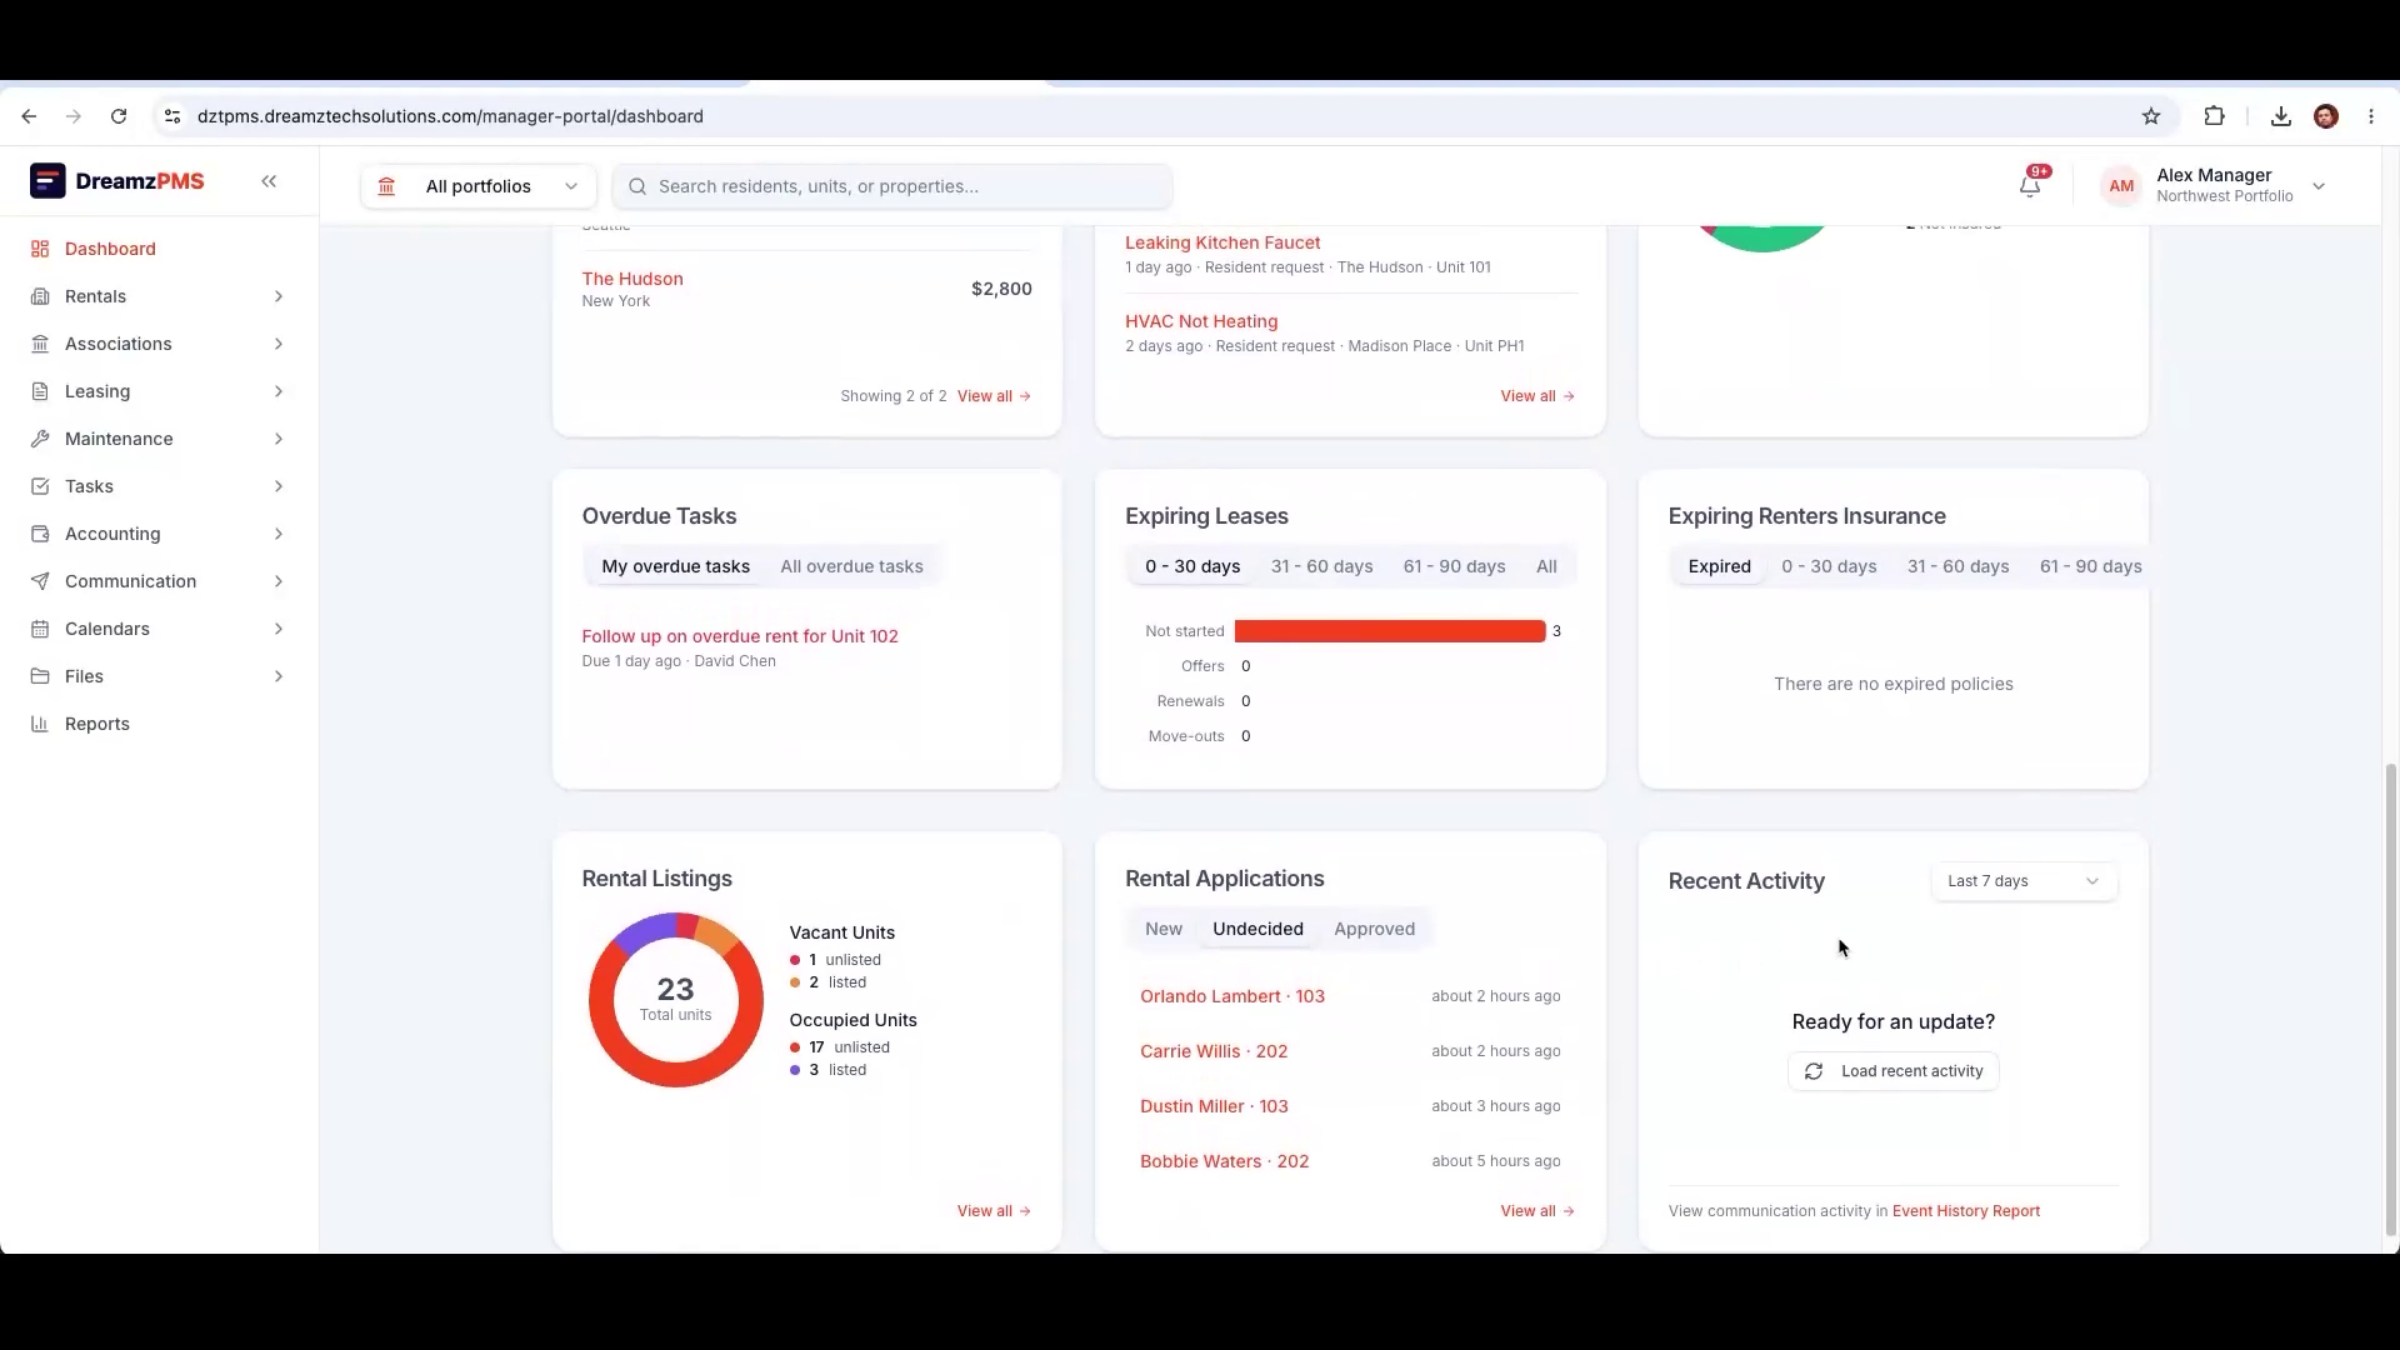
After logging in, managers land on the dashboard, which shows recent requests, action items needing attention, outstanding balances, overdue tasks, and applications awaiting review. You can switch between property portfolios directly from here.
Step 9 – Rentals Module
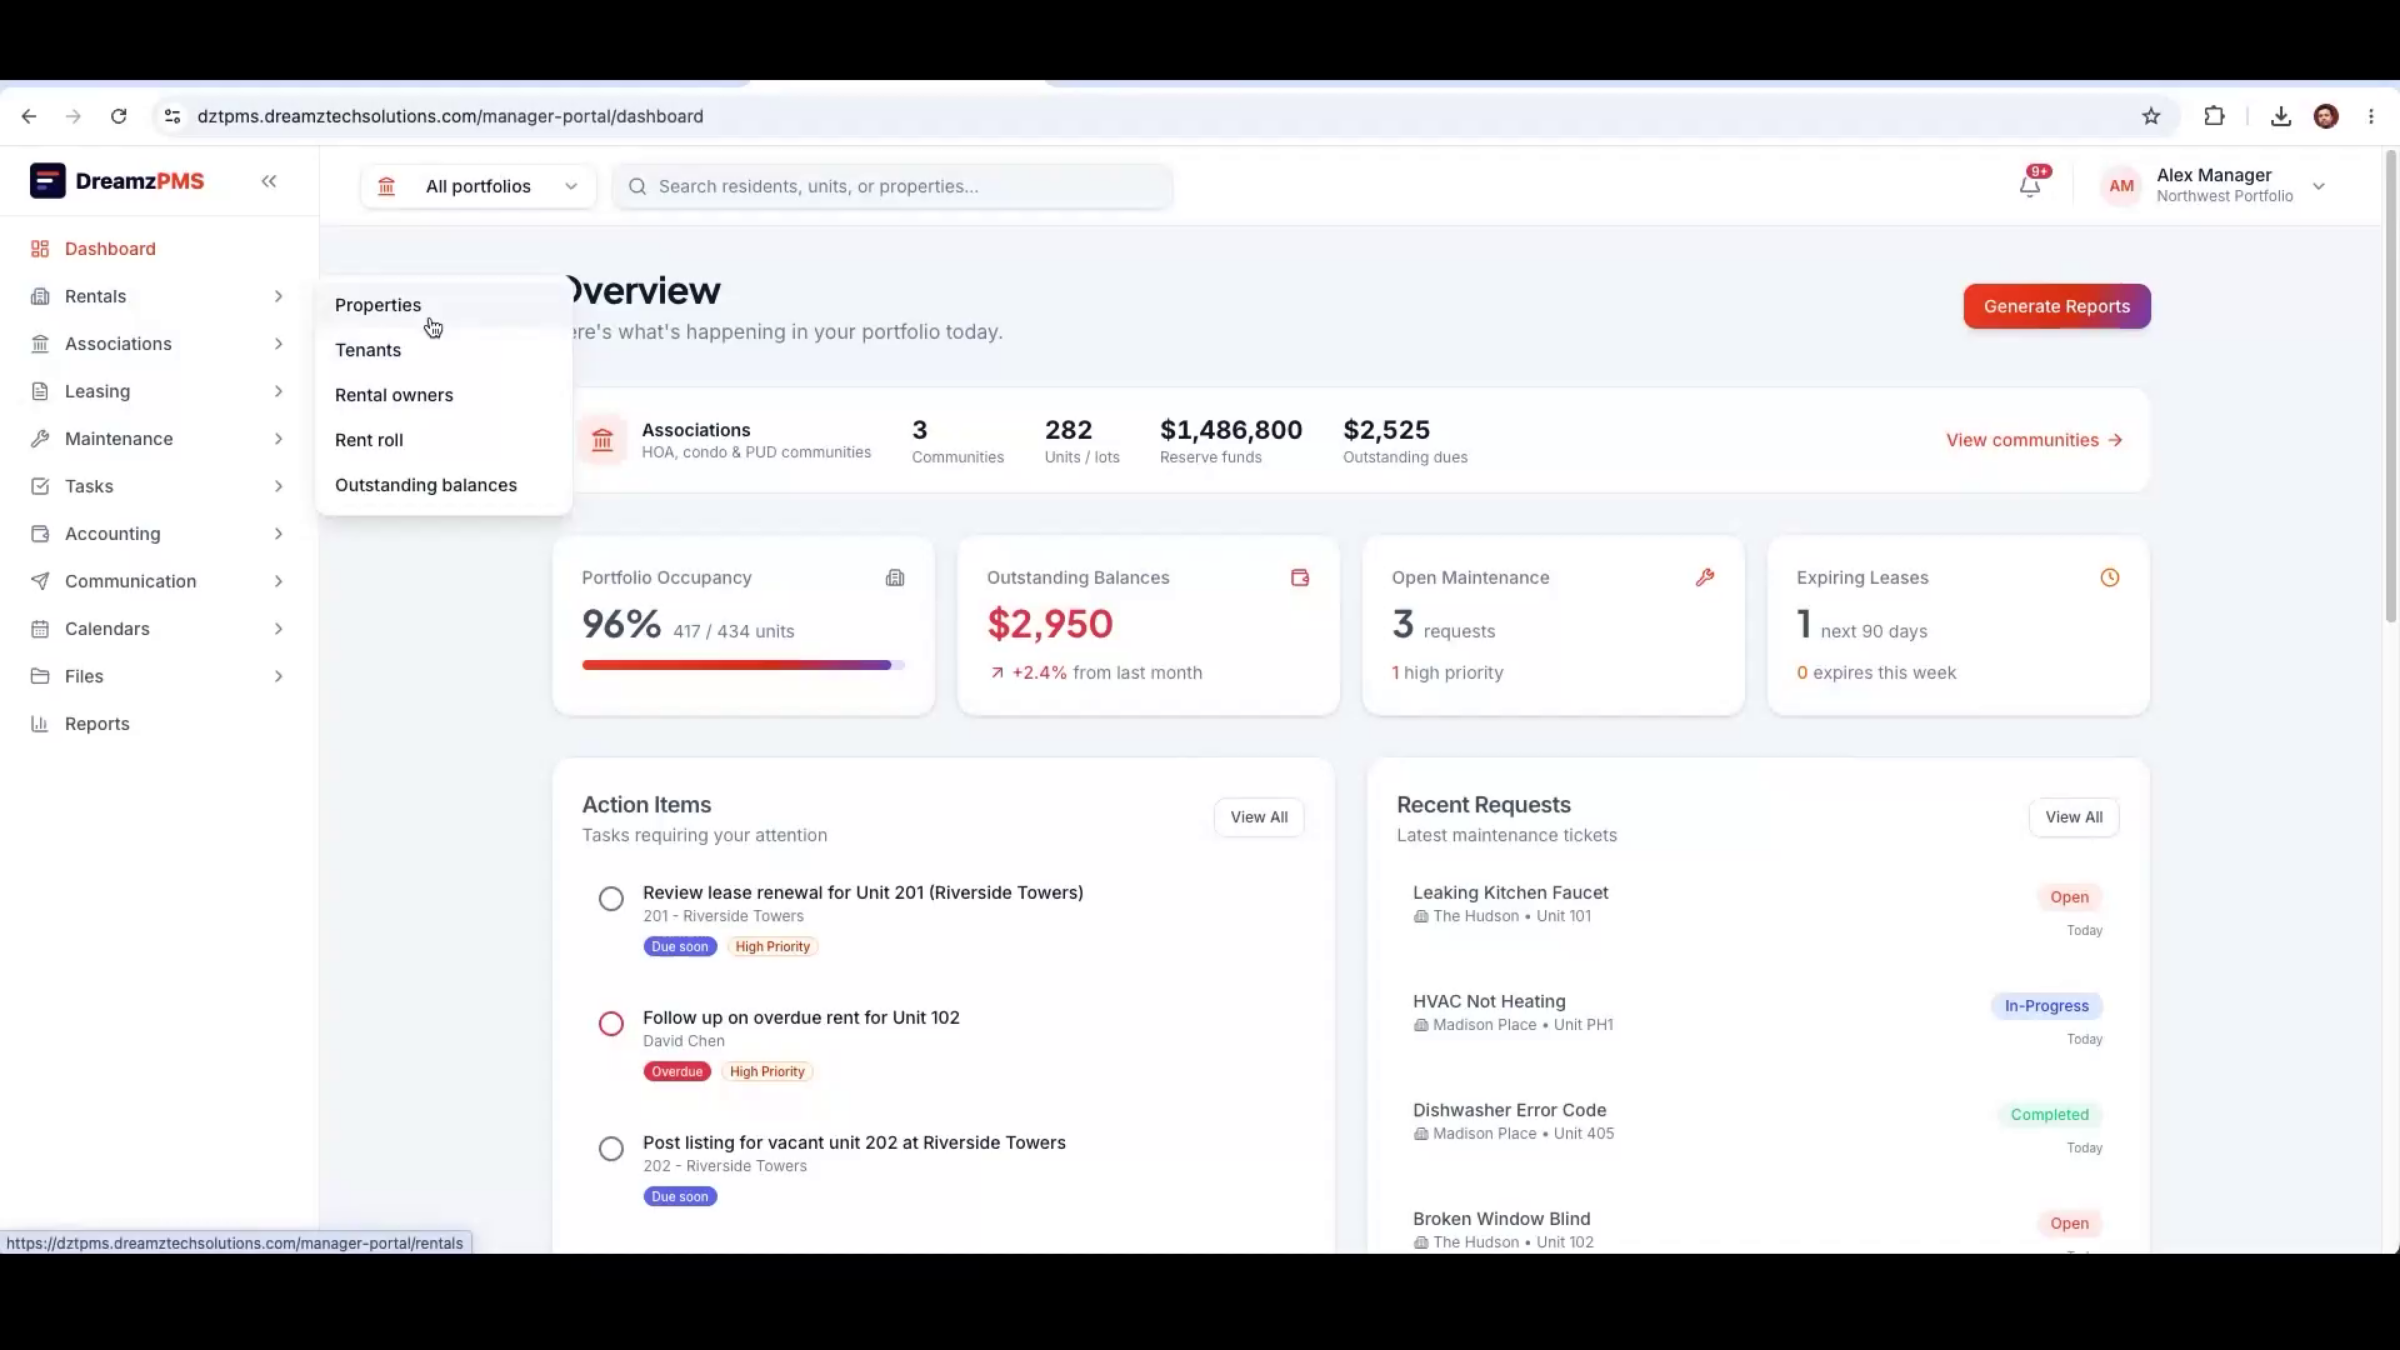
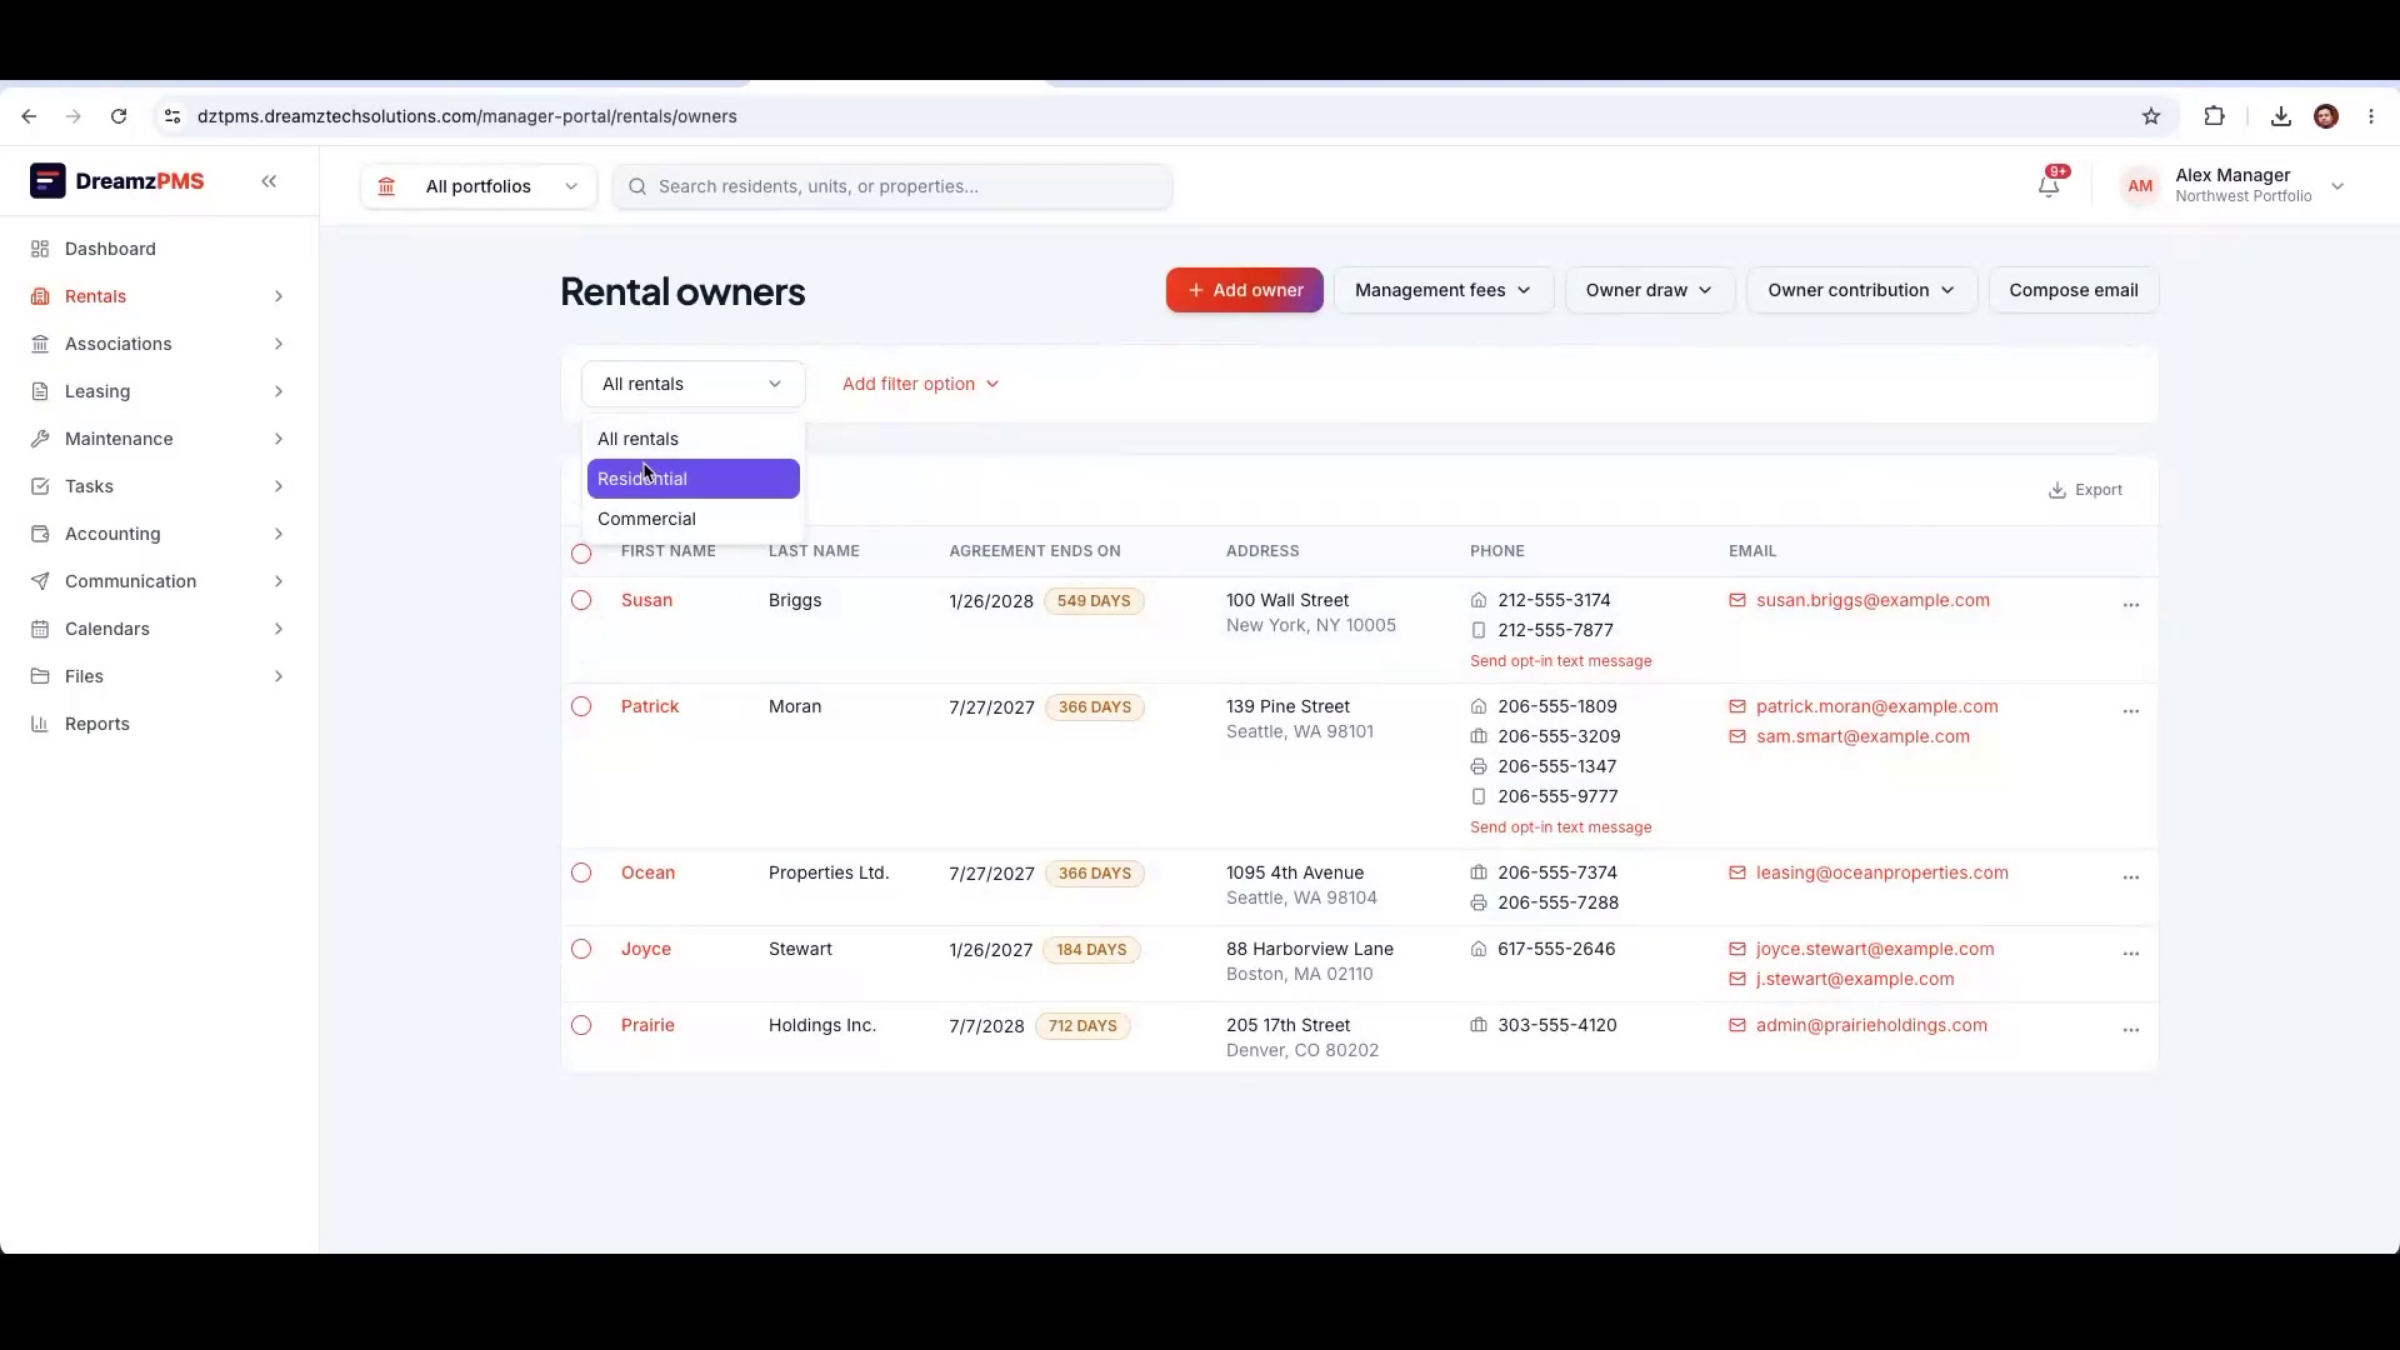
The Rentals module is where you manage your rental properties and tenants.
Step 10 – Property Details
Selecting a property shows key details — total units, occupied and vacant counts, the ability to add new units, and the property's ownership information.
Step 11 – Rent Roll
The rent roll gives a full financial view of the property: tracking outstanding balances, recording or receiving payments, sending resident notices, and reviewing lease information, all in one place.
Step 12 – Resident Entry Process
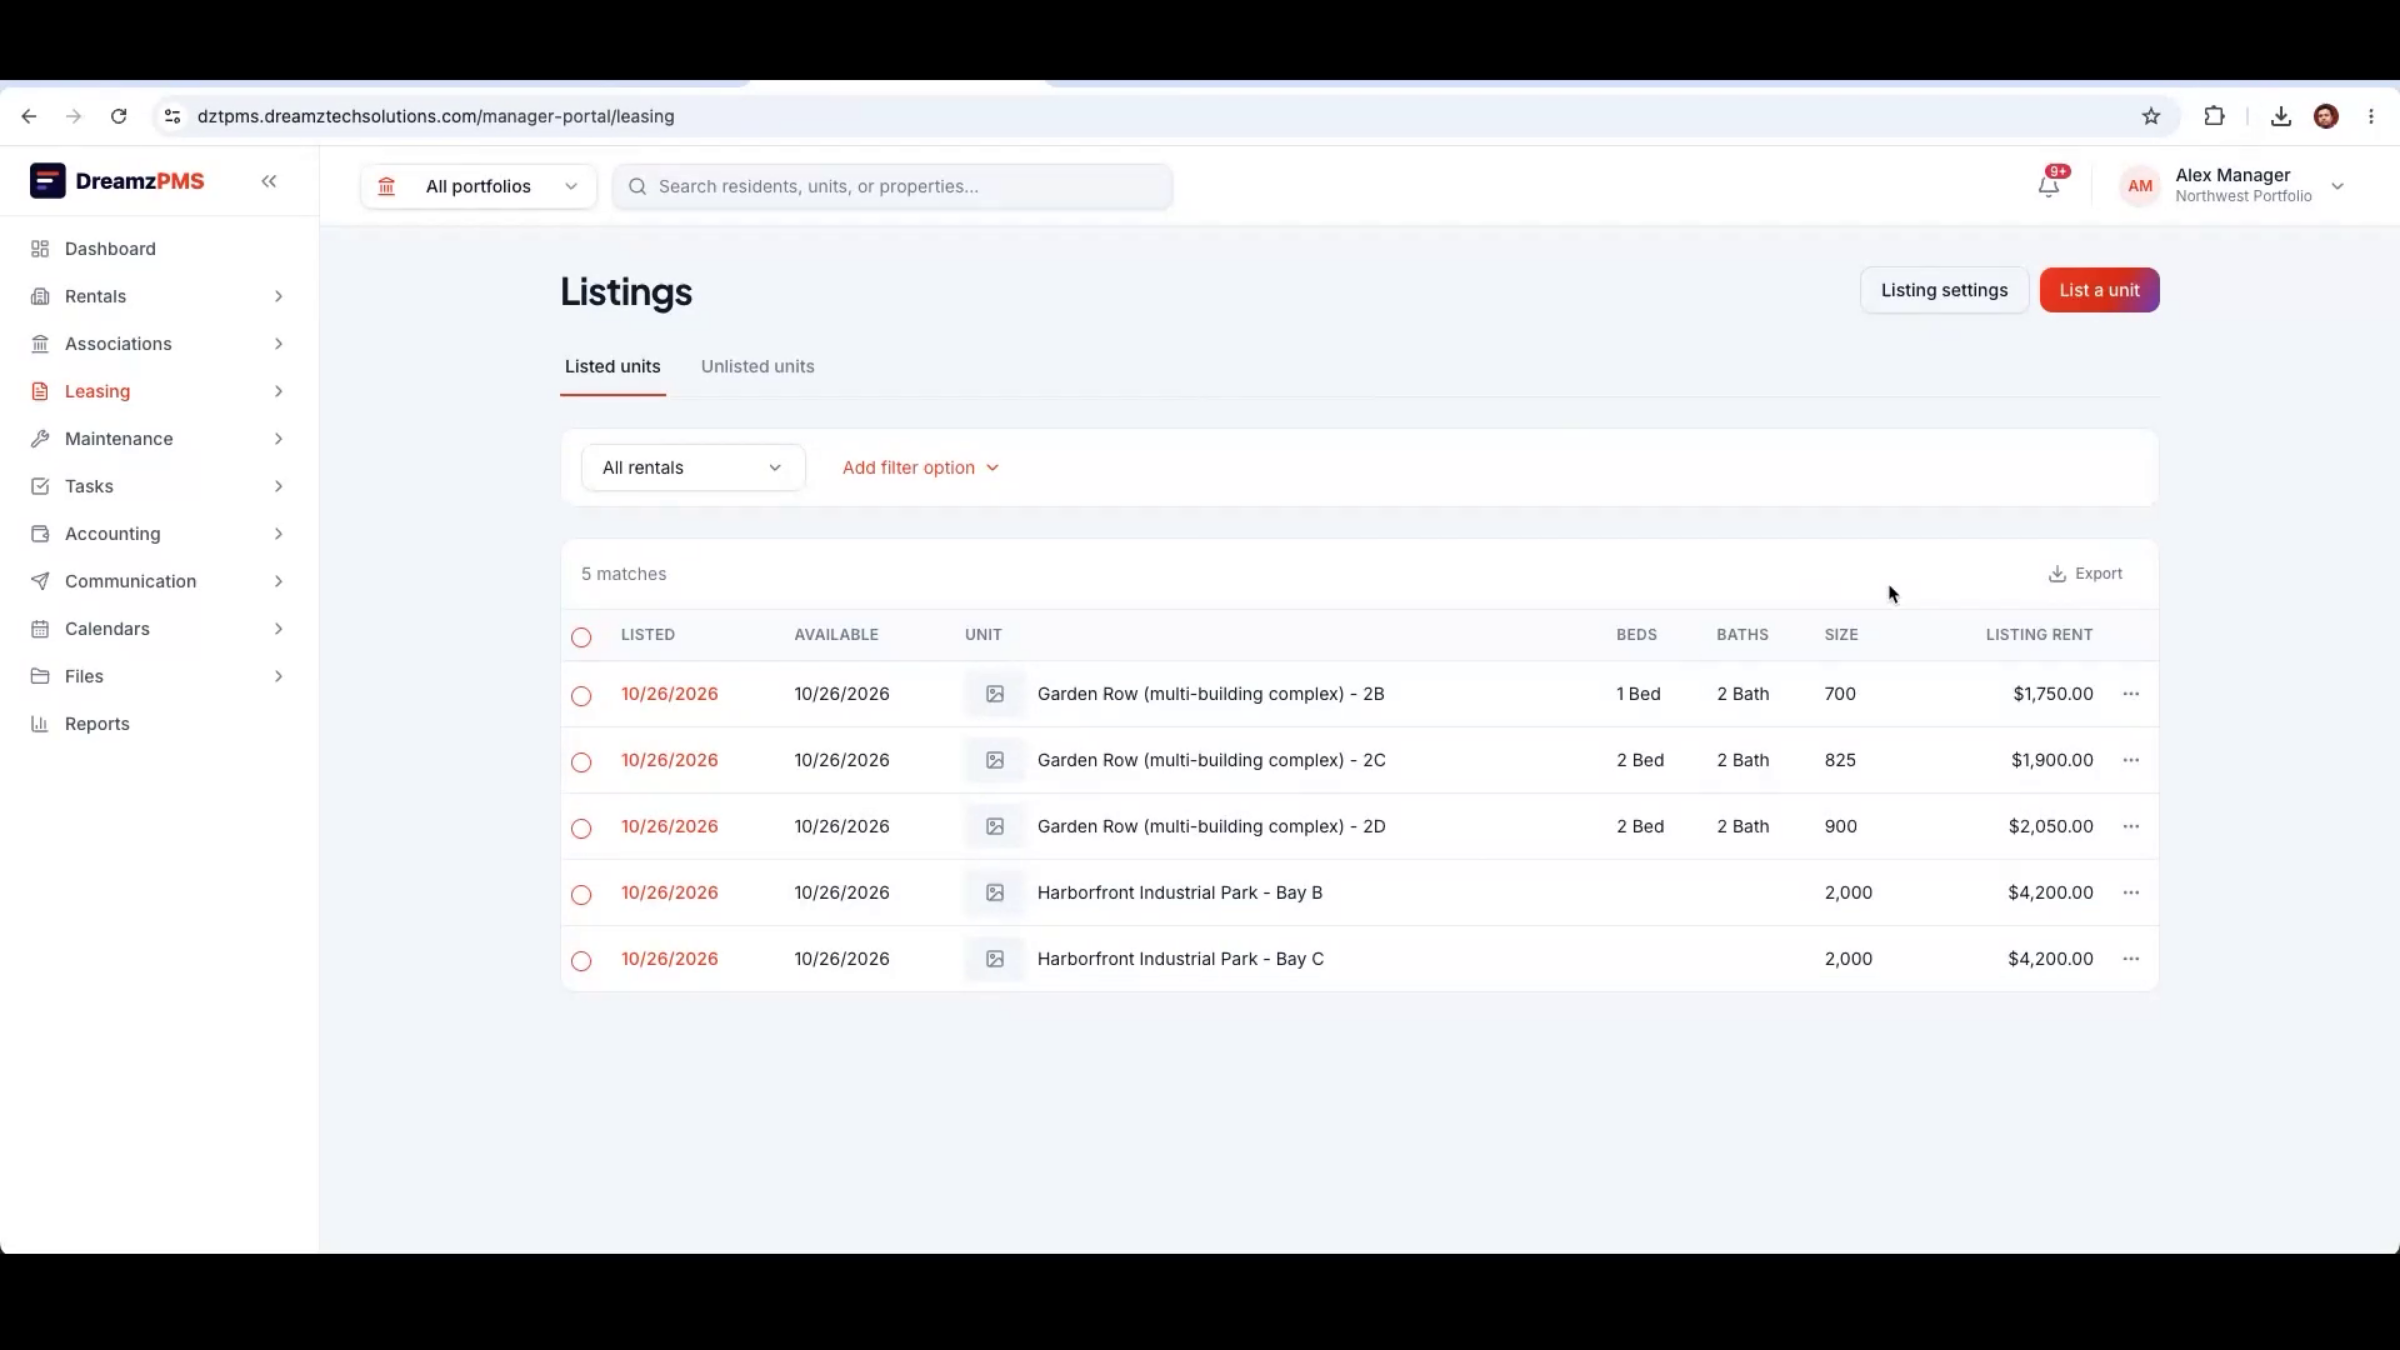
Residents first enter the system through the Listings module, where available units are published and the leasing process begins.
Step 13 – Listings Module Functions
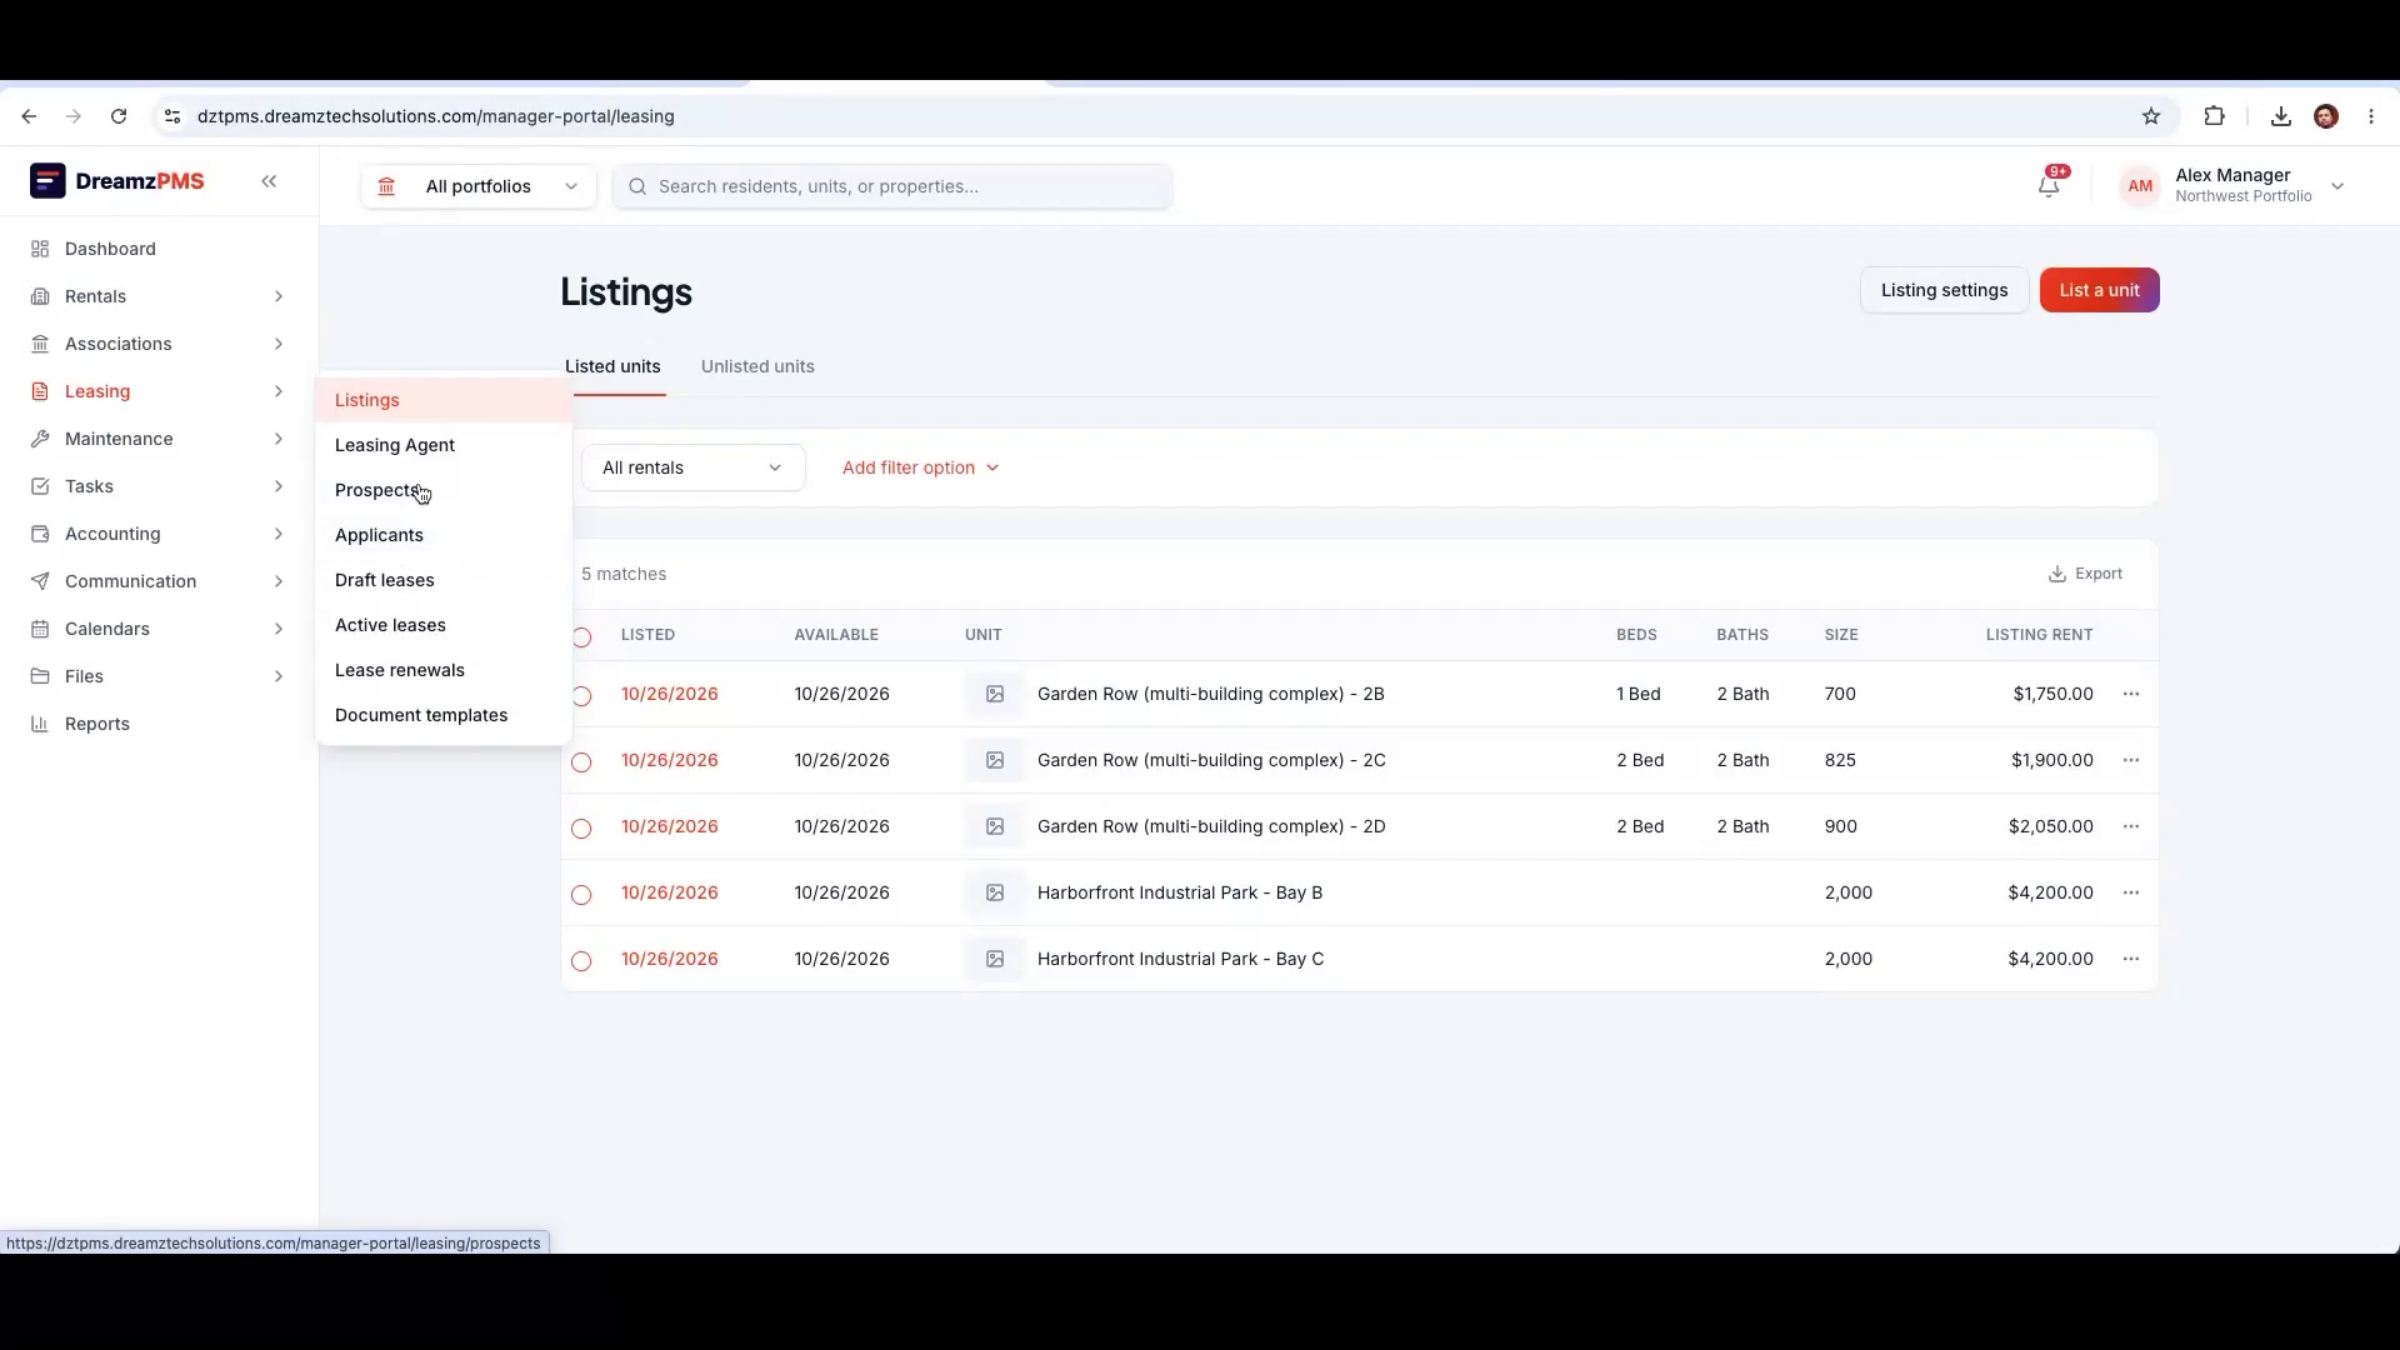
From Listings, you can add listing agents, view prospects and applicants, and draft leases for available units.
Step 14 – Maintenance Module Overview
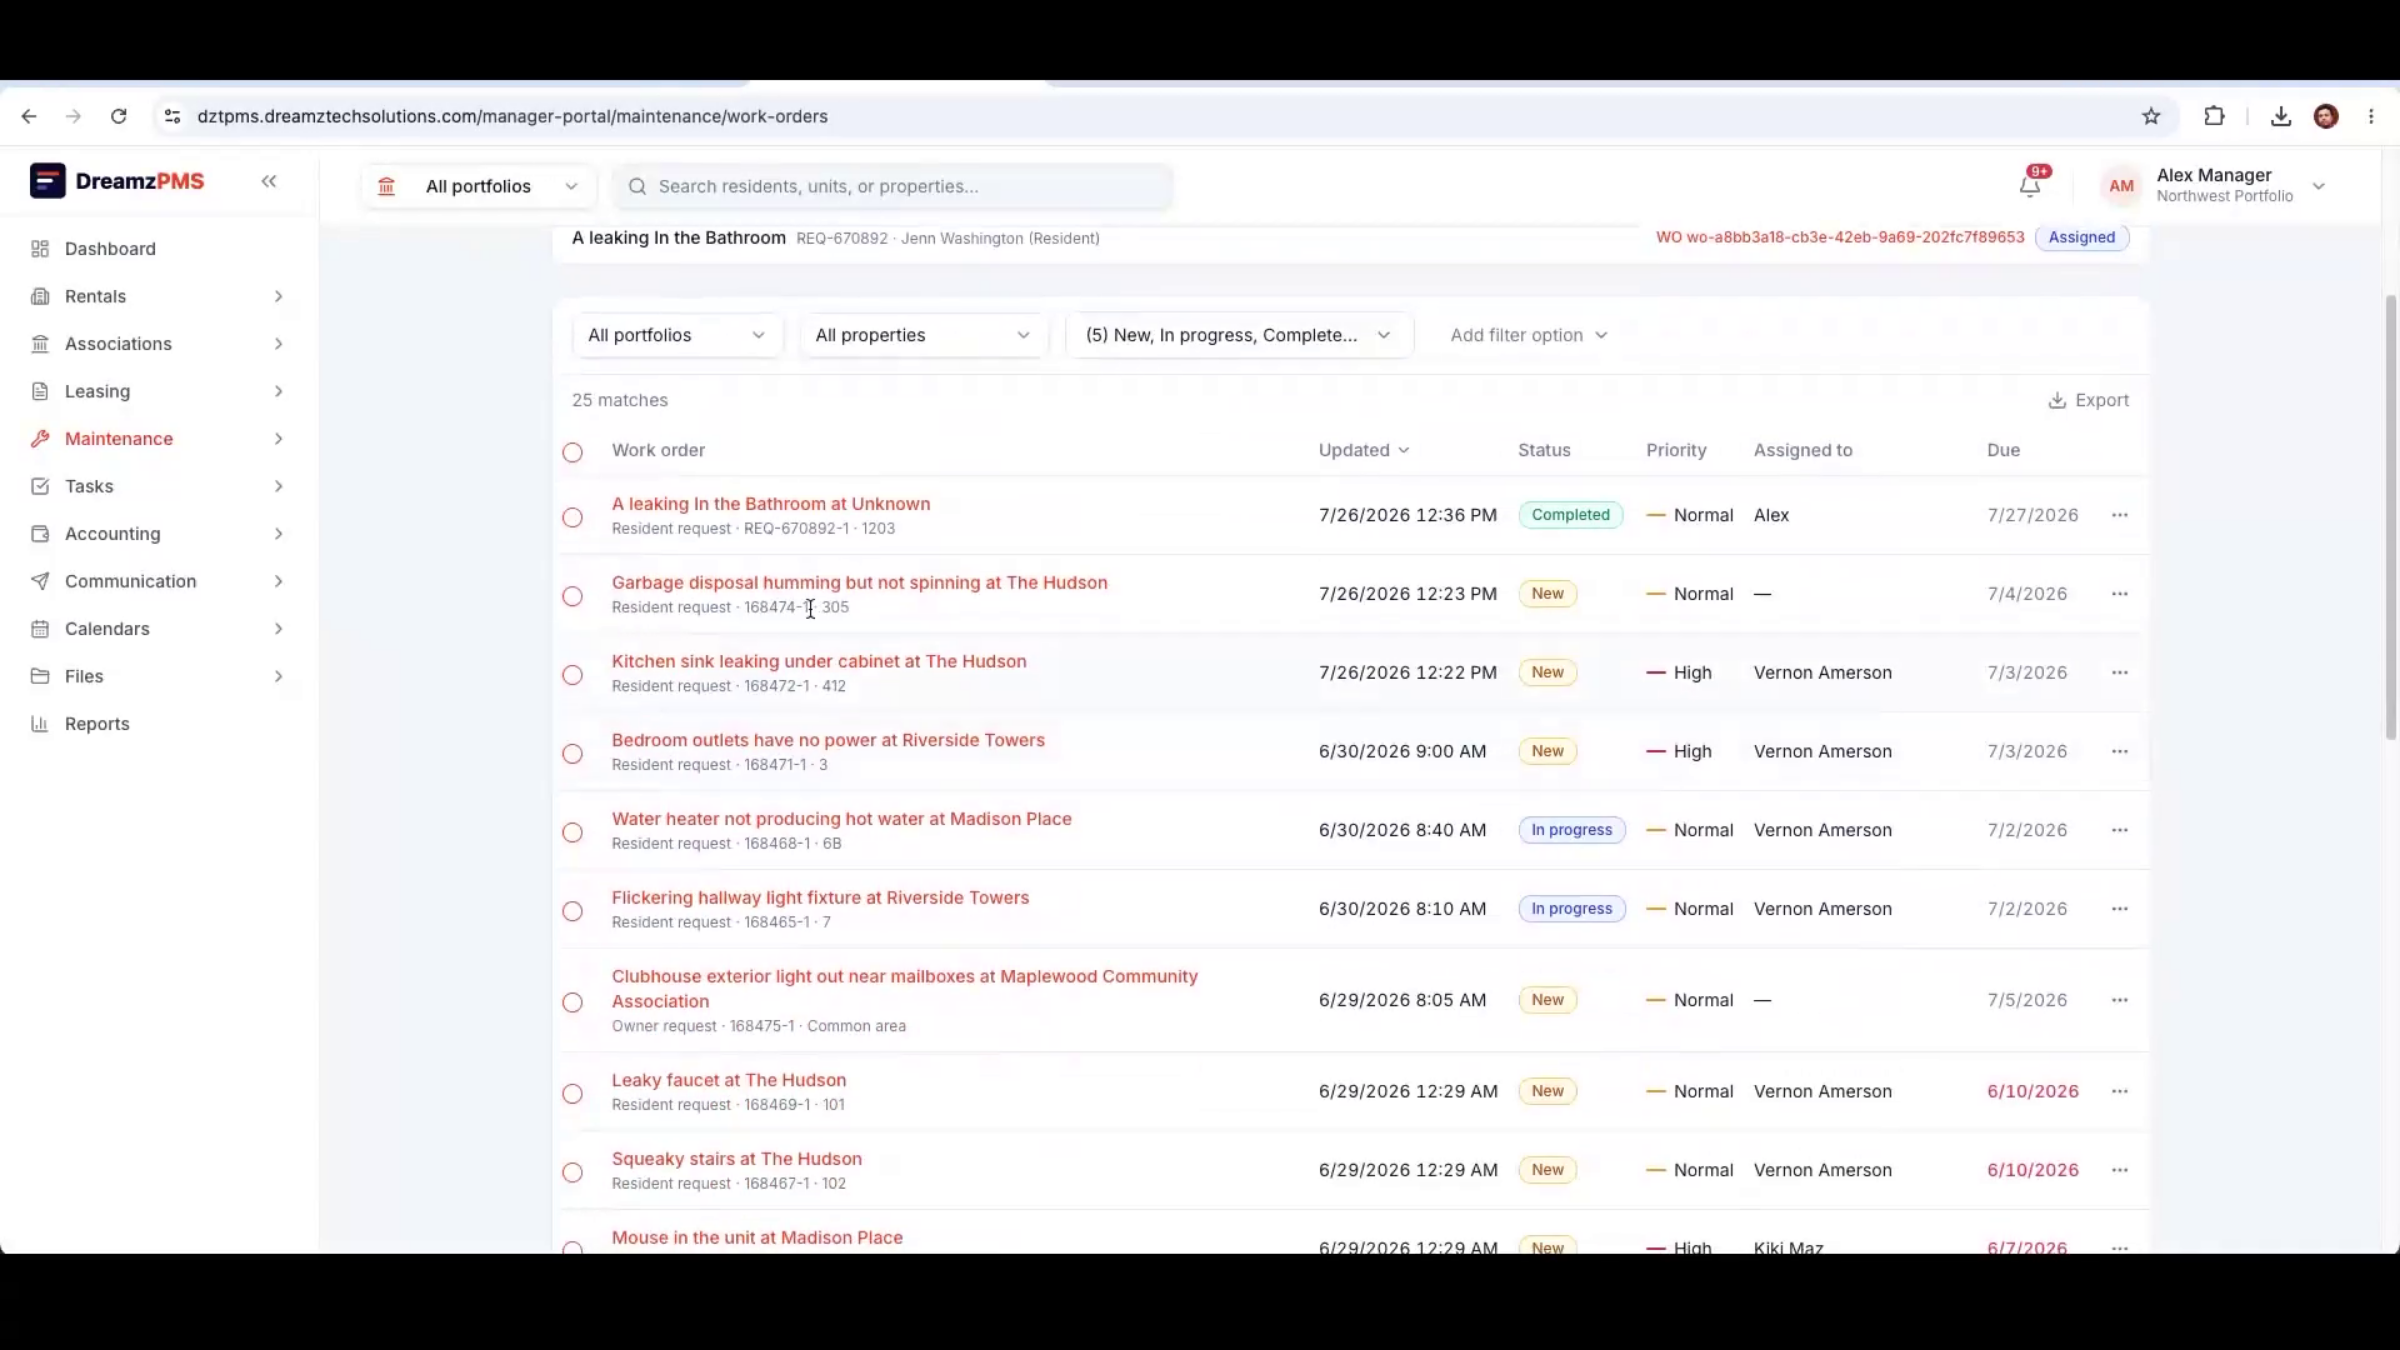
The Maintenance module lists every maintenance work order in the system.
Step 15 – Maintenance Work Orders
From here you can see incoming work orders, their current status, and what the maintenance team is actively working on.
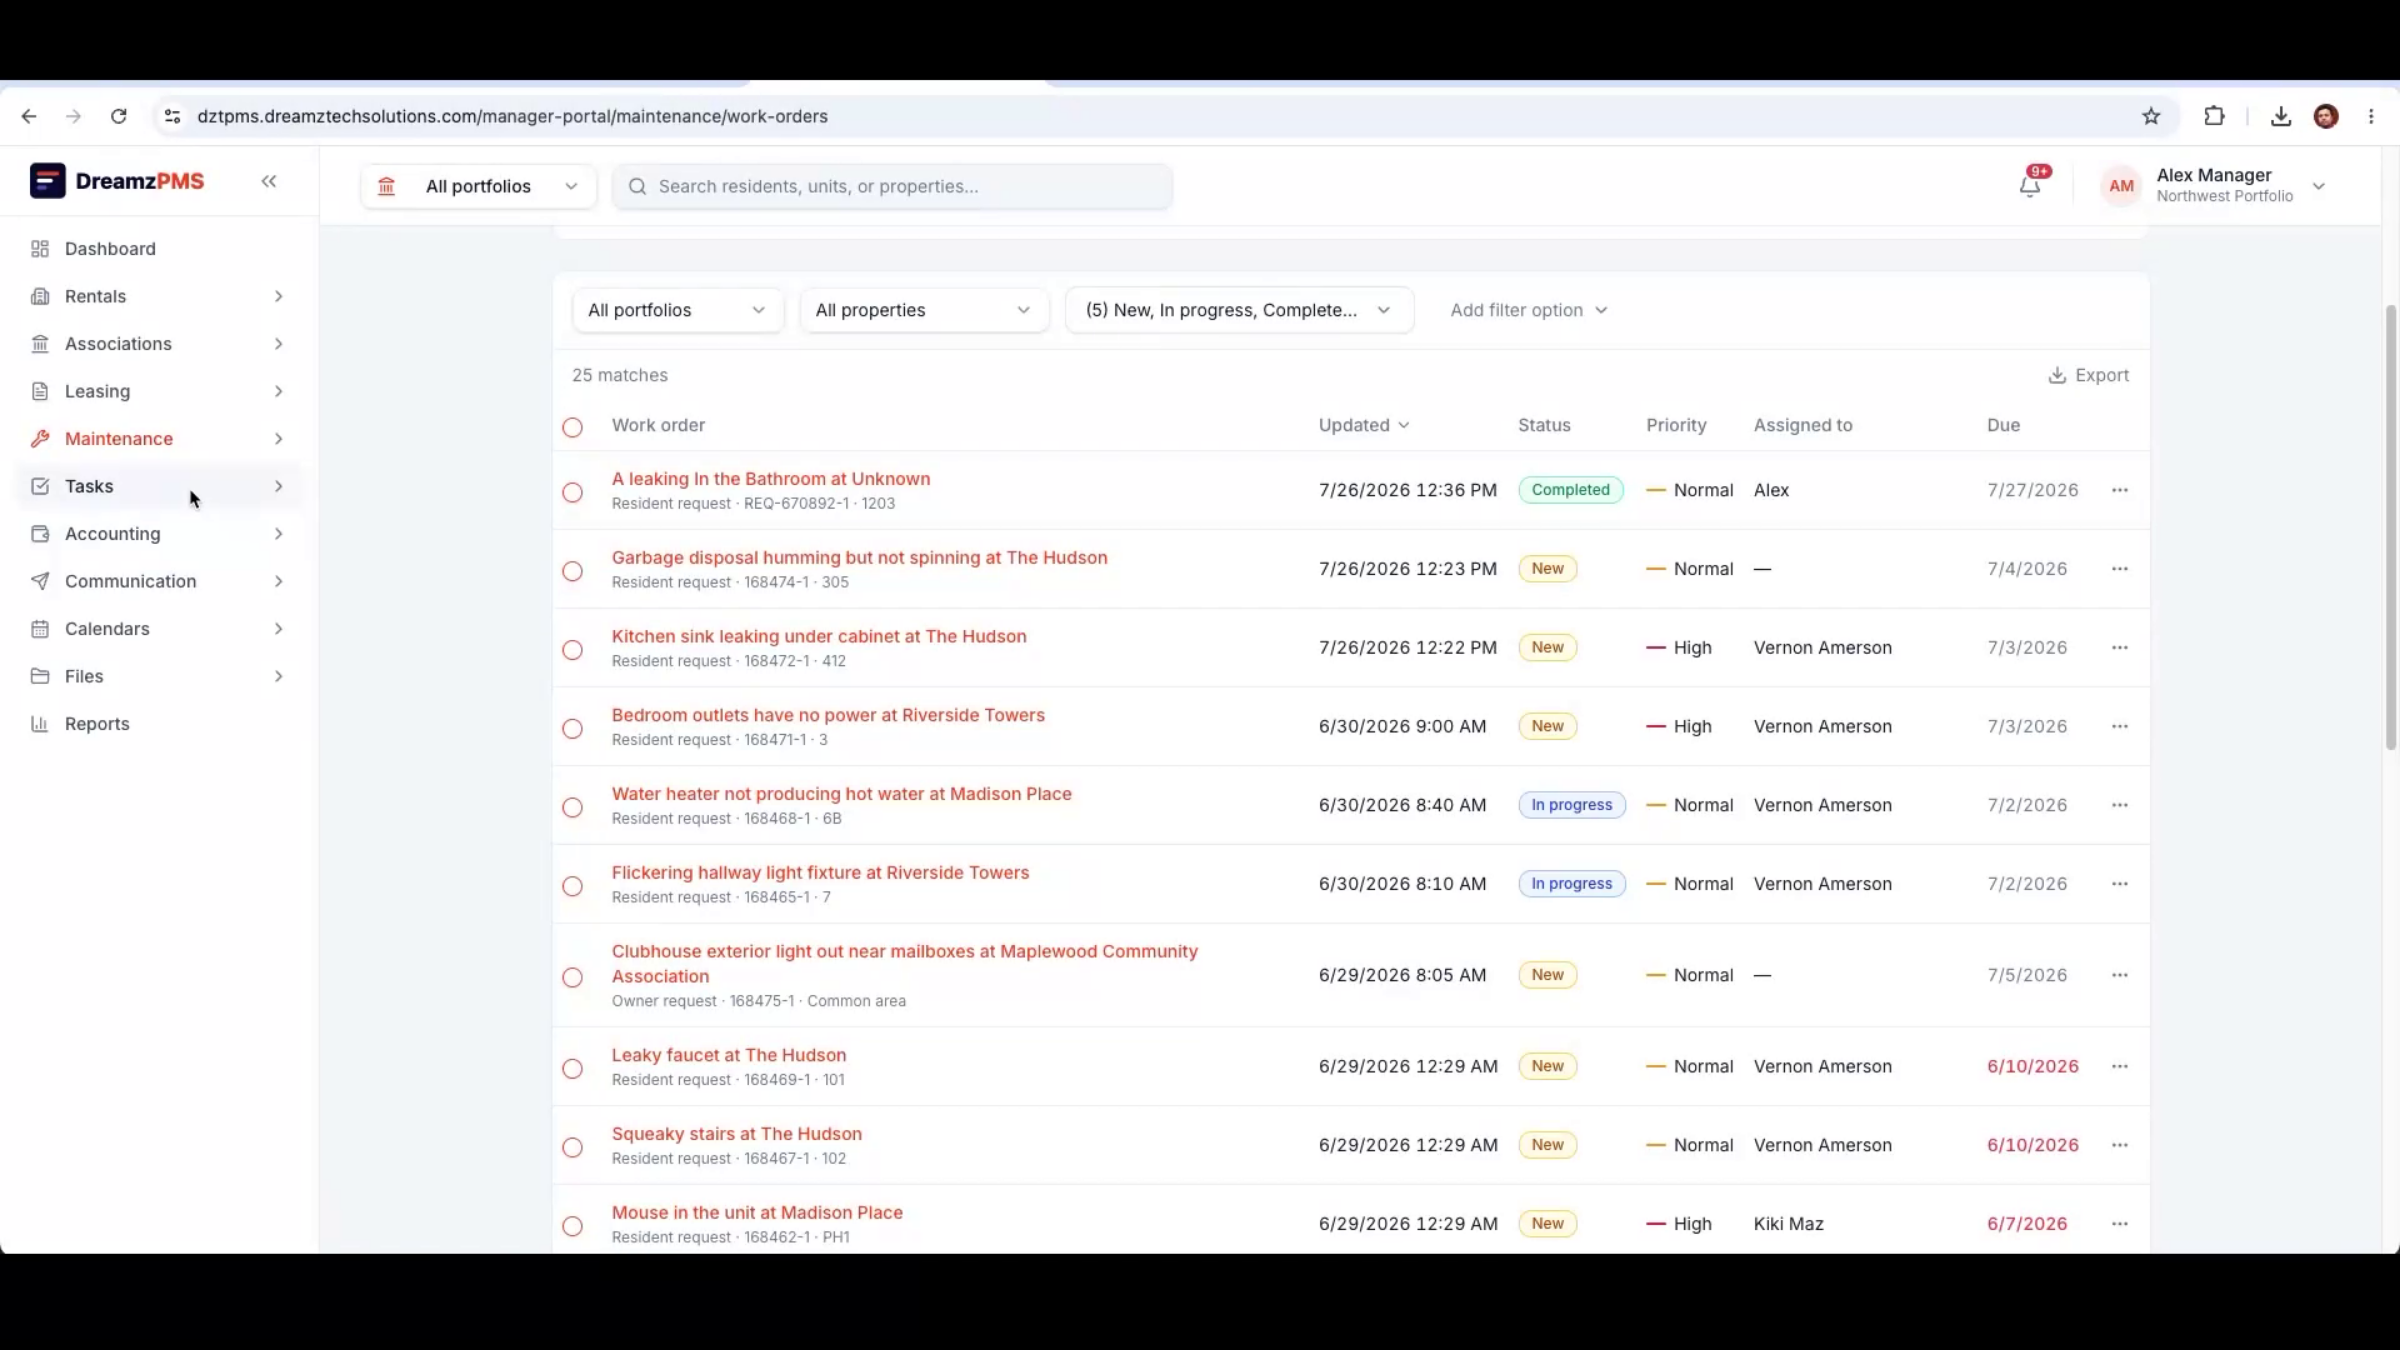
Step 16 – Menu Navigation and Tasks
The Tasks section covers internal, non-resident-facing work items, kept separate from resident maintenance requests.
Step 17 – Accounting Module Details
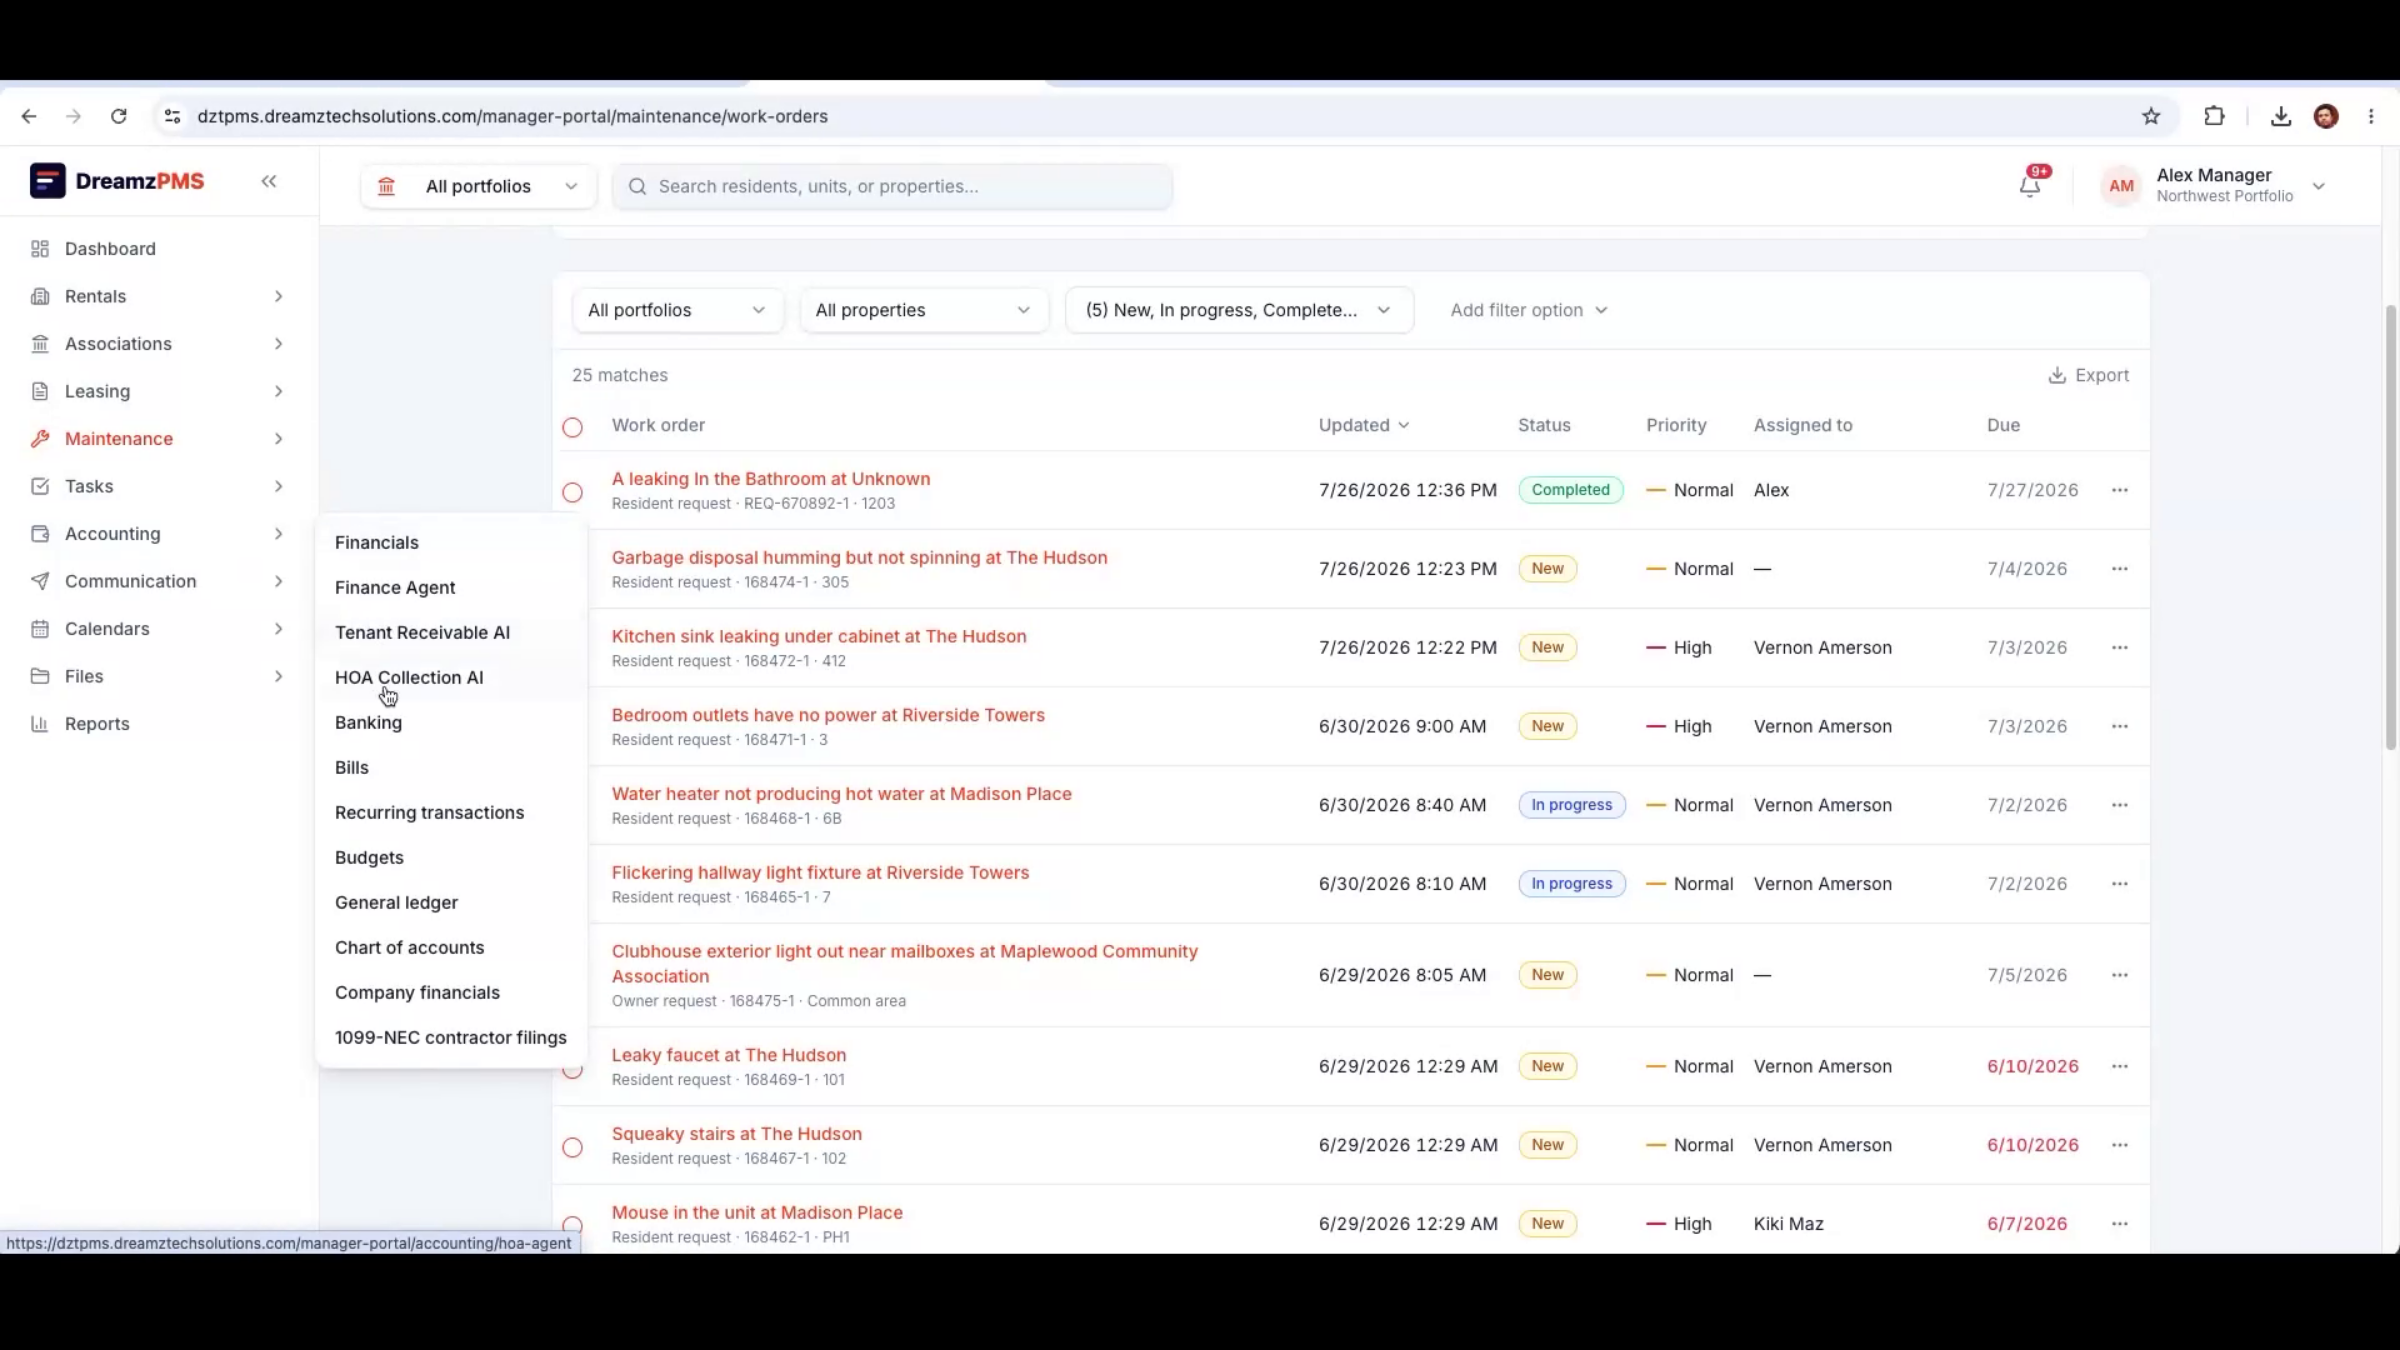
Accounting covers financials, bank accounts, bills, recurring transactions, budgets, the general ledger, chart of accounts, and company financials — the full accounting stack, built into the platform.
Step 18 – Communications Module
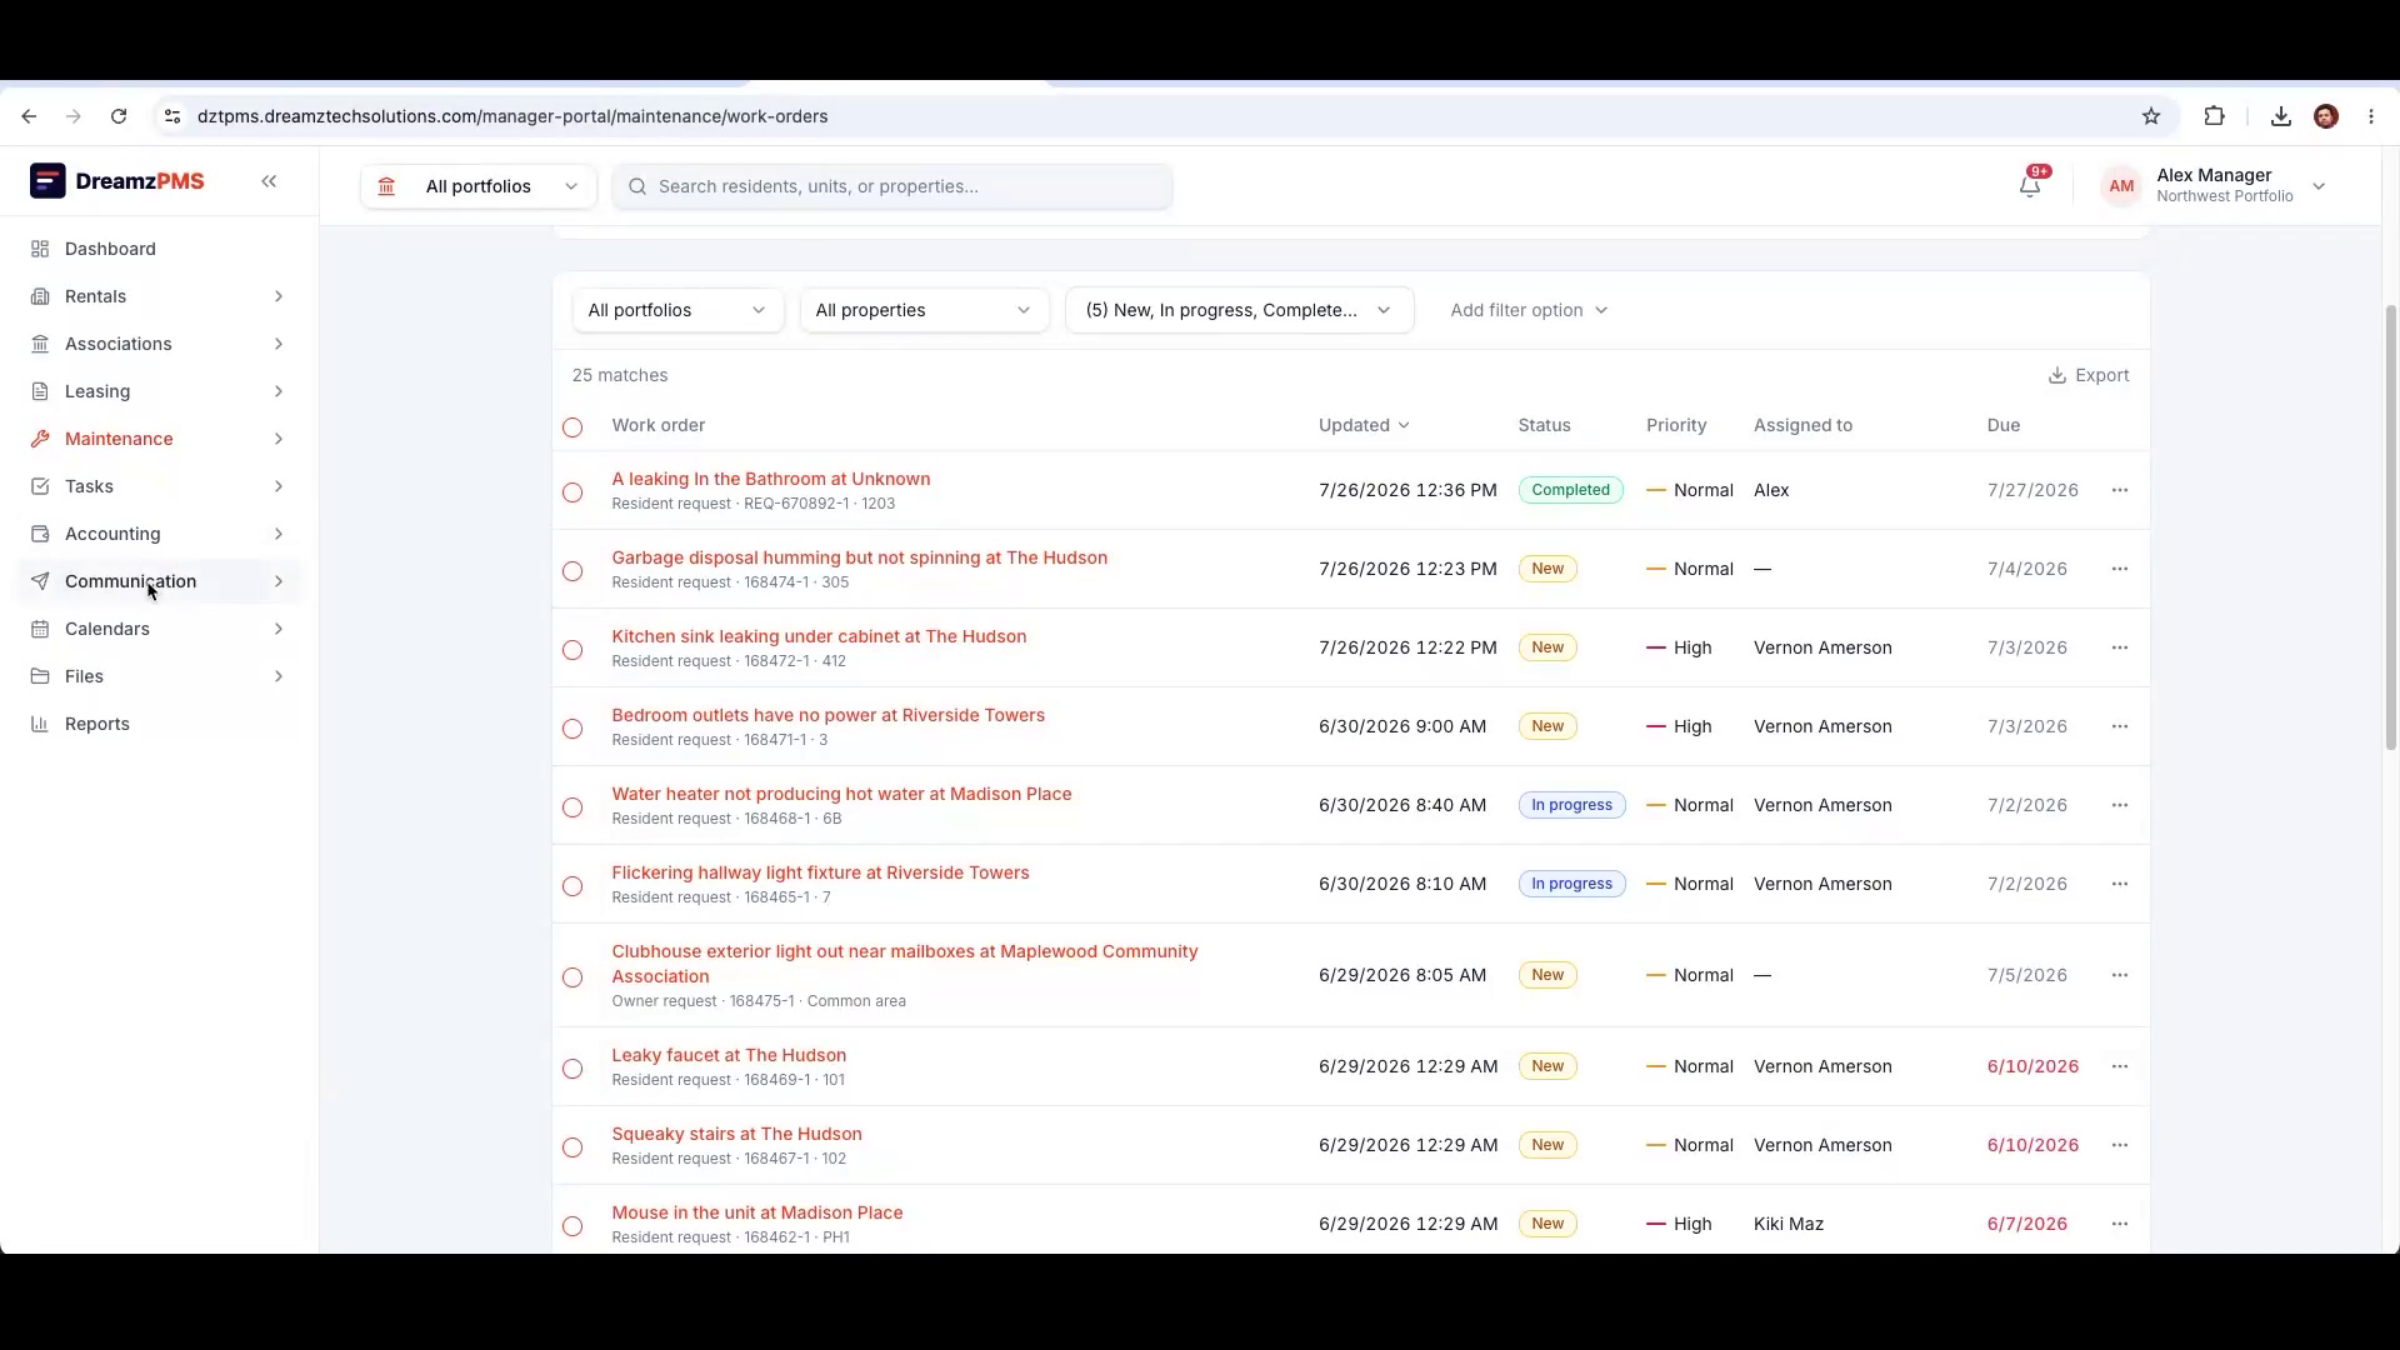
Communications brings together email, WhatsApp, SMS, announcements, letters, and the AI Letter Composer in one module.
Step 19 – Calendar and Document Storage
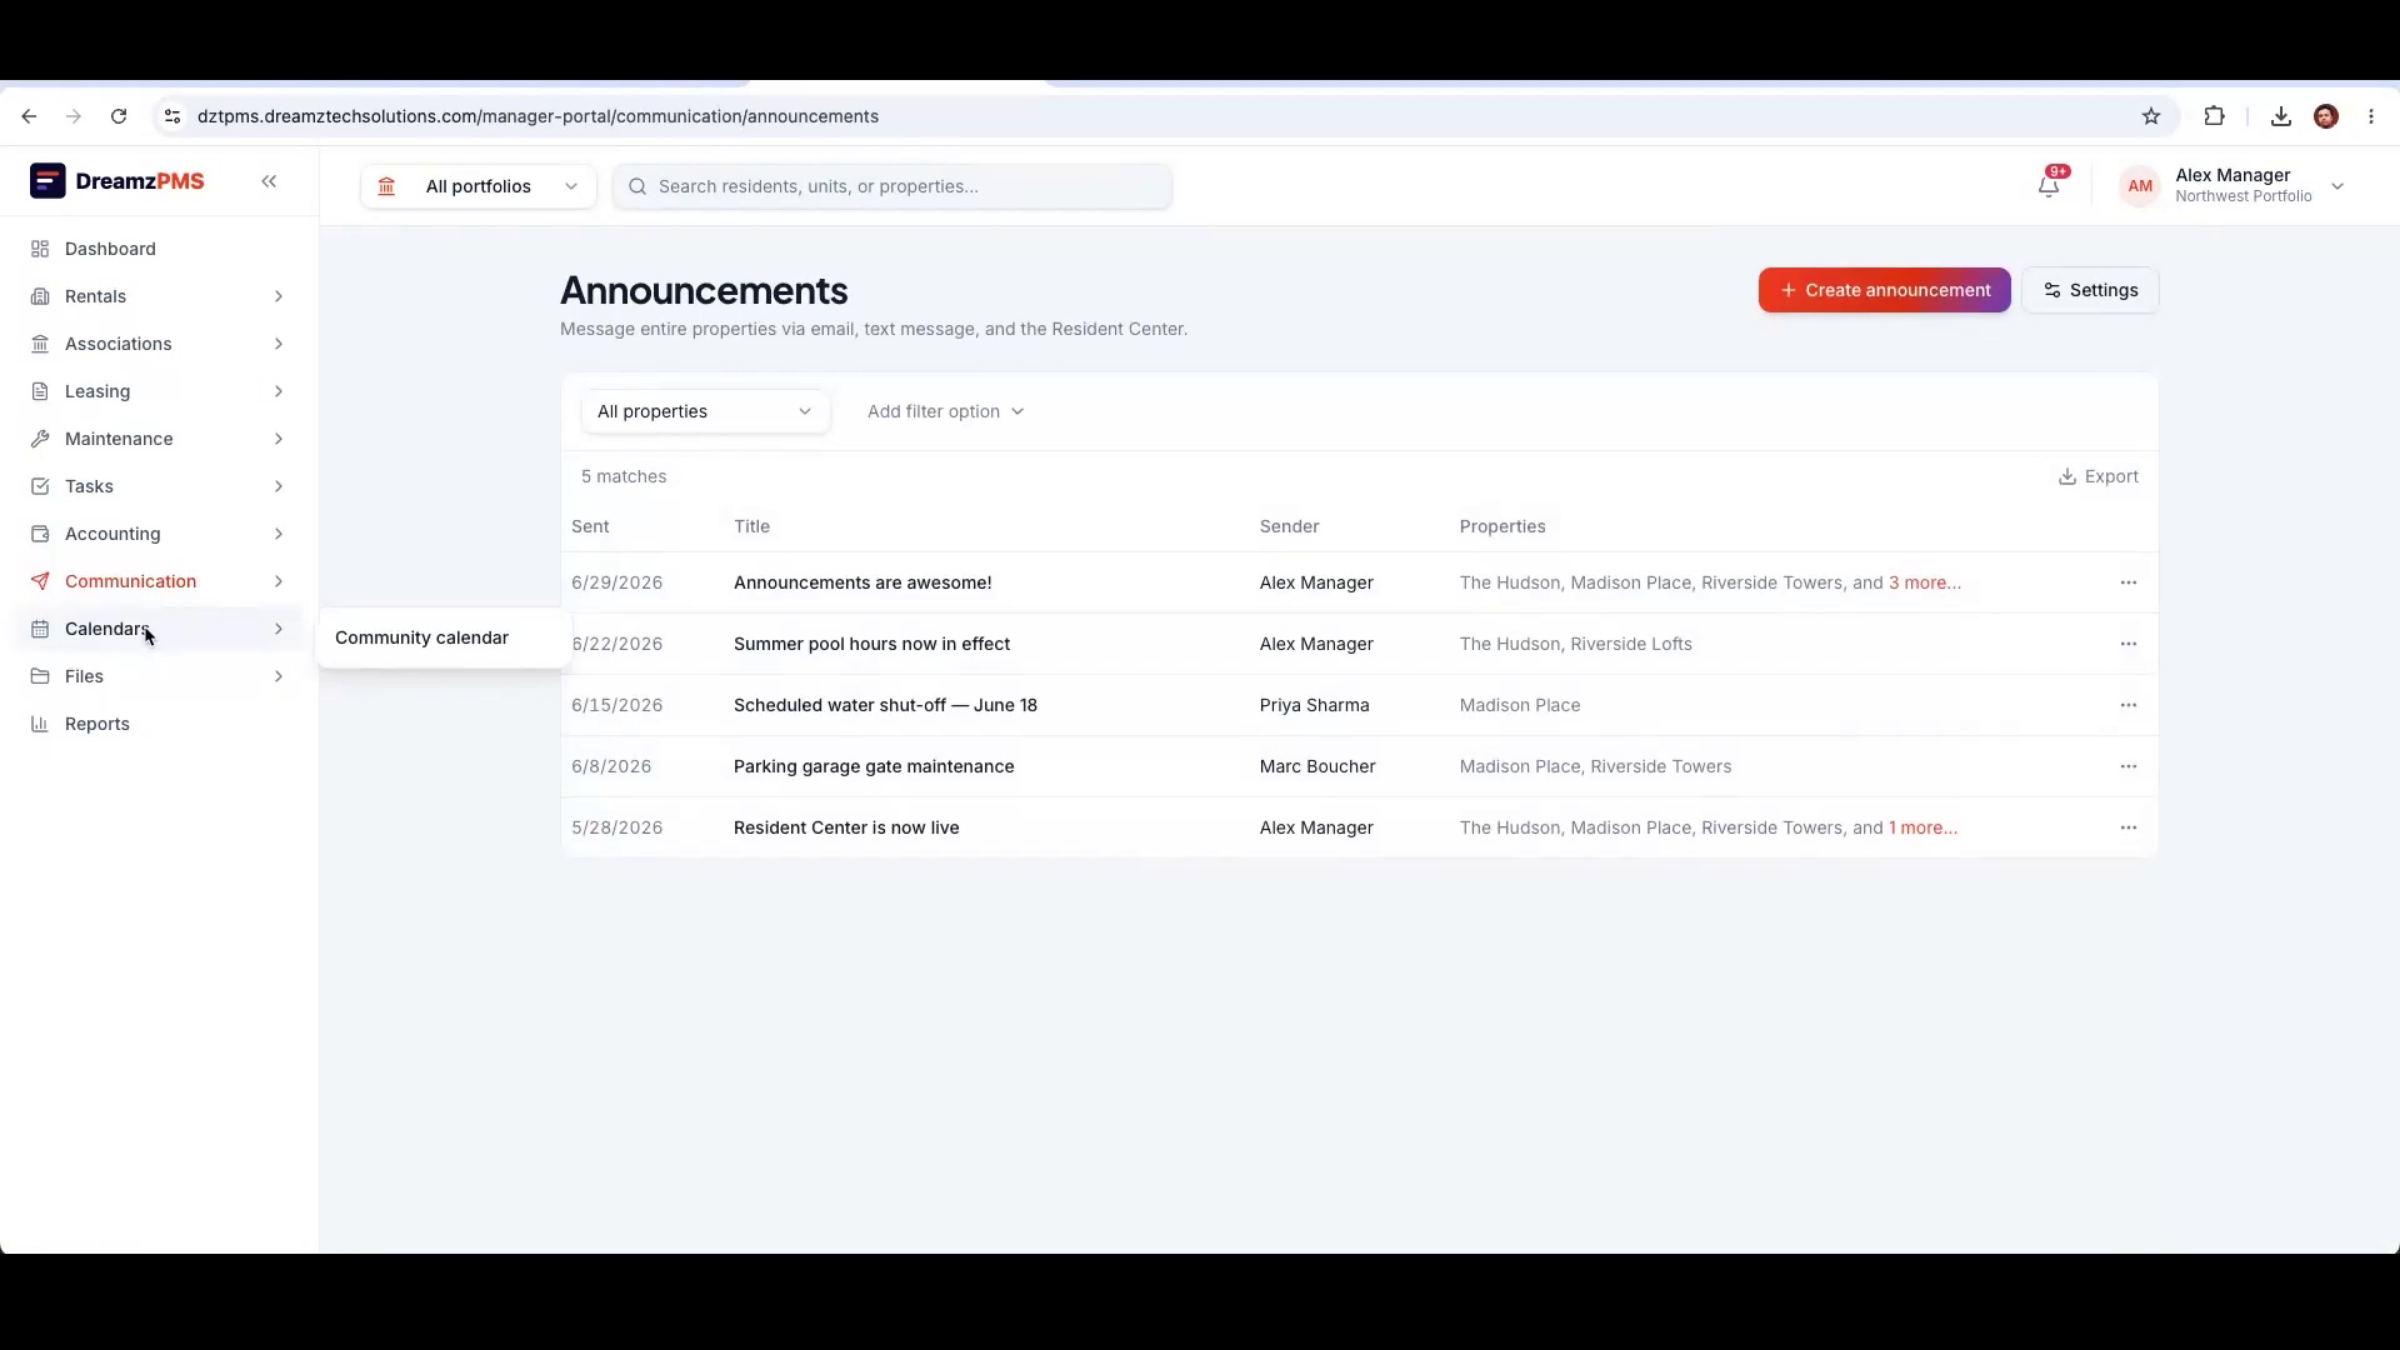
The calendar covers communication scheduling and portfolio-level scheduling and reports, and also serves as central storage for lease agreements and other documents, which can be created, categorized, and stored right here.
Public Listing Site and AI Leasing Agent
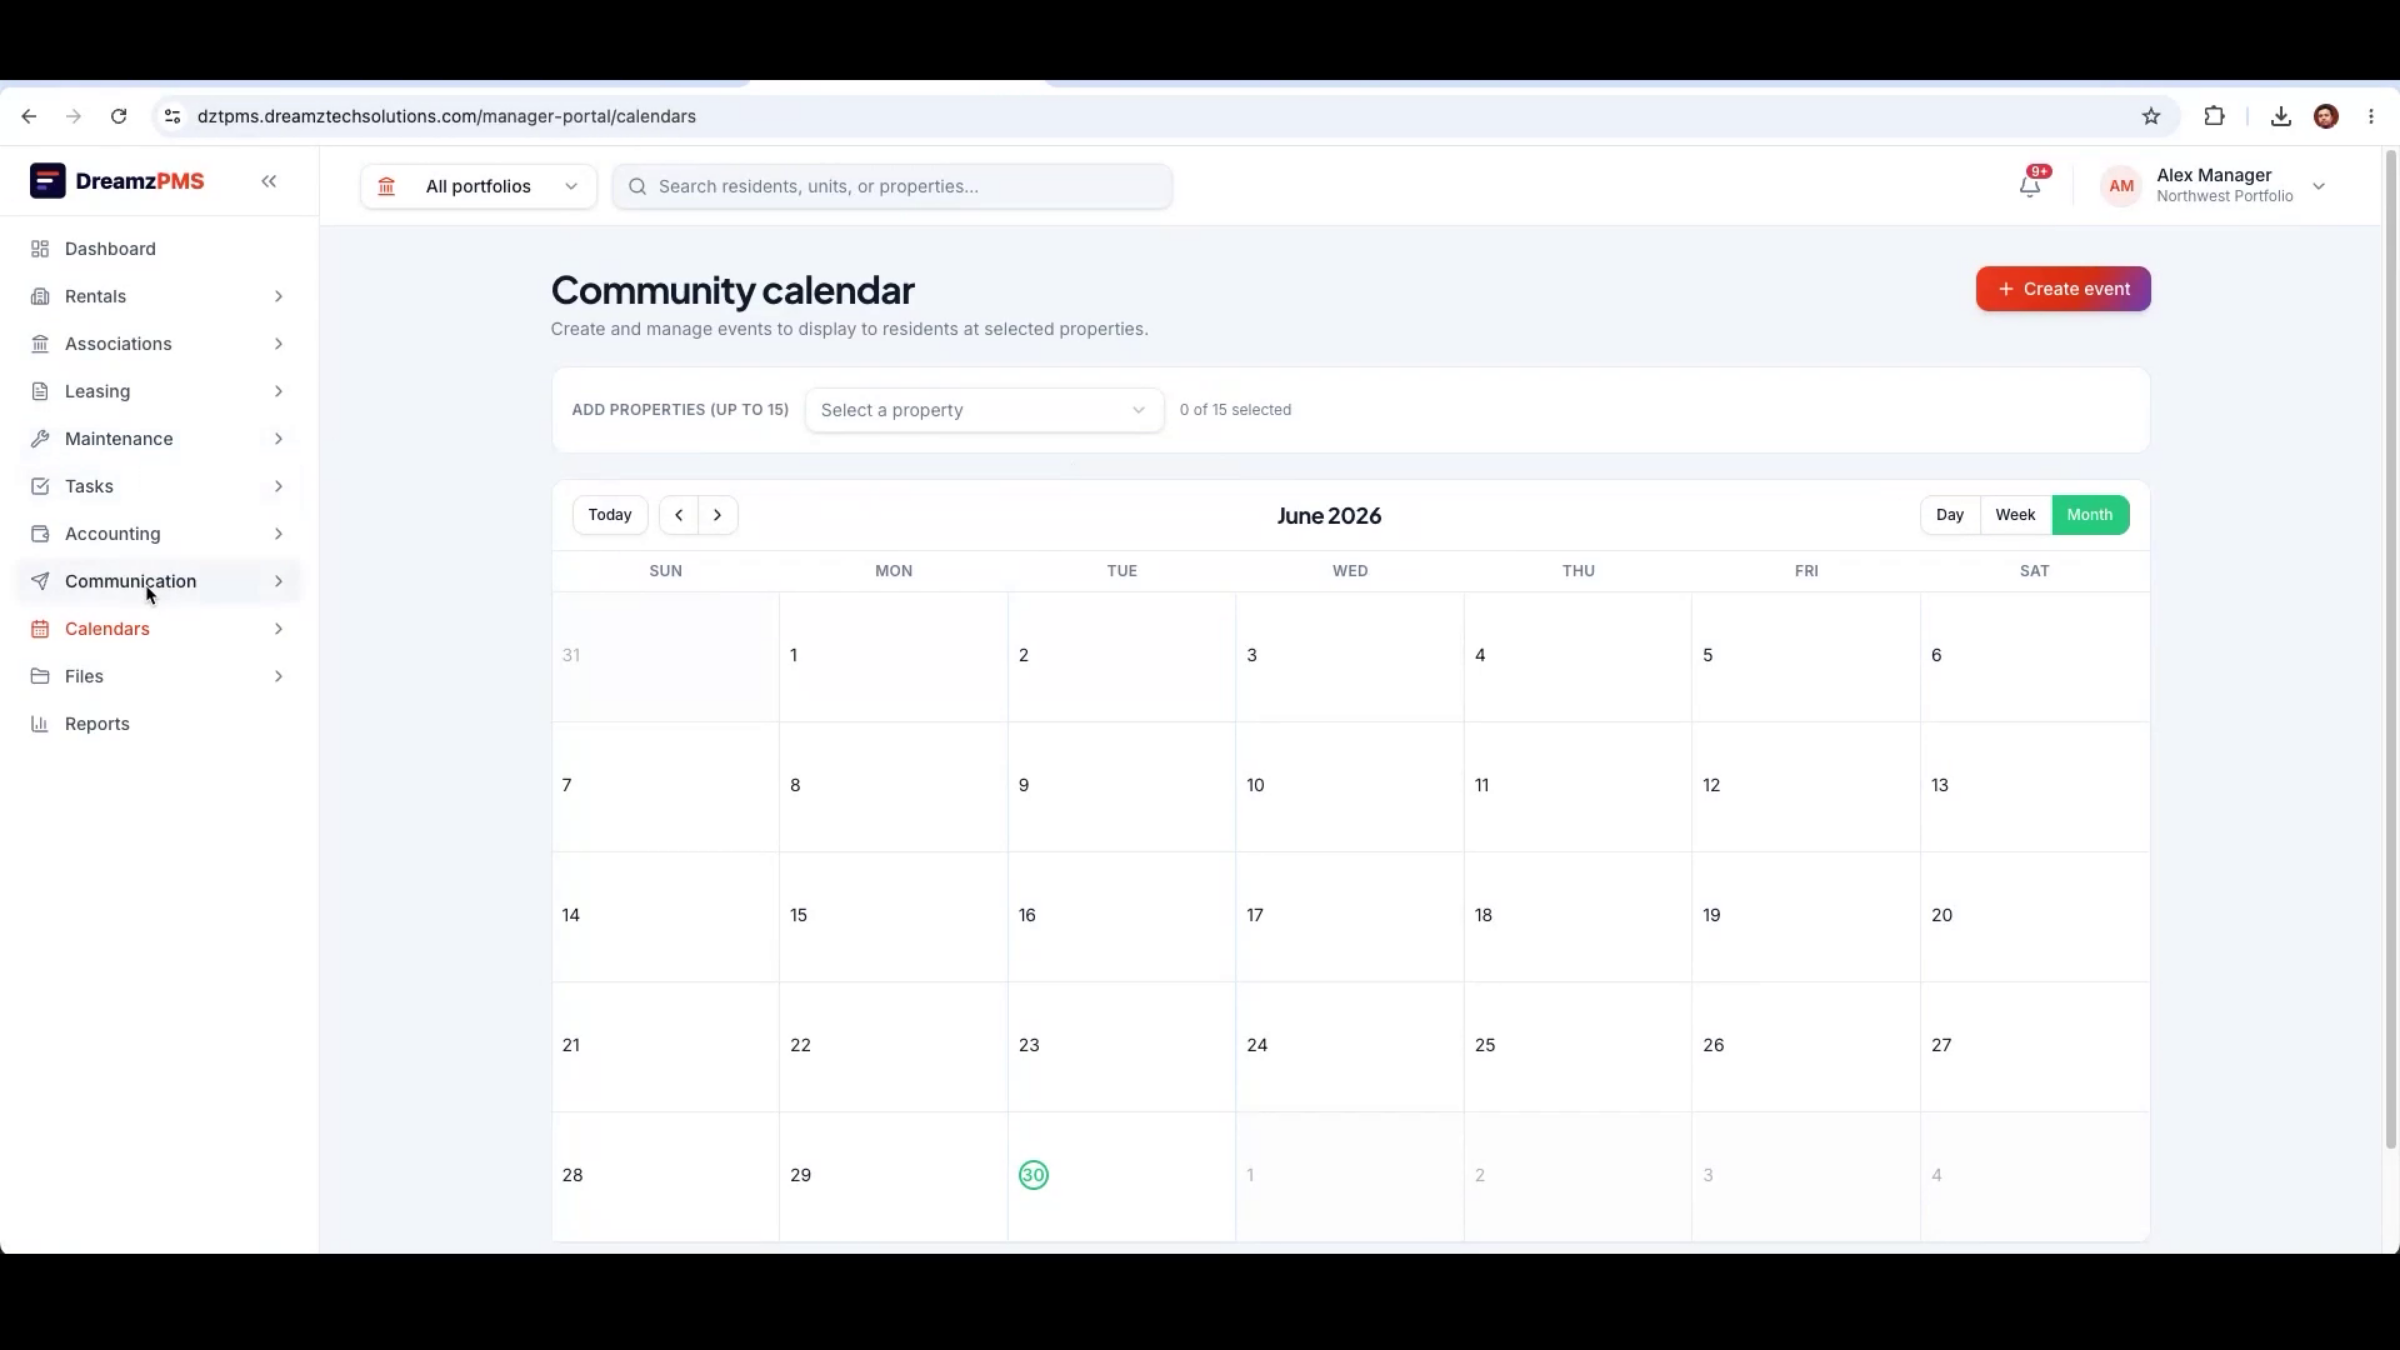
Step 20 – Community Calendar Events
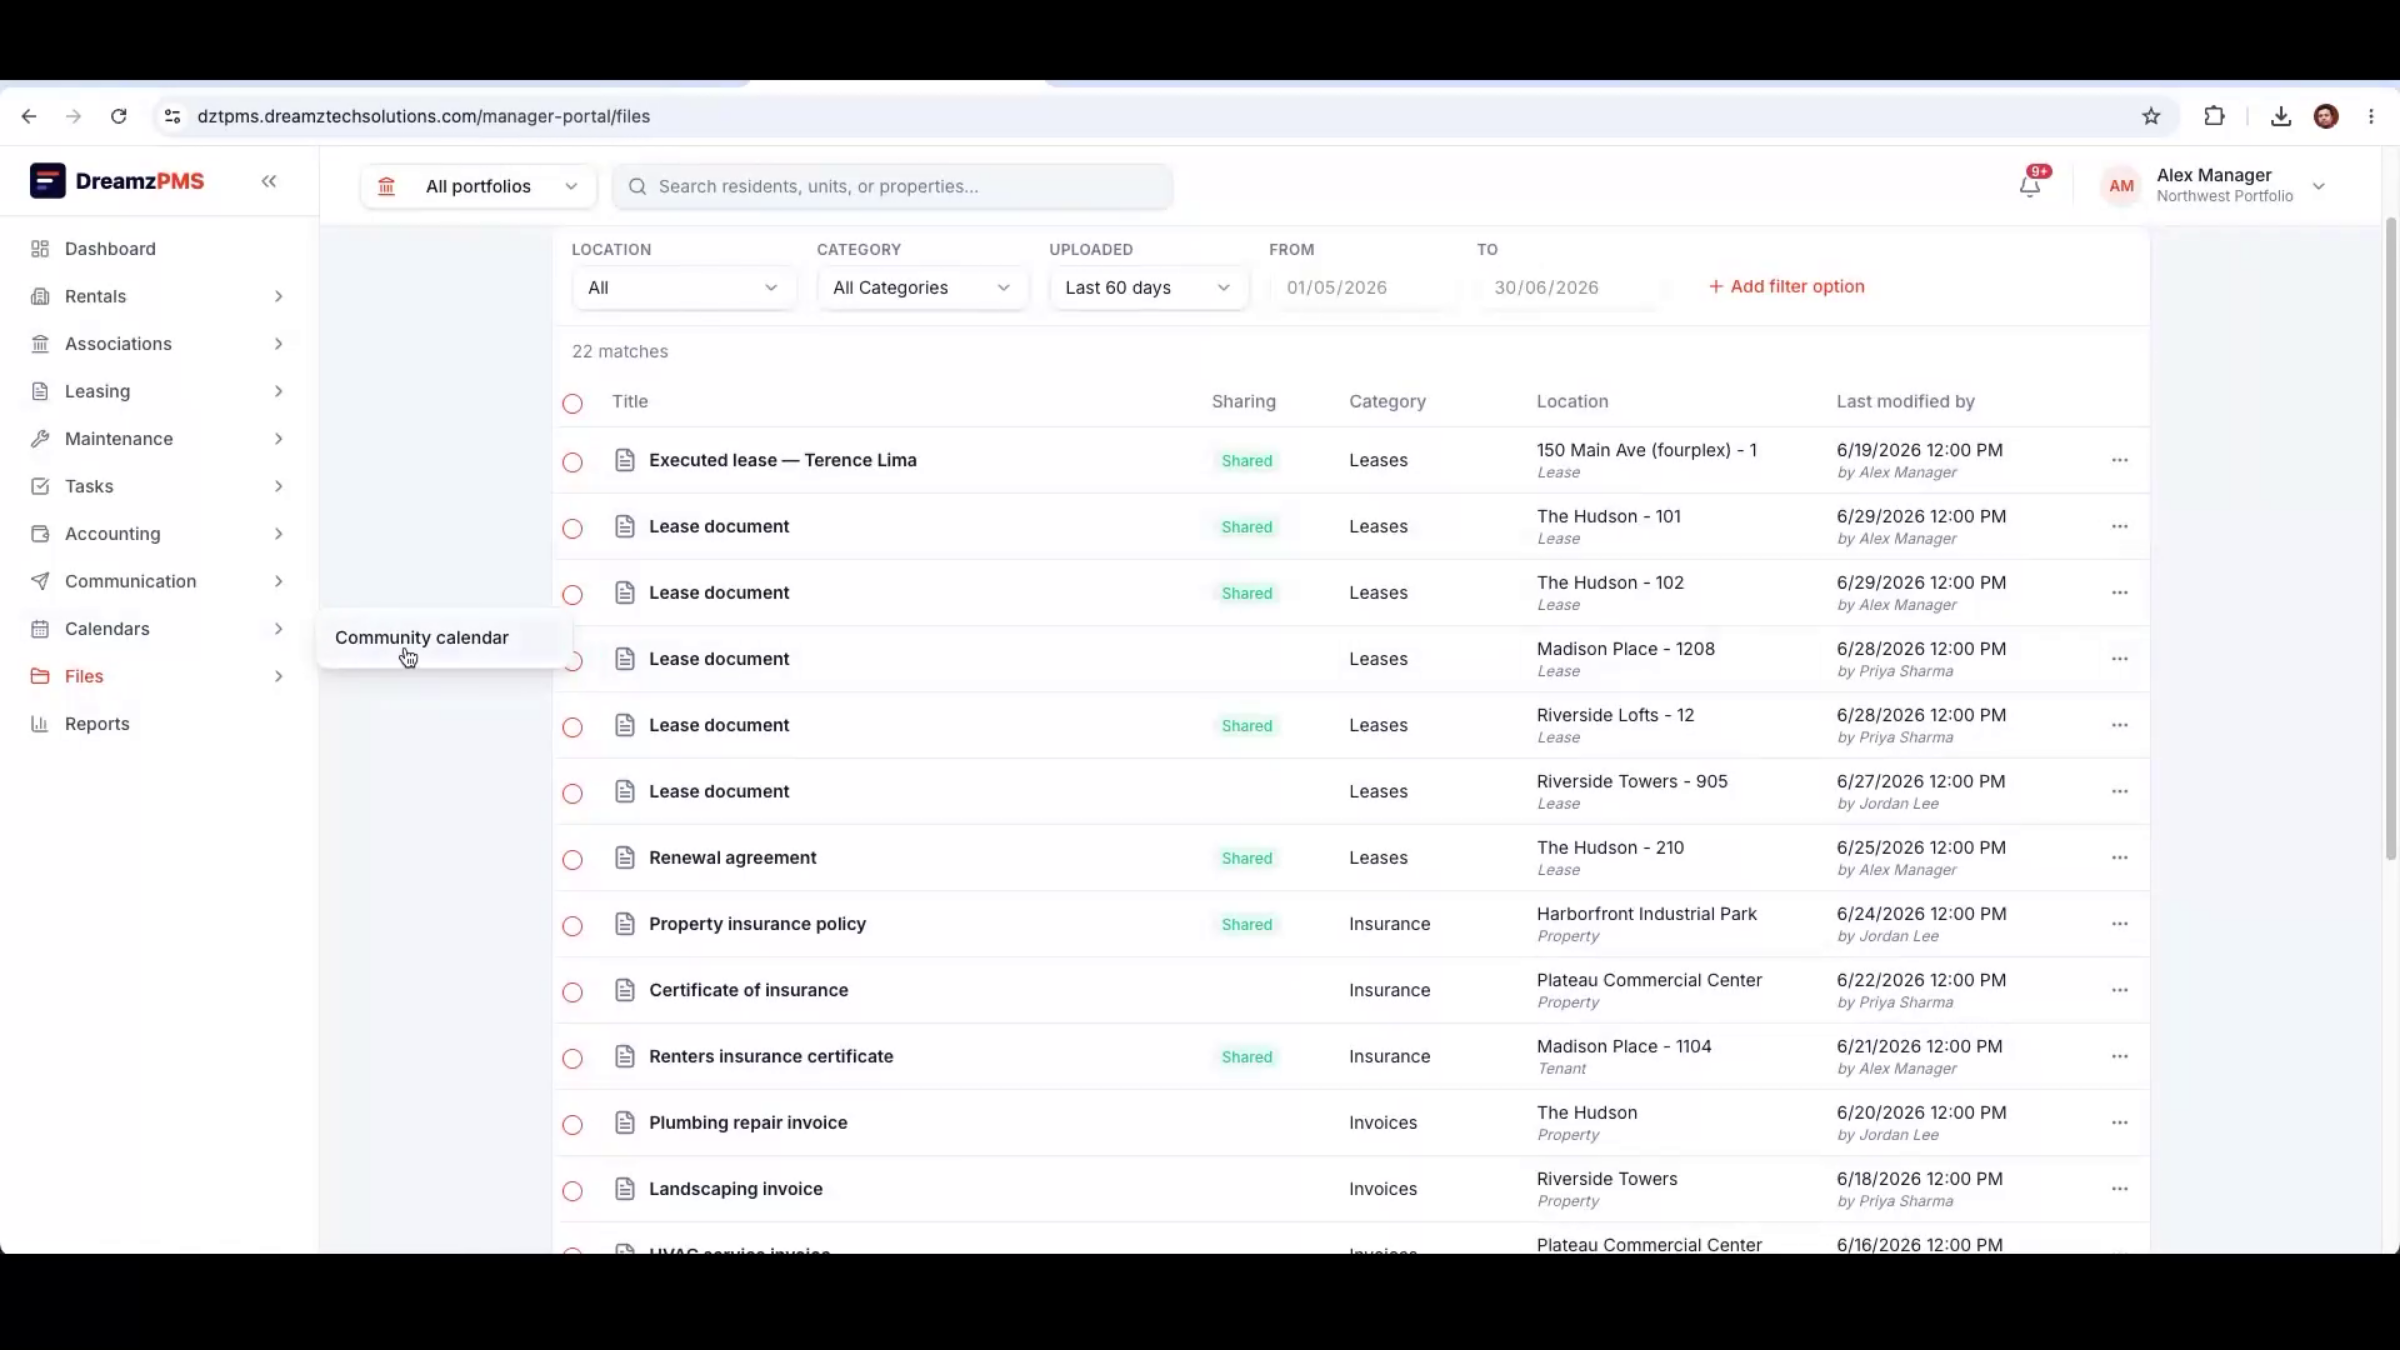
Before we get to the public site, note that you can create a community event and publish it property-wide or to selected residents only from the same calendar.
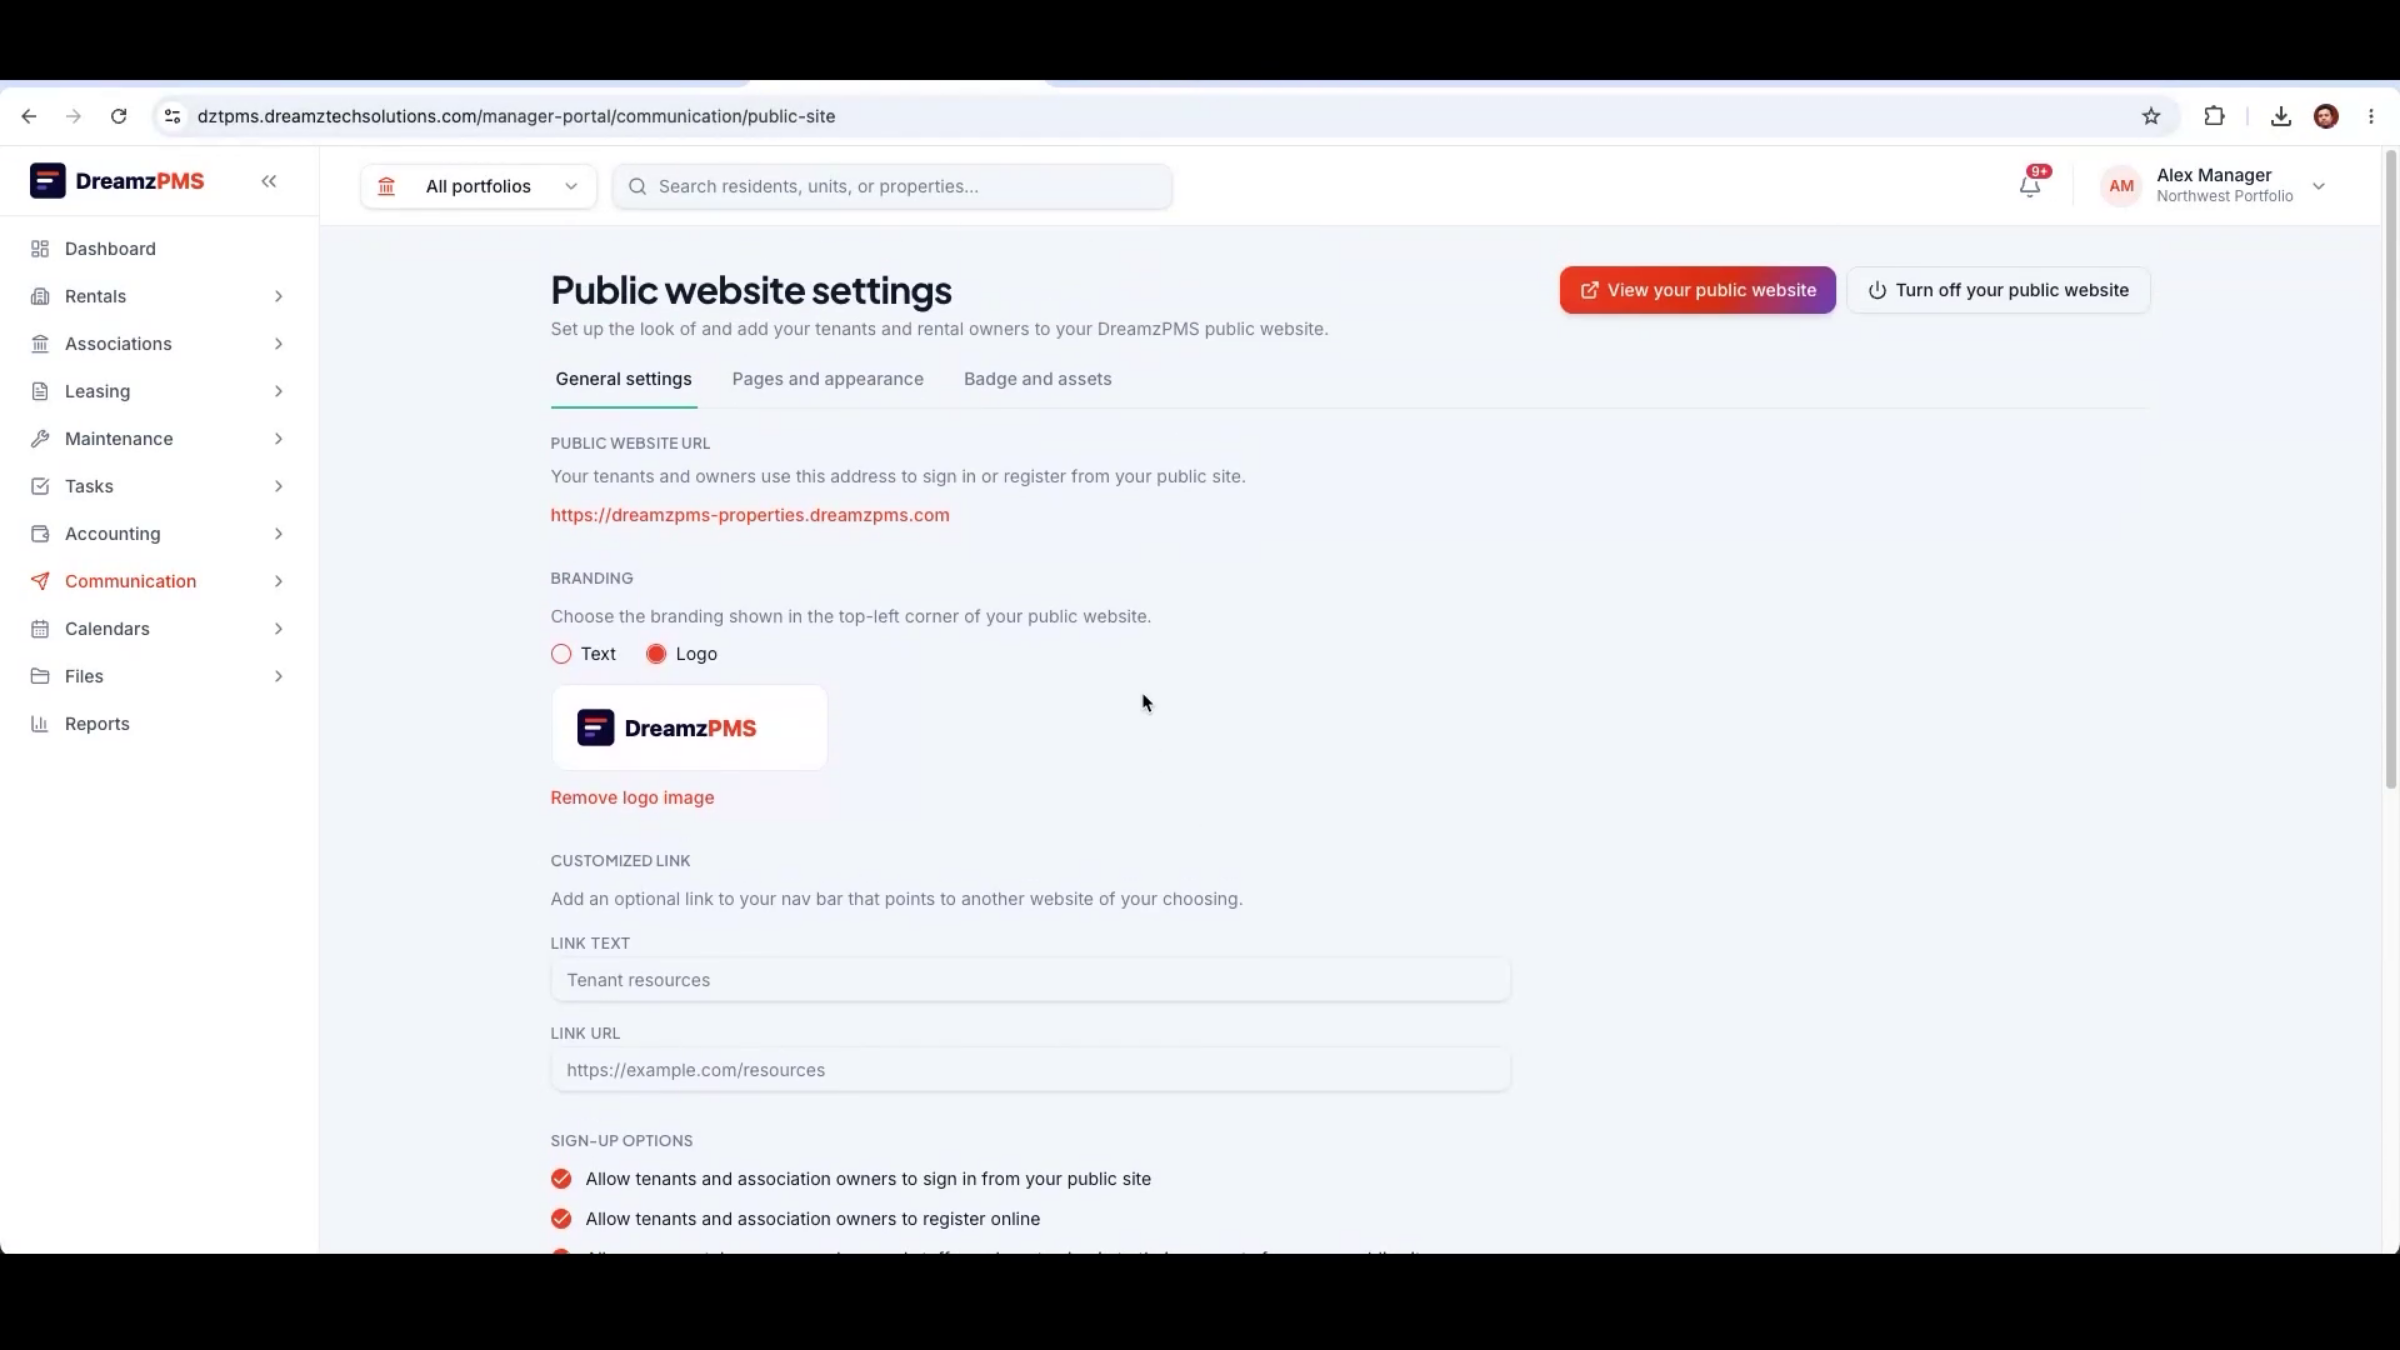
Step 21 – Public Listing Site Setup
Every portal gets a public listing site you can configure yourself — logo, company information, tracking codes, page layout and content, and QR codes if you want them.
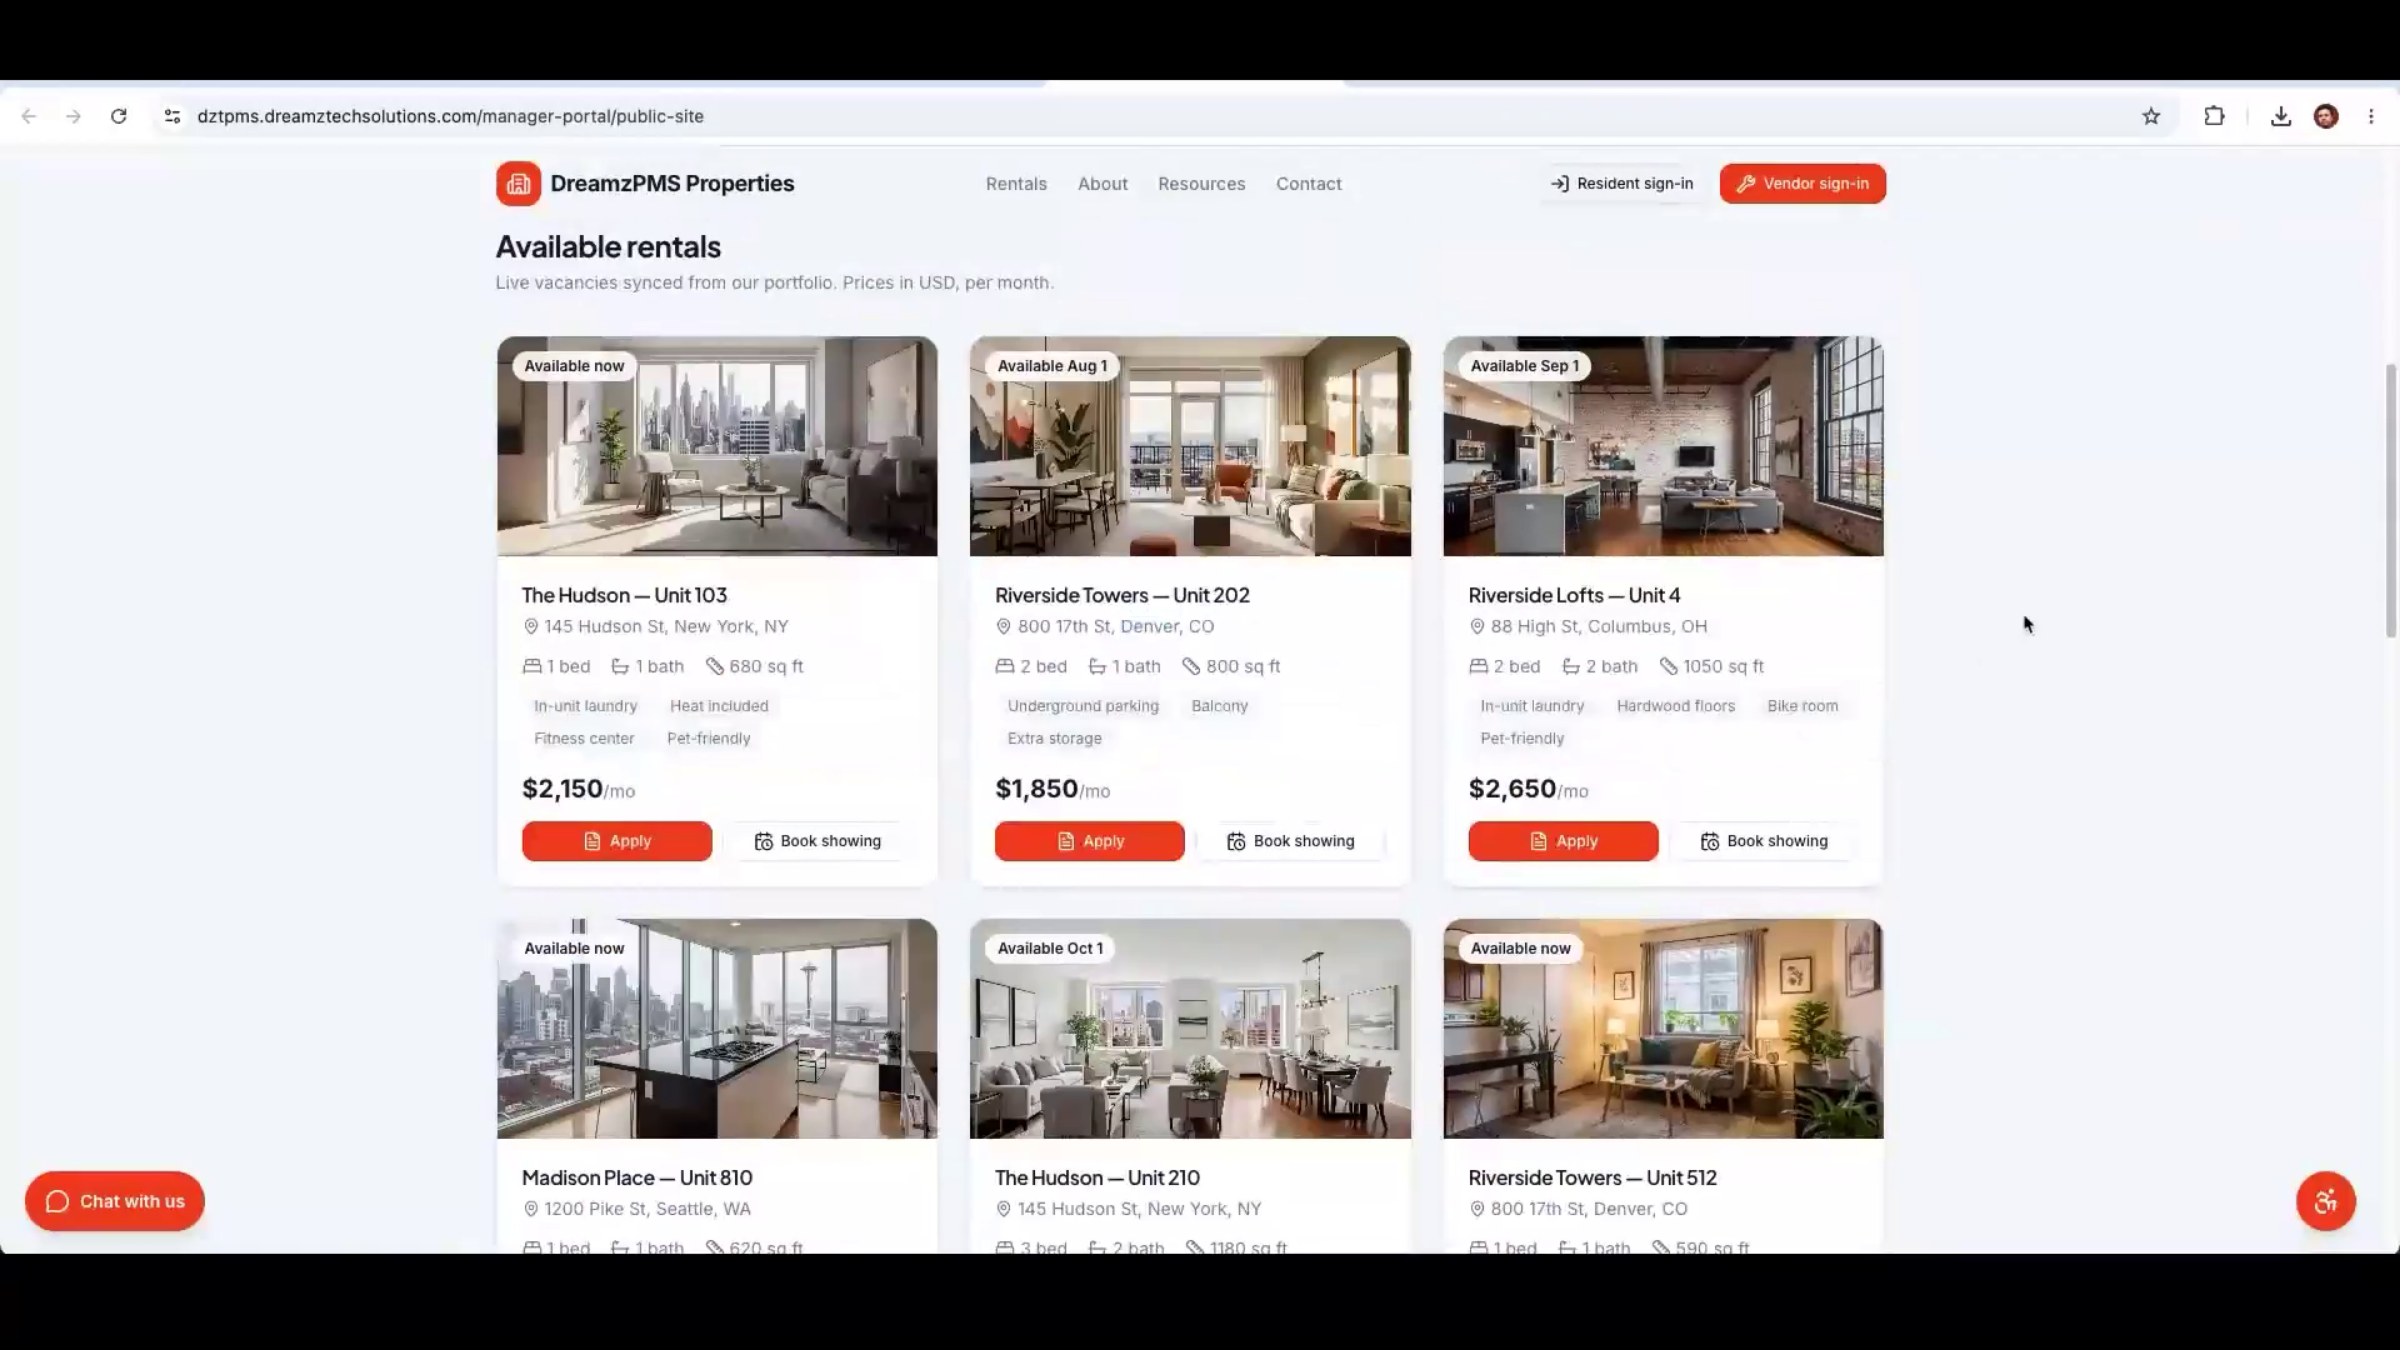
Step 22 – Public Listing Website
The public site automatically displays every unit marked available in your system, giving prospects a live view of what's on the market as soon as it changes.
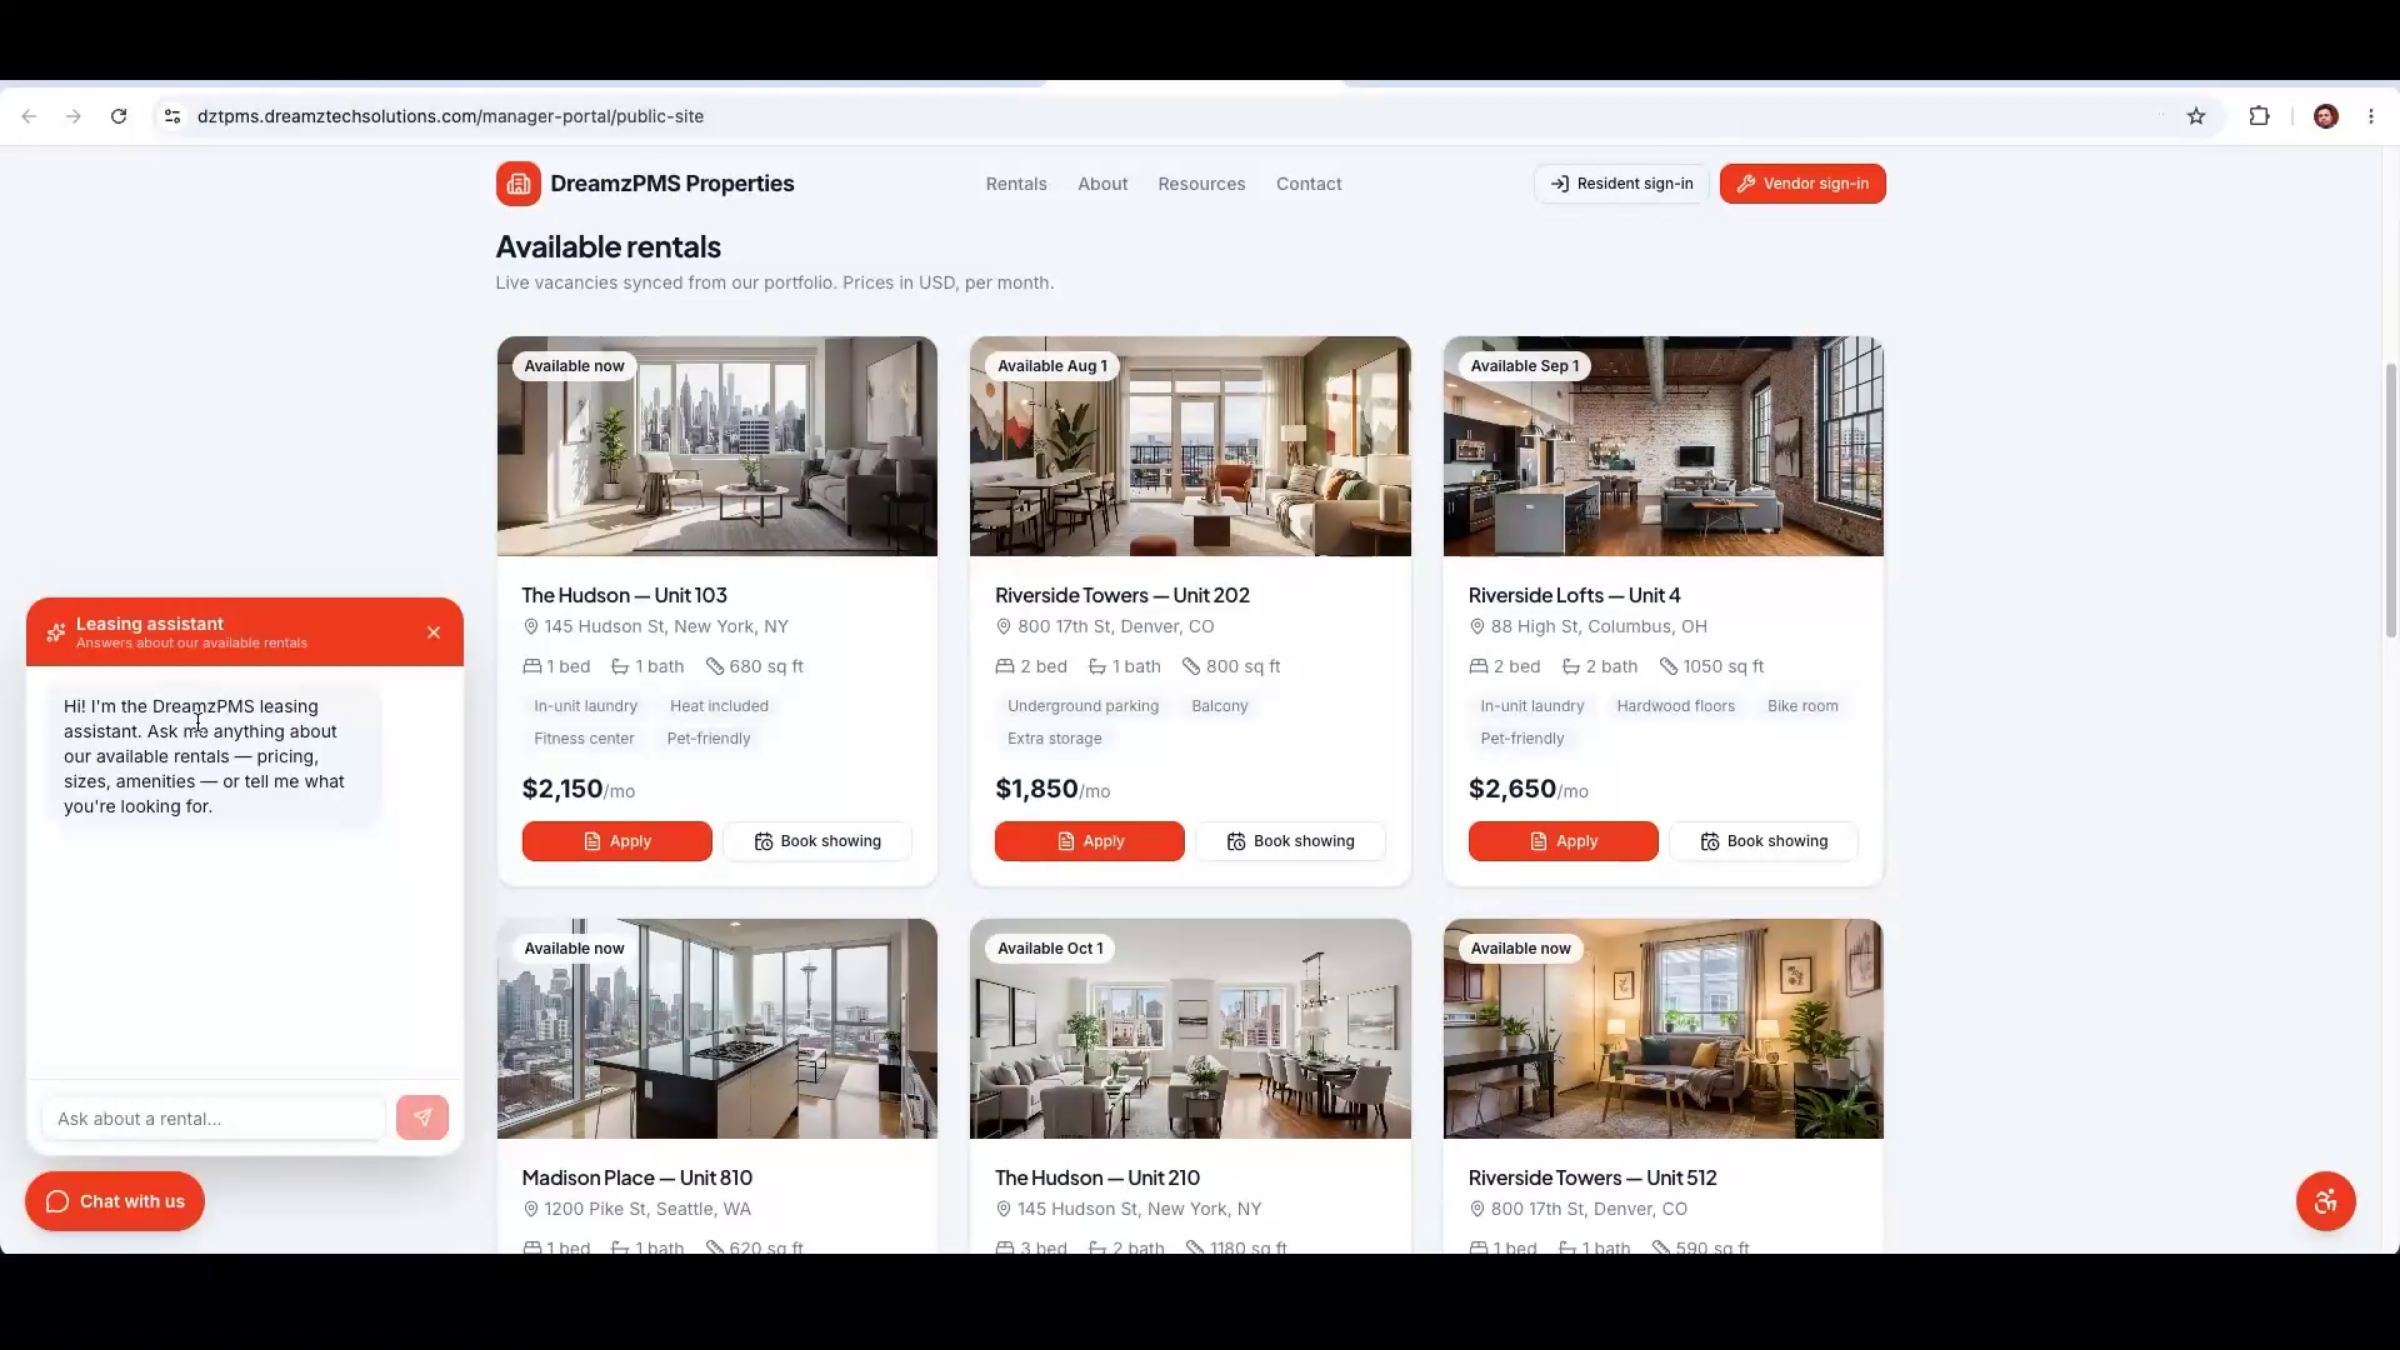
Step 23 – AI Chat Assistant Introduction
An AI leasing assistant sits right on the public site, helping prospective residents find available rentals and answering their questions directly — no manager involvement required to get started.
Step 24 – AI Leasing Agent Demo
A prospect can simply ask the AI leasing agent about availability — for example, whether any units are open in a specific area.
Step 25 – AI Rental Property Search
The AI agent searches the platform's live data and responds with matching listings and unit details — such as bedroom count — then asks which one interests the prospect.
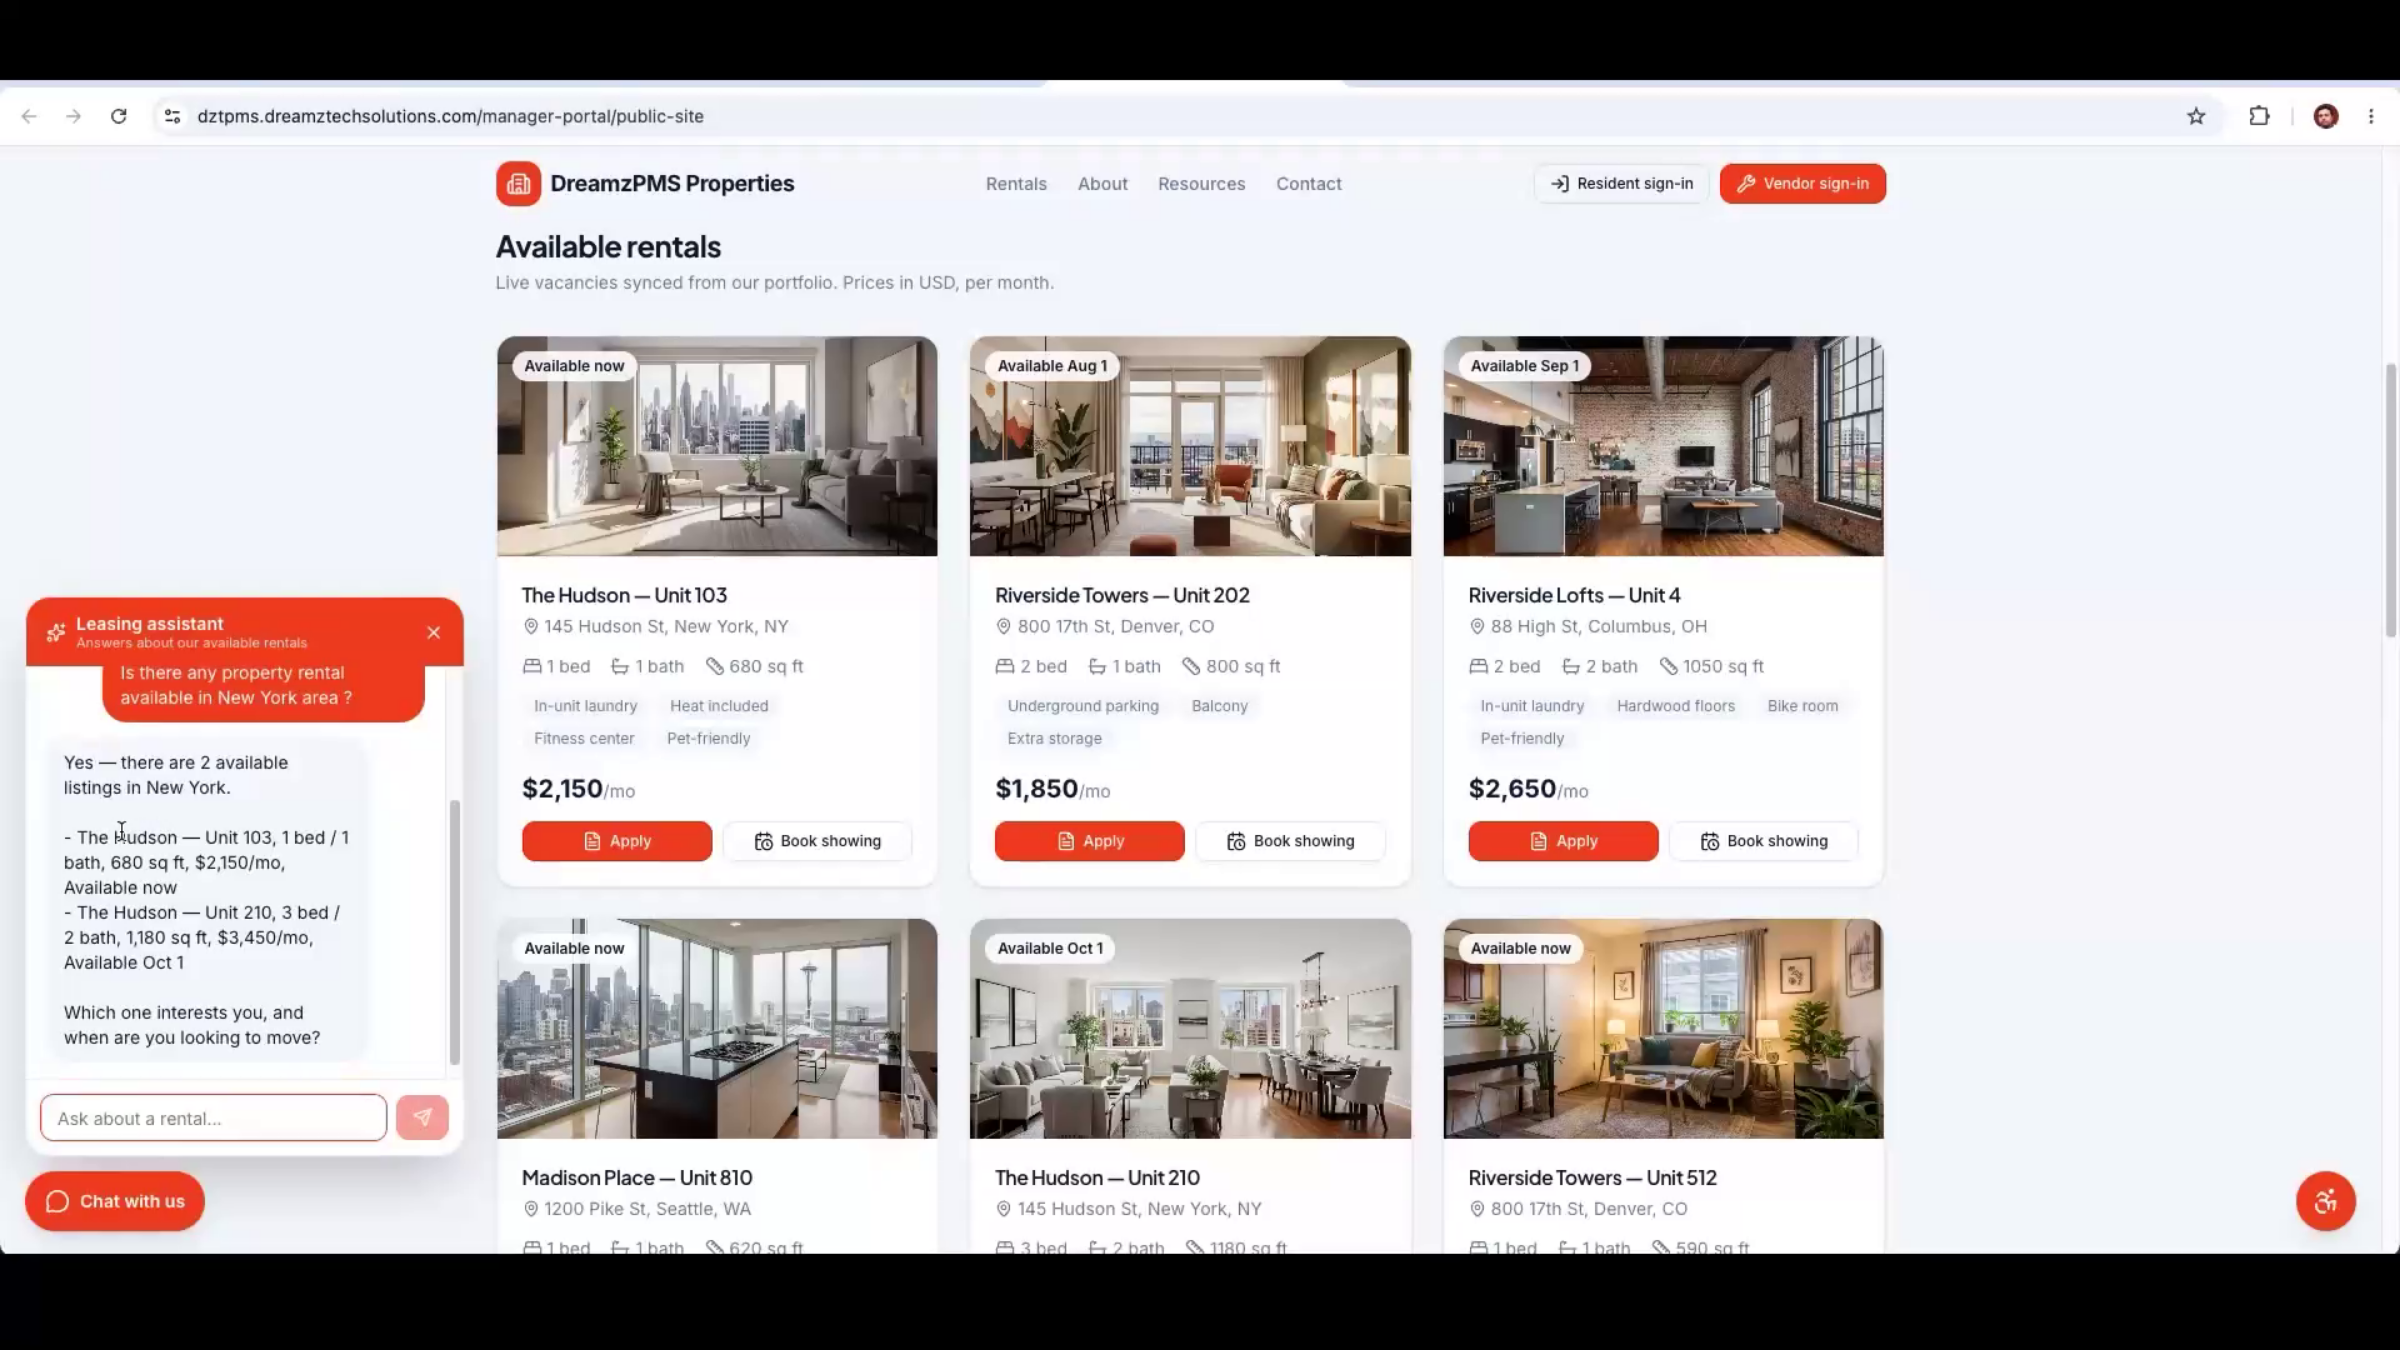
Step 26 – Scheduling Showing Interaction
Once the prospect confirms a unit and a preferred move-in date, the AI checks it against the unit's availability and offers to schedule a showing.
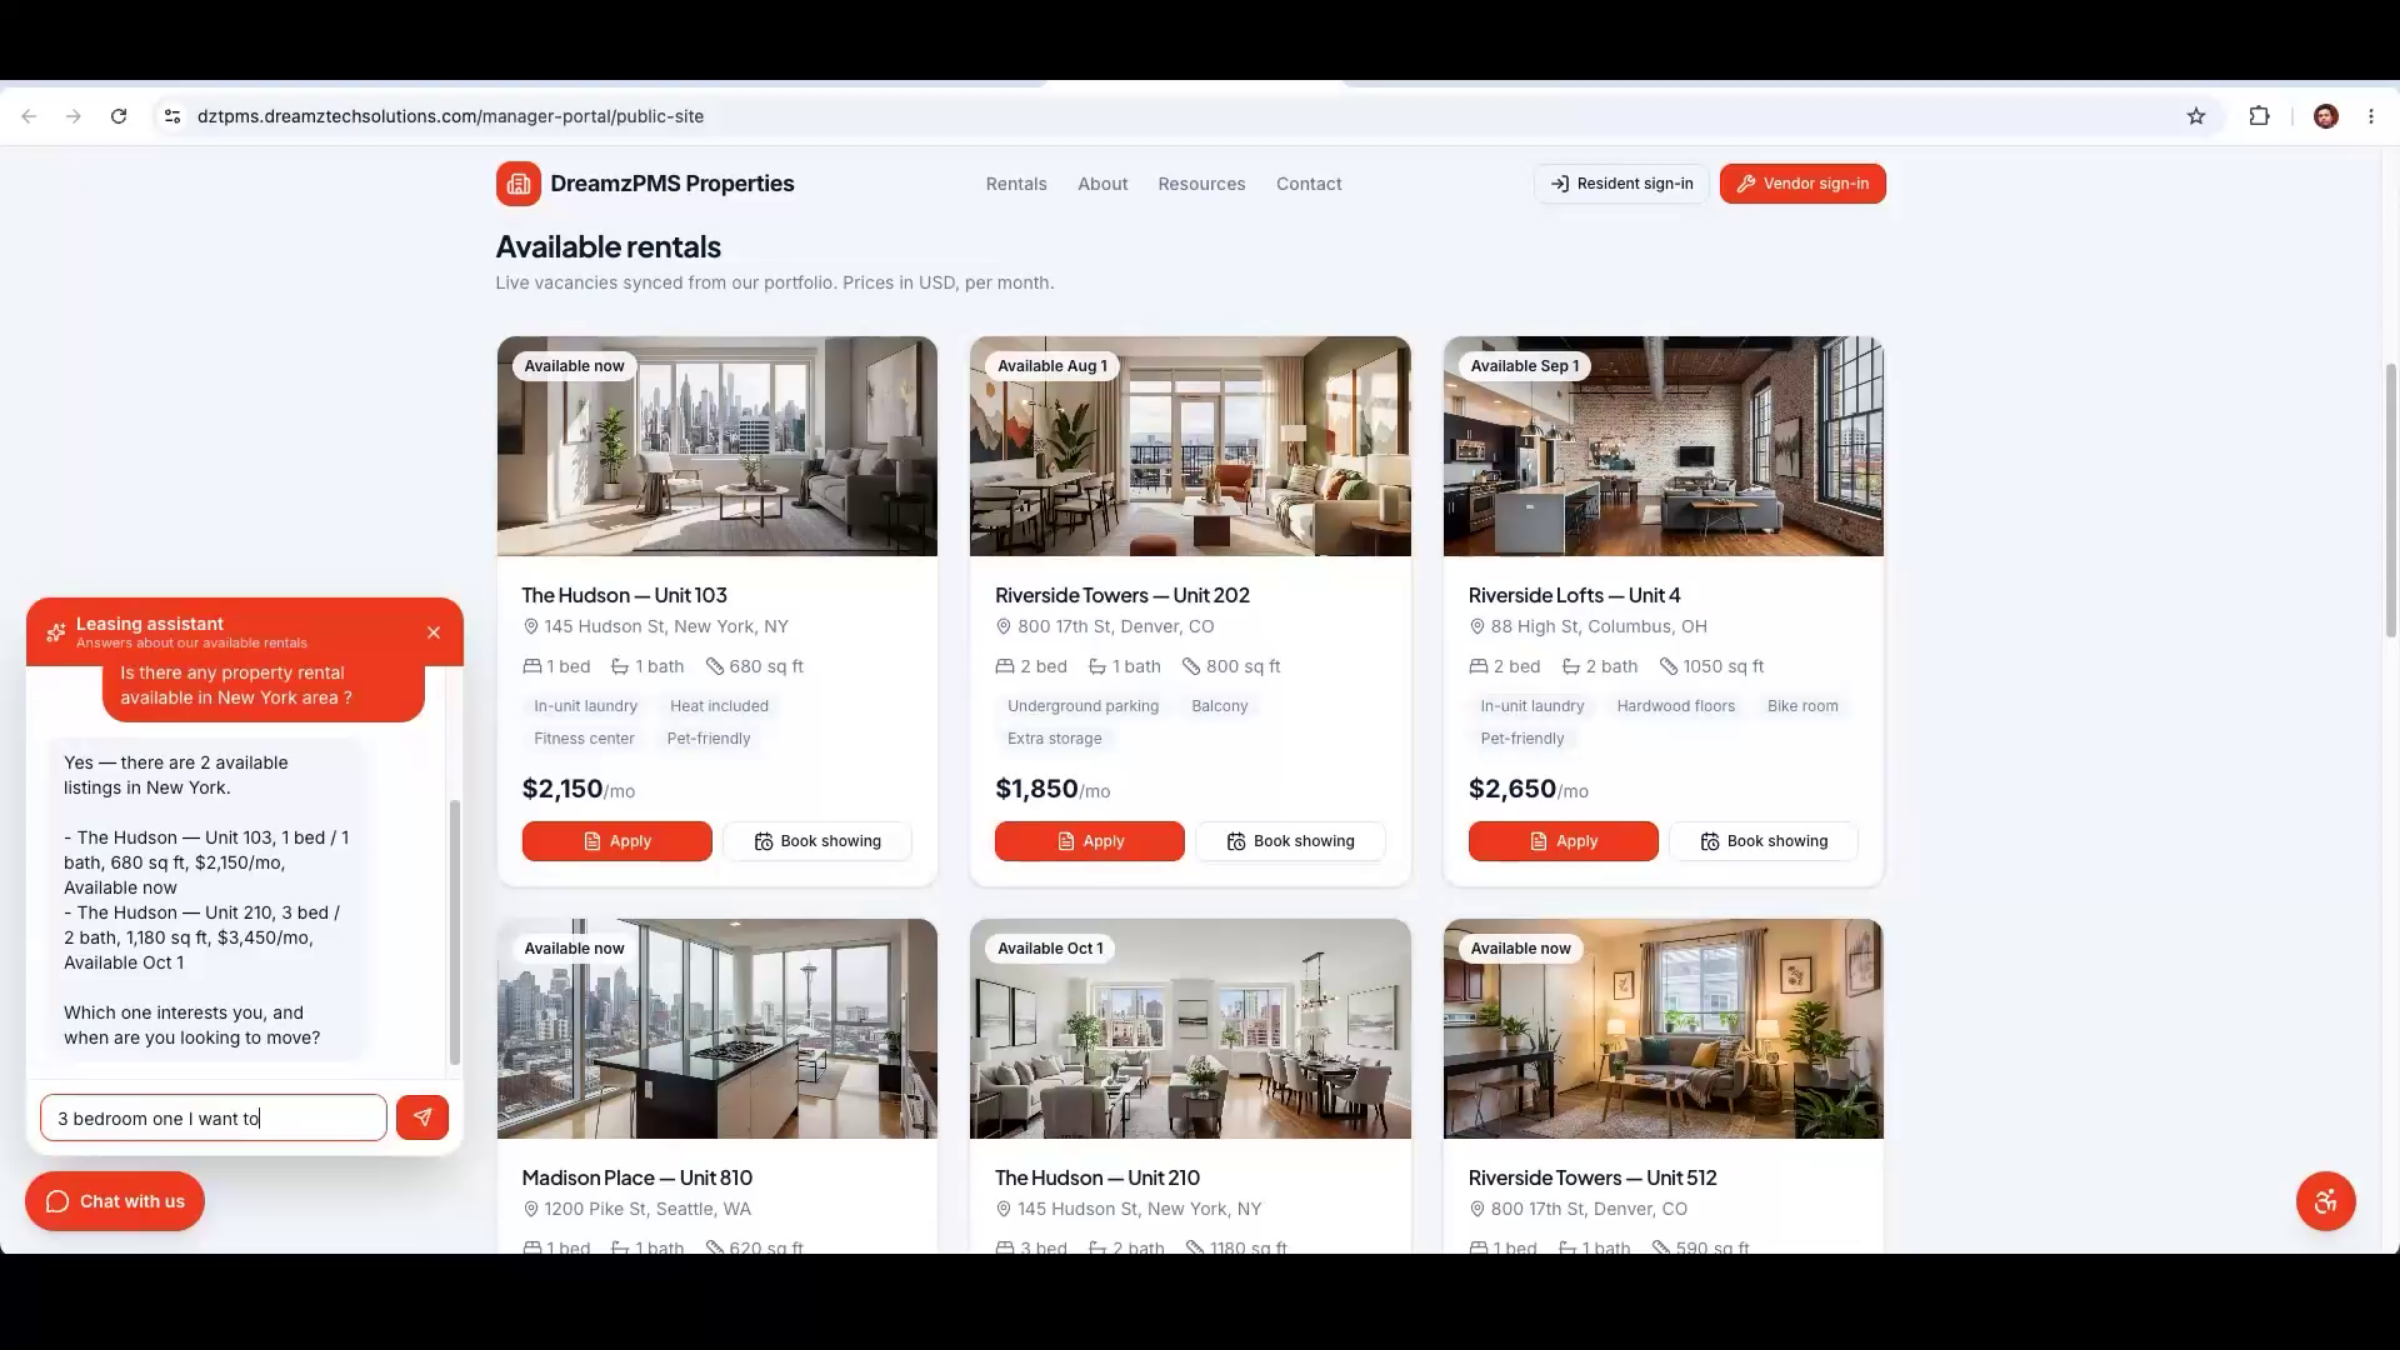
Step 27 – Automated Prospect Communication
The AI collects the prospect's contact information and confirms interest in scheduling a showing — all without any human agent involvement in the conversation itself.
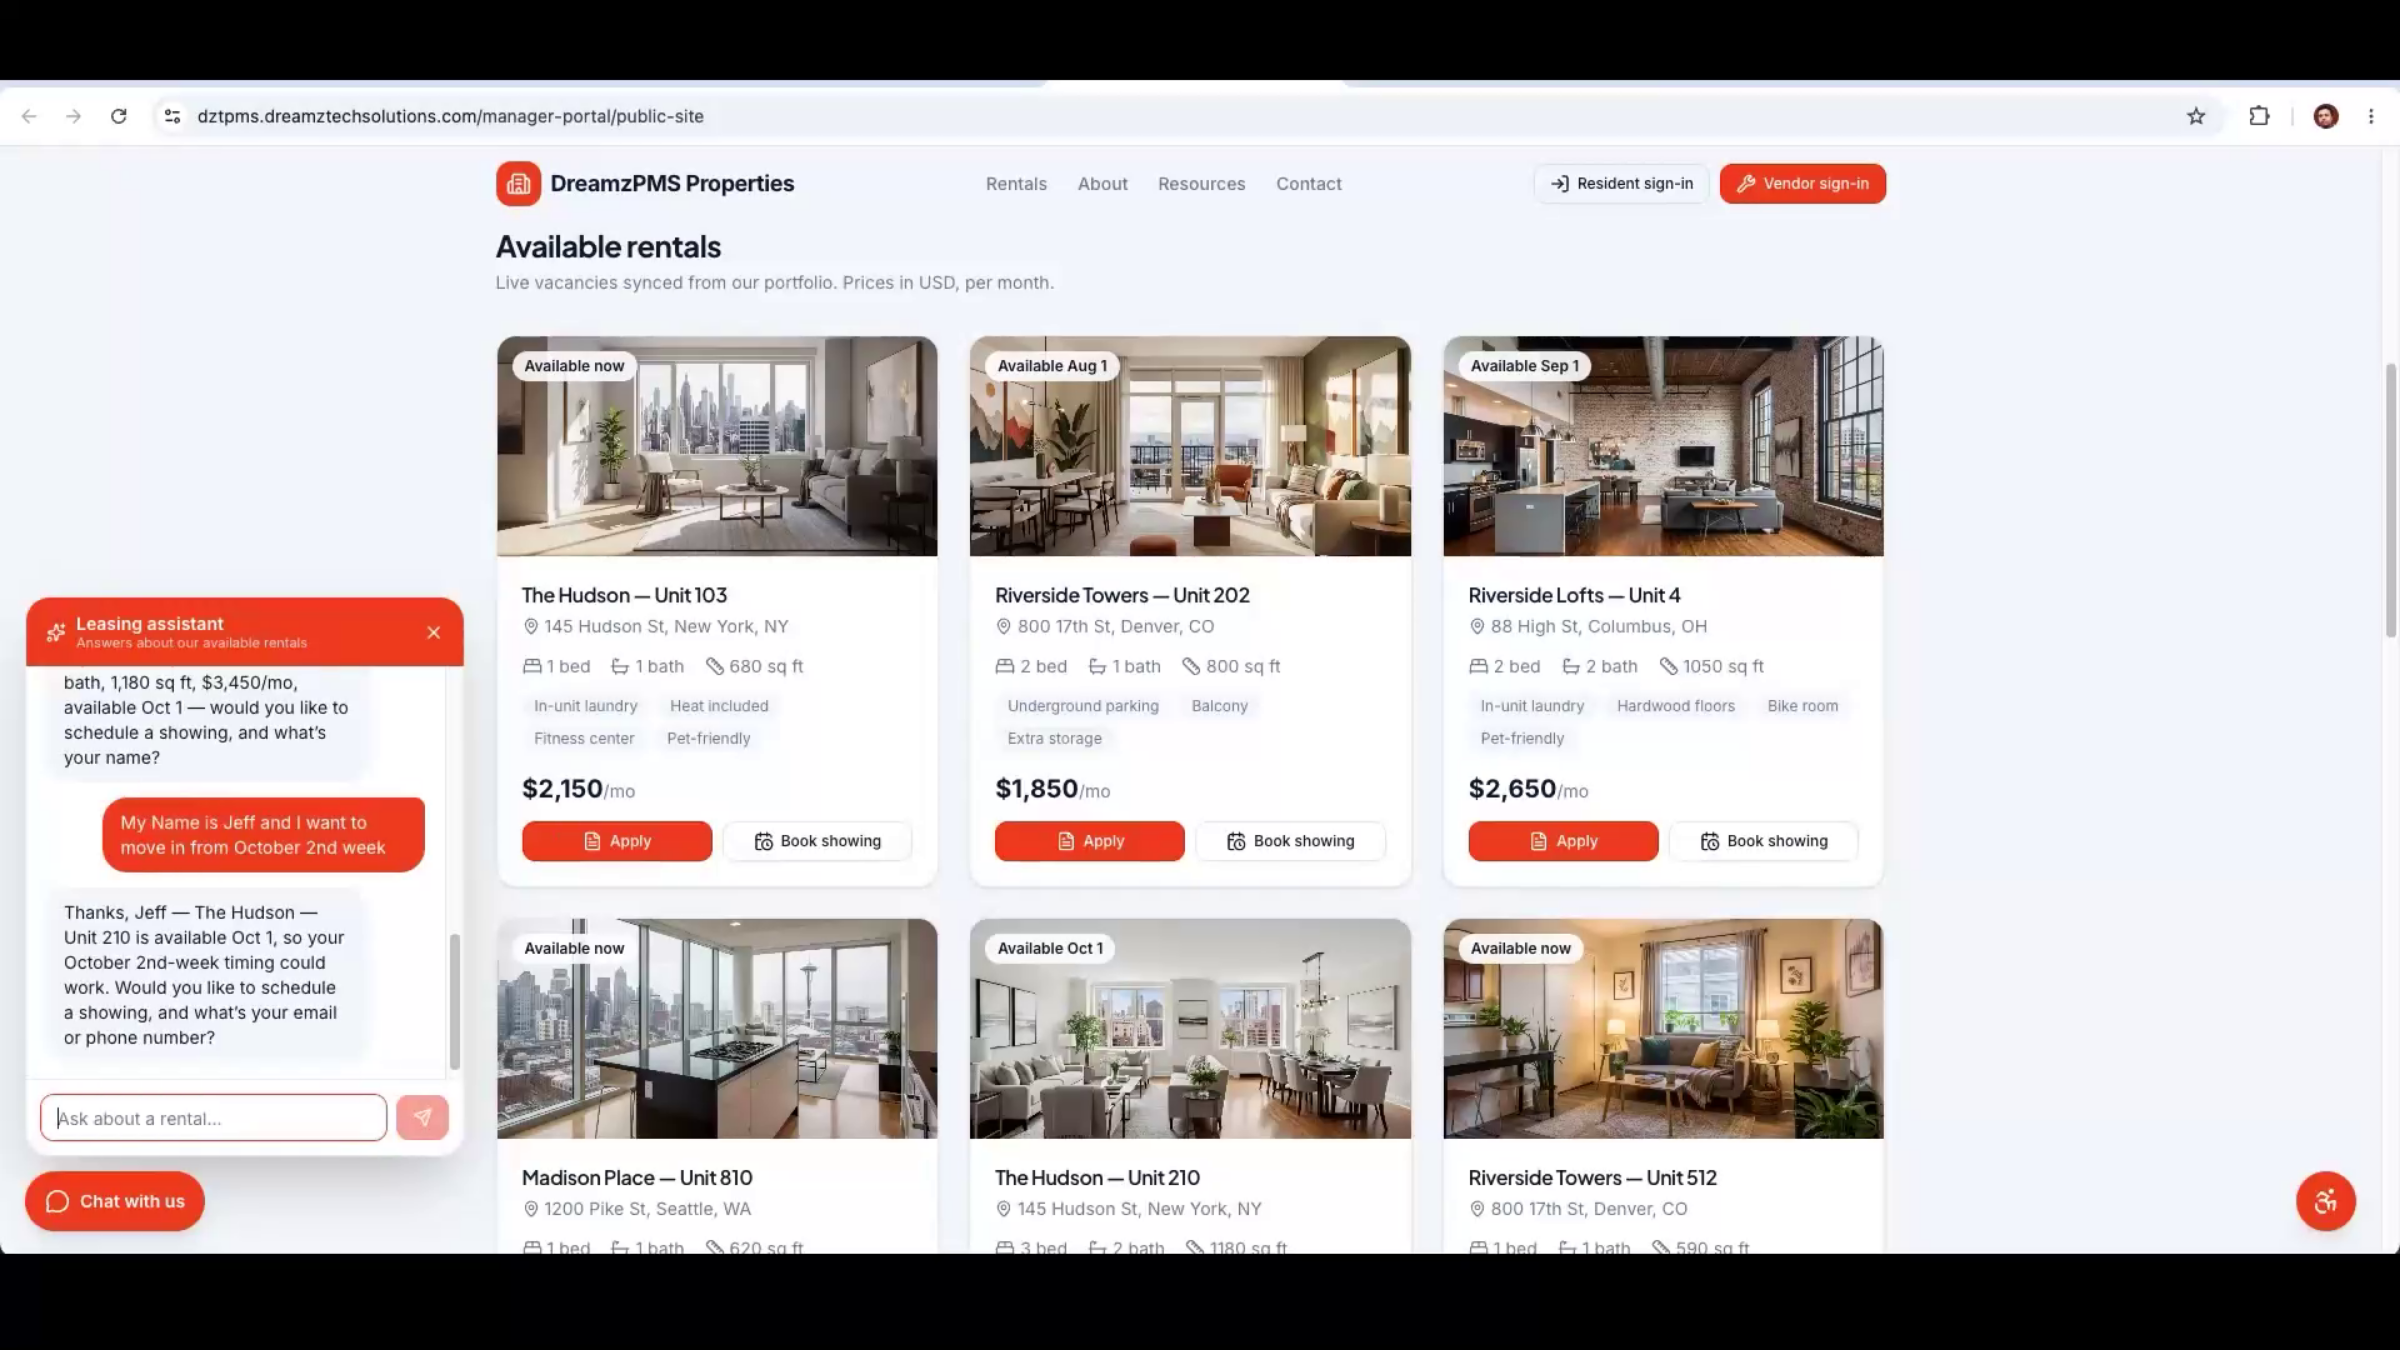
Step 28 – Lead Creation and Follow-Up
The conversation automatically creates a lead record with the prospect's contact details and unit of interest, sends an auto-acknowledgment email, and lets the manager follow up by email, text, or WhatsApp. If the manager doesn't follow up, a configurable auto-nudge goes out to the lead after a set number of days.
From Lead to Signed Lease
Step 29 – Applicant Conversion Process
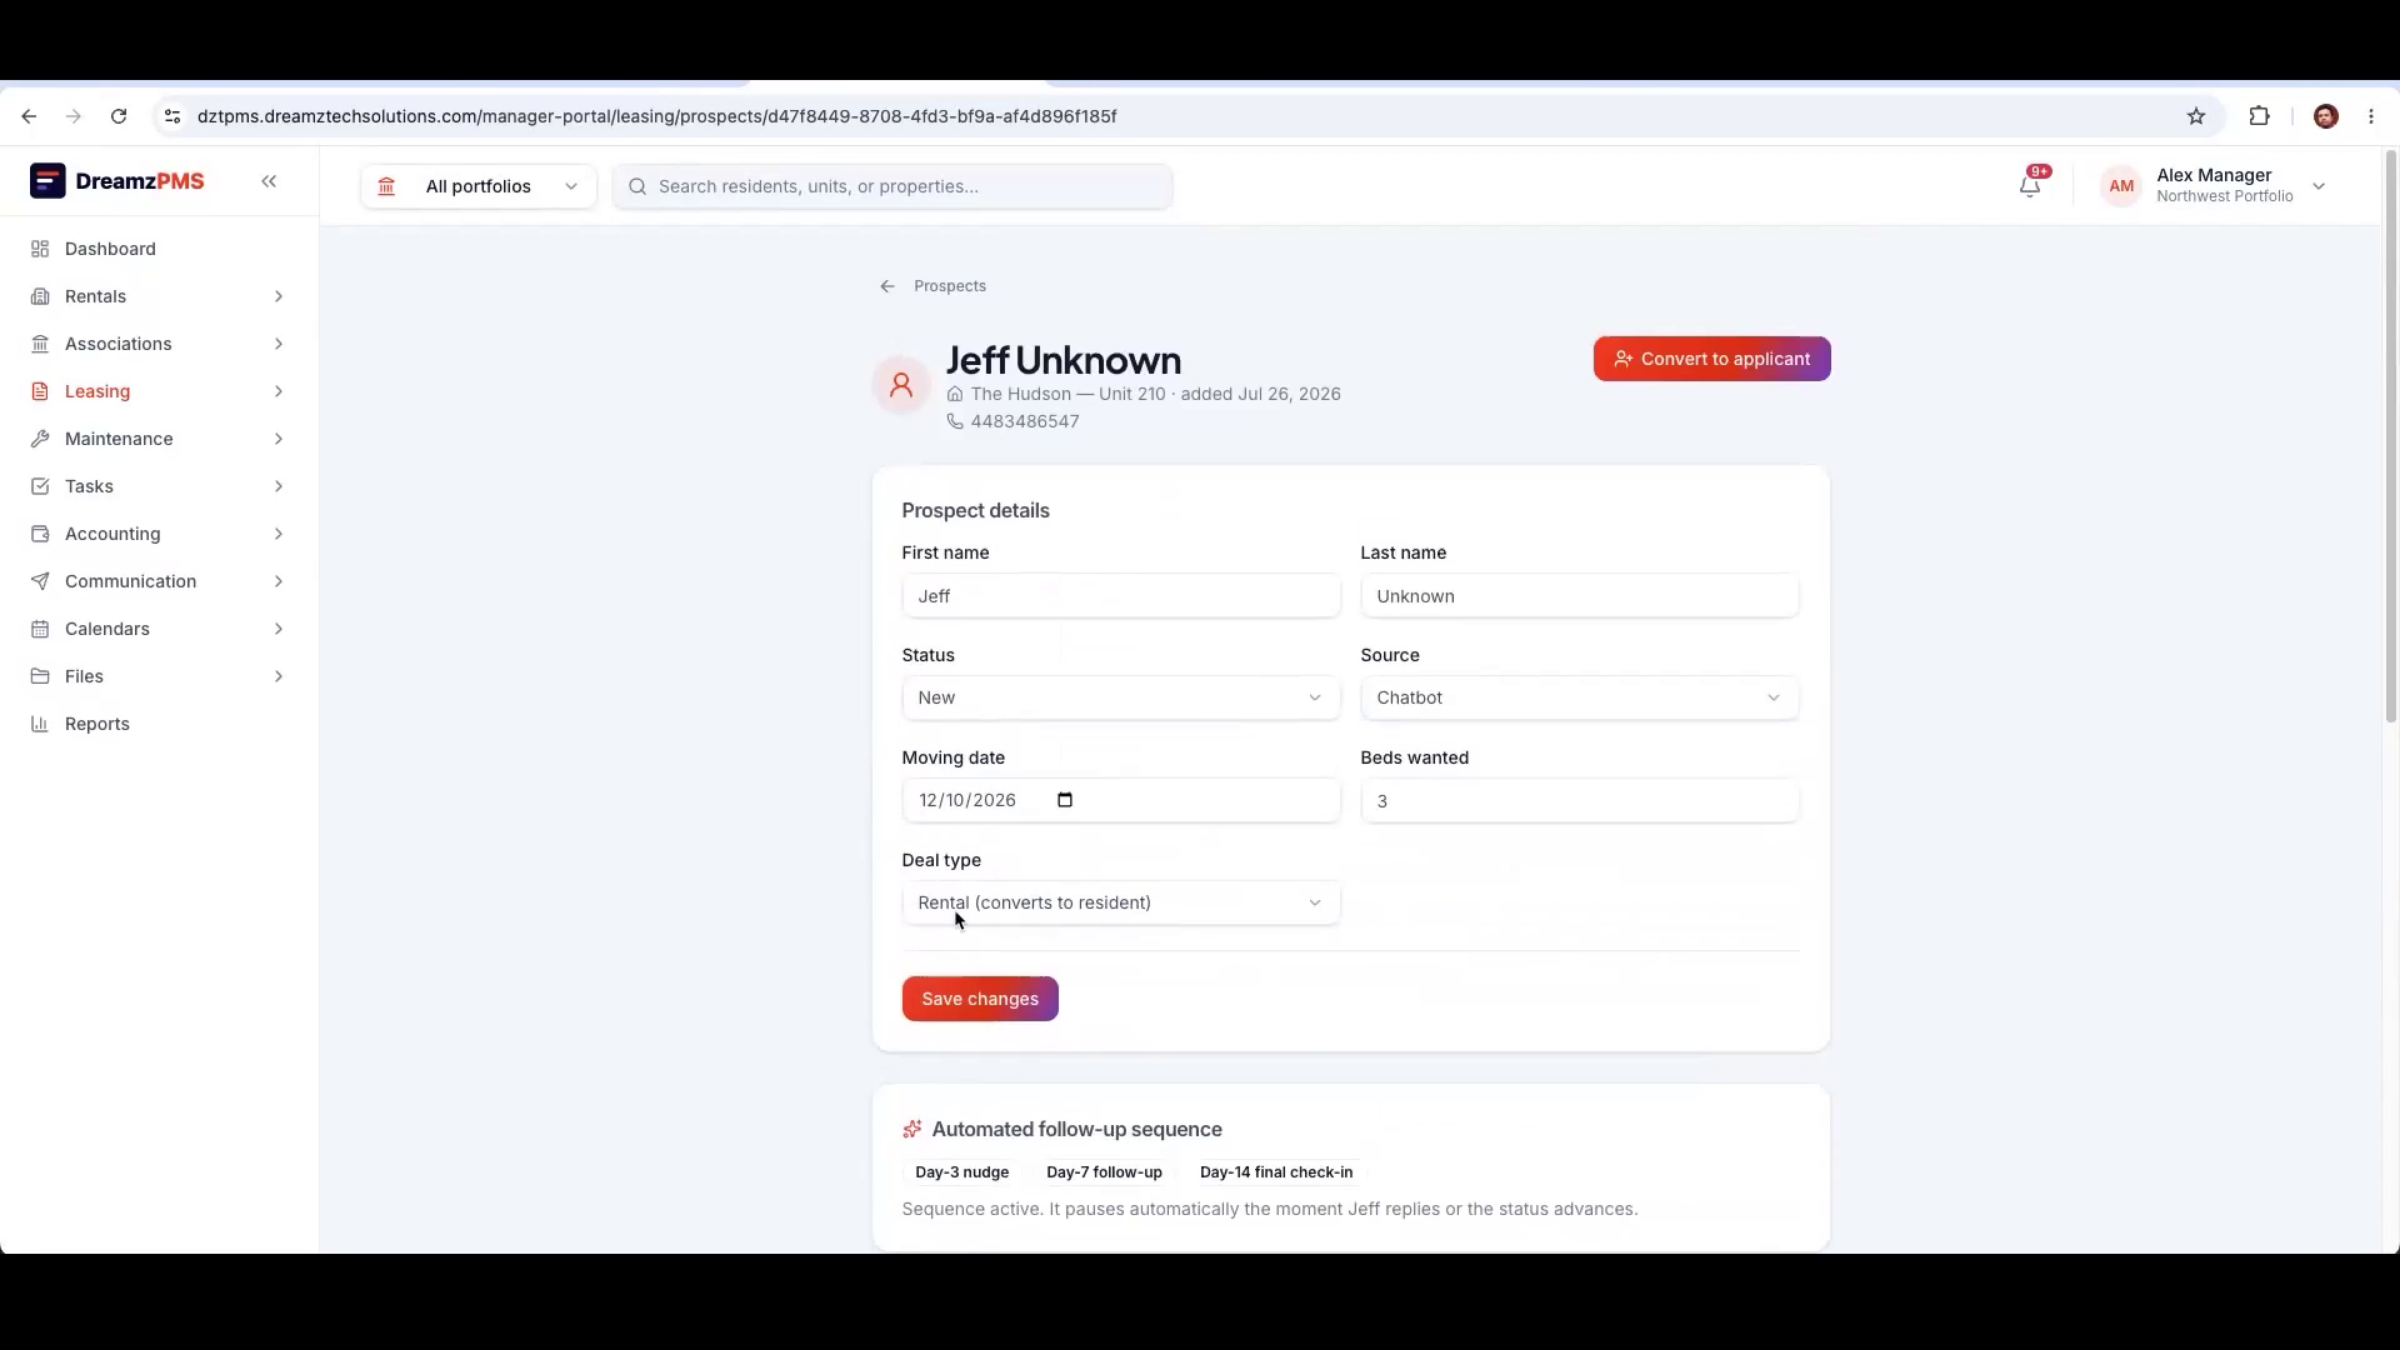
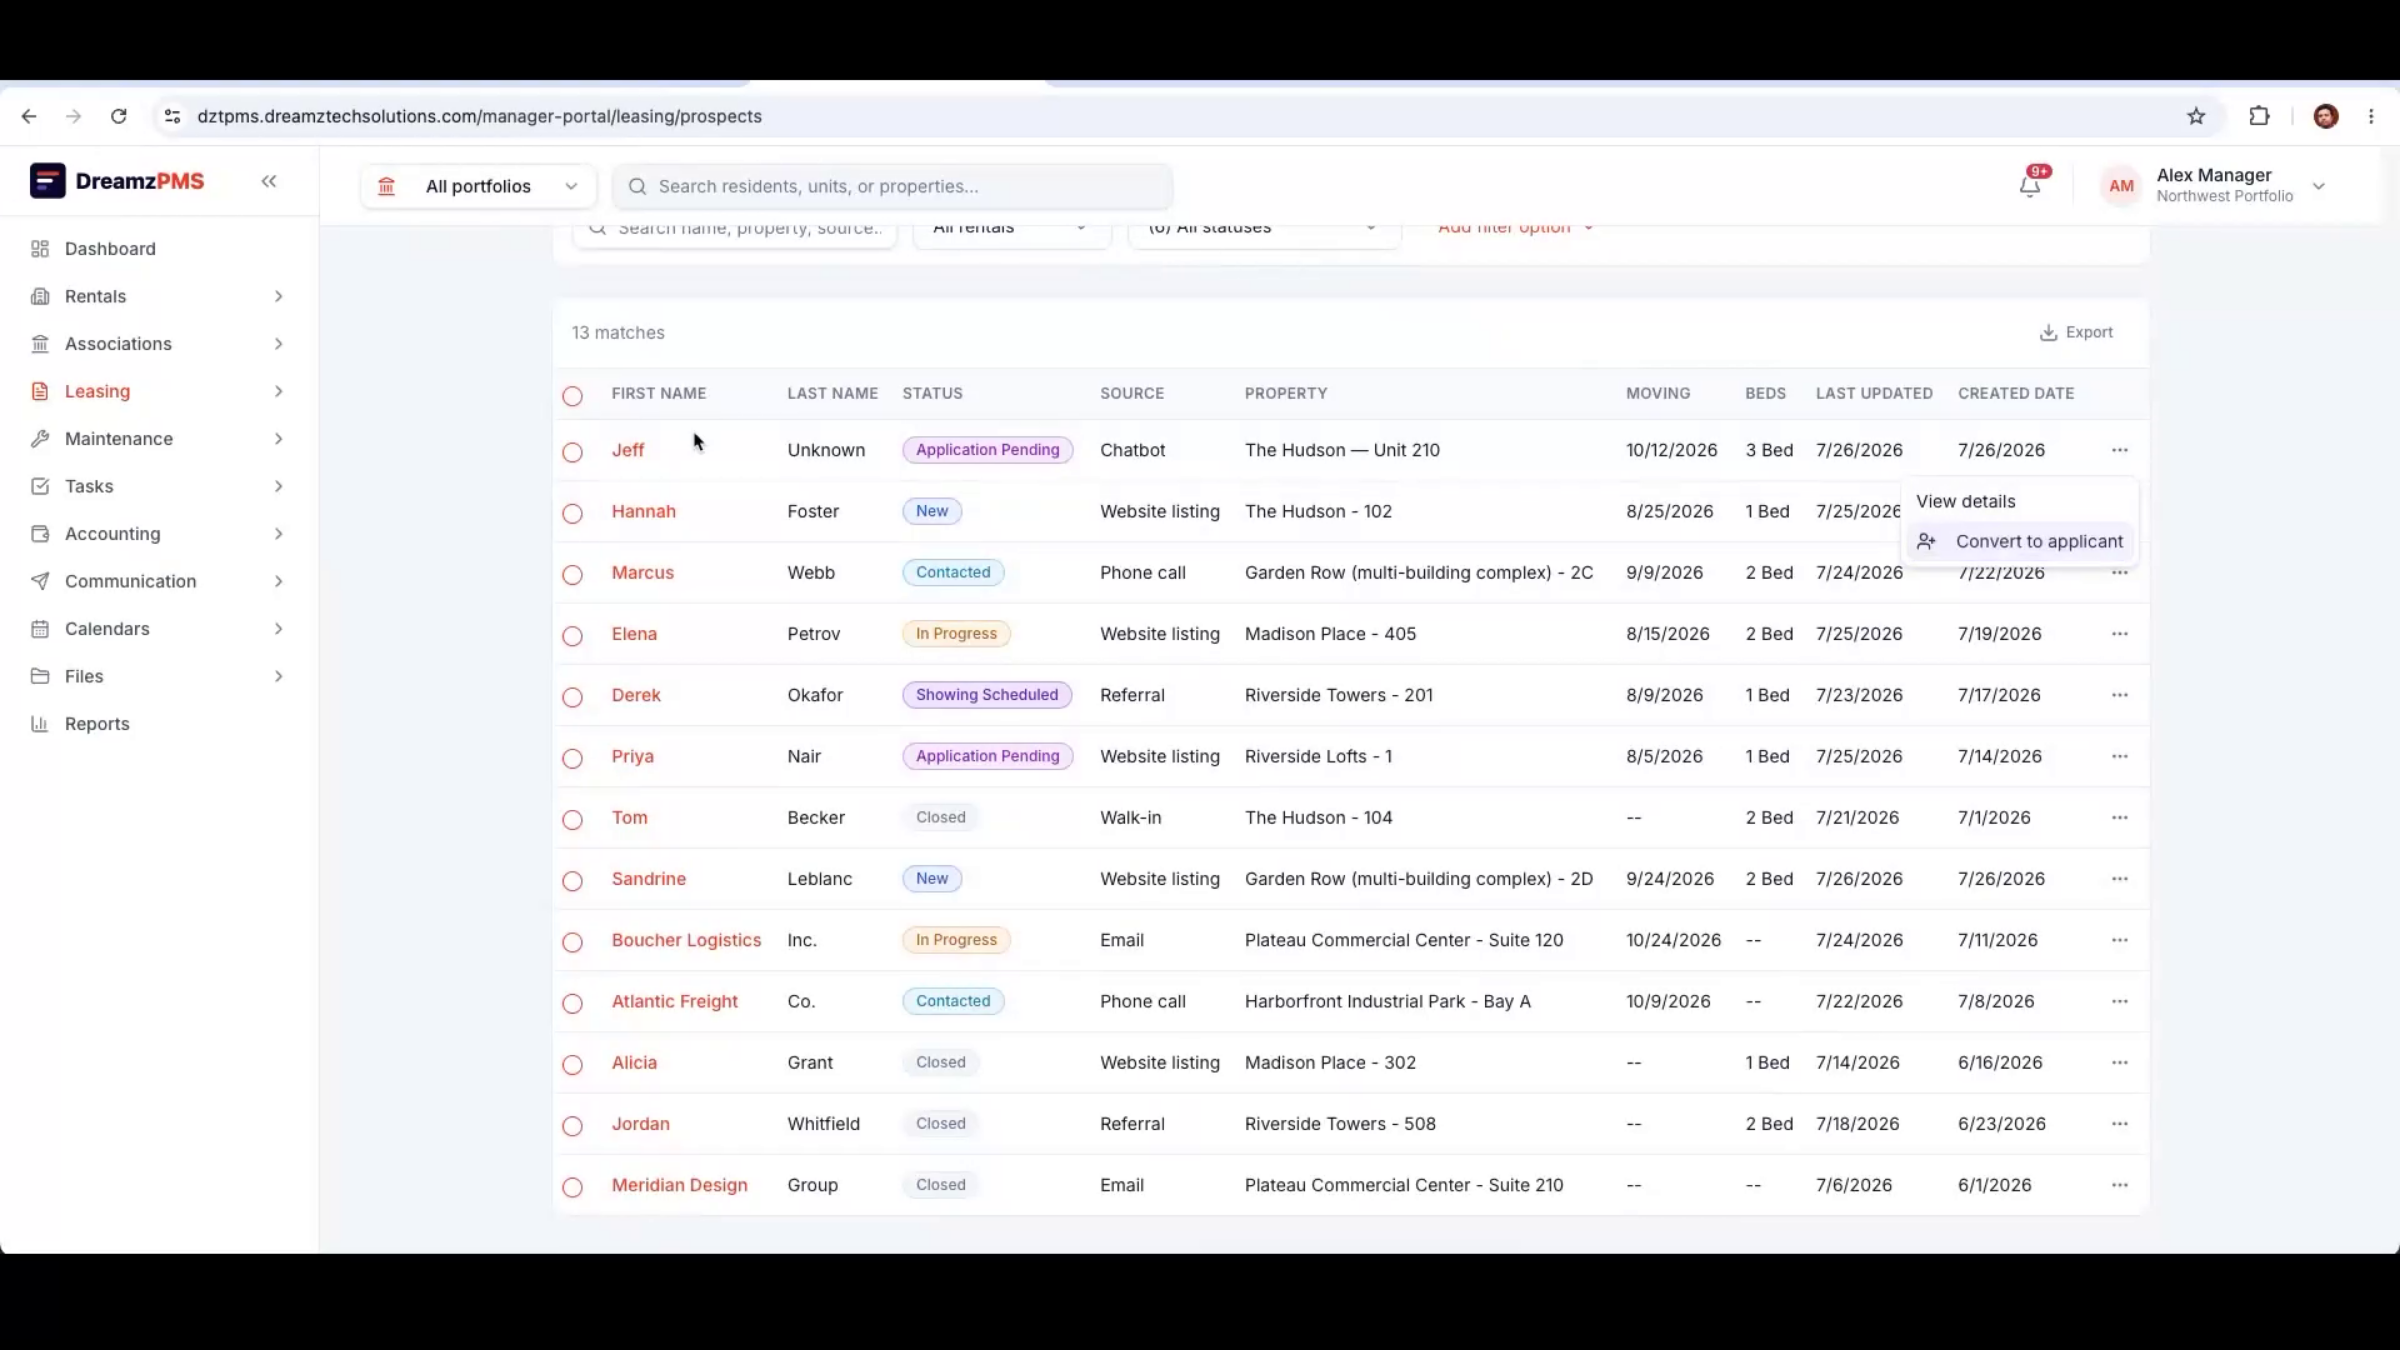
From the lead record, a manager can convert the prospect into an applicant and move them into the screening stage.
Step 30 – Screening and Verification
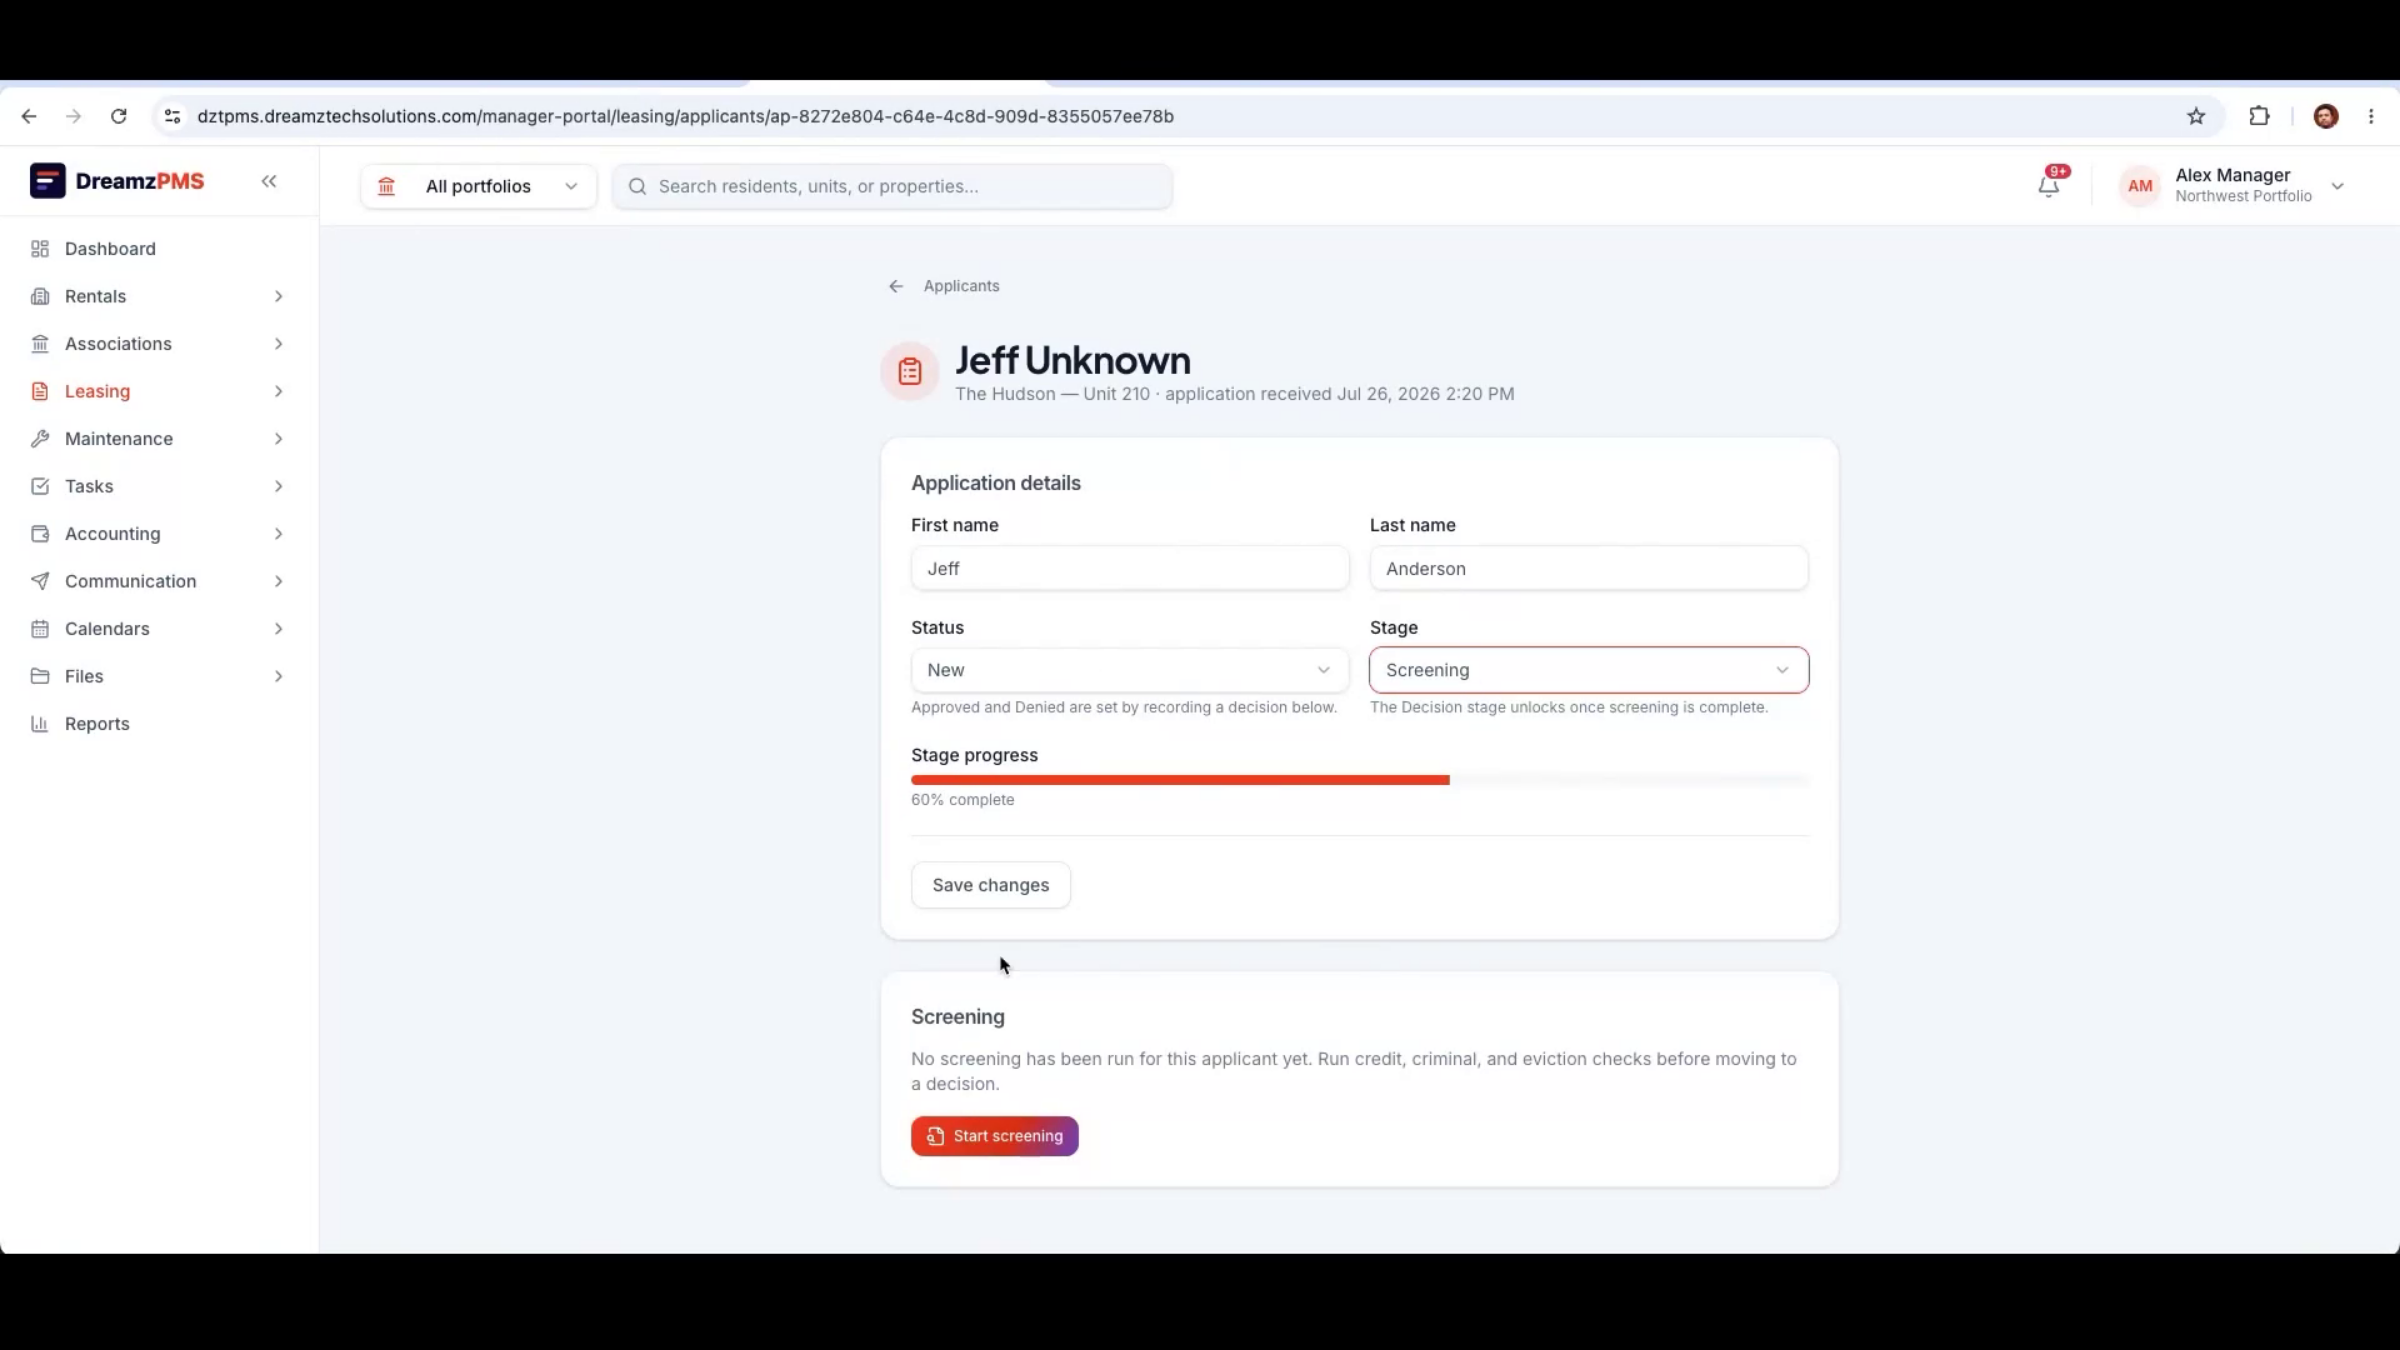
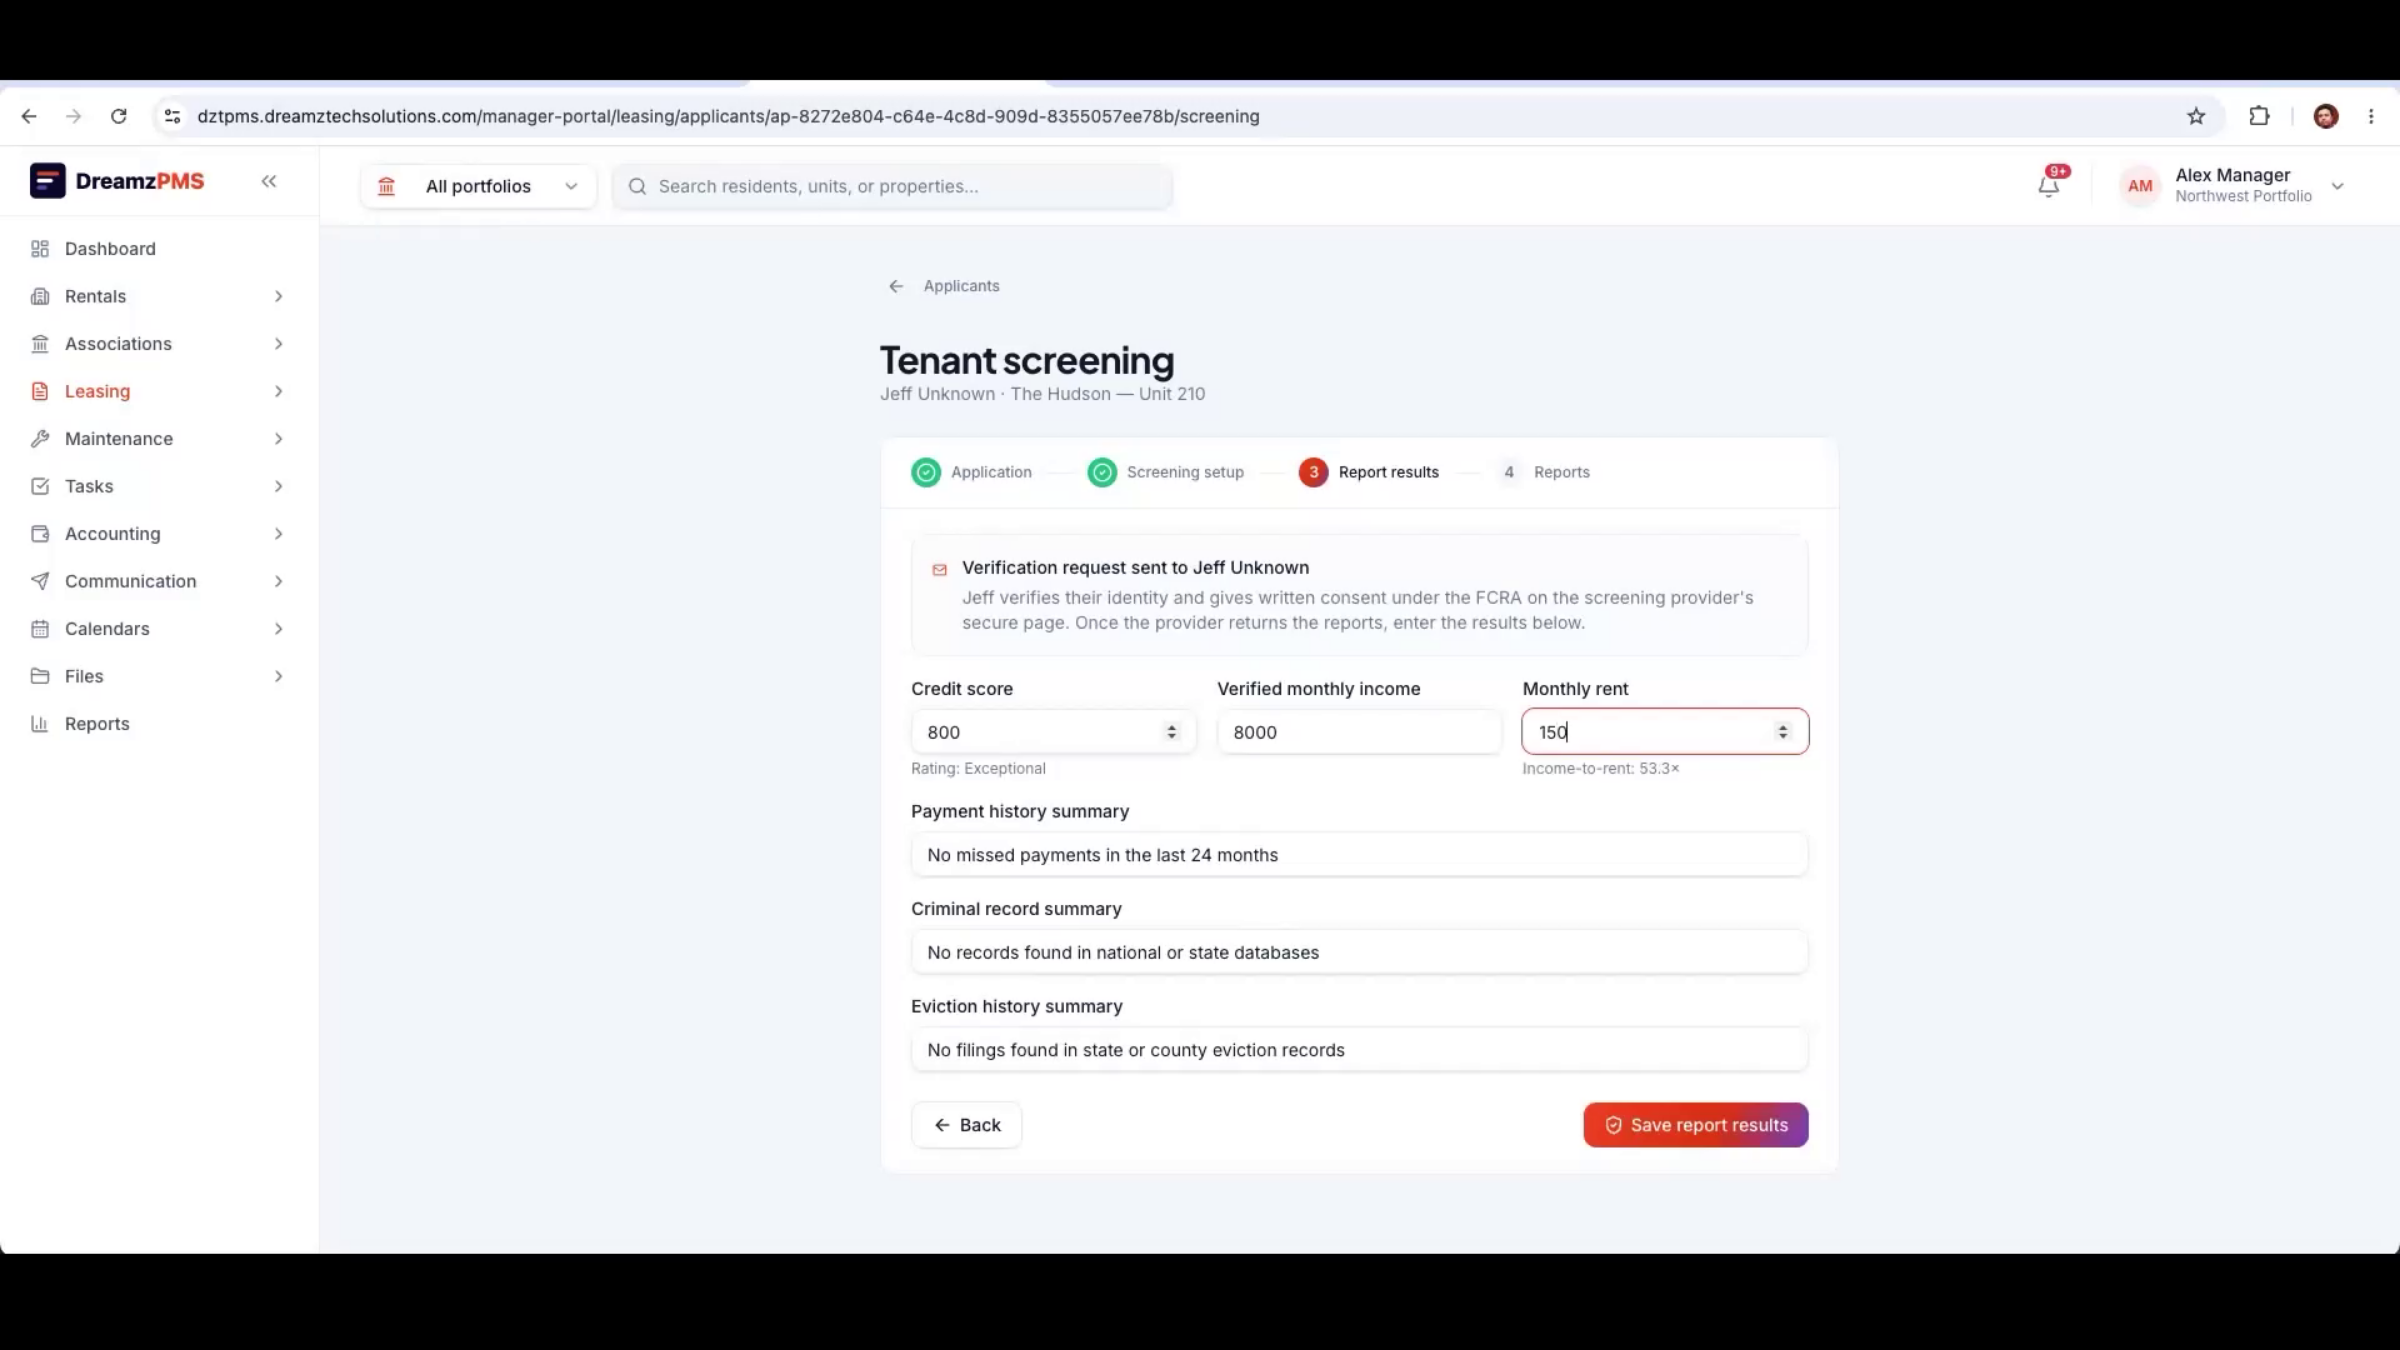
Screening covers criminal record and eviction history checks. Once a verification request is sent, the applicant verifies their identity and consents to a credit check, and the manager records the resulting credit score.
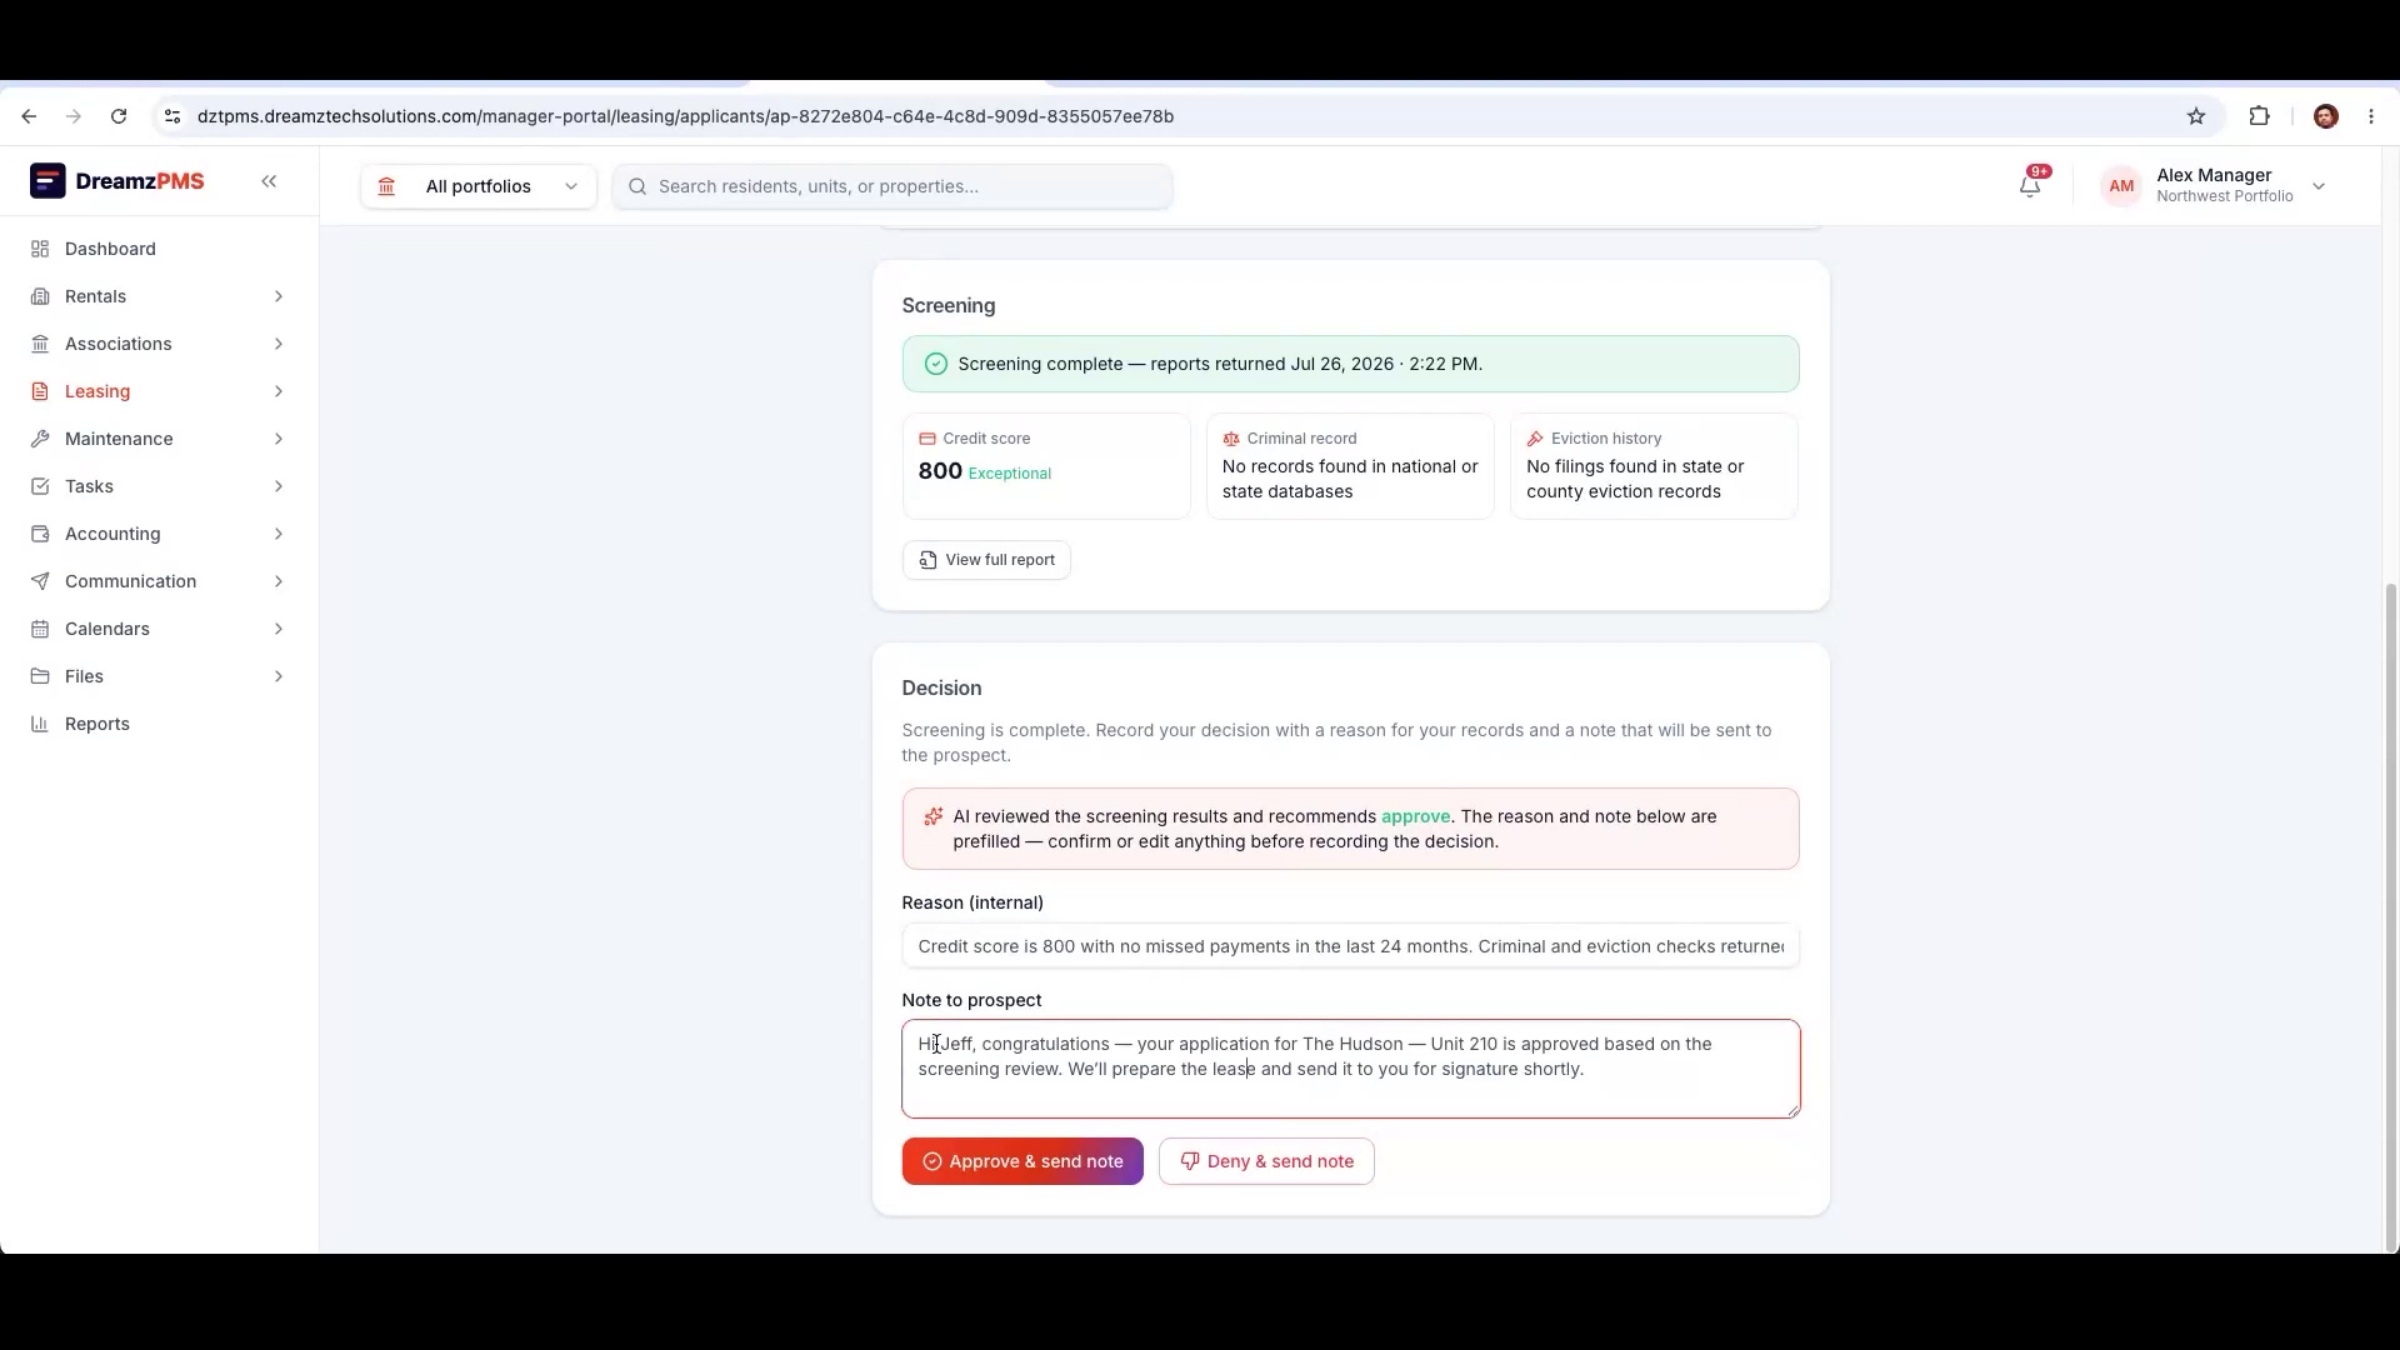
Step 31 – AI Screening Decision
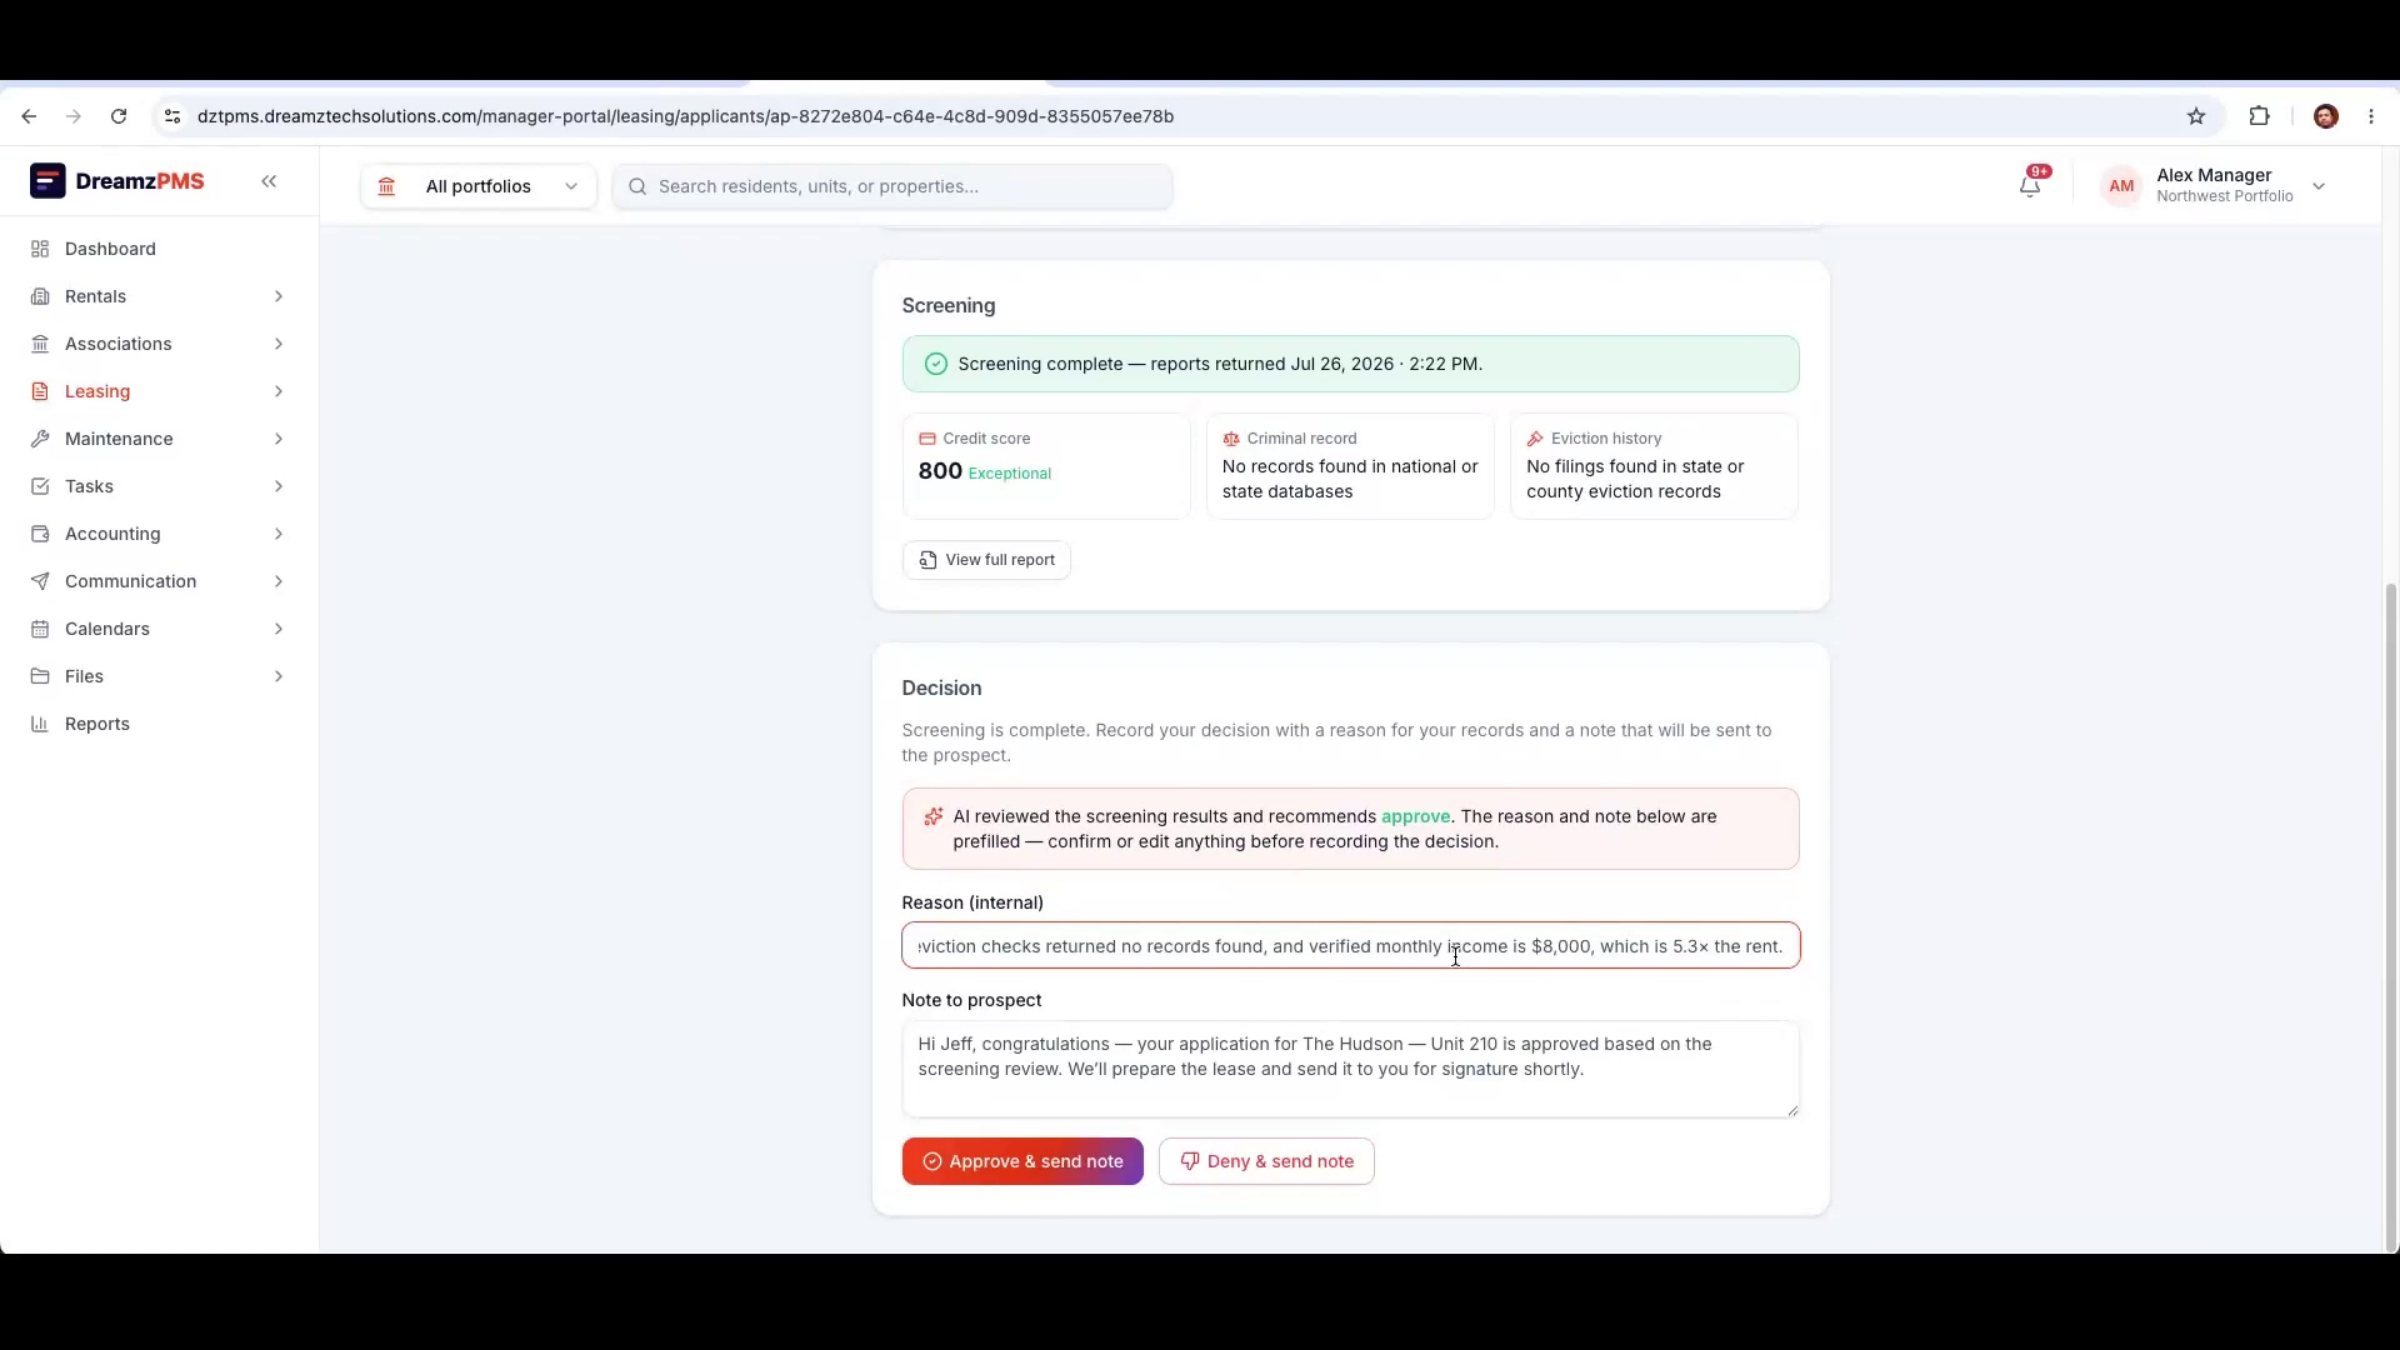
Running the screening decision has AI review the results and recommend an outcome — for example, approve — with a prefilled reason based on factors like credit score and payment history.
Step 32 – Prefilled Screening Notes
The AI's recommendation and supporting note are prefilled and fully editable before the manager finalizes the decision.
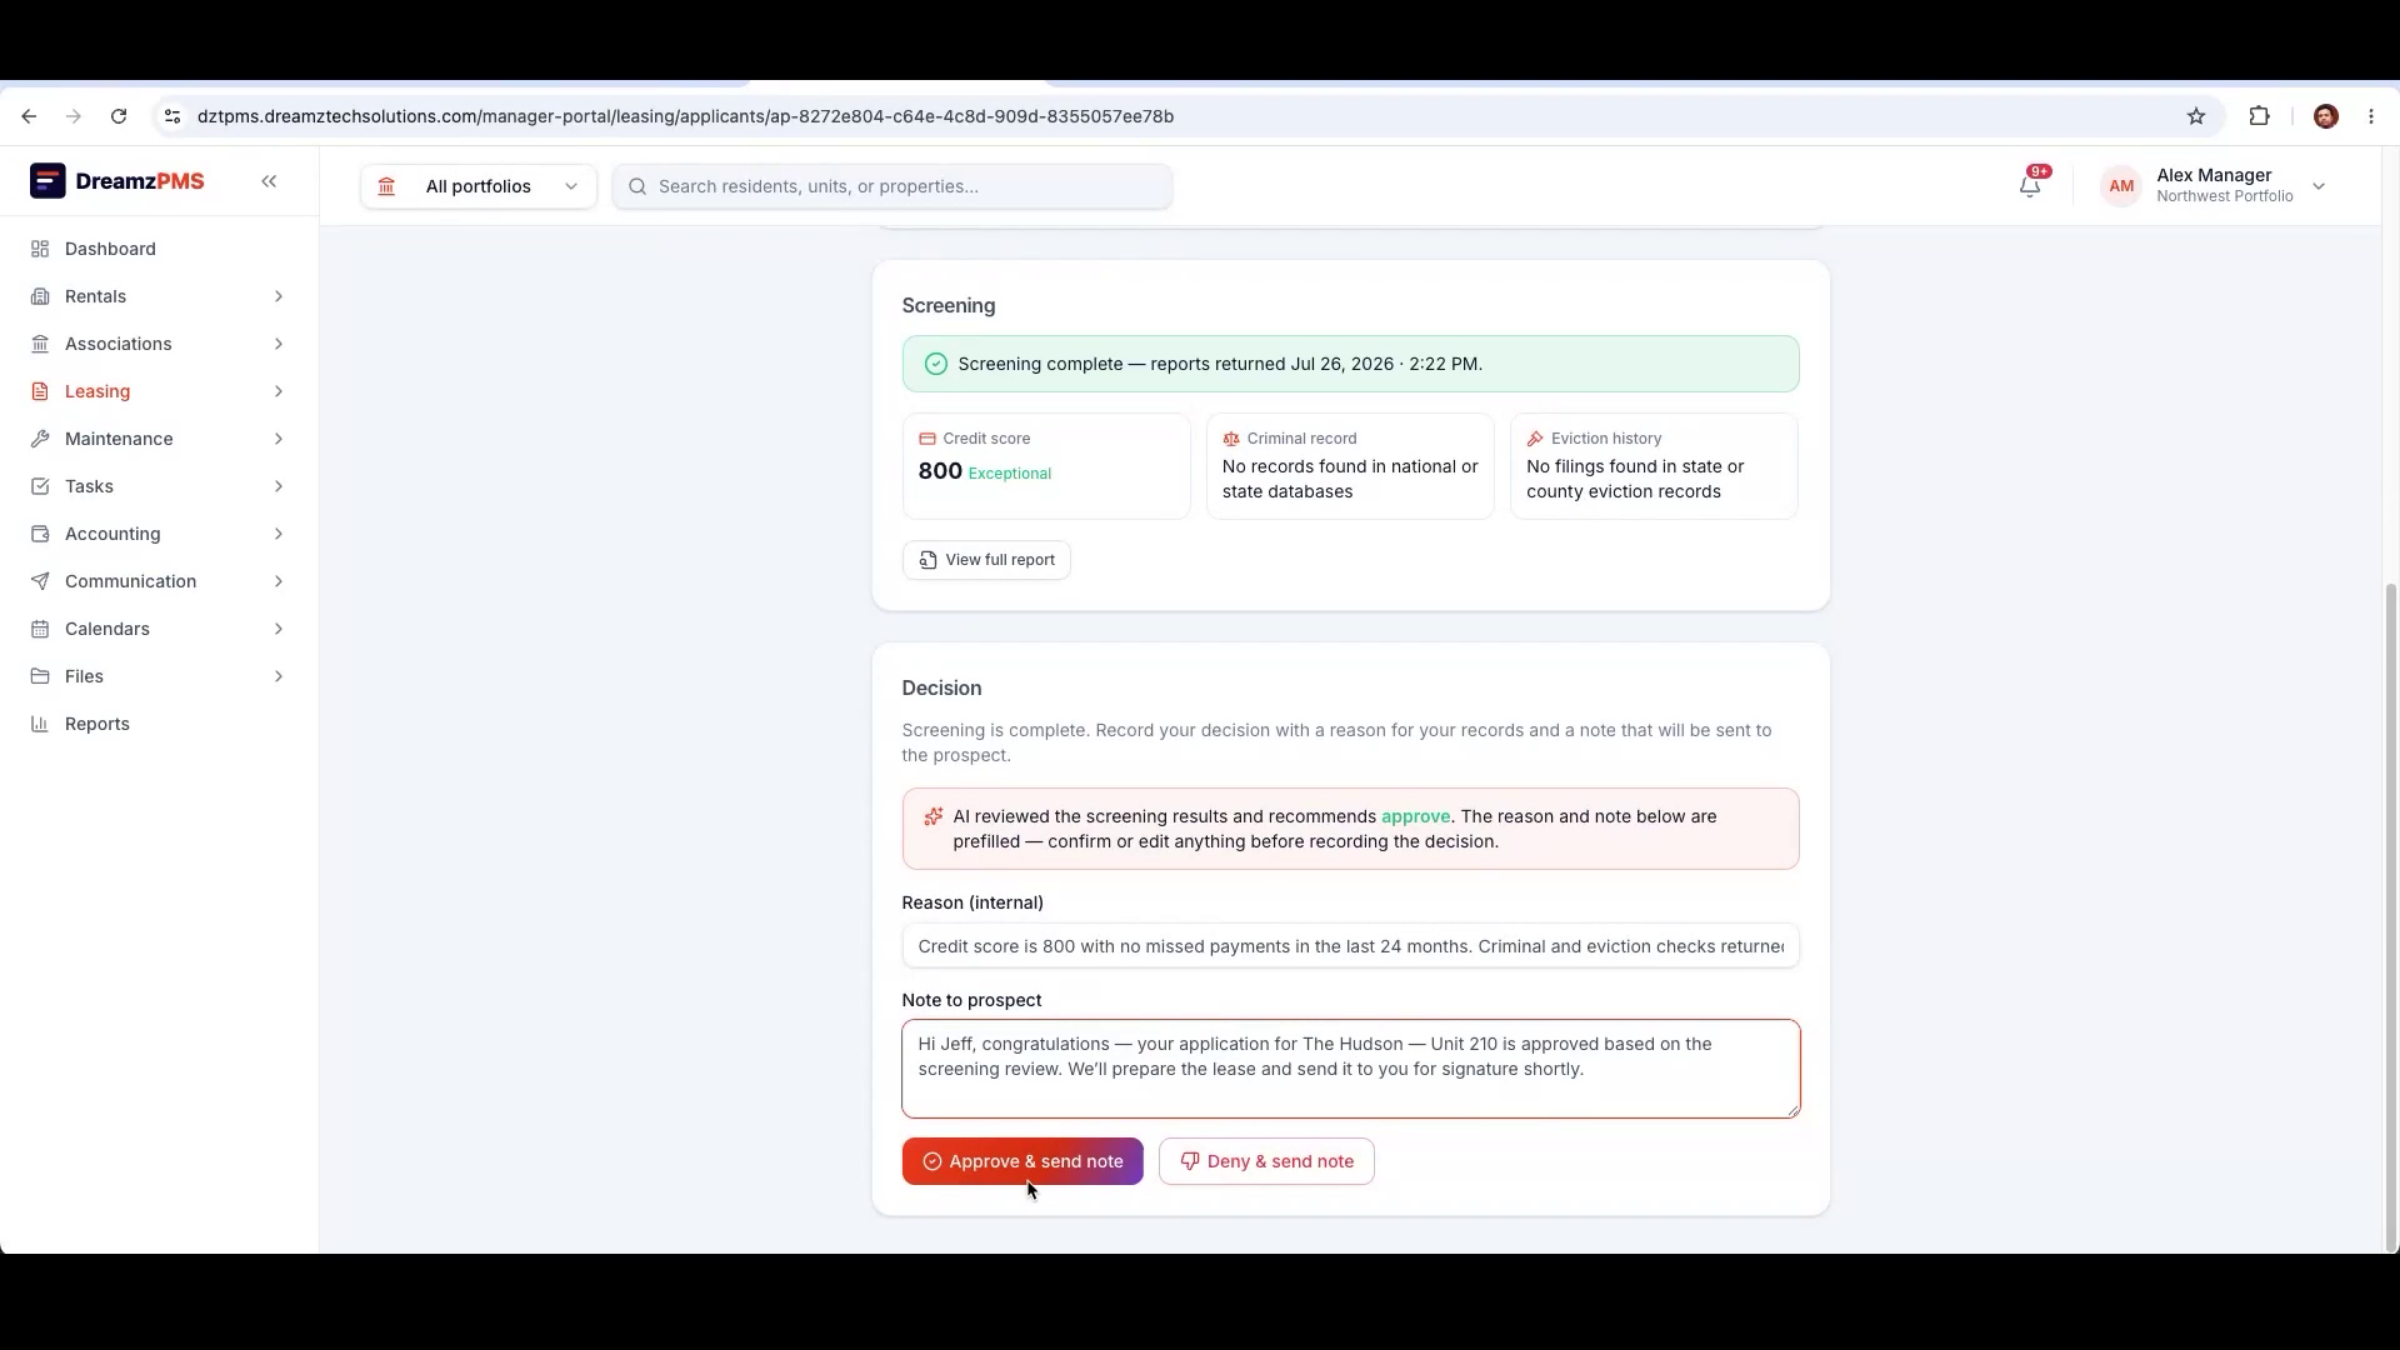
Step 33 – Application Approval Message
An approval message is prepared confirming the unit and next steps, including preparation of the lease agreement for the applicant's signature.
Step 34 – Approval Notification Process
Clicking Approve (or Deny) automatically sends the corresponding message to the applicant — no separate step needed to notify them.
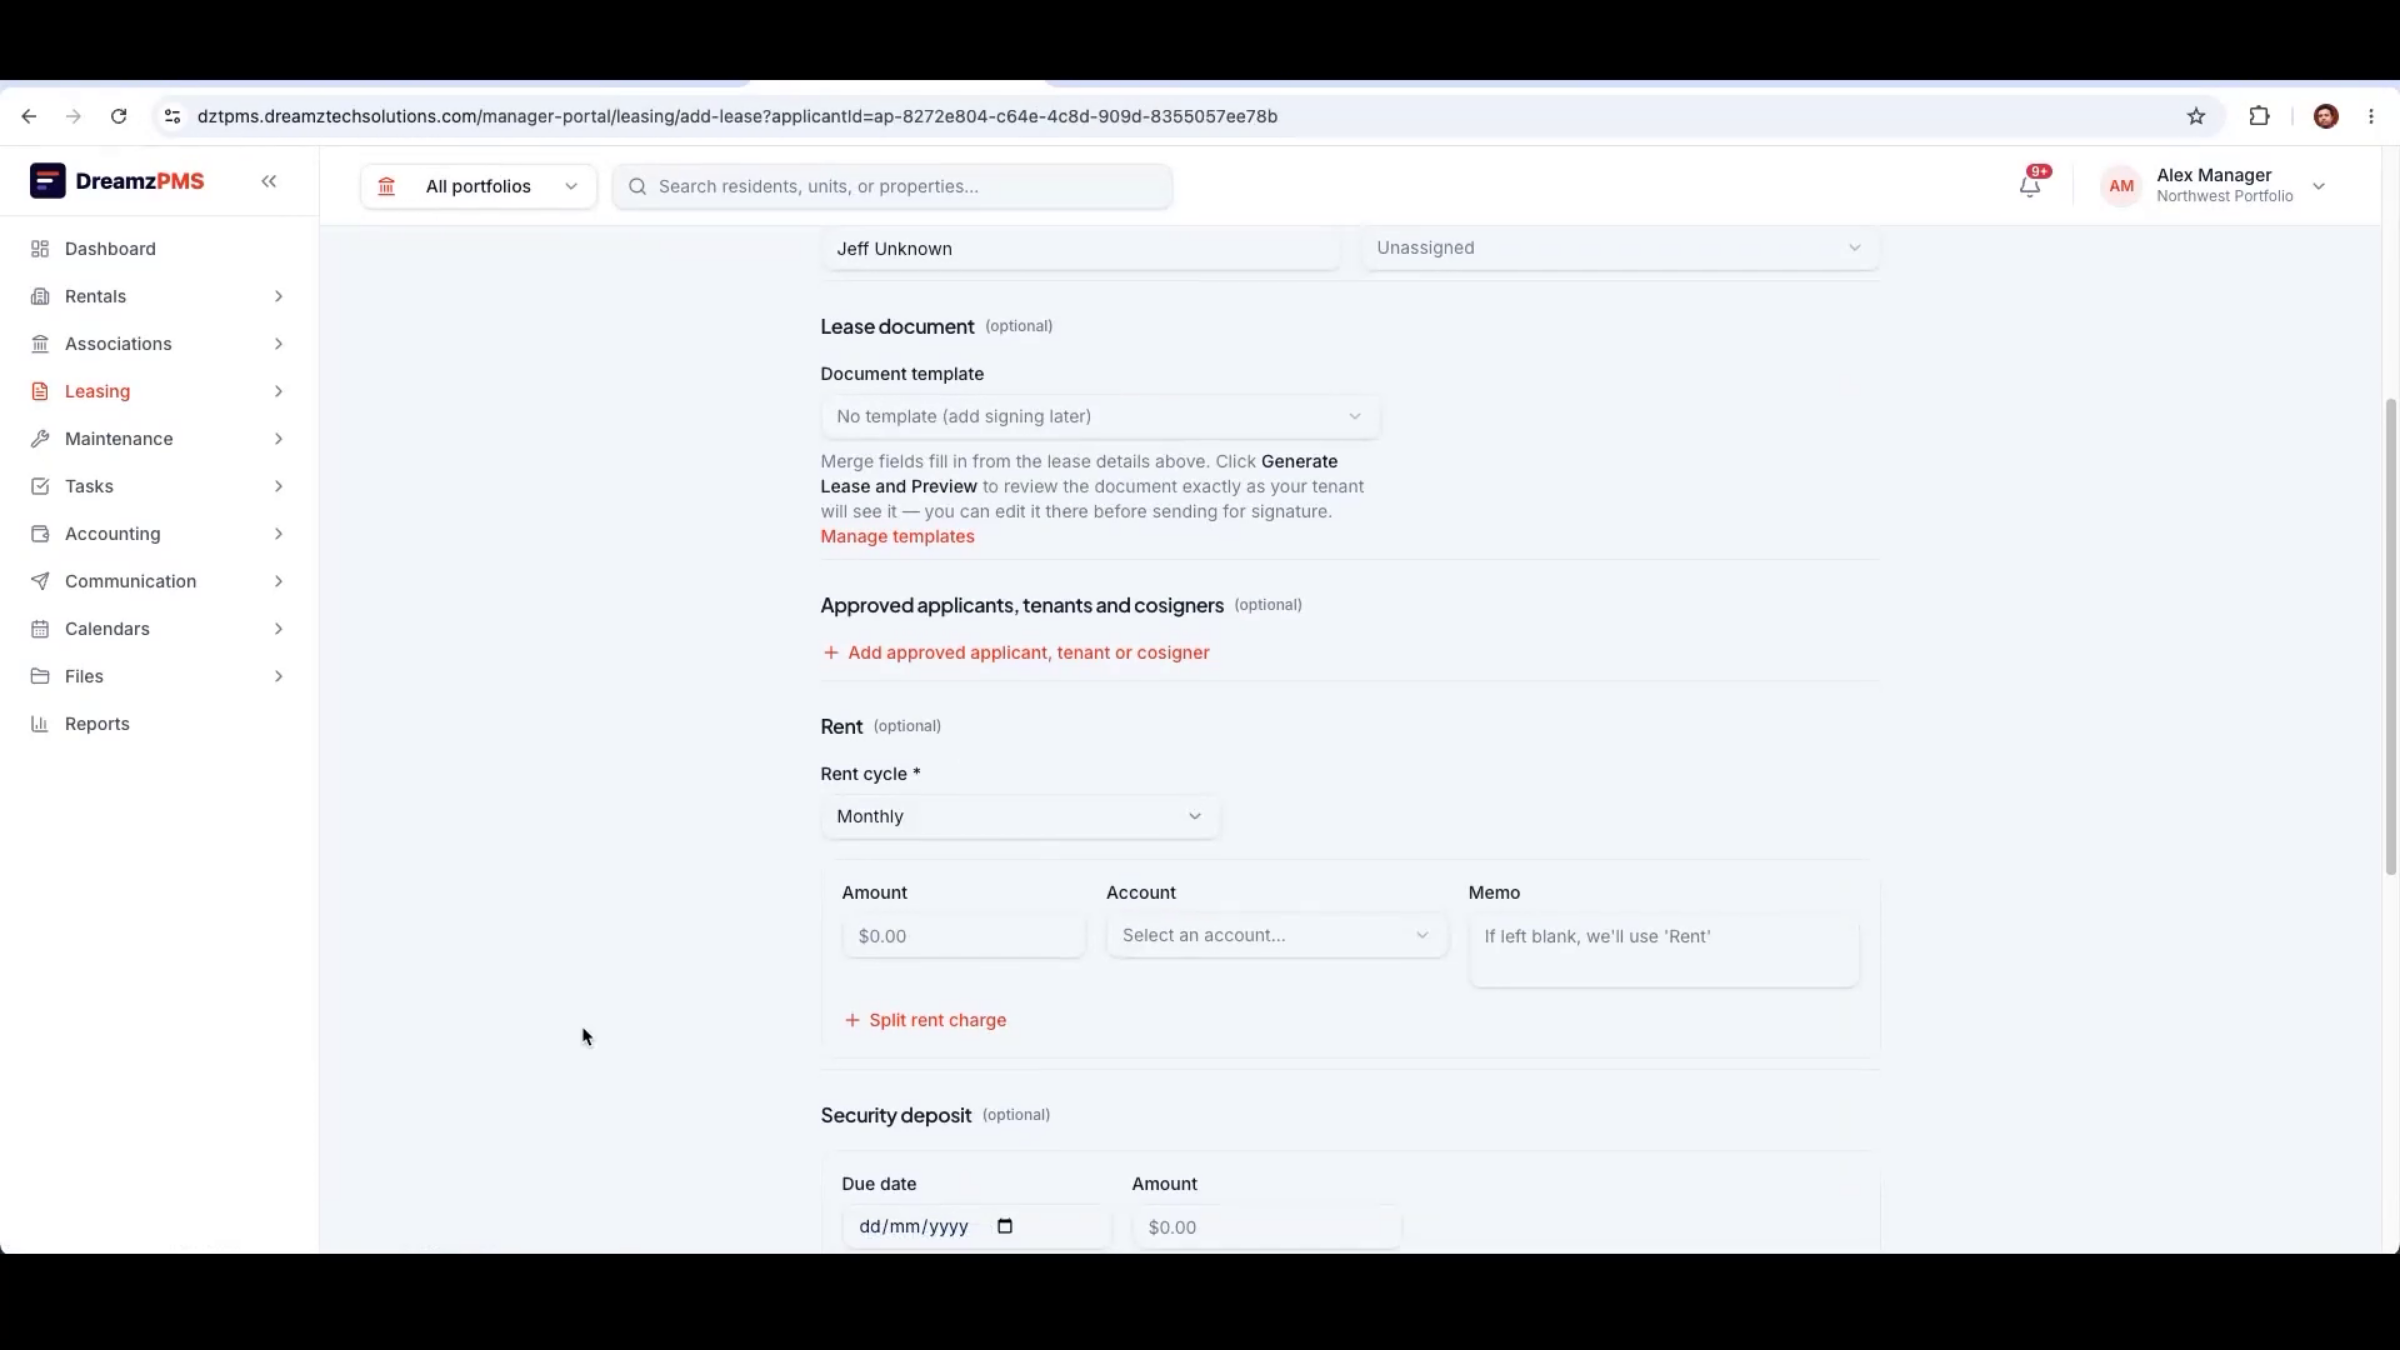
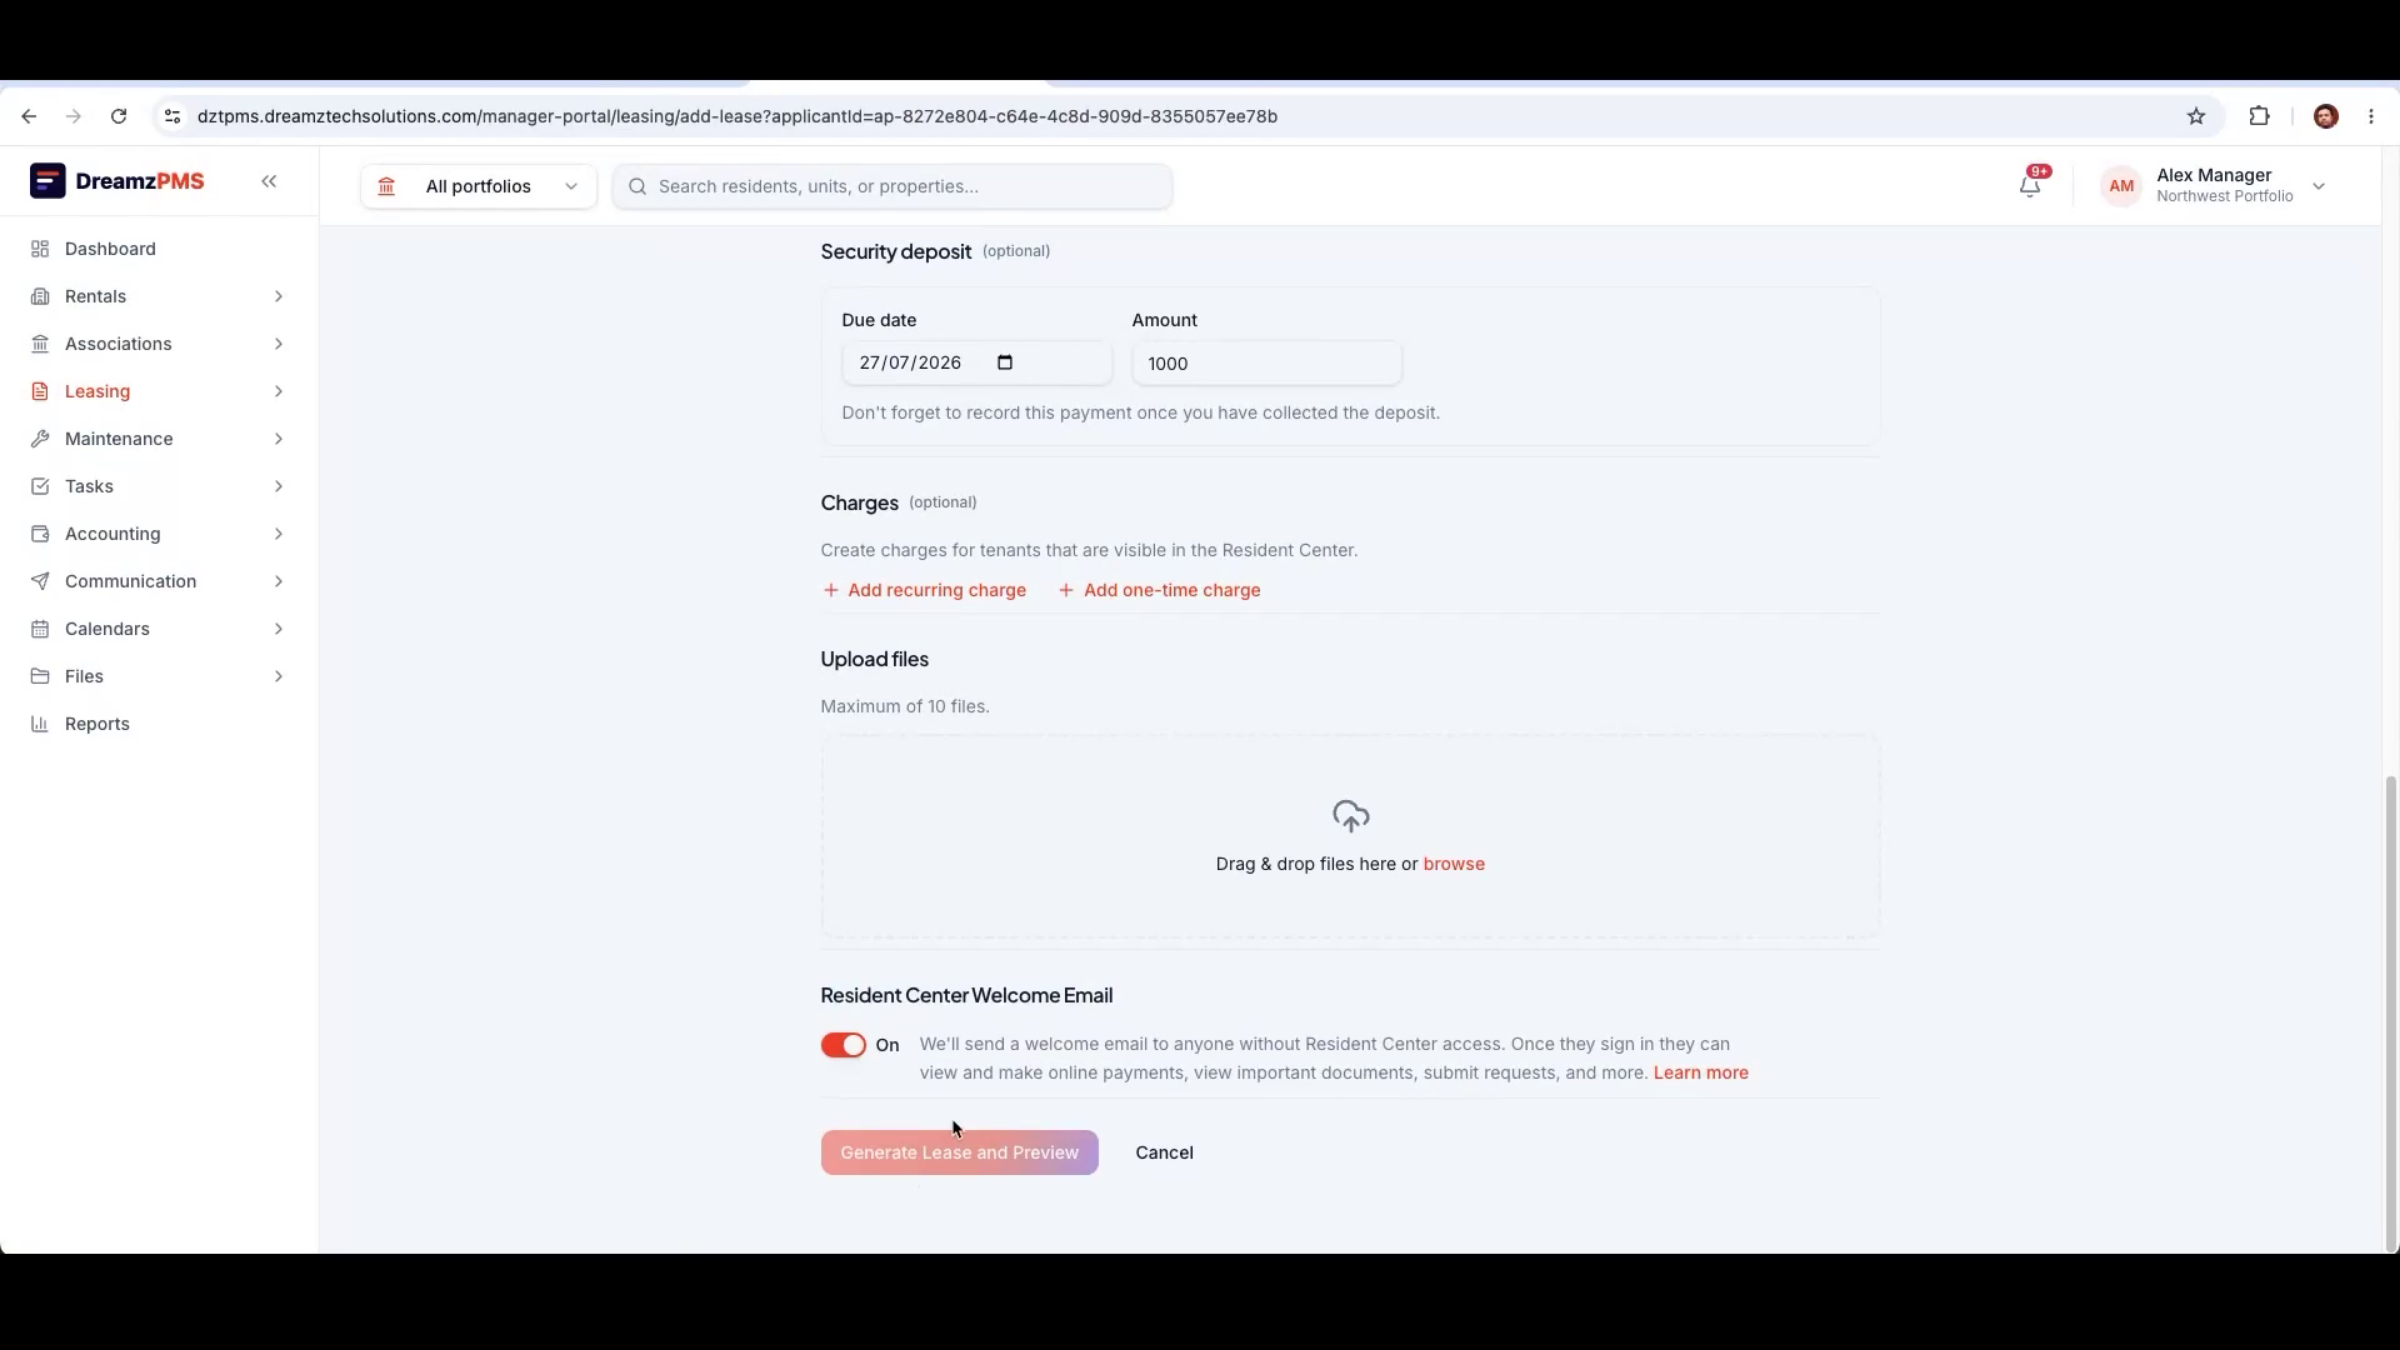
Step 35 – Lease Creation Steps
Building the lease lets you choose a standard monthly lease, add monthly charges such as parking, enter the security deposit, attach supporting documents, and optionally grant resident portal access as part of onboarding.
Step 36 – Lease Agreement Finalization
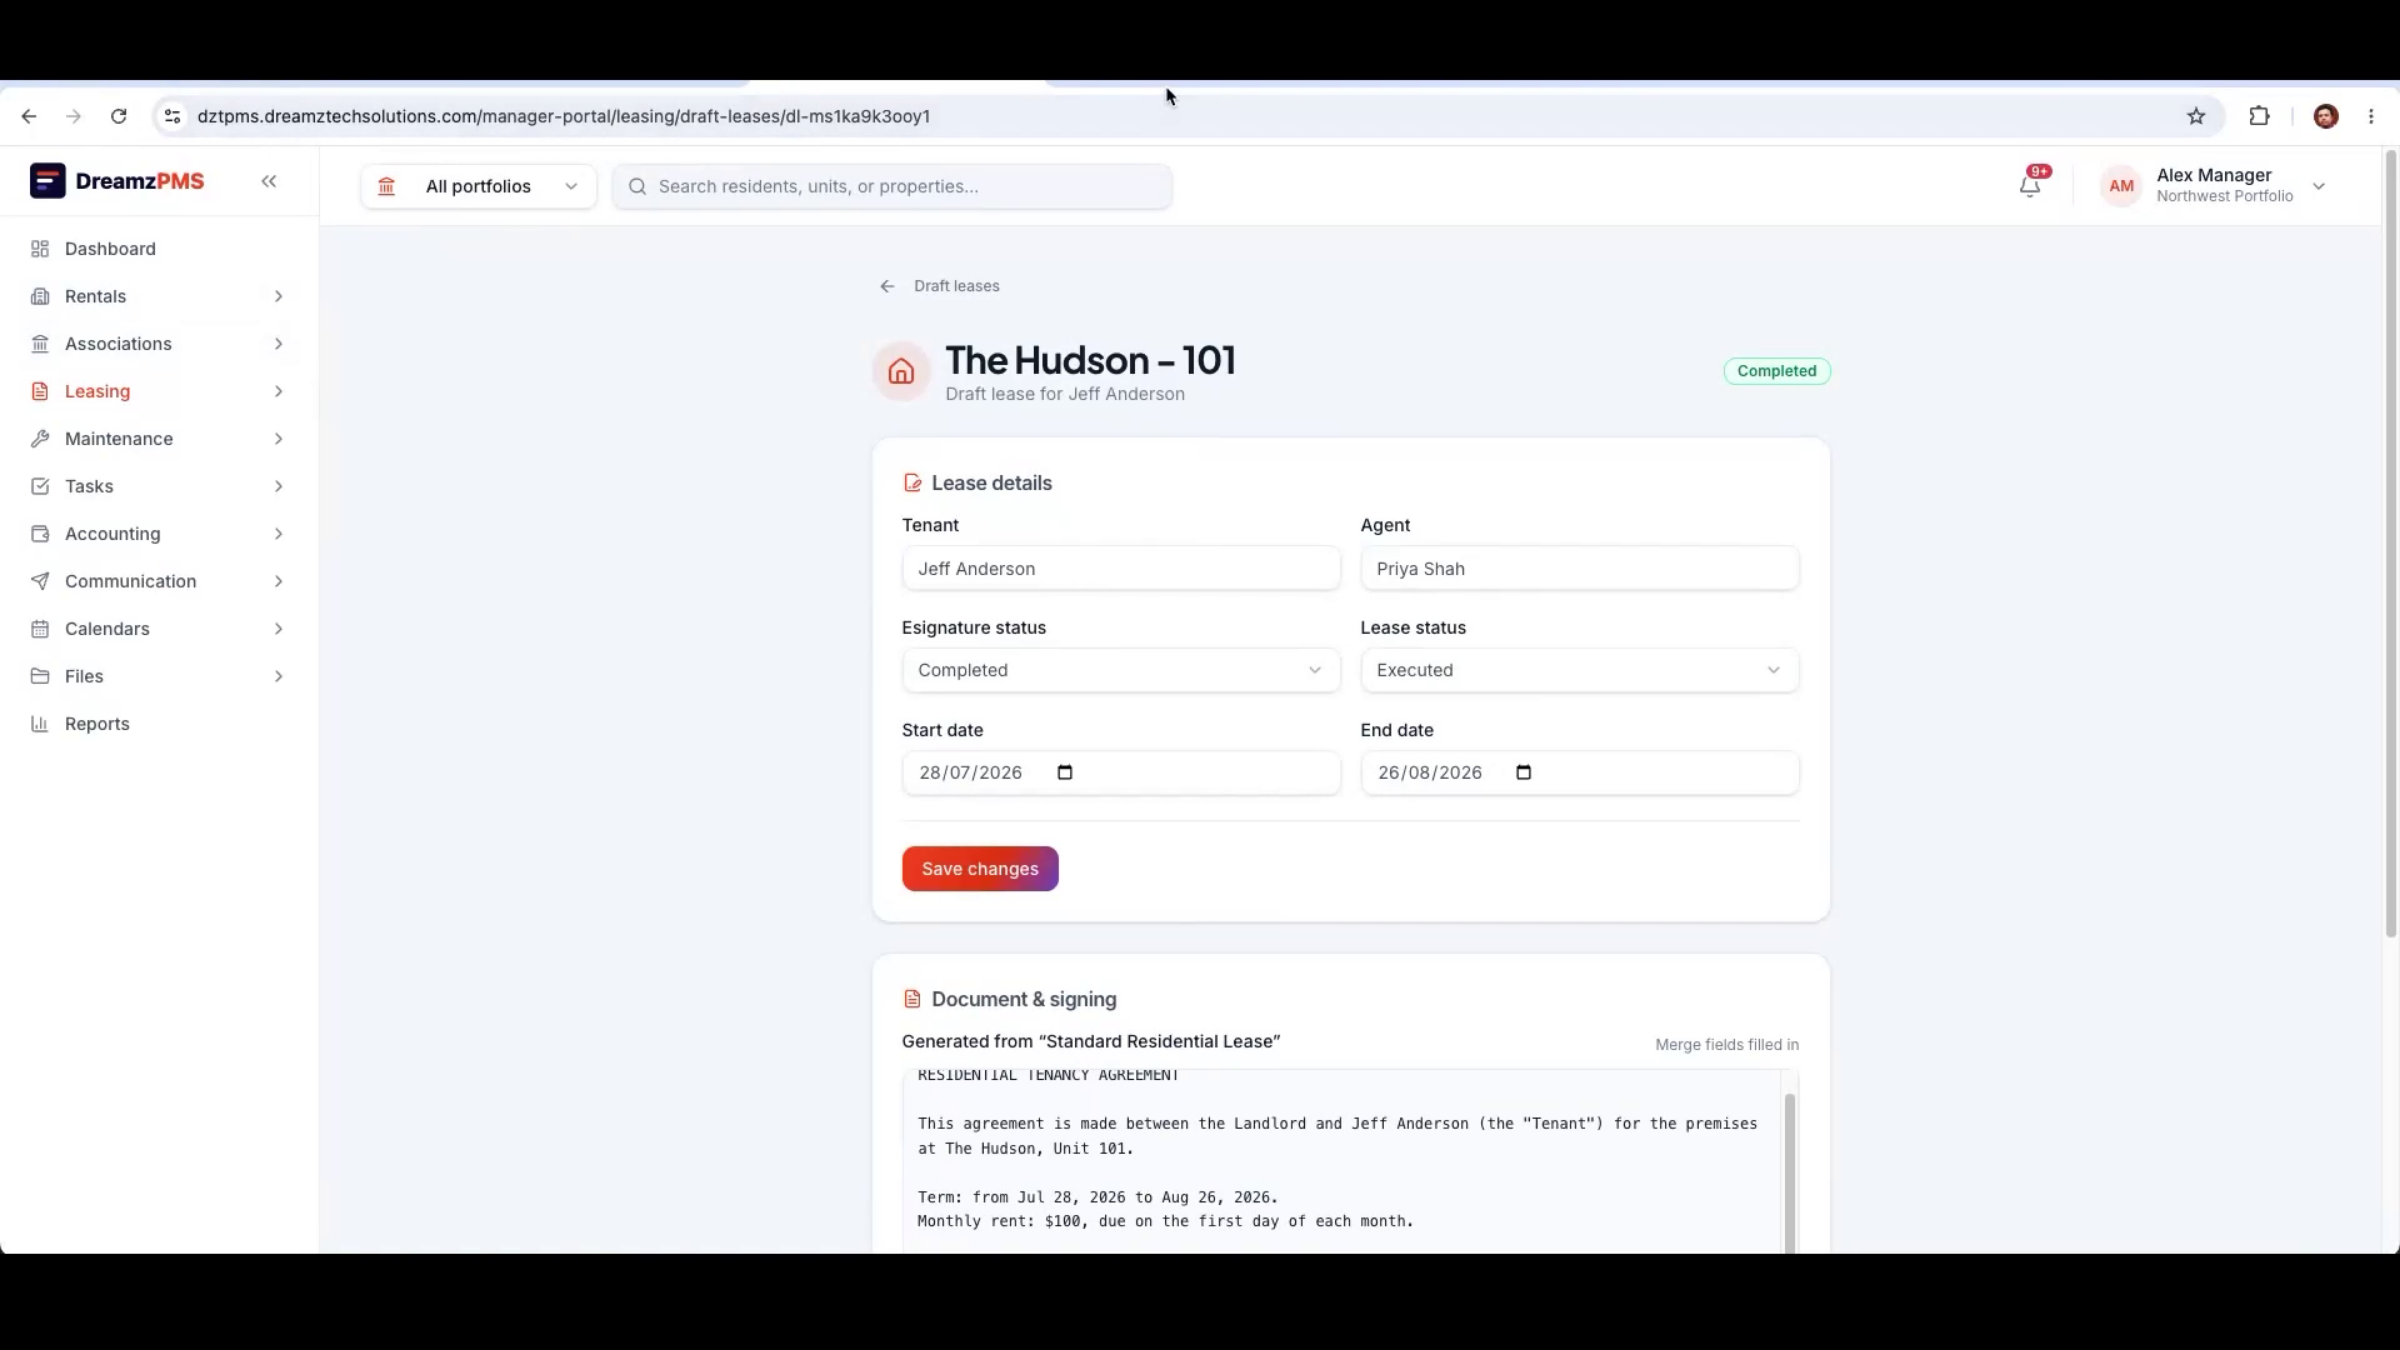
From there, generate the lease with unit details and term dates, edit the agreement as needed, and send it for e-signature. You can track signature status, mark it signed once complete, and countersign on the company's behalf to finalize the lease.
Step 37 – Leasing Workflow Summary
This is the full workflow, start to finish: a website lead, AI-assisted qualification and follow-up, screening and approval, and a signed lease. The prospect list lets you track every lead's current stage and communicate or convert them as needed.
Step 38 – Lead Management Options
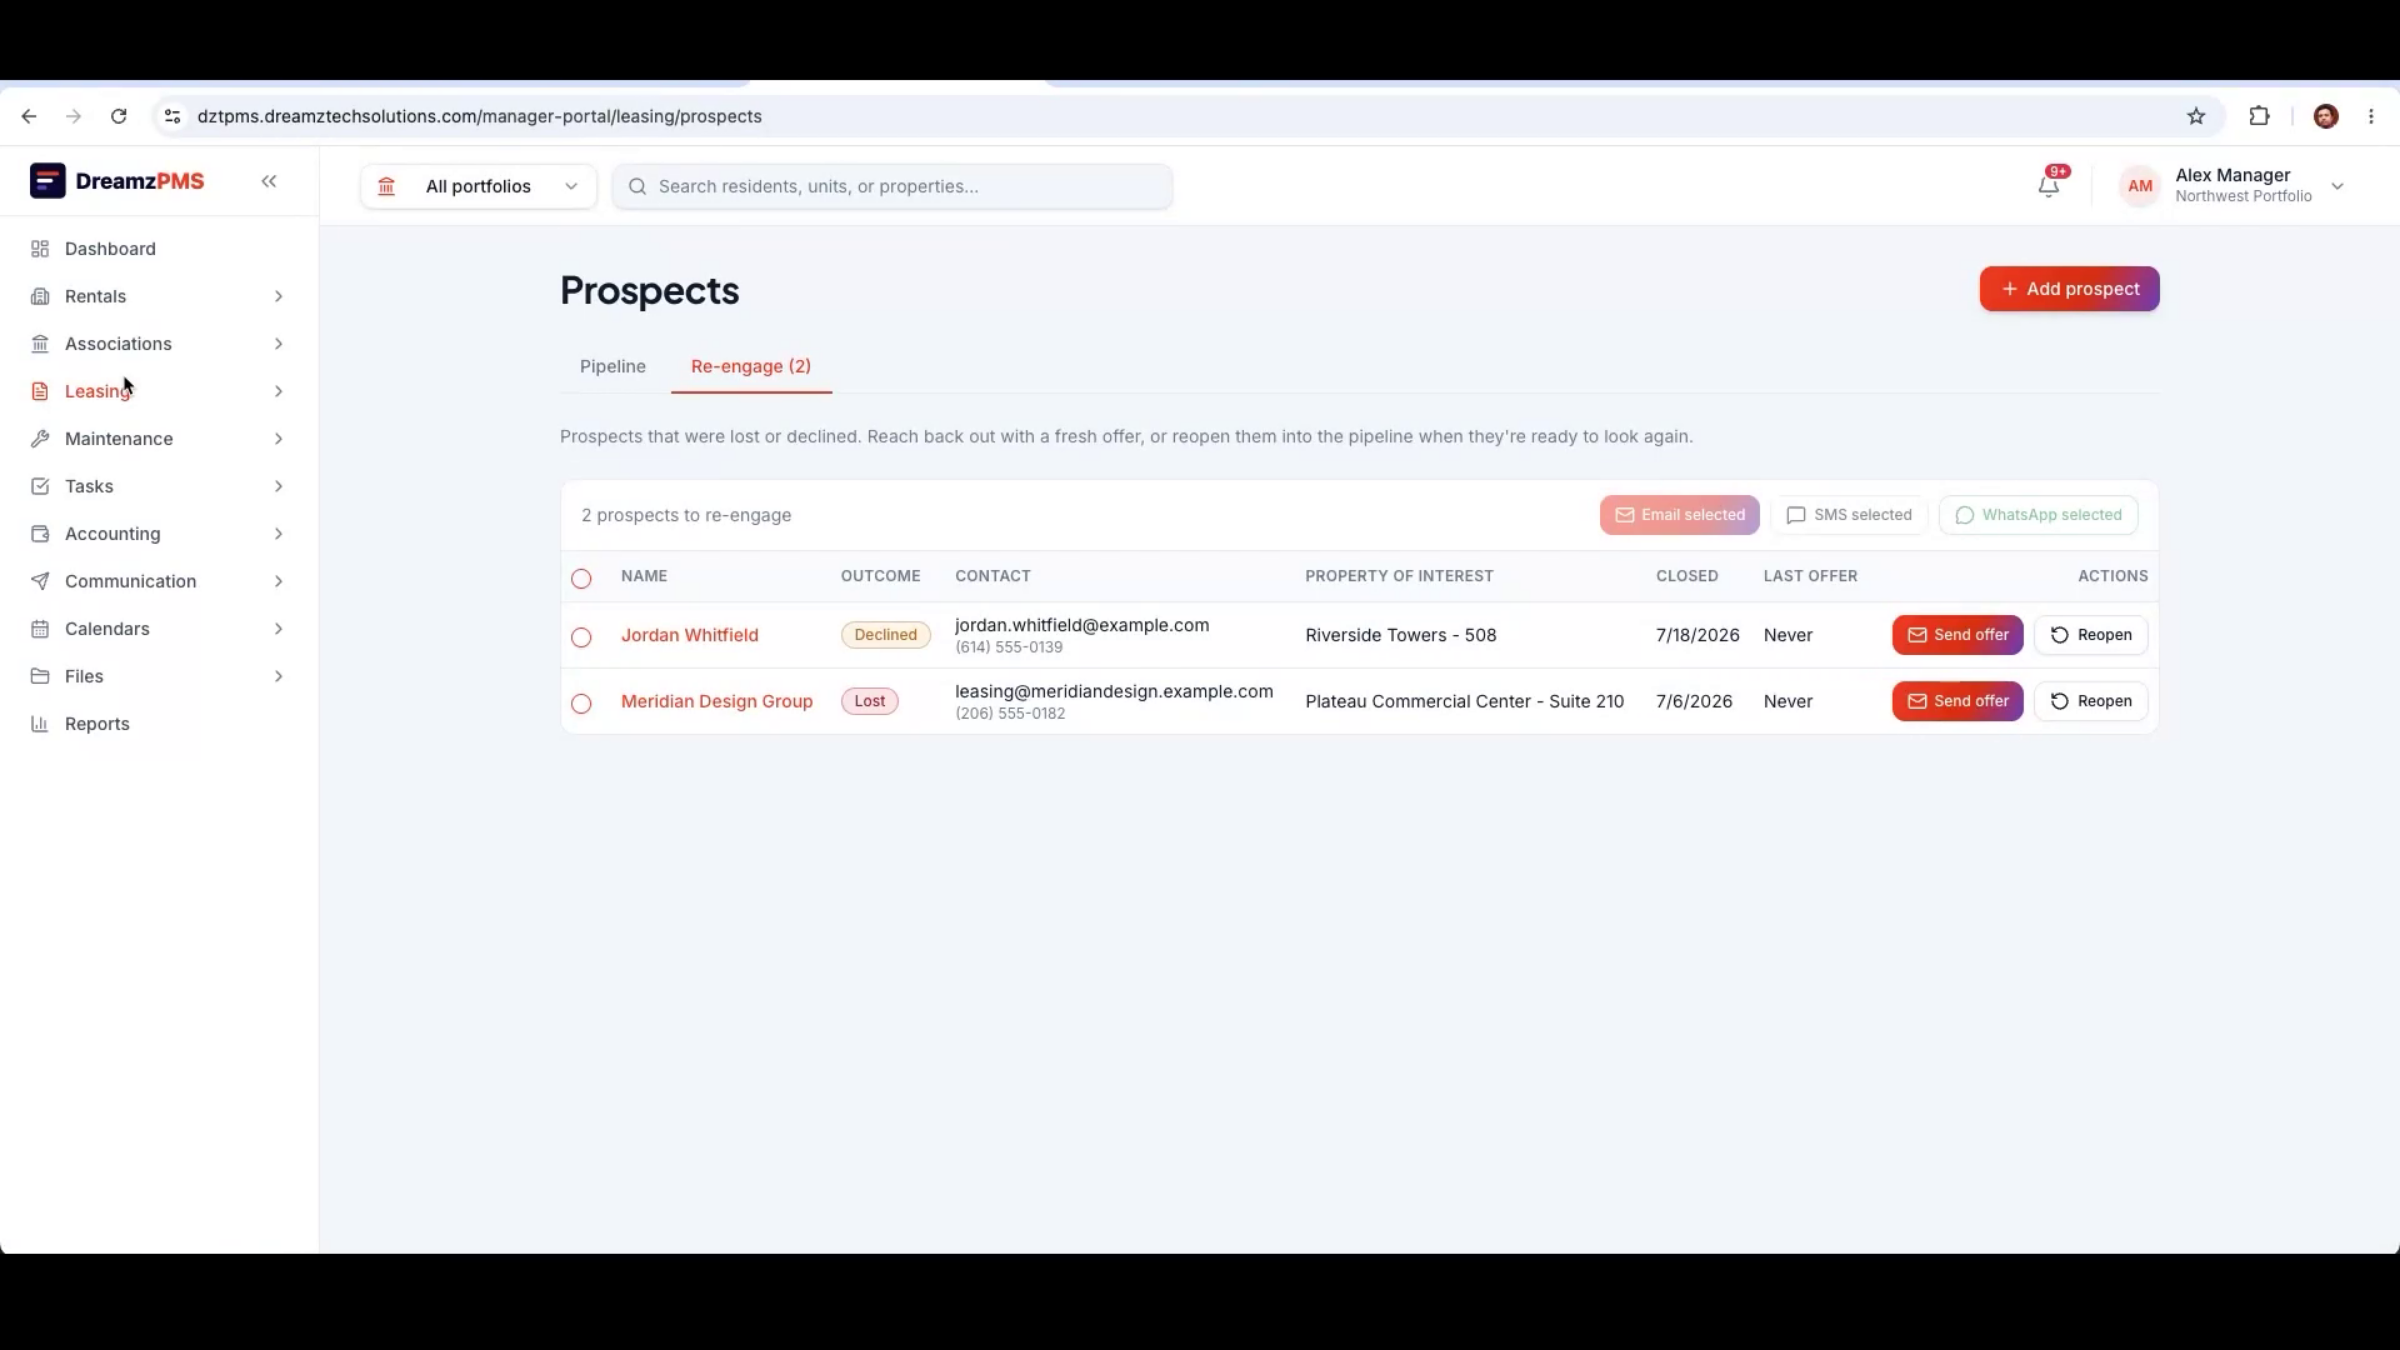
Leads that don't proceed can be marked lost without losing the relationship — you can keep sending offers or updates, and reopen a lost lead later to pick the conversation back up rather than starting over.
Step 39 – Prospect Management Workflow
Taken together, this is the complete prospect management workflow — the AI agent and your leasing team working side by side, from the first inquiry all the way to a signed resident.
Maintenance: Mobile App, Resident Requests, and Vendor Assignment
Step 40 – Maintenance Mobile App Overview
The maintenance mobile app lets the property management team run day-to-day operations from anywhere.
Step 41 – Mobile App Operations
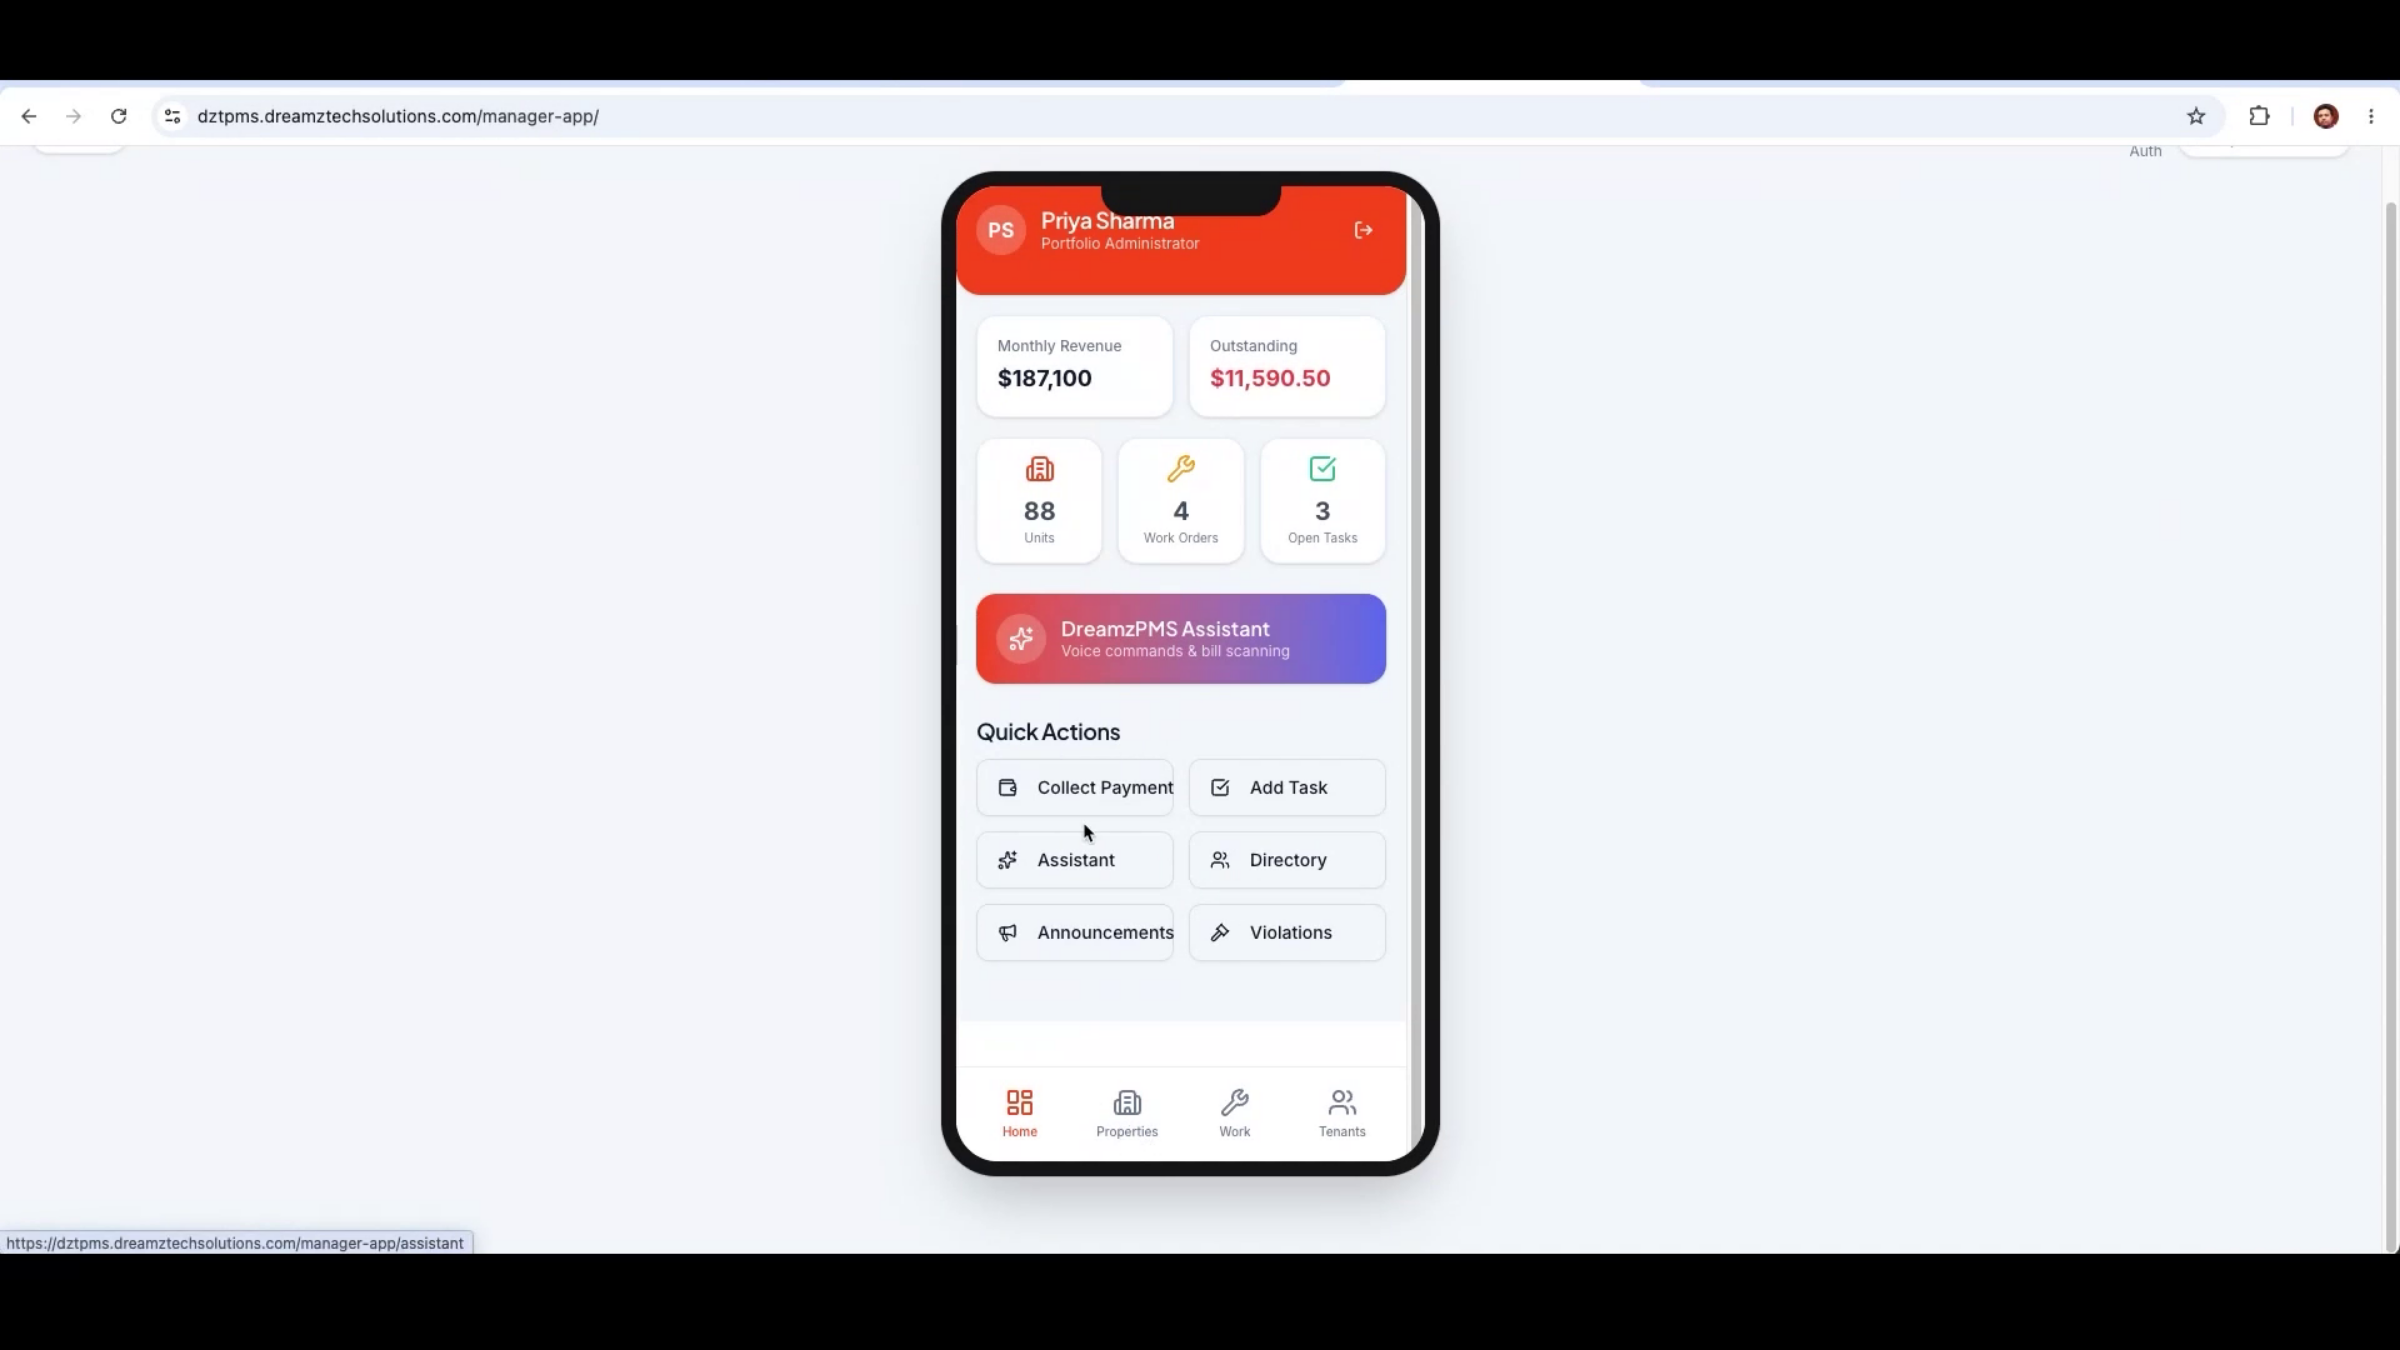
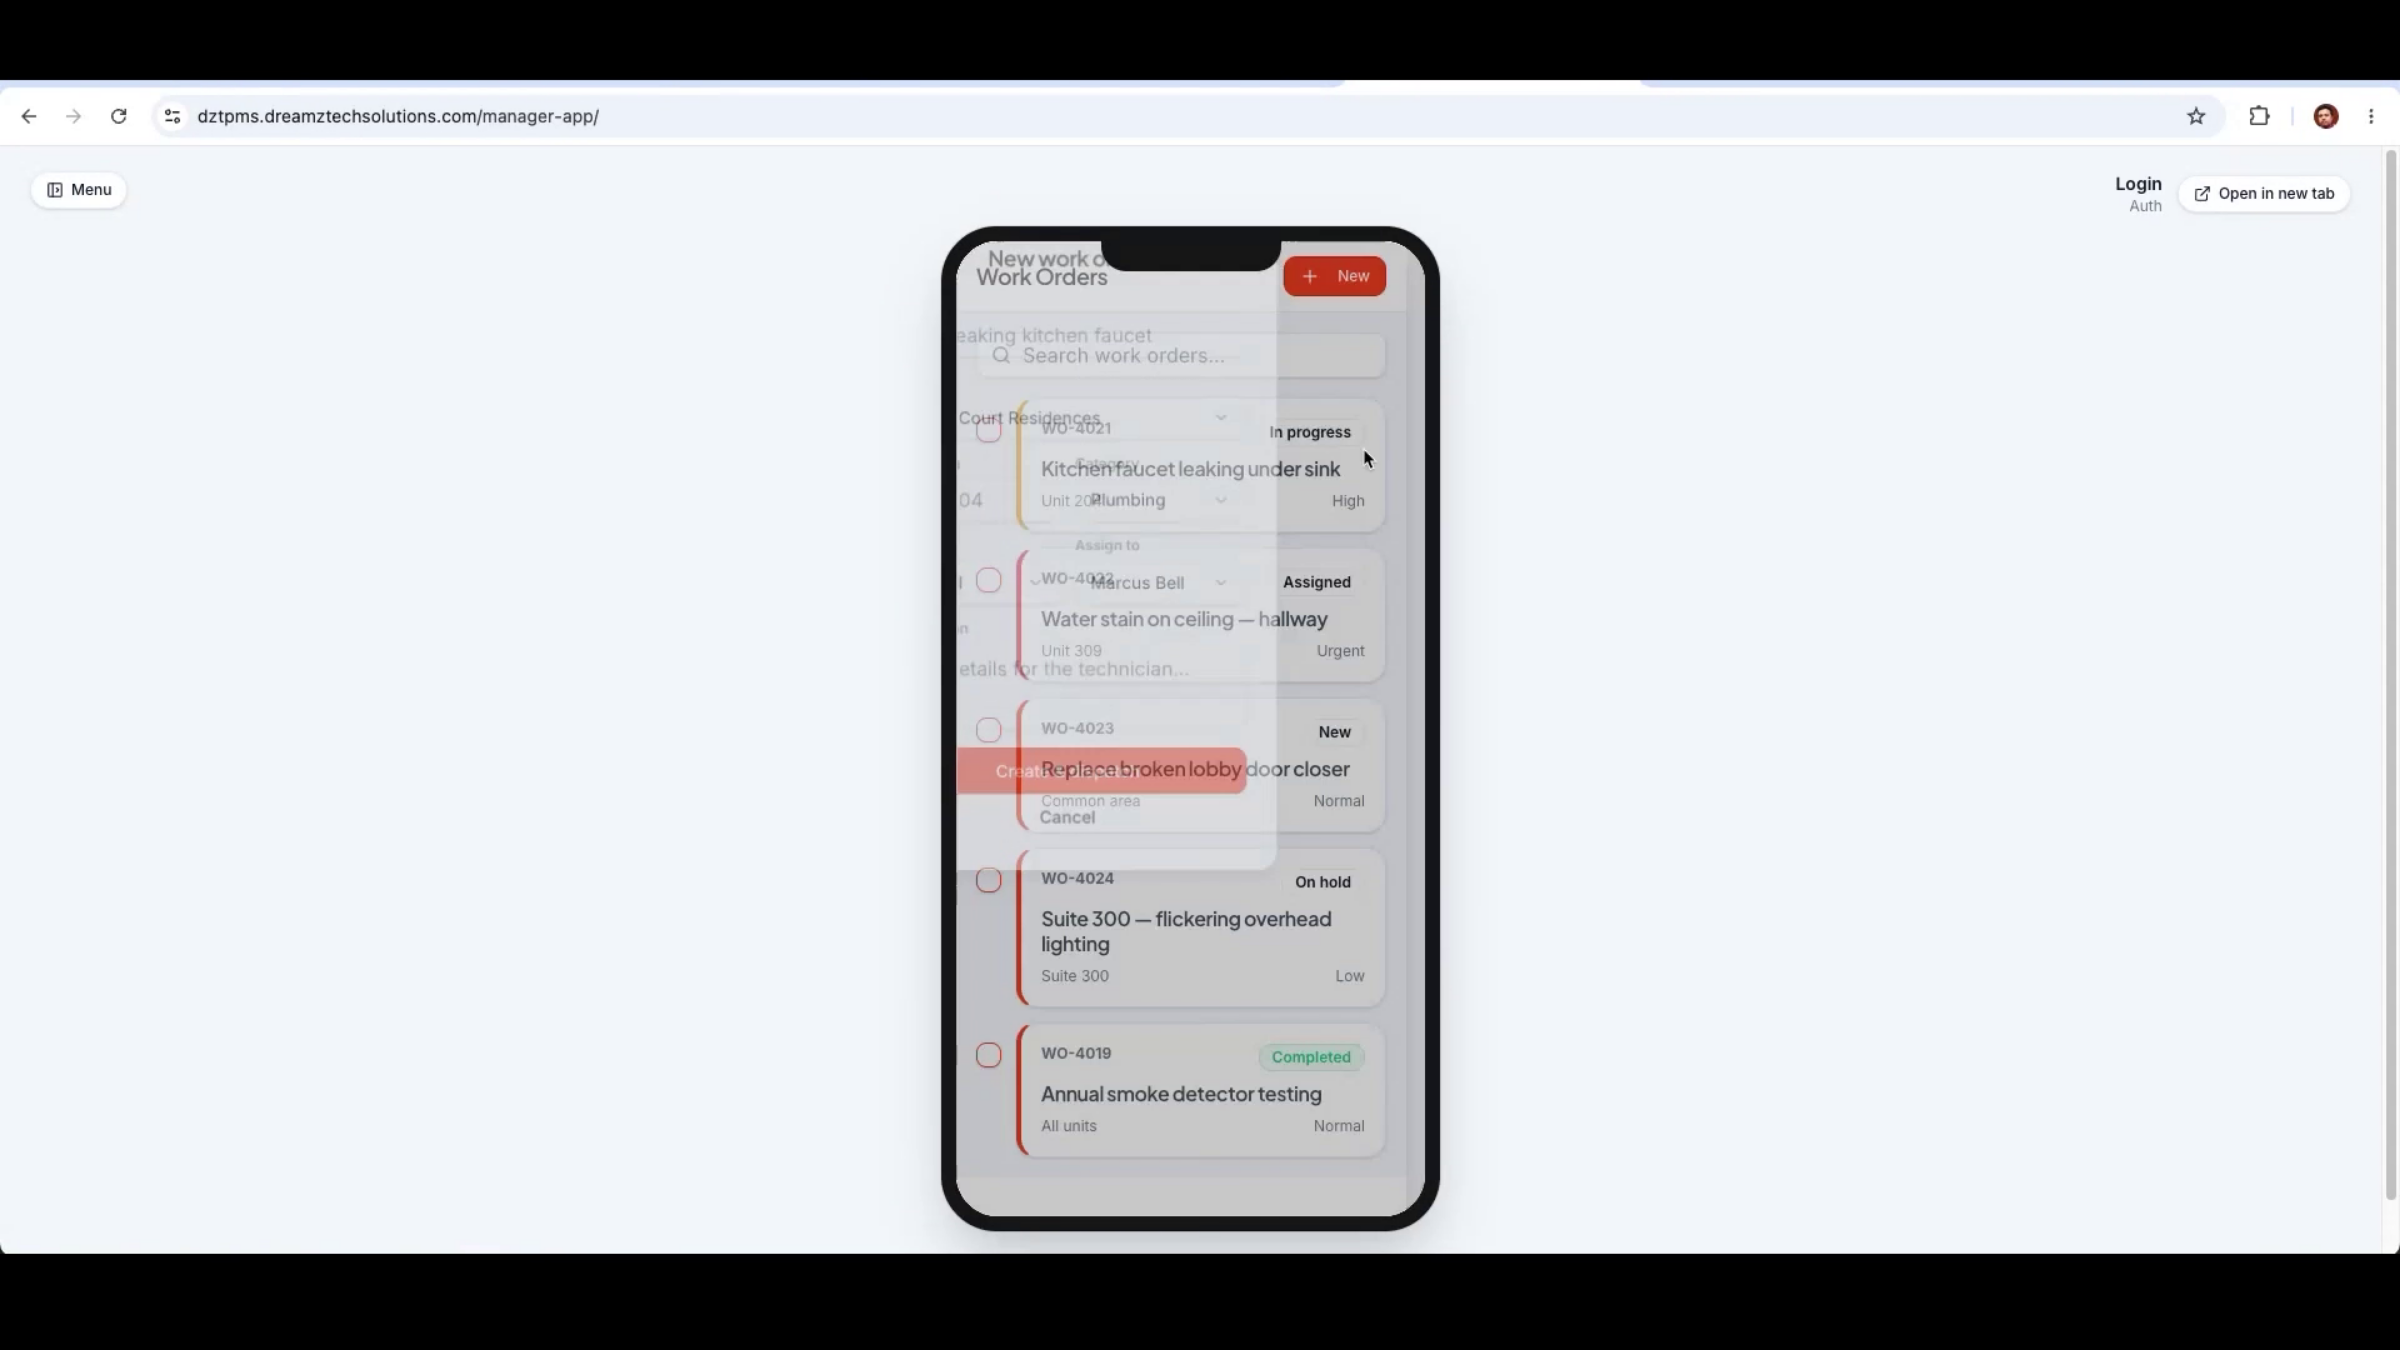
From the app, staff can connect payment information, add tasks, use the AI assistant, check current occupancy, send resident announcements, and manage outstanding payments — including viewing balances and recording payments received. Creating a new work order takes seconds: select the property, add details, set priority, and assign a vendor or technician.
Step 42 – Field Work Order Management
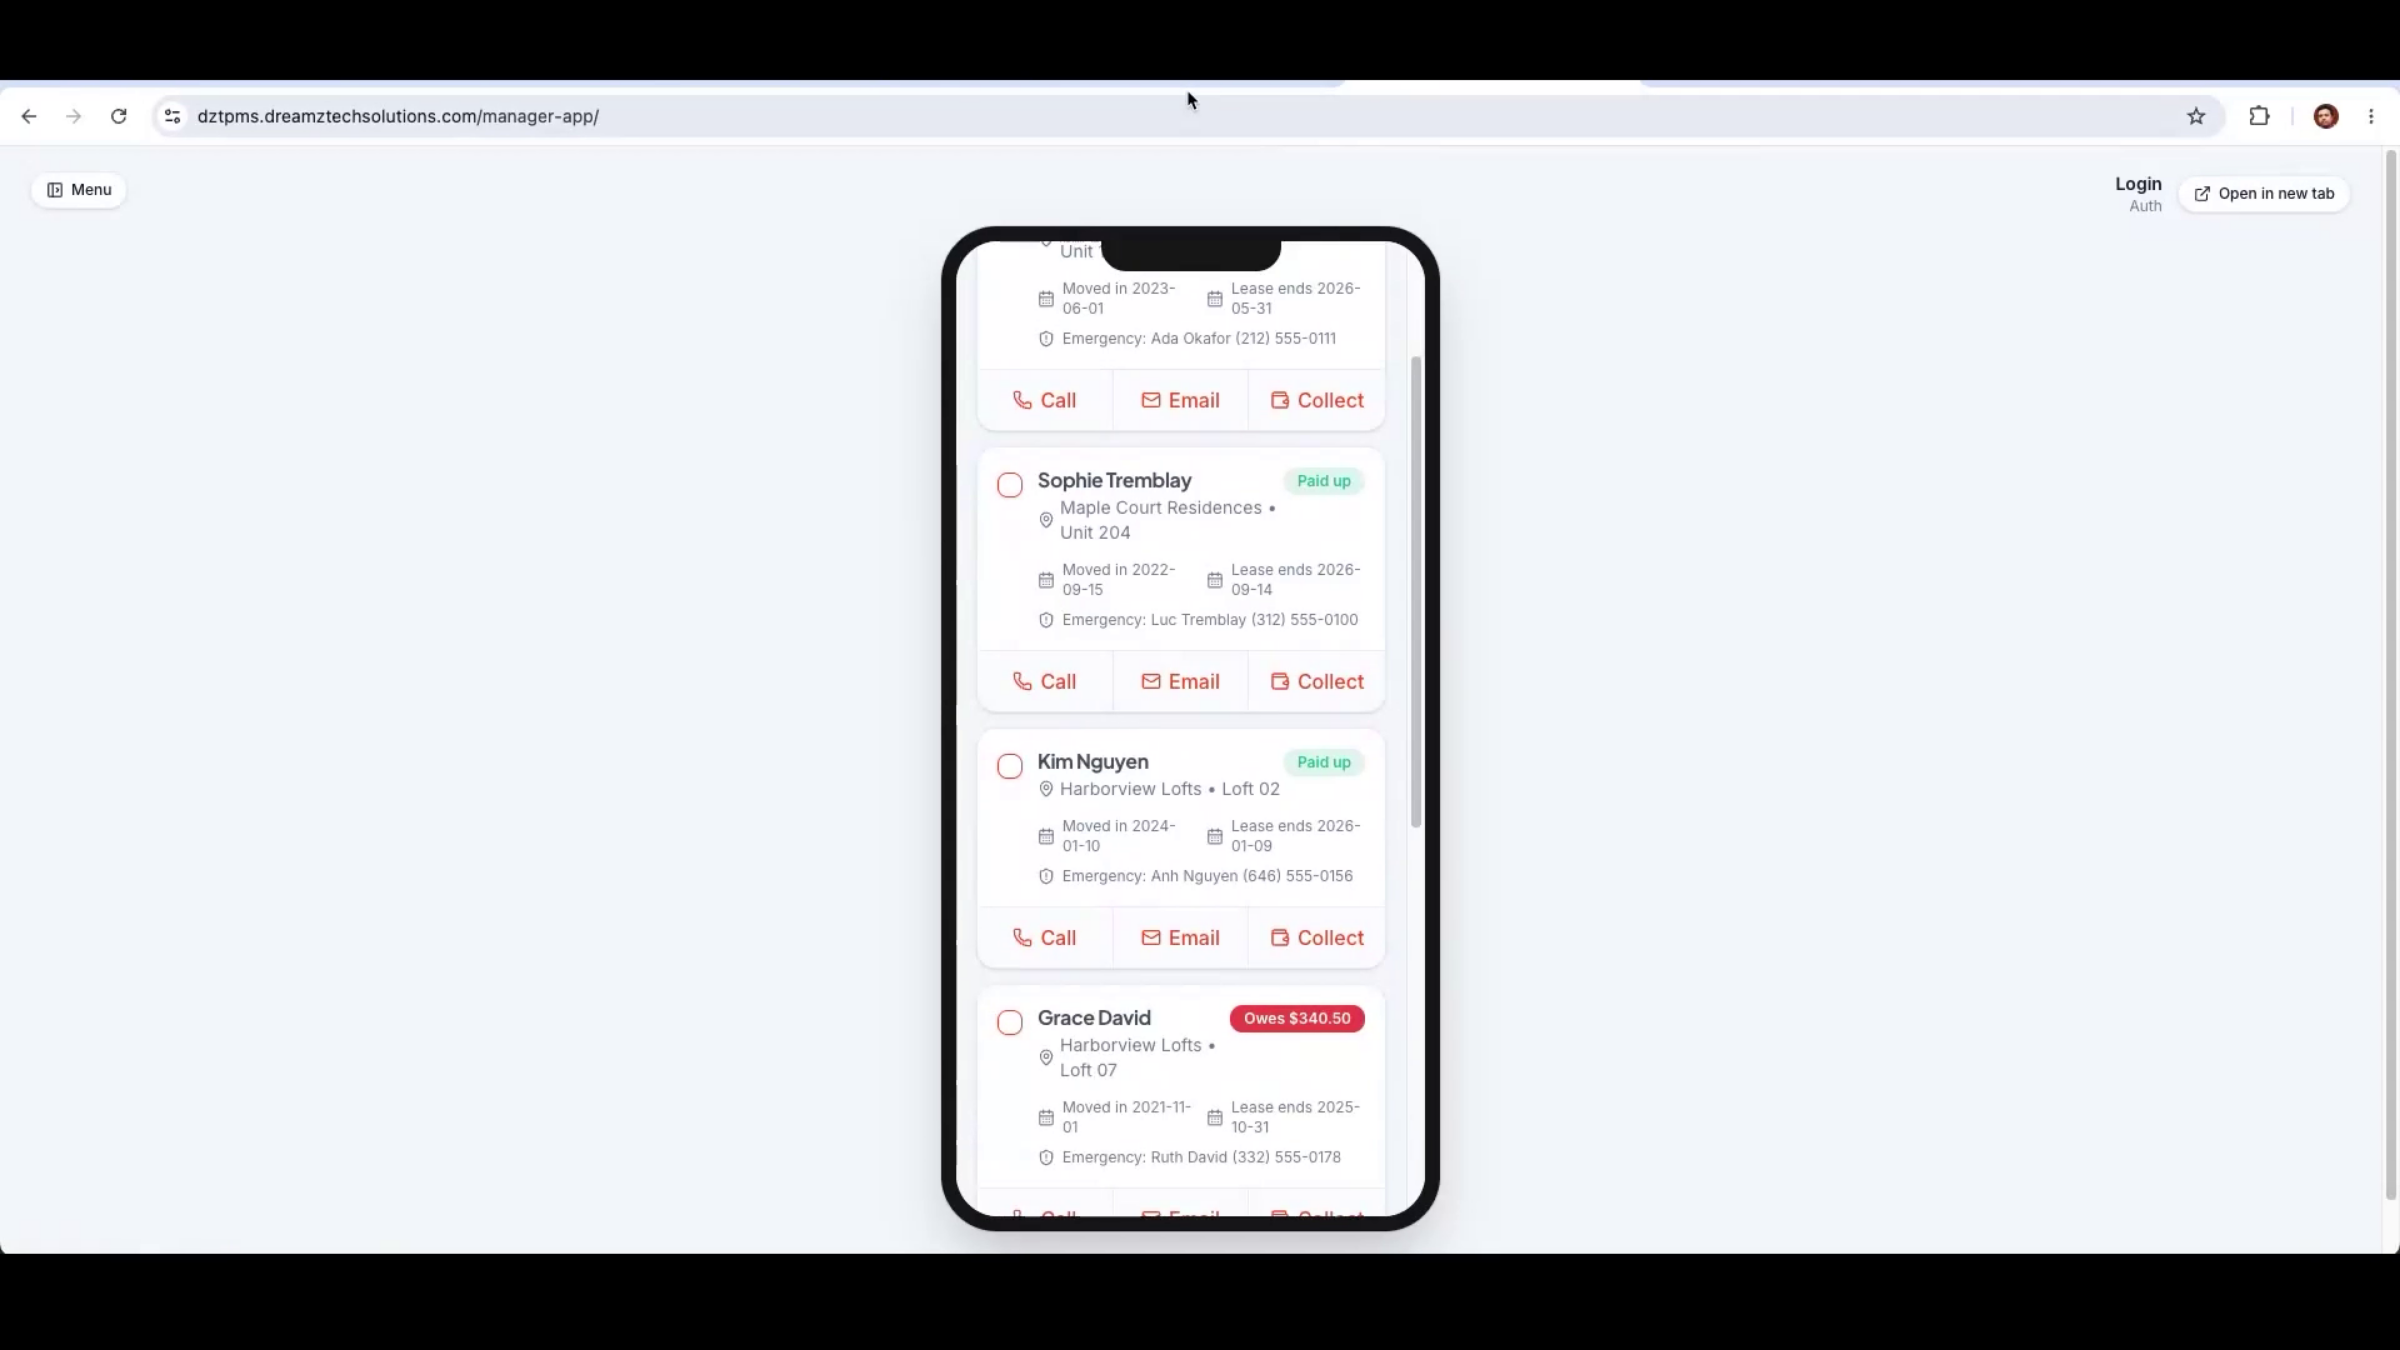
While working a job, staff can view full job details, get built-in directions to the property, capture photos, add notes, and update progress from the field — plus call tenants, send emails, review property information, and collect payments, all from the same app.
Step 43 – Resident Portal Access
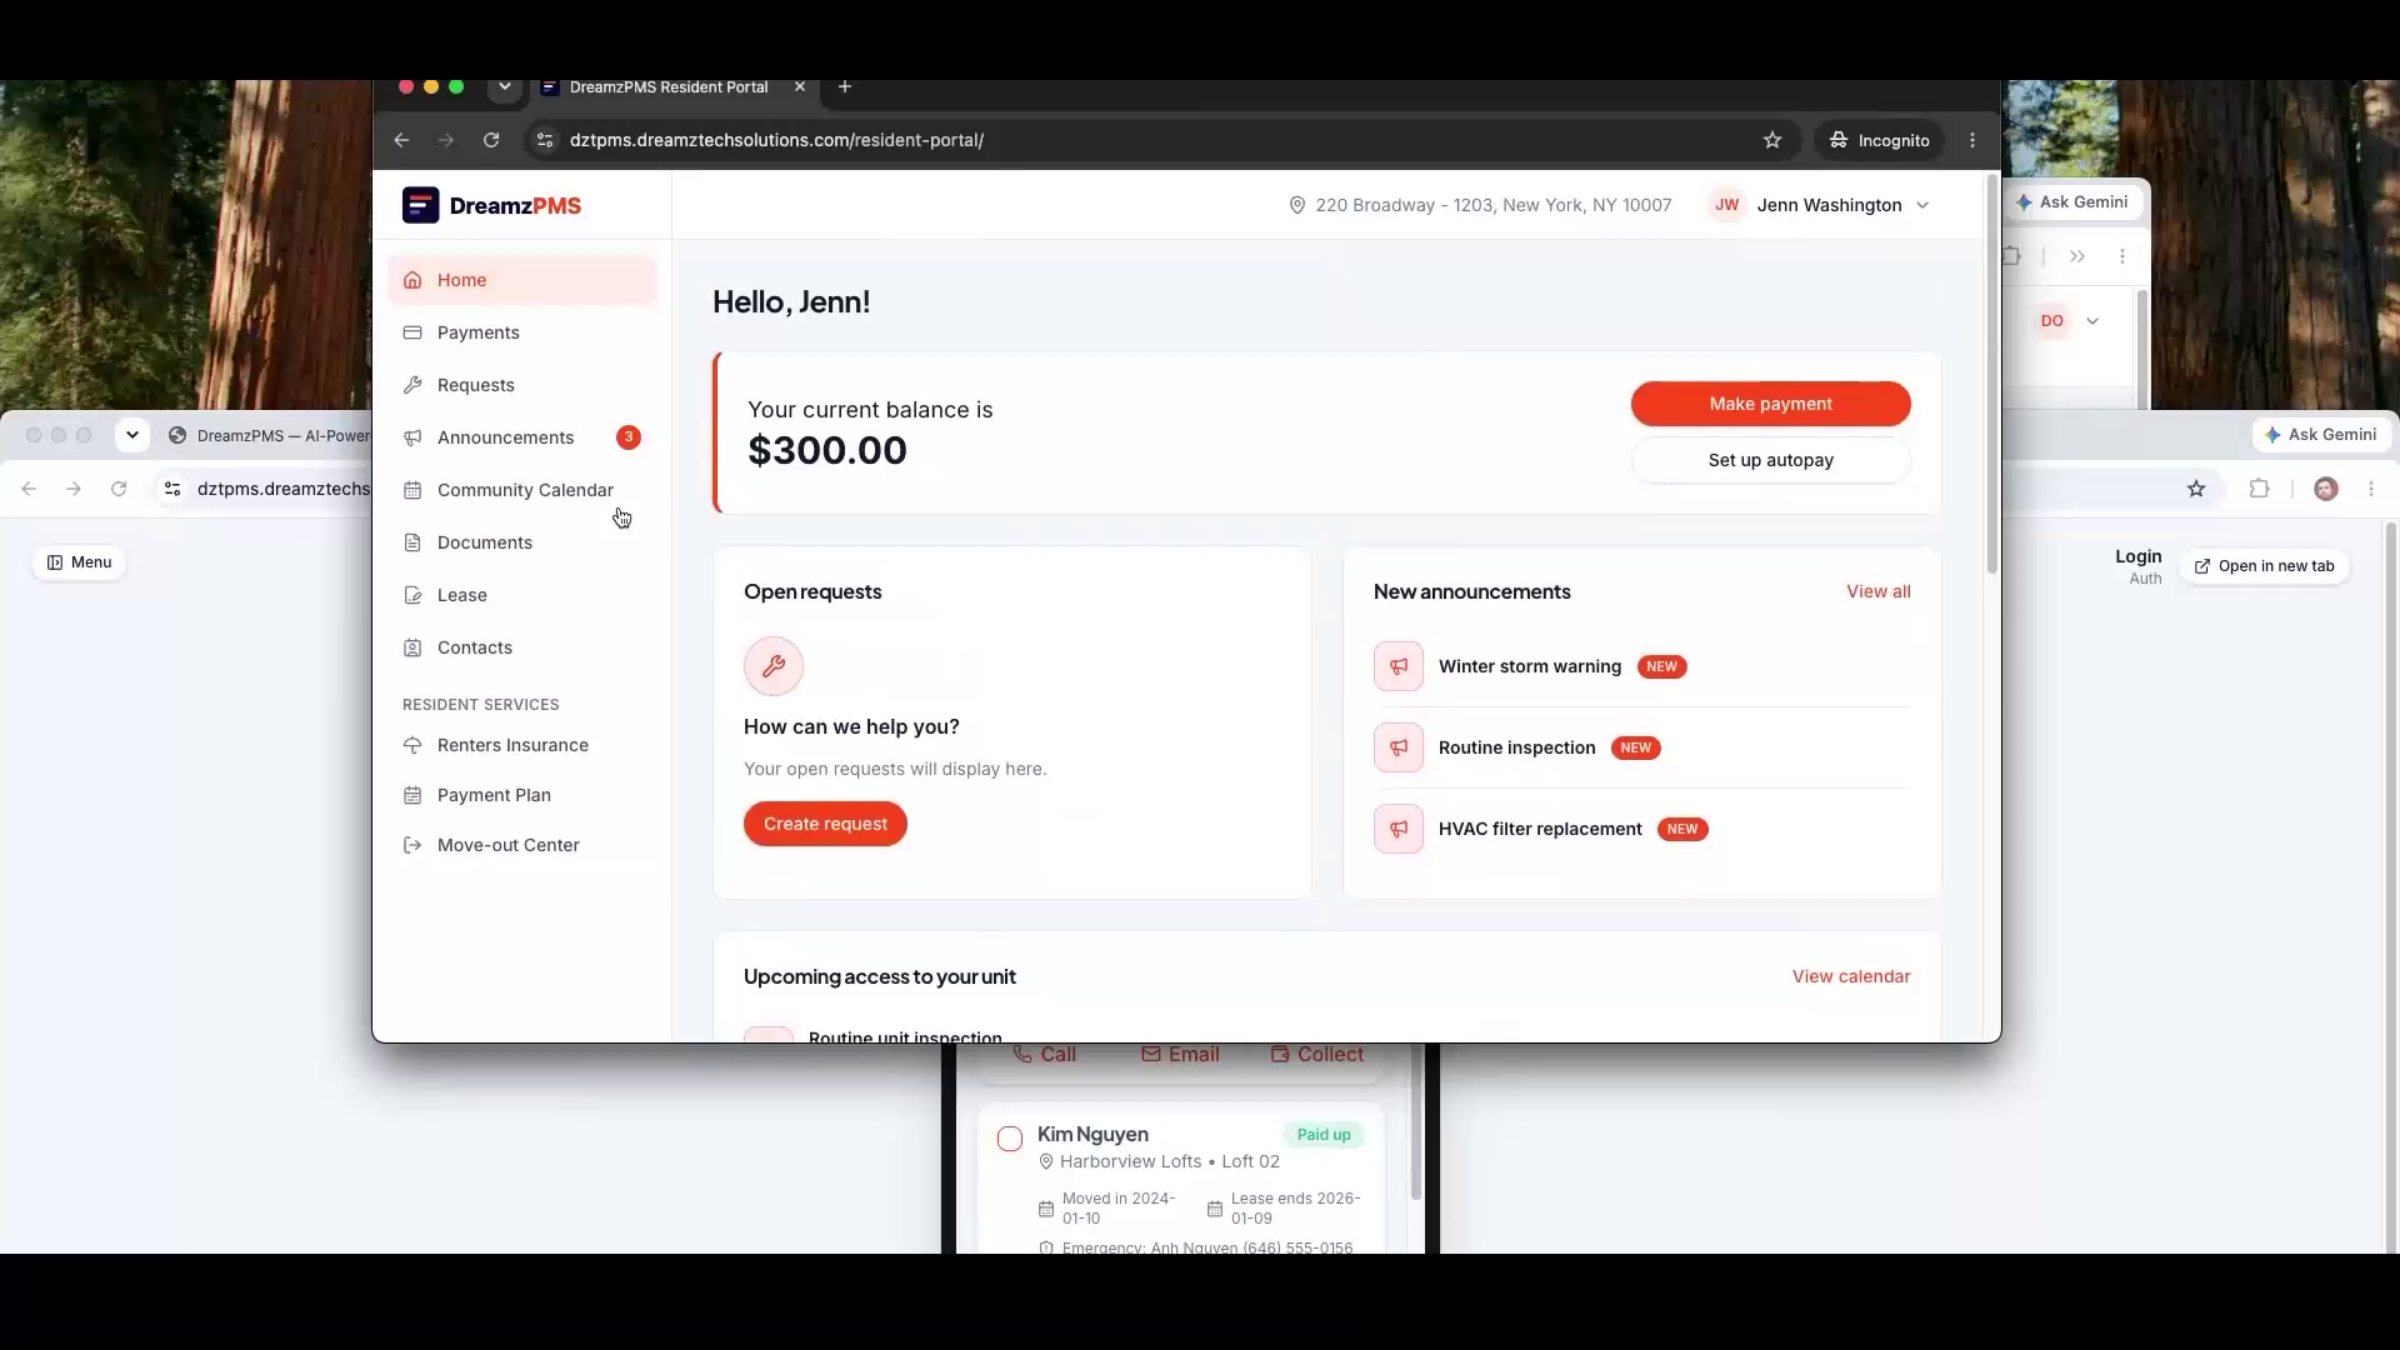
Once registered, a resident gets their own web portal and mobile app to manage their account, including automatic rent payment.
Step 44 – Auto Payment Configuration
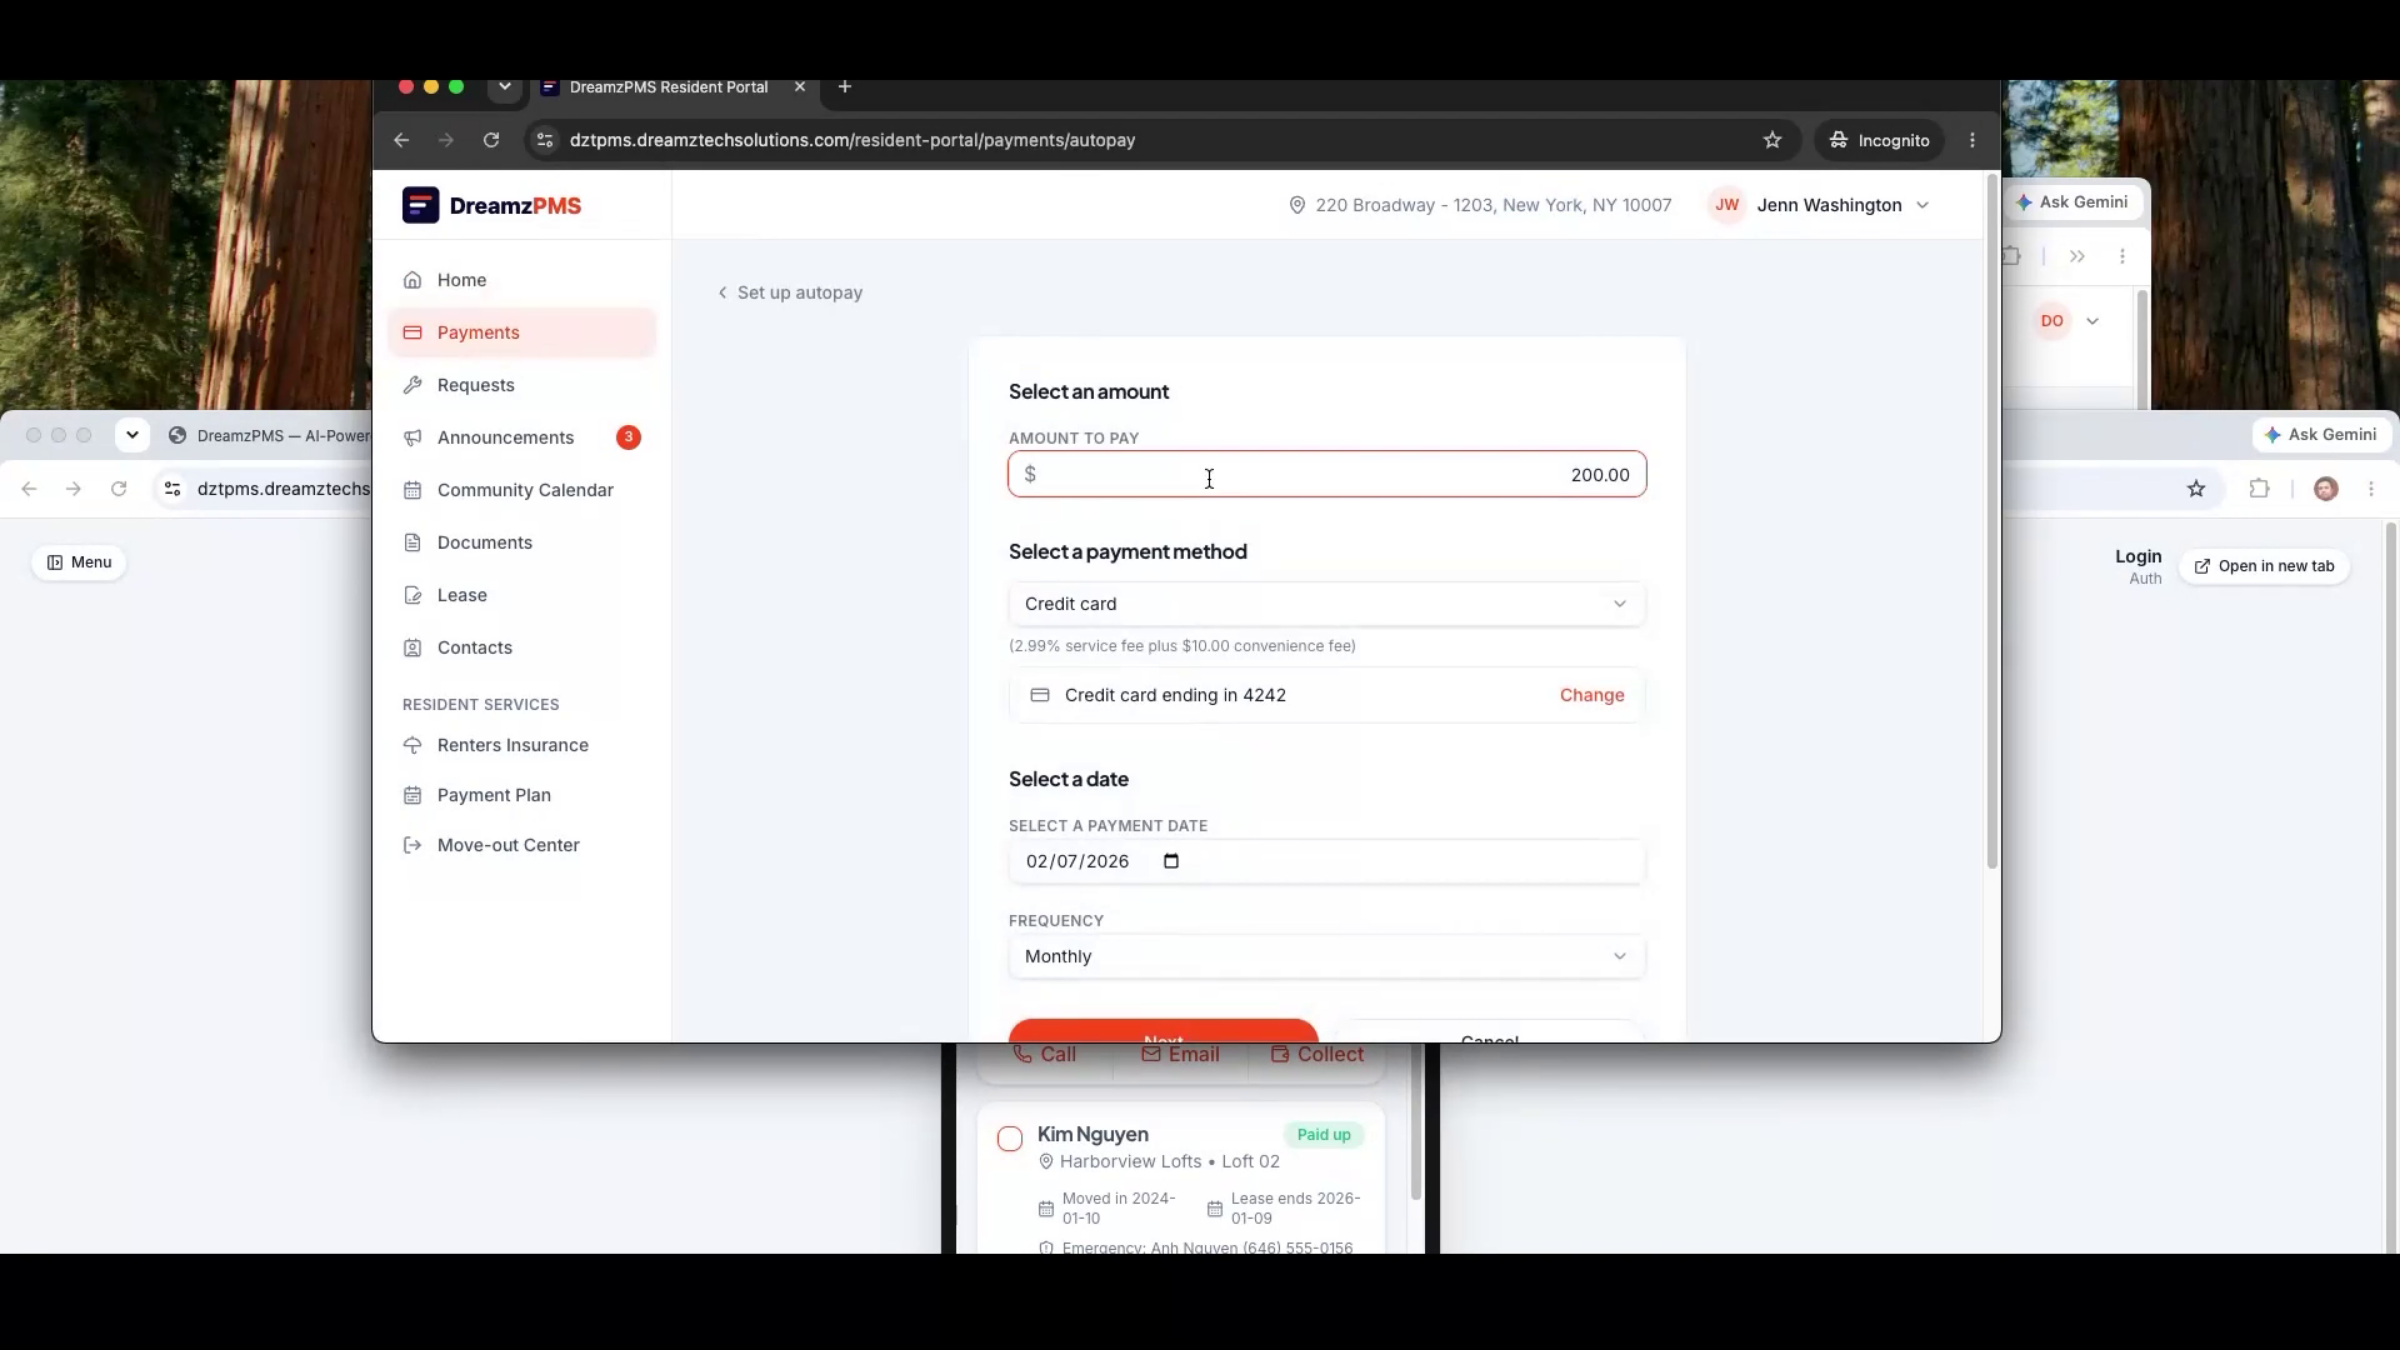
Residents can set up automatic rent payments by choosing the amount, payment source (bank account or ACH), payment date, and frequency (monthly or weekly), plus when payments should begin. Once configured, future payments process automatically on that schedule.
Step 45 – Payment History and Requests
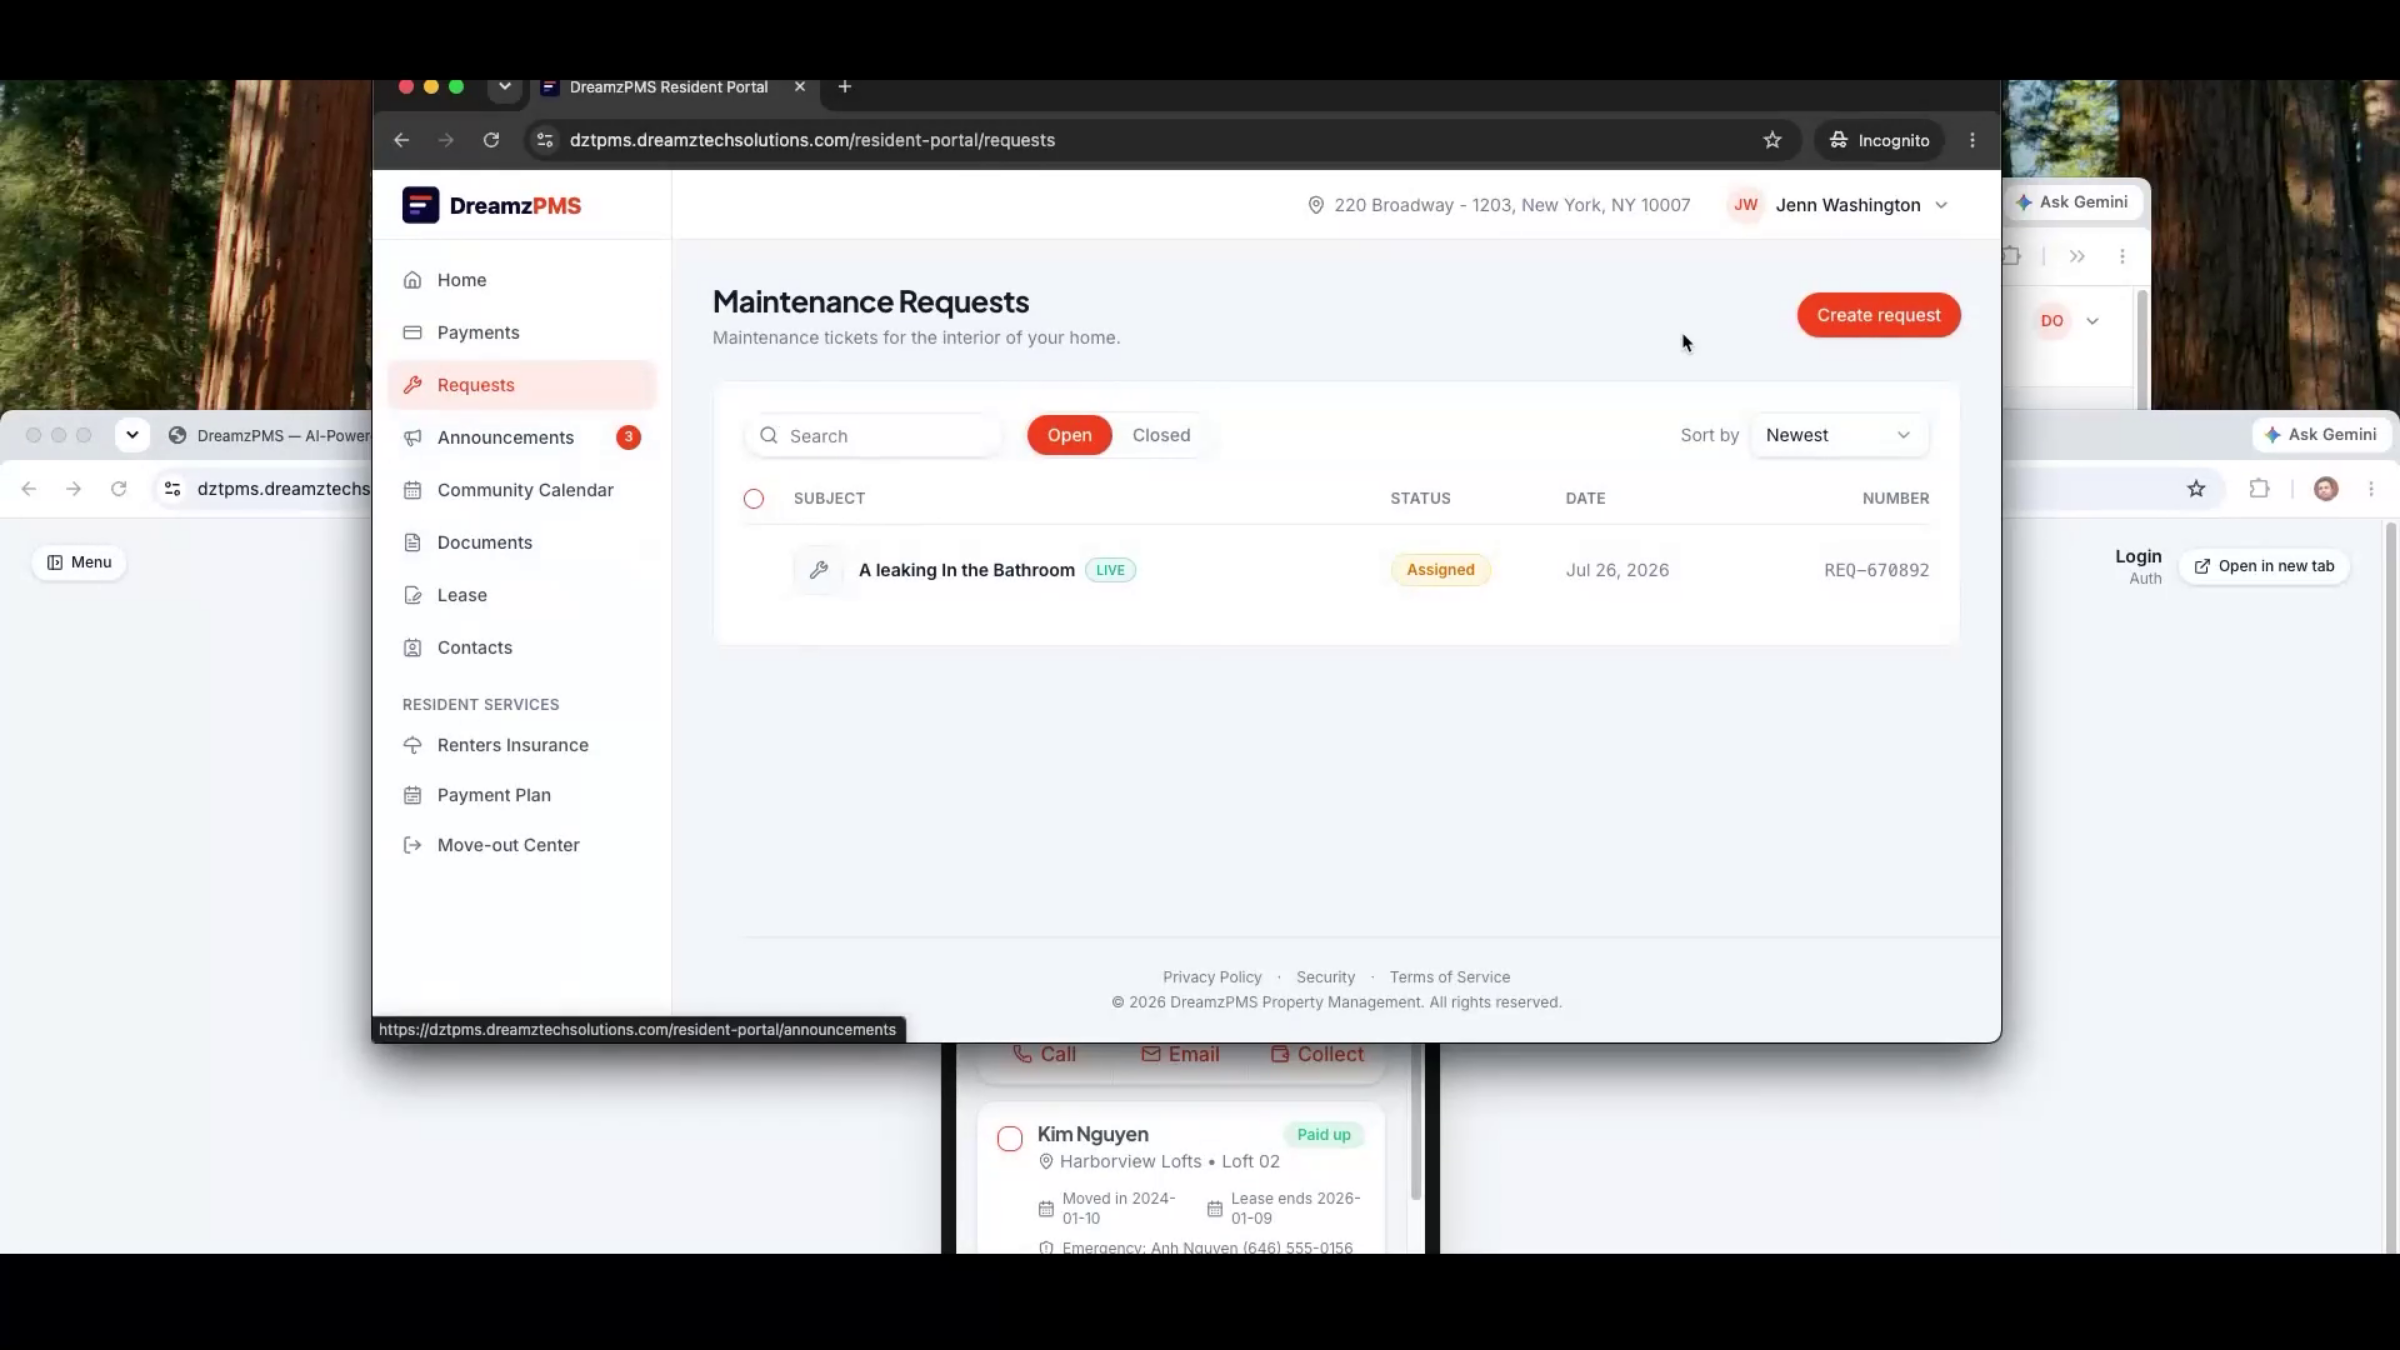
Residents can also make one-off payments, view their full payment history, and create and track service requests — one of the most-used features of the portal.
Step 46 – Resident Portal Documents
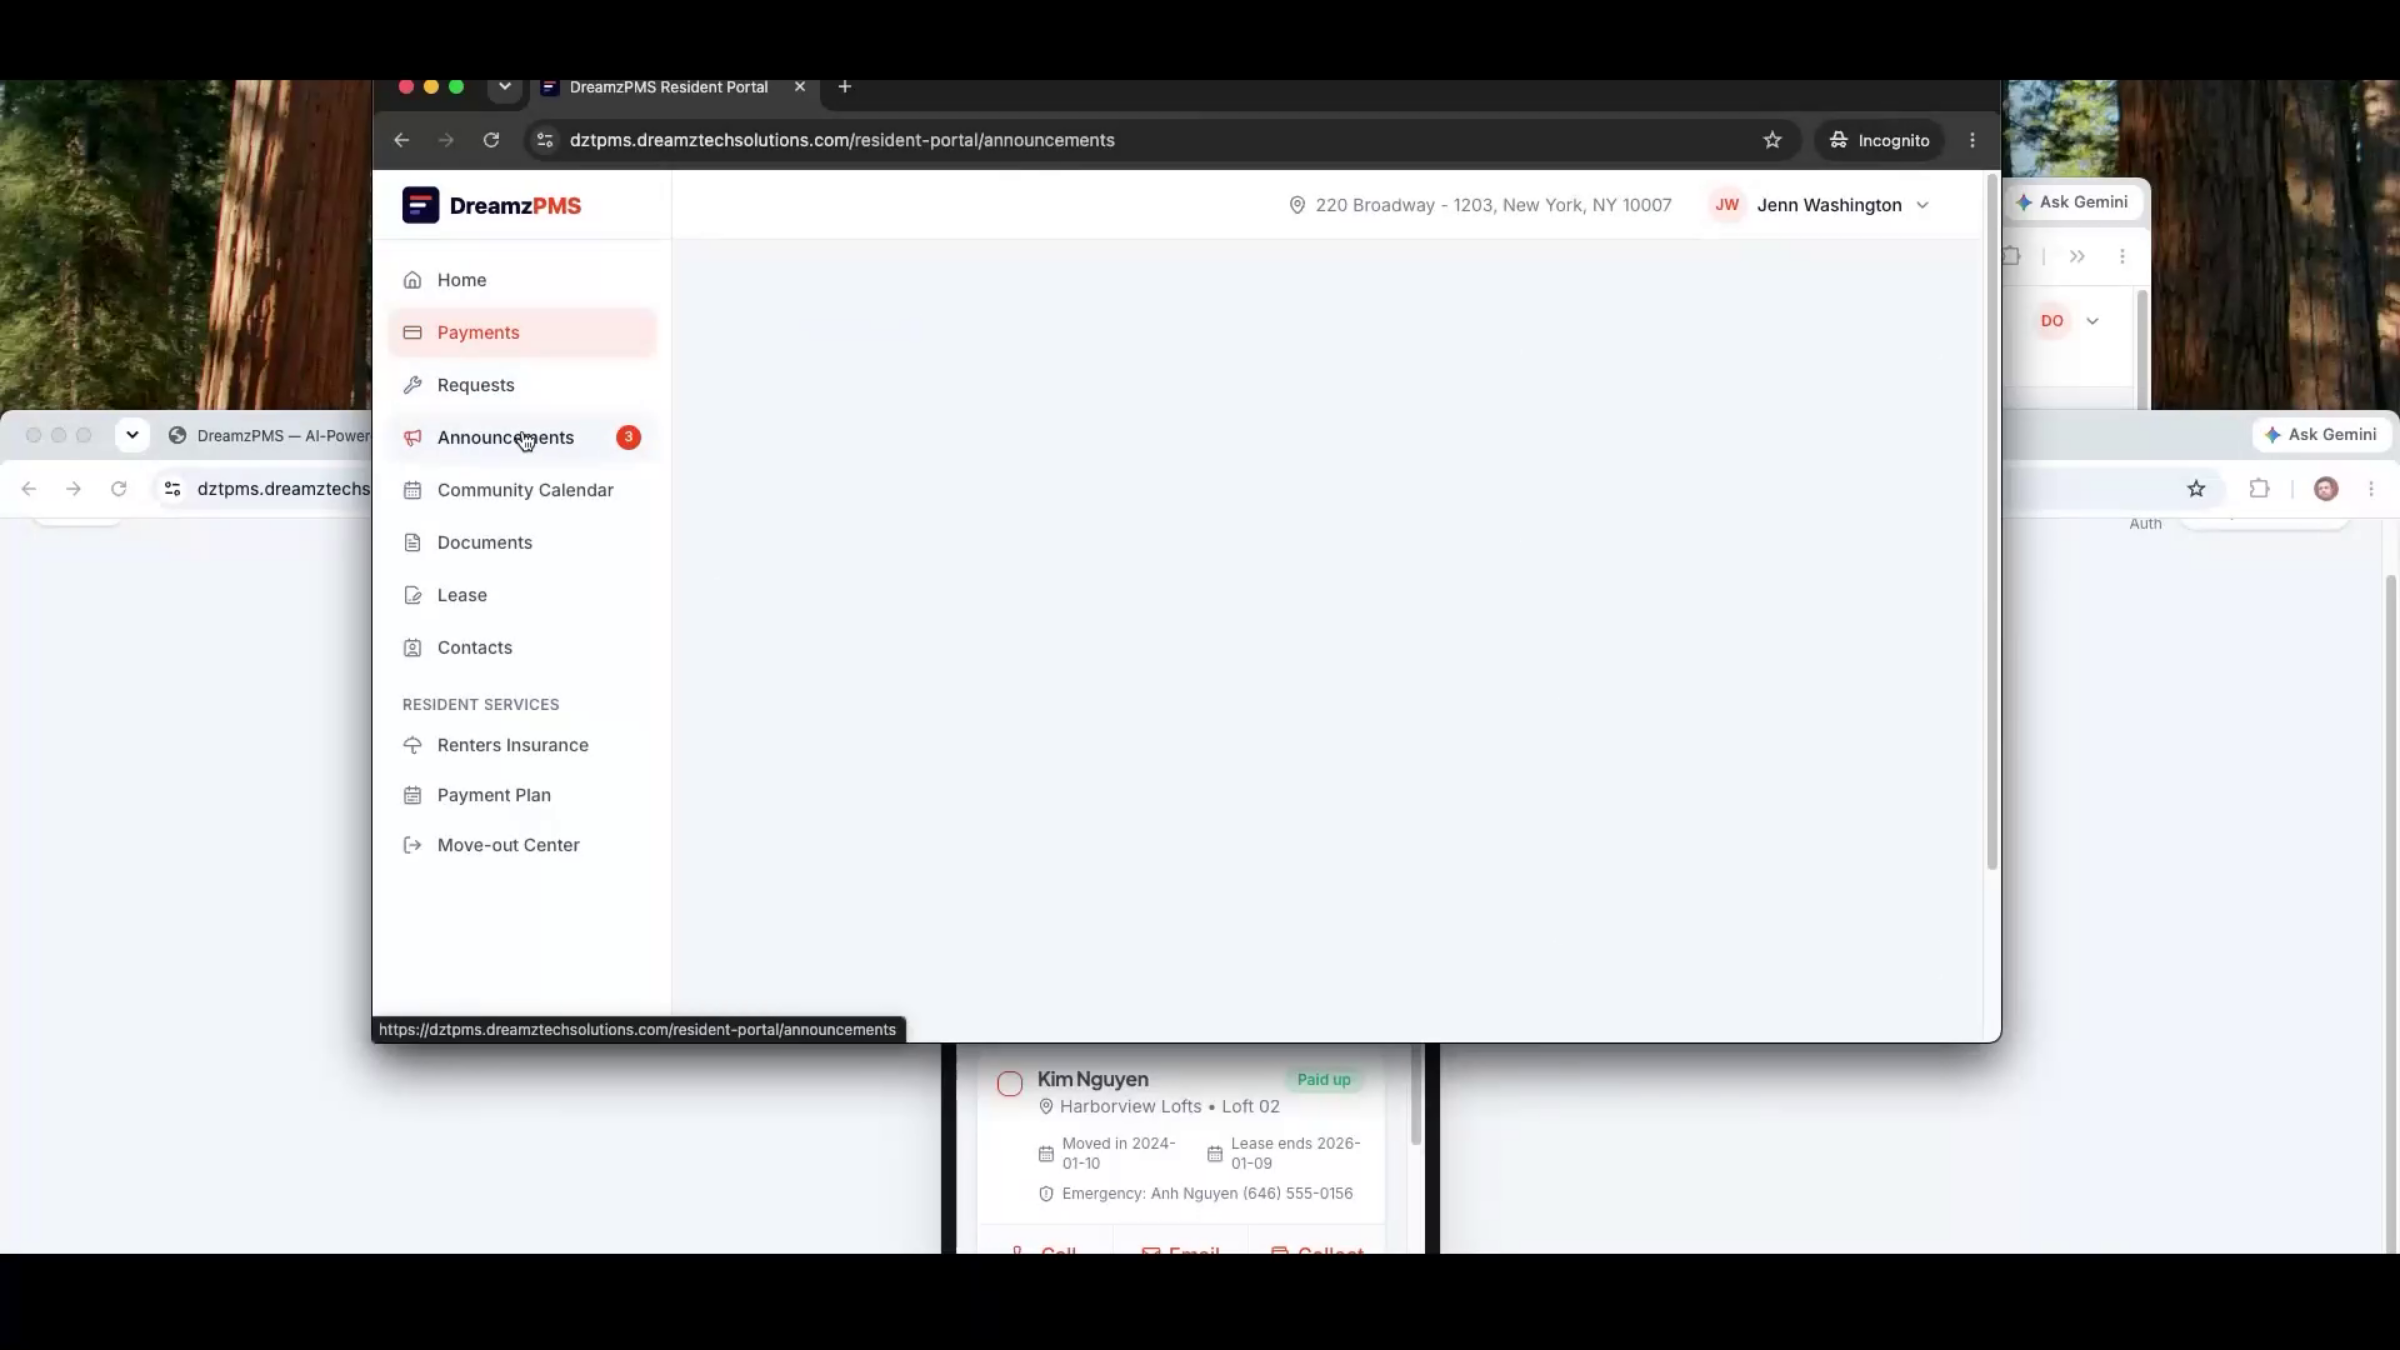
Residents can view management announcements, check the community calendar, and access documents such as lease agreements and notices from one place. On first login, they can review and sign their lease, view key contact information, check their payment plan, and start a move-out process if needed.
Step 47 – Move-Out Process Overview
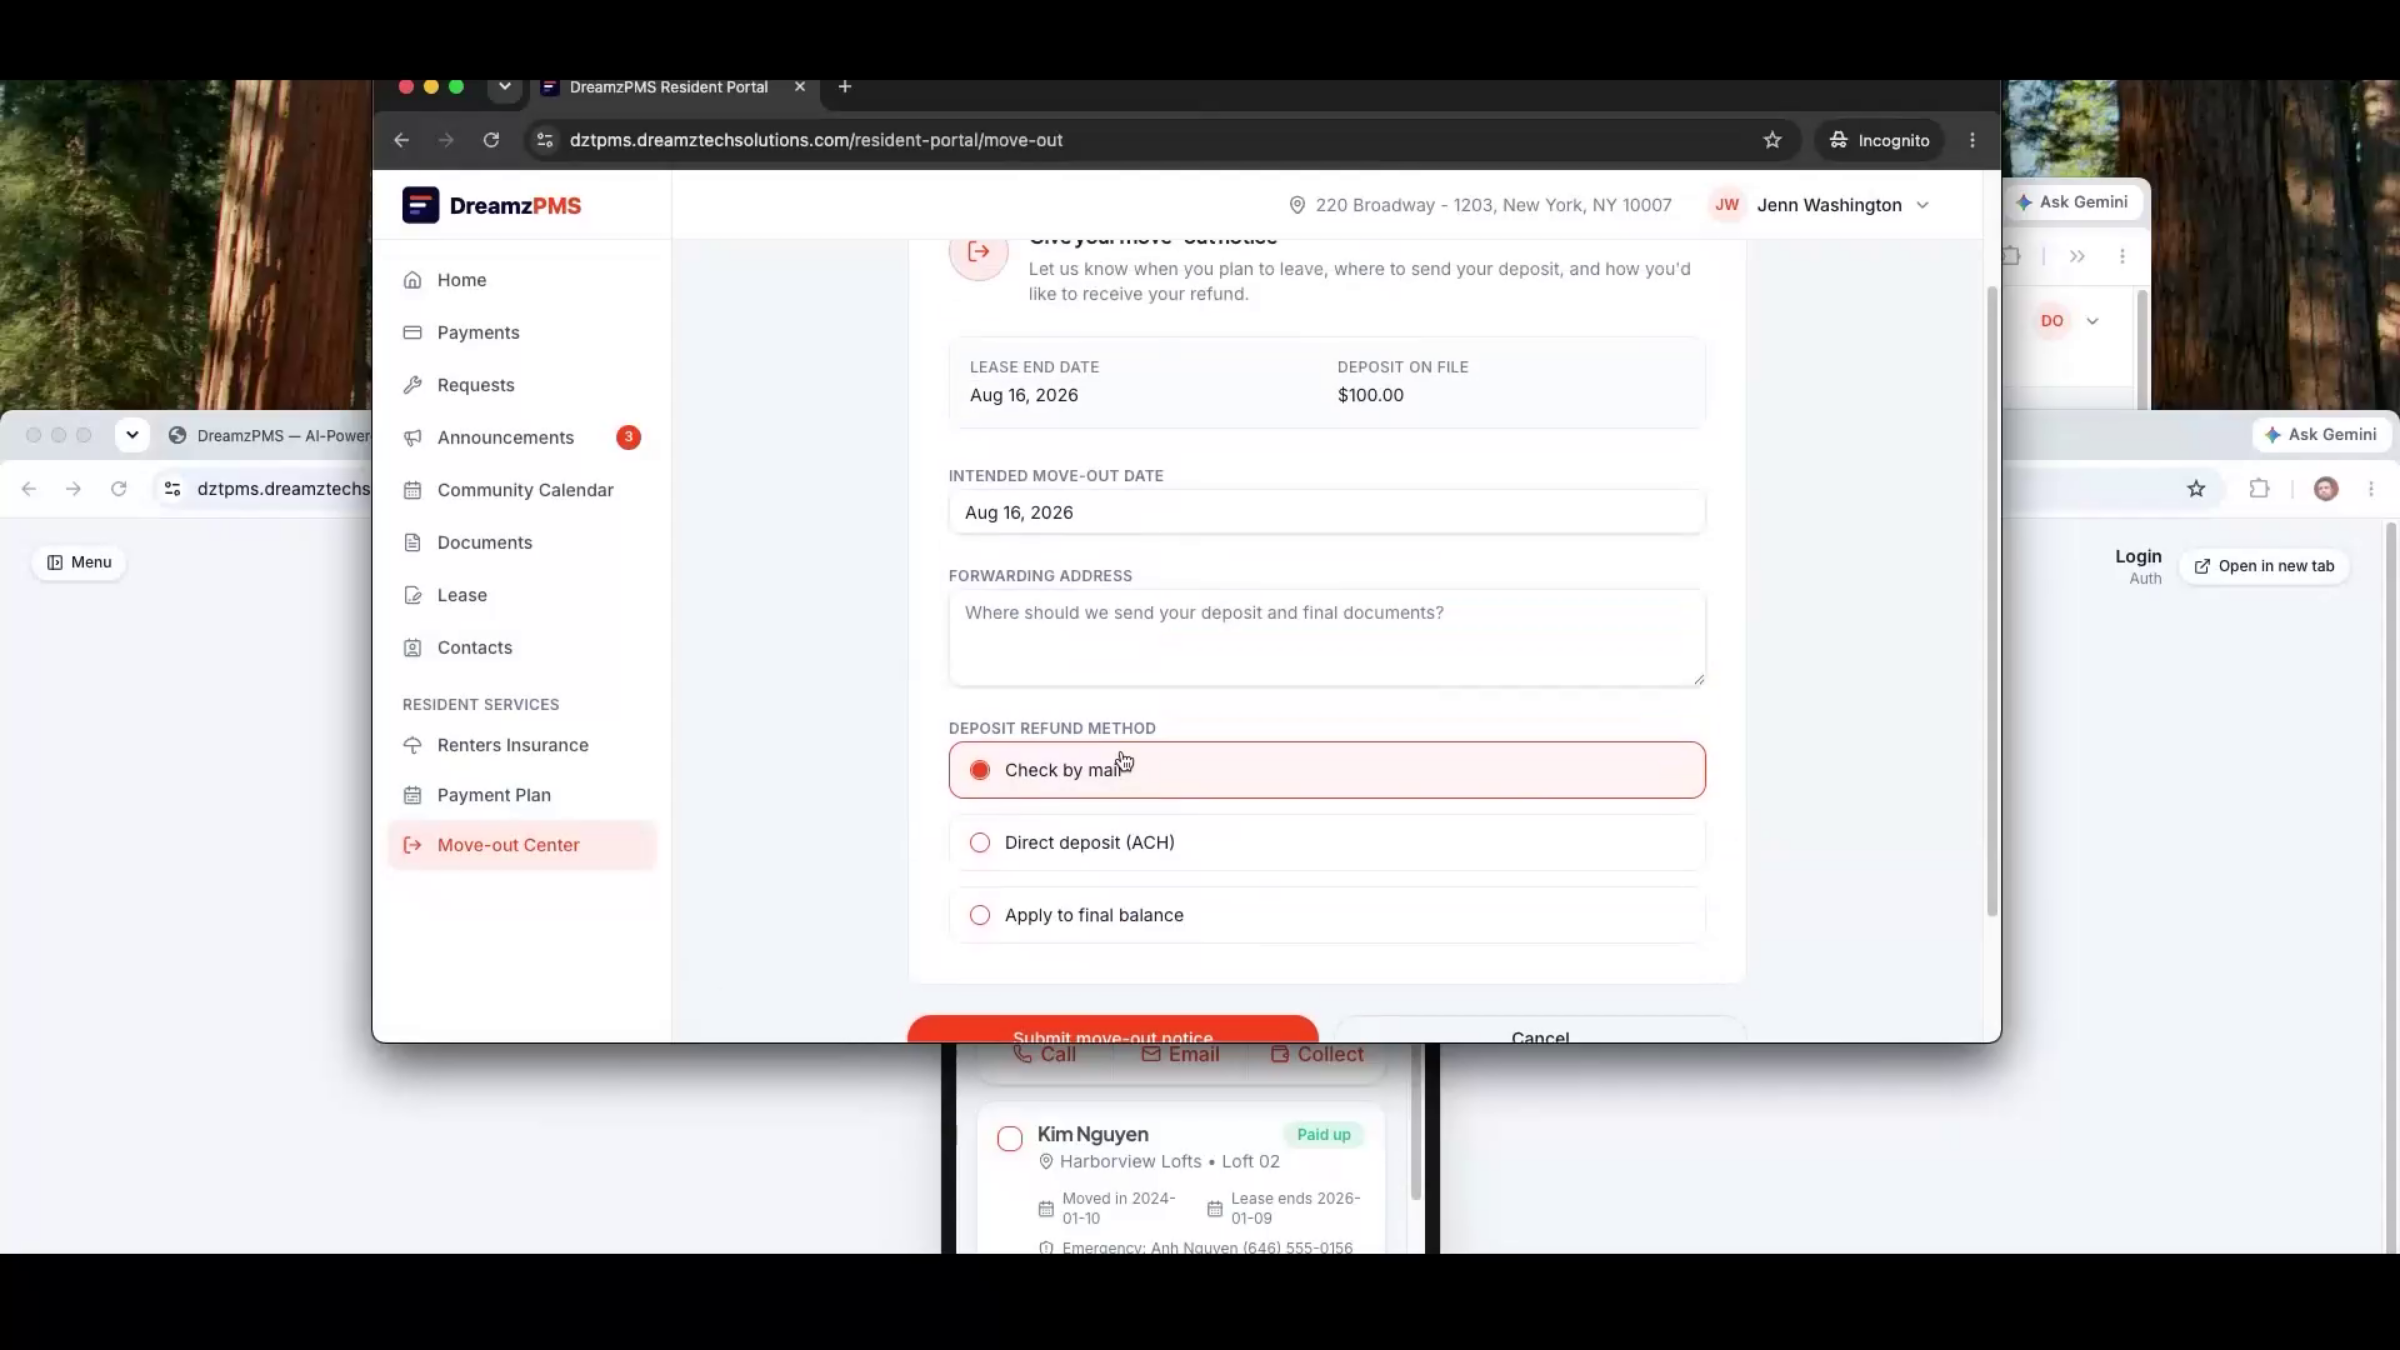
Ending a lease means submitting a move-out request, providing a reason, and completing the settlement process — all through the portal.
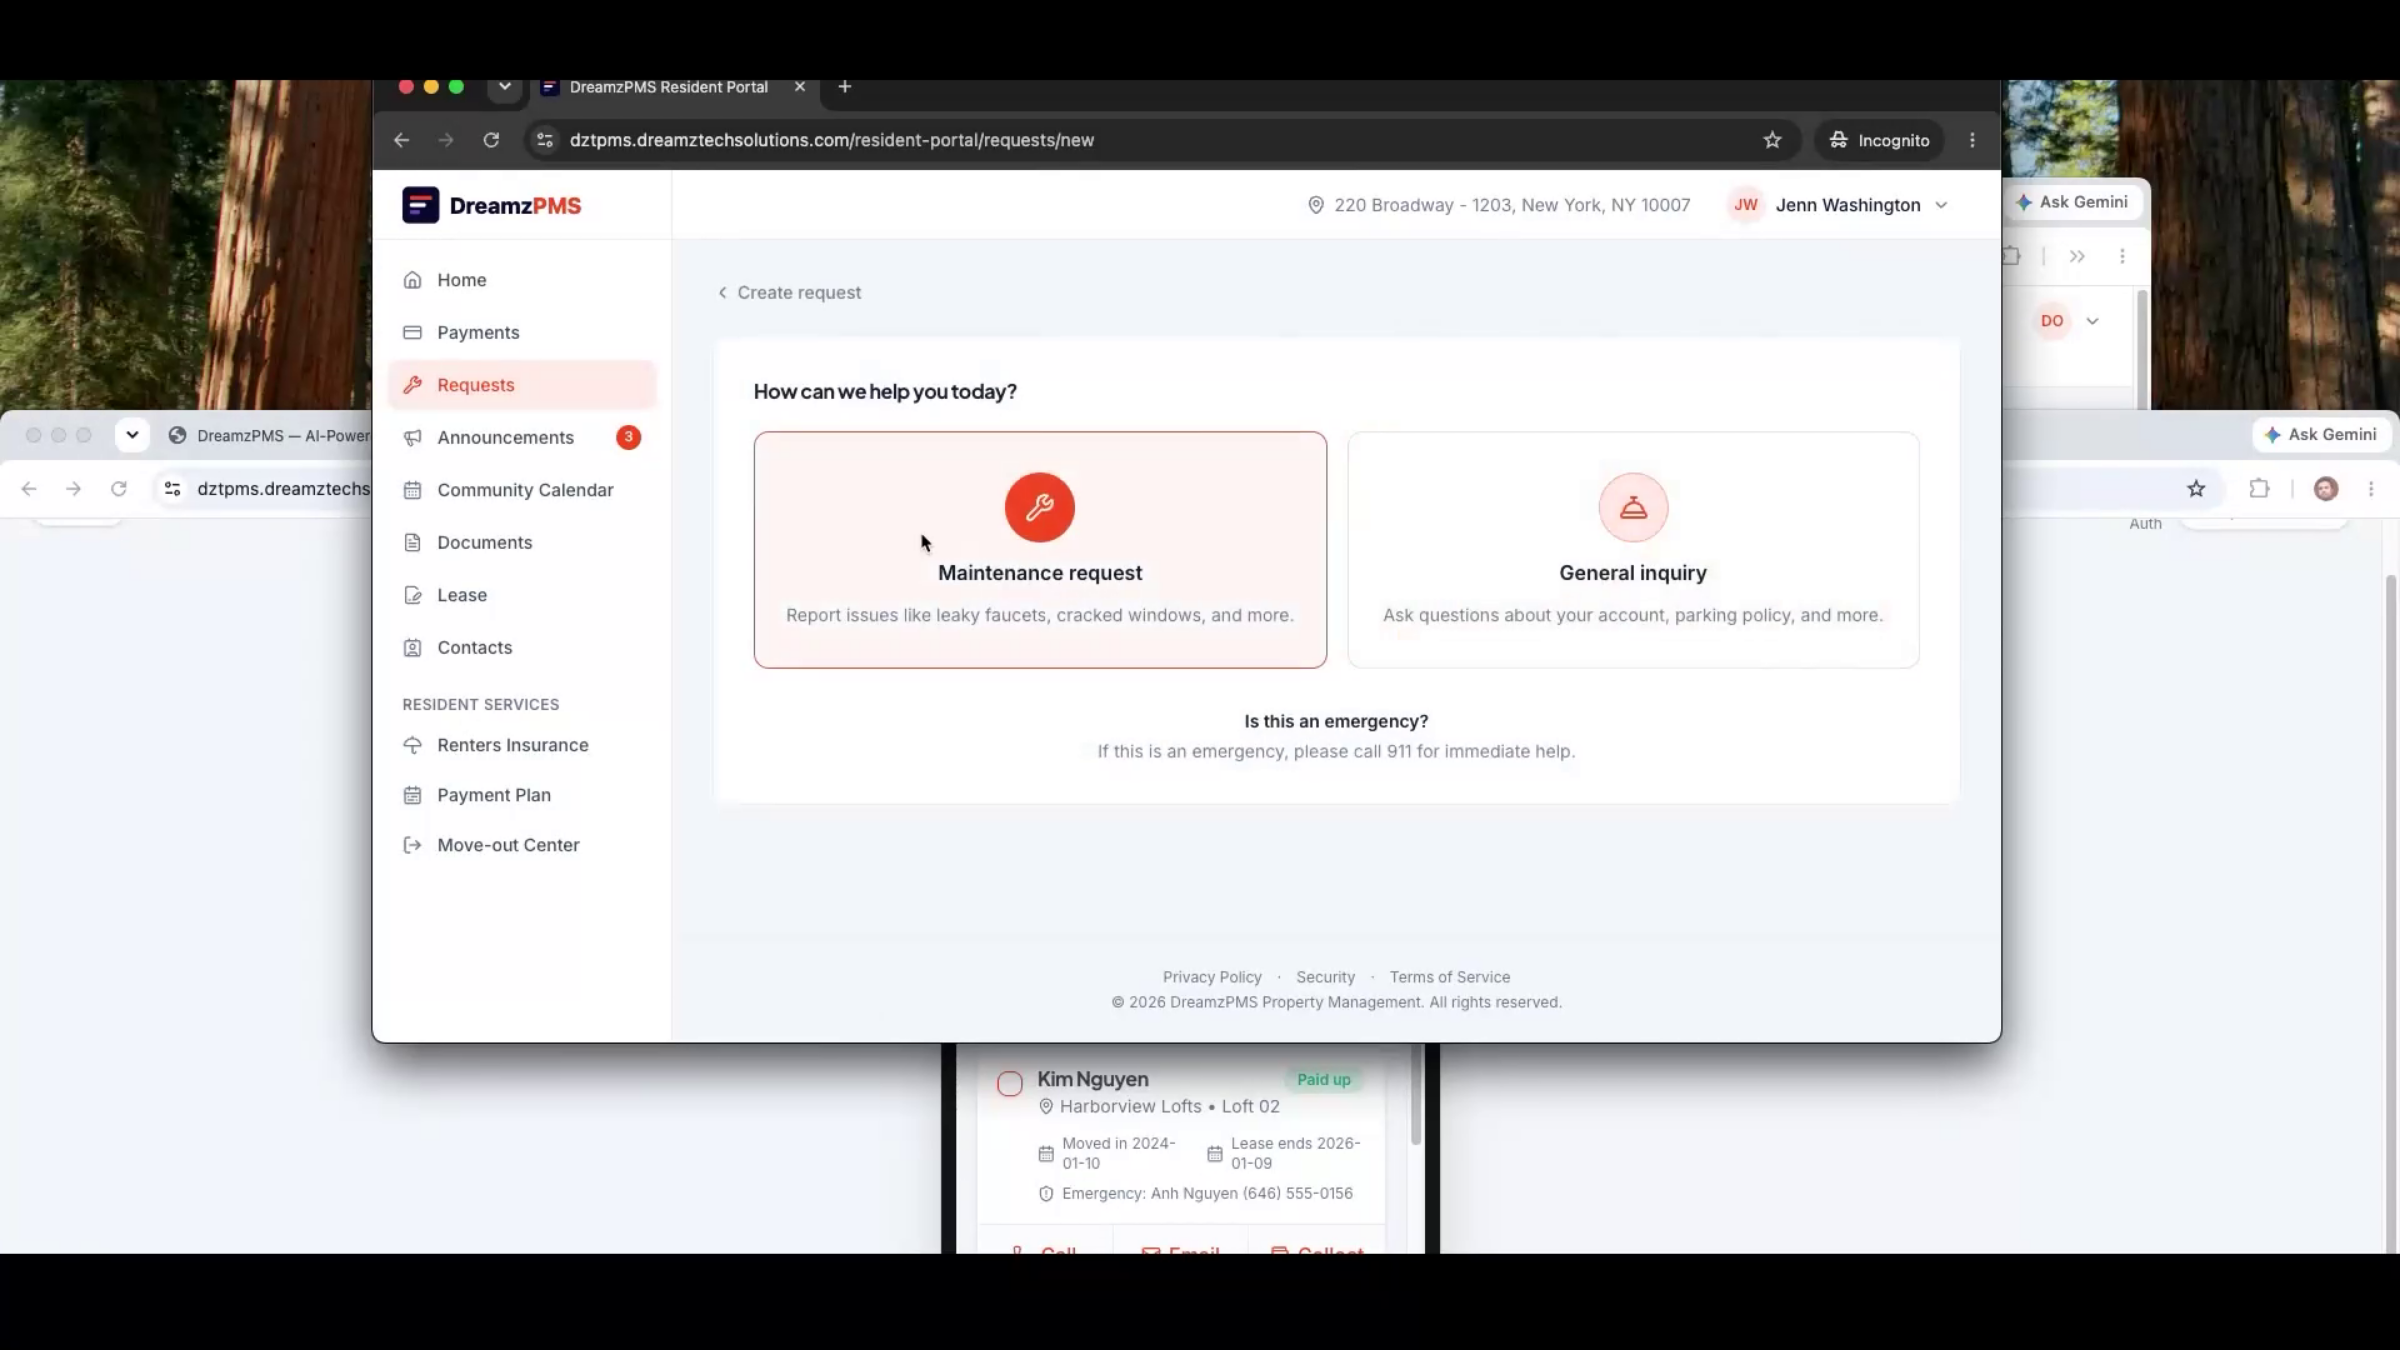
Step 48 – Service Request Creation
To open a request, a resident simply selects Create Request.
Step 49 – Maintenance Request Details
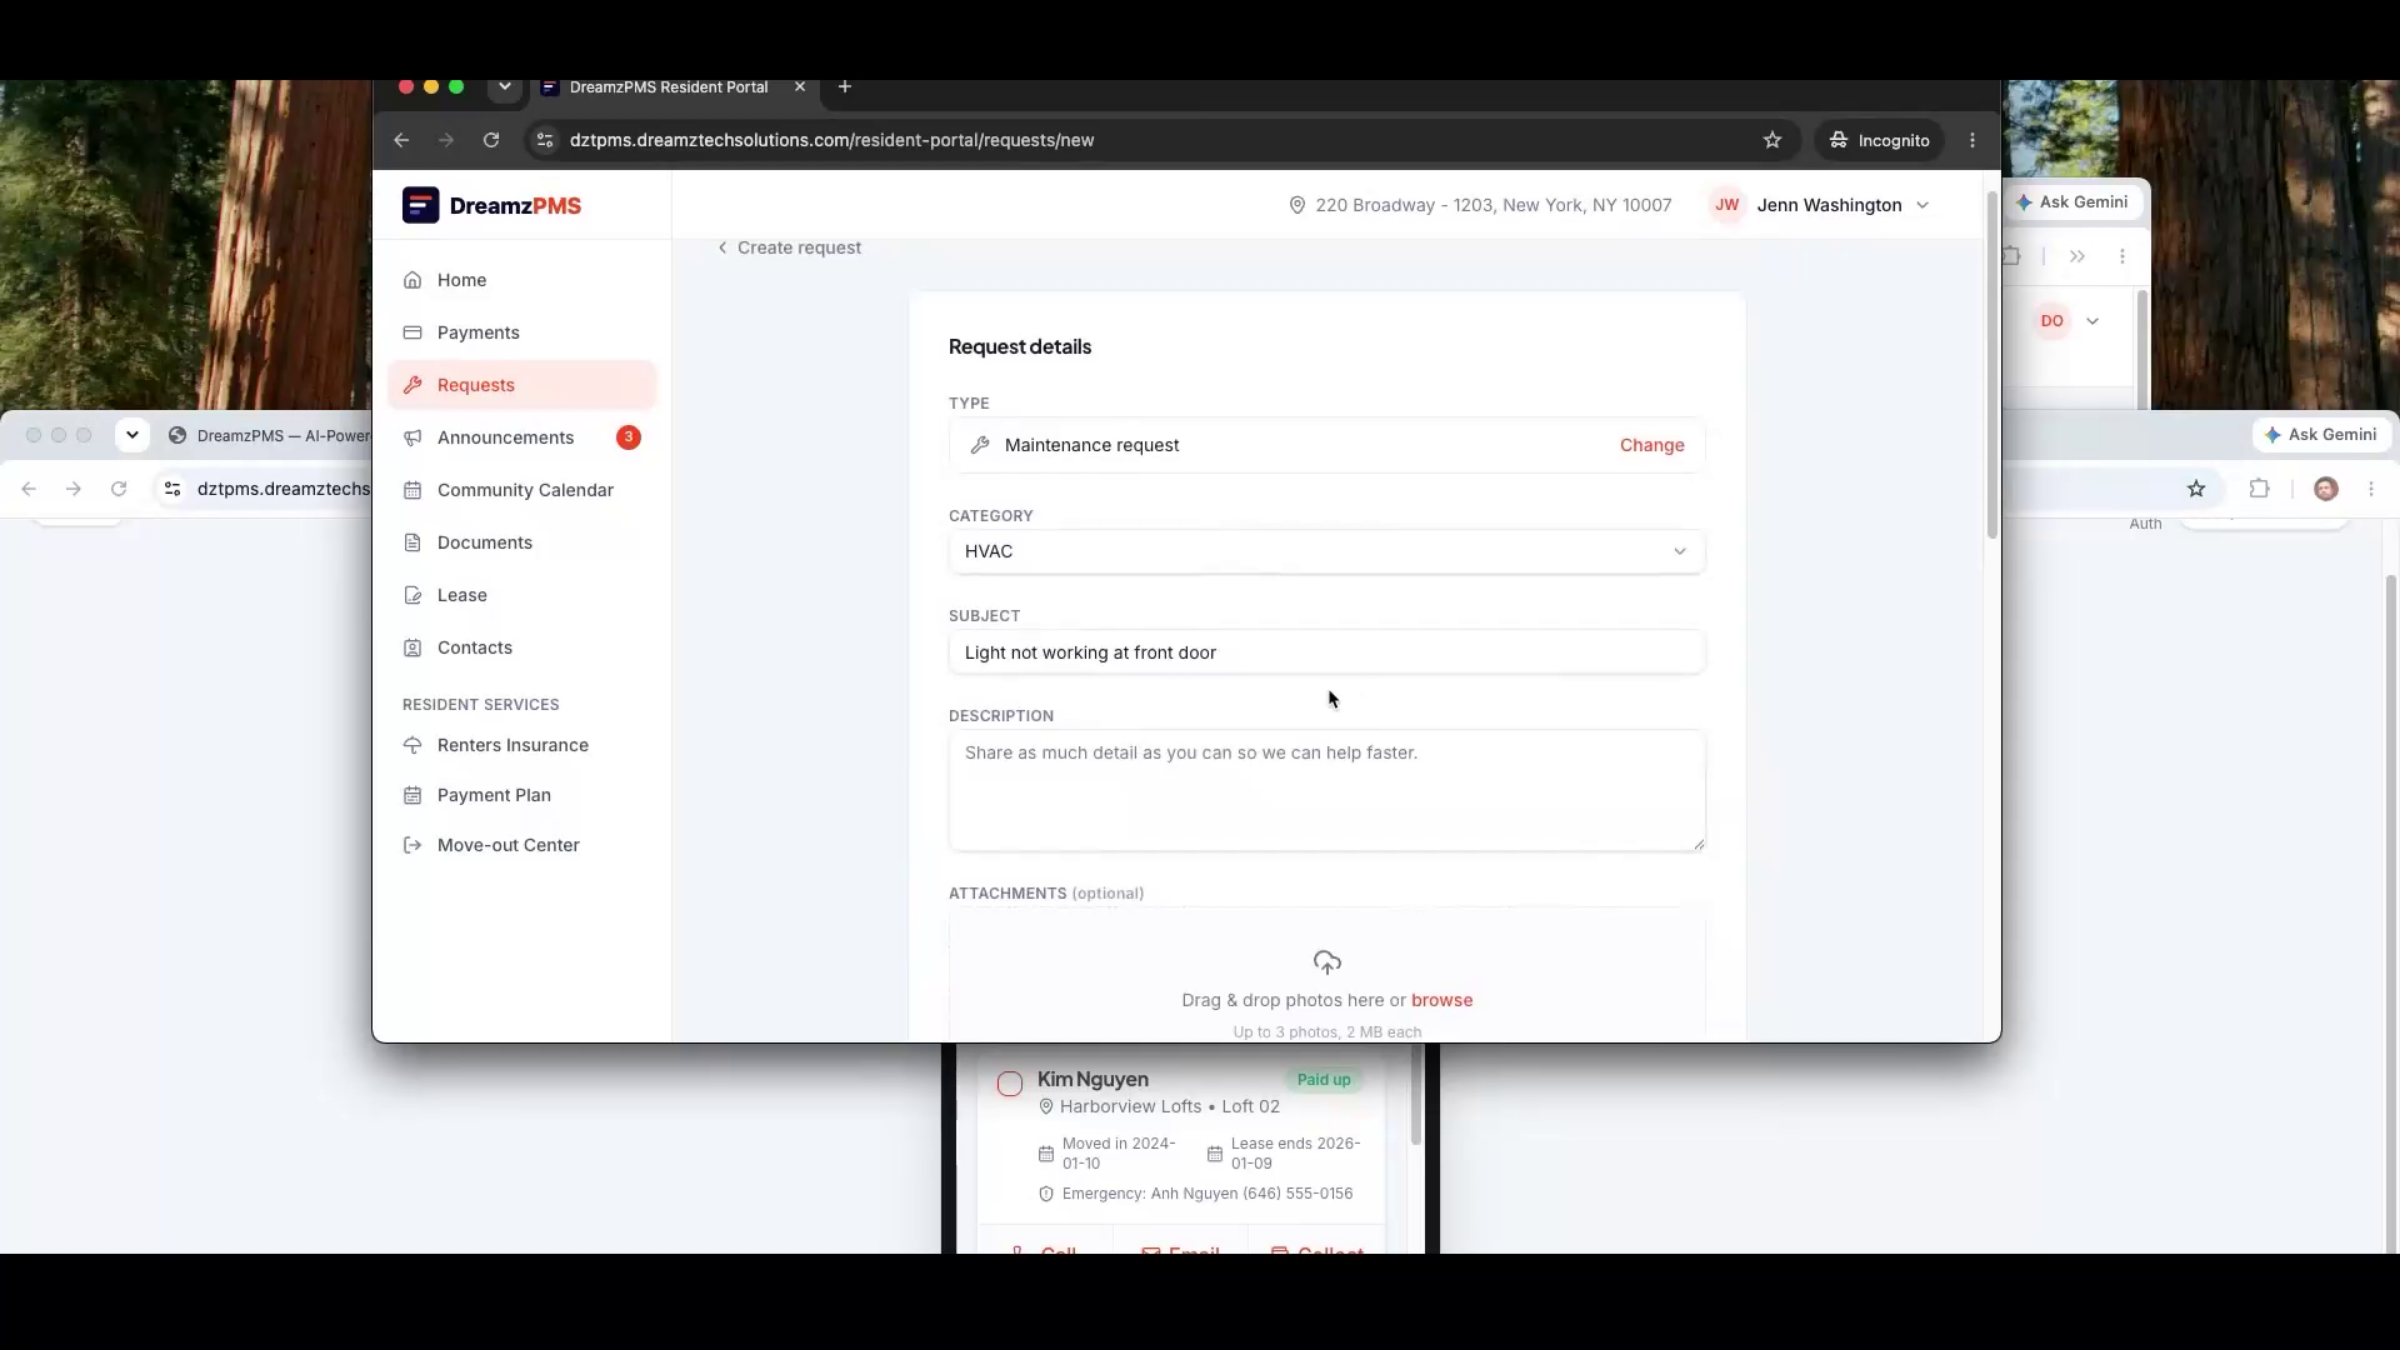
From there, they choose a general inquiry or a maintenance request and select the issue type — for example, an HVAC problem or a specific issue such as a broken front door light.
Step 50 – Request Submission Process
Residents describe the problem, attach a photo, and add any helpful notes before submitting.
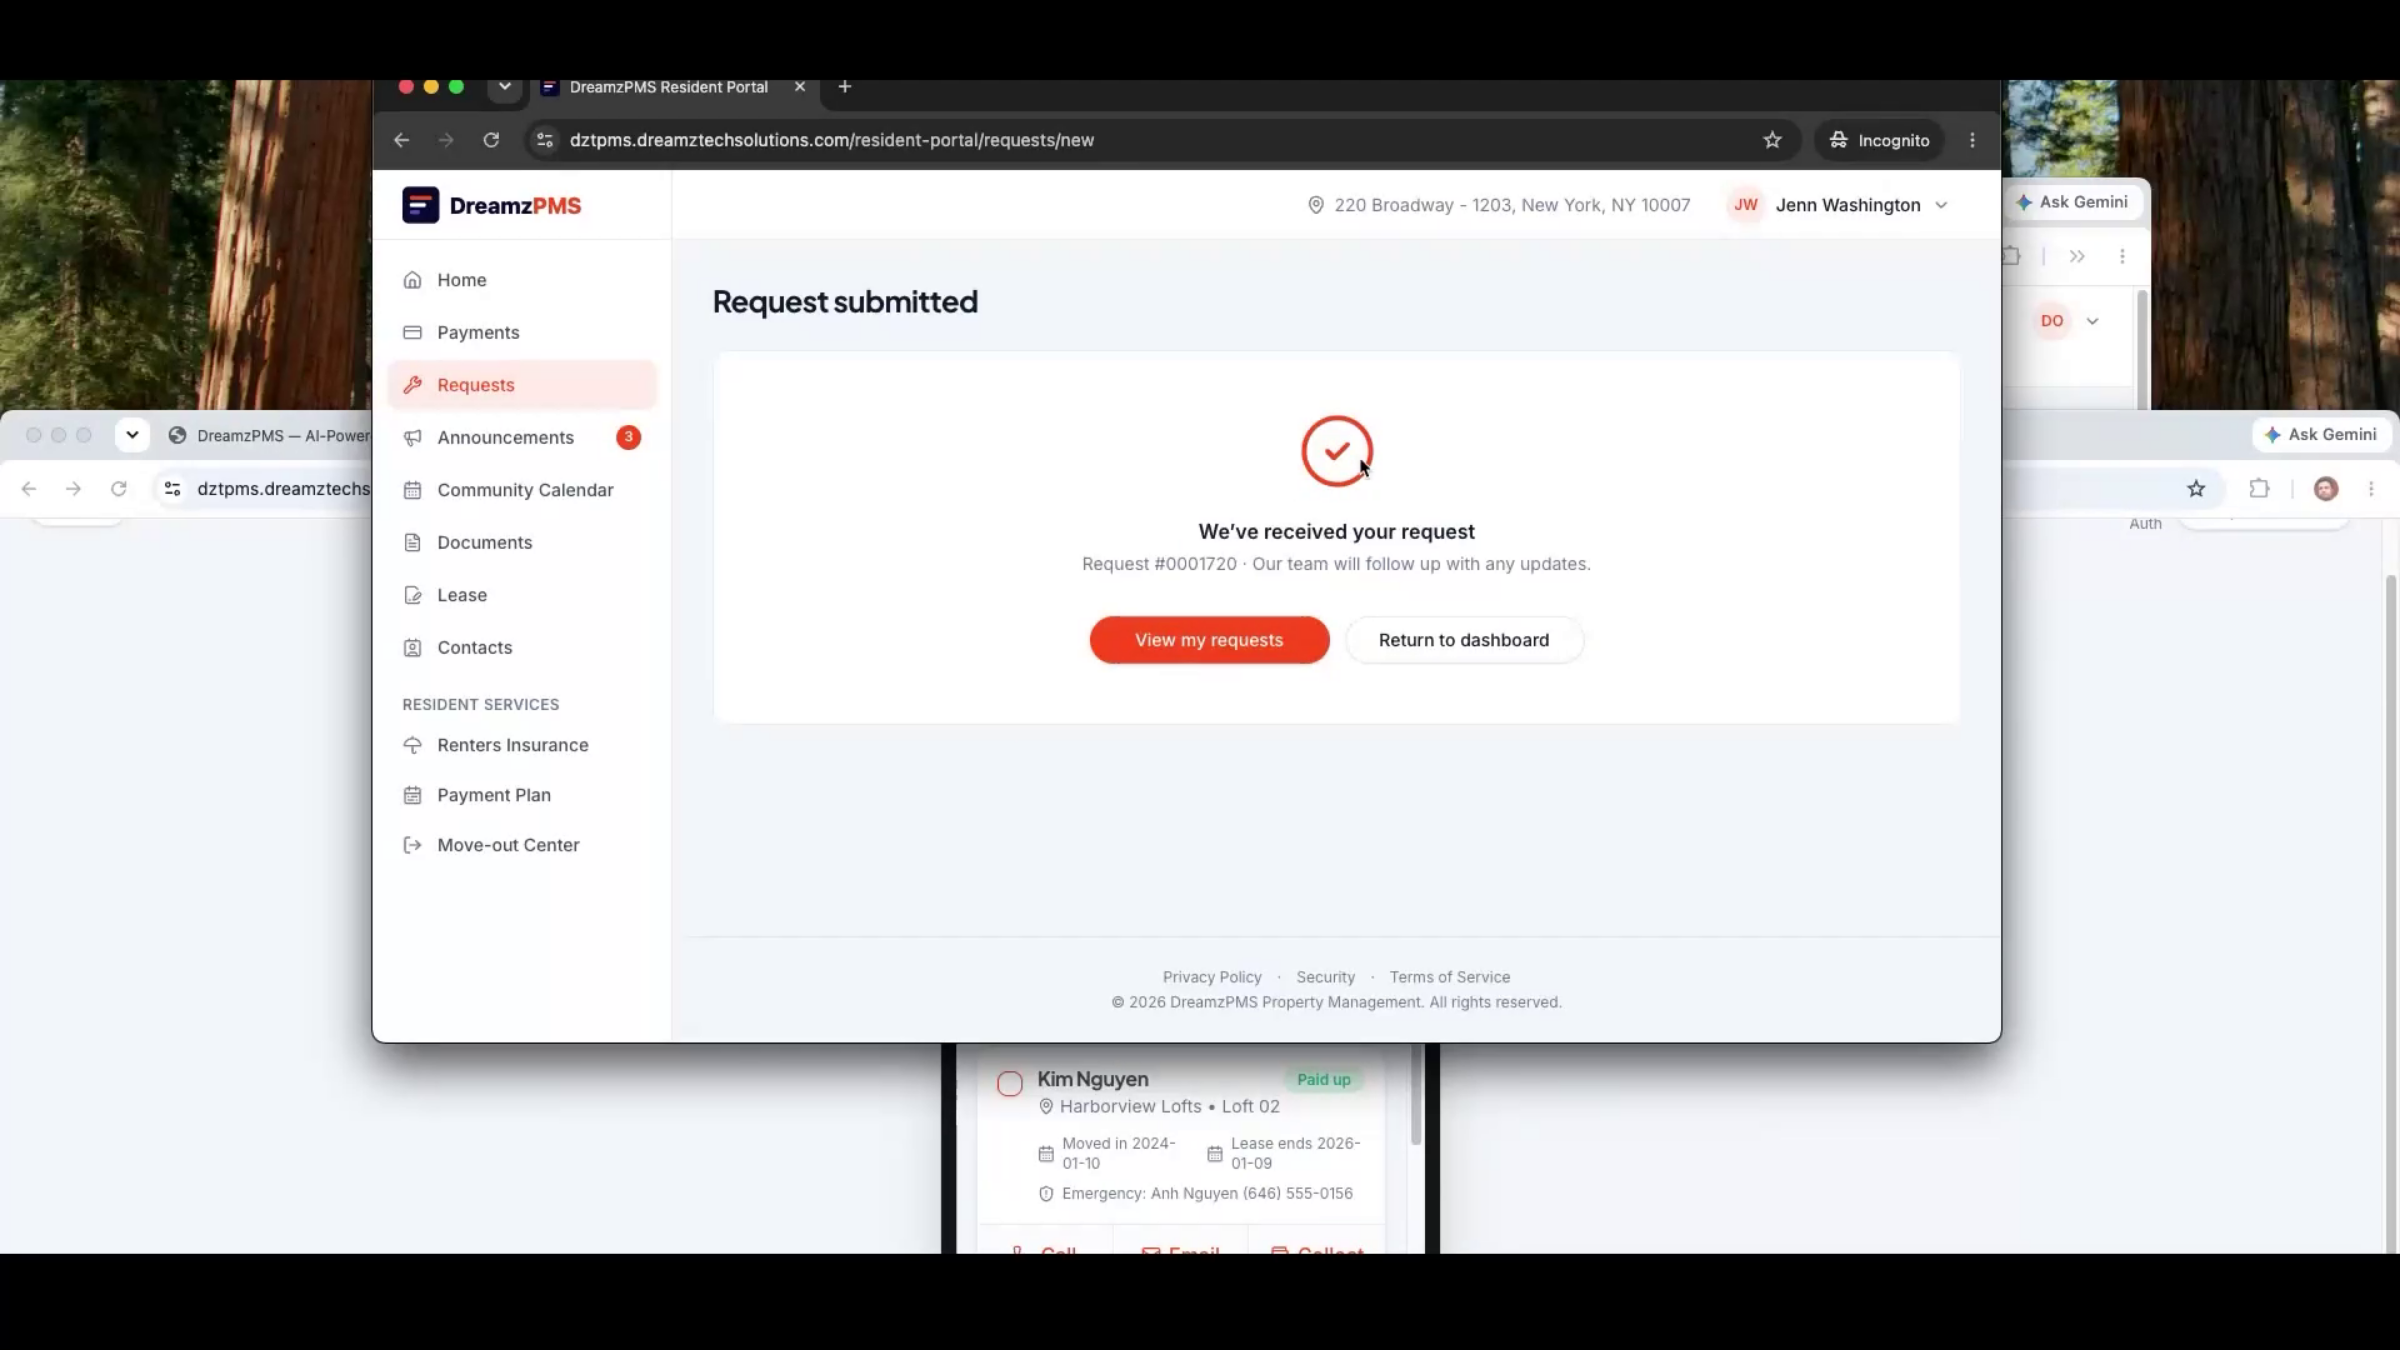
Step 51 – Request Confirmation and Status
Submitting generates a unique request ID immediately, and the request status shows as Submitted.
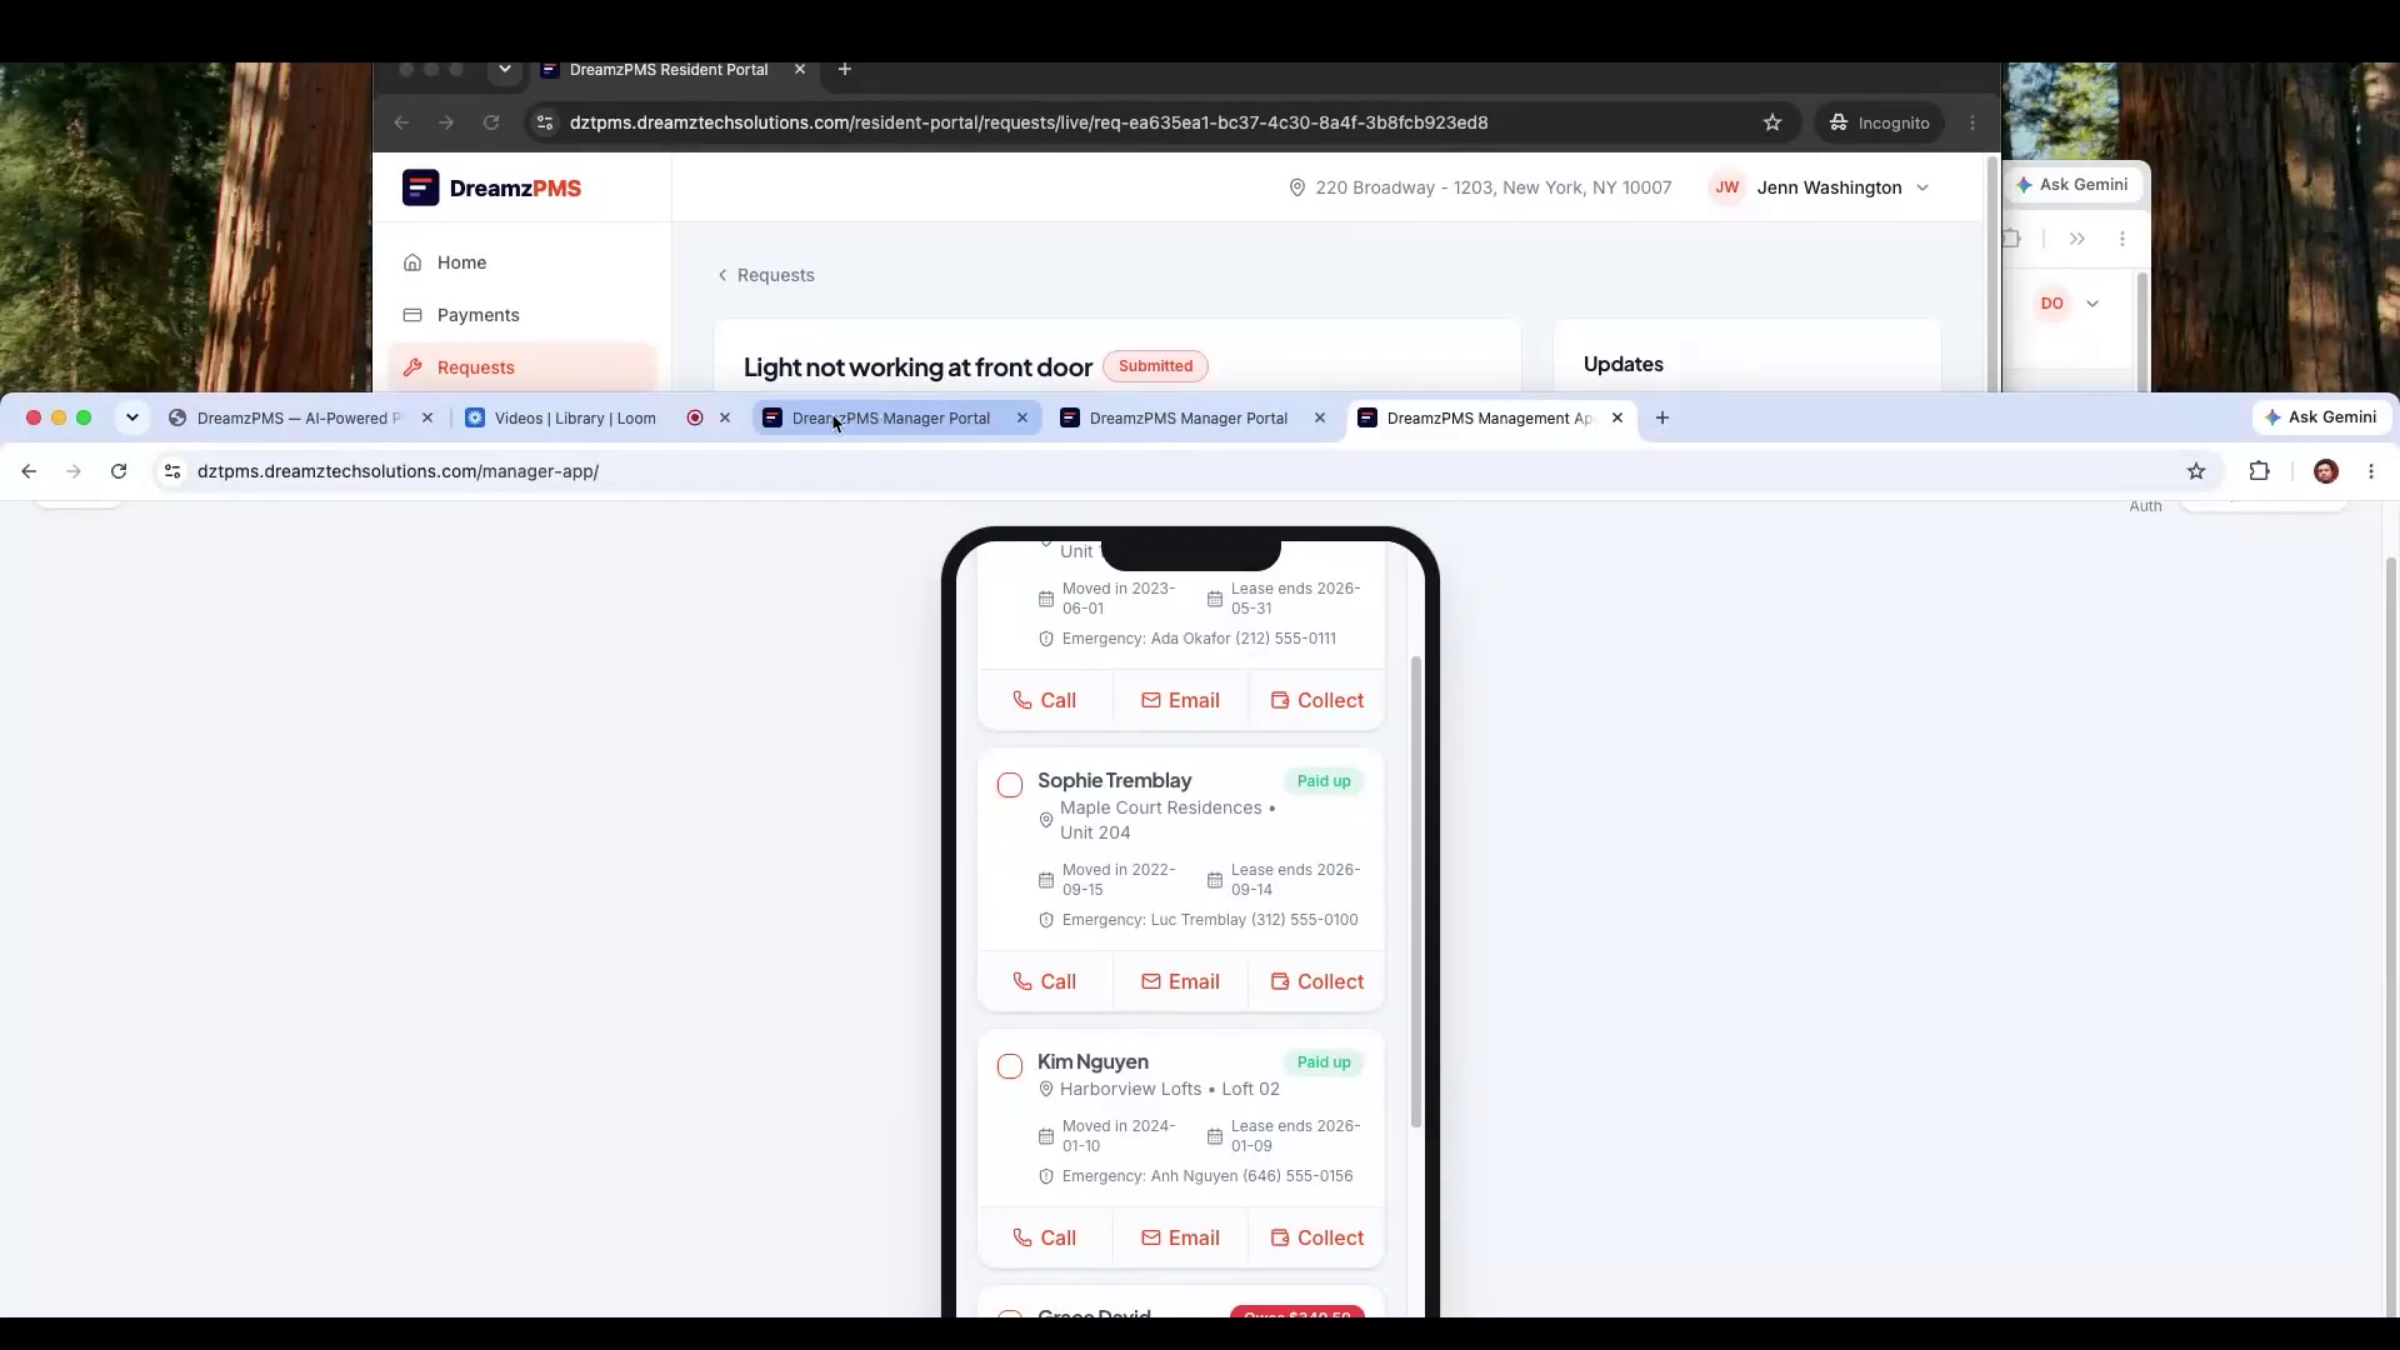
Step 52 – Manager Request Review
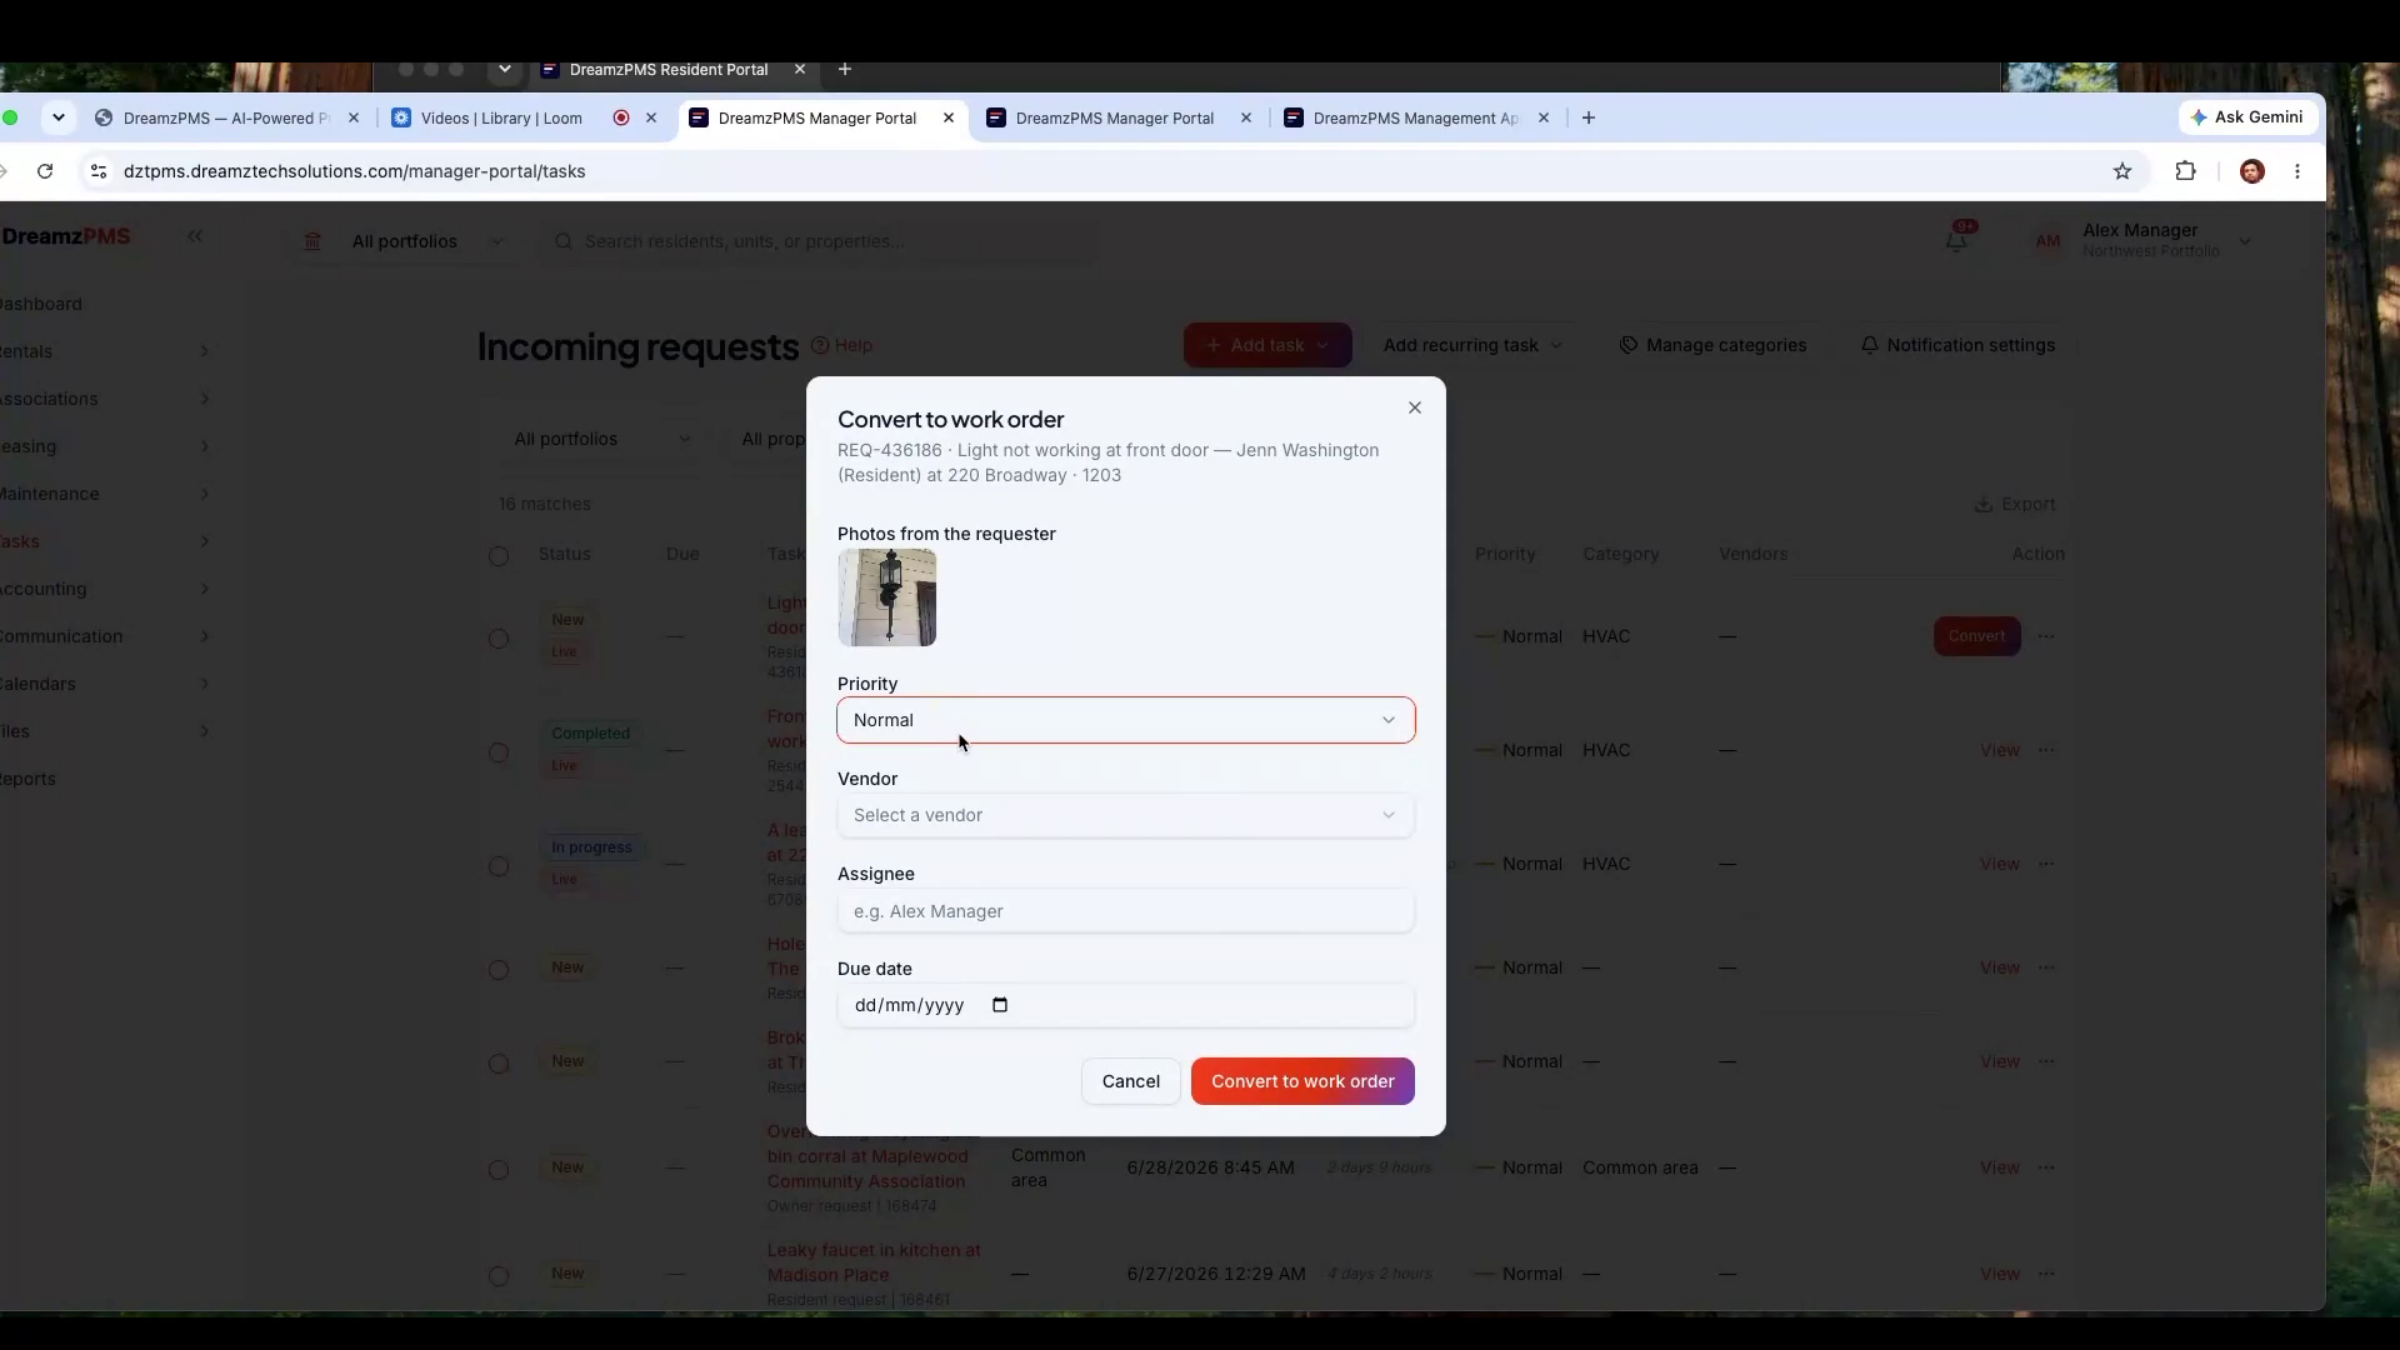
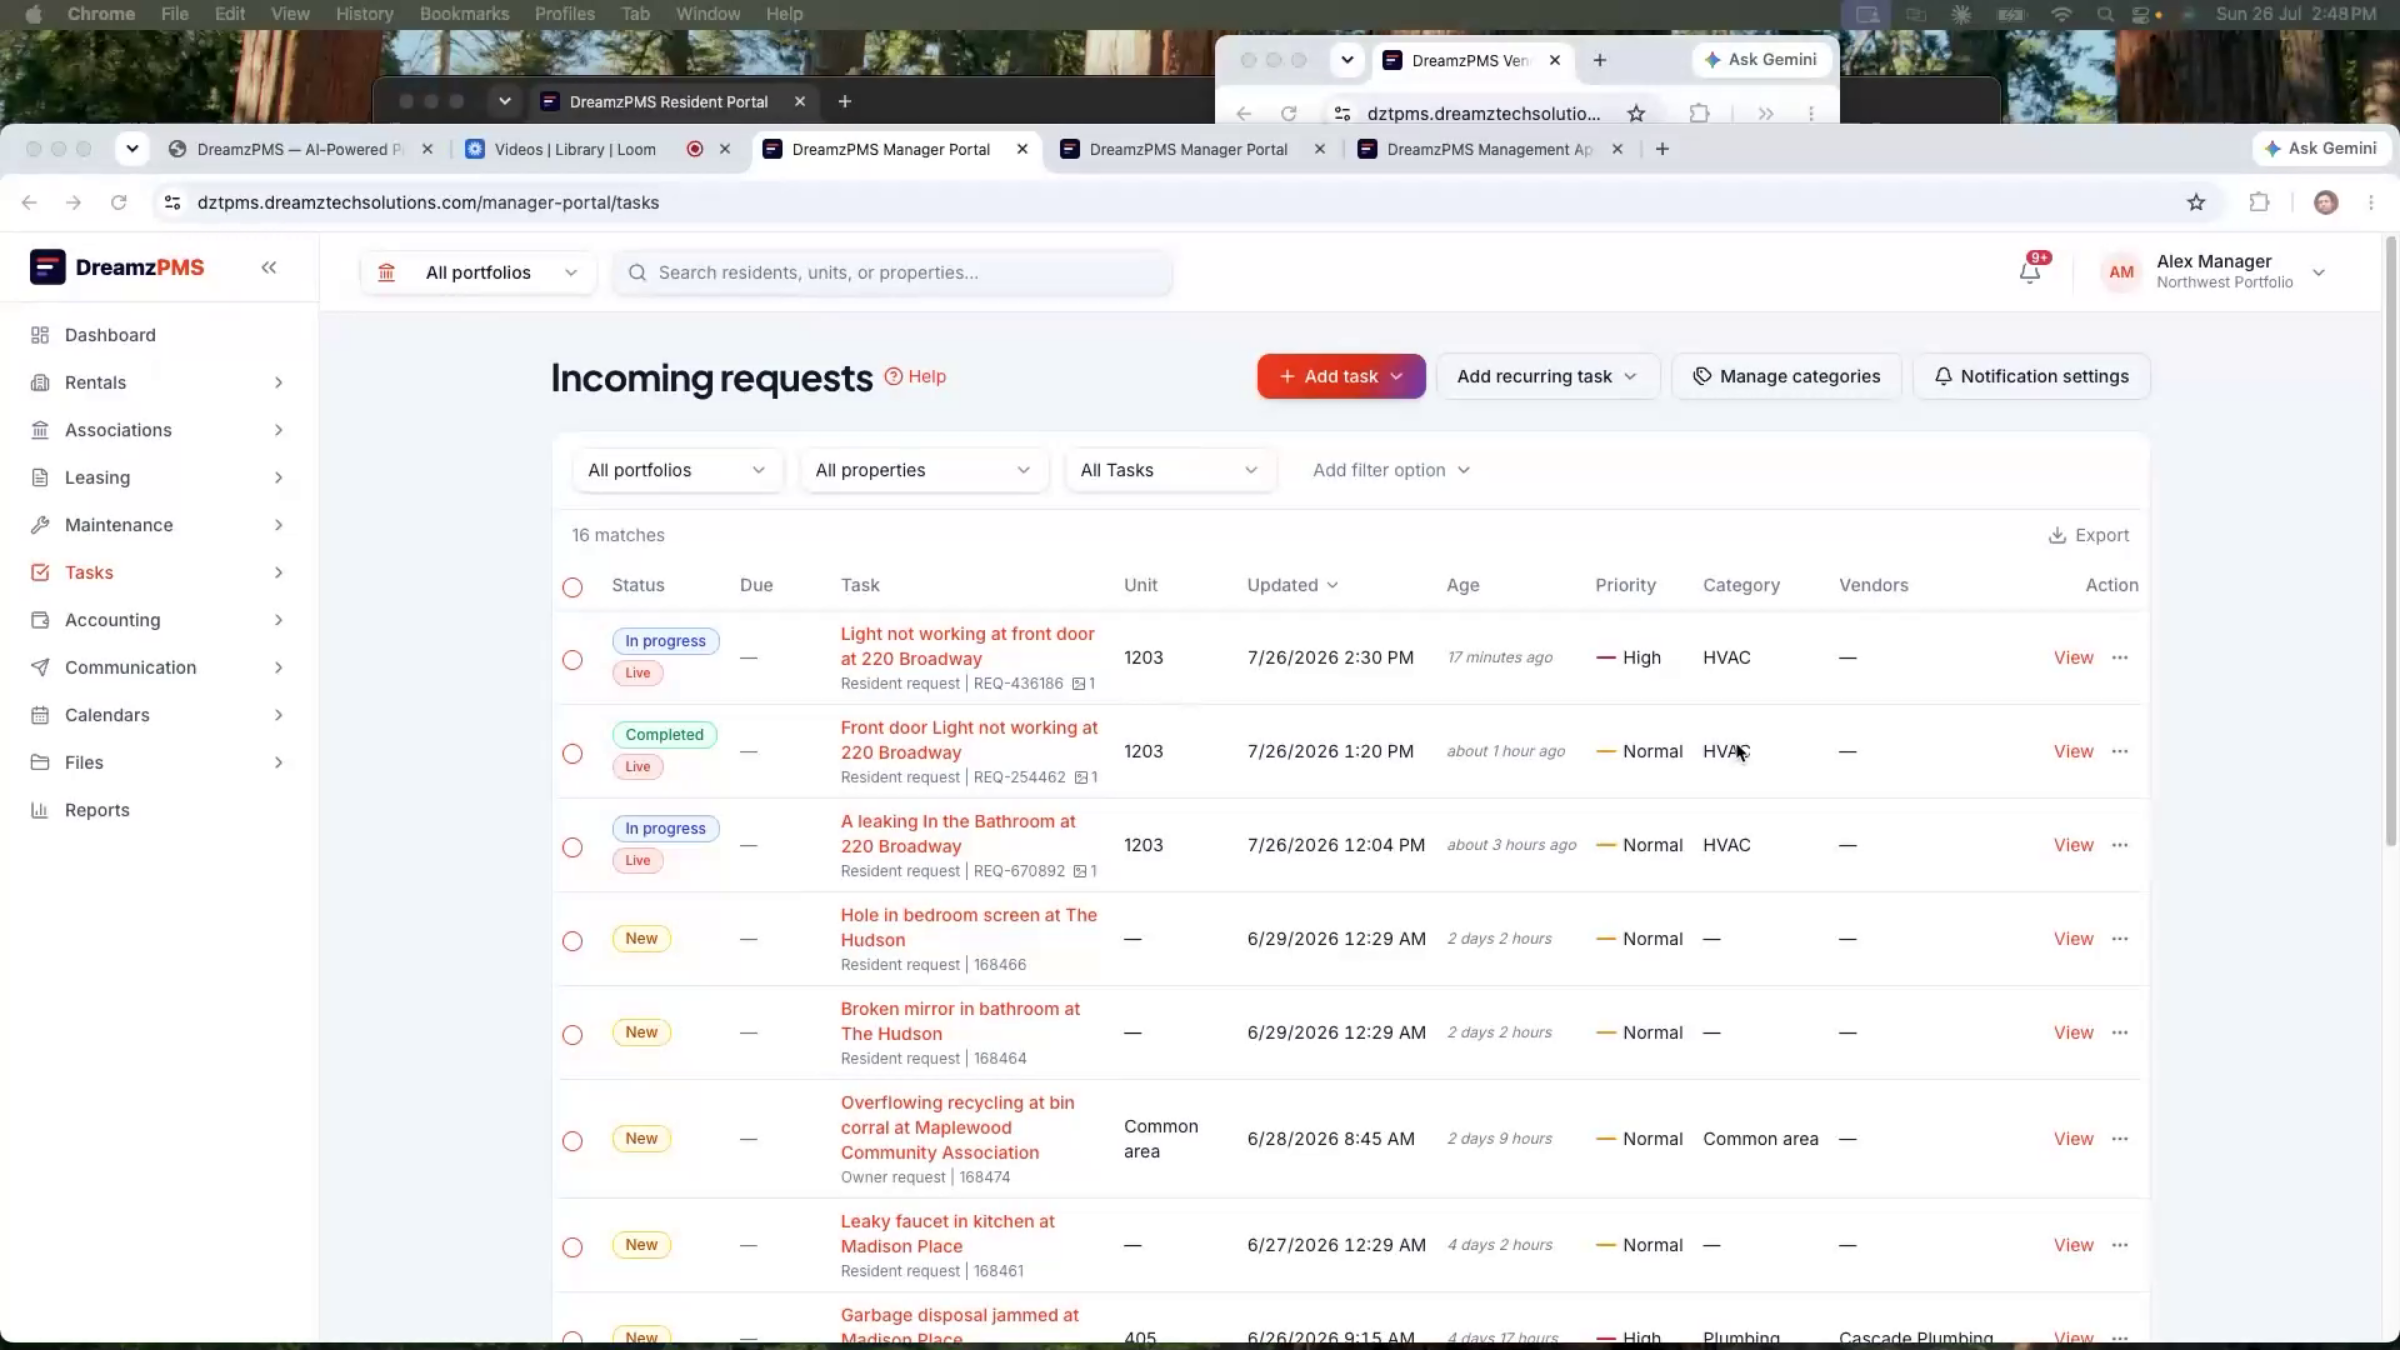
On the manager side, from web or mobile, new requests appear right away with all resident-provided details, and the manager sets a priority — high, medium, or normal.
Step 53 – Assigning Work Orders
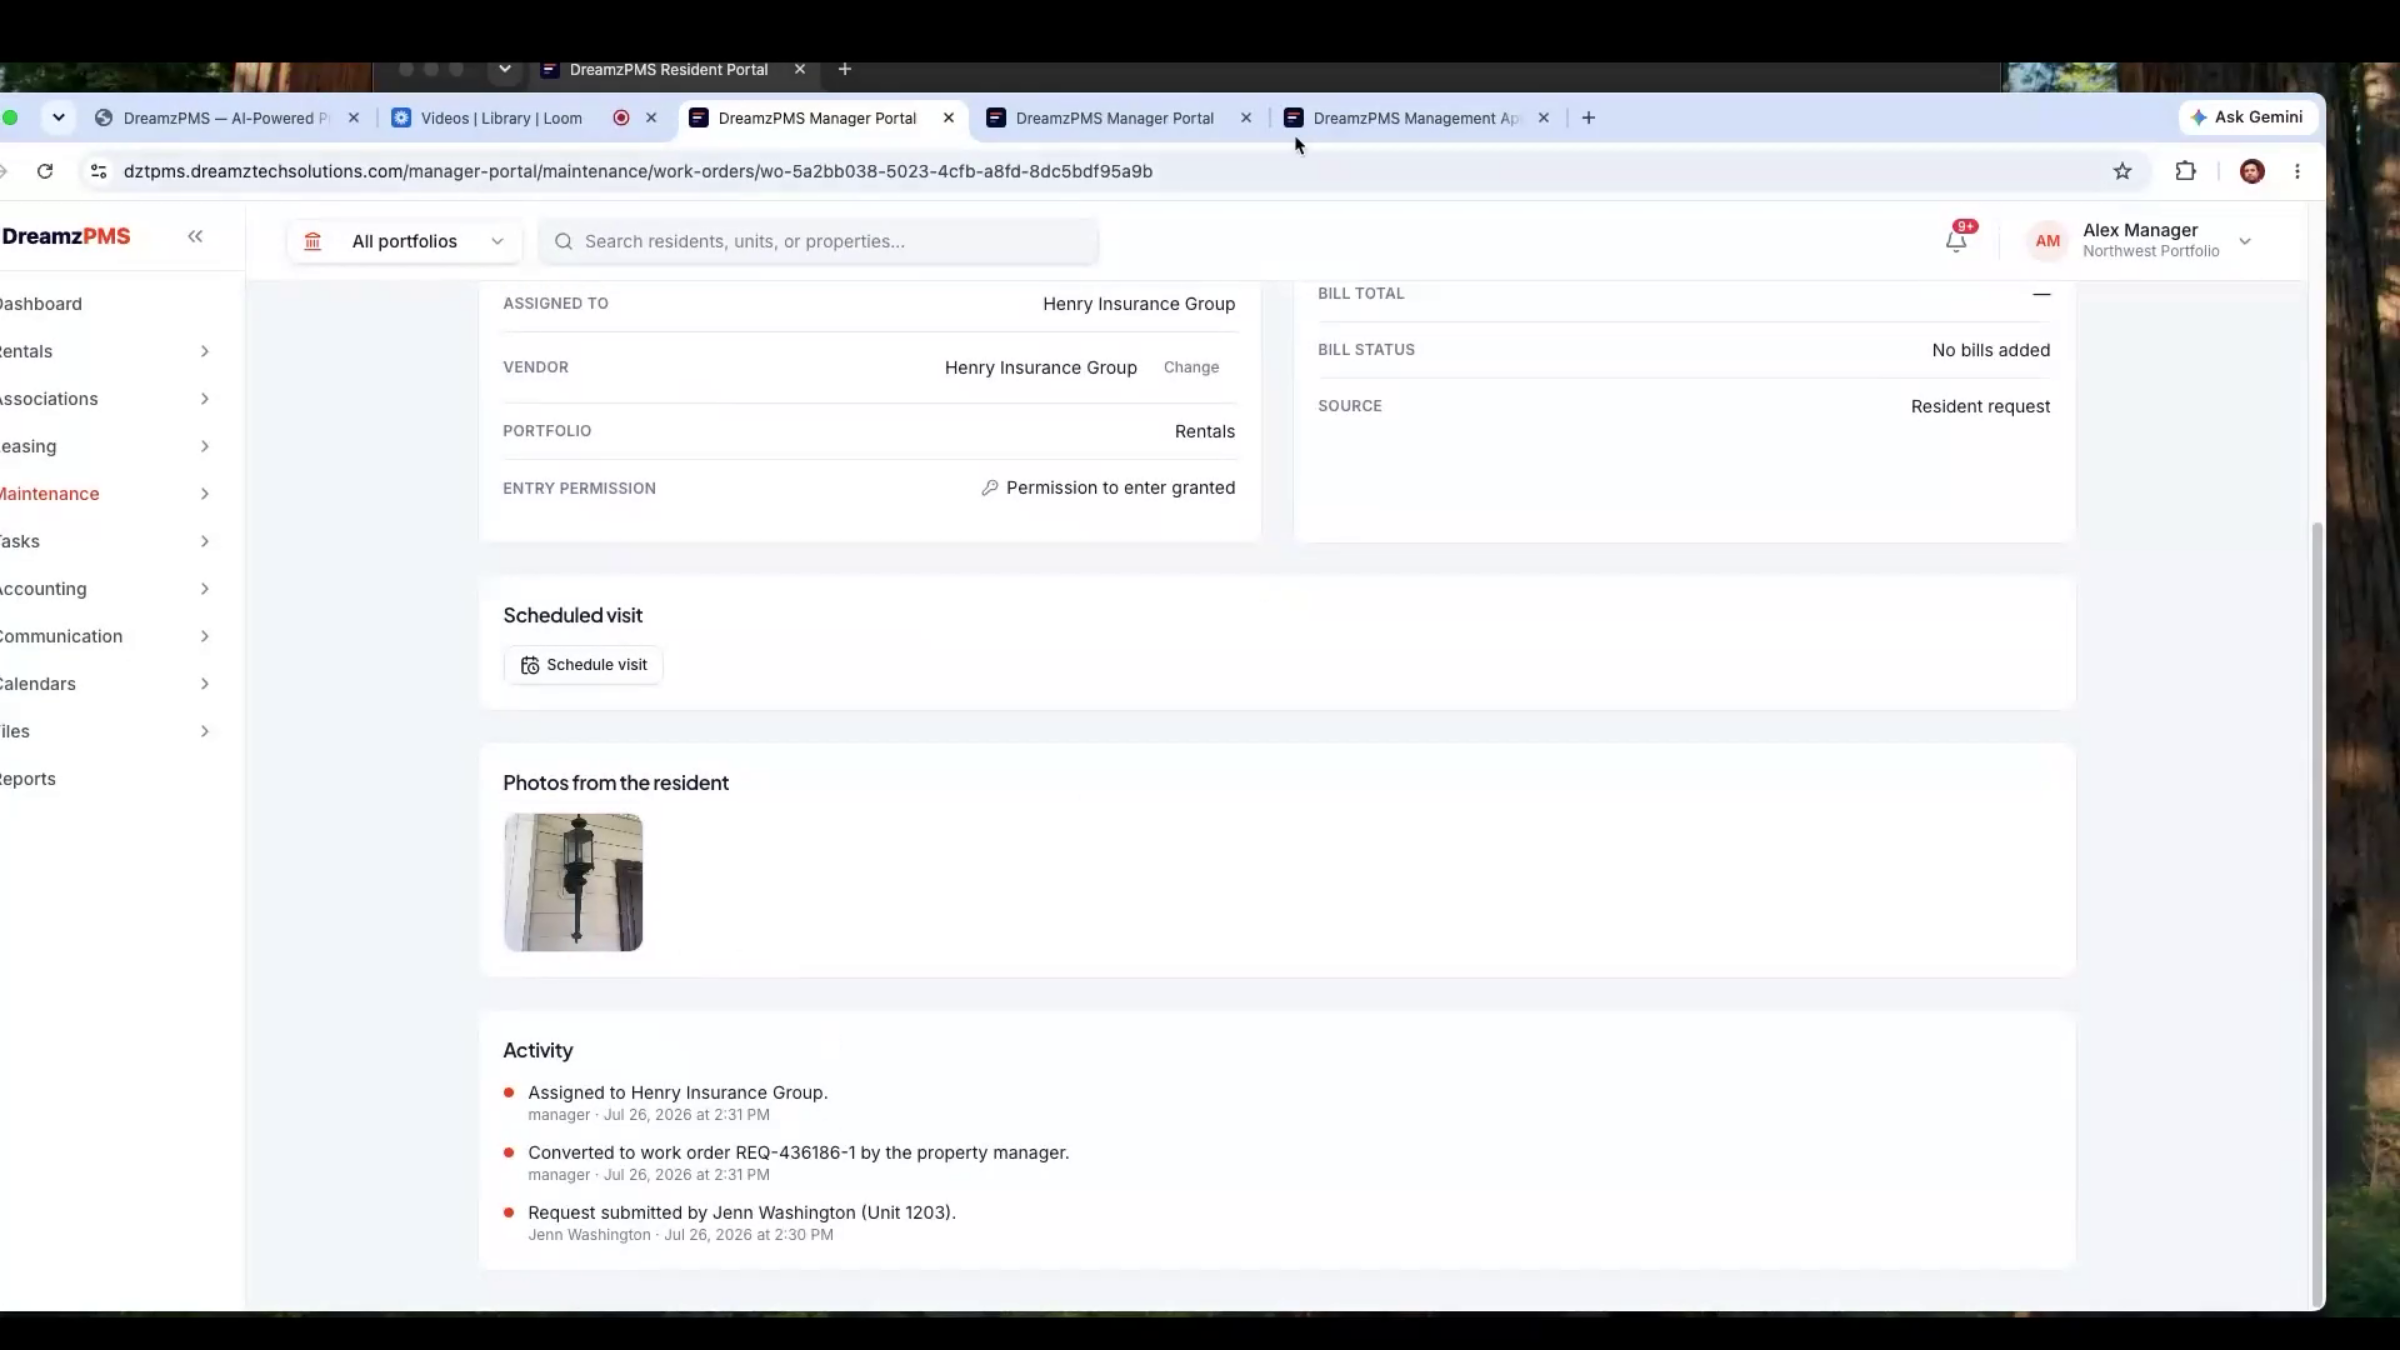
The manager selects a vendor or technician, sets a due date, and assigns the work order to them.
Step 54 – Resident Request Tracking
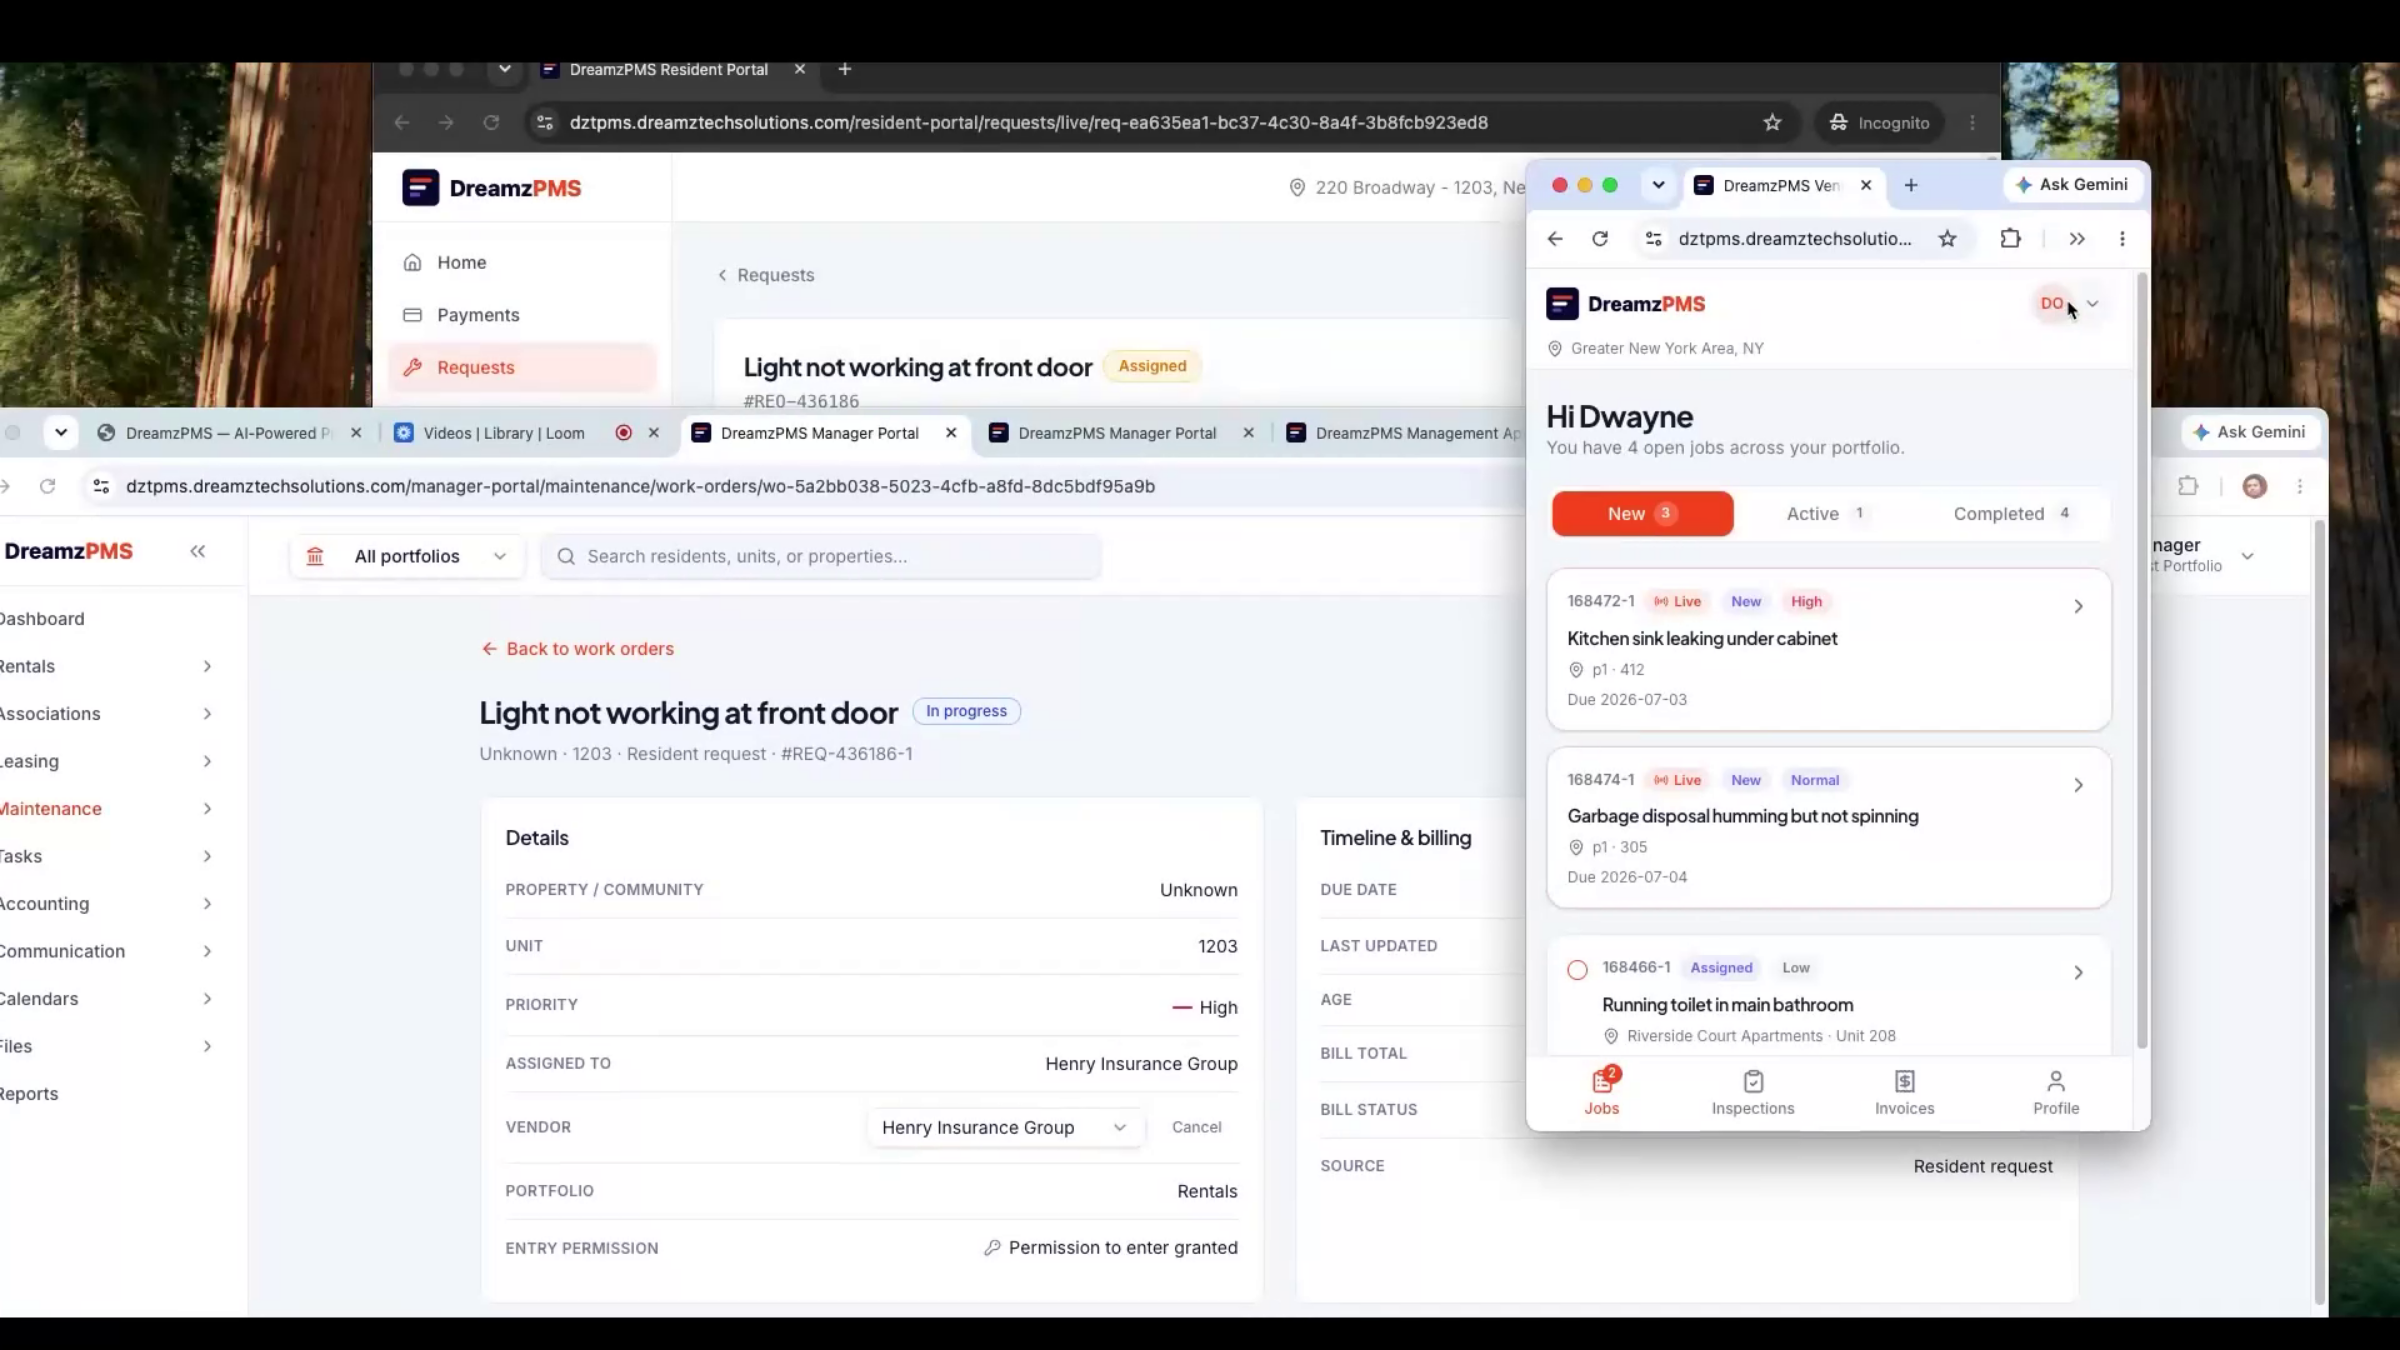
The resident sees the status change from Submitted to In Progress as soon as it's assigned, and the manager can reassign to a different vendor at any time. The assigned vendor is notified automatically the moment the work order goes out.
Vendor Portal and AI Invoice Processing
Step 55 – Vendor Portal Features
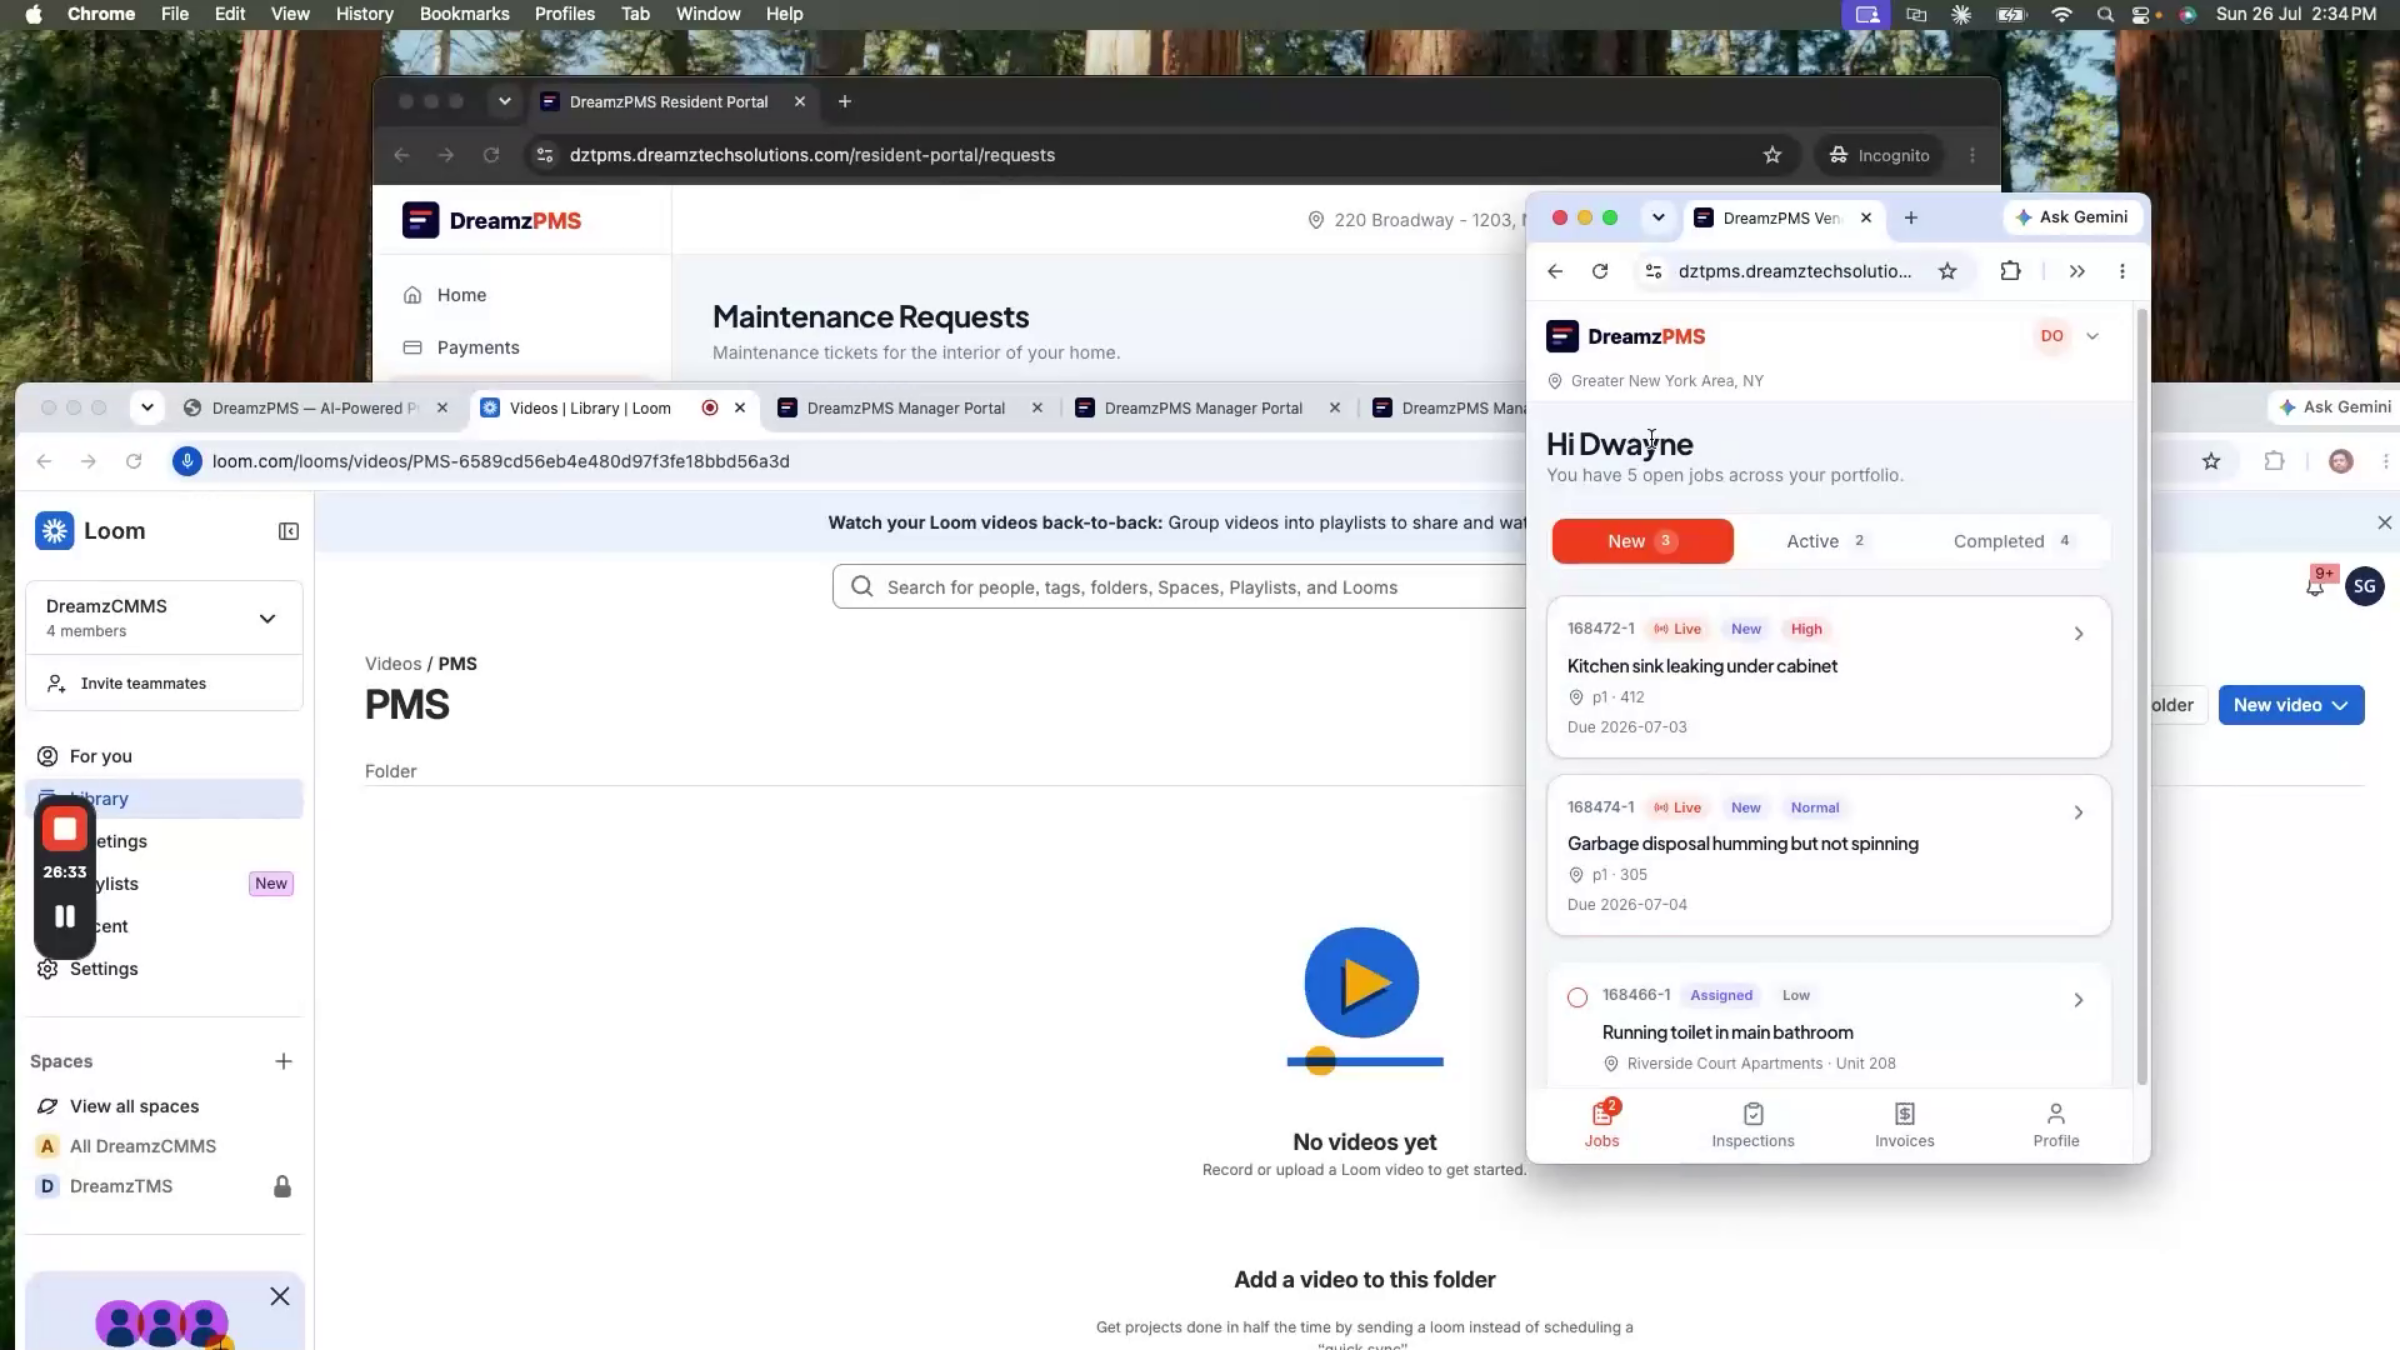
Vendors log into their own portal and app to view assigned jobs, inspect work orders, manage tasks, collect payments, send invoices, and manage their profile.
Step 56 – Vendor Job Management
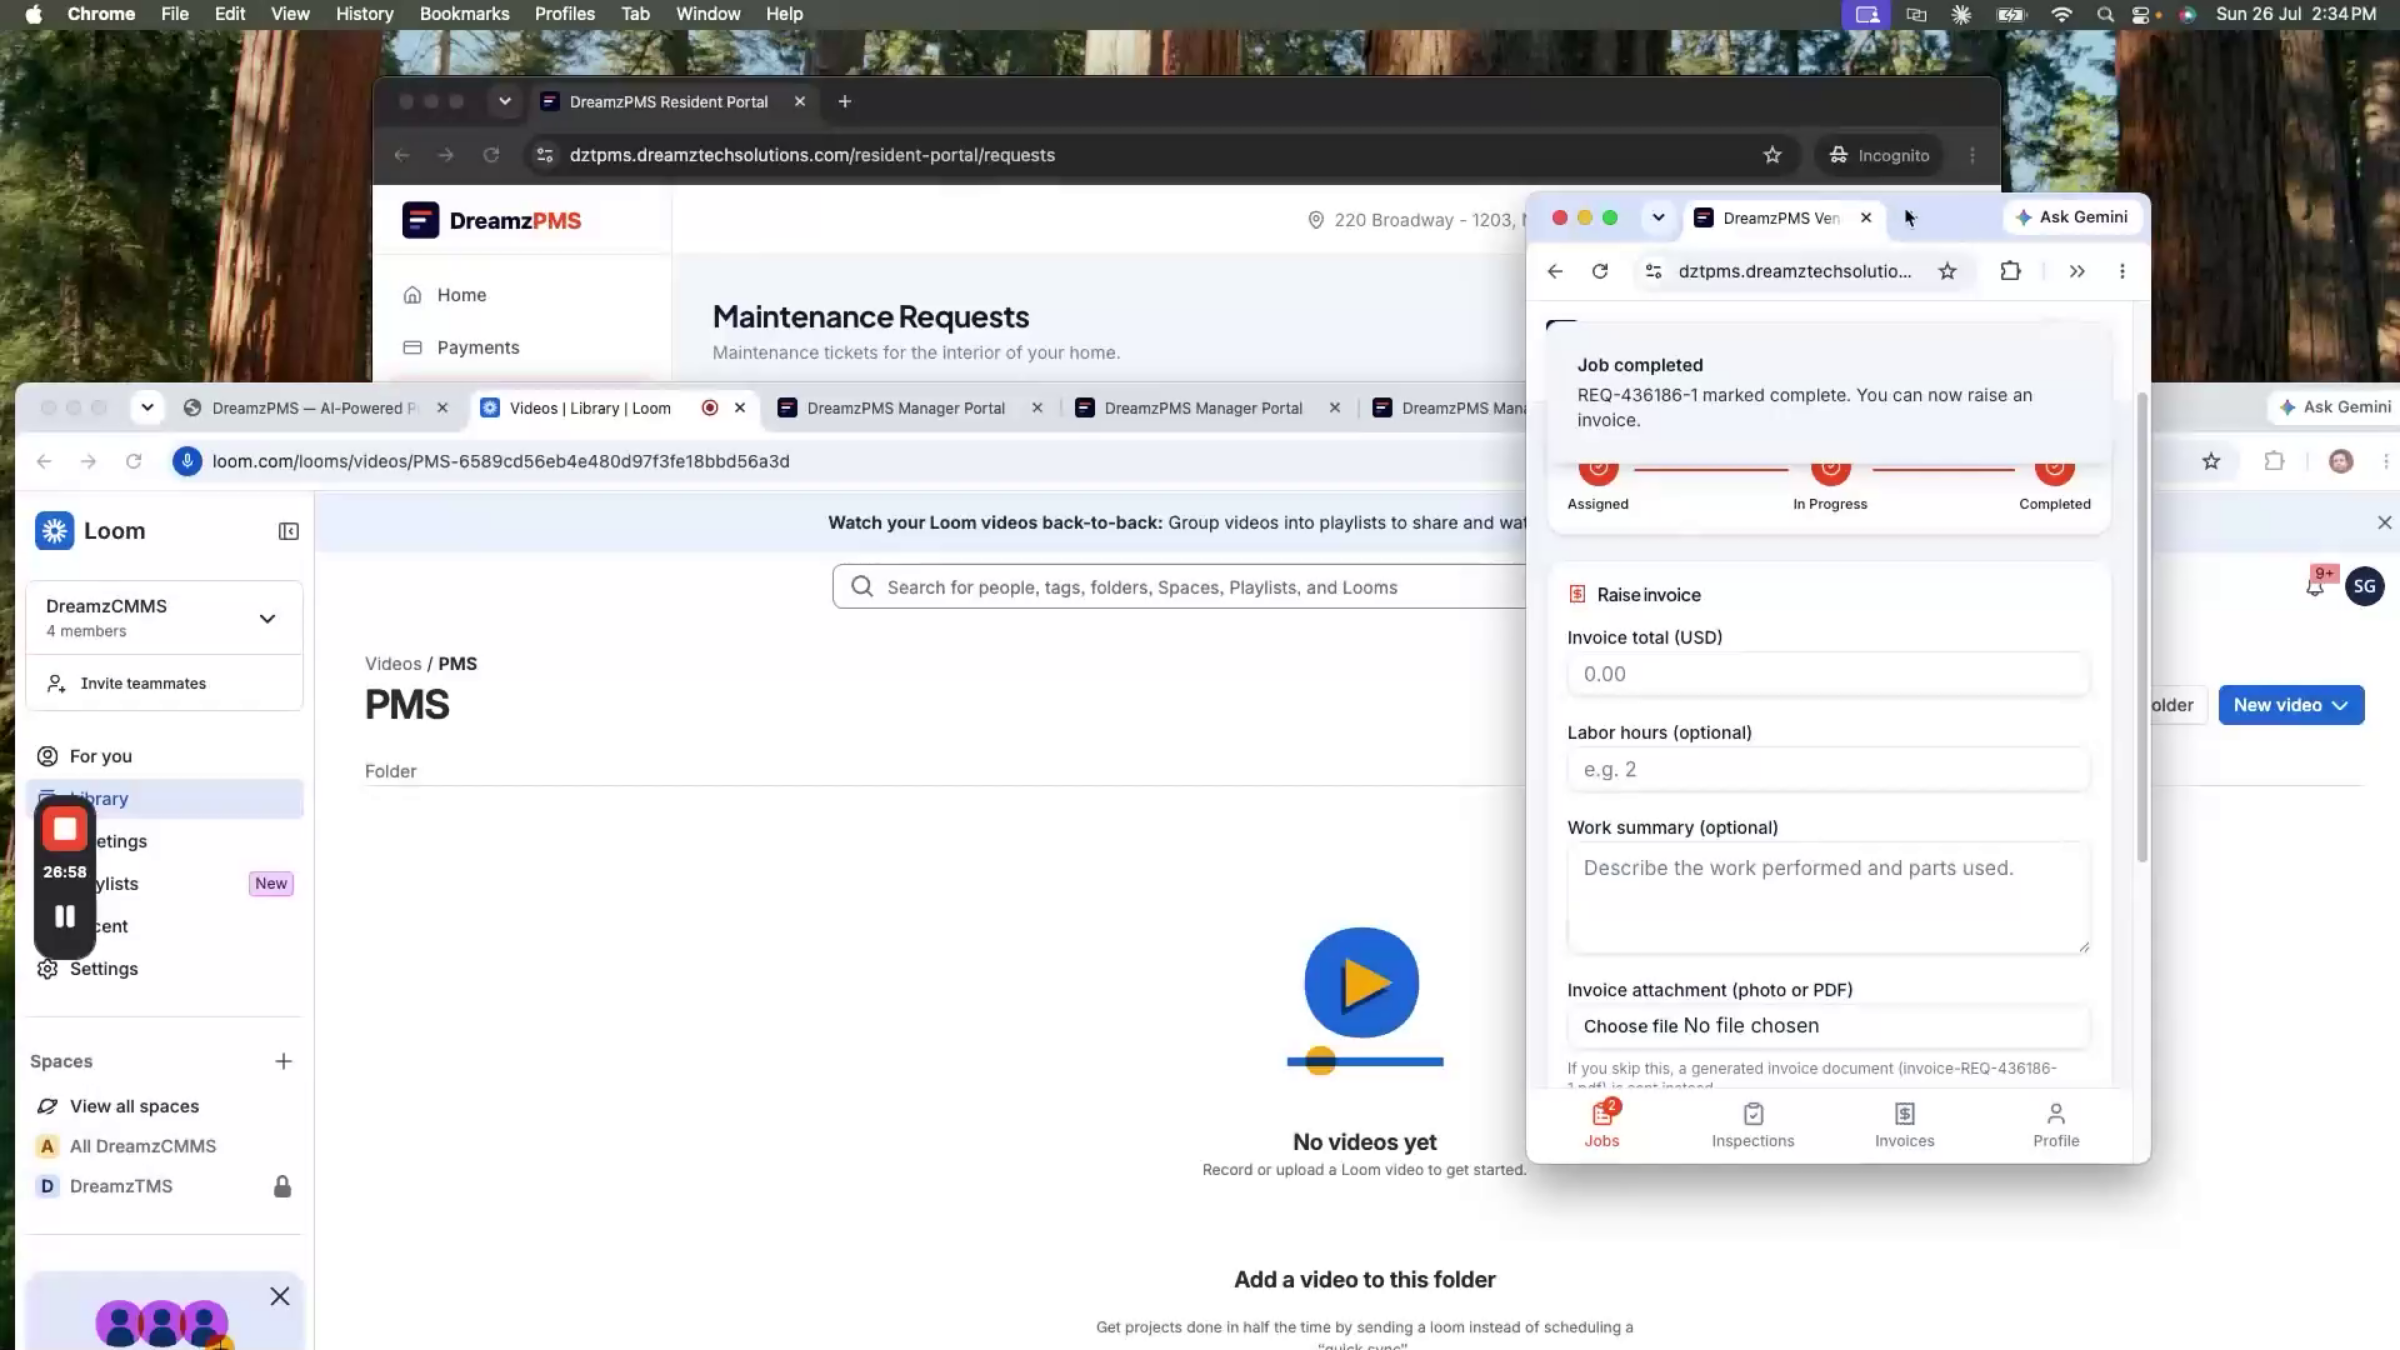
The vendor sees full job details — description, photos, location, and notes — and updates status as work progresses, marking the job complete when finished.
Step 57 – Invoice Submission Options
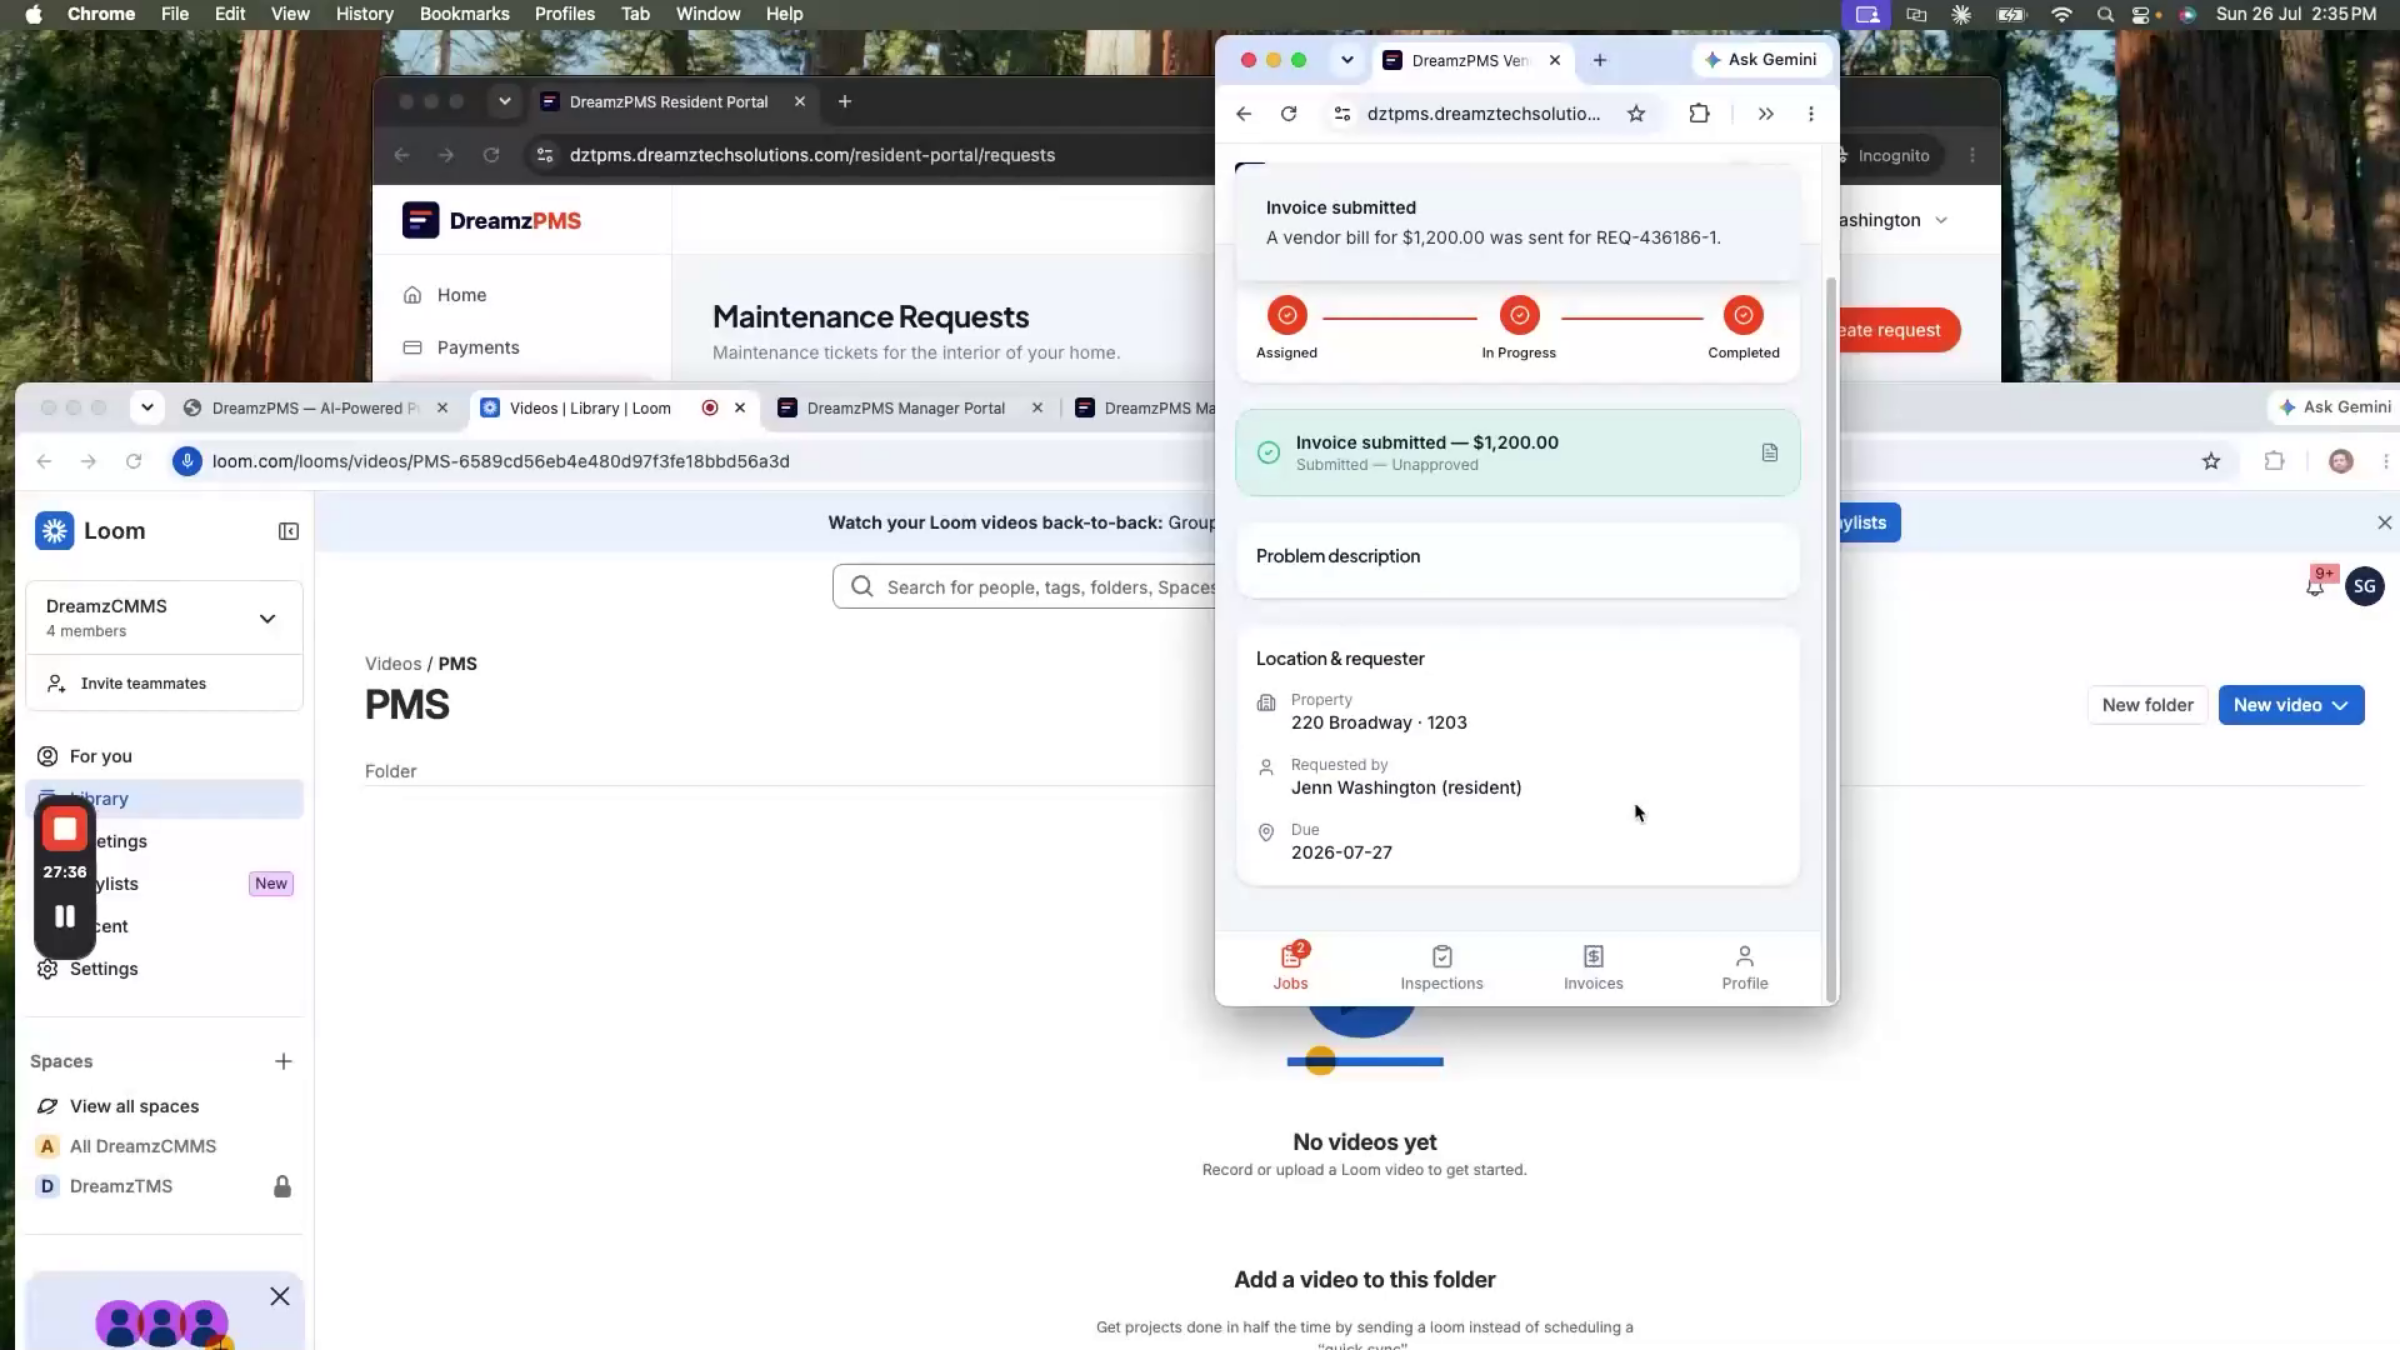
Once the job is complete, the vendor can raise an invoice by recording labor hours and work completed, or simply upload an existing invoice — PDF, scan, or photo — and submit it for the property management team's review.
Step 58 – Invoice Review Process
The invoice appears on the finance side as a submitted bill awaiting approval, skipping the traditional process of reading a PDF line by line and re-entering everything into accounting by hand.
Step 59 – AI Invoice Data Extraction
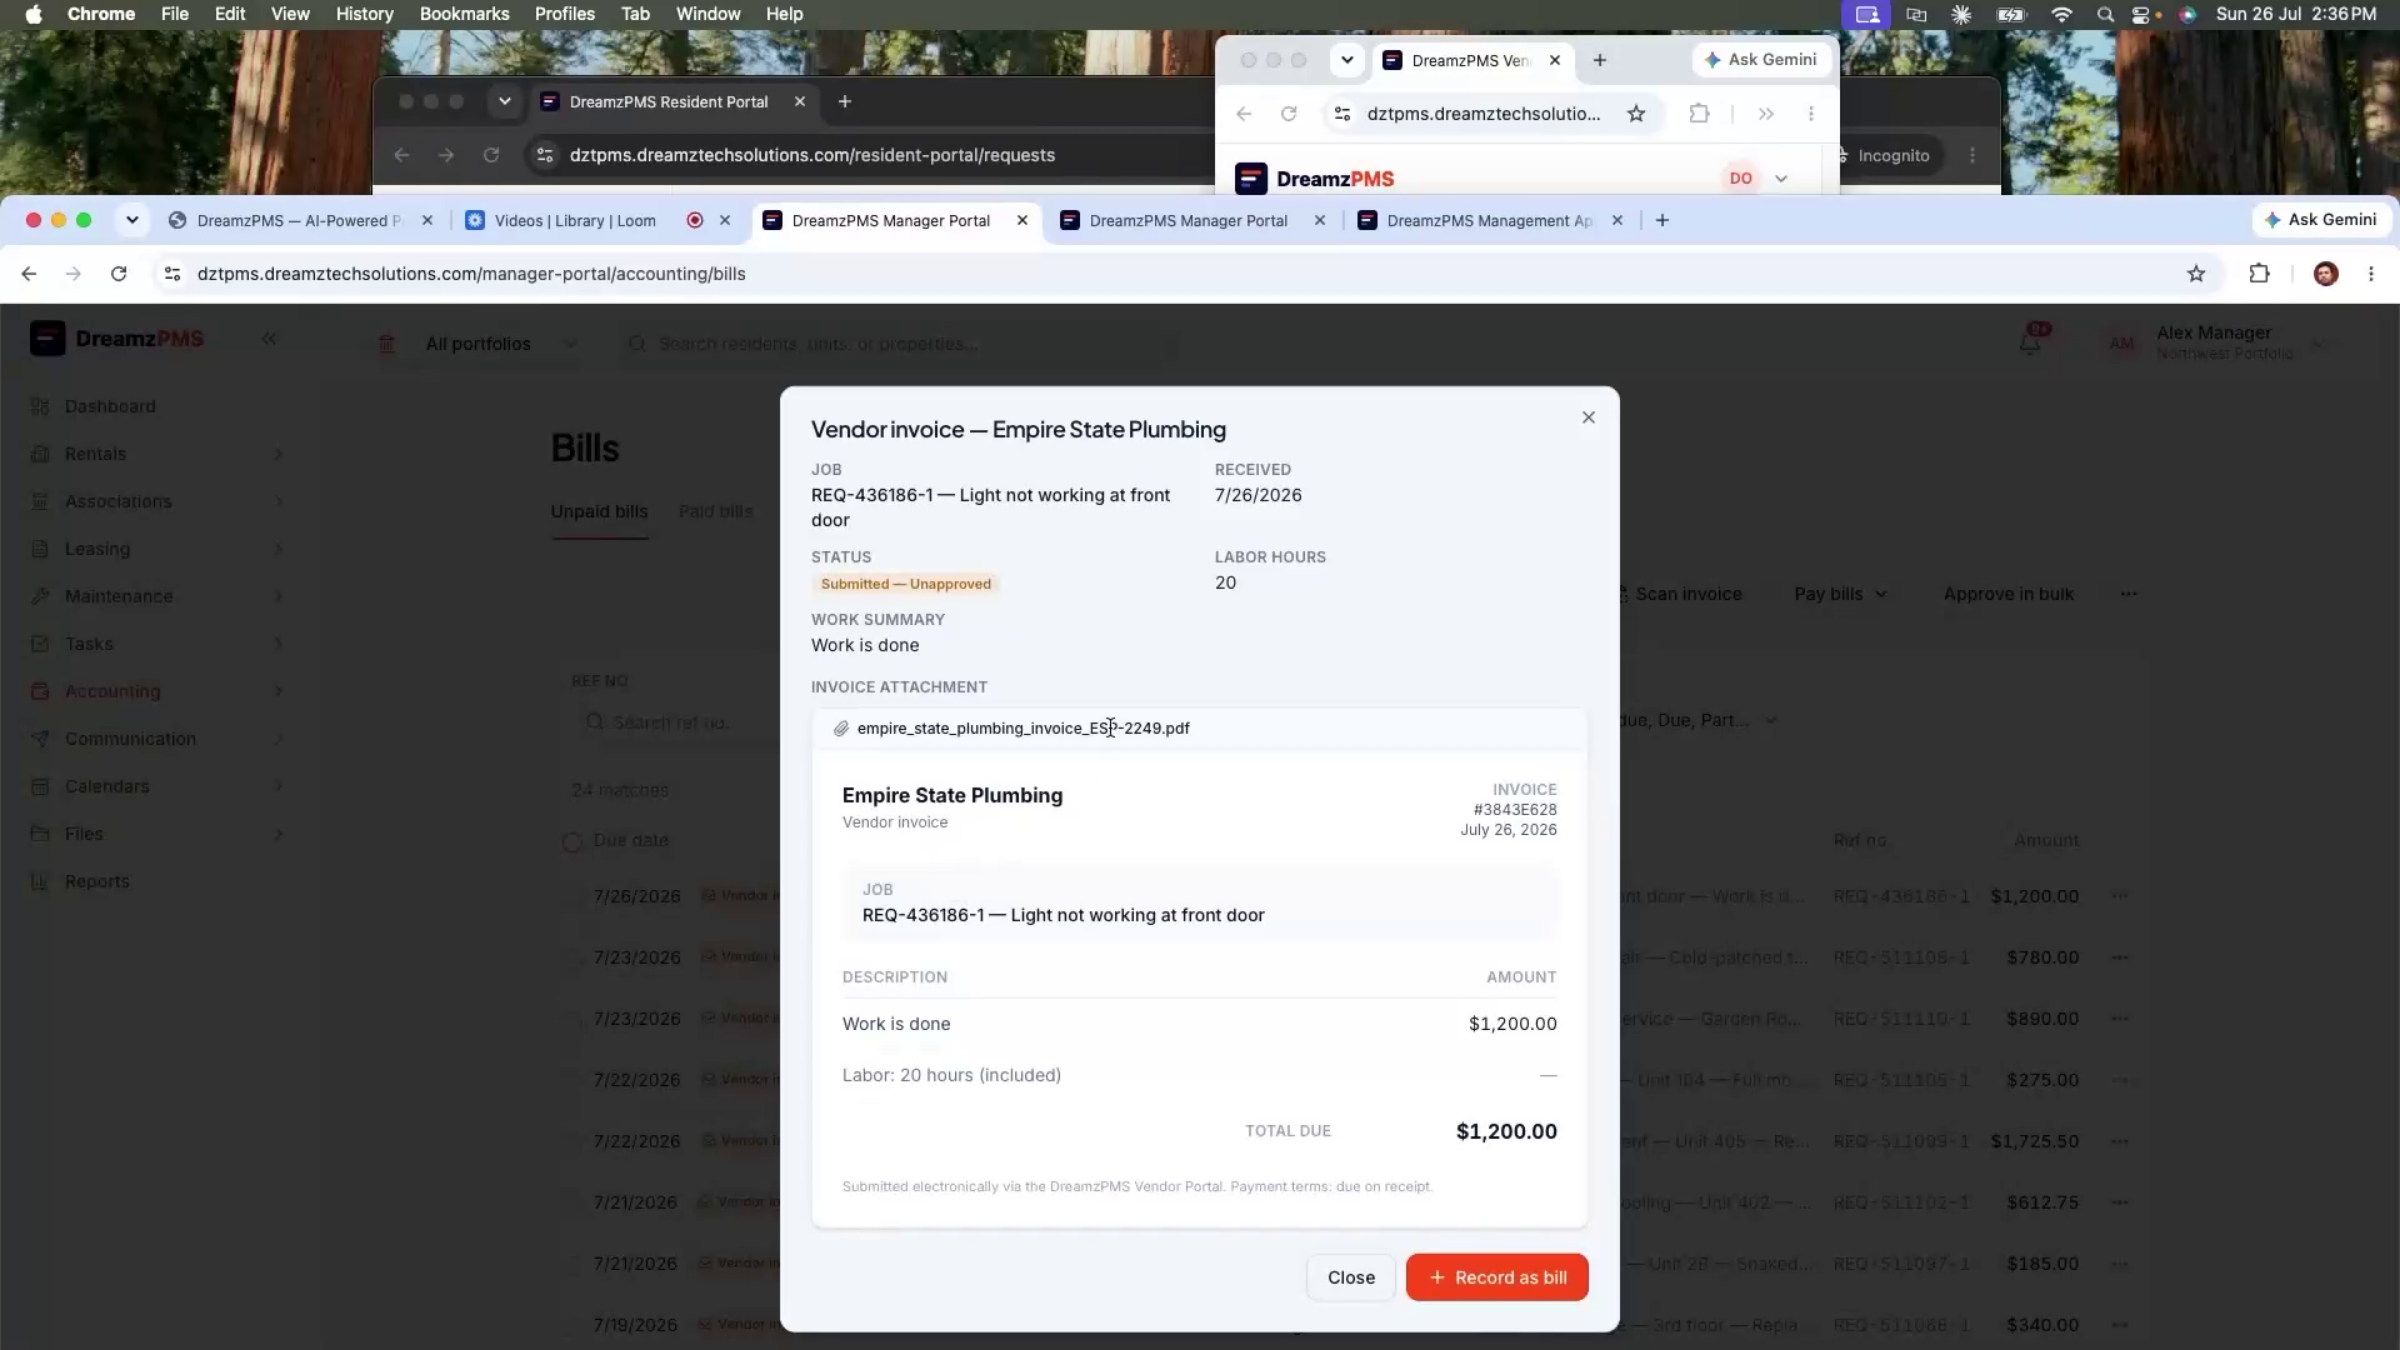
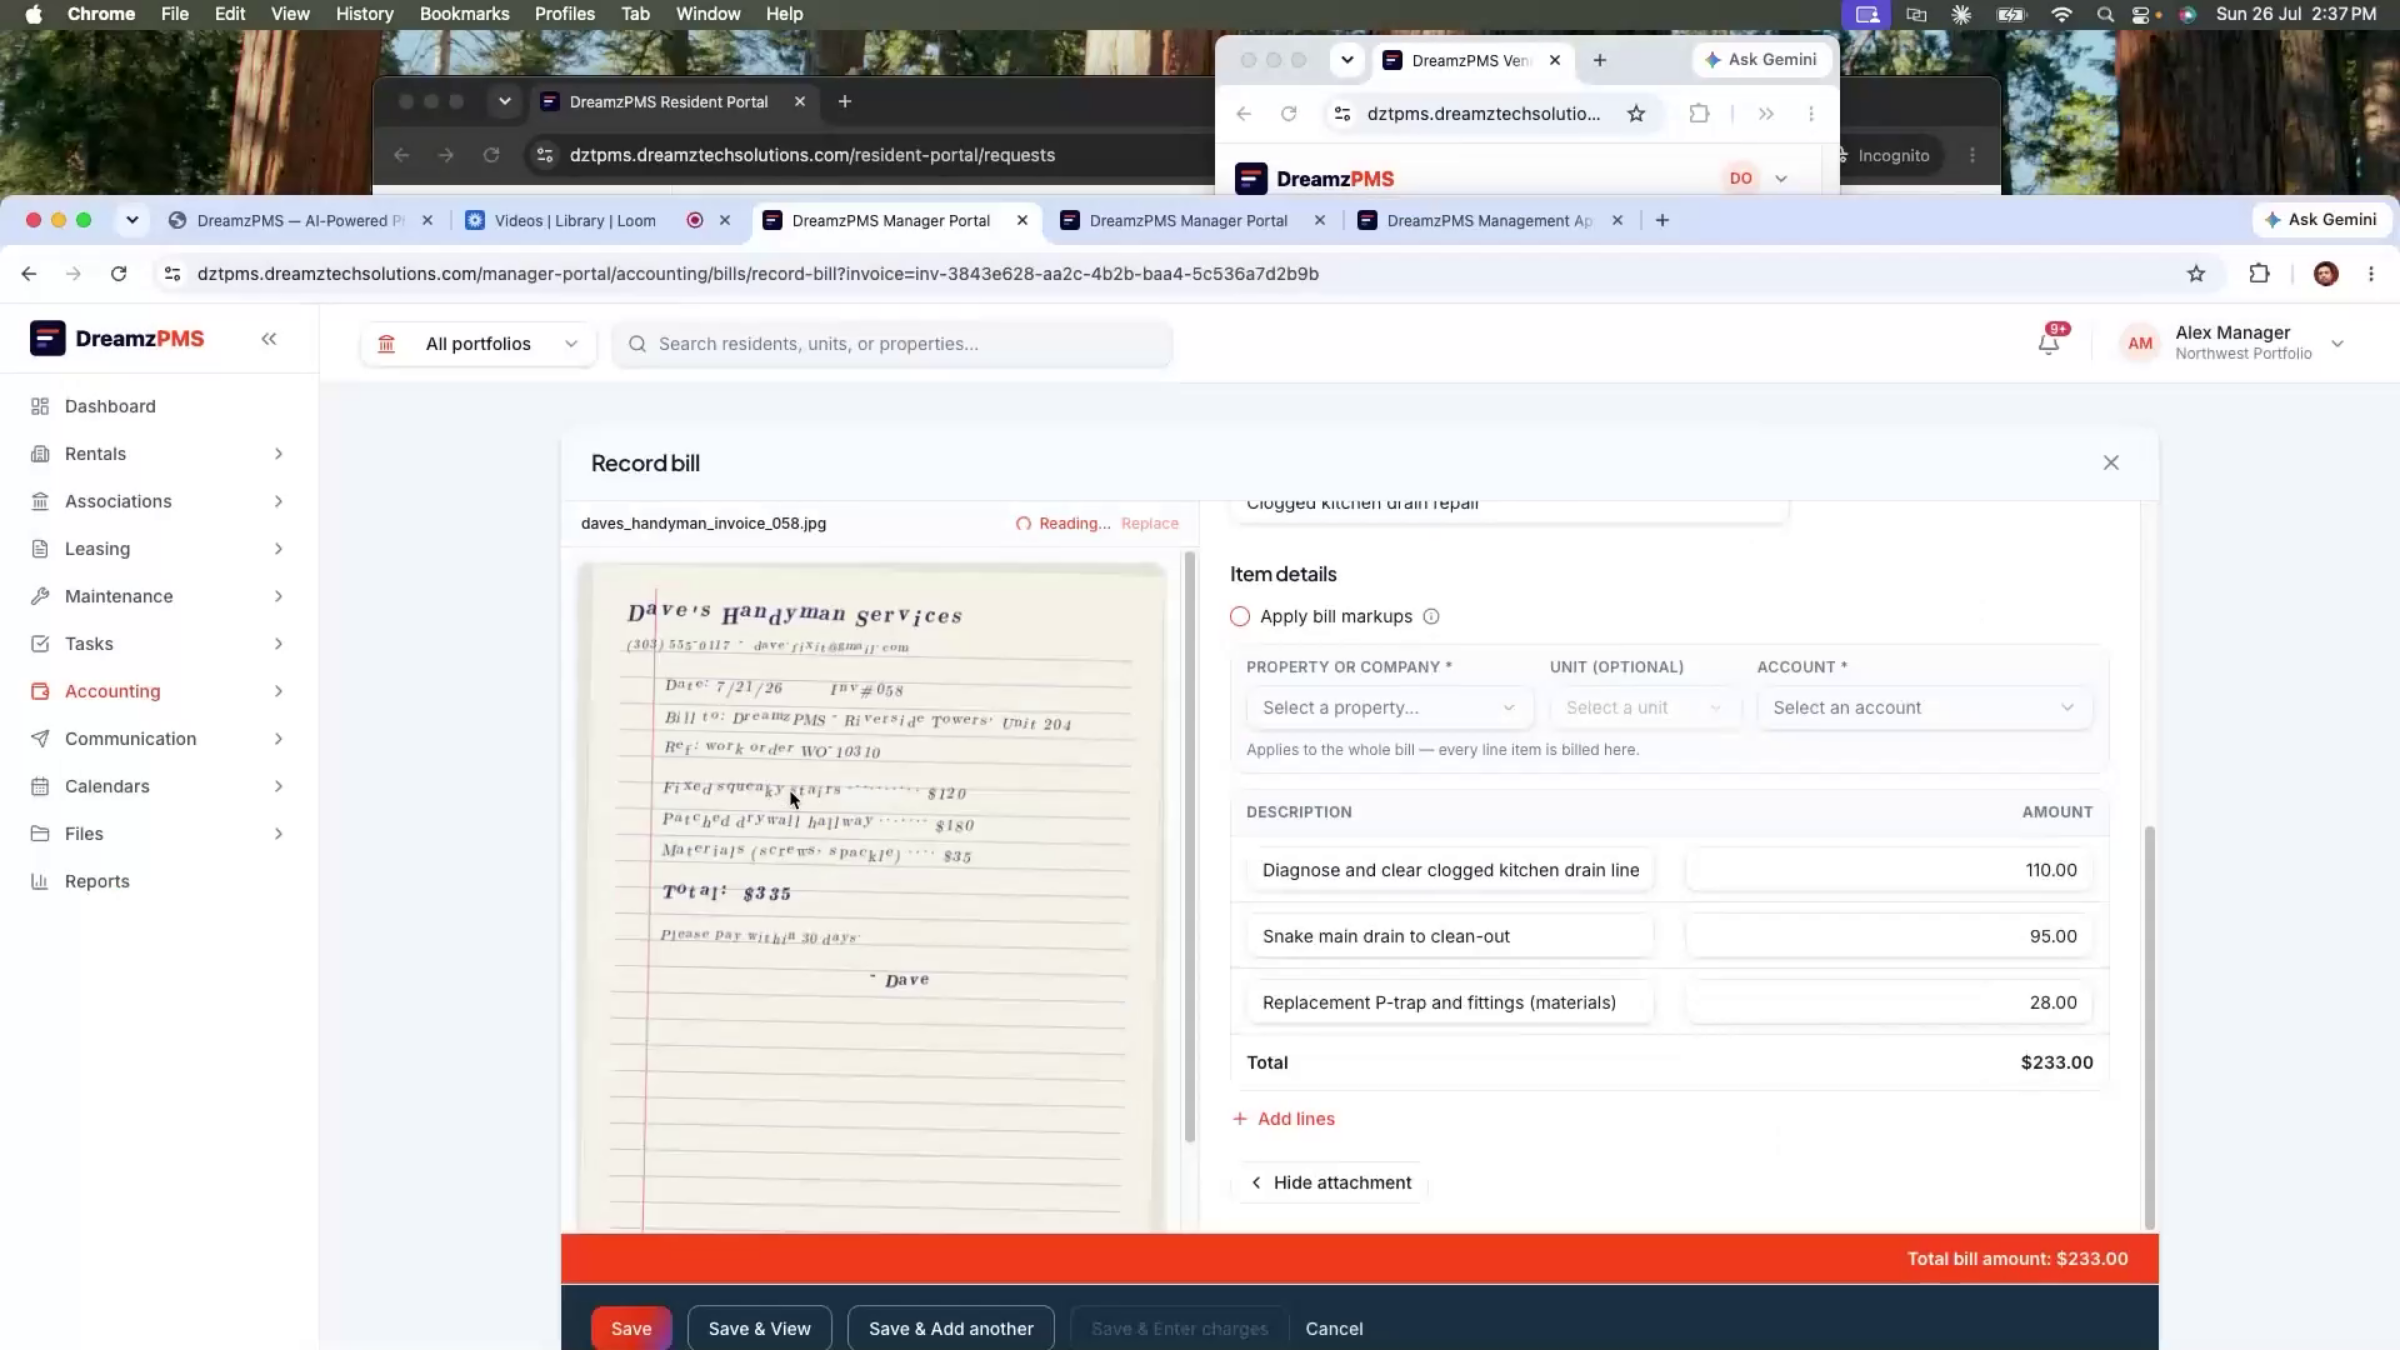
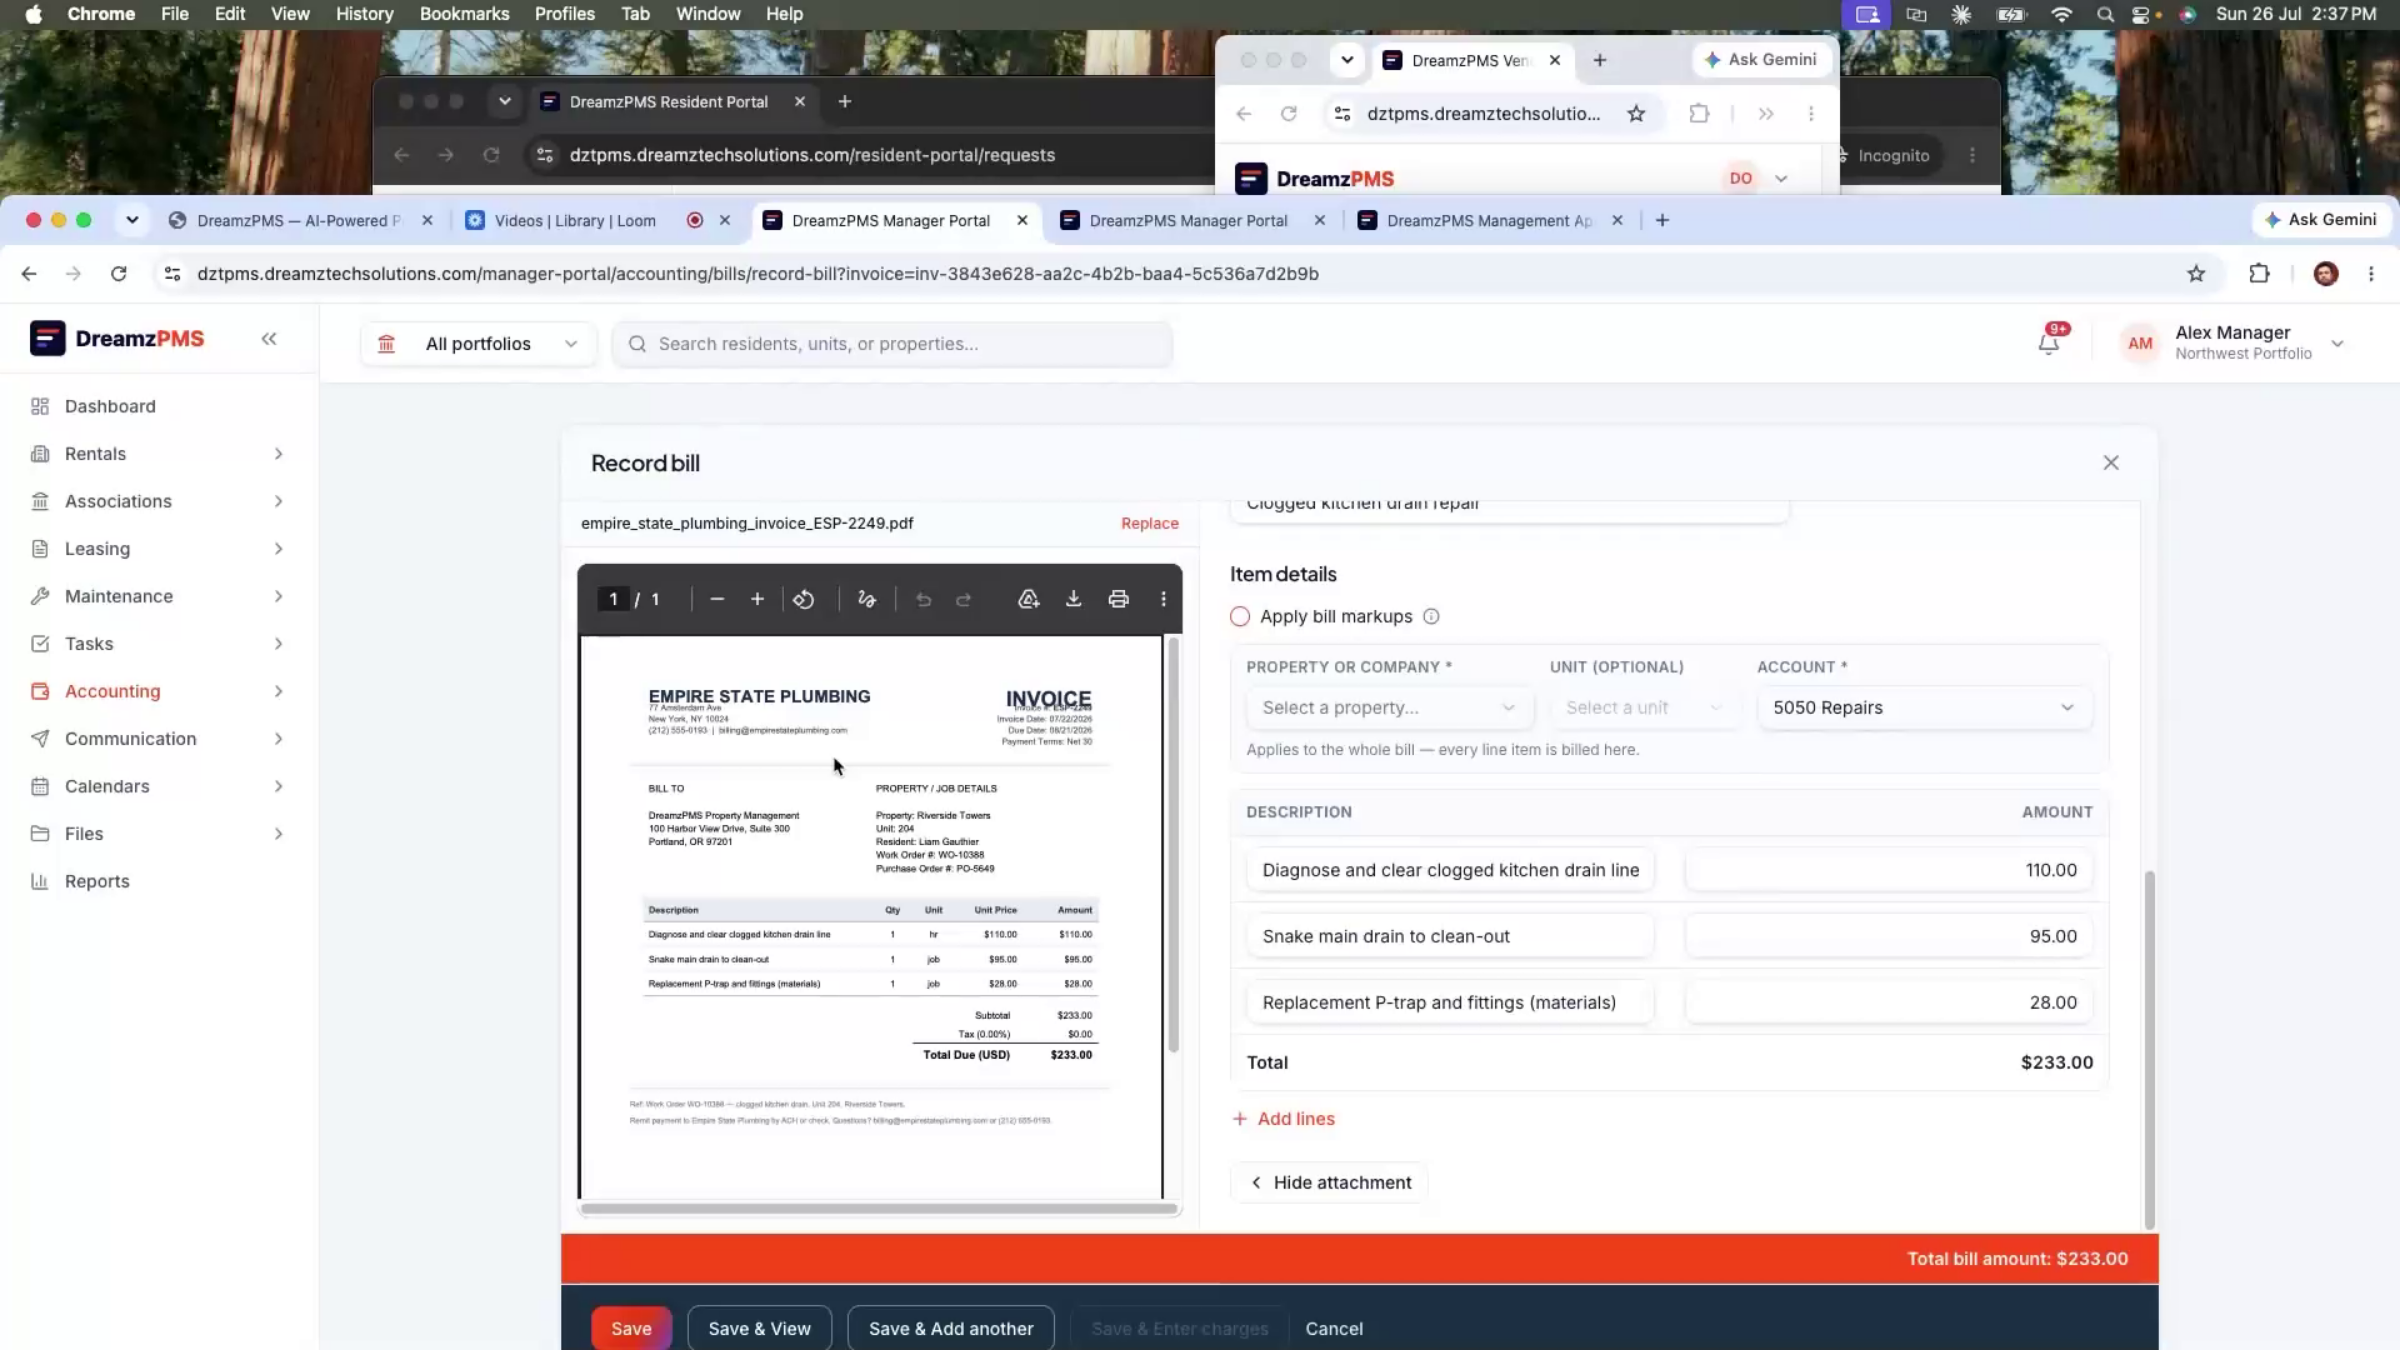
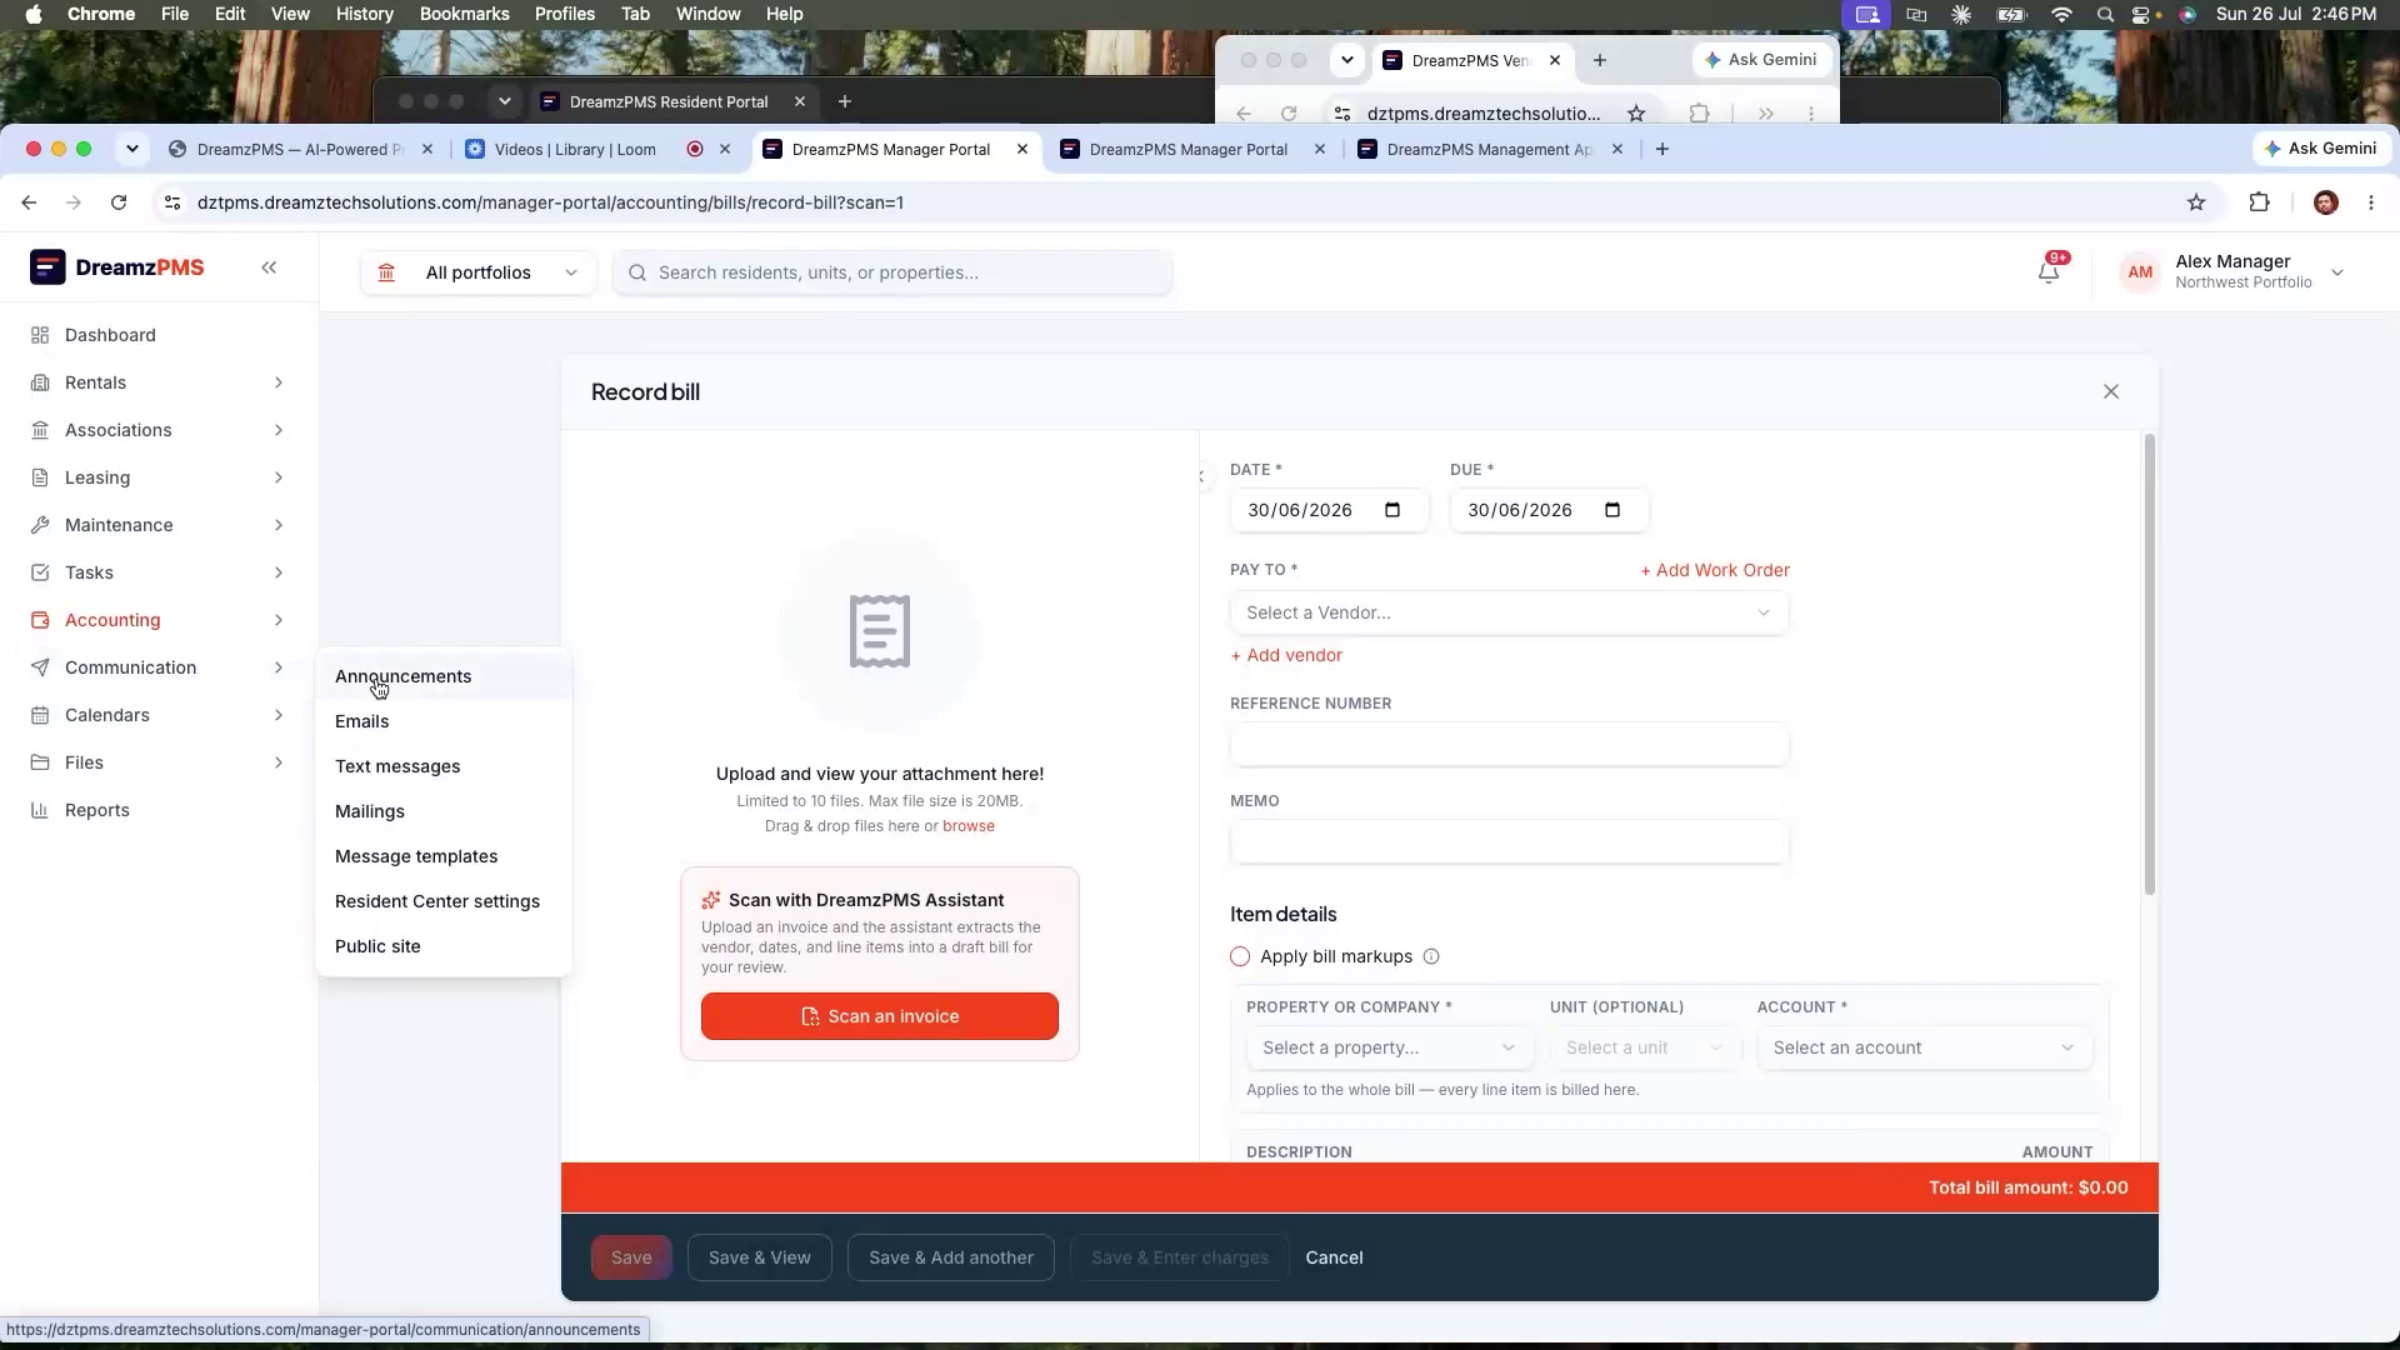
Clicking Record as Bill has the AI read the uploaded invoice and extract the amount, vendor details, invoice number, dates, and other key fields automatically — even from a handwritten invoice.
Step 60 – Invoice Upload Flexibility
The AI processes a professional PDF, scanned document, handwritten invoice, or photo the same way, though vendors can still enter details manually if they'd rather.
Step 61 – Invoice Approval and Payment
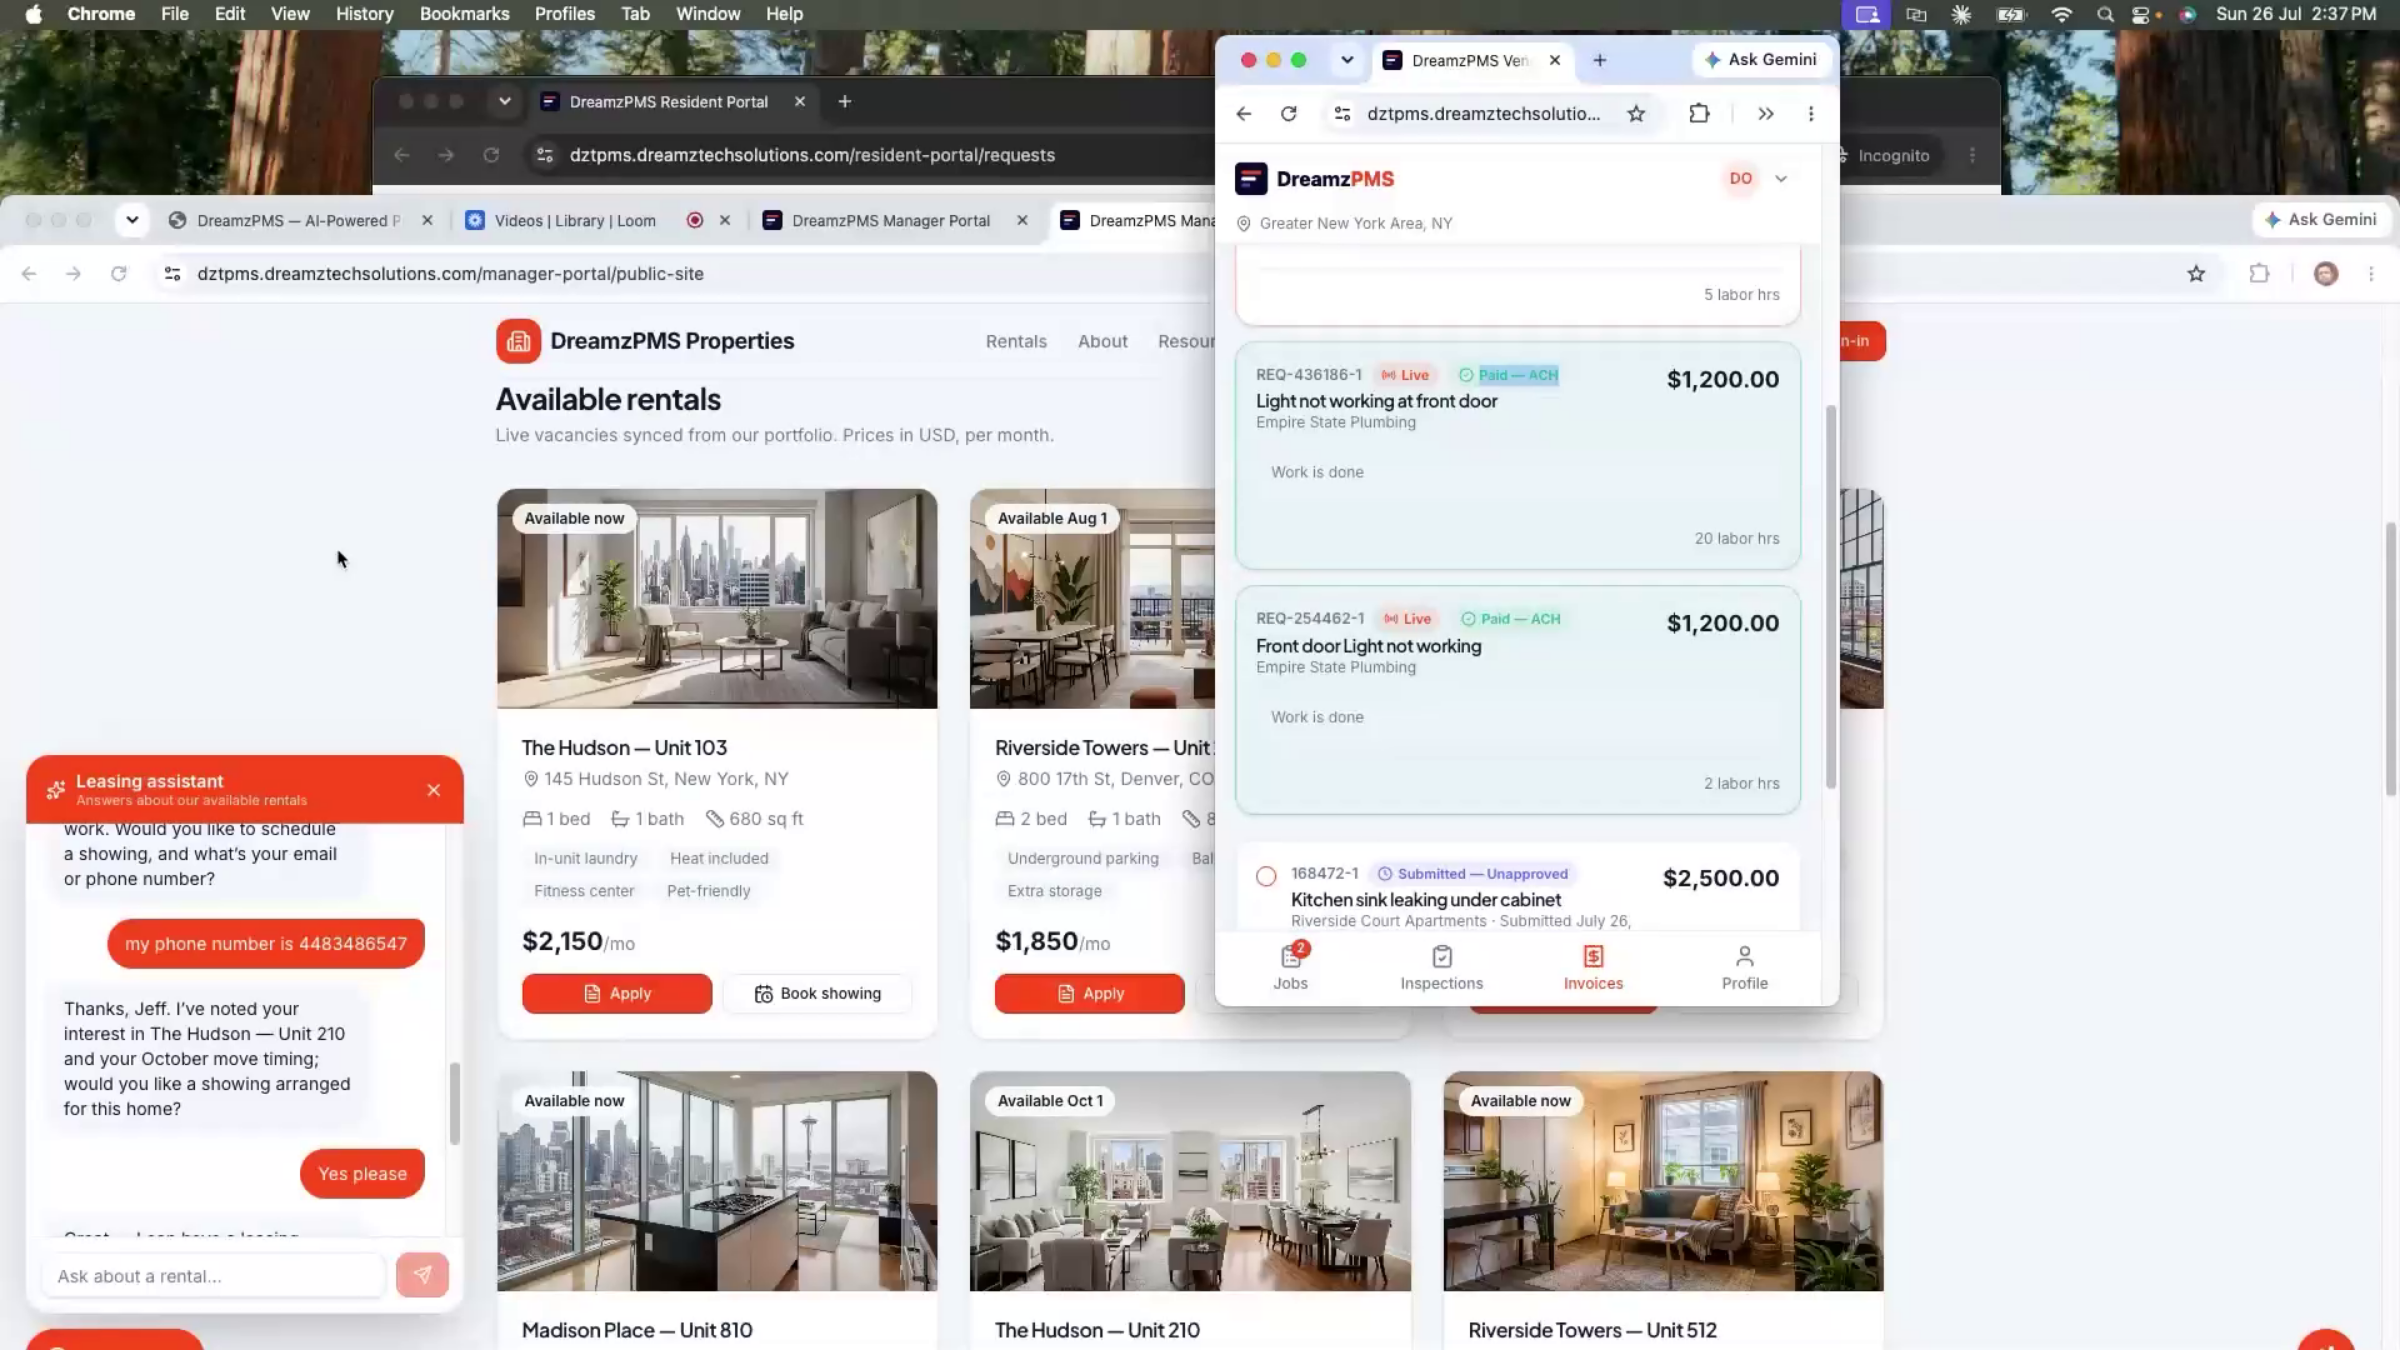
Once reviewed and approved, the bill is marked paid, the vendor is paid, and the transaction is reflected automatically in your invoice and payment records — completing the maintenance billing cycle with minimal manual entry.
AI Maintenance Agent
Step 62 – AI Maintenance Agent Overview
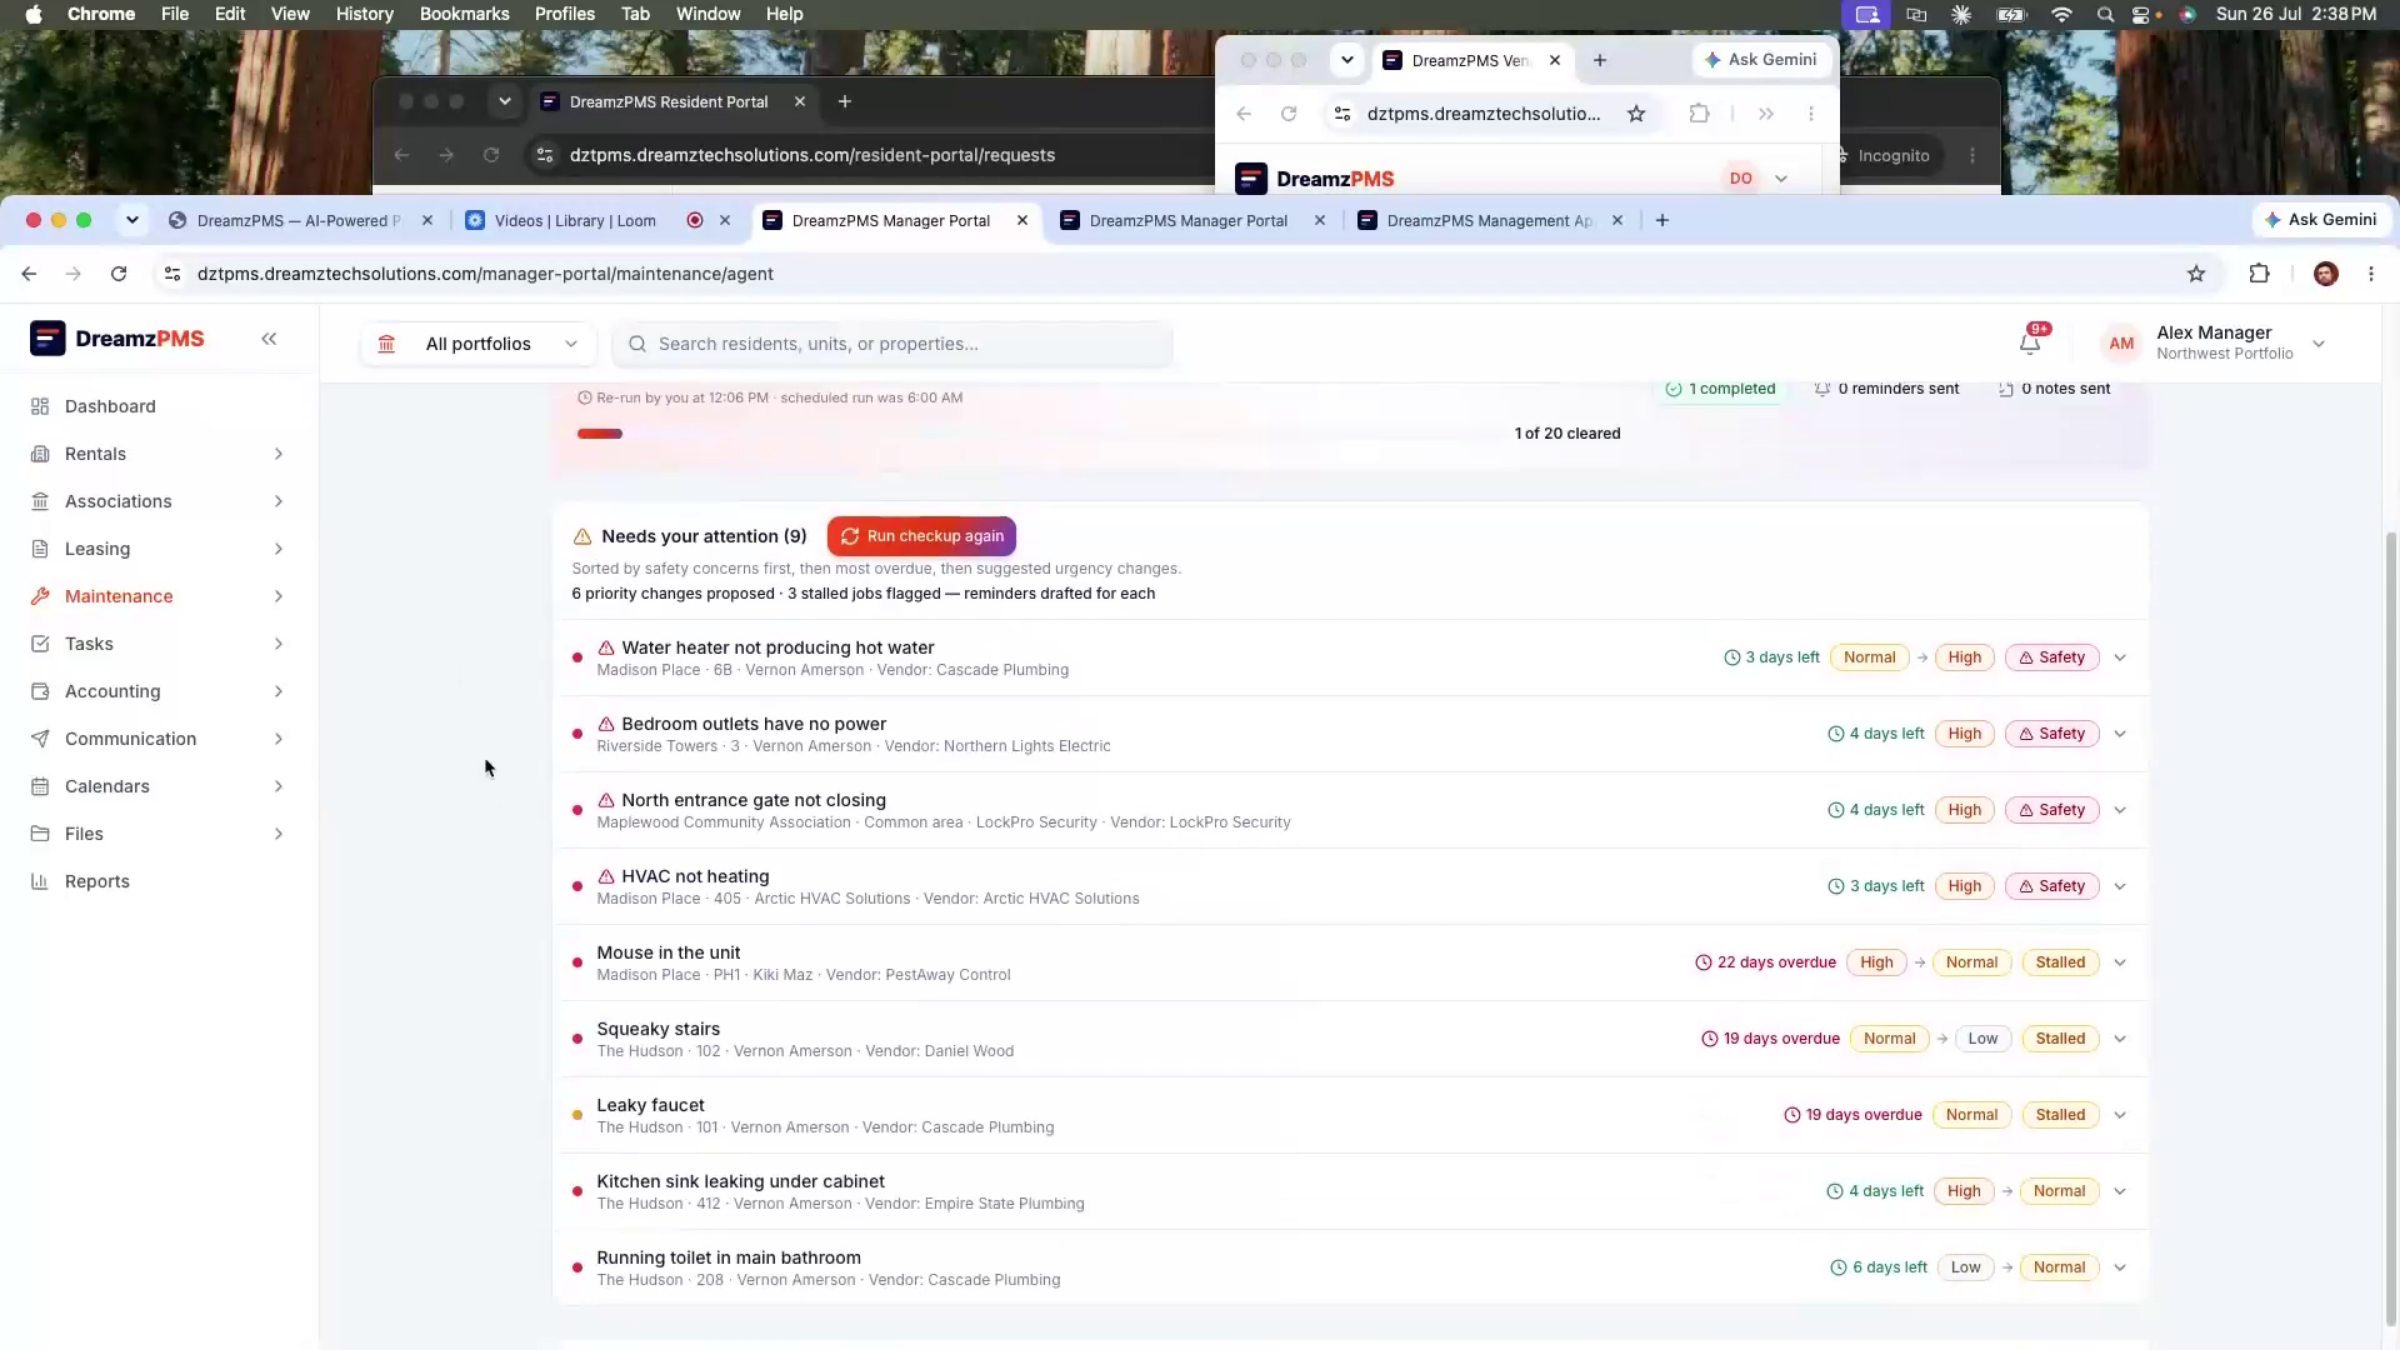
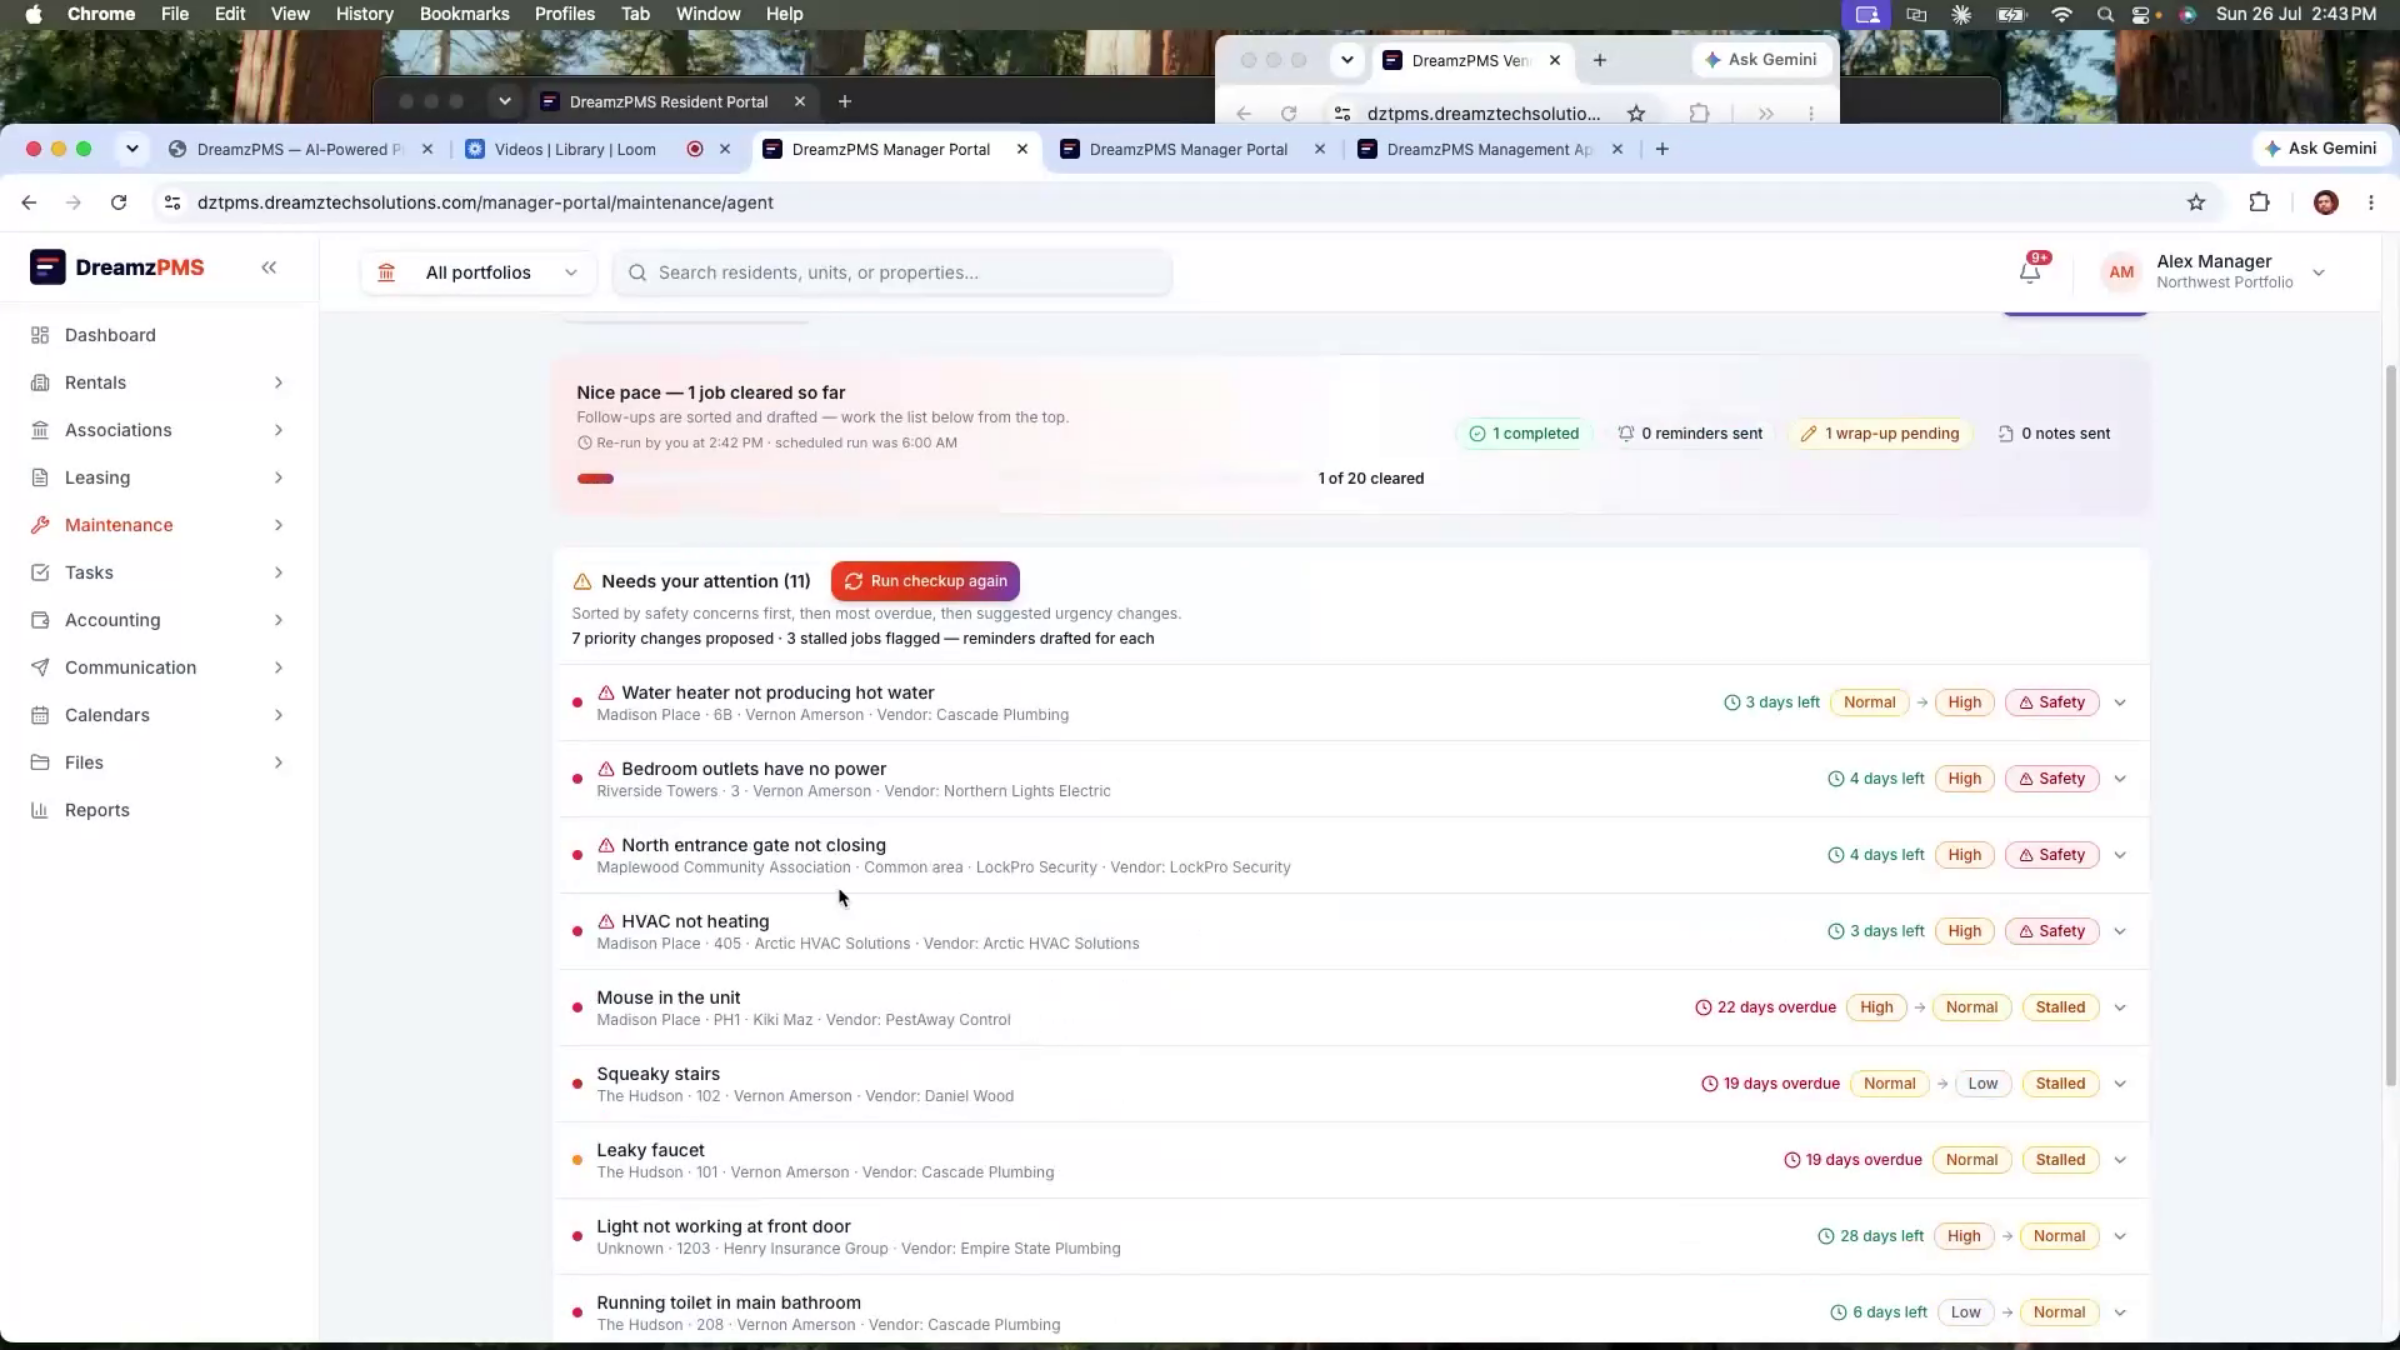
The AI Maintenance Agent runs automatically in the background — for example, every morning at 6 a.m. — reviewing every open work order, evaluating priority, and flagging overdue or high-risk requests.
Step 63 – AI Priority Recommendations
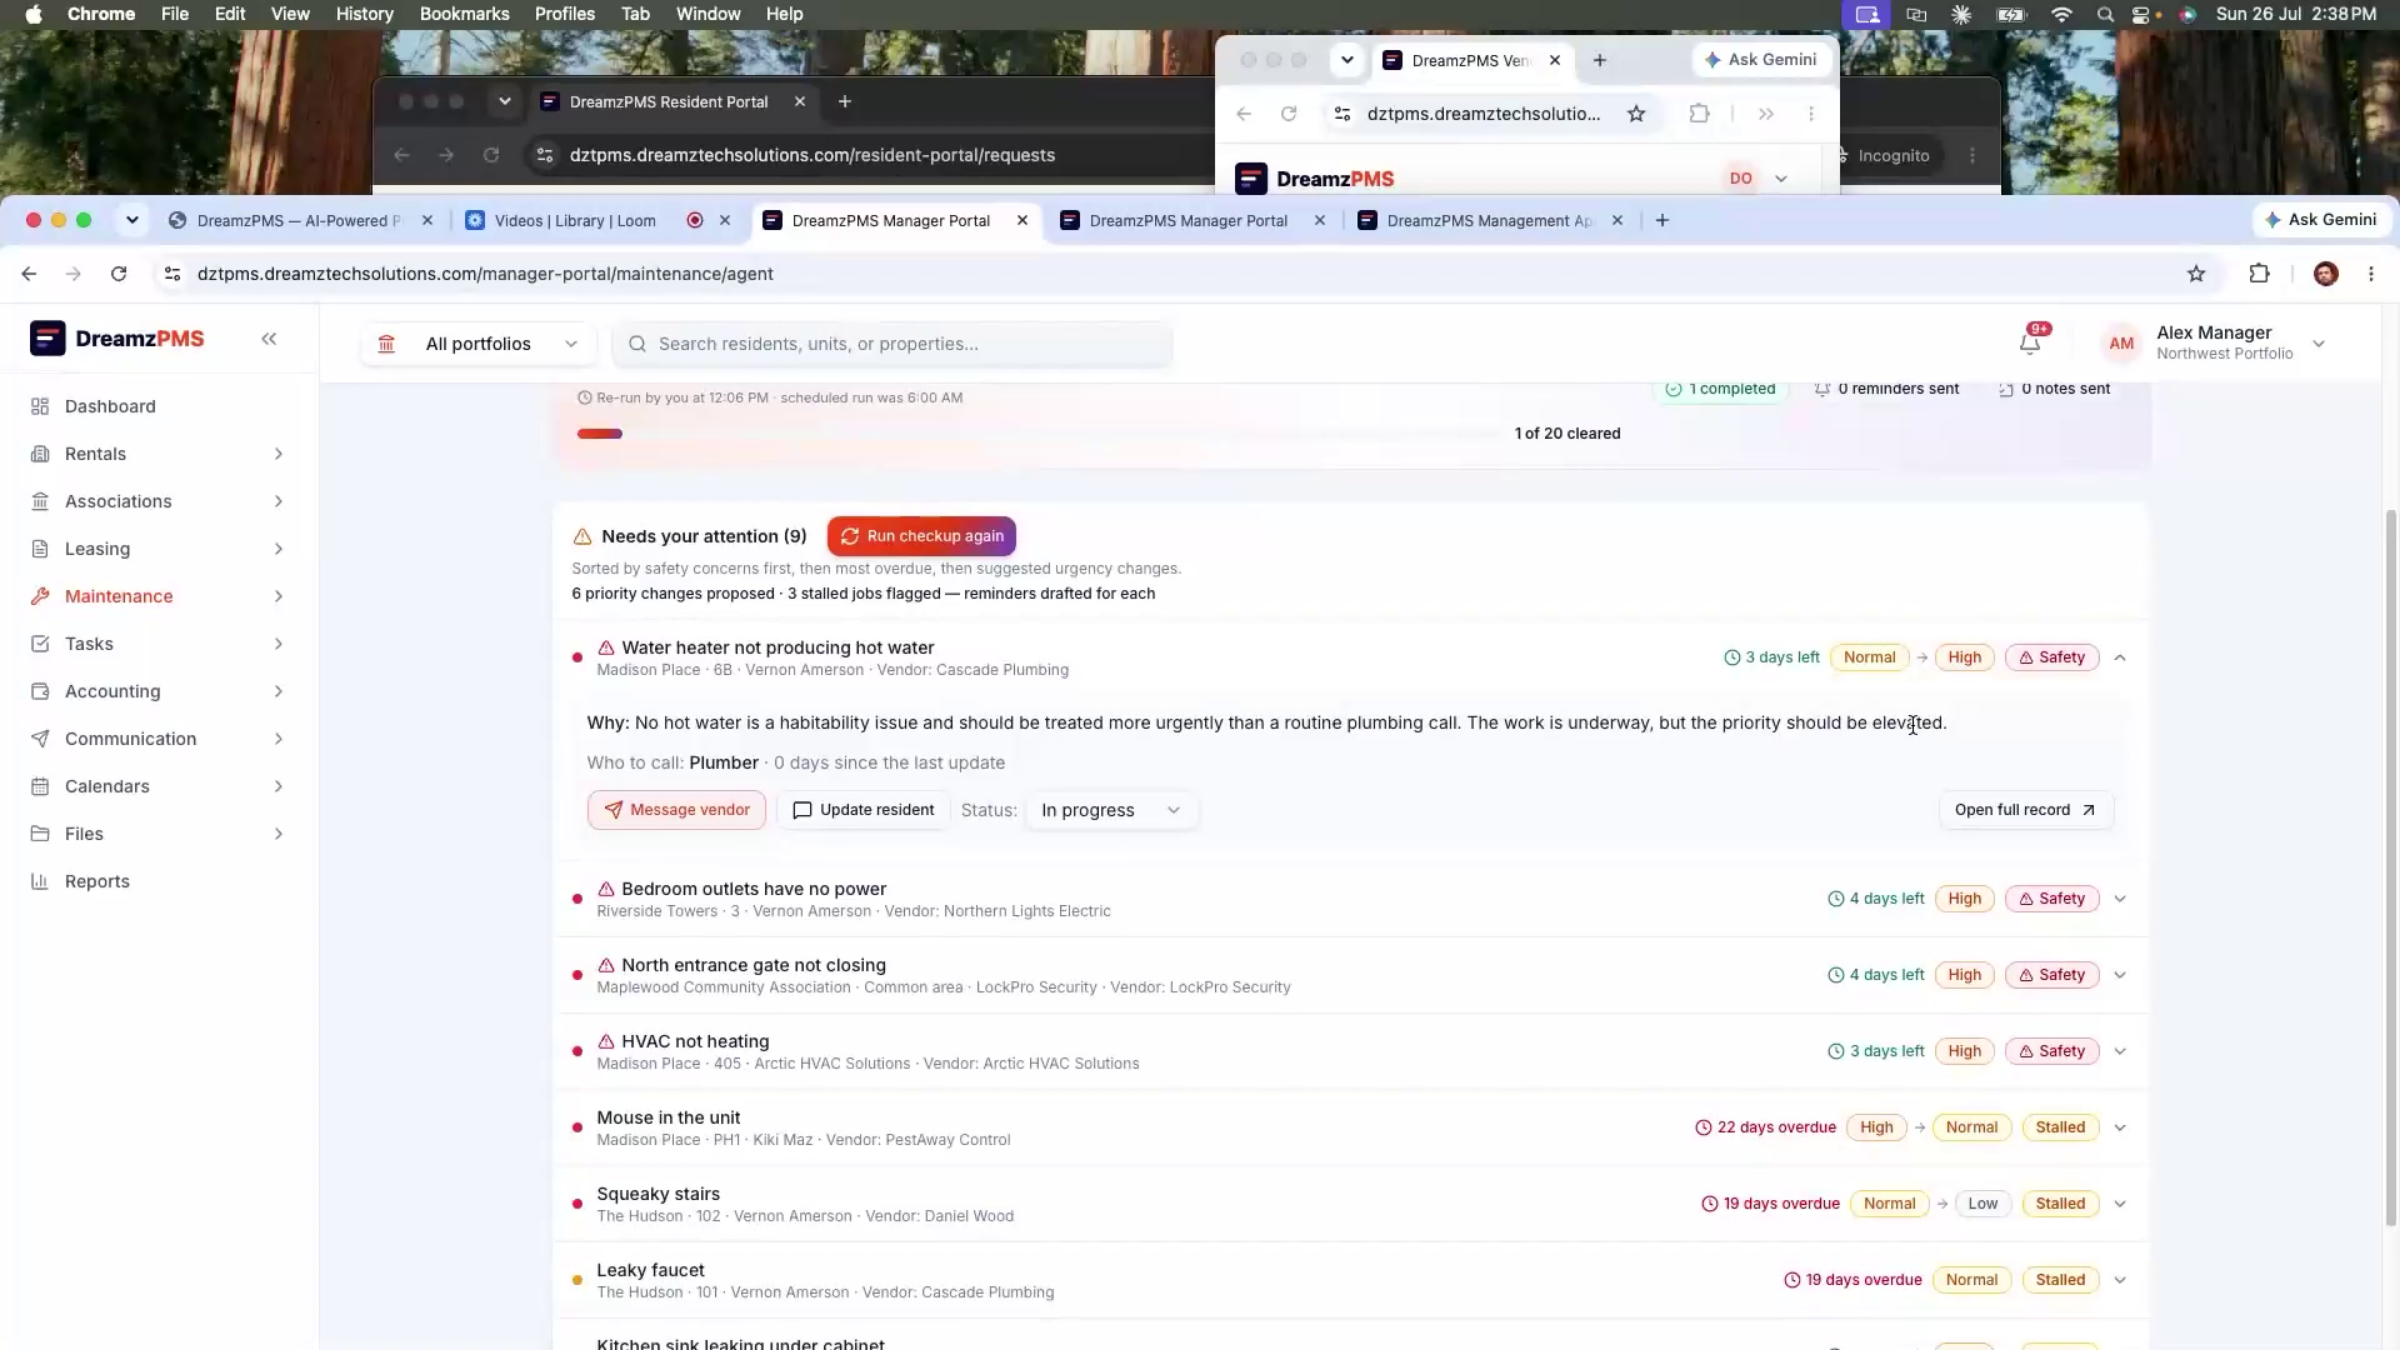
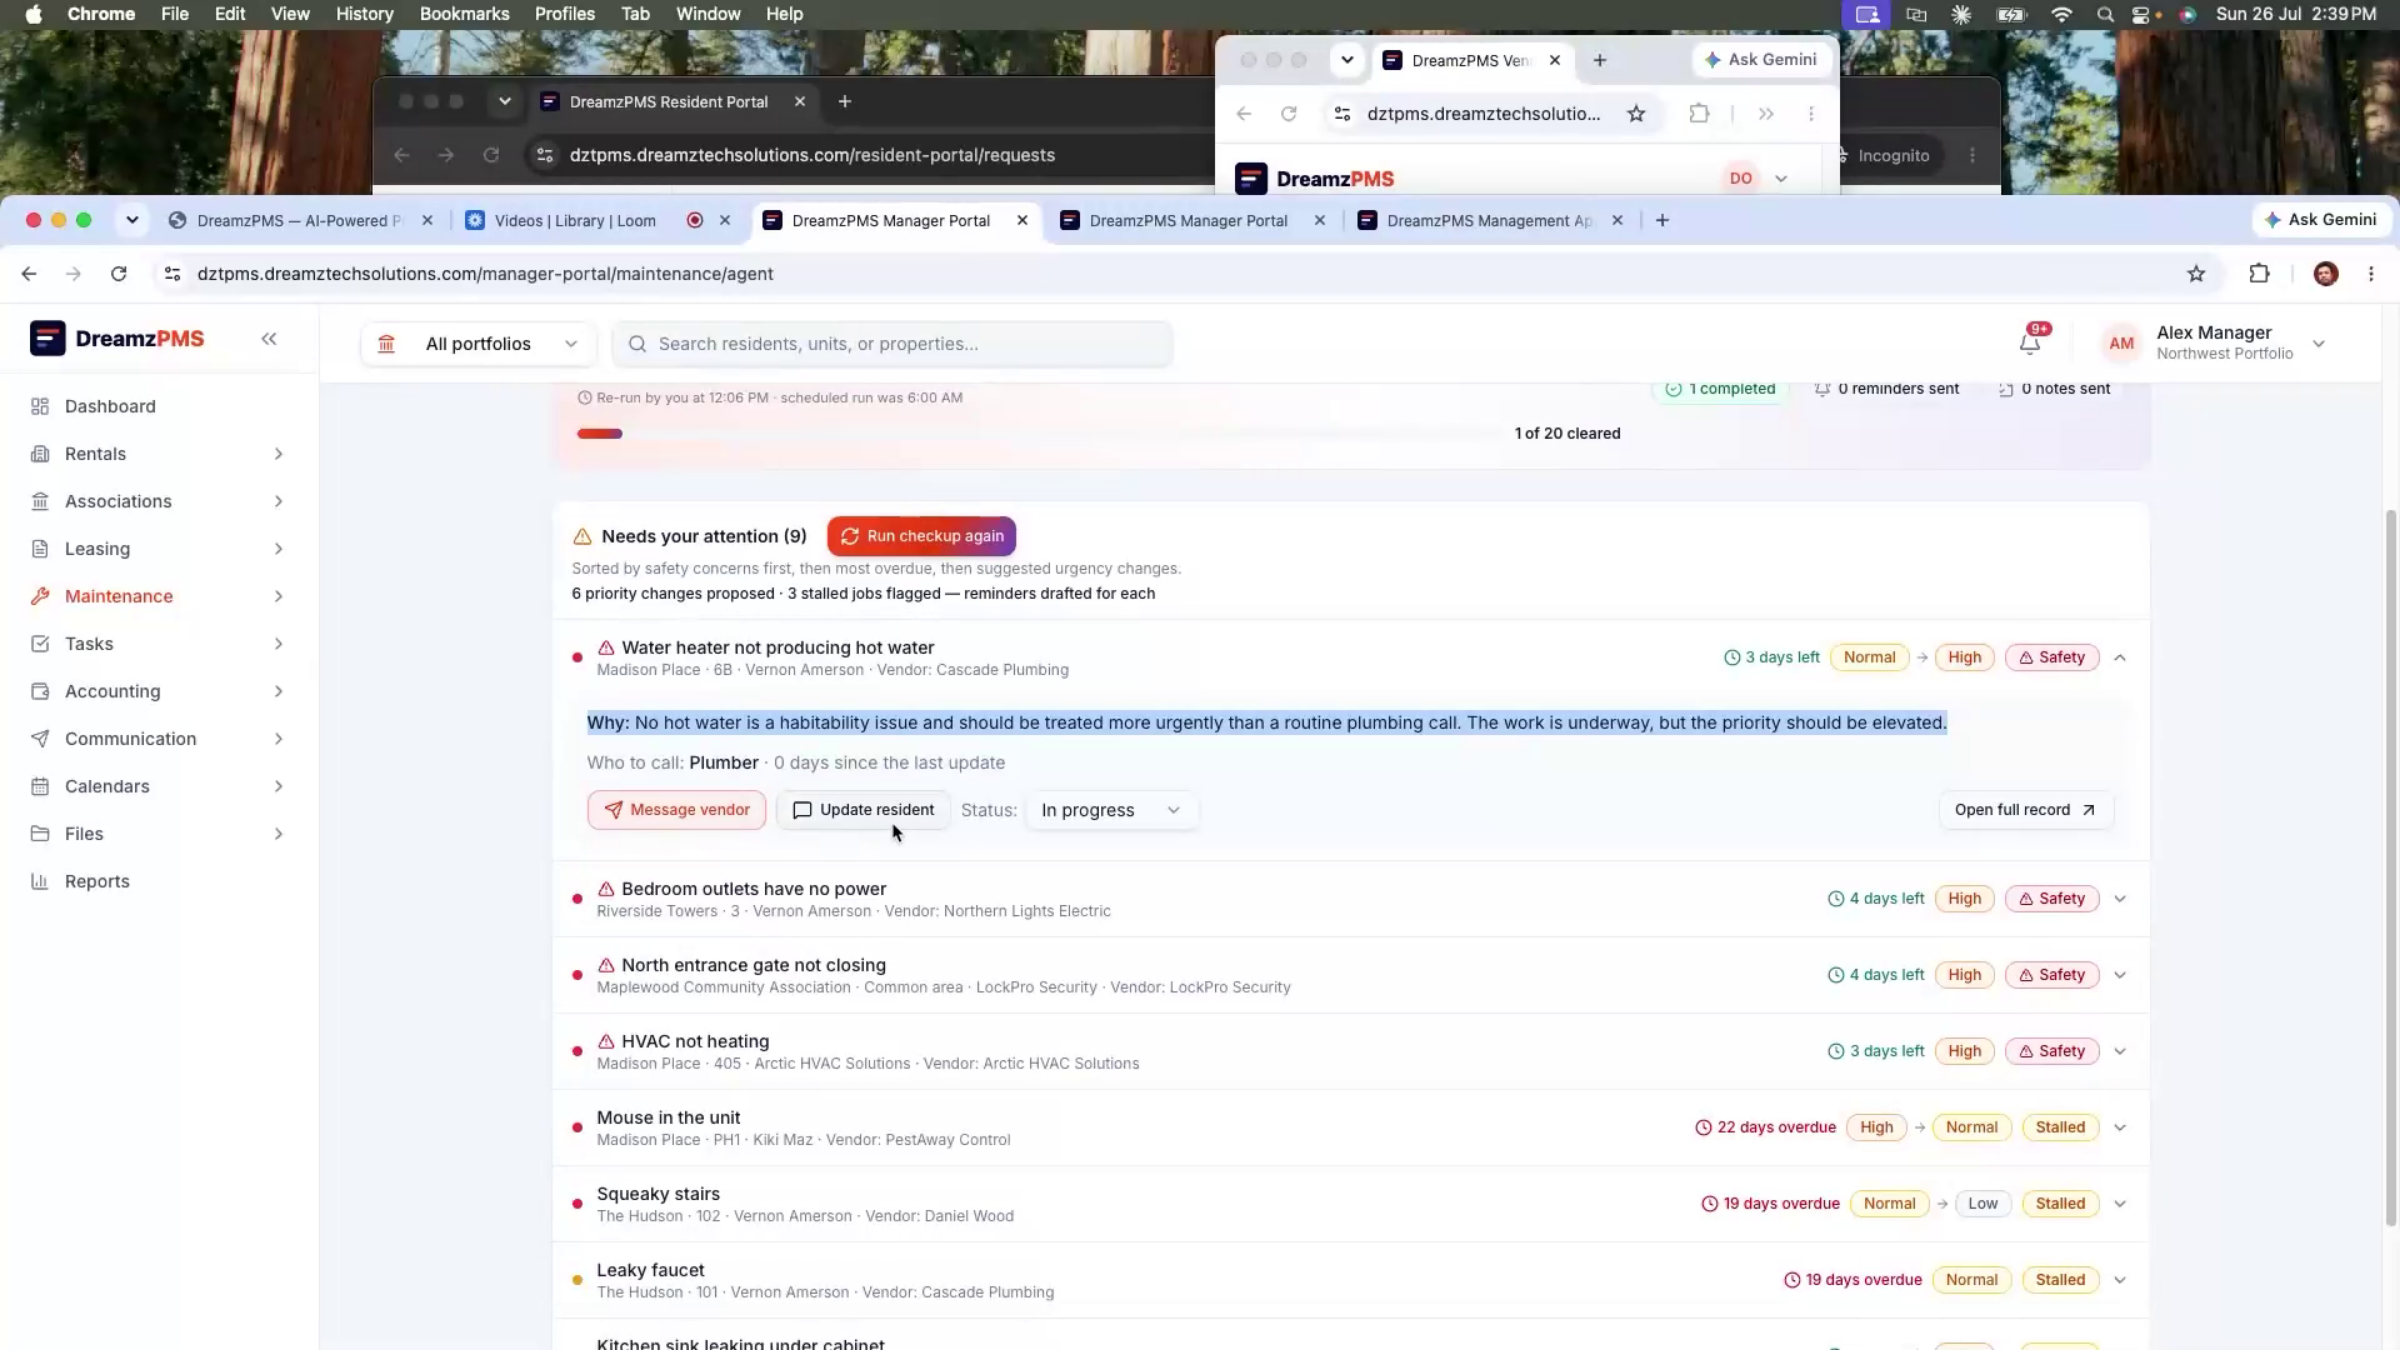
If a request has gone unresolved too long, the AI can recommend raising its priority — for example, elevating an aging water heater issue before it causes more damage or resident dissatisfaction.
Step 64 – AI Maintenance Manager Actions
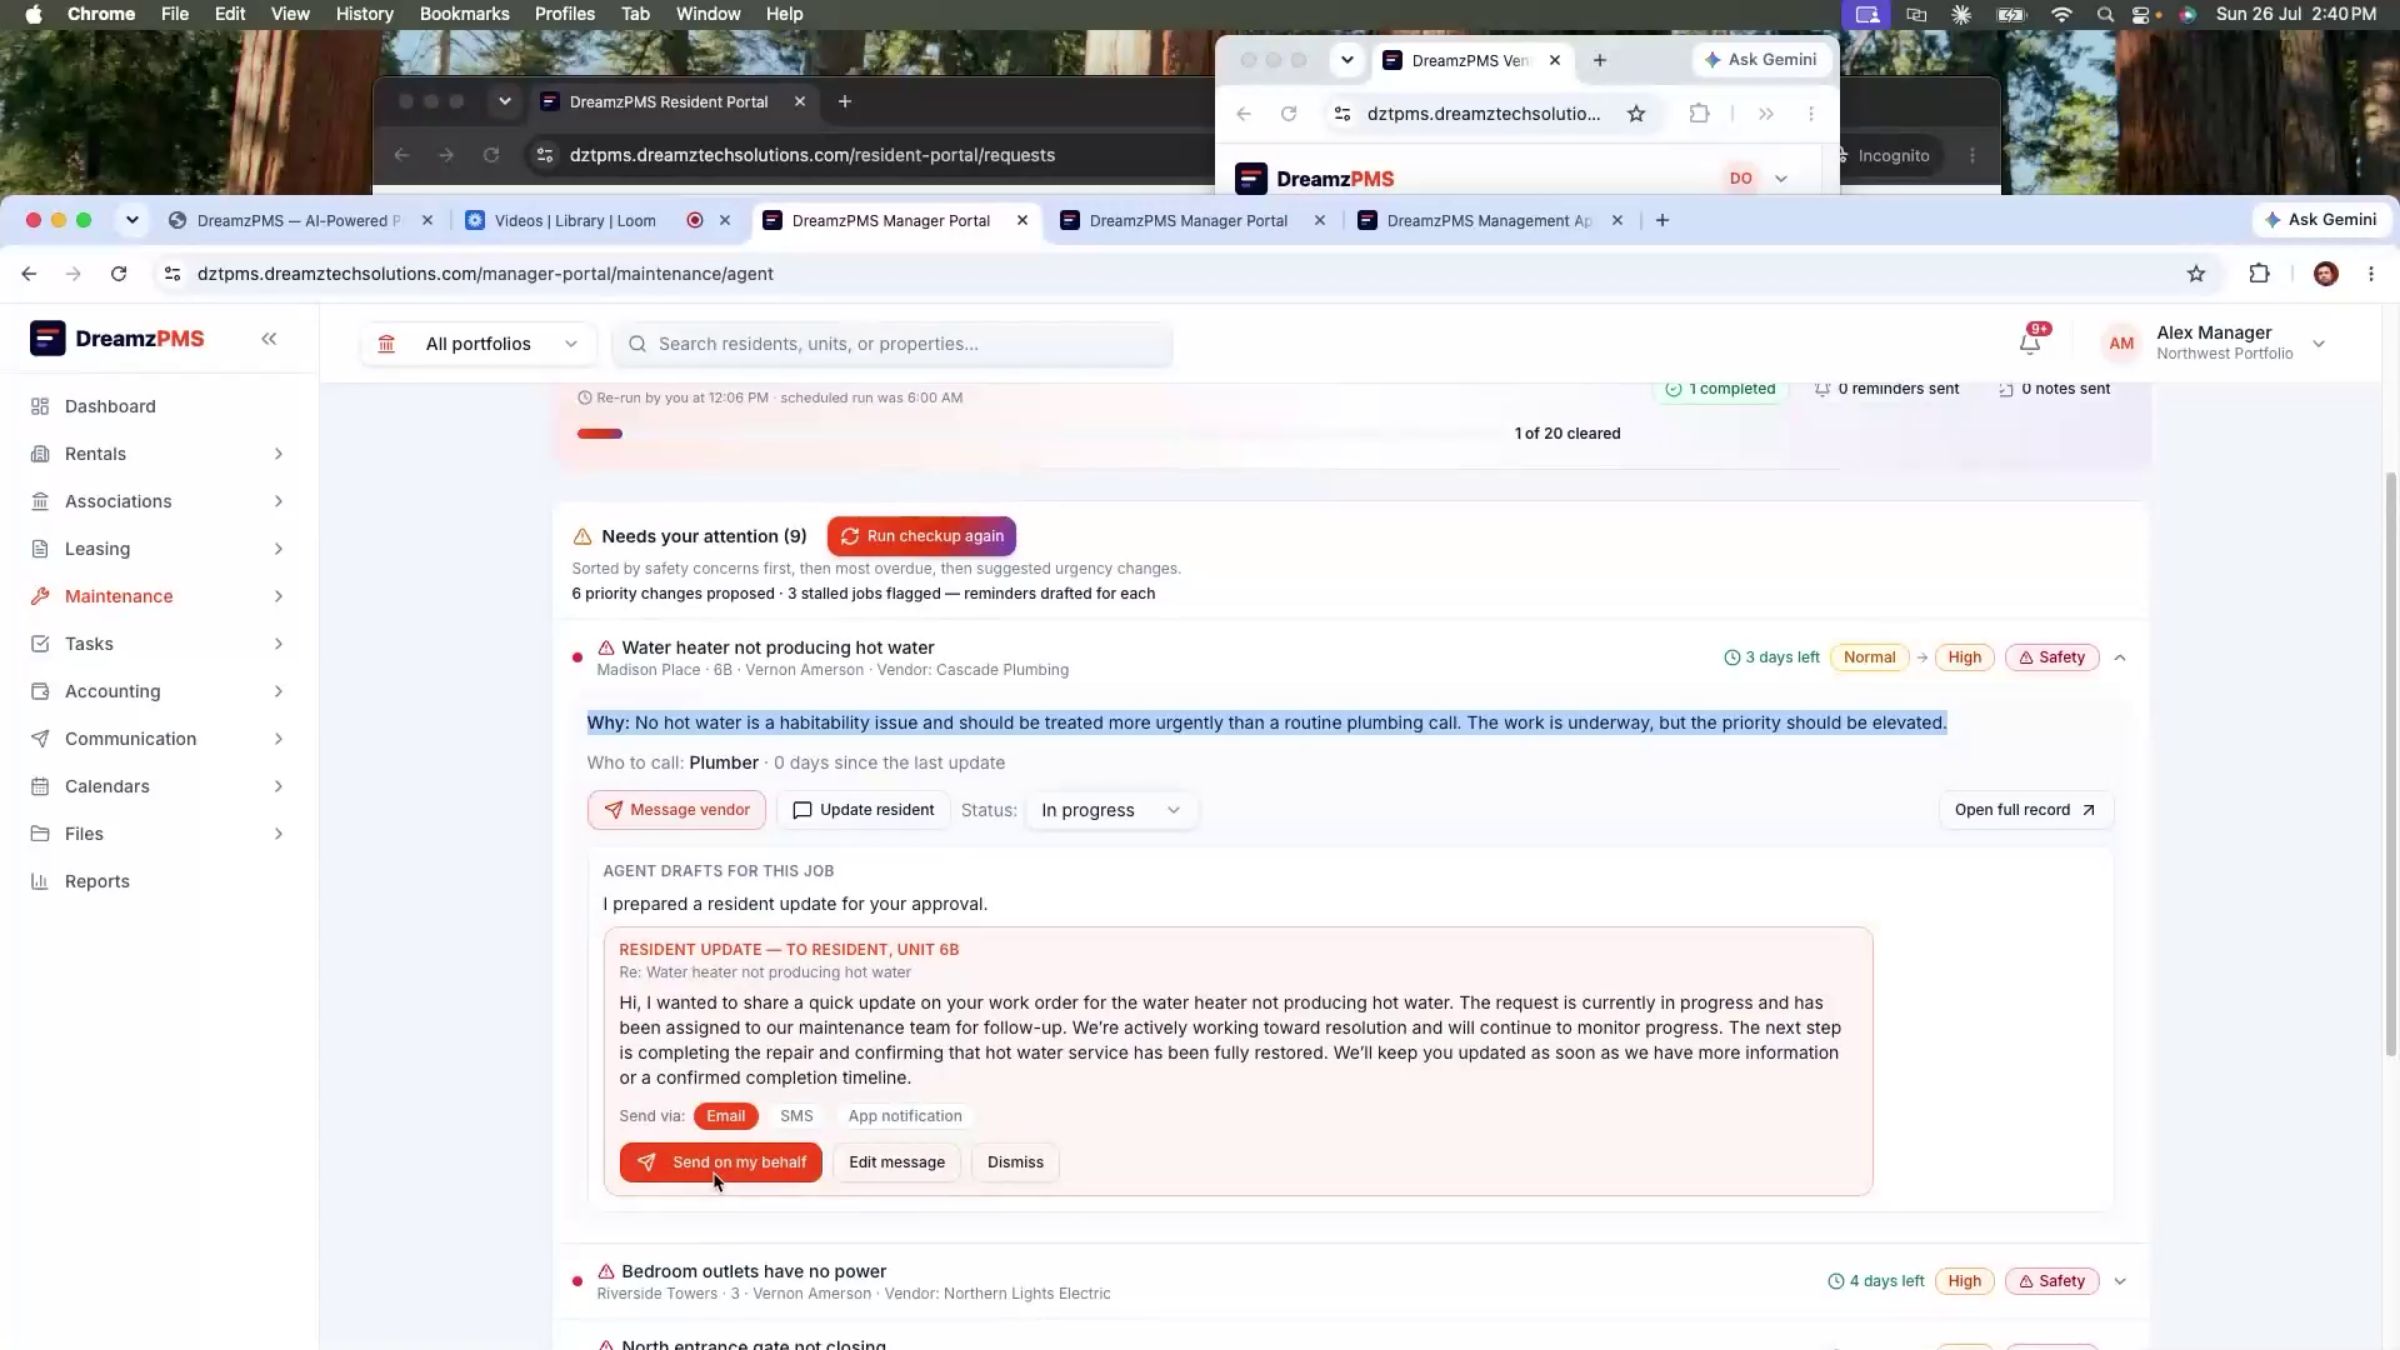
From the AI agent screen, the manager can message the assigned vendor, send the resident a status update, or change the work order's priority directly.
Step 65 – AI Automated Communications
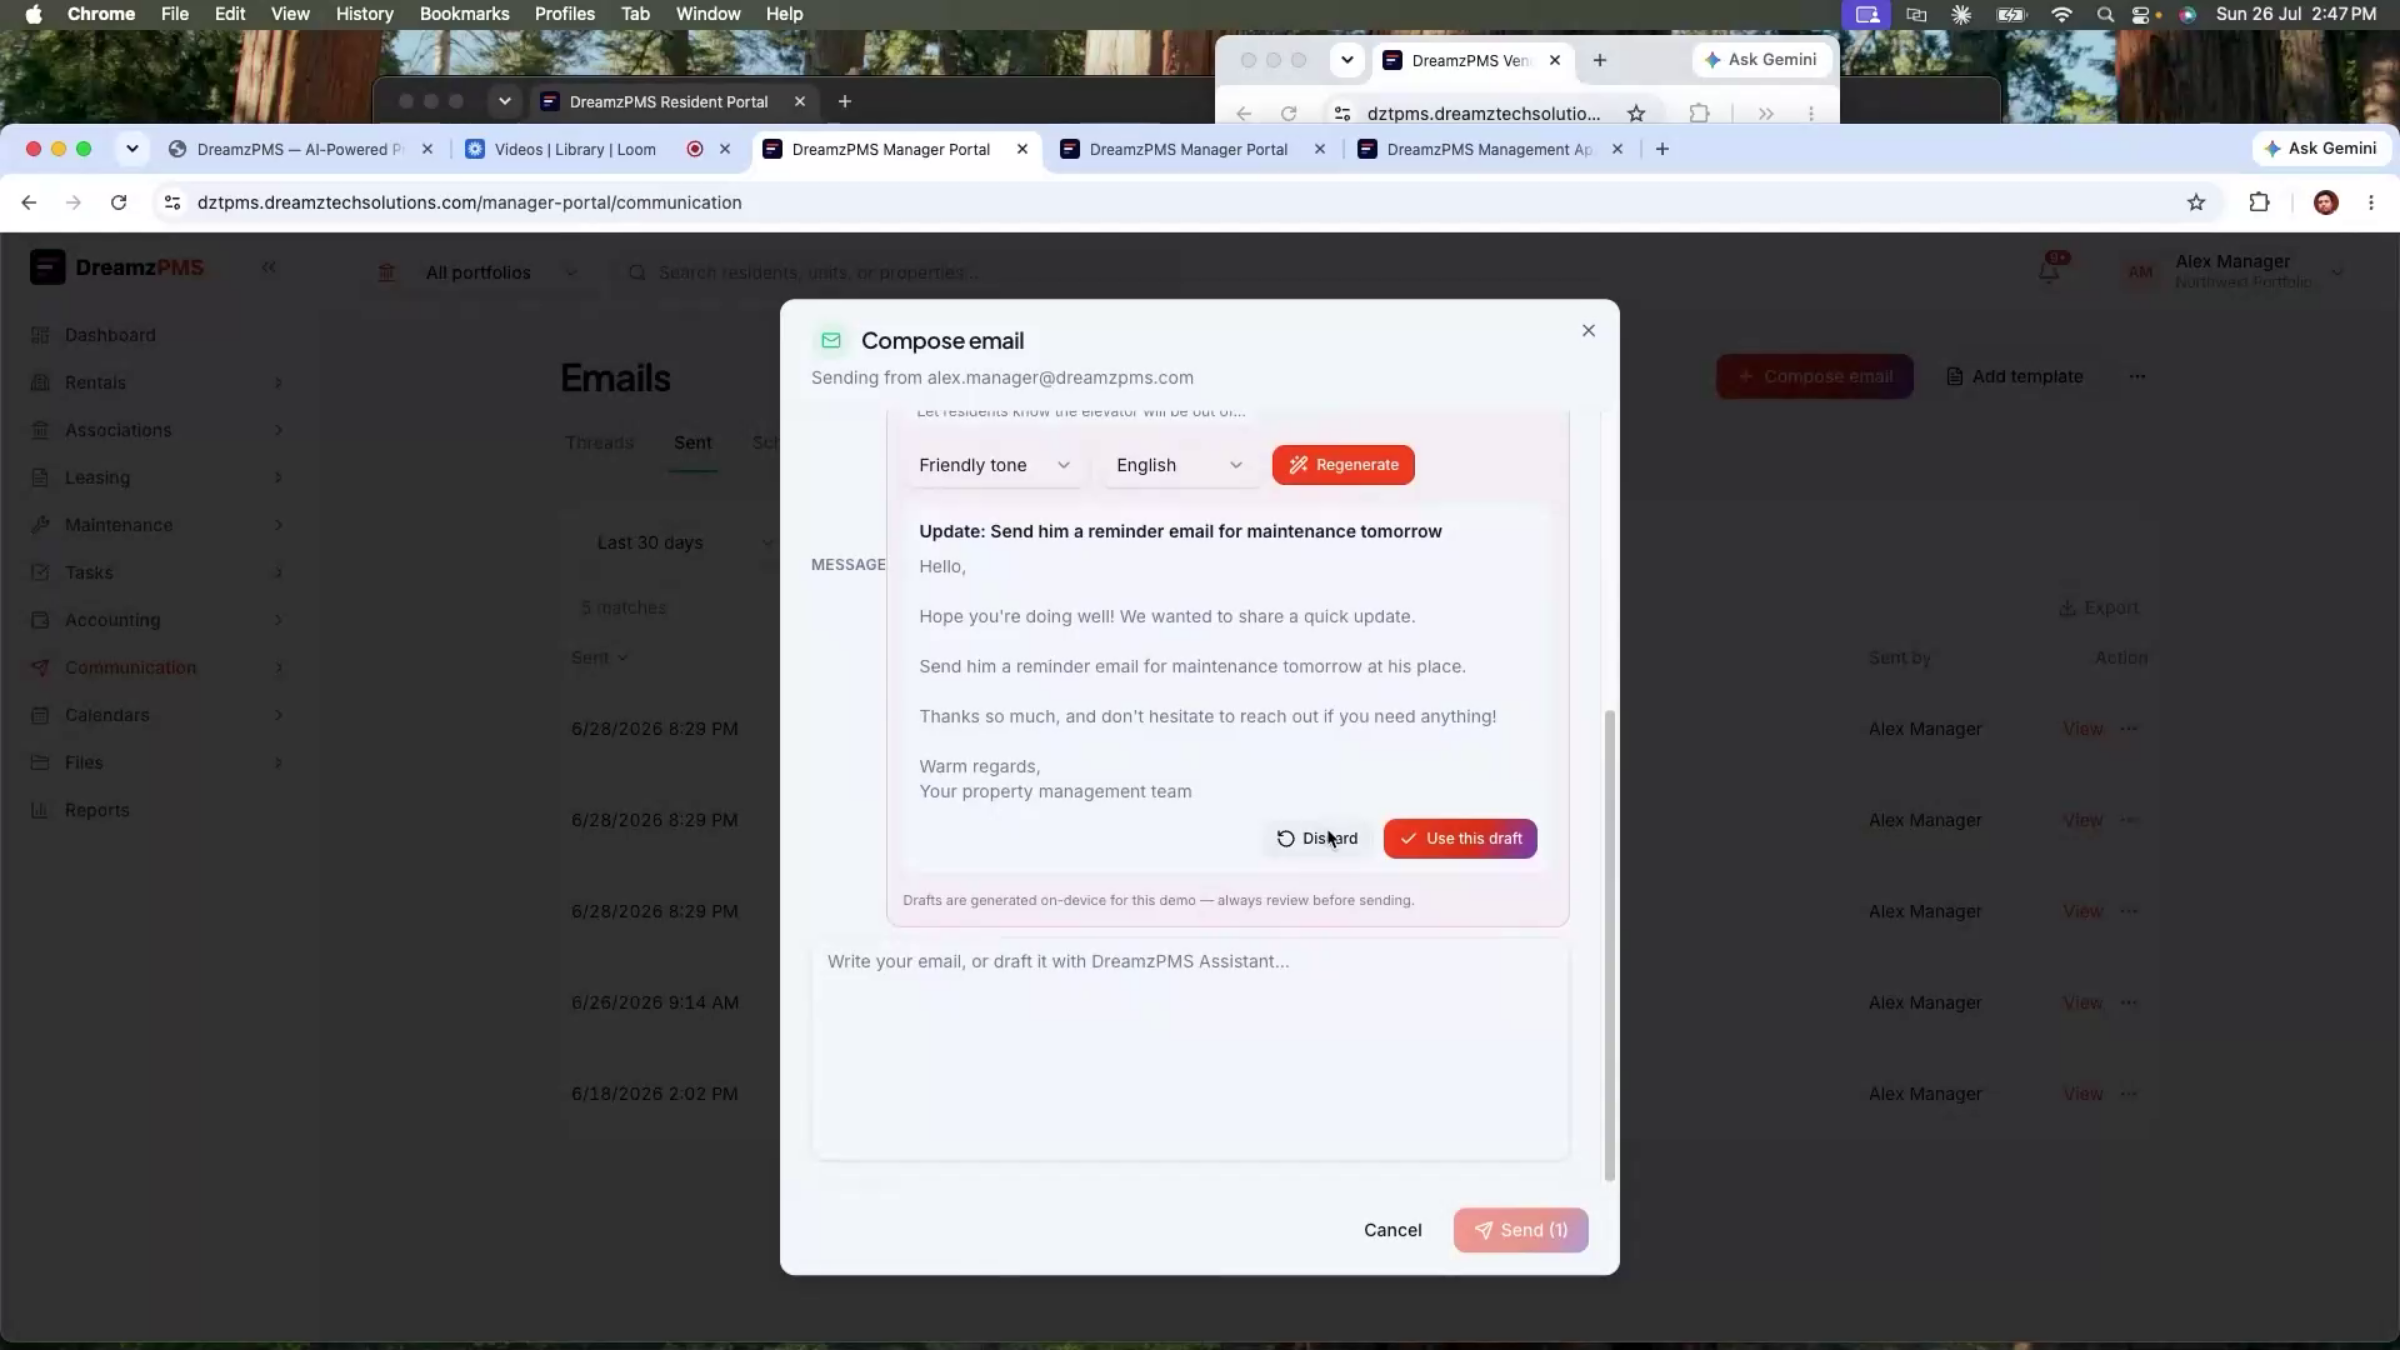
The AI drafts these messages for you — for example, a vendor reminder requesting a progress update and a firm completion date, sendable by SMS, WhatsApp, email, or in-app notification — along with a similar update for the resident, both ready for your review before sending.
Step 66 – AI Maintenance Assistant Chat
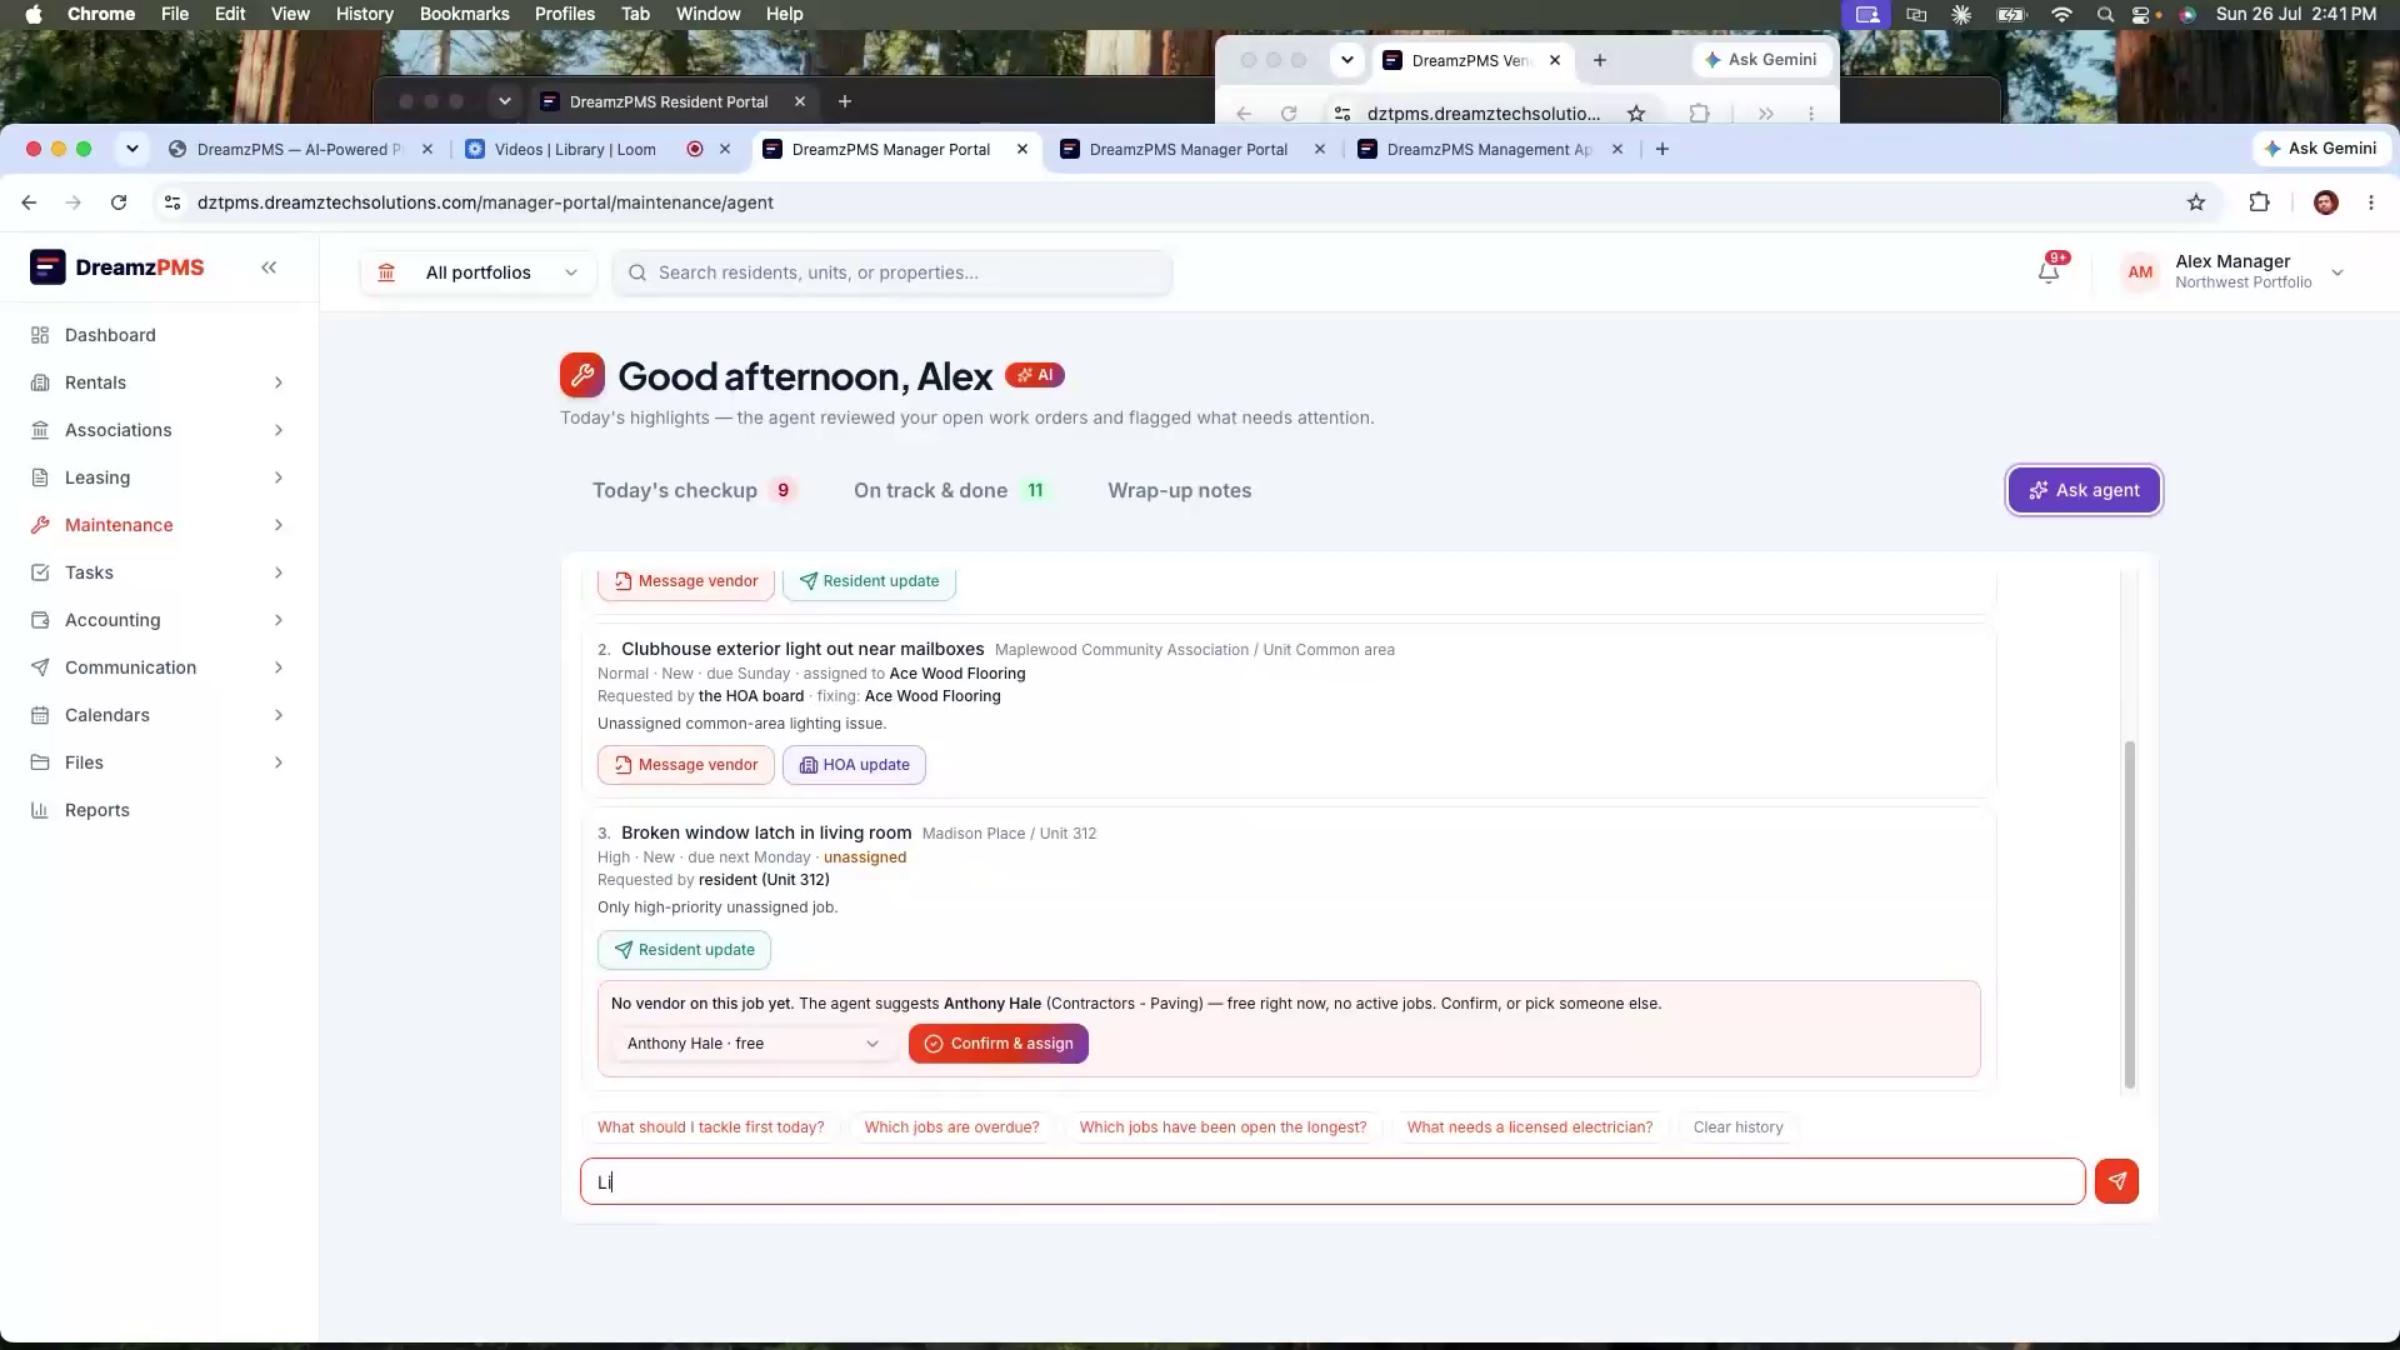
You can also just ask the AI Maintenance Assistant natural-language questions — like which jobs are still unassigned — and it analyzes open work orders and recommends the best available vendor for each, based on workload and availability, which you can confirm or override.
Step 67 – AI Job Prioritization Example
Asking which job to assign first, the assistant identifies the highest-risk unassigned work order and explains why — for example, a high-priority job due soon with no vendor yet assigned.
Step 68 – AI Maintenance Dashboard Benefits
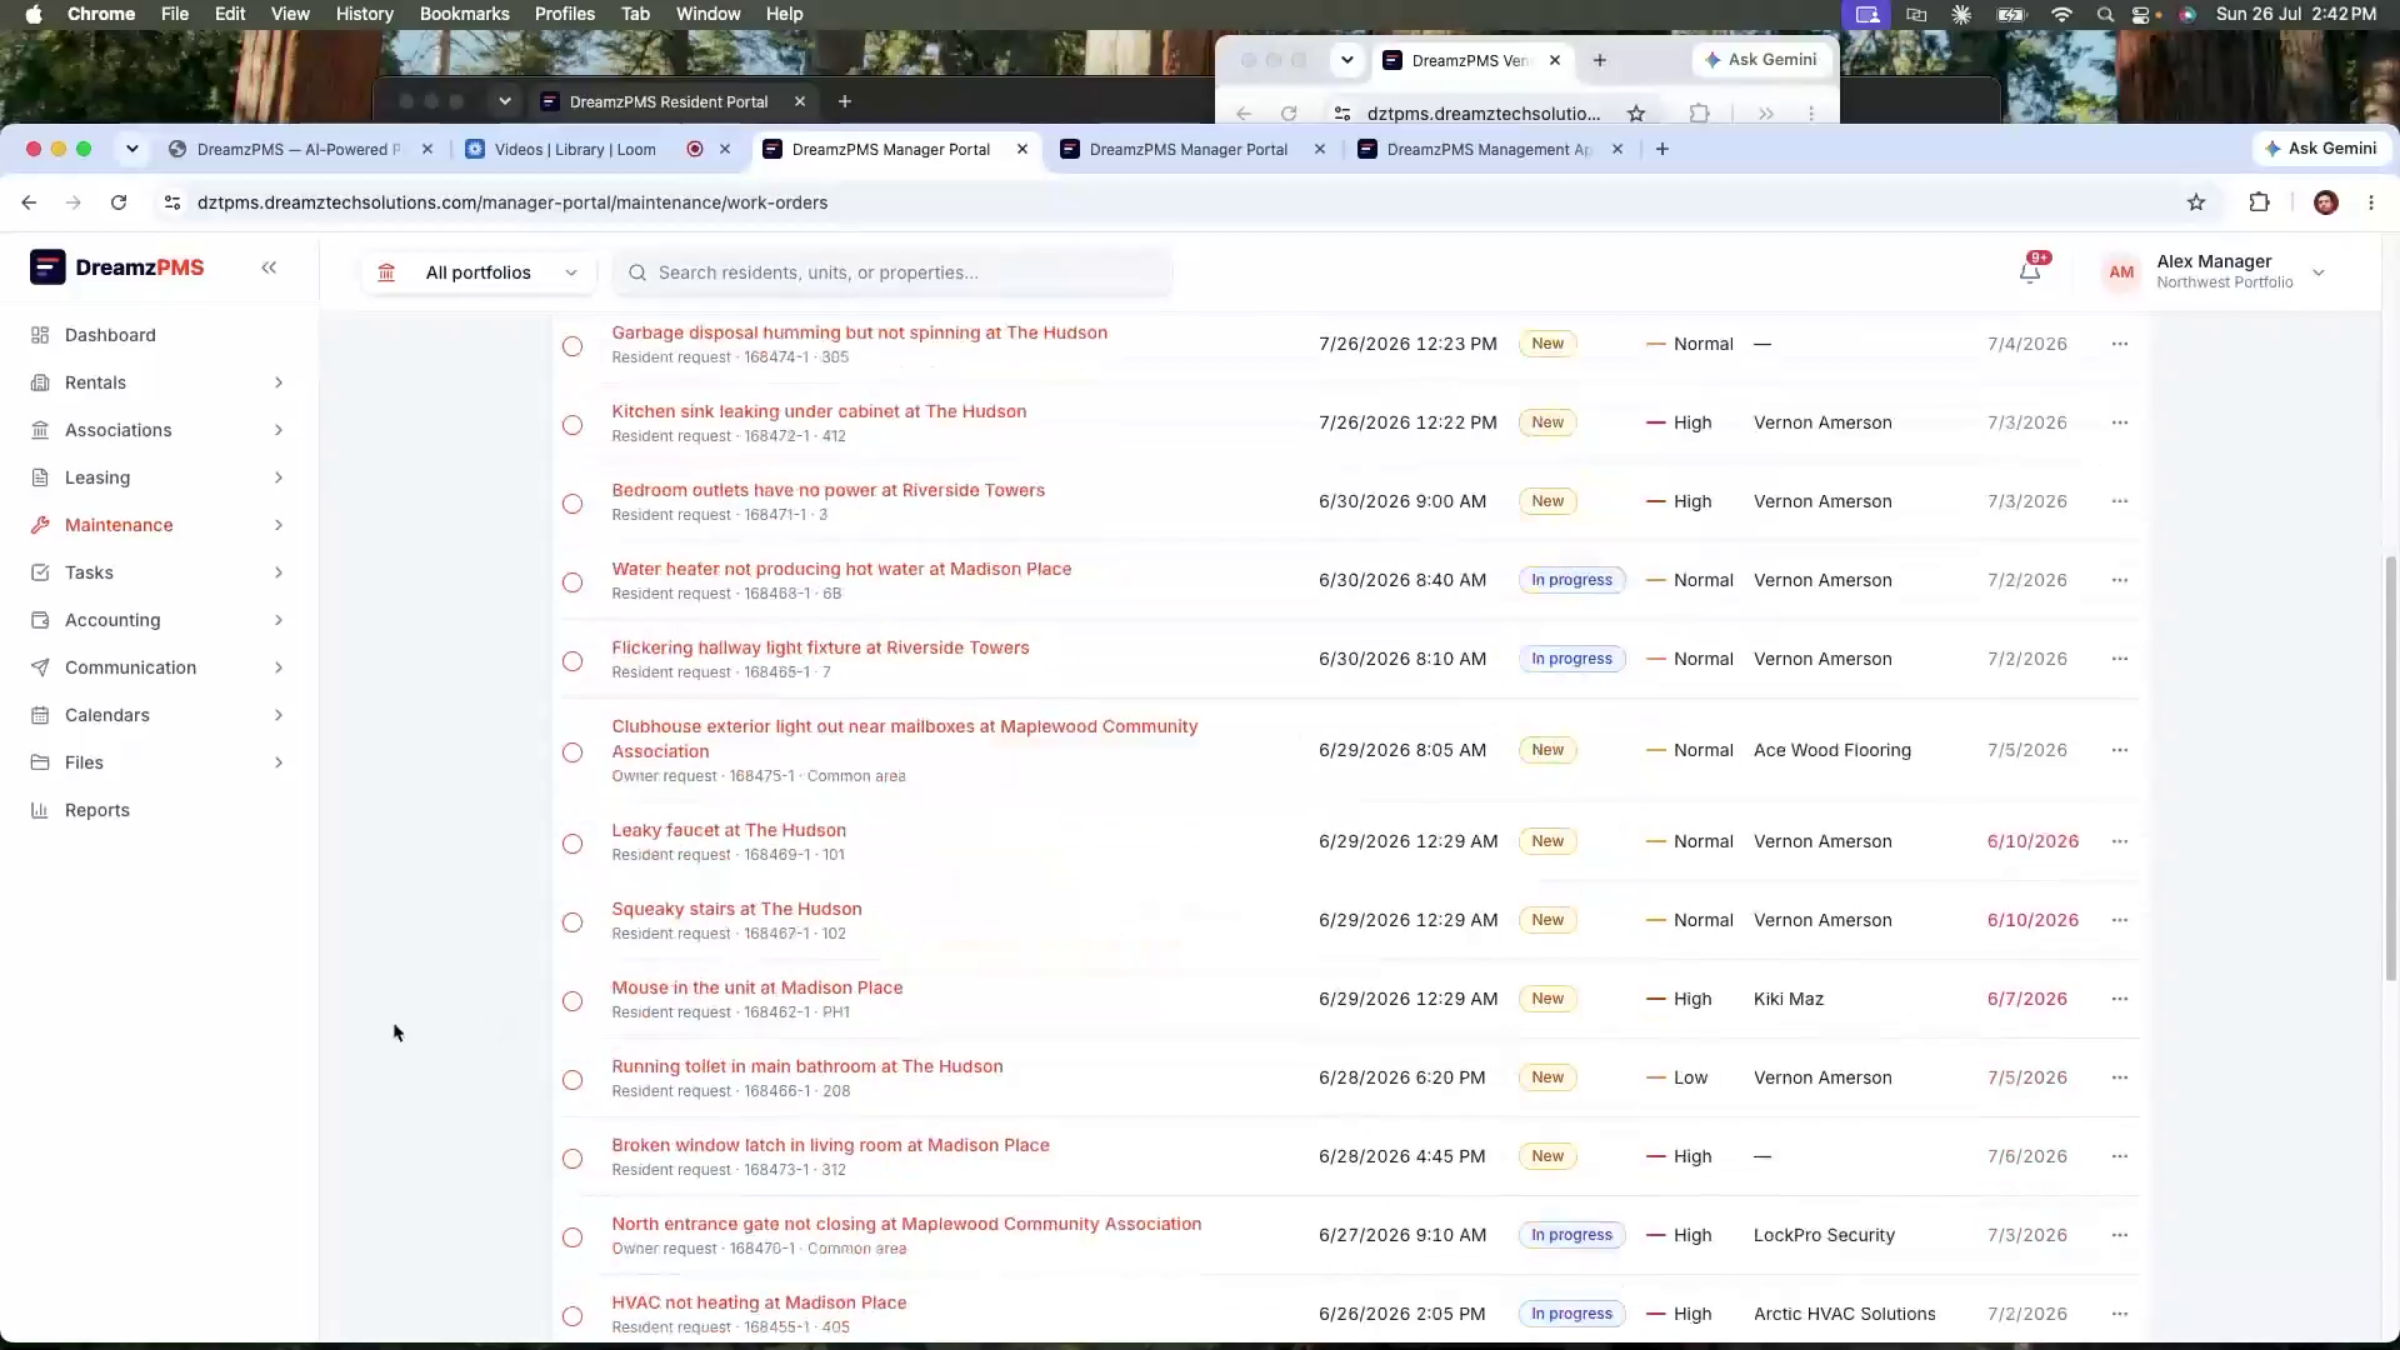
For a large team, running the AI review takes only 20–30 seconds and returns an updated summary of what needs attention, what's overdue, what's completed, and what's still pending, with a timestamp showing when it last ran — effectively a daily operational dashboard.
Finance AI Agent
Step 69 – Finance AI Agent Automation
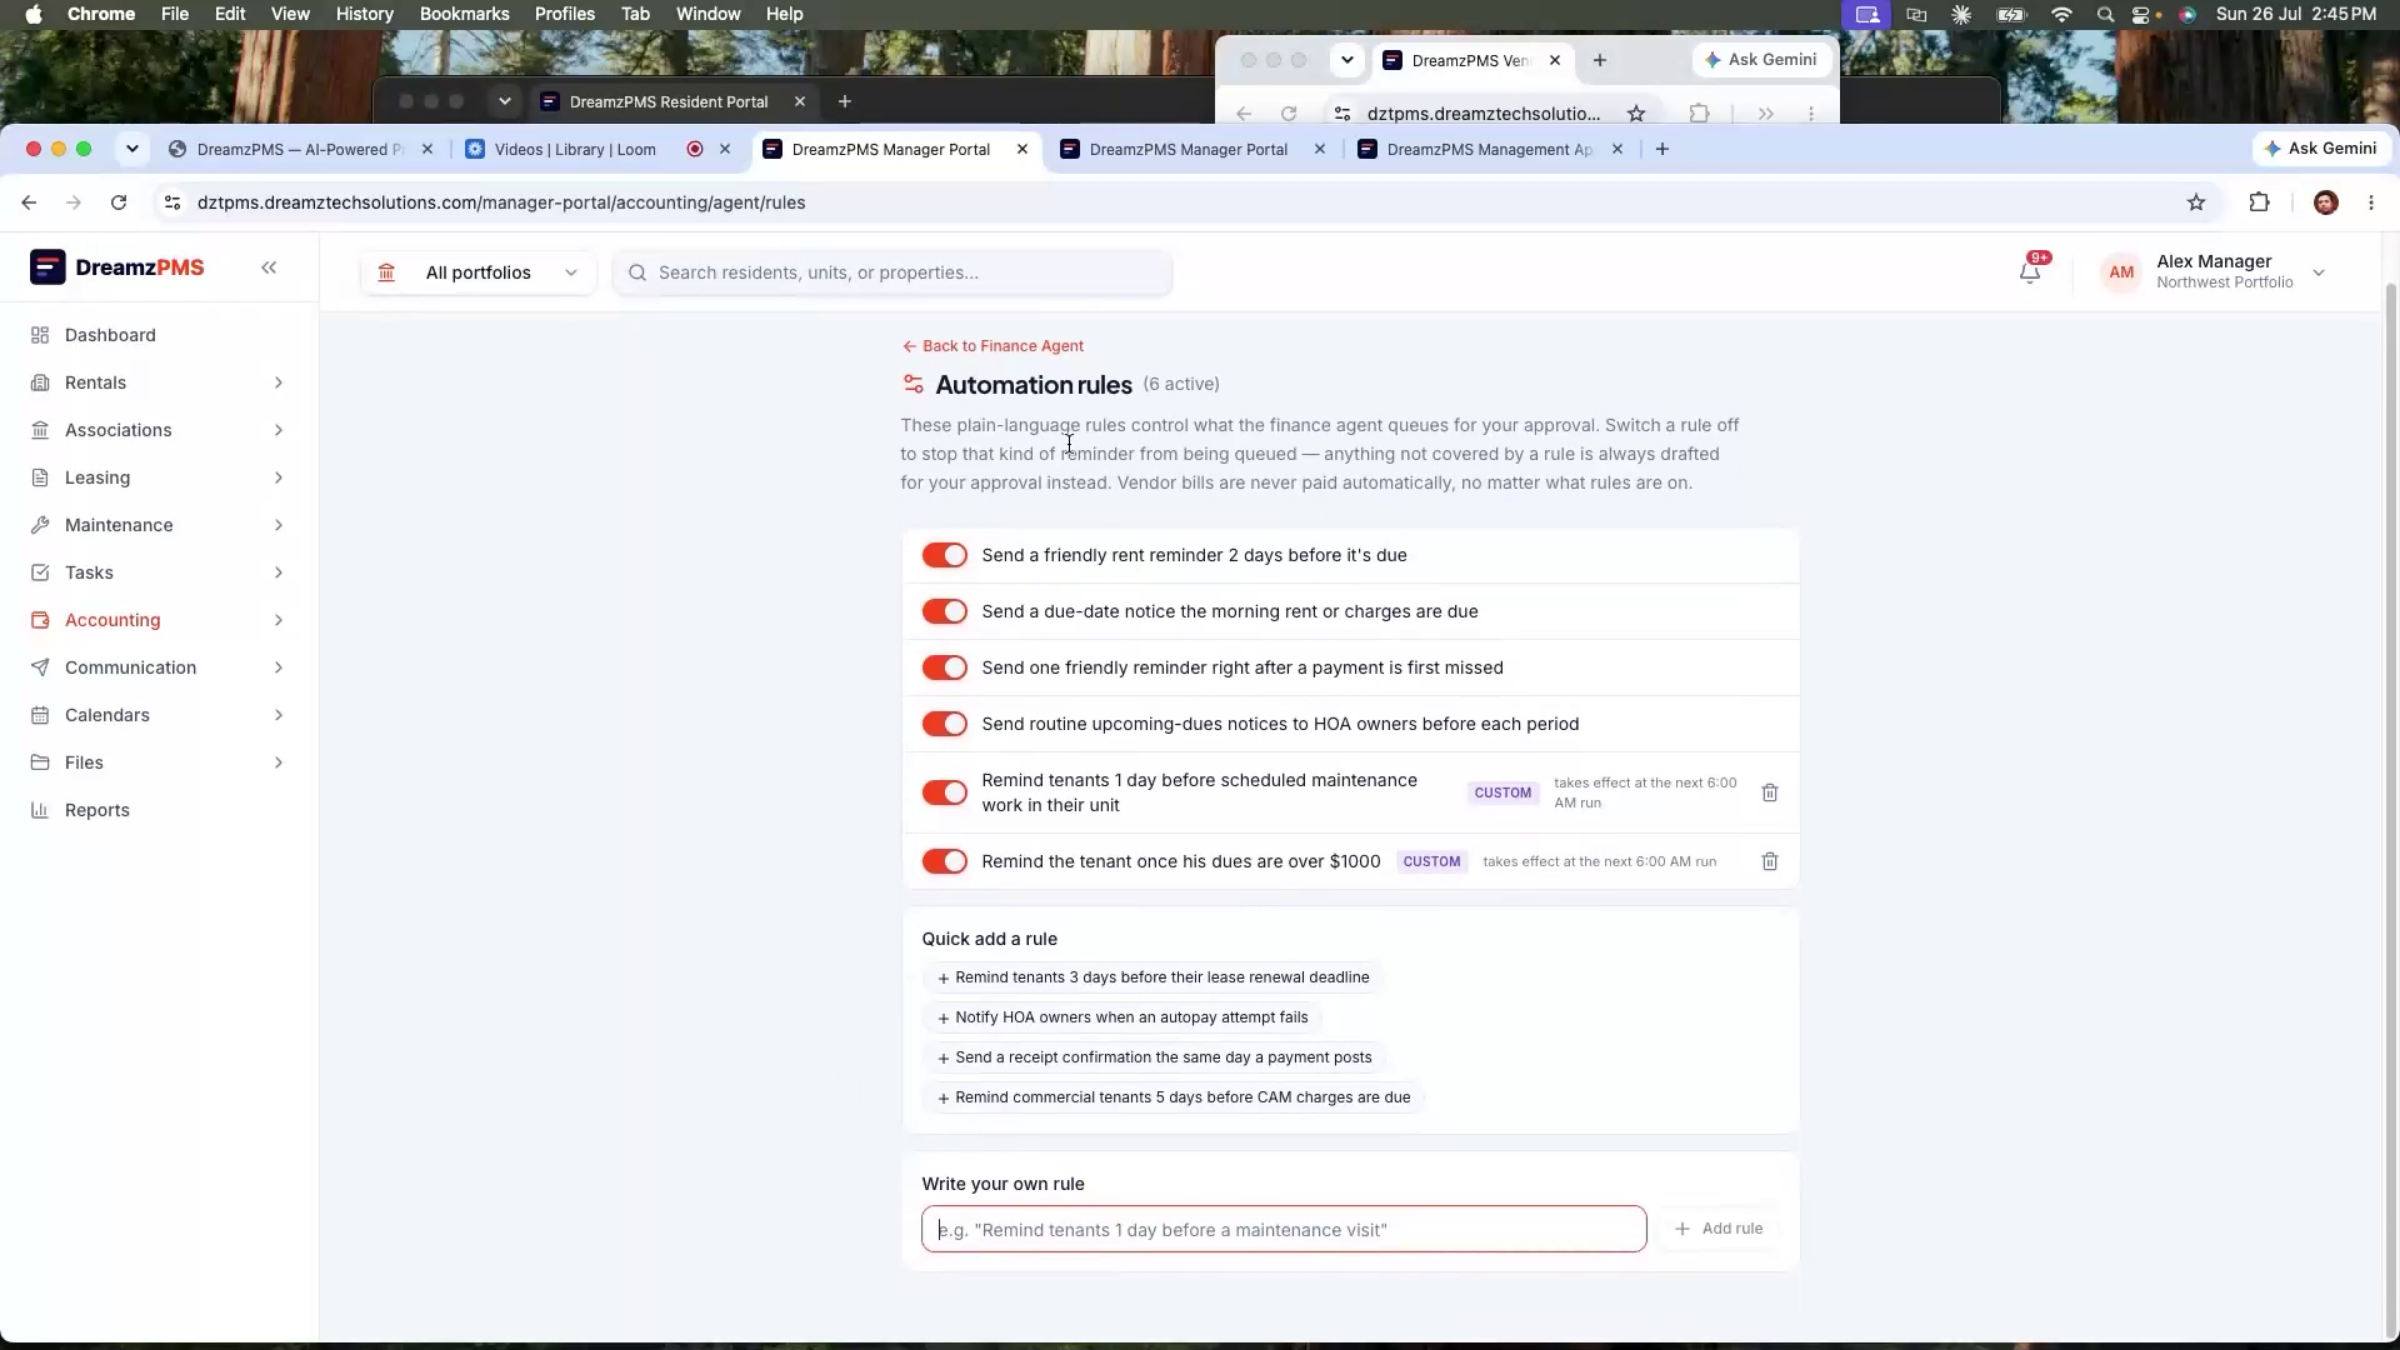
The Finance AI agent automates routine accounting tasks like payment reminders. Configure the rules once — for example, a reminder two days before rent is due, another the day before, late-fee notices after the due date, or maintenance-visit reminders — or describe a custom rule in plain language, such as automatically reminding any resident whose balance exceeds a set amount.
Step 70 – Finance AI Draft Review
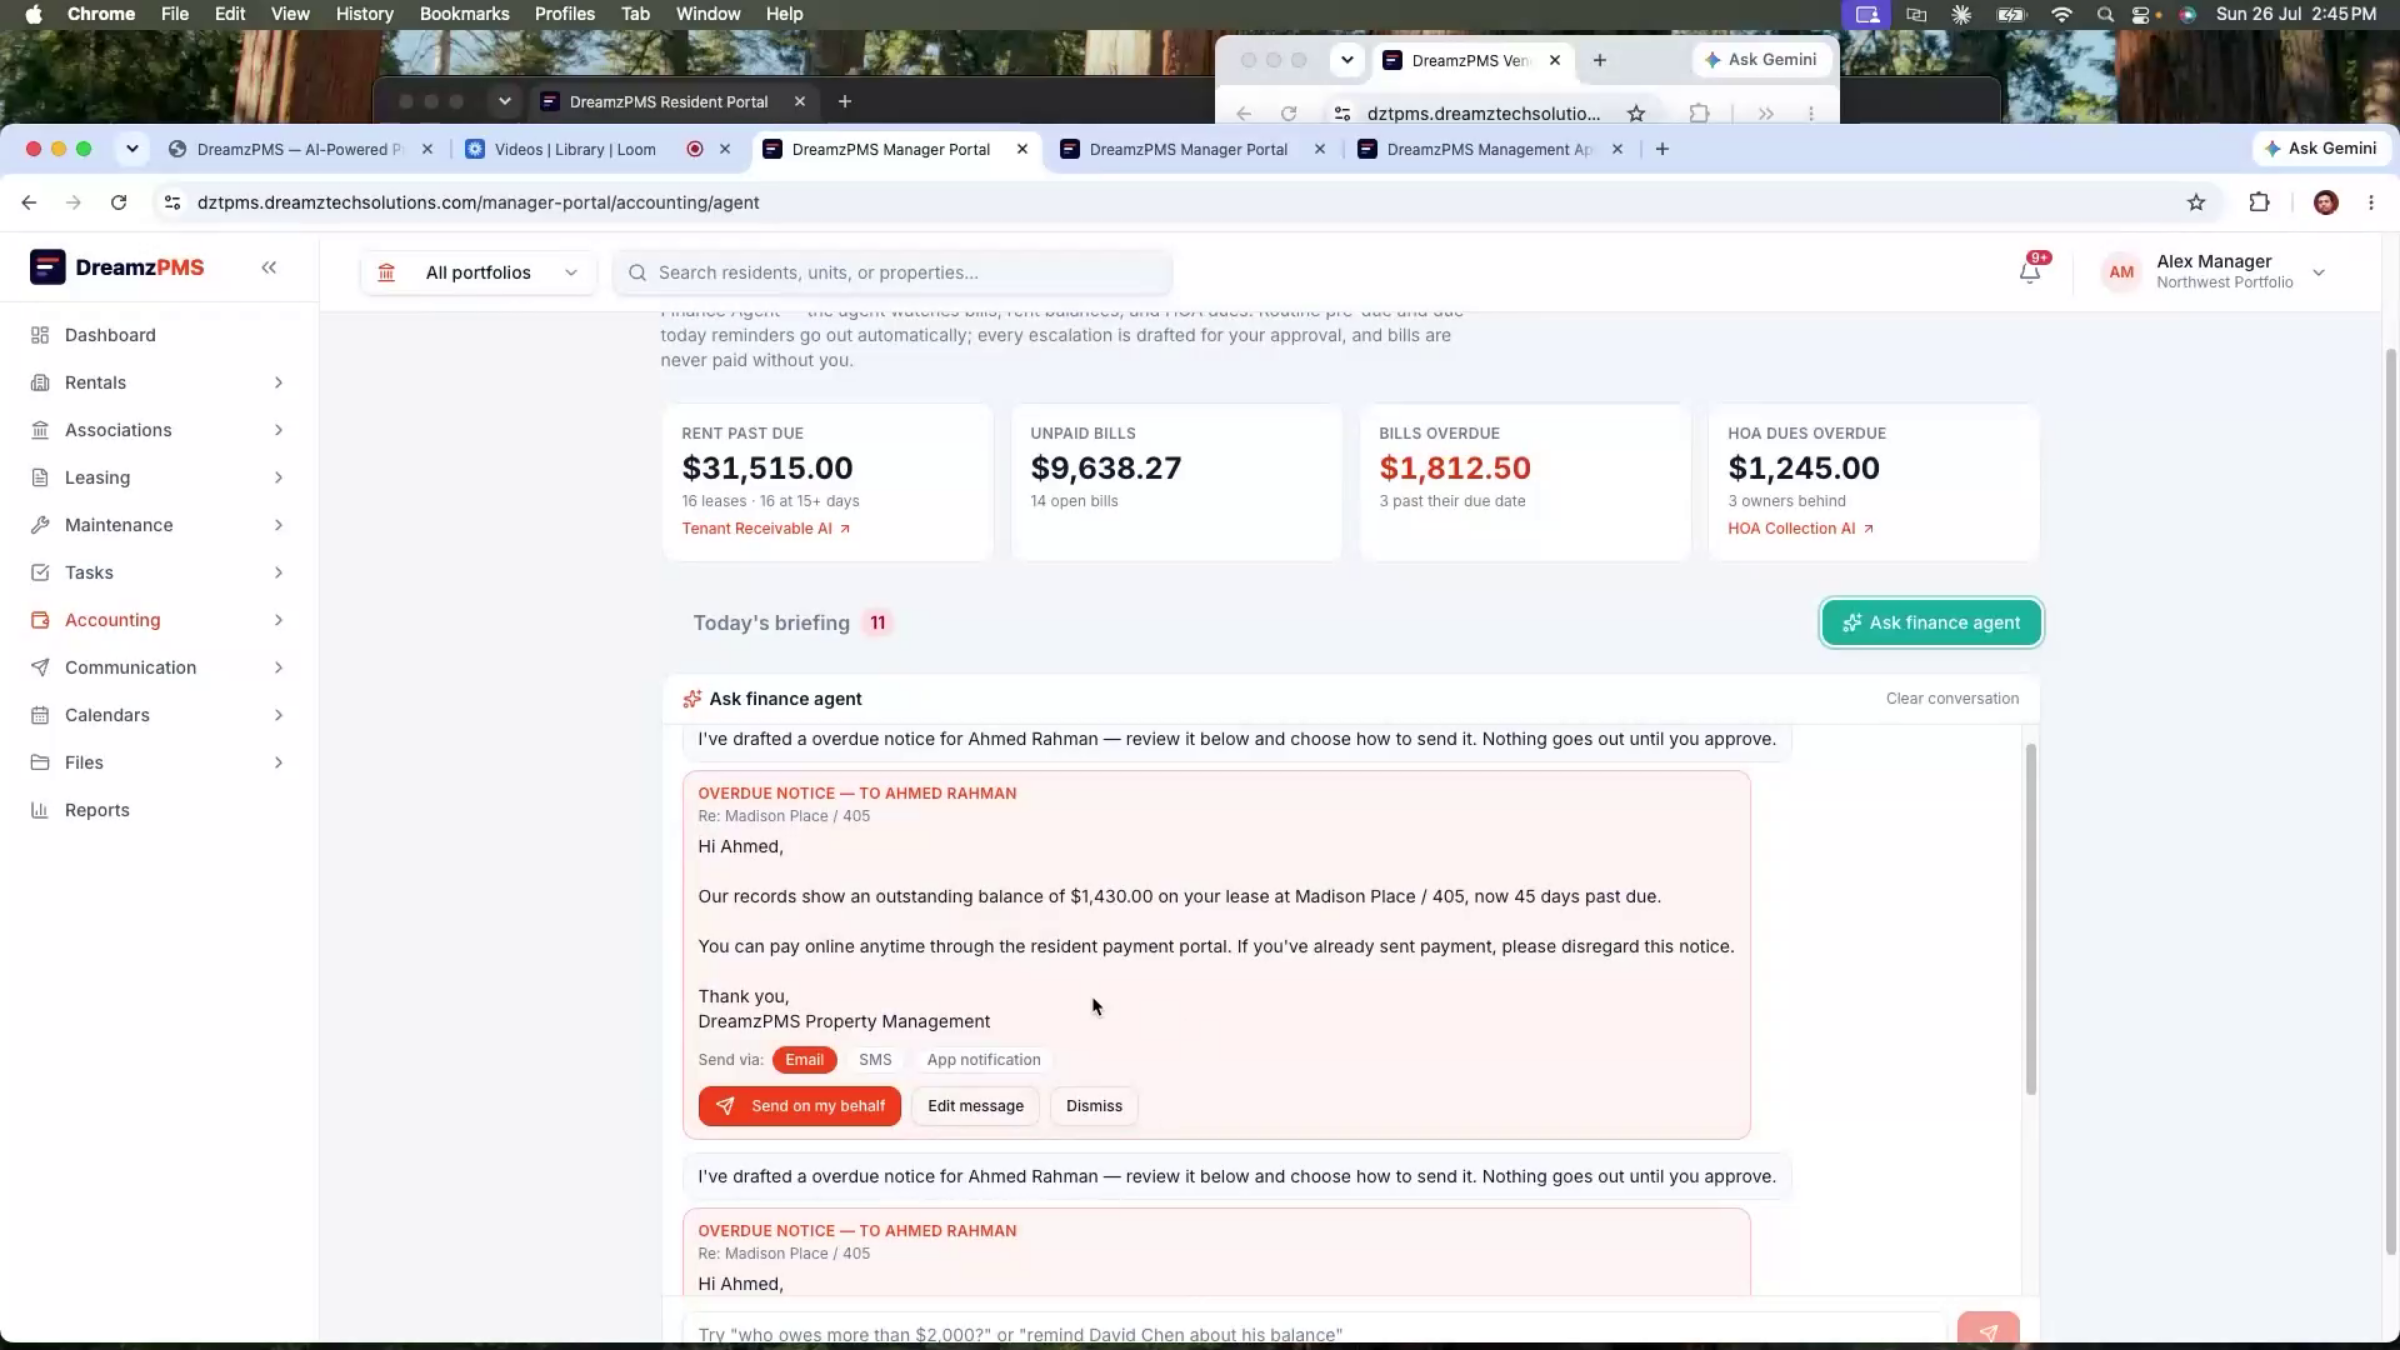
Note: Because finance communications matter, the AI drafts reminders and other financial messages for your review rather than sending them automatically — nothing goes out to a resident until a manager approves it.
Step 71 – Finance AI Assistant Chat
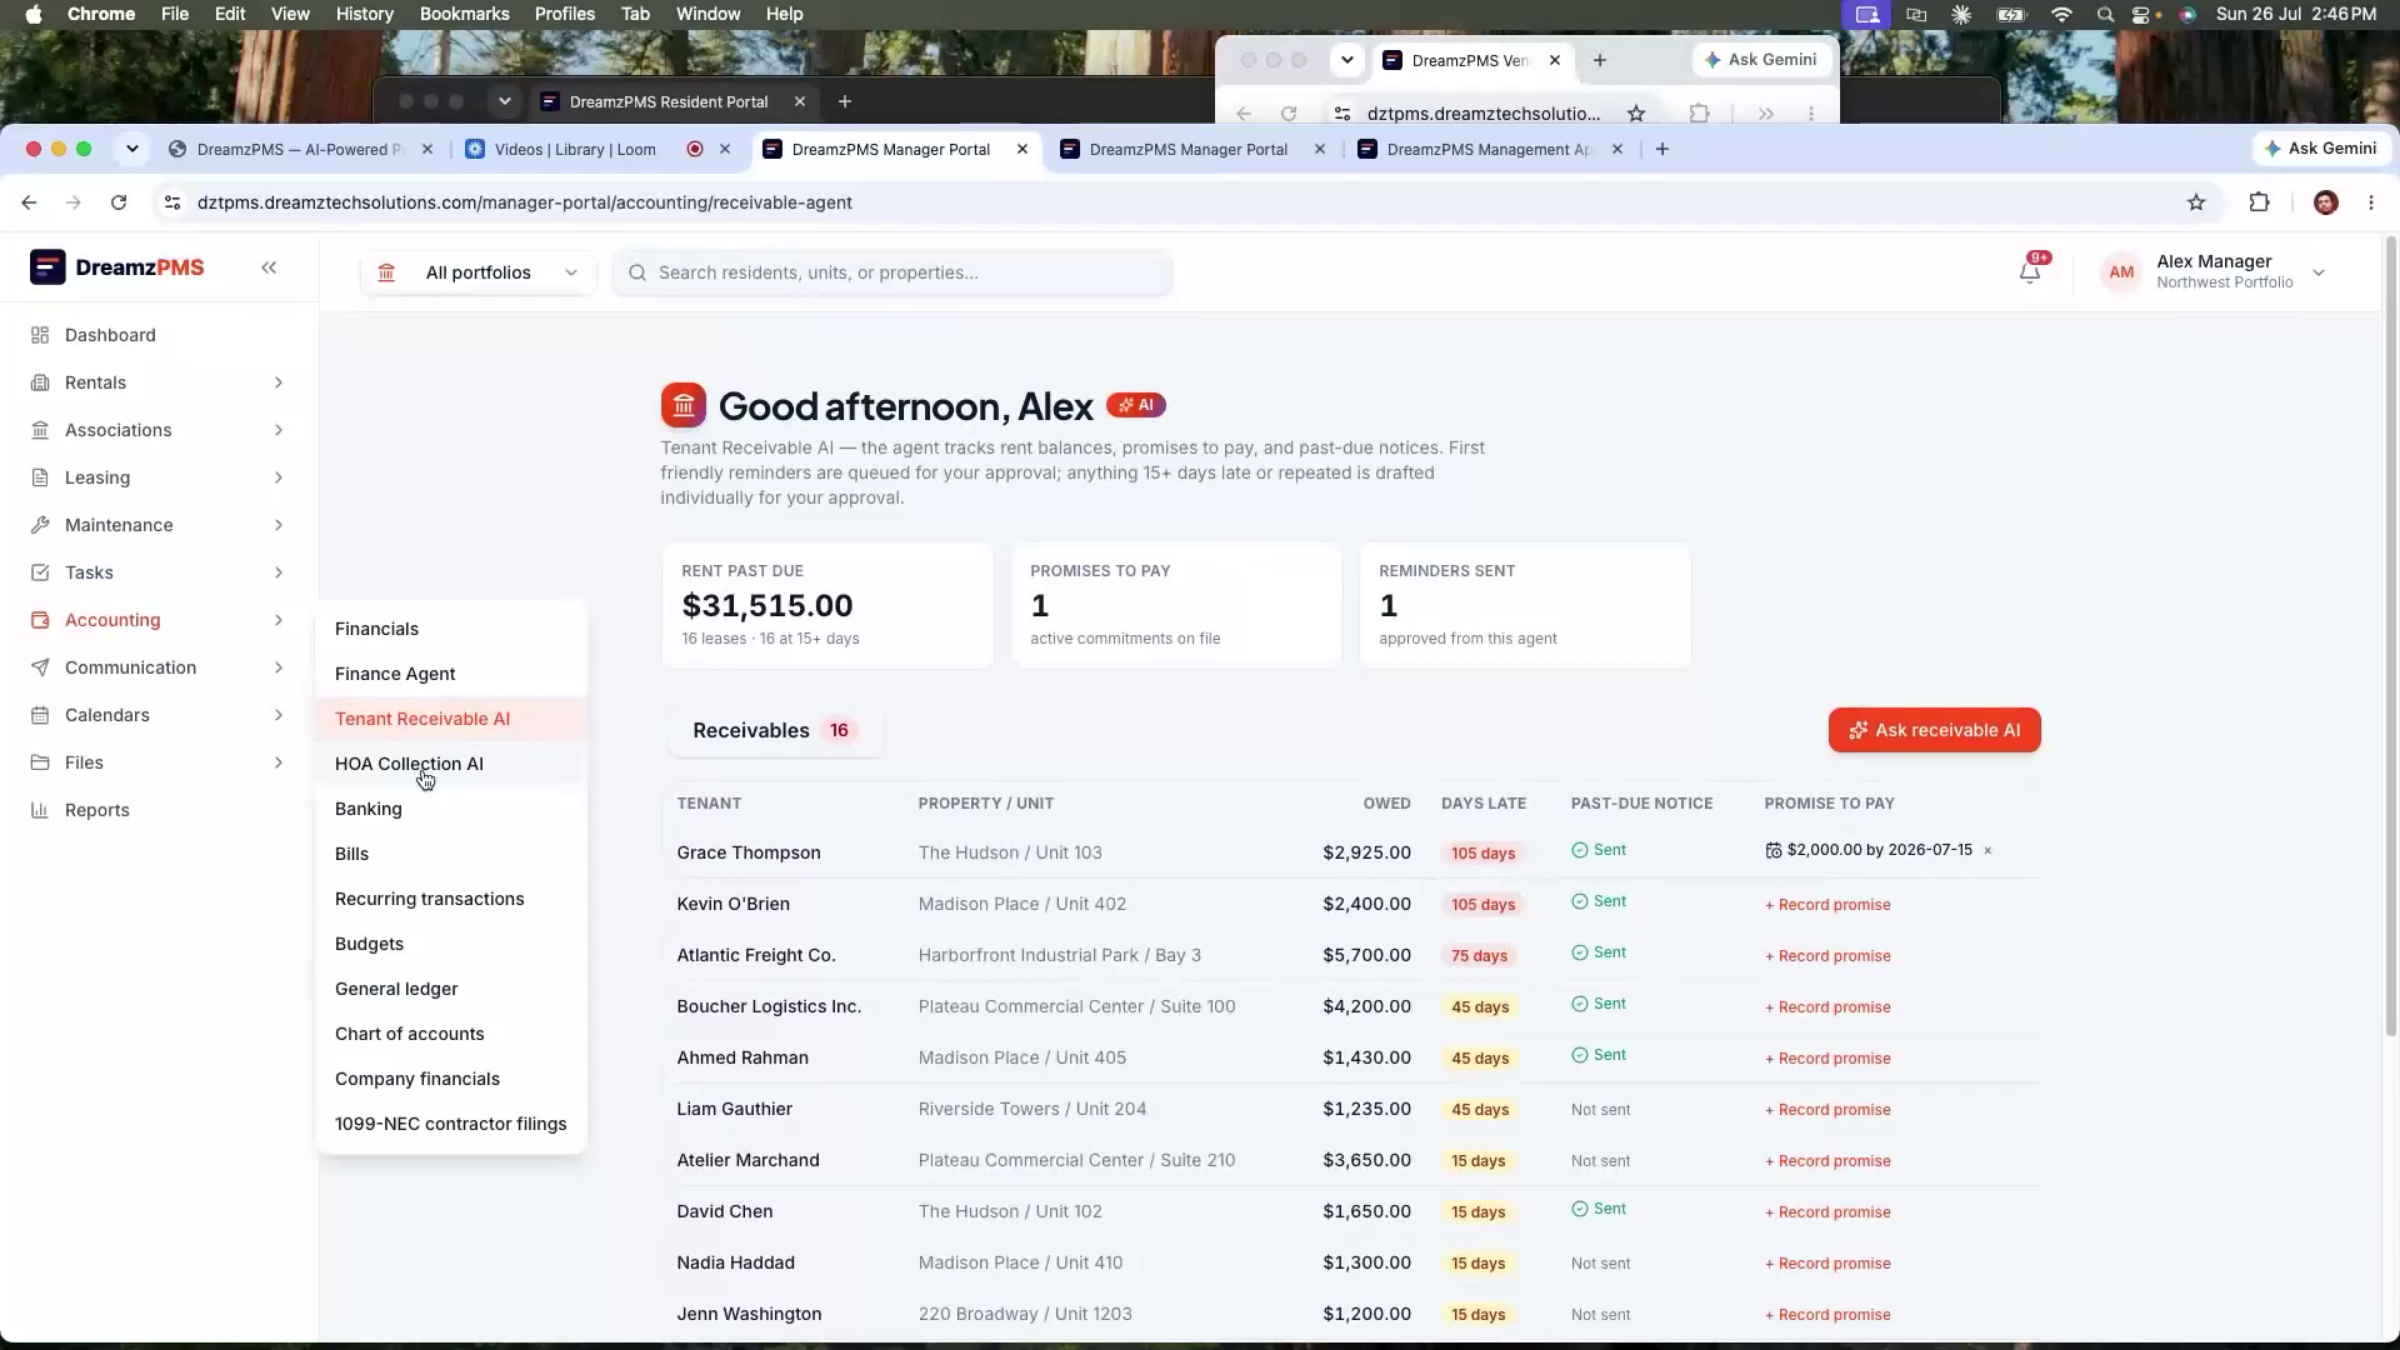
A Finance AI assistant answers natural-language questions too — for example, which residents have outstanding balances, who's promised payment, or which accounts need follow-up — for both rental and HOA portfolios.
Step 72 – Invoice Processing Simplification
As with maintenance invoices, the AI scans uploaded bills, extracts the details, and flags anything still pending payment.
Step 73 – AI Communication Drafting
Ask the AI to draft any email or message and it produces a complete, professional message you can review, edit, and send — useful for reminders, payment updates, and maintenance notifications alike.
Step 74 – Platform Workflow Summary
Across the platform, you've now seen prospect management from the first inquiry, AI-assisted leasing, resident self-service, maintenance requests and vendor assignment, automated invoice processing, and AI-driven finance operations — all working from the same connected data.
After Setup — What's Next?
With prospect management, leasing, maintenance, and finance all working from one connected platform — and an AI workforce supporting each step along the way — your team can focus on the decisions that need a human. Once you're comfortable with the core workflow, you can:
- Configure your public listing site and AI leasing agent so prospects can browse, ask questions, and schedule showings on their own before your team ever gets involved.
- Set up Finance AI automation rules for payment reminders and late-fee notices so every resident gets consistent, timely communication.
- Lean on the AI Maintenance Agent's daily review to catch overdue or high-risk work orders before they escalate.
DreamzPMS isn't meant to replace your team — the AI works alongside them, handling repetitive tasks so managers, leasing agents, and finance staff can focus on higher-value work.
Ready to see DreamzPMS in action? Contact DreamzTech to schedule a personalized demonstration.
Tips for Property Management Teams
- Let AI Pilot and the leasing assistant handle first-touch prospect conversations, and step in yourself once a lead is ready to convert or has a specific question that needs a human answer.
- Configure your Finance AI automation rules once so payment reminders and late-fee notices go out consistently for every resident, not just the ones you remember to follow up with.
- Check in with the AI Maintenance Assistant each morning to see which jobs are unassigned or overdue before scanning the full work order list manually.
- Encourage vendors to upload their existing invoices — PDF, scan, or photo — instead of retyping billing details; AI extraction handles the data entry either way.
Frequently Asked Questions
Do residents need to call or email to report a maintenance issue?
No. Residents can submit a maintenance request directly from the resident portal or app, describing the issue and attaching a photo, and receive an instant request ID to track its status.
Does the AI ever send financial communications without approval?
No. Finance AI drafts reminders and messages for review, but nothing is sent to a resident until a manager approves it.
Can vendors submit invoices they've already created elsewhere?
Yes. Vendors can upload an existing invoice — a PDF, scan, or even a photo of a handwritten one — and the AI extracts the amount, vendor details, and dates automatically.
How does the AI Maintenance Agent decide which jobs need attention first?
It reviews every open work order each day, evaluates priority and how long a request has been open, and recommends escalating anything overdue or high-risk, along with the best available vendor for unassigned jobs.