Managing Casino Facilities and Work Orders with DreamzCMMS
Casino properties run on uptime — from gaming floor equipment to back-of-house systems, every asset needs to be tracked, maintained, and quickly restored when something goes wrong. DreamzCMMS gives casino facility teams one connected platform to manage assets, capture incidents from the floor, assign and schedule work orders, and report on how well everything is performing.
Overview
The platform starts with the Assets module, where every piece of equipment, location, and sub-location is organized and searchable. When something needs attention, staff or guests can submit an incident directly from a QR code on the equipment itself, no app login required. From there, the request flows into the Incidents list, where it can be assigned and dispatched as a full work order — complete with checklists, financials, and files. Reports and the VEDA AI assistant then turn all of that activity into performance insight, from maintenance summaries to inventory levels.
Here is a reference video:
Before You Begin
- You must have access to the Assets, Incidents, Work Orders, and Reports modules in DreamzCMMS.
- Your casino's locations, sub-locations, and assets should already be set up in the Assets module — see Create Asset Locations if you haven't done this yet.
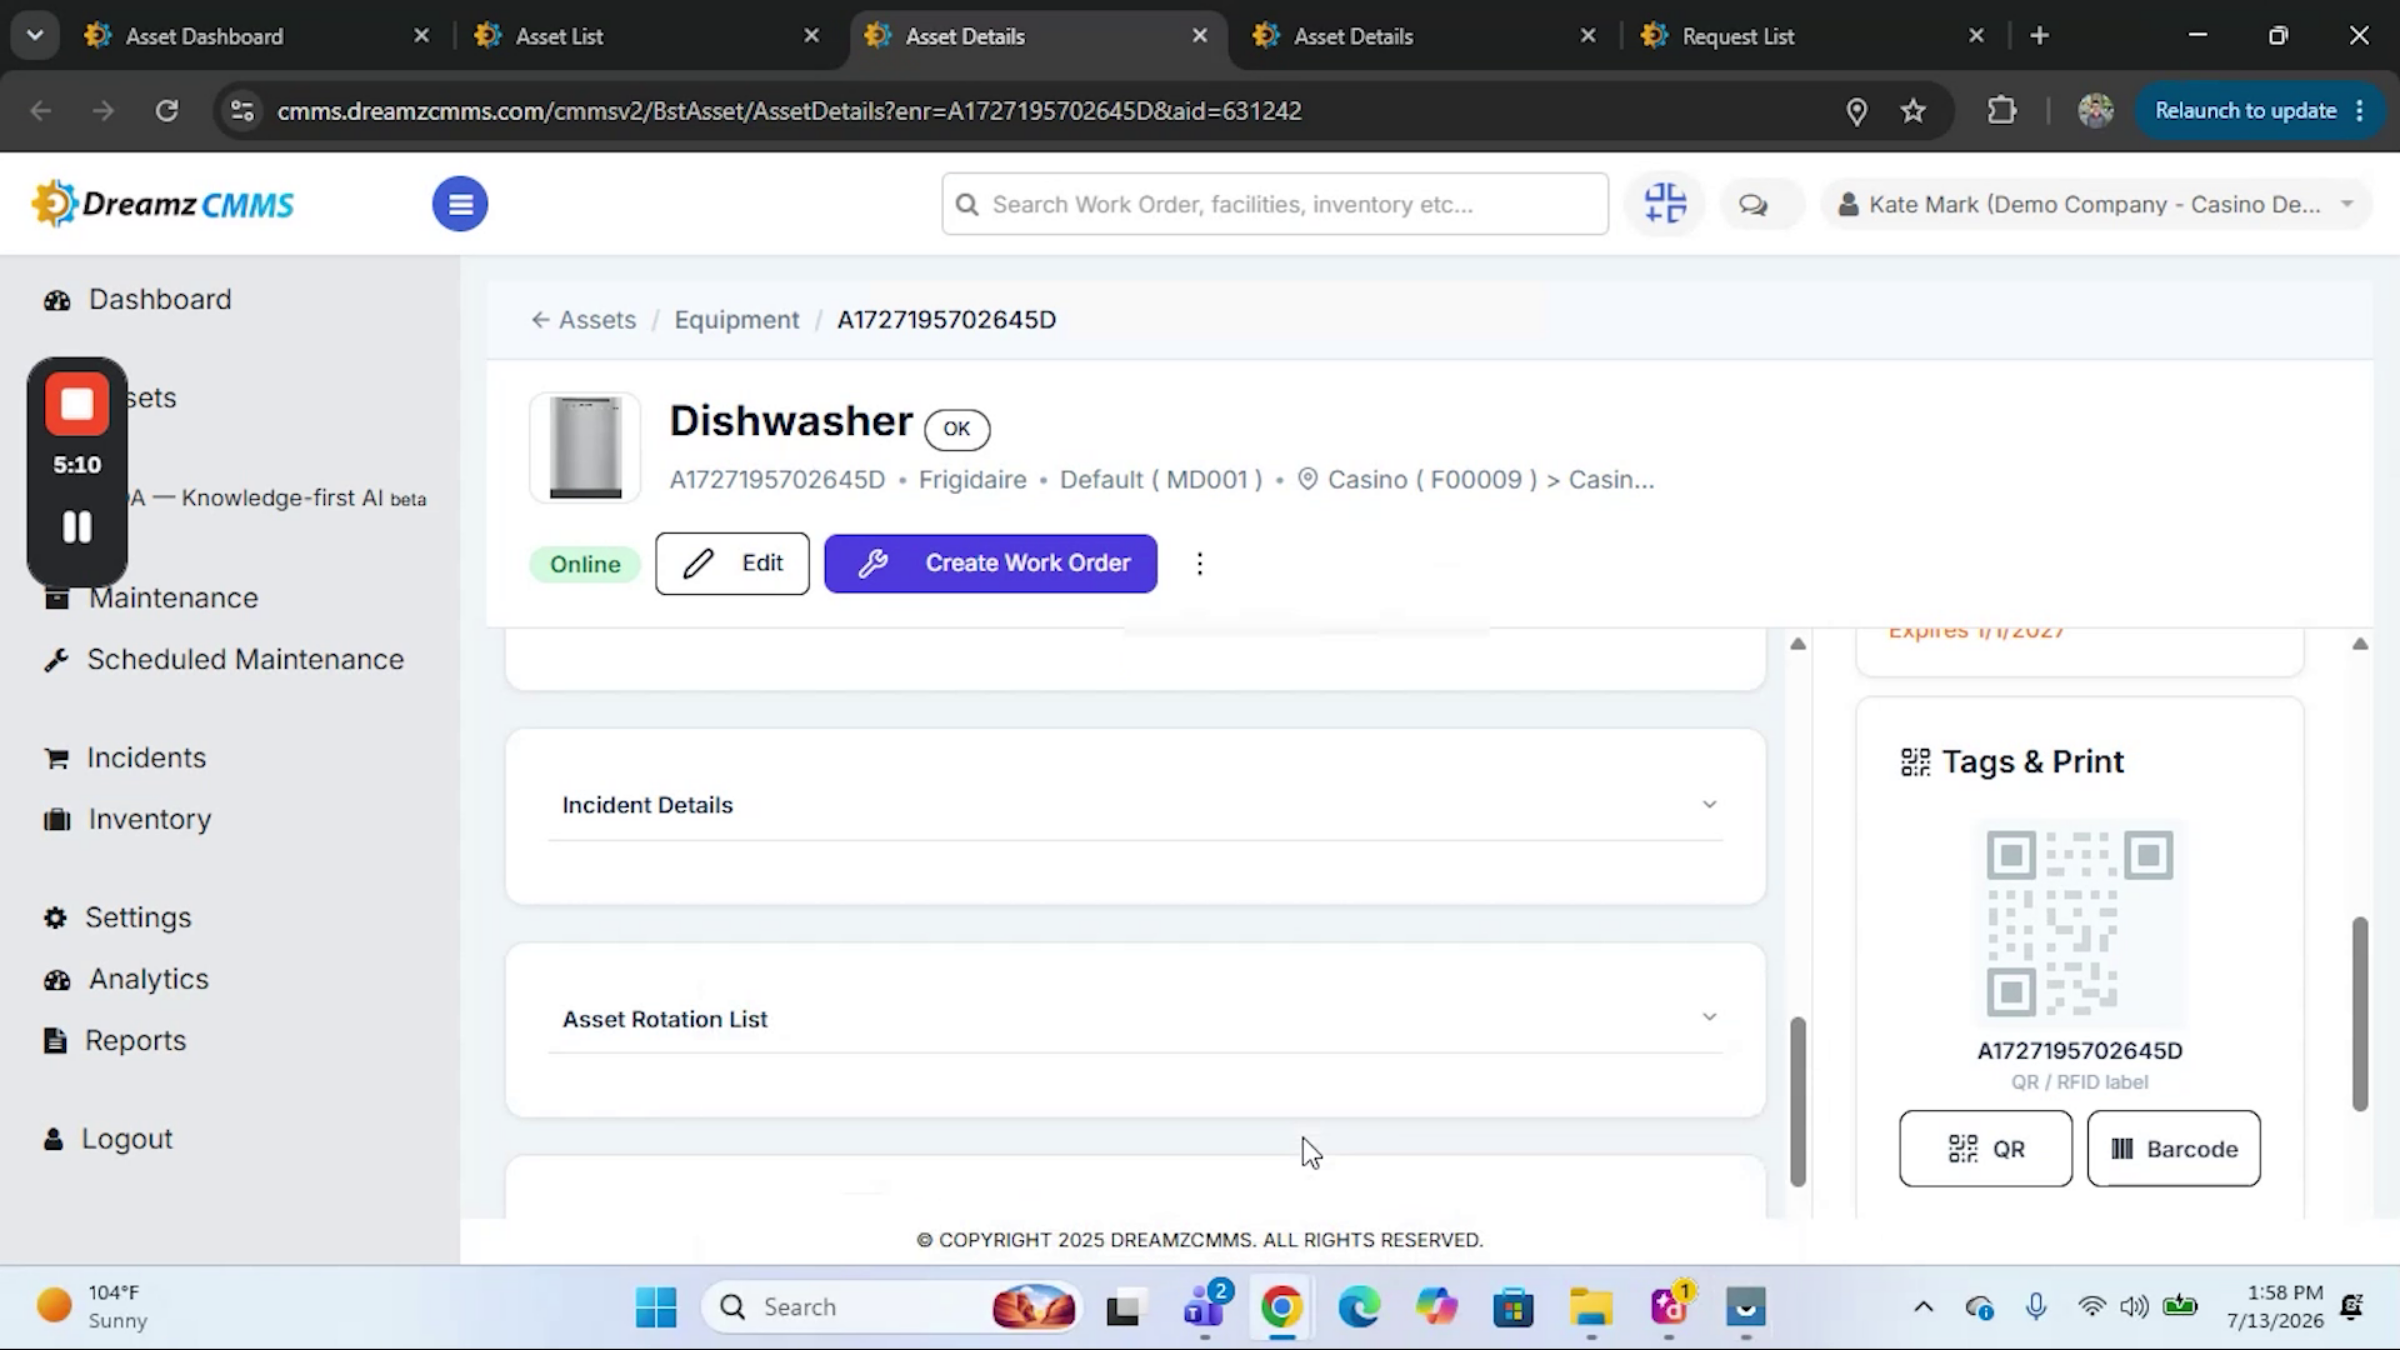
- Make sure identification or work request QR codes are printed and posted on equipment if you want staff or guests to submit incidents directly from the floor.
Managing Assets and Equipment
Step 1 – Start From the Assets Dashboard
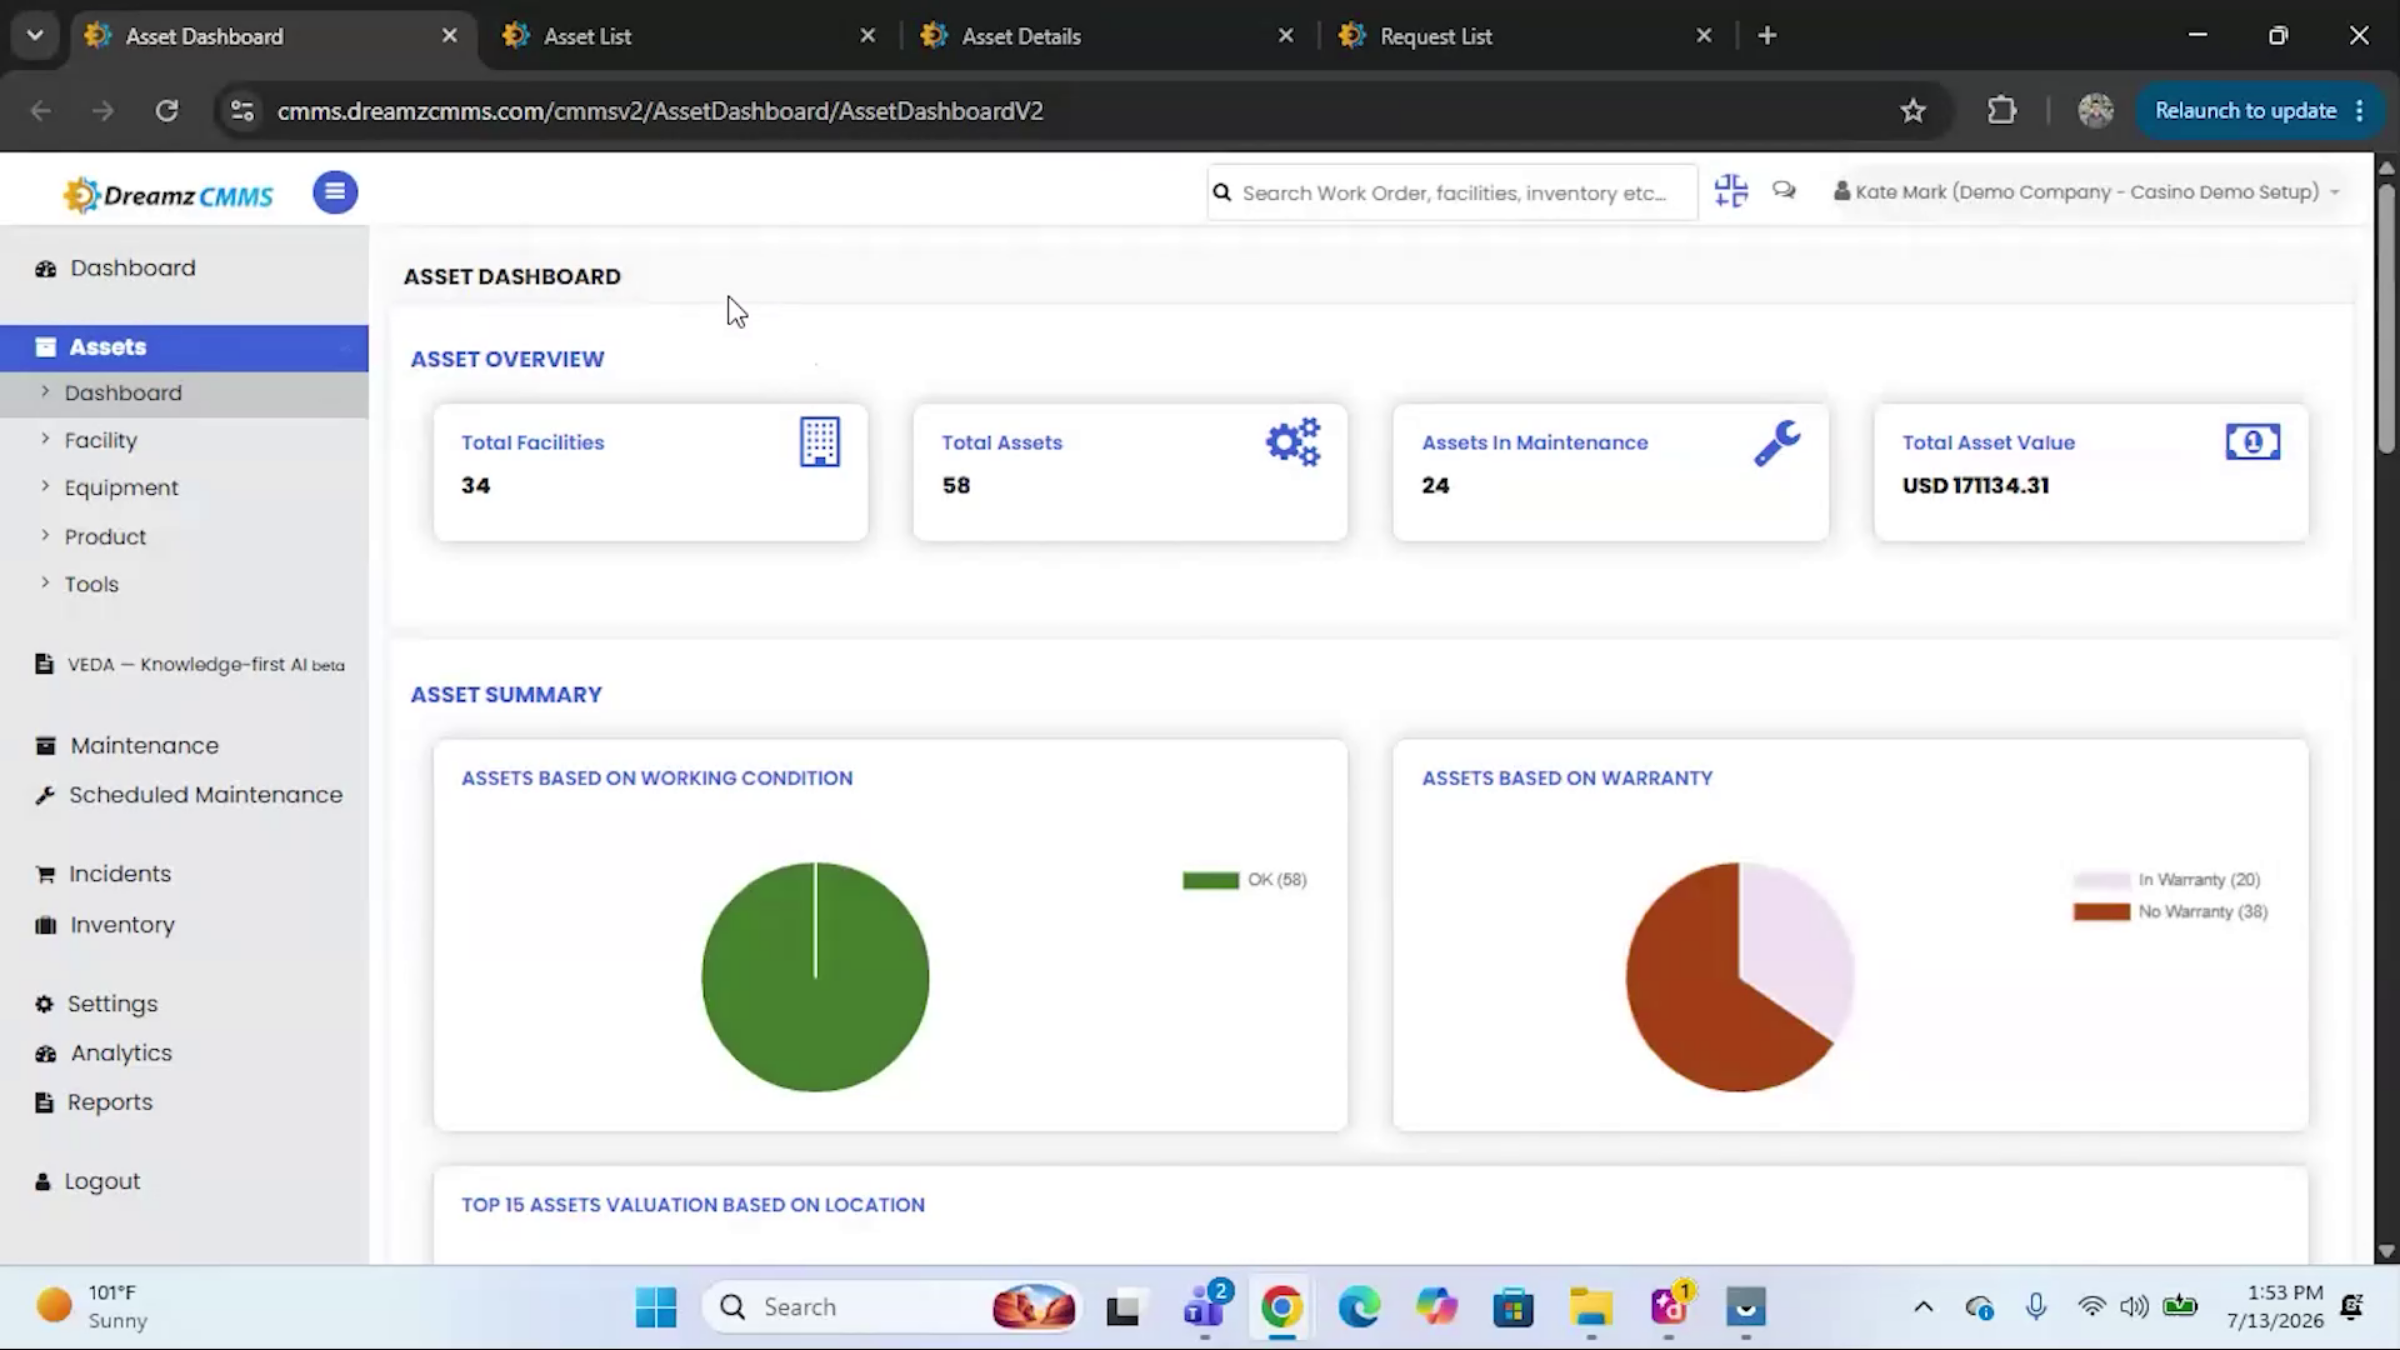
The Assets module opens on a dashboard showing an overview of your platform, along with key metrics about your assets and their performance.
Step 2 – Navigate Equipment by Location
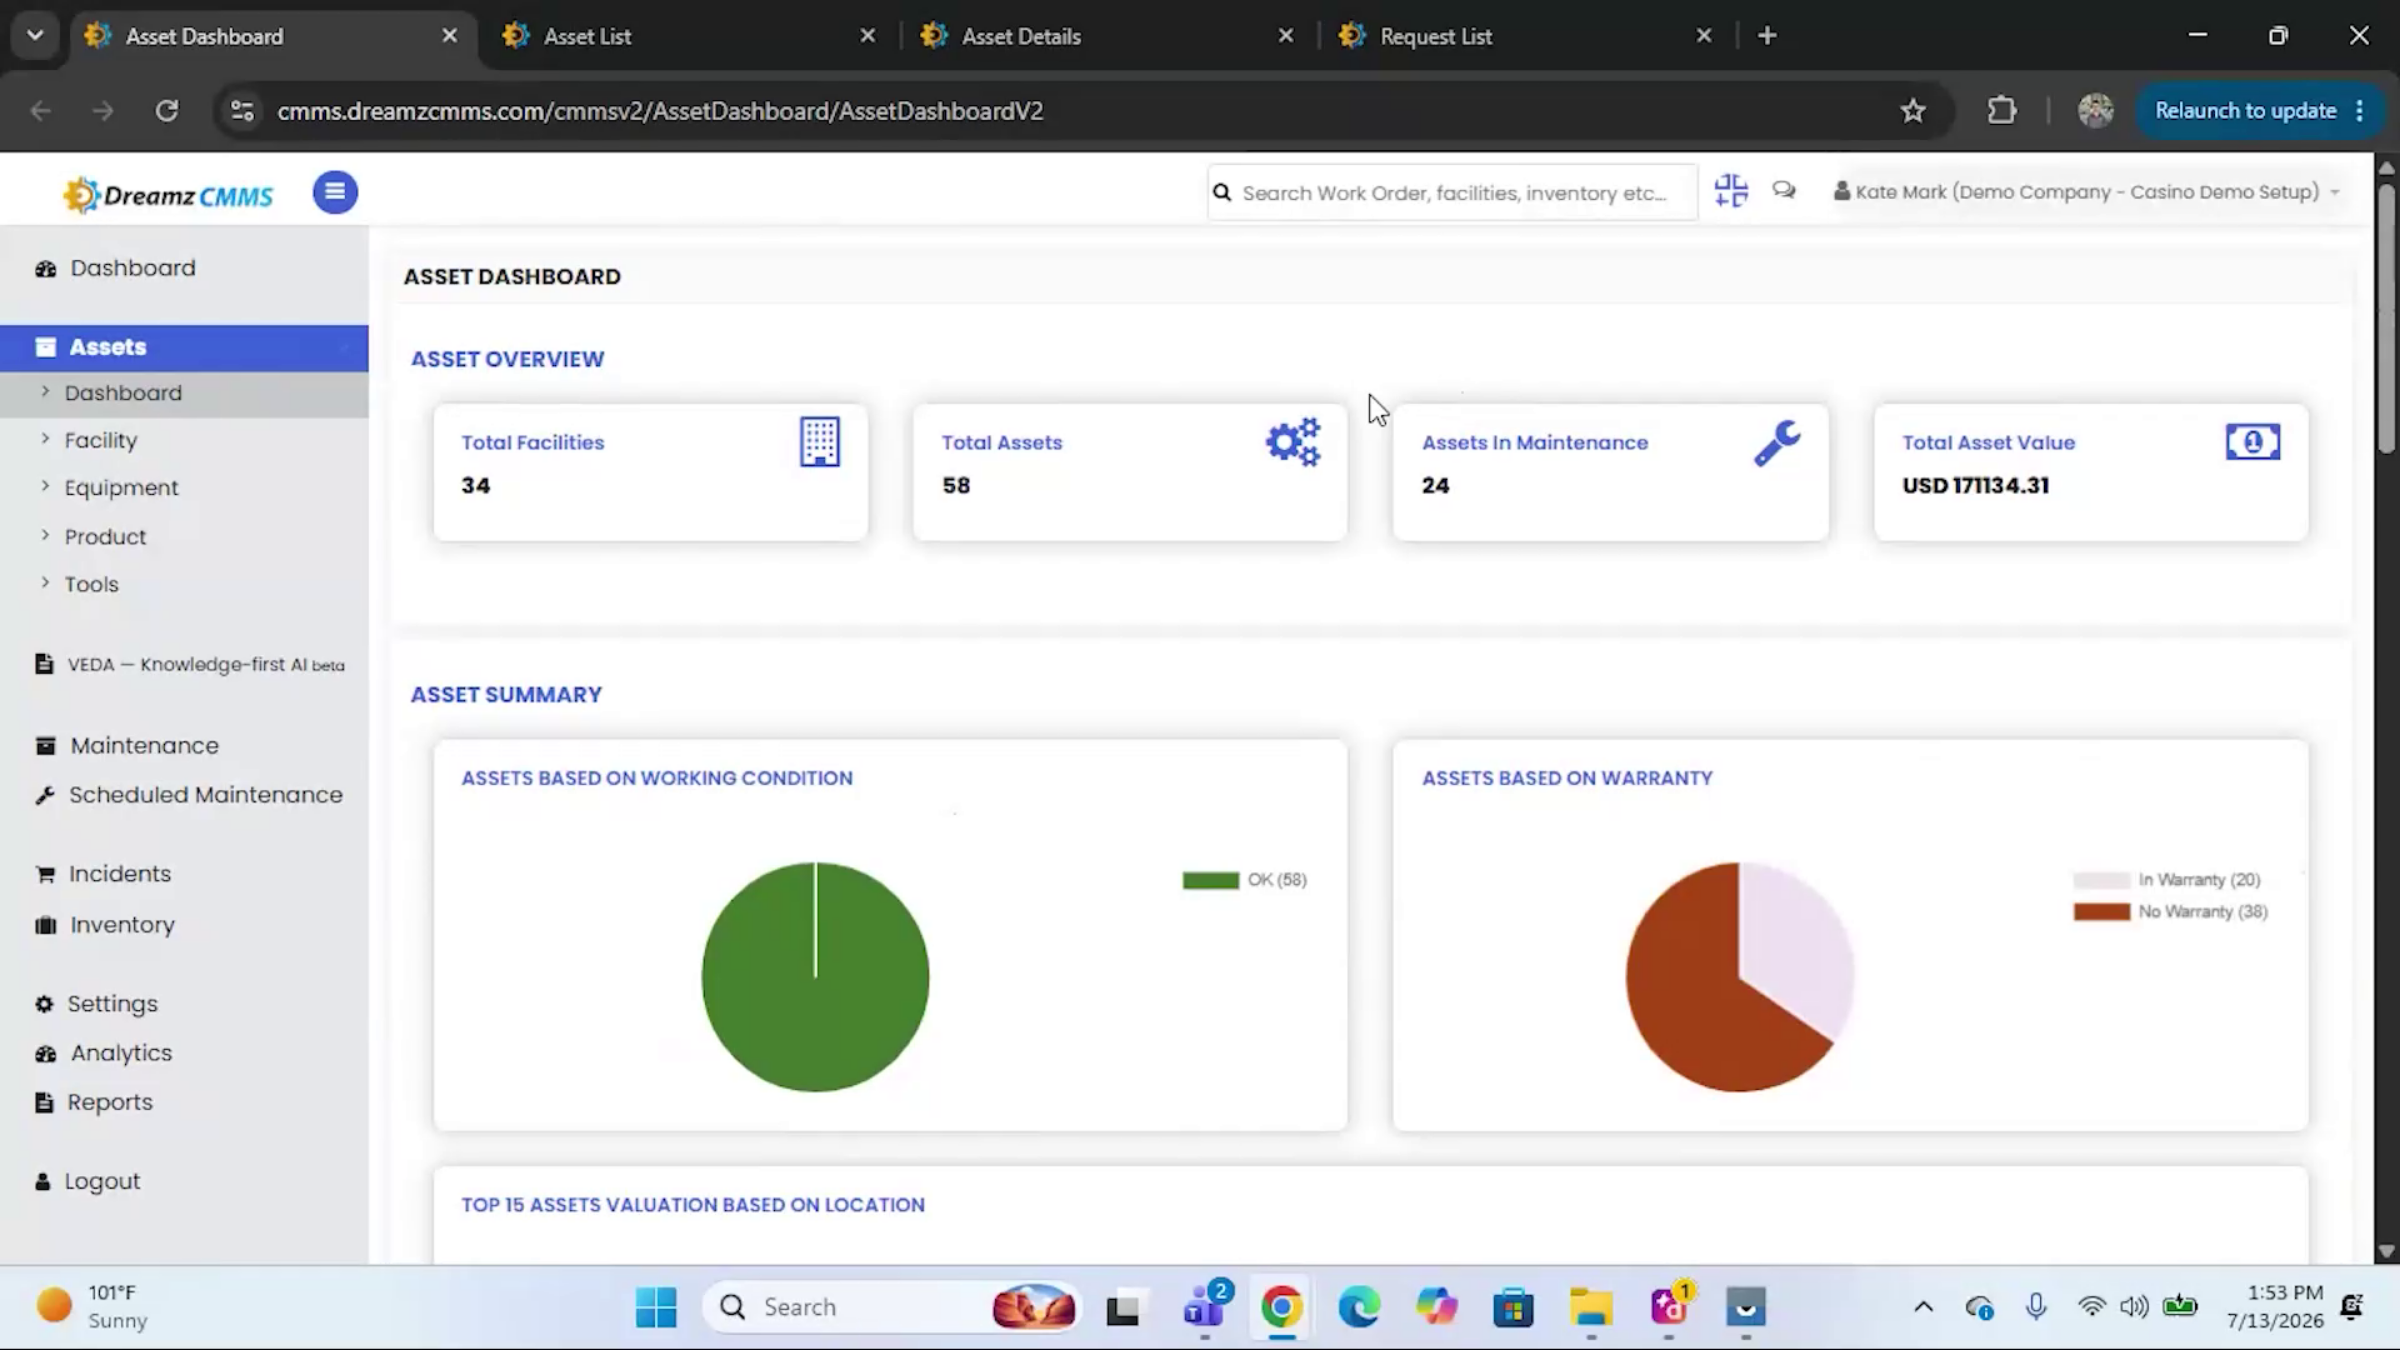
The Equipment tab gives you a list view of your different locations. Click the dropdown on any parent location, such as the casino floor, to open it and see its sub-locations. Like the parent, each sub-location can be expanded further to reveal additional sub-locations or connected assets.
Step 3 – Review Asset Details
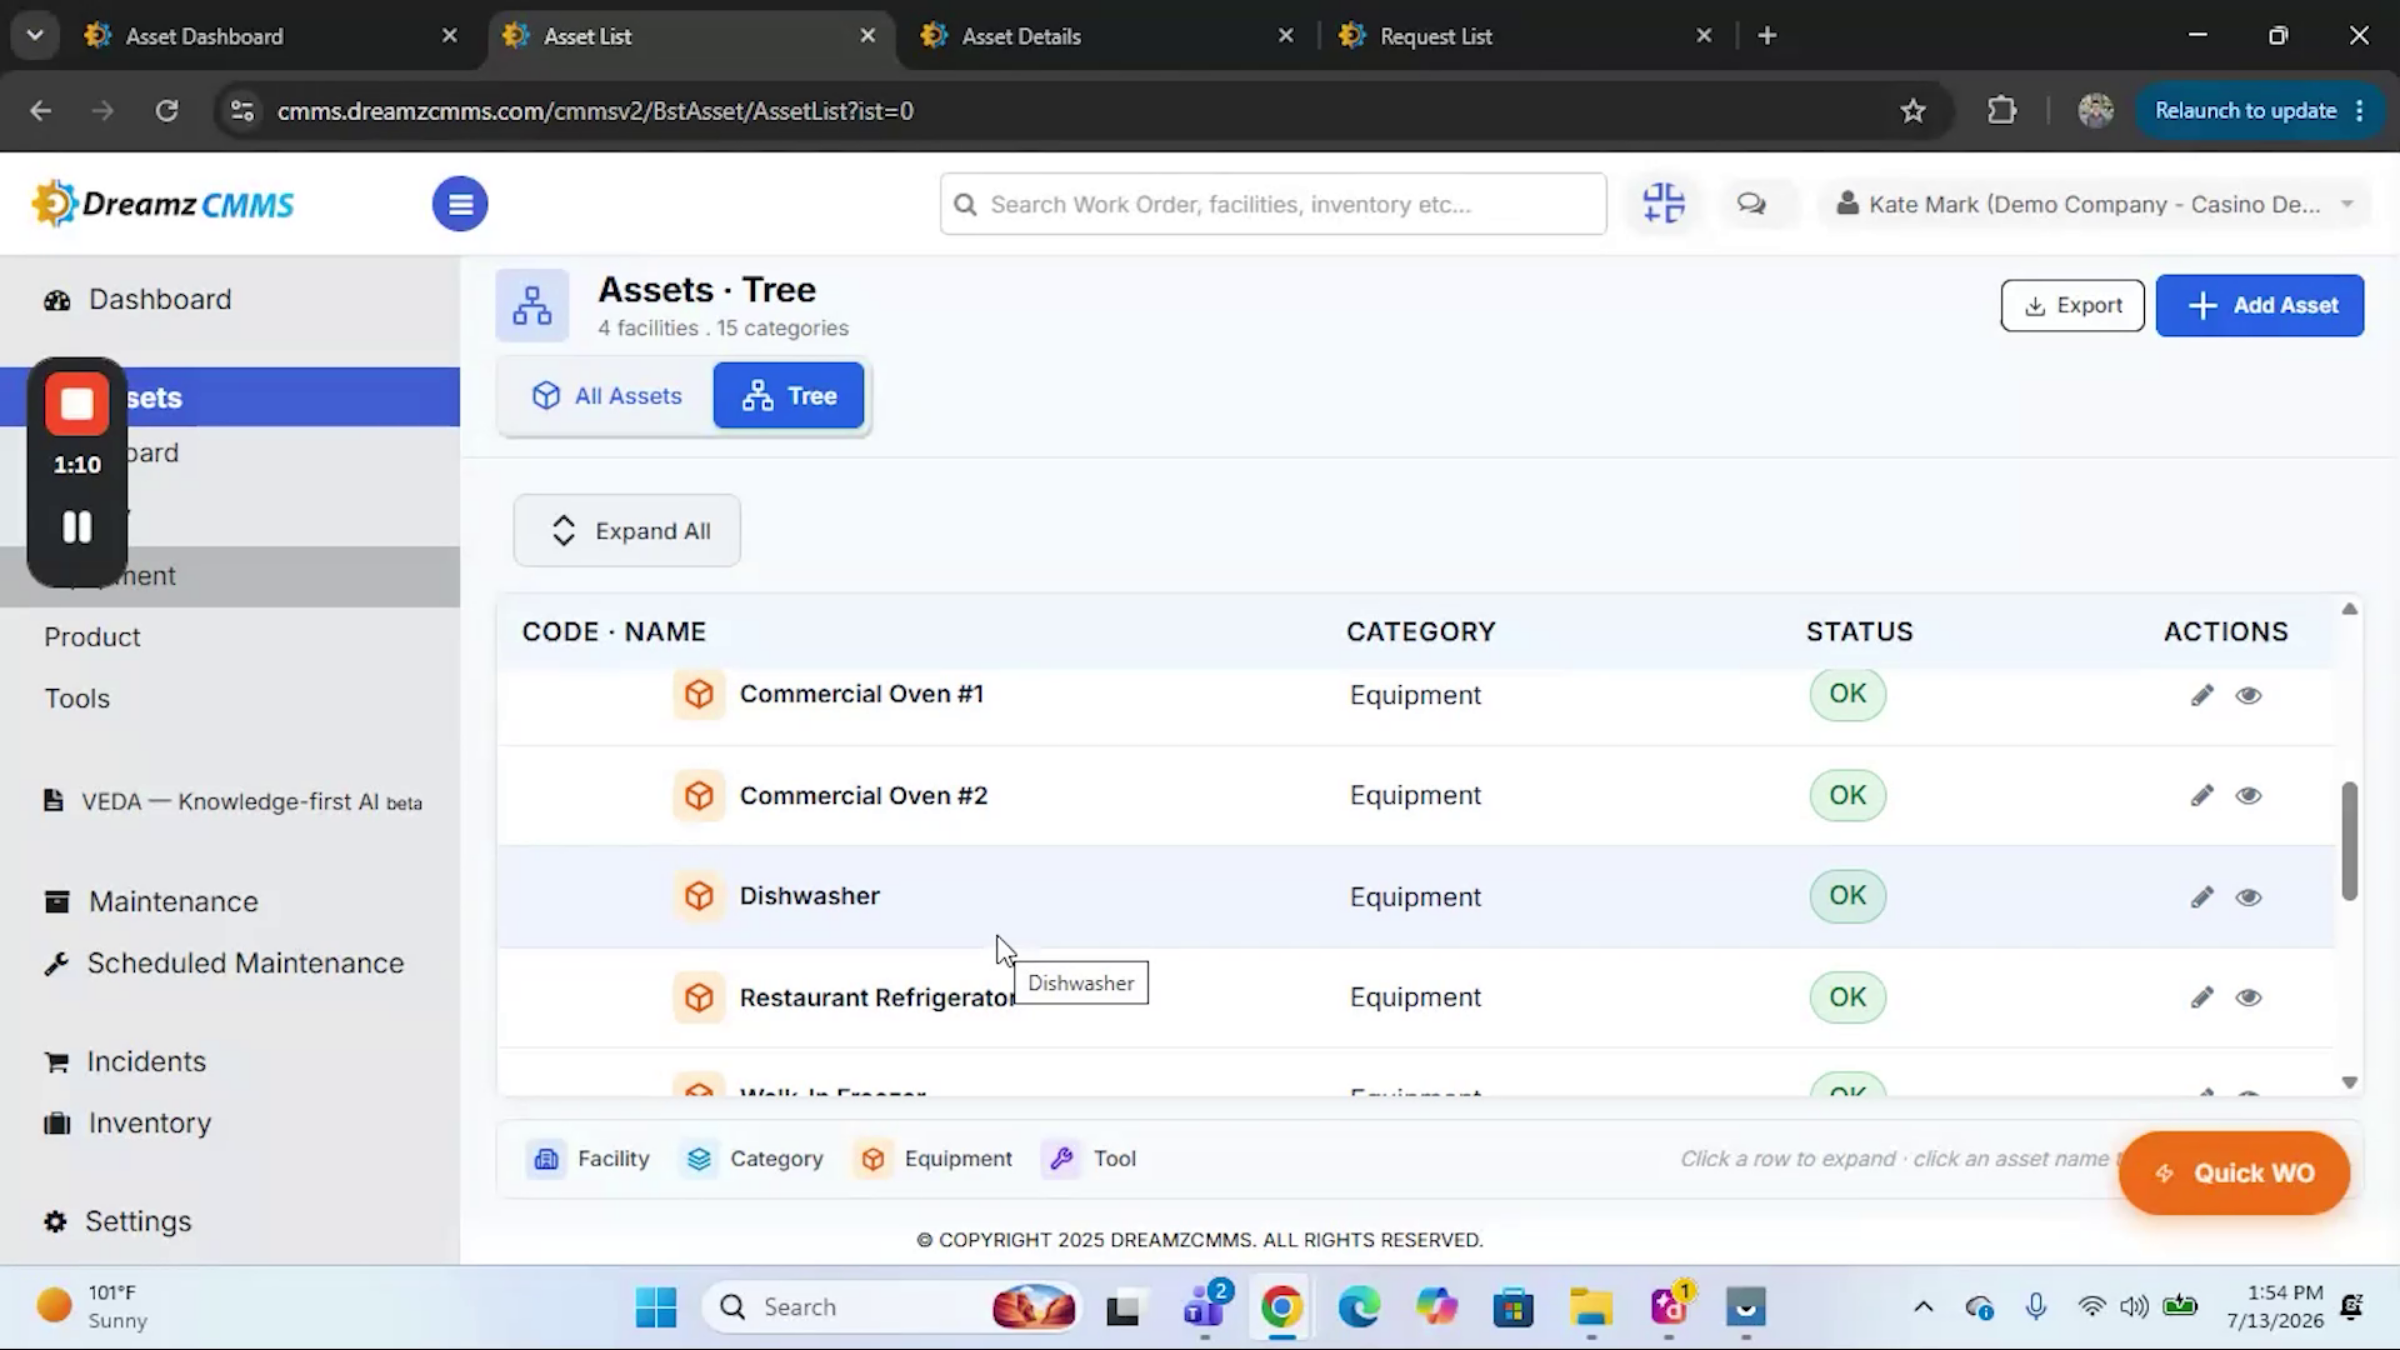
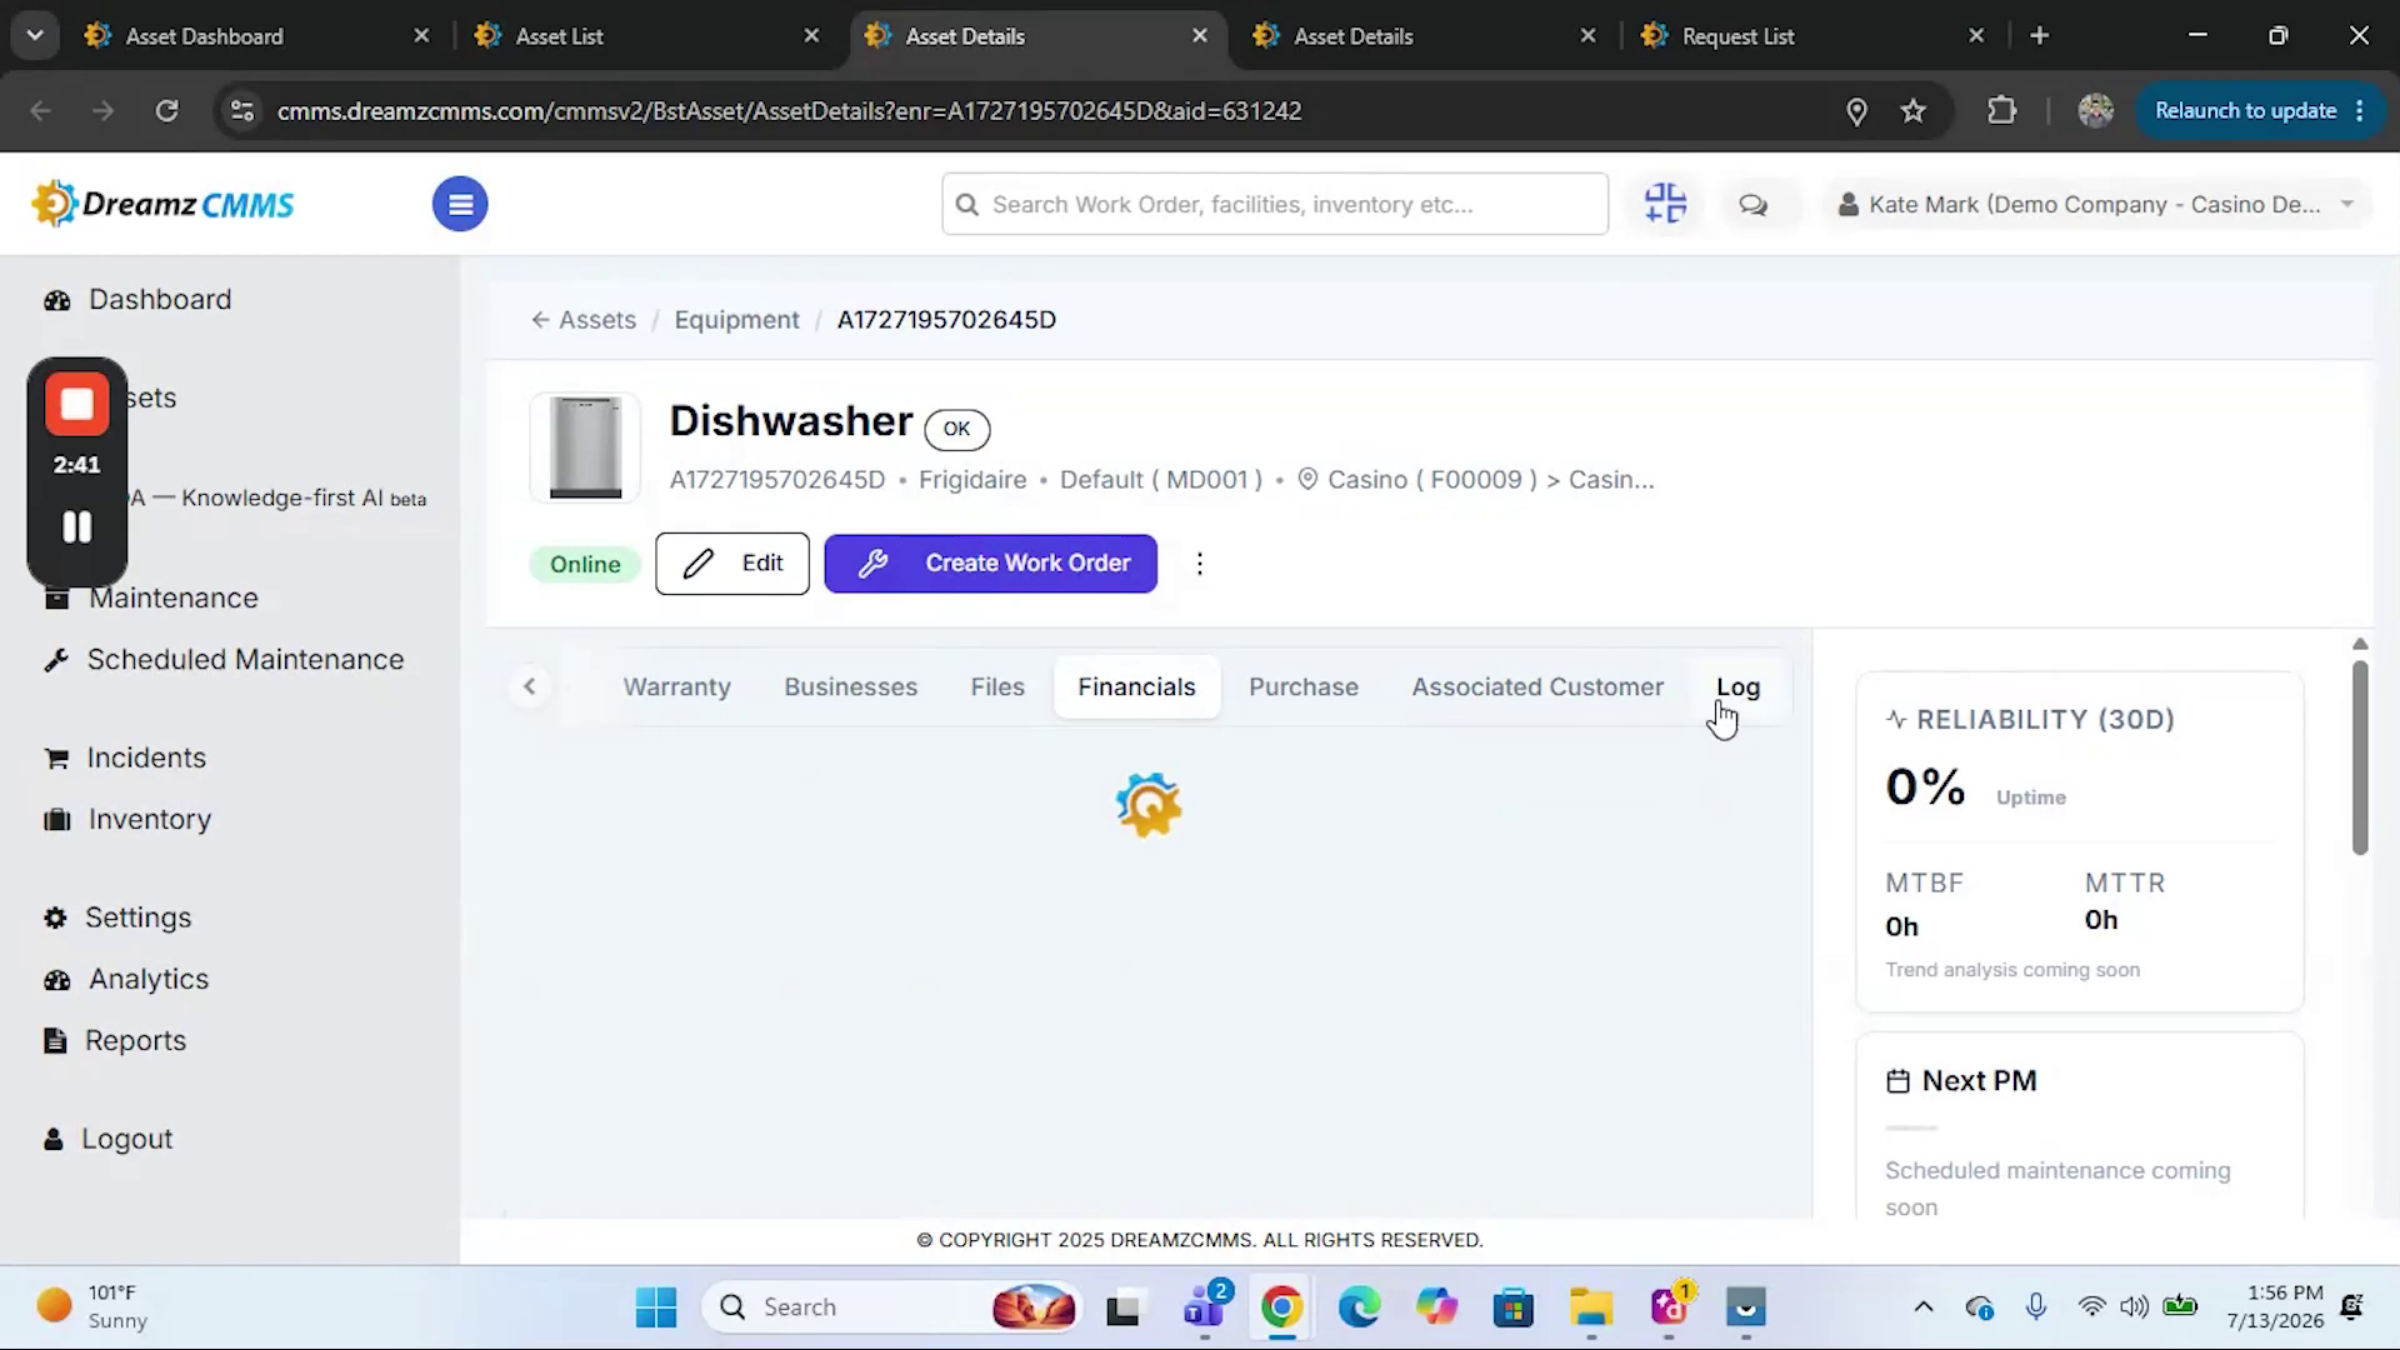
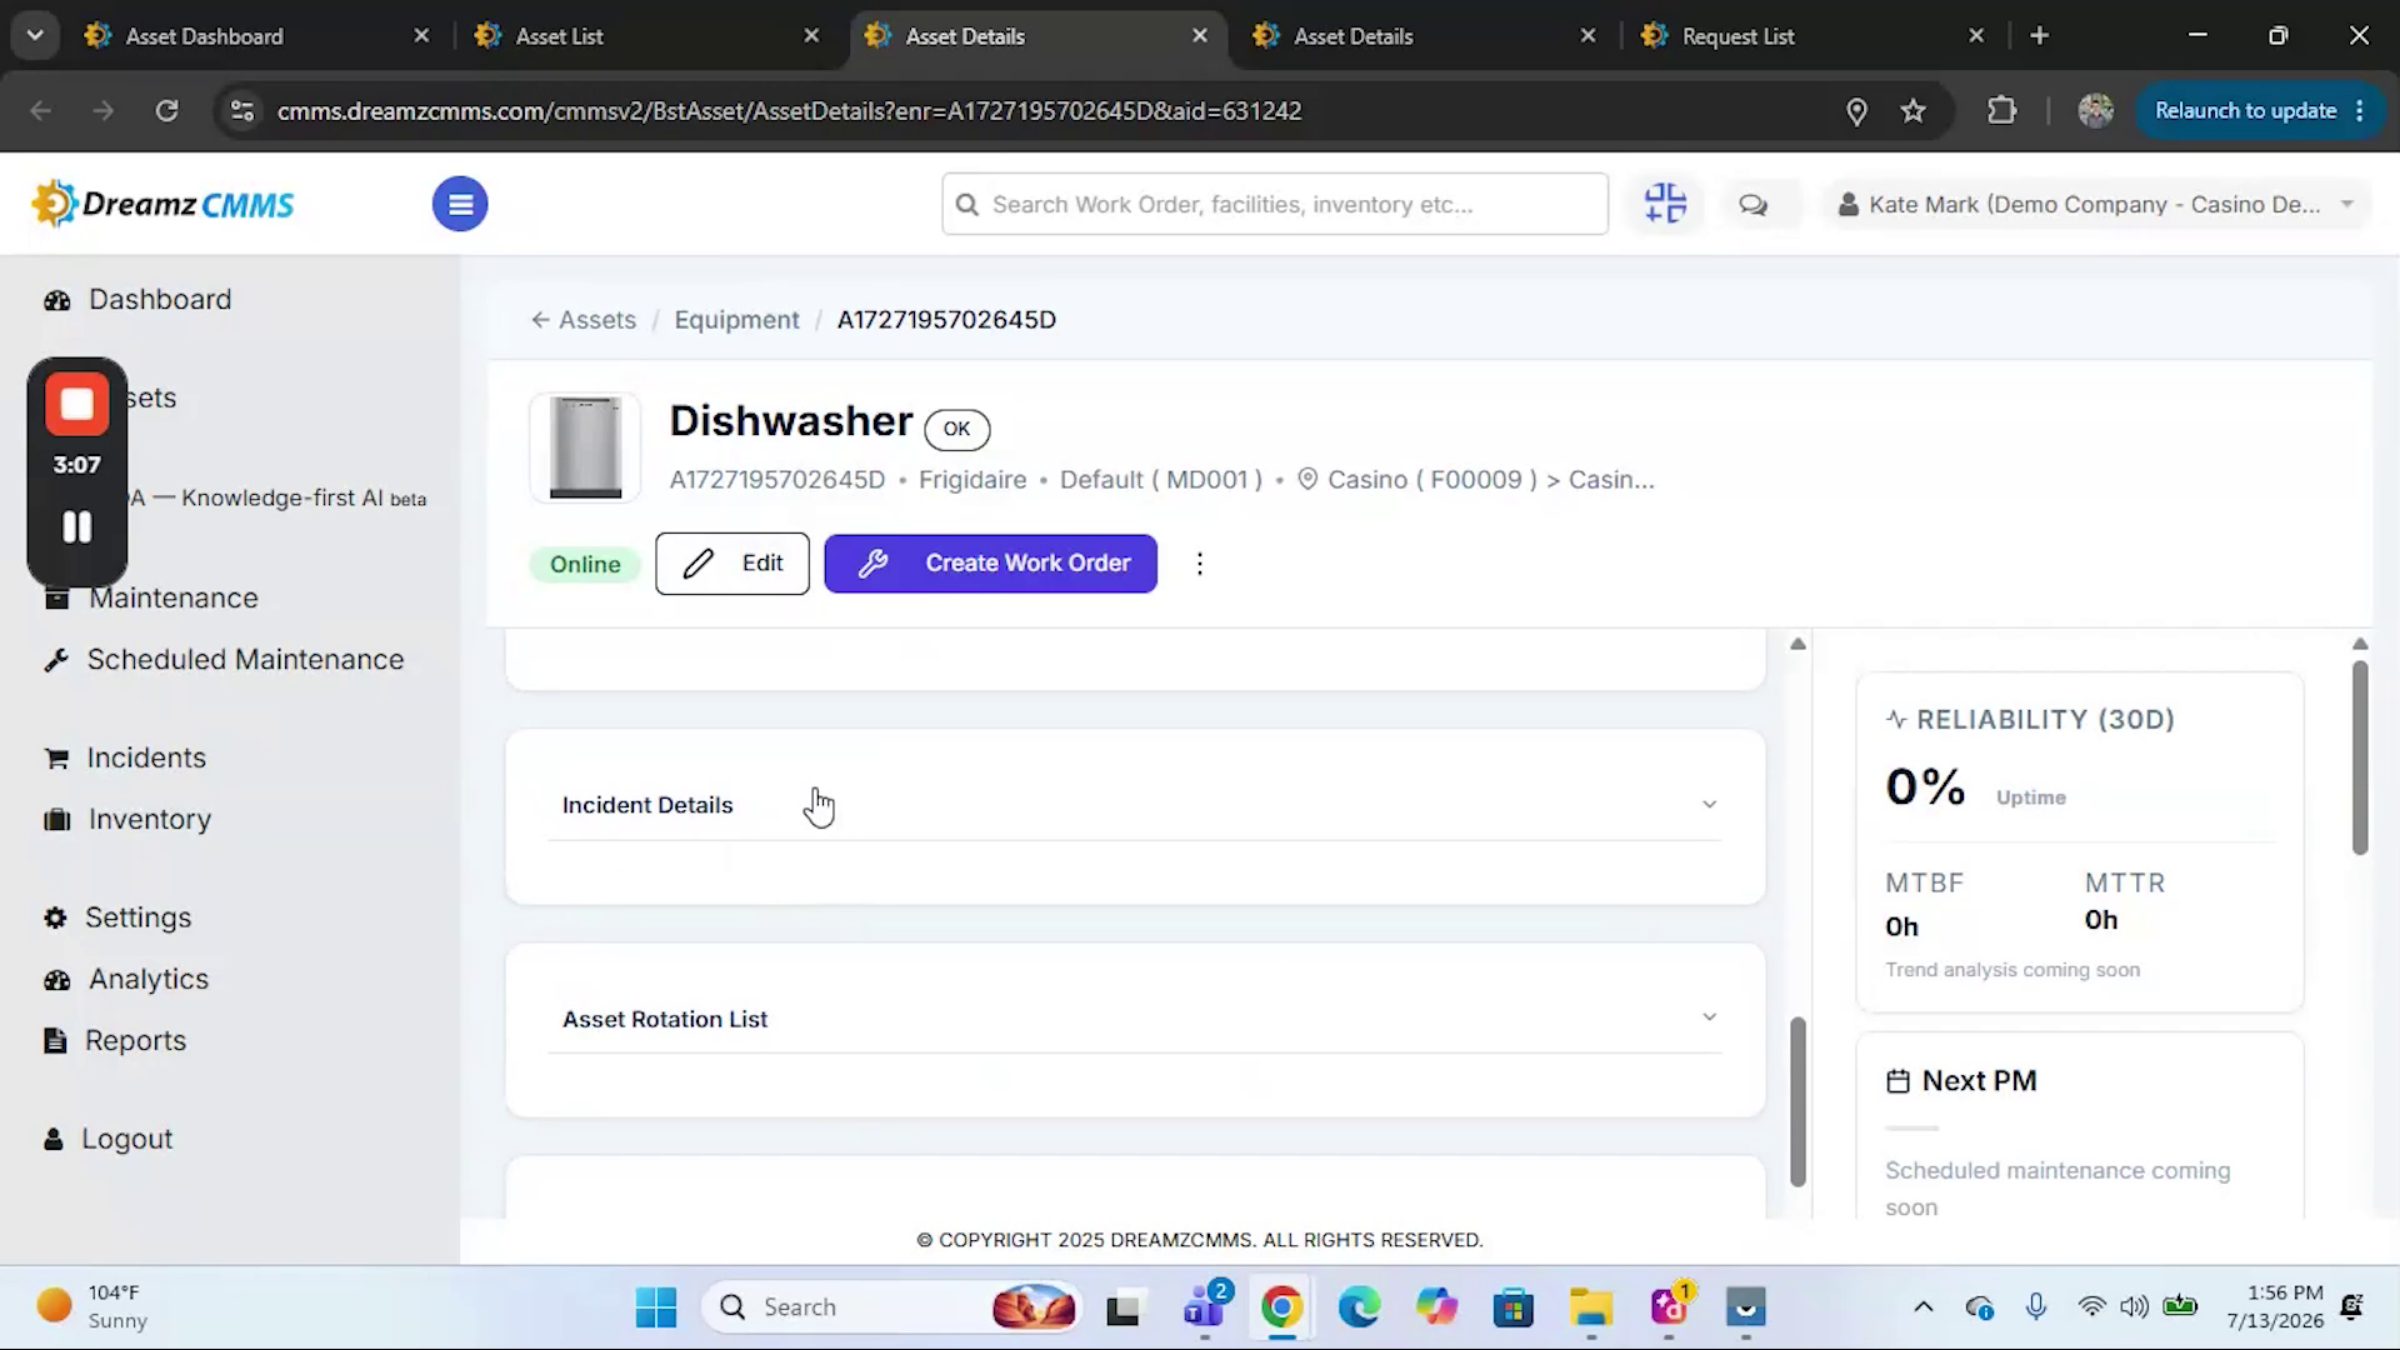
Click into any asset to view its identification information and control buttons at the top, along with a set of detail tabs. The General tab holds saved information you can flip through, including any added BOM items, captured meter readings, tagged personnel, warranty information, associated vendors, photo files, and work order details and attachments.
Step 4 – Track Financials and Purchases
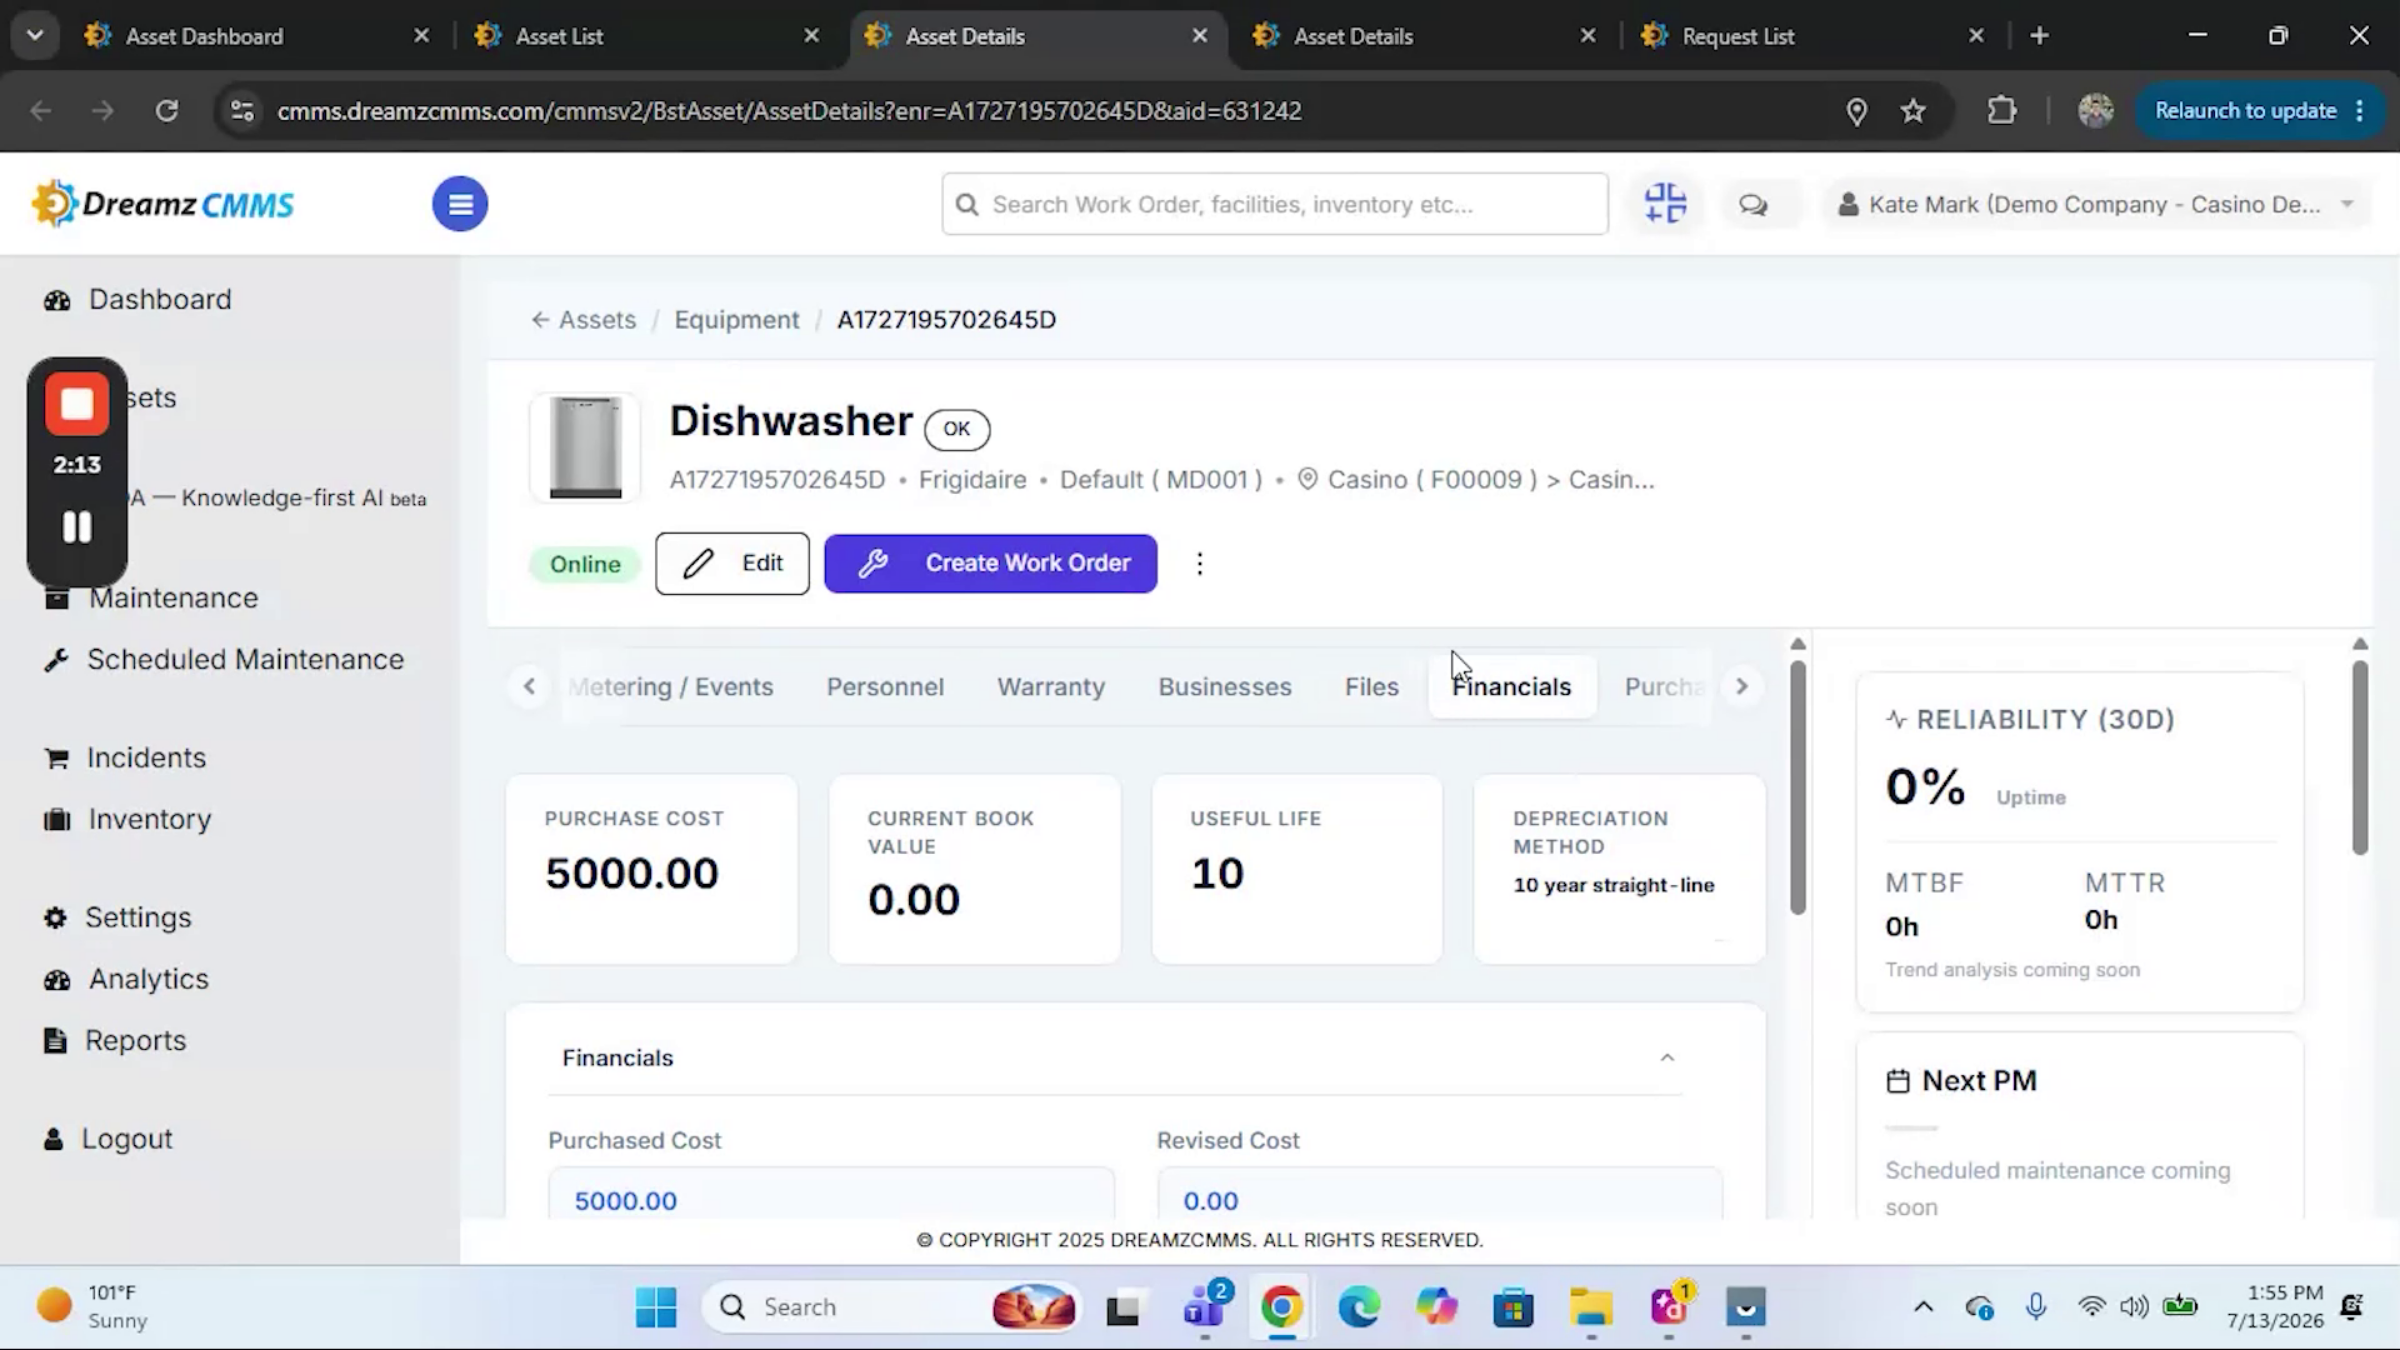
The Financial tab shows financial information, a depreciation board, expenses, and a schedule for the asset. Use the Purchase tab to capture purchases made from vendors and associate customers as needed.
Step 5 – Review Asset History and Logs
The Log tab shows a historical view of the individual asset, including transaction details, a timeline, upcoming work orders, work order history, online/offline time, parts and supplies consumed, and incidents.
Submitting and Managing Incidents
Step 6 – Submit an Incident by QR Code
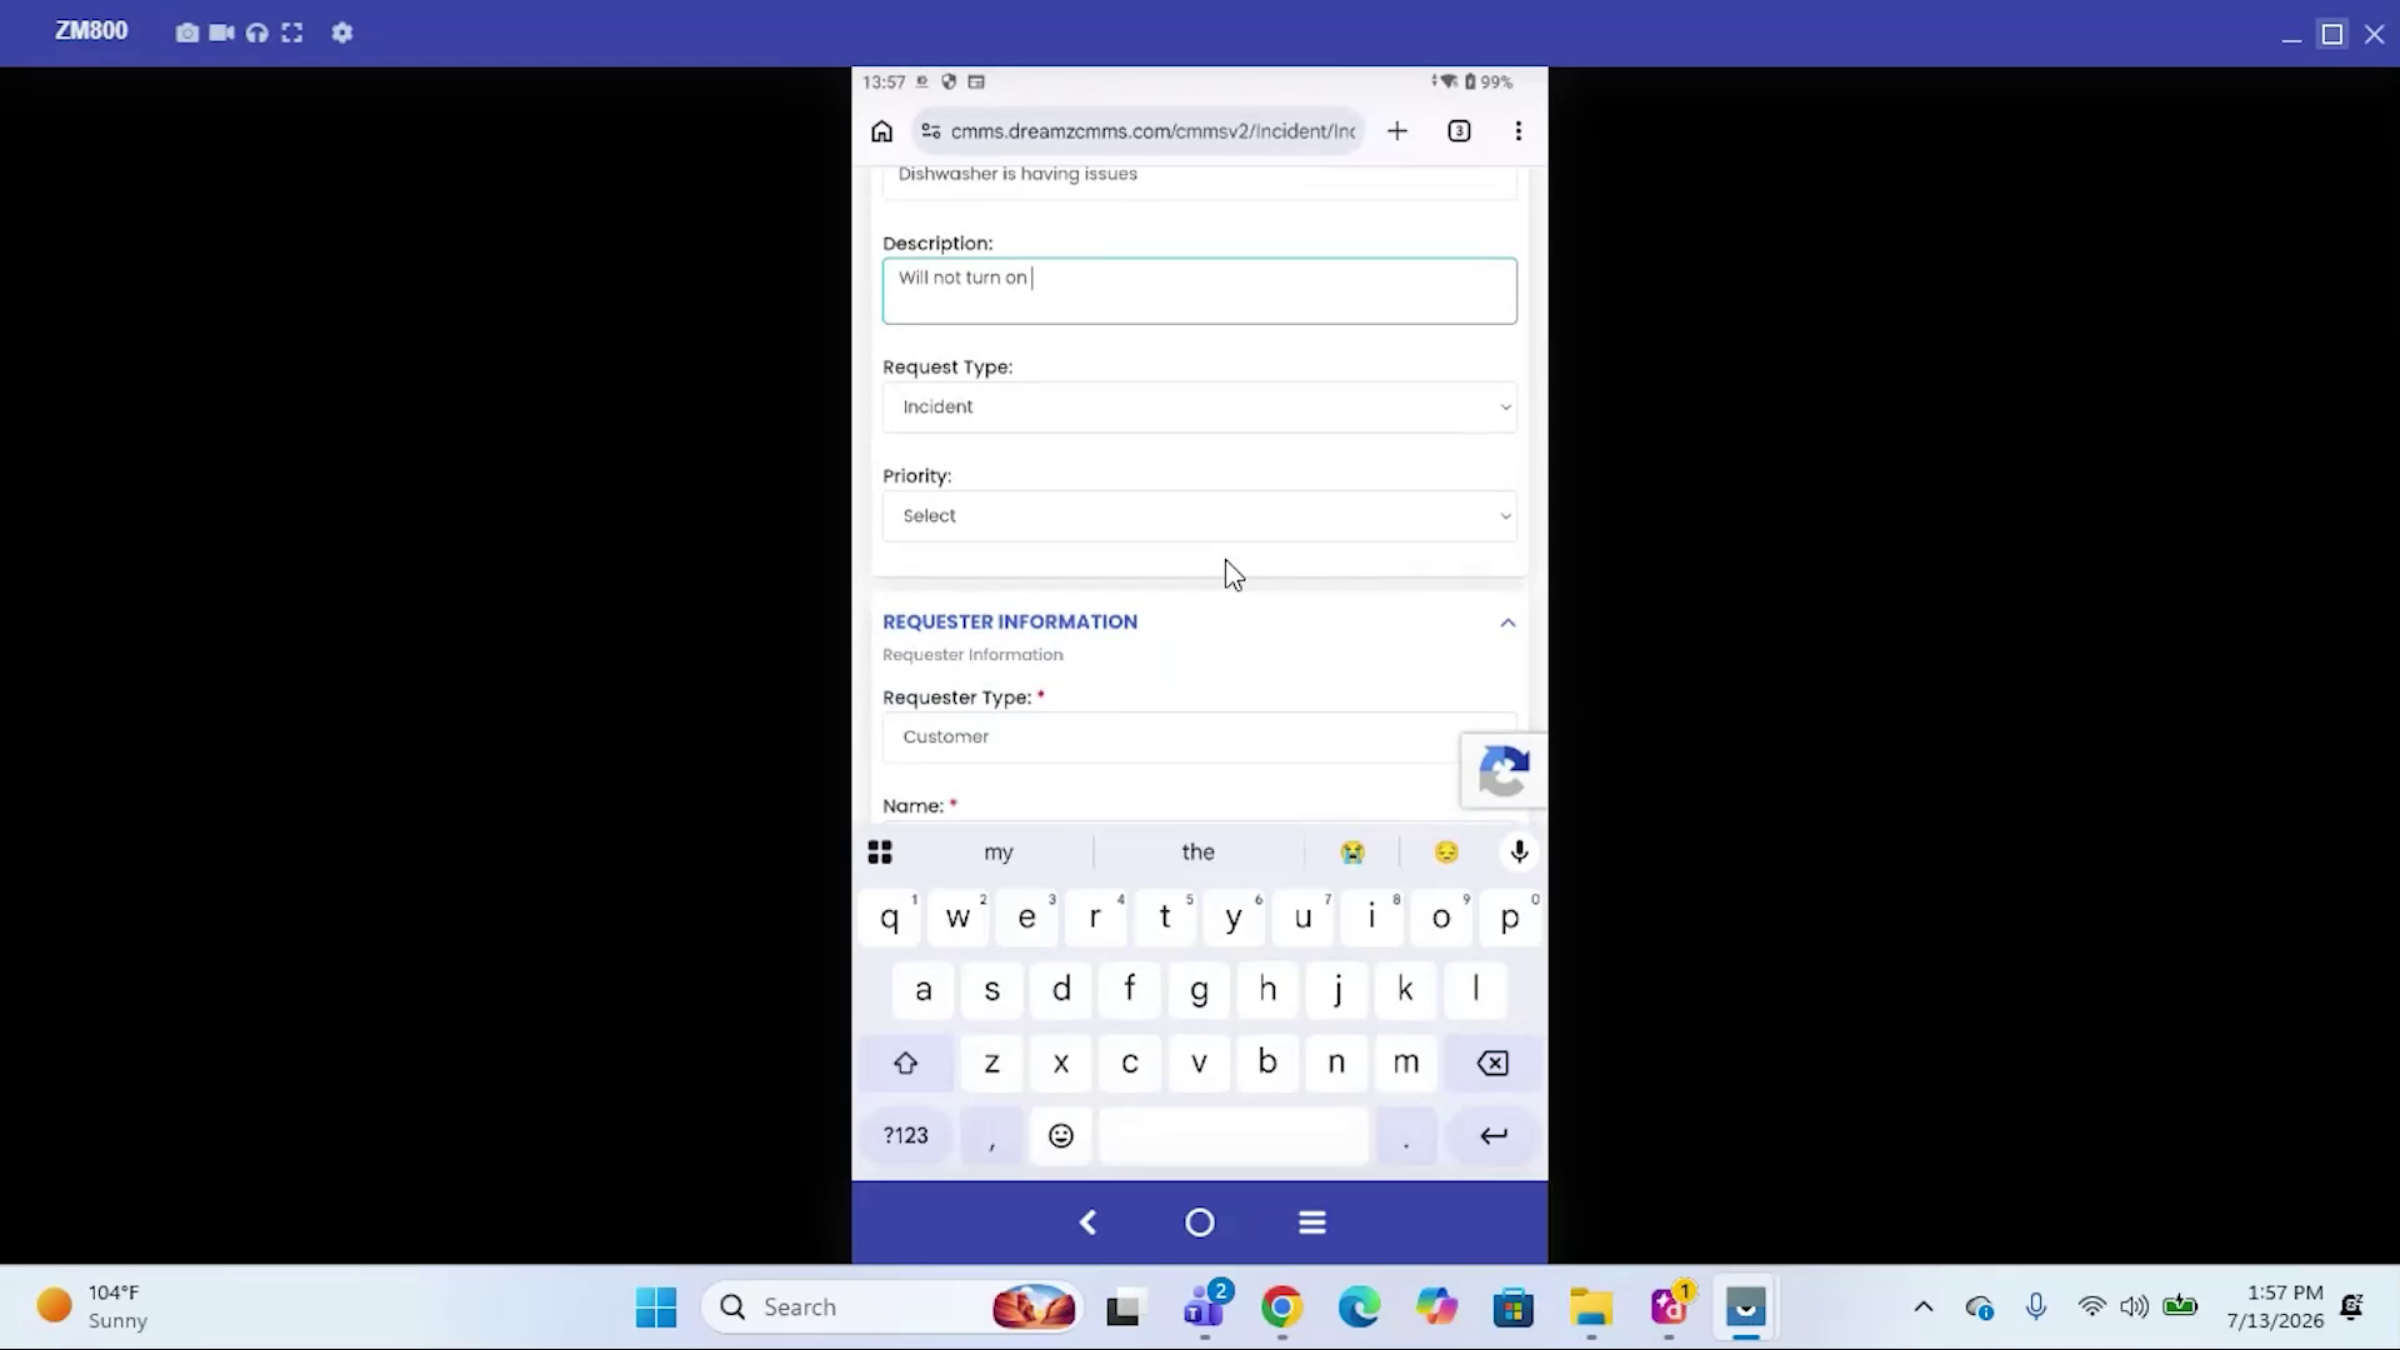
Note: Incidents can be submitted as a request through the Technician app or by scanning a QR code — either the identification QR code or the work request QR code — using any smartphone. Scanning the code brings the requester to the incident webpage where they can submit the request directly.
Step 7 – Fill In Incident Details
The requester selects a priority and enters their information. The asset is already filled in based on the QR code scanned, and the requester can add a photo or attach files before saving. Once saved, the request is submitted and ready for review.
Step 8 – Review and Act on Incoming Requests
Open the Incidents tab and the request list to see submitted requests, with the newest at the top. From here you can view the details, add a note, or assign and dispatch service to turn the request into a work order.
Assigning and Managing Work Orders
Step 9 – Assign and Schedule the Work Order
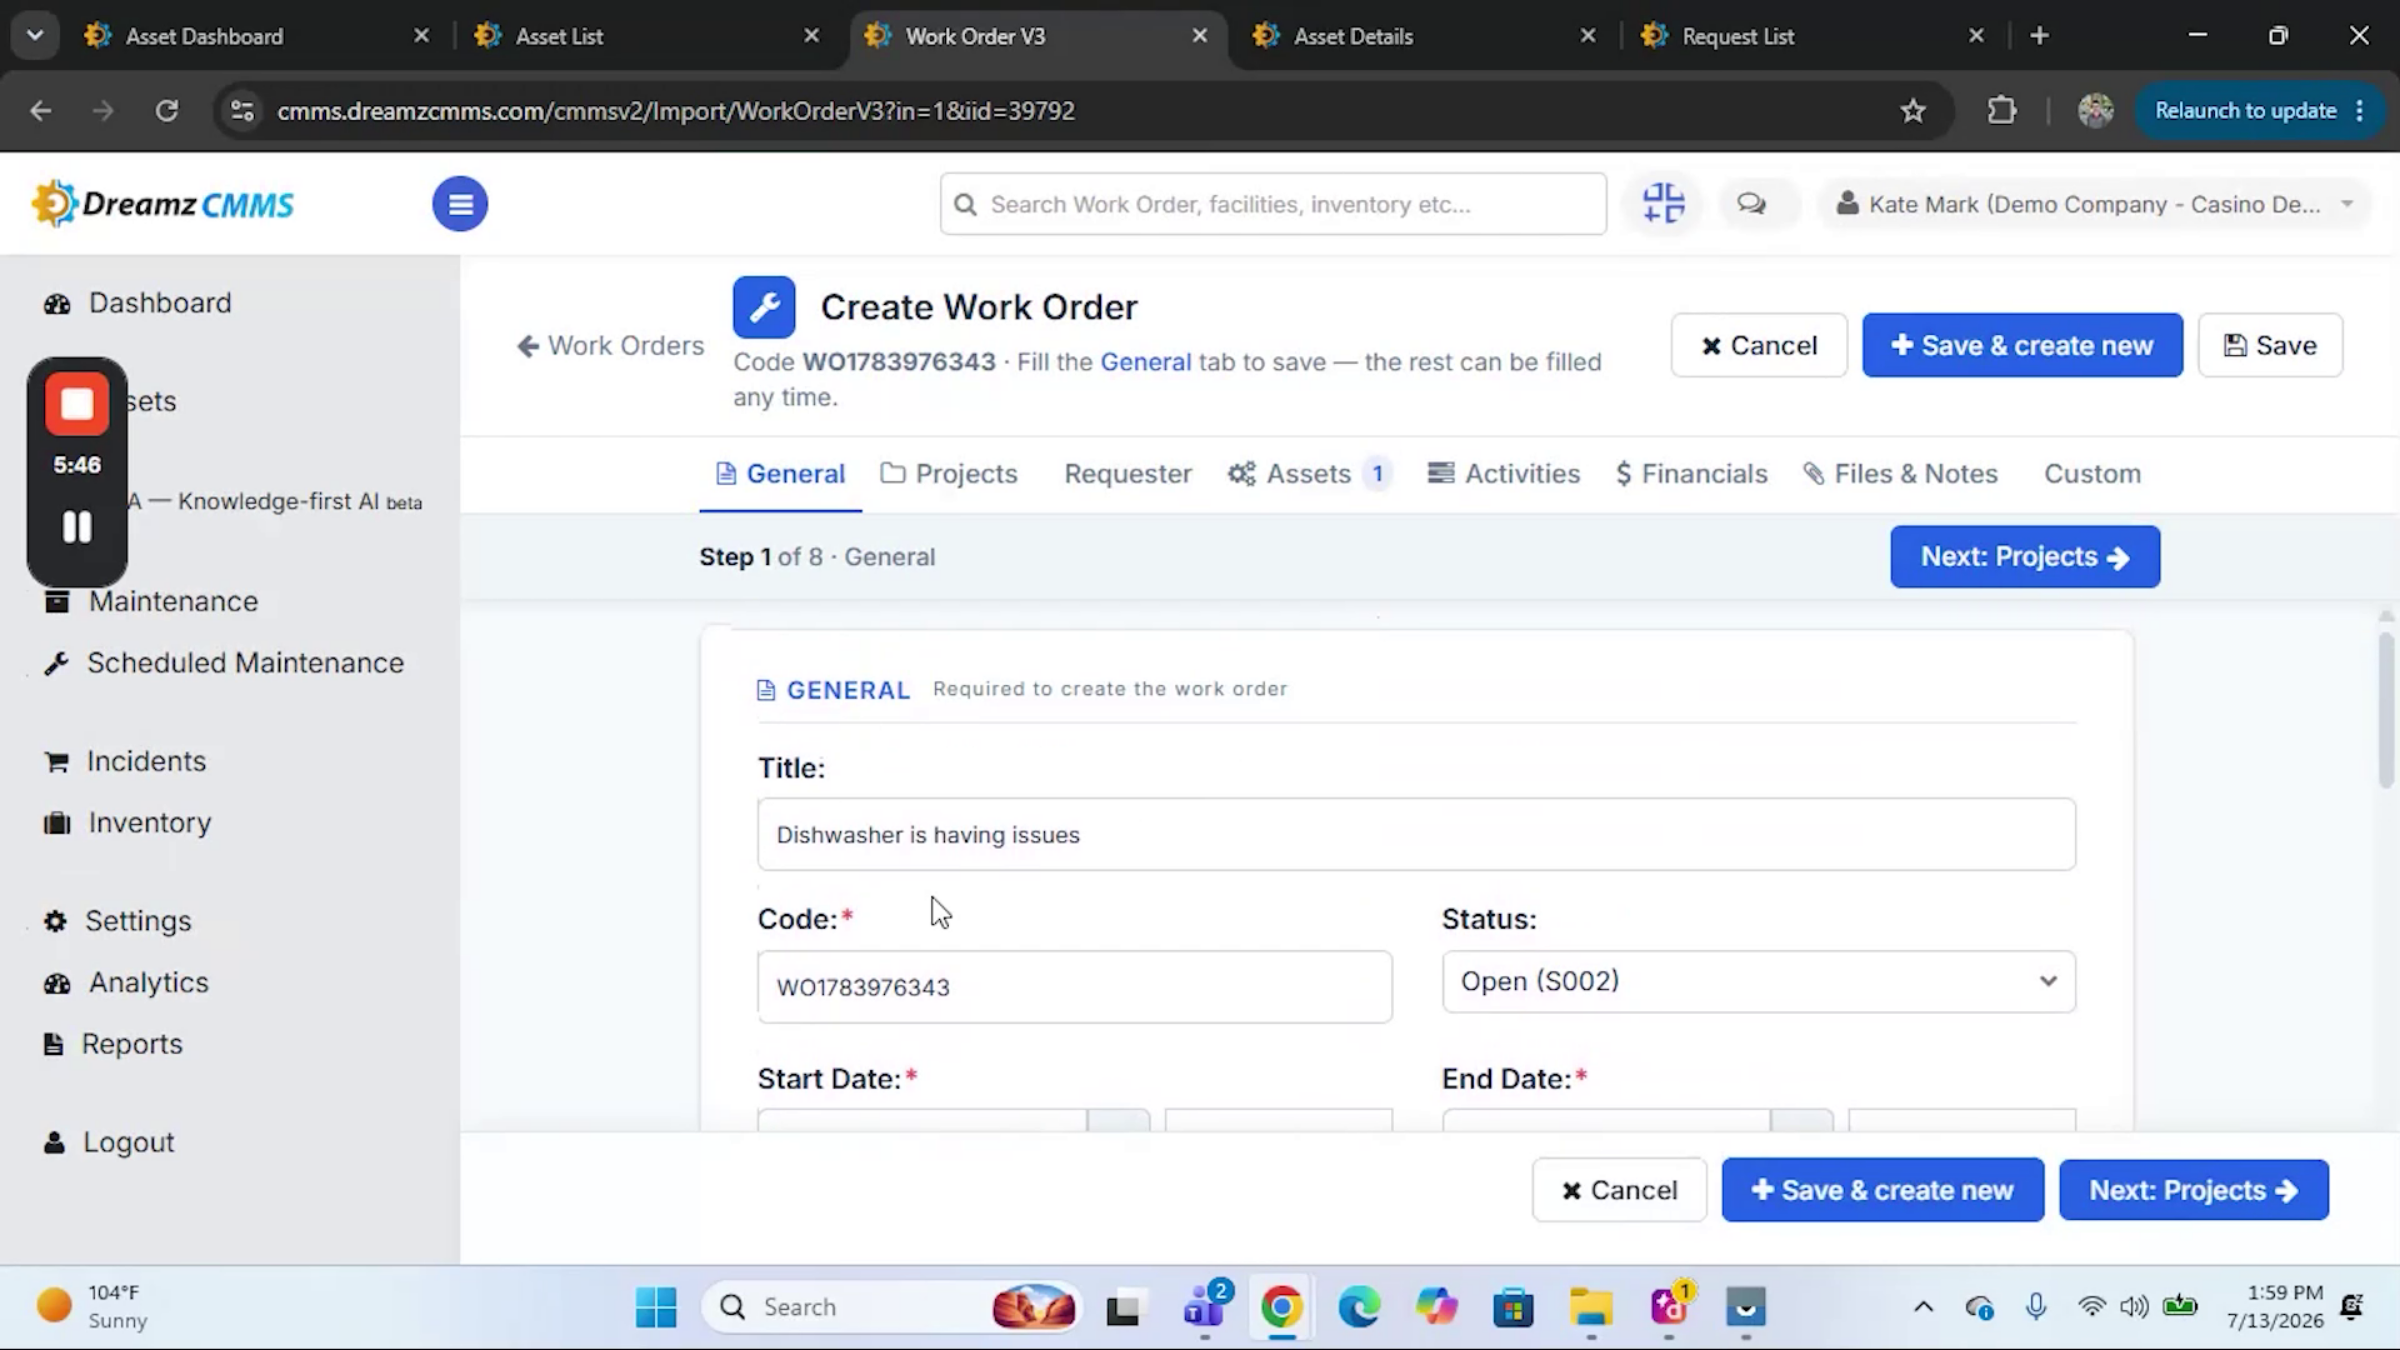
Adjust the title, code, and scheduling information, then assign the job by department or individual technician. Additional tabs let you connect the work order to a larger project, review requester information and notification settings, confirm the asset involved, add tasks from your checklist library under Activities, and attach financial information, files, or notes for reference during the job. Click Save to finalize.
Step 10 – View the Work Order List
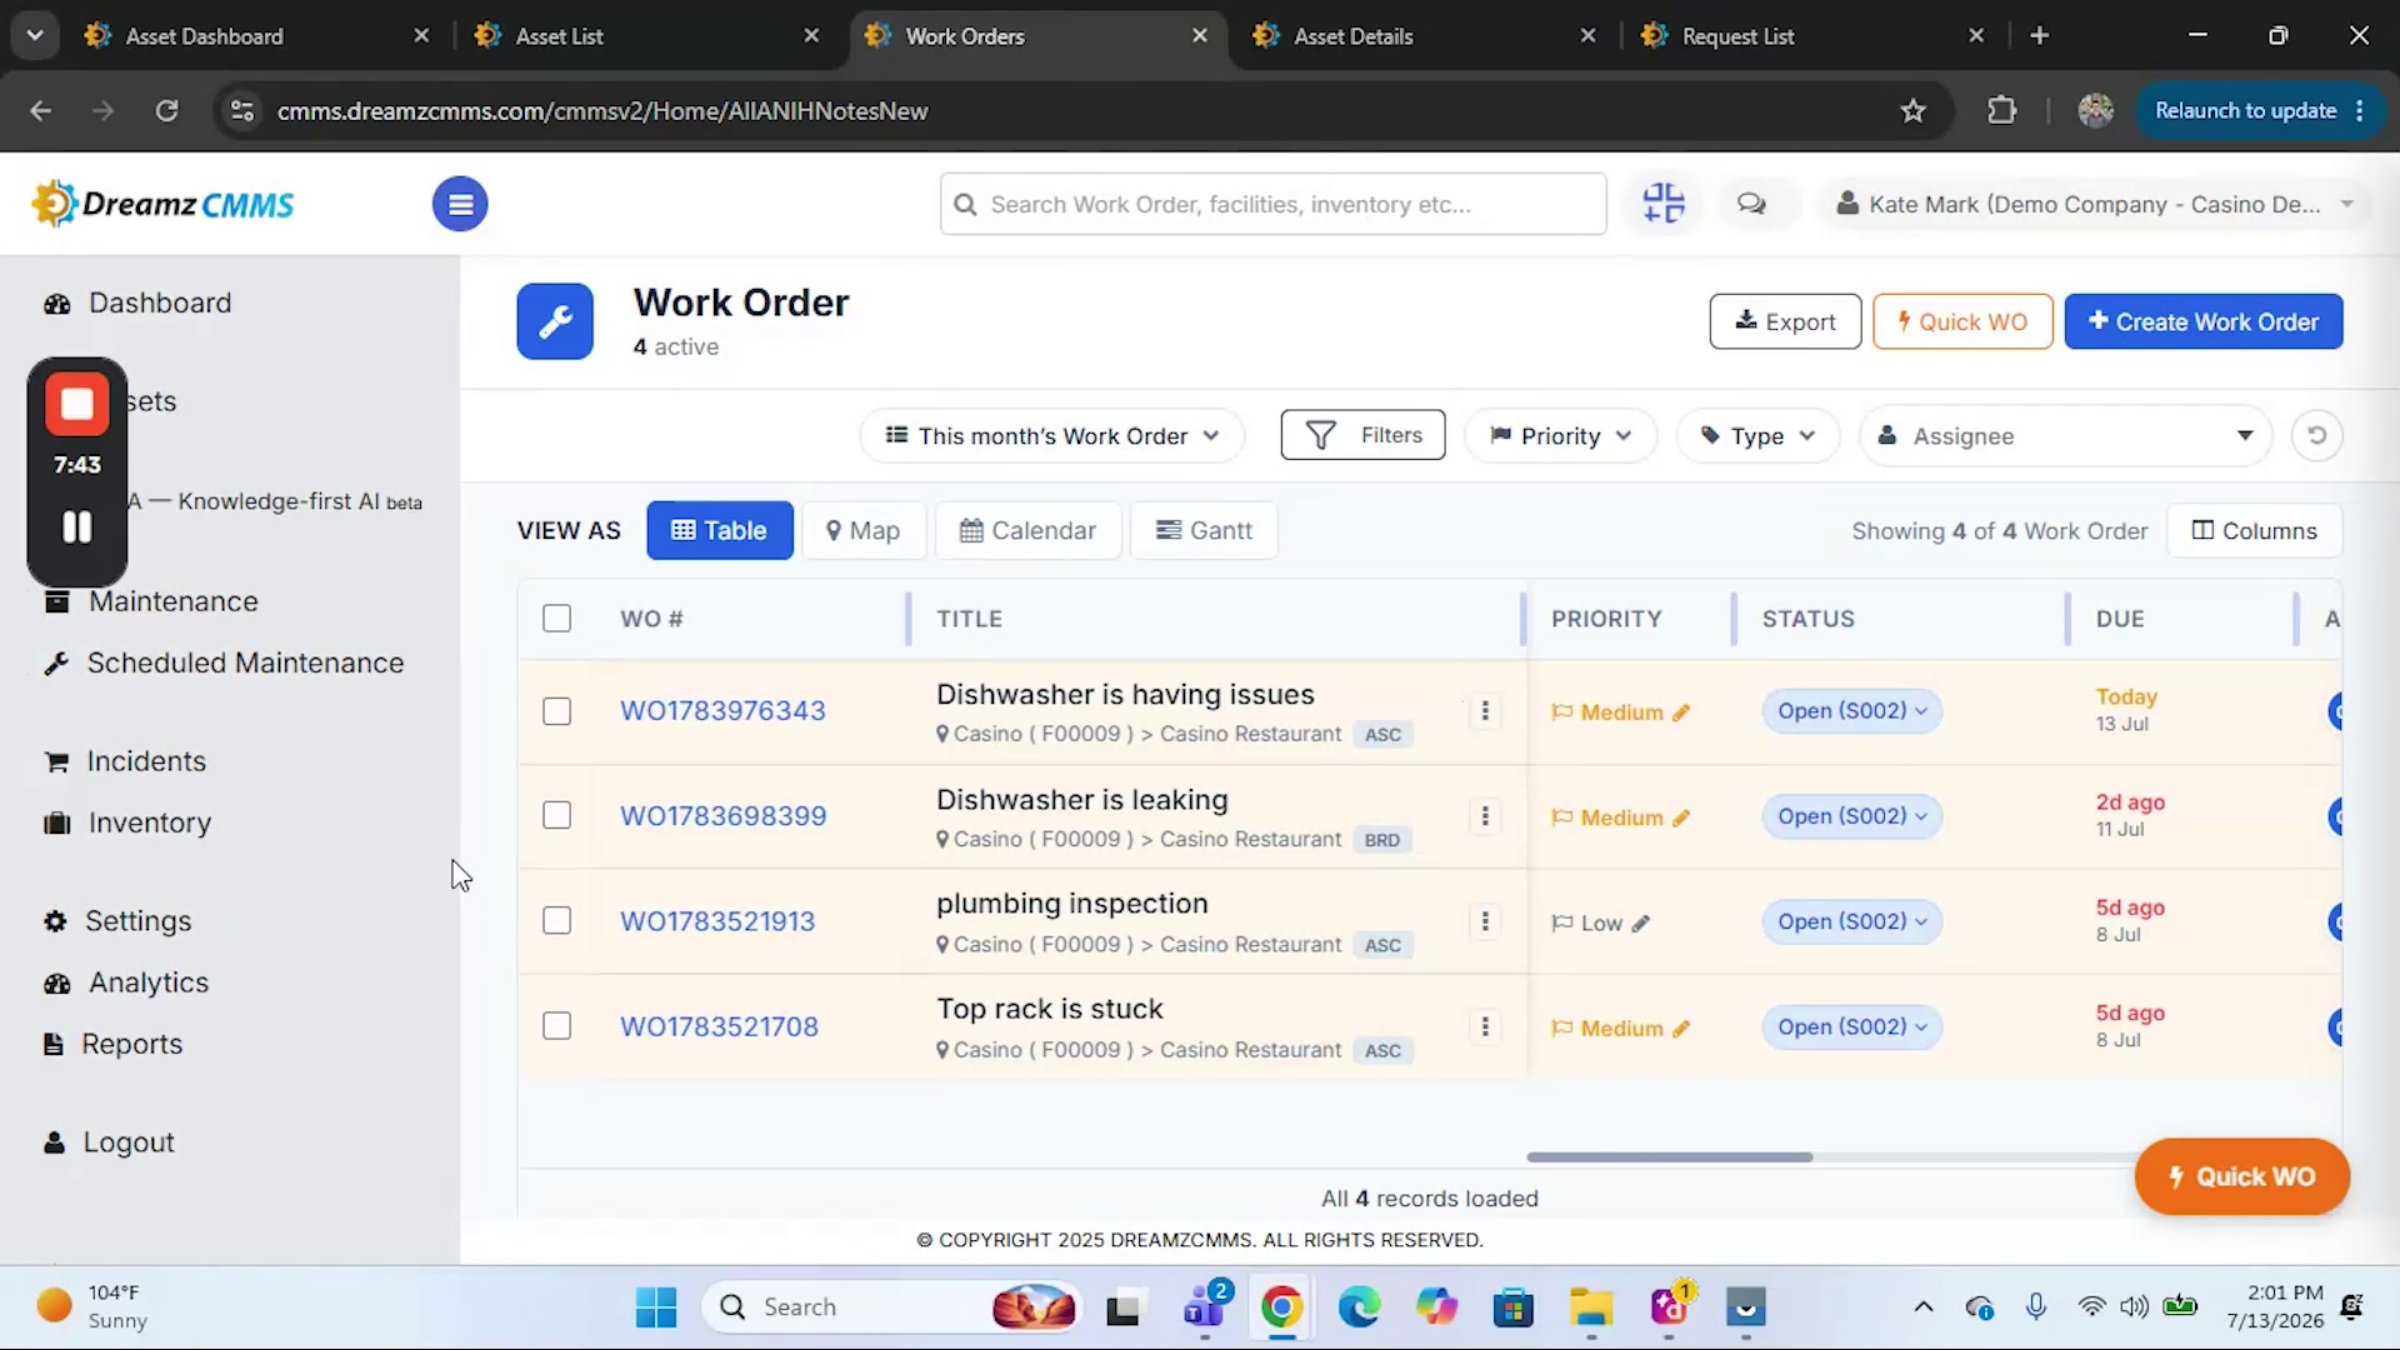
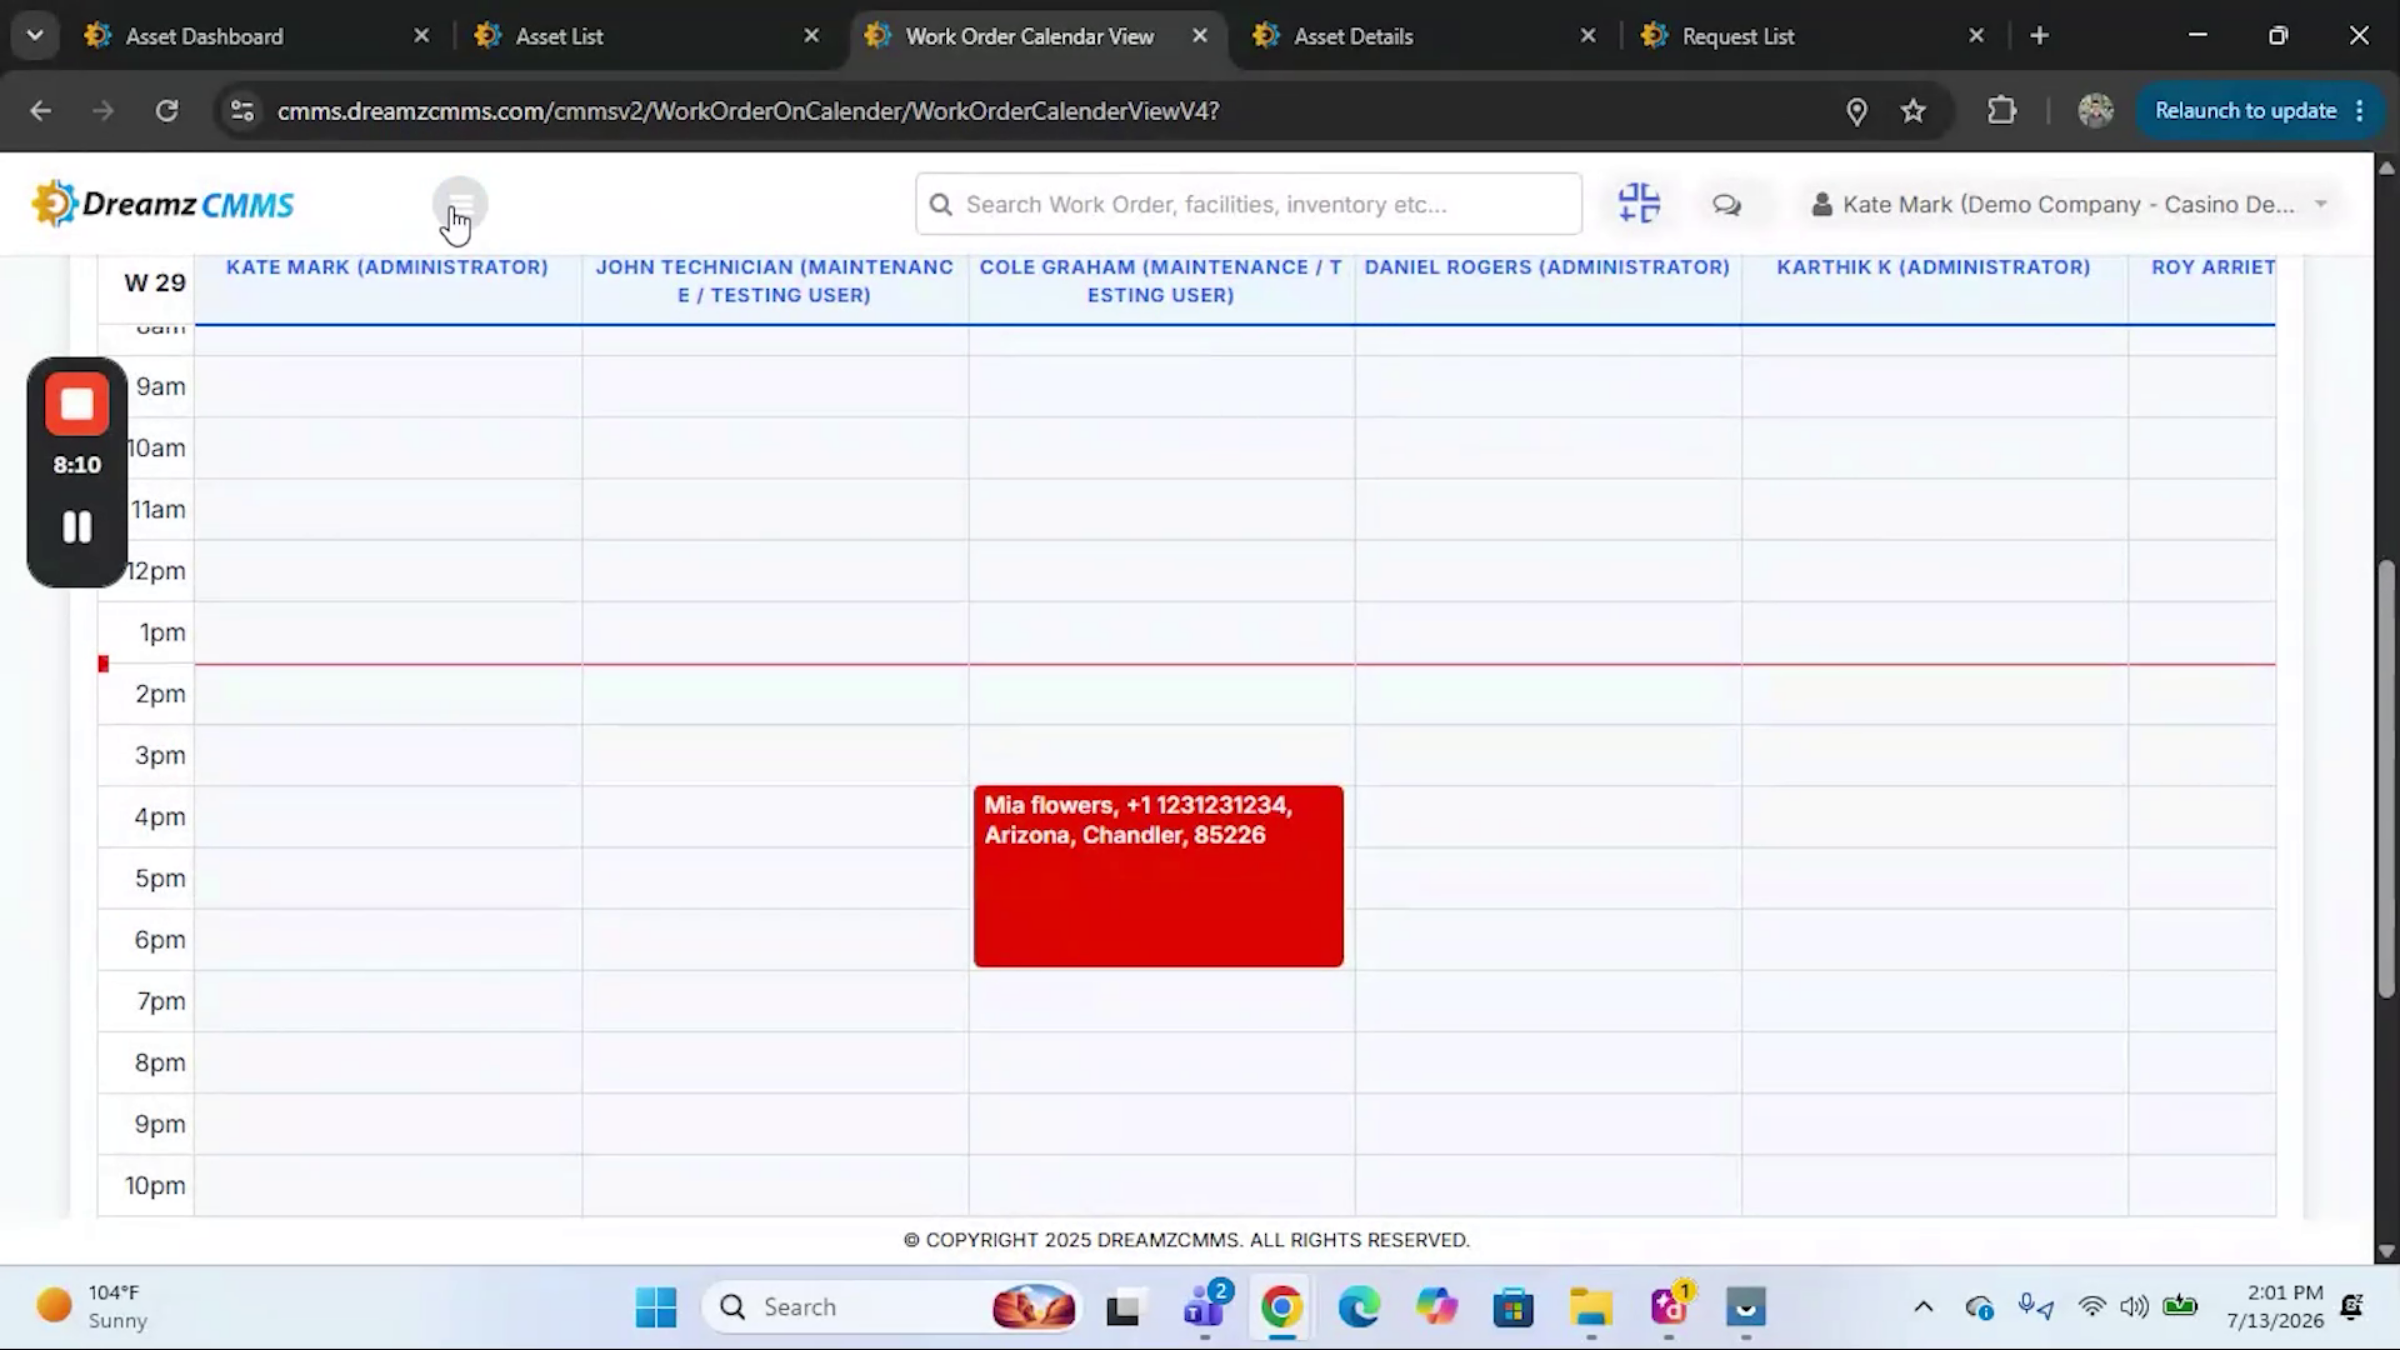
The new work order appears in your work order list. You can view it in list, map, or calendar view, organized by assignee.
Reports and VEDA AI
Step 11 – Browse the Reports Module
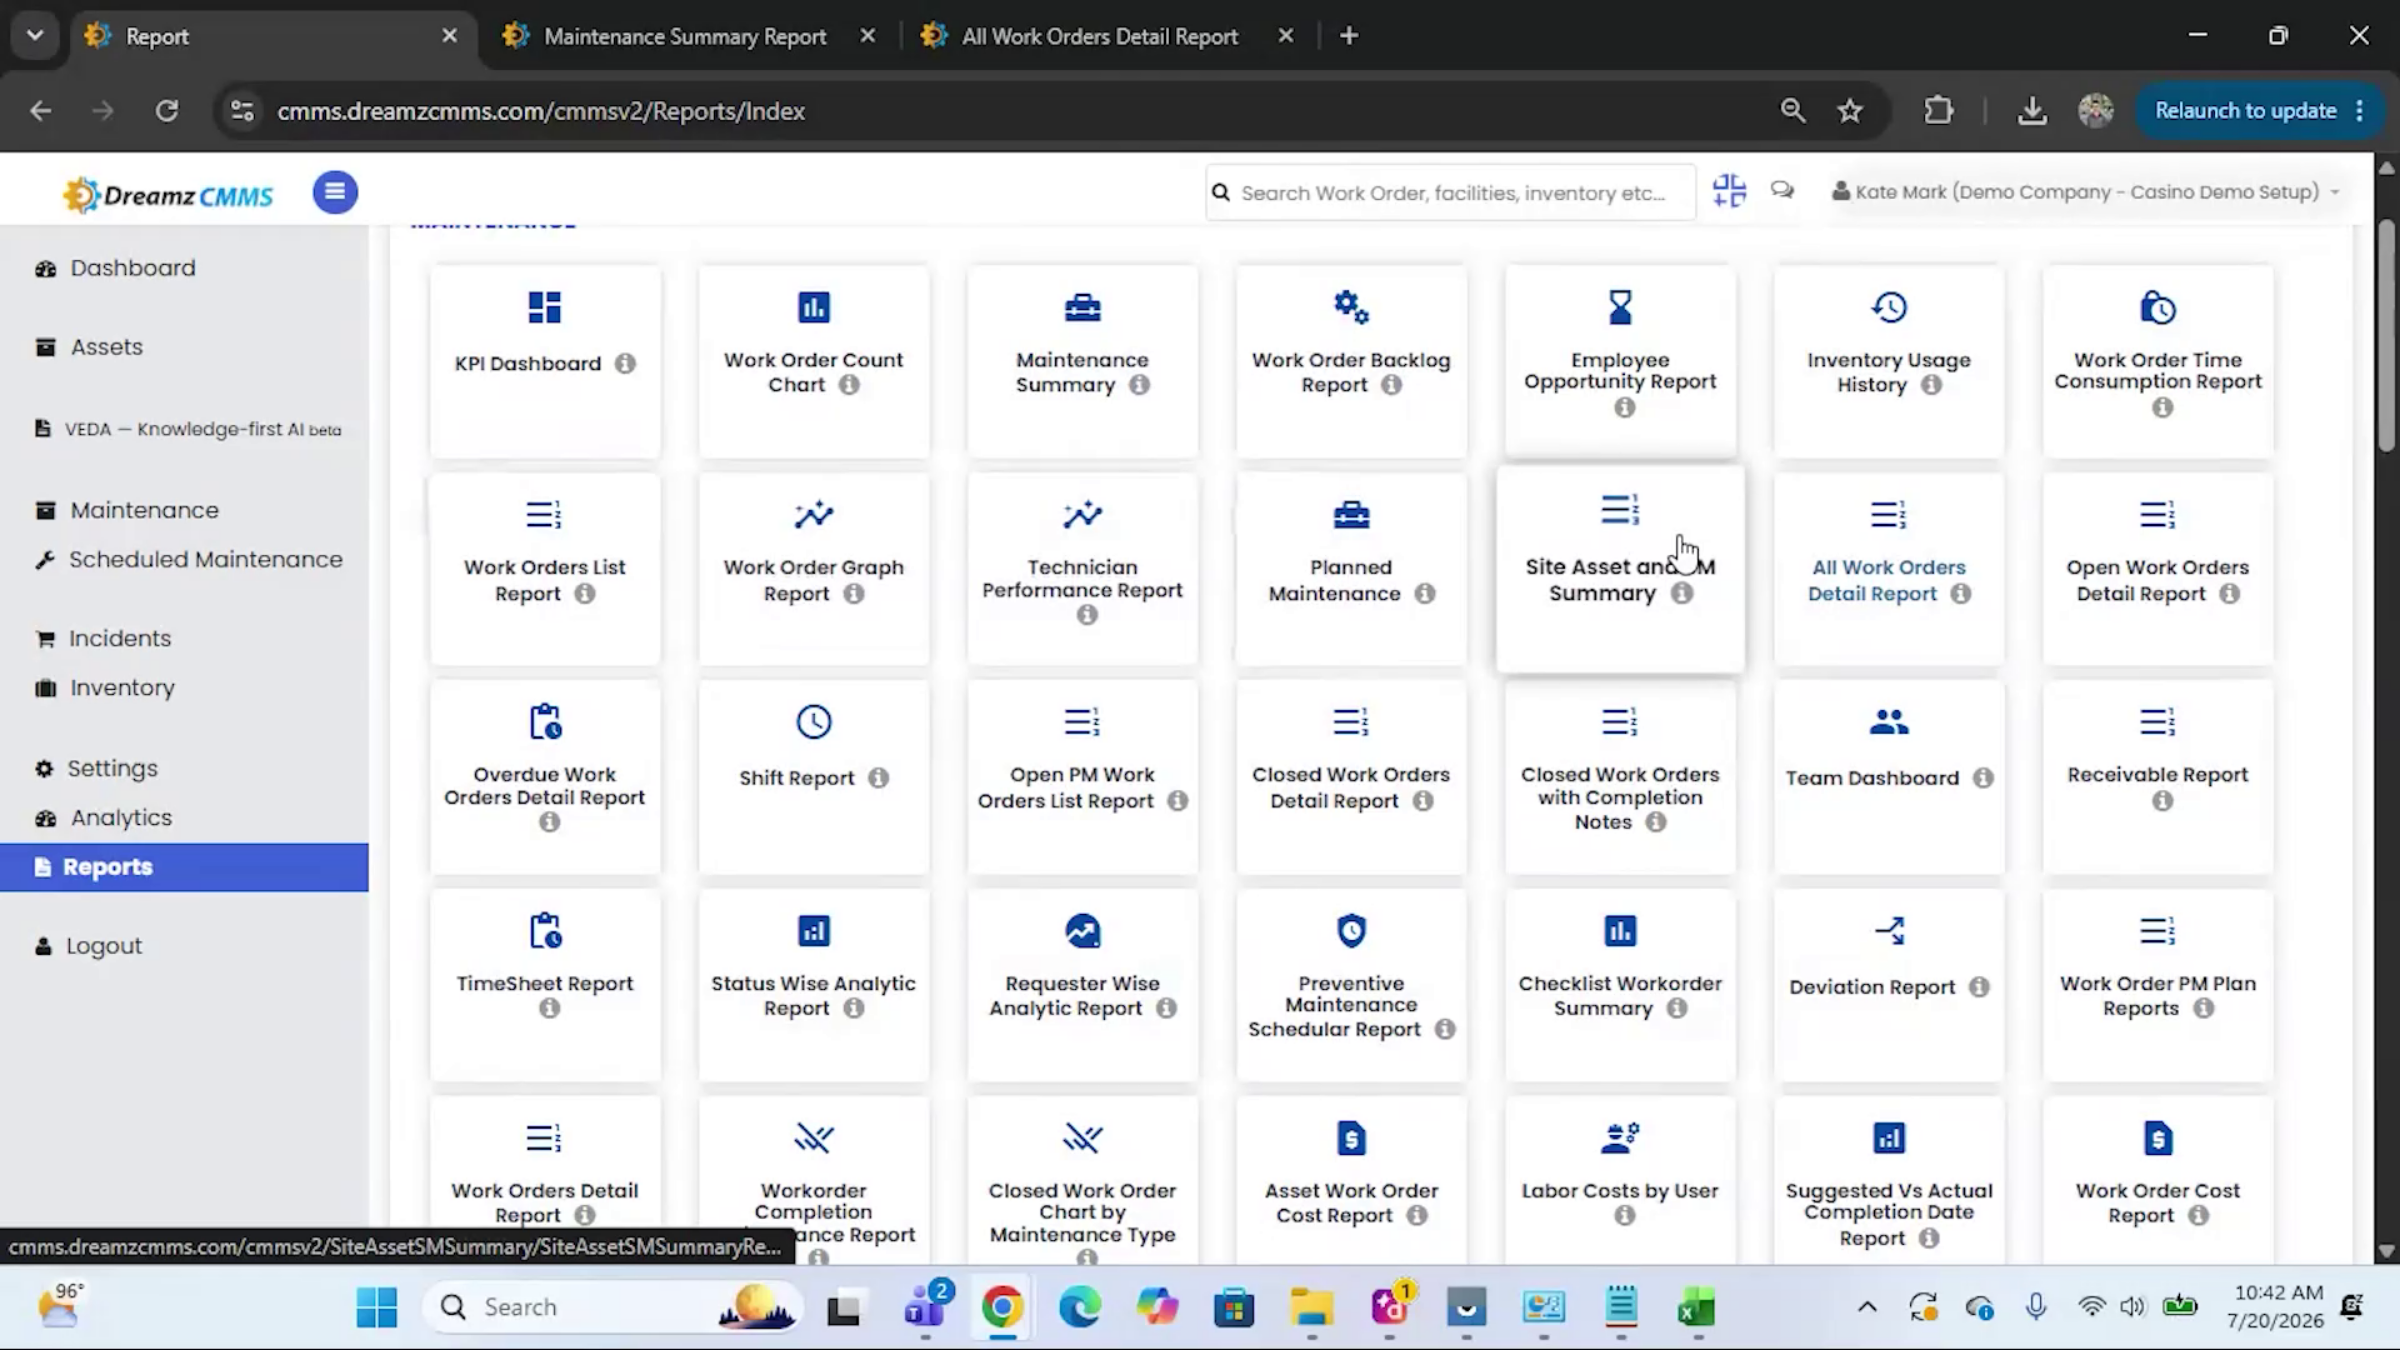
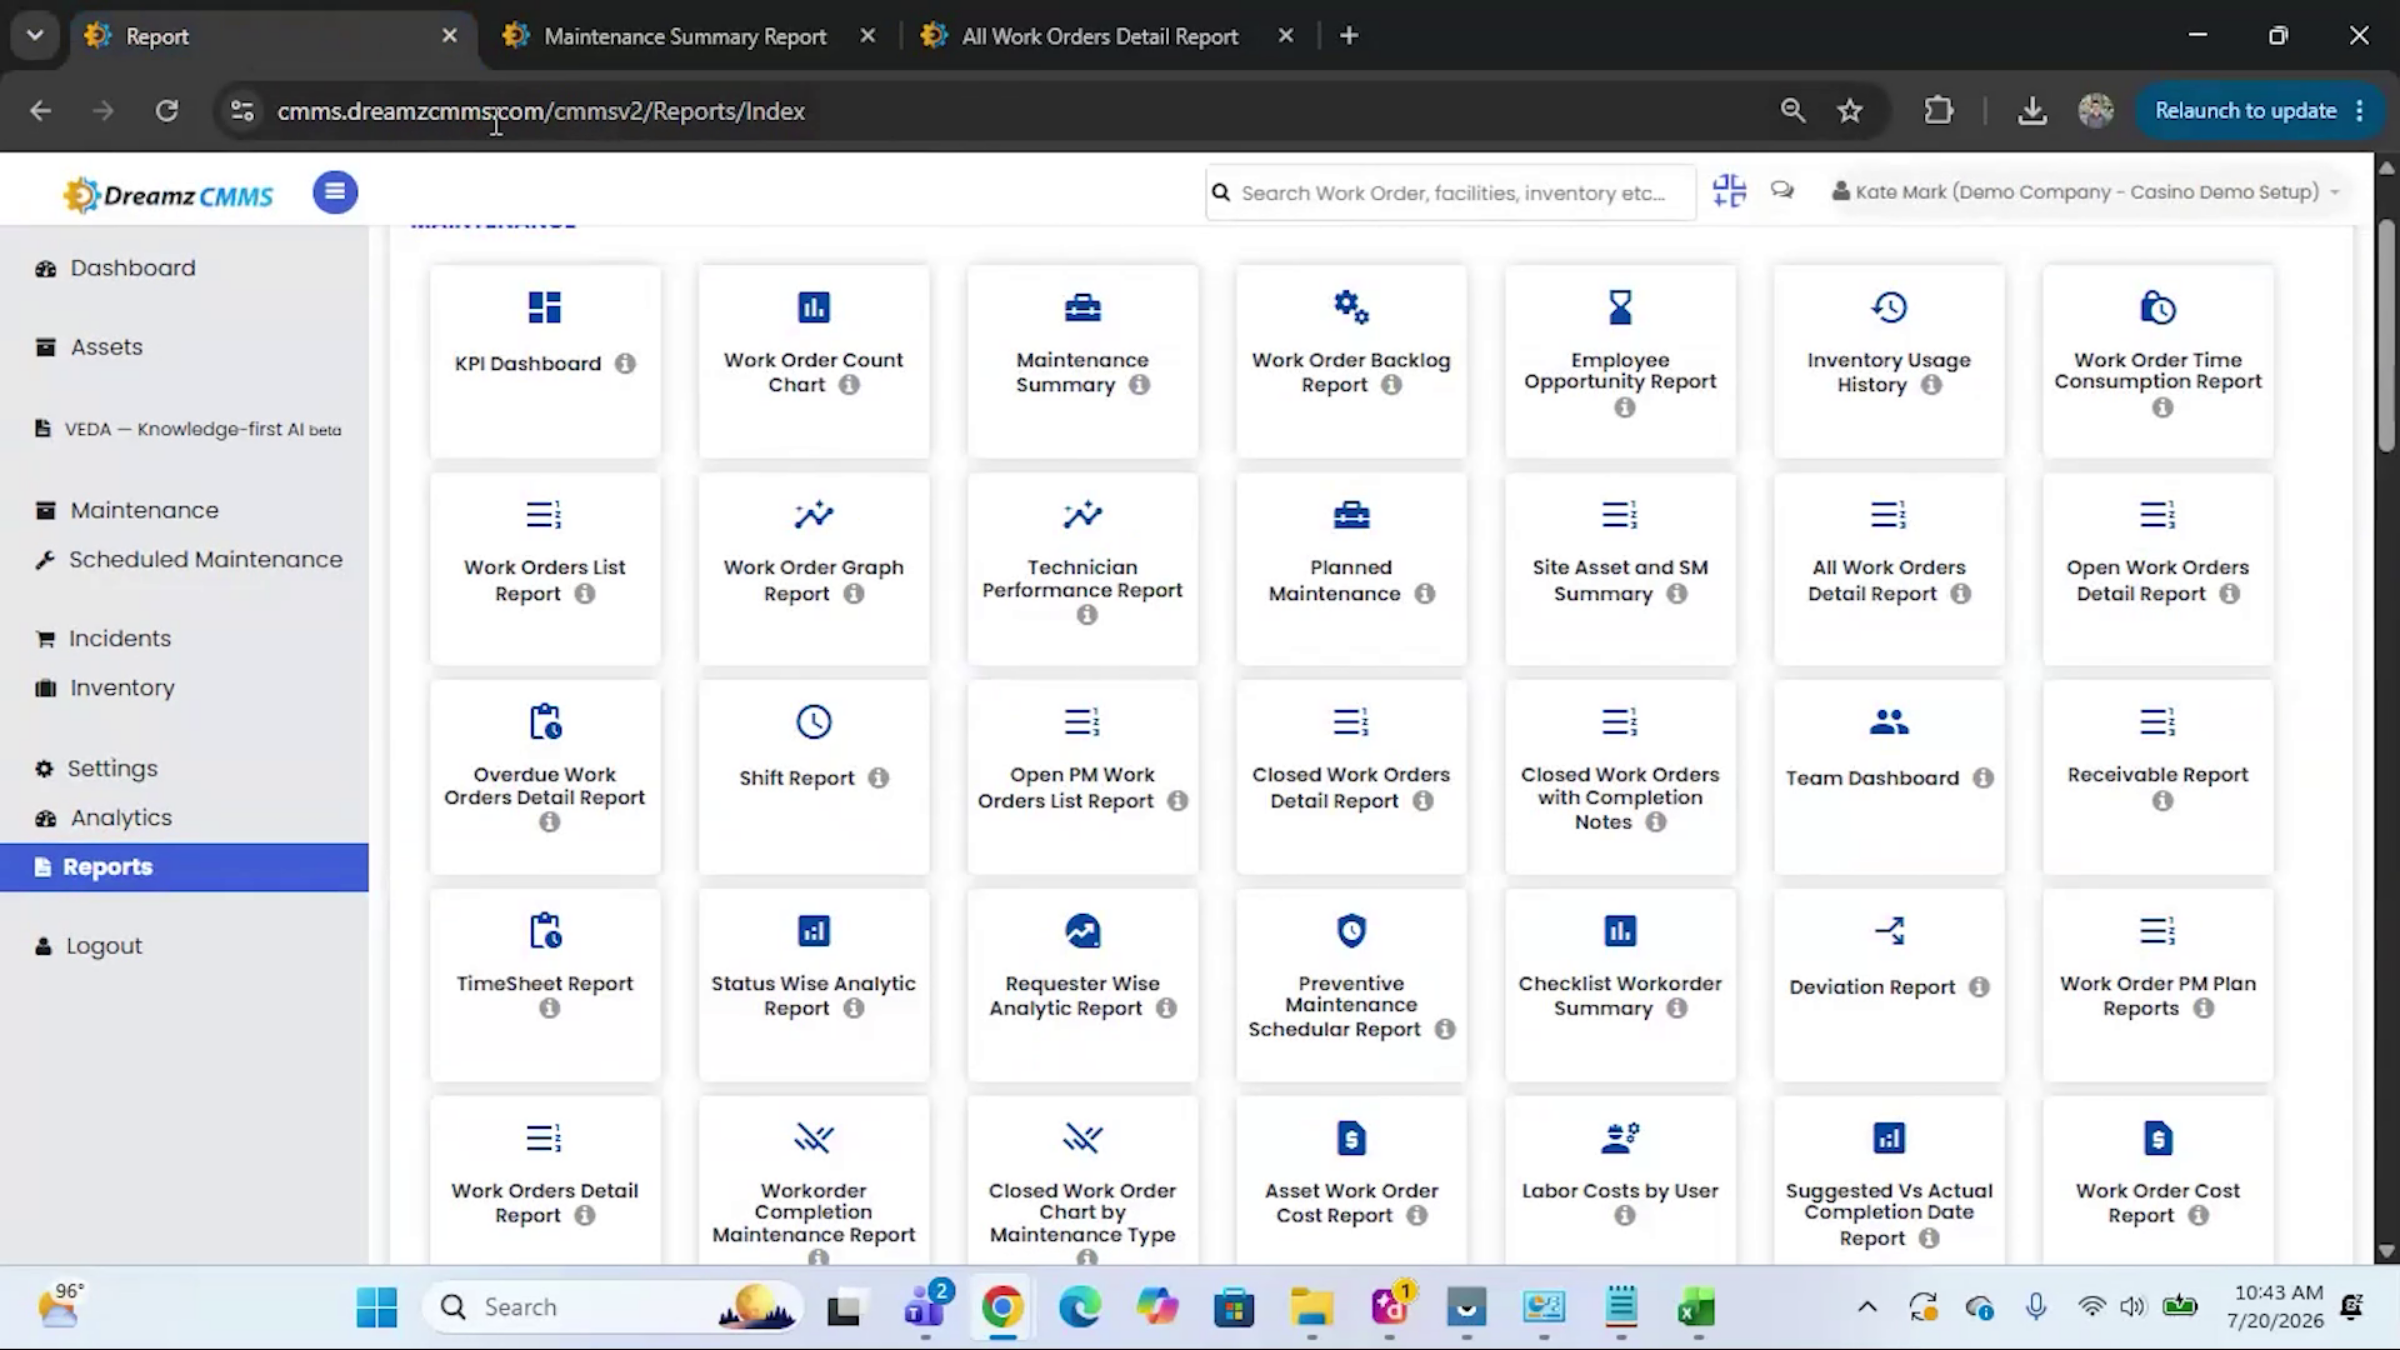
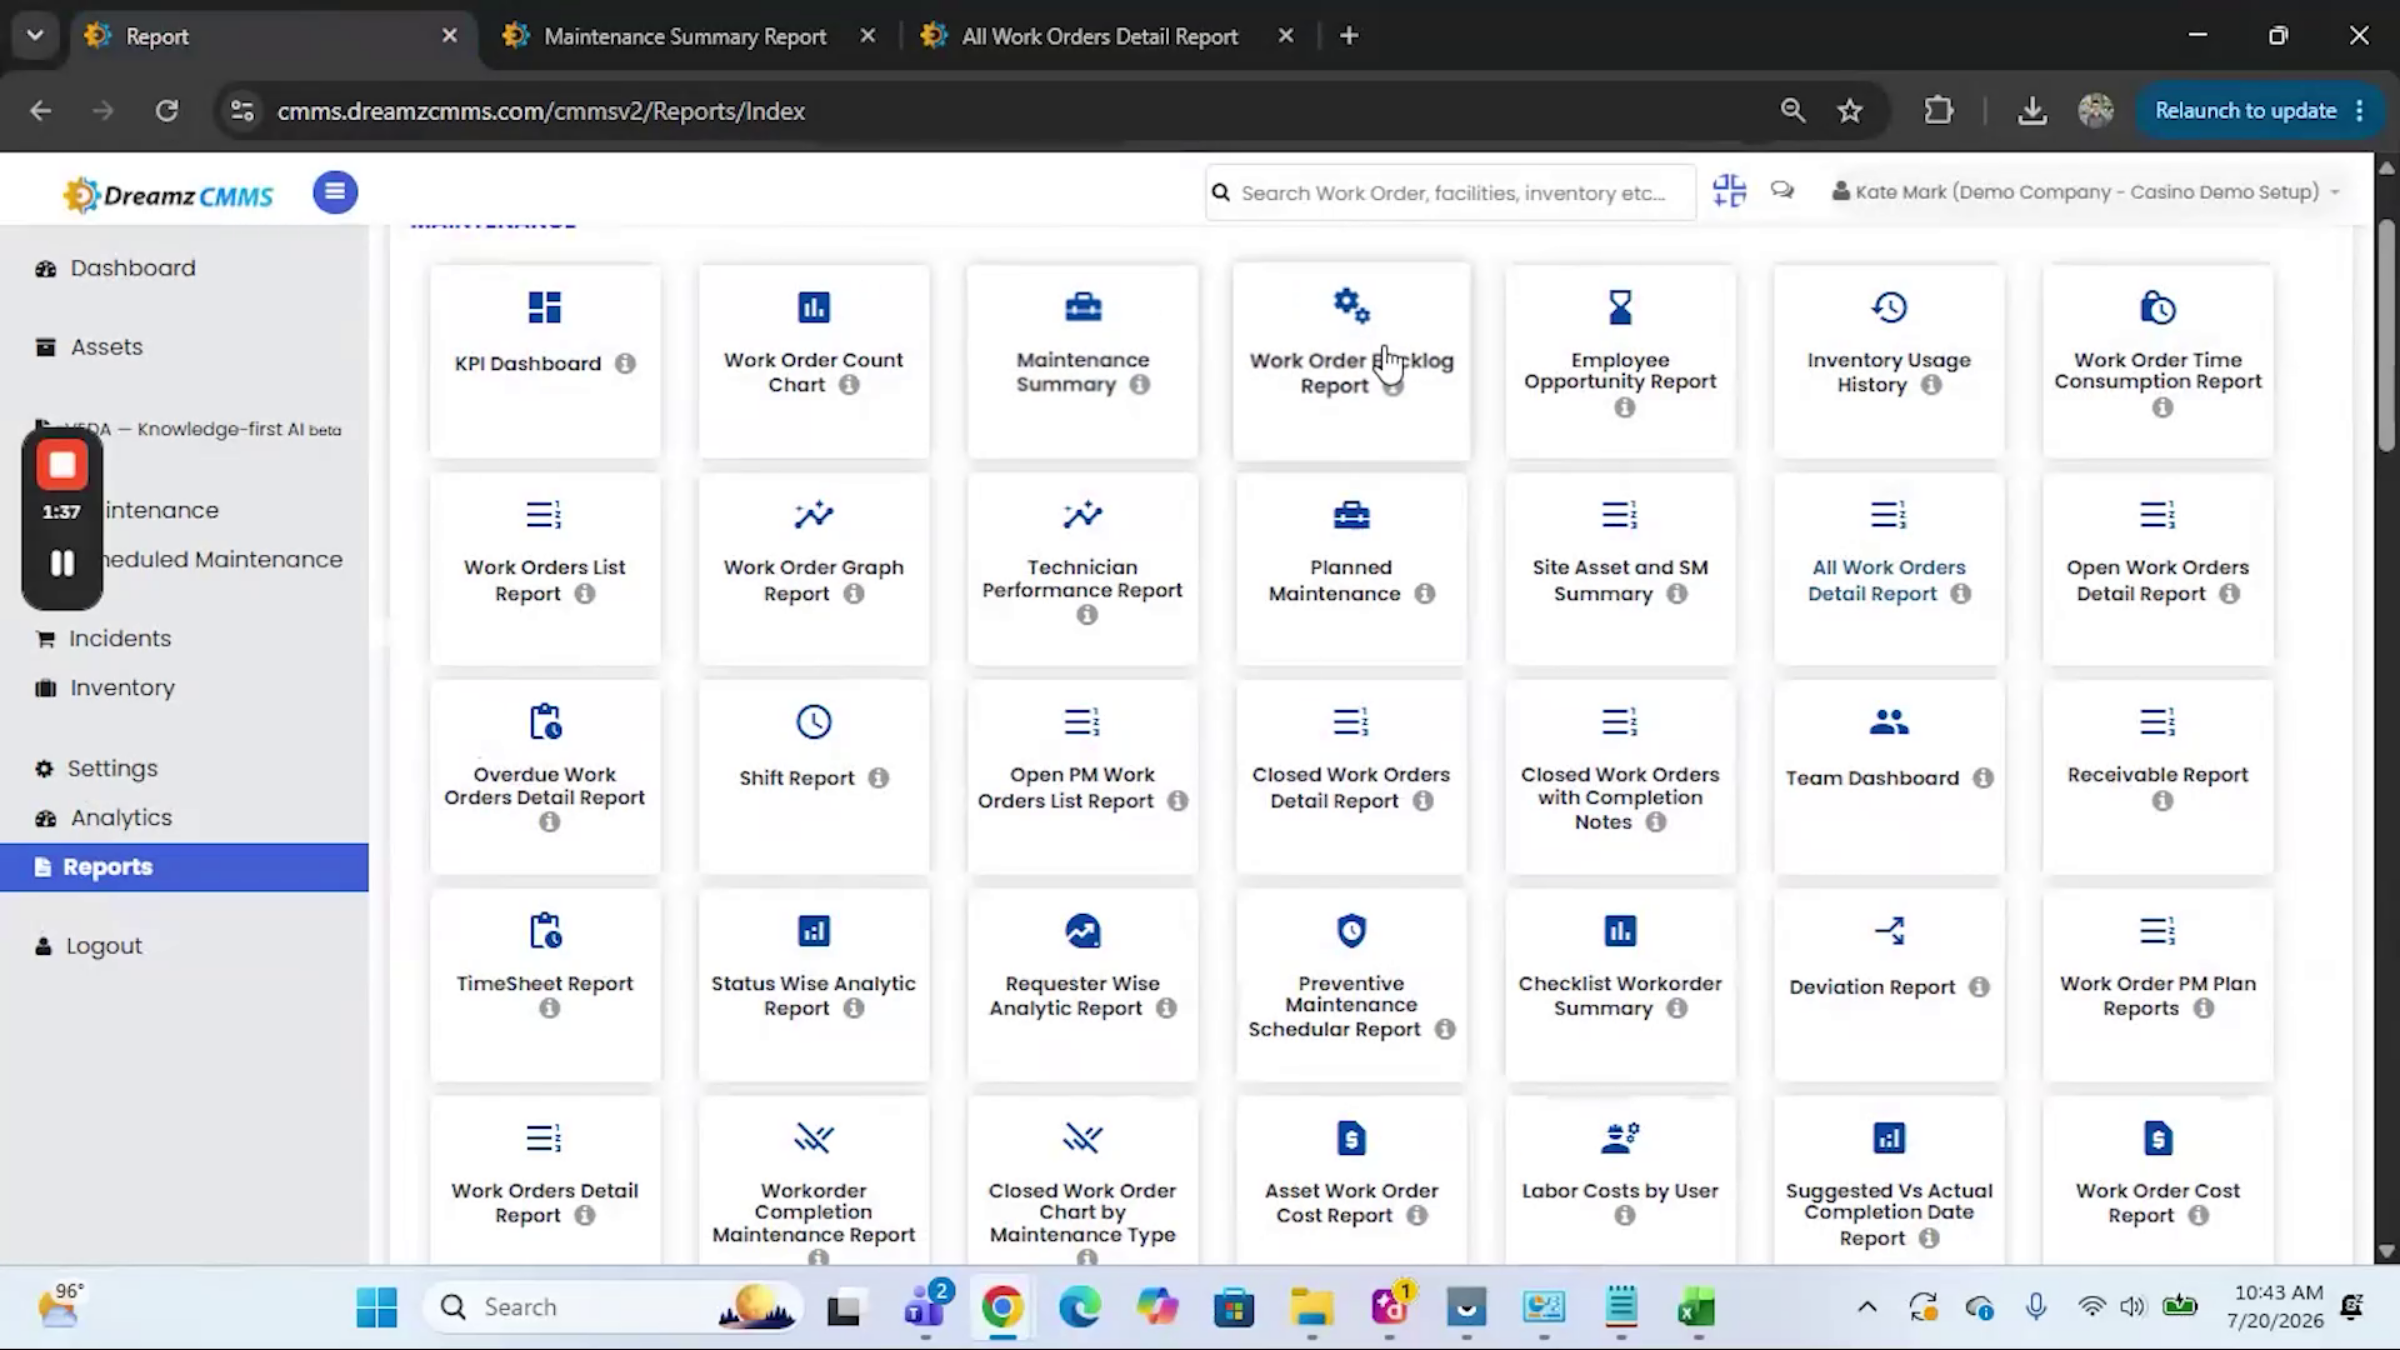
The Reports module is organized by category, filterable using the dropdown on the right. The Maintenance section shows work orders, work order details, and how well you're maintaining your assets — including a maintenance summary, work order list, upcoming PMs, and detailed work order reports.
Step 12 – Read the Maintenance Summary
The maintenance summary is a graph view showing work orders broken down by status, an assignee breakdown of who's receiving the most work orders, and a location breakdown of which location generates the most work orders overall.
Step 13 – Export Detailed Work Order Reports
Reports like the All Work Order Details report show a list view that can be filtered on the right and exported using the options in the top-right corner.
Step 14 – Explore Other Report Categories
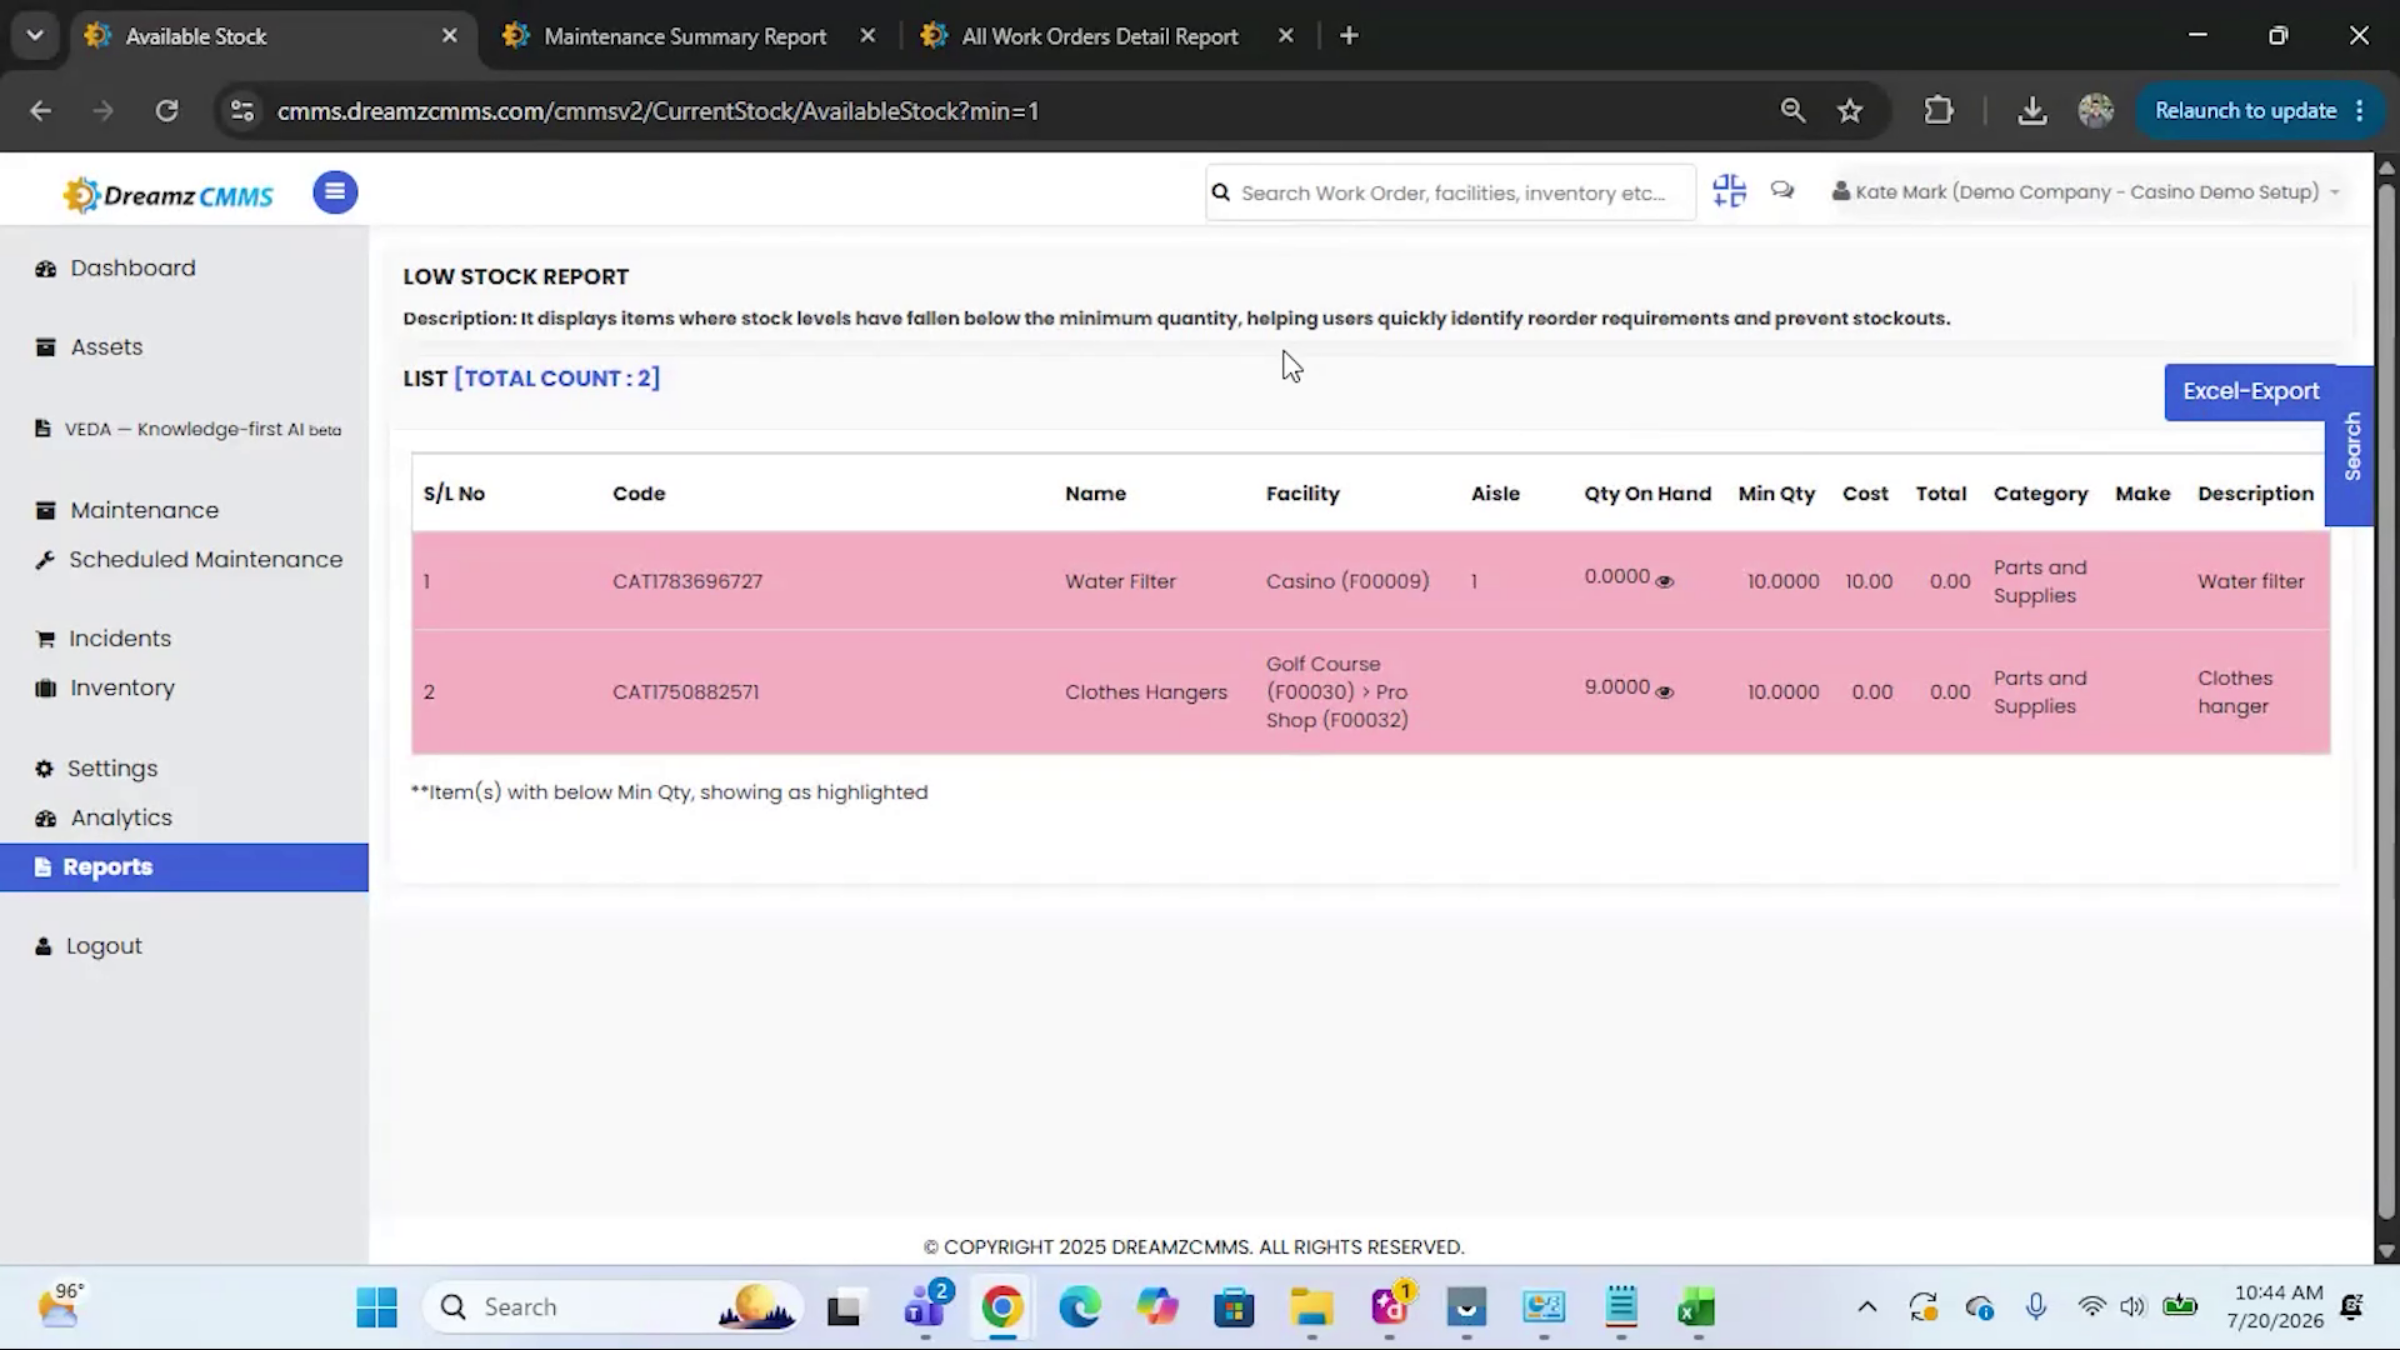
Beyond maintenance, the Assets section shows asset performance, Fixed Assets shows asset valuation, Incidents shows work requests coming from your workforce, and Inventory helps you manage current stock and identify low-stock items. Like the other reports, these can all be exported and filtered.
Step 15 – Use VEDA AI for Reports and Queries
If you need help creating or managing reports, click the VEDA module to open its chat window, which offers quick options to click on, or use the chat box at the bottom of the page to ask for reports or query your own data directly. Reports can still be filtered and exported as needed. VEDA AI is also available on the mobile app — tap the plus icon and select VEDA to see prompt suggestions, or scan a QR code or type your request directly at the bottom of the page.
After Setup — What's Next?
With assets organized, QR-code incident reporting in place, and work orders flowing through to reports and VEDA AI, your casino facility team has full visibility from the gaming floor to the back office. Once you're comfortable with the core workflow, you can:
- Print and post identification and work request QR codes across the property to make incident reporting effortless for staff and guests.
- Build out checklist libraries for common casino equipment tasks, so they can be added to work orders in a click.
- Schedule regular maintenance summary and inventory reports to keep leadership informed automatically.
Ready to see DreamzCMMS for casino facilities in action? Contact DreamzTech to schedule a personalized demonstration.
Tips for Casino Facility Teams
- Keep asset location hierarchies consistent (casino floor → sub-area → equipment) so equipment is easy to find and QR codes map to the right asset automatically.
- Use the Log tab before dispatching a technician — recent history and prior incidents can point straight to the root cause.
- Ask VEDA AI for a quick report instead of building one manually when you just need a fast answer.
- Review the Inventory report regularly to catch low-stock parts before they delay a work order on the floor.
Frequently Asked Questions
Do guests or staff need the app to report an issue?
No. Scanning an identification or work request QR code takes them straight to a webpage where they can submit the incident, no app or login required.
How do I turn an incident into a scheduled work order?
Open the request in the Incidents list and choose Assign and Dispatch Service, which lets you set the title, scheduling, and assignee before saving it as a work order.
Can I see which locations generate the most work orders?
Yes. The maintenance summary report includes a location breakdown showing which locations have the most work orders overall, alongside status and assignee breakdowns.
Can I ask questions about my data instead of building a report manually?
Yes. VEDA AI lets you query your own data directly through chat, on both desktop and the mobile app, and the results can still be filtered and exported.