Scheduled Maintenance
This tutorial guides you through configuring scheduled maintenance in DreamzCMMS. You will learn how to create, customize, and manage schedulers to optimize your maintenance workflow.
Overview
Scheduled Maintenance lets you set up recurring schedulers that automatically generate work orders or maintenance plans on a defined frequency — daily, weekly, monthly, quarterly, or yearly. Each scheduler can be linked to assets, checklists, and resources, and can be tracked through list, calendar, or bird's-eye views.
Before You Begin
- You must have access to the Scheduled Maintenance section in your account.
- Have your assets, checklists, and requester/assignee details ready before creating a scheduler, since these are configured as part of the setup.
How to Create a New Scheduler
Step 1 – Access Dashboard Main Menu
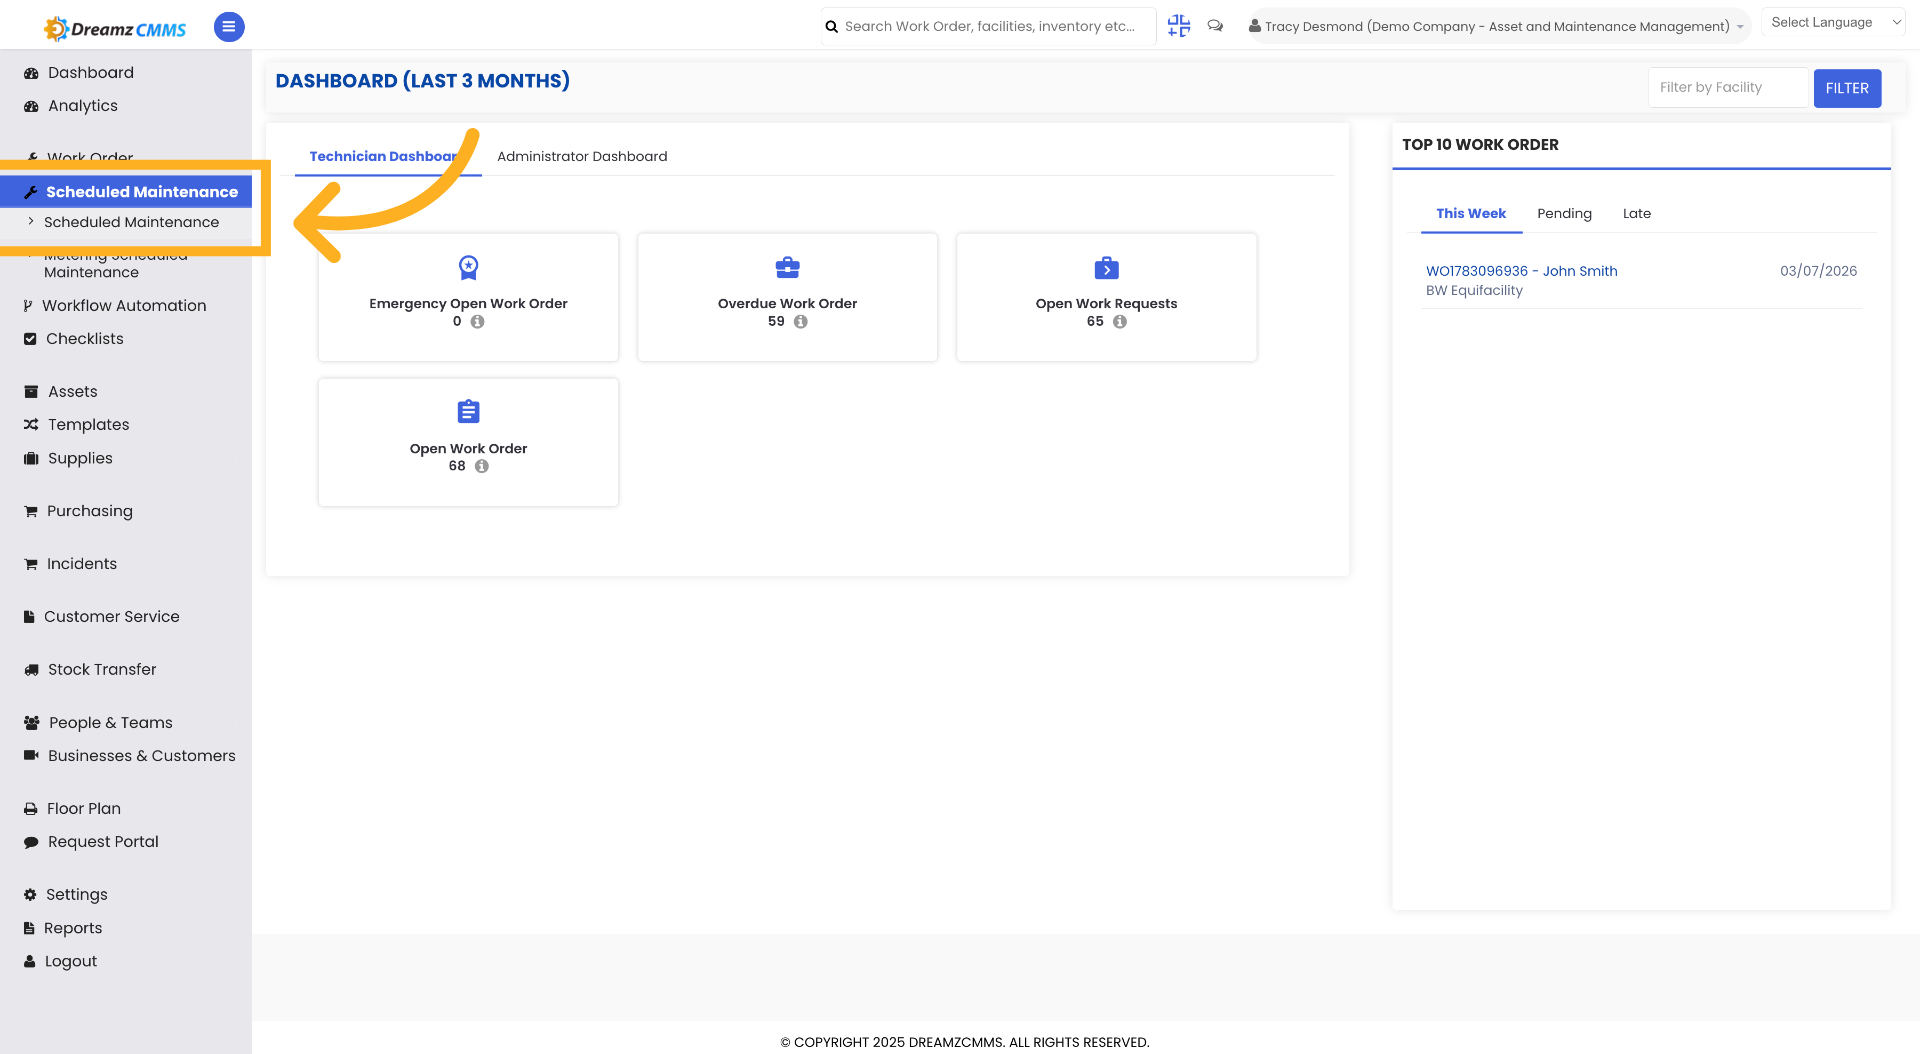
Click the "Scheduled Maintenance" menu to go to the Scheduled Maintenance listing.
Step 2 – Open Scheduled Maintenance Listing Page
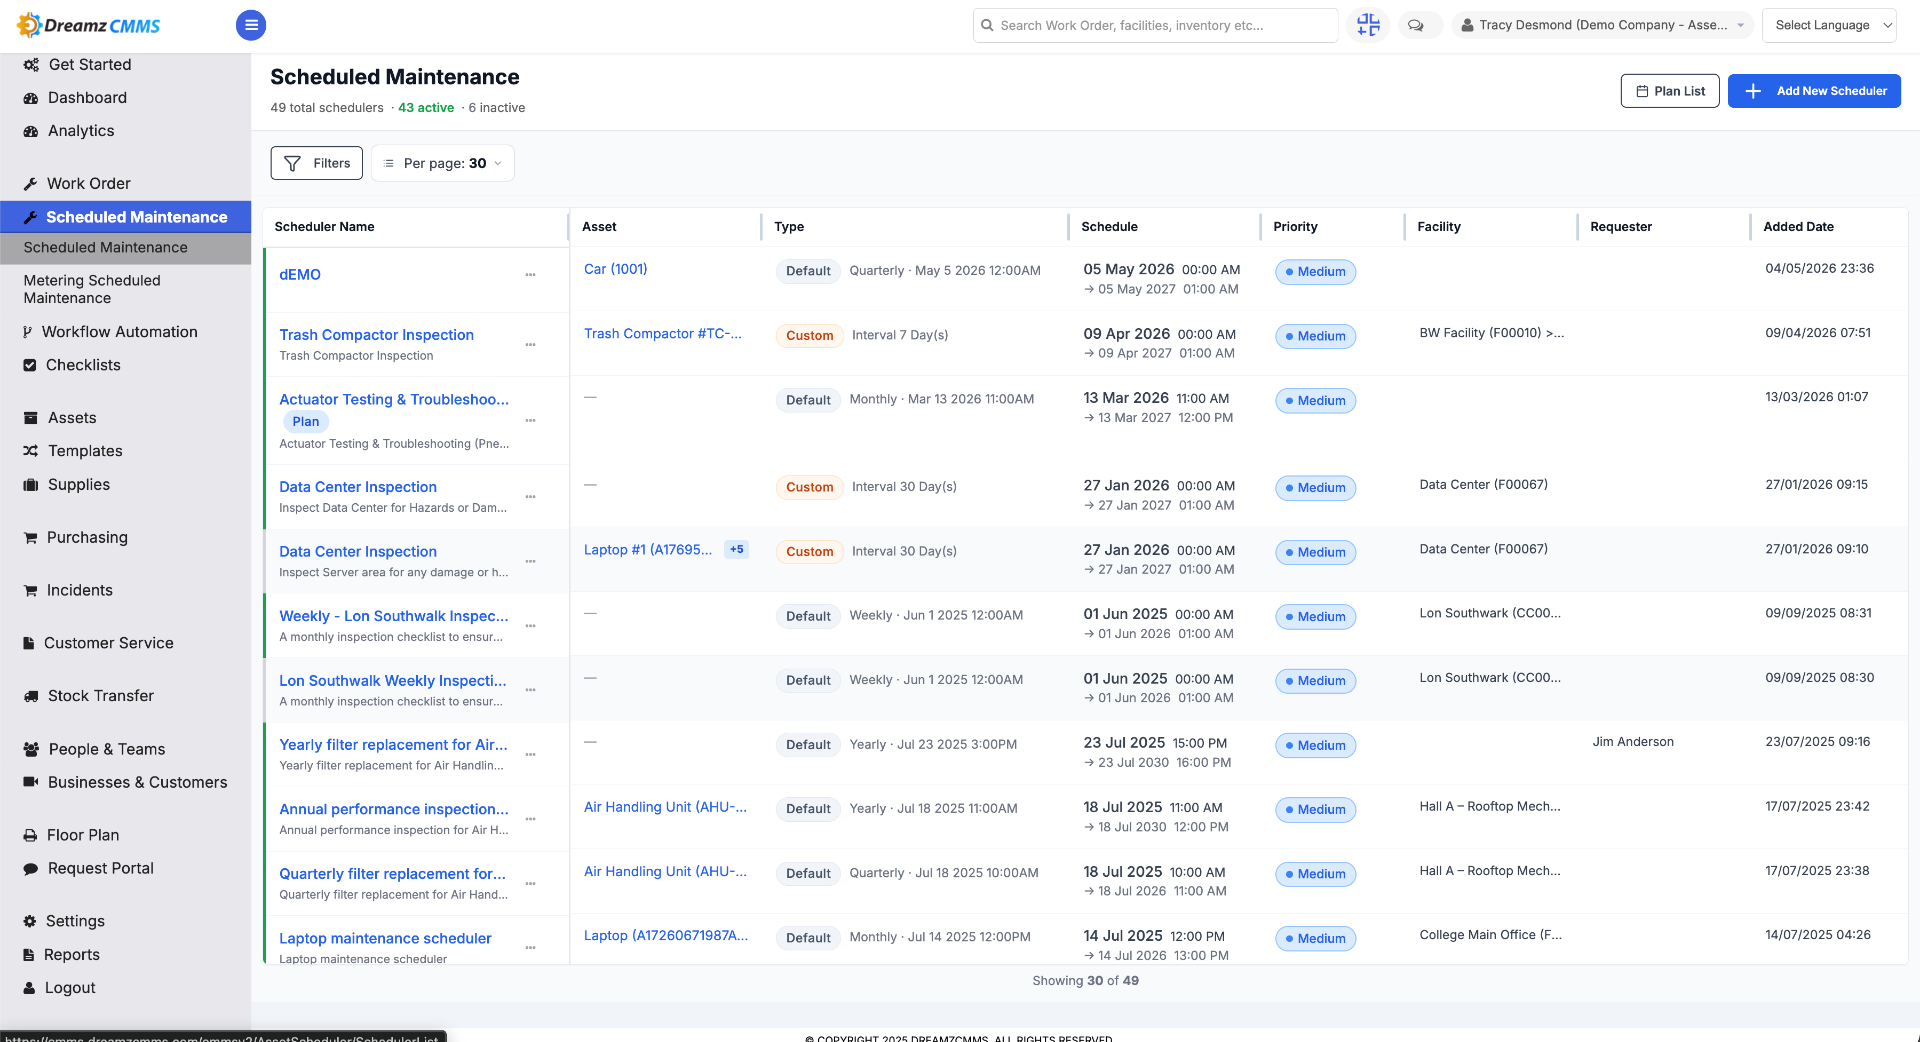
This is the Scheduled Maintenance listing page, where all previously created schedulers are listed.
Step 3 – Add New Scheduler
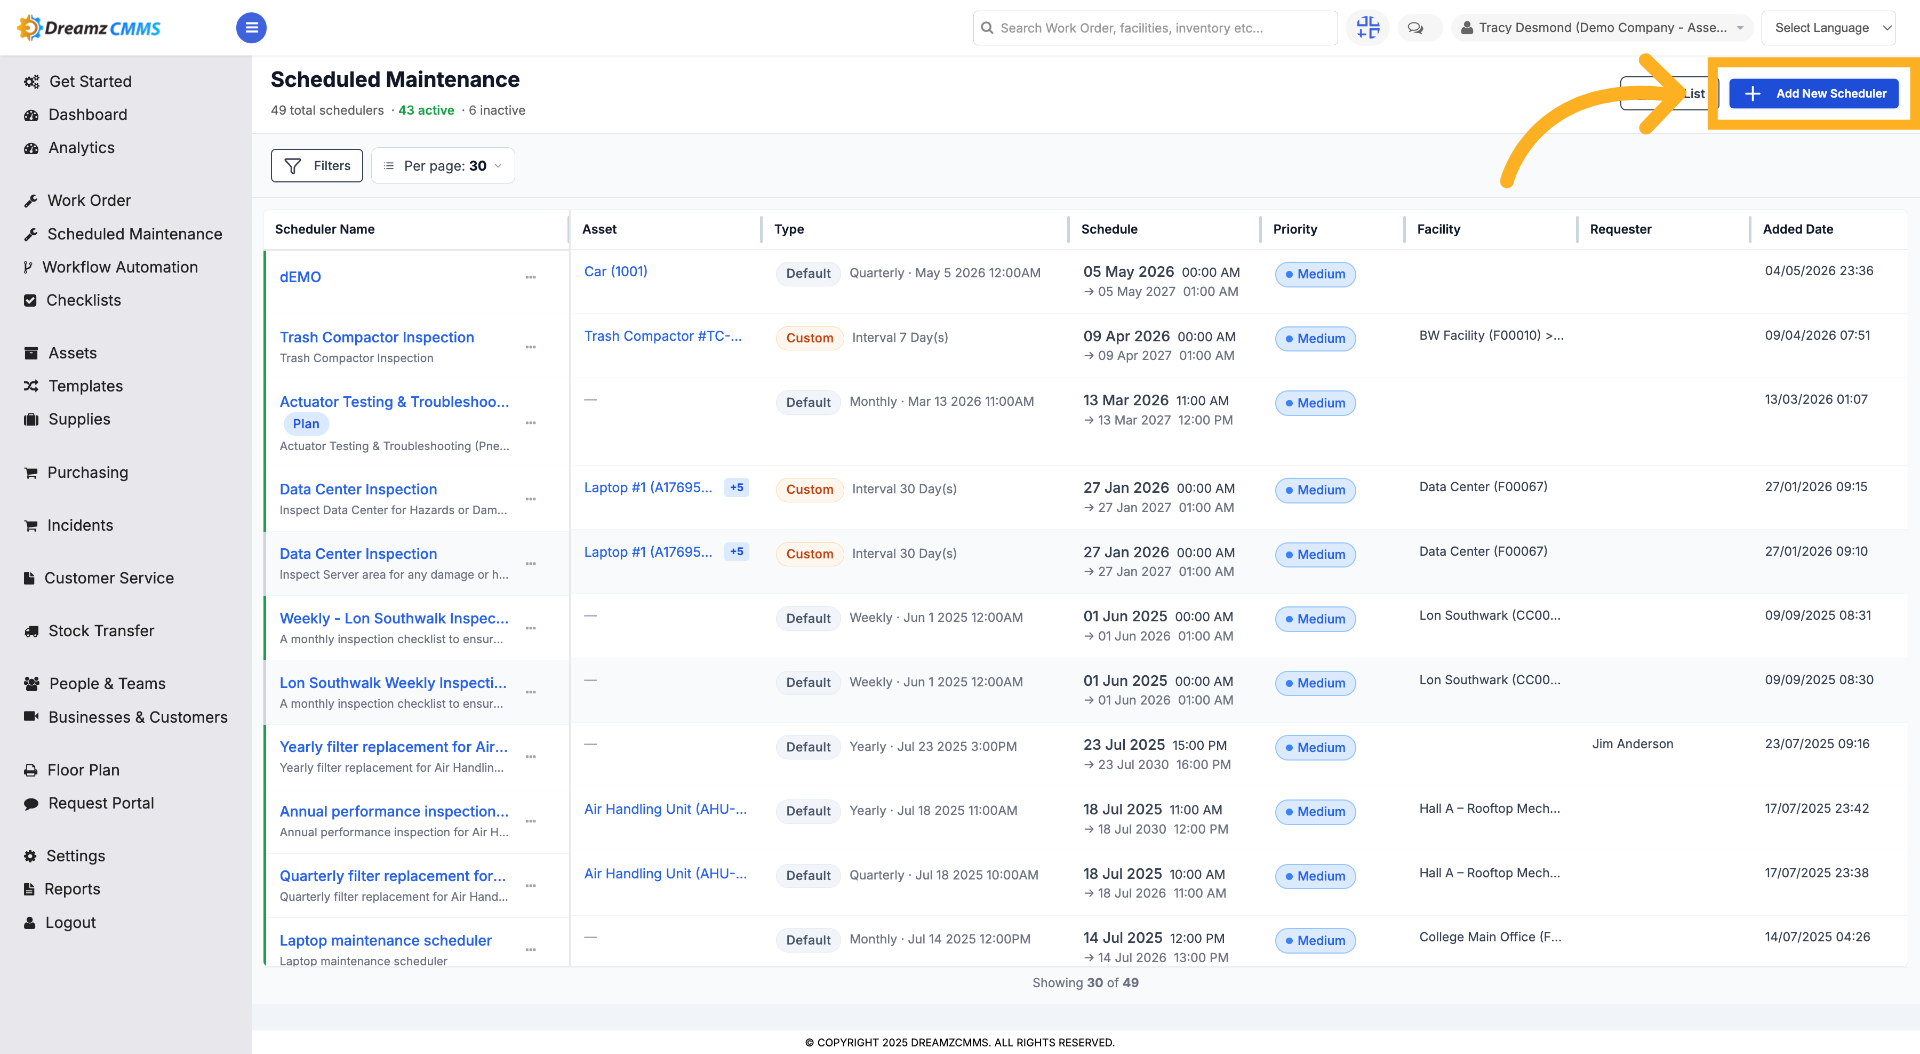
Click "Add New Scheduler" to start creating a new maintenance scheduler.
Step 4 – Name Your Scheduler
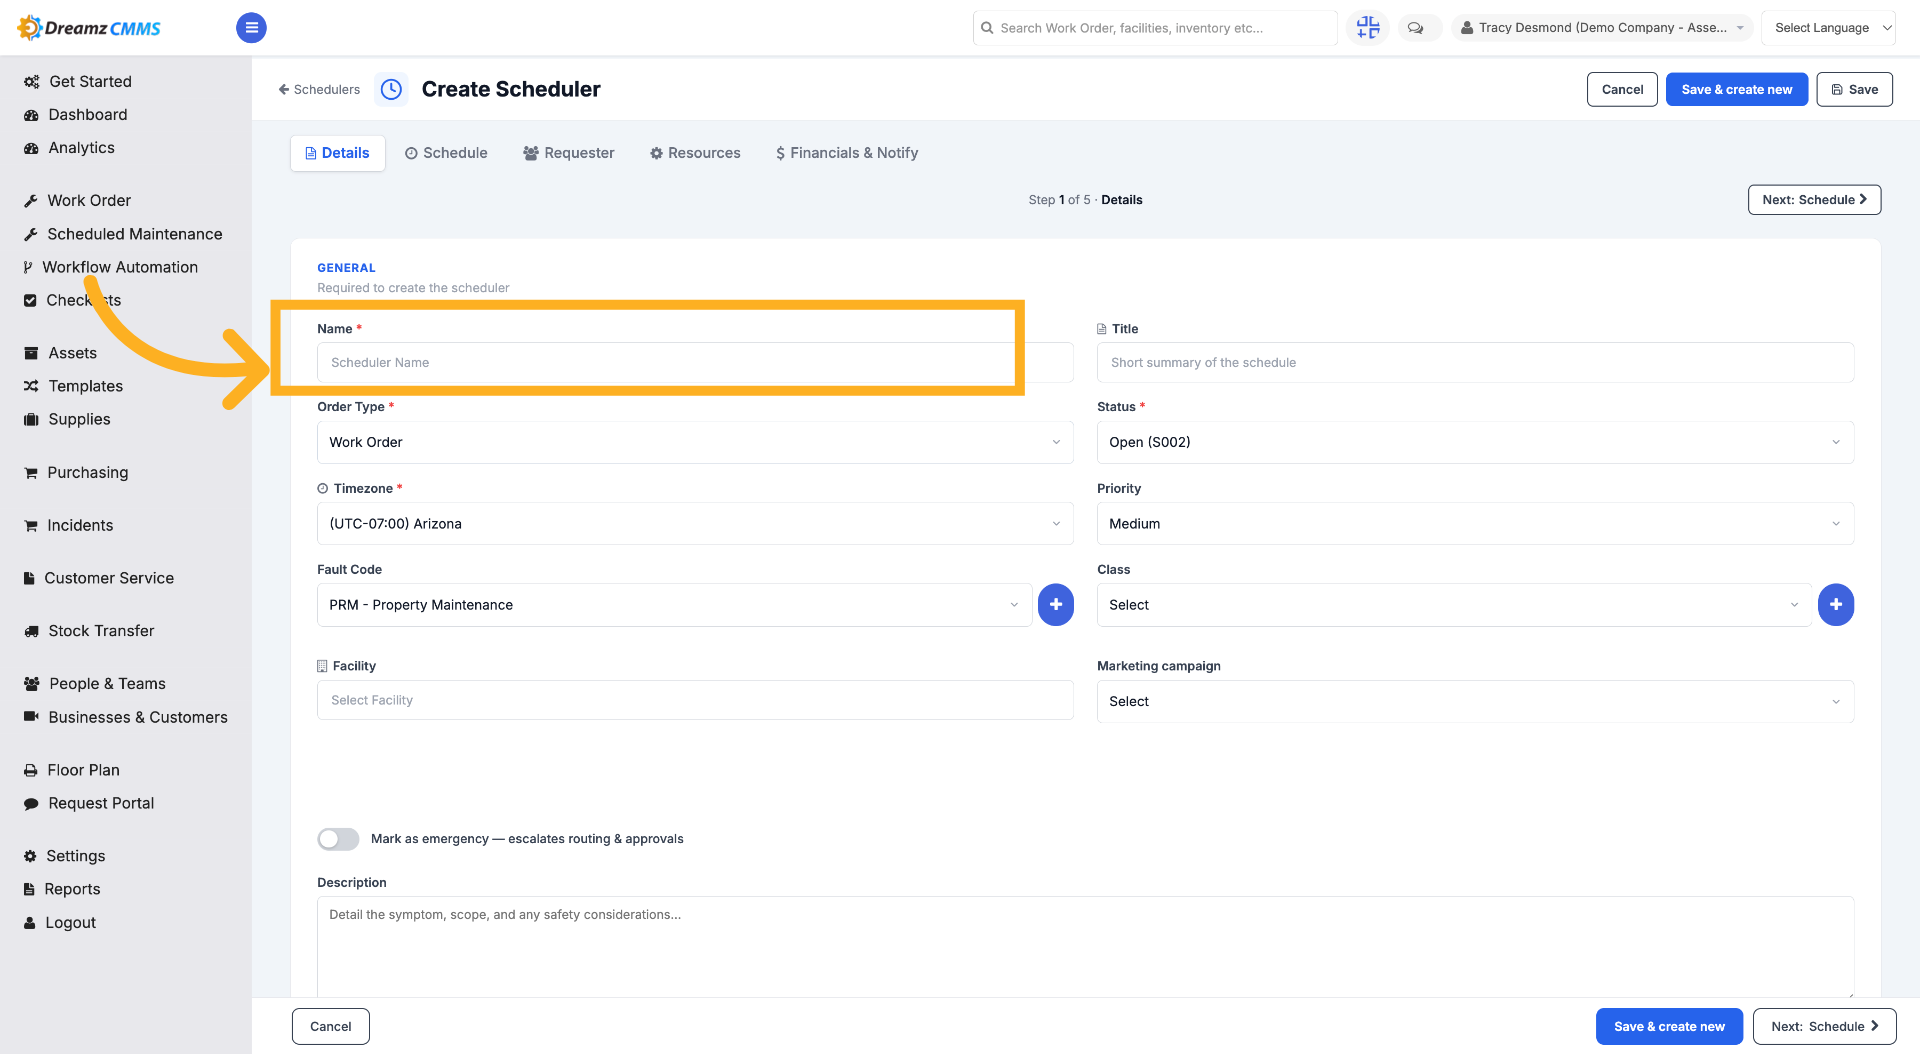
Give a name to your scheduler.
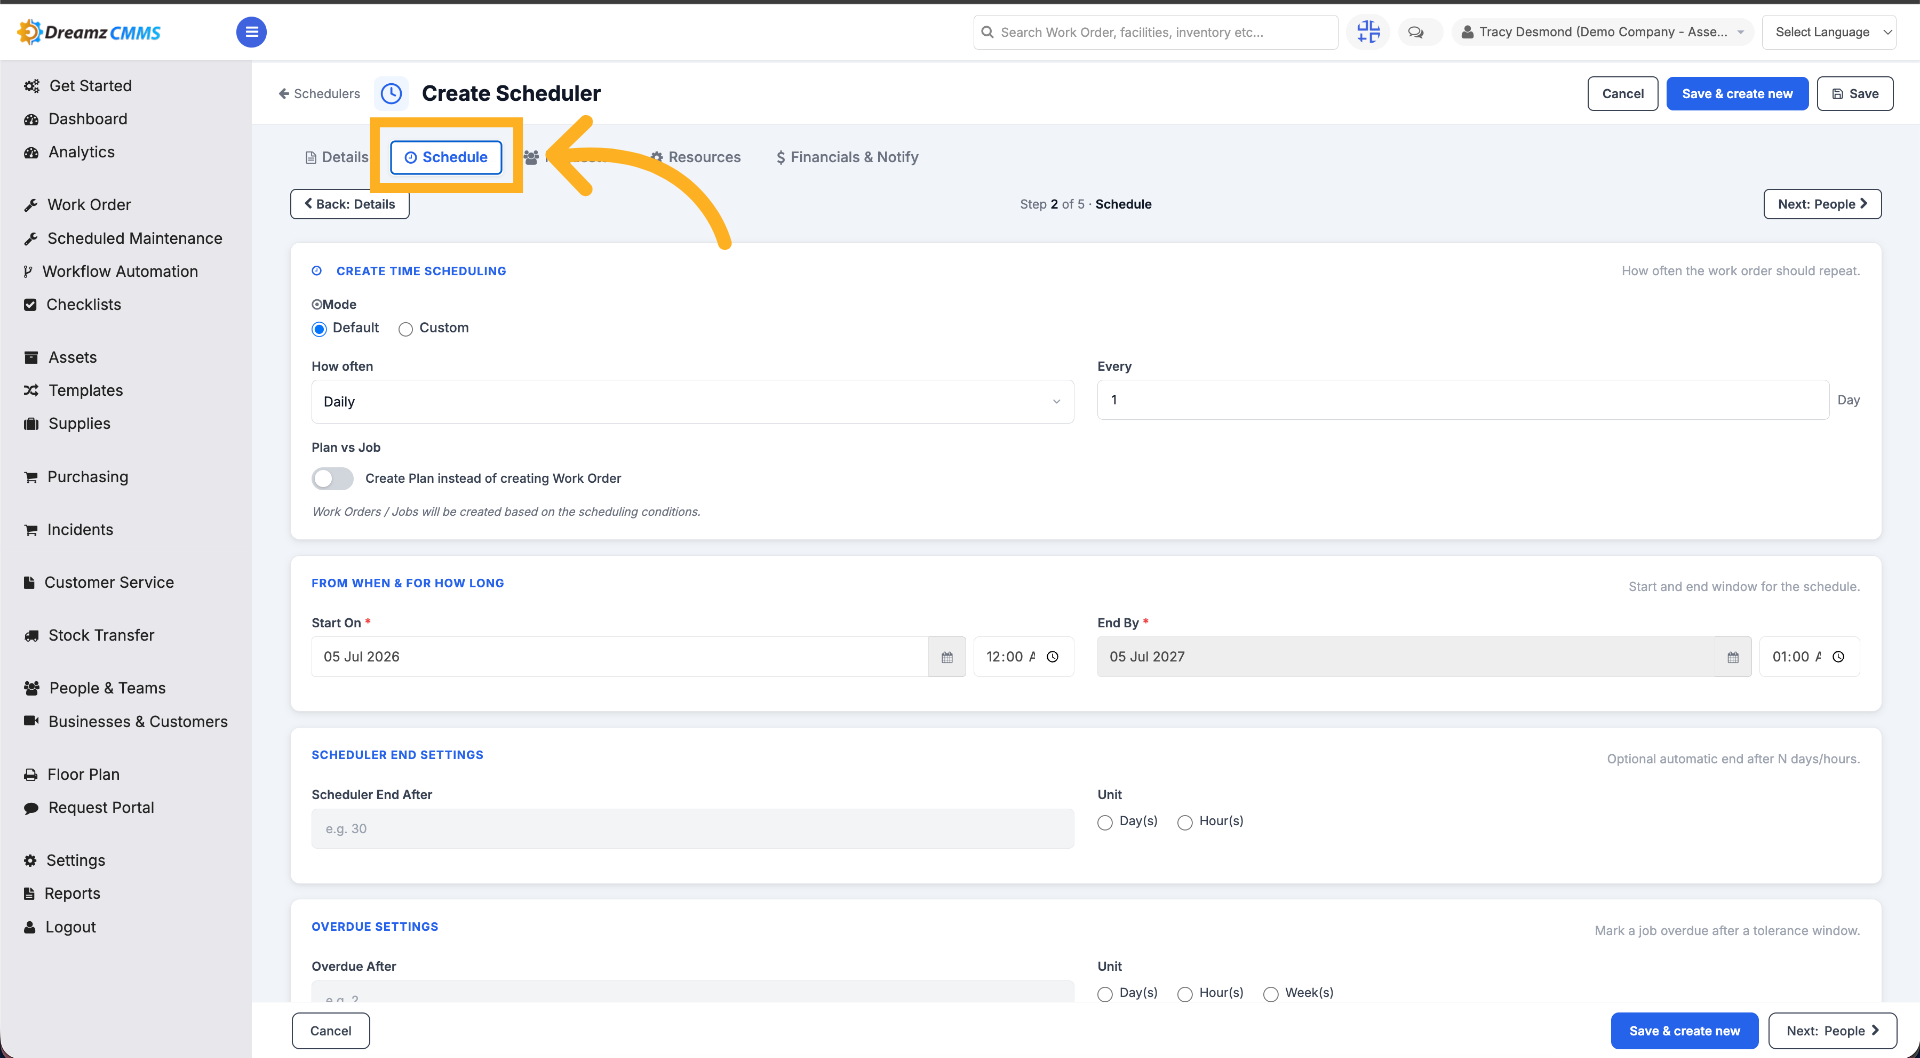
Step 5 – Open Schedule Tab
Click "Schedule" to define the timing and frequency of the scheduler.
Step 6 – Choose Between Default or Custom Schedule Option
Choose between the Default or Custom scheduling option.
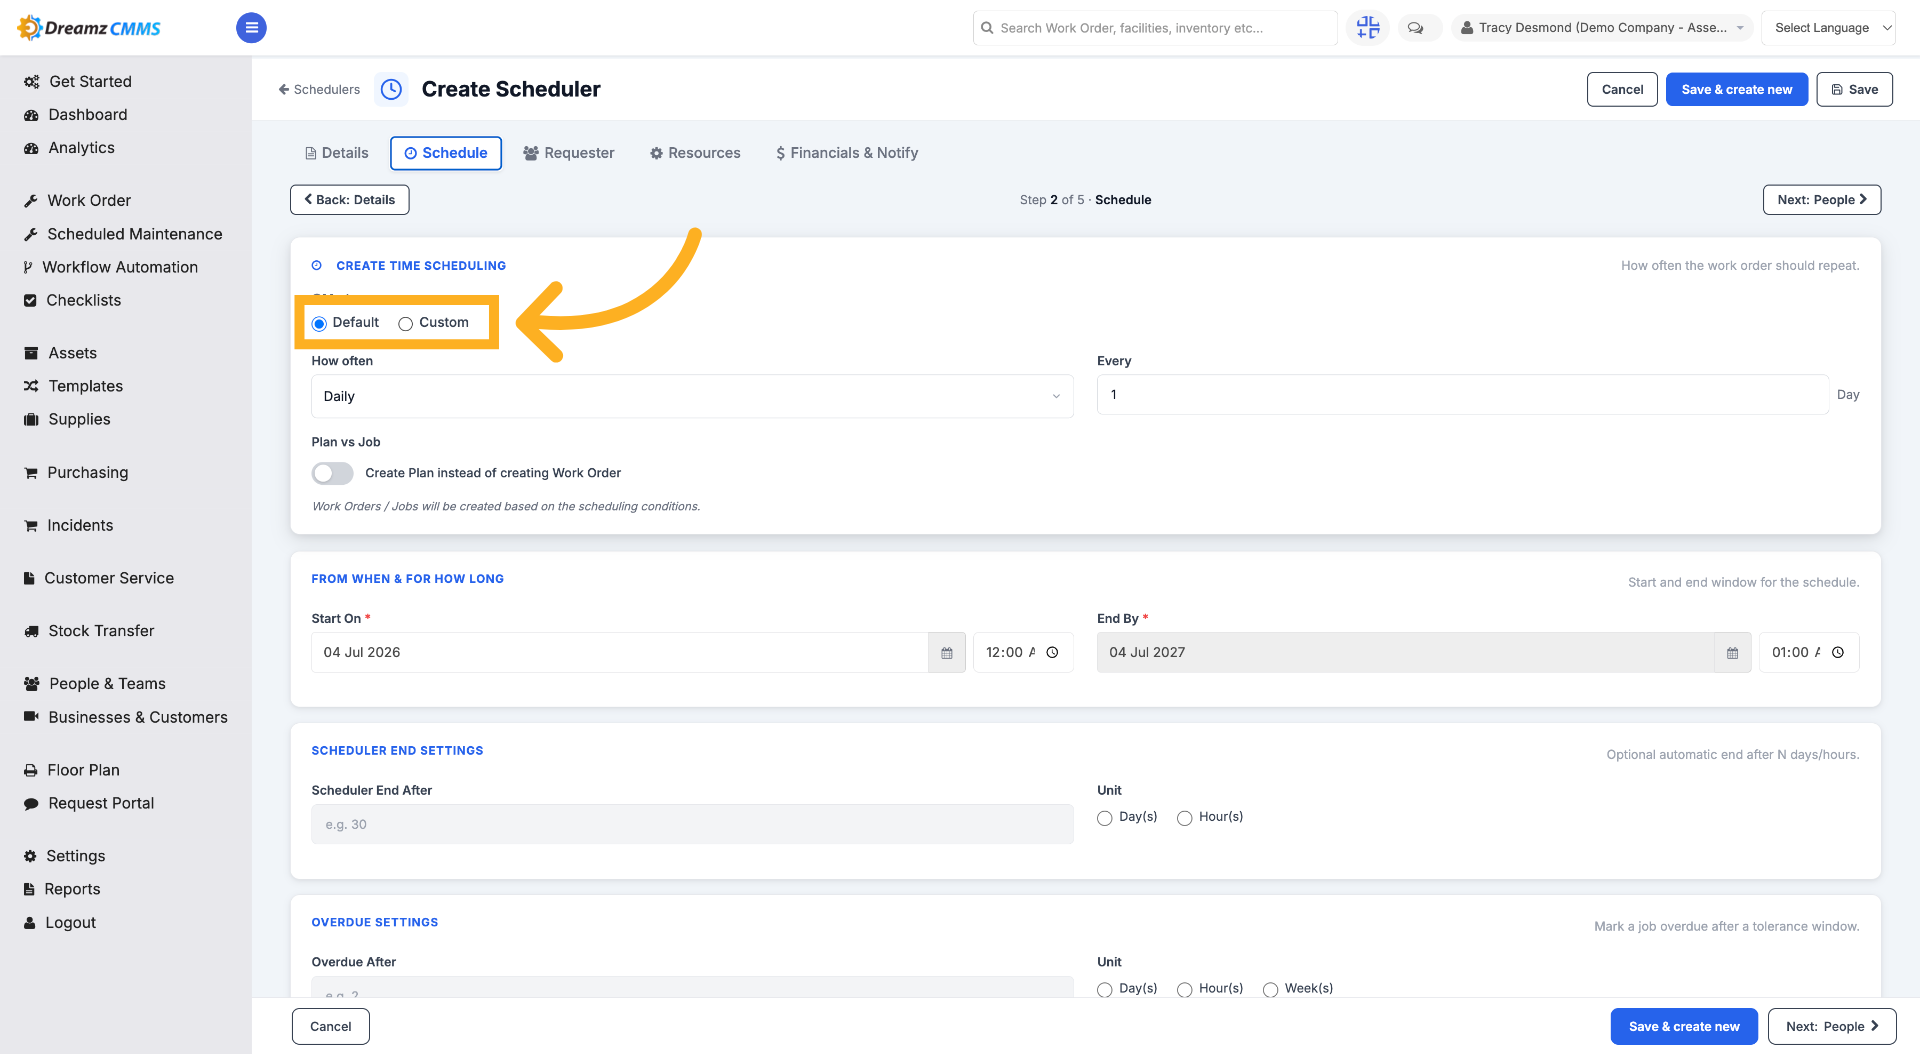
Step 7 – Select Default Option
Click "Default" to apply default settings for the scheduler.
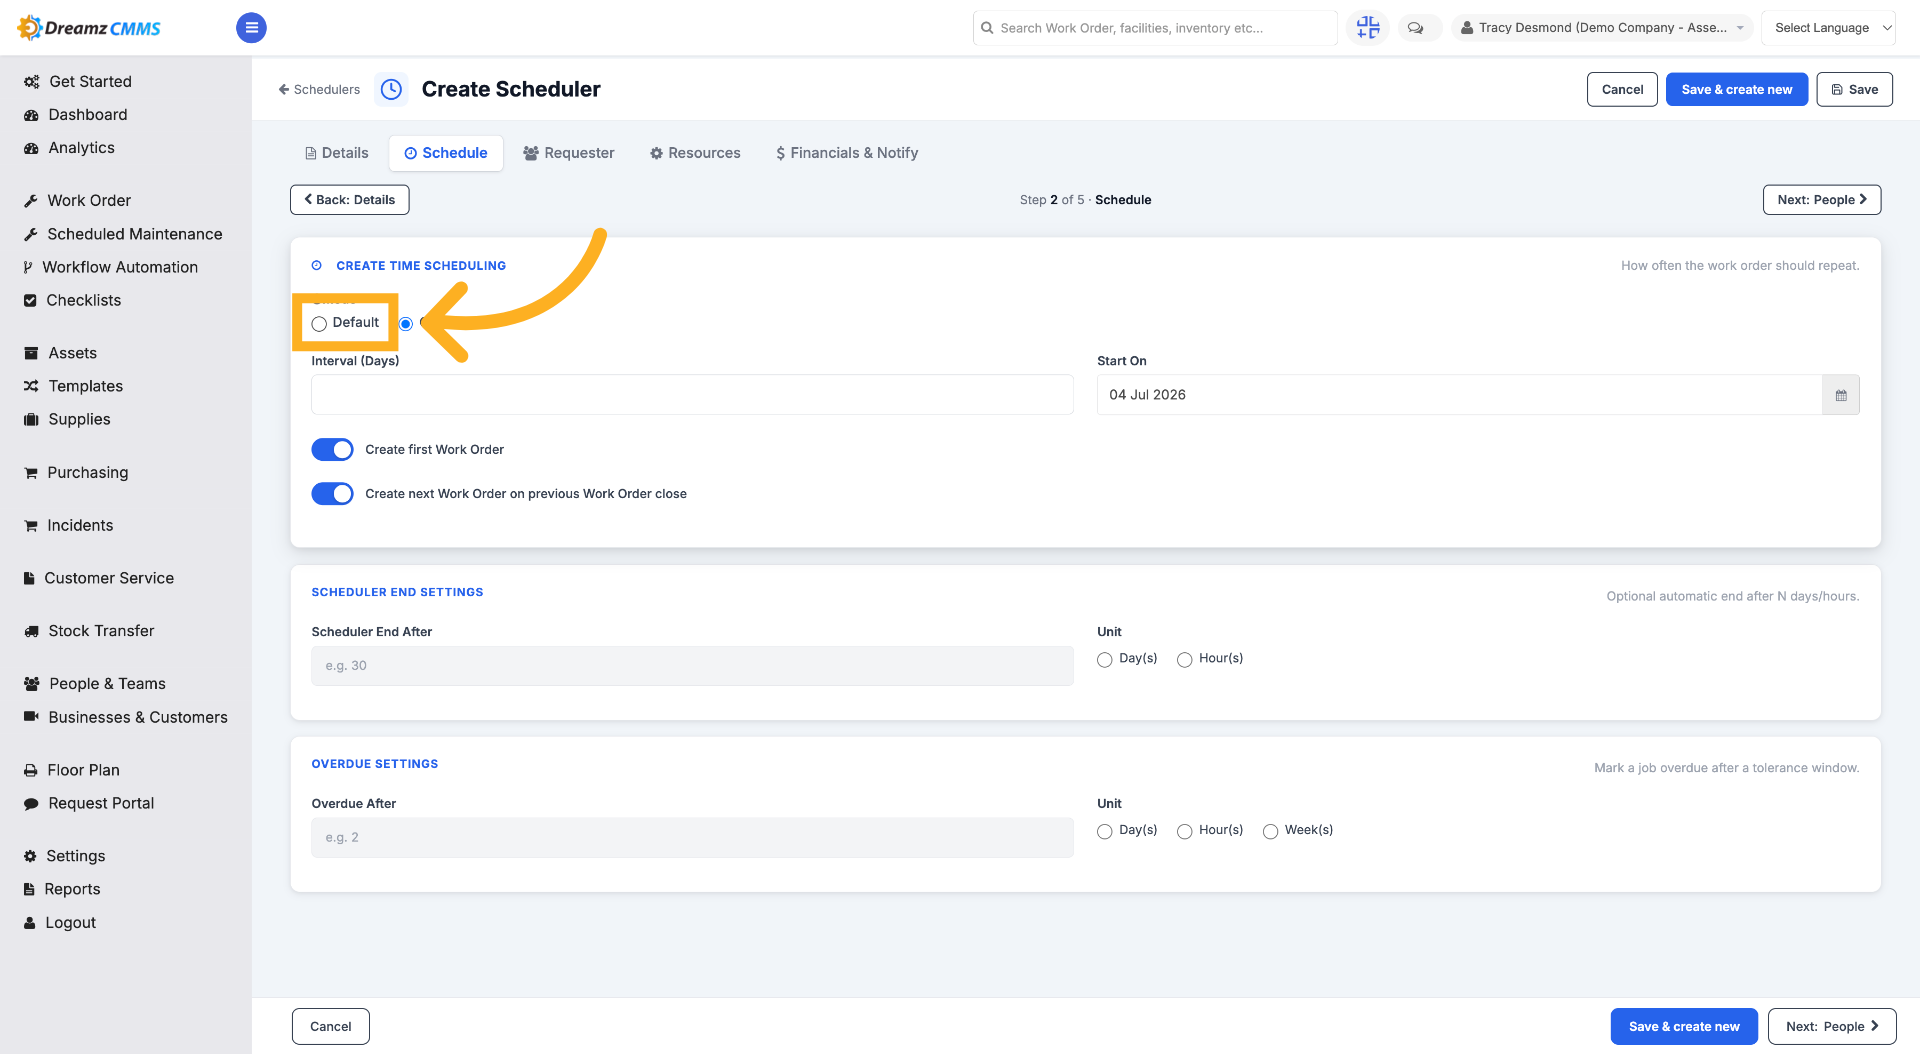
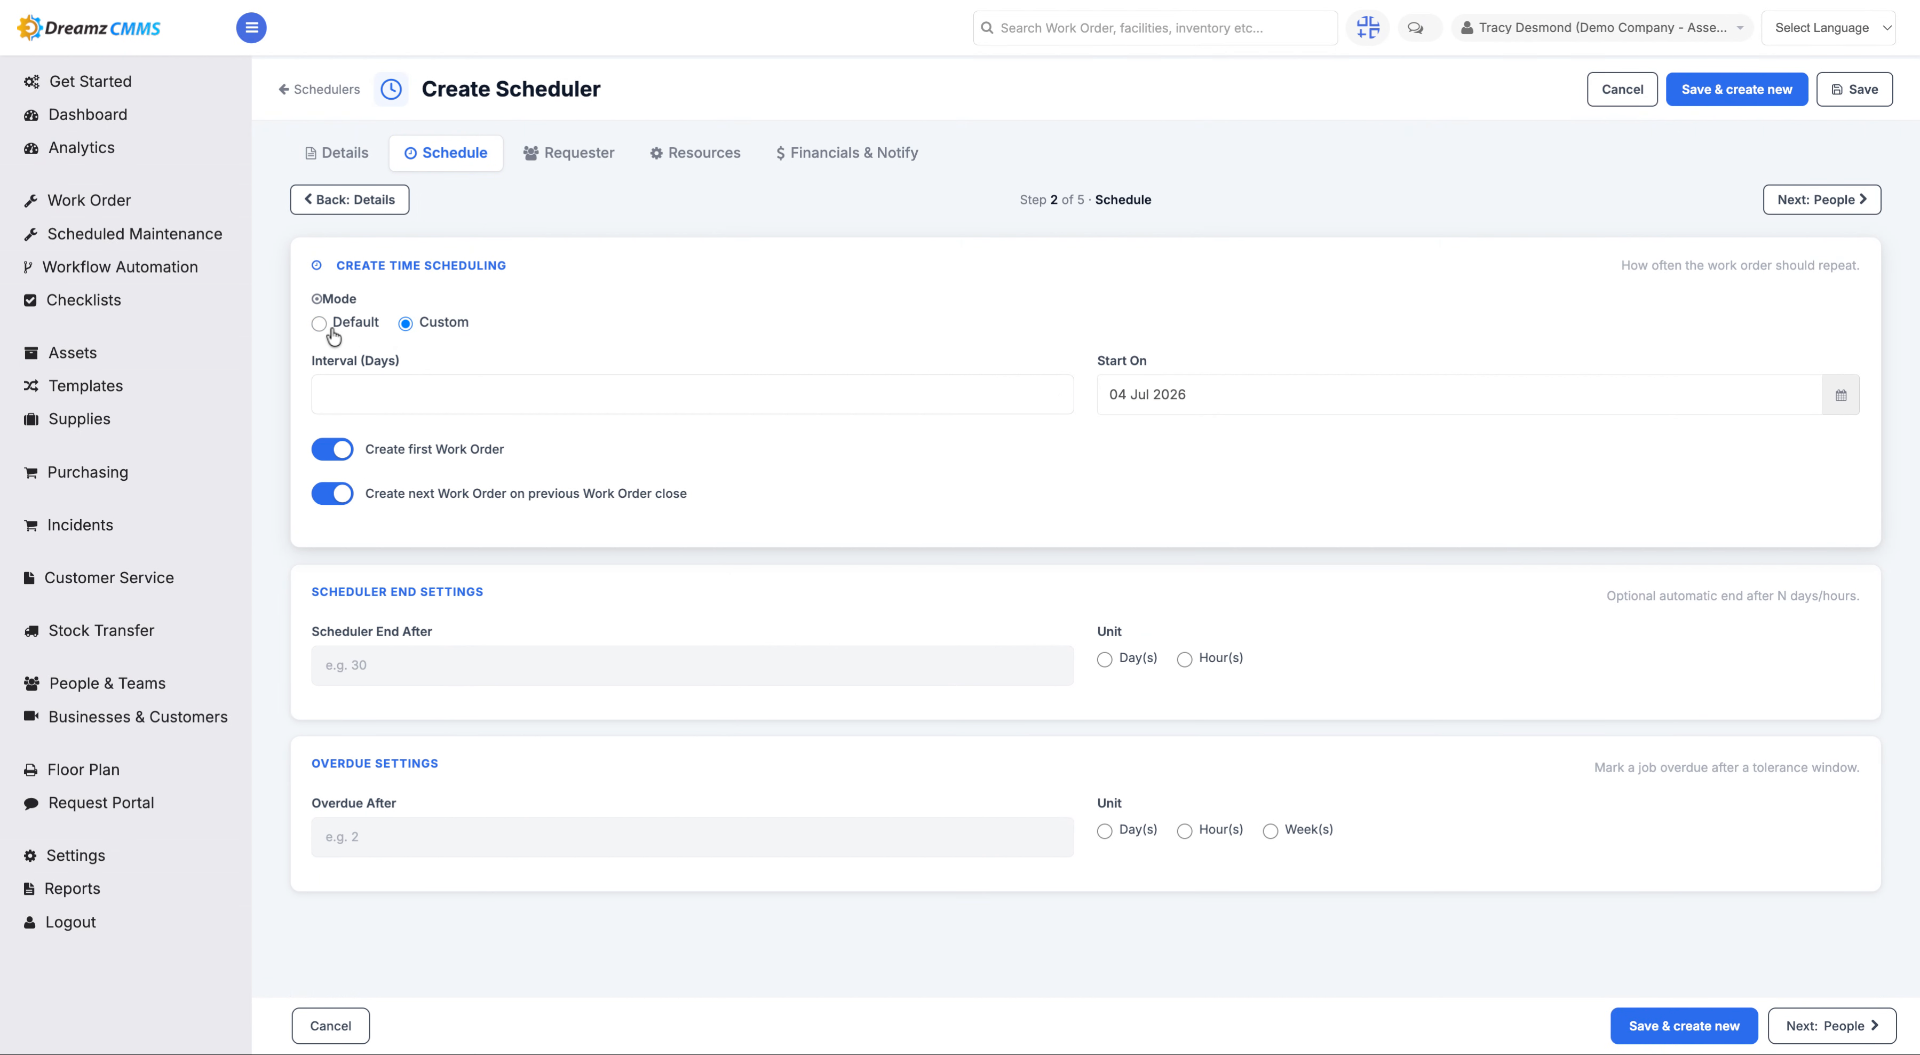
Step 8 – Set Custom Frequency
Click "Custom" to apply custom settings for the scheduler.
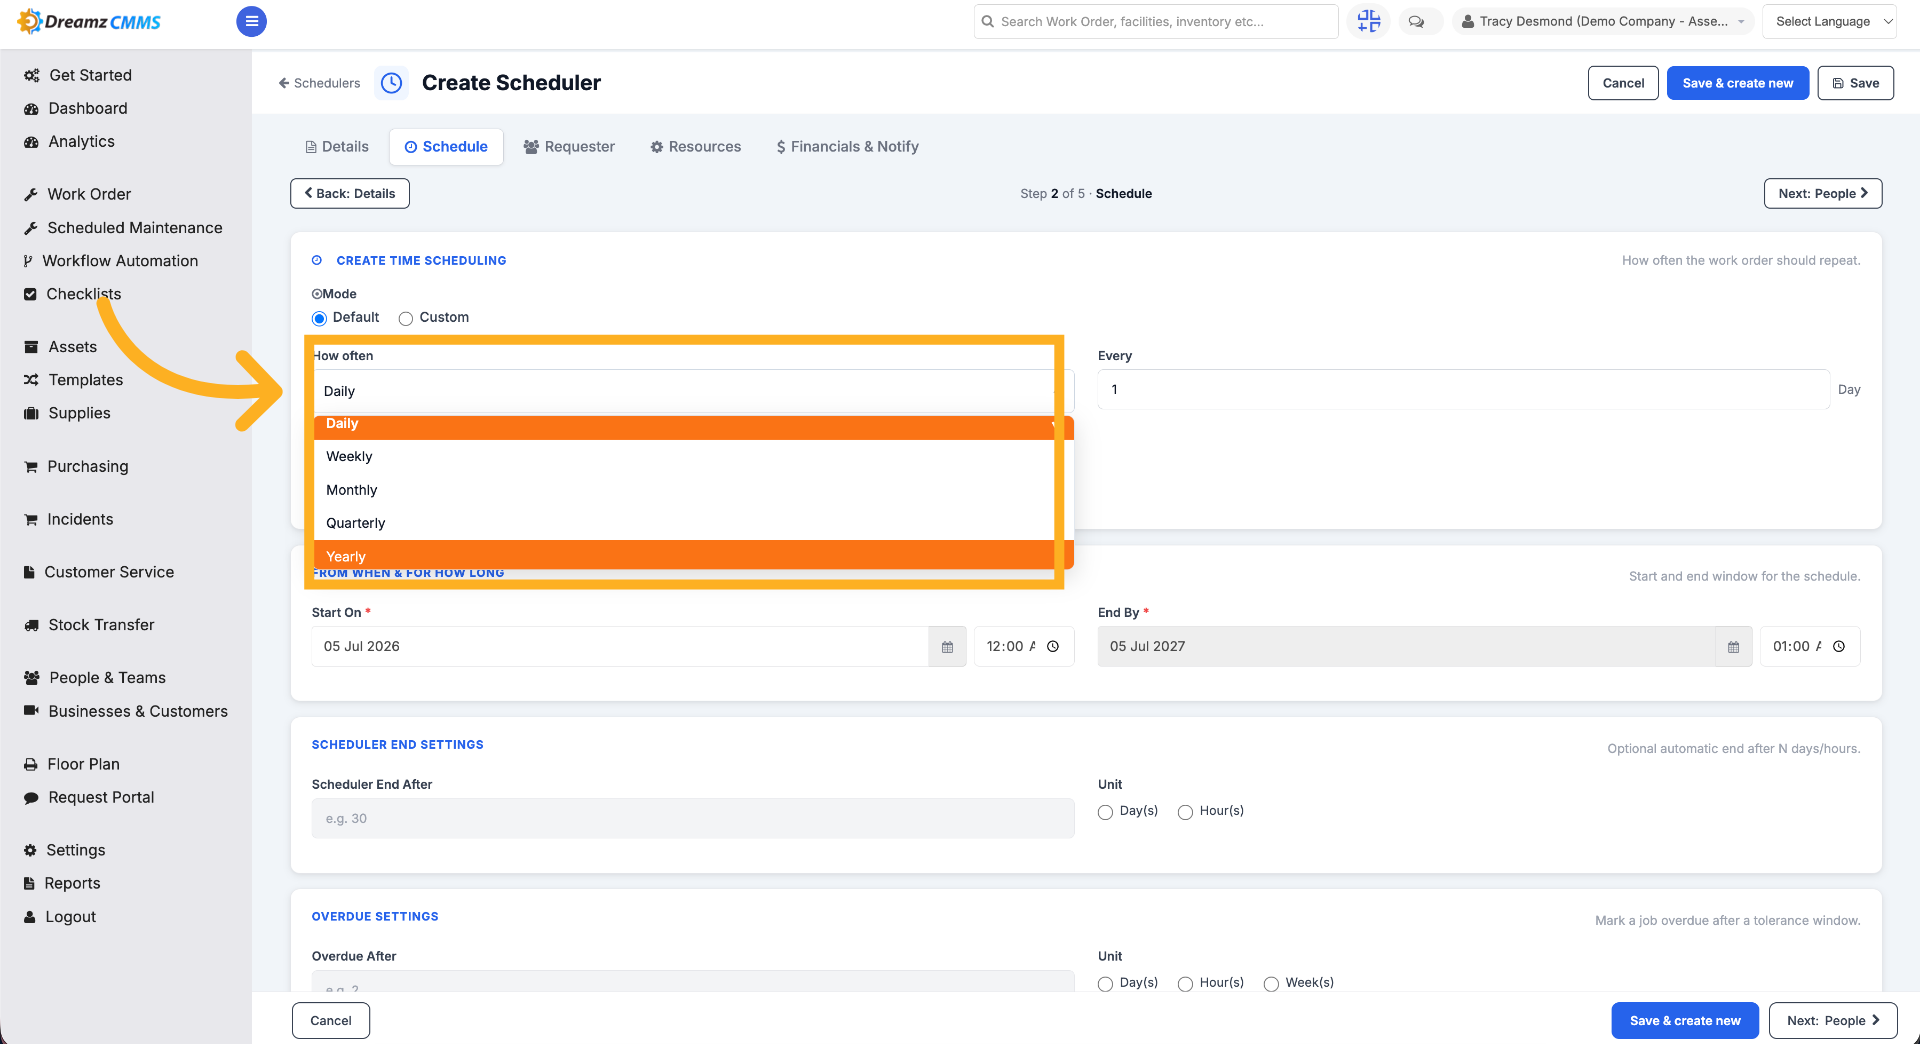
Step 9 – Choose How Often the Scheduler Will Trigger
Choose from scheduling options like Daily, Weekly, Monthly, Quarterly, or Yearly to set how often the scheduler will trigger.
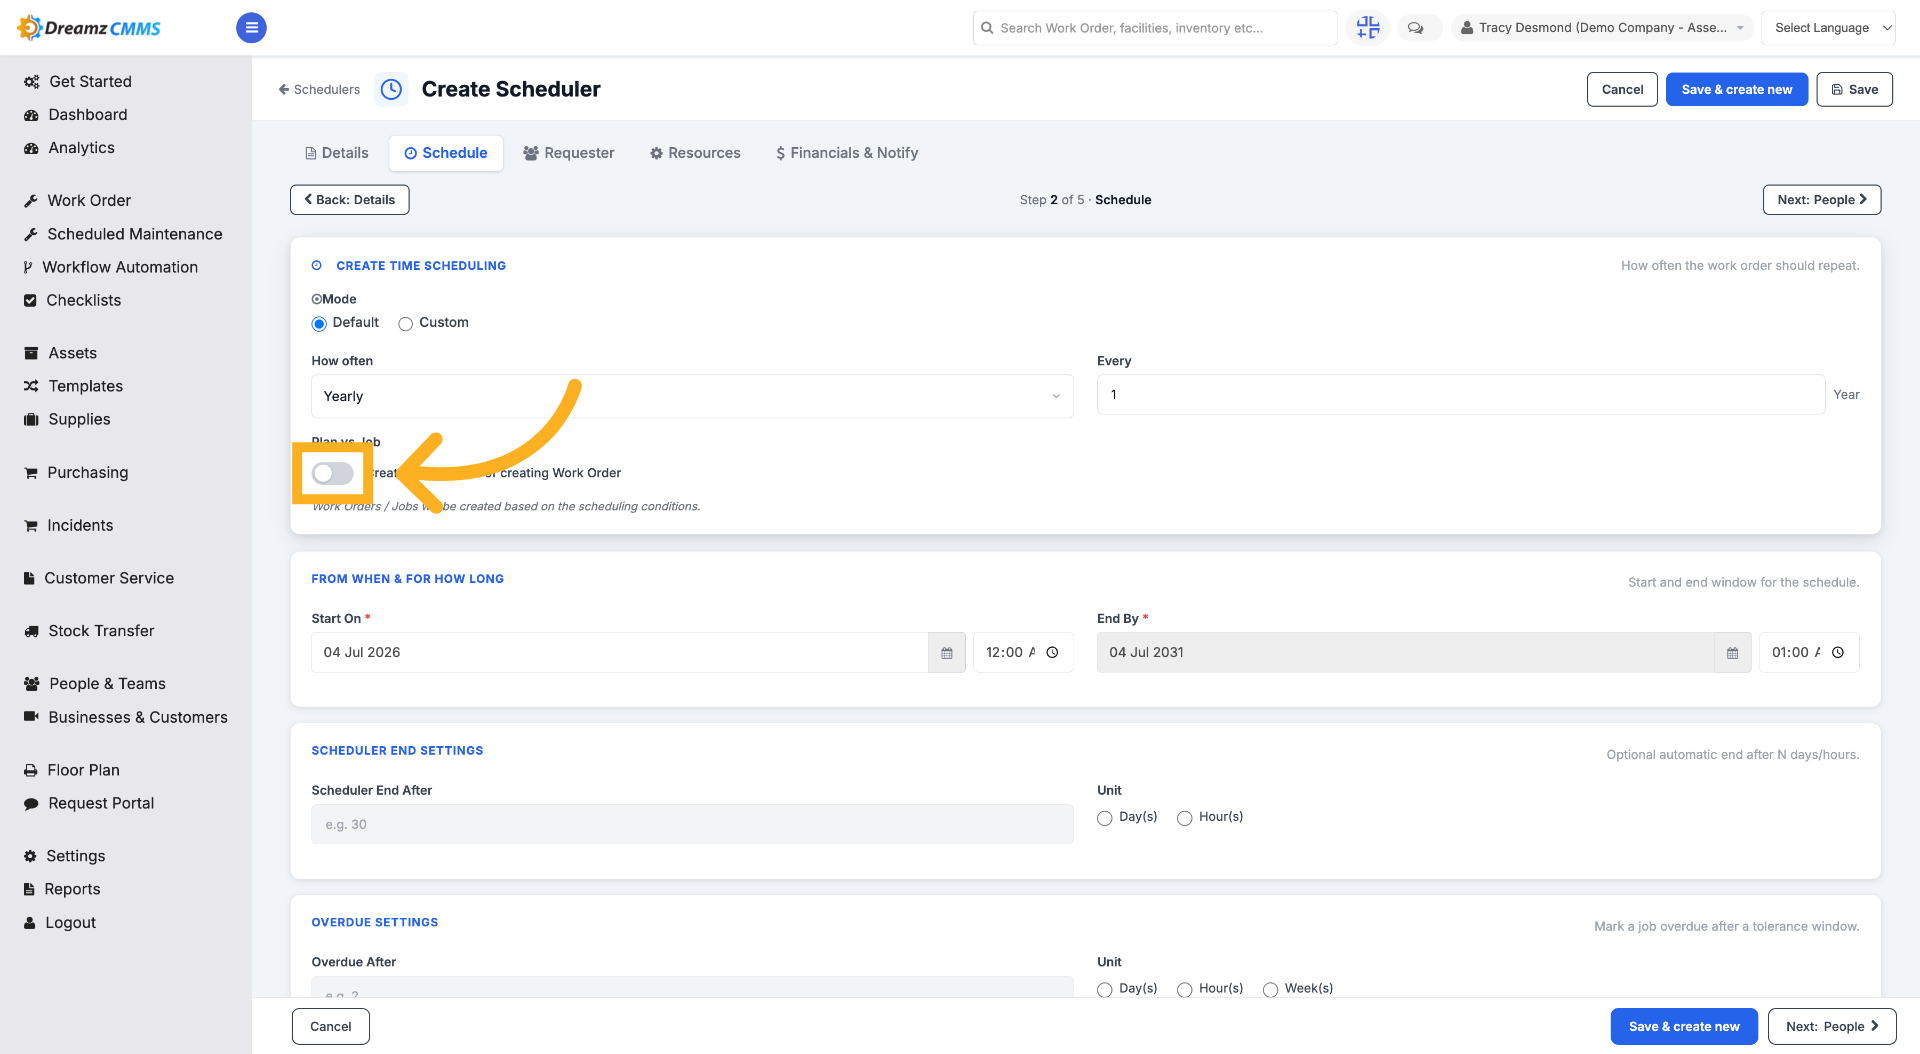
Step 10 – Toggle Scheduler Plan Activation
Toggle the switch between creating a work order or a plan.
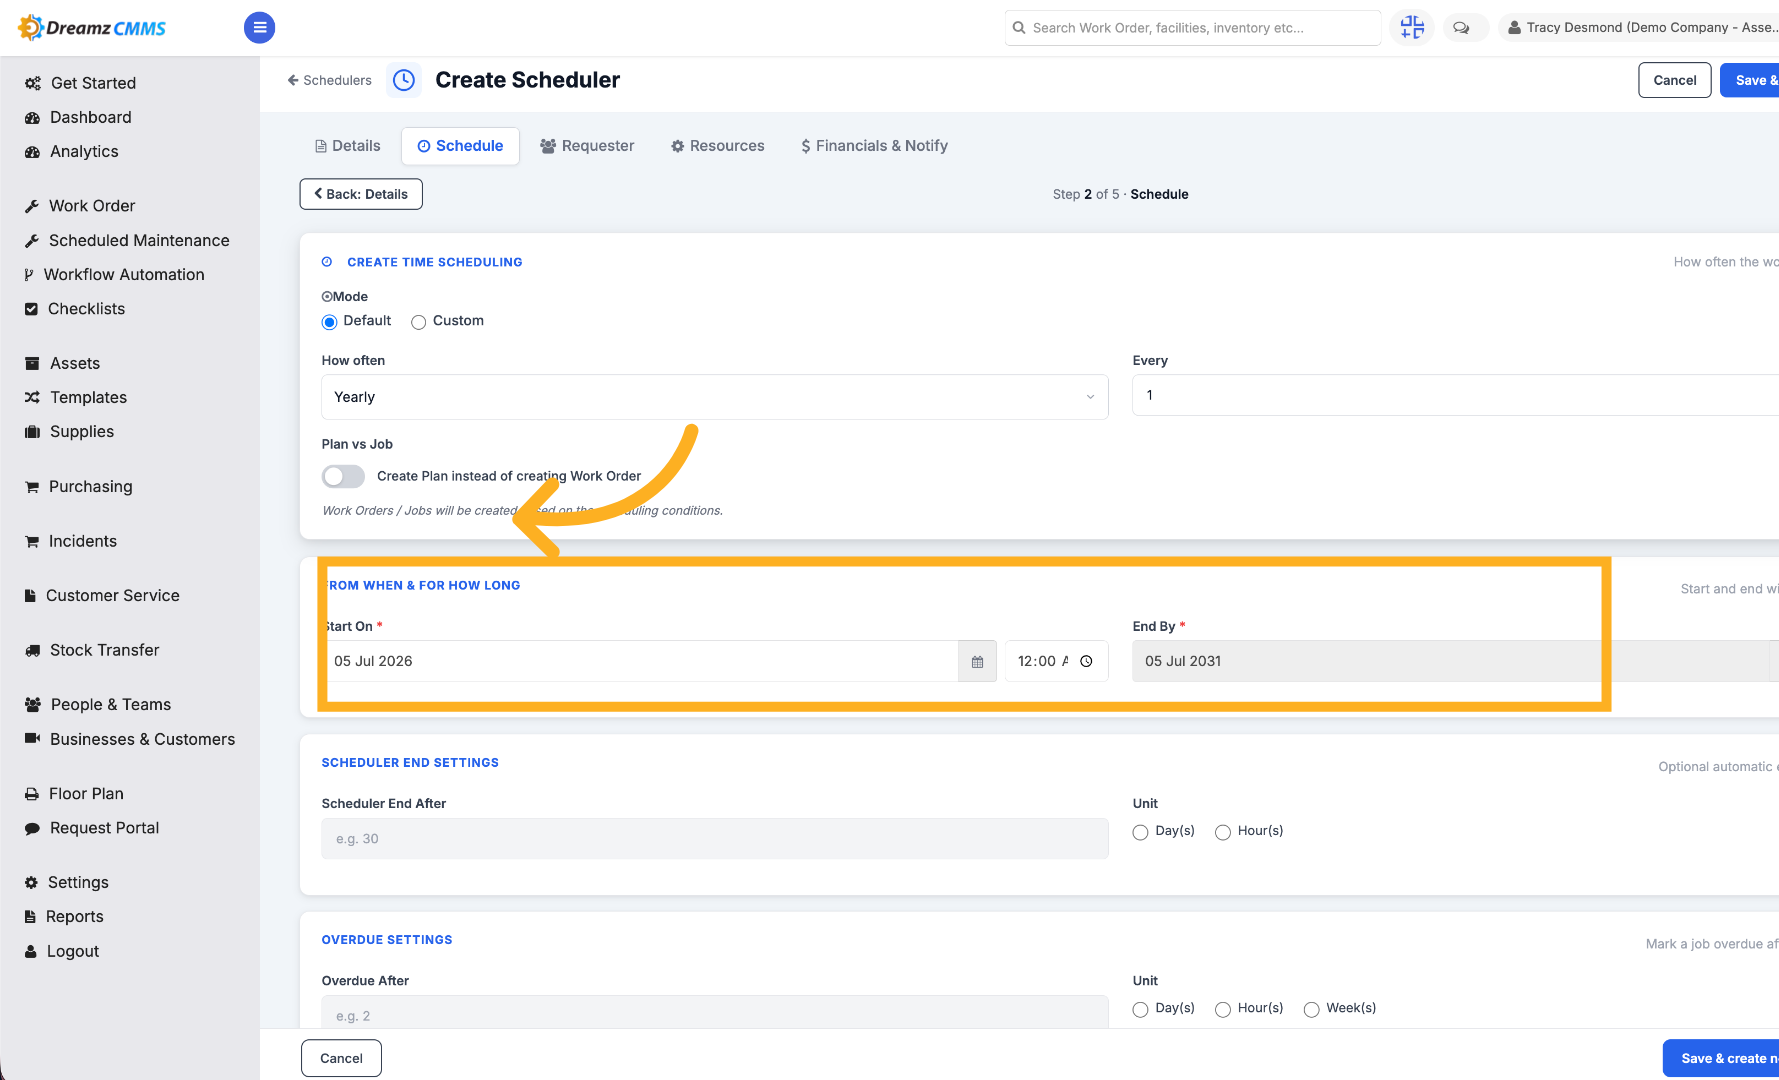
Step 11 – Set Time Duration for the Scheduler
Set the time duration for the scheduler, including the start date and the end date.
Step 12 – Open Requester Options
Click "Requester" to specify requester details for the scheduler.
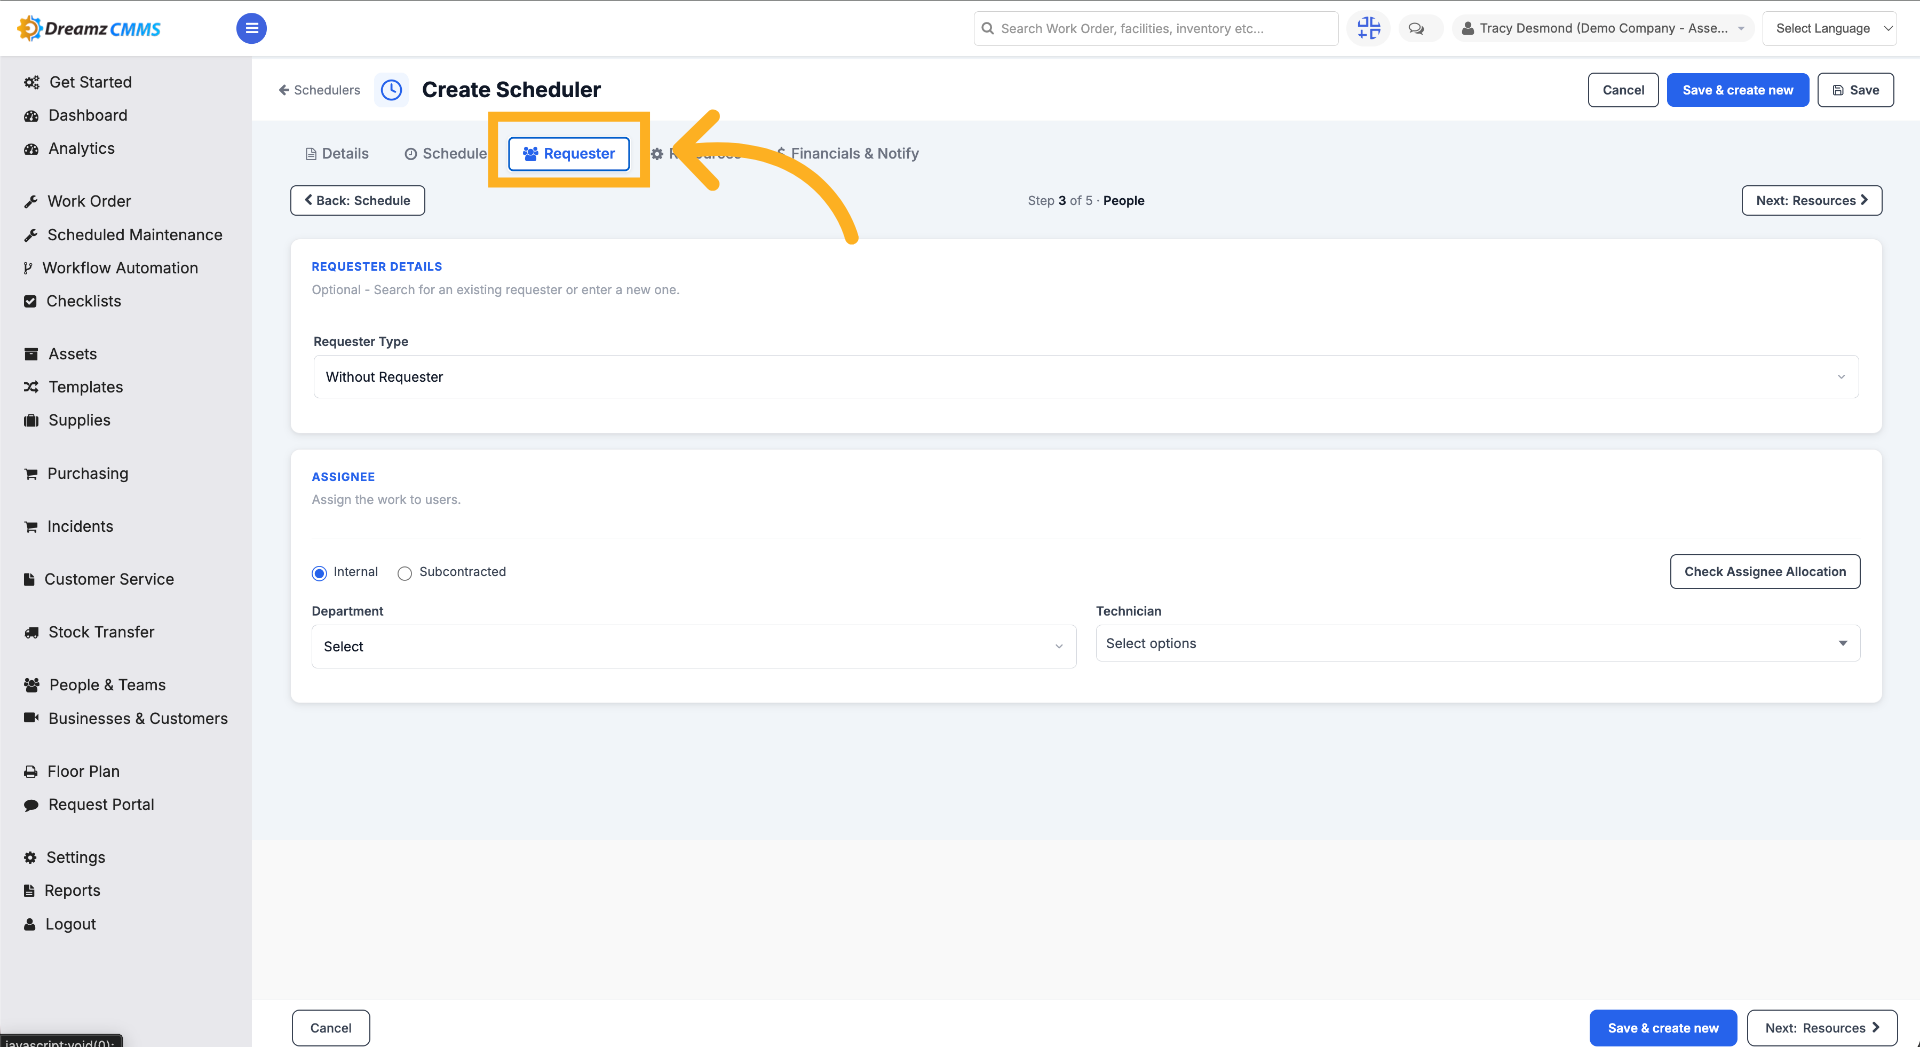
Step 13 – Select From the Requester Options
Click "Requester type" to select from options such as Without Requester, Employee, Customer, or Sub Contractor to specify who is requesting the scheduler.
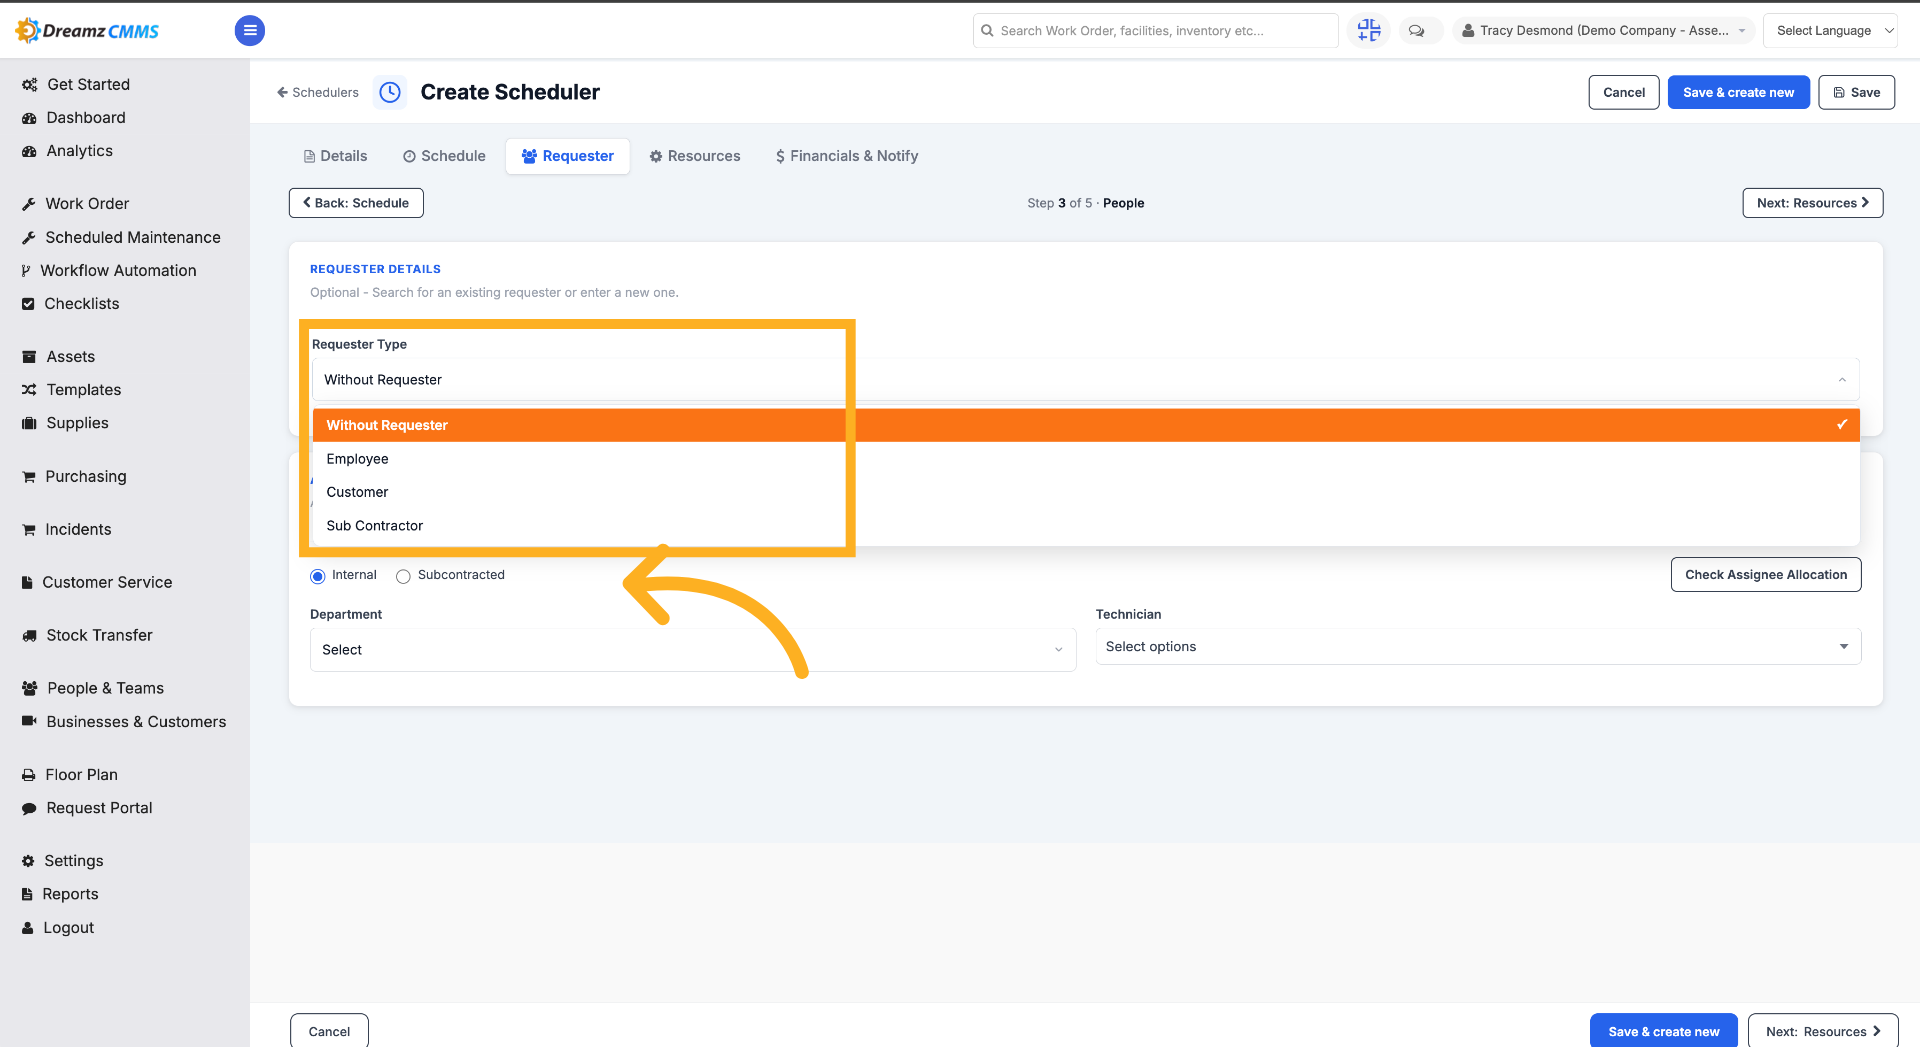
Step 14 – Select Without Requester
Click "Without Requester" to proceed without assigning a requester (or select the appropriate requester type for your scheduler).
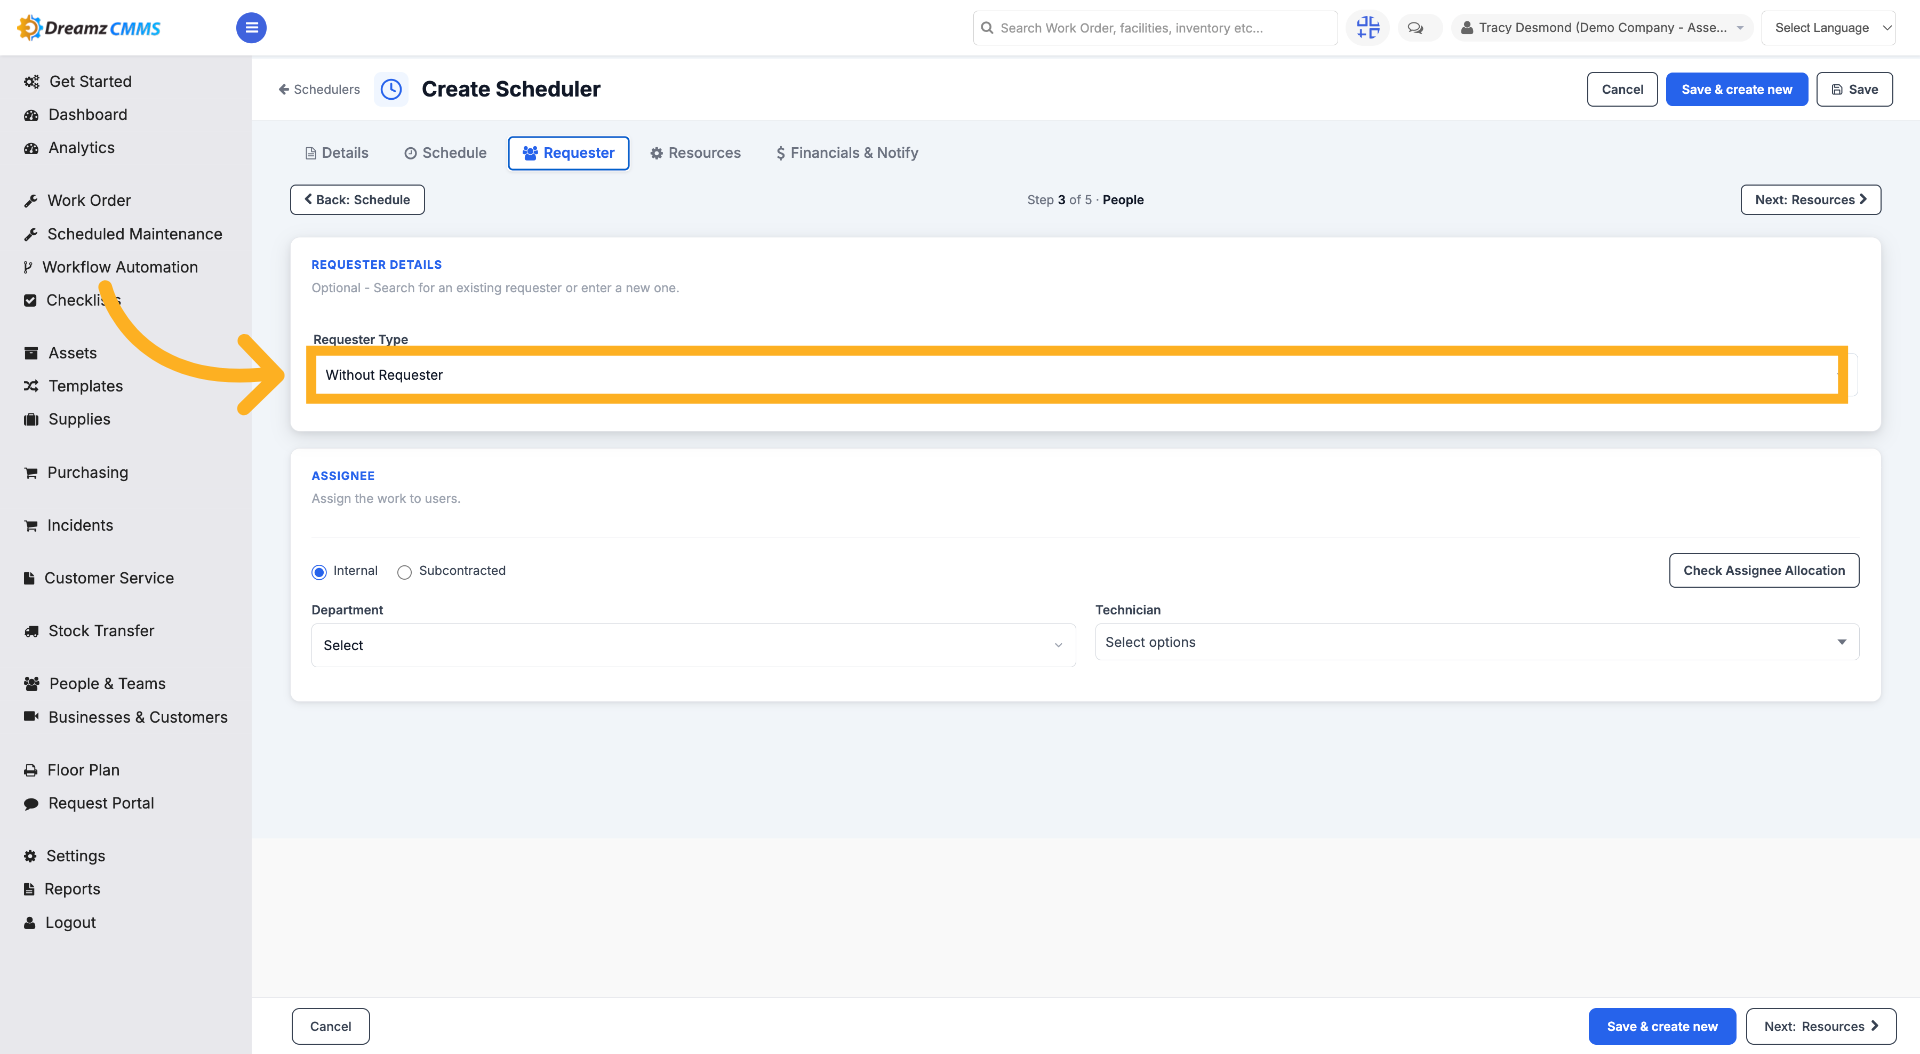
Step 15 – Open Assignee Select Options Menu
Go to the Assignee section, choose Internal, and click the Technician dropdown to select from your technicians.
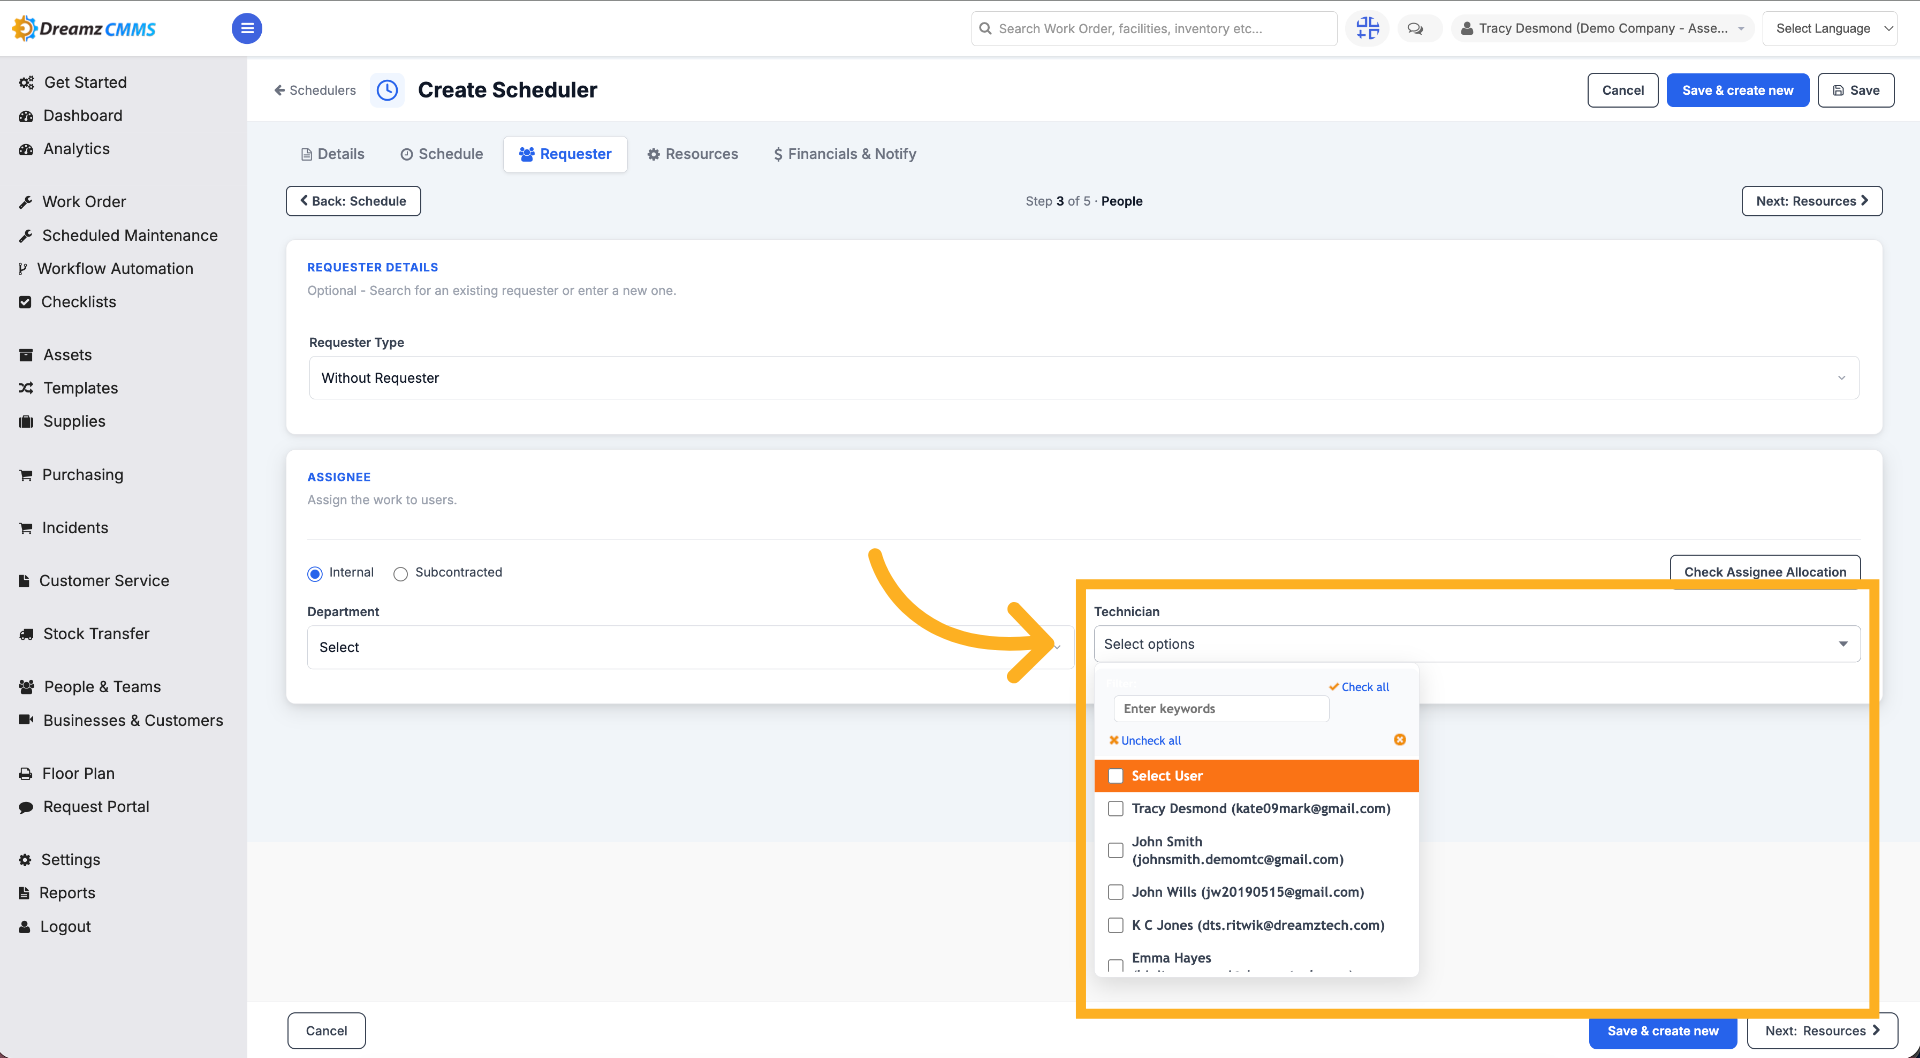
How to Add Resources to a Scheduler
Step 1 – Access Resources Section
Click "Resources" to manage resources like projects, assets, and labor tasks linked to the scheduler.
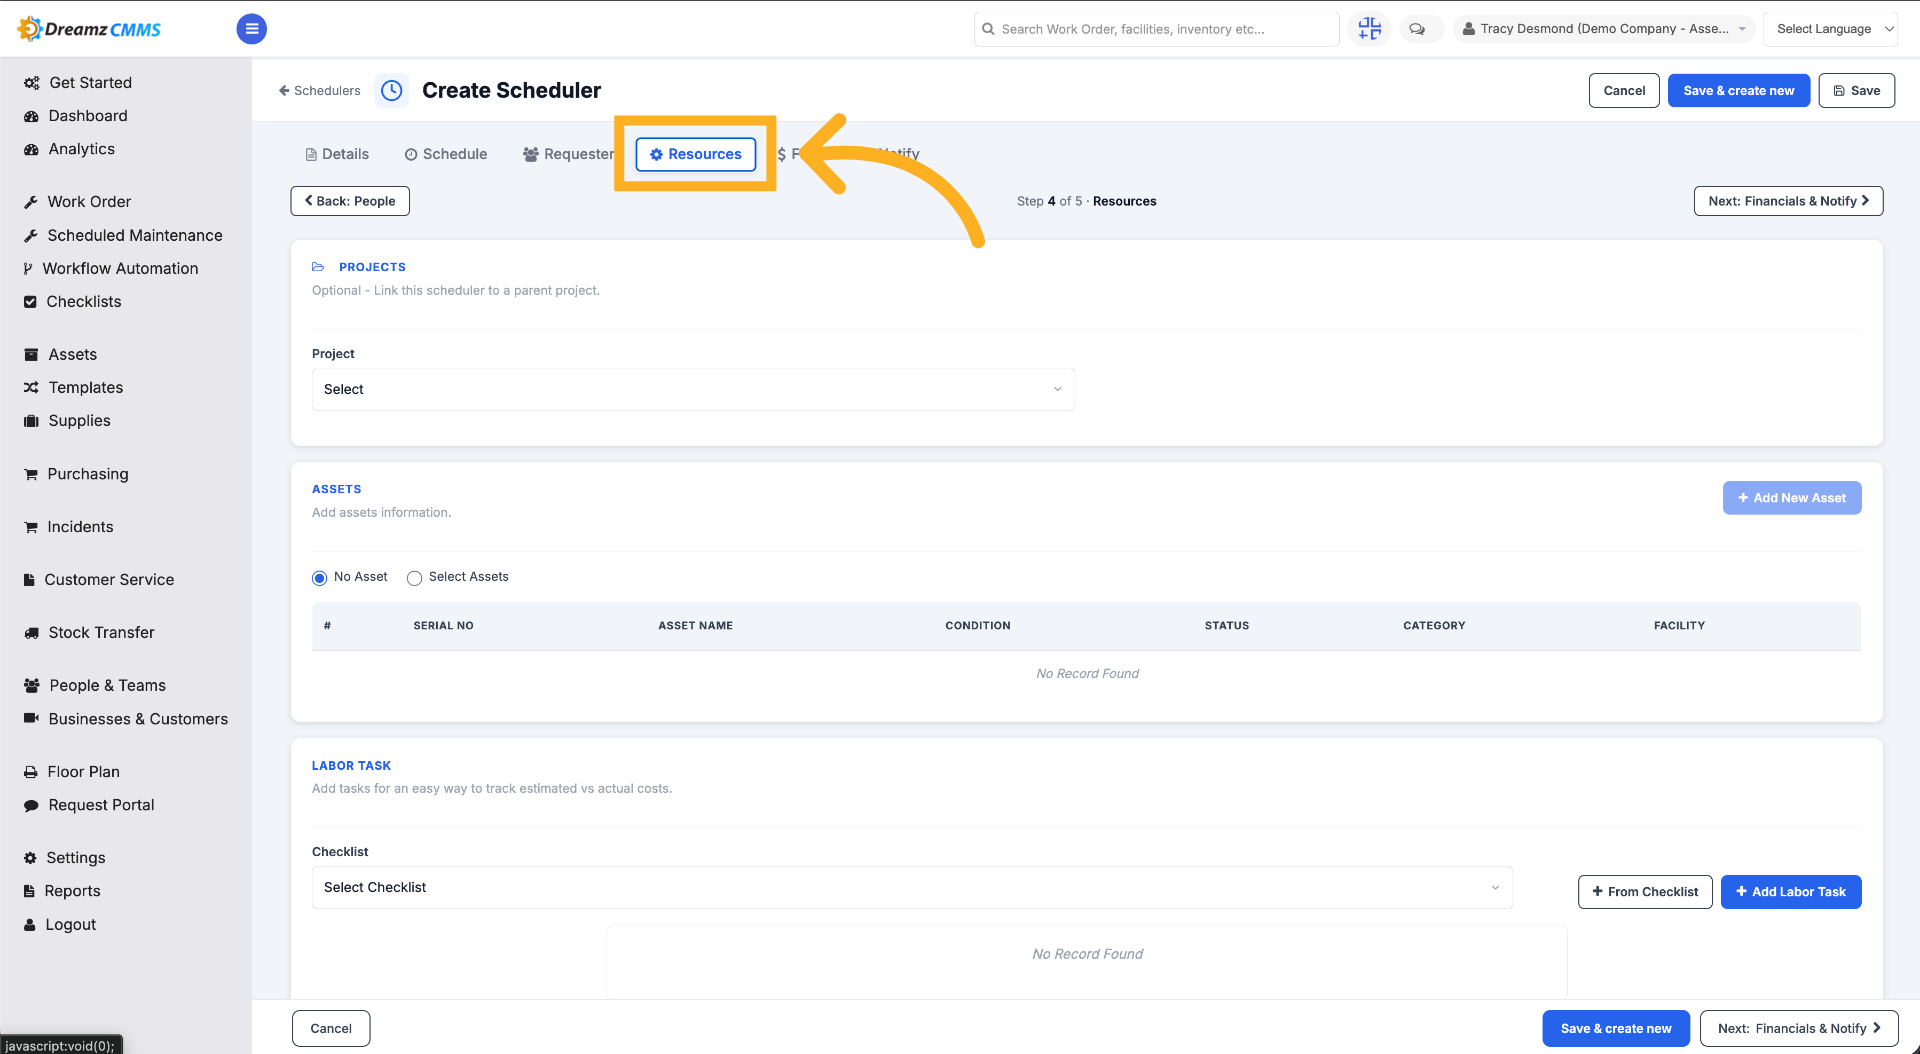
Step 2 – Open Projects Link
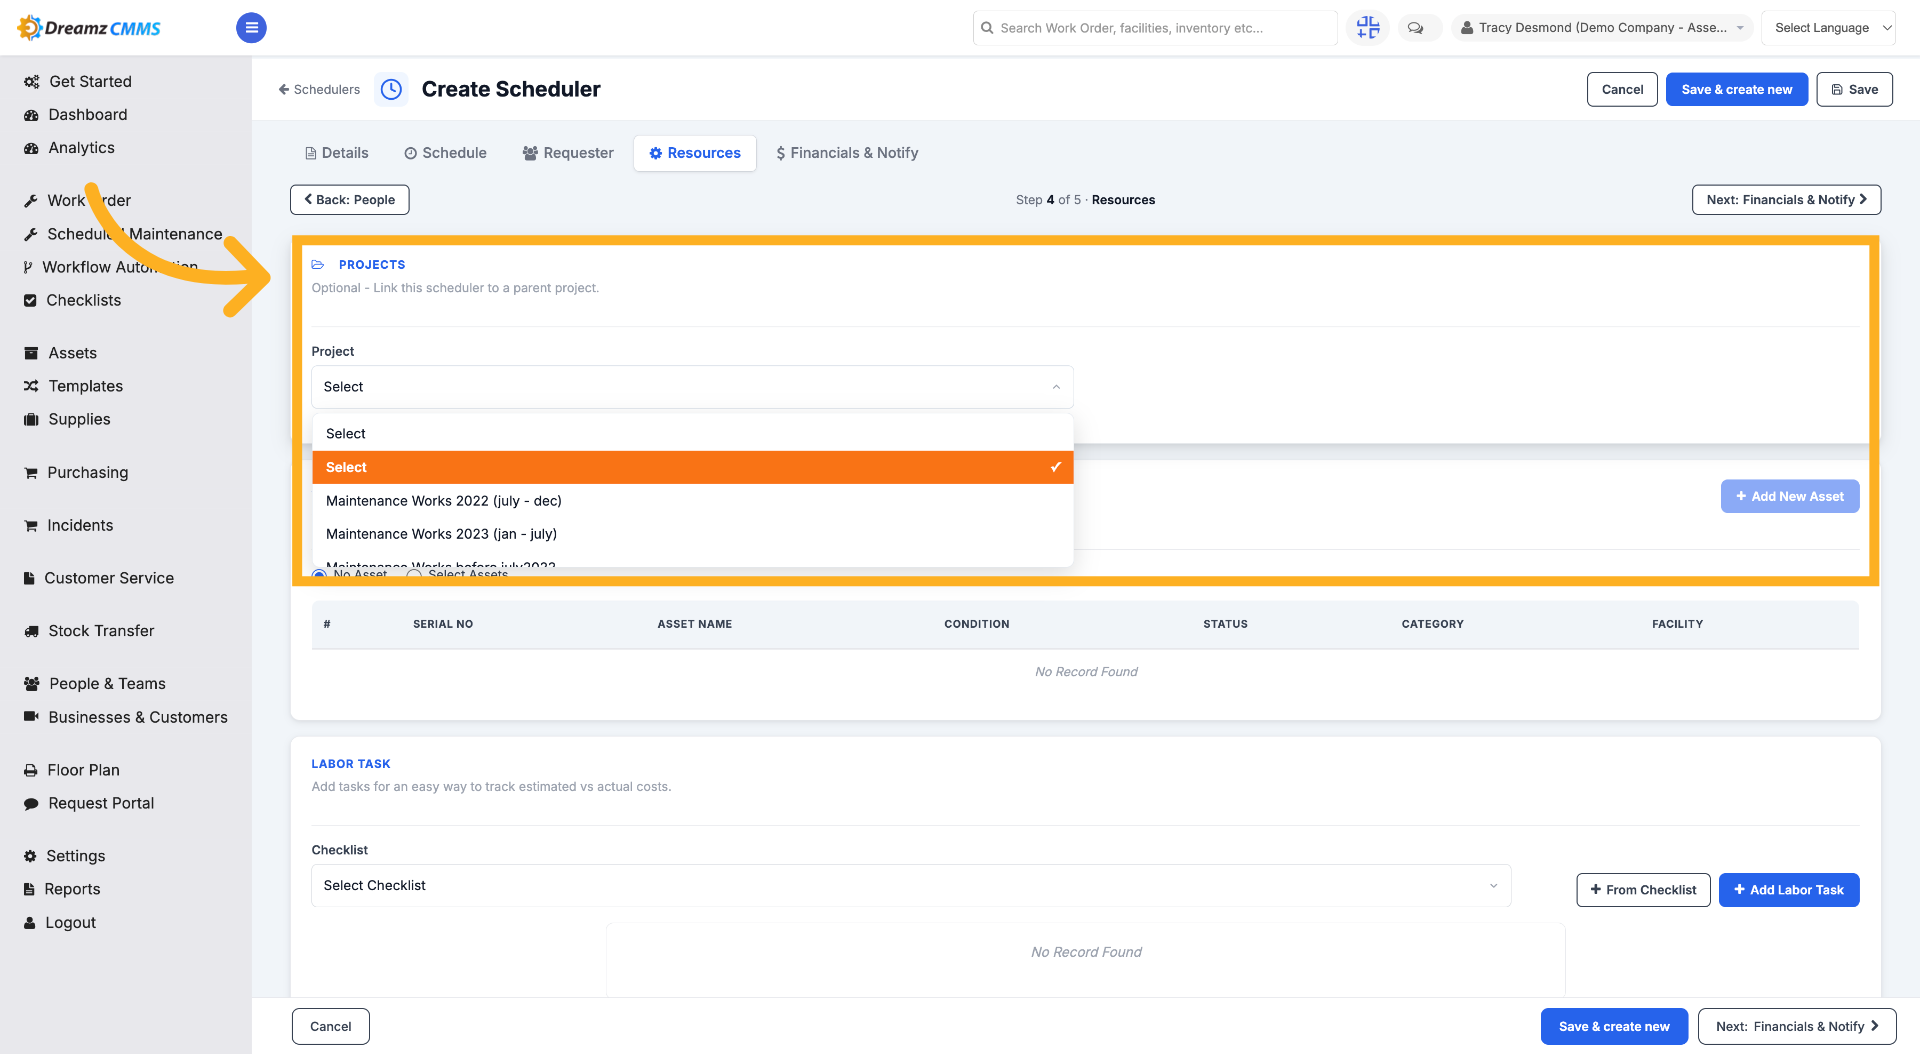
You can map projects to the scheduler. Click "PROJECTS" to link this scheduler to a project.
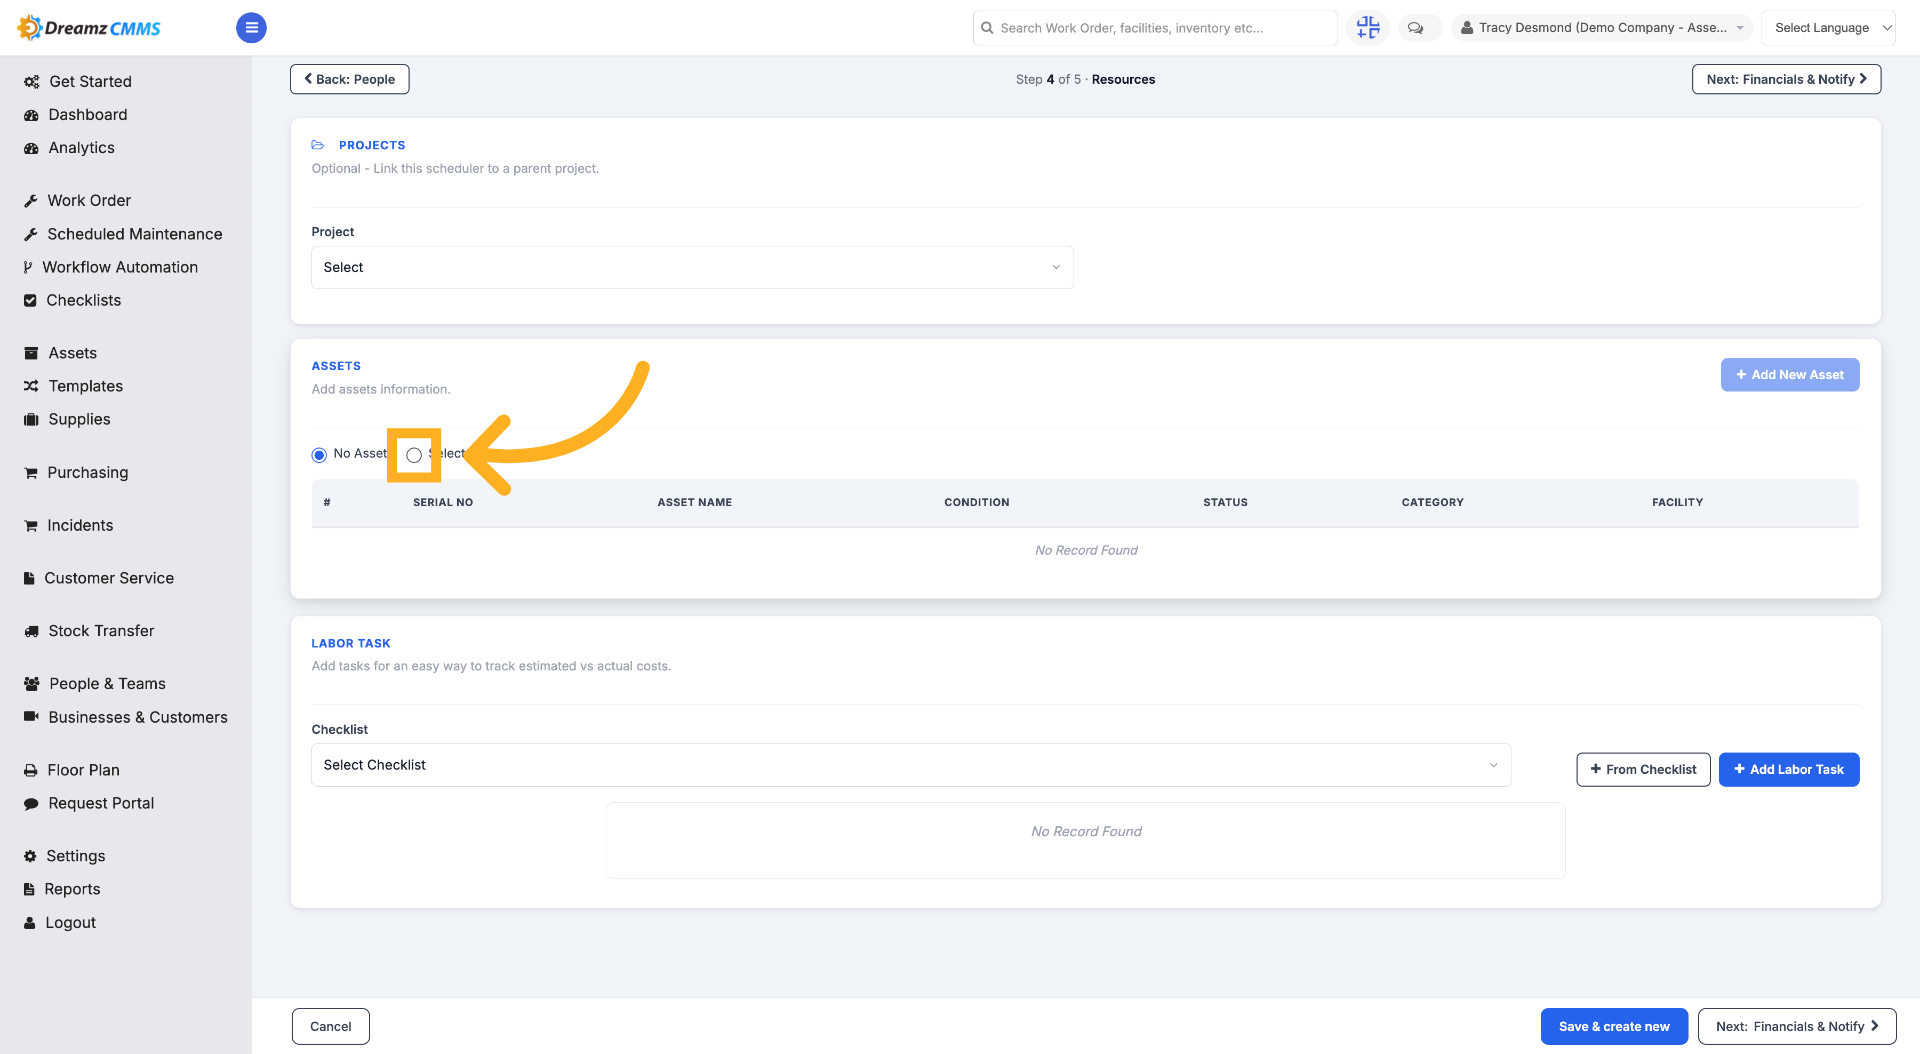
Step 3 – Select Assets
Click "Select Assets" to choose assets related to the scheduler.
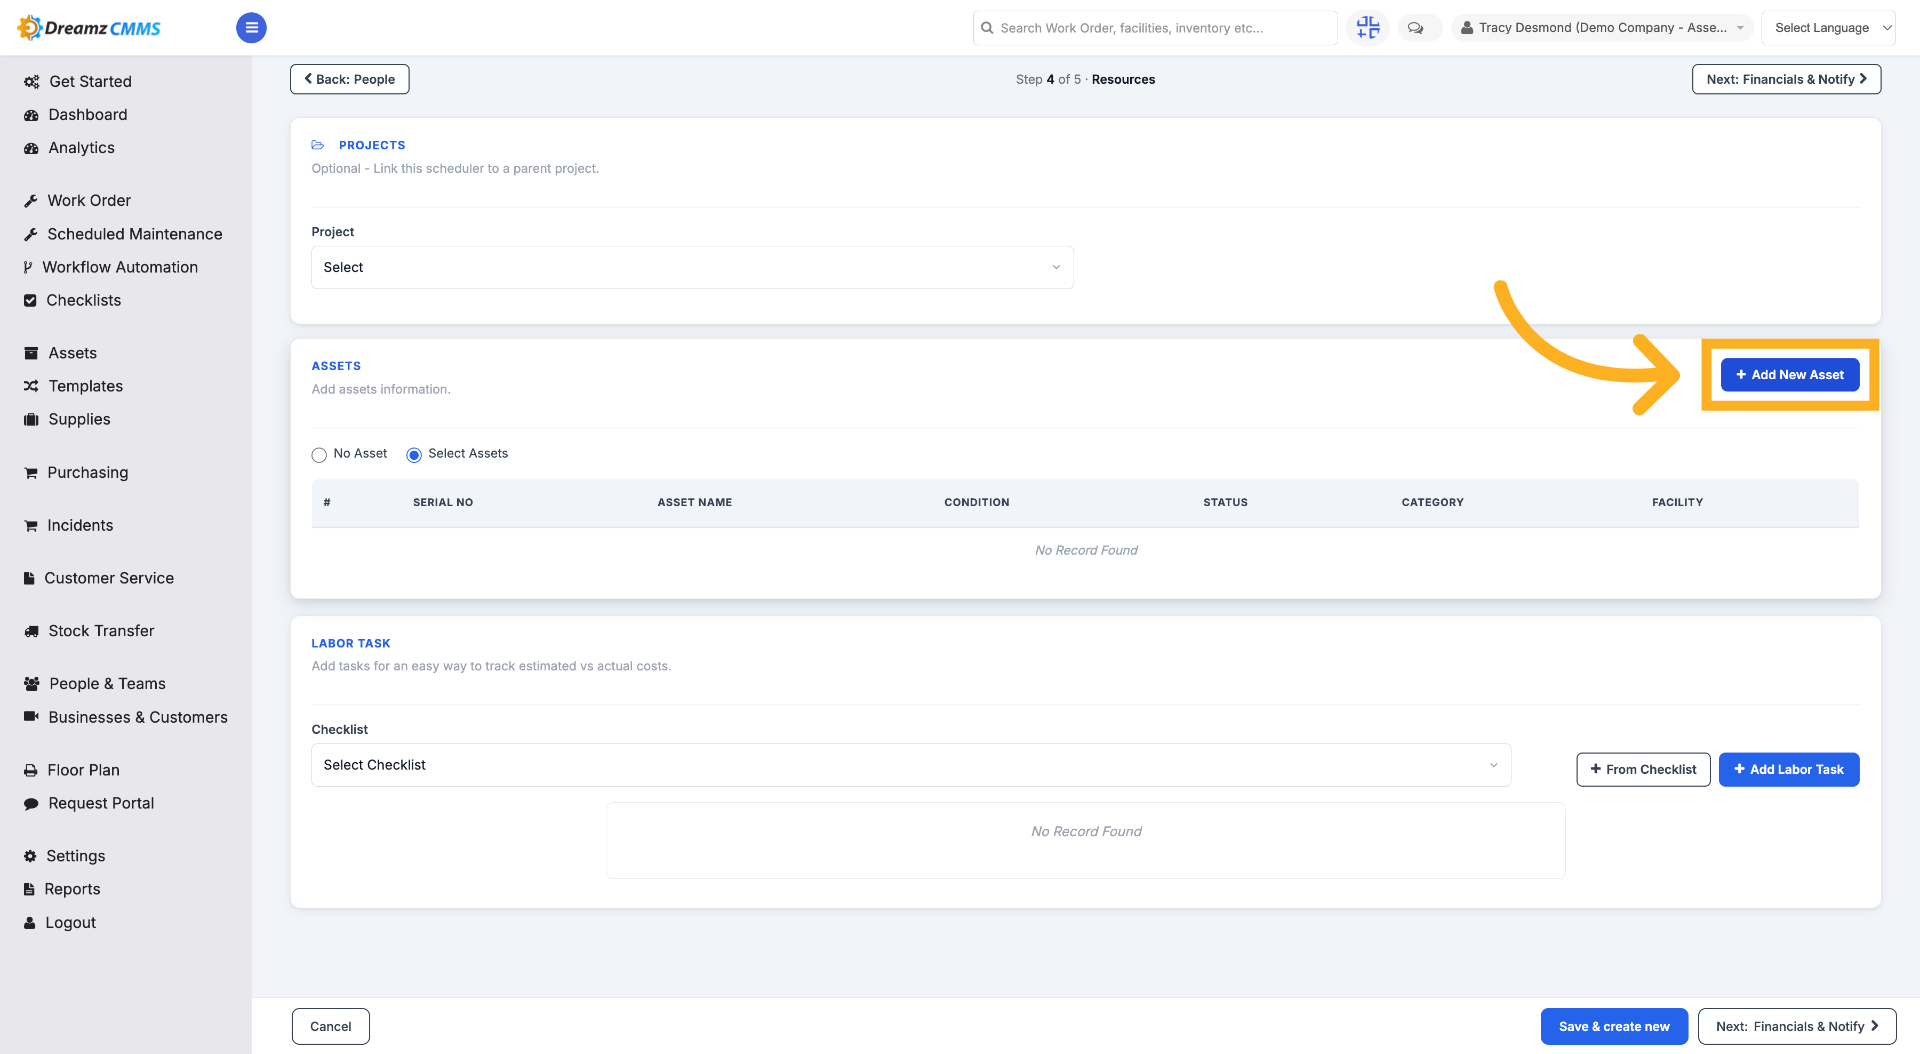
Step 4 – Add New Asset
Click "Add New Asset" to create a new asset entry.
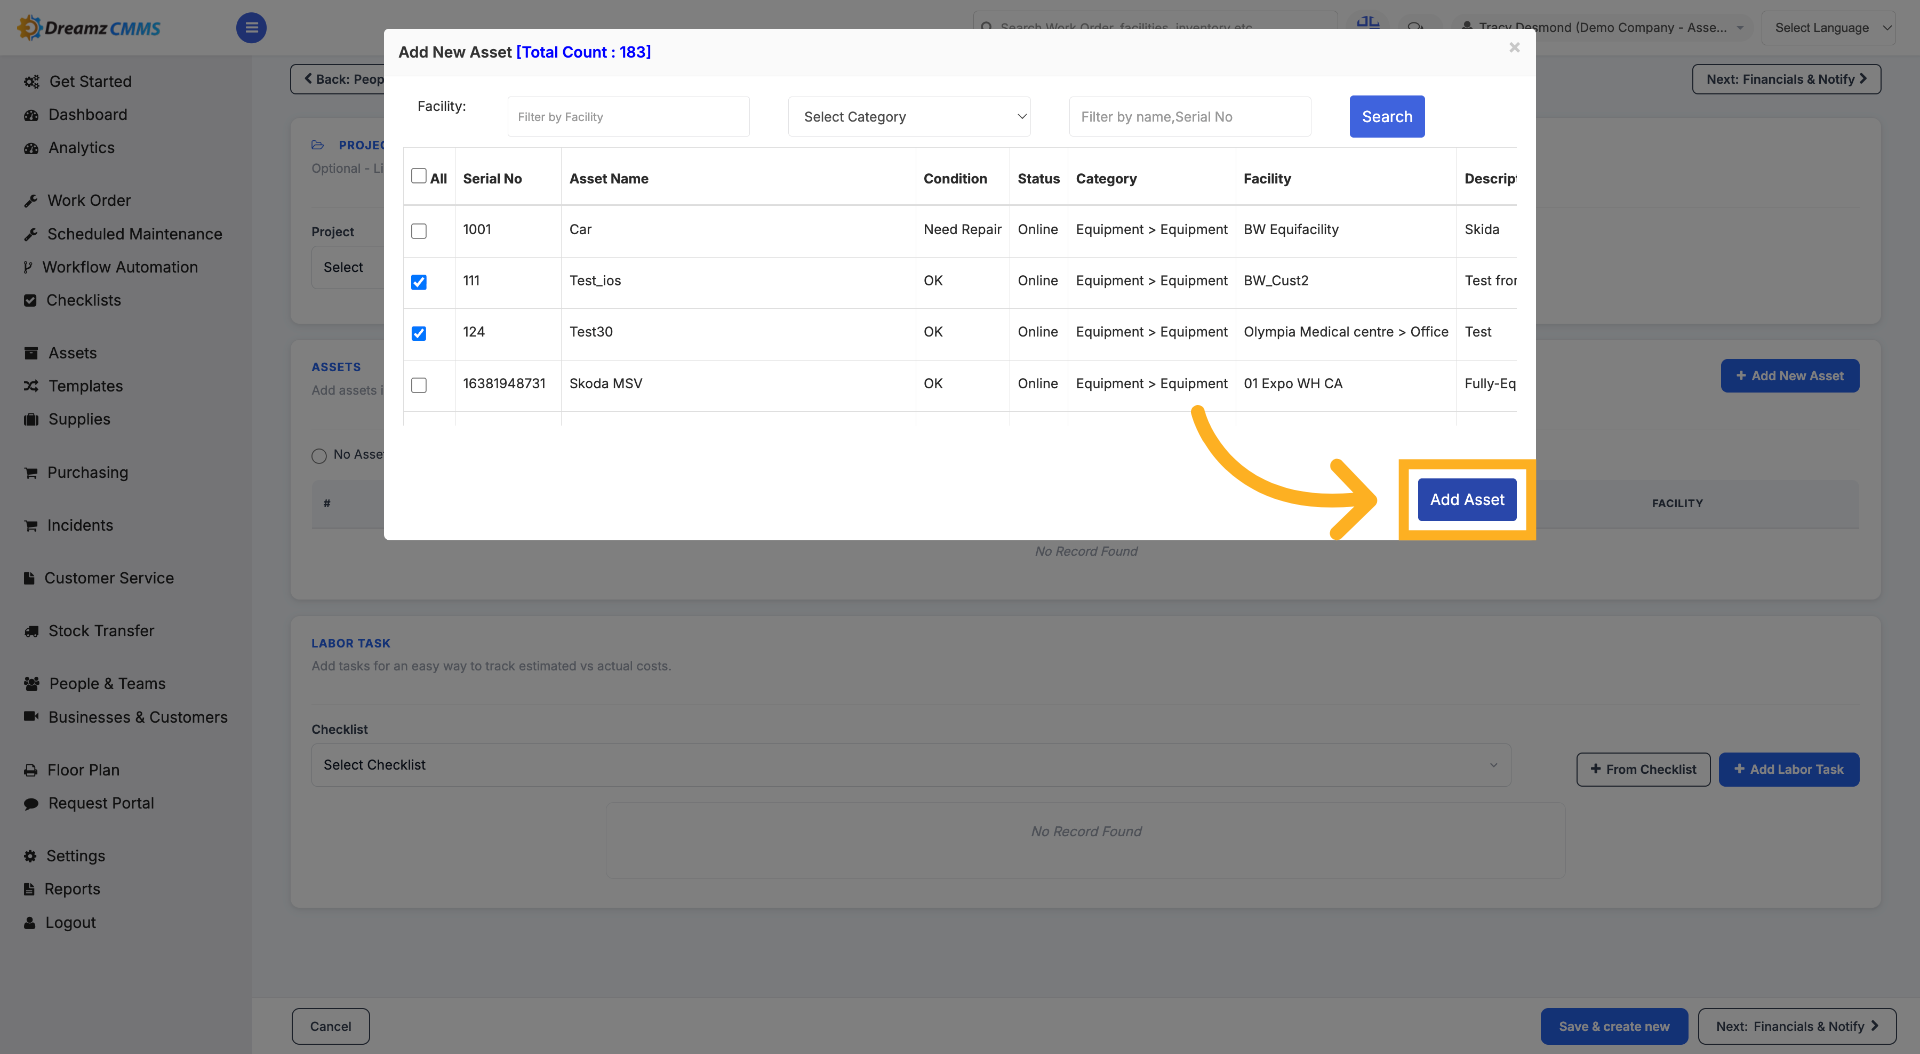
Step 5 – Map Assets to the Scheduler
You can map multiple assets to the scheduler.
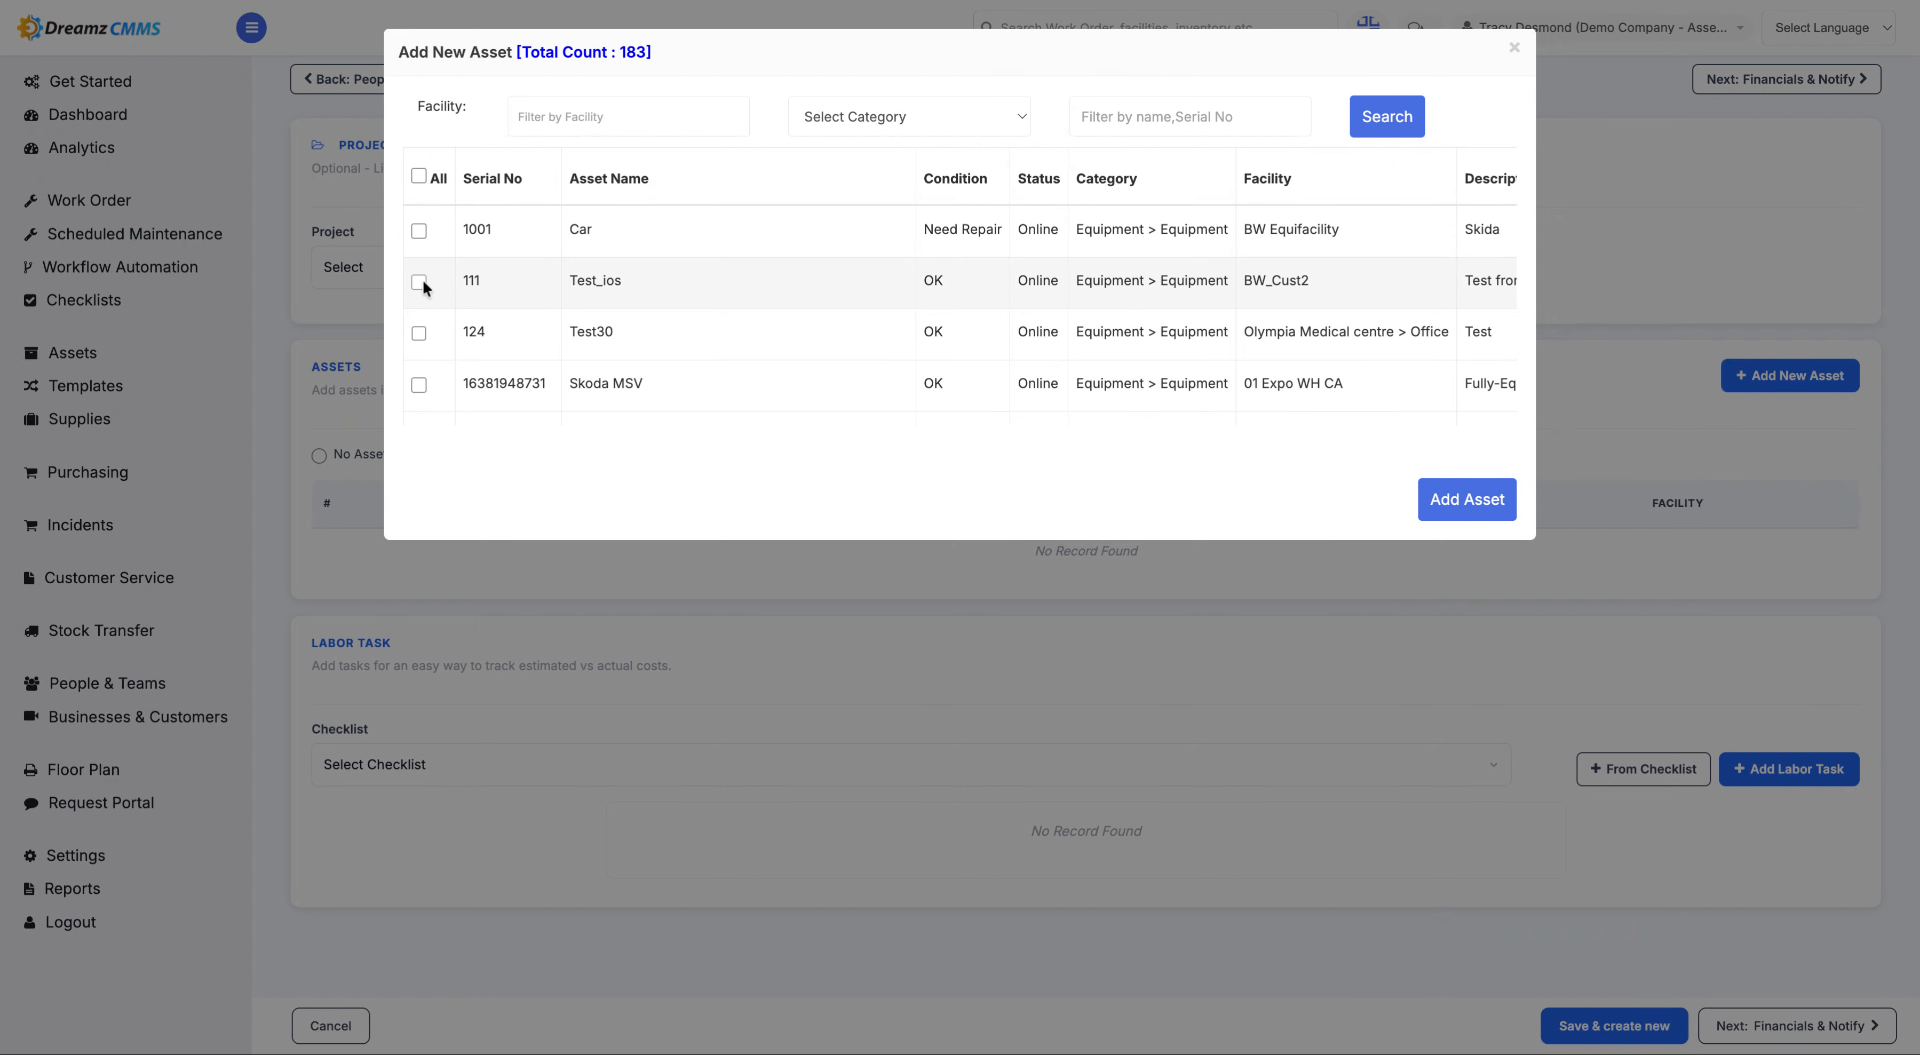
Step 6 – Confirm Asset Addition
Click "Add Asset" to include the selected assets in the scheduler.
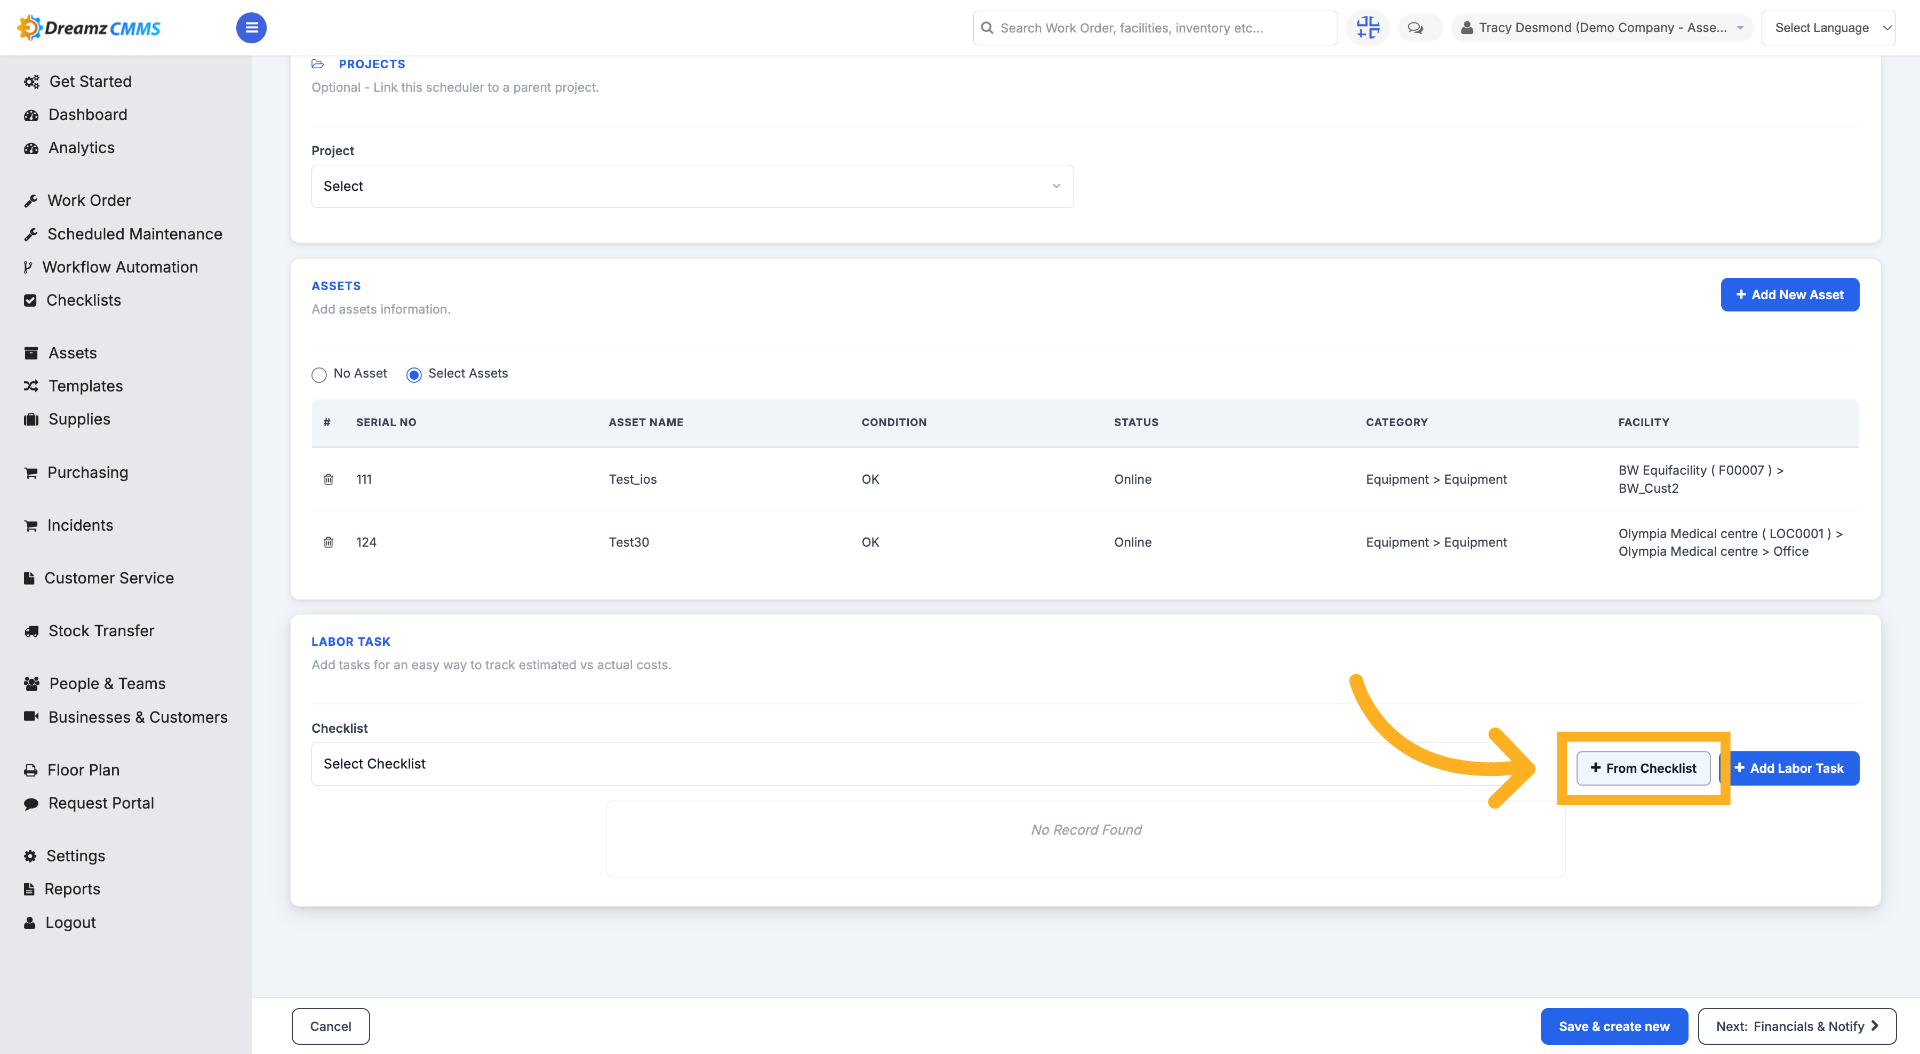
Step 7 – Choose From Checklist
Click "From Checklist" to select tasks from an existing checklist.
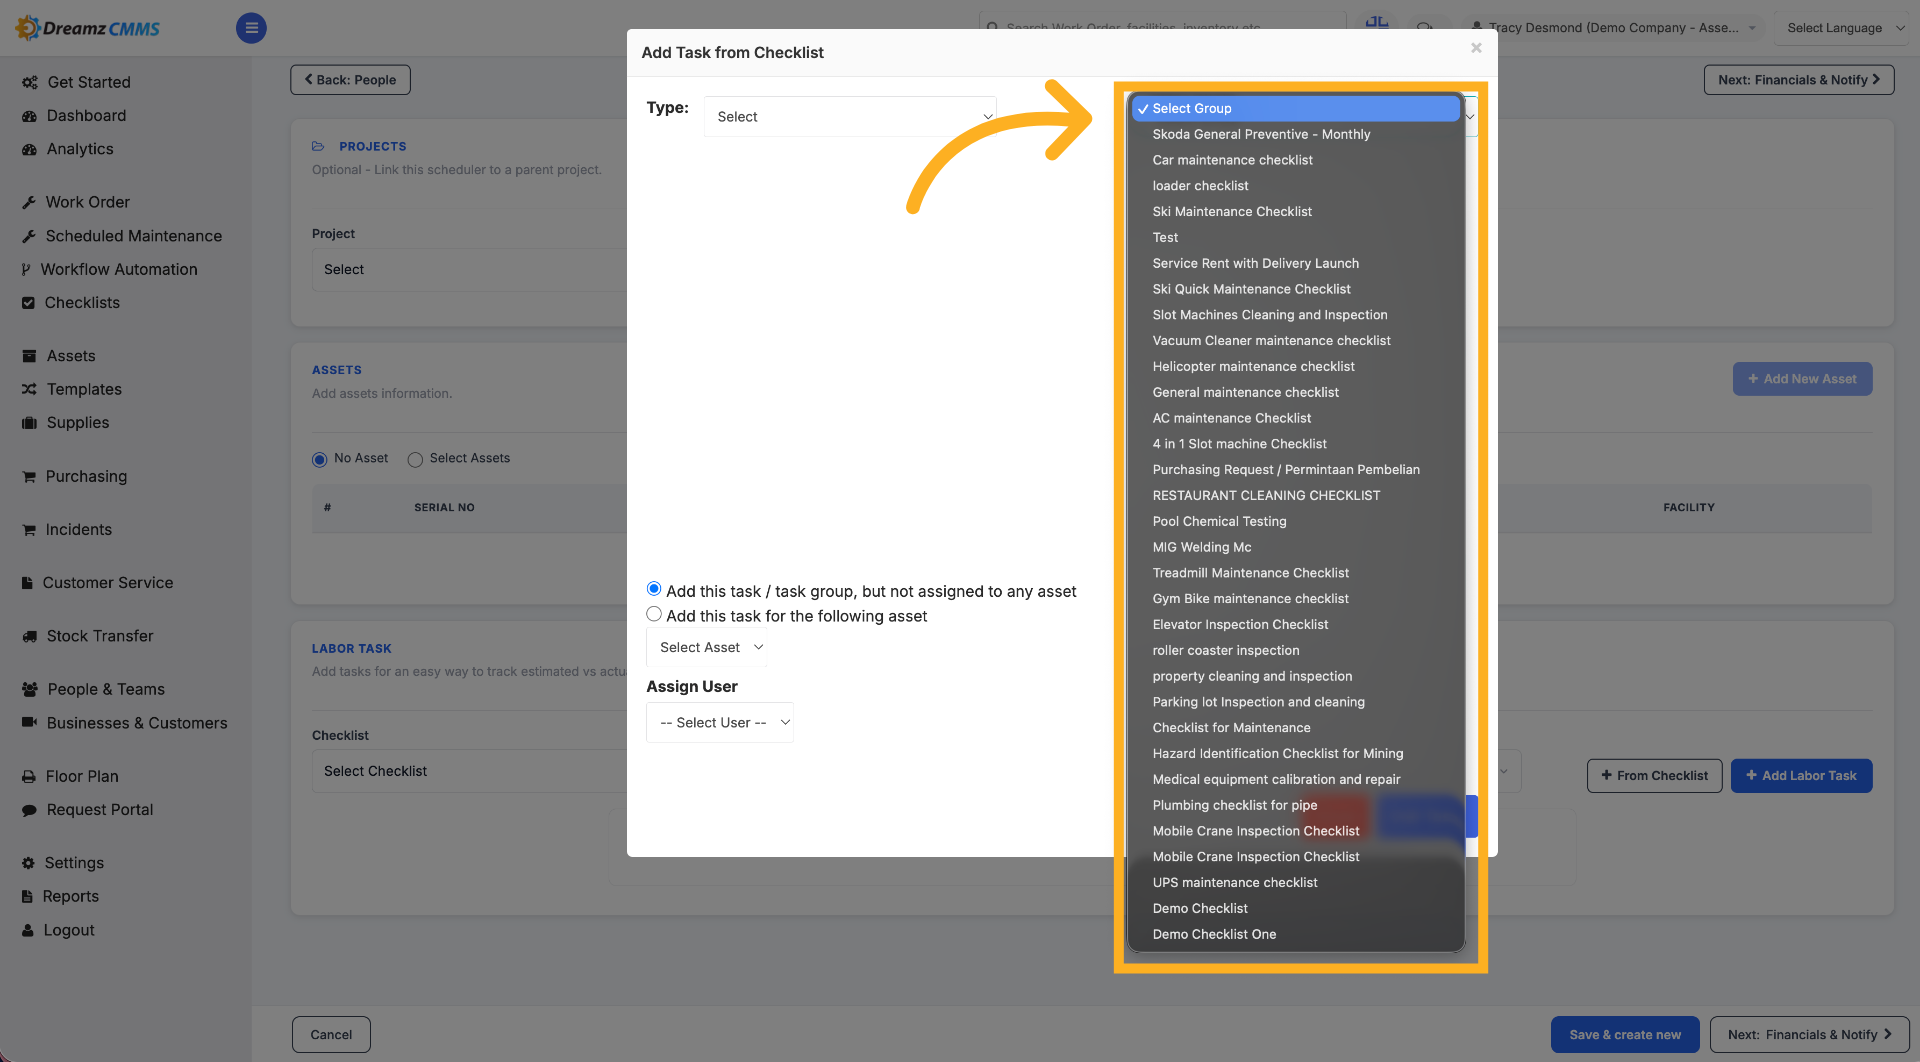
Step 8 – Select the Desired Checklist
Select from the list of checklists to choose your desired checklist and add it to the scheduler.
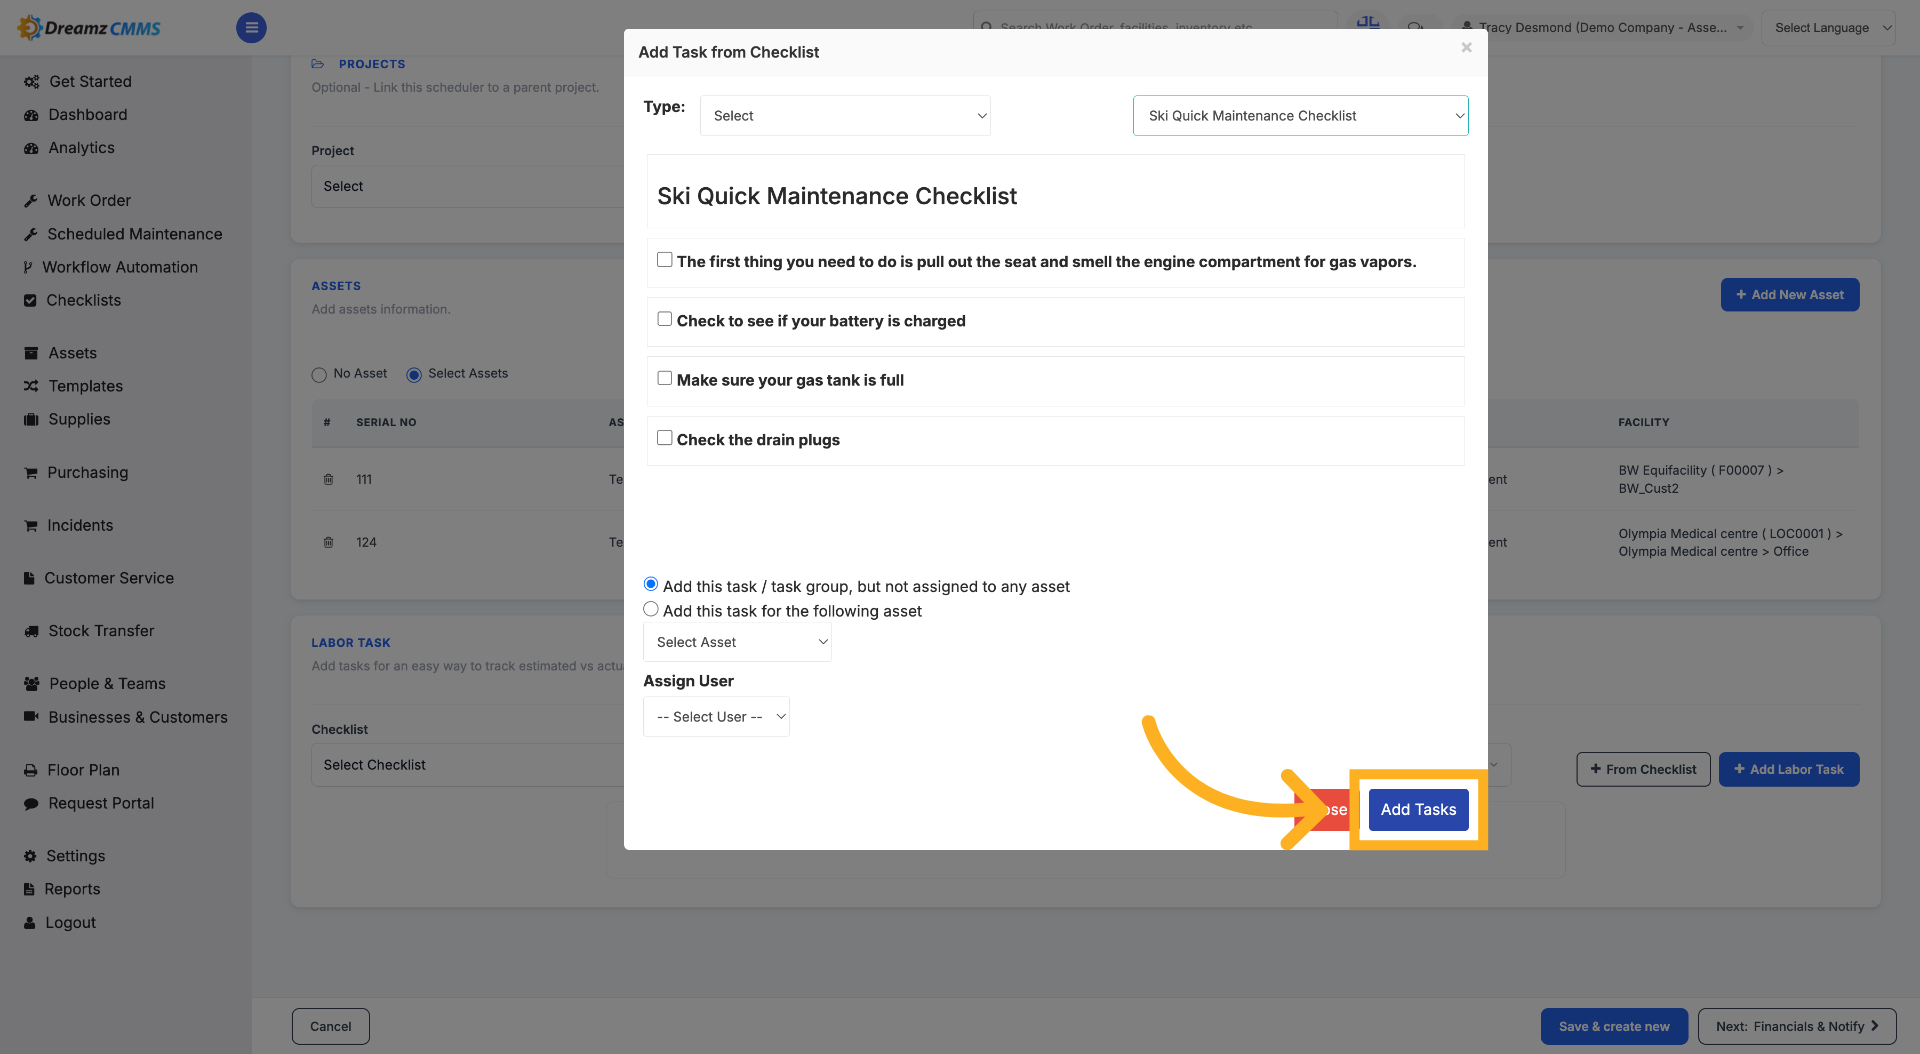
Step 9 – Add Tasks to Scheduler
Click "Add Tasks" to include the selected tasks in the scheduler.
How to Finalize and Save a Scheduler
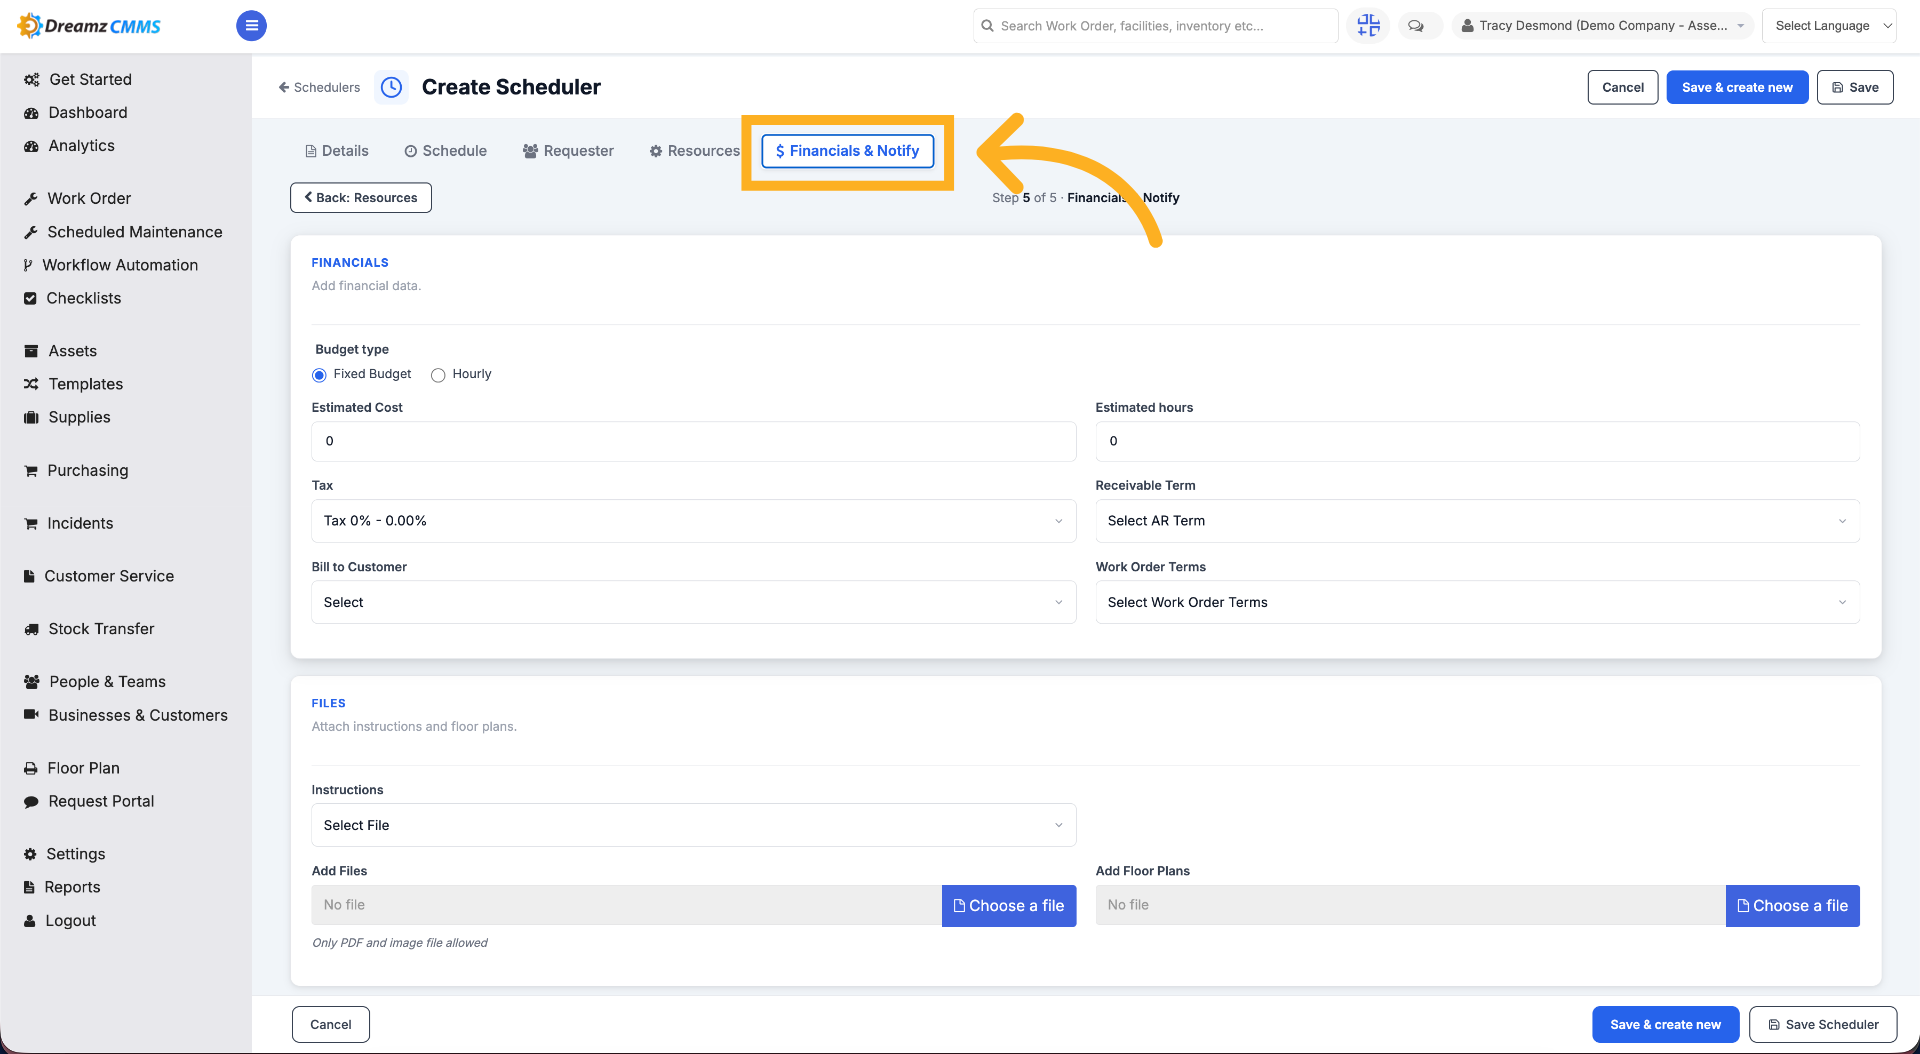
Step 1 – Access Financials and Notifications
Click "Financials & Notify" to manage budget and notification settings. Here you can manage budget information, upload any required files, and manage notification settings for the schedule.
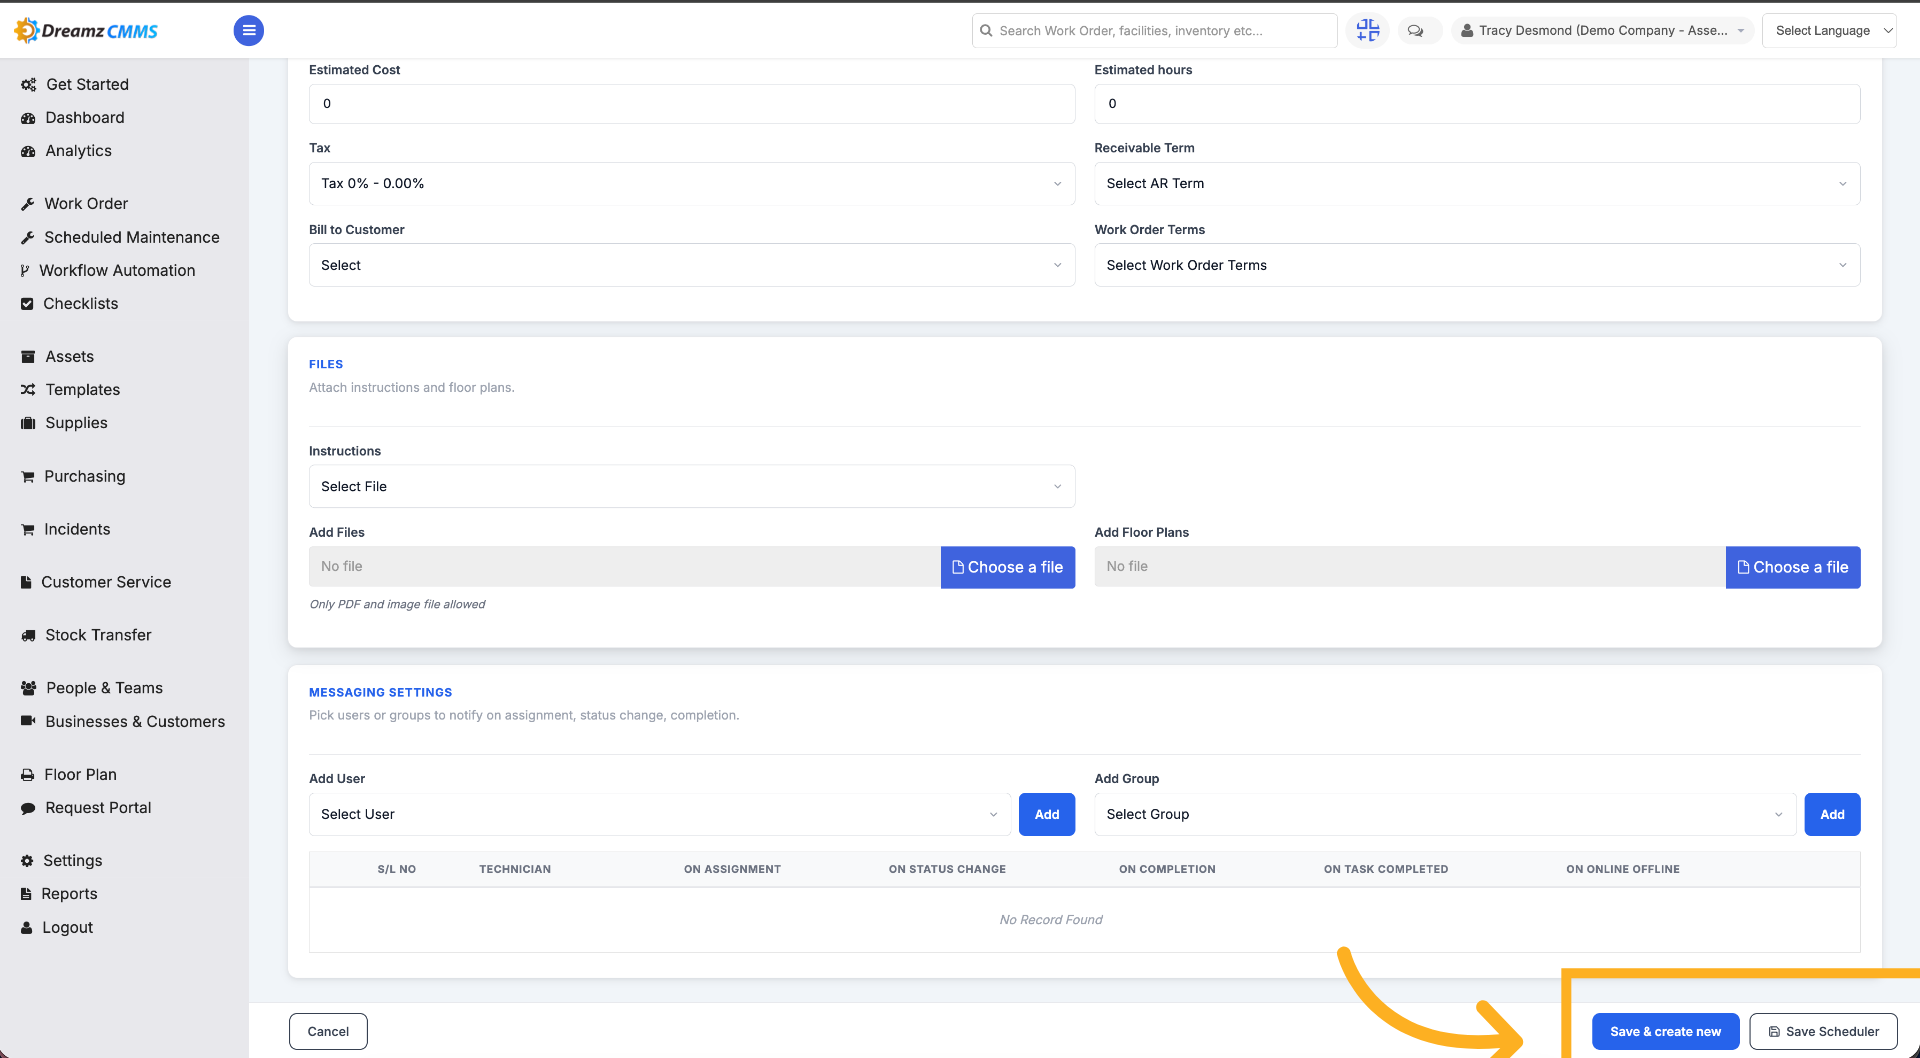
Step 2 – Click Save Scheduler
Once all the information is filled in, click Save Scheduler to save the schedule.
How to View and Filter the Scheduler List
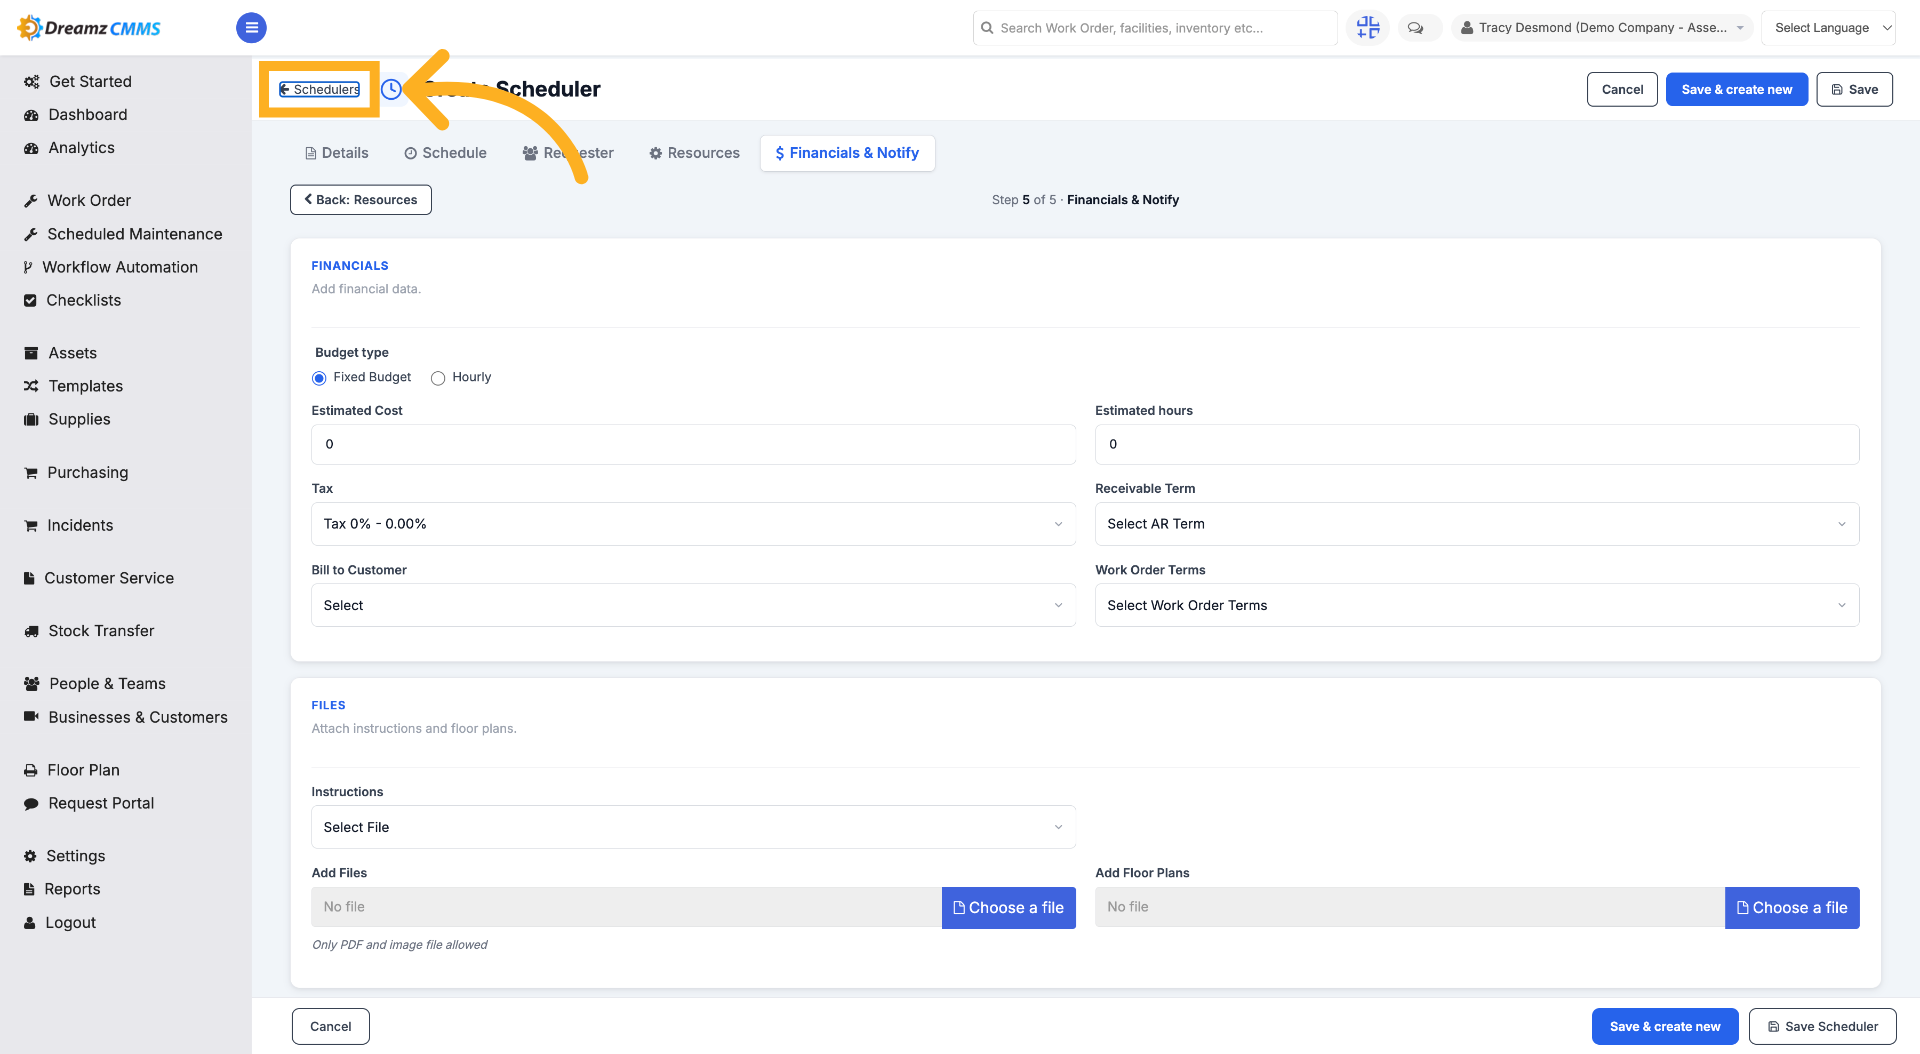
Step 1 – Open Schedulers List
Click the "Schedulers" breadcrumb to view all existing schedulers.
Step 2 – Filter Scheduler List
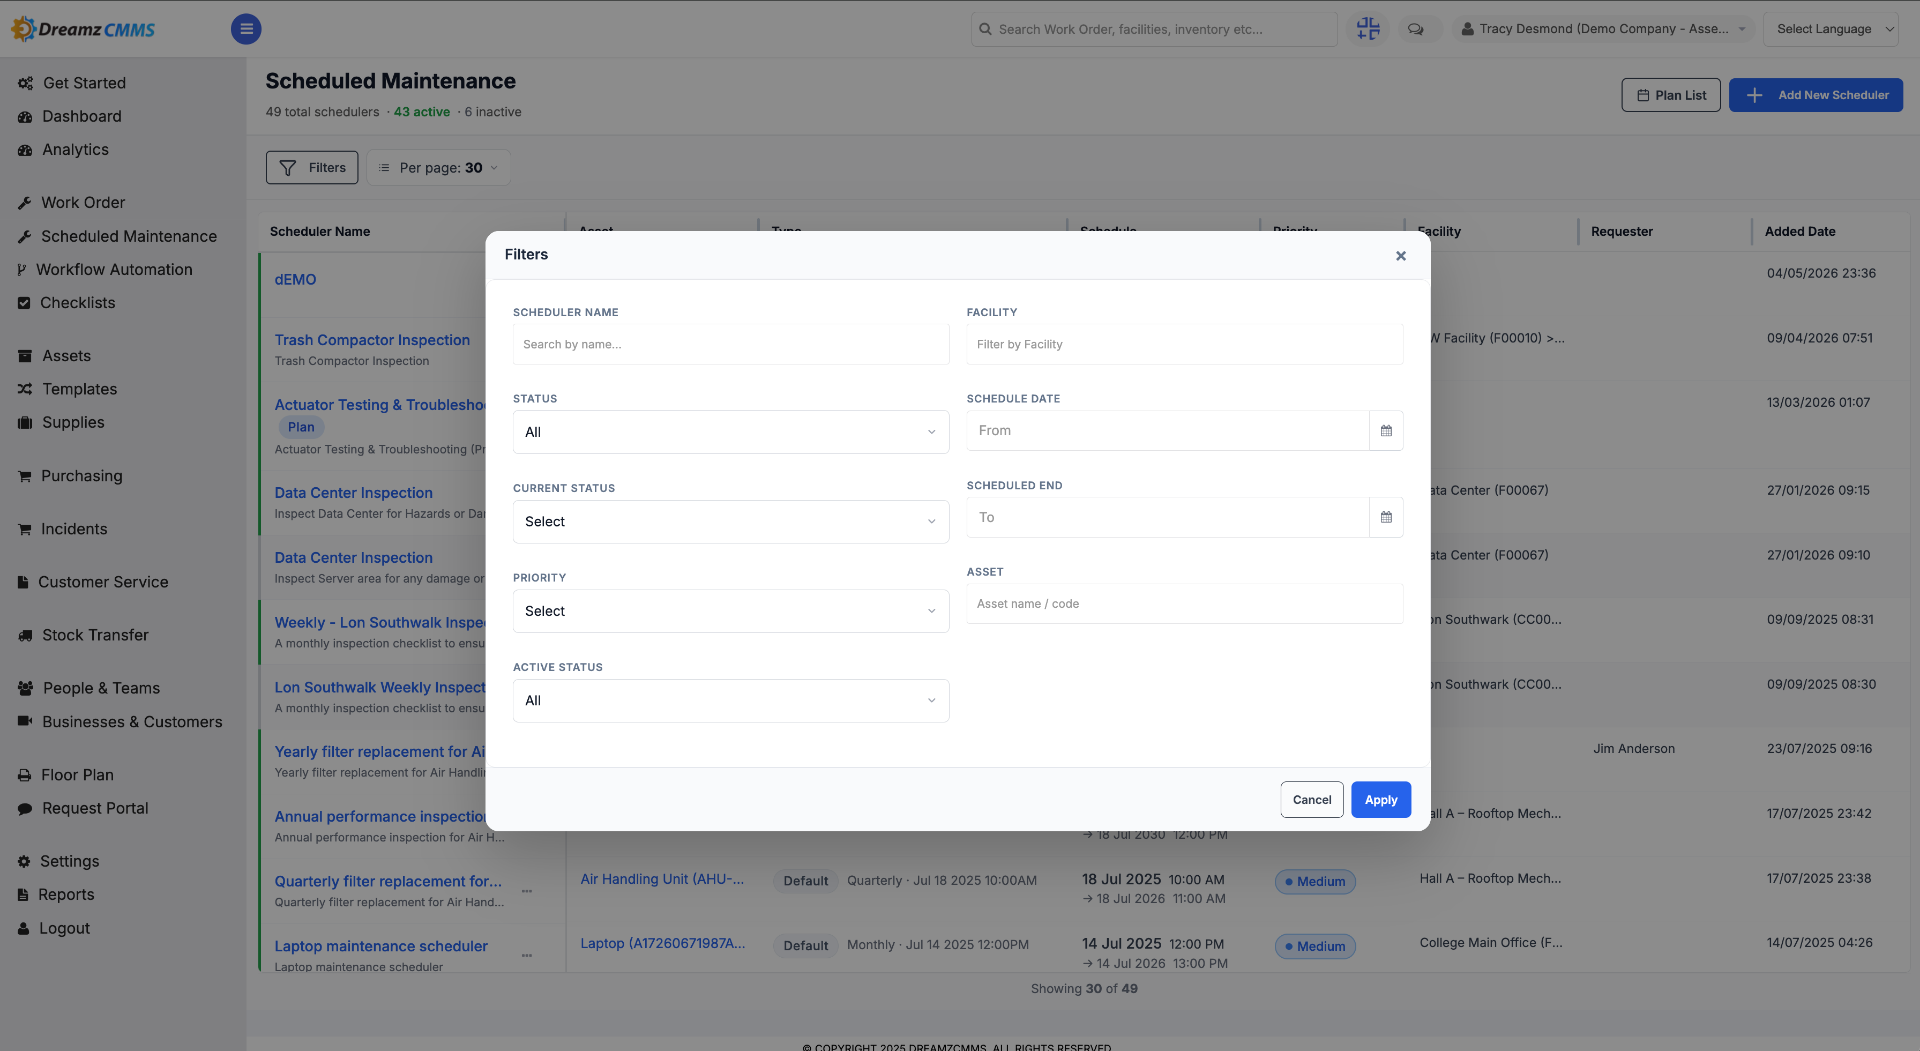
Click Filters to filter the scheduler list.
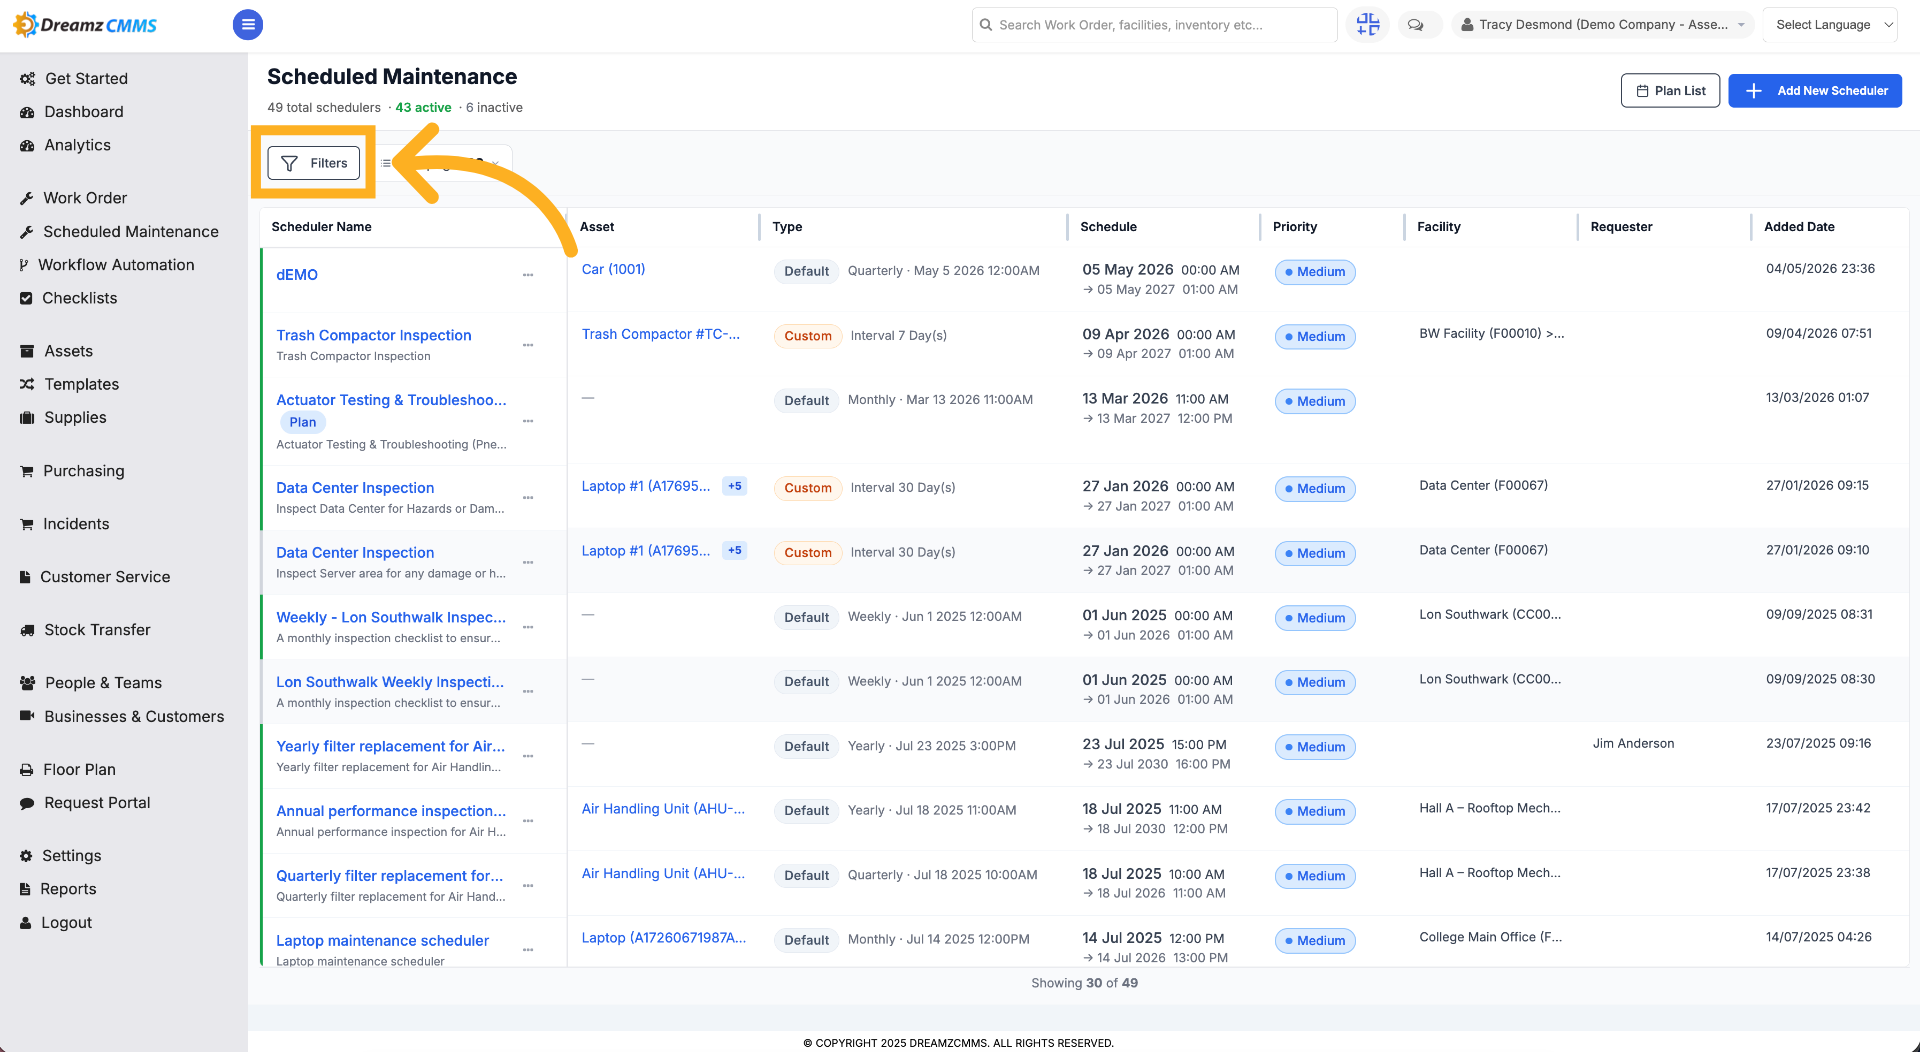
Step 3 – Set Filter Options
You can filter based on parameters such as scheduler name, facility, page size, and asset, then click Apply to see the filtered results.
How to View and Manage Plans
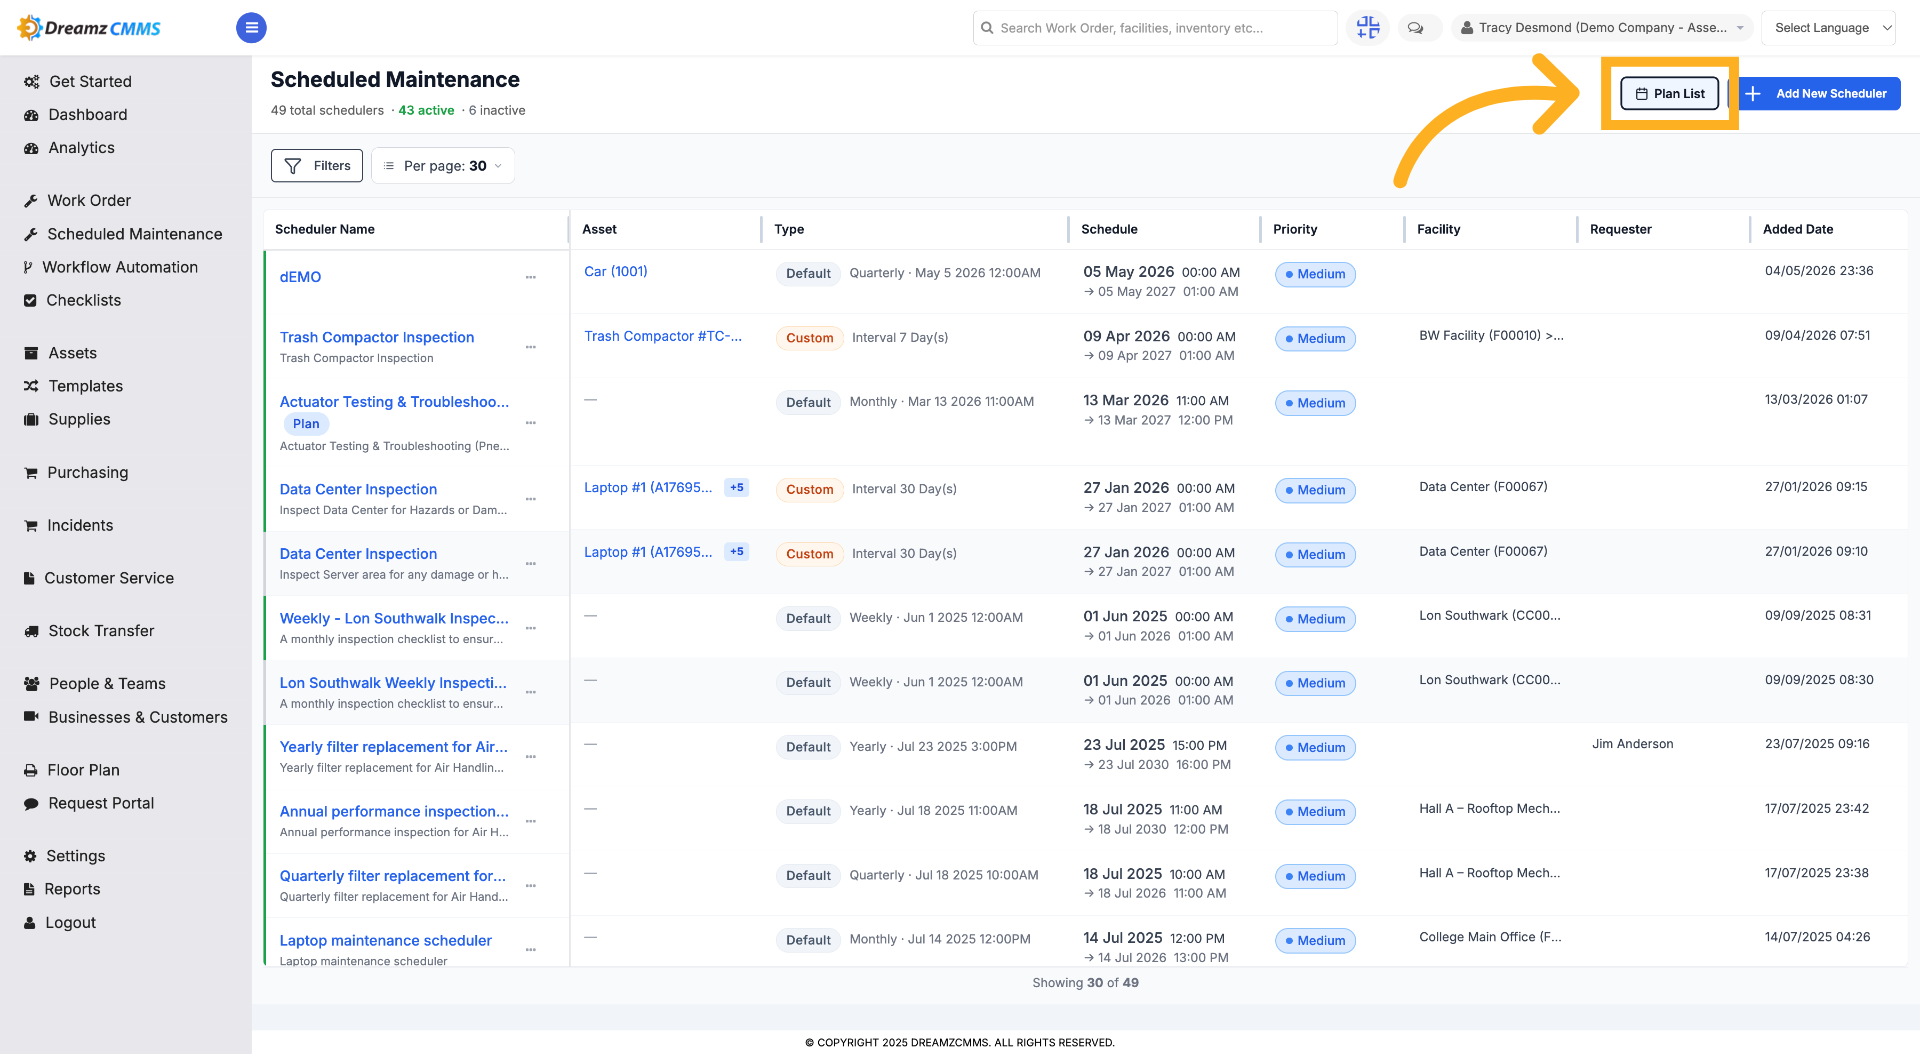
Step 1 – Access Plan List
Click "Plan List" to see the list of scheduled plans.
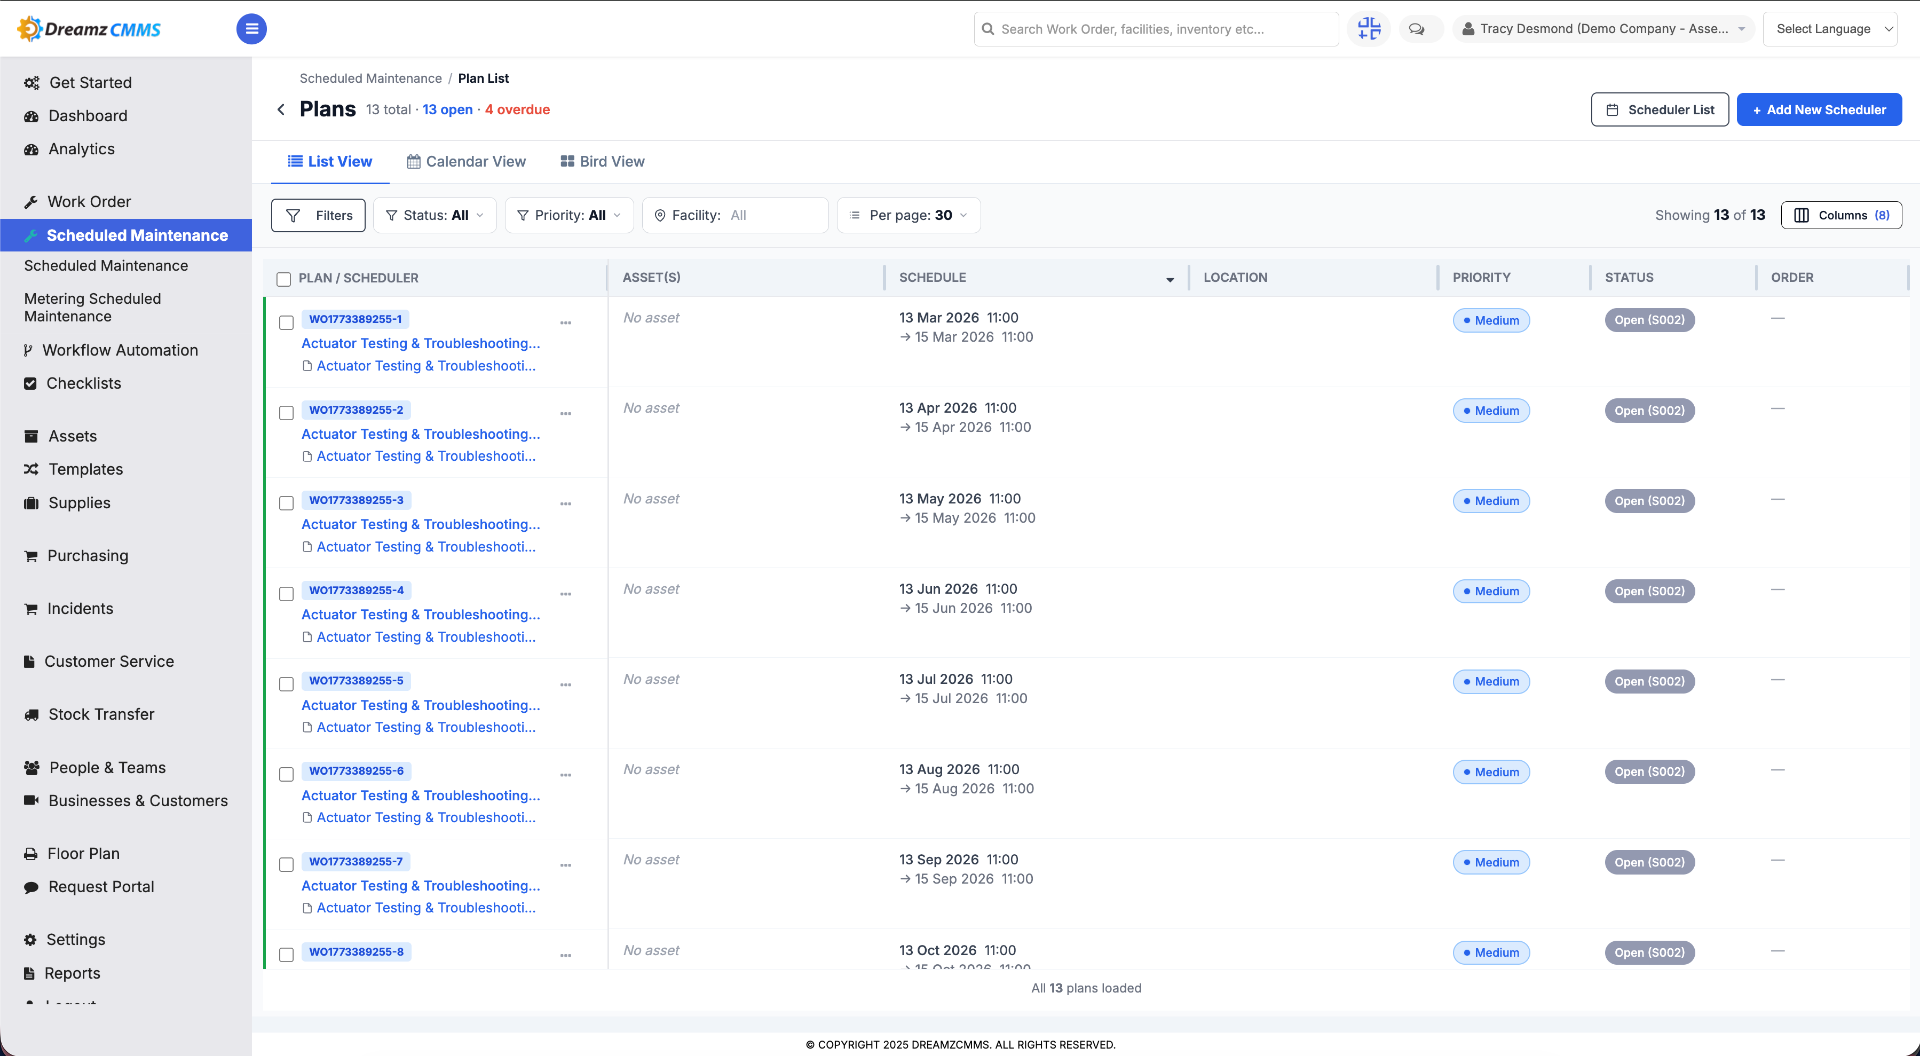
Step 2 – View the Plan List
Clicking "Plan List" redirects you to a page showing all your plans. The Plan List has three views: List, Calendar, and Bird View.
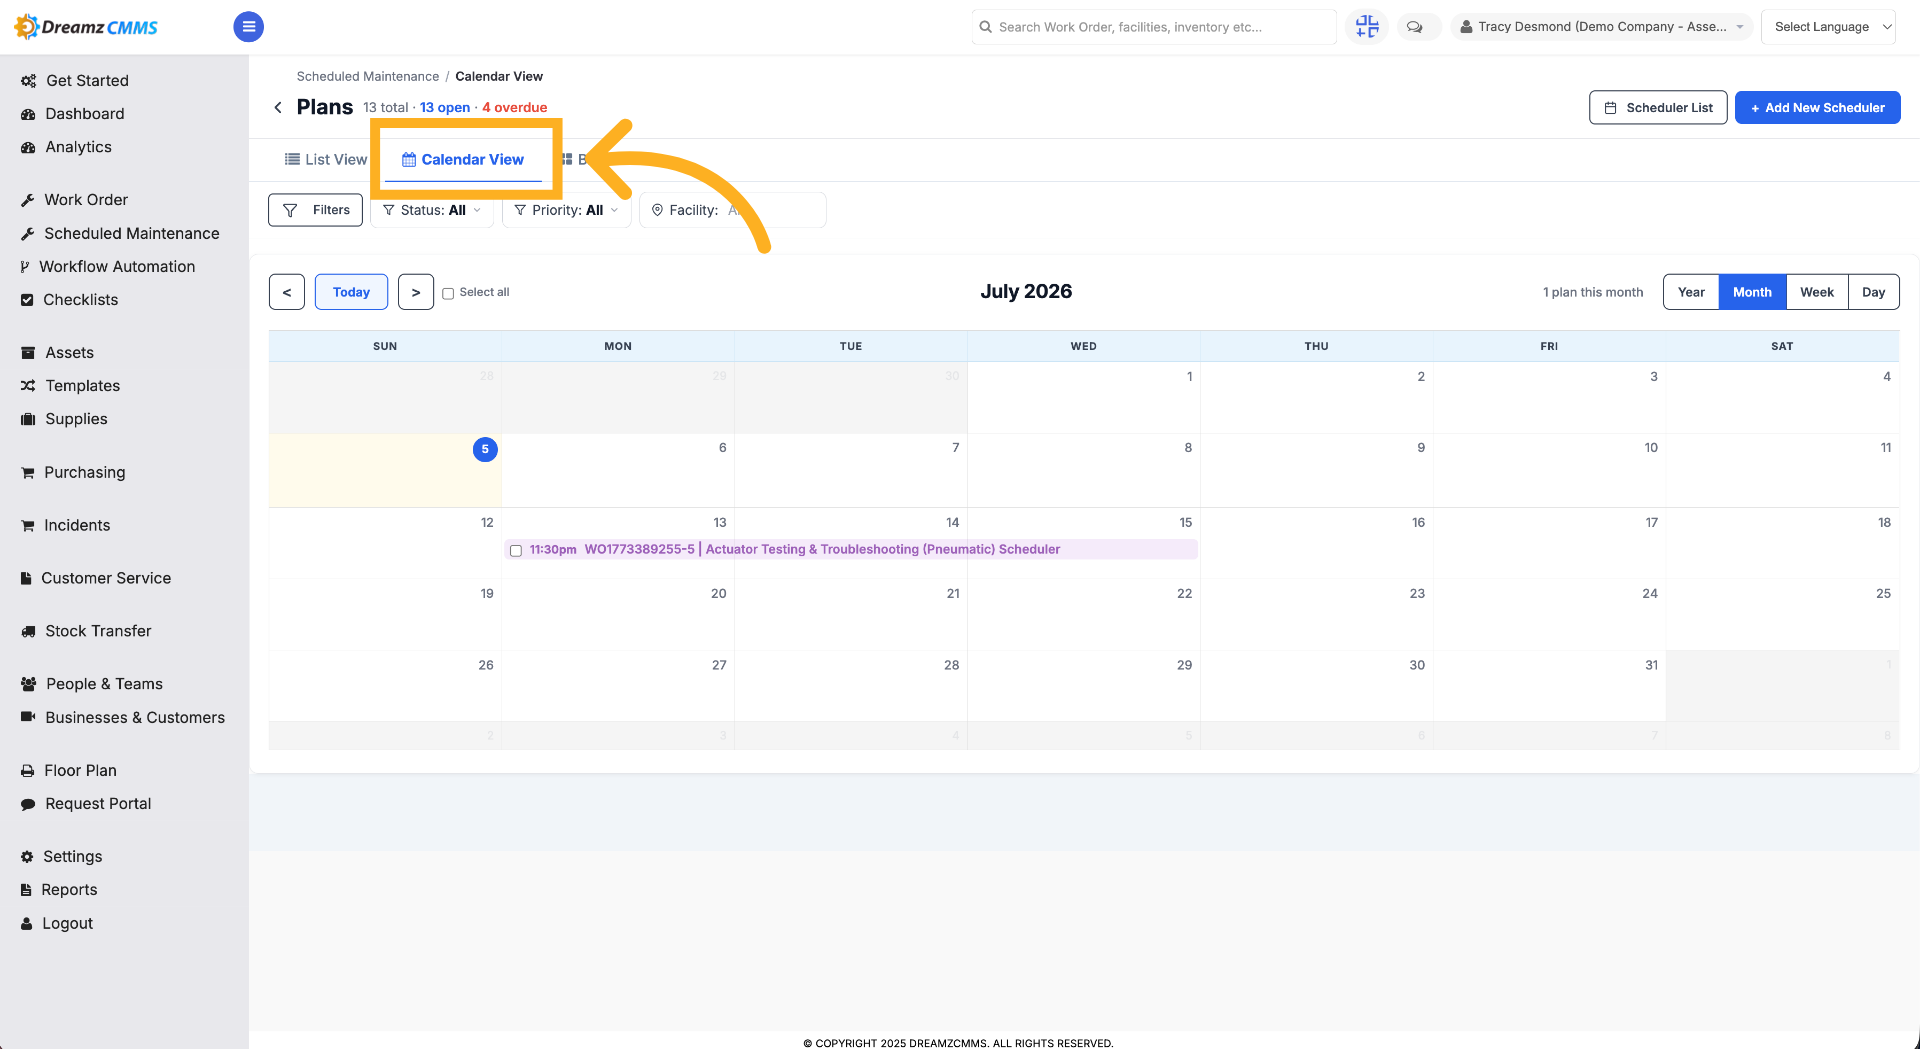
Step 3 – Switch to Calendar View
Click "Calendar View" to visualize plans on a calendar.
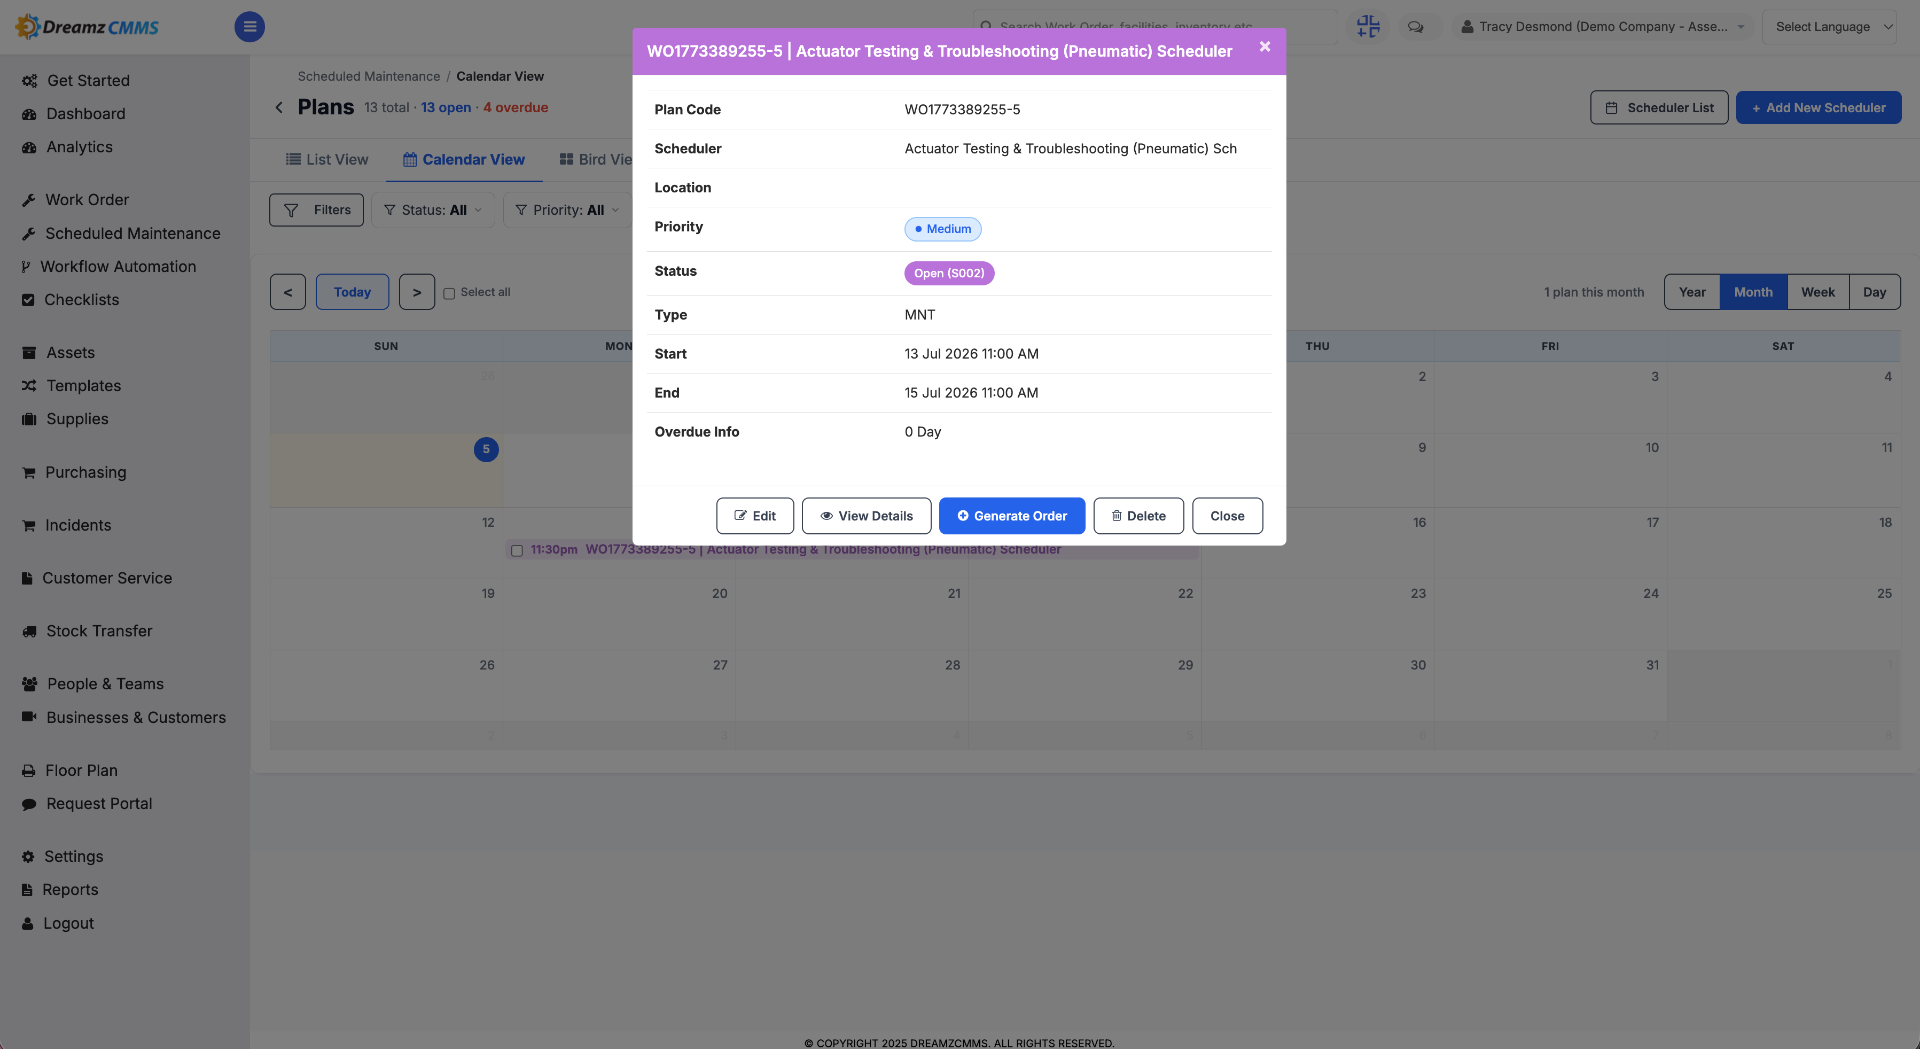
Step 4 – View Plan Details in the Calendar View
Click on a plan in the calendar to view its details.
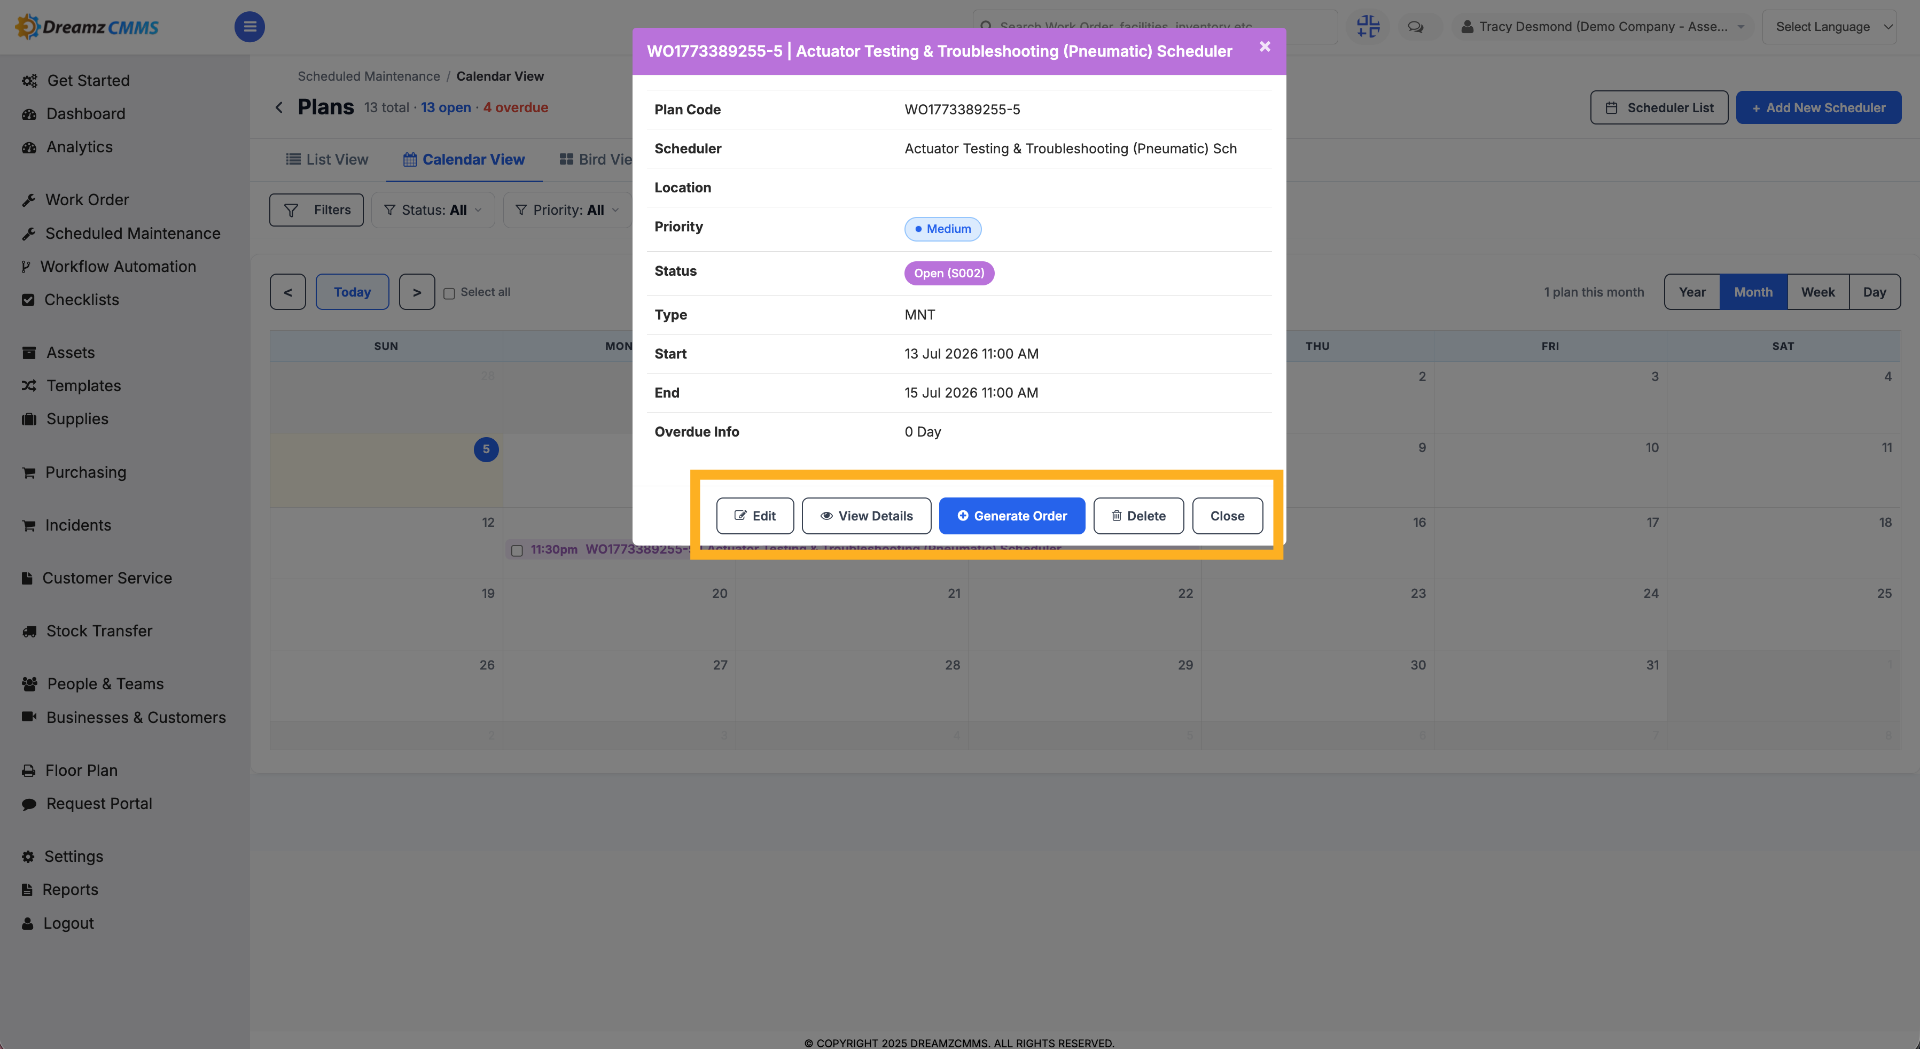
Step 5 – Perform Actions in Calendar View
From the plan details in calendar view, you can edit, view the details, generate work orders, or delete the plan.
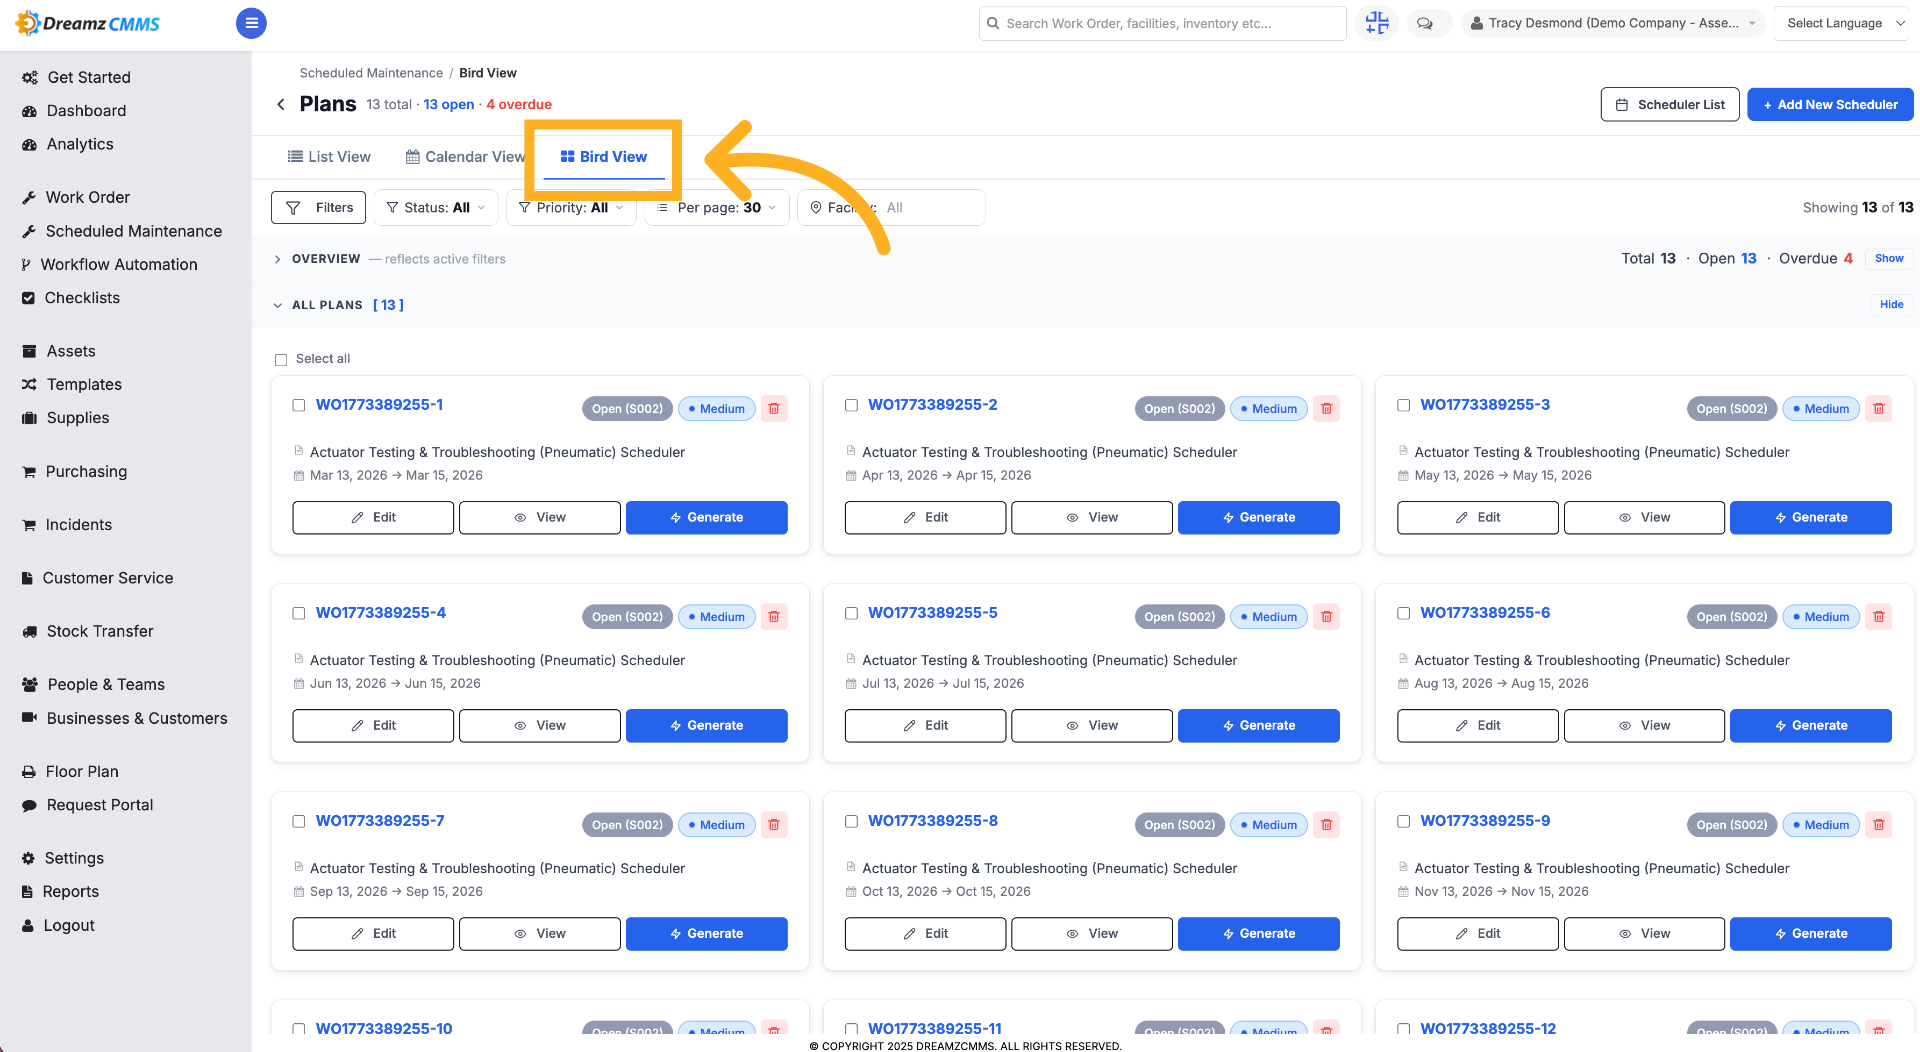
Step 6 – Switch to Bird View
Click "Bird View" to see an overview of schedules in a bird's-eye format.
Step 7 – Use the Toggle View Option
Click on any plan to edit, view, or generate a work order from here.
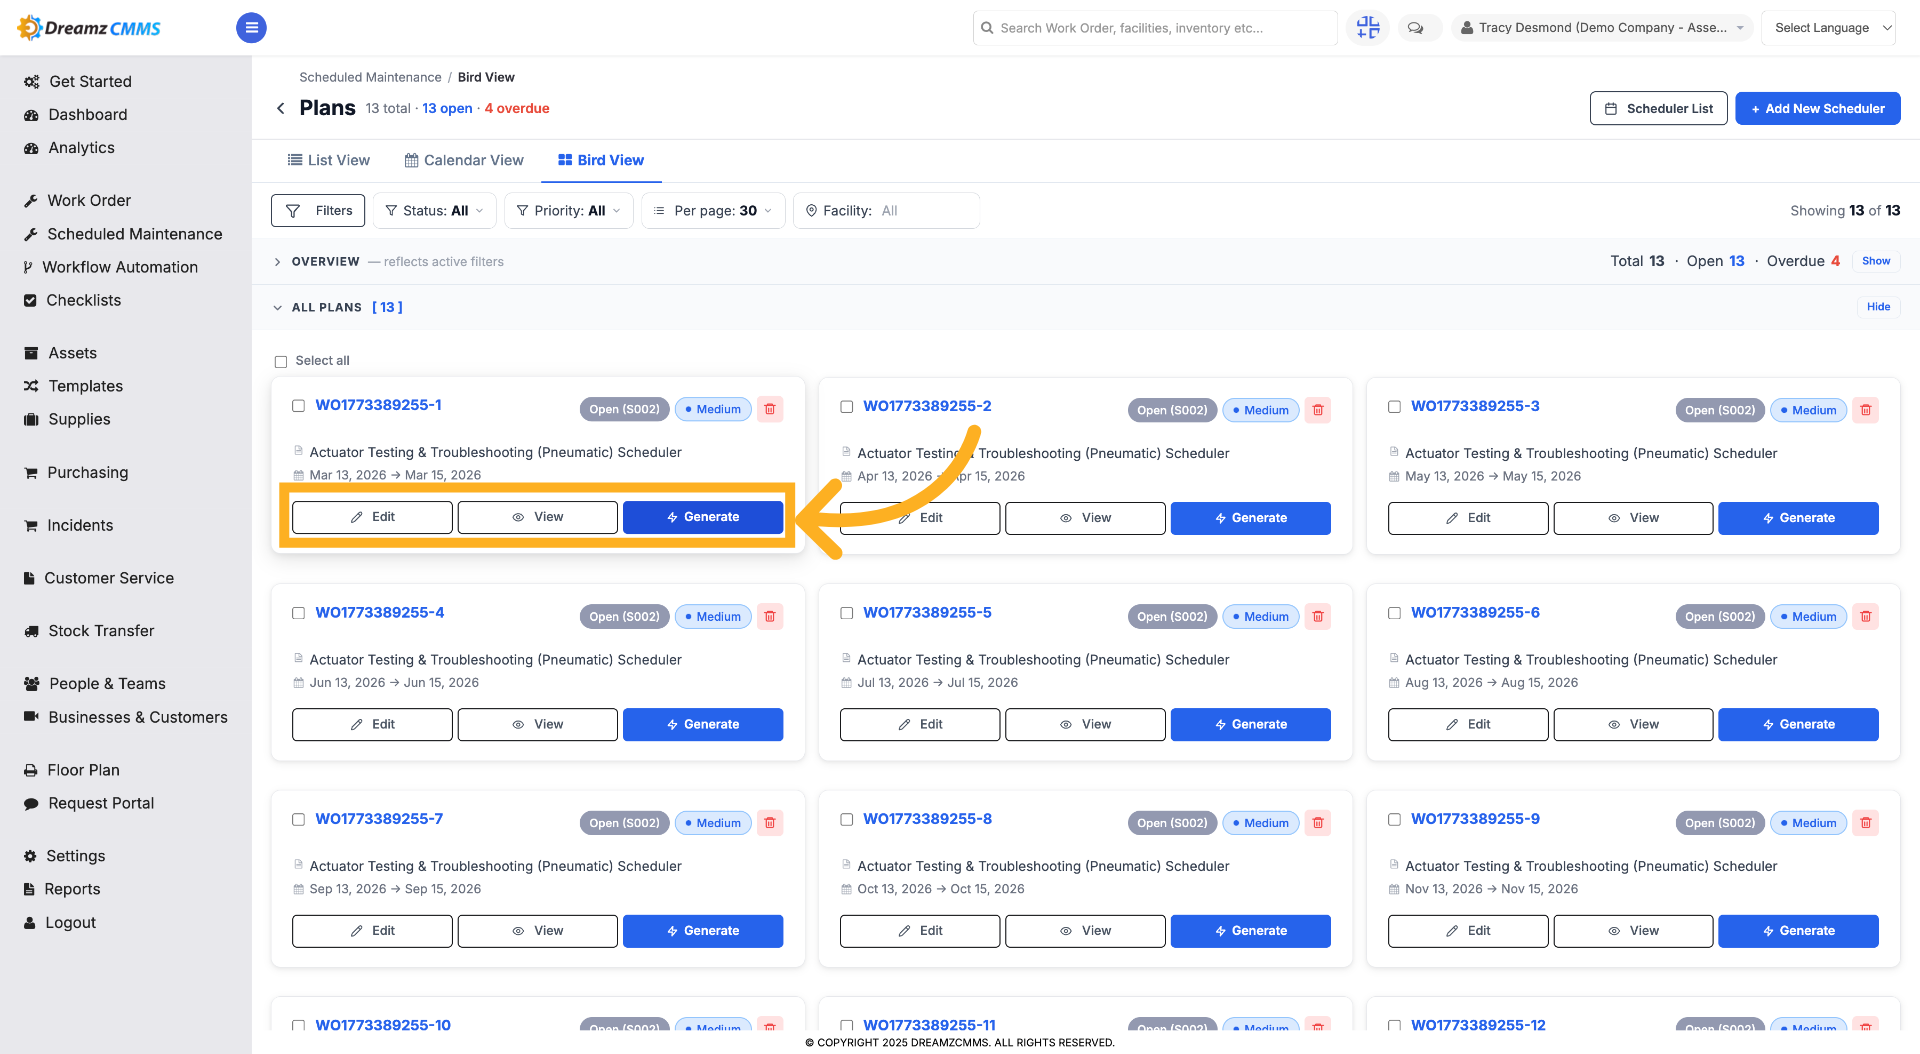
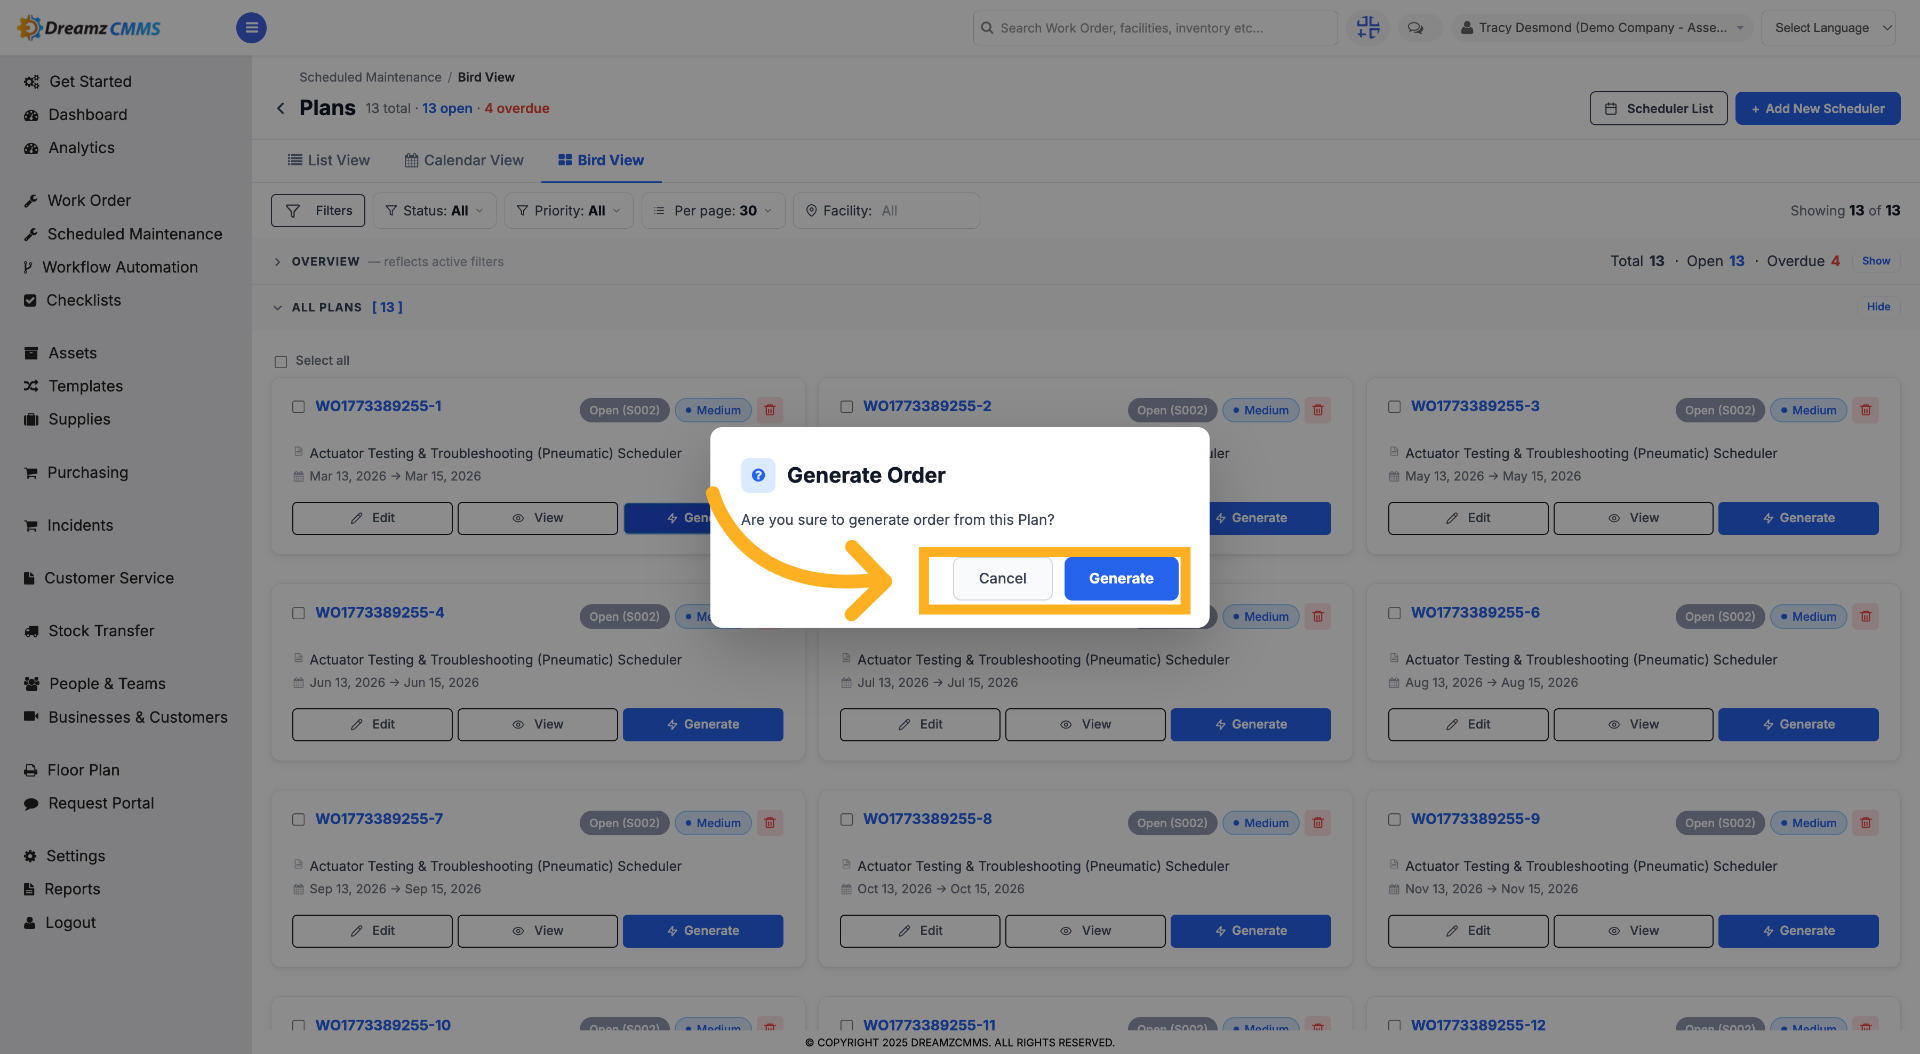
Step 8 – Generate a Work Order
Clicking Generate Order will ask for confirmation. Clicking Generate creates a work order; clicking Cancel closes the popup without creating one.
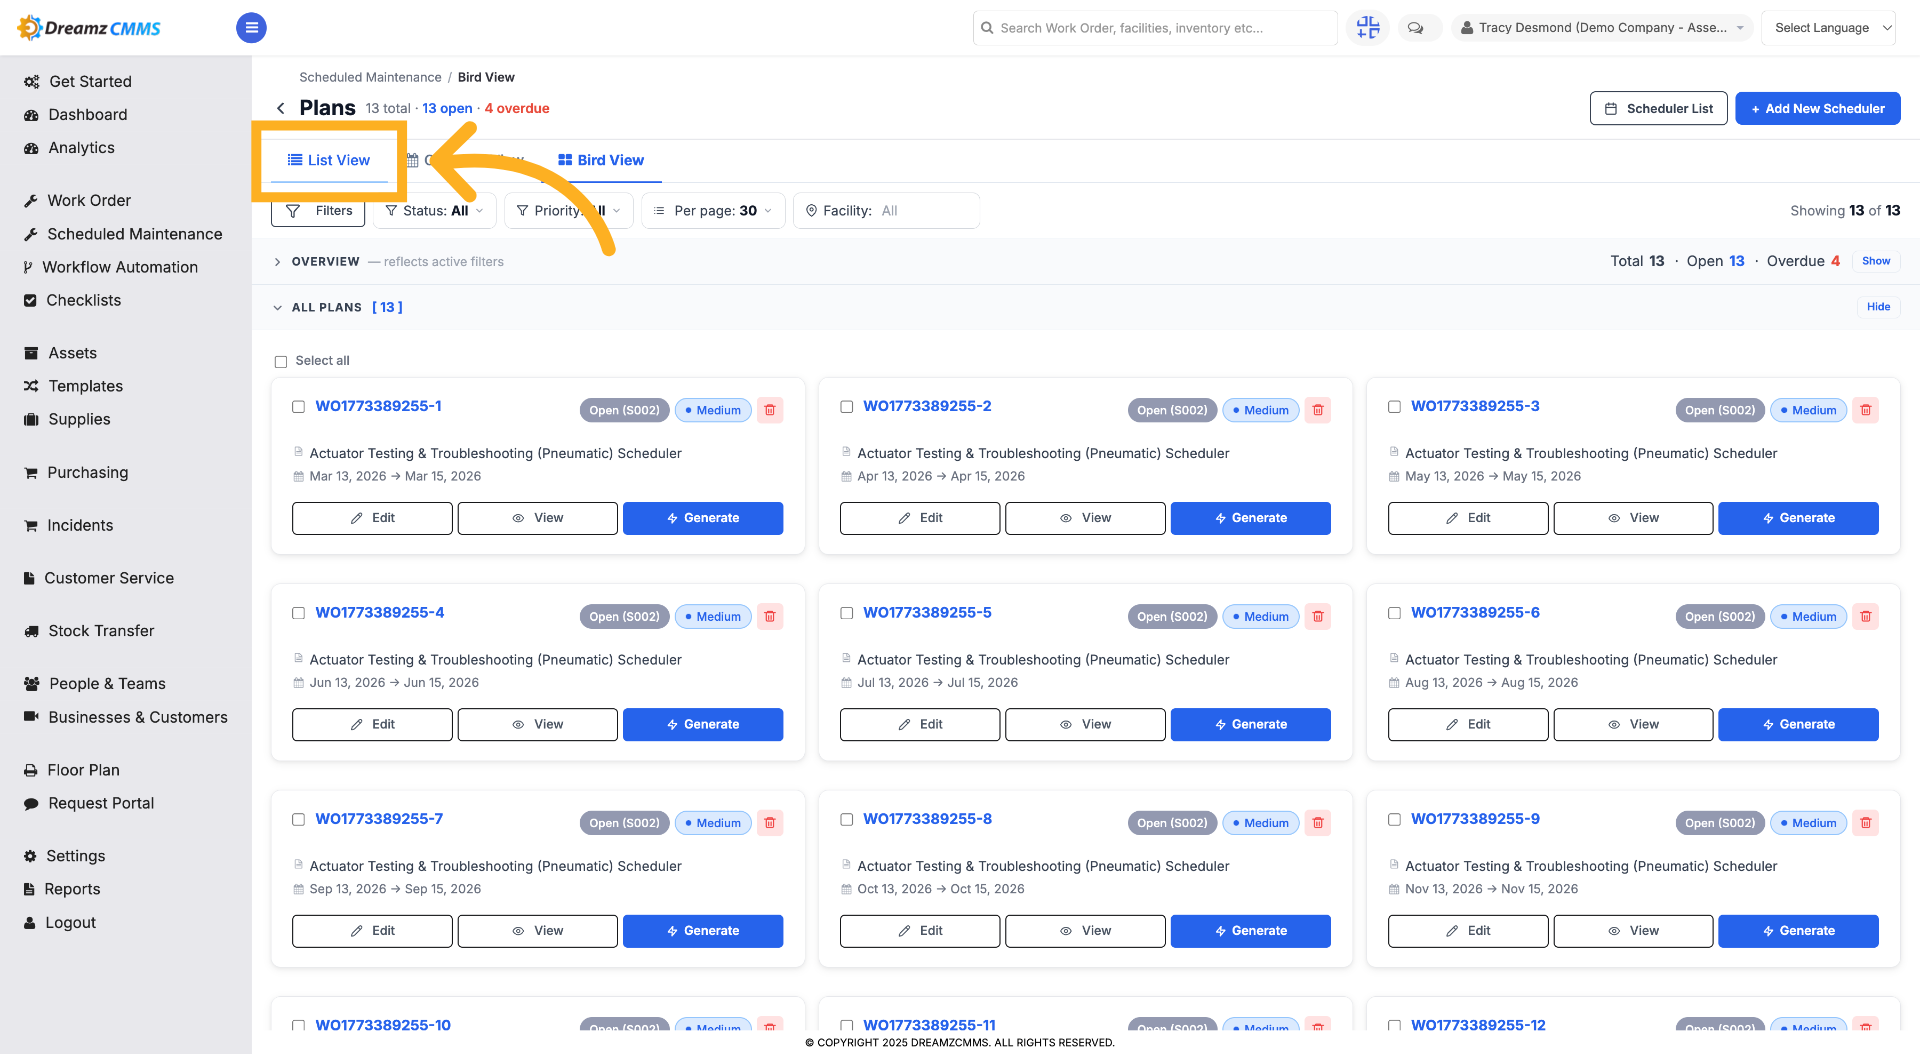
Step 9 – Switch to List View
Click "List View" to go back to the list view of the plans.
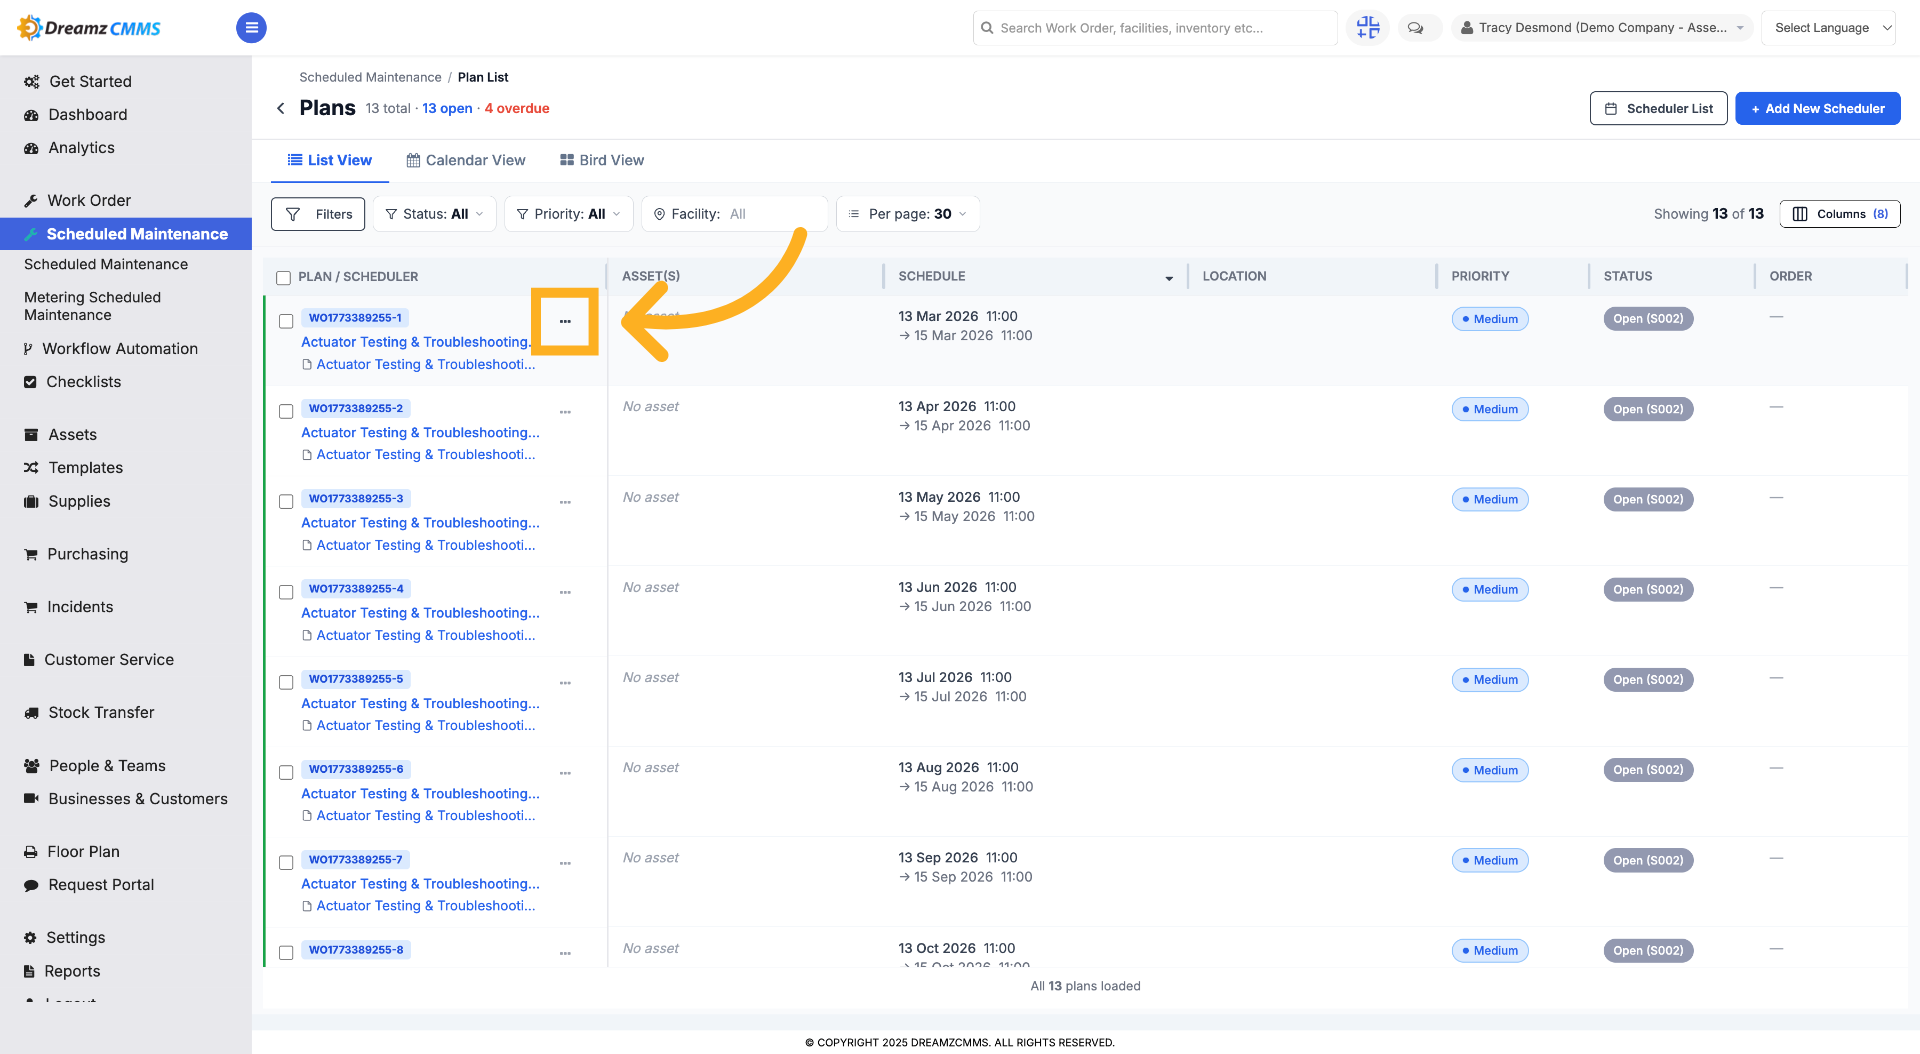
Step 10 – Toggle View Mode
Click on the three dots to see more actions that can be performed against a plan.
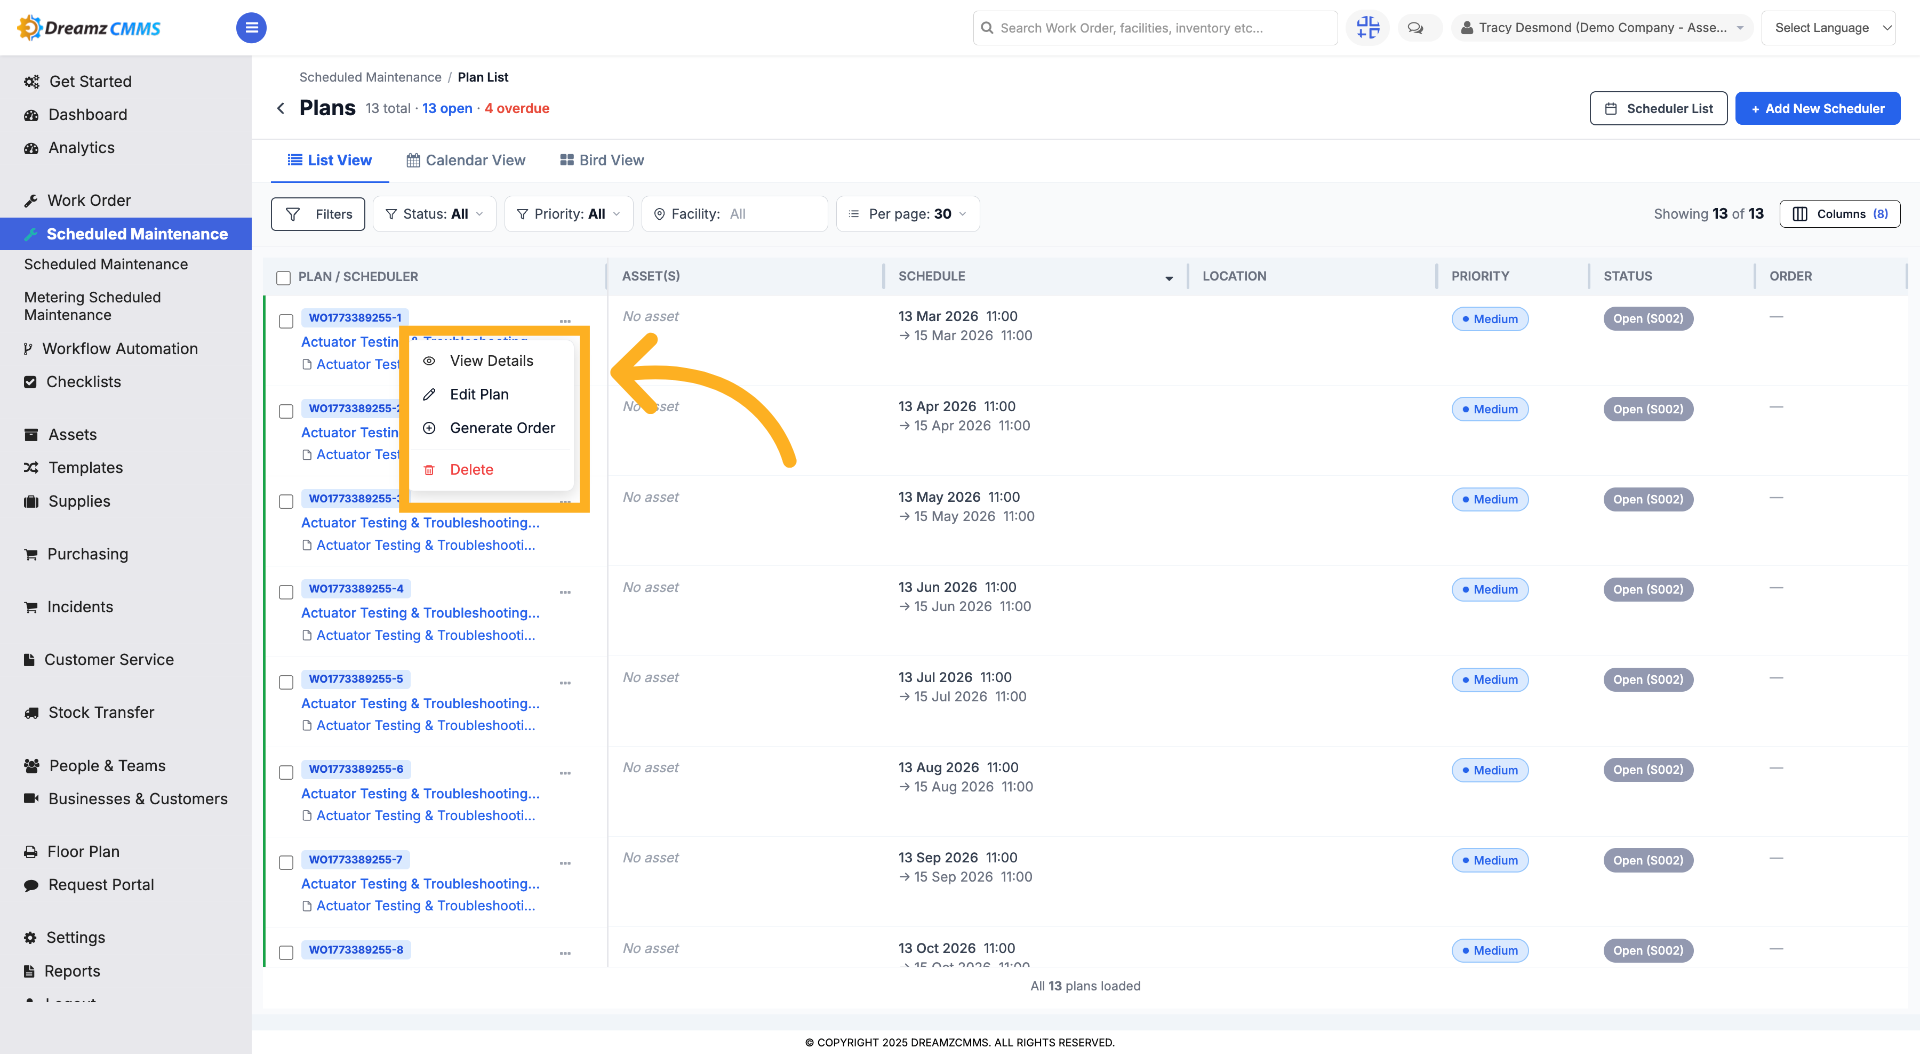
Step 11 – Open View Options
From the three dots menu, you can view details, edit, generate a work order, or delete a plan.
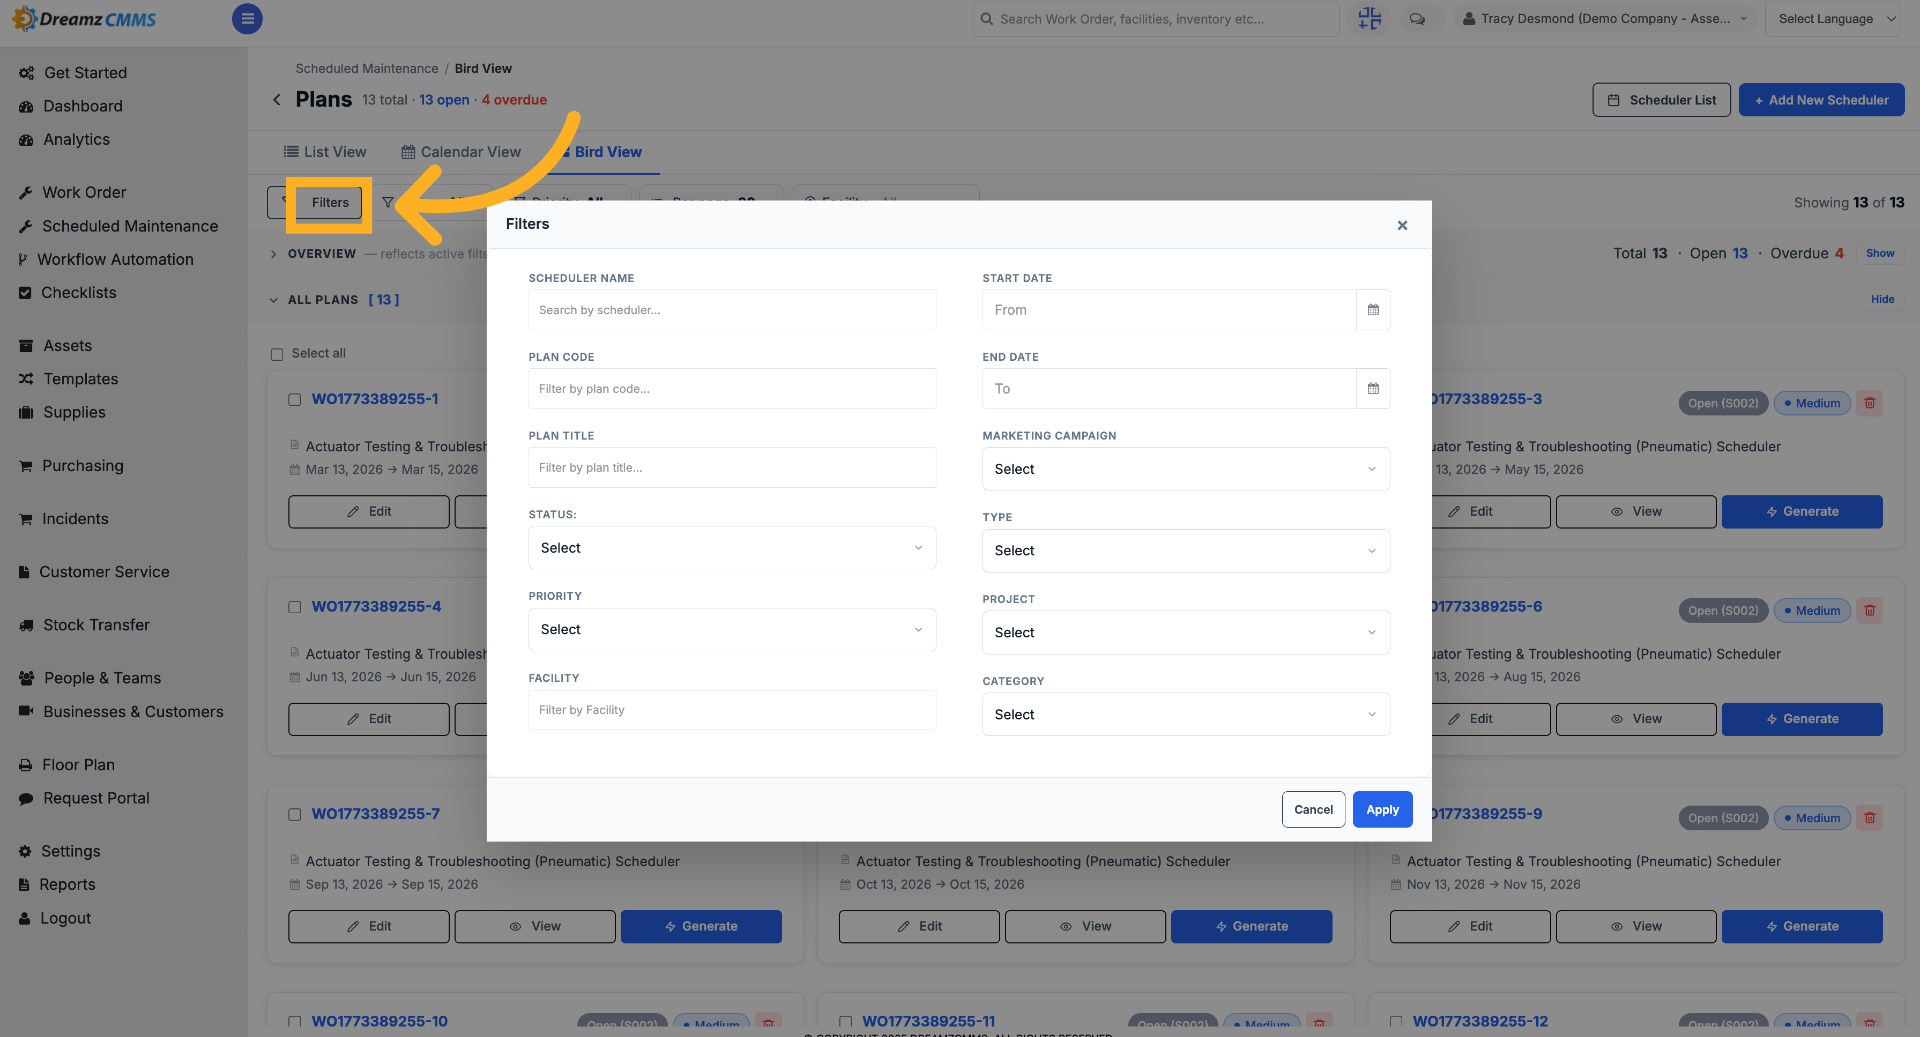
Step 12 – Open Filters Menu
Click "Filters" to apply filters to the plan list. You can filter based on parameters like scheduler name, plan code, plan title, and other fields.
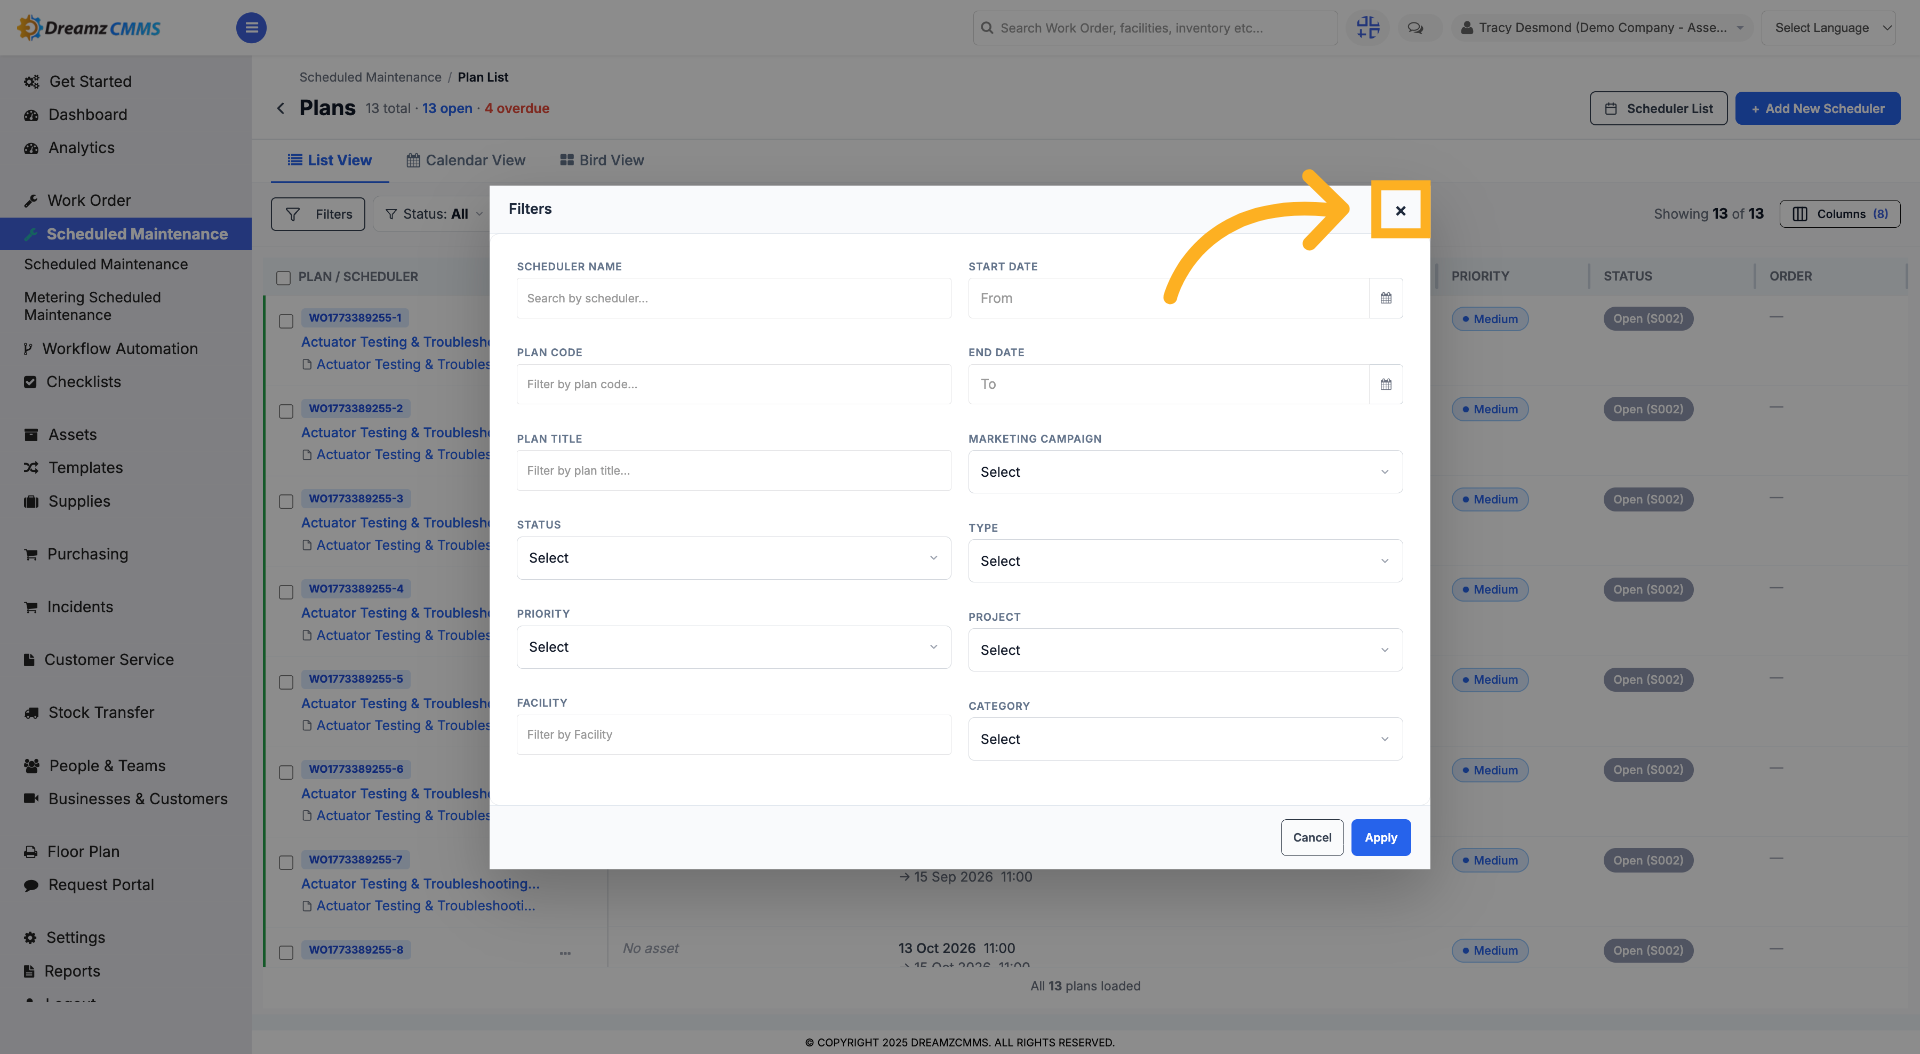
Step 13 – Close Filters Menu
Click "×" to close the filters menu and return to the plan list.
Tips for Scheduled Maintenance
- Use the Default option for standard recurring schedules and Custom when you need more precise control over frequency and duration.
- Link checklists to your scheduler so technicians know exactly what tasks to complete on each visit.
- Use Calendar View or Bird View to get a quick visual overview of upcoming maintenance across multiple assets or facilities.
- Set an end date for temporary or project-based schedulers so they don't continue generating work orders indefinitely.
Frequently Asked Questions
Can a scheduler generate a work order automatically, or does it need to be triggered manually?
You can toggle the scheduler to create a work order or a plan. Plans can also generate a work order manually from the calendar, bird, or list view using the Generate Work Order option.
Can I link multiple assets to one scheduler?
Yes. Use the Resources section to select and map multiple assets to a single scheduler.
Can I filter the scheduler or plan list?
Yes. Both the Scheduler List and Plan List have a Filters option to narrow results by fields like name, facility, asset, or plan code.
What views are available for viewing plans?
Plans can be viewed in List, Calendar, or Bird View, each accessible from the Plan List page.