Managing Production Scheduling with DreamzCMMS
DreamzCMMS Production Planning is a digital production scheduler integrated directly into DreamzCMMS. It replaces the traditional whiteboard with a real-time, color-coded overview of every job across every extrusion line, so you always know what's currently running, what comes next, and where bottlenecks may arise.
Overview
Production Scheduling covers the full lifecycle of a production job: reviewing pending work orders, releasing them to the schedule, dragging and adjusting jobs on the production line calendar, tracking progress through stage gates, closing jobs with actual tonnage, and reviewing performance in the reports section. Administrators can also configure production lines, shifts, and role permissions from Settings, and import work orders in bulk from Excel.
Before You Begin
- You must have access to the Production Scheduling module in your account.
- Know your production lines, shift windows, and stage gate configuration, since these determine how jobs are scheduled and tracked.
Dashboard Overview
Step 1 – View the Dashboard
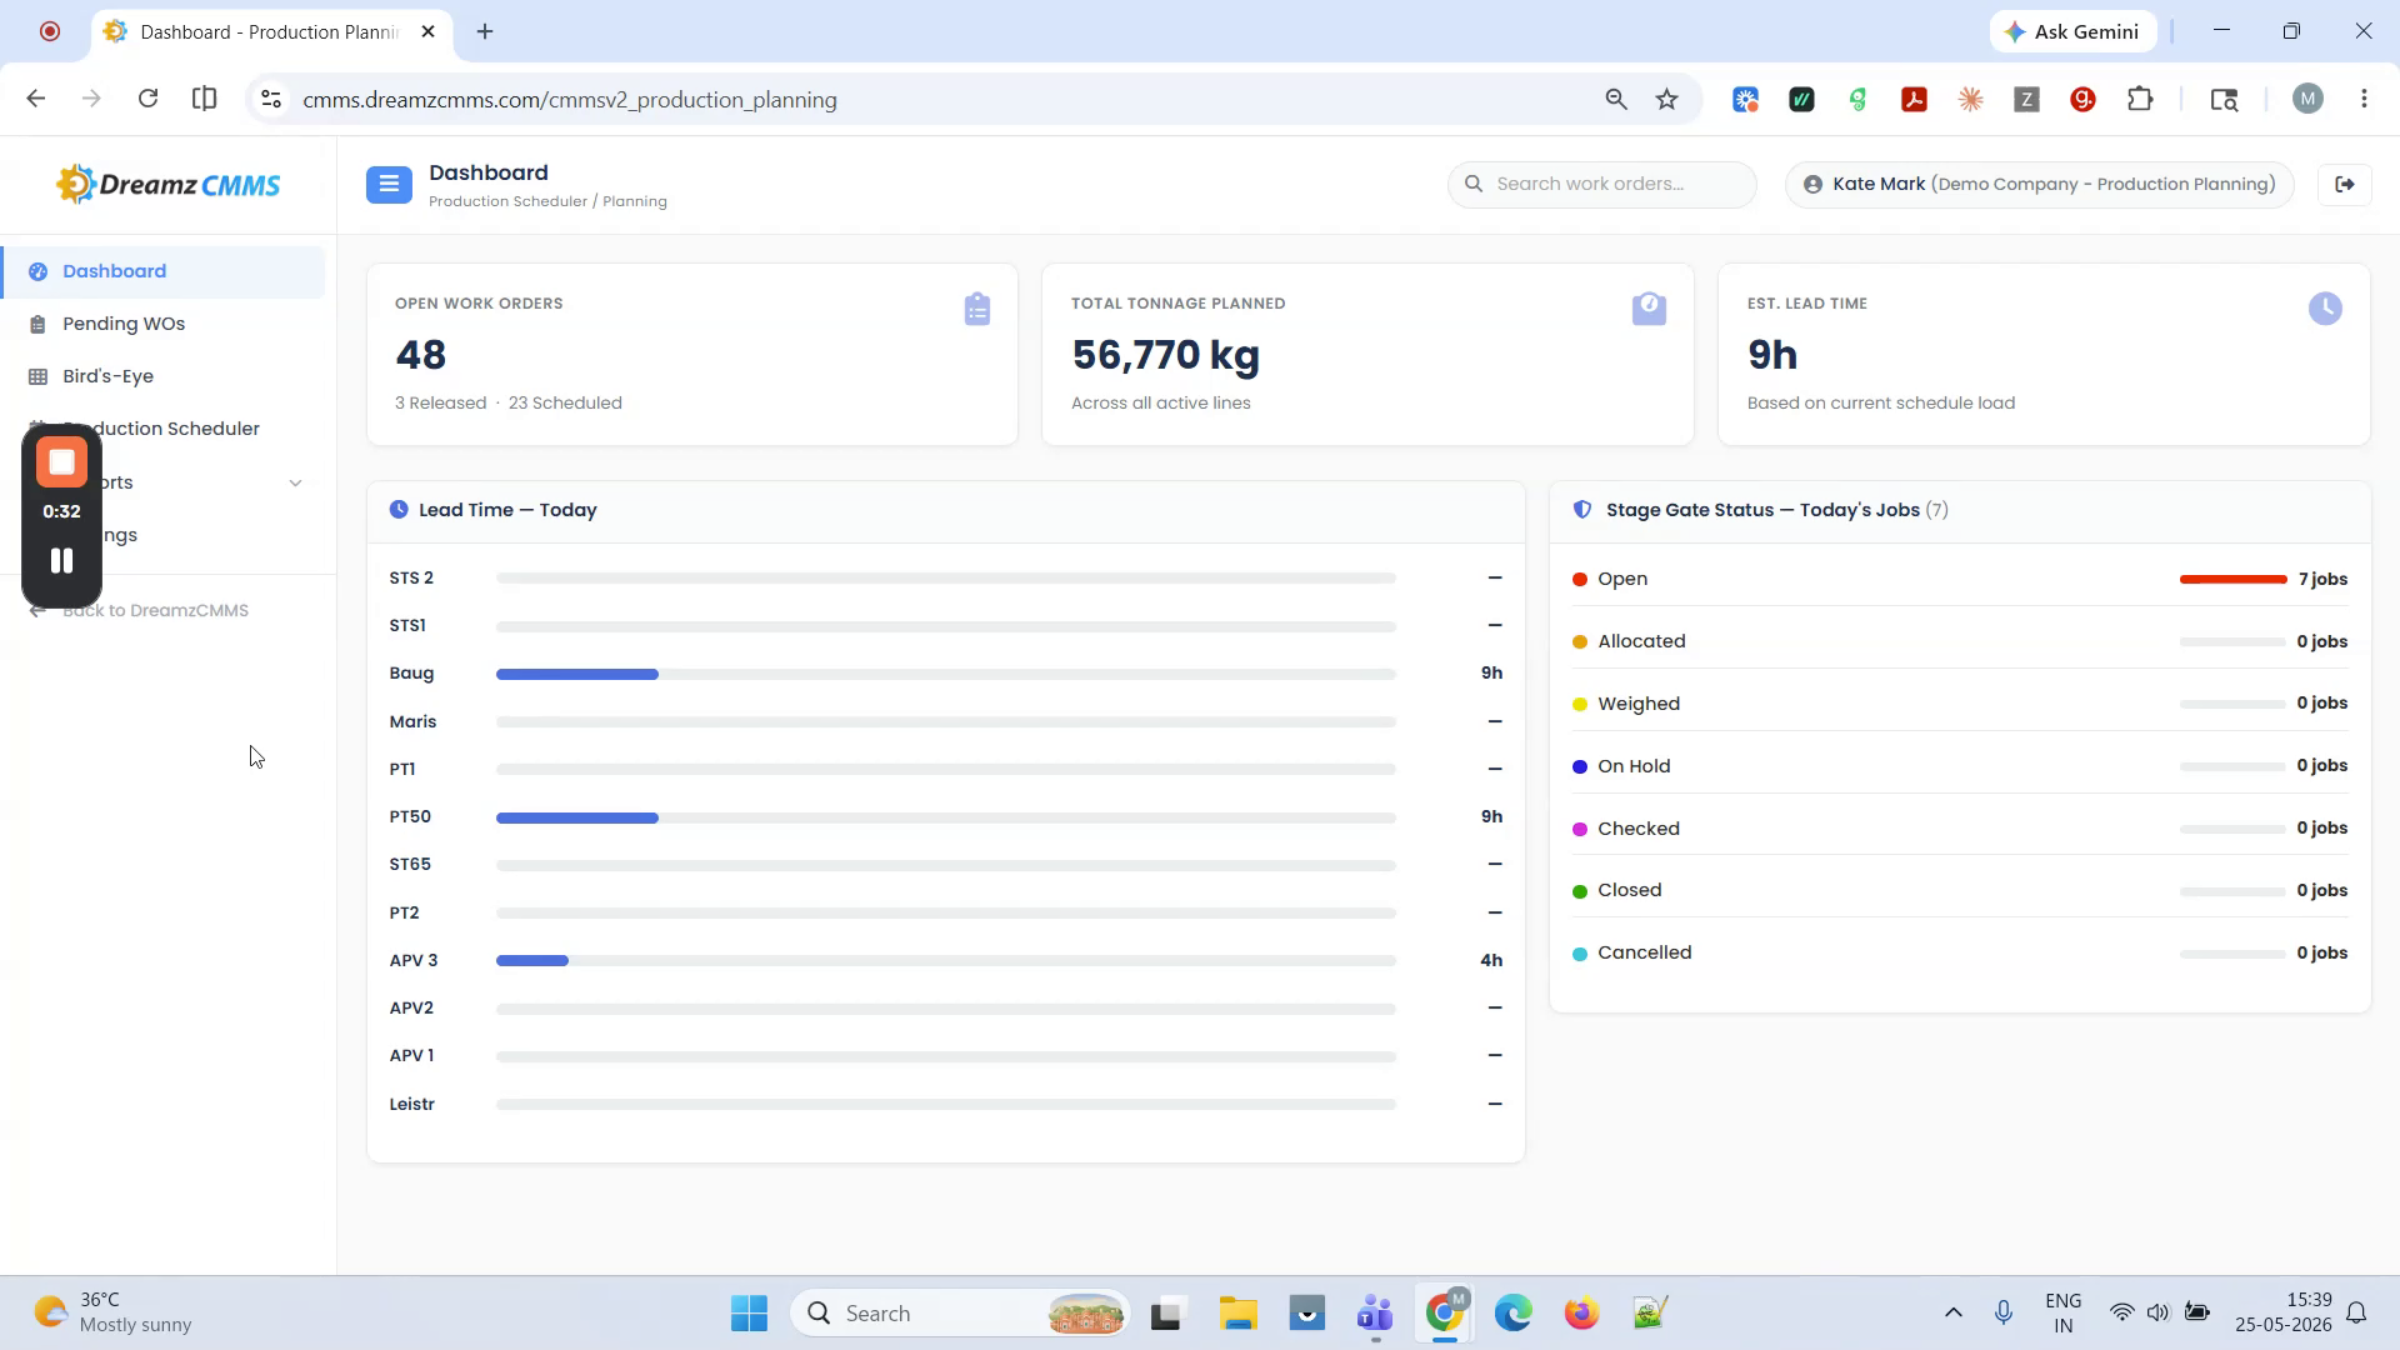
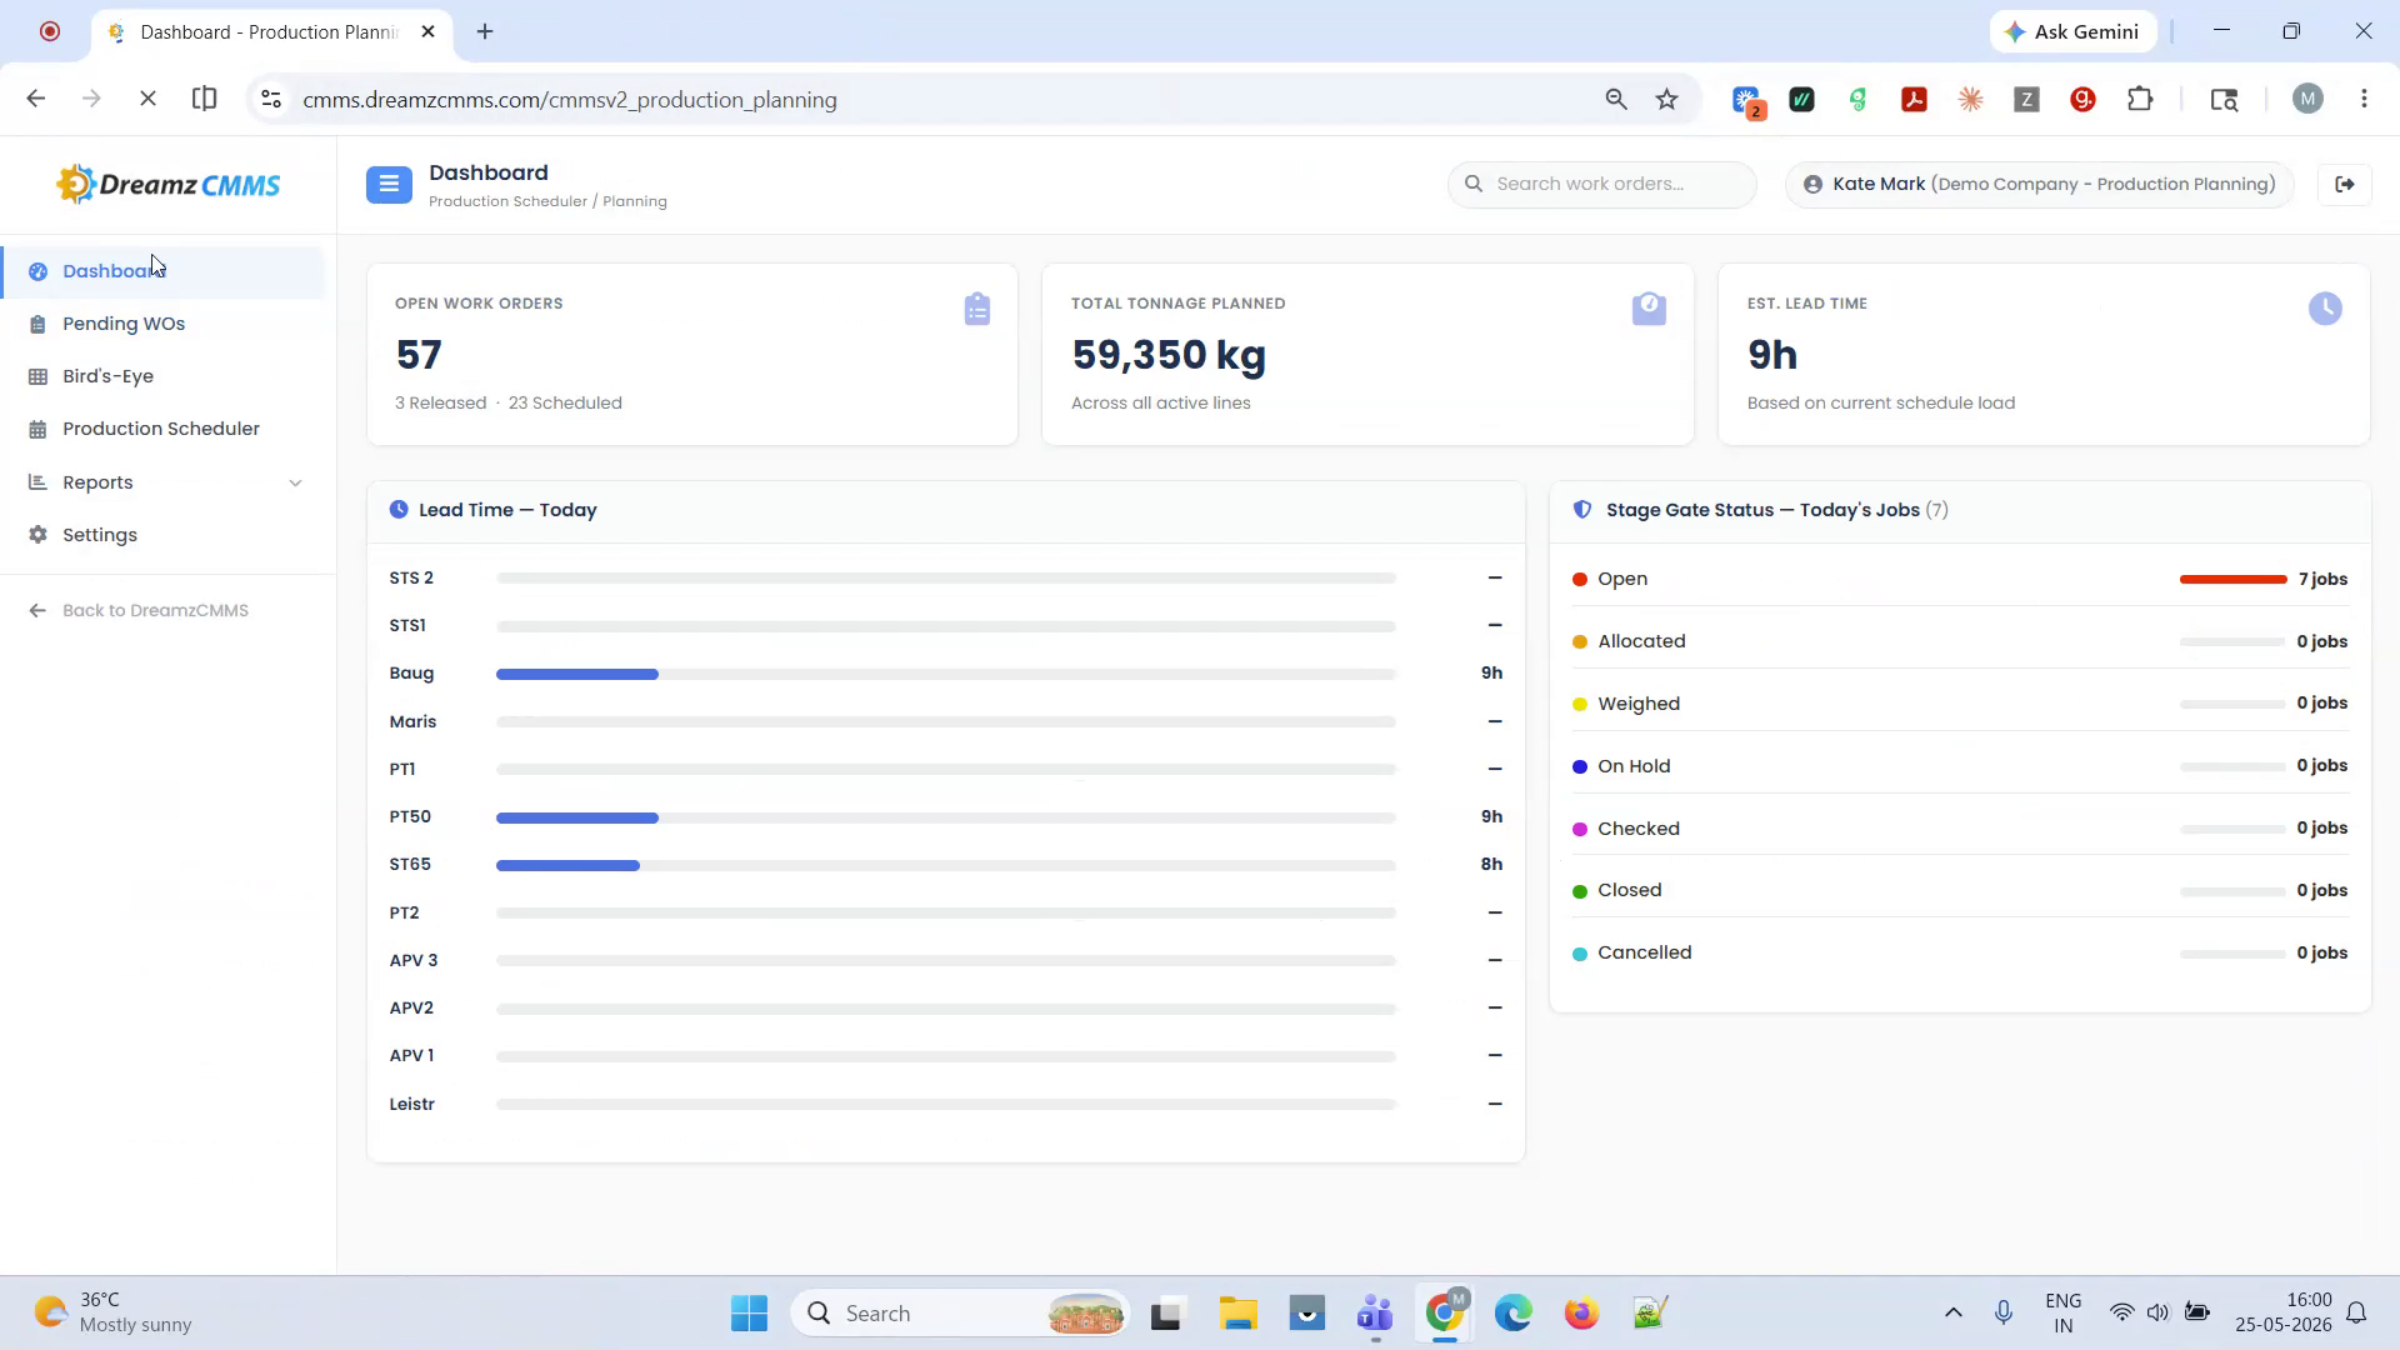
After logging in, you'll arrive at the dashboard, which gives you a complete view of production activity.
Step 2 – Review Key Metrics
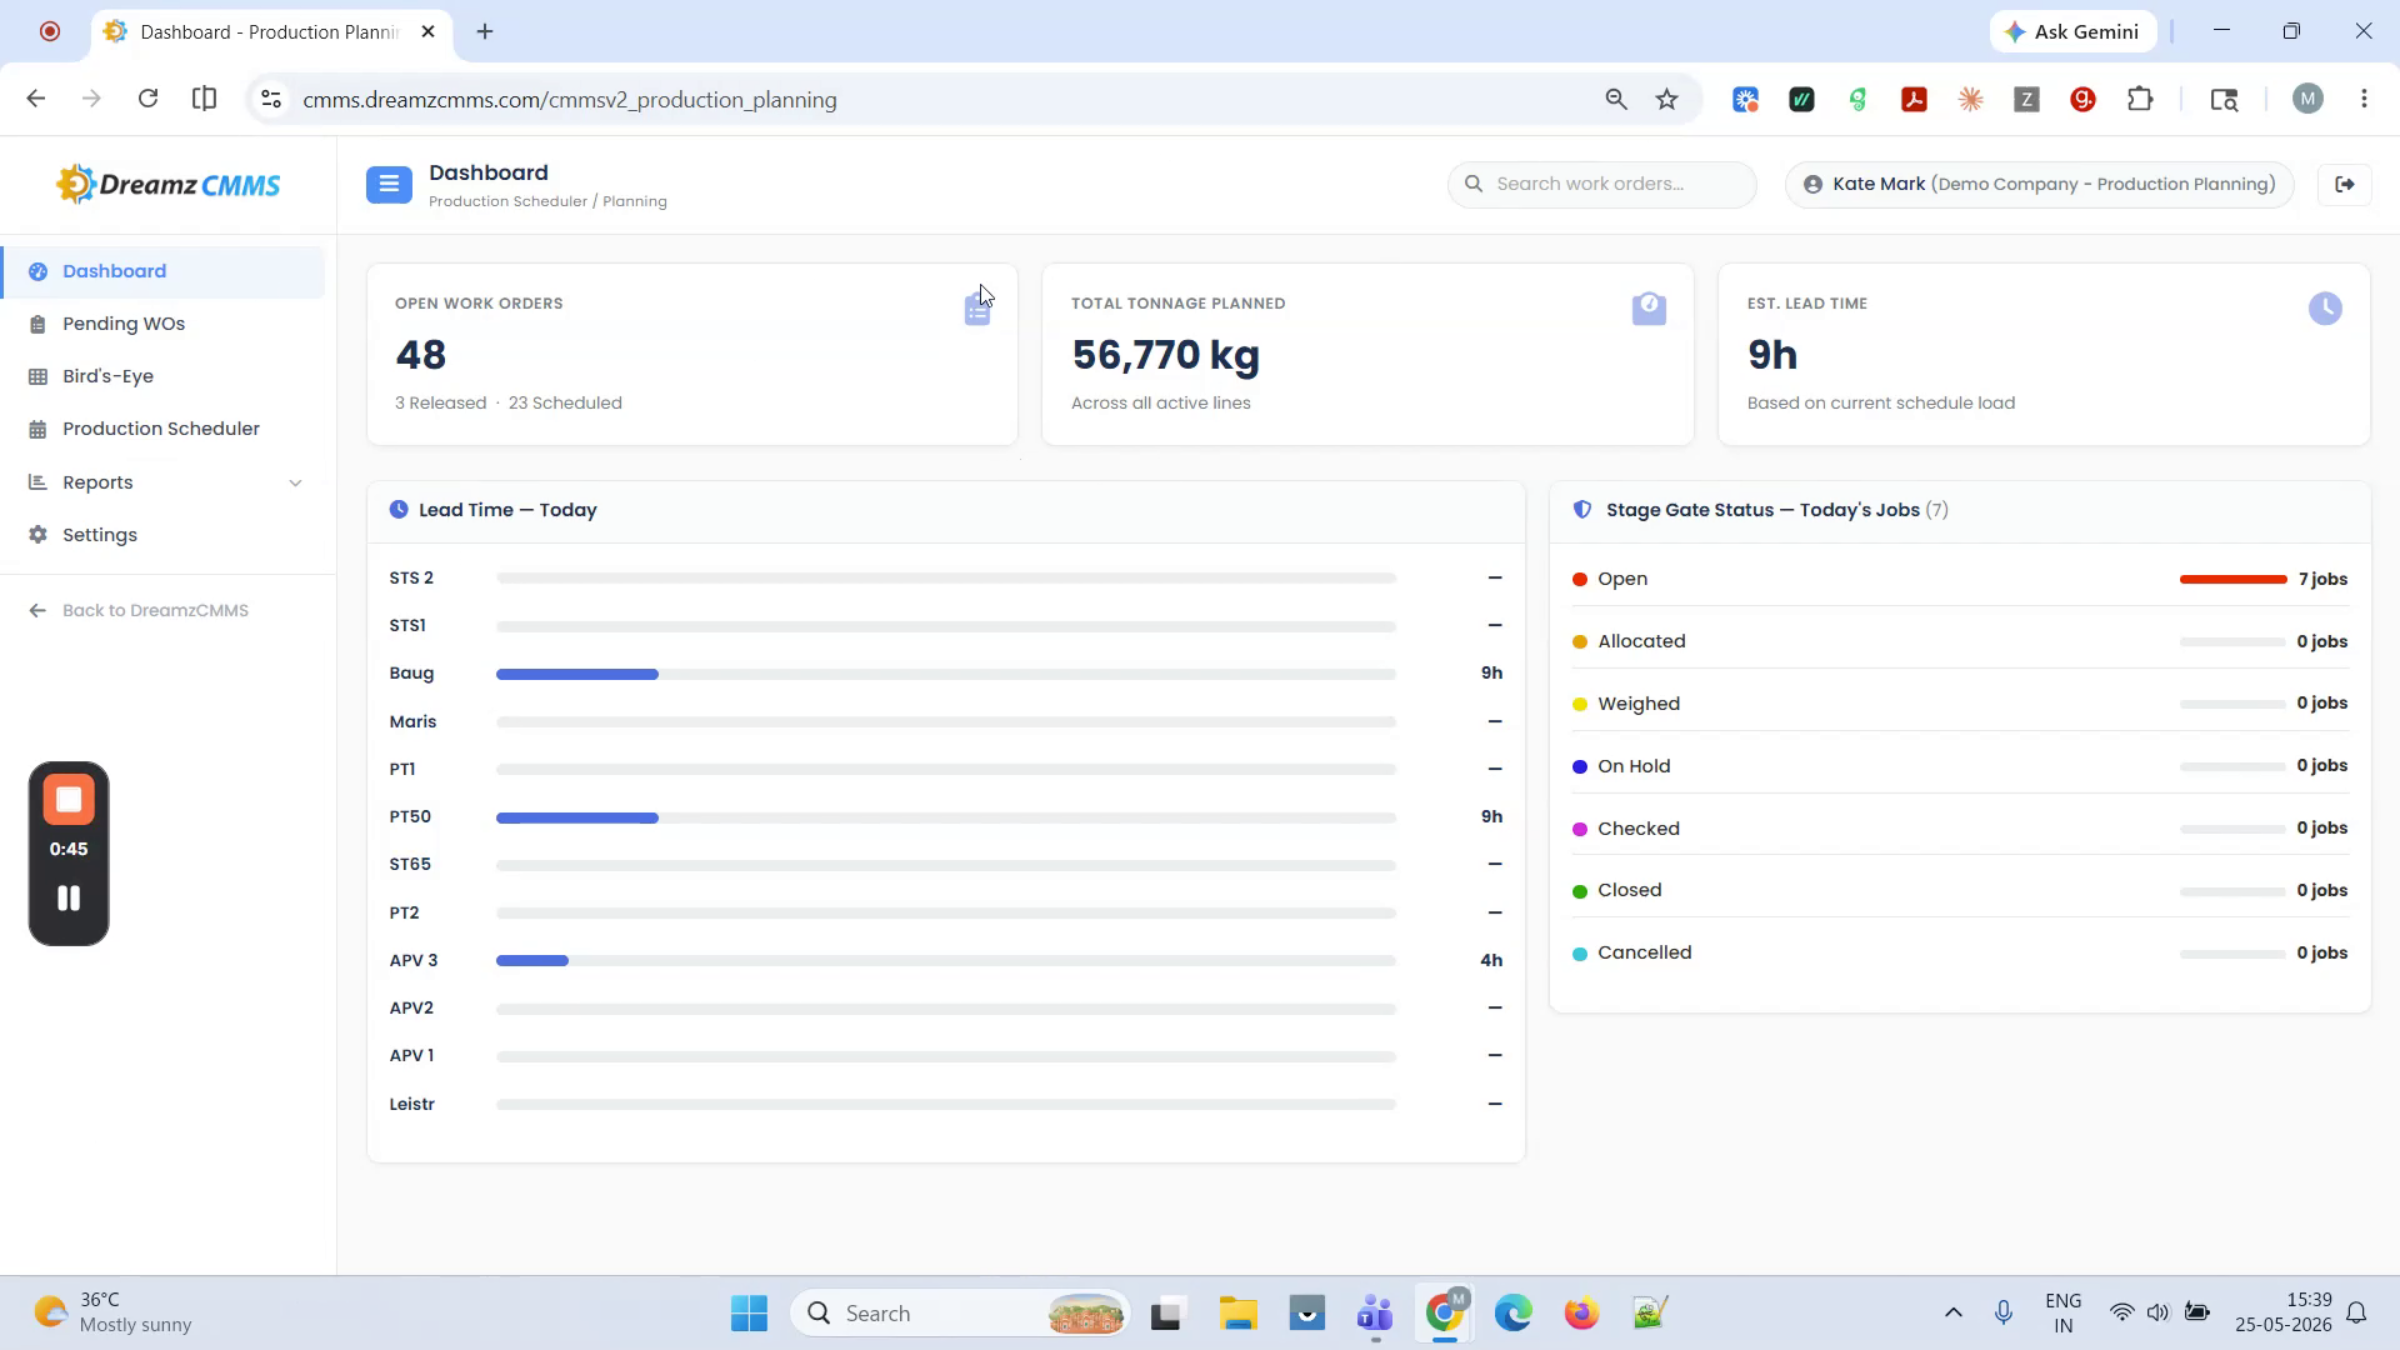
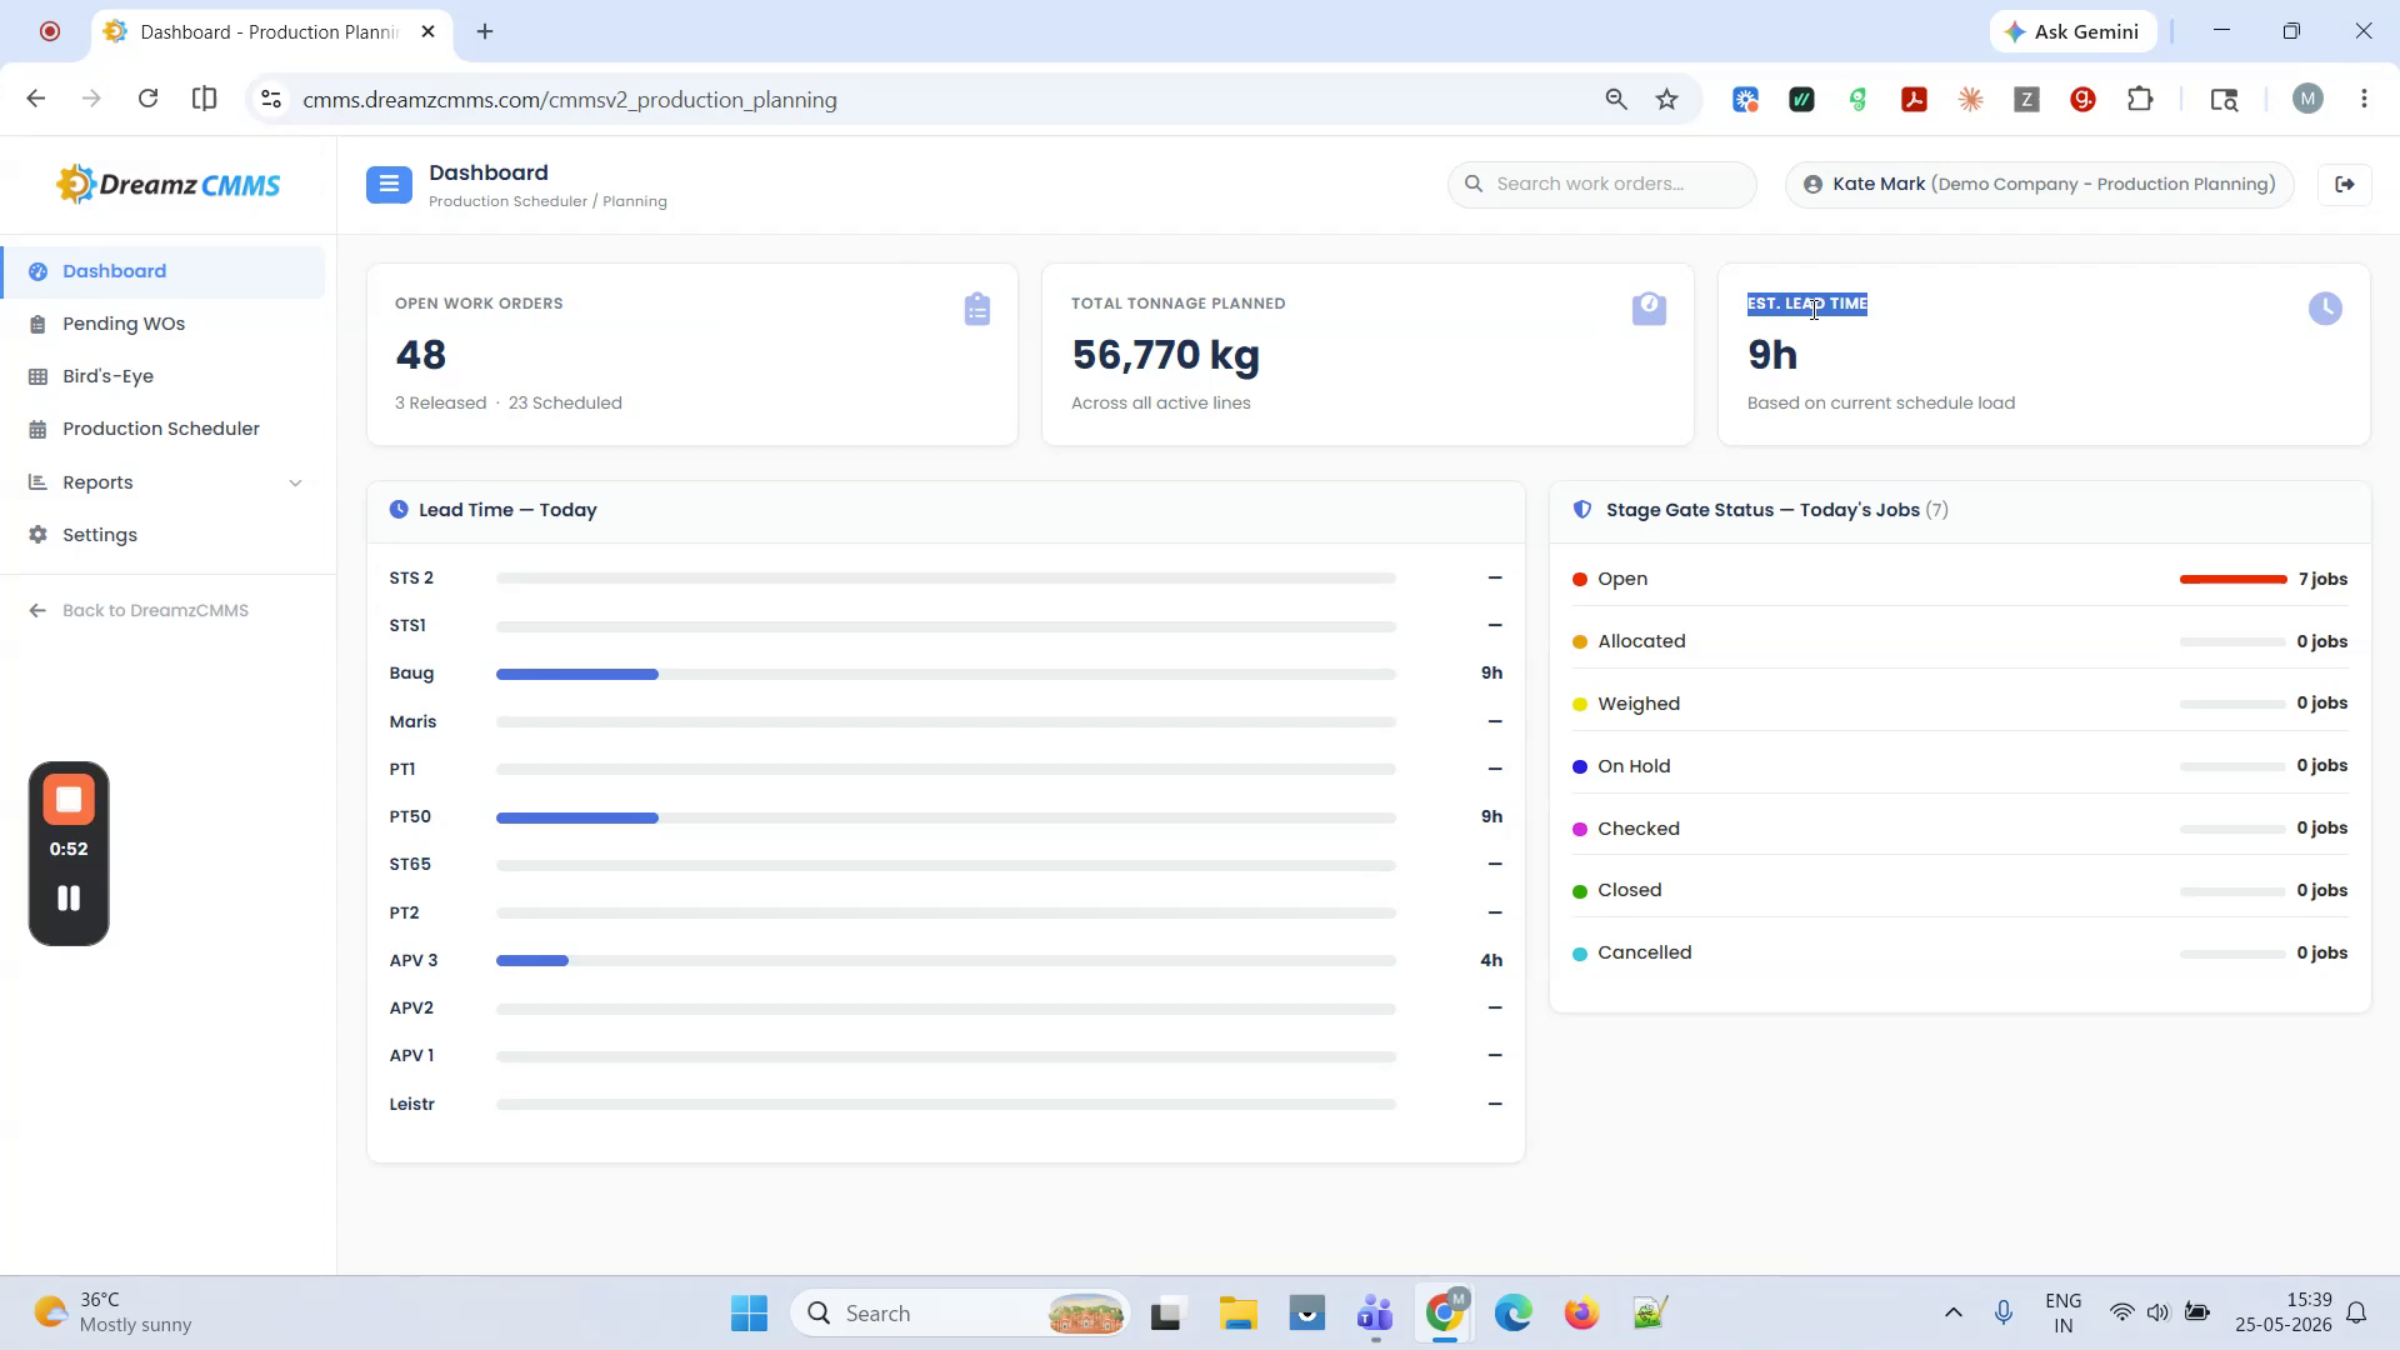
At the top of the dashboard, you'll see three key metrics: open work orders, total tonnage plan, and estimated lead time.
Step 3 – Check Lead Time and Stage Gate Status
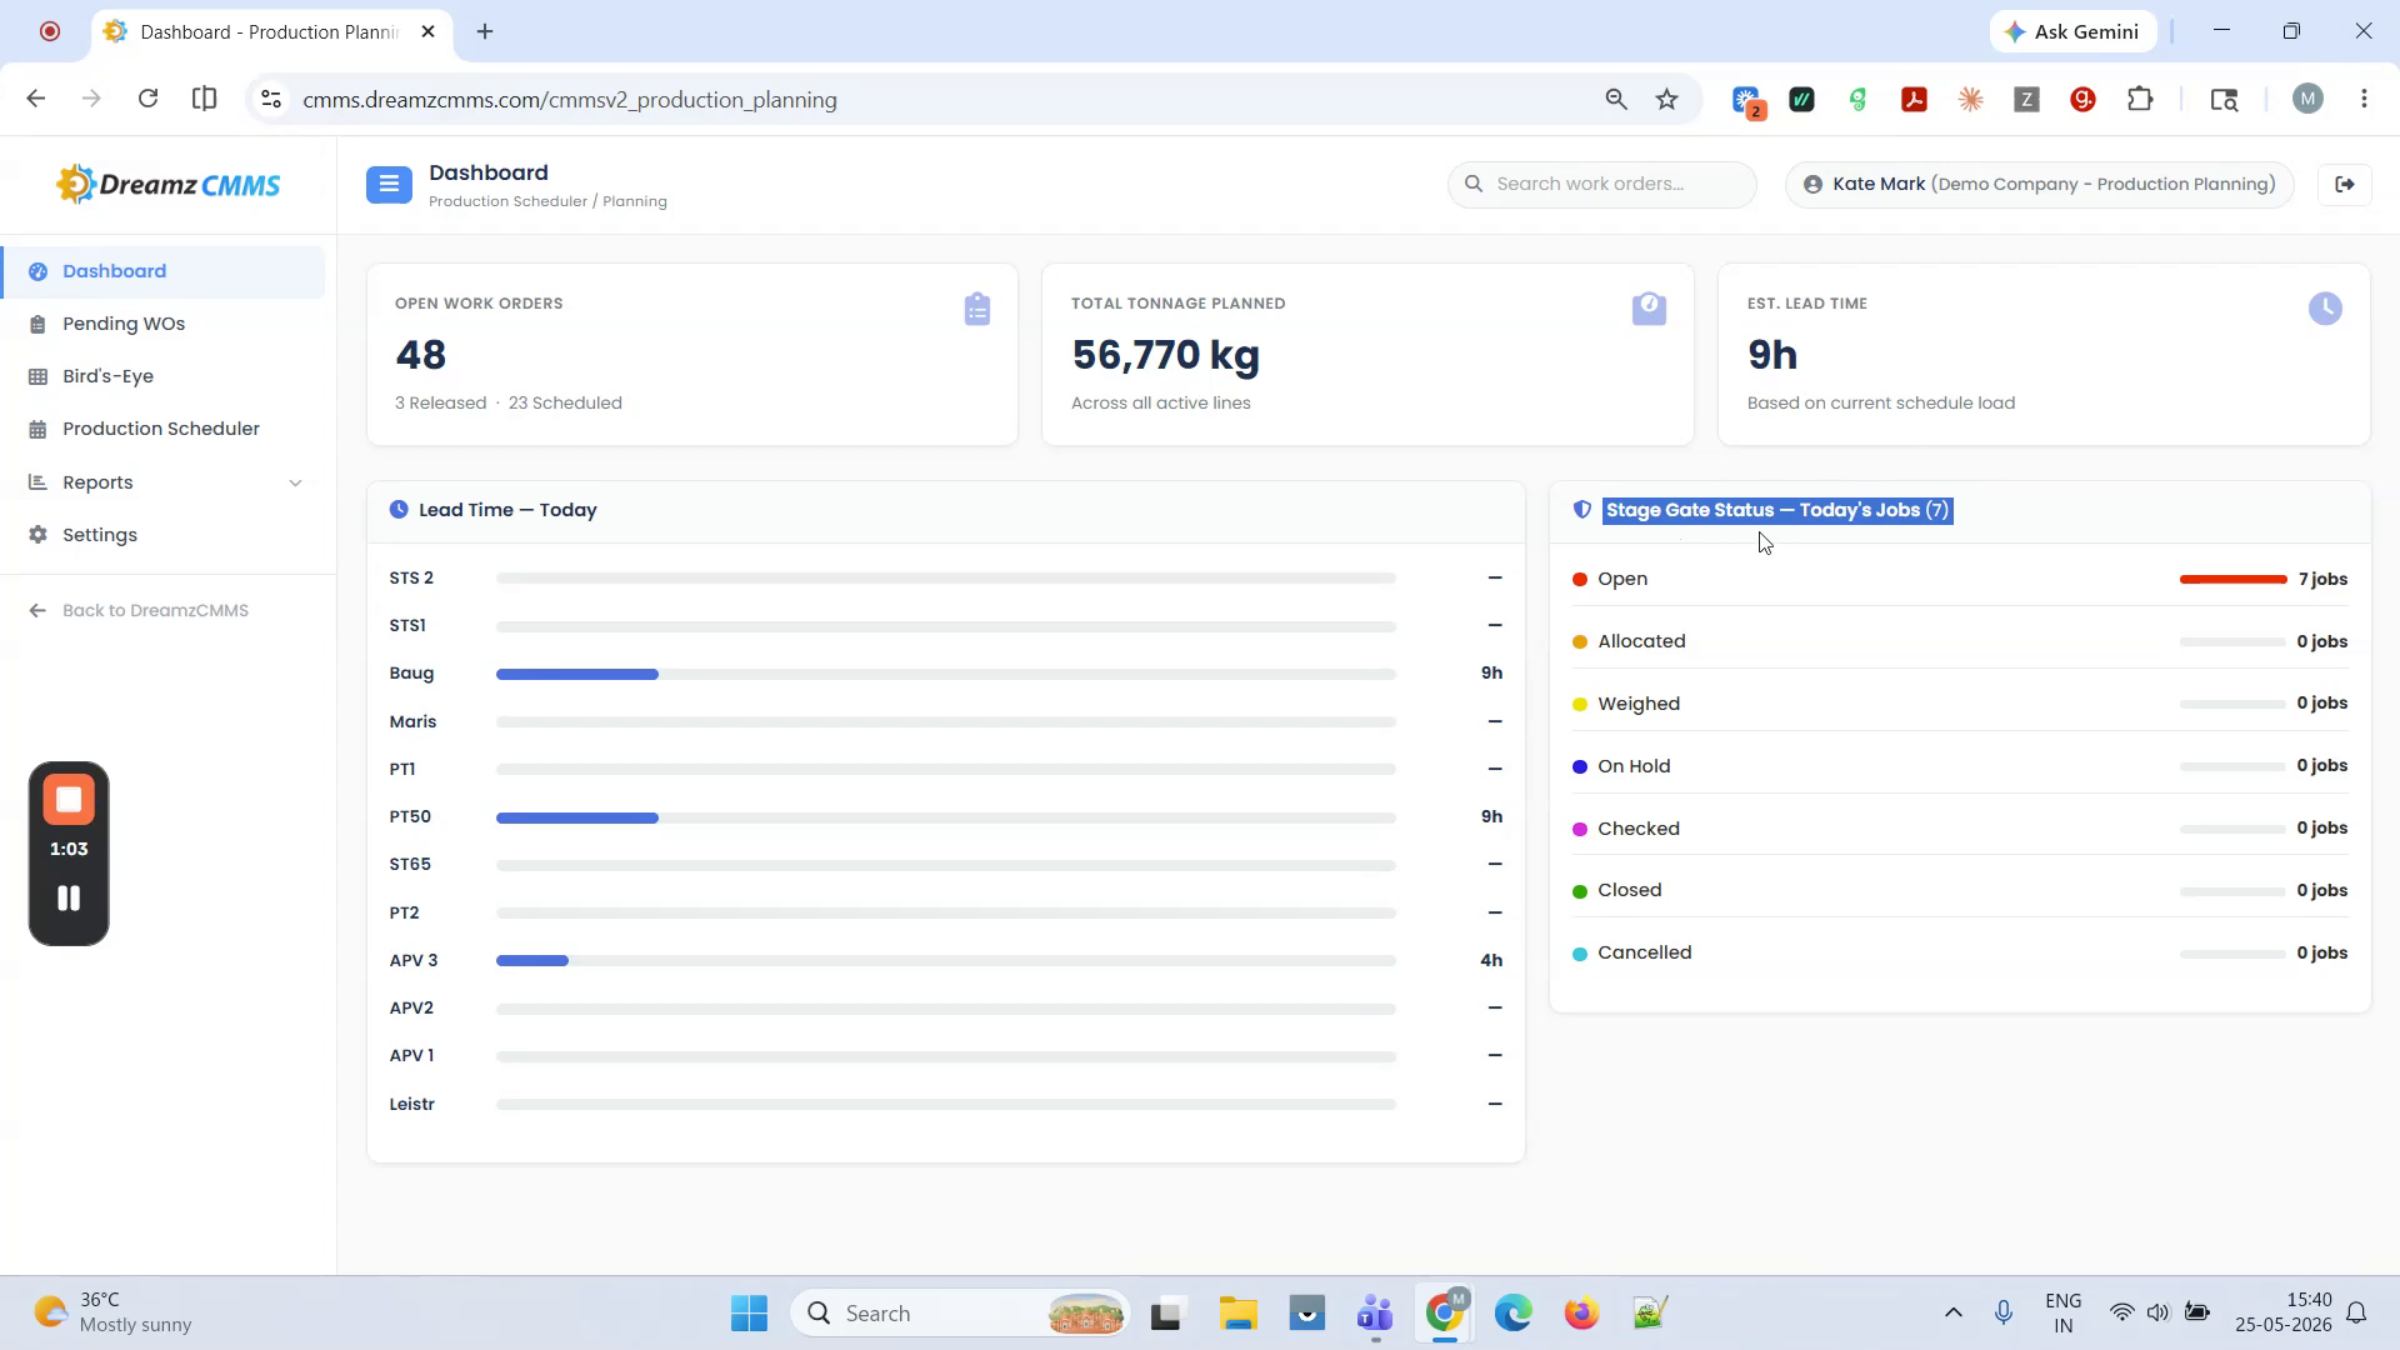
Below the key metrics, you can view the lead time to date and the status of the stage gate, both reflecting the current date.
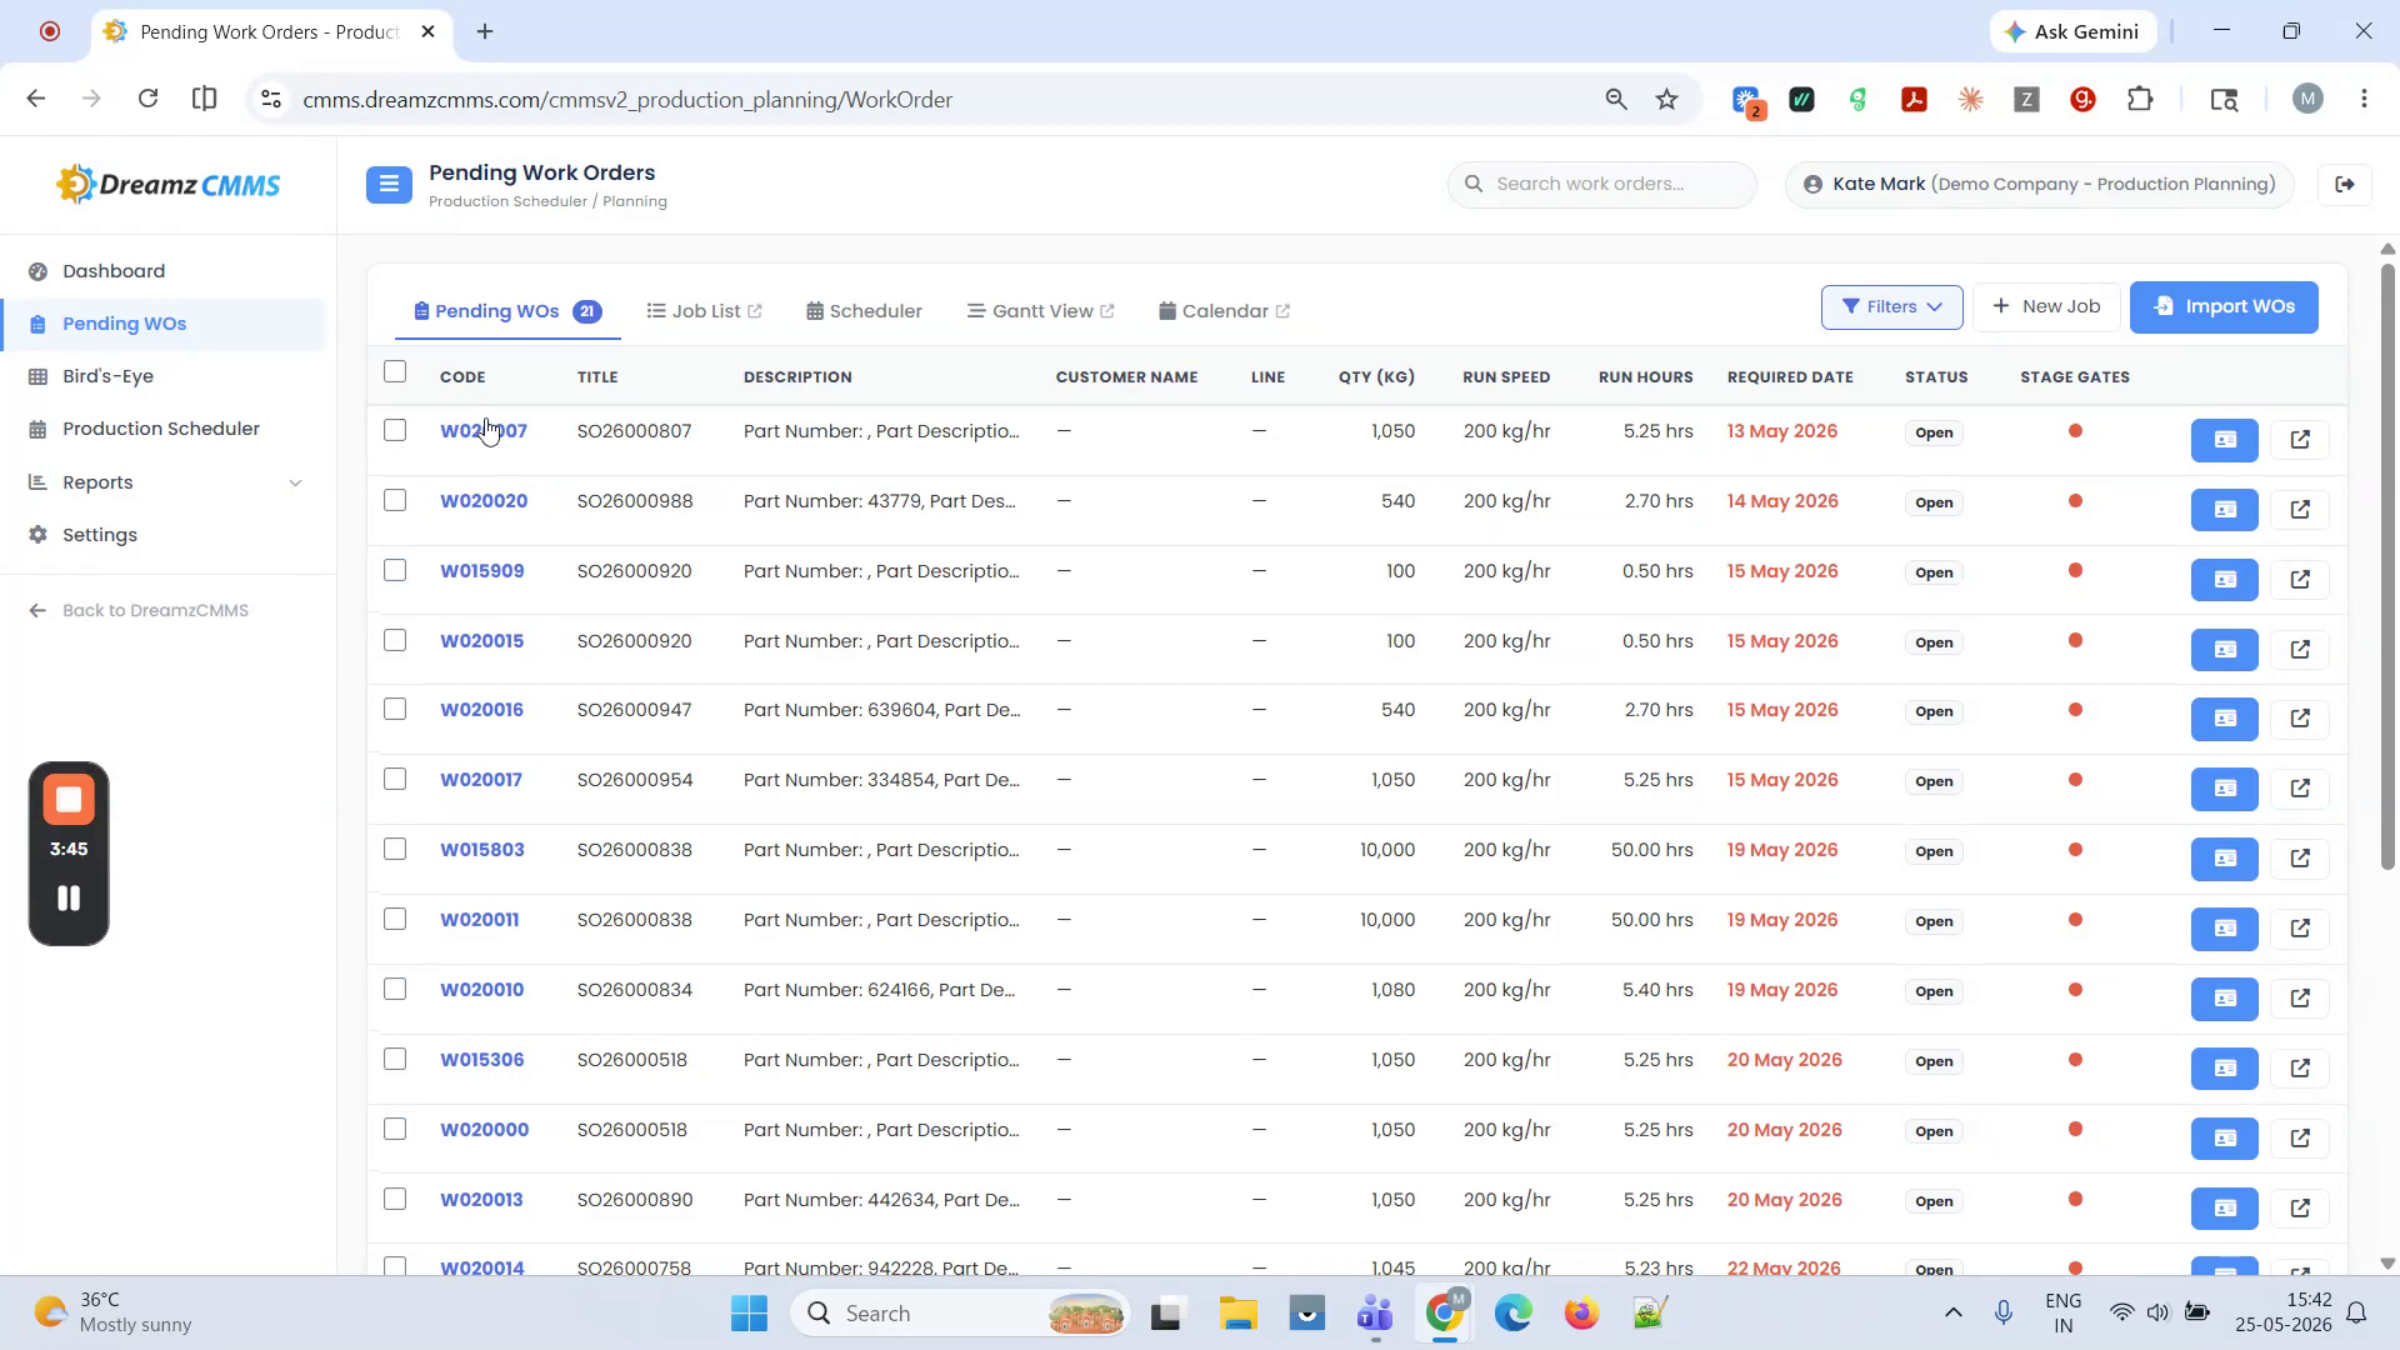
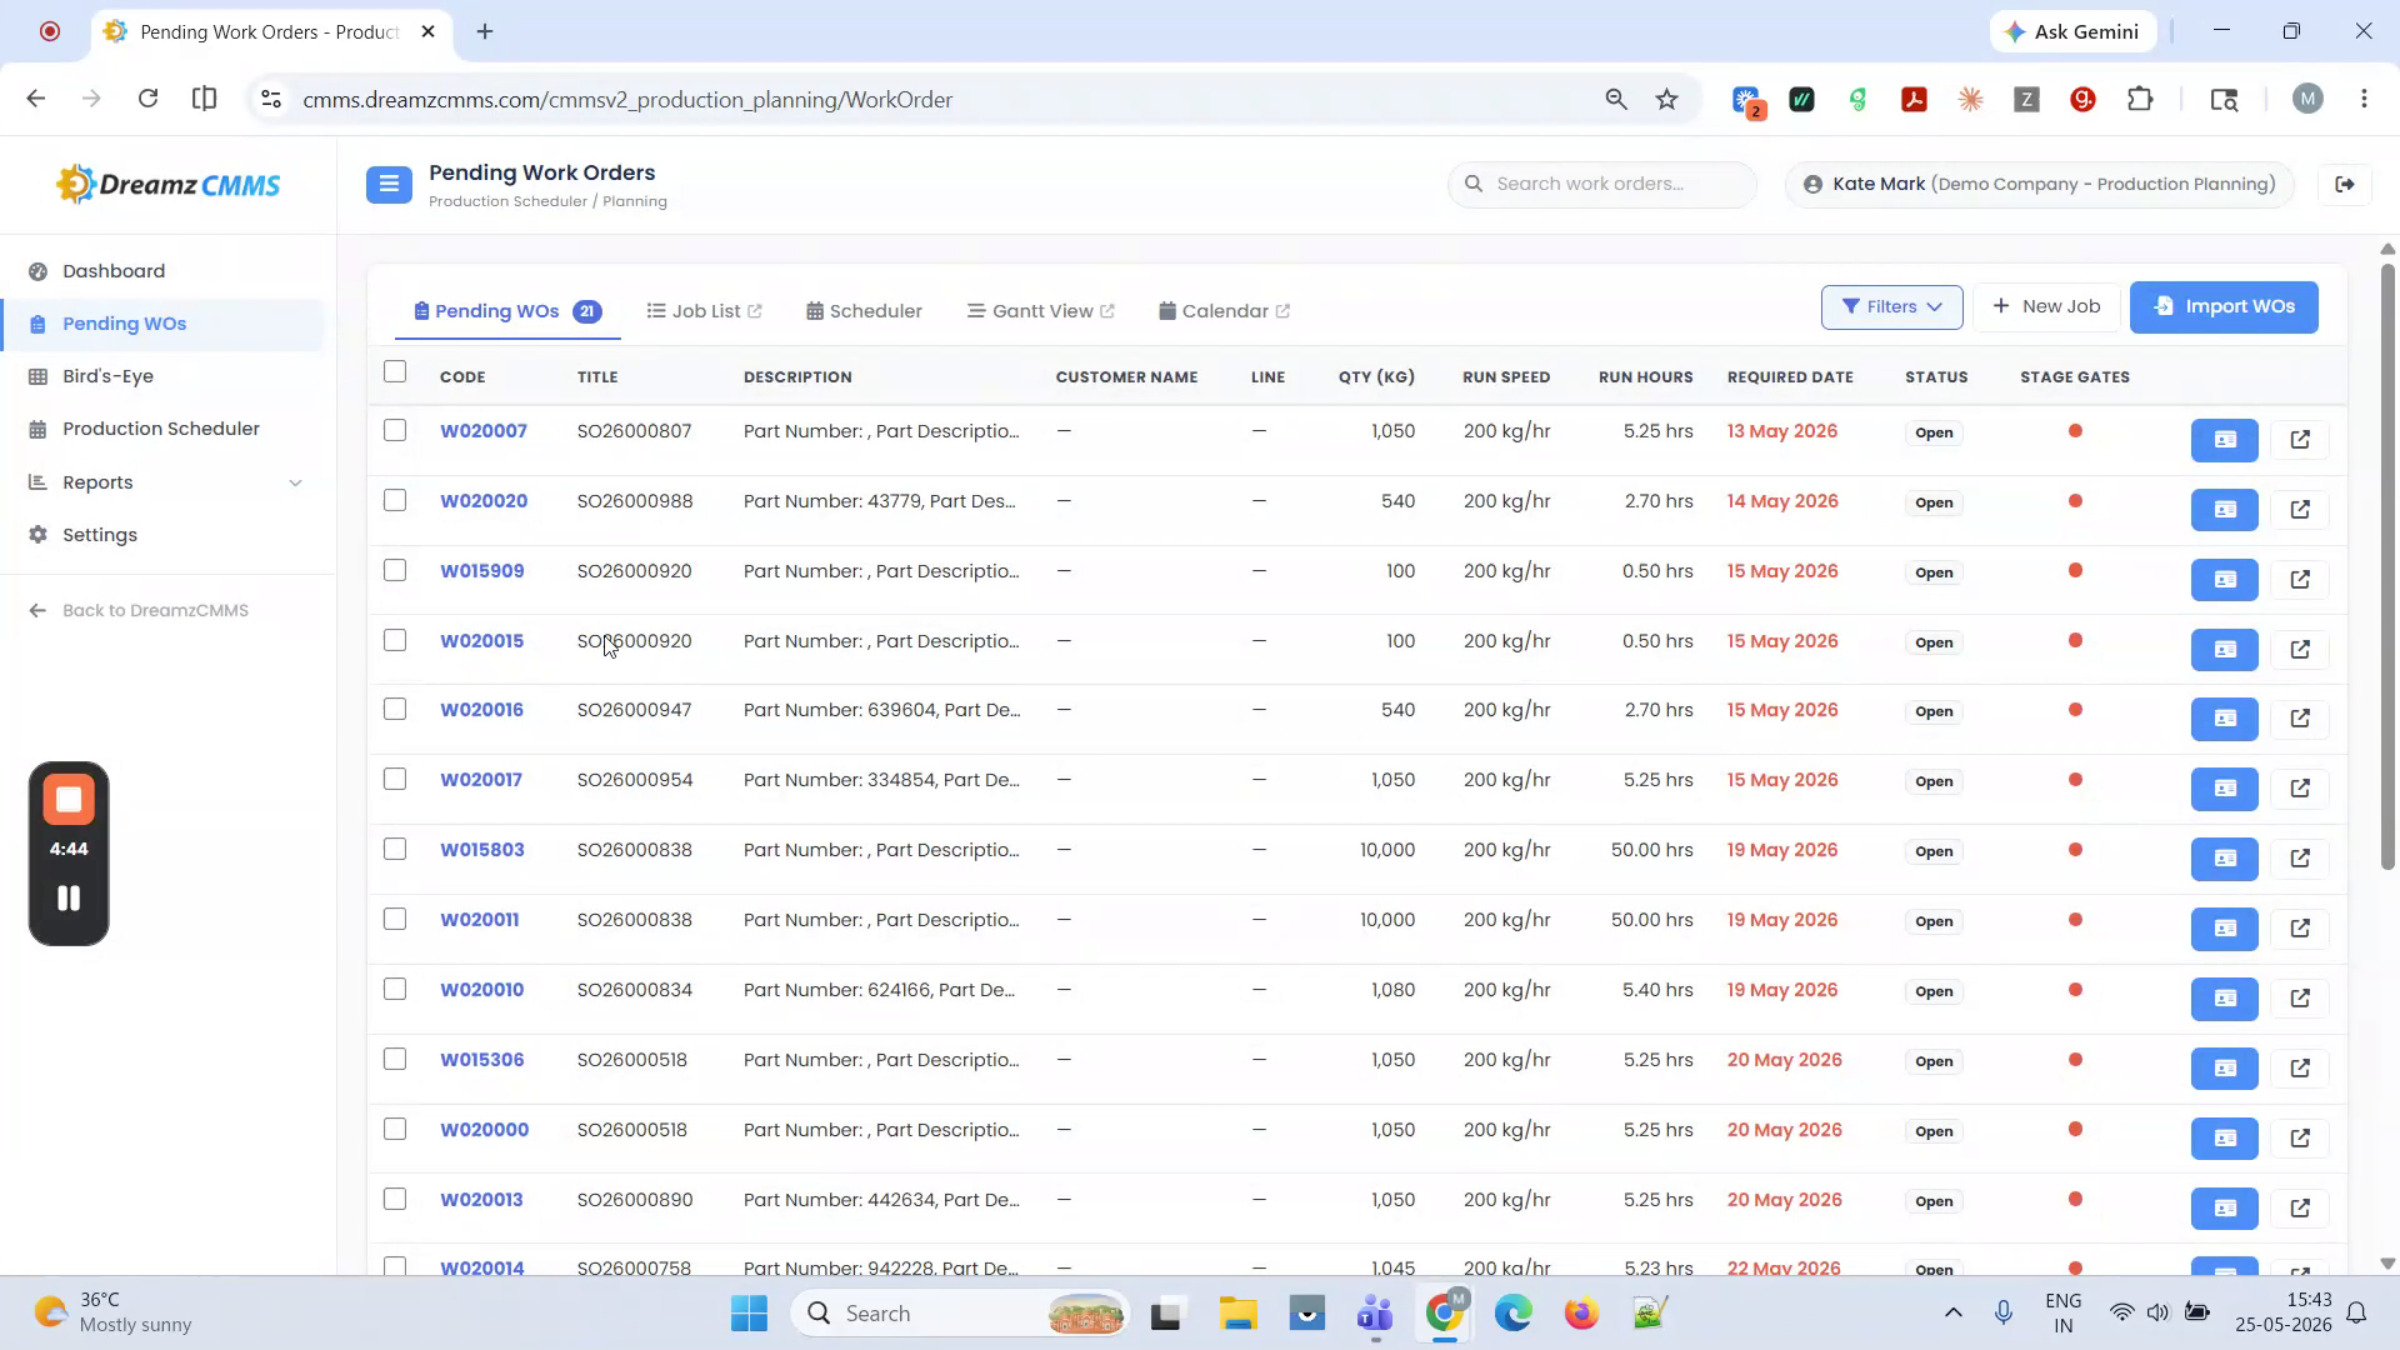
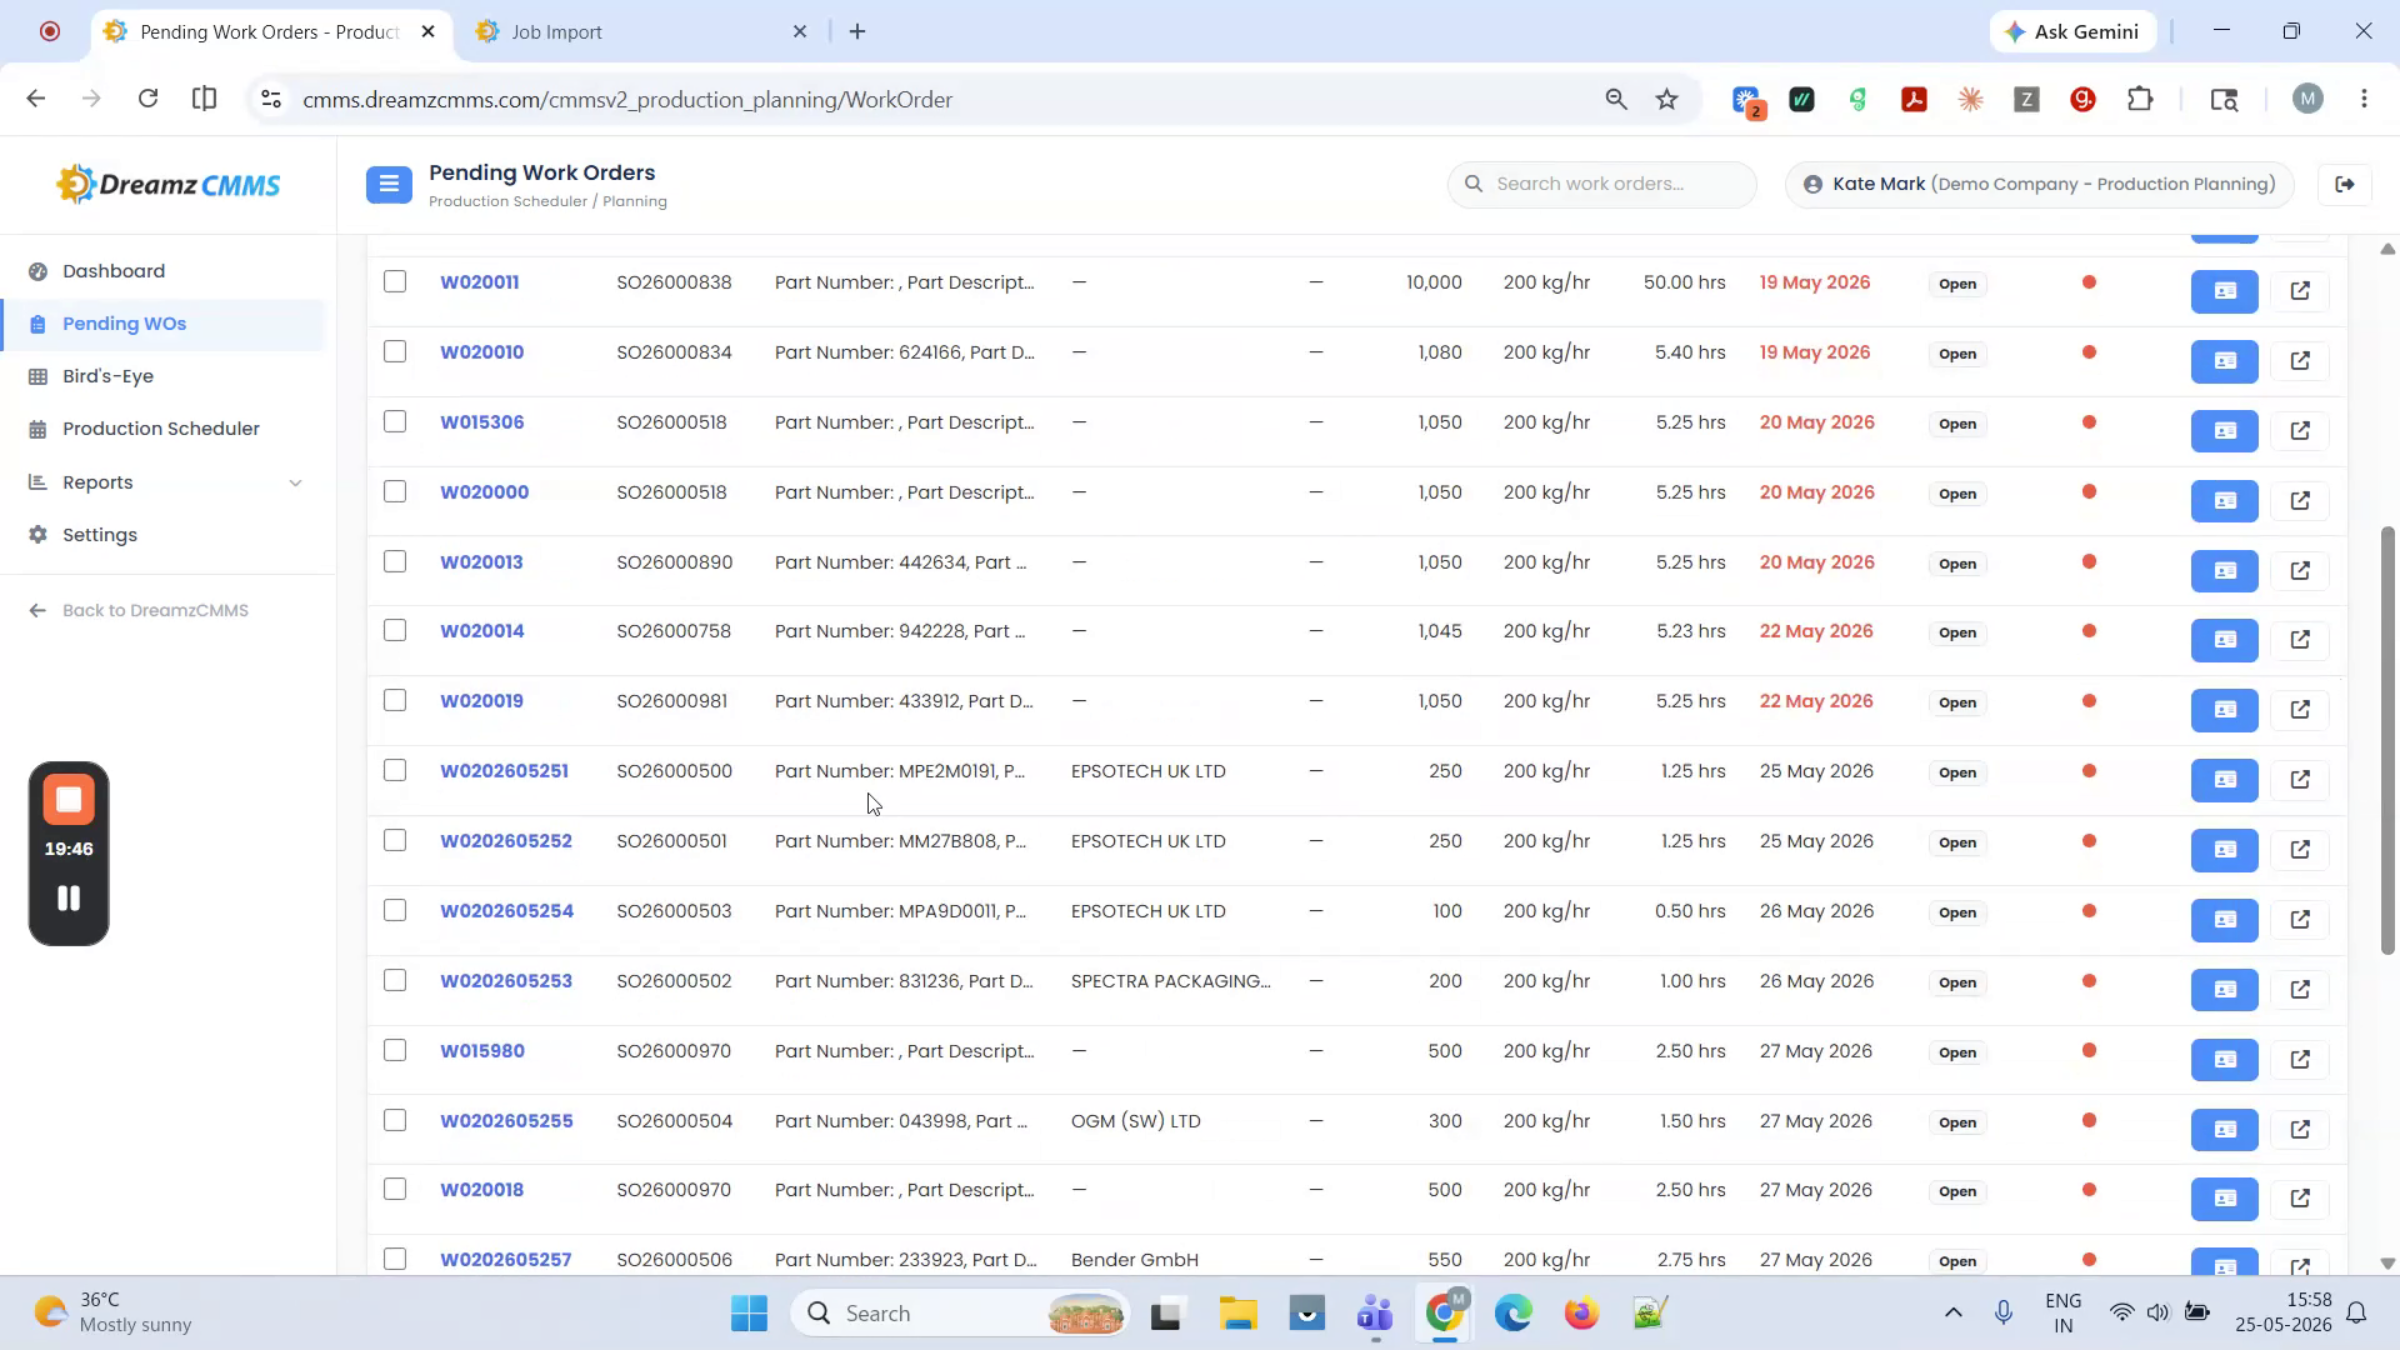
Step 4 – Review Pending Work Orders
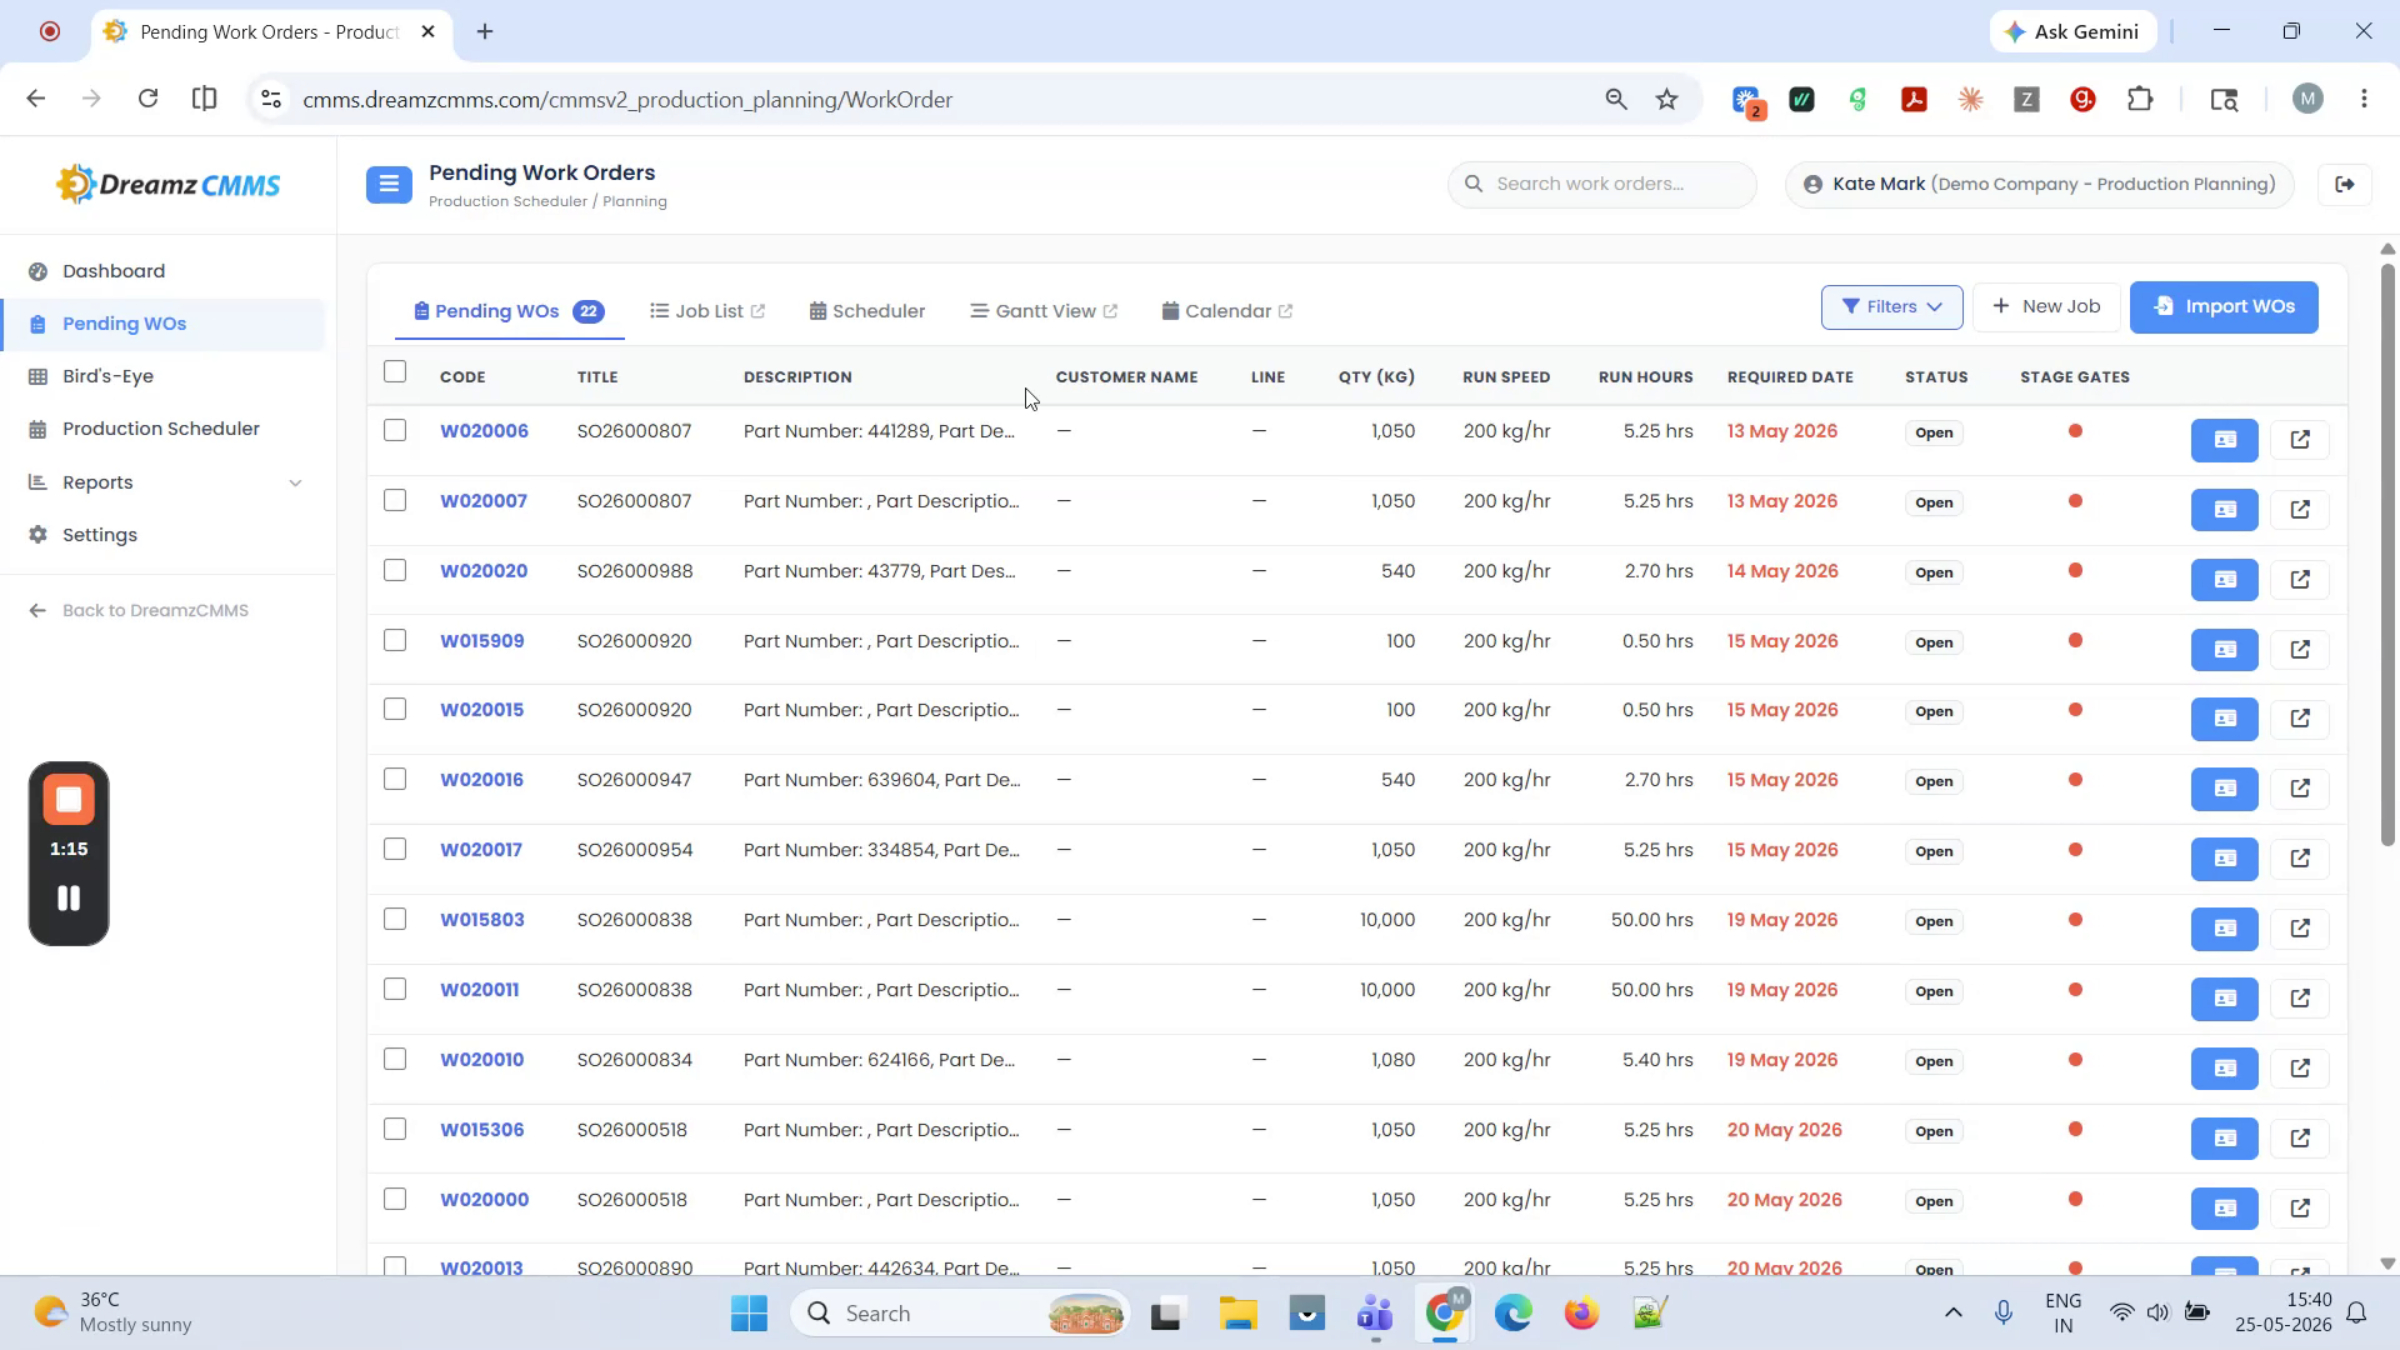
Move on to the Work Order (or Pending Work Order) section to review all imported jobs.
Step 5 – Search and Filter Work Orders
You can search and filter work orders by date range, status, production line, or by using the work order number or product.
Manage Work Orders and Job Cards
Step 1 – Enter Run Speed on a Job Card
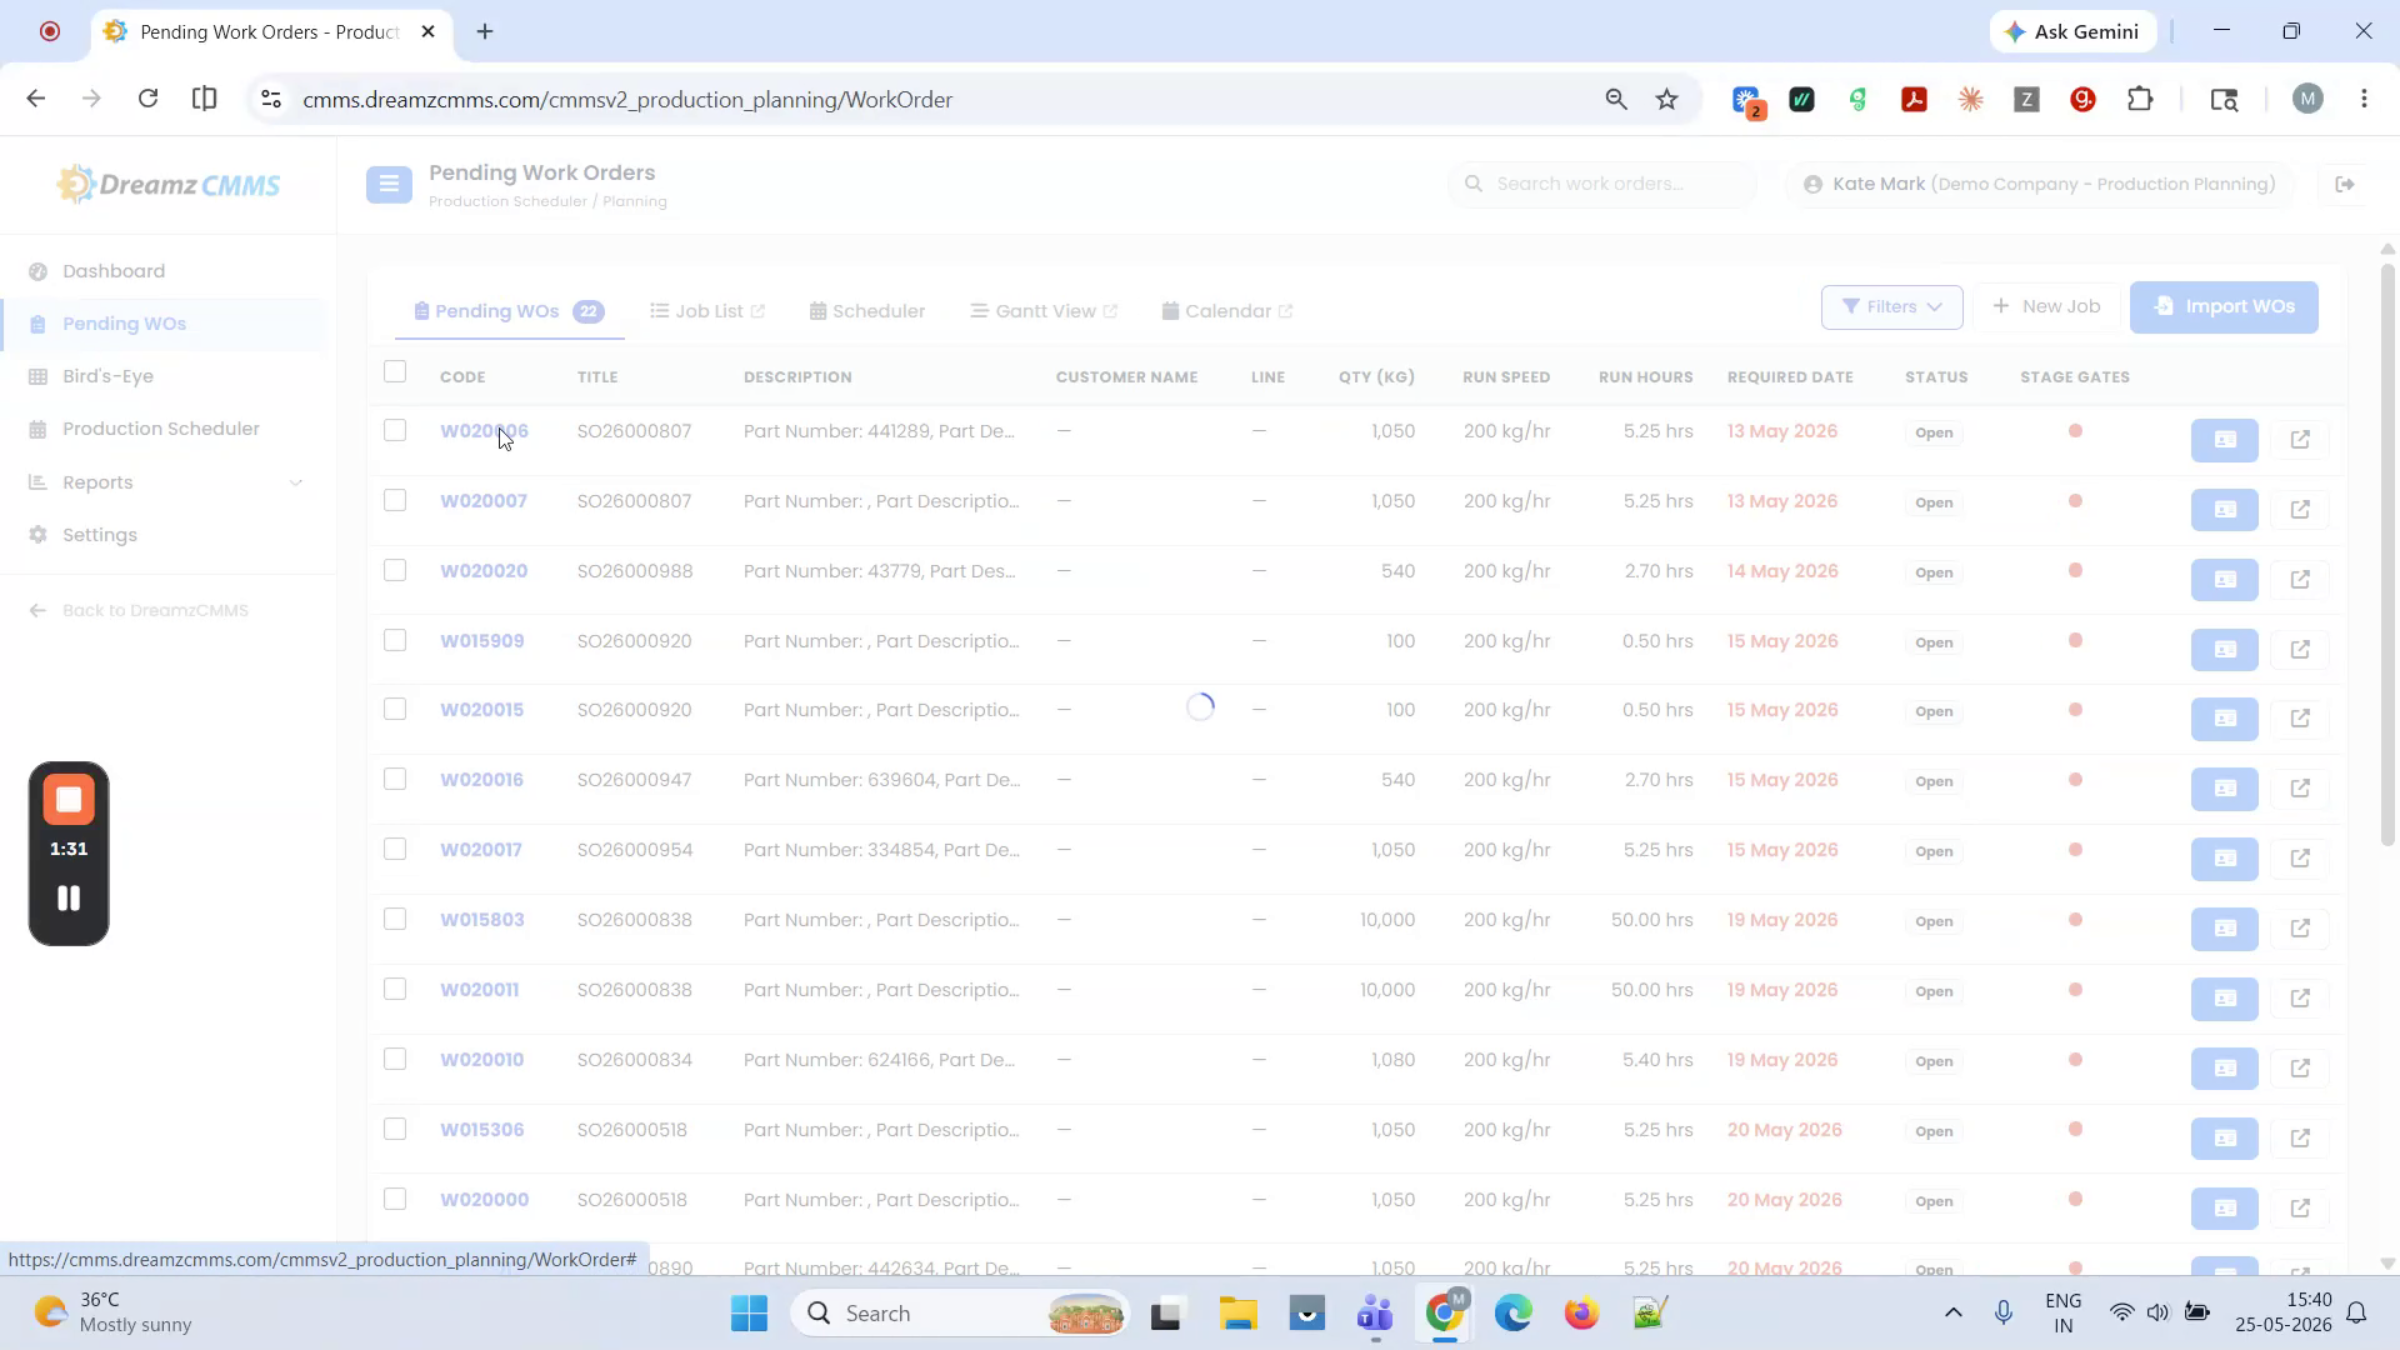
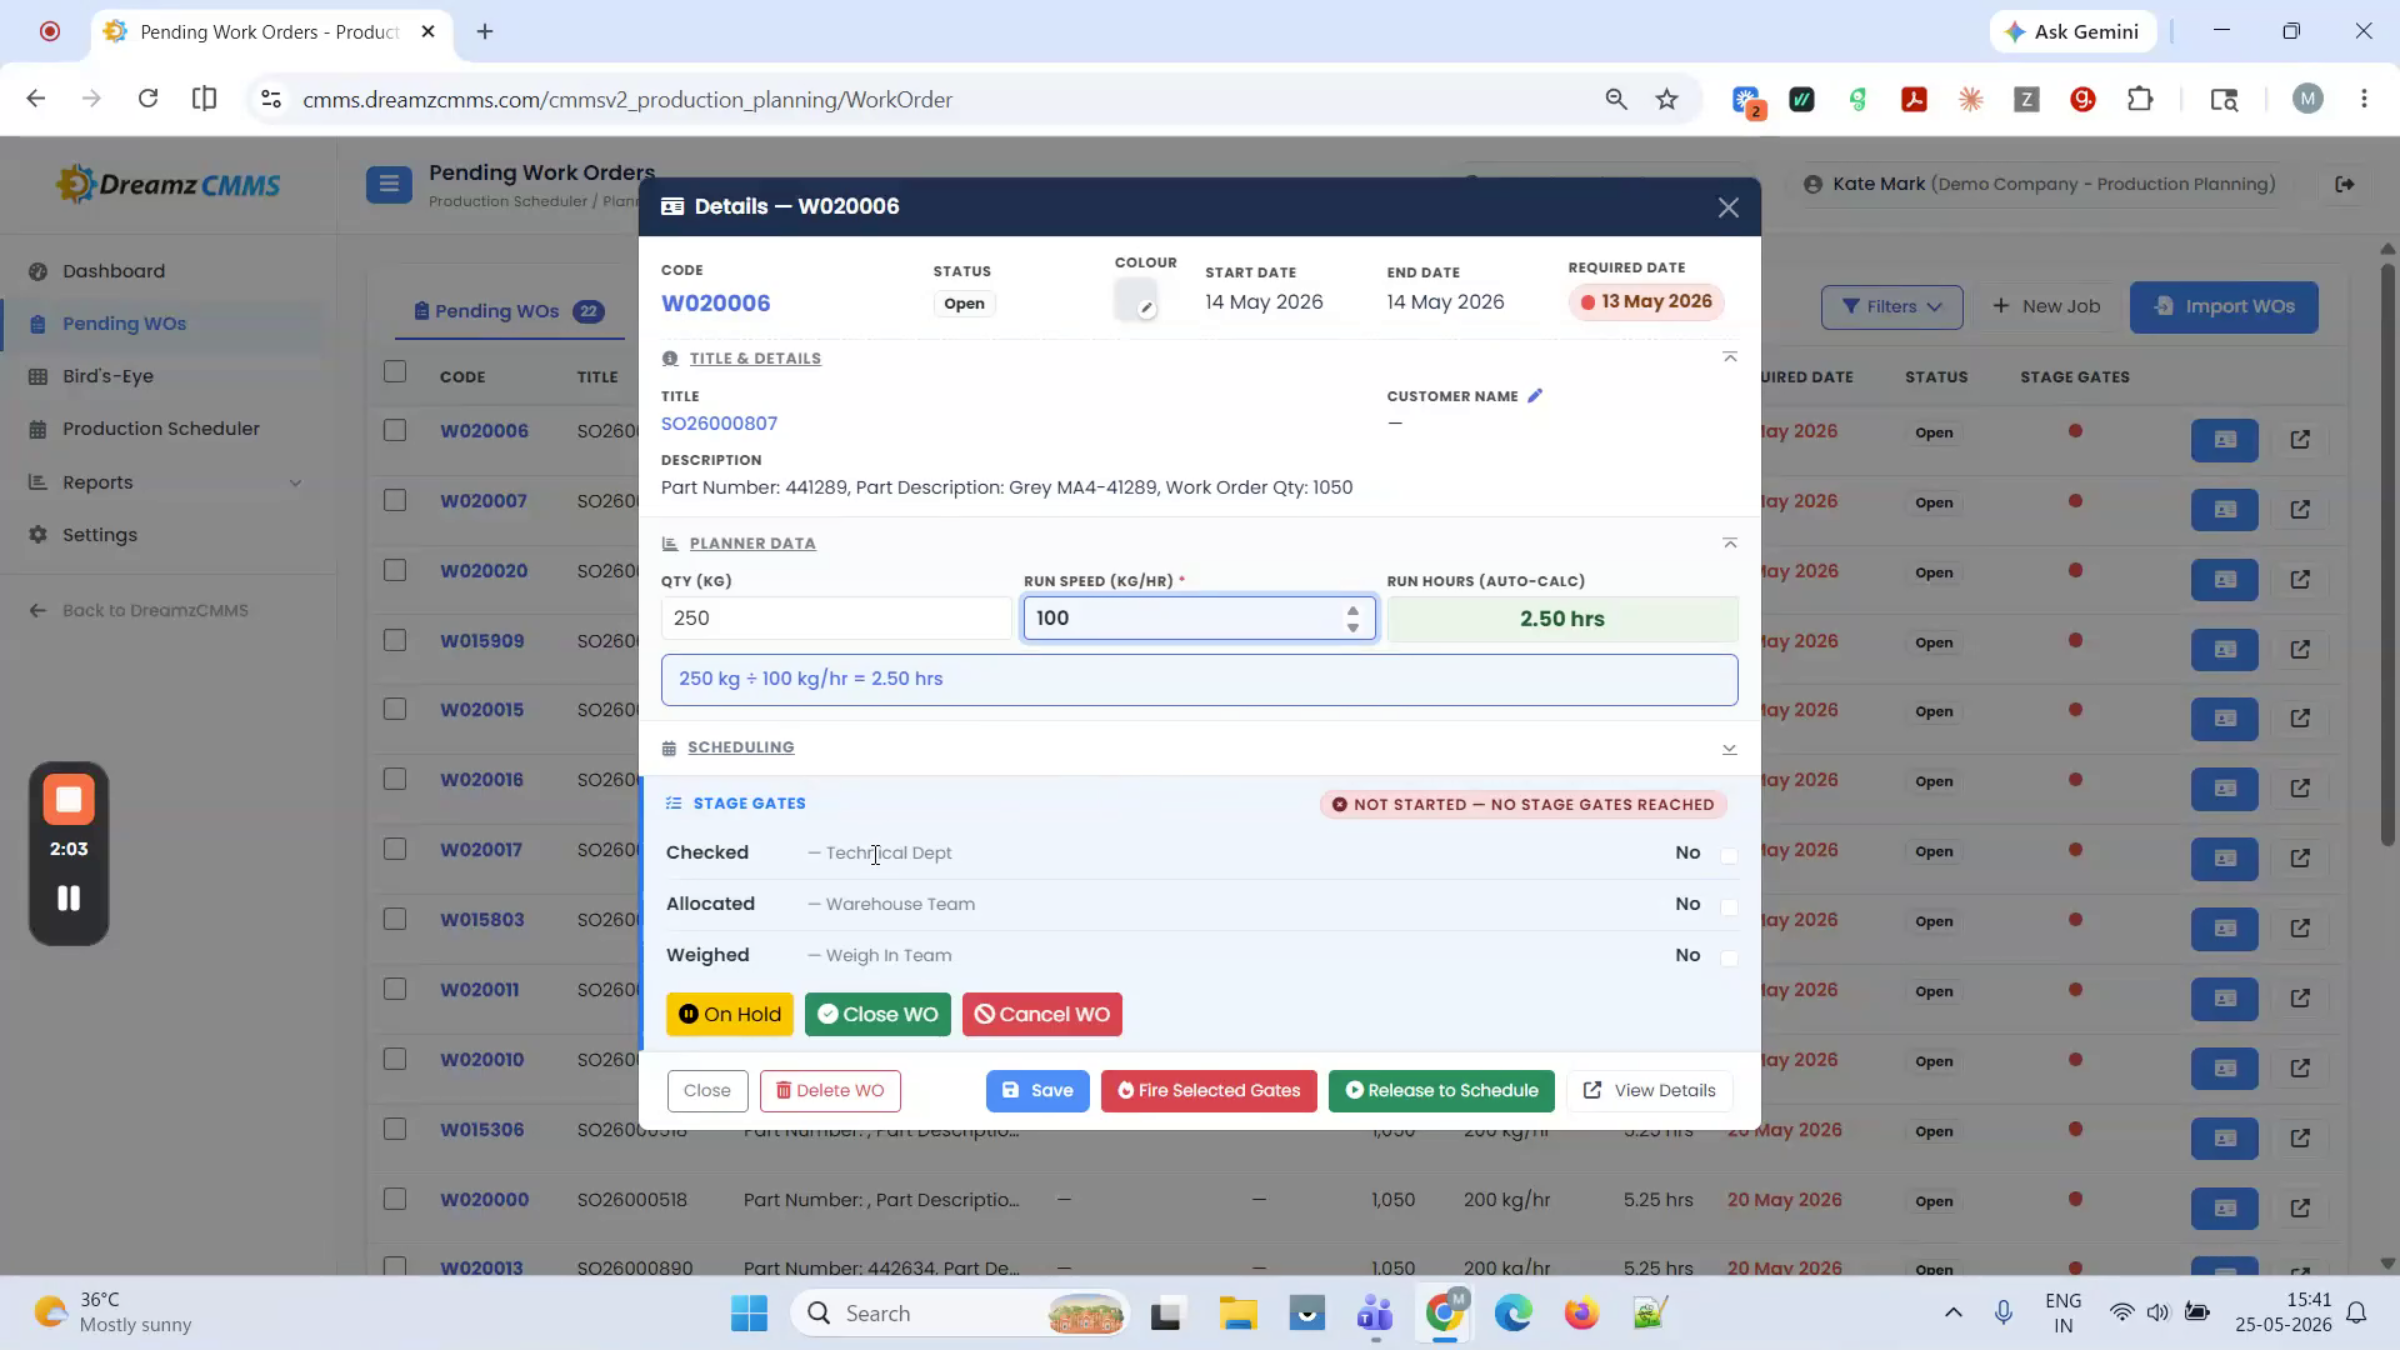
Click on any job to open the job card. Here, you can input the run speed or quantity, and the run hours will be calculated automatically.
Step 2 – Assign the Production Line and Status
Assign the production line from this section, and modify the start date and time as needed.
Step 3 – Update Status and Gate Color
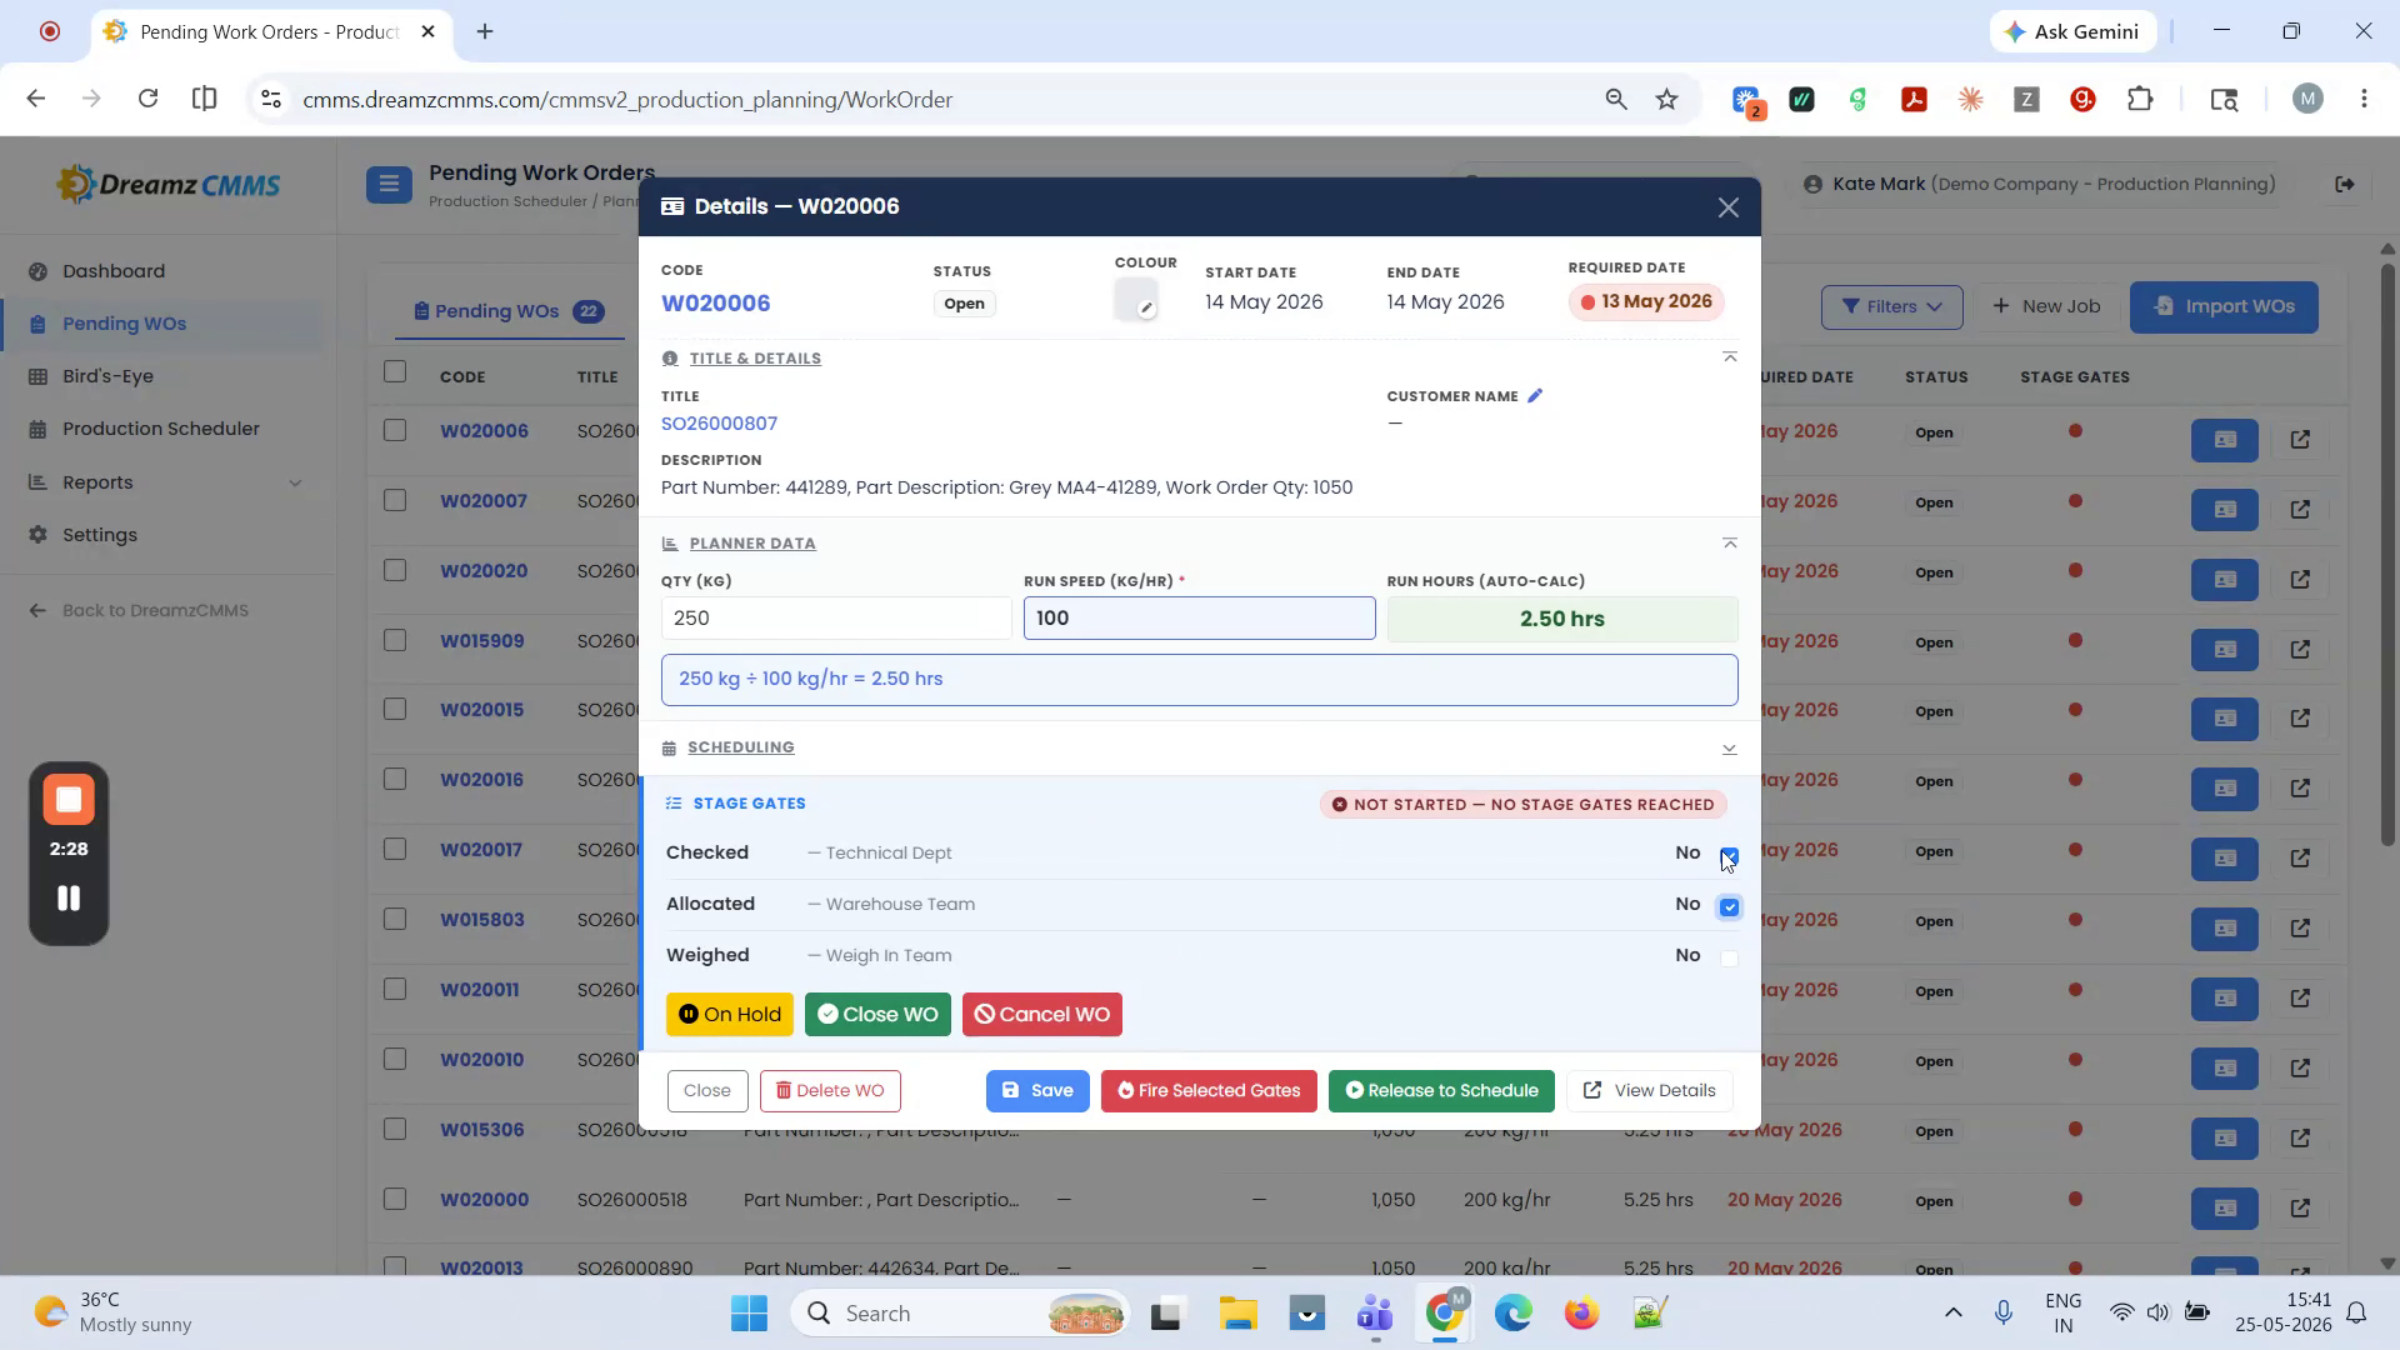
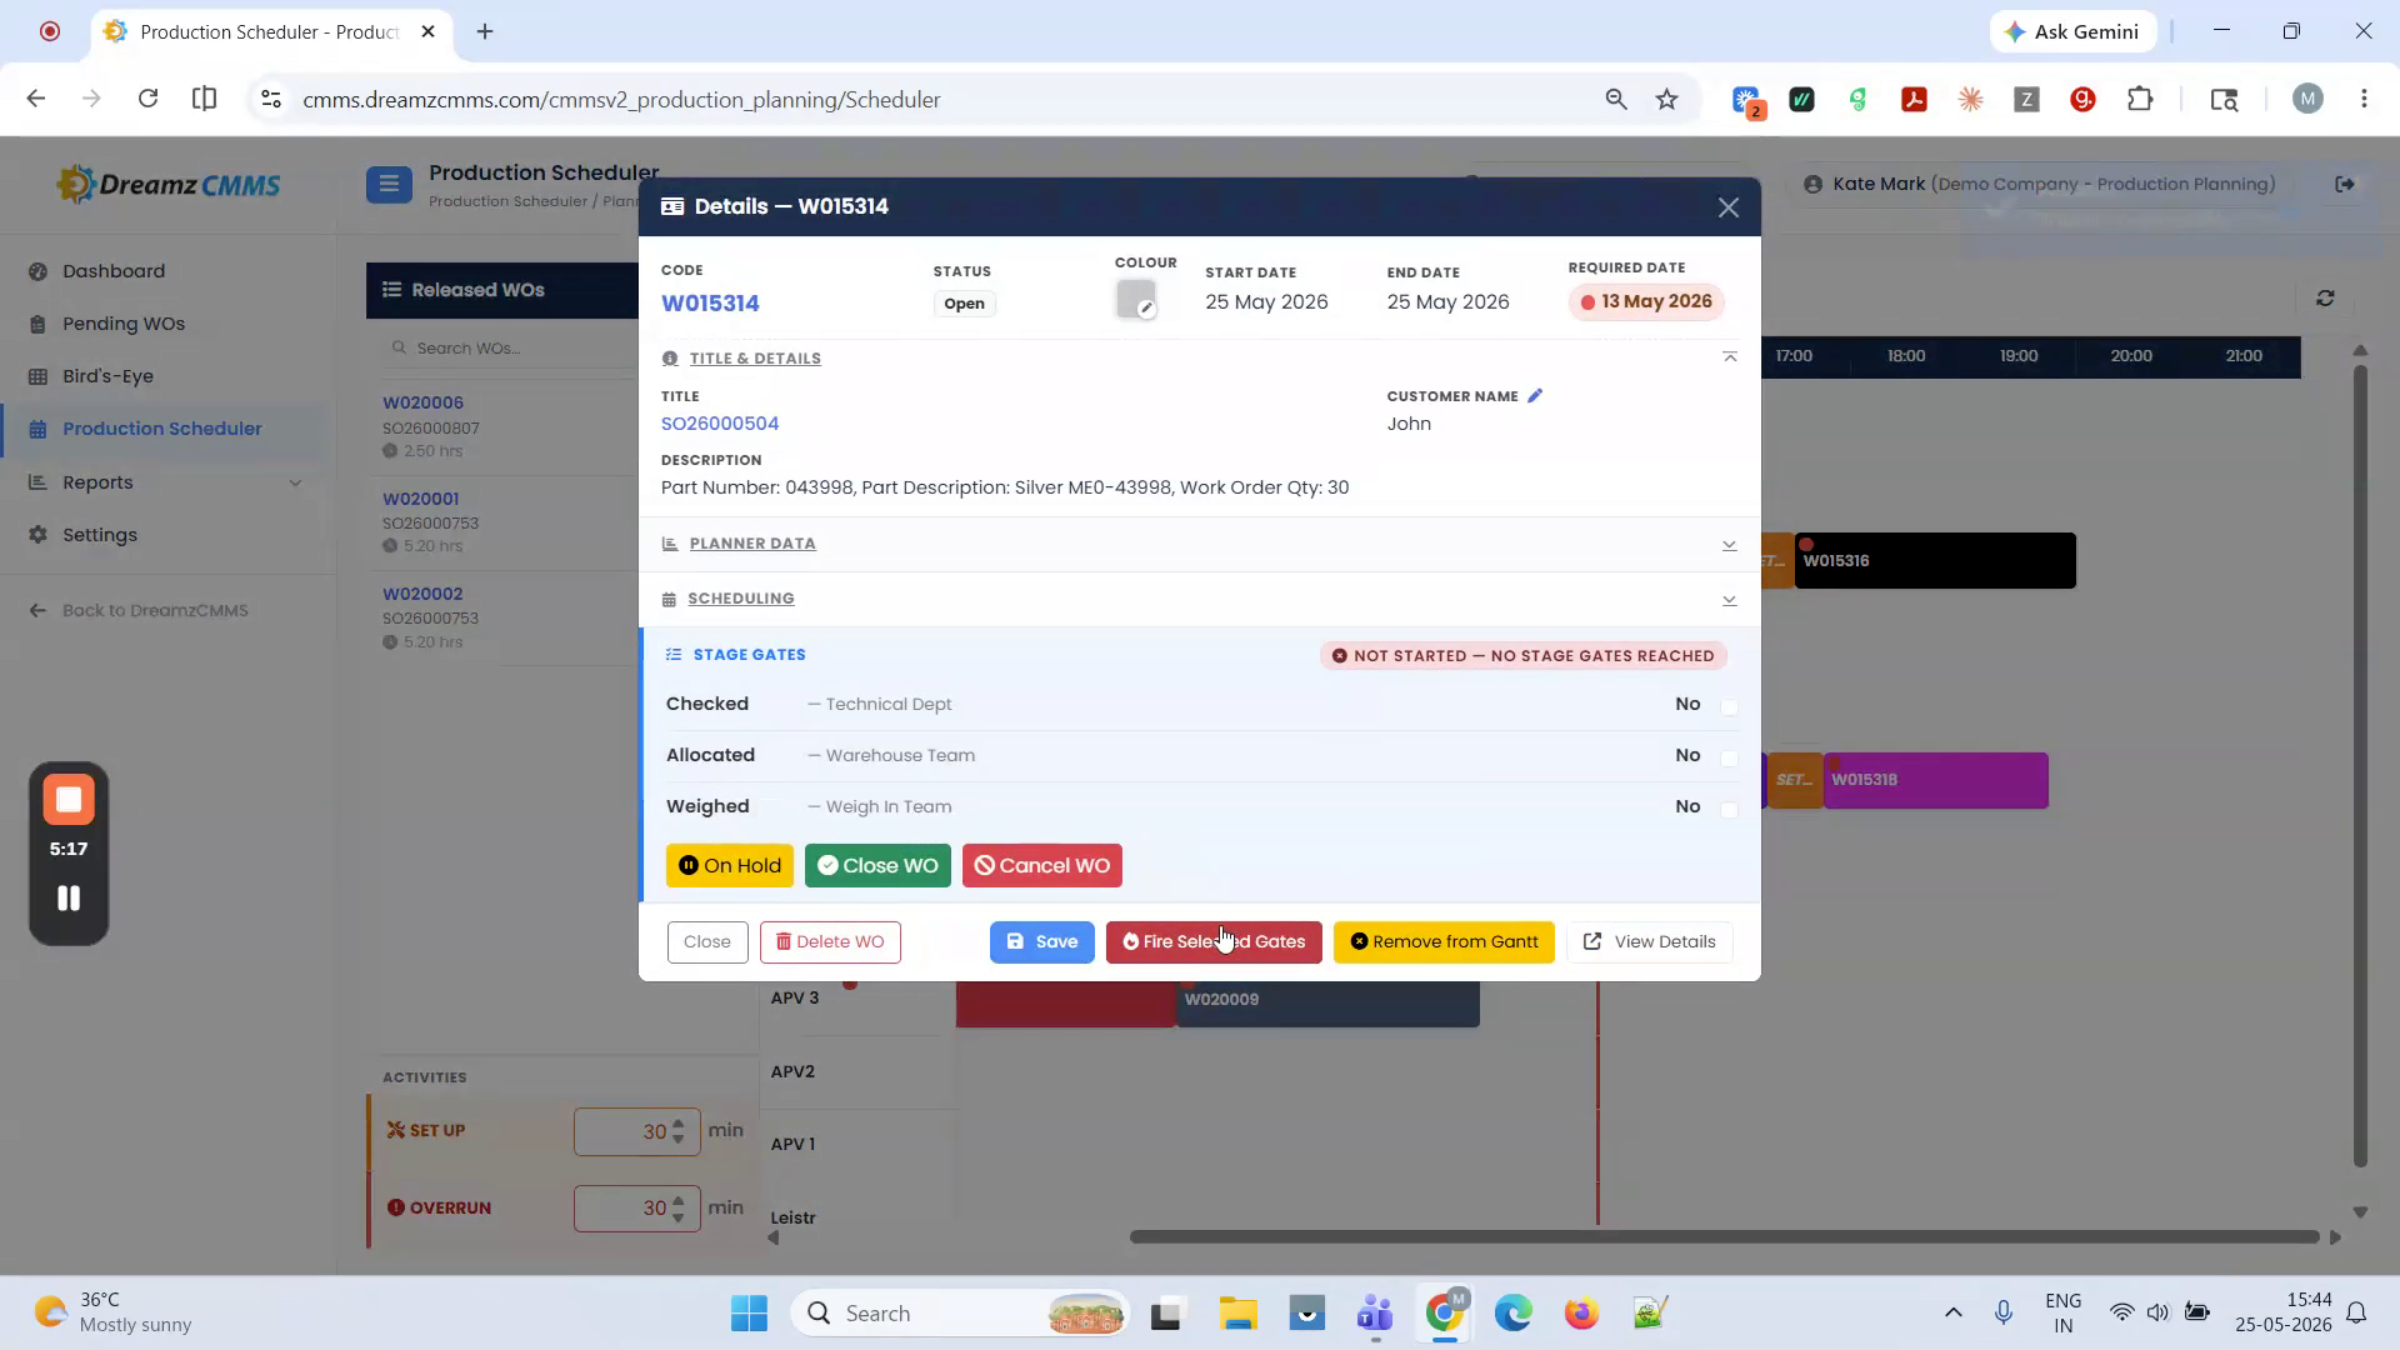
Check the status, then click "Fire Selected Gate." The current status for the job (for example, Allocated) is shown, and you can change the gate color from this location.
Step 4 – Add a Customer Name
You can input a customer name on the job card as well.
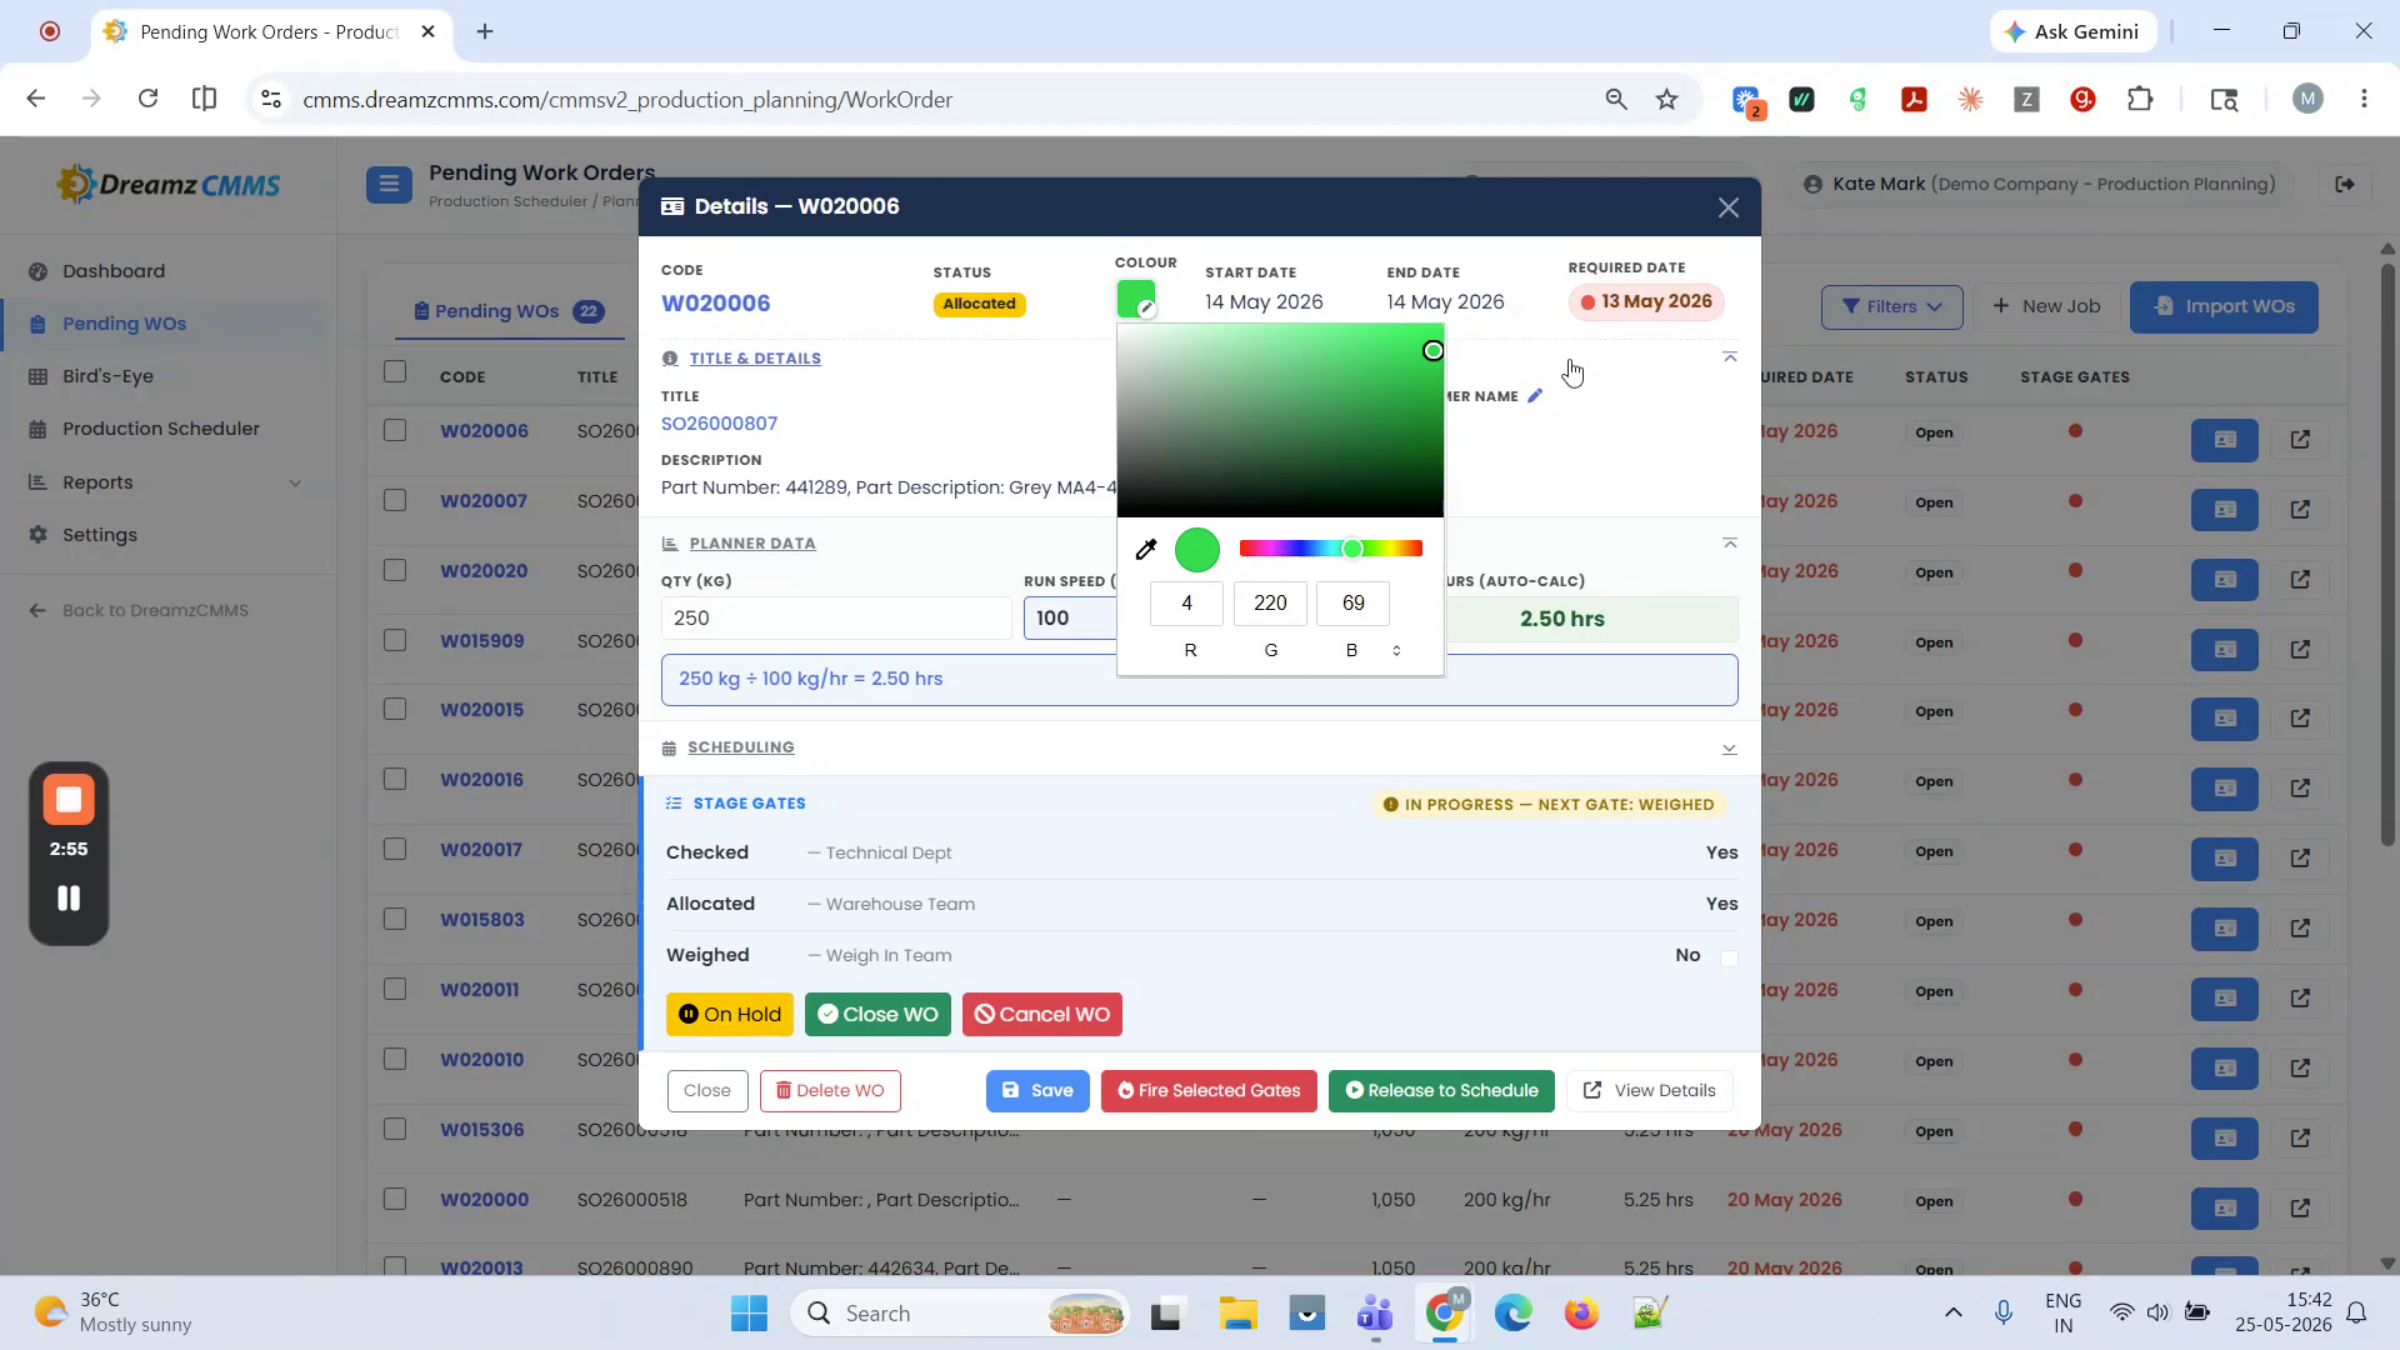
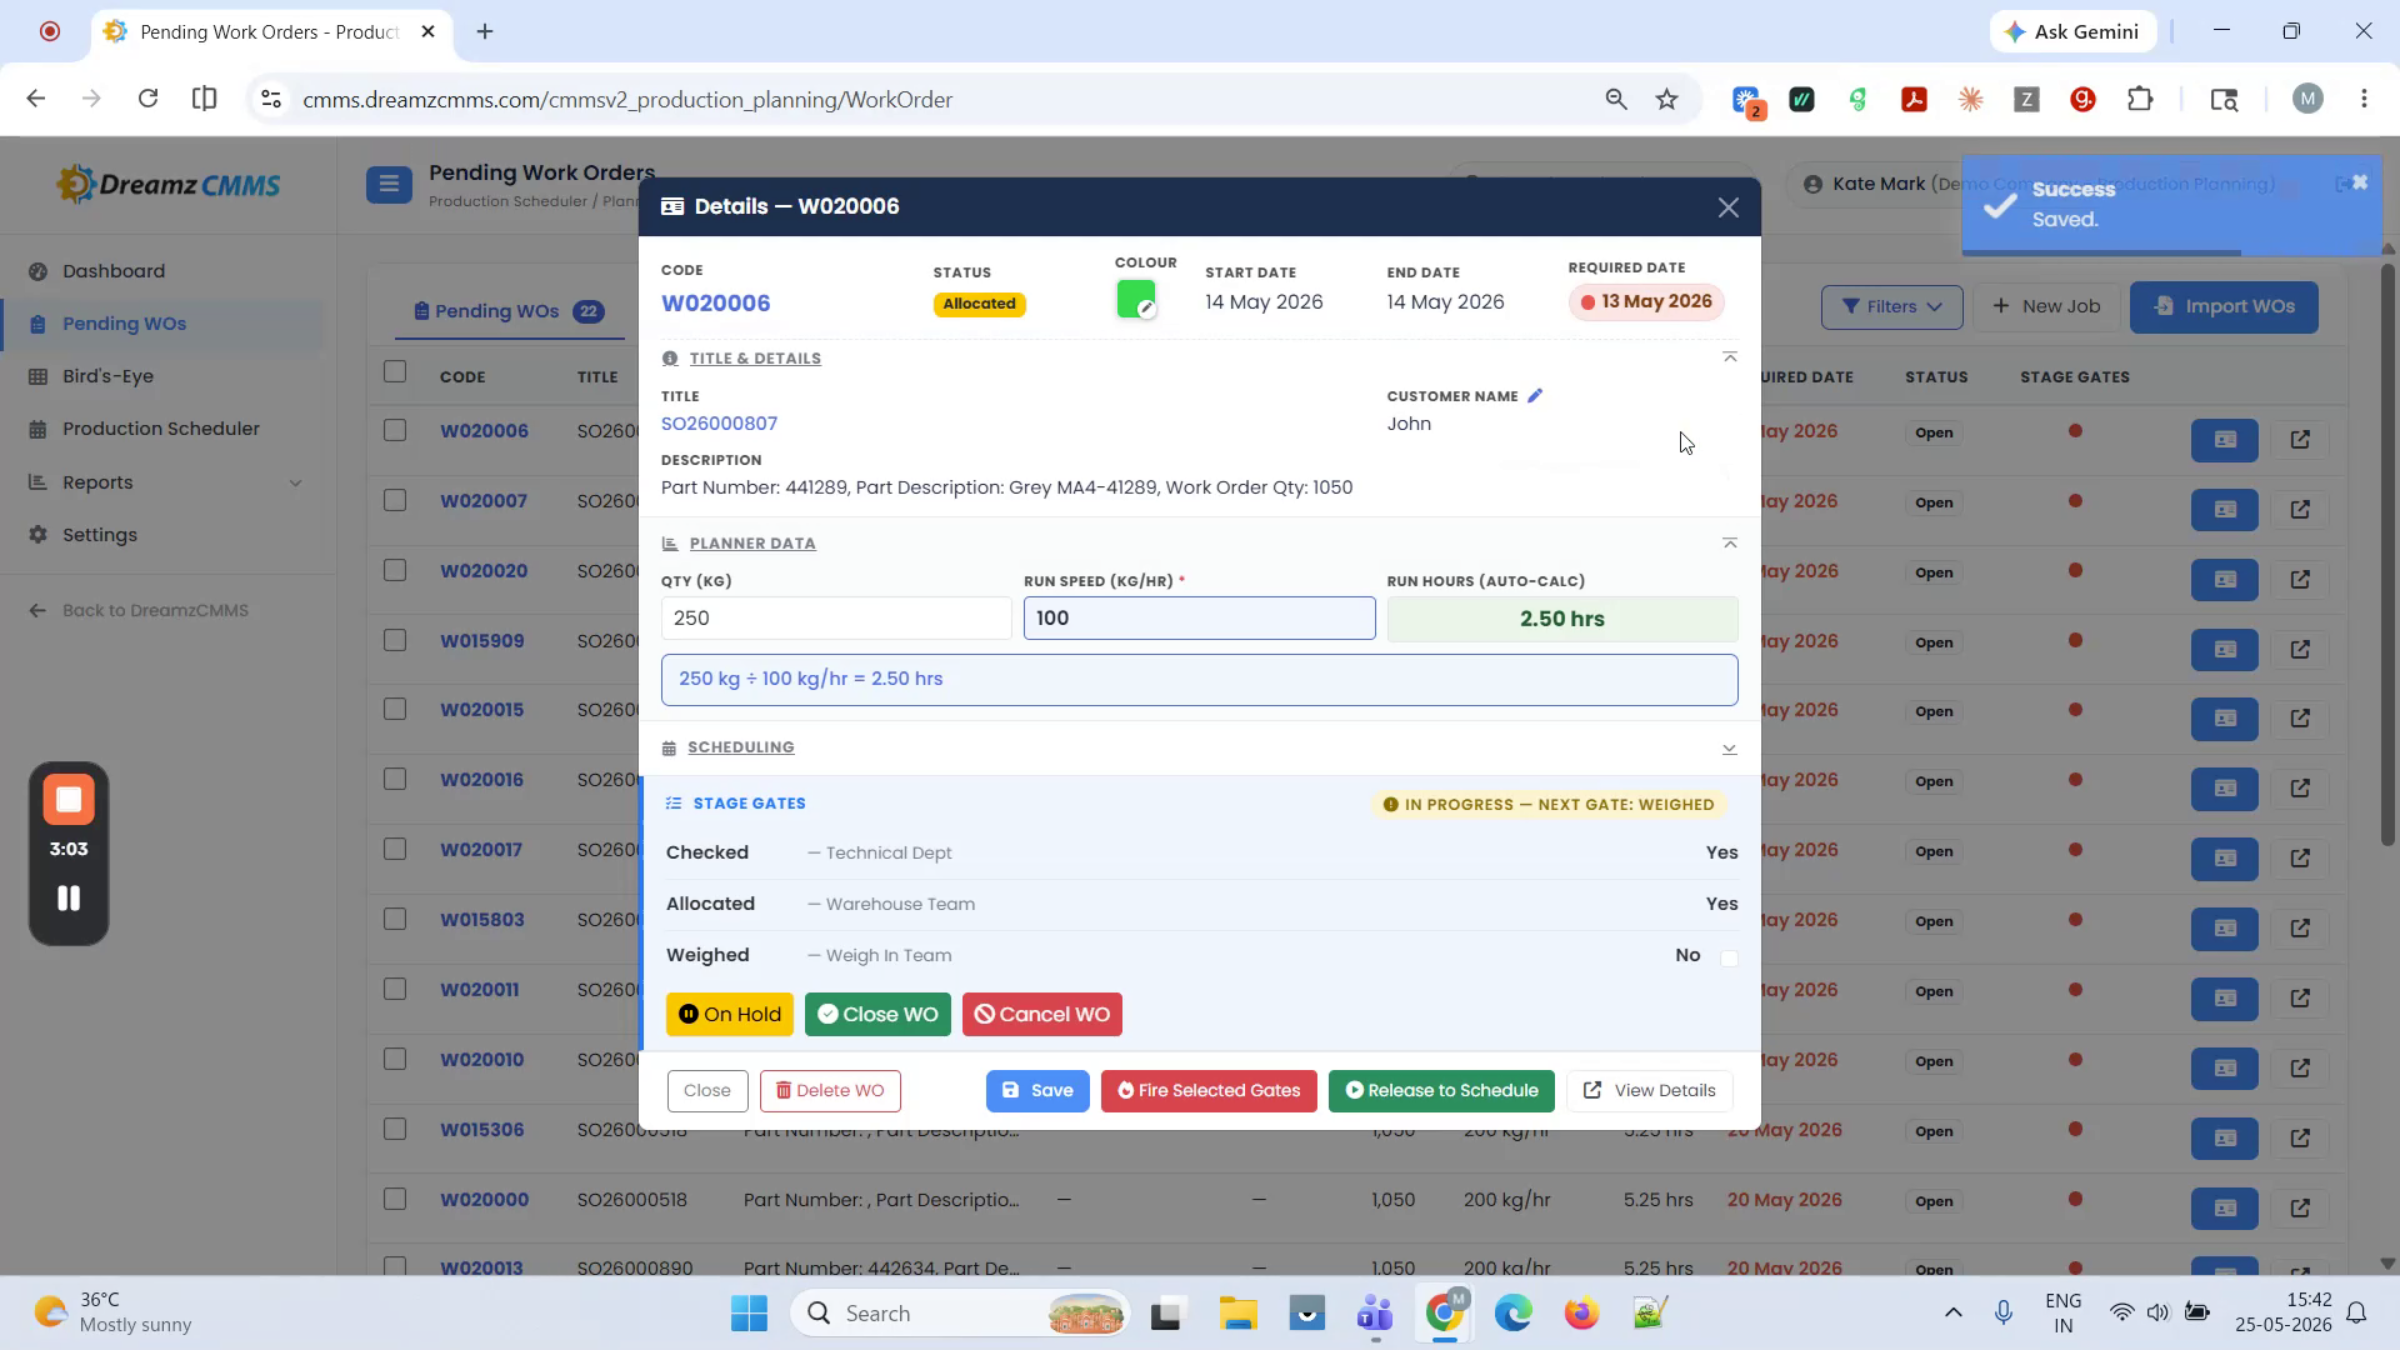
Step 5 – Release a Work Order to the Schedule
Click Release to send the work order to the schedule. Once released, it's successfully placed on the production schedule.
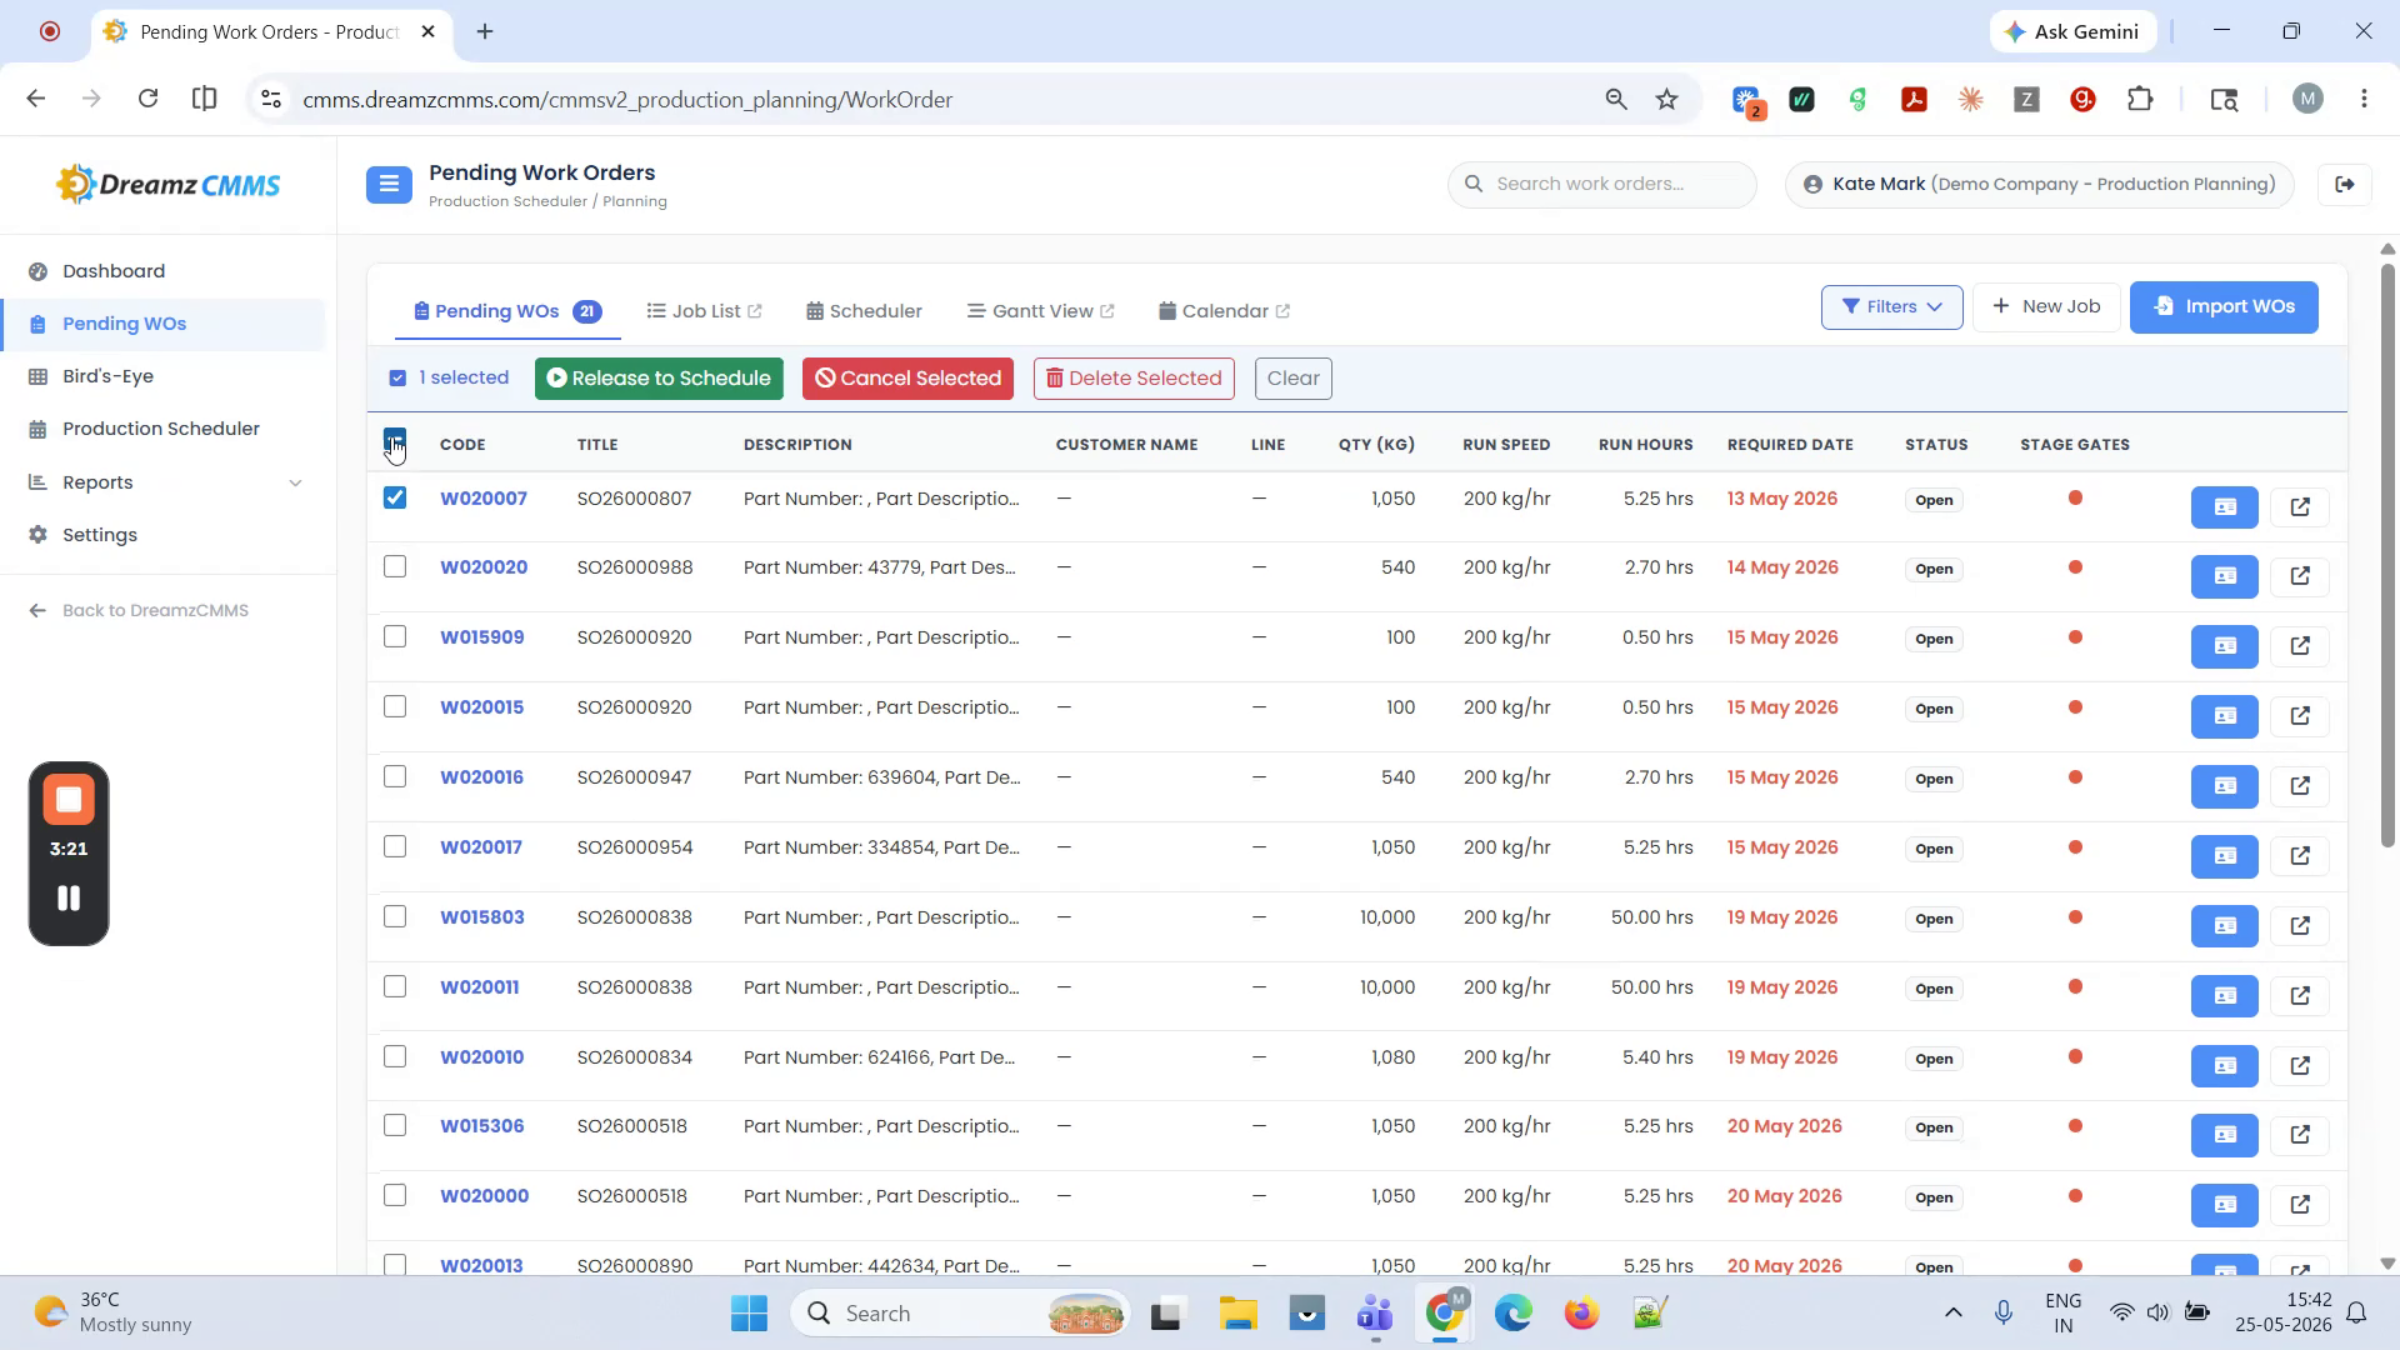
Step 6 – Release Multiple Work Orders at Once
To release several work orders at once, check the checkboxes next to each one and click Release to Schedule.
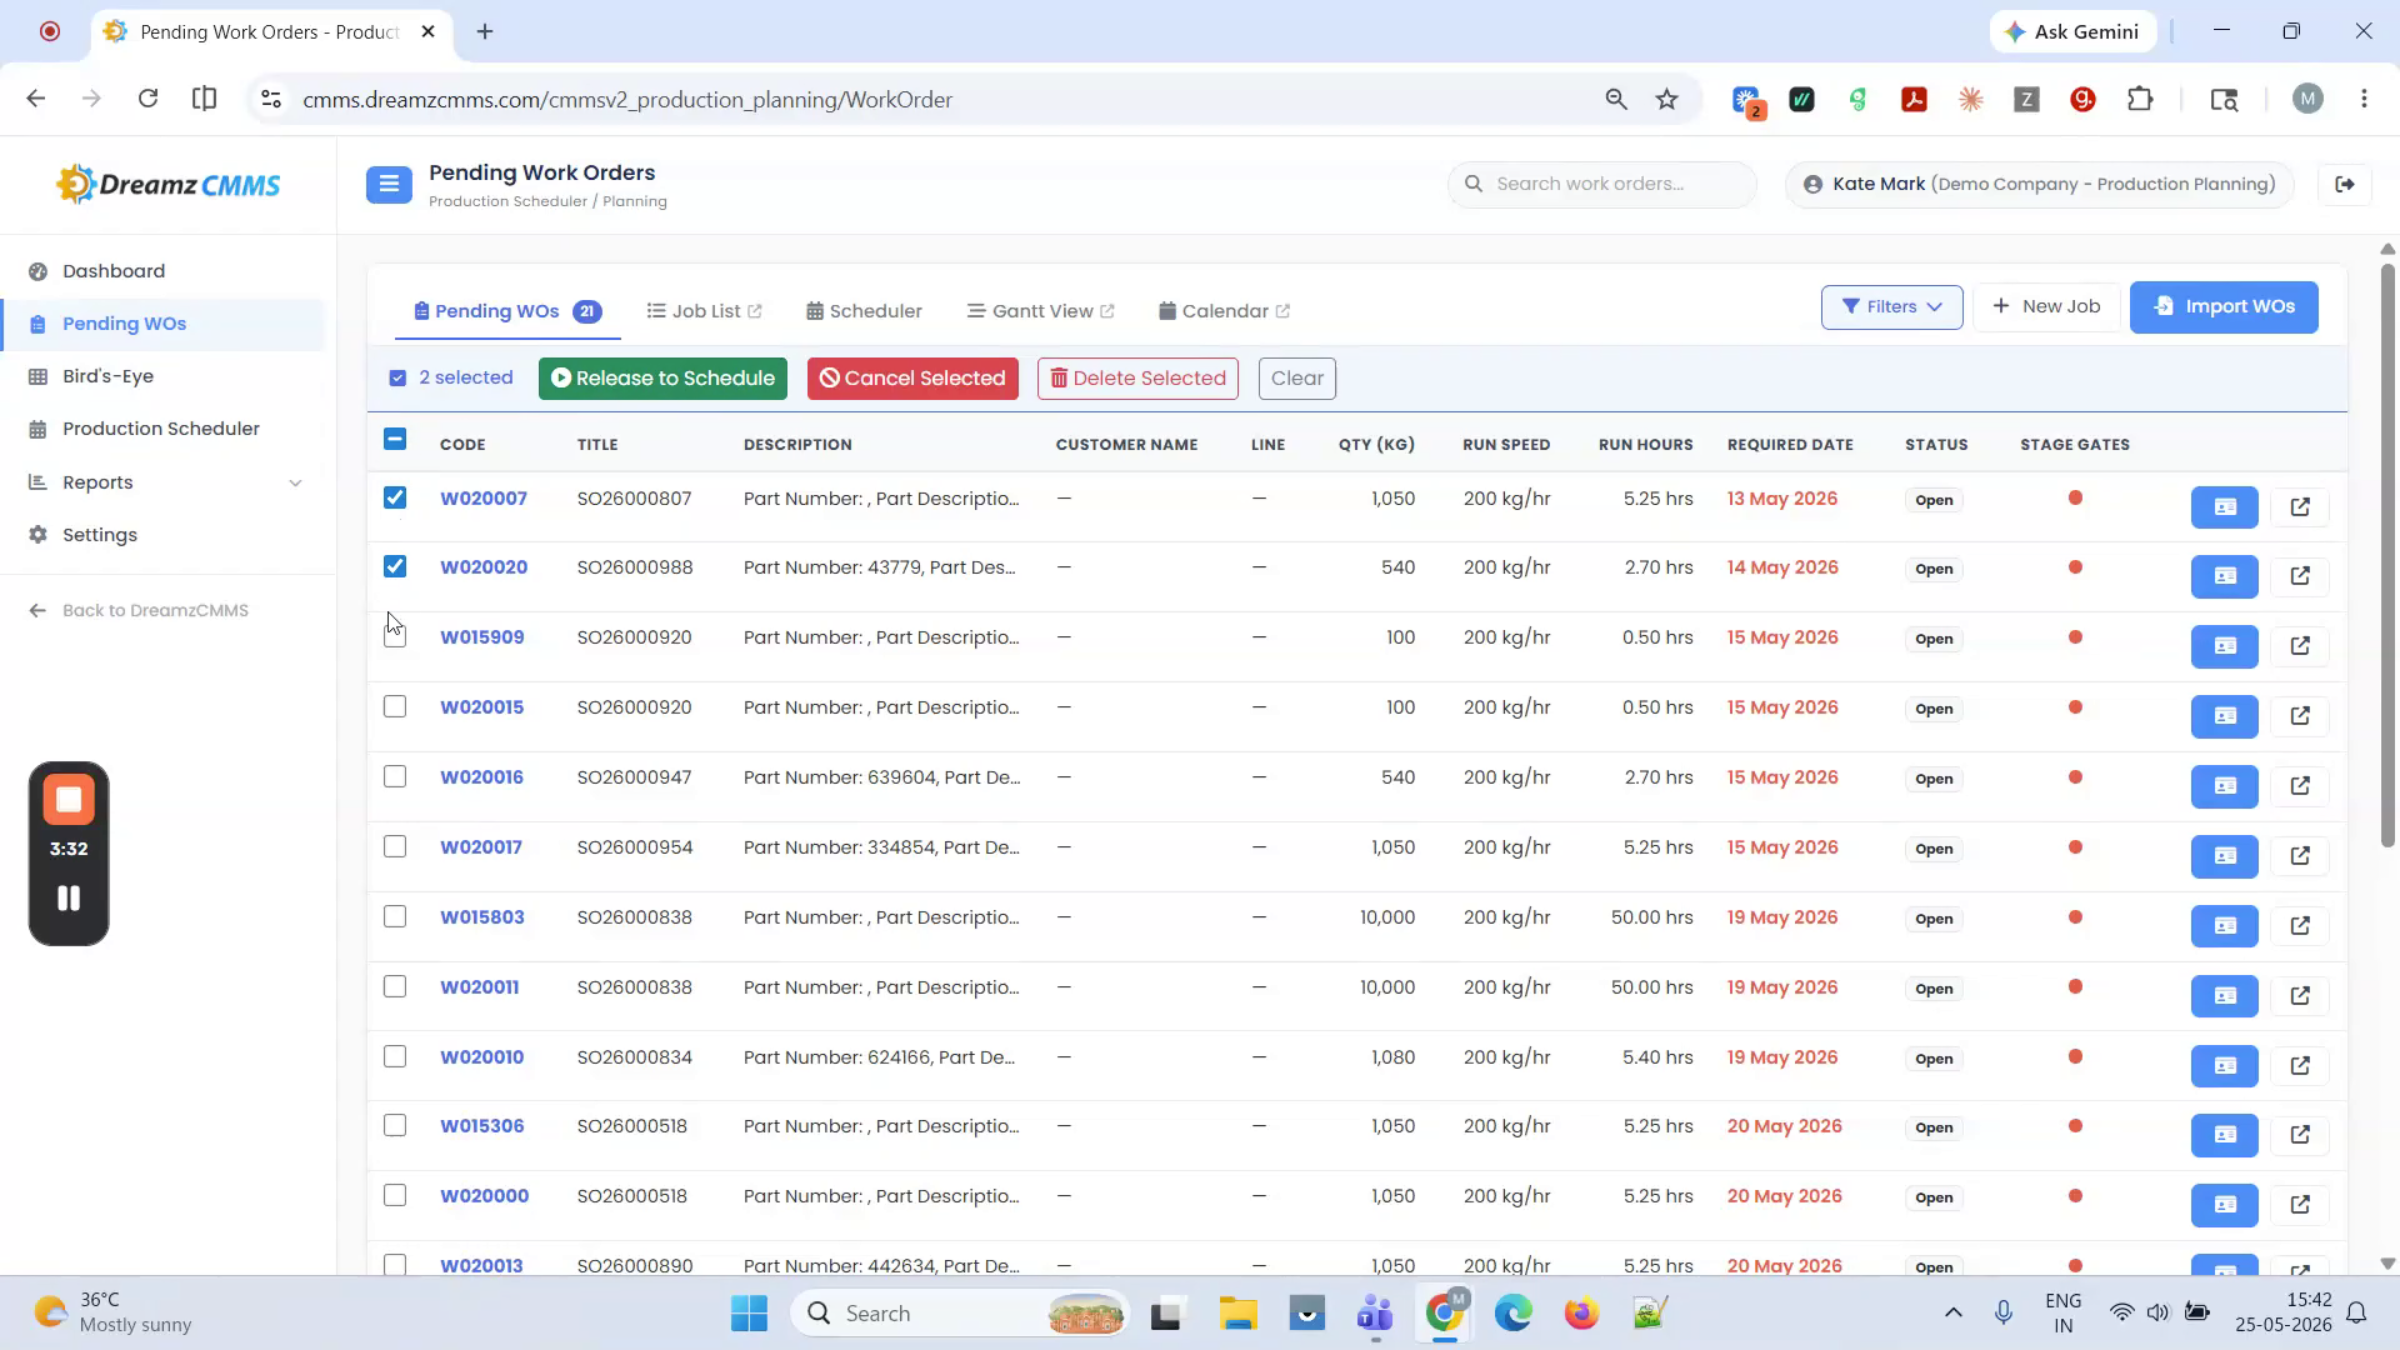
Step 7 – Bulk Cancel or Delete Work Orders
The same selection lets you bulk cancel or delete work orders — cancel from this location, or delete the selected work orders as needed.
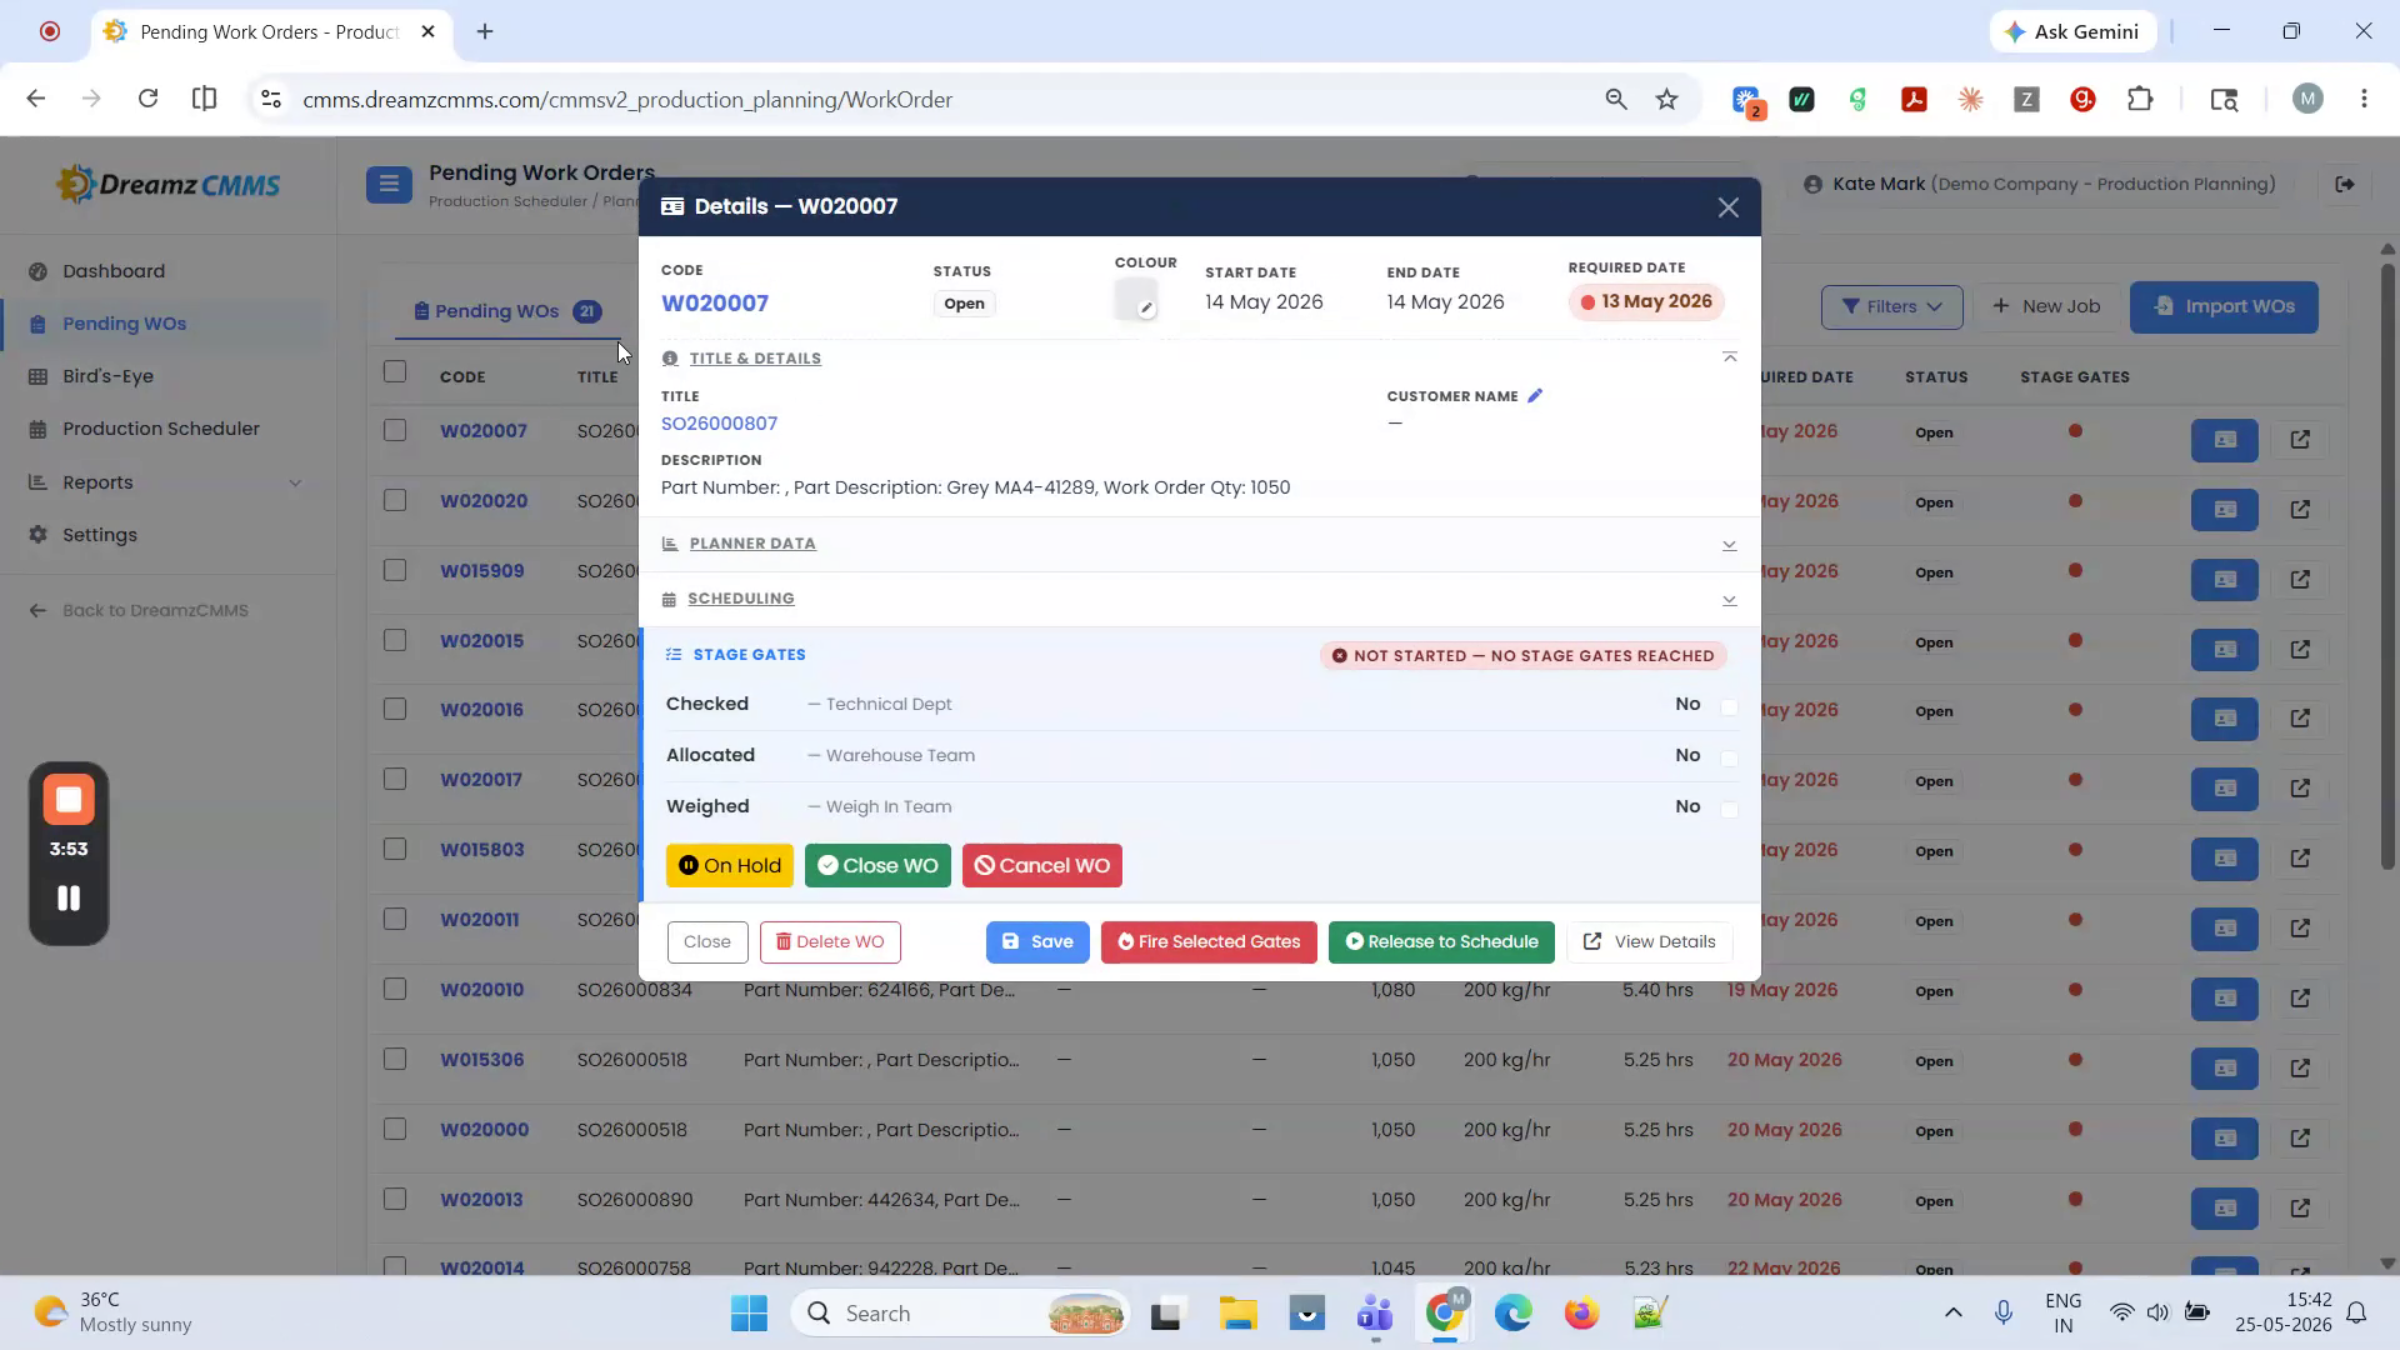
Step 8 – Open the Job Card Popup
Clicking a work order opens the job card popup.
Step 9 – Review the Job Card Details
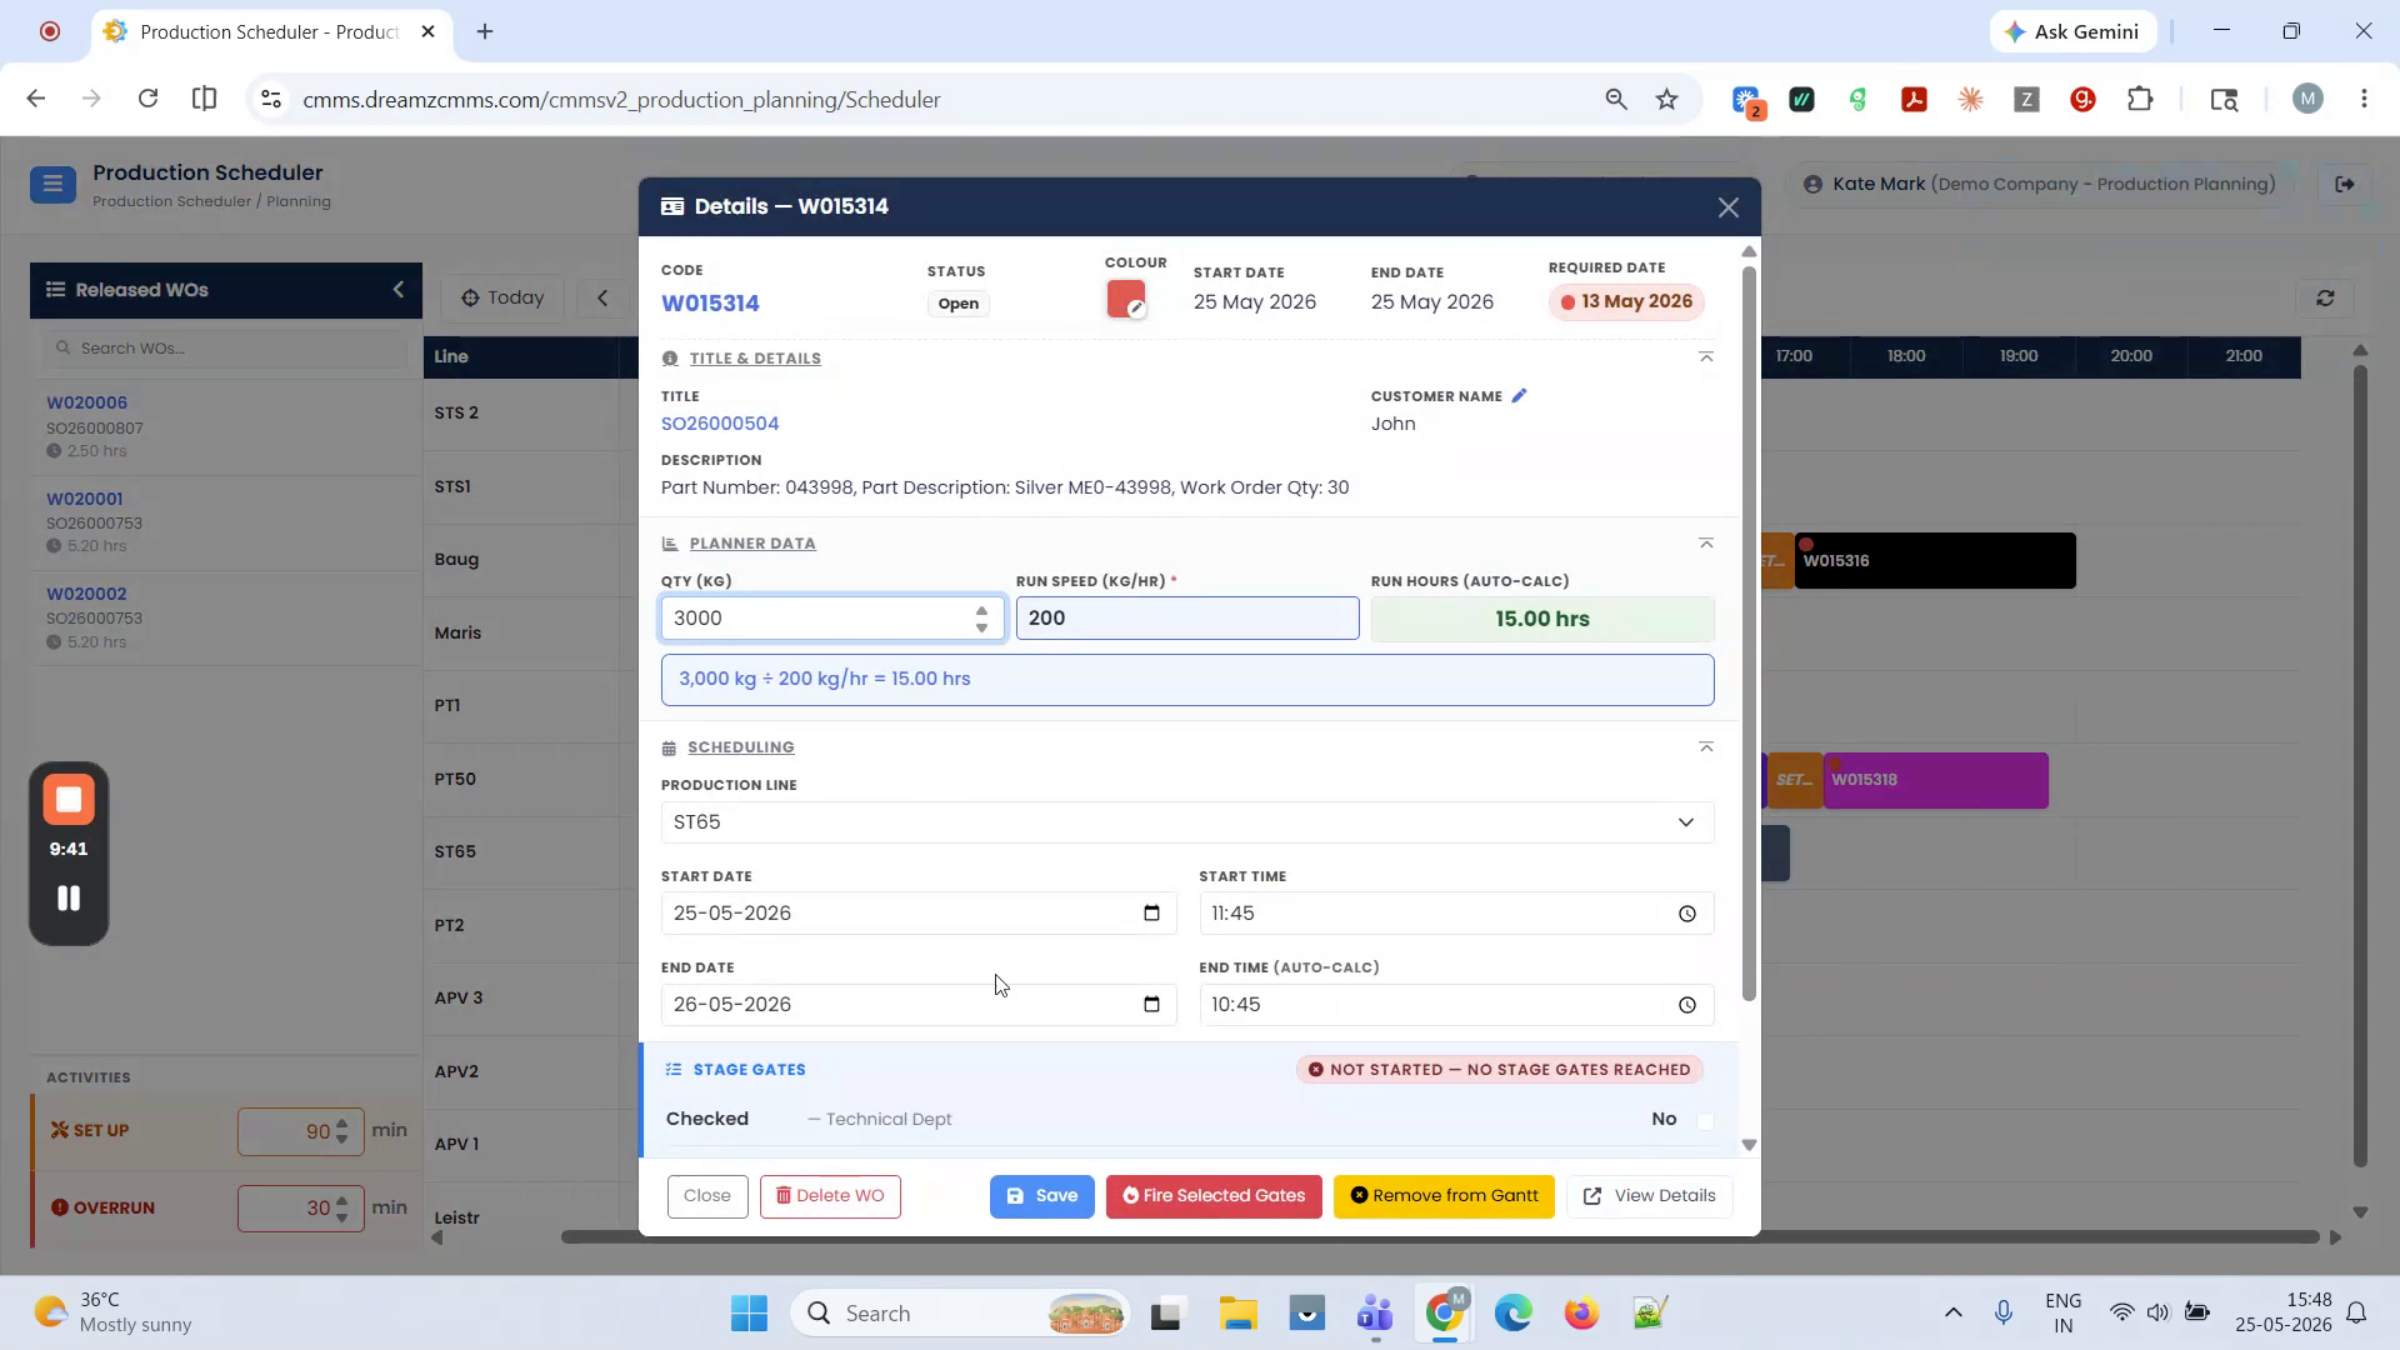
By default, the job card shows the ticket title, customer name, description, code, color, status, and required date. Opening the planner data automatically calculates and shows the quantity, run speed, and run hours; opening the scheduling section shows the production line and date.
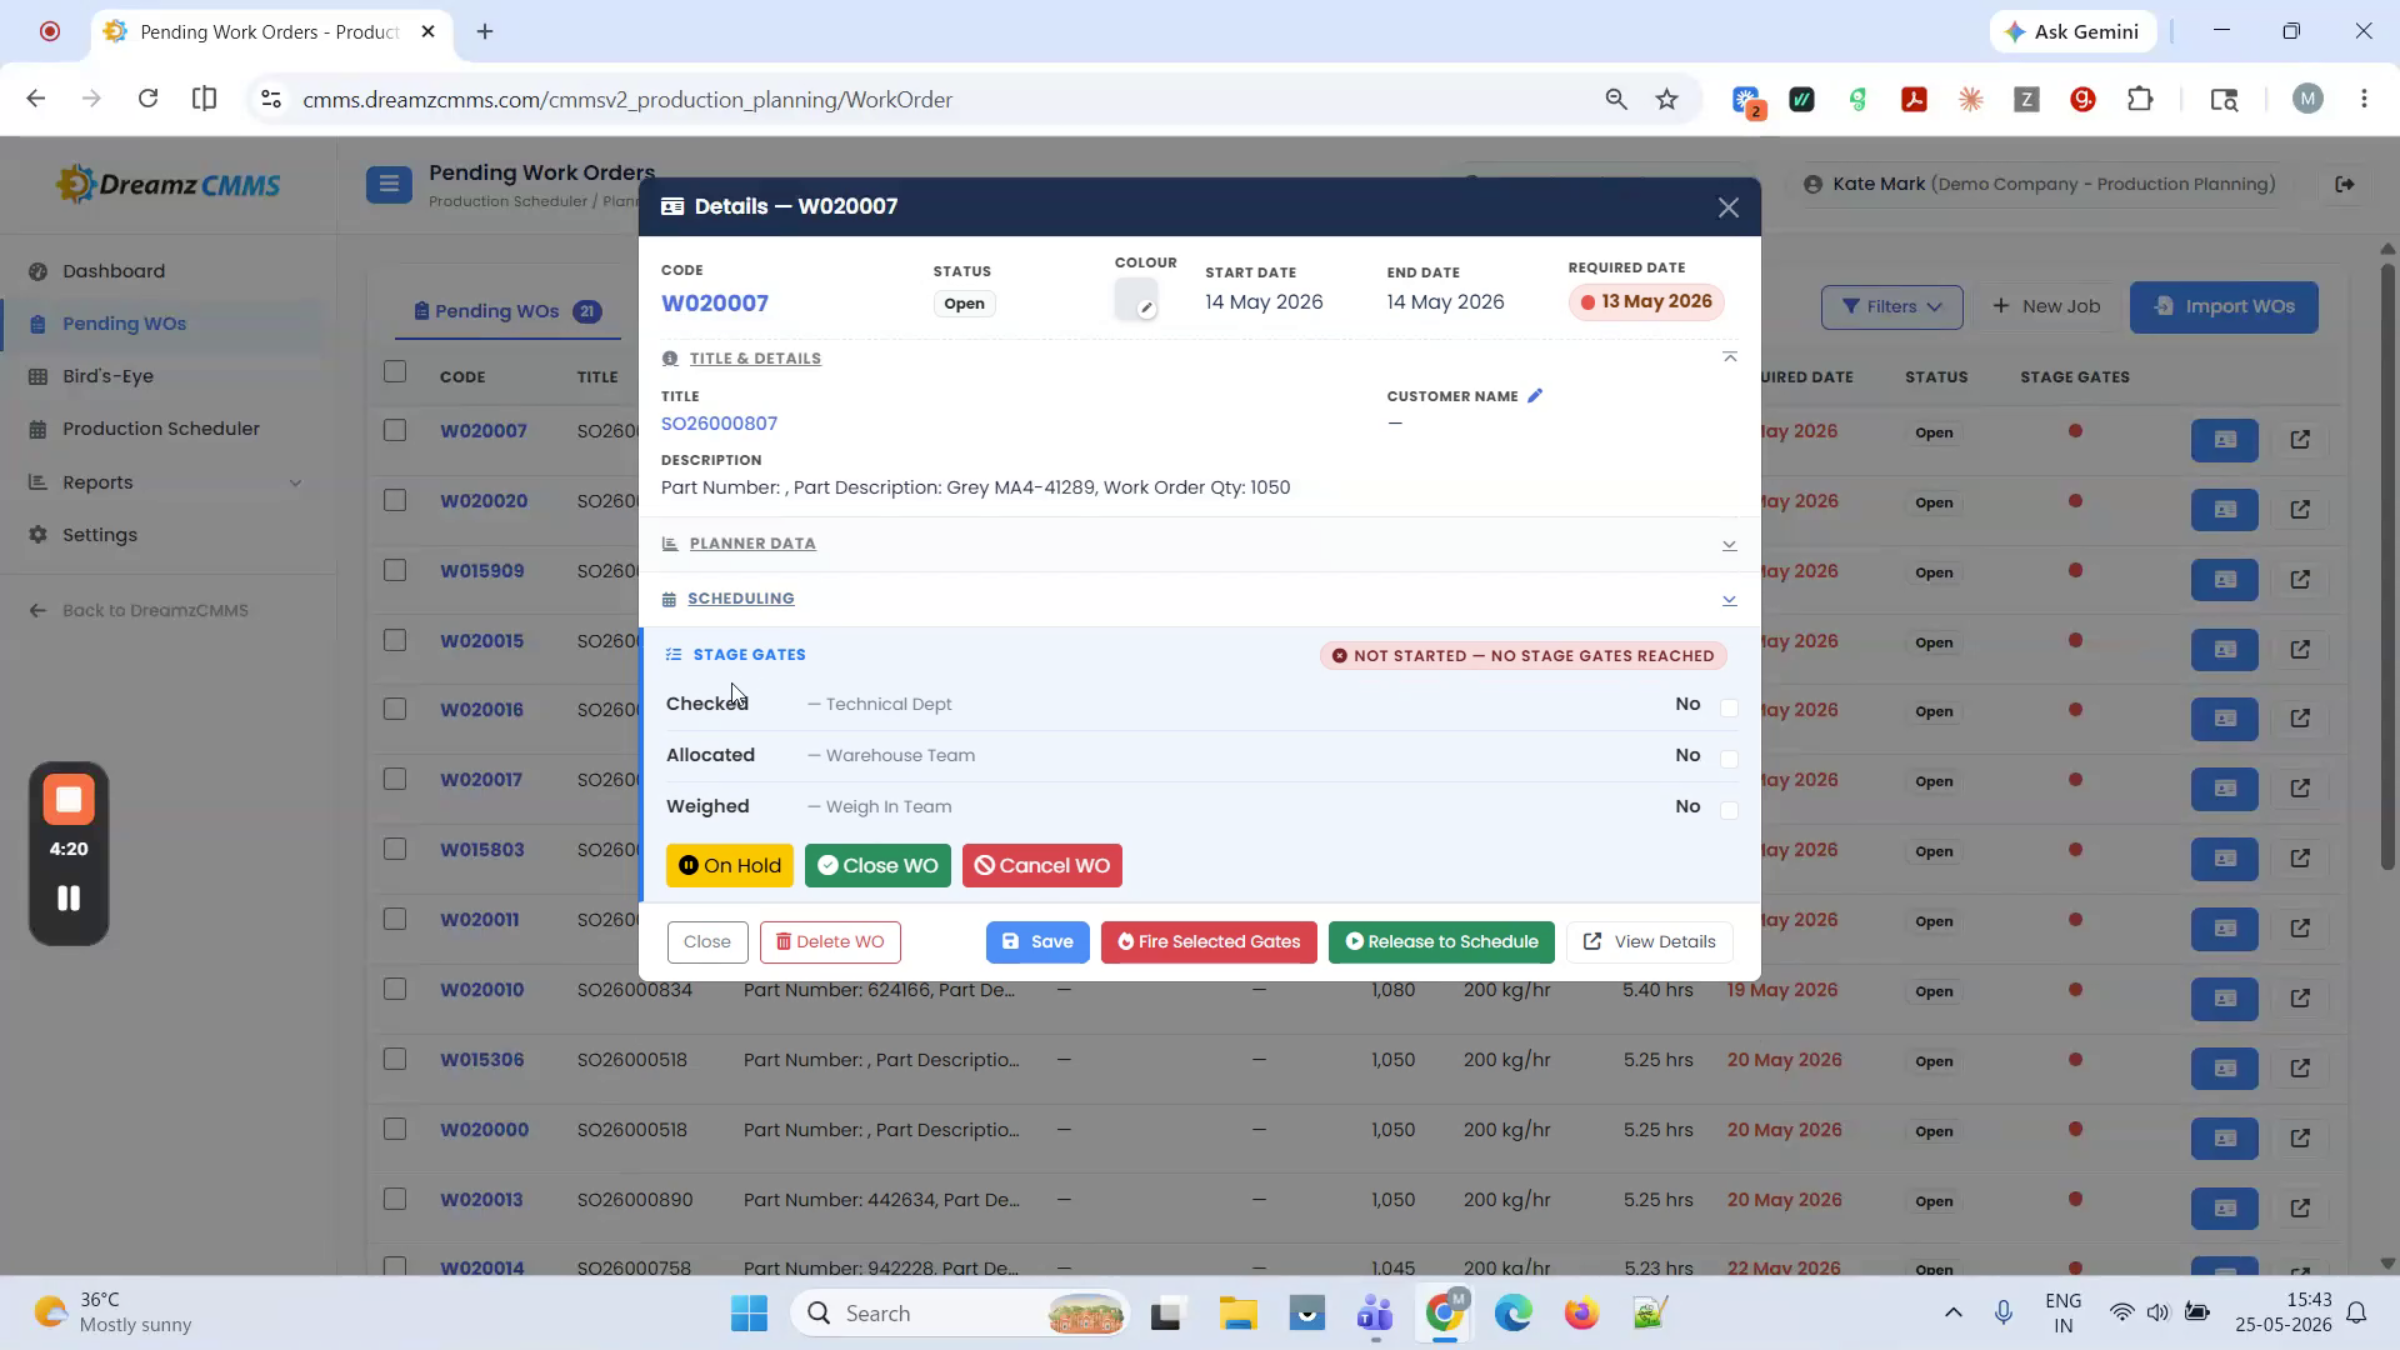
Step 10 – Use Stage Gate Actions and Close a Job
From the stage gates, you can mark a work order as on hold, close it, cancel it, or (if you're an admin) delete it.
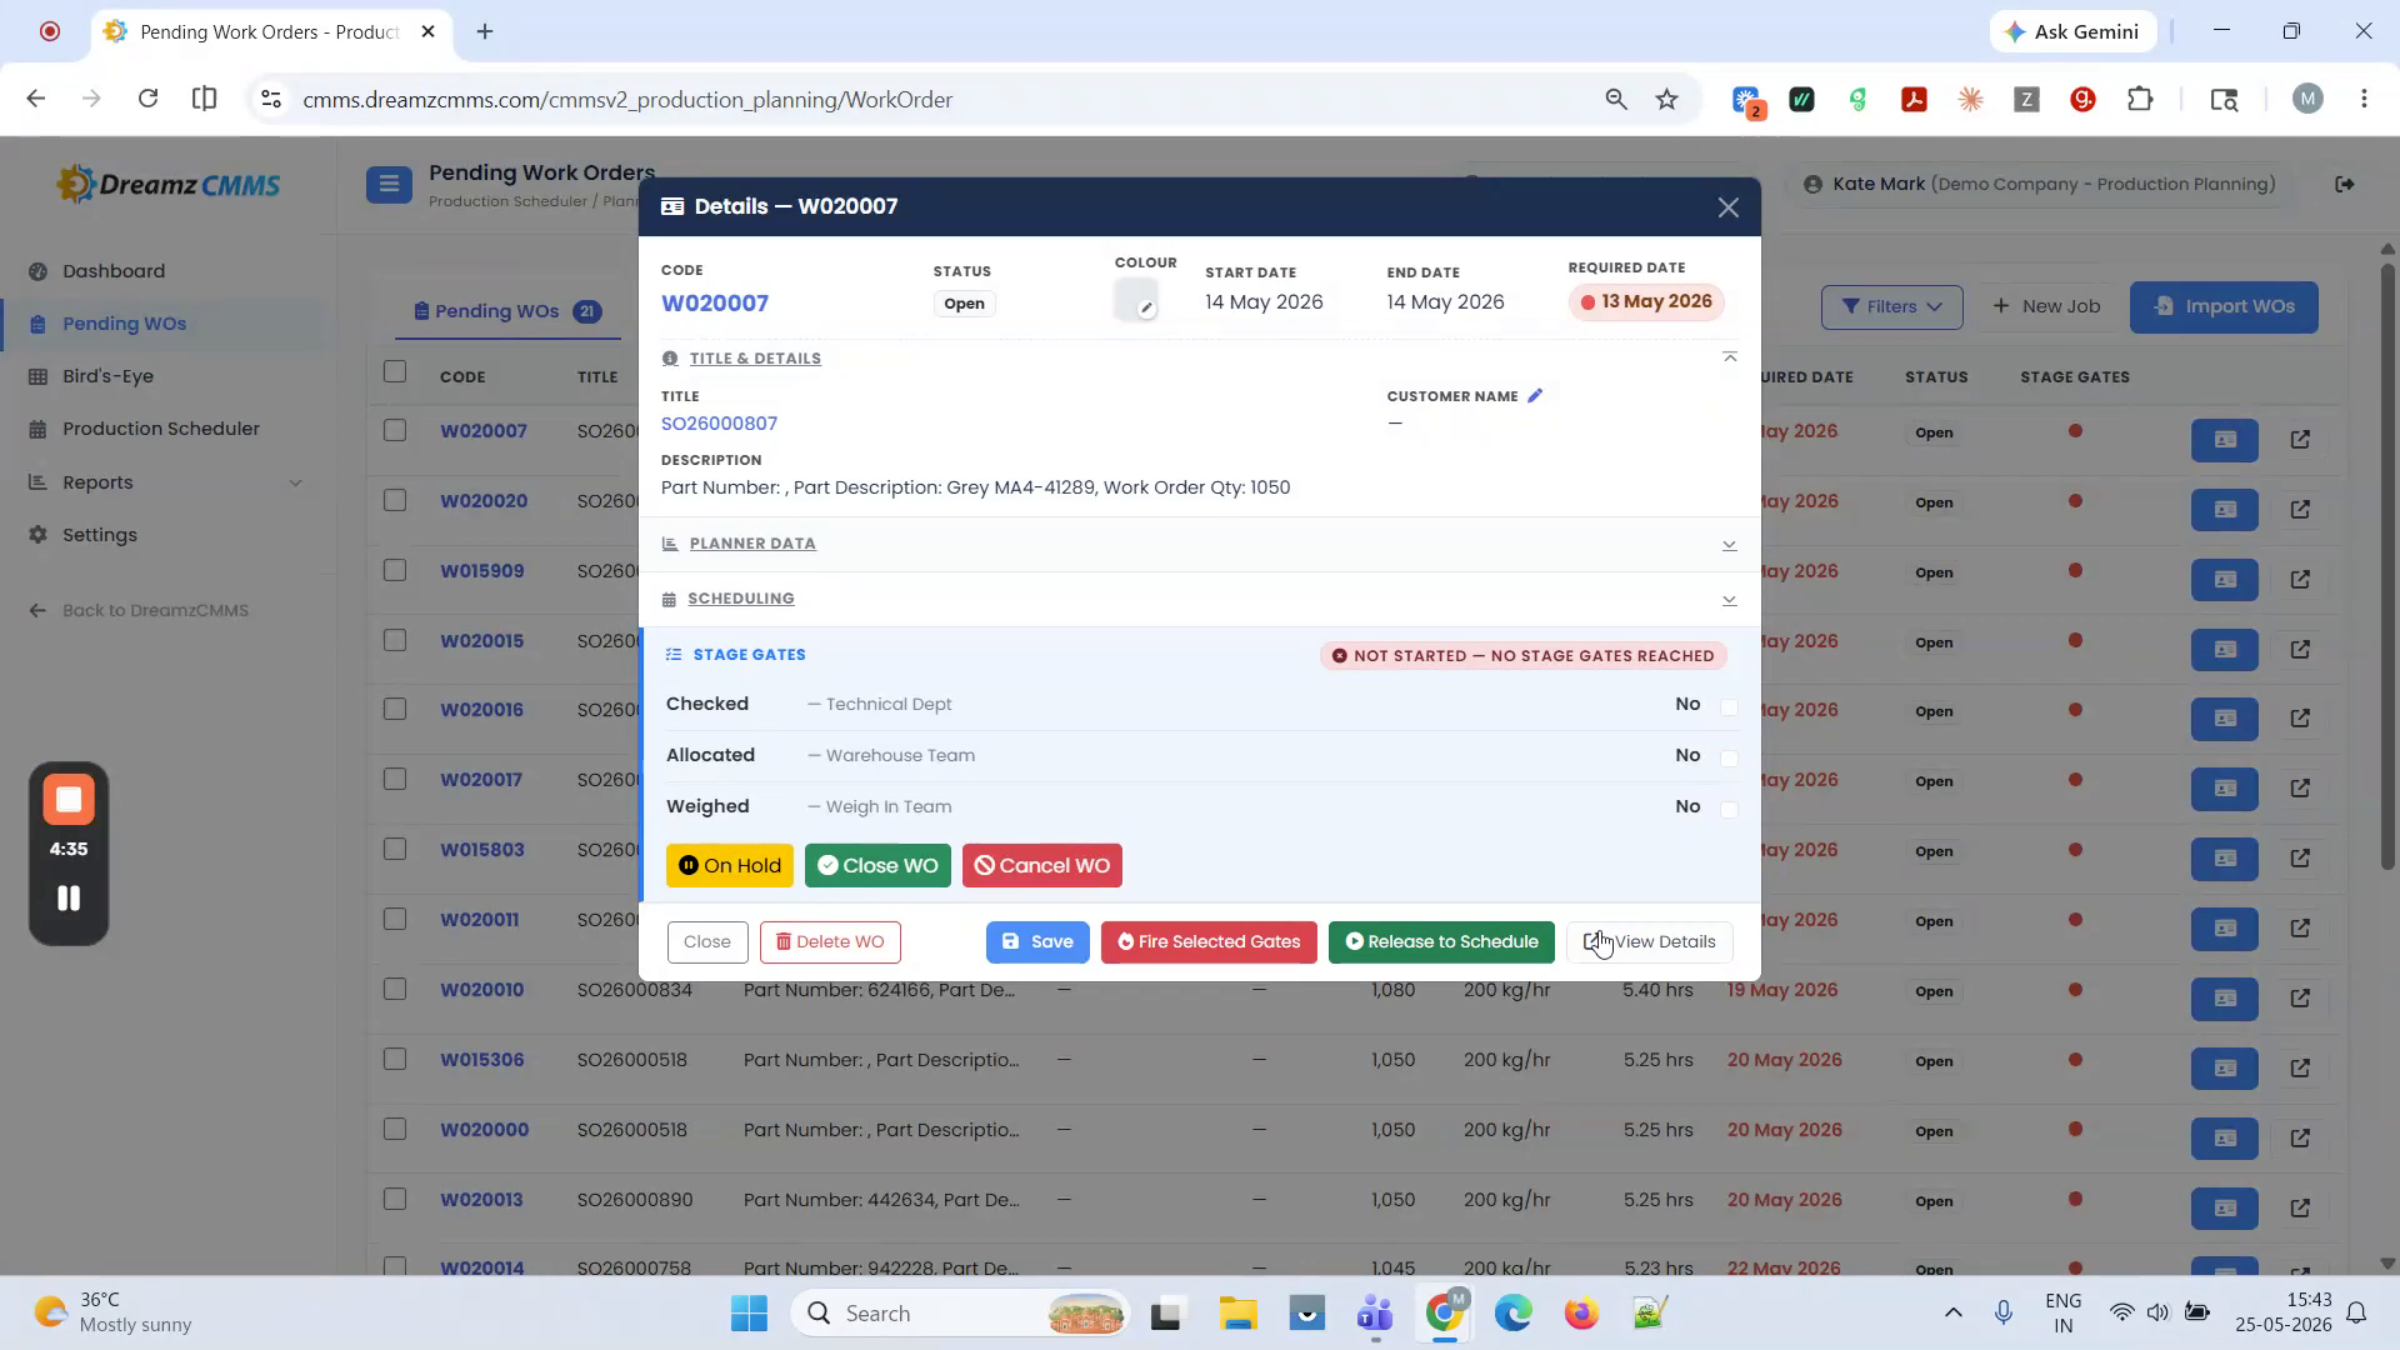
Step 11 – View Full Job Details
Clicking "View Details" takes you to the core CMMS job details screen.
Use the Production Scheduler
Step 1 – Navigate to the Production Scheduler
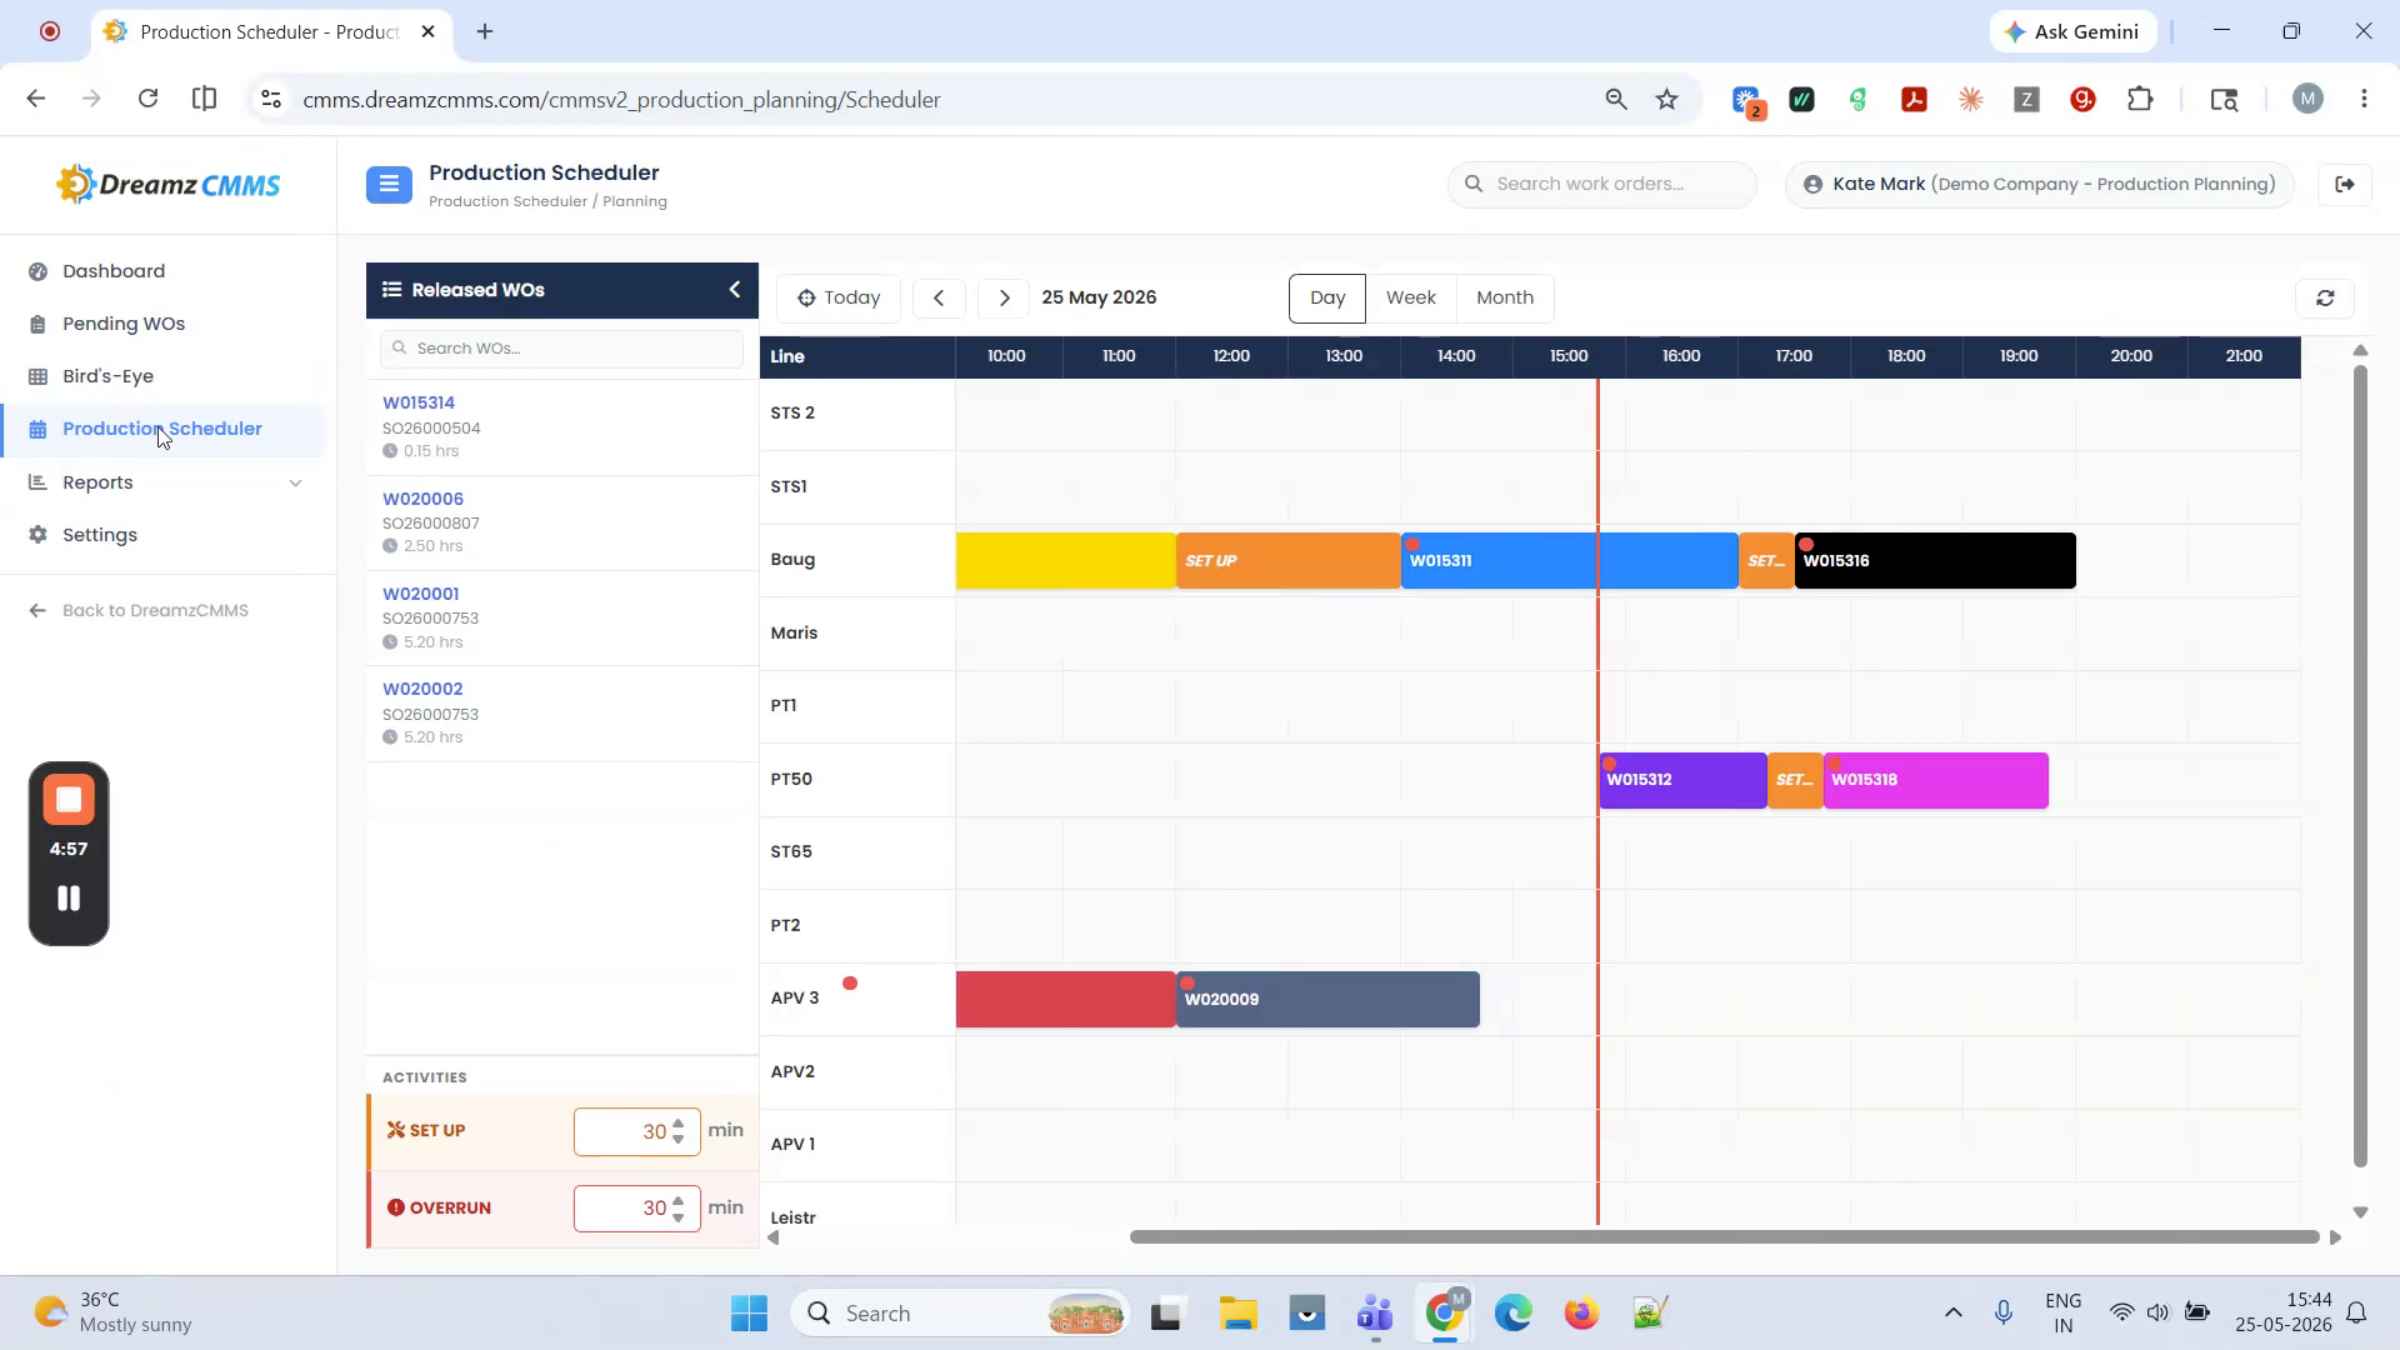
Open the Production Scheduler, where all planning activities take place.
Step 2 – Drag Released Jobs onto the Schedule
All released jobs appear in the left panel. Drag any job and drop it onto the schedule, or click on it directly.
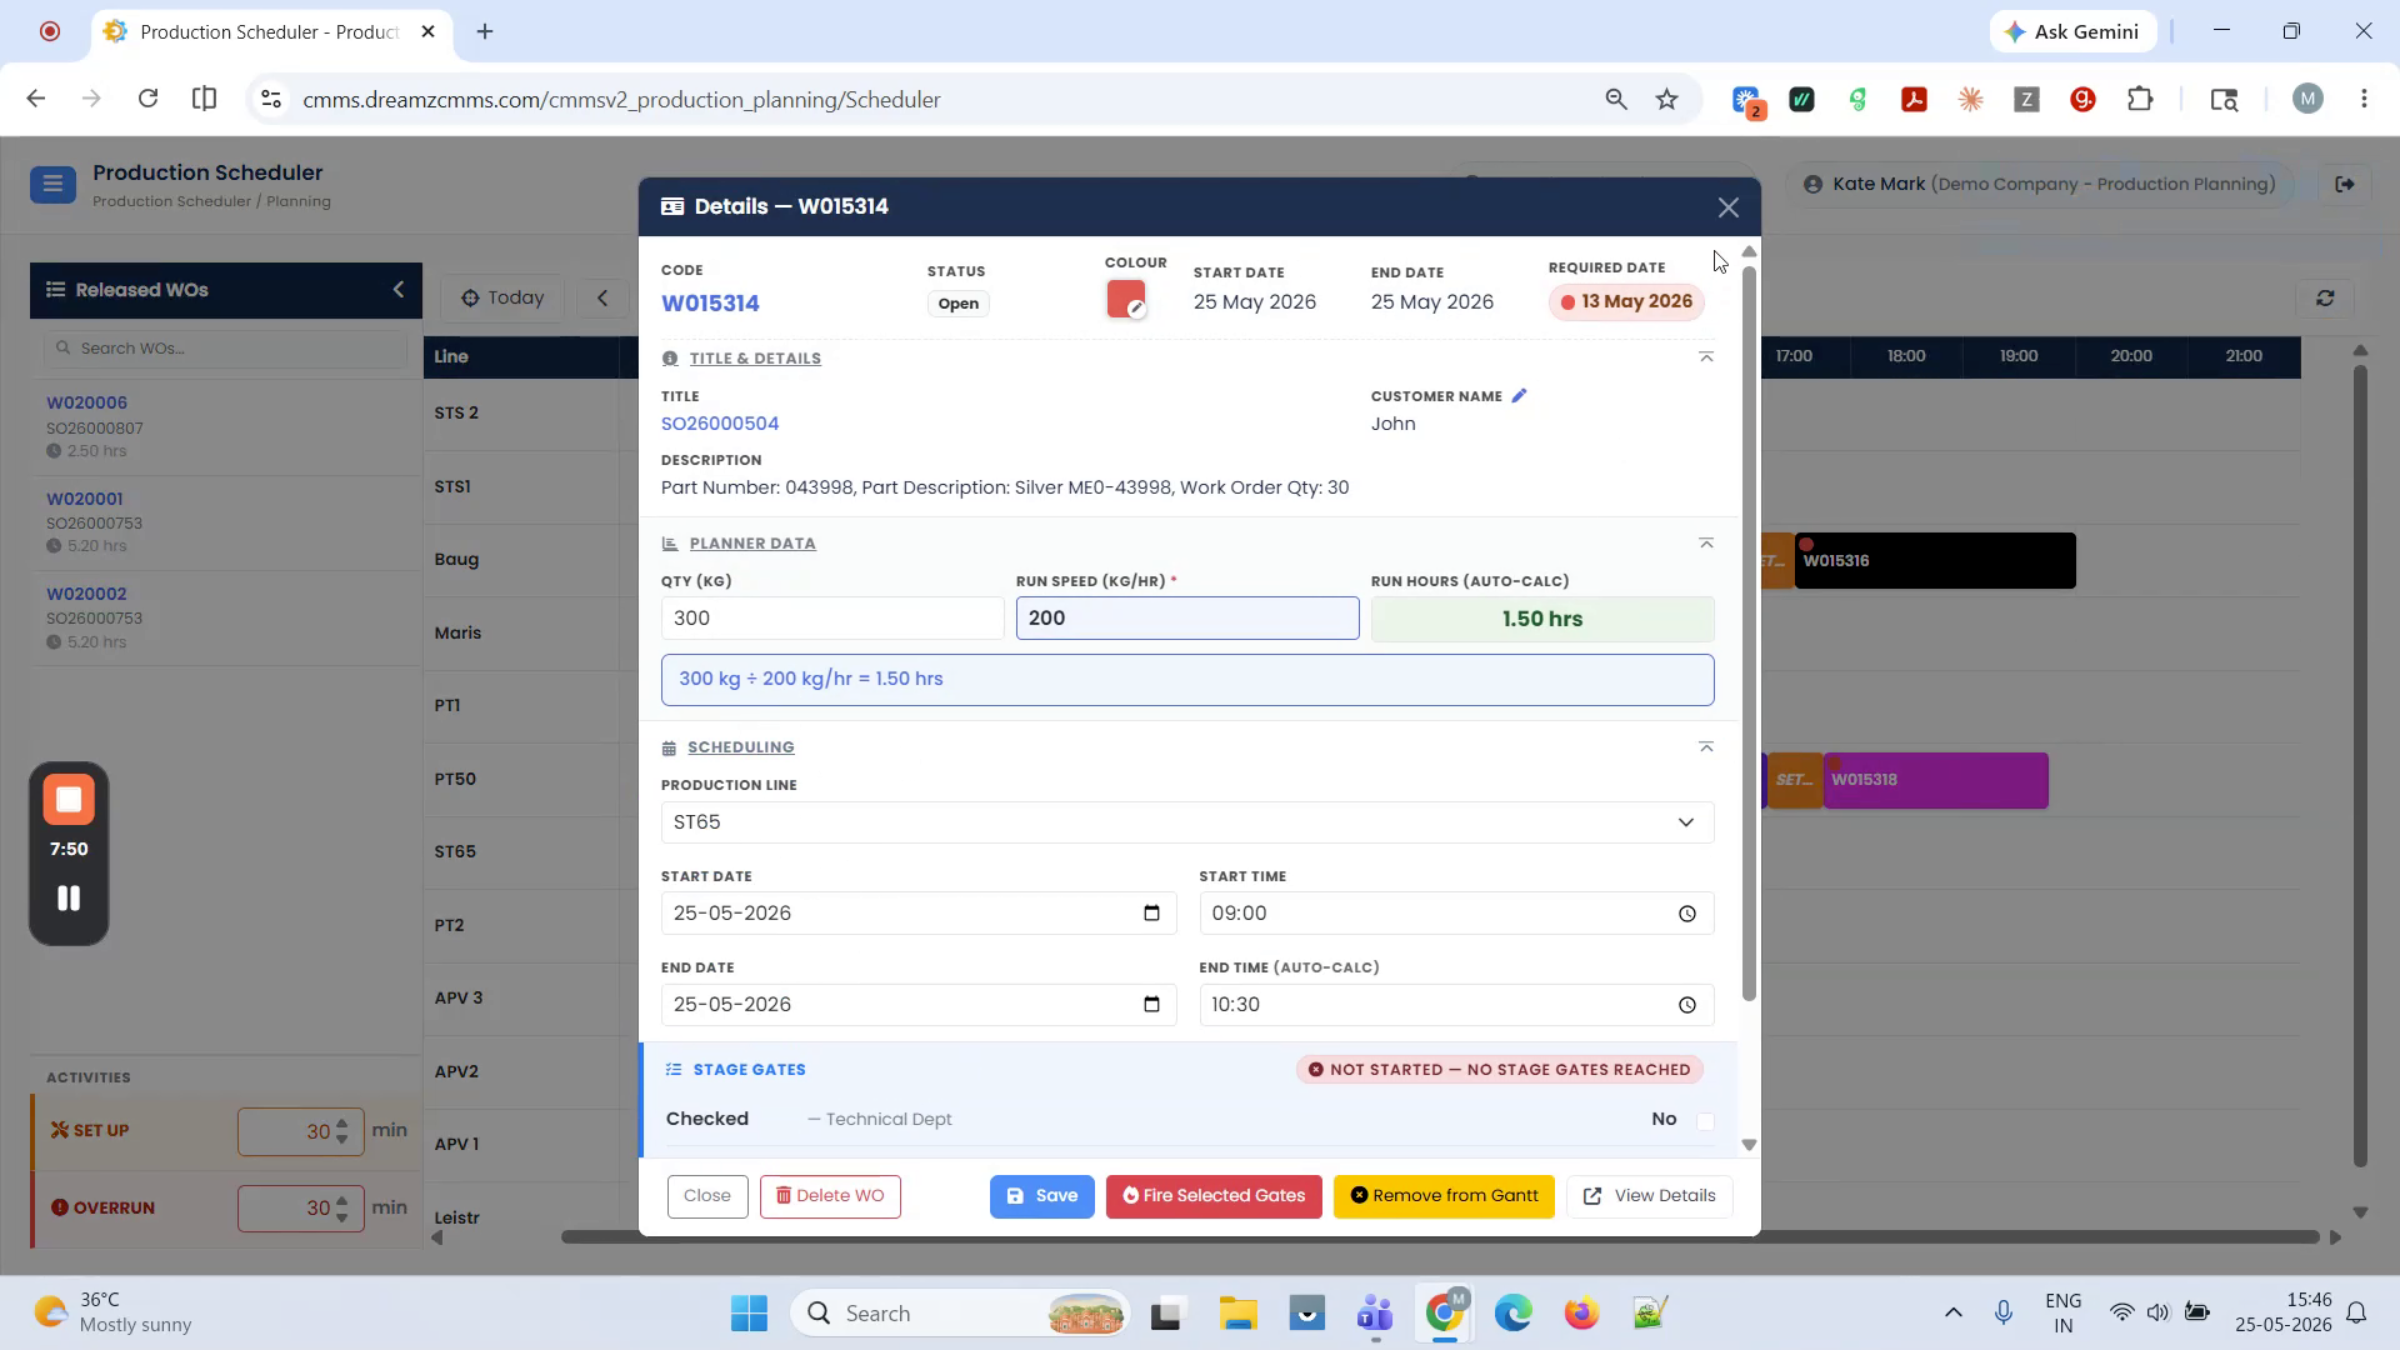
Step 3 – Set Job Details from the Popup
Clicking a job opens a popup showing its details. You can choose the color, enter the customer name, and save your selections.
Step 4 – Edit Quantity and Run Hours
A job shown in red can have its quantity and run speed adjusted. After clicking Save, the run hours update accordingly (for example, to 1.5 hours).
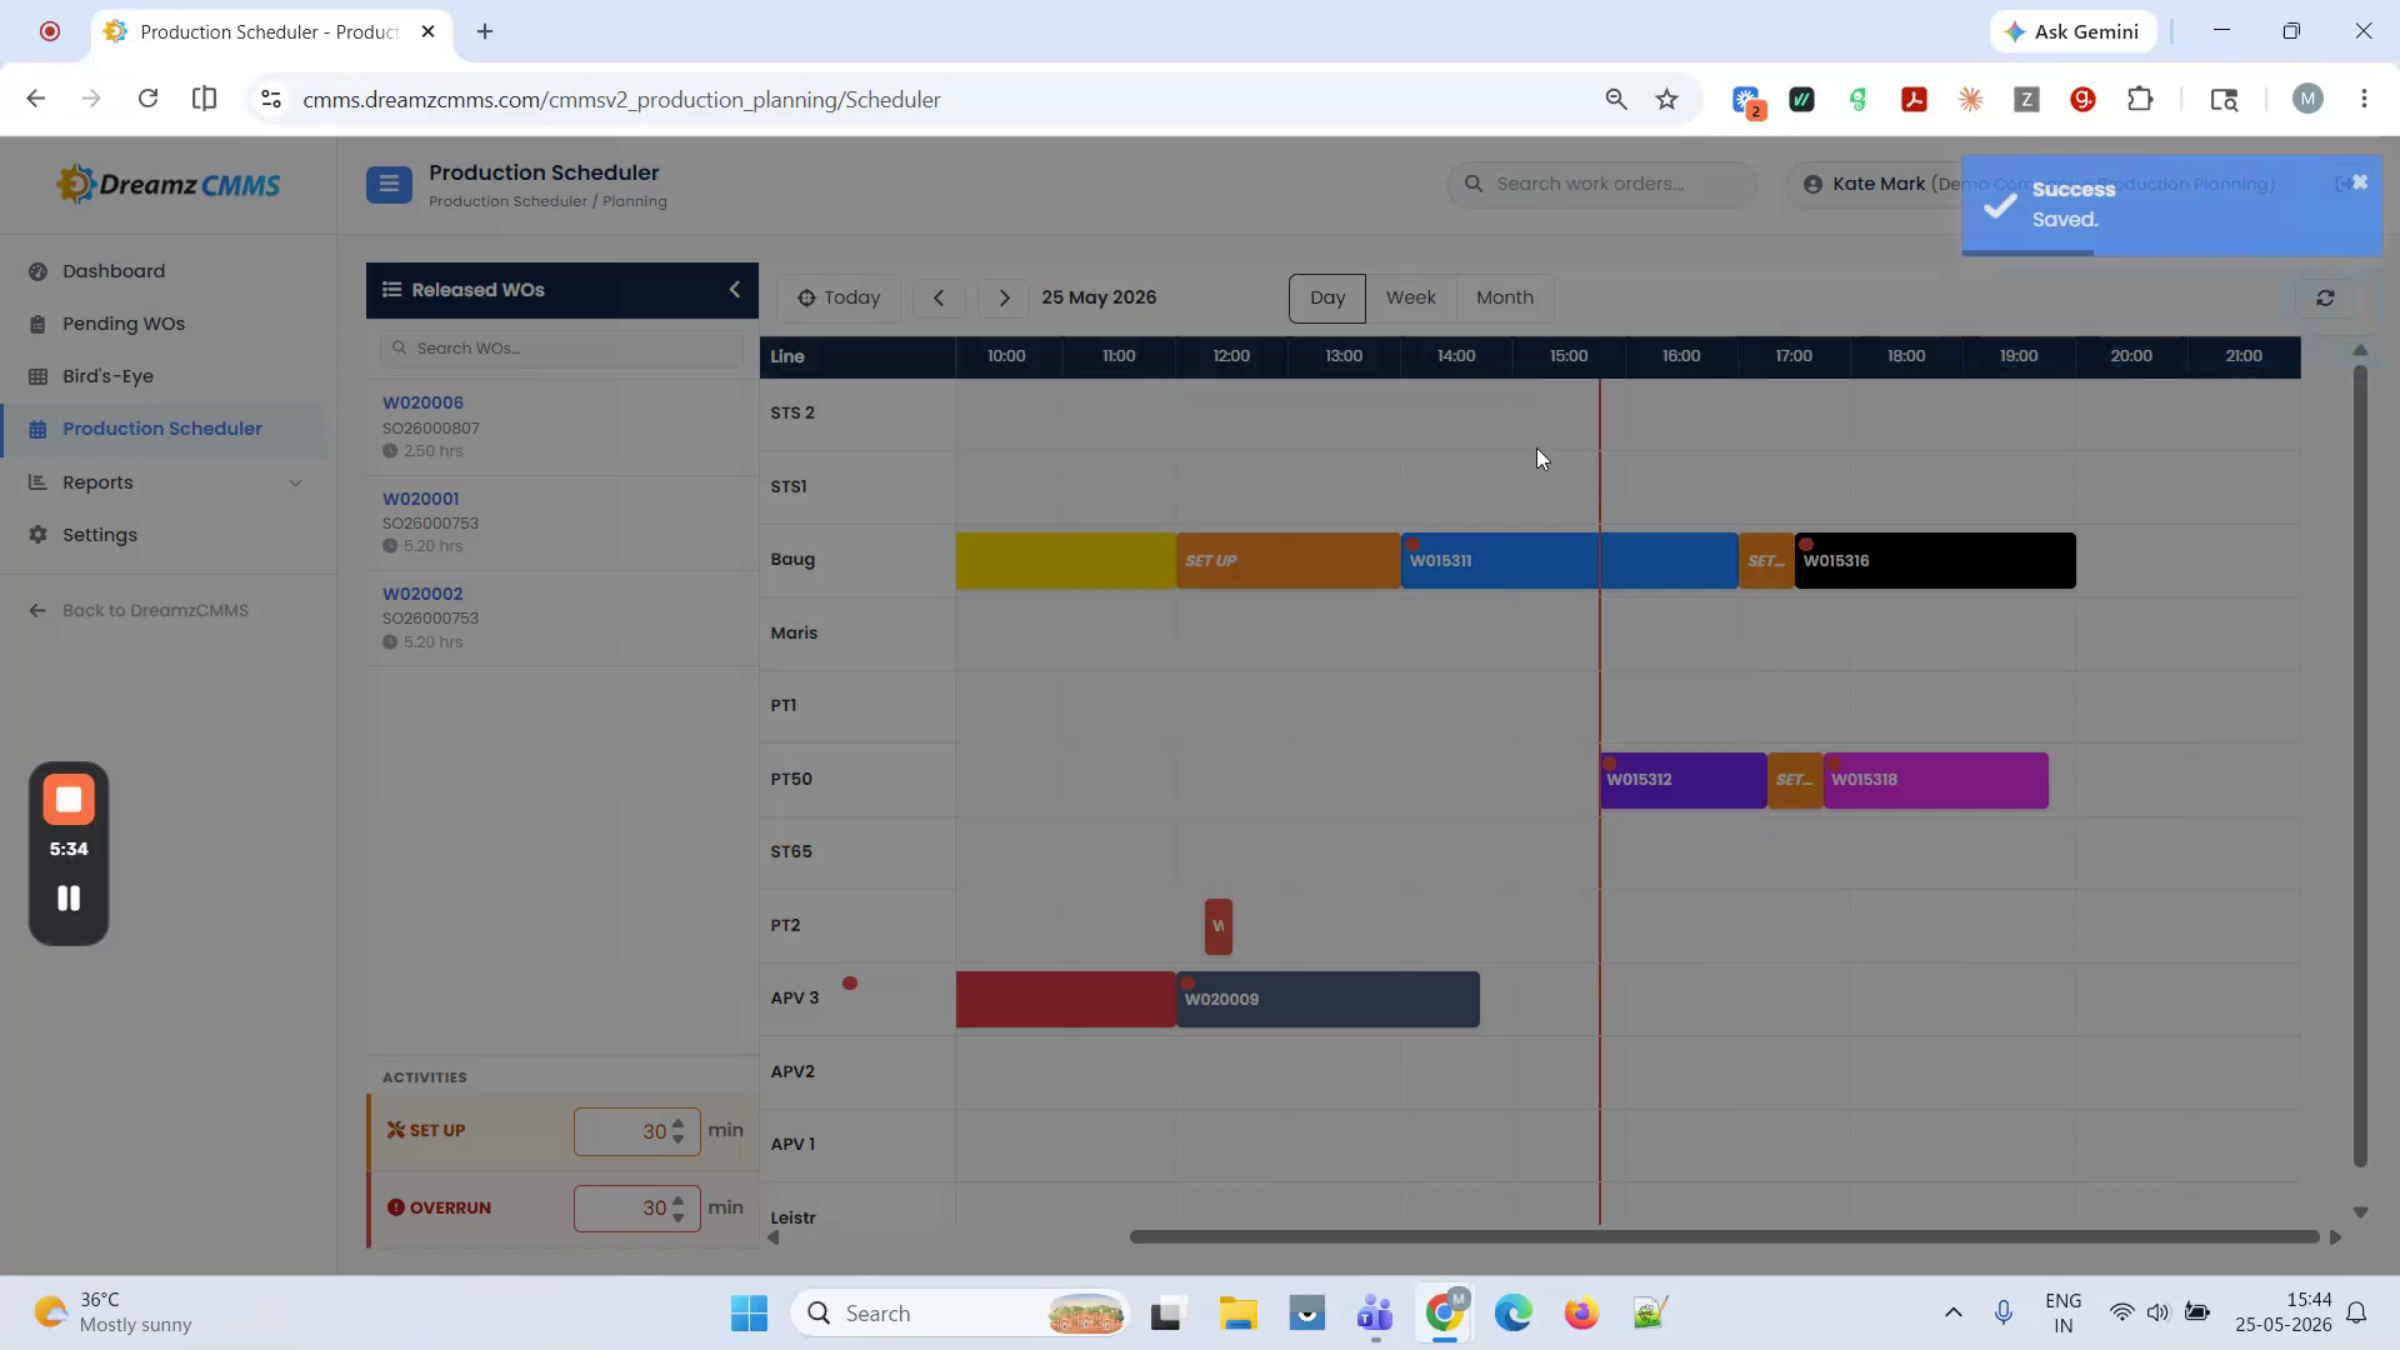
Step 5 – Understand Schedule Blocks
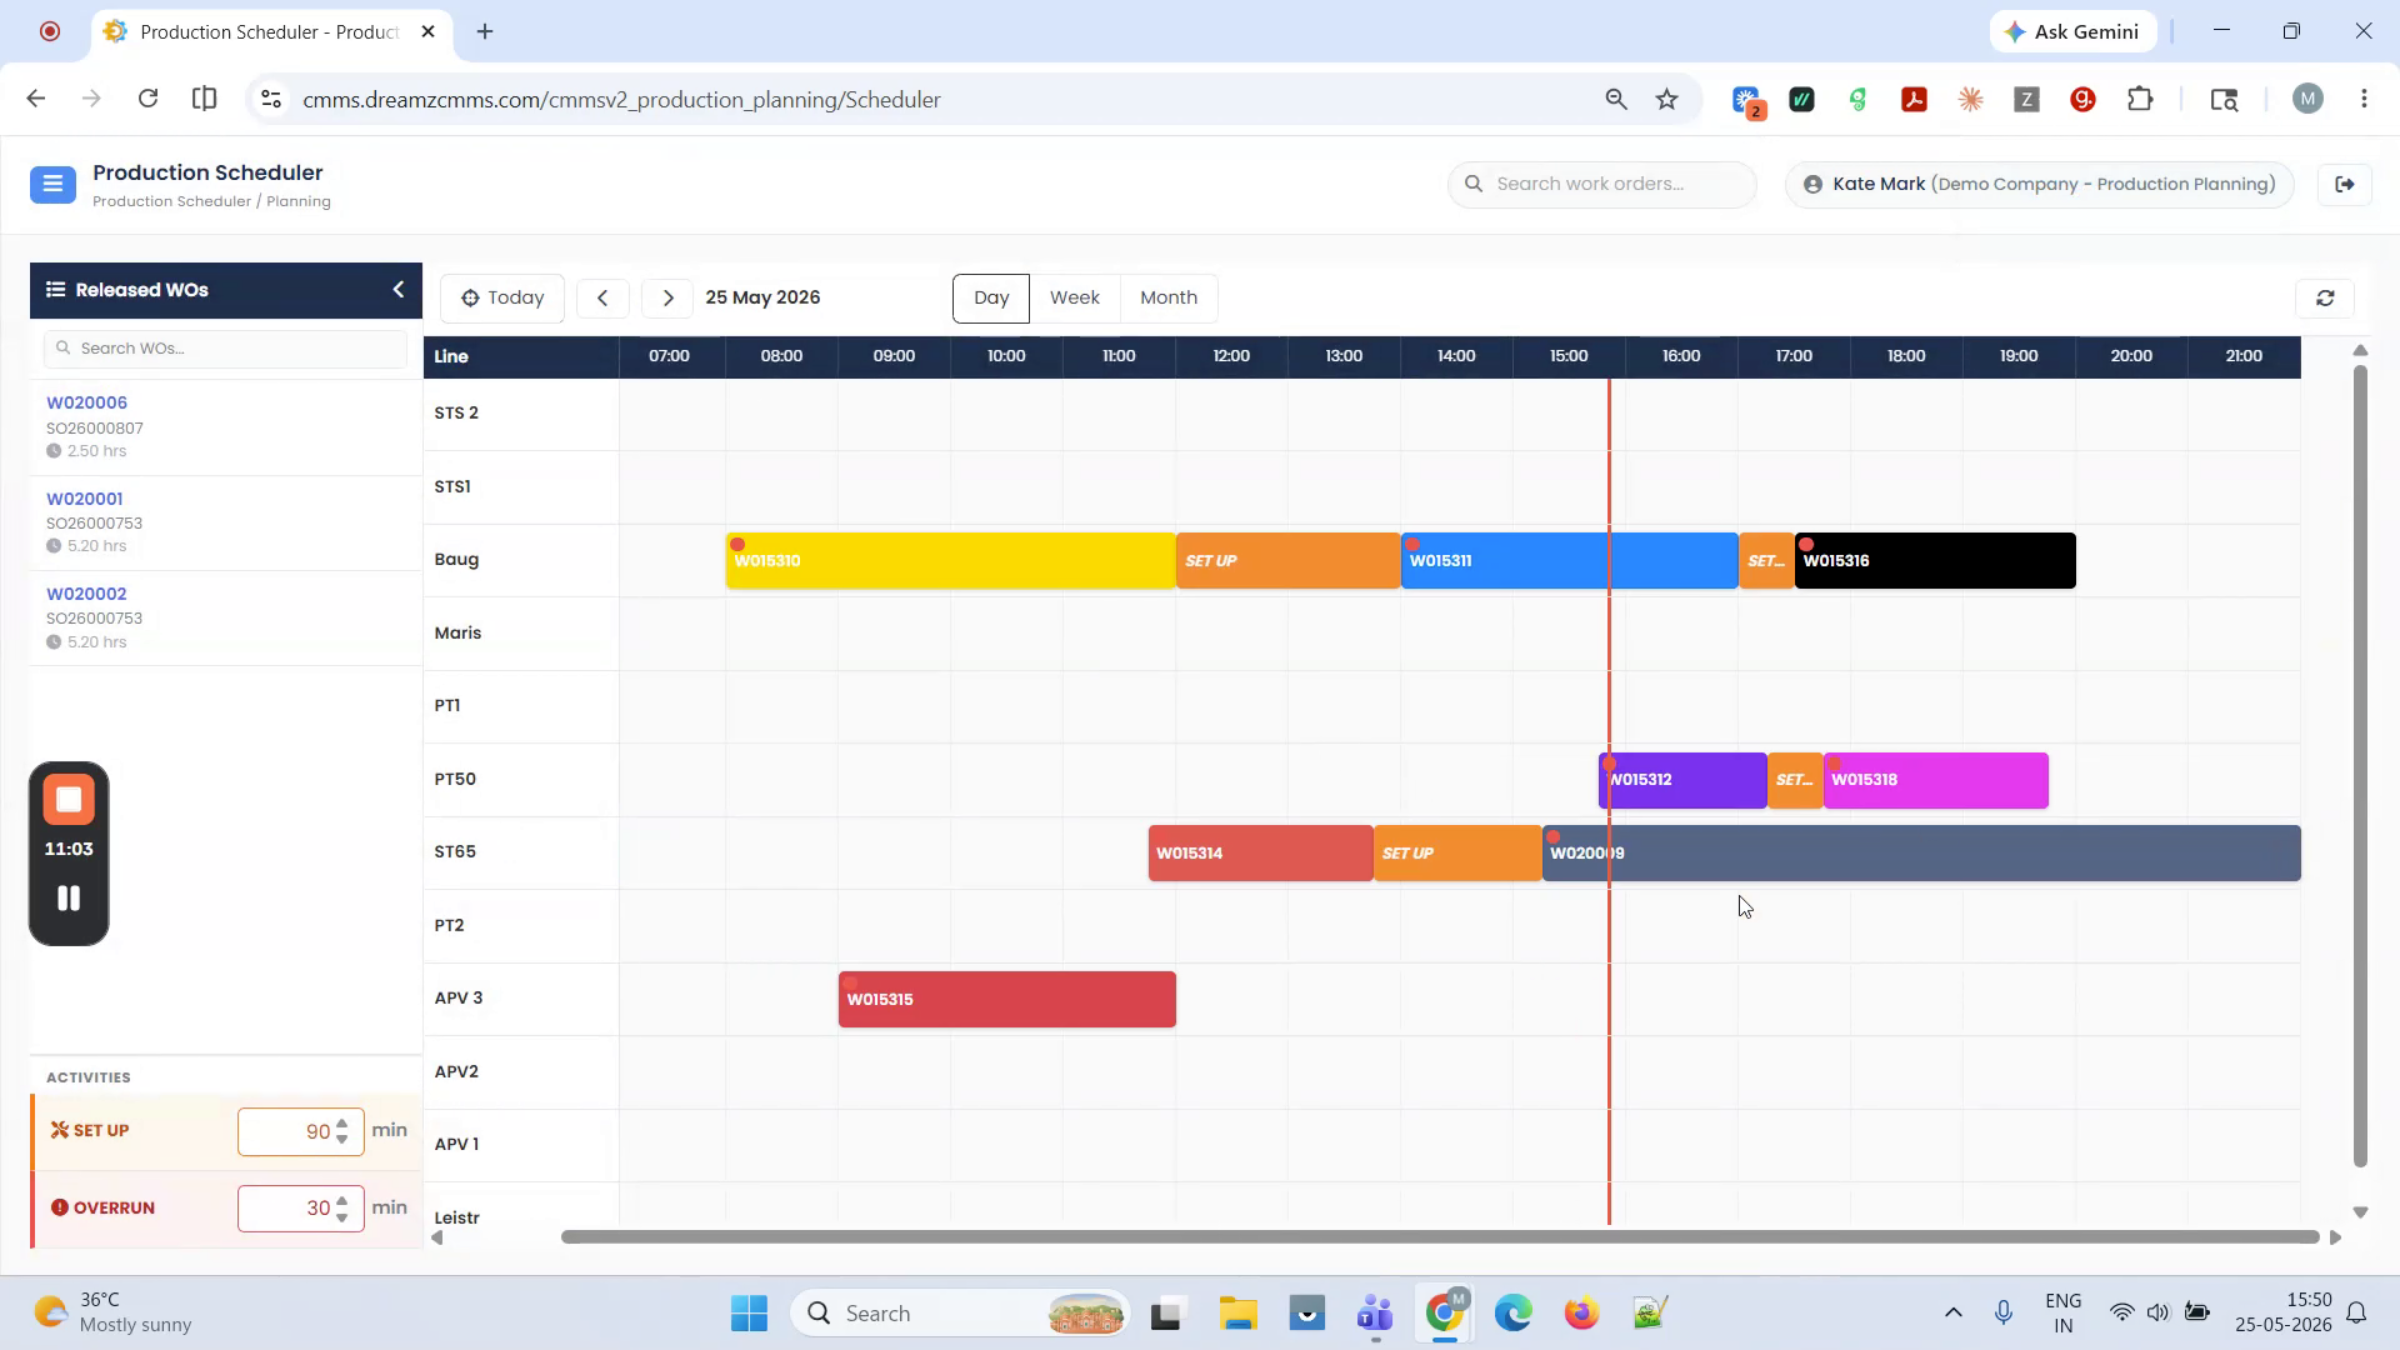
To schedule a job, drag it onto the production line at your desired start time. The width of the block indicates the job's duration — a wider block means a longer run time. A small dot on each block gives a quick traffic-light view of the gate's completion status.
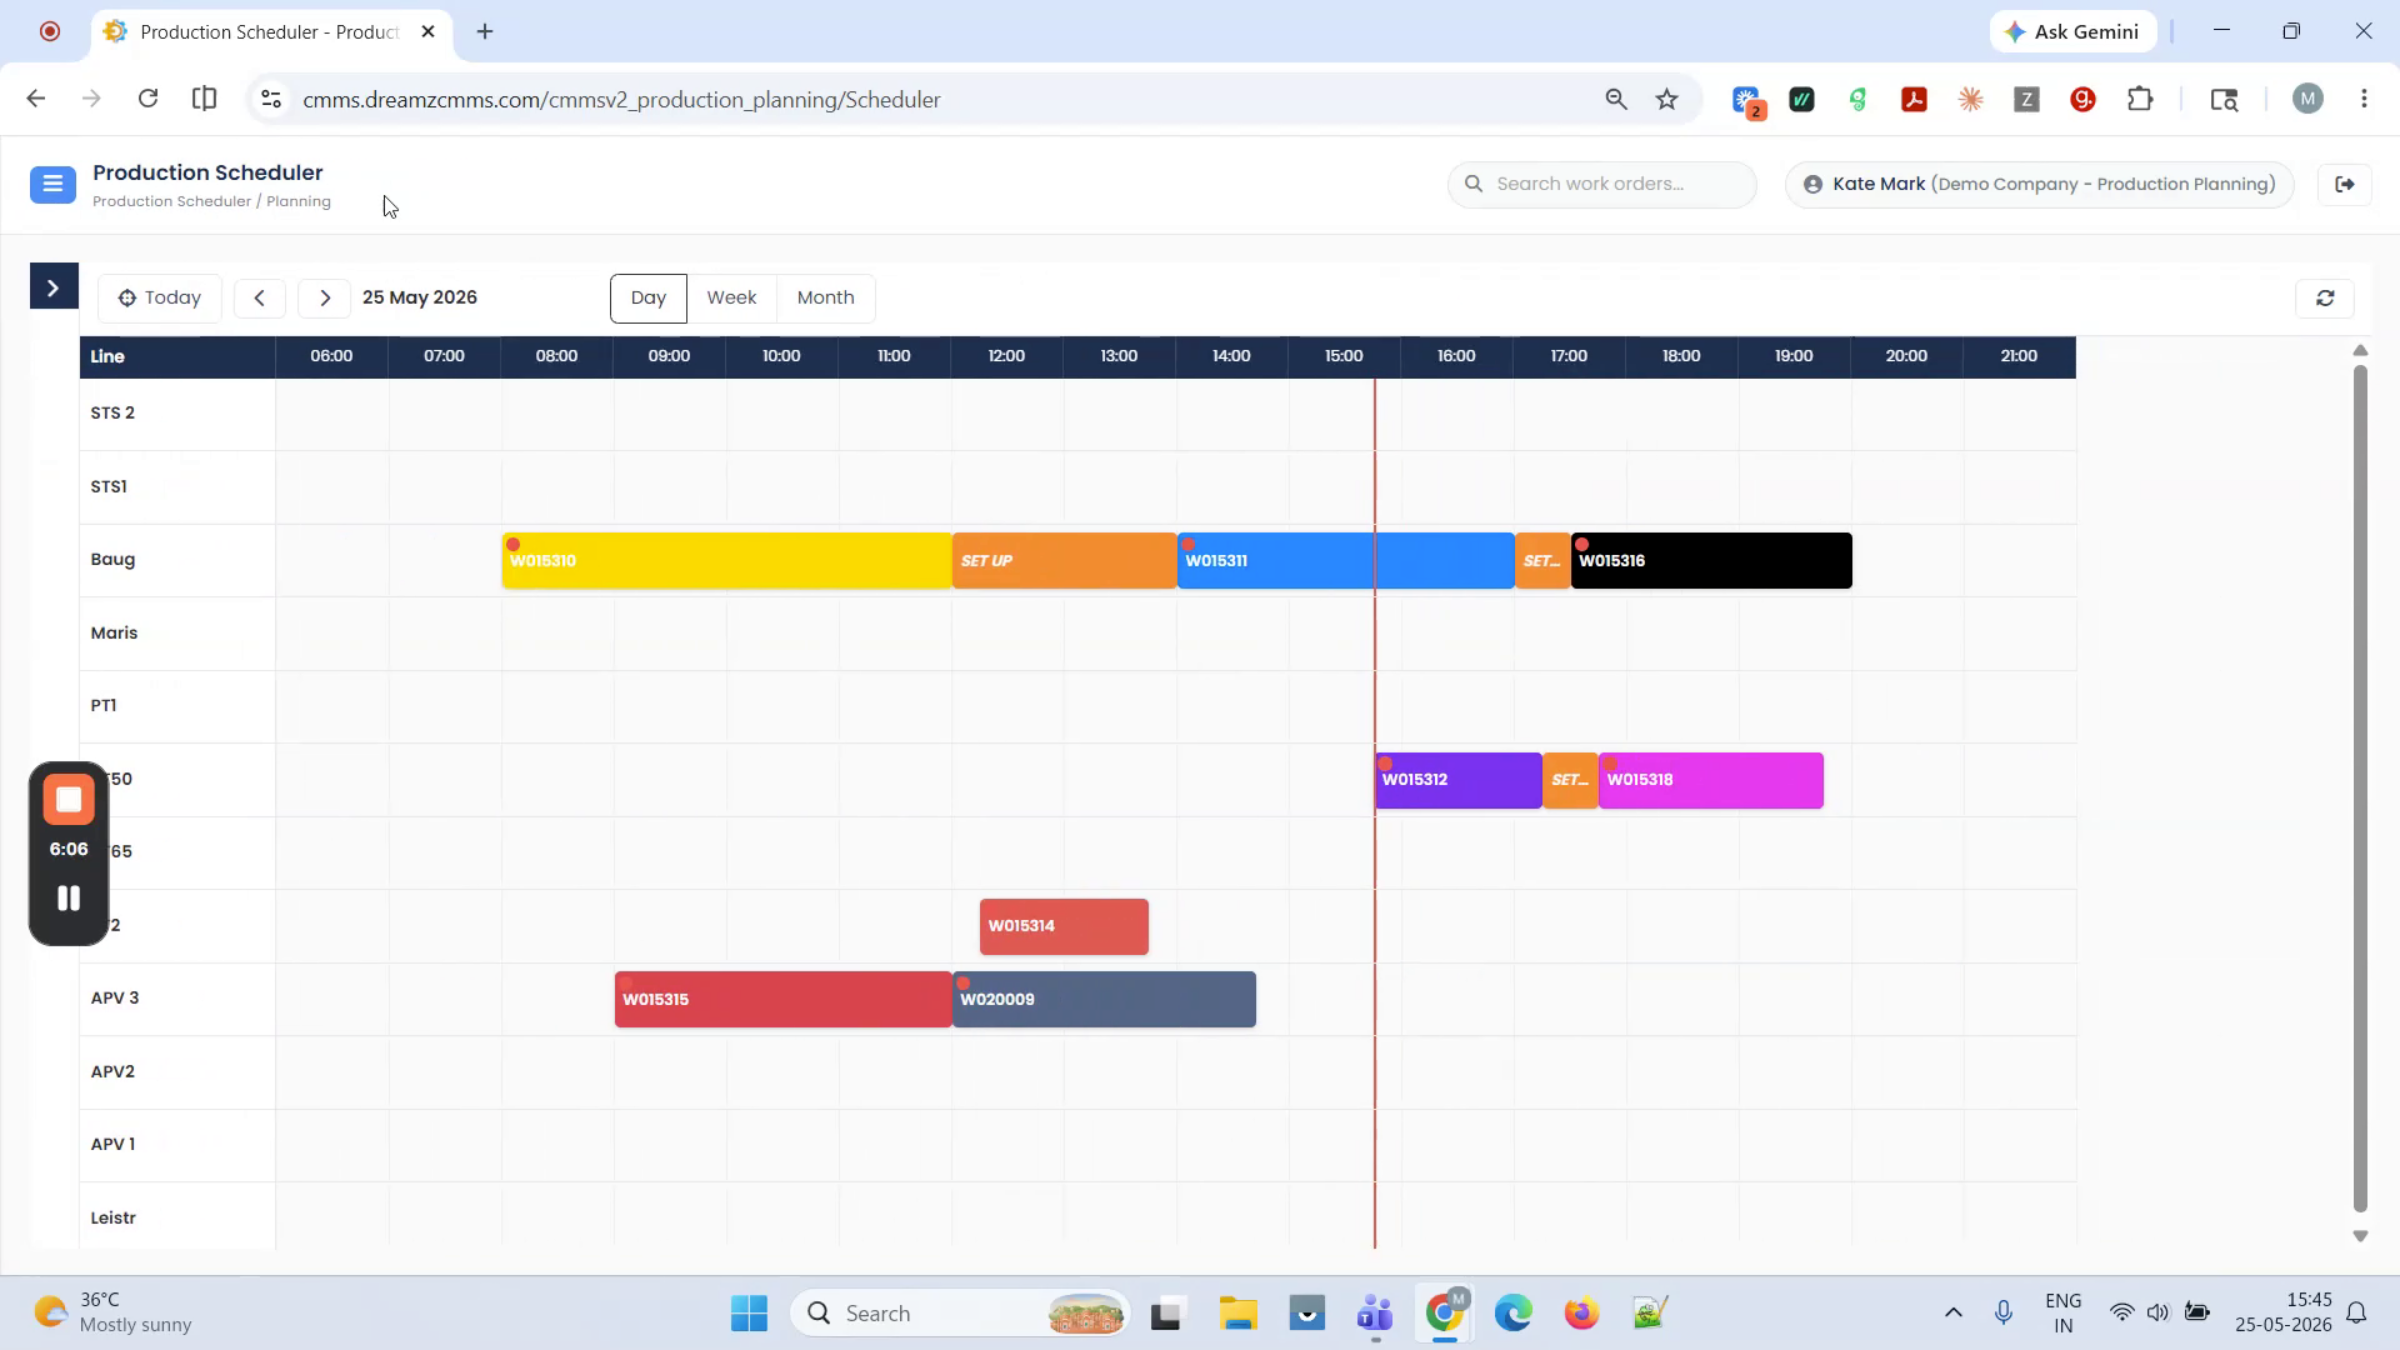
Step 6 – View Job Details on Hover
Hover over any job to see a tooltip with the product code, tonnage, run speed, run hours, gate status, and other key details — without needing to open the job card.
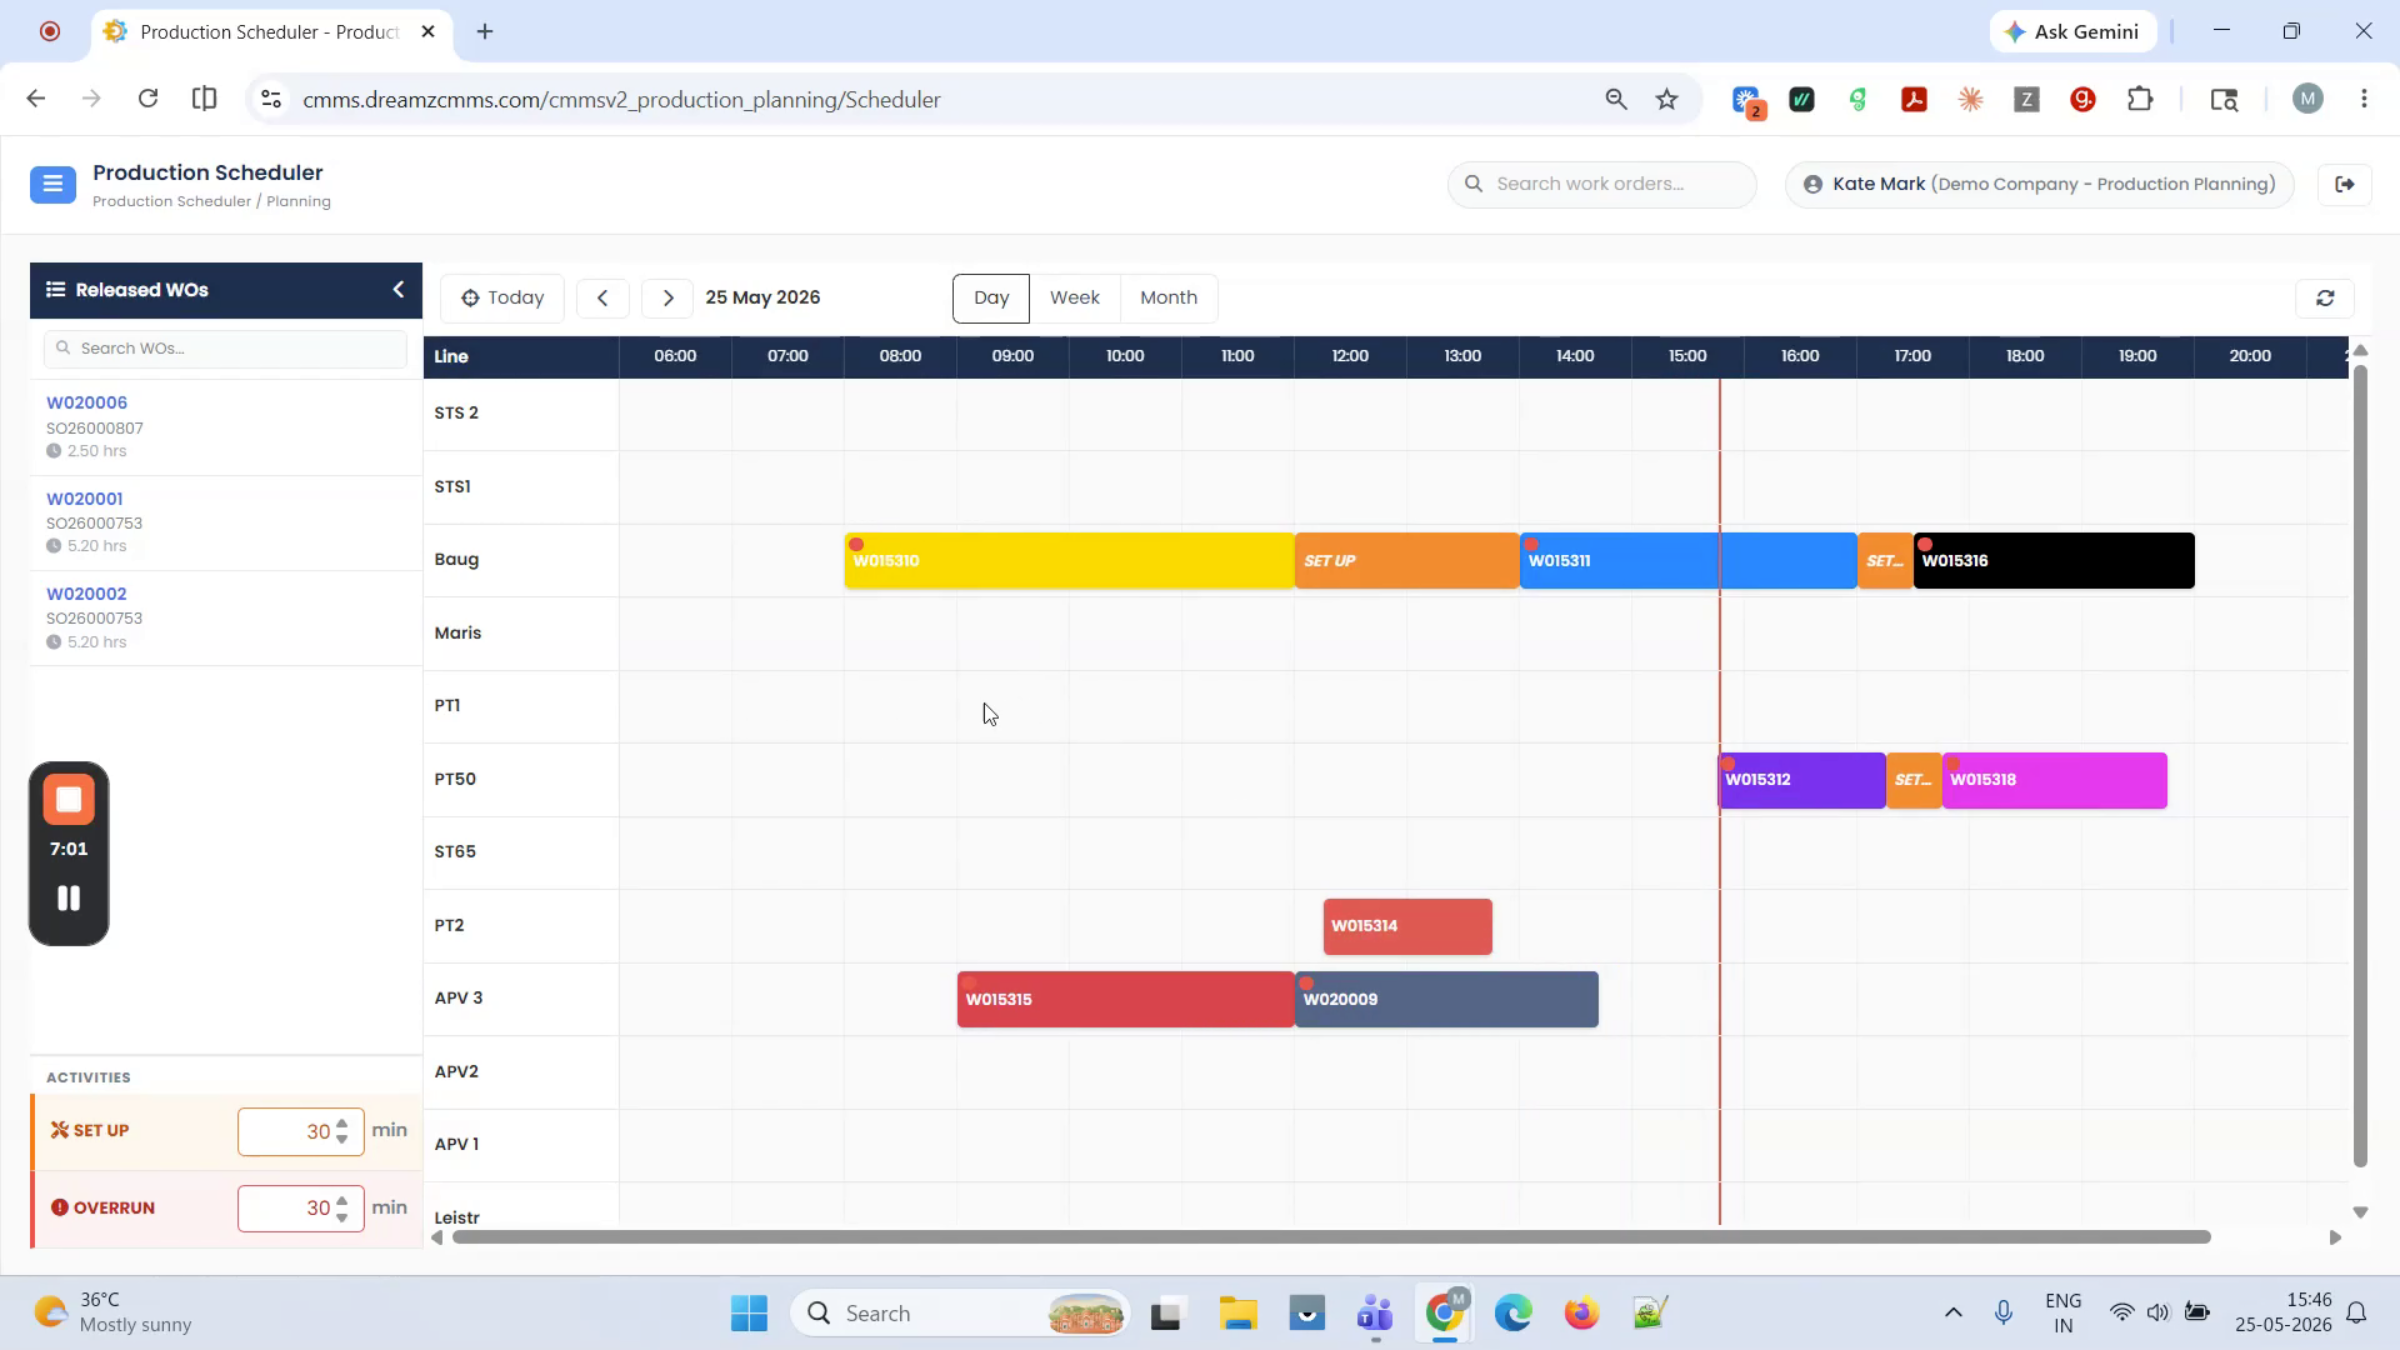
Step 7 – Move, Resize, or Reset a Job
You can move a block to a different line or time, or resize it by dragging its right edge, to set it back to pending.
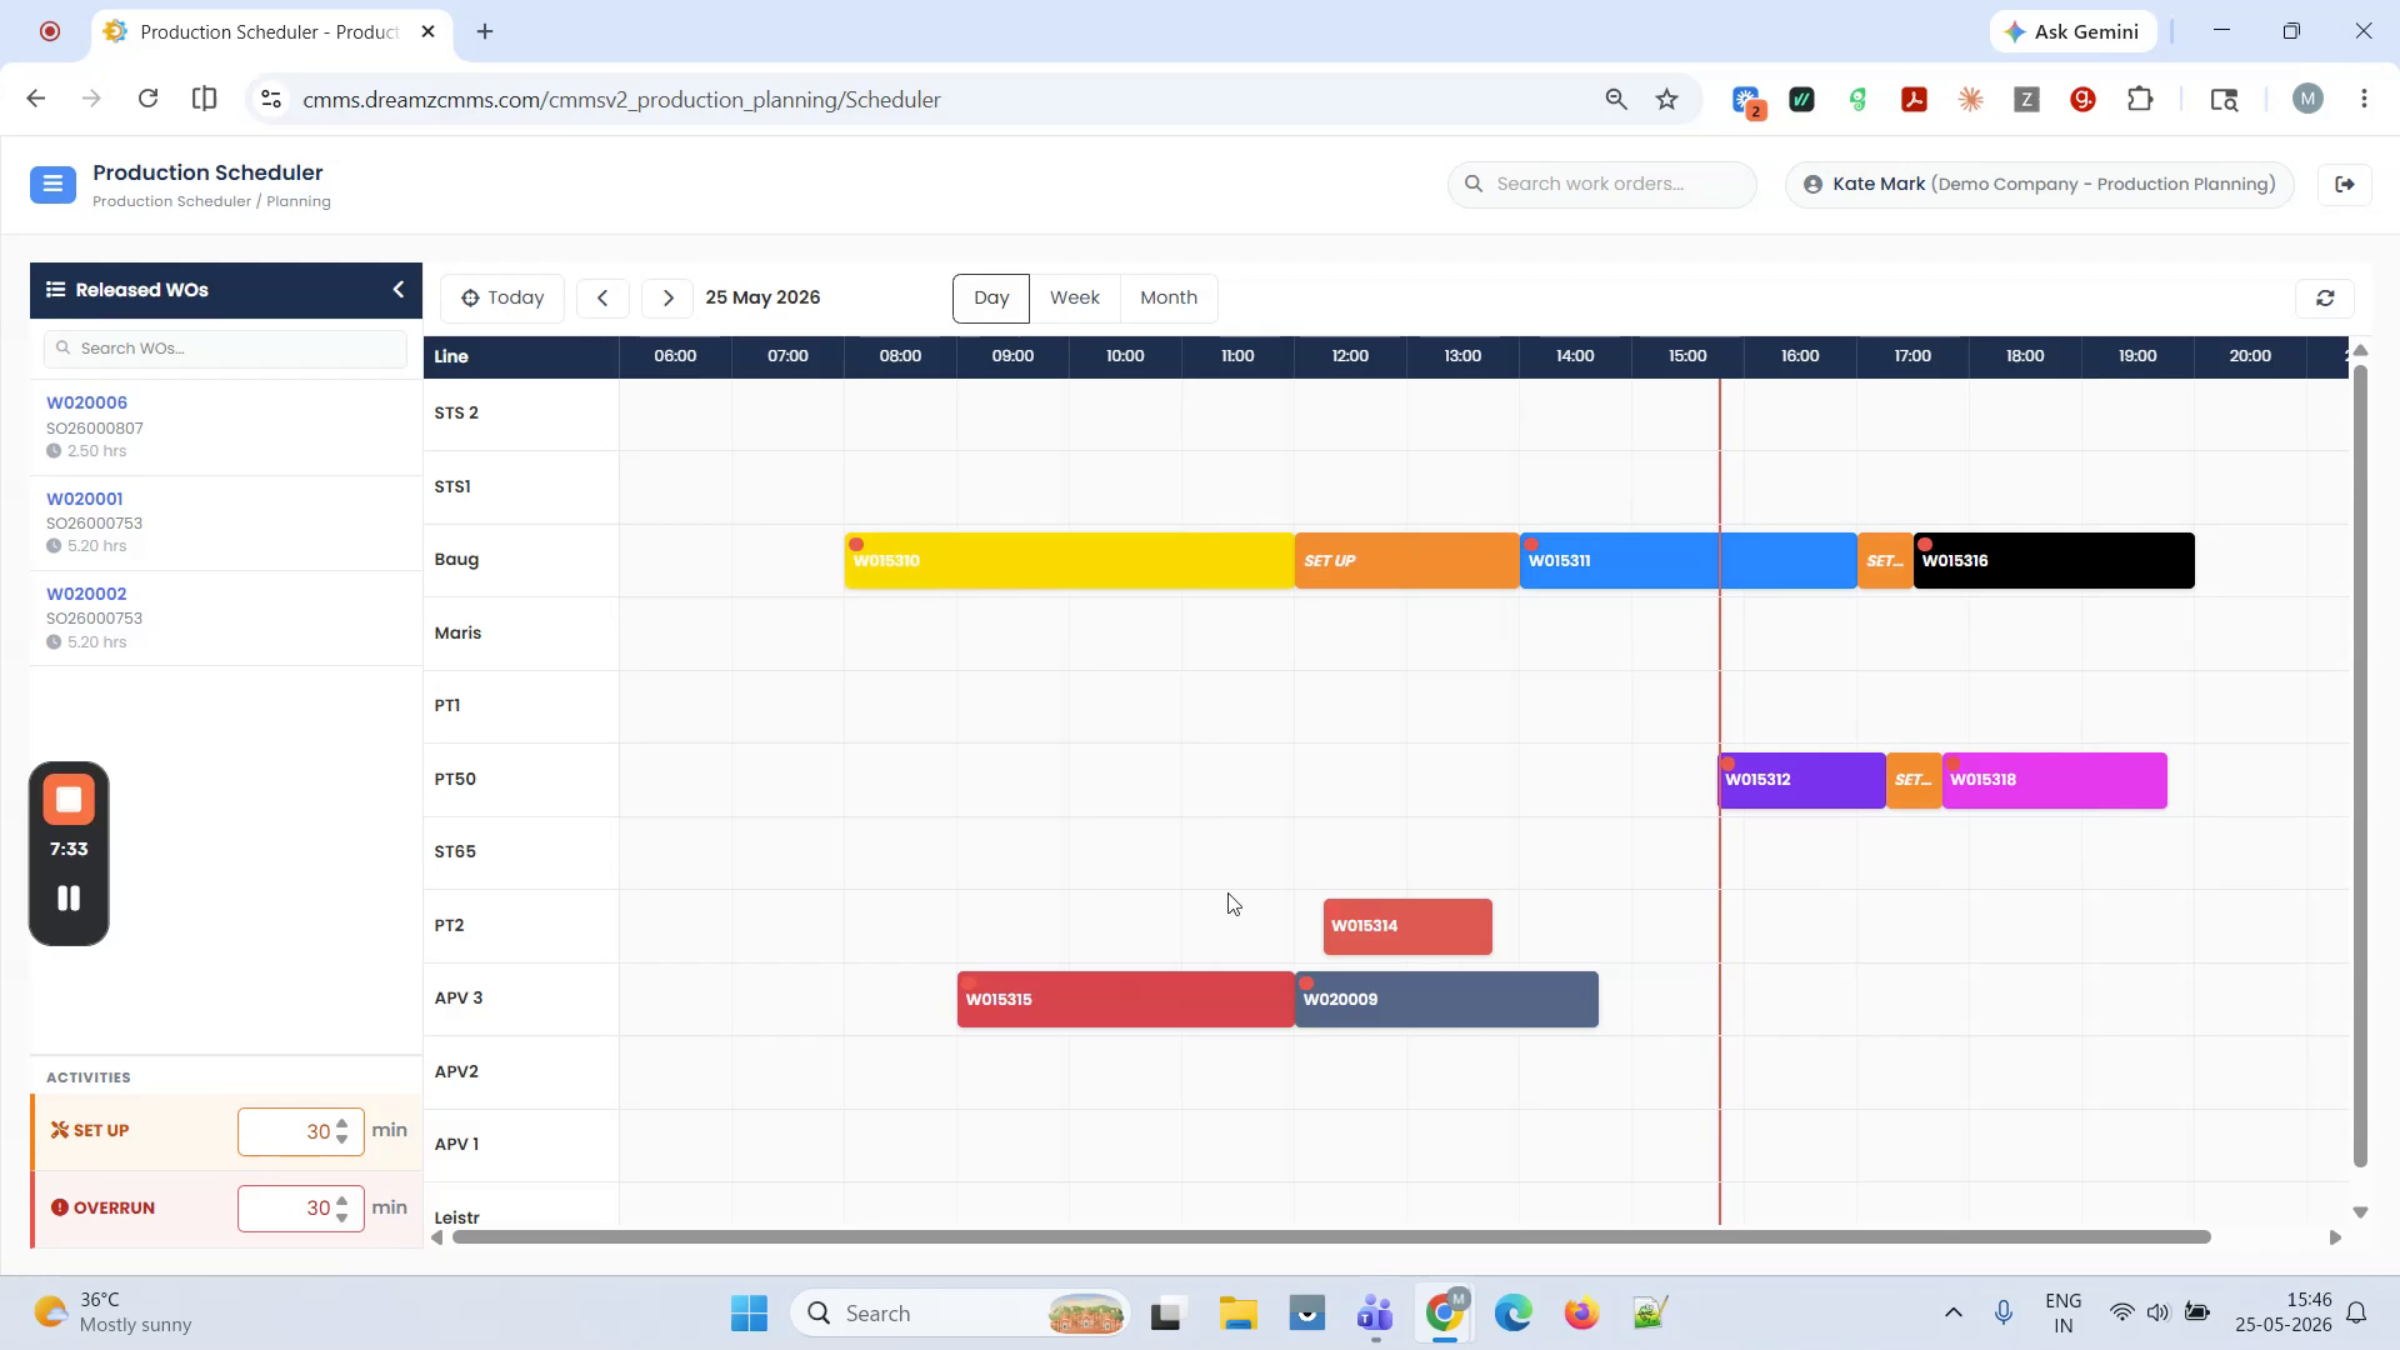
Step 8 – Edit a Job's Start Time
Click any job to edit its start time from this location.
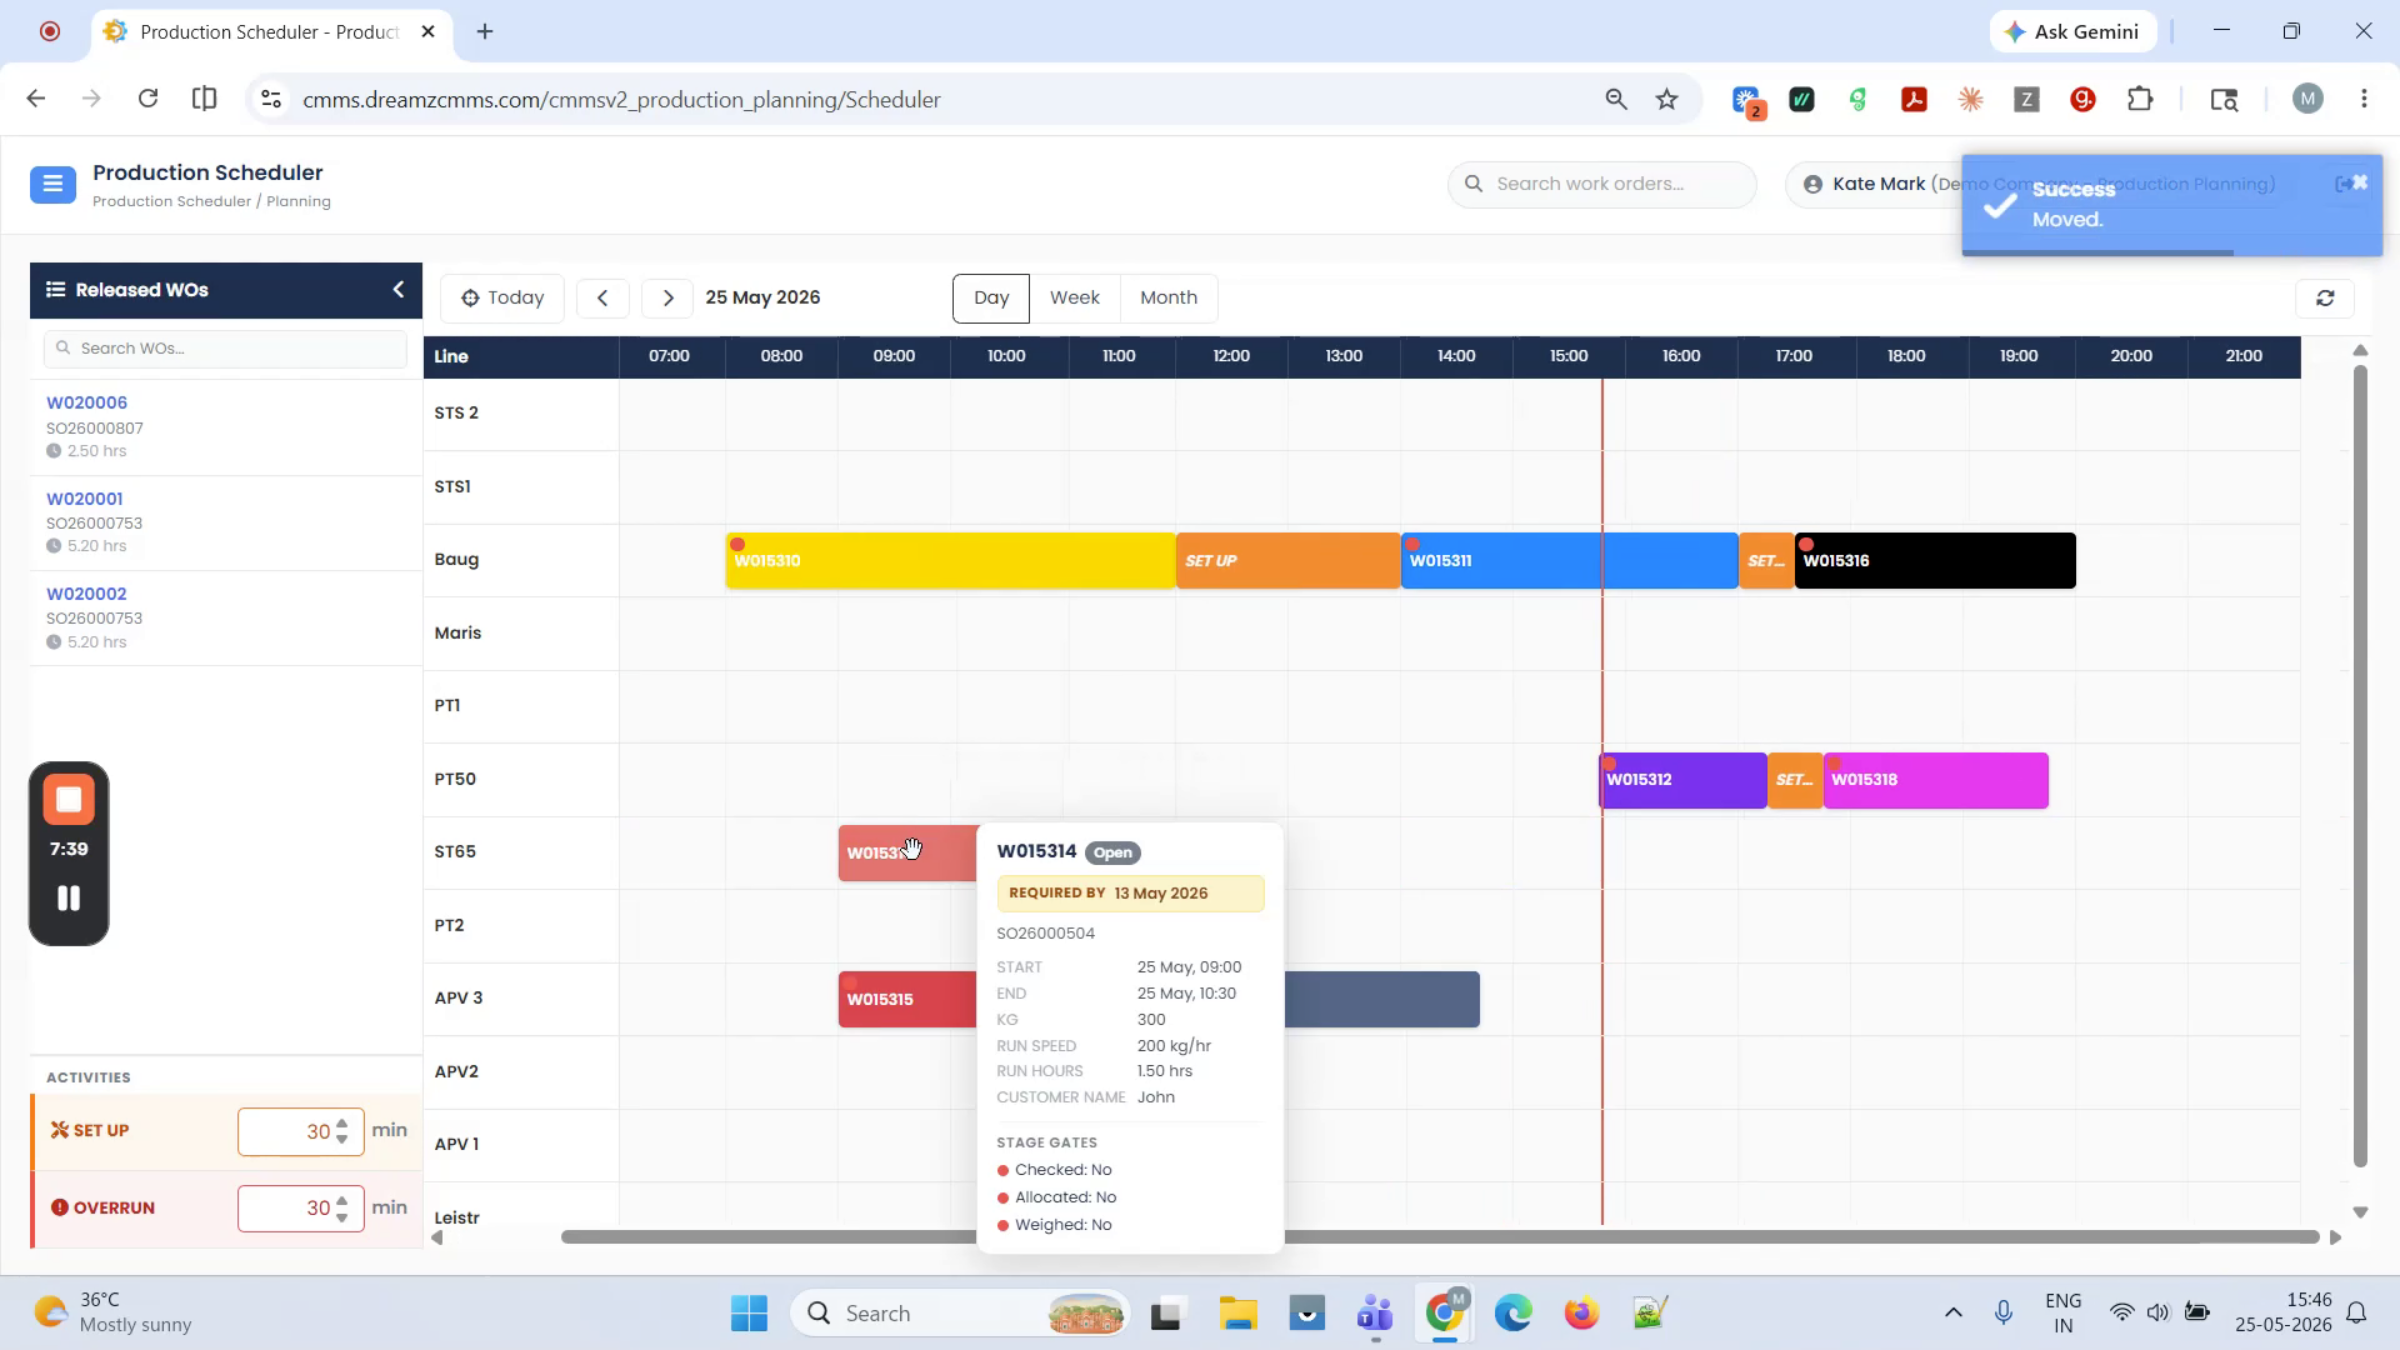
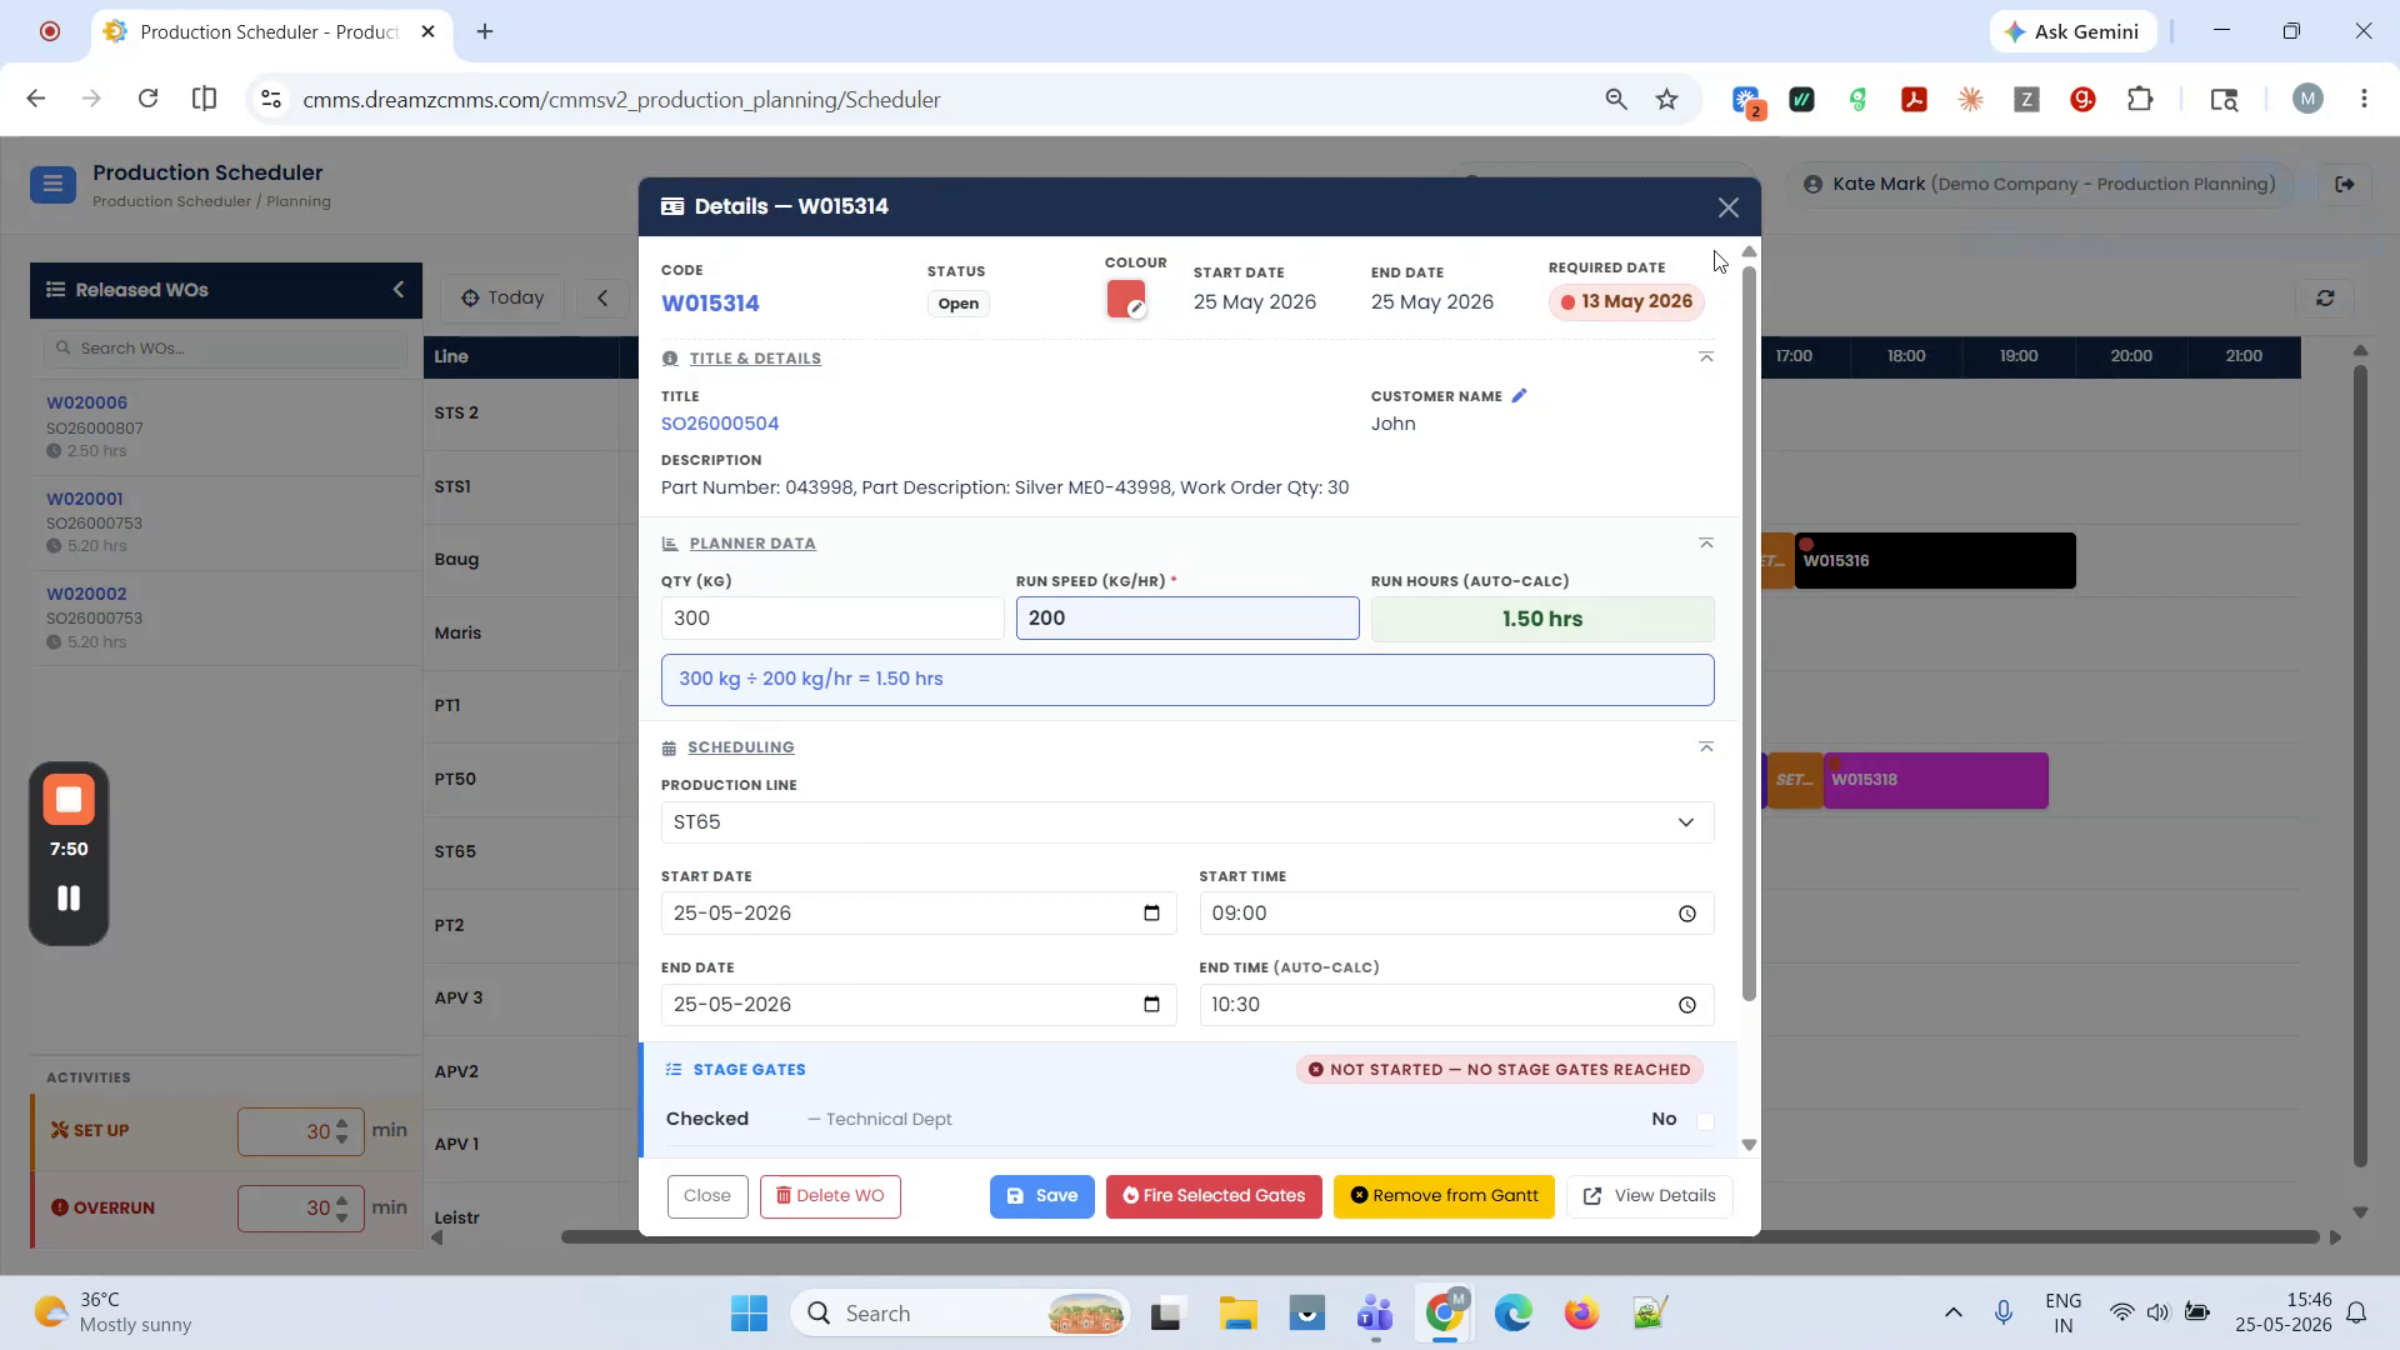
Step 9 – Switch Between Day, Week, and Month Views
Use the buttons at the top to switch between day, week, or month view.
Step 10 – Compare Day and Week Views
The day view provides hour-by-hour precision, while the week view displays the complete five-day spread.
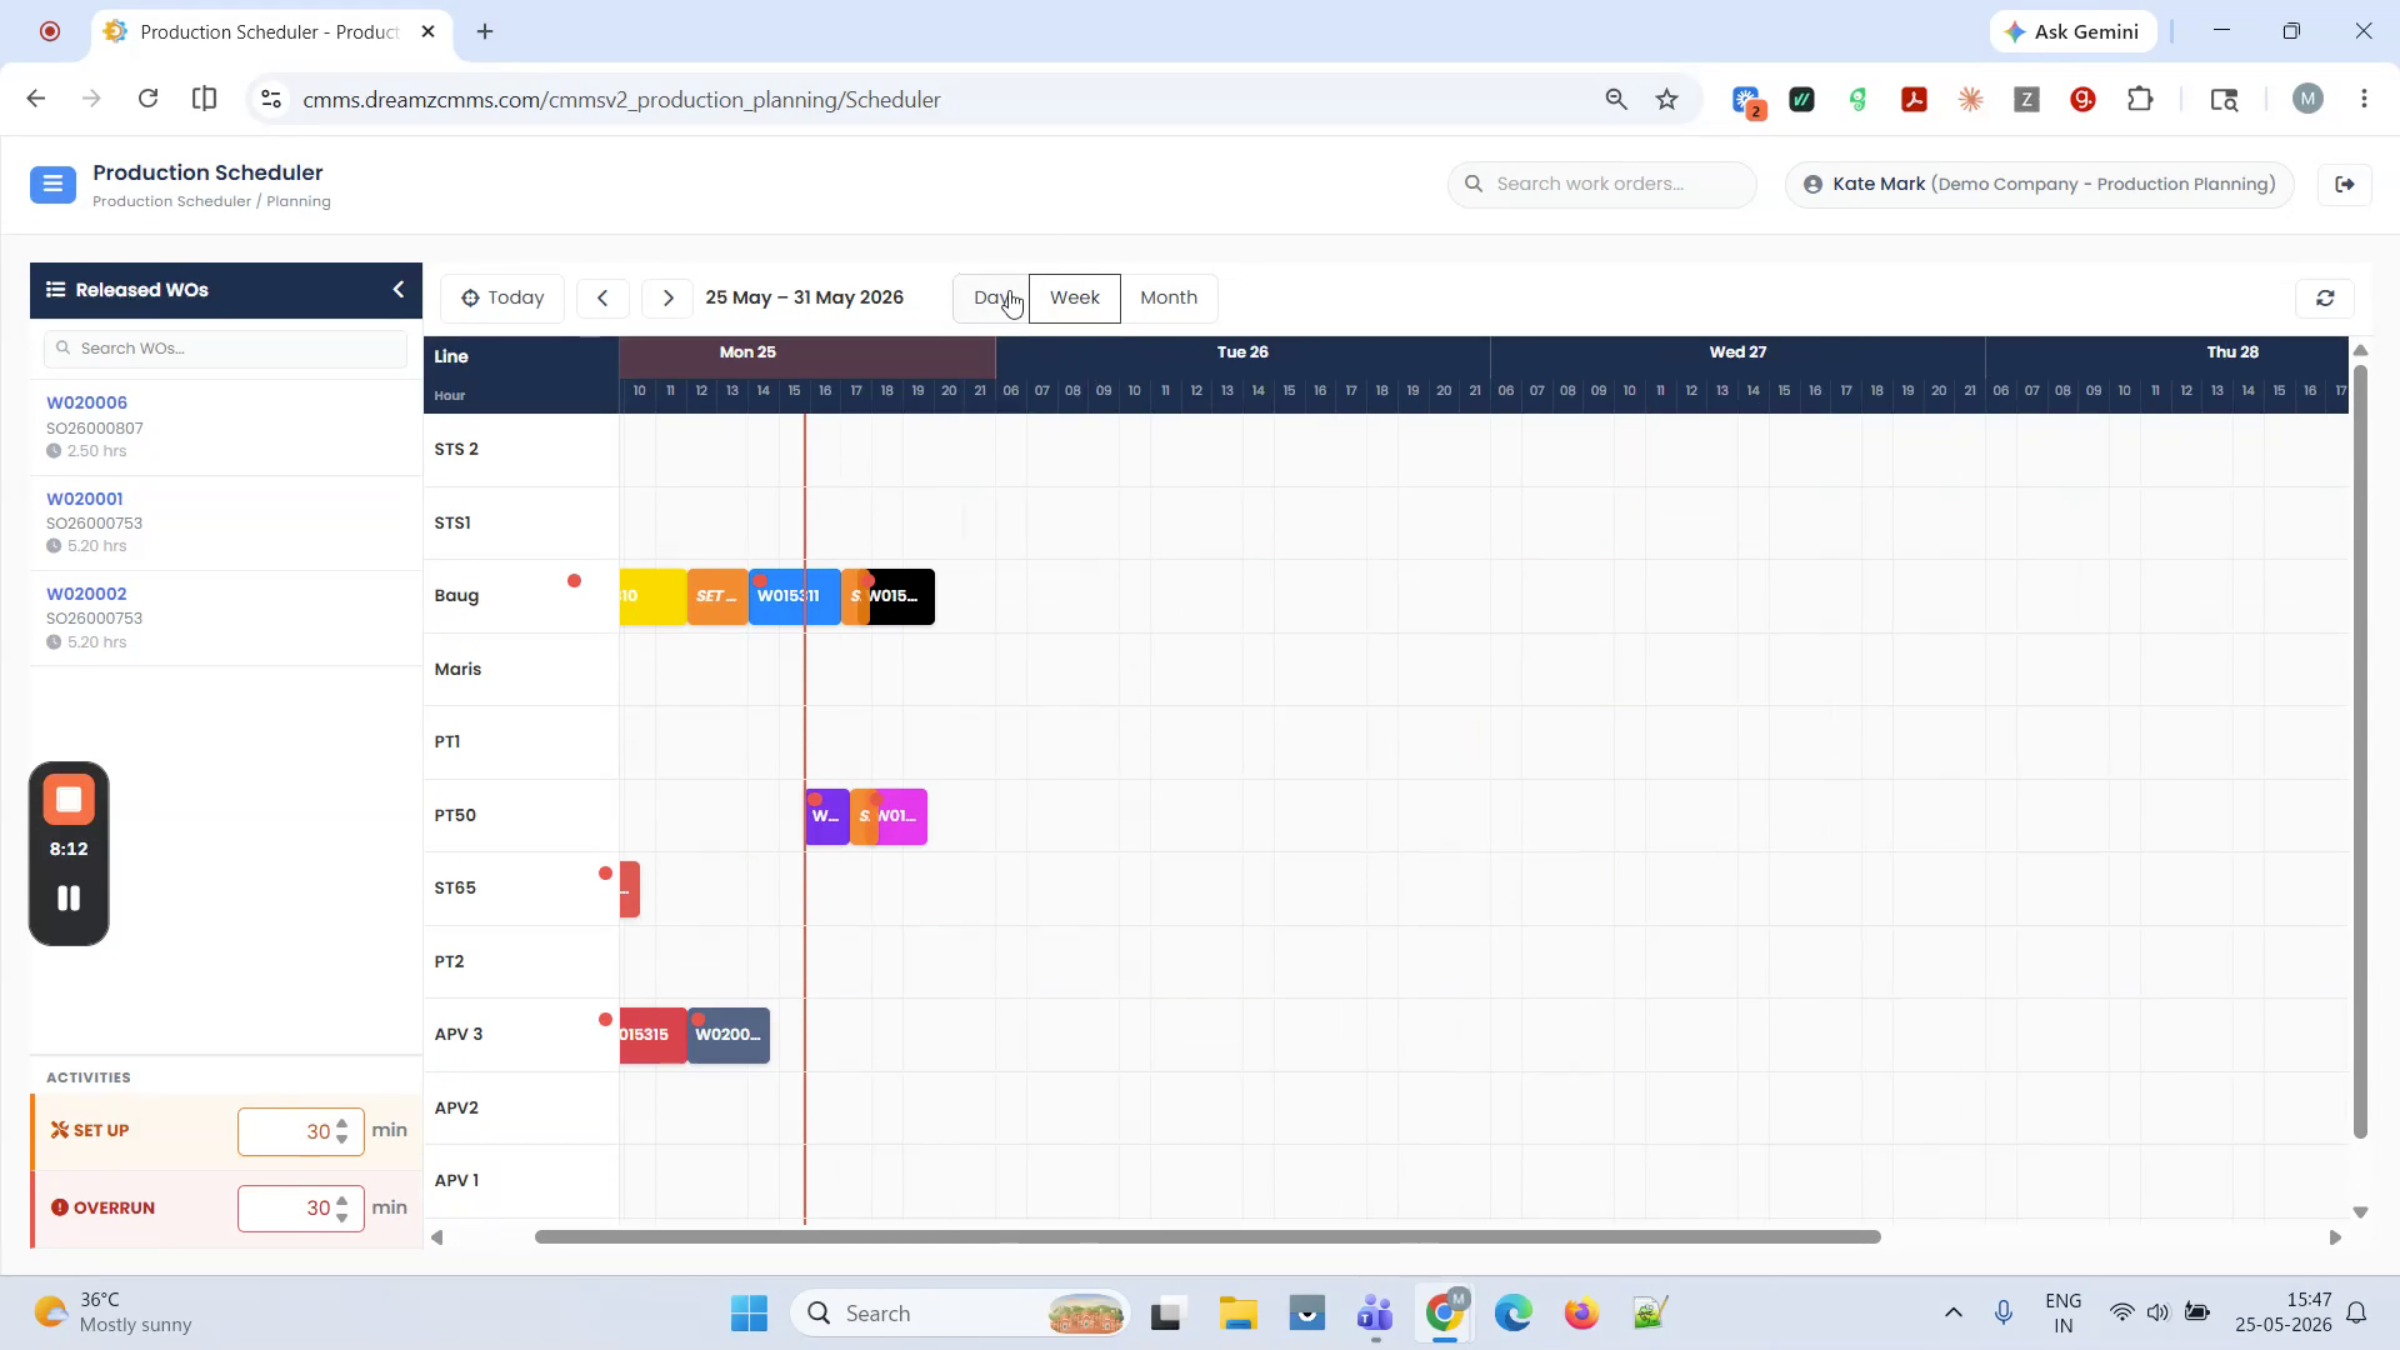
Step 11 – Review Day View and Shift Details
Day view shows the current time so you can instantly identify your position within the shift. The grid displays each line's configuration and shift window, and jobs are fixed to their respective start and end times. Weekends are automatically excluded from scheduling, so you never accidentally assign a job on an off day.
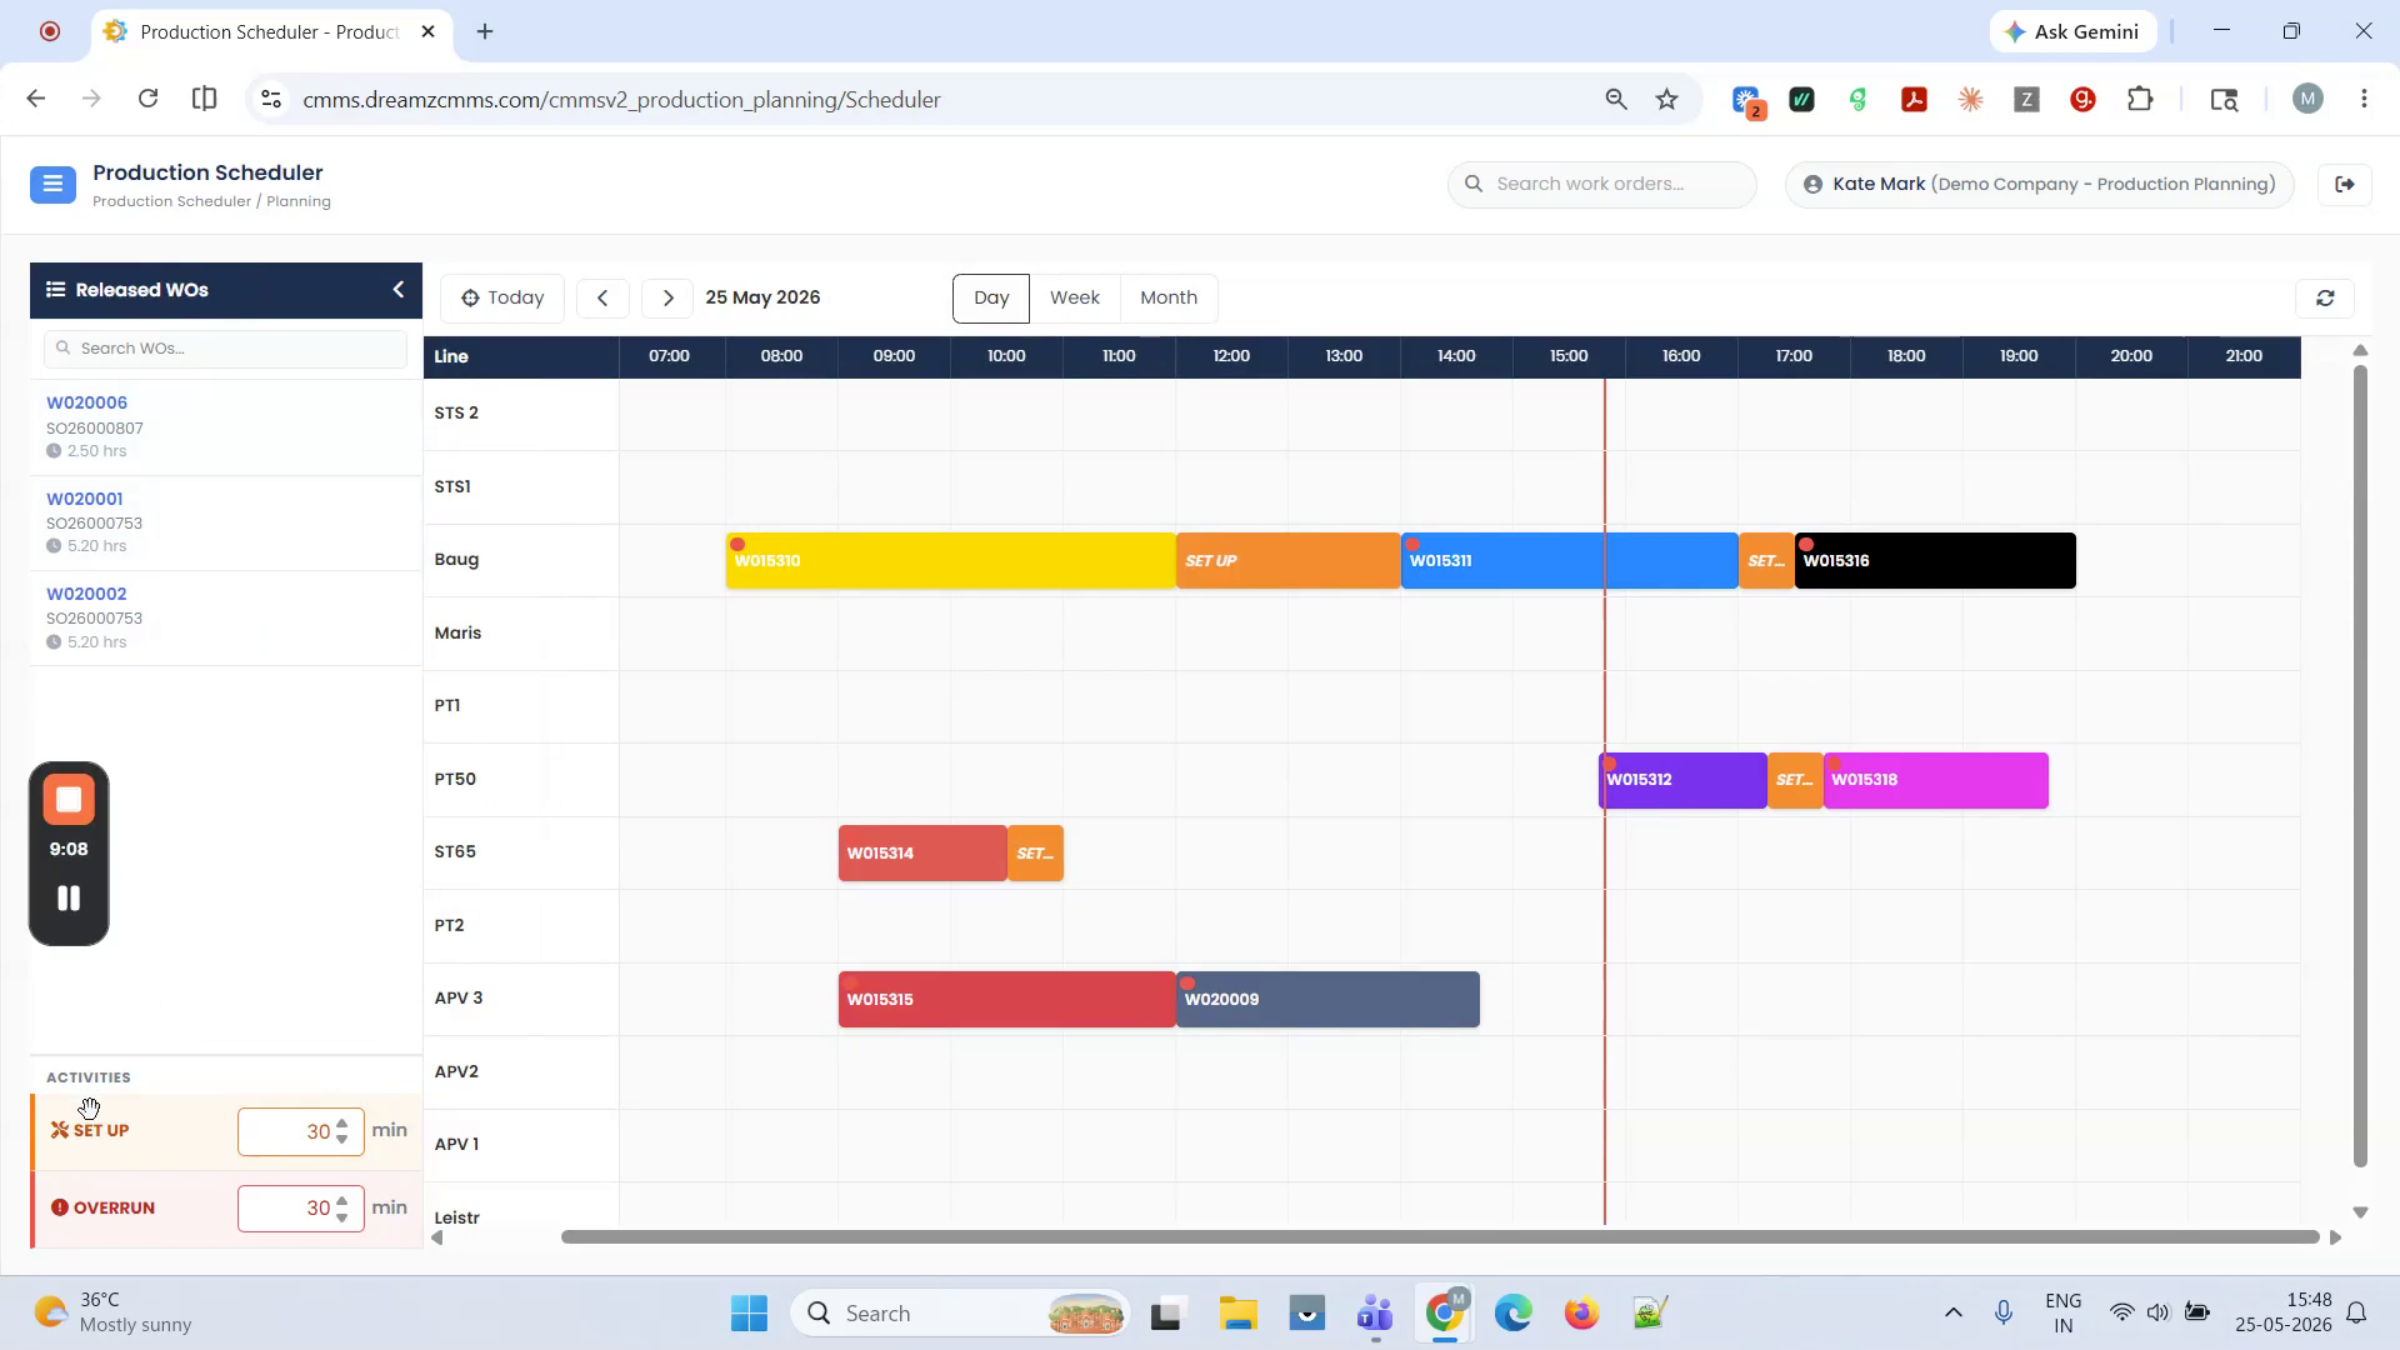
Step 12 – Schedule Setup Activities
Drag a setup activity from the released work order panel and configure it against a job on the schedule. To delete a setup, click on its right edge and it's removed automatically. You can also adjust the setup time from this location; if you relocate the job, the setup moves with it.
Step 13 – Adjust Job Duration and Setup
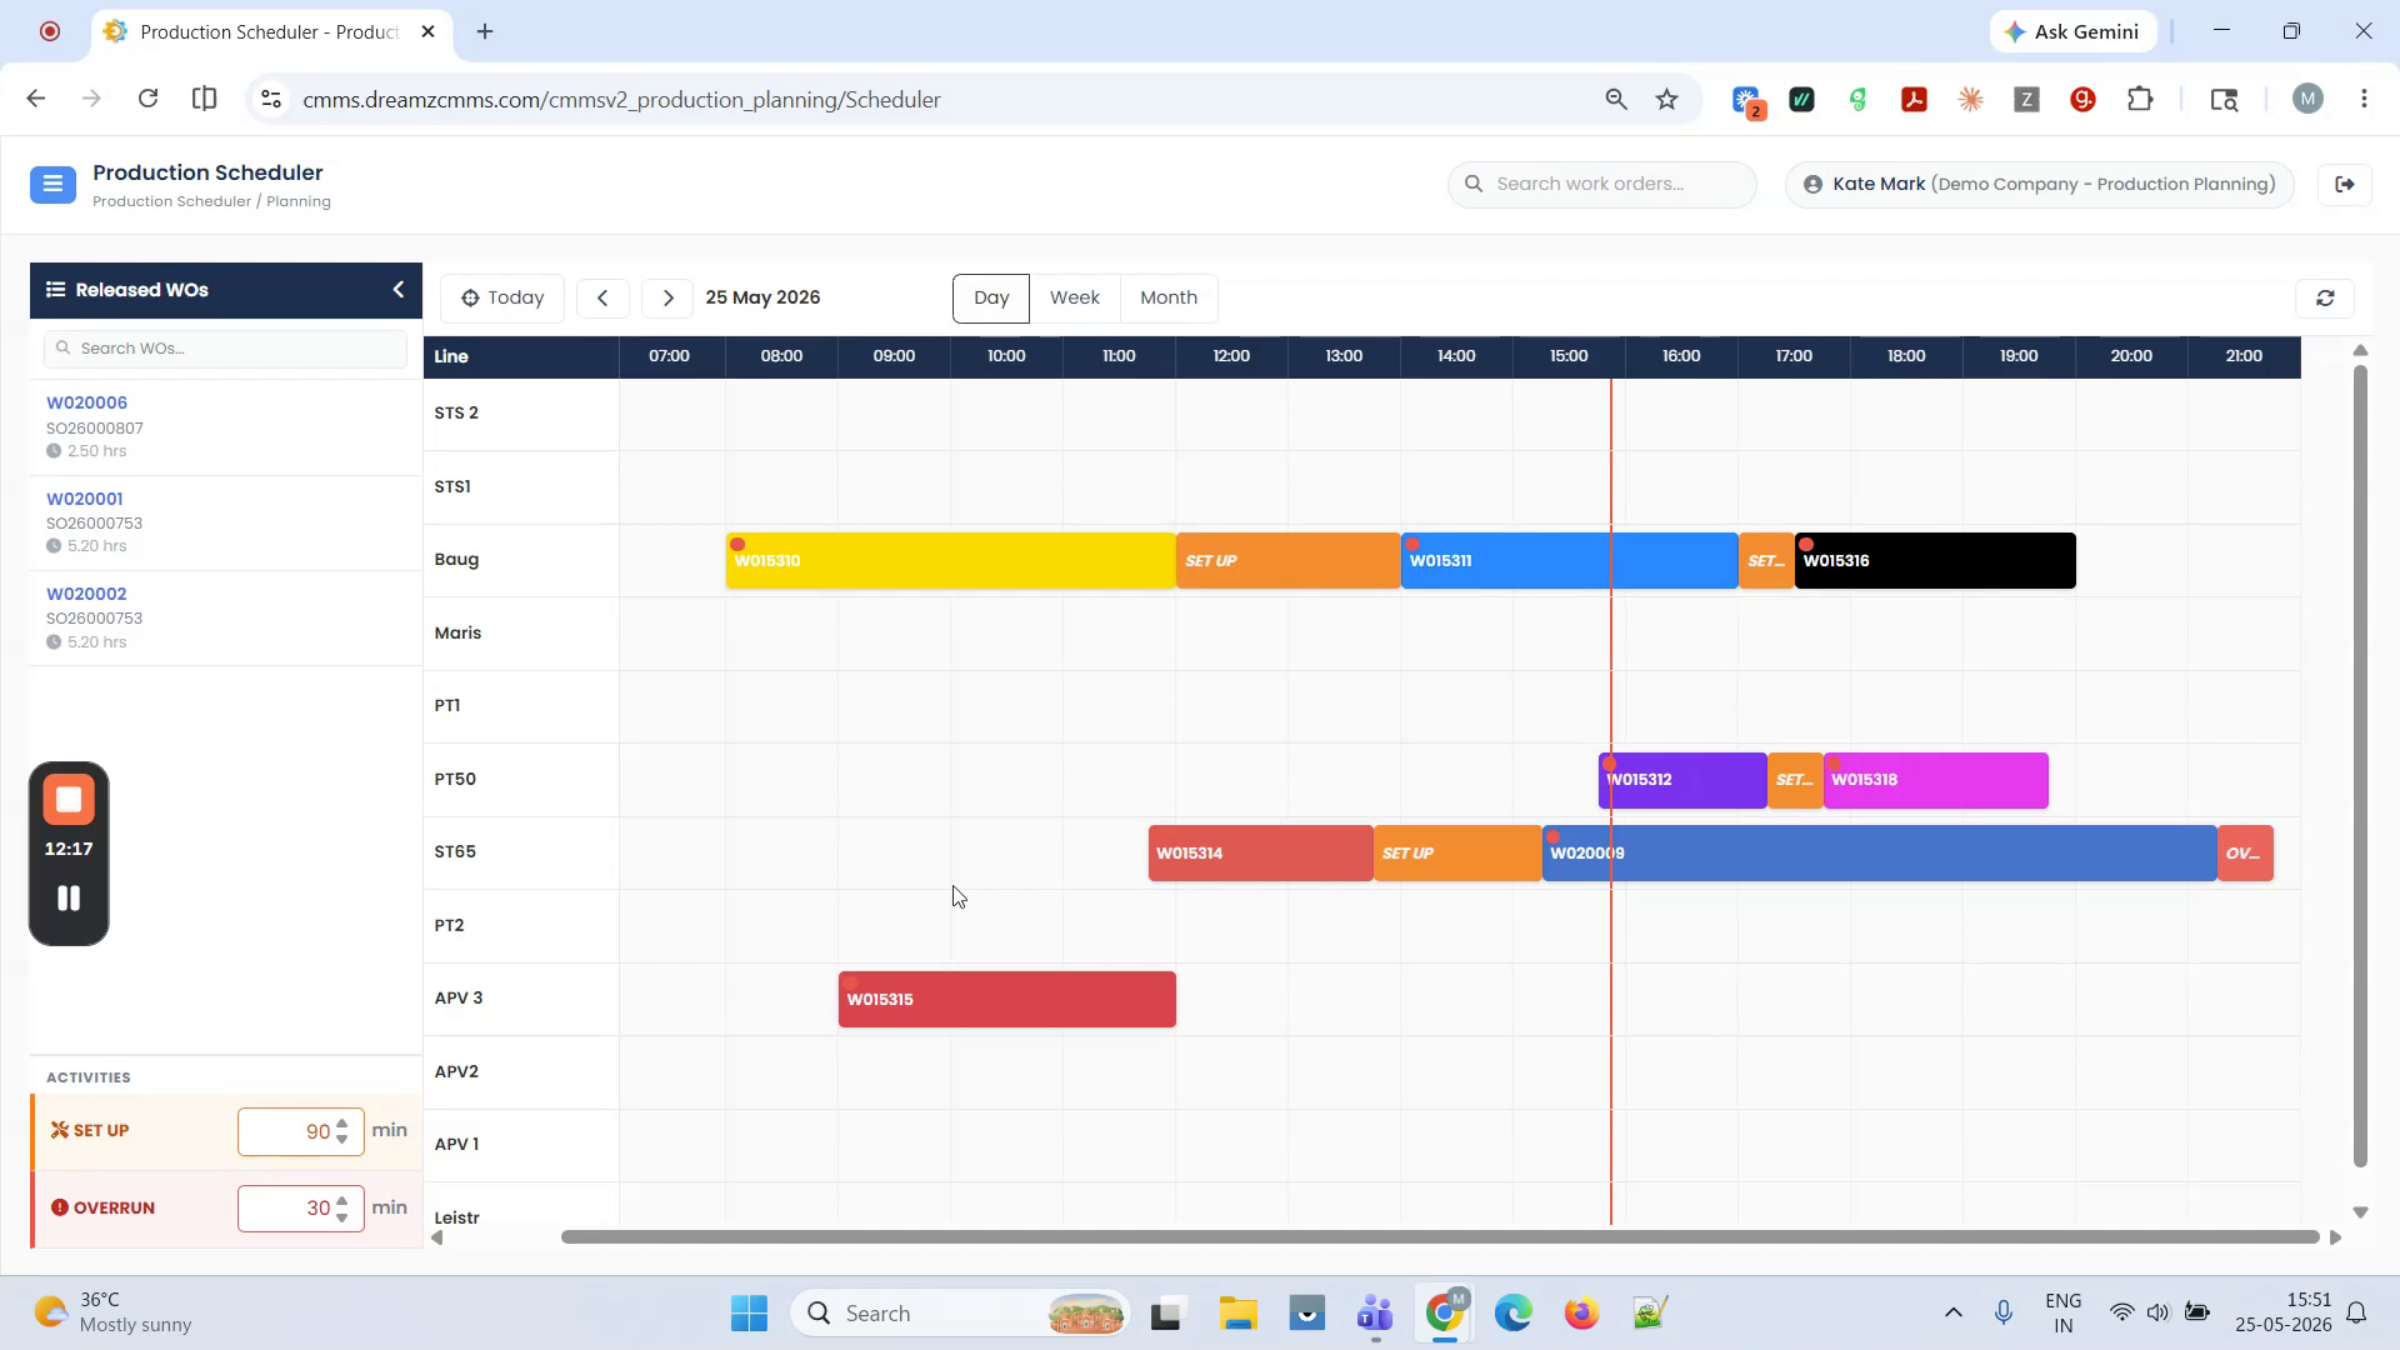
You can extend or shorten a job's duration (for example, to 20 hours), and the setup and the next job on the line will adjust accordingly. You can also move the time back to revert to the original duration.
Step 14 – Understand the Cascade Engine
If you move or reschedule any job, the cascade engine automatically advances all subsequent jobs on that line to keep the schedule consistent.
Step 15 – Use the Month View
Rescheduling can be done from either the day view or the week view without manual reworking. A month view is also available, offering a high-level calendar overview of all scheduled jobs.
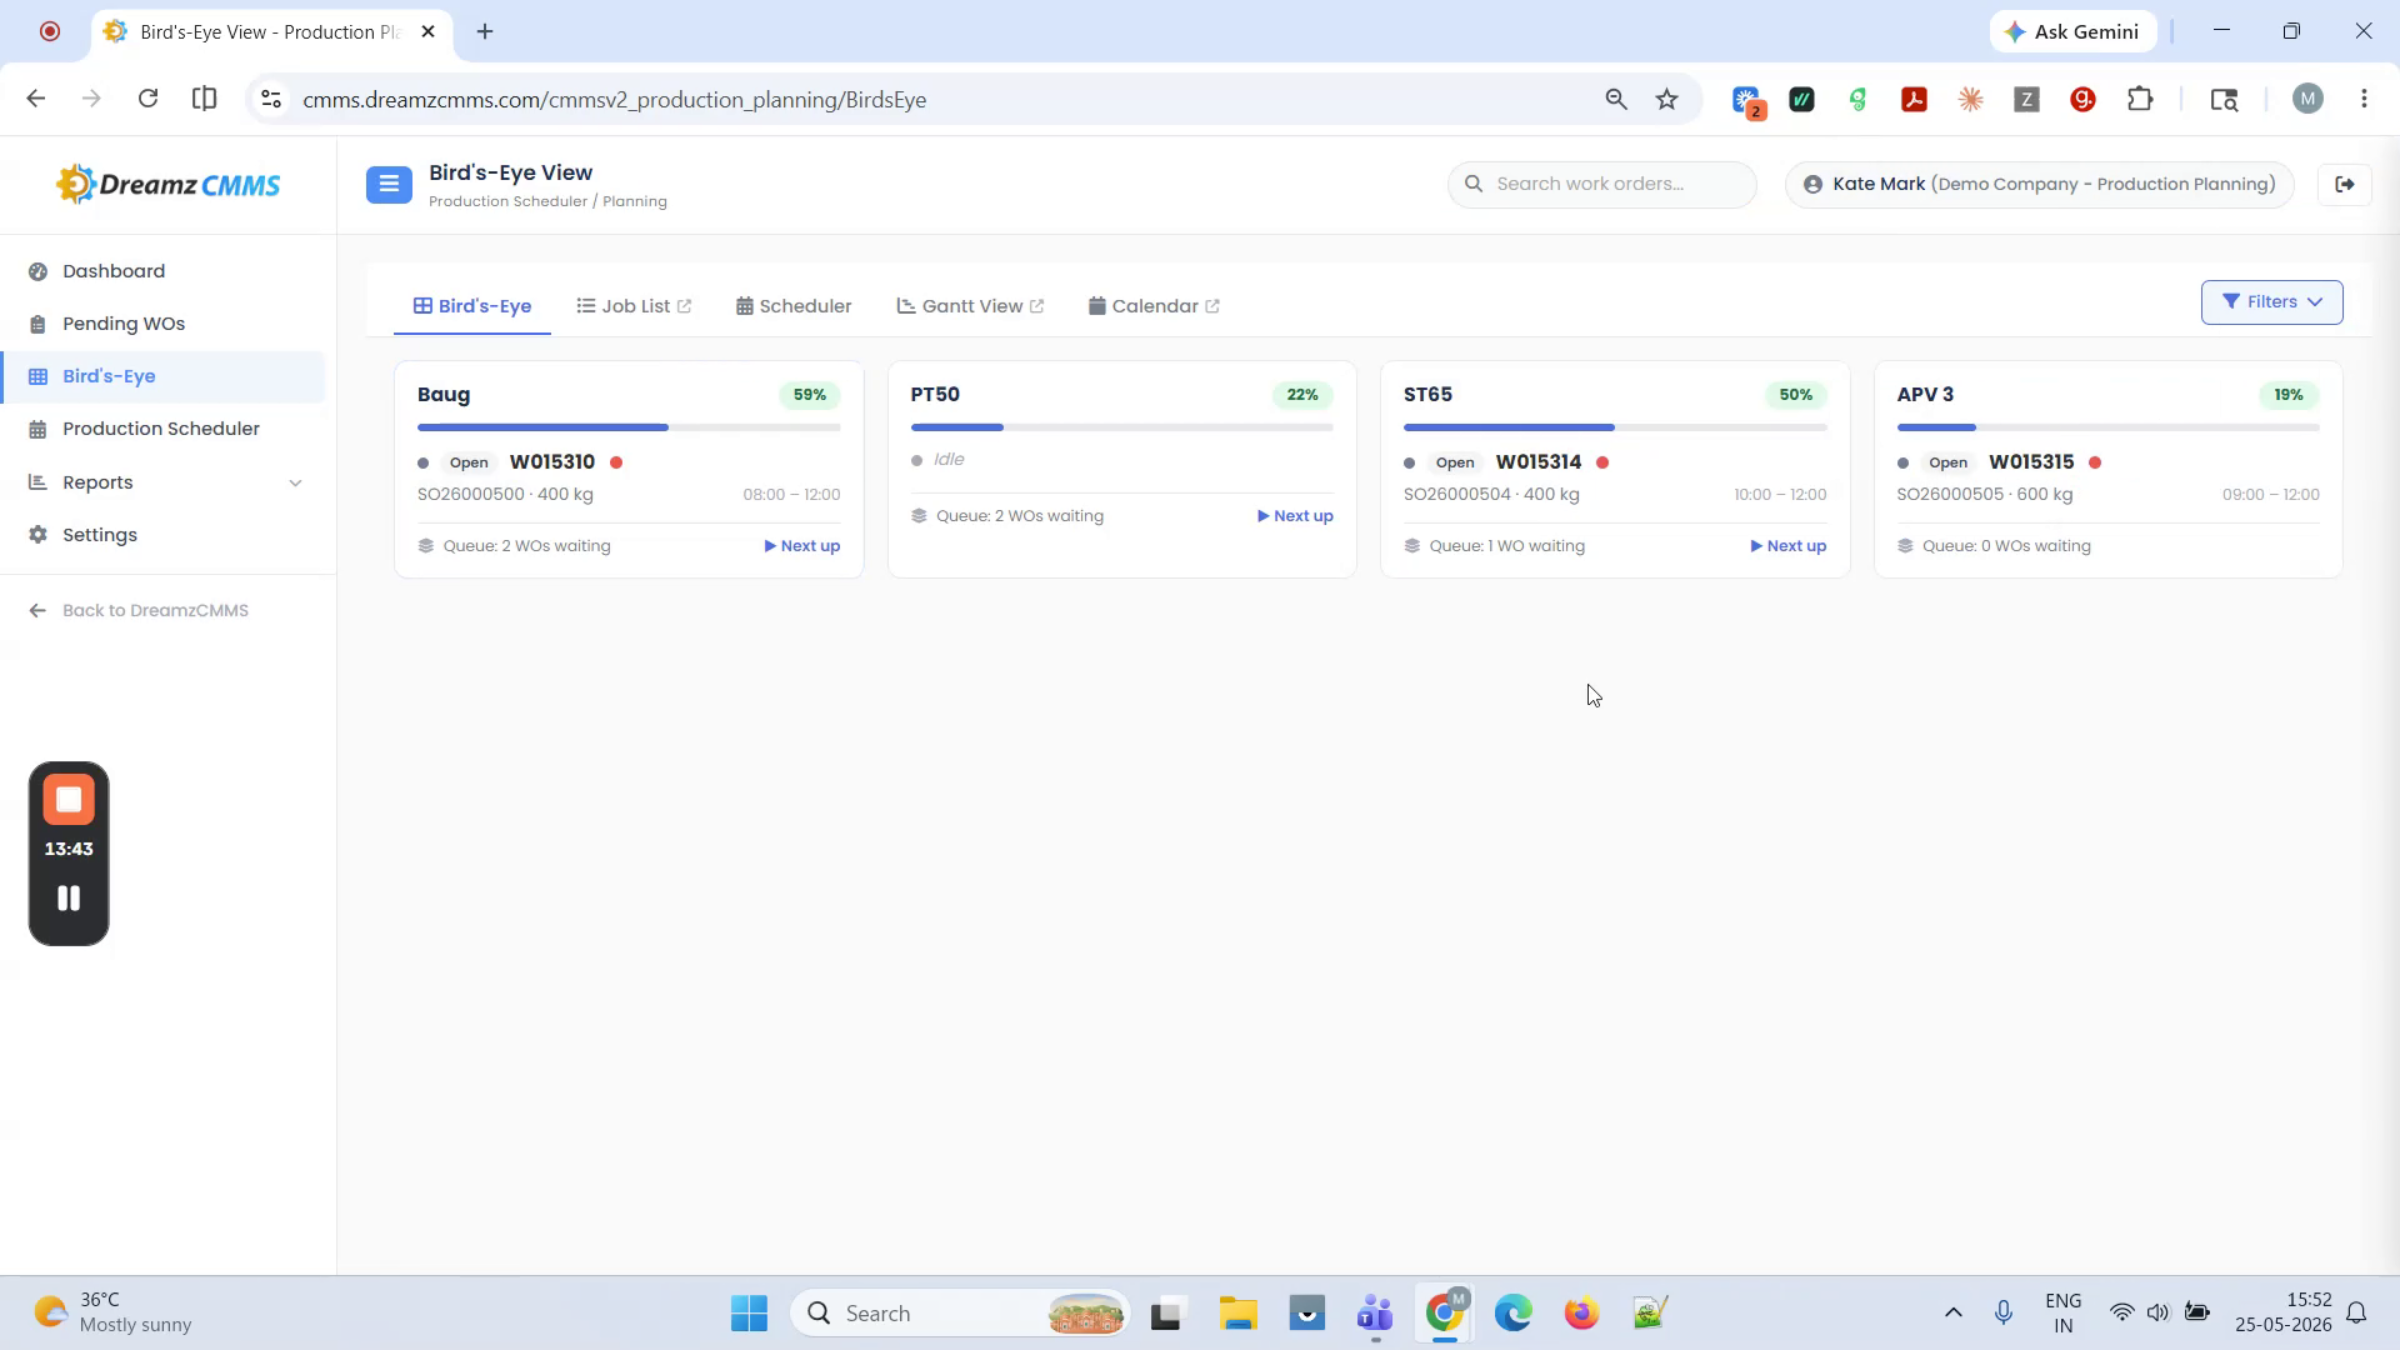
Step 16 – Use the Bird's-Eye View
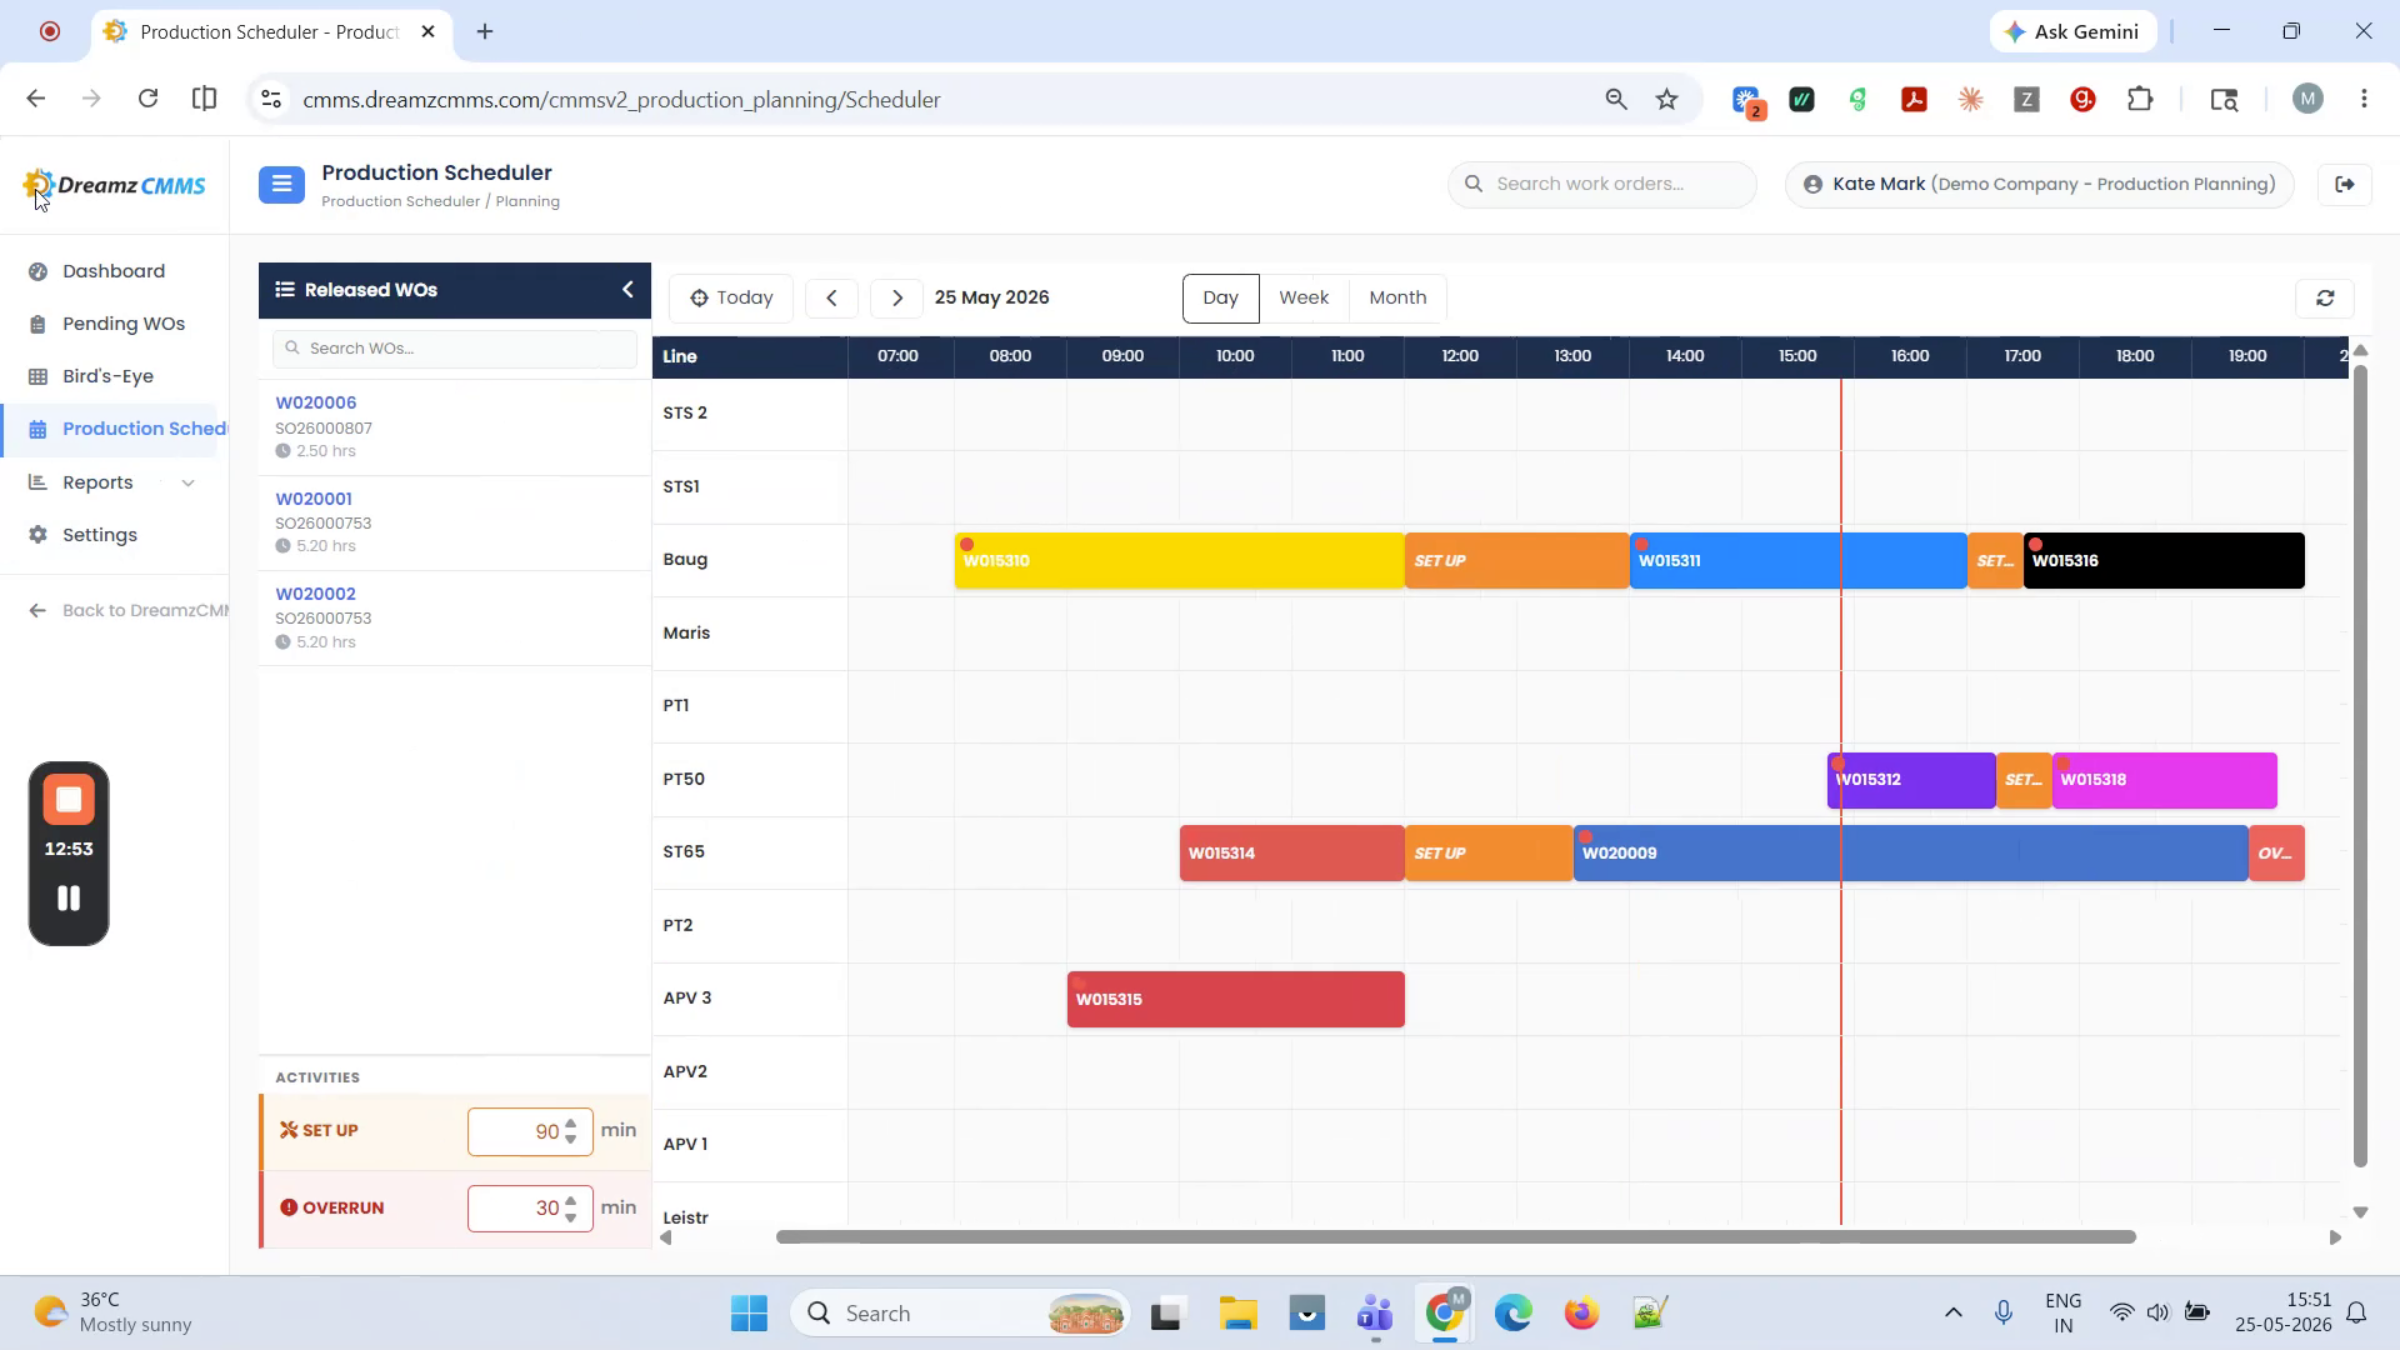
Switch to the bird's-eye view to see each line's name, current utilization, the job currently running, and how many jobs are queued behind it. Clicking a job opens a side drawer with its full details, including stage gate, job status, start time, end time, required/due date, and current color coding.
View Reports
Step 1 – Open the Report Section
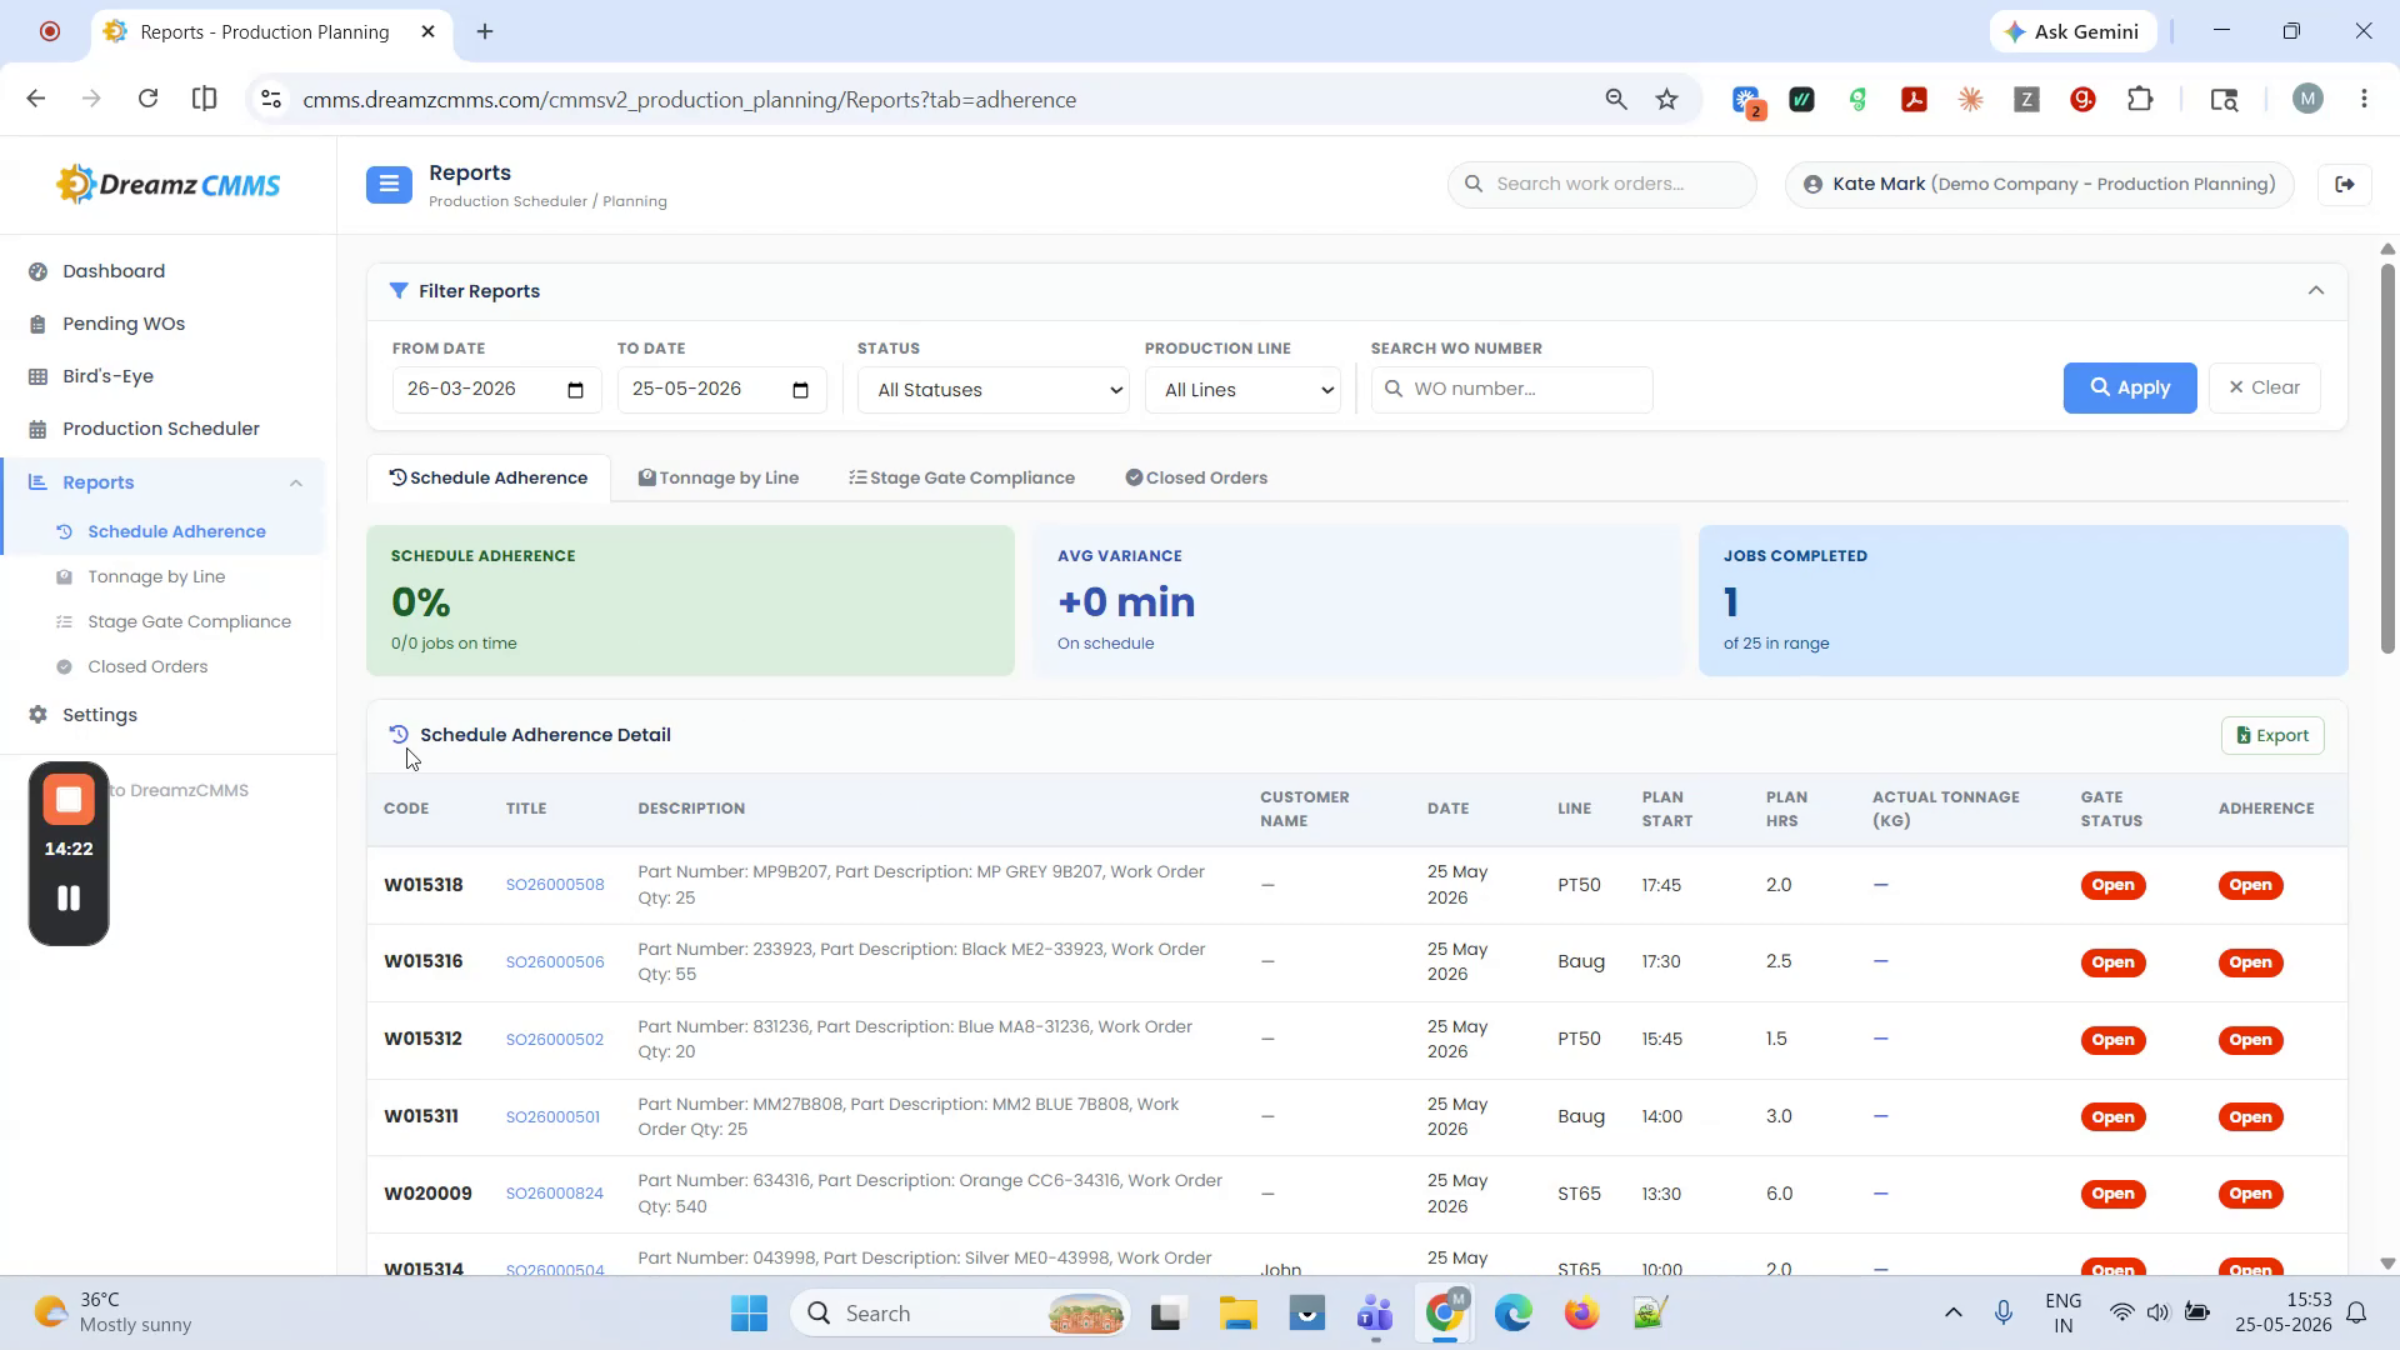
The Report section gives you an overview of SQCDP — safety, quality, cost, delivery, and people — across four tabs. Each tab opens with a KPI summary featuring figures like adherence percentage, average variance, and total plan versus actual tonnage.
Step 2 – Review Schedule Adherence and Tonnage by Line
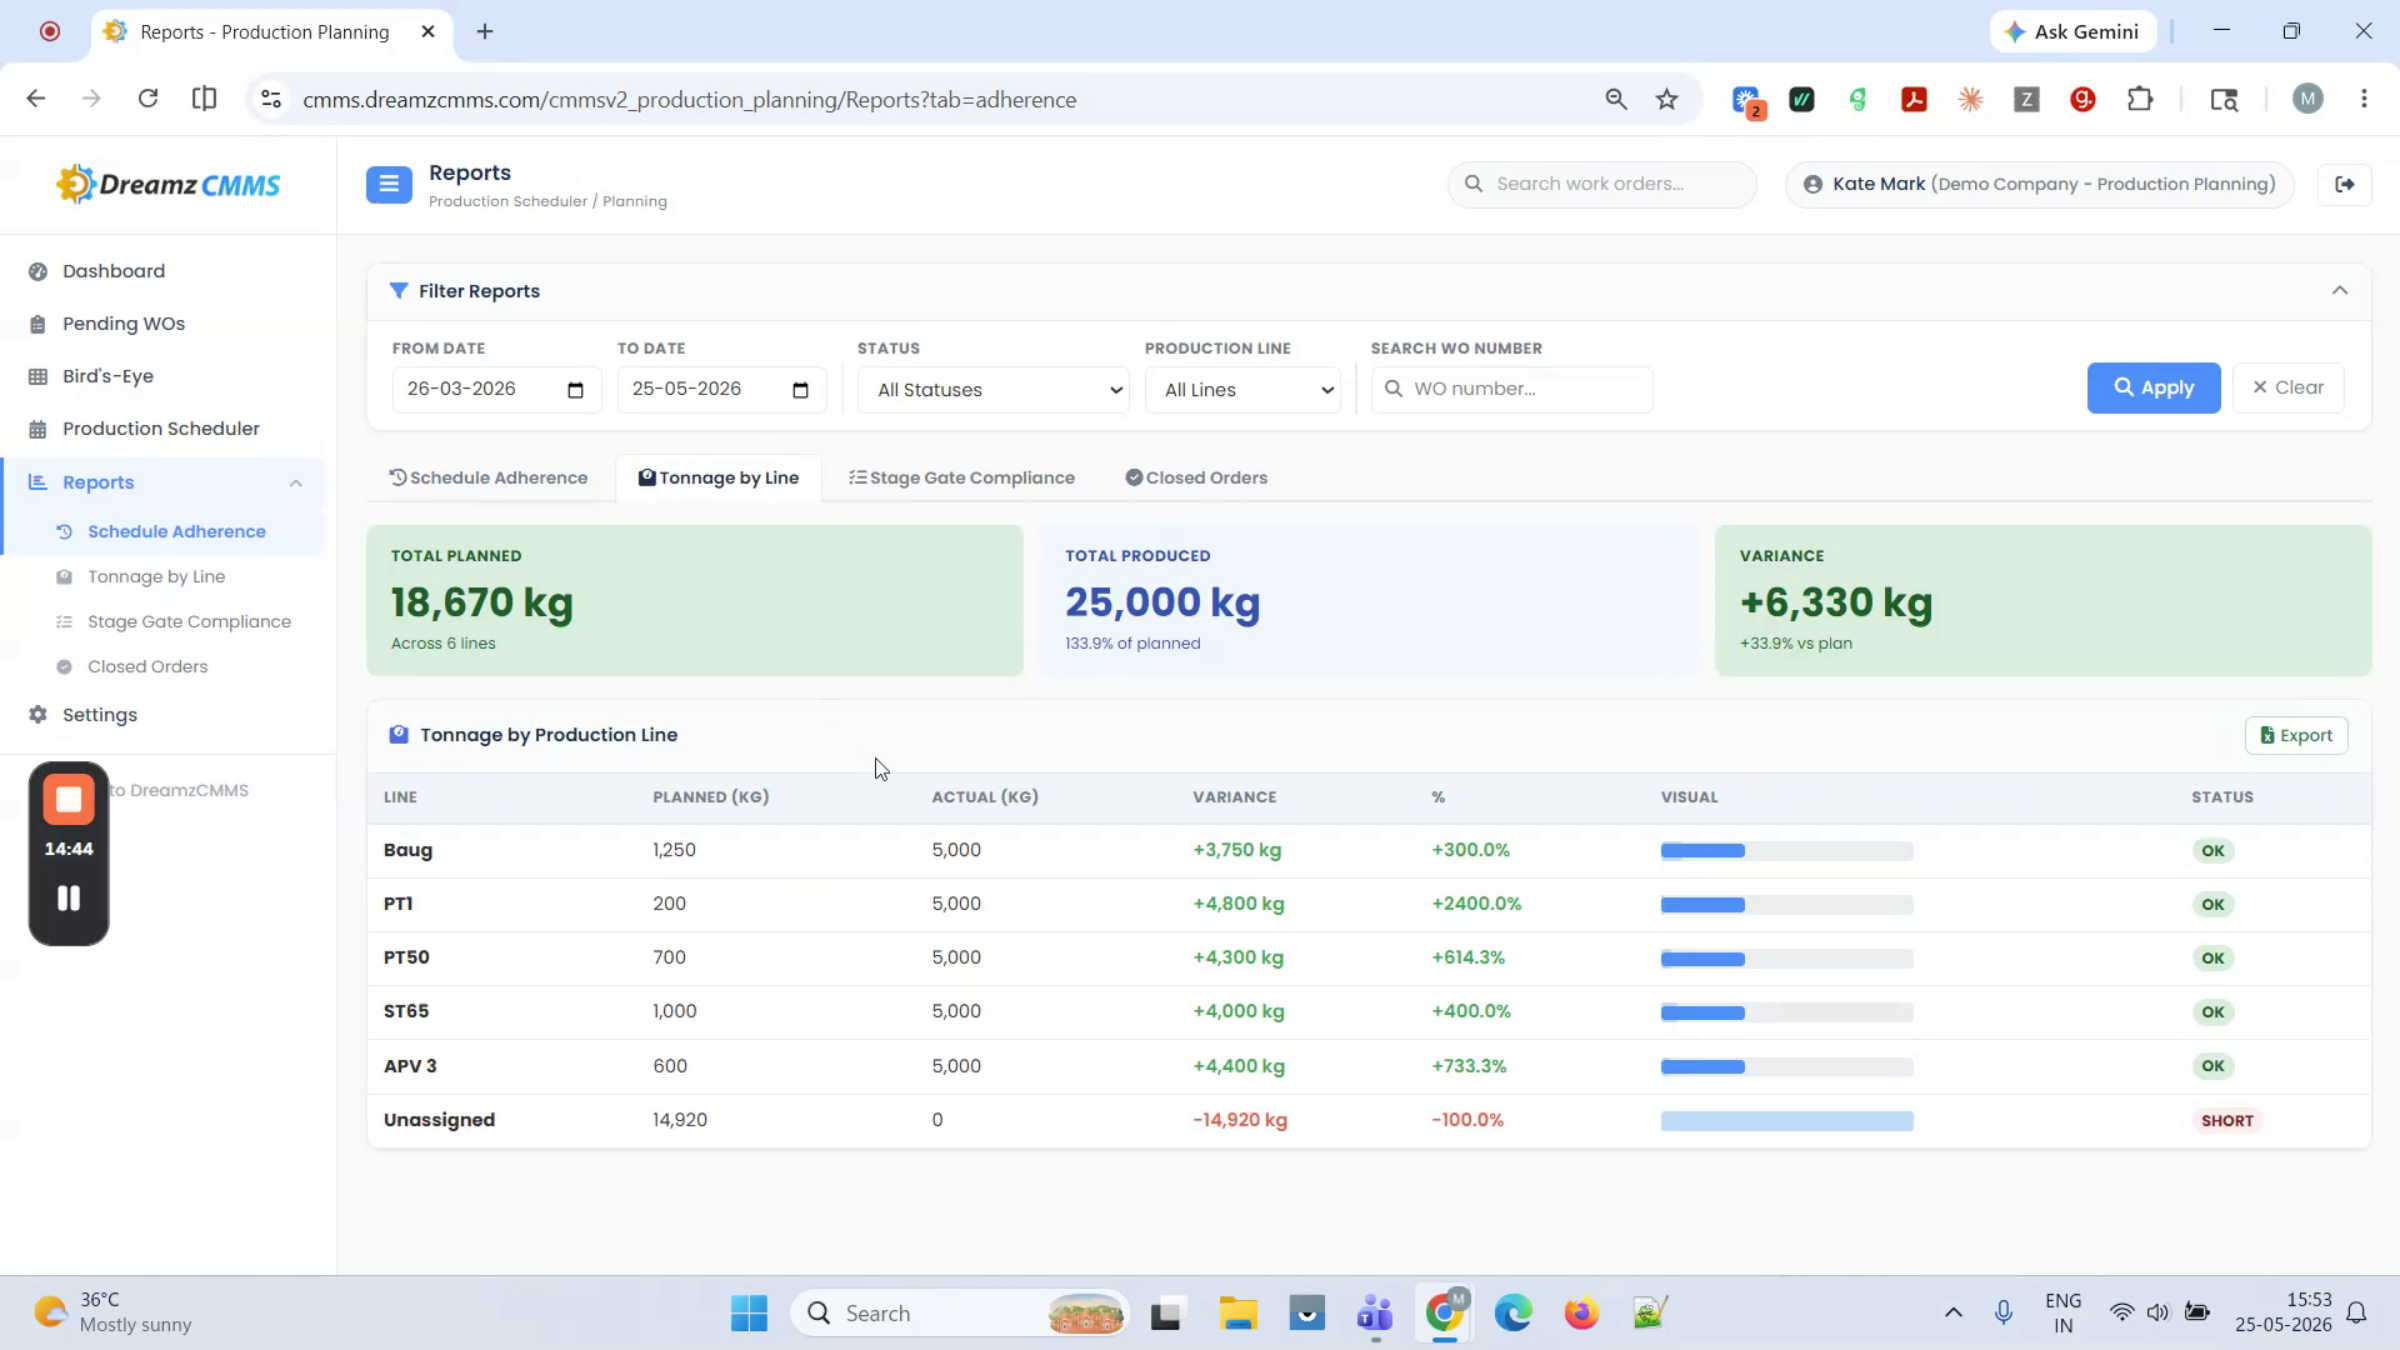
Schedule Adherence compares planned versus actual start times and shows your adherence percentage; you can export this report to Excel. Tonnage by Line displays planned versus actual output in kilograms.
Step 3 – Review Stage Gate Compliance
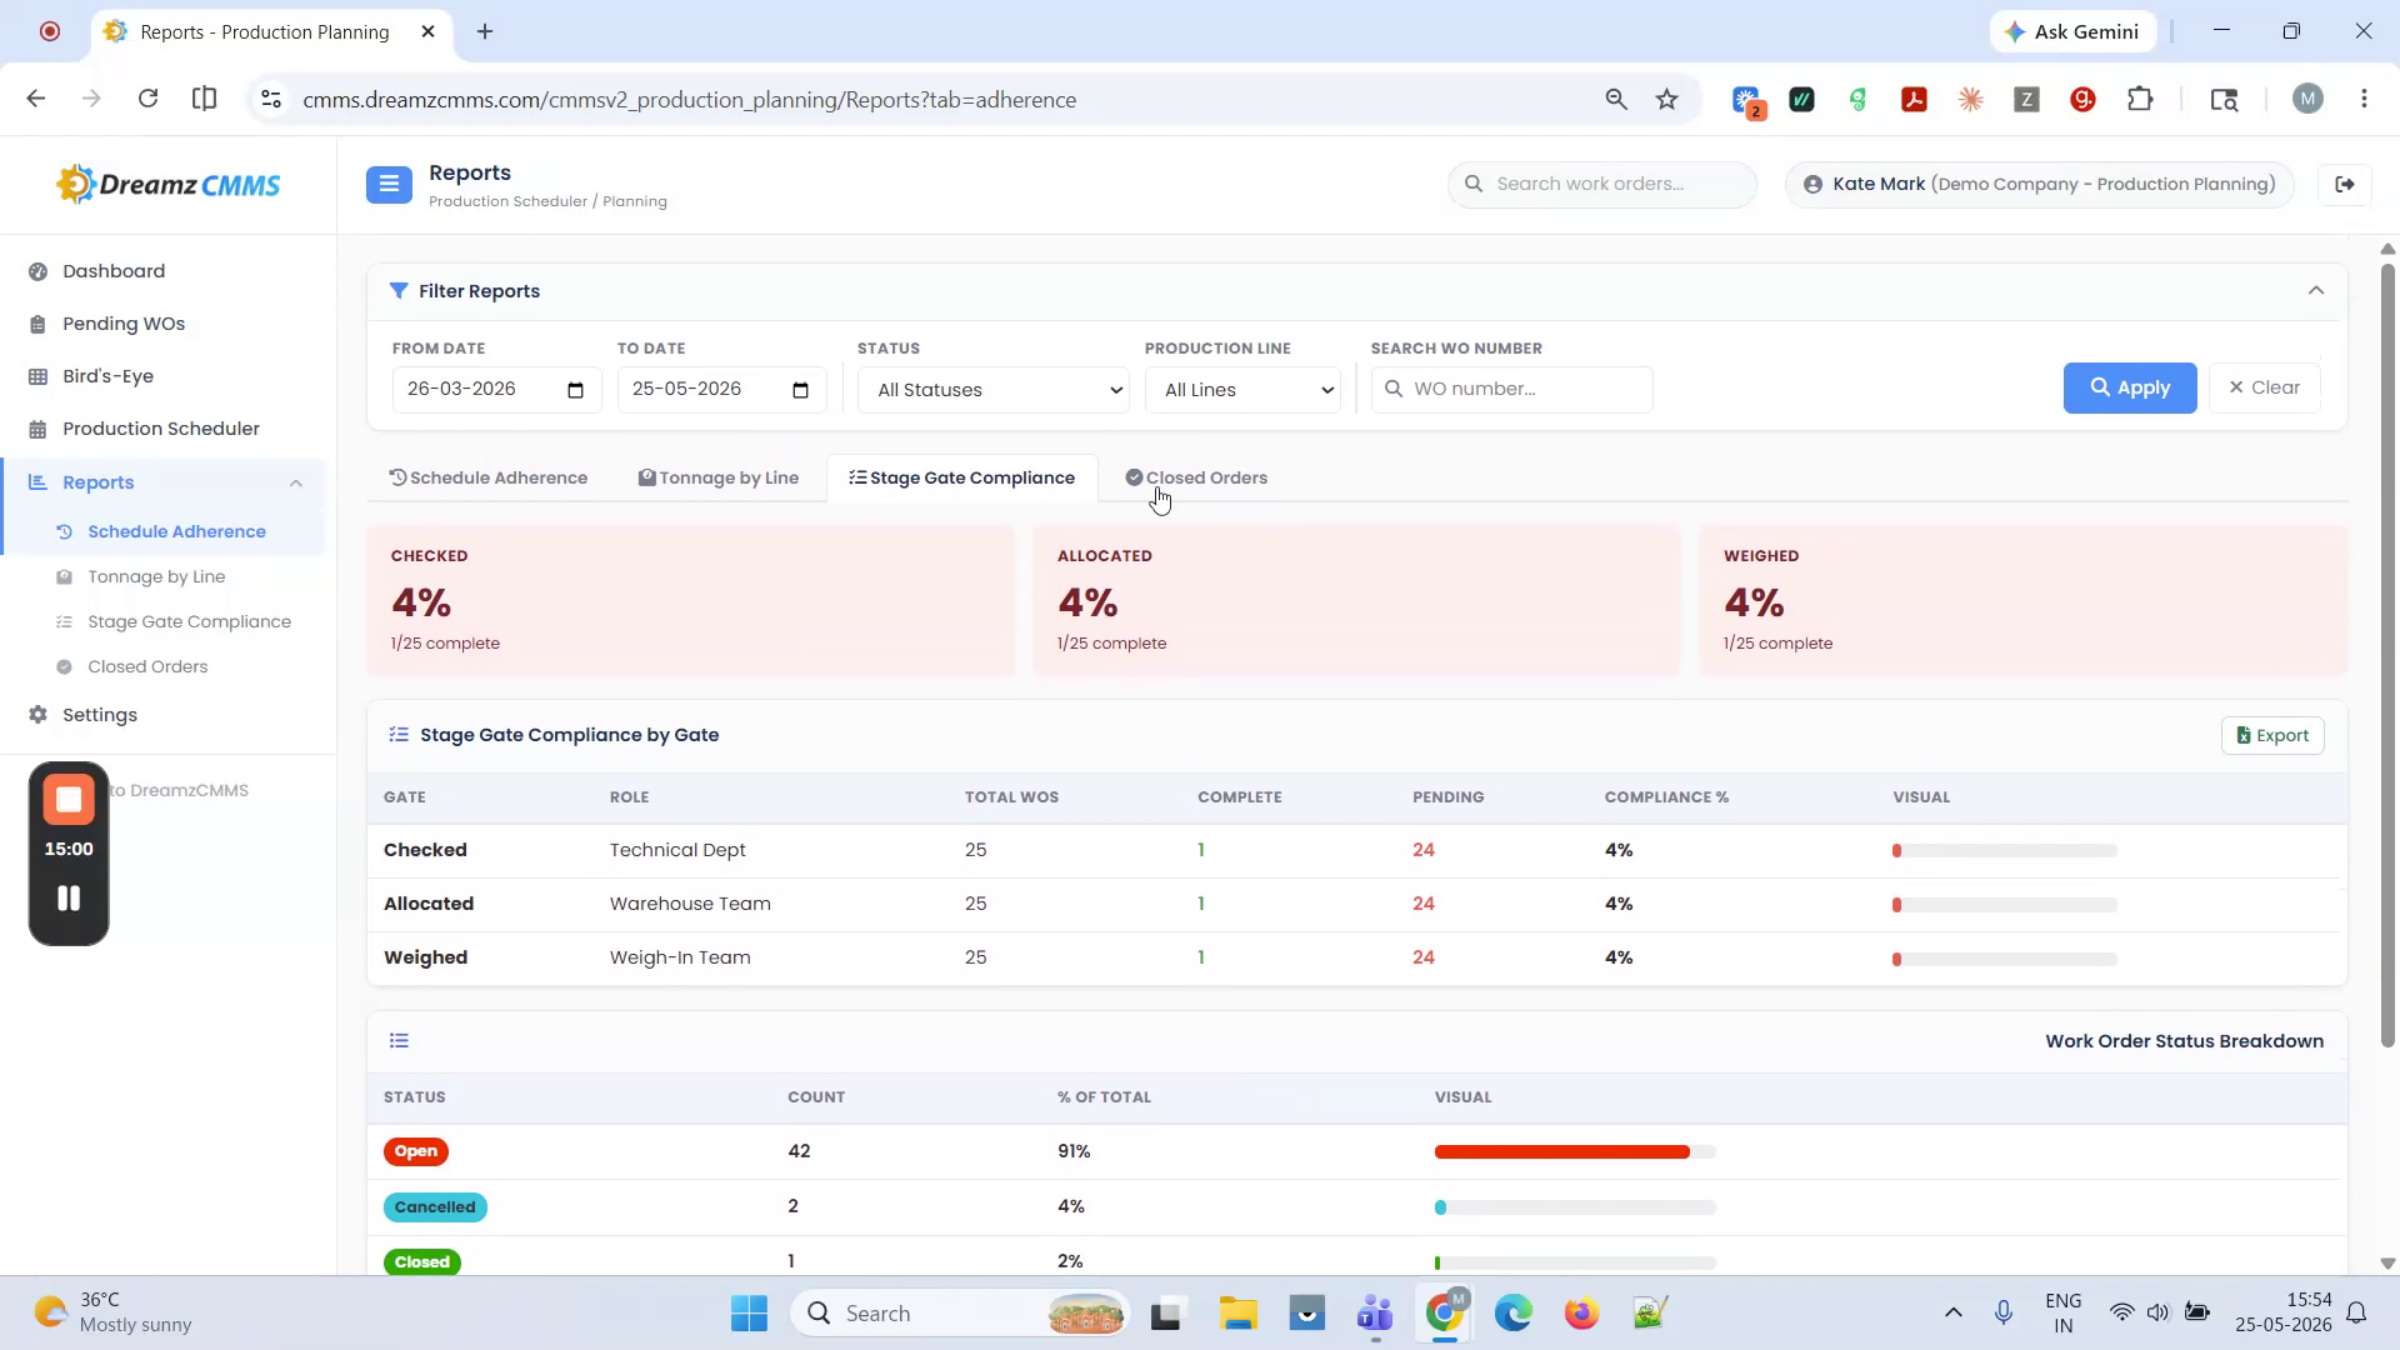
Stage Gate Compliance shows the completion rate for each gate, categorized by rolls.
Step 4 – Review Closed Orders
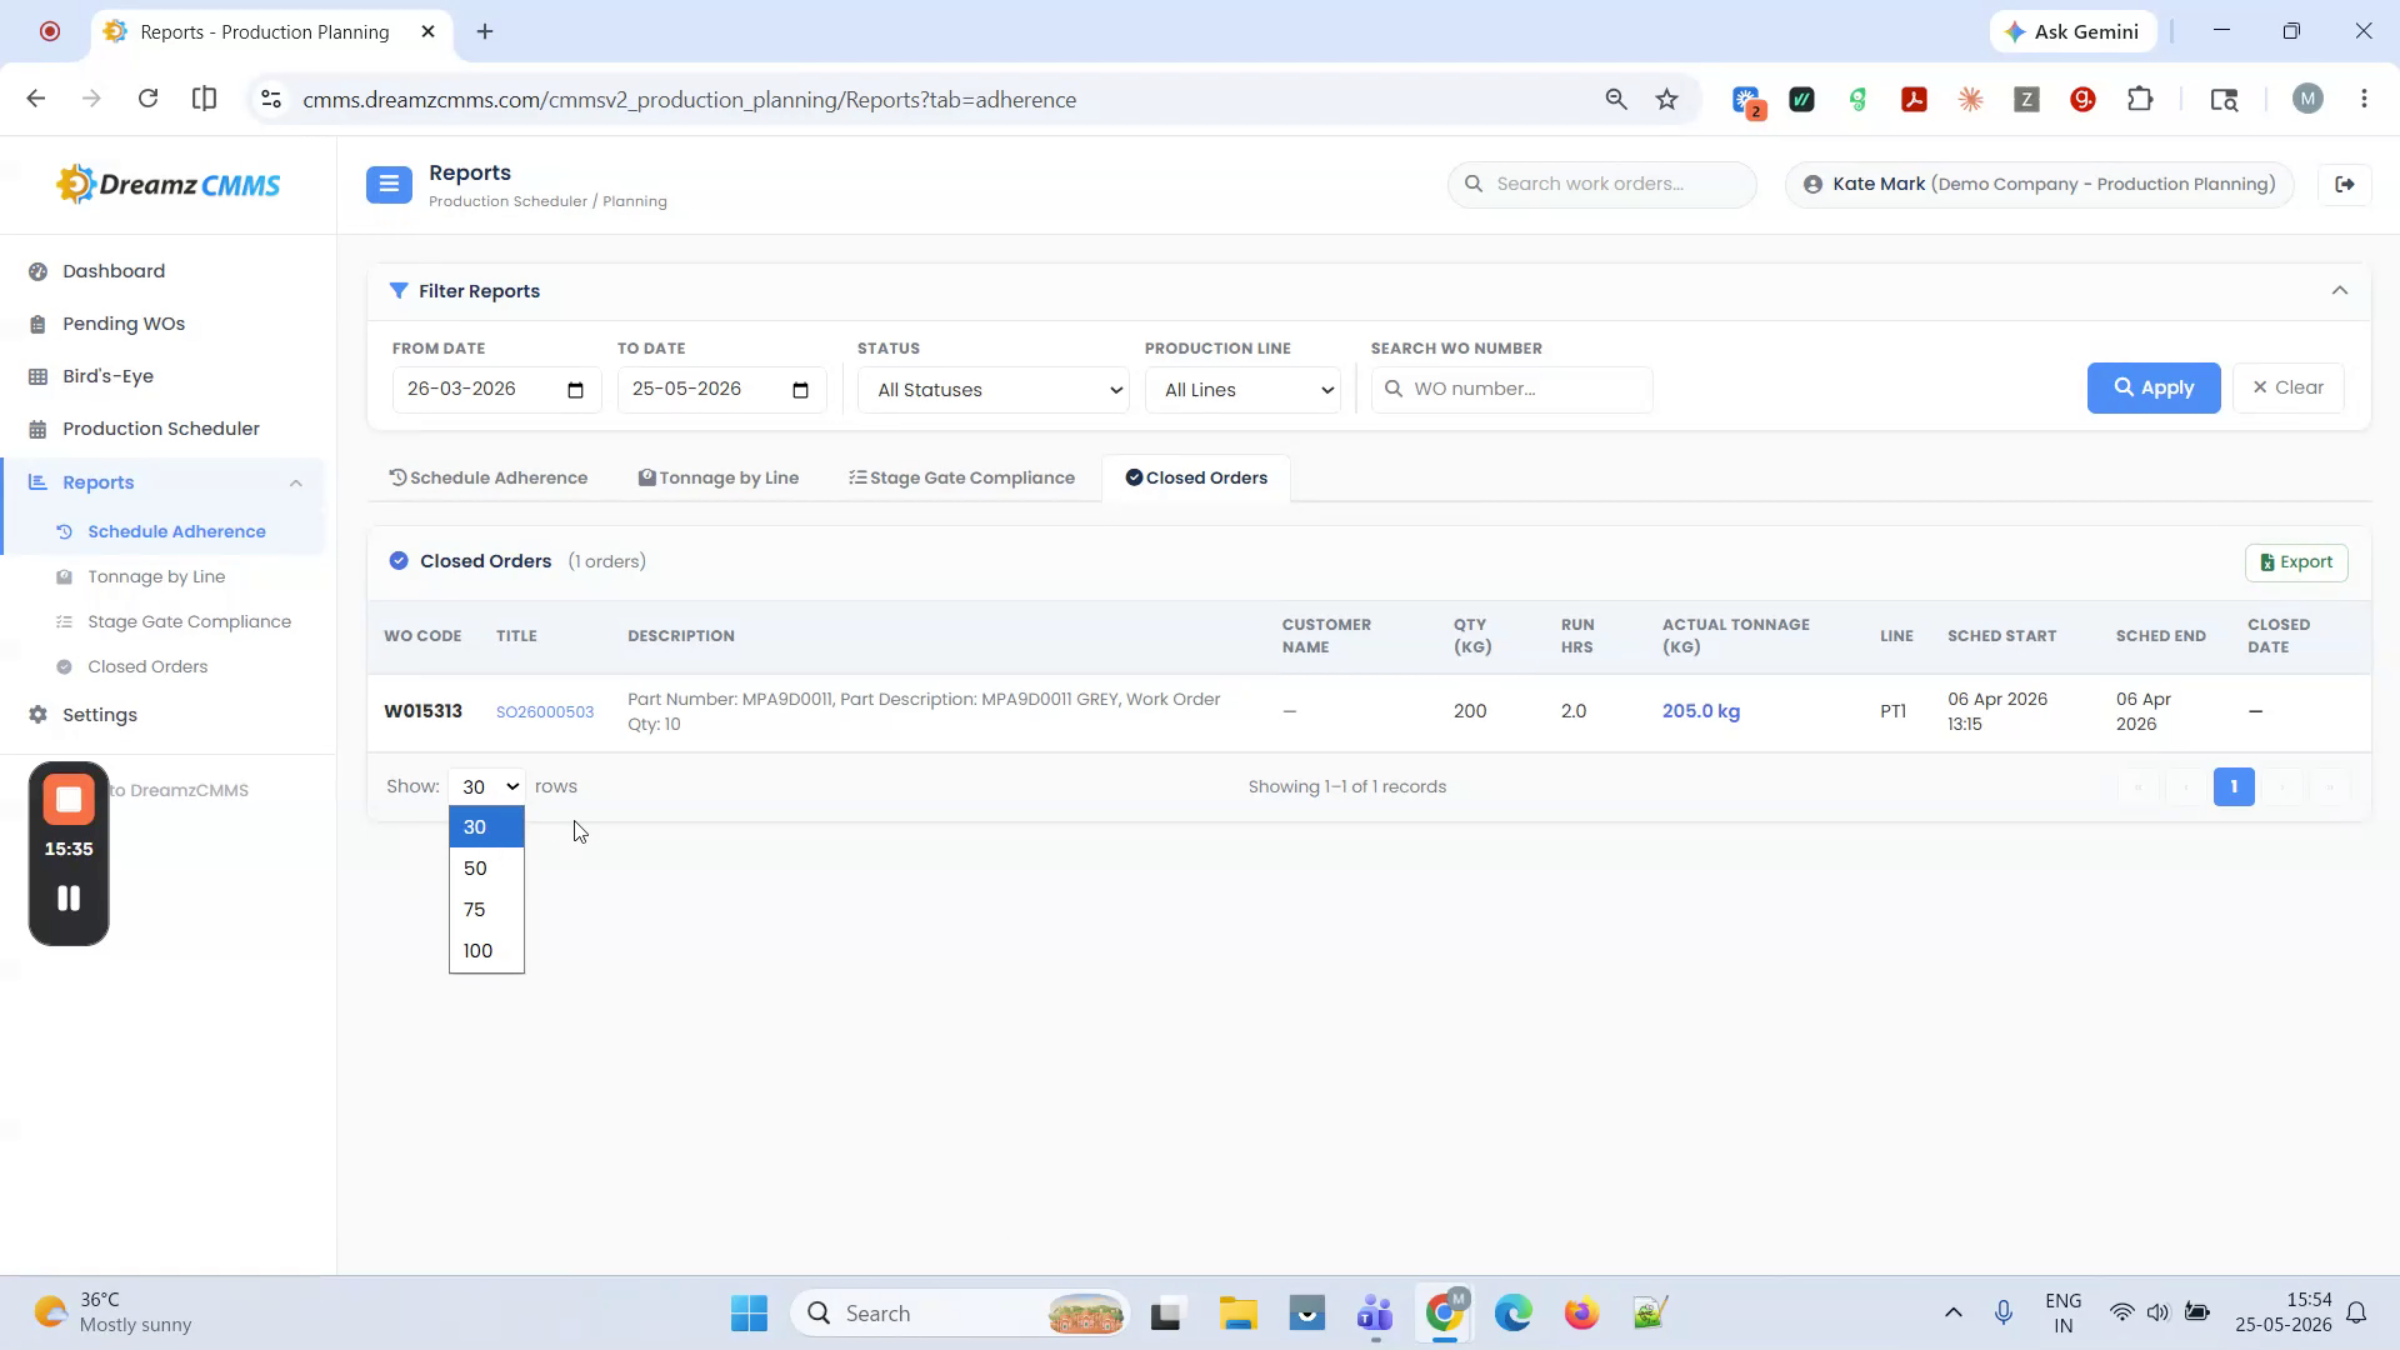
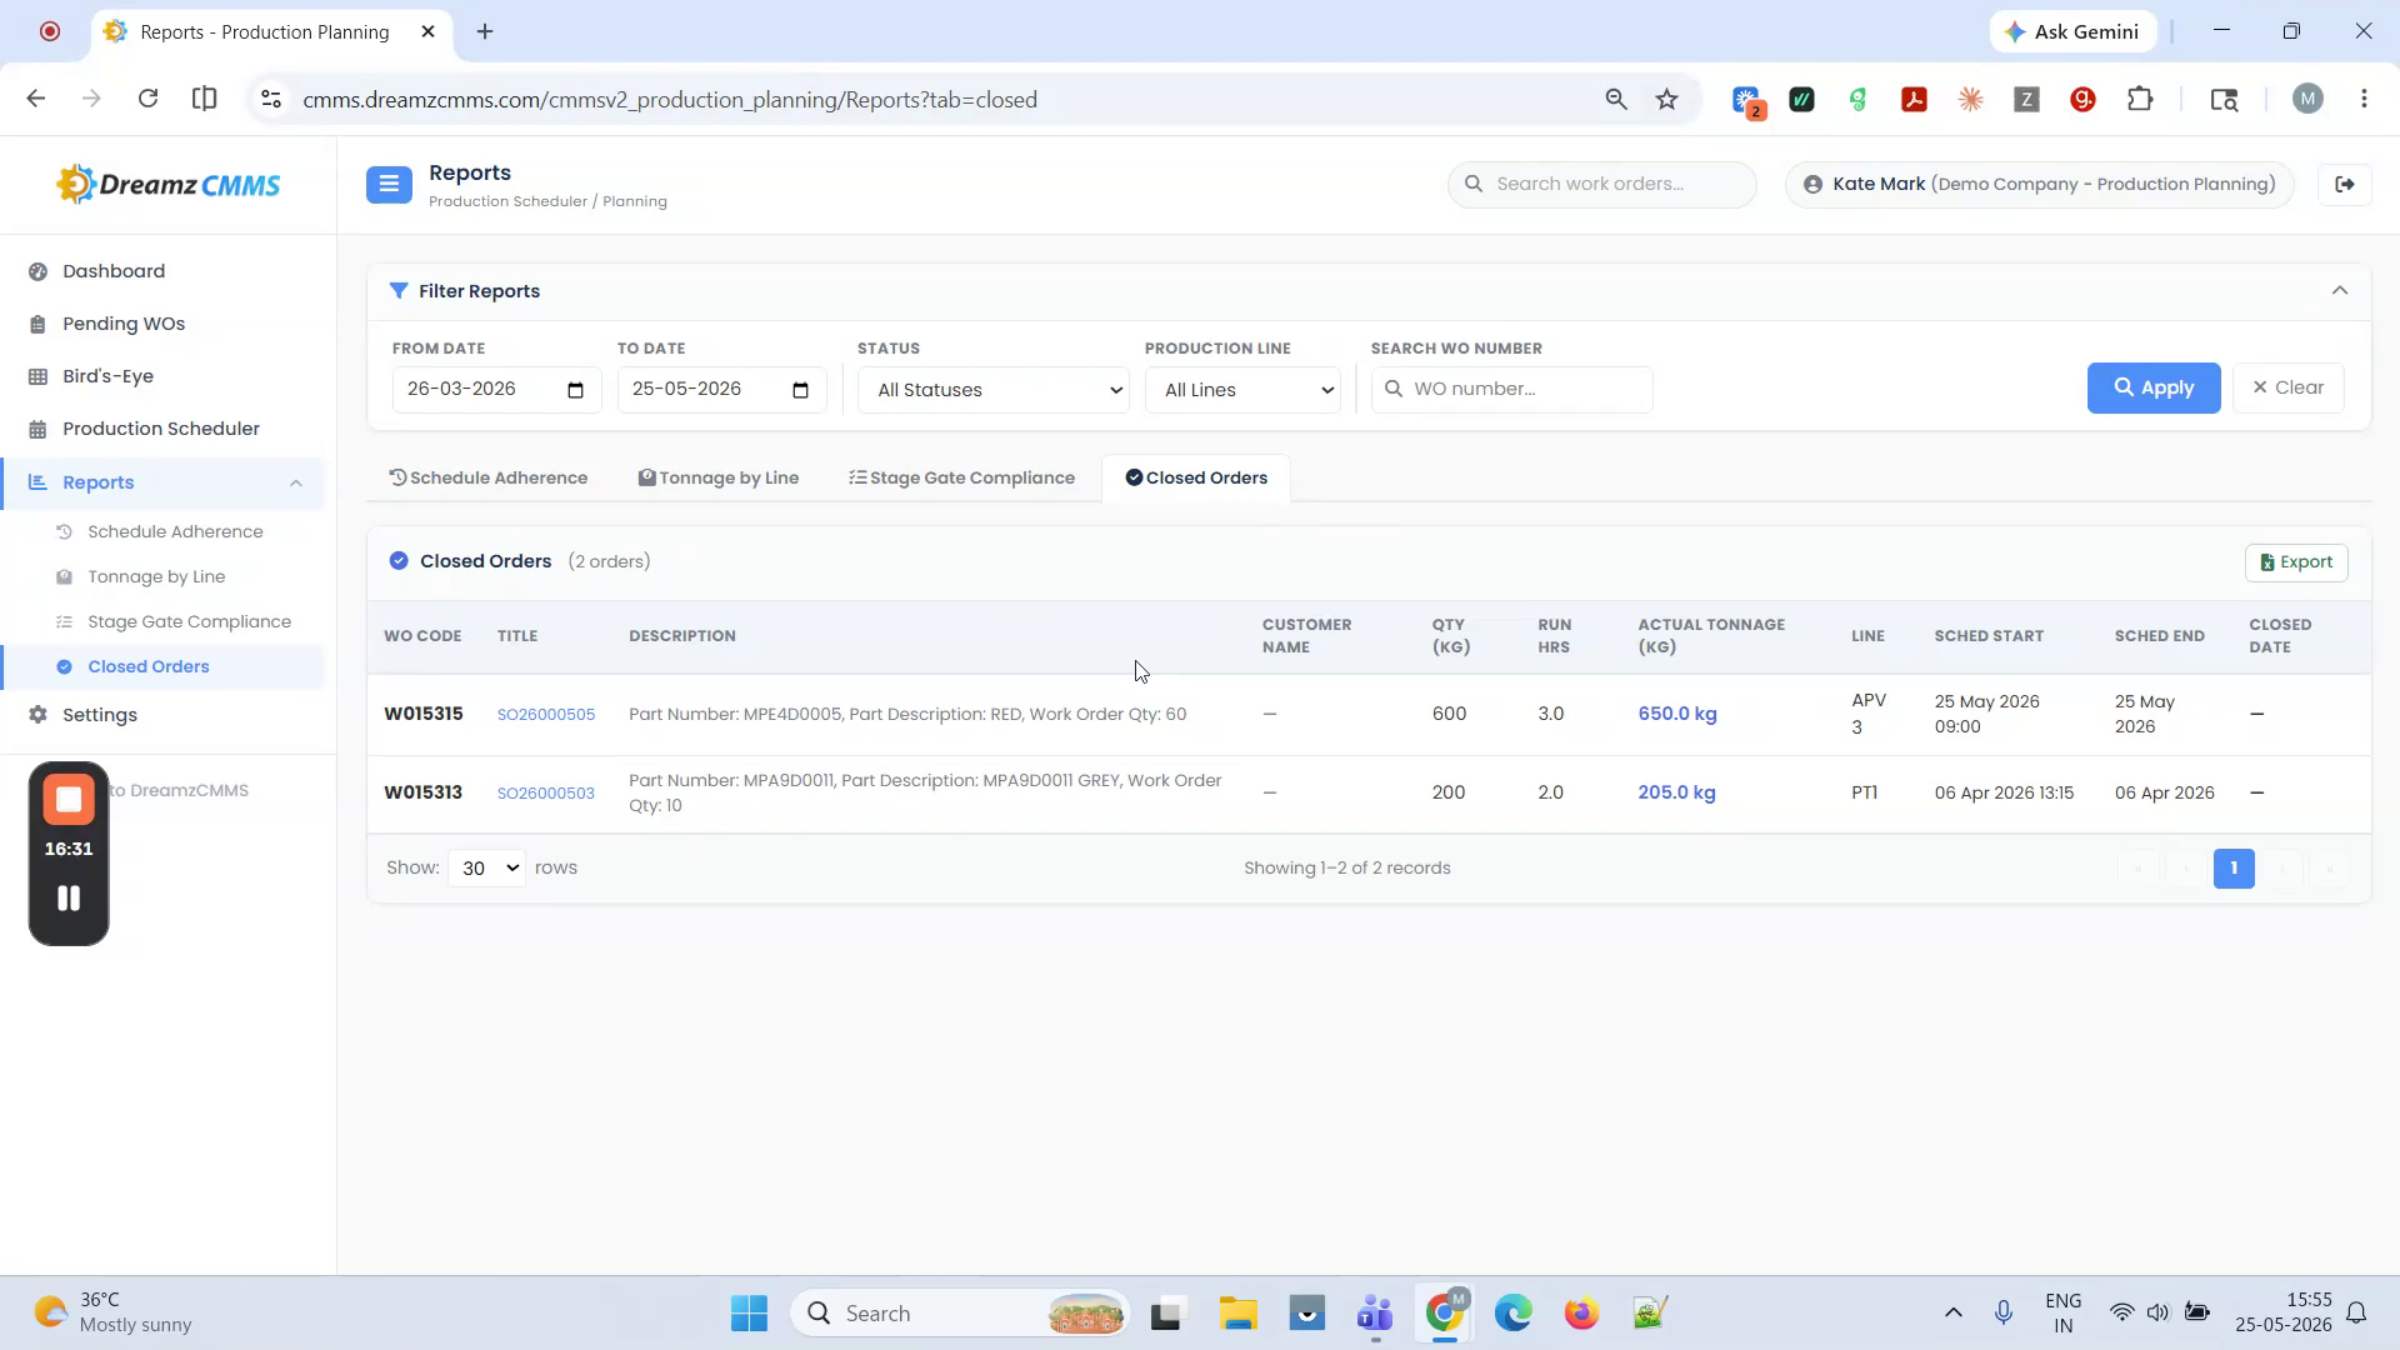
The Closed Orders view lists completed jobs with dates and variances. Each tab includes a date range filter and an Excel export button, and you can adjust the page size to show 30, 50, 75, or 100 entries.
Close a Work Order and Capture Actual Tonnage
Step 1 – Close the Work Order with Actual Quantity
From the Production Scheduler, open the job and enter the actual finished quantity (for example, "650") to close the work order and clear it from the line. The Close Work Order screen will then show the job with its quantity and actual tonnage. This is the process for completing any job and capturing its actual tonnage.
Configure System Settings
Step 1 – Review Settings Options
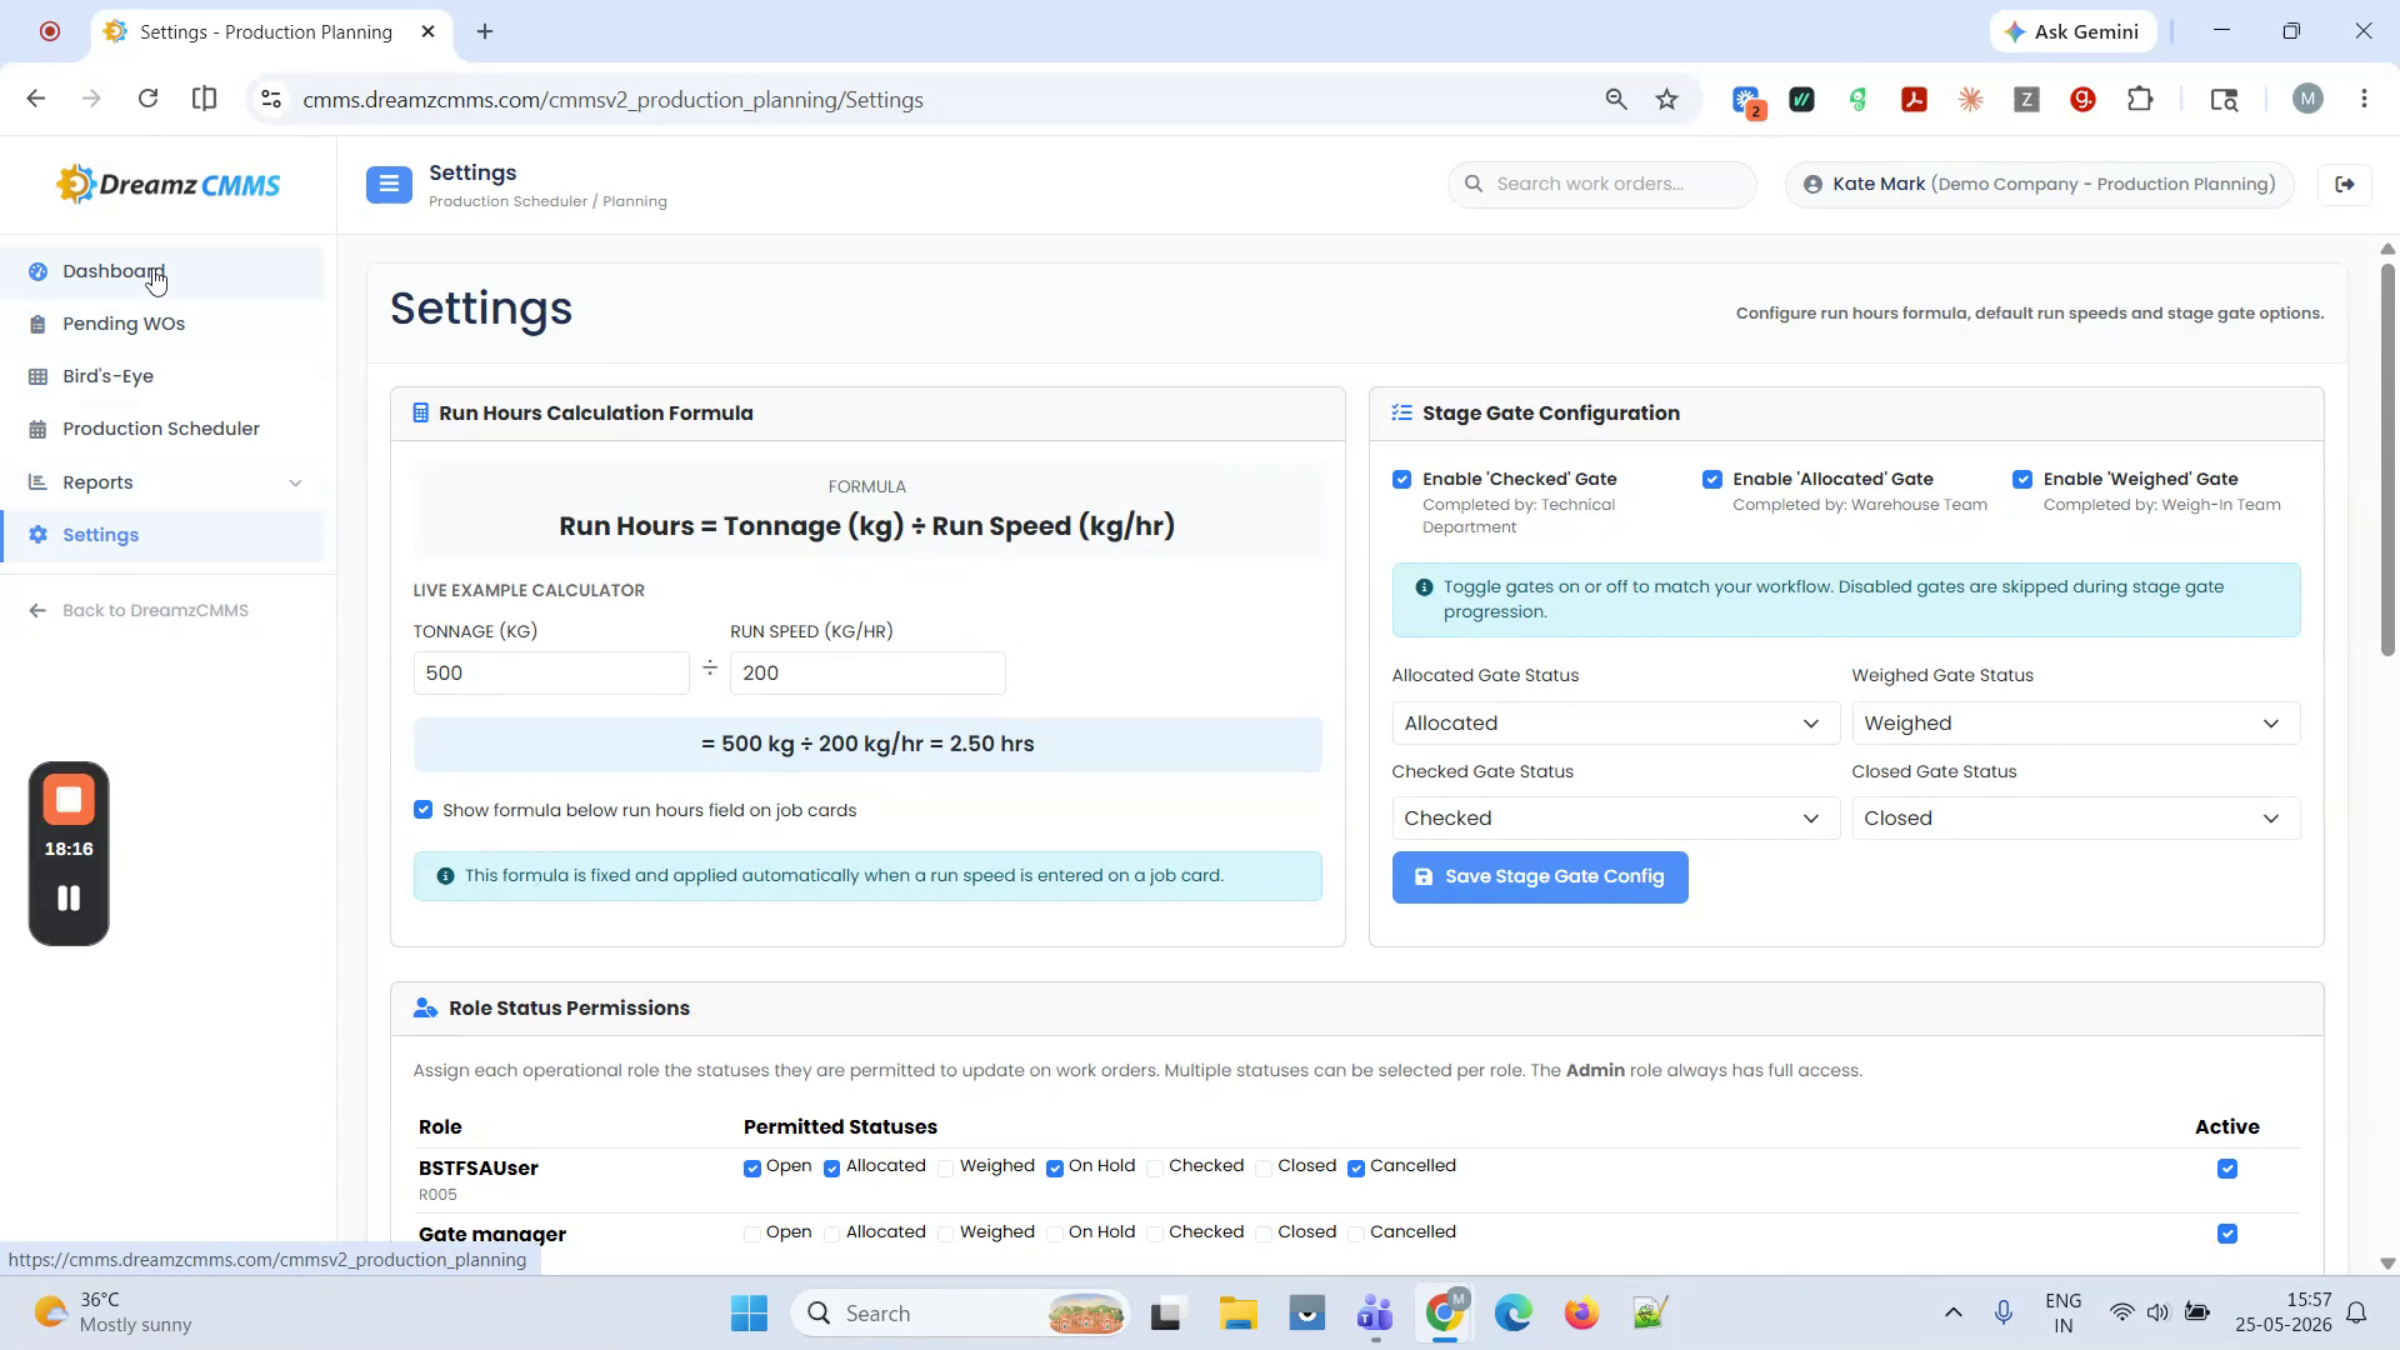
The Settings page is where an administrator configures the system's behavior. Key areas include:
- Run Rate Formula — set example values used to calculate run speed and hours.
- Stage Gate configuration — enable stage gates or statuses, and map work order statuses to stage gates.
- Role permissions — control which role can access which status (for example, the Manager role might have Check and Cancel access; the Admin role has all permissions by default).
- Production line setup — set the display order, capacity, shift start/end dates, and shift start/end times for each line. Lines can also be deactivated so they don't appear in the production schedule.
Once everything is configured, click Save.
Import Work Orders via Excel
Step 1 – Prepare and Import Work Order Data
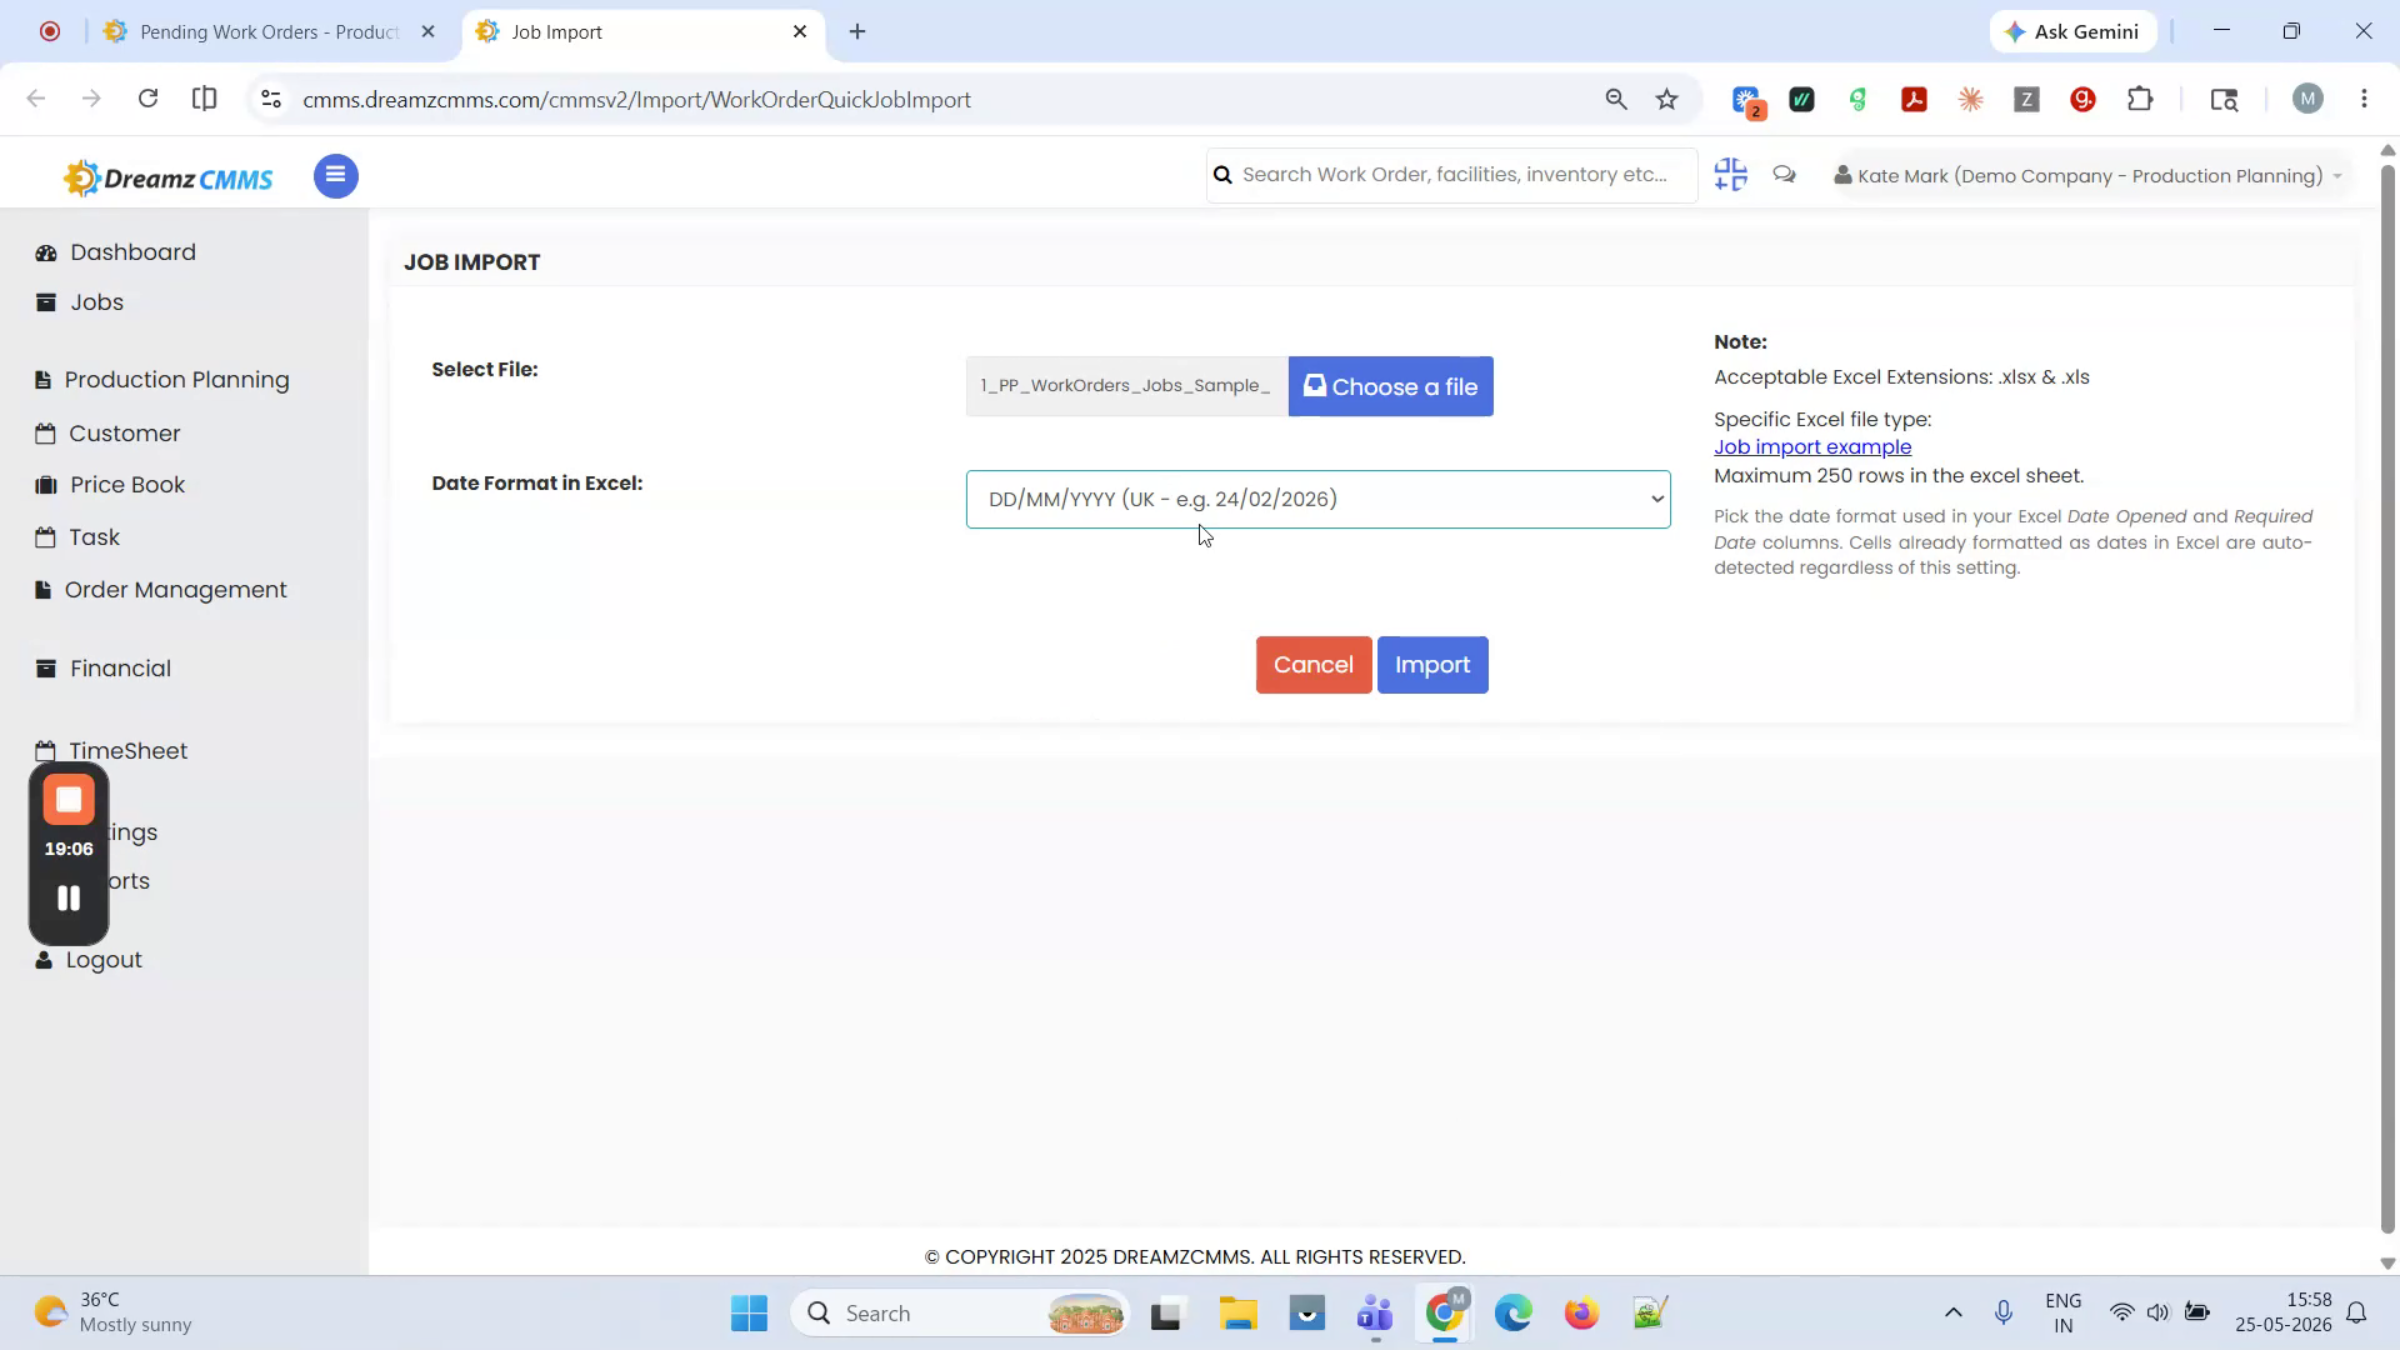
Navigate to Import Work Order to import work order data such as the work order number, date opened, part number, description, top level, customer name, status, quantity, order date, and color. Make sure the Excel date format is set correctly before importing.
Step 2 – Select the Date Format and Complete the Import
Choose the date format that matches your Excel file, then click Import. All work orders are imported automatically and appear on the work order list screen with an updated count. Return to Pending Work Orders and refresh the list to confirm the new entries.
View and Edit the Job List
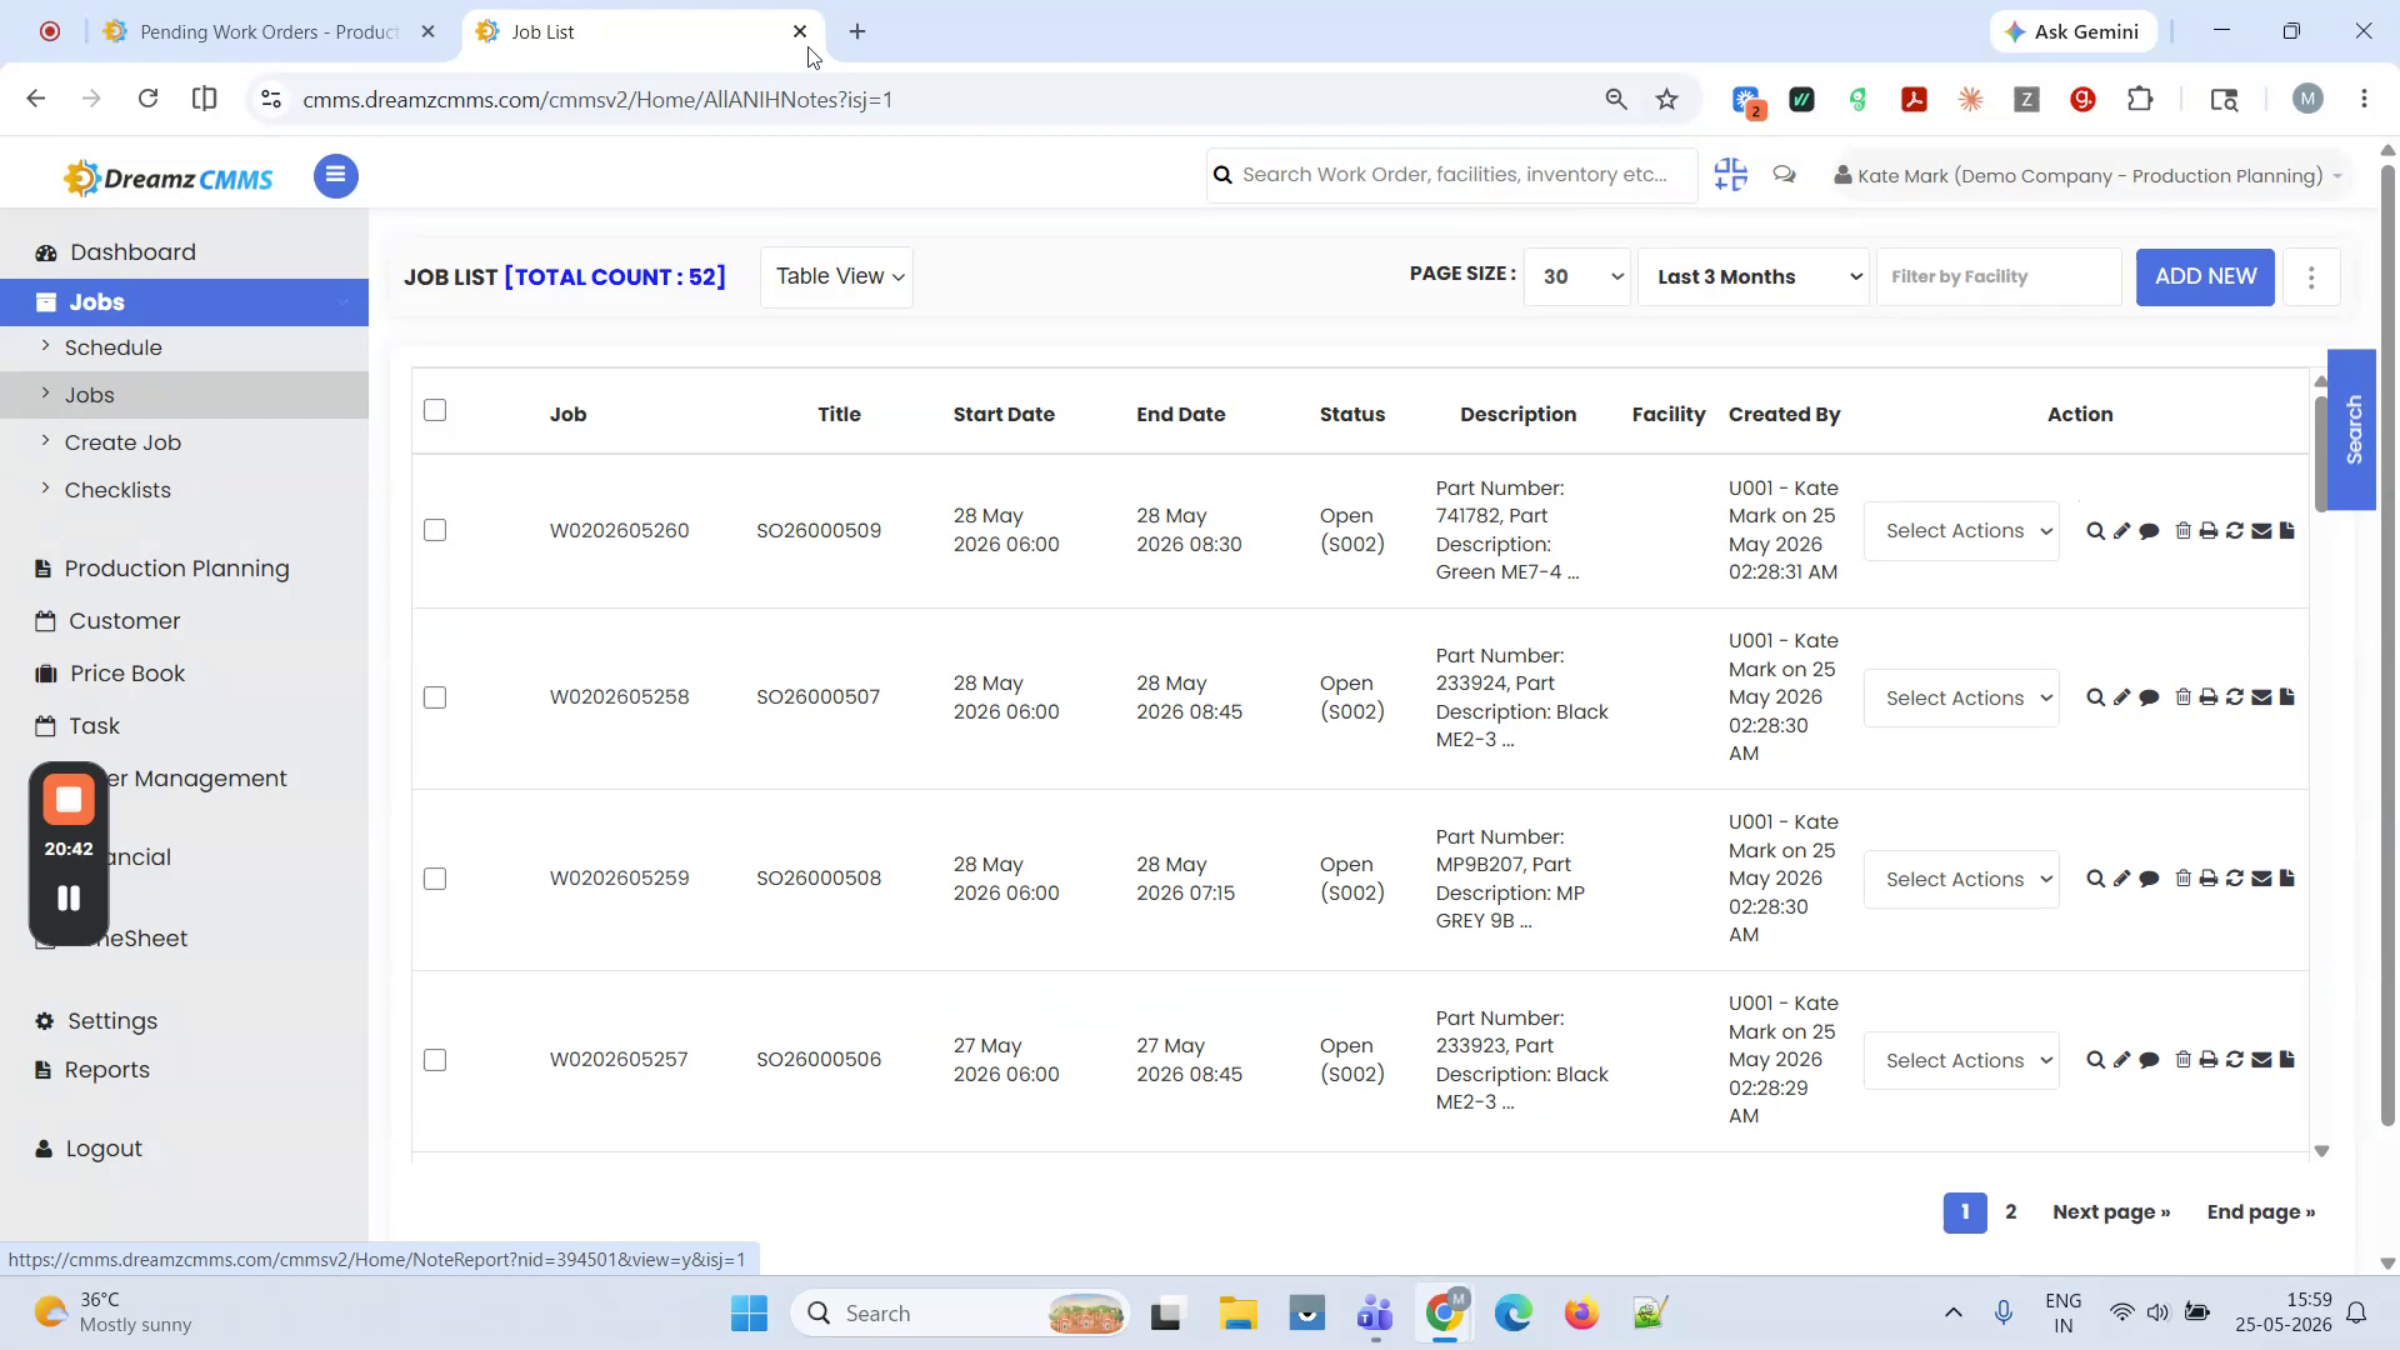
Step 1 – Browse and Edit Jobs
The Job List screen shows all open jobs; completed jobs are not displayed here. Click a job to open its details screen, or use the Edit option to modify it directly from the list. You can also add a new job to the grid from this screen.
Use Map, Calendar, Gantt Views, and the Painting Wall
Step 1 – Switch Between Map, Calendar, and Gantt Views
You can view all jobs using the Map, Calendar, or Gantt view options.
Step 2 – Access Jobs from the Painting Wall
Navigate to the Painting Wall corner to quickly access the job list, which includes the production scheduler, CAD view, and calendar view. Click "New Job" to add a job, "Import" to bulk import, or "View Details" to open the job details popup for a closer look.
Tips for Production Scheduling
- Use the tooltip on hover to check a job's key details quickly without opening the full job card.
- Rely on the cascade engine when rescheduling — moving one job automatically adjusts the timing of subsequent jobs on the same line.
- Use the Bird's-Eye view for a quick, high-level check of line utilization and queue depth across your whole operation.
- Review the Reports section regularly to track schedule adherence, tonnage by line, and stage gate compliance.
- Set up production lines, shifts, and role permissions carefully in Settings, since these govern how scheduling behaves for your whole team.
Frequently Asked Questions
How do I get a job onto the production schedule?
Release the work order from the pending work order list, then drag it from the released jobs panel onto the desired production line and time in the Production Scheduler.
What happens when I move or resize a scheduled job?
The cascade engine automatically shifts subsequent jobs on that line to keep the schedule consistent, and resizing the block updates the job's run hours.
How do I close a job and record the actual tonnage produced?
Open the job from the scheduler and enter the actual finished quantity to close it. The closed job then appears in the Close Work Order screen with its quantity and actual tonnage.
Can I import work orders in bulk?
Yes. Use Import Work Order, select the matching Excel date format, and import your file — the new work orders will appear in the work order list.
Who can configure production lines and role permissions?
An administrator configures these from the Settings page, including production line capacity, shift windows, stage gate mapping, and role-based access.