Create and Manage Vehicles
Vehicles in DreamzCMMS can be managed as assets within the system. To add and manage vehicles properly, you first need to create a Vehicle Category. Once the category is created, you can add a vehicle as an asset and later view it in the Vehicle List.
This guide will walk you through the process of:
Creating a Vehicle Category
Adding a Vehicle Asset
Viewing the Vehicle Listing
DreamzCMMS allows organizations to manage and track assets, maintenance activities, and operational workflows from a centralized platform, helping teams improve efficiency and asset visibility.
Overview
Vehicles are treated as assets within DreamzCMMS. By defining a vehicle category and creating assets under that category, organizations can easily track vehicle details, assign locations, and manage their lifecycle within the system.
This article explains how to configure and manage vehicles step by step.
Before You Begin
Before you start creating vehicles in DreamzCMMS, ensure the following:
You have access to the Settings and Assets modules.
Required locations are already created in the system.
You have the necessary permissions to create asset categories and assets.
Here is a reference video:
How to Access Vehicle Creation
Step 1: Create a Vehicle Category
Follow these steps to create a vehicle category.
From the left-hand menu, click on Settings.
In the Settings section, navigate to:
Assets → Asset Category
On the Asset Category page, click the option to create a new category.
Enter the required details:
Vehicle Code
Title
Category Name
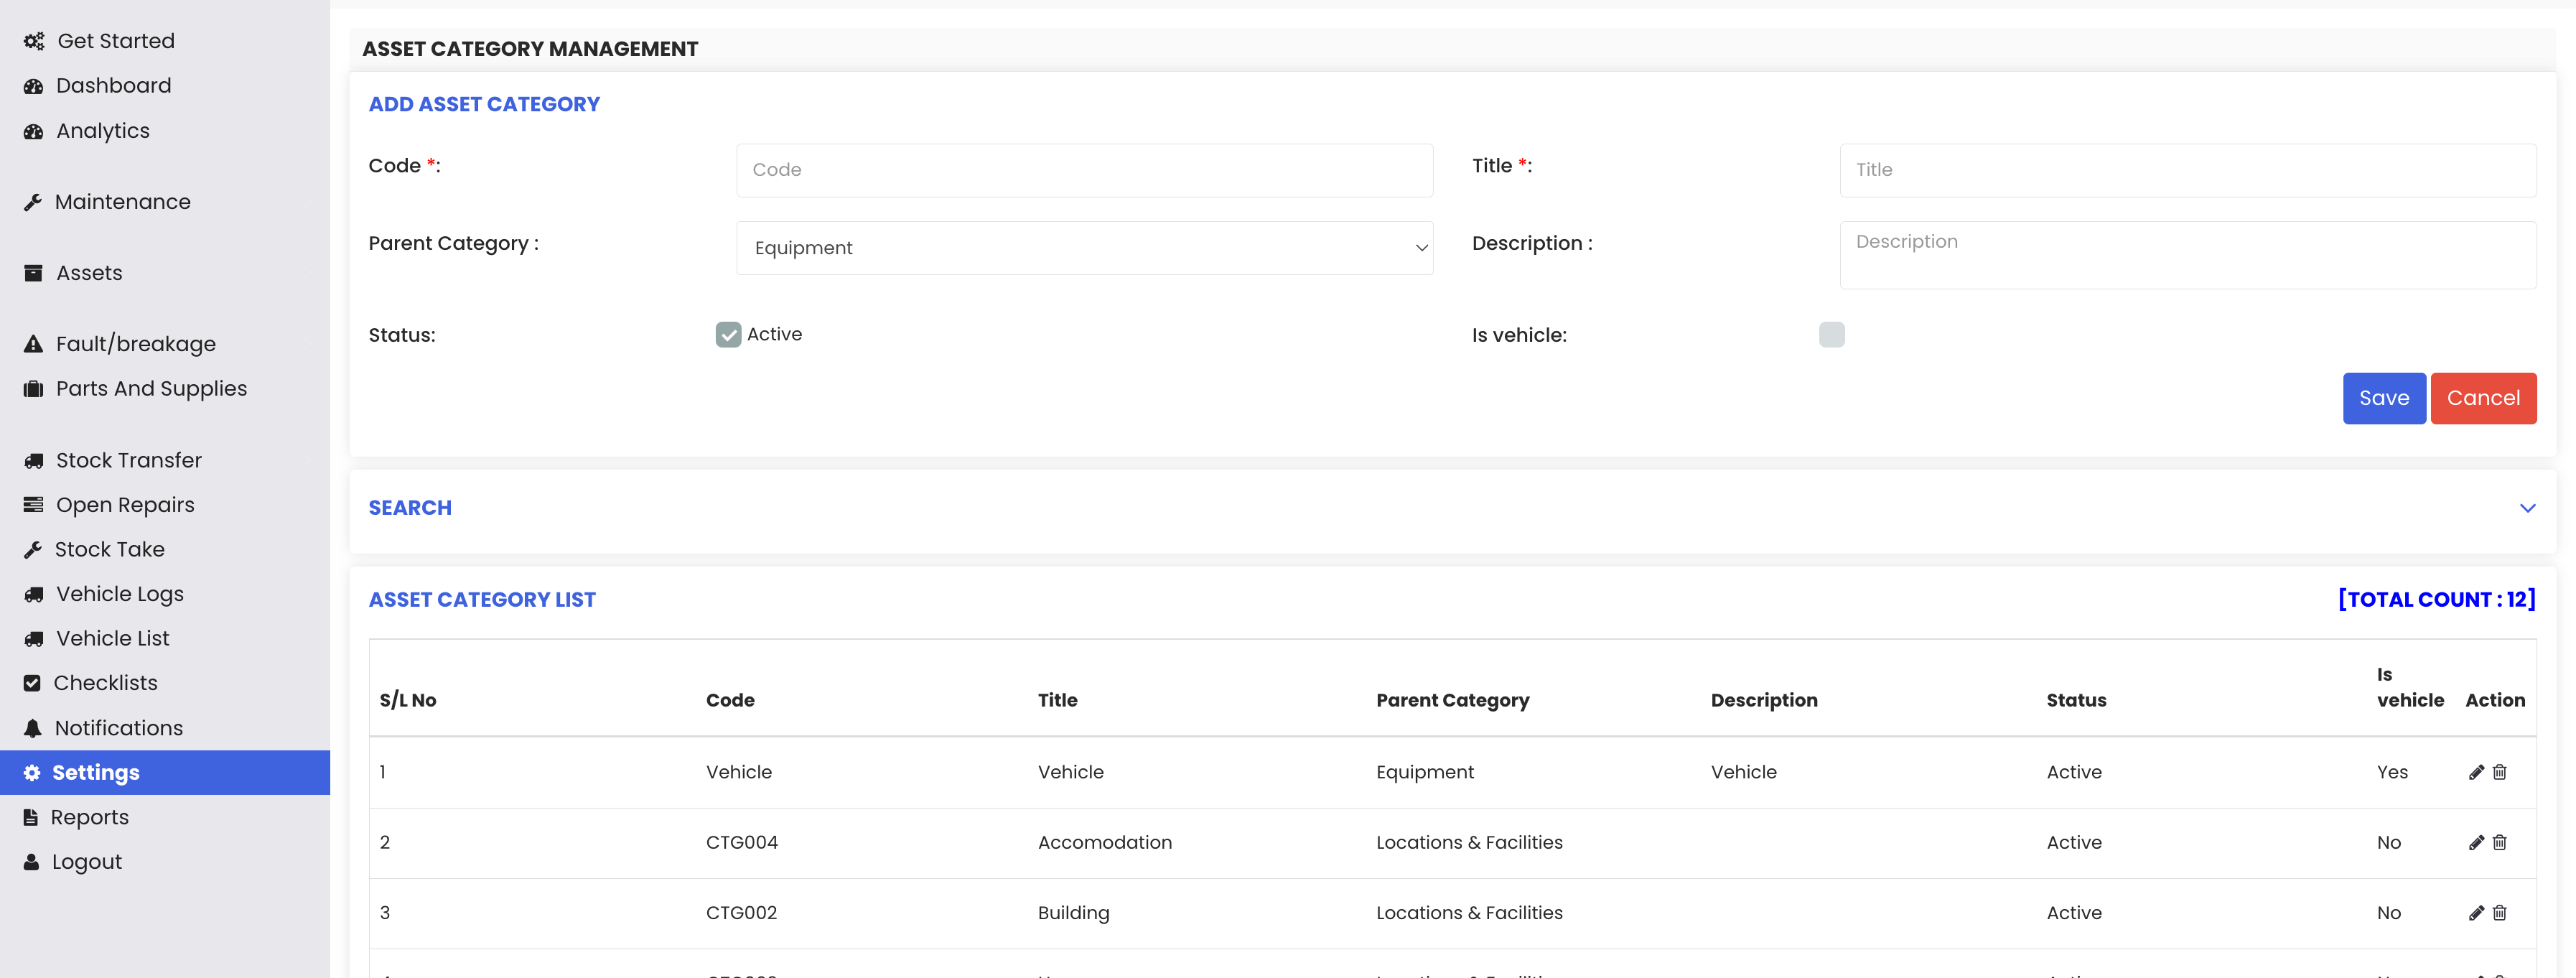
If required, select a Parent Category from the dropdown menu.
Enter a Description for the category.
Enable the option Is Vehicle.
This step is important because it identifies the category as a vehicle category in the system.
After entering all the details, click Save.
Image
The new Vehicle Category will now be created and stored in the system.
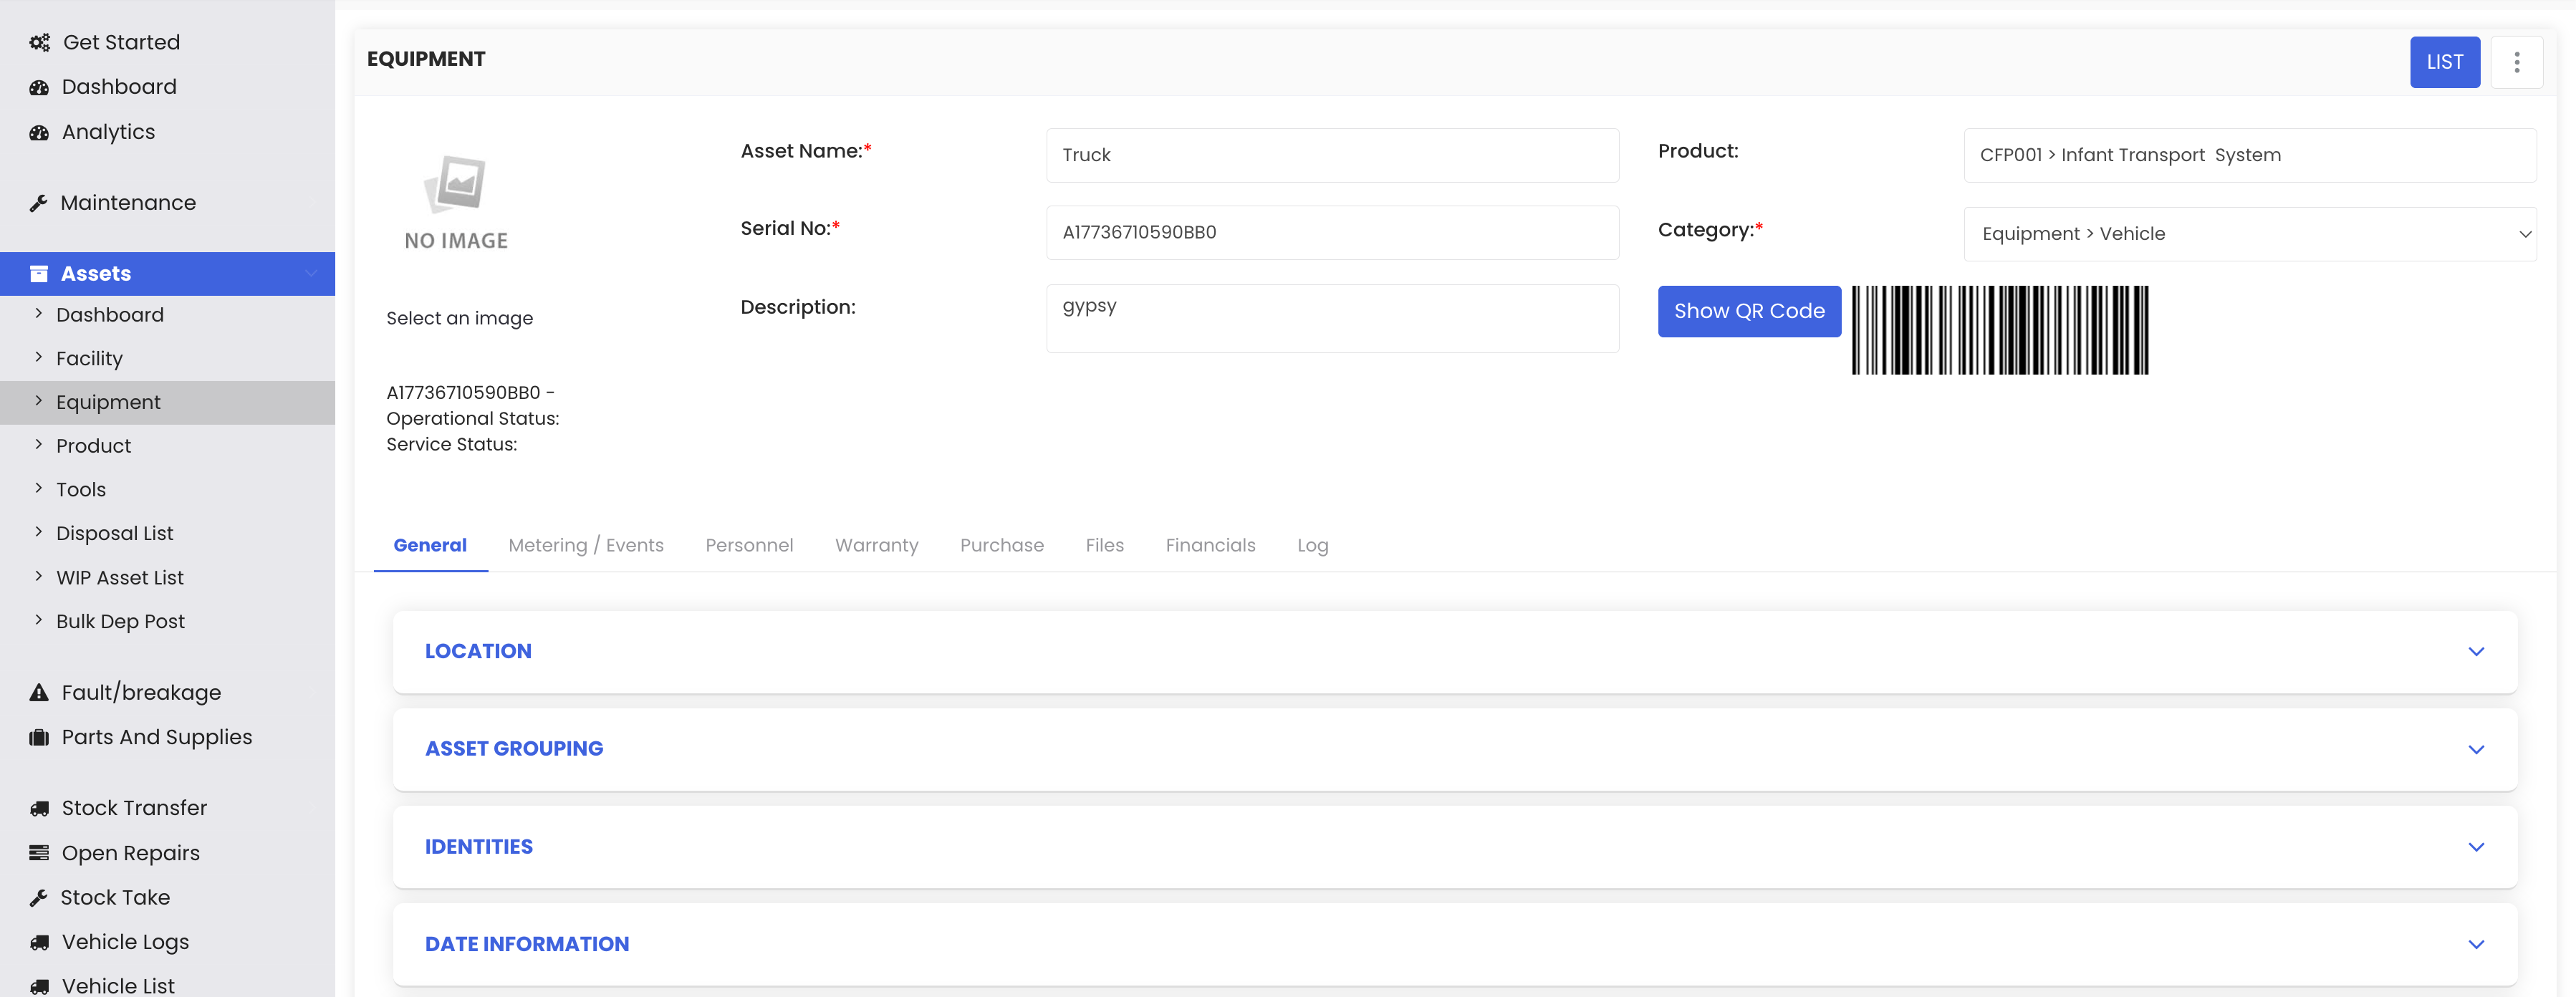
Step 2: Add a Vehicle to the System
Once the vehicle category is created, you can add a vehicle as an asset.
From the left-hand menu, click on Assets.
Select Equipment to open the equipment listing page.

Click New Asset.
Select Equipment / Machines.

This will open the Equipment and Machines Creation Page.
Enter the required asset details:
Asset Name (Example: Truck)
Product Code
Category (Select the vehicle category created earlier)
Location (Example: West)
After entering the required information, scroll down and click Save.
The vehicle will now be successfully stored in the system as an asset.
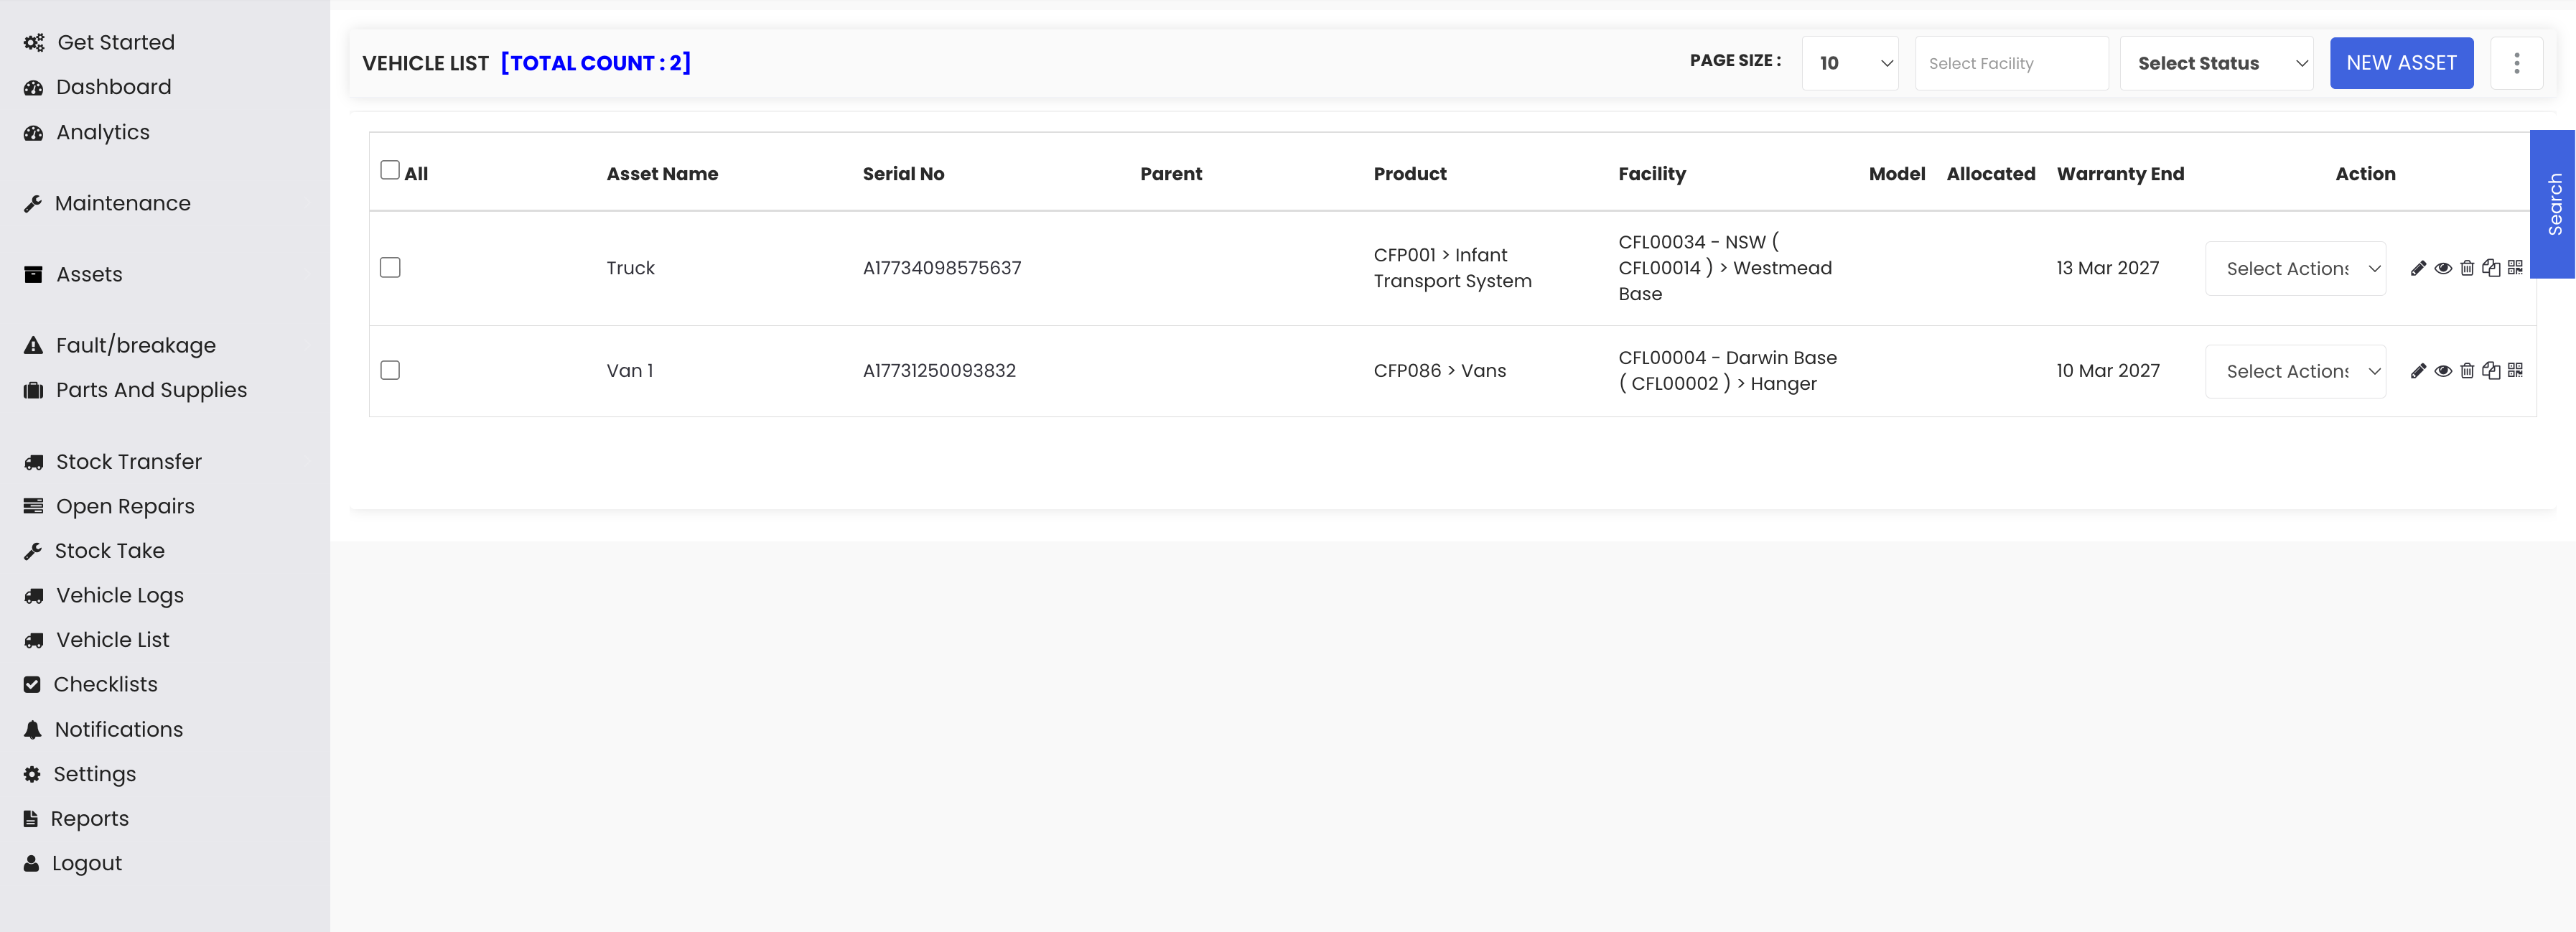
Step 3: View the Vehicle List
After saving the vehicle, you can view it in the vehicle listing.
From the left-hand menu, open the Vehicle List section.
The system will display a list of all vehicles available in the system.
Locate the newly added vehicle in the list.
Image
You can now view and manage vehicles directly from the Vehicle List page.