Purchase Order Approval Workflow
This tutorial guides you through setting up purchase order approval workflows in DreamzCMMS. You will learn how to create and customize workflows to streamline your approval process.
Overview
Purchase Order Approval Workflows let you define multi-level approval chains for purchase orders. Each level can be assigned to a specific approver and associated with a department, ensuring purchase requests are reviewed by the right people before they move forward.
Before You Begin
- You must have the appropriate permissions to create and manage workflows.
- Know in advance who your approvers will be at each level, and which department the workflow applies to.
How to Set Up a Purchase Order Approval Workflow
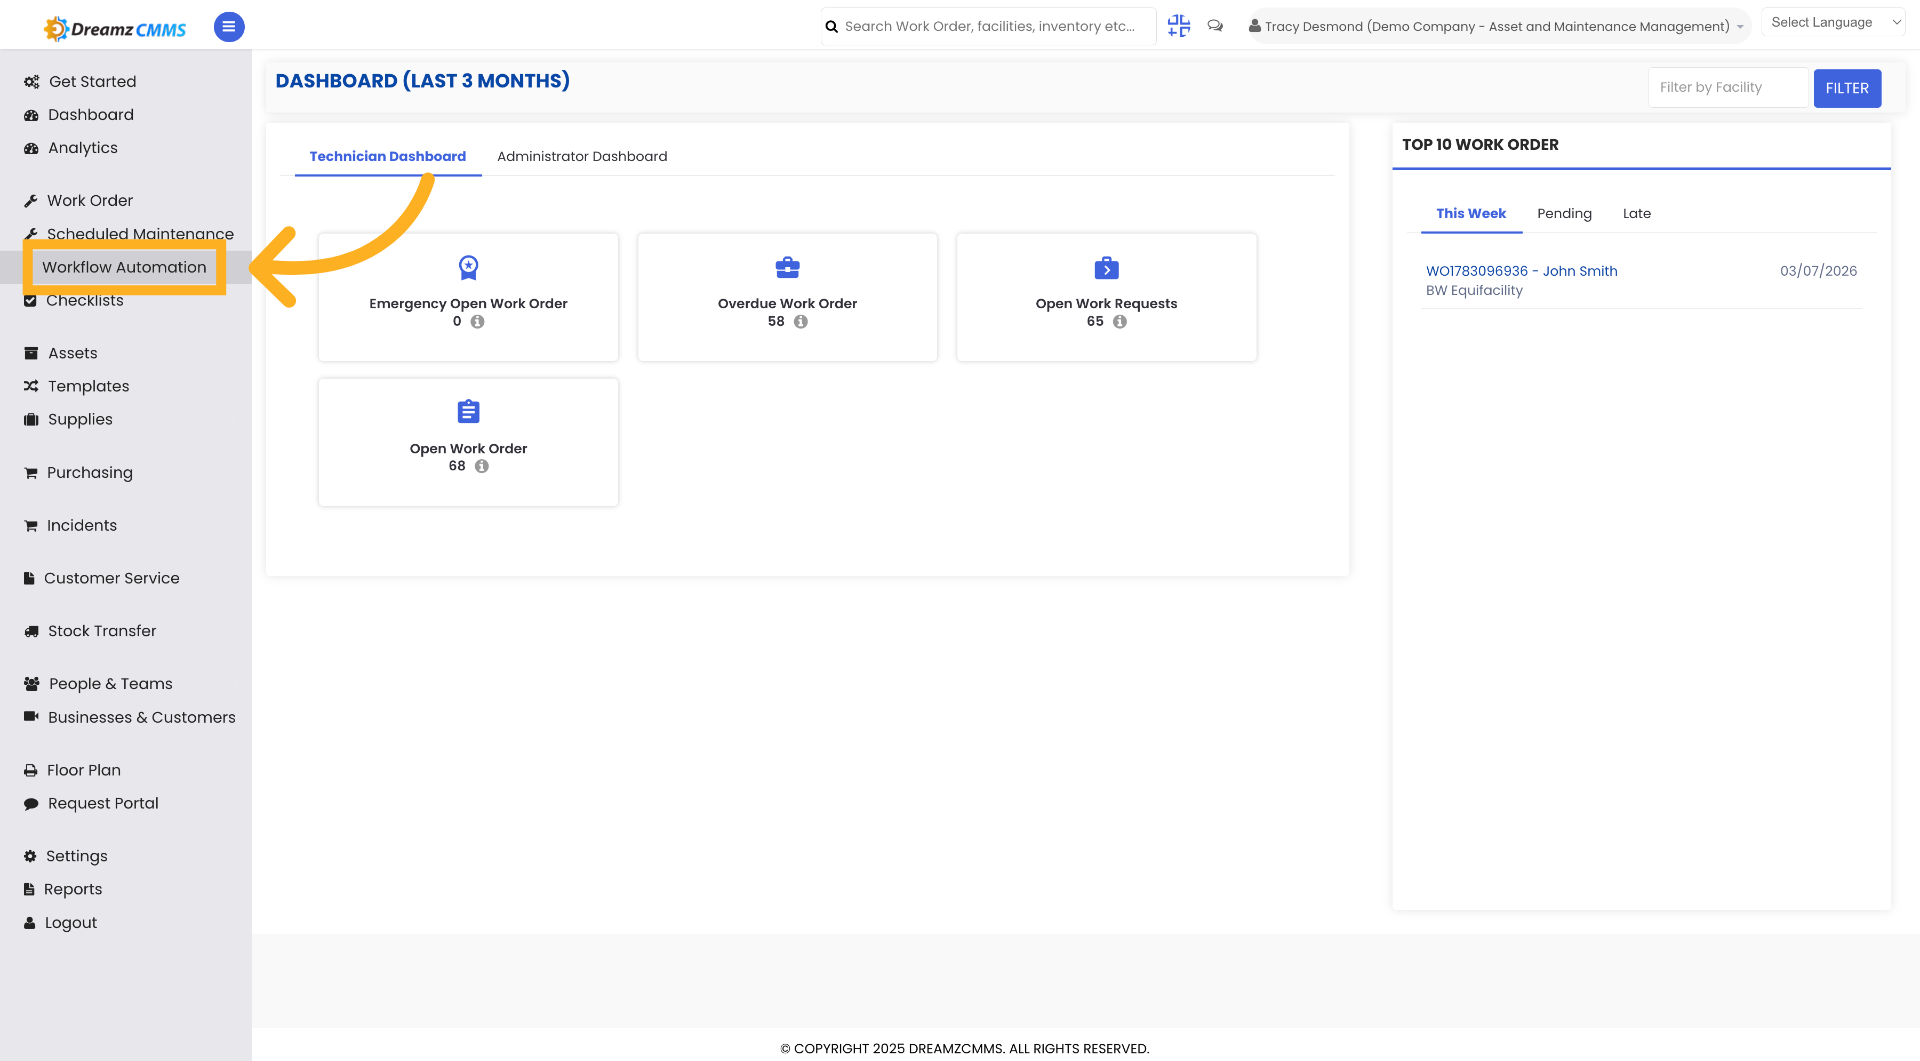
Step 1 – Access Workflow Automation
Click "Workflow Automation" on the left-hand menu to begin managing your workflows.
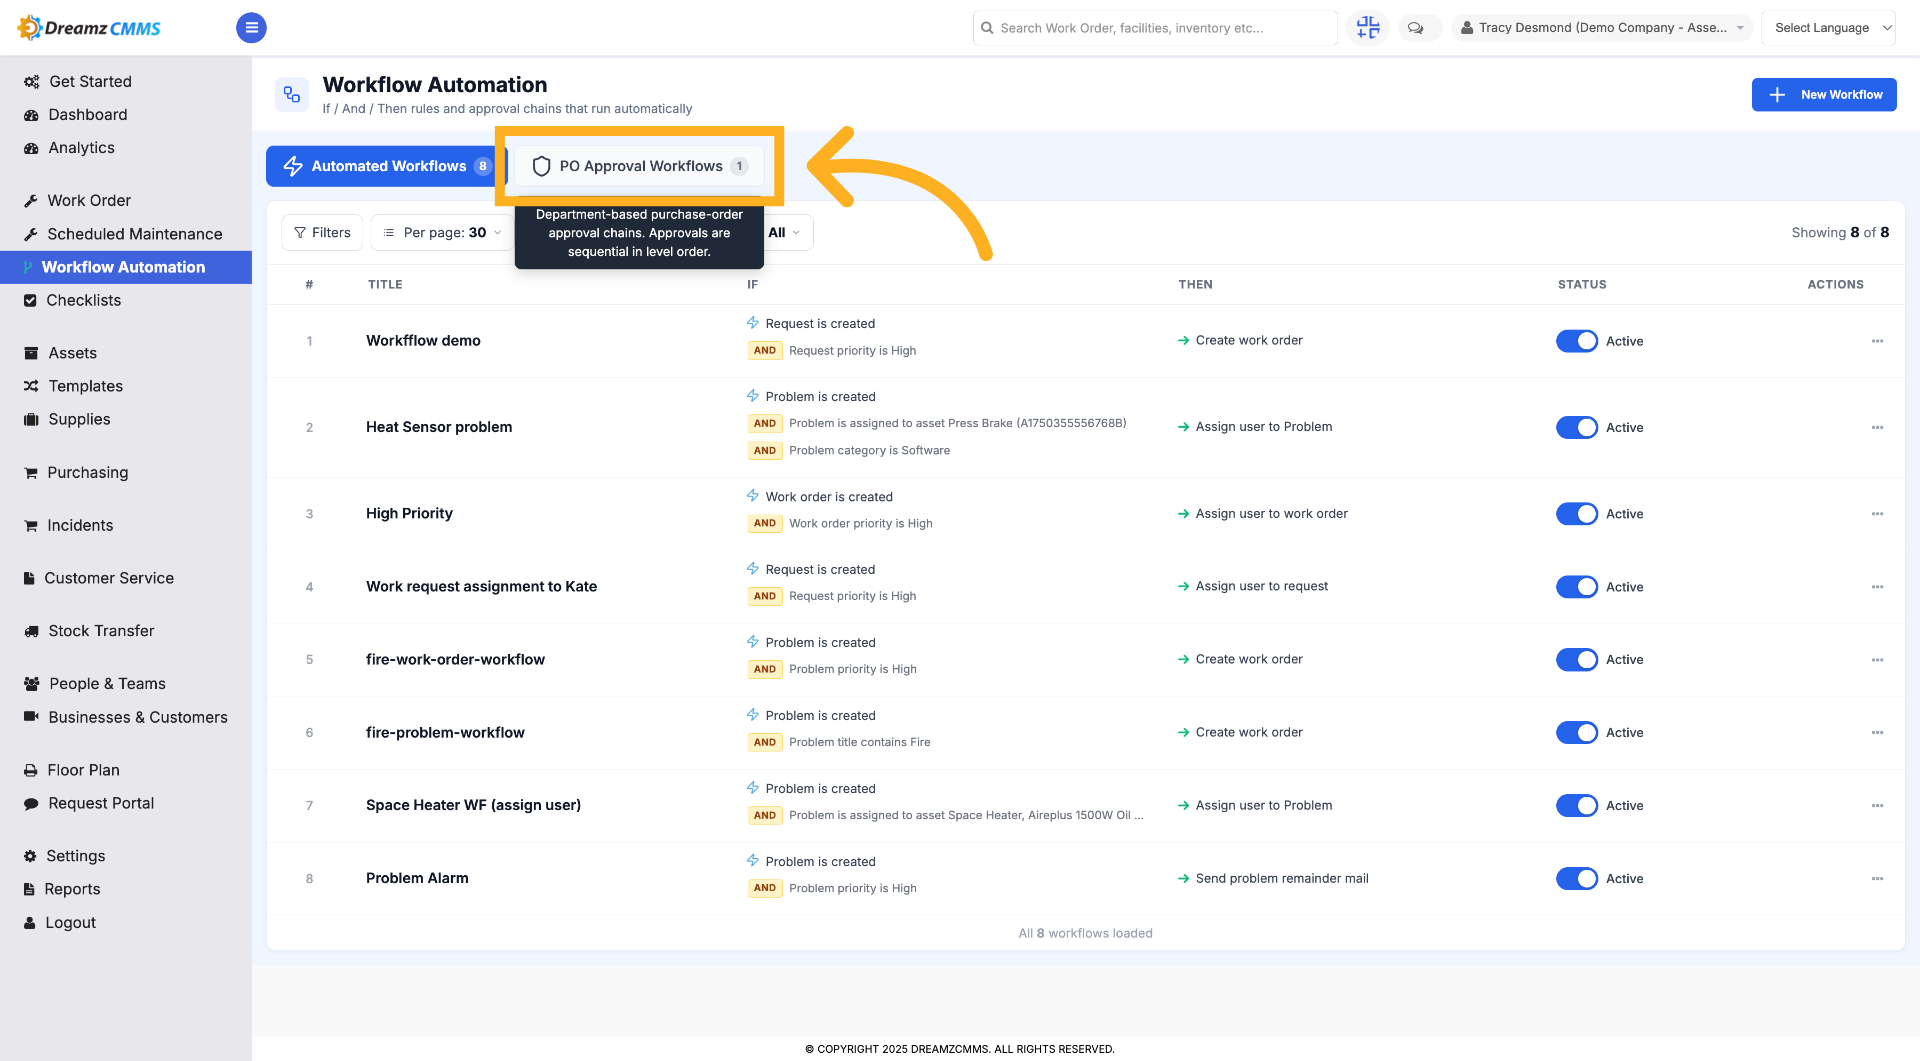
Step 2 – Open PO Approval Workflows
Click "PO Approval Workflows" to view existing purchase order approval workflows.
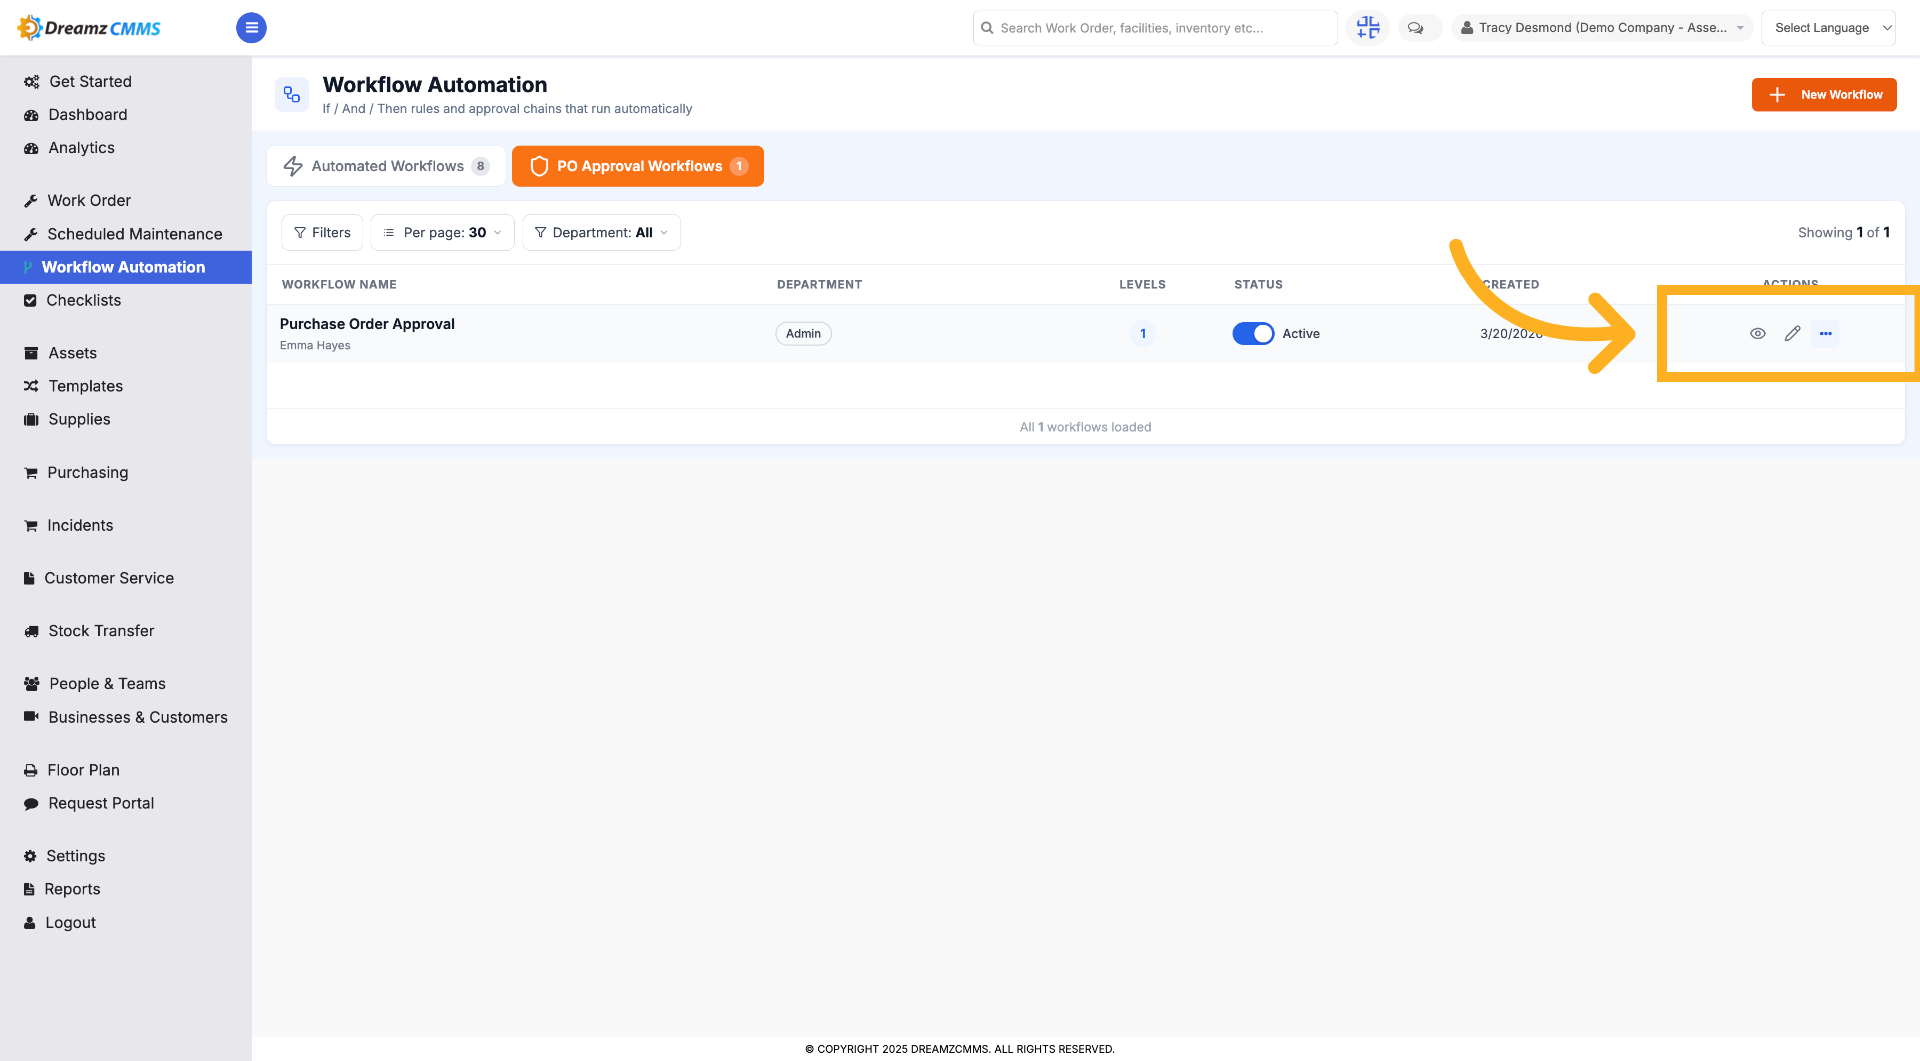
Step 3 – View or Edit an Existing Workflow
Click View or Edit to view or edit a particular workflow.
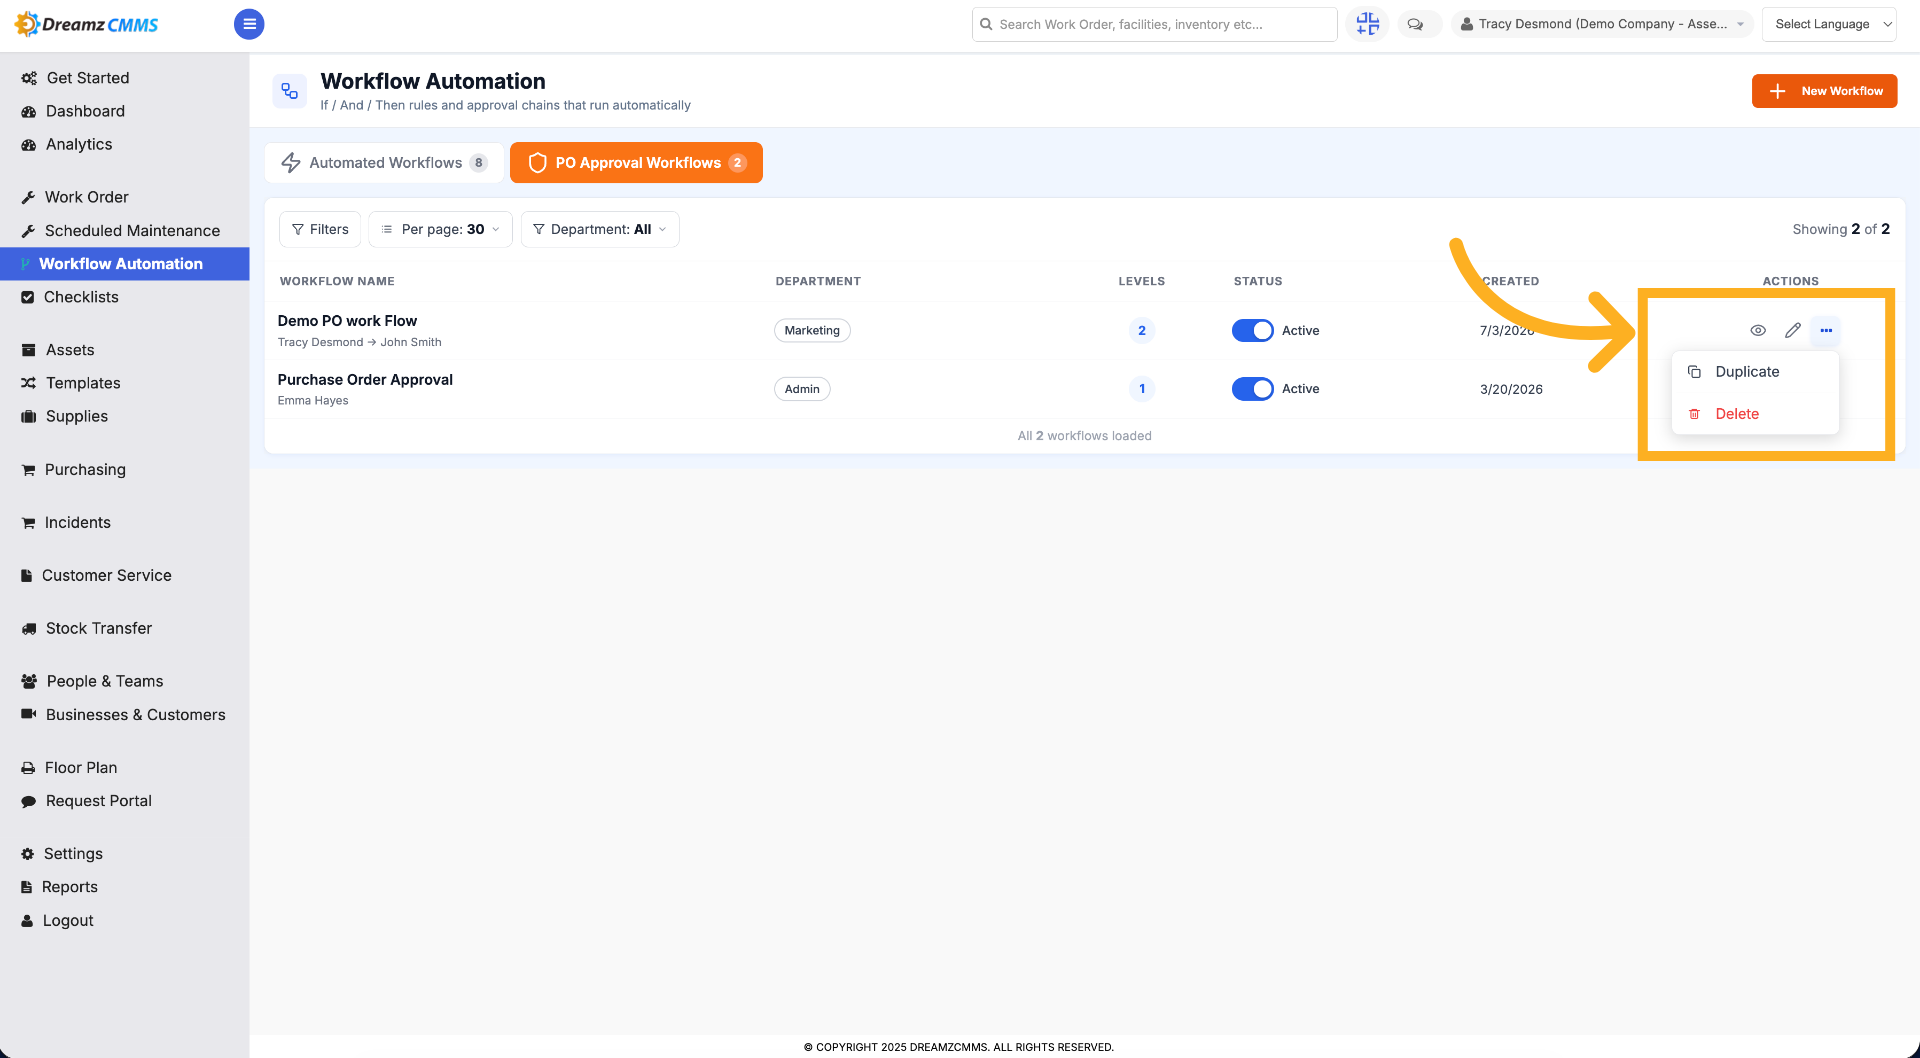
Step 4 – Click on the Three Dots Menu
Clicking the three dots menu gives you the option to duplicate or delete that particular purchase order workflow.
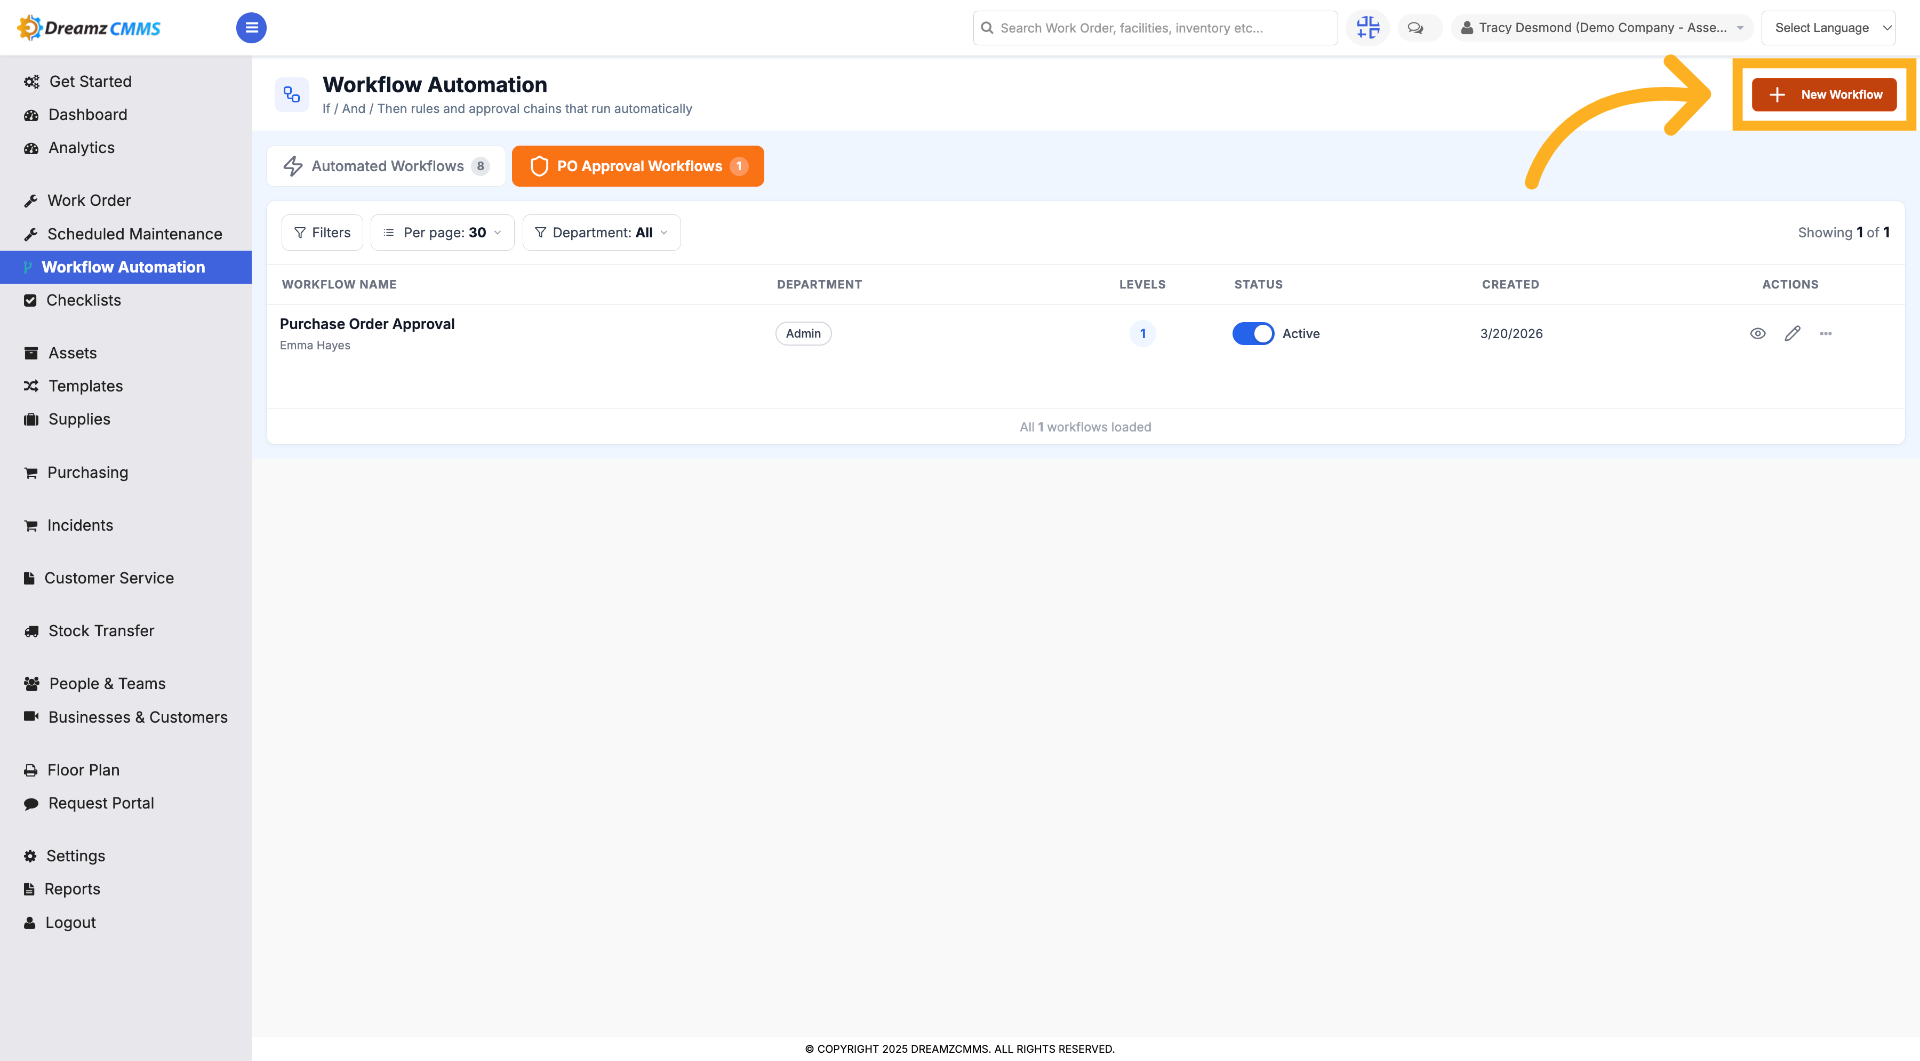
Step 5 – Create New Workflow
Click "New Workflow" to start defining a new purchase order approval process.
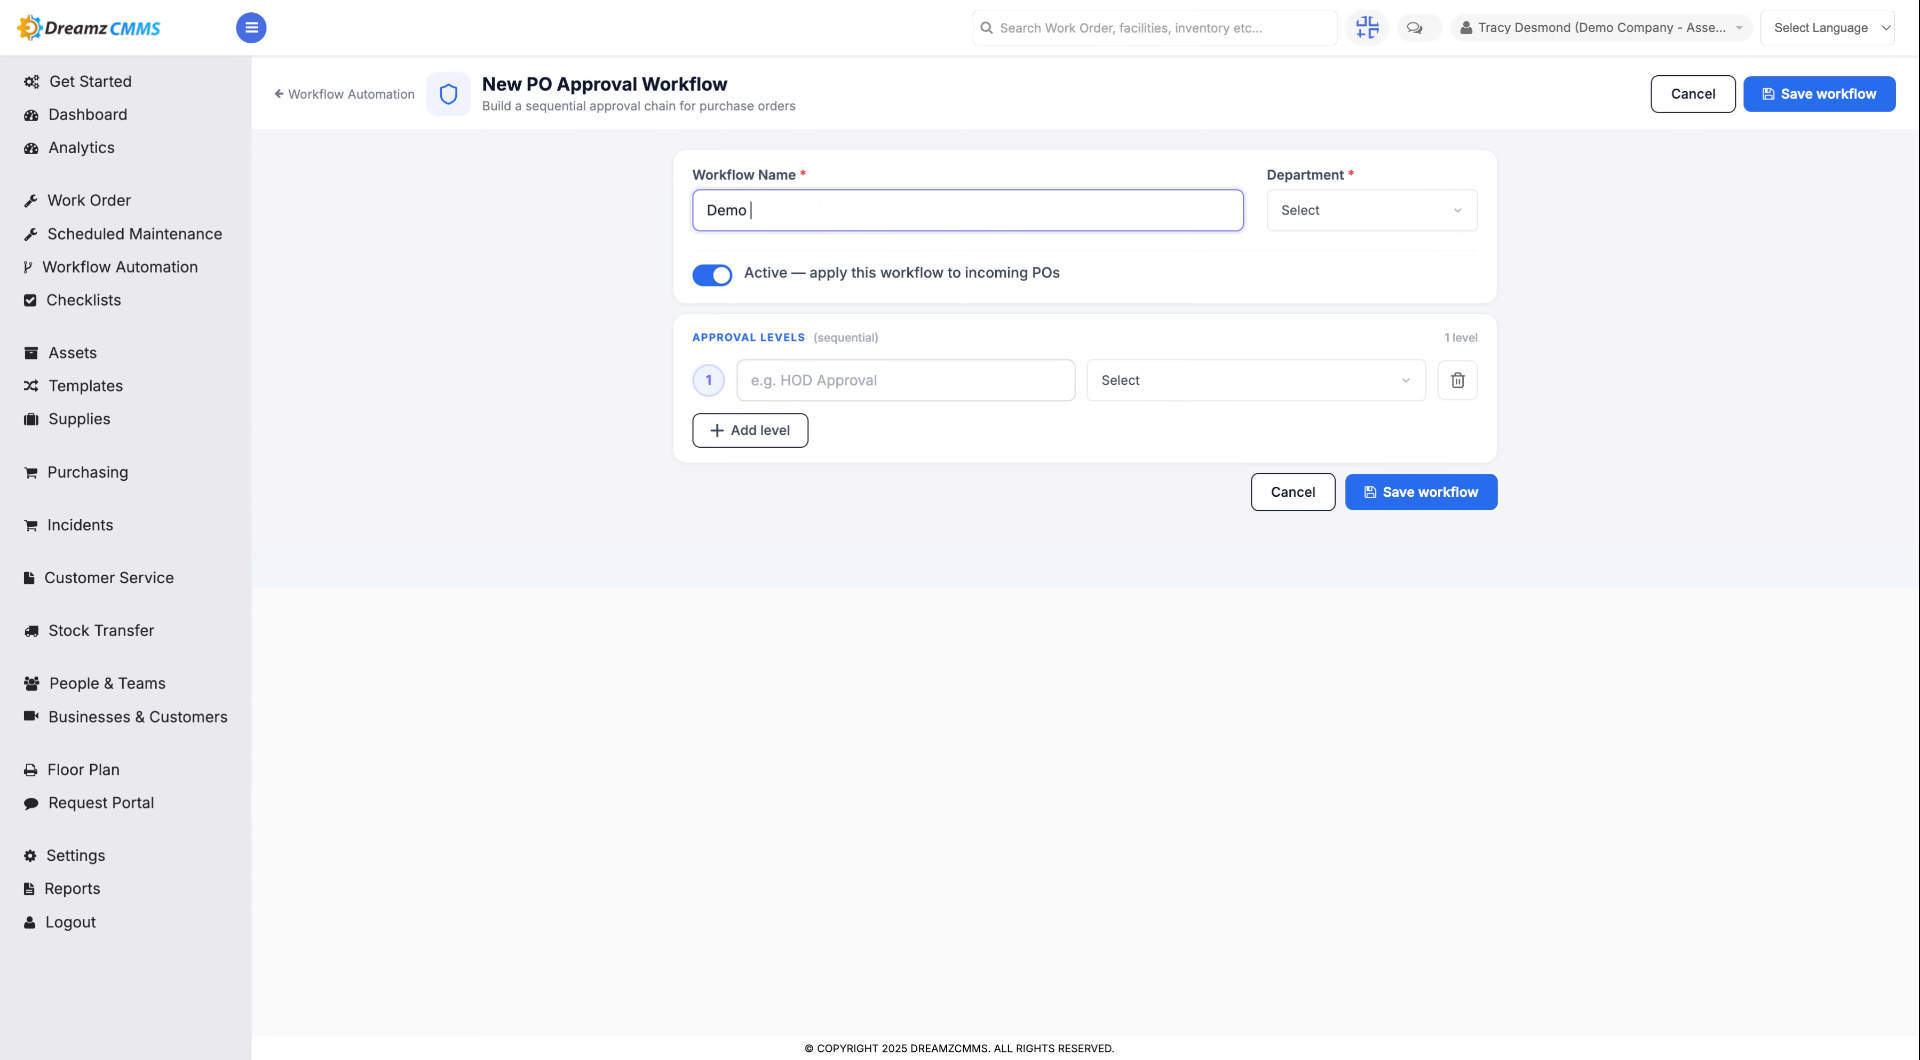
Step 6 – Name Your Workflow
Fill in a name (for example, "Demo Purchase Order Workflow") to assign a name to your new workflow.
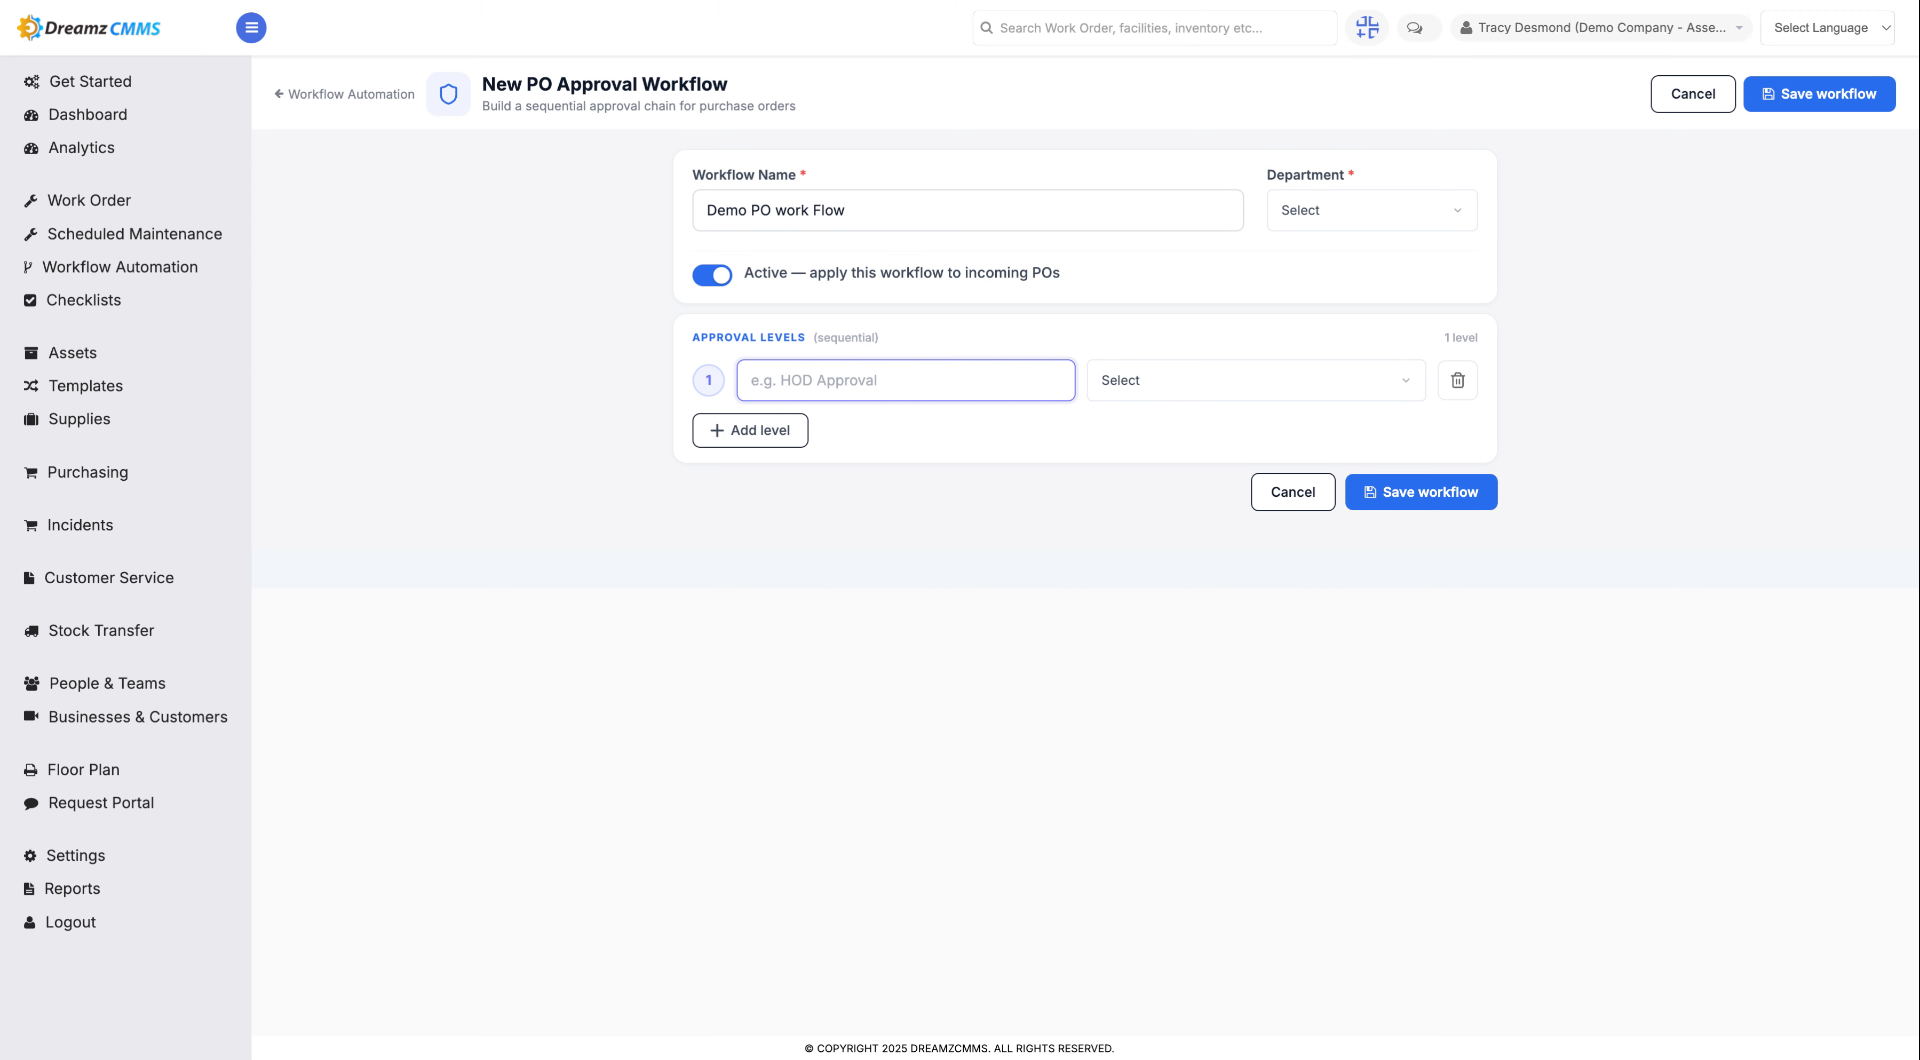
Step 7 – Set Level 1 Name
Fill in "Level 1" to label the first approval level.
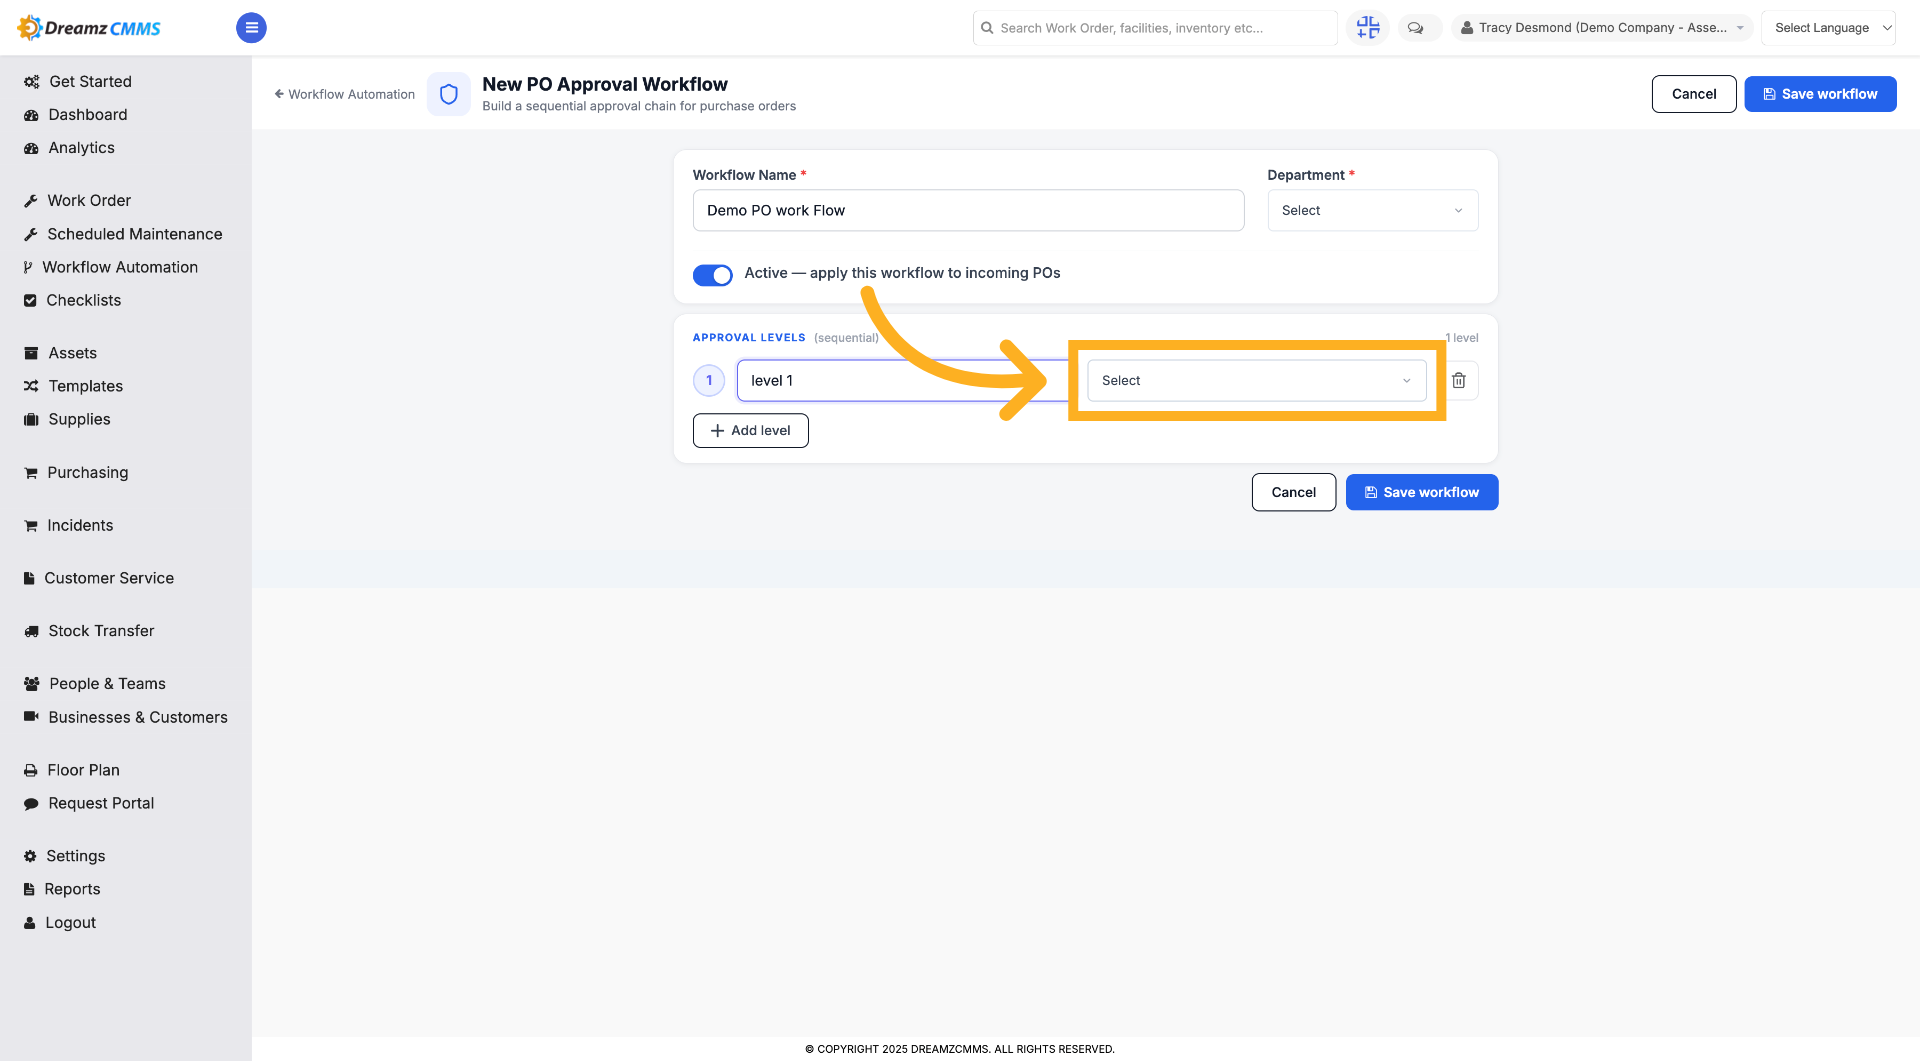
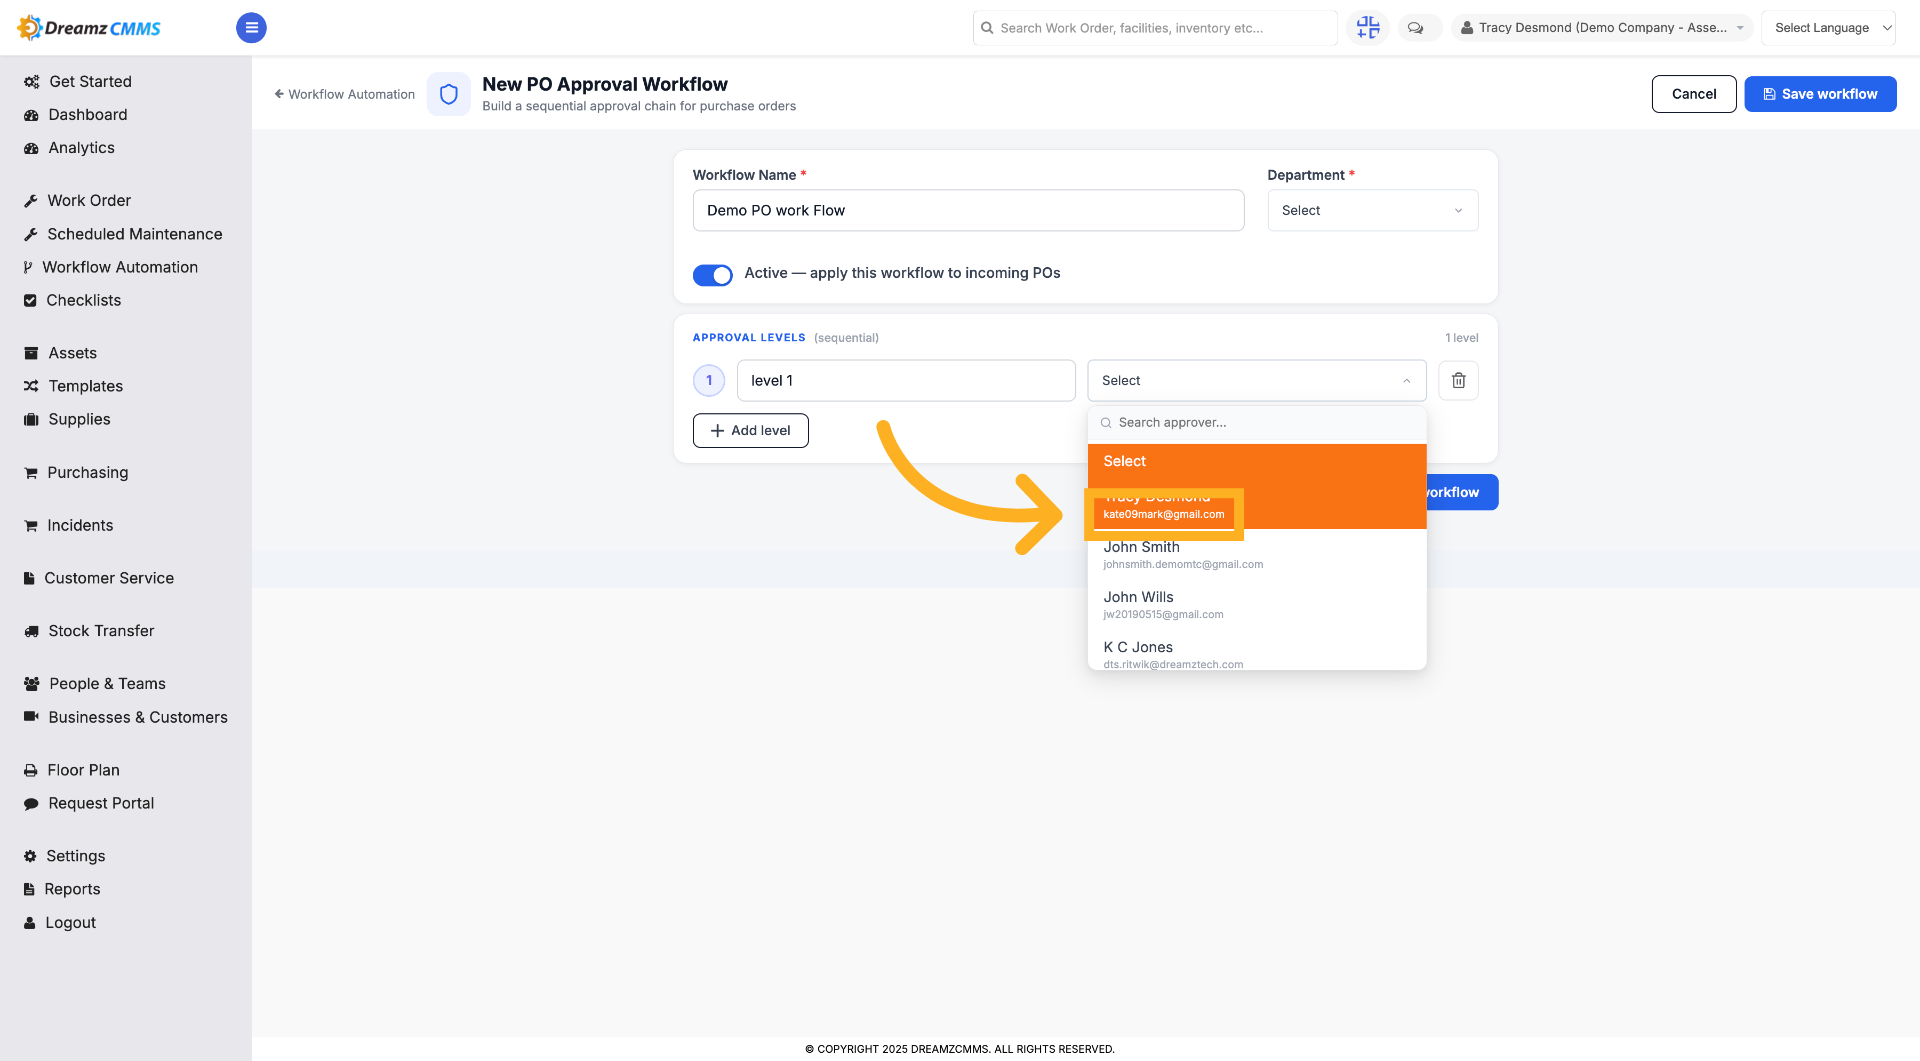
Step 8 – Select Approver for Level 1
Click "Select" to choose the approver responsible for level 1 approval.
Step 9 – Assign Level 1 Approver
Select the appropriate user (for example, "Tracy Desmond") to assign as the level 1 approver.
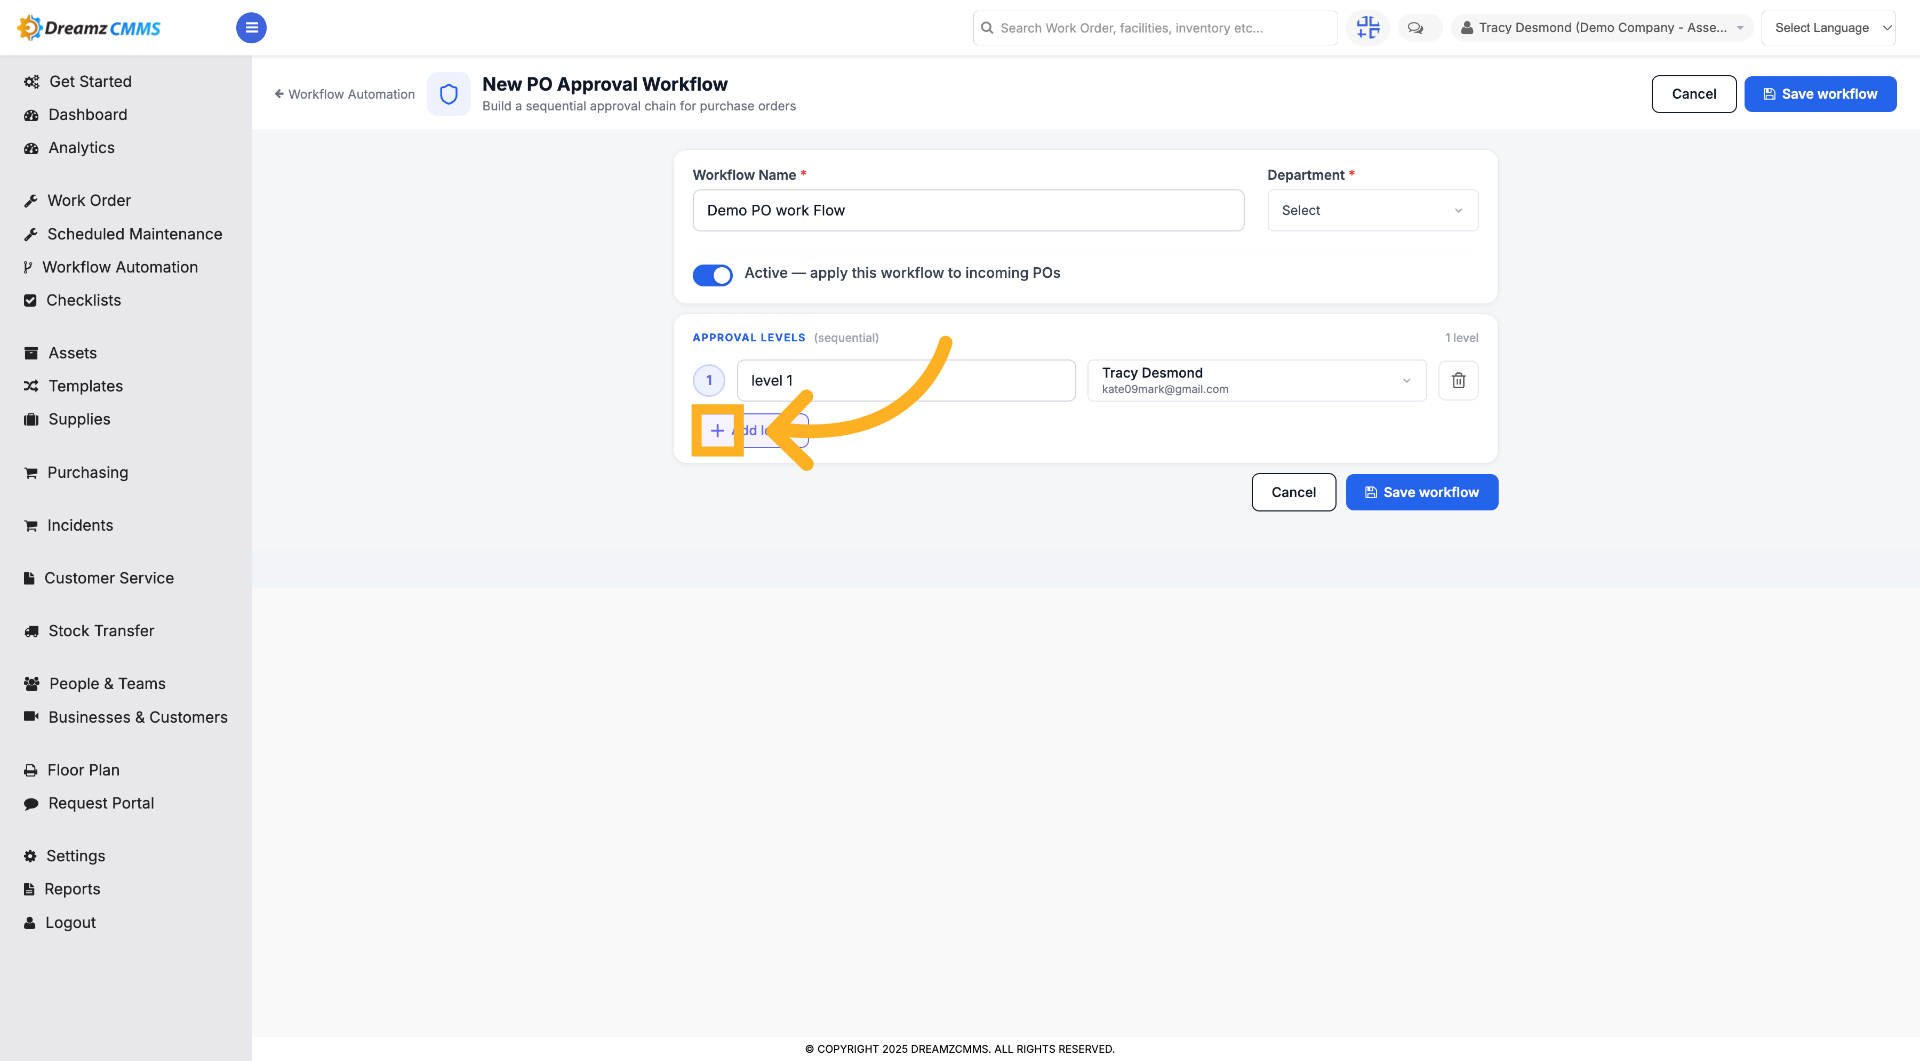
Step 10 – Add an Additional Level of Approver
Click here to add another level of approver.
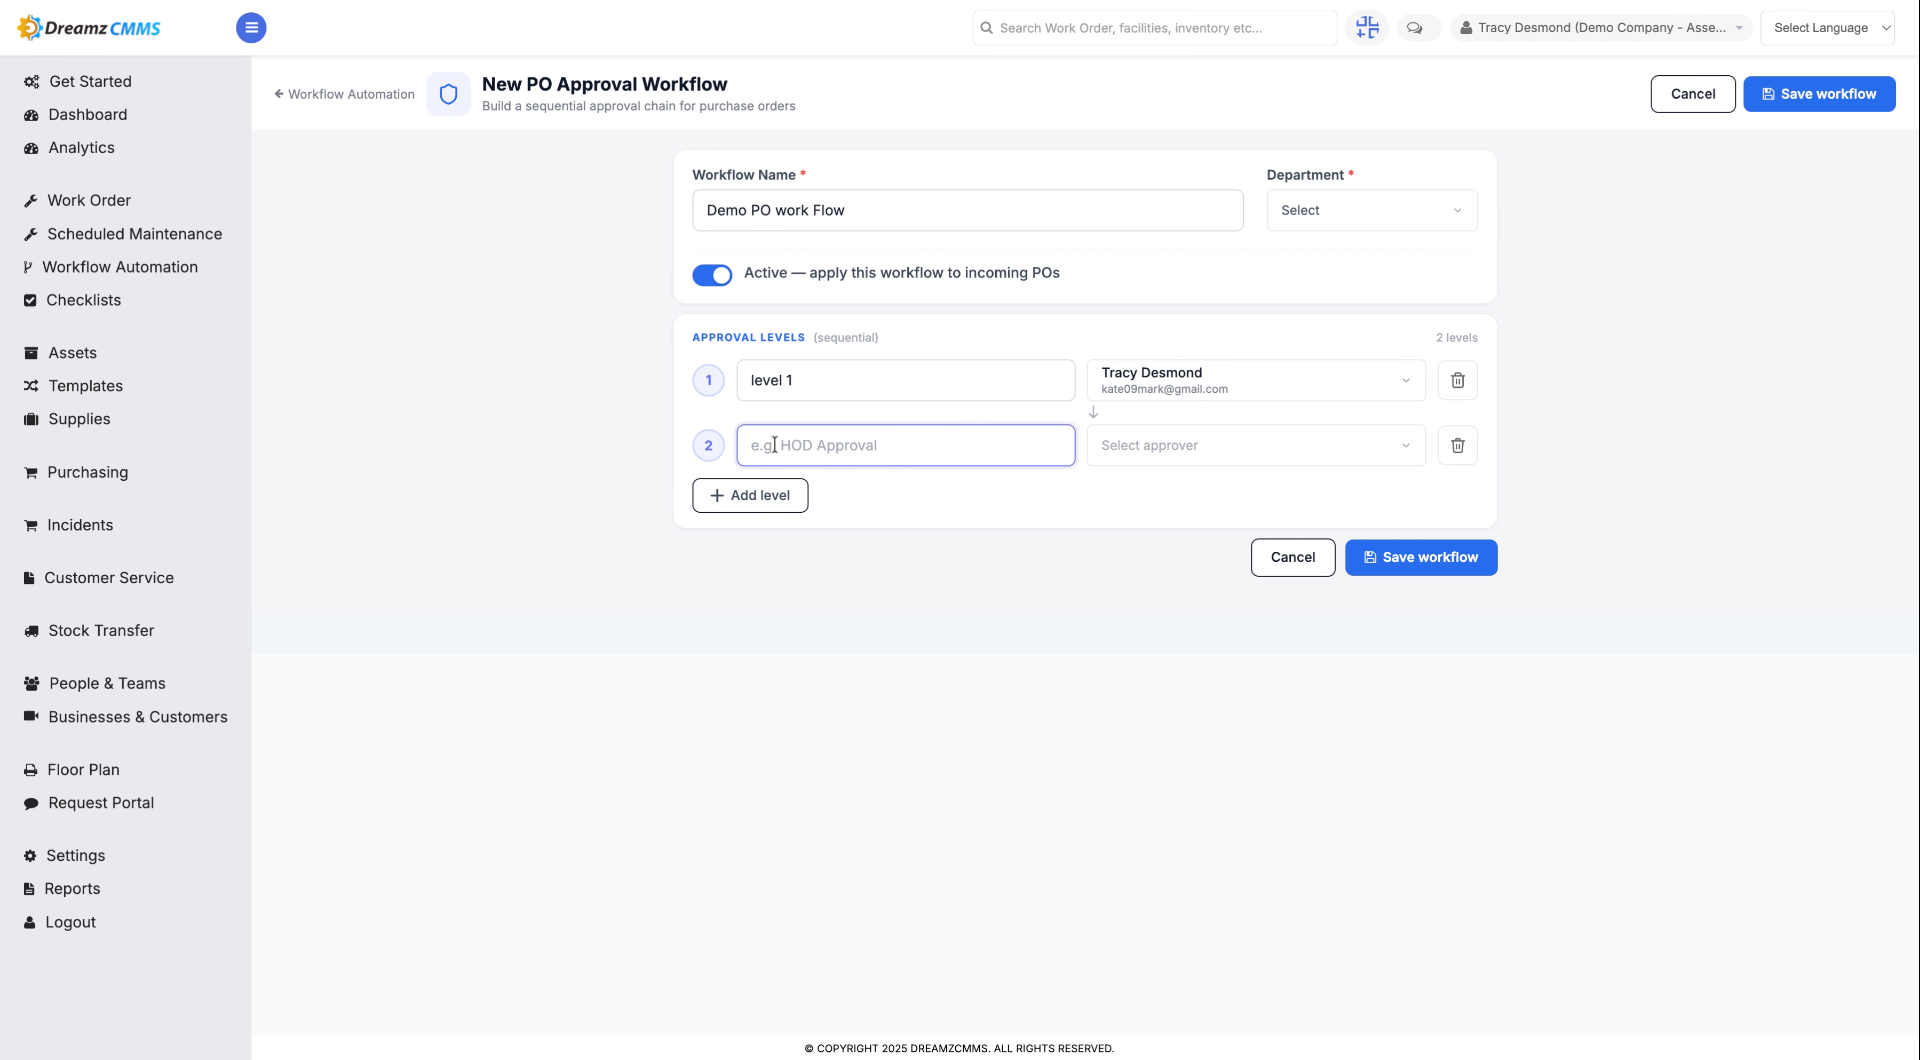
Step 11 – Set Level 2 Name
Fill in "Level 2" to label the second approval level appropriately.
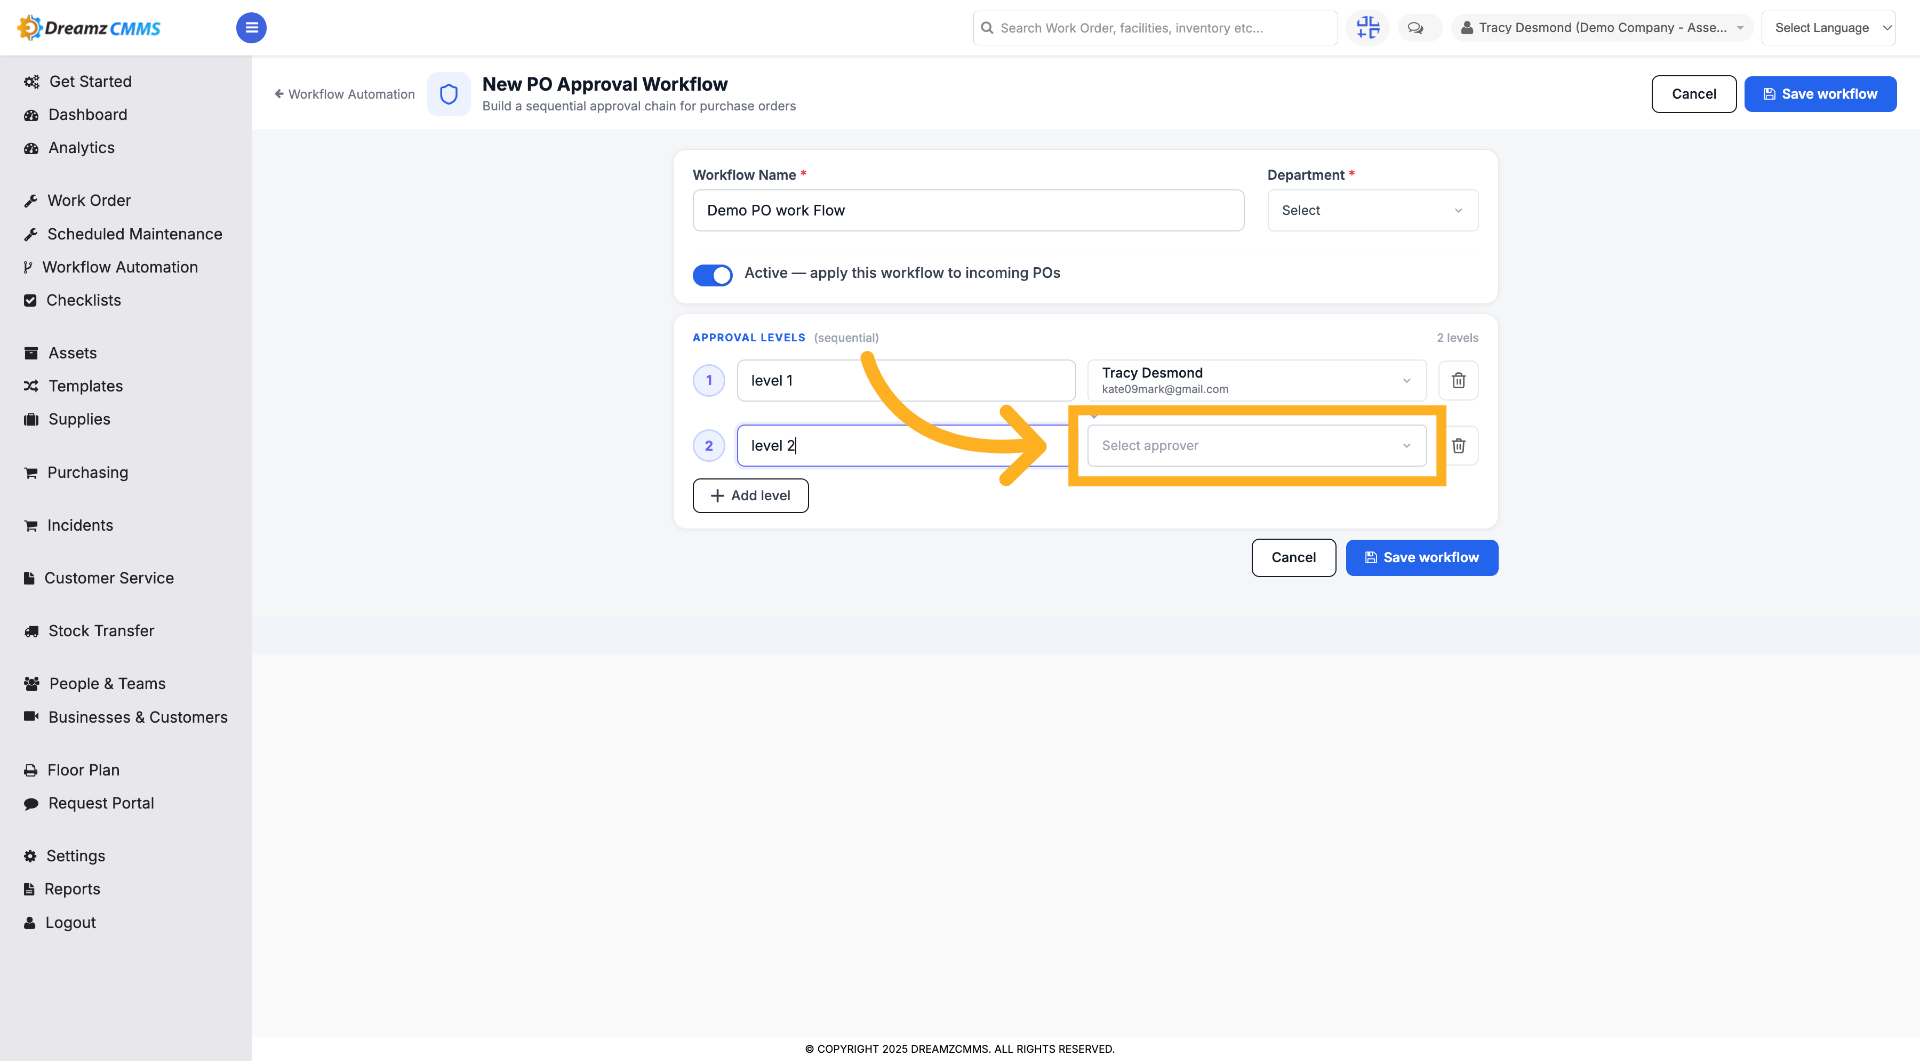
Step 12 – Select Approver for Level 2
Click "Select approver" to pick the user responsible for level 2 approval.
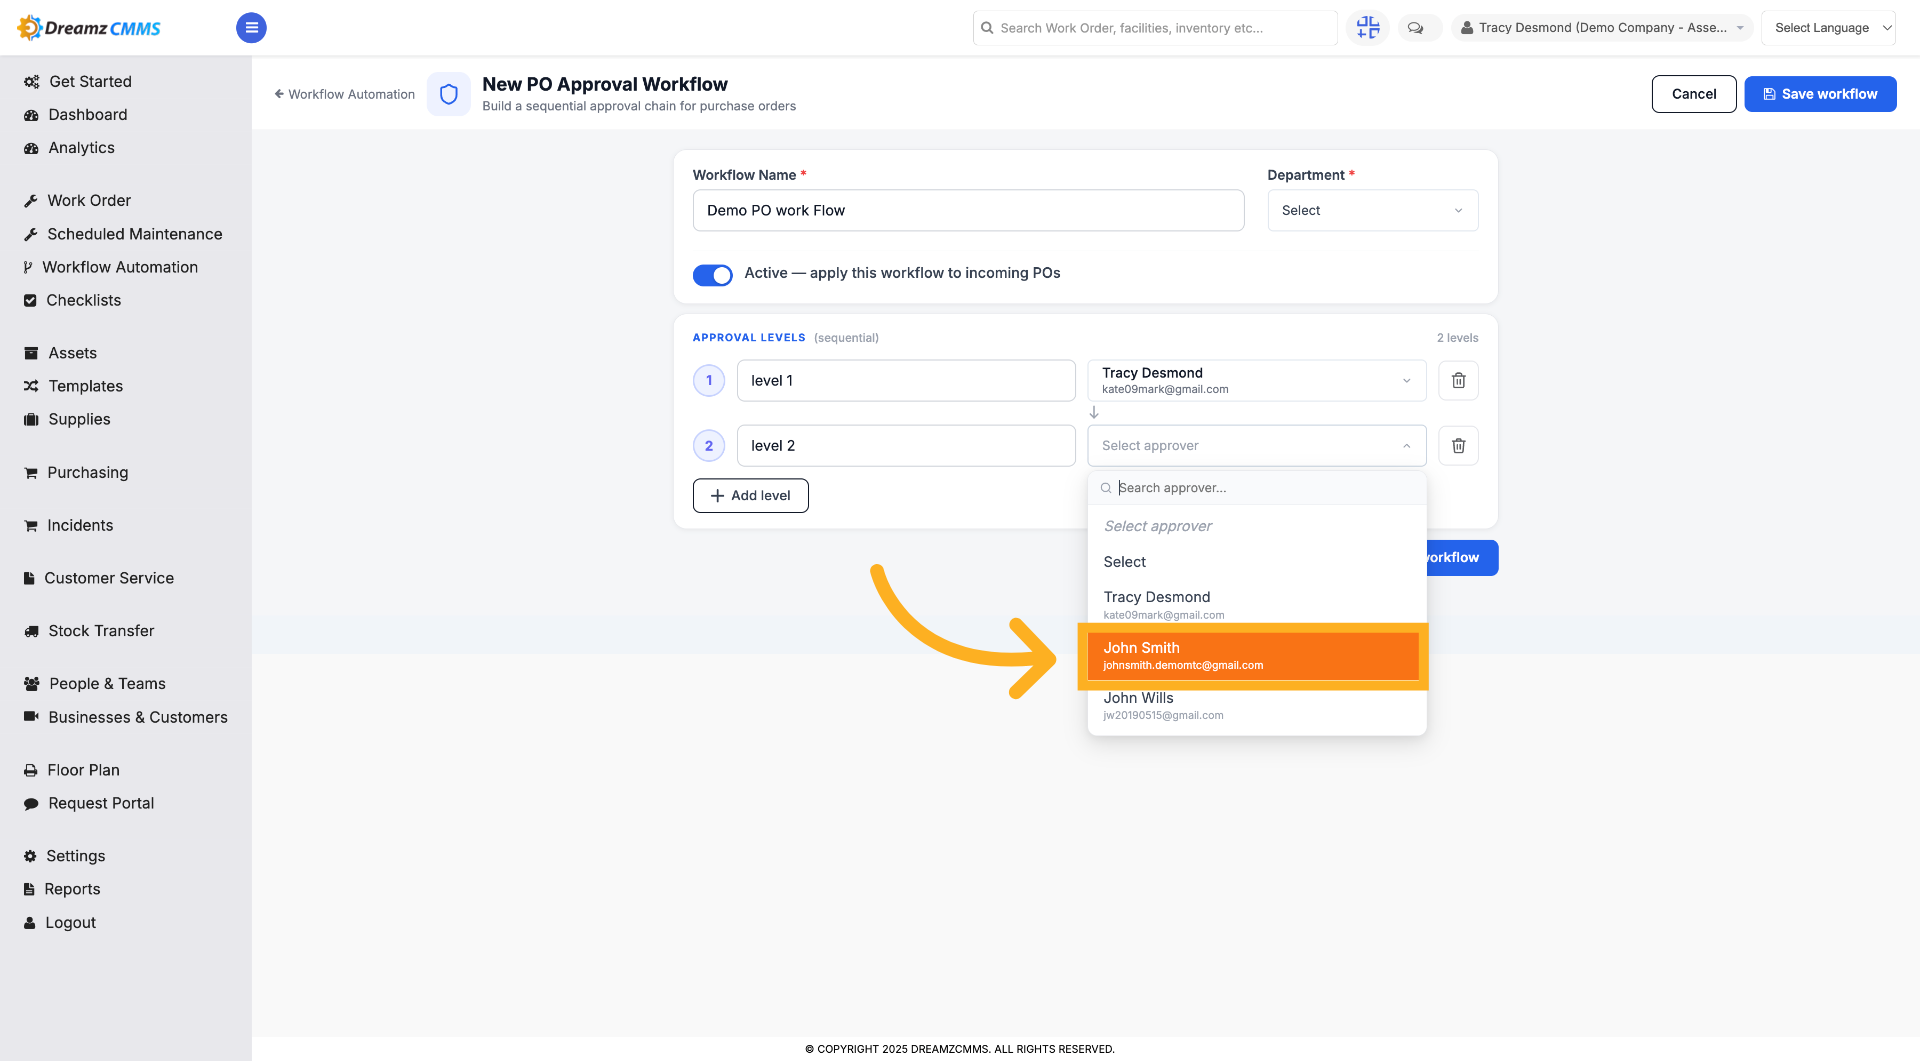
Step 13 – Assign Level 2 Approver
Select the appropriate user (for example, "John Smith") to assign as the level 2 approver.
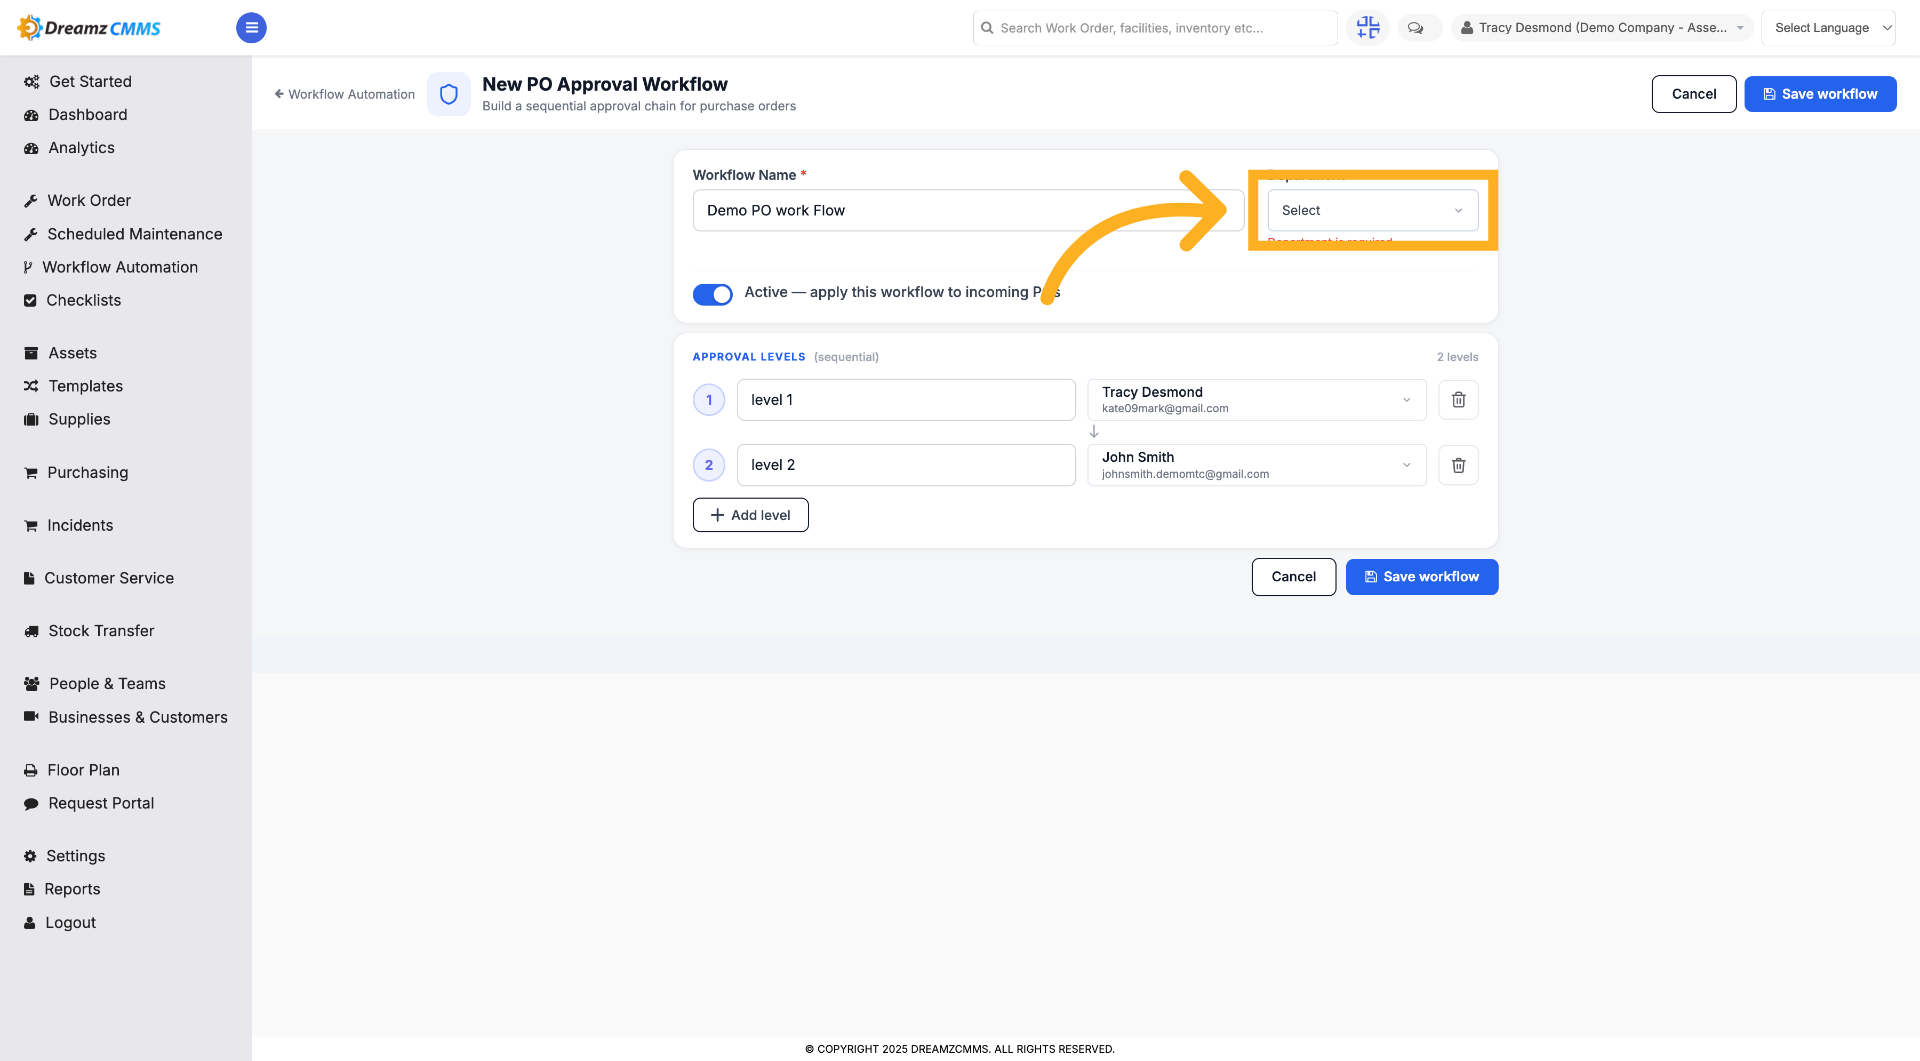
Step 14 – Select Department
Click "Select" to choose the department associated with this workflow.
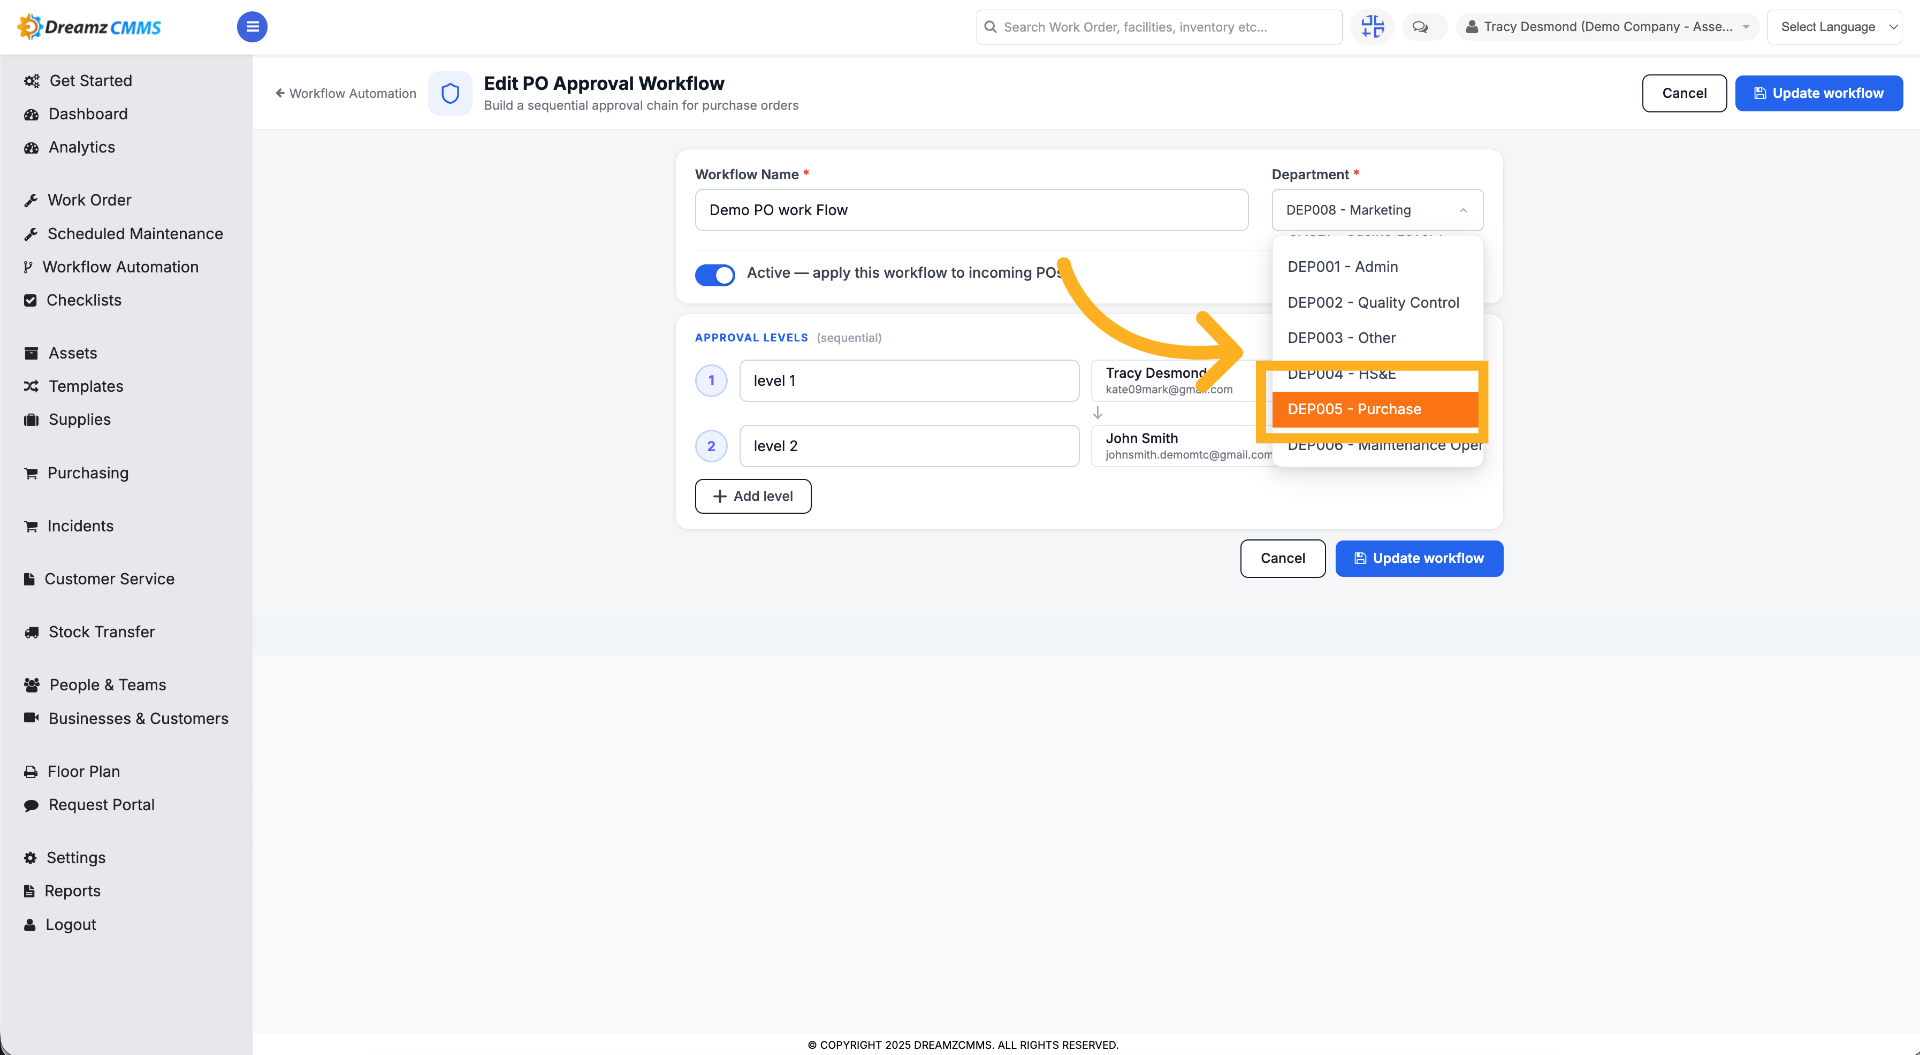
Step 15 – Assign Department
Click the relevant department (for example, "Purchase") to assign it to the workflow.
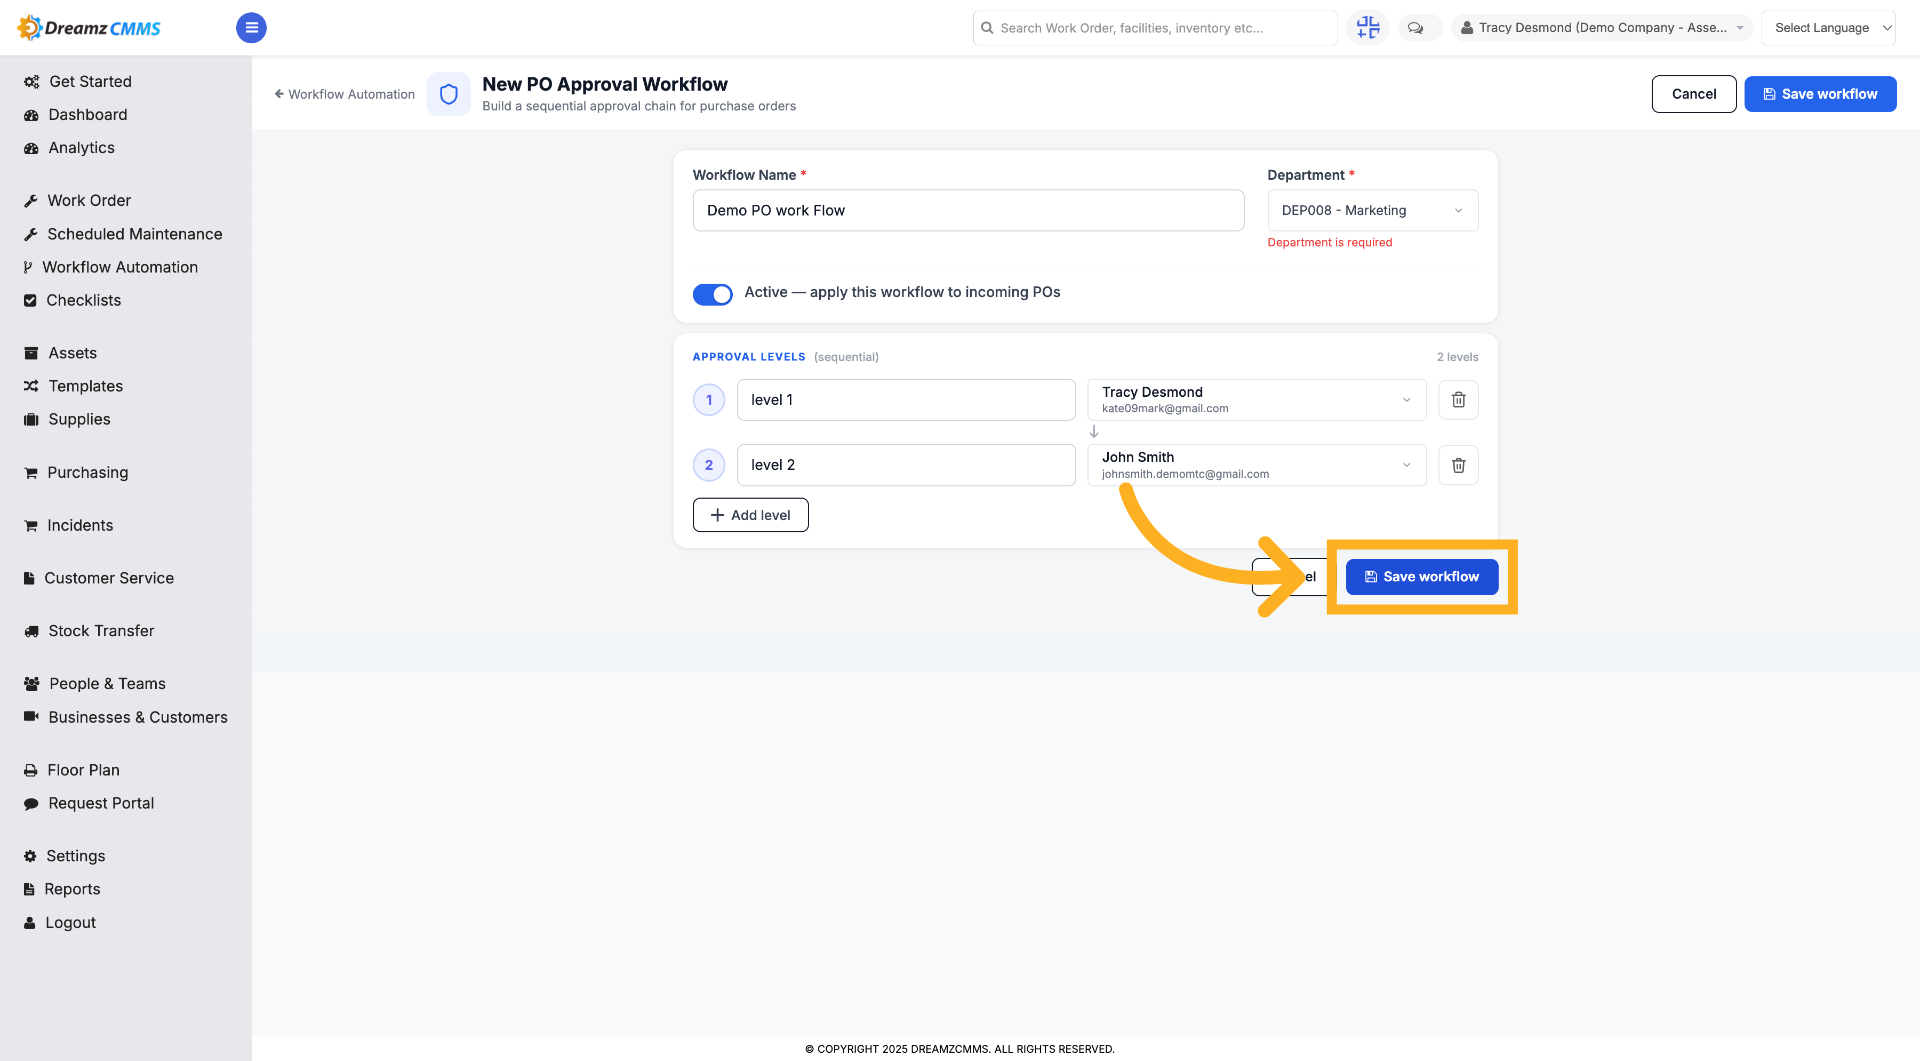
Step 16 – Finalize Workflow Setup
Click "Save workflow" to complete and save all workflow settings.
Tips for Purchase Order Approval Workflows
- Use clear level names (e.g., "Level 1", "Level 2") so approvers understand where they sit in the chain.
- Assign department-specific workflows if approval requirements differ across teams.
- Review and update approvers whenever team roles change to avoid approval bottlenecks.
- Test a new workflow with a sample purchase order to confirm it routes to the correct approvers before relying on it fully.
Frequently Asked Questions
Can I add more than two approval levels?
Yes. Use the "Add Additional level of approver" option to add further levels beyond level 1 and level 2.
Can I edit an existing approval workflow?
Yes. Go to PO Approval Workflows, find the workflow, and click View or Edit.
Can I duplicate or delete a workflow?
Yes. Click the three dots menu next to a workflow to duplicate or delete it.
Is a department required for every workflow?
You can associate a workflow with a specific department to route approvals based on that department's needs.