User Group Creation
User Groups in DreamzCMMS allow you to organise employees into logical teams — such as Inventory, Purchasing, or Managers — so you can manage access, workflows, and reporting at scale. Instead of configuring permissions or assignments for individual users, you can apply settings to an entire group, making your system easier to maintain as your organisation grows.
Overview
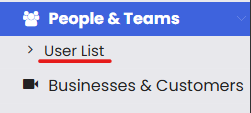
The User Group page is accessed via the User List in the People & Teams module. From here you can create new groups, assign users to them, and manage existing groups from the Group List. Each group displays its Code, Name, assigned Users, Description, and Status, with row-level actions to edit or delete groups as your organisation changes.
Here is a reference video:
Before You Begin
- You must have the appropriate permissions to access People & Teams and manage User Groups.
- The employees you want to add to the group must already exist as users in the system. See Create User/Employee if you need to add them first.
- Plan your group structure in advance — grouping users by department, function, or access level will make ongoing management much easier.
How to Create a User Group
Step 1 – Navigate to the User List
From the main menu, click People & Teams, then click User List. This opens the Employee List page.
Step 2 – Click the "User Group" Tab
From the User List page, click the User Group tab. This switches the view to the User Group management page, where you can see existing groups and create new ones.

Step 3 – Fill In the Group Details and Save
Click Add Group and complete the following fields in the group creation form:
- Code — Enter a unique identifier code for the group (required). This code is used to reference the group in reports and system records.
- Name — Enter a clear, descriptive name for the group (required), e.g., “Purchasing Team” or “Inventory Managers”.
- Users — Select the employees to include in this group (optional). You can add or remove users at any time after the group is created.
- Description — Add an optional description to clarify the purpose or scope of the group for other administrators.
- Status — Set the group to Active to make it available for use across the system, or Inactive to create it without activating it immediately.
Note: The group Code and Name are both required fields and must be unique. Choose meaningful names that clearly reflect the team or function the group represents — this makes group management much easier as your user base grows.
Once all details are entered, click Save. The newly created group will appear in the Group List below, showing its Code, Name, assigned Users, Description, and Status.

Managing Existing User Groups
From the Group List, you can manage any existing group using the row-level actions menu. Available actions include:
- Edit — Update the group’s name, code, description, user membership, or status at any time.
- Delete — Permanently remove the group from the system. Use this with caution — deleting a group cannot be undone and may affect workflows or assignments that reference it.
After Creating a Group — What's Next?
- Assign the group to workflows or approval chains to route tasks, notifications, and approvals to the right team automatically.
- Review group membership regularly as your team changes — add new employees and remove those who have left or changed roles.
- Use groups in reporting to filter and analyse activity by team or department across work orders, purchase orders, and other modules.
Tips for Managing User Groups
- Use clear, function-based names for groups (e.g., “Maintenance Technicians”, “Procurement Approvers”) rather than generic labels. This makes it easier to manage access as your organisation scales.
- Keep group membership up to date. Outdated group memberships can cause incorrect task assignments, missed notifications, and approval bottlenecks.
- Set groups to Inactive rather than deleting them when they are no longer needed. This preserves any historical references tied to the group.
- Use a consistent code convention (e.g., department abbreviation + number) to keep the Group List easy to scan and search.
Frequently Asked Questions
Can a user belong to more than one group?
Yes. A single user can be assigned to multiple groups simultaneously. This is useful when an employee has responsibilities across more than one team or department.
Can I create a group without assigning any users to it?
Yes. Users are optional when creating a group. You can create the group first and add users to it at any time by editing the group record.
What happens if I delete a User Group?
Deleting a group permanently removes it from the system. Any workflows, assignments, or notifications that reference the group may be affected. It is recommended to set the group to Inactive instead of deleting it unless you are certain it is no longer needed.
Can I change the group Code after it has been created?
Yes. You can edit the group at any time from the Group List, including updating the Code, Name, user membership, and status.
Is there a limit to how many users can be in a group?
There is no fixed limit on the number of users that can be assigned to a single group in DreamzCMMS.
Related Articles
- Create User/Employee
- Manage Work Requests
- Create and Approve a Purchase Request
- Manage Businesses
- Manage Stock Levels