Create User/Employee
The User/Employee module in DreamzCMMS allows you to create and manage user accounts for everyone in your organisation. Each employee profile stores key details including their name, code, email, company, user type and role, default dashboard, auto-notification settings, and reporting manager. Once created, users can log in to DreamzCMMS and access the modules and features appropriate to their role.
Overview
The Employee List gives you a searchable, filterable roster of all users in the system. From the listing page you can view key details at a glance — including code, email, name, company, user type/role, default dashboard, auto-notification setting, and reporting manager. You can manage any existing user directly from the list using the row-level actions menu, which supports viewing, editing, resetting credentials, and activating or deactivating accounts.
Here is a reference video:
Before You Begin
- You must have the appropriate permissions to access People & Teams and create or manage user accounts.
- Have the employee’s details ready before starting — including their full name, email address, role, and reporting manager.
- Confirm the correct user type and role for the employee to ensure they have the right level of access once their account is created.
- Decide whether the employee should receive auto-notifications and what their default dashboard should be.
How to Create a New User/Employee
Step 1 – Navigate to the User List
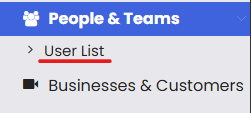
From the main menu, click People & Teams, then click User List. This opens the Employee List showing all existing user accounts.
Step 2 – Click "Add New Employee"
From the Employee List, click the Add New Employee button to open the employee creation form.

Step 3 – Fill In the Employee Details and Save
Complete the following fields in the employee creation form:
- Name — Enter the employee’s full name as it should appear across the system.
- Code — Assign a unique identifier code for this employee. This is used to reference the user in reports and records.
- Email — Enter the employee’s email address. This will be used for login and system notifications.
- Company — Select the company or organisation this employee belongs to.
- User Type / Role — Select the appropriate user type and role to define what the employee can access and do within DreamzCMMS.
- Default Dashboard — Select the dashboard that will be shown to this user upon login.
- Auto-Notification — Enable or disable automatic system notifications for this user.
- Reporting Manager — Assign the manager this employee reports to. This is used in approval workflows and reporting hierarchies.
Note: The email address must be unique across all user accounts. Attempting to save with a duplicate email will result in an error. Assign the correct user type and role before saving — this determines the employee’s system access from the moment their account is activated.
Once all details are entered, click Save. The new employee will appear in the Employee List and can log in to DreamzCMMS using their registered email.

Managing Existing Users
From the Employee List, you can manage any existing user using the row-level actions menu. Use the search bar at the top of the page to filter users by name, code, email, or role. Available actions include:
- View — Open the full employee profile in read-only mode.
- Edit — Update any details on the employee profile, including role, dashboard, or contact information.
- Reset / Update Credentials — Reset the user’s login password or update their access credentials.
- Activate / Deactivate — Toggle the user’s account status. Deactivated users cannot log in to the system but their records and history are preserved.
After Creating a User — What's Next?
- Share login credentials with the new employee so they can access DreamzCMMS using their registered email.
- Assign the user to a team or group if your organisation uses team-based access or task assignment — see Manage User Groups.
- Review their role and permissions after first login to confirm they have access to the correct modules and no more.
Tips for Managing Users
- Always assign the correct user type and role at the time of creation. Roles determine what the user can view, create, and approve across the system.
- Deactivate rather than delete users who leave the organisation. This preserves their history and prevents orphaned records in work orders, POs, and approvals.
- Use consistent employee codes (e.g., initials + department code) to make the user list easy to search and report on.
- Enable auto-notifications for users who need to stay informed of task assignments, approvals, and status changes in real time.
- Set the reporting manager correctly — this field drives approval hierarchies and escalation workflows throughout the system.
Frequently Asked Questions
What is the difference between User Type and Role?
User Type defines the broad category of the user (e.g., internal staff, contractor, administrator), while Role determines the specific permissions and access level within DreamzCMMS. Both should be assigned carefully to match the employee’s responsibilities.
Can two users share the same email address?
No. Each user account must have a unique email address. The system will not allow duplicate emails to be saved.
What happens when a user is deactivated?
Deactivated users cannot log in to DreamzCMMS. Their profile, assigned records, and history are preserved and remain visible in the system. The account can be reactivated at any time.
Can I change a user’s role after their account has been created?
Yes. You can edit a user’s profile at any time from the Employee List to update their role, dashboard, reporting manager, or any other details.
How does a user reset their password?
An administrator can reset a user’s credentials directly from the Employee List using the Reset / Update Credentials action. Users may also be able to reset their own password via the login page, depending on your system configuration.
Related Articles
- Manage User Groups
- Create and Approve a Purchase Request
- Manage Work Requests
- How to Add BOM to a Facility
- Manage Stock Levels