Configure Metering Scheduled Maintenance
Metering Scheduler in DreamzCMMS
This tutorial guides you through configuring metering scheduled maintenance using DreamzCMMS. You will learn how to navigate the system, set up schedulers, and manage related tasks effectively.
Overview
Metering Scheduled Maintenance lets you trigger maintenance automatically based on equipment meter readings (such as running hours) rather than a fixed calendar. Each scheduler can be linked to equipment, requesters, customers, assignees, checklists, and financial settings, and can be reviewed, edited, deactivated, or deleted from the scheduler list.
Before You Begin
- You must have access to the Scheduled Maintenance section in your account.
- Know which equipment, requester, assignee, and financial details apply to your metering scheduler before you start.
How to View and Filter the Metering Scheduler List
Step 1 – Access Scheduled Maintenance
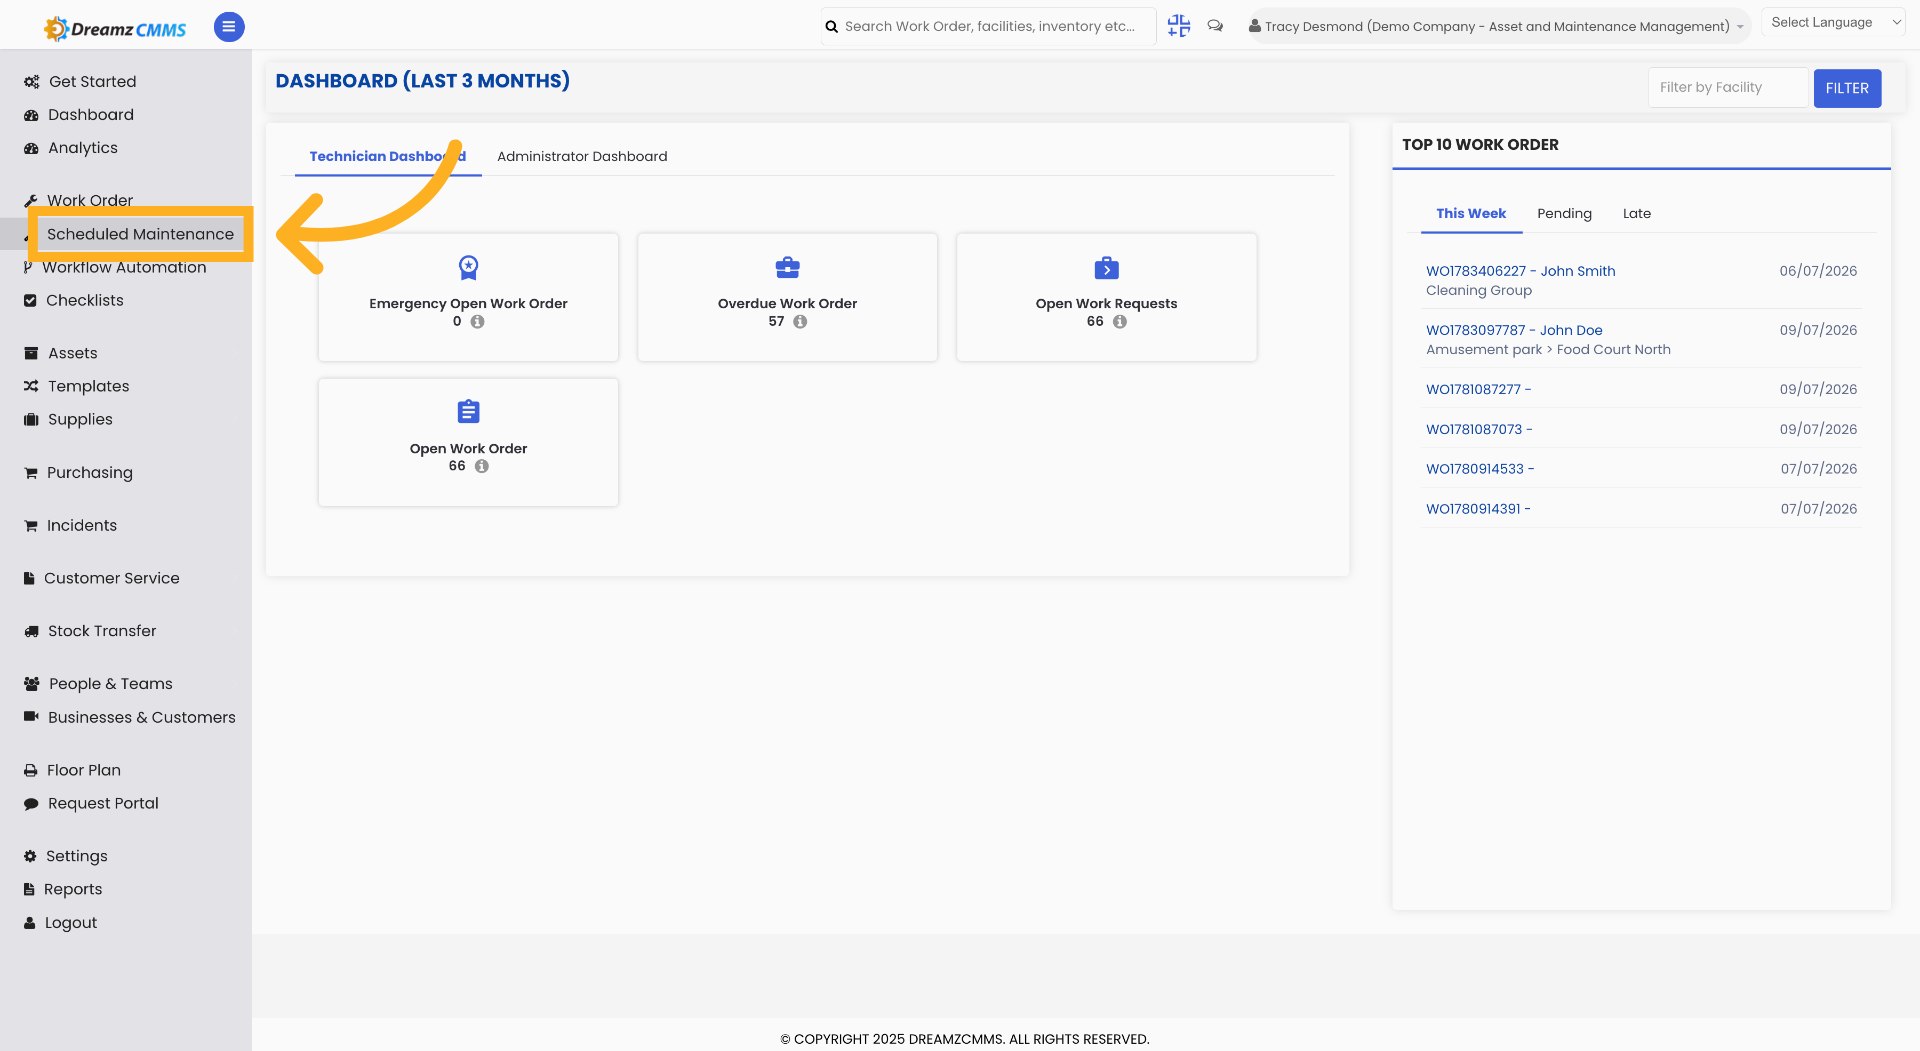
Click "Scheduled Maintenance" to open the maintenance scheduling options on the Dashboard.
Step 2 – Open Metering Scheduled Maintenance
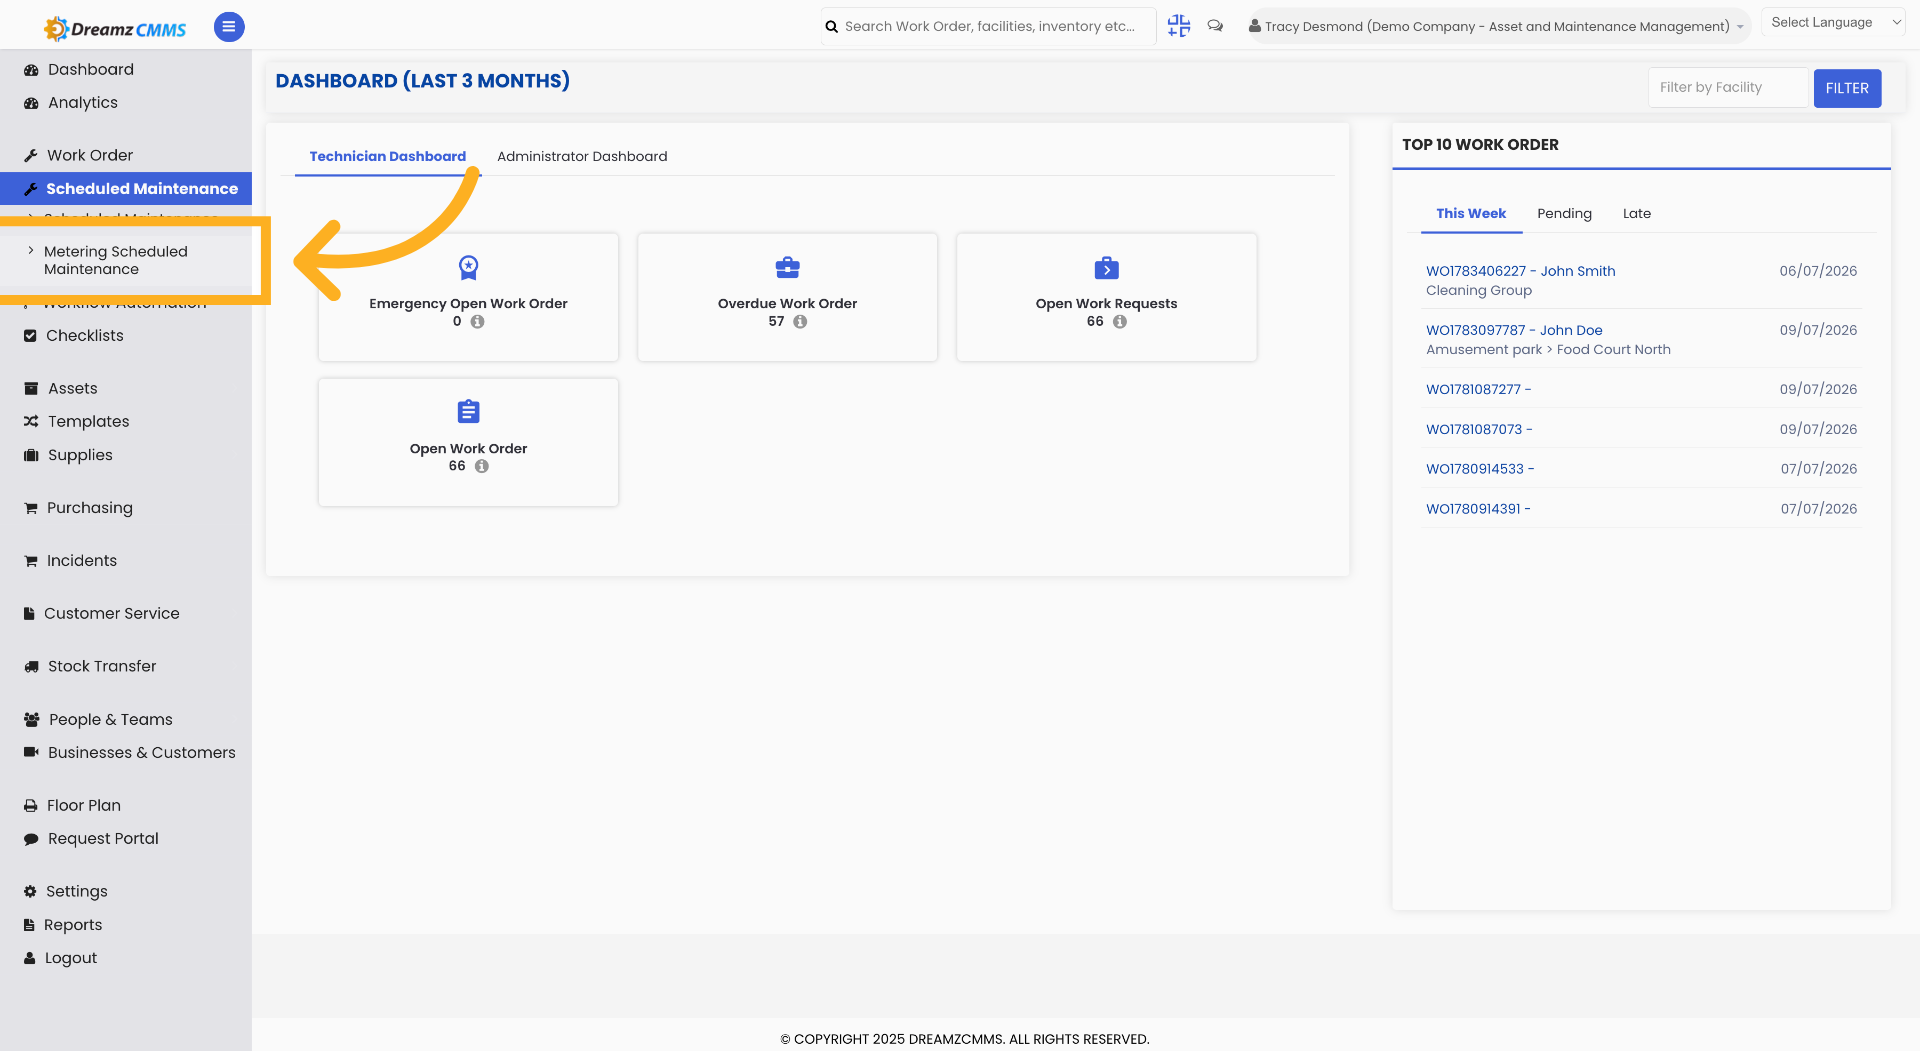
Click "Metering Scheduled Maintenance" to view the list of metering schedules.
Step 3 – Use the Splitter
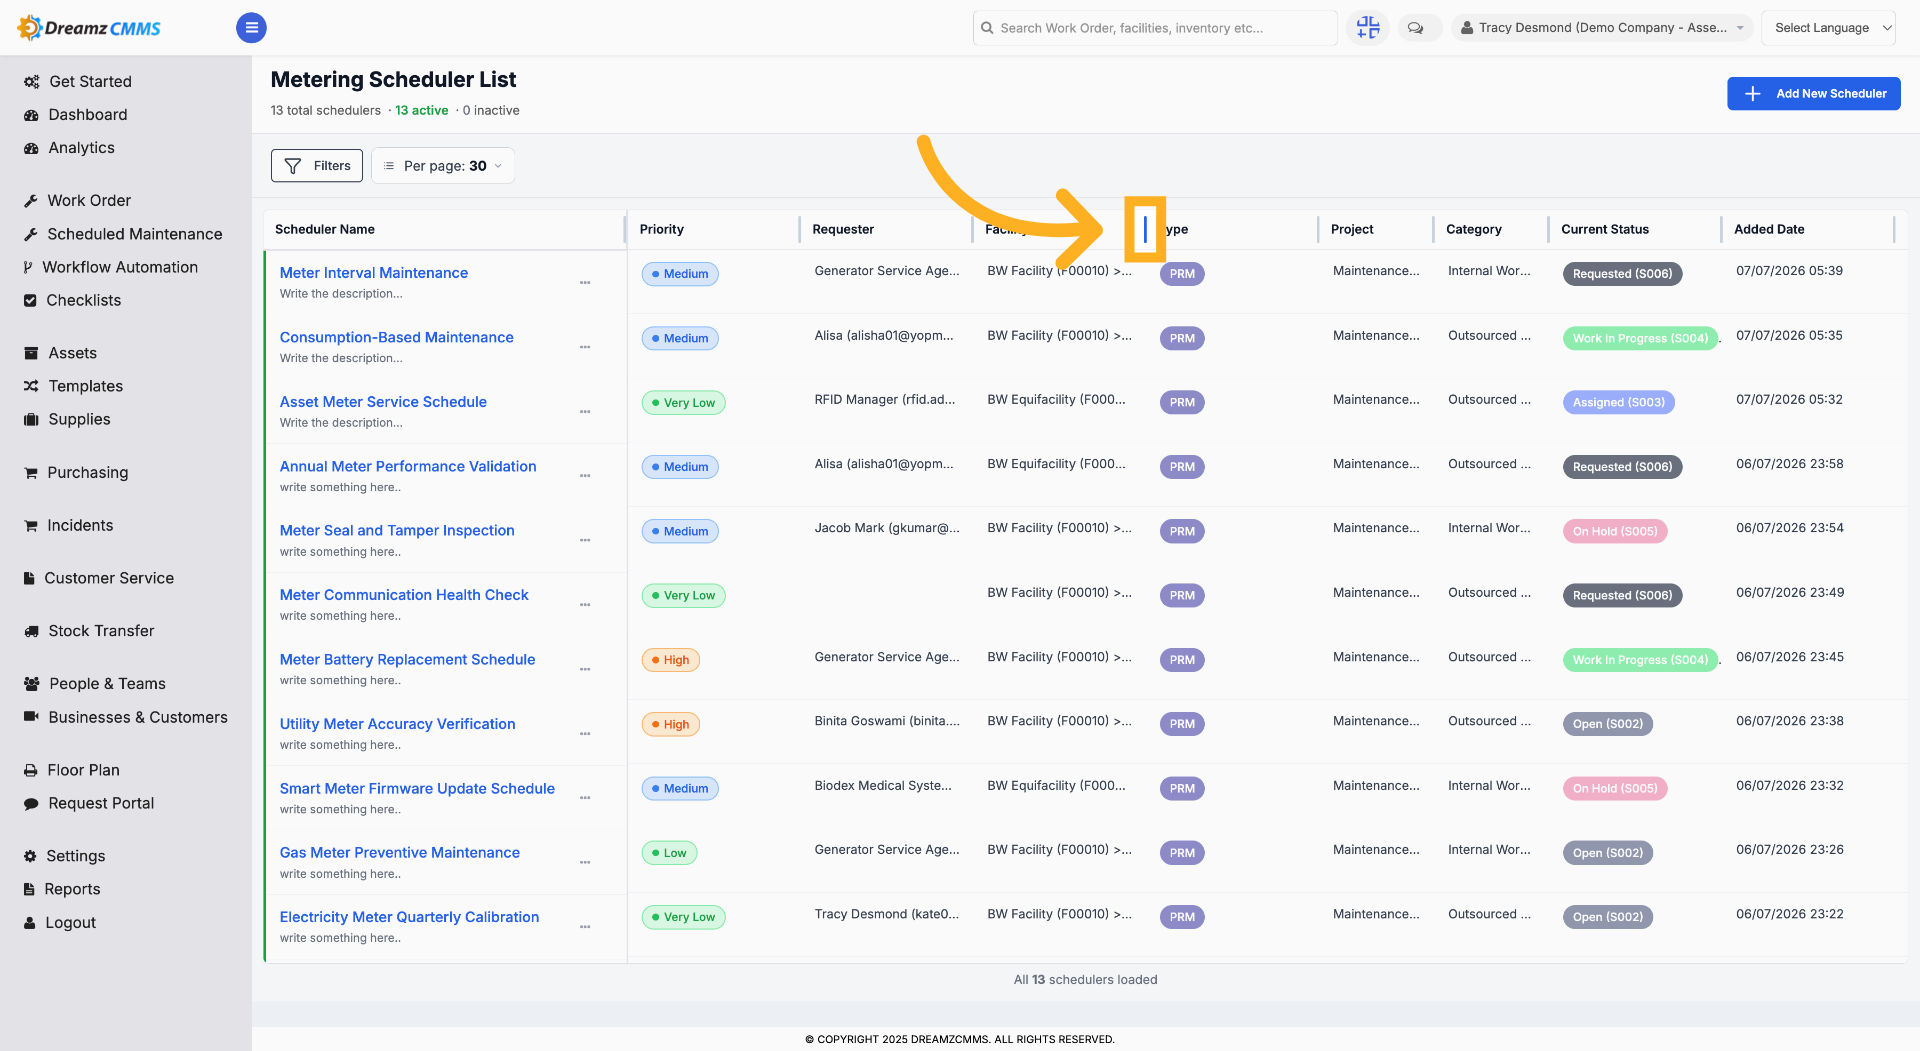
Select the splitter to increase or decrease the column width.
Step 4 – Select Page Size
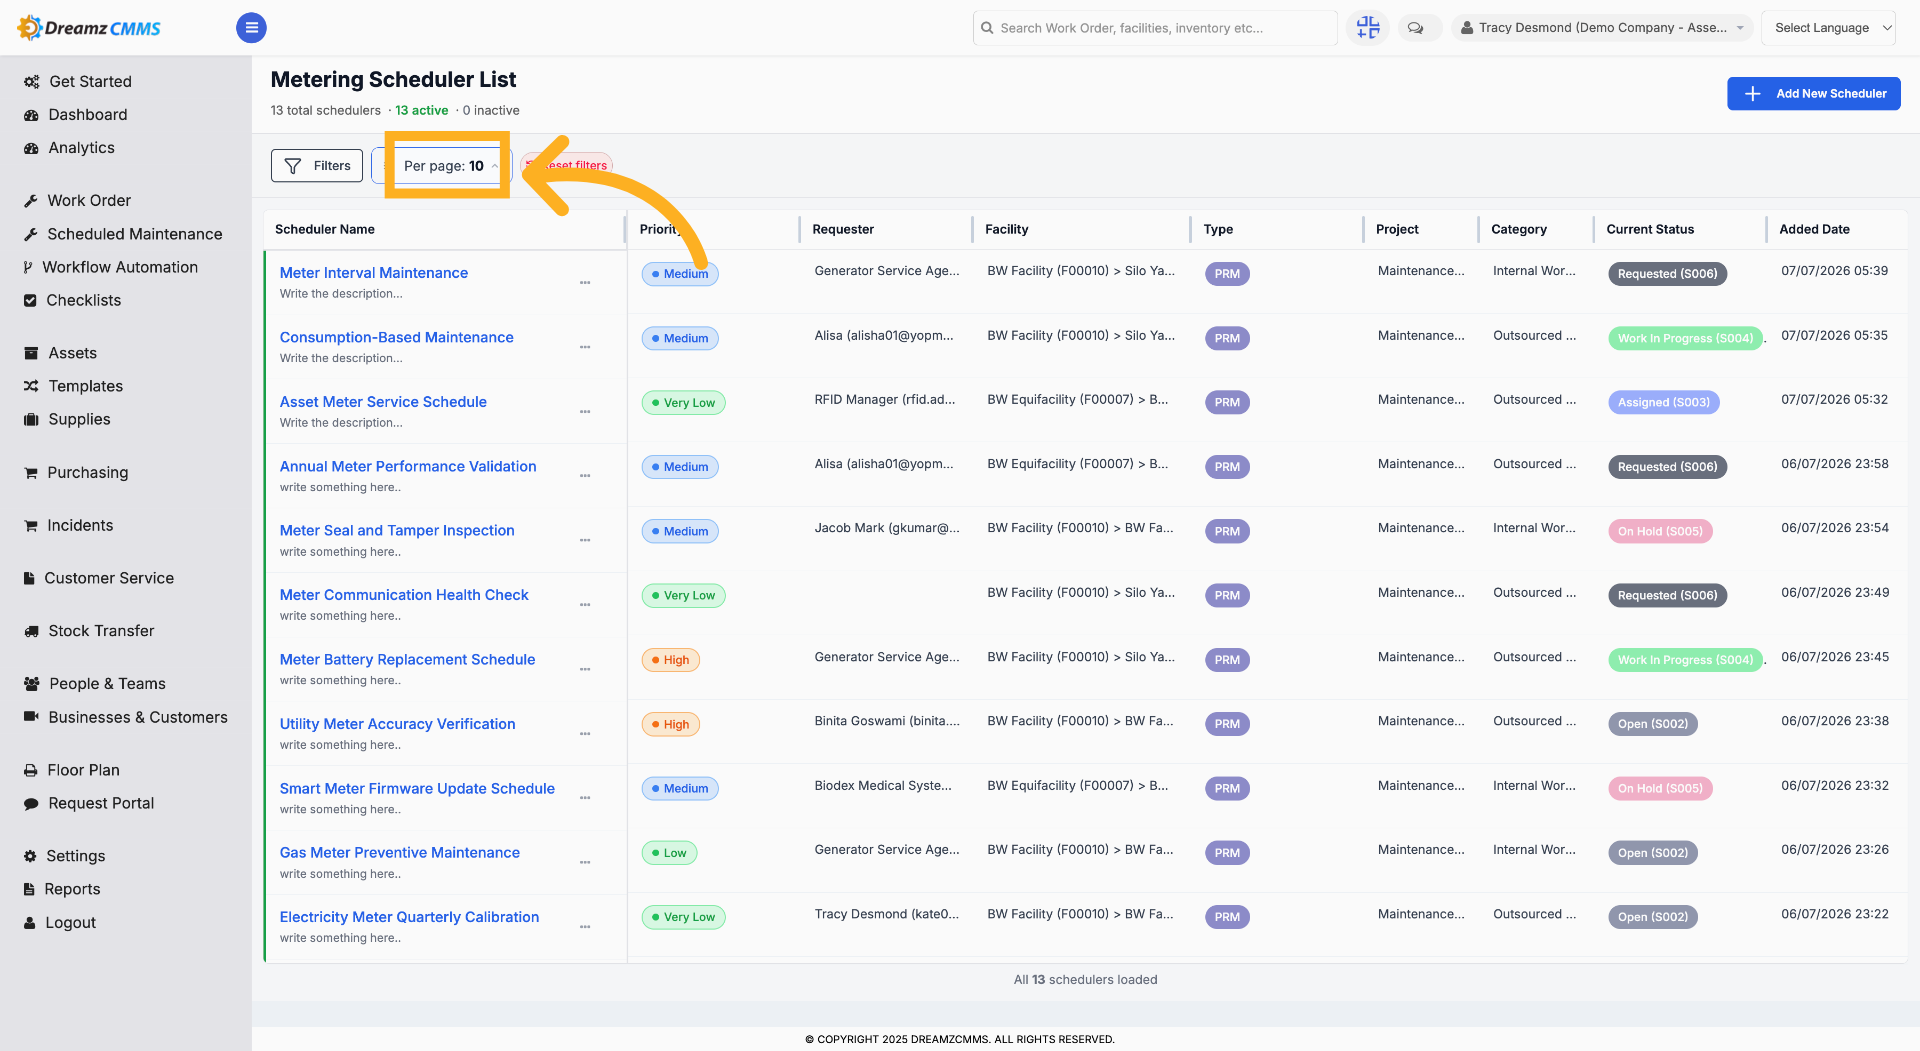
Click "Page Size" to set the number of records shown per page.
Step 5 – Reset Scheduler Filters
Click "Reset filters" to clear all applied filters and view the full scheduler list.
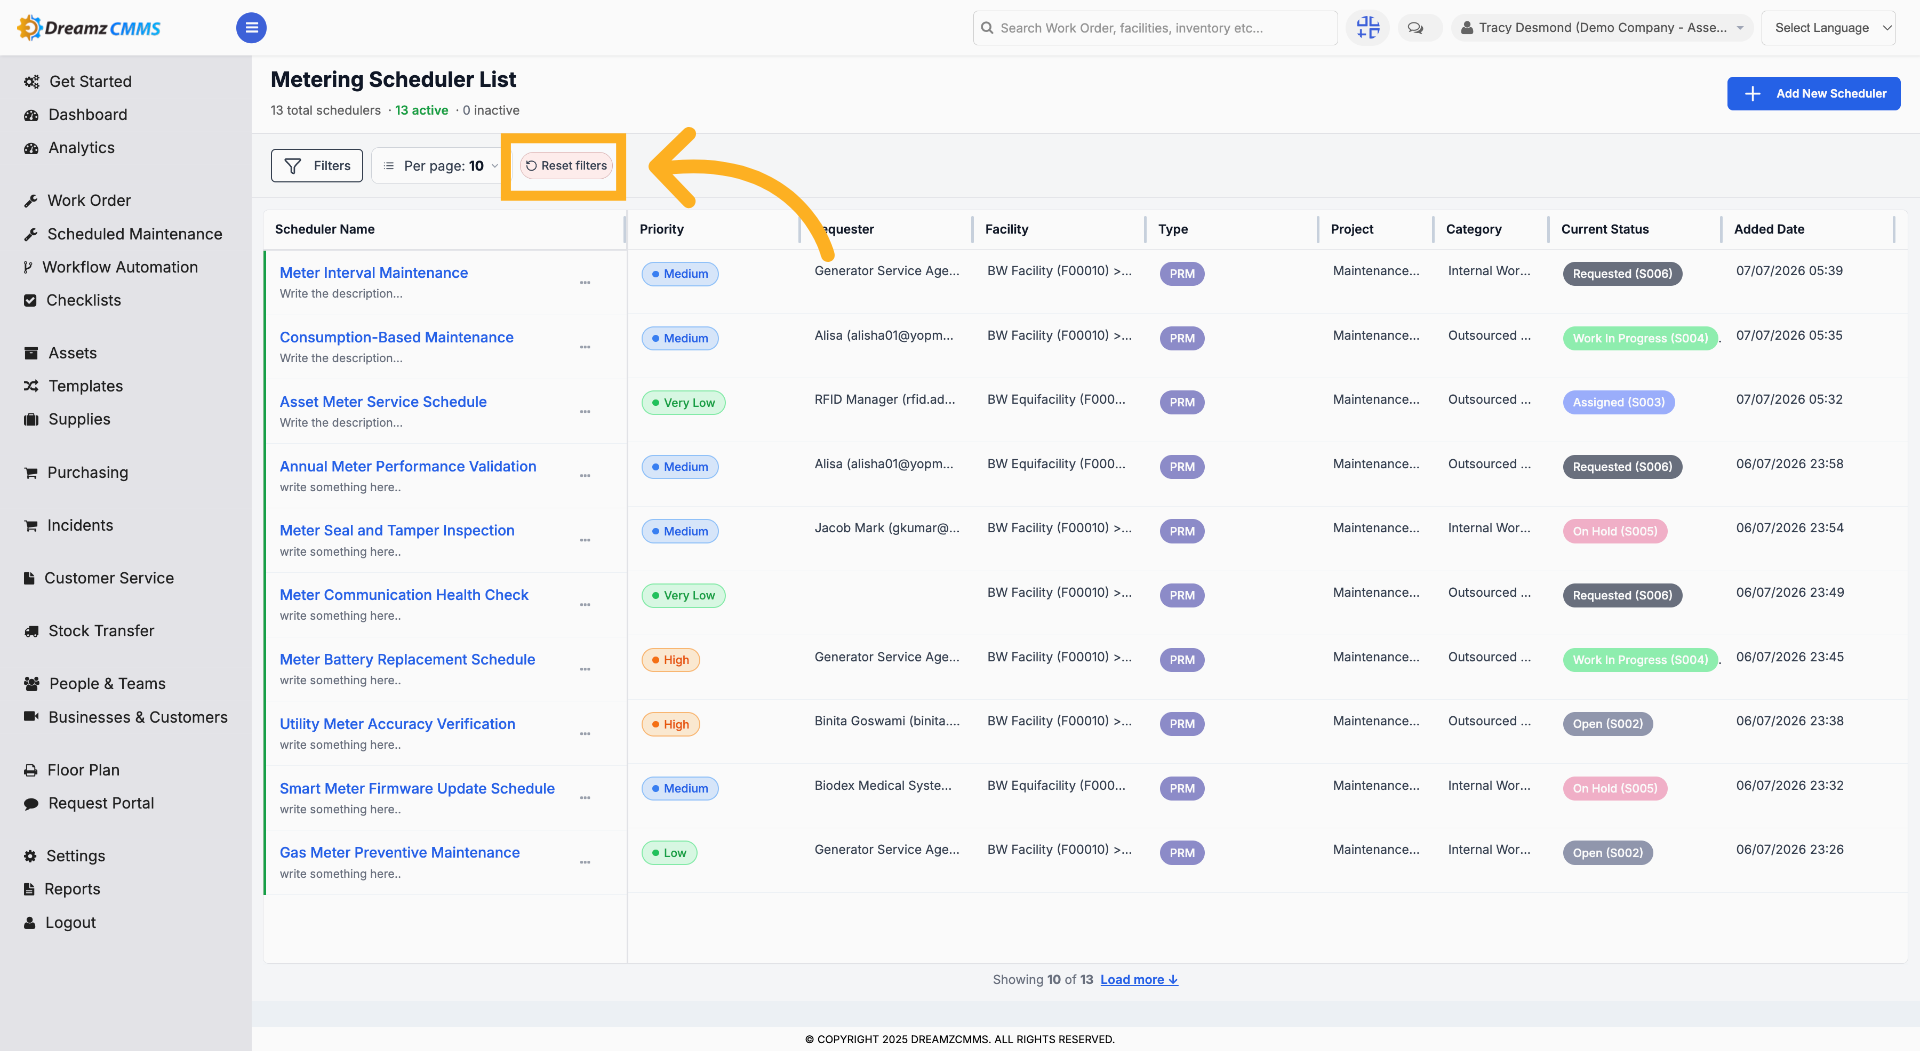
Step 6 – Open Filter Options
Click "Filters" to access advanced filtering options for the metering scheduler list.
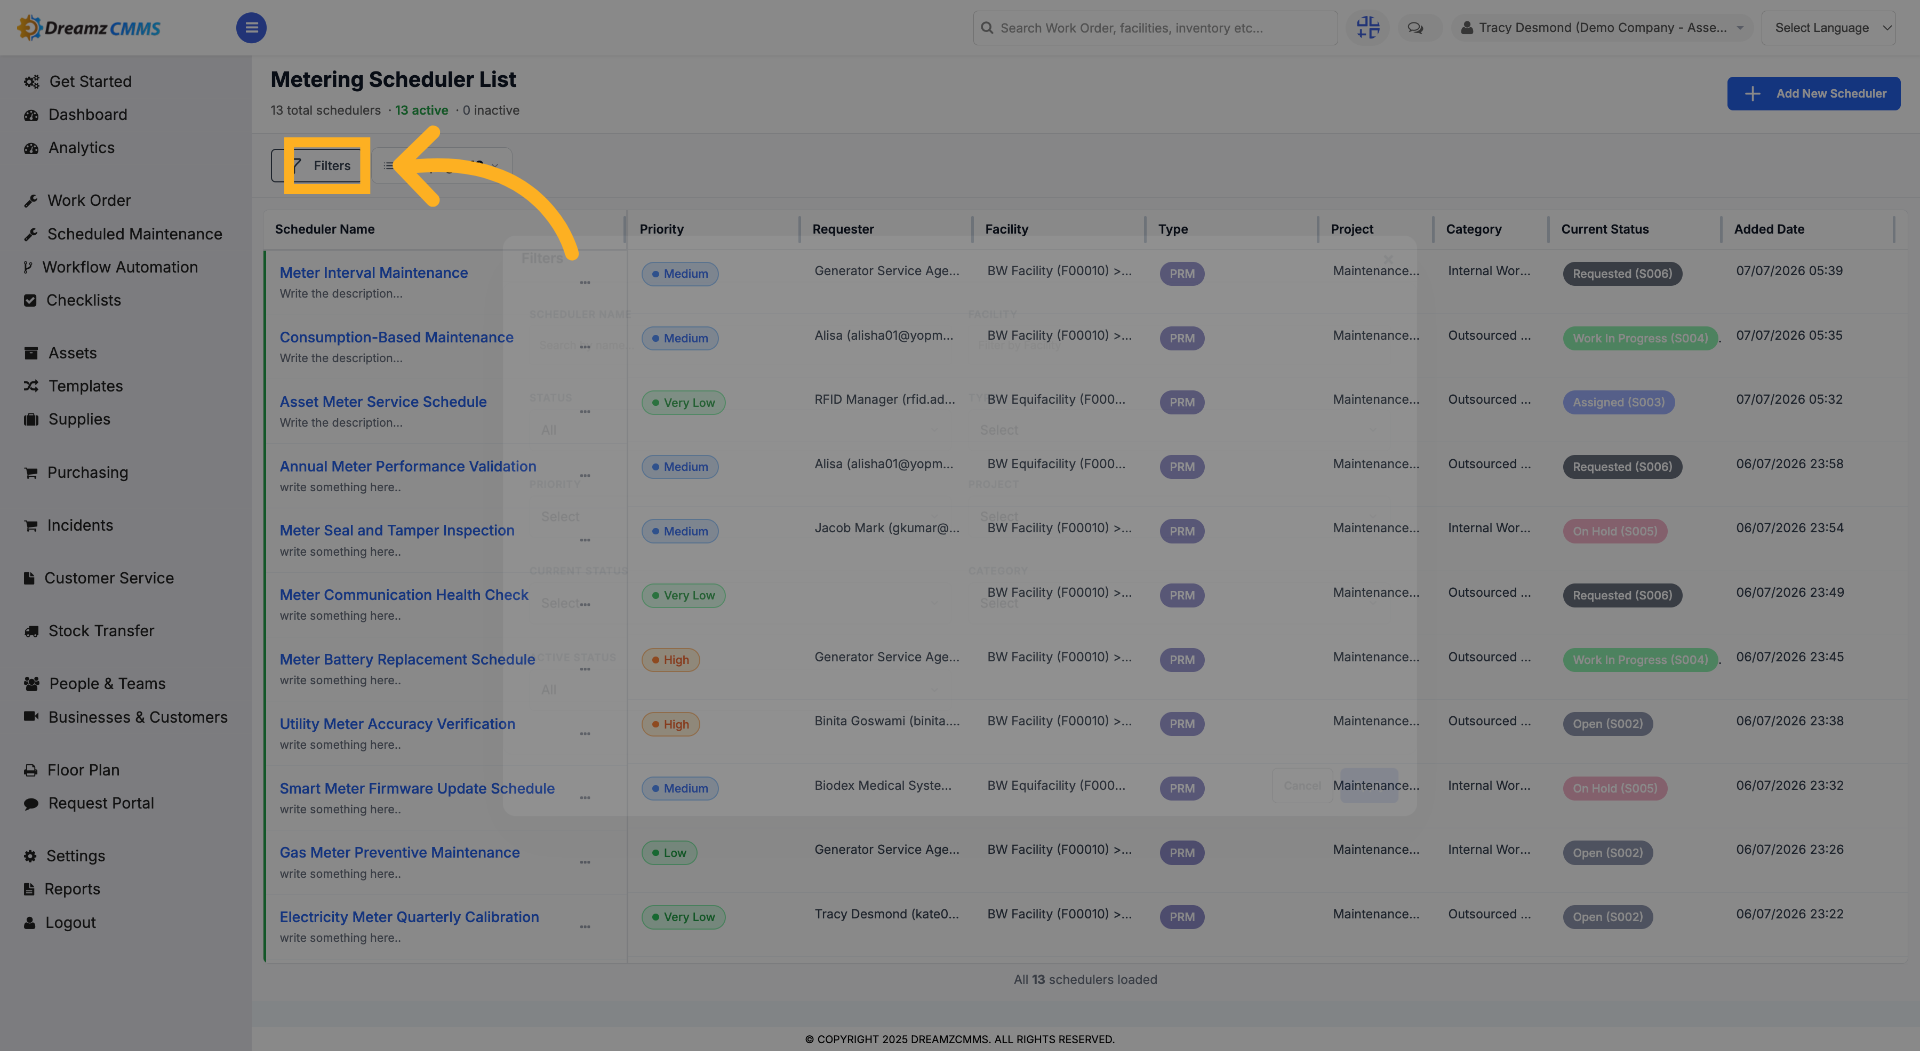
Step 7 – Apply Scheduler Filters
After choosing your filters, click "Apply" to update the scheduler list accordingly.
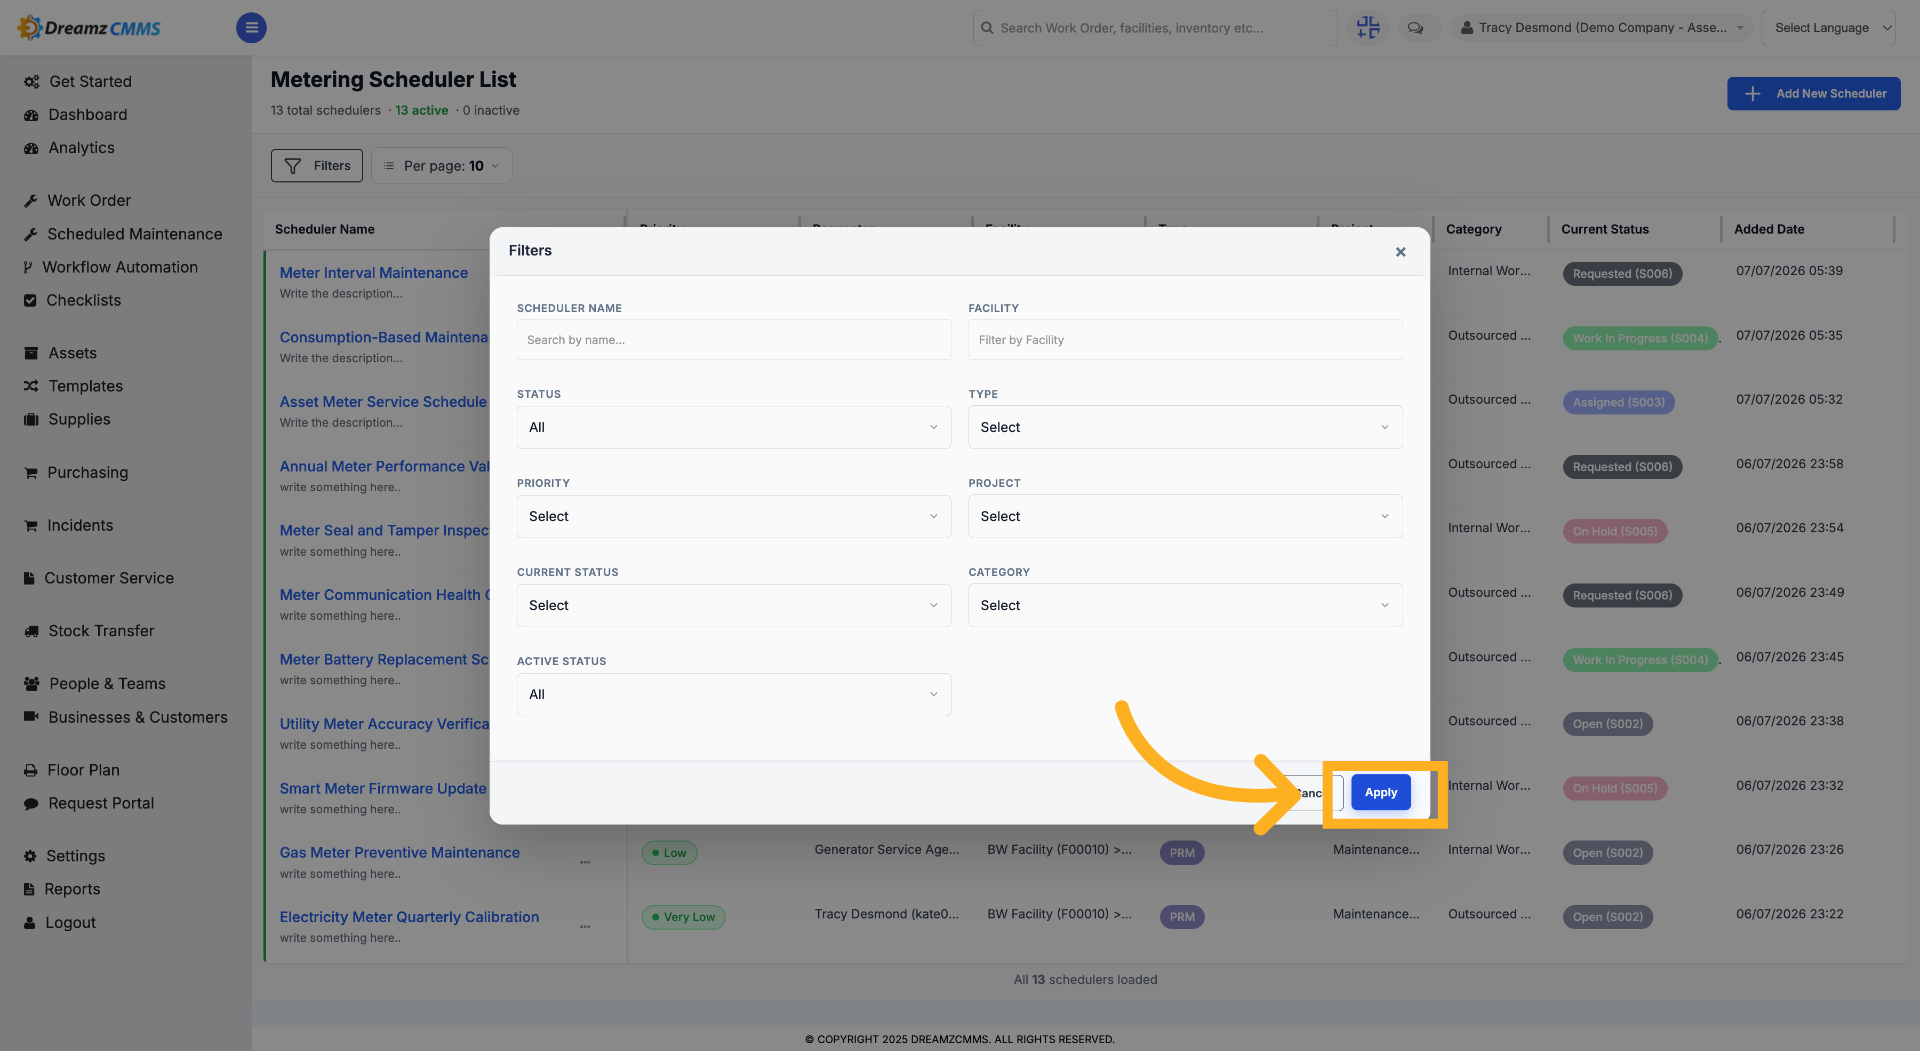
Step 8 – Use the 3-Dot Menu
Click the three dots menu to see additional options for a particular metering schedule.
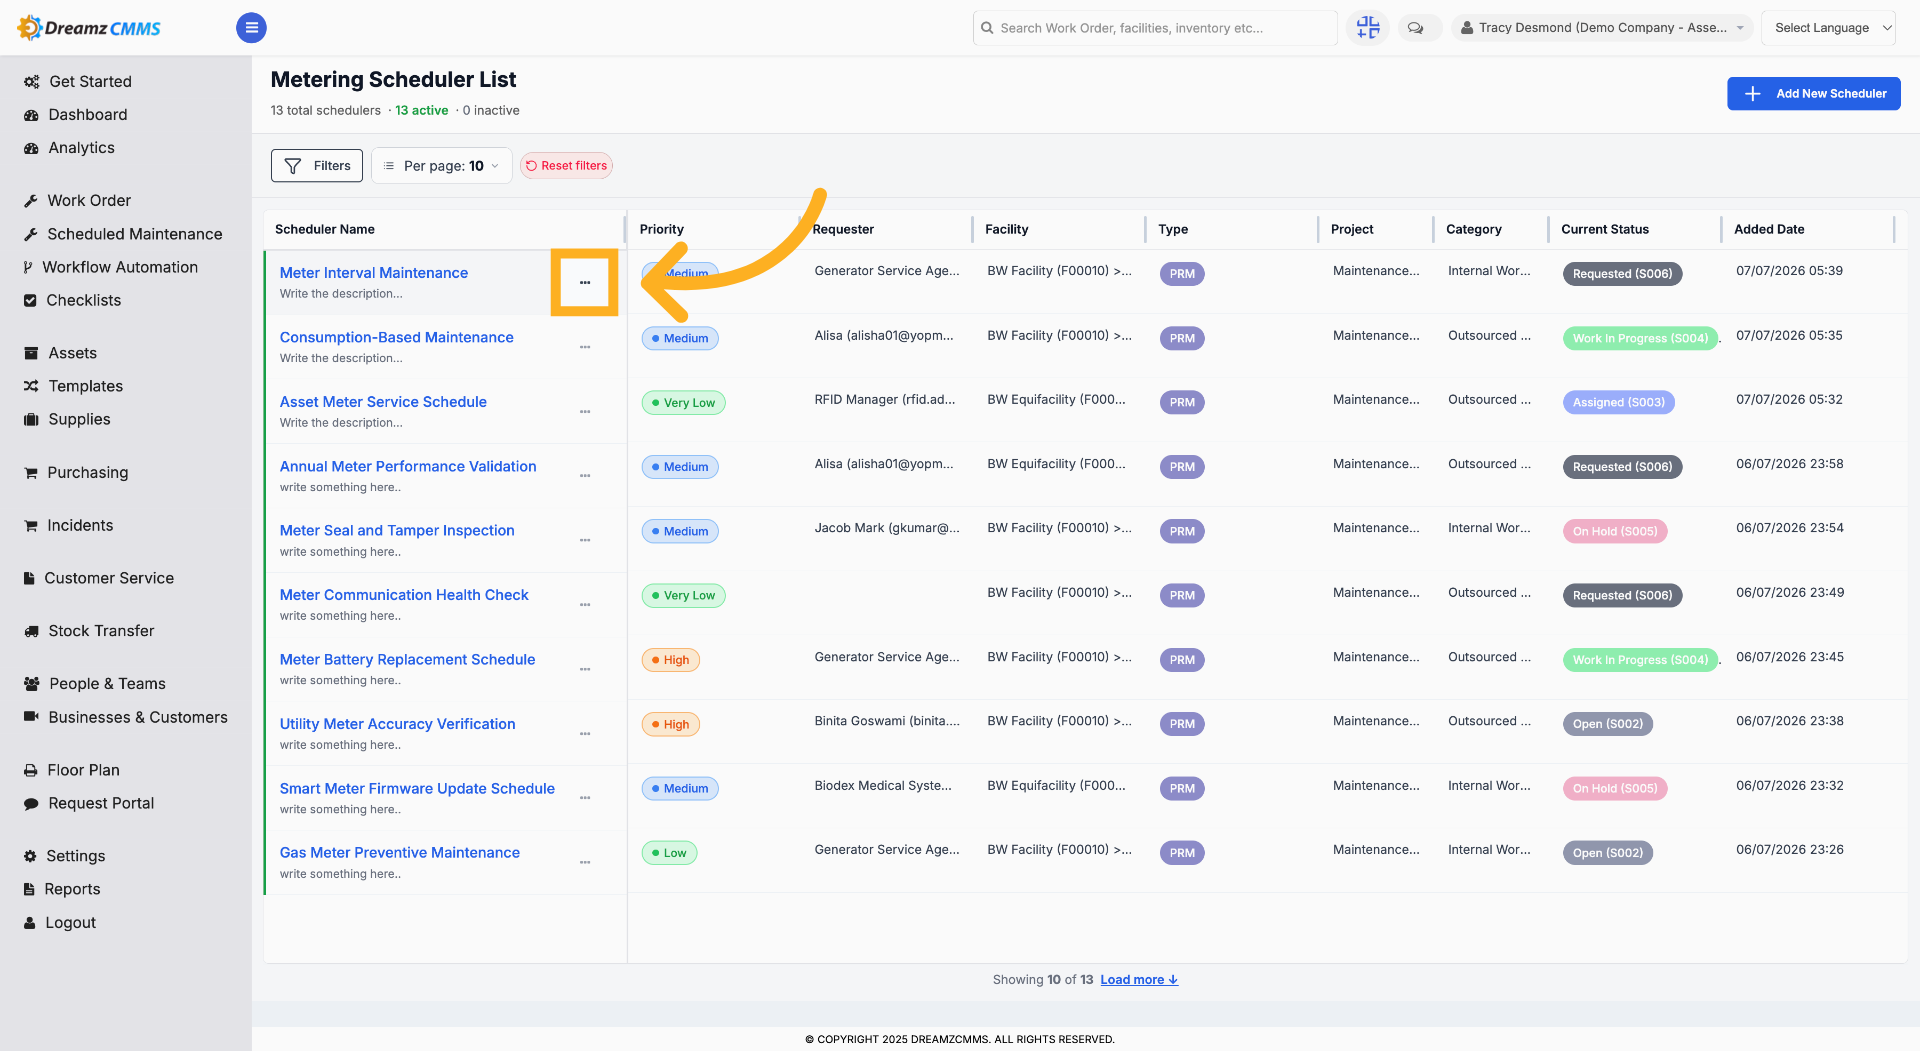
How to View Metering Scheduler Details
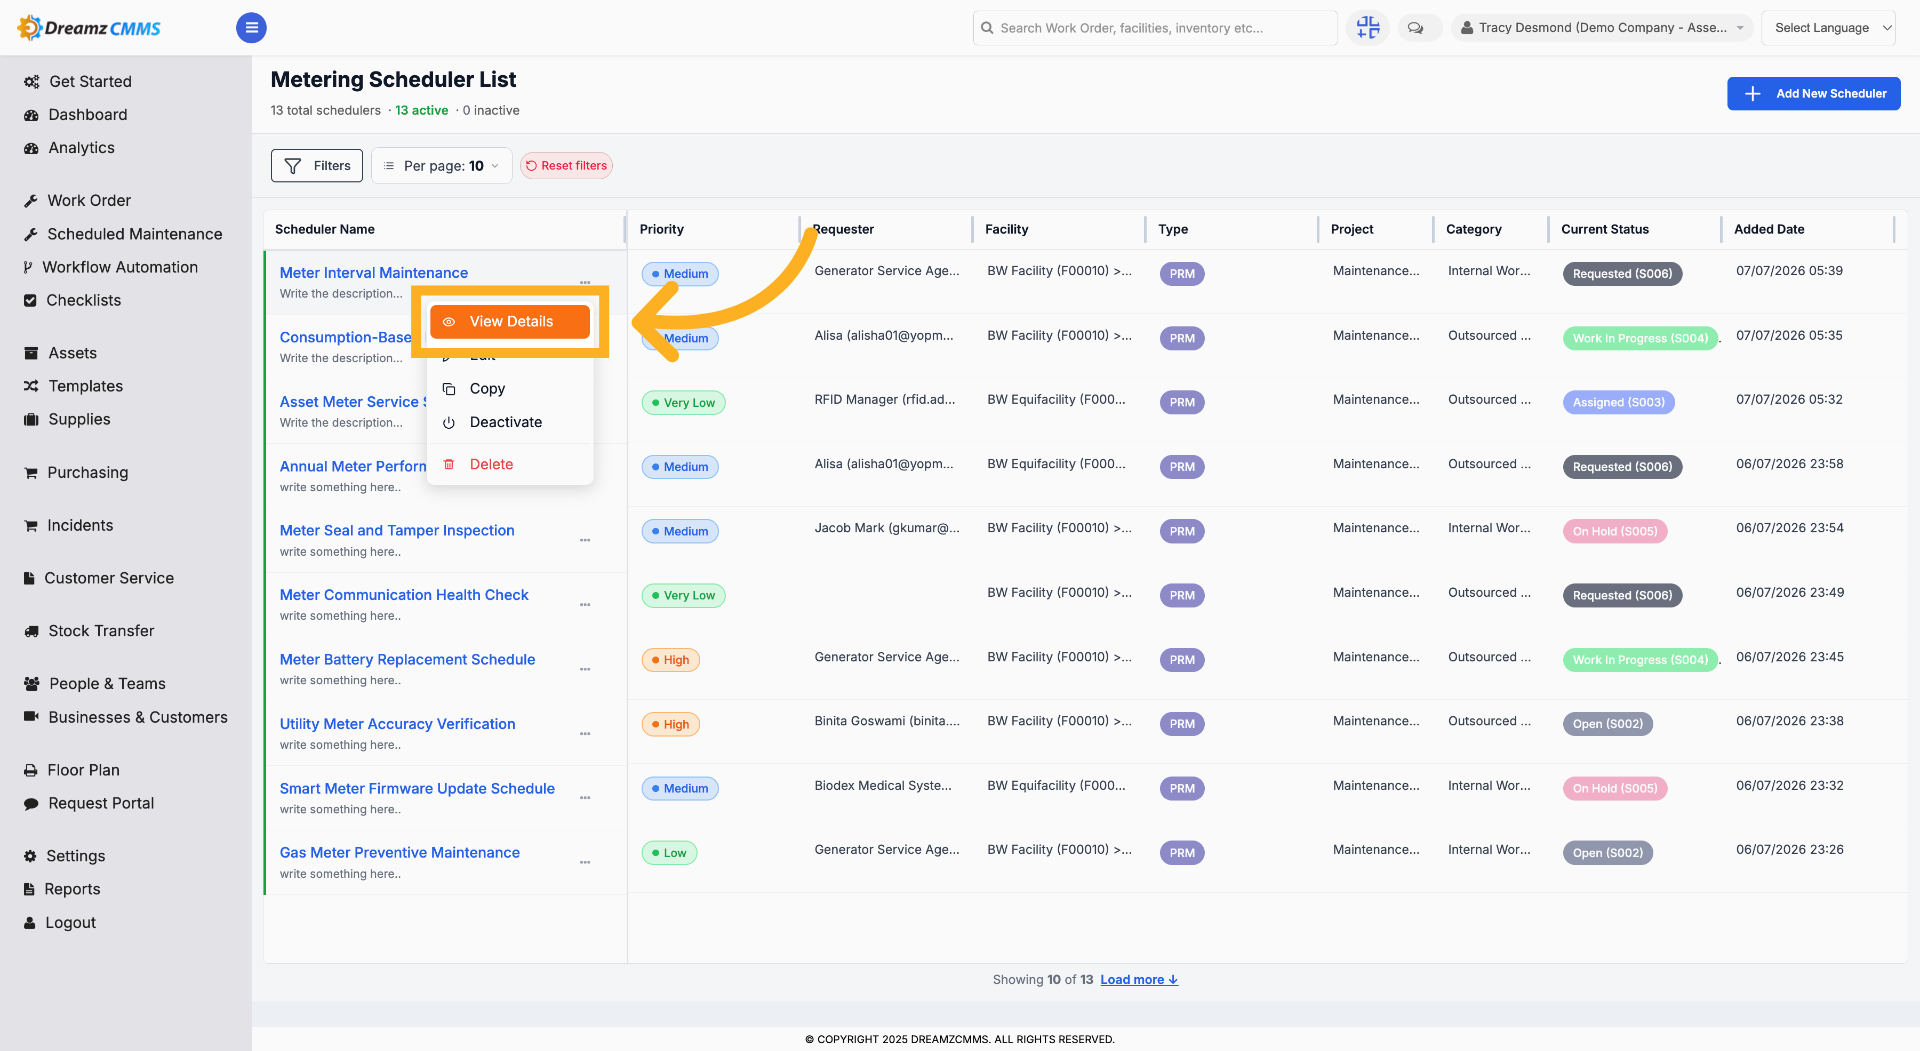
Step 1 – View Scheduler Details
Click "View Details" to open detailed information about the selected scheduler.
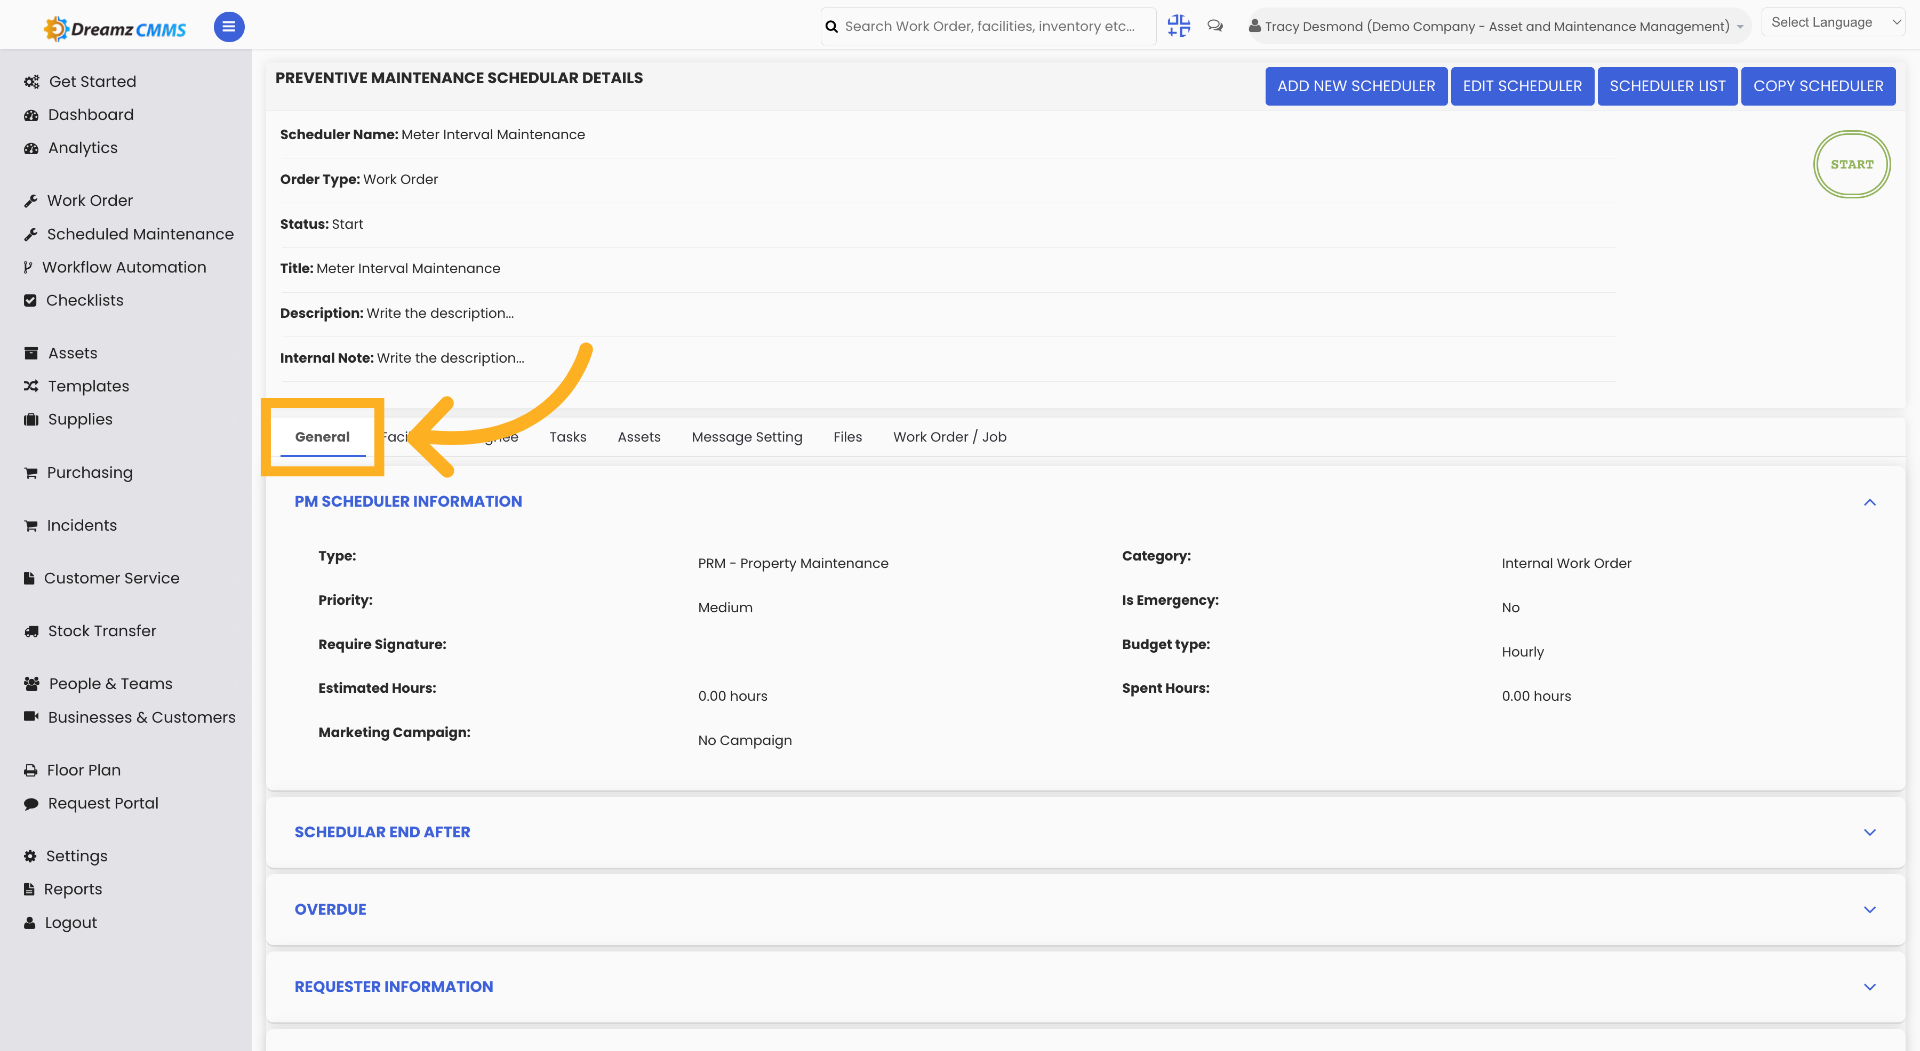
Step 2 – Access General Tab
Click "General" to view general information about the metering schedule.
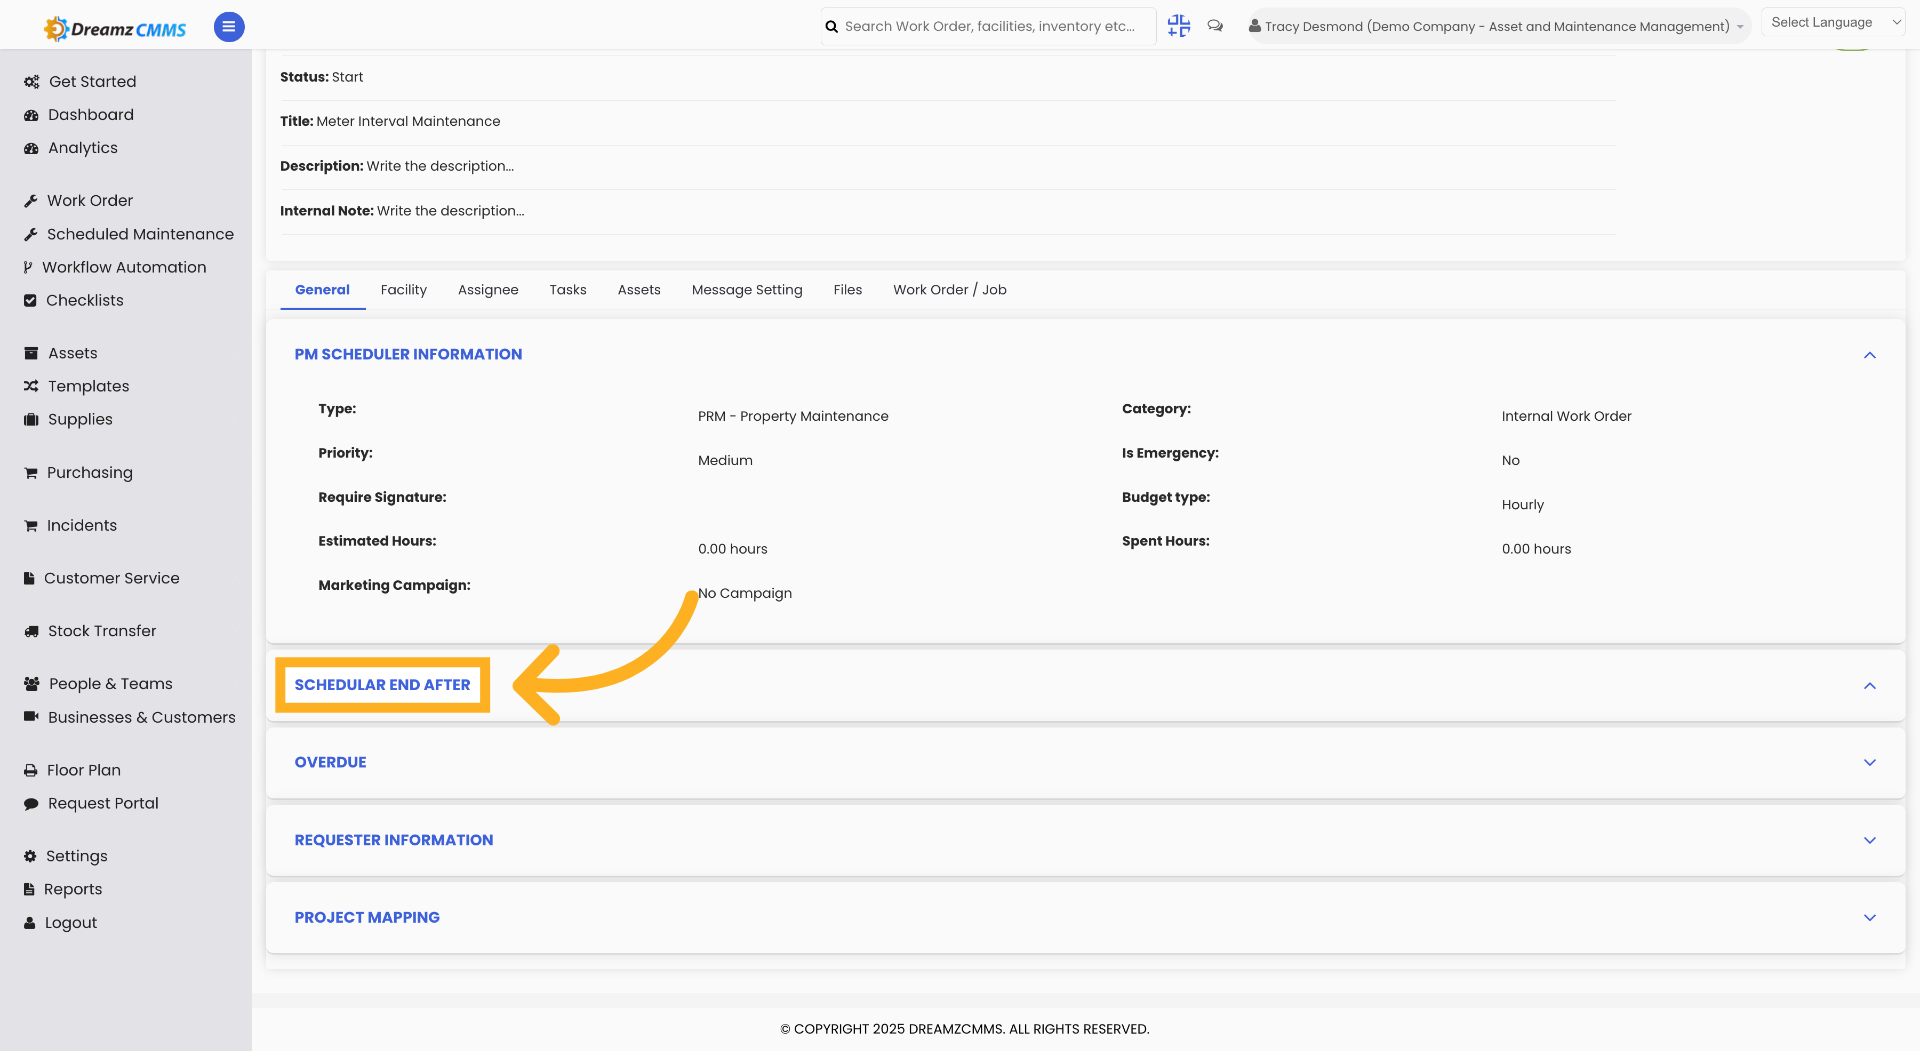
Step 3 – Open Scheduler End Settings
Click "Scheduler End After" to view when the scheduler should end.
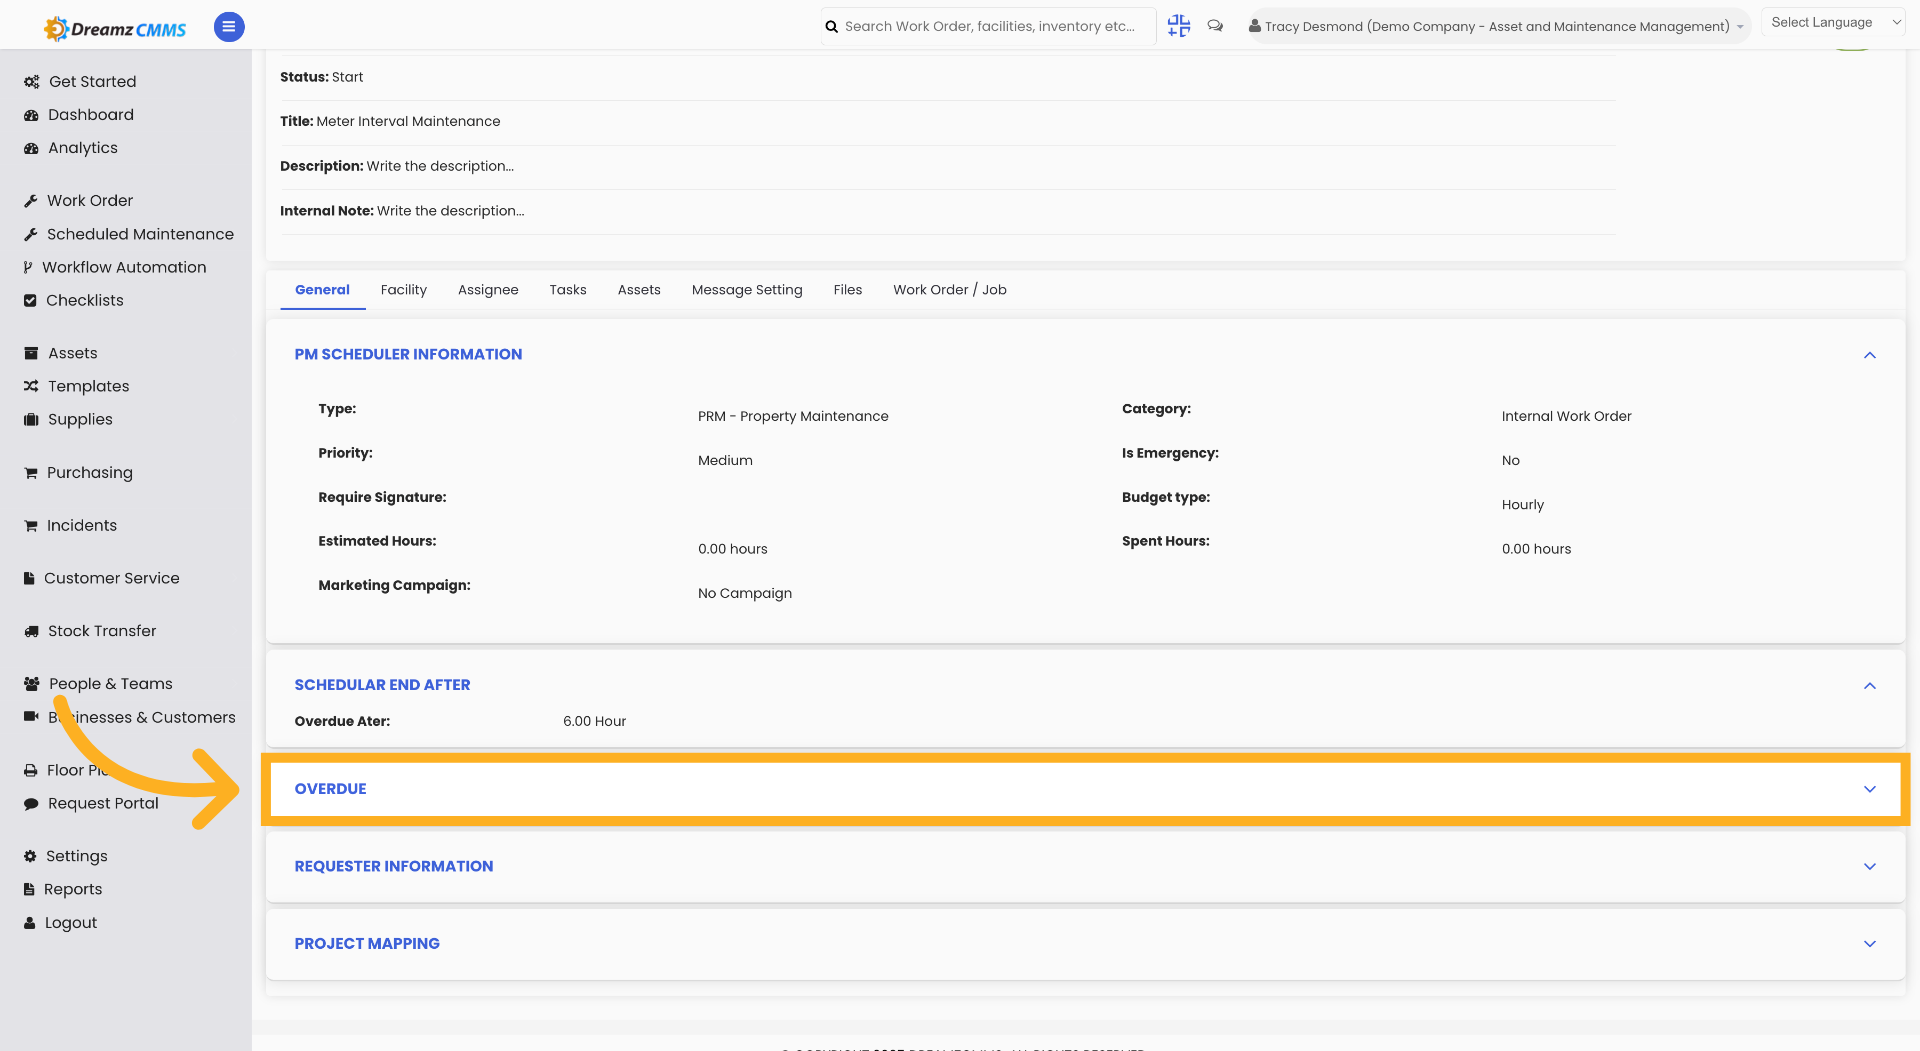
Step 4 – View Overdue Settings
Click "Overdue" to view the overdue scheduler status.
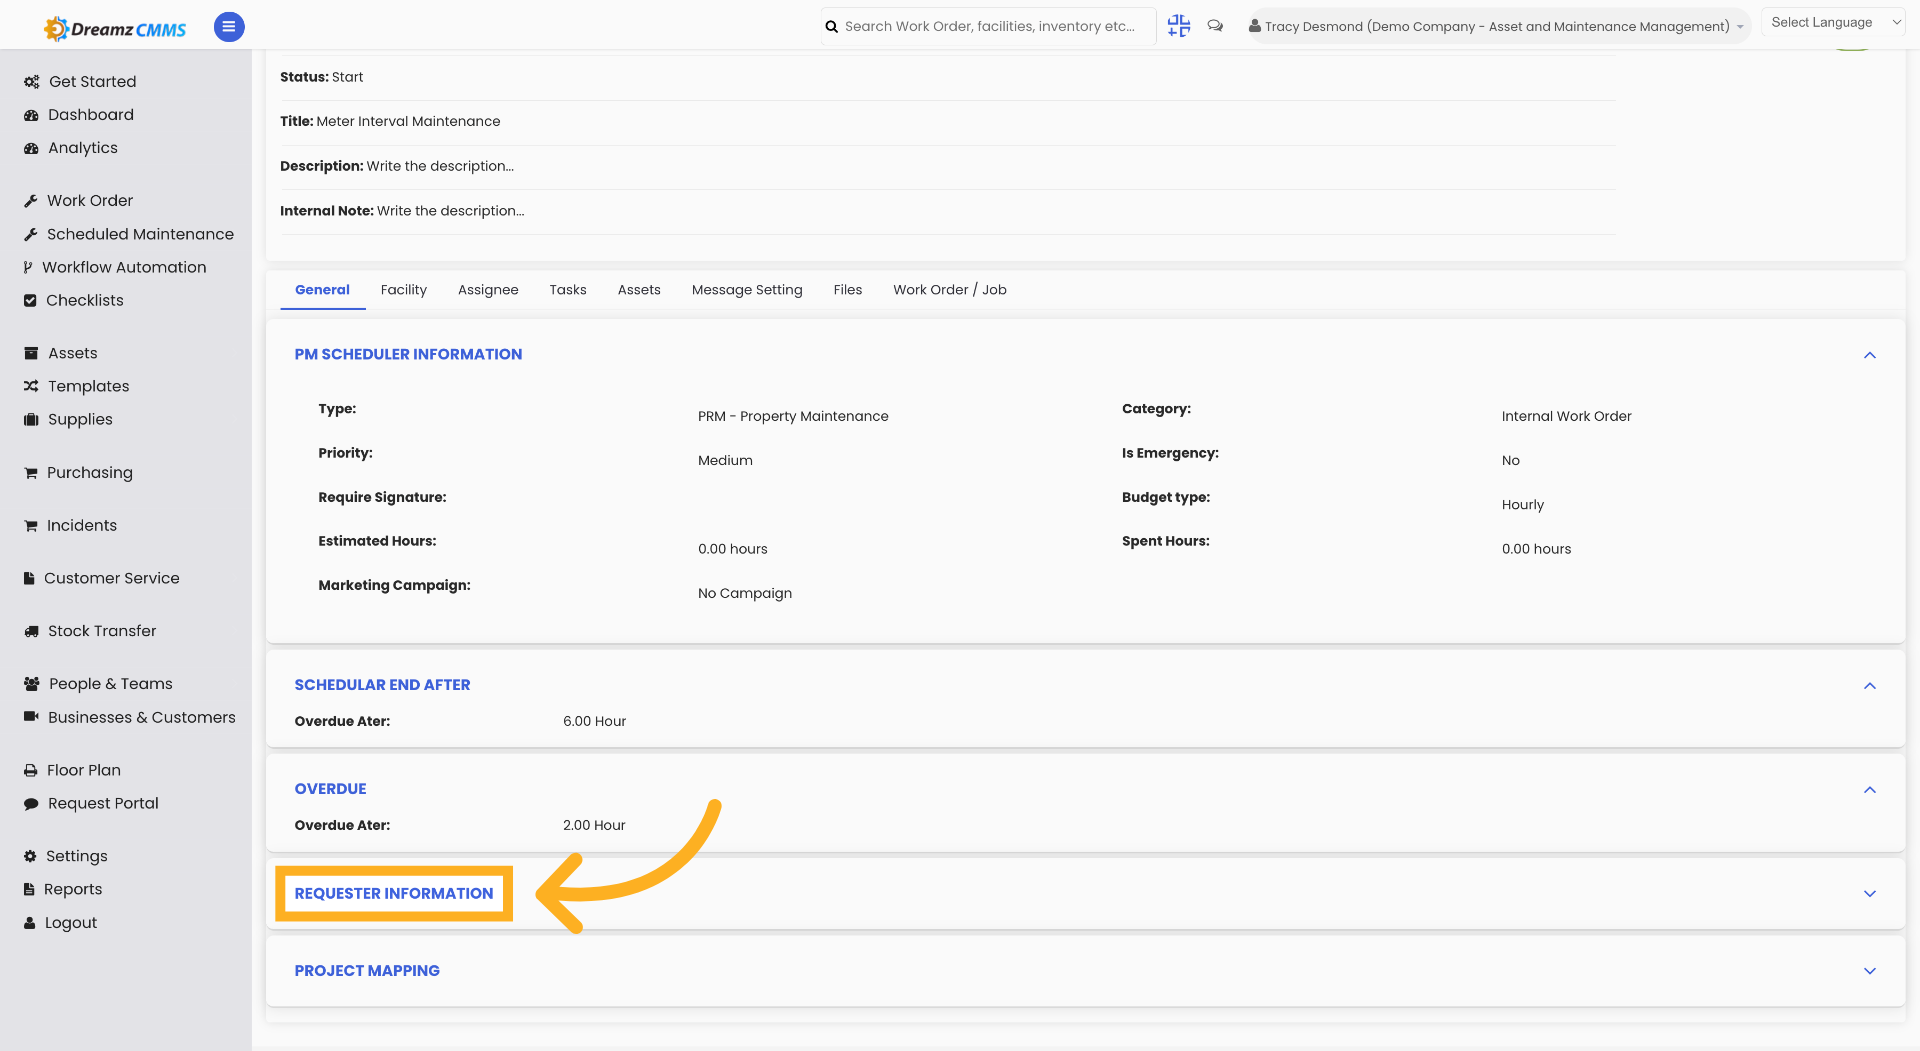
Step 5 – Access Requester Information
Click "Requester Information" to view details about the maintenance requester.
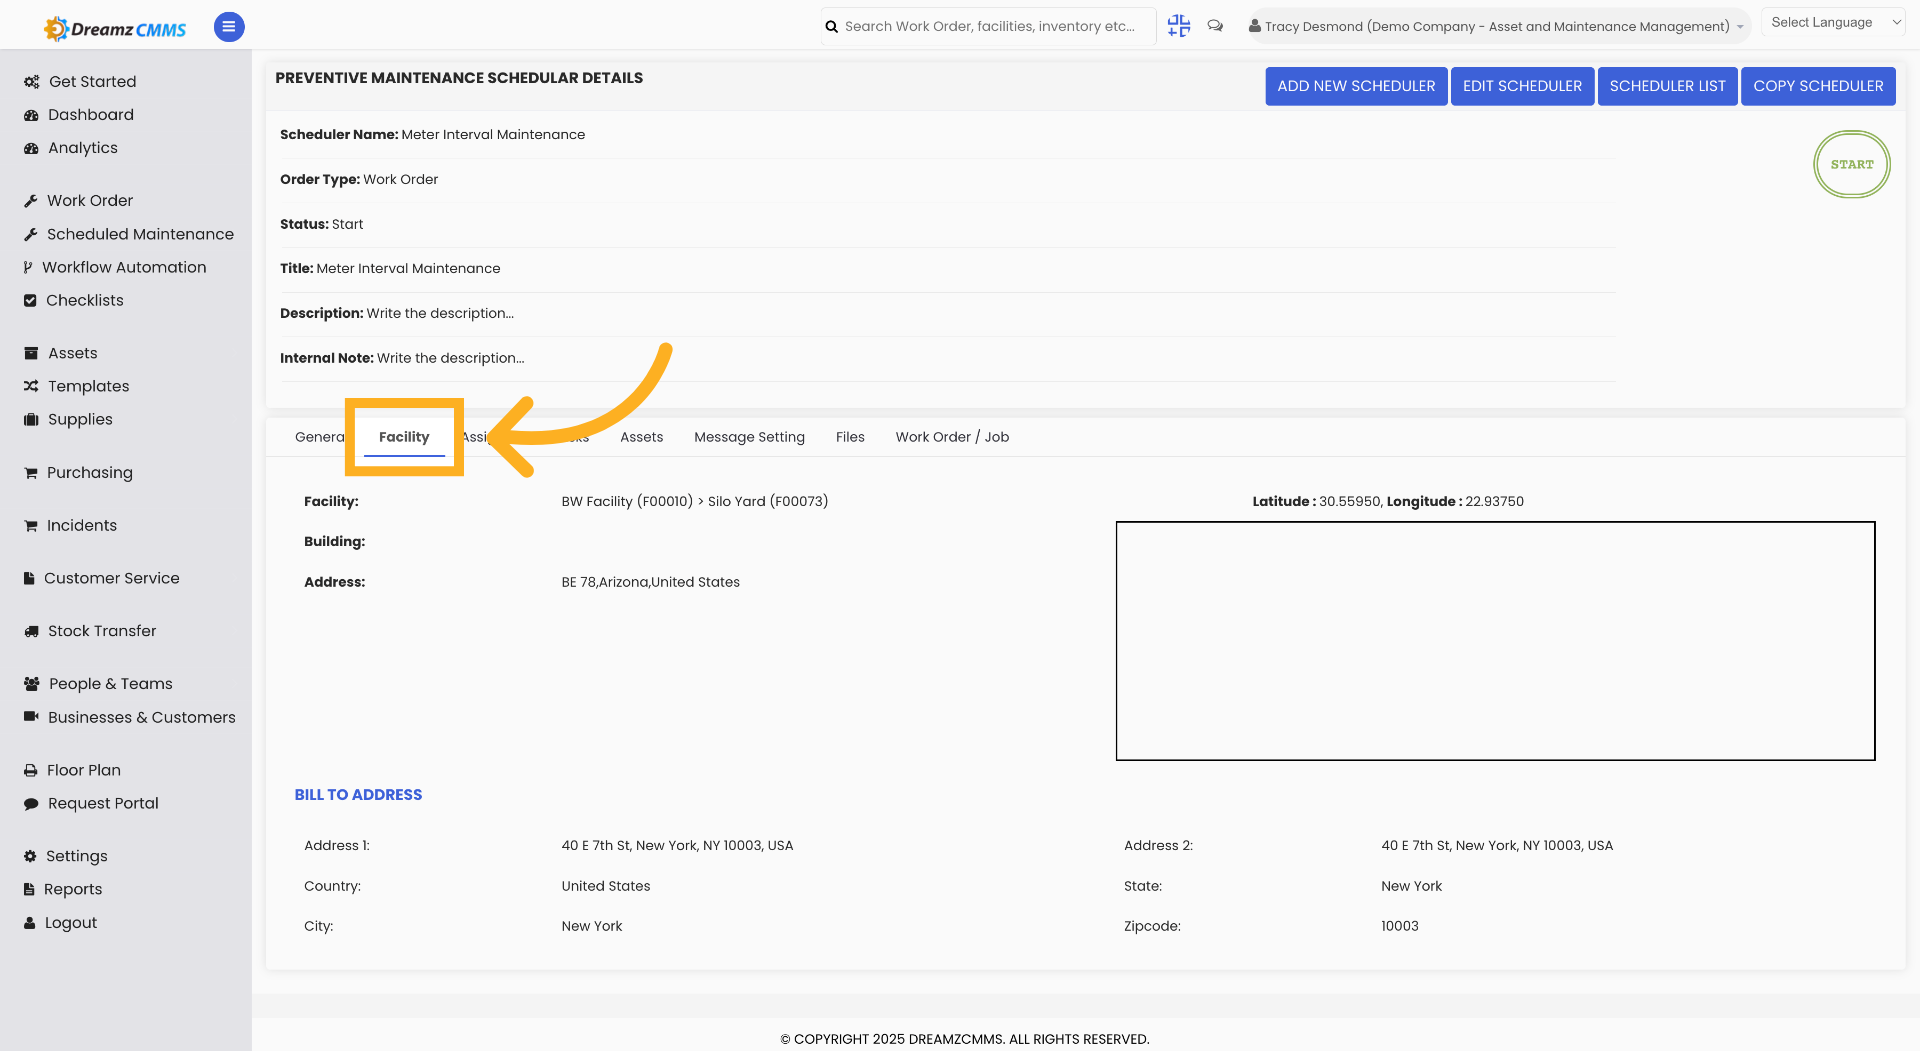
Step 6 – Select Facility Tab
Click "Facility" to view facility-related information for the metering scheduler.
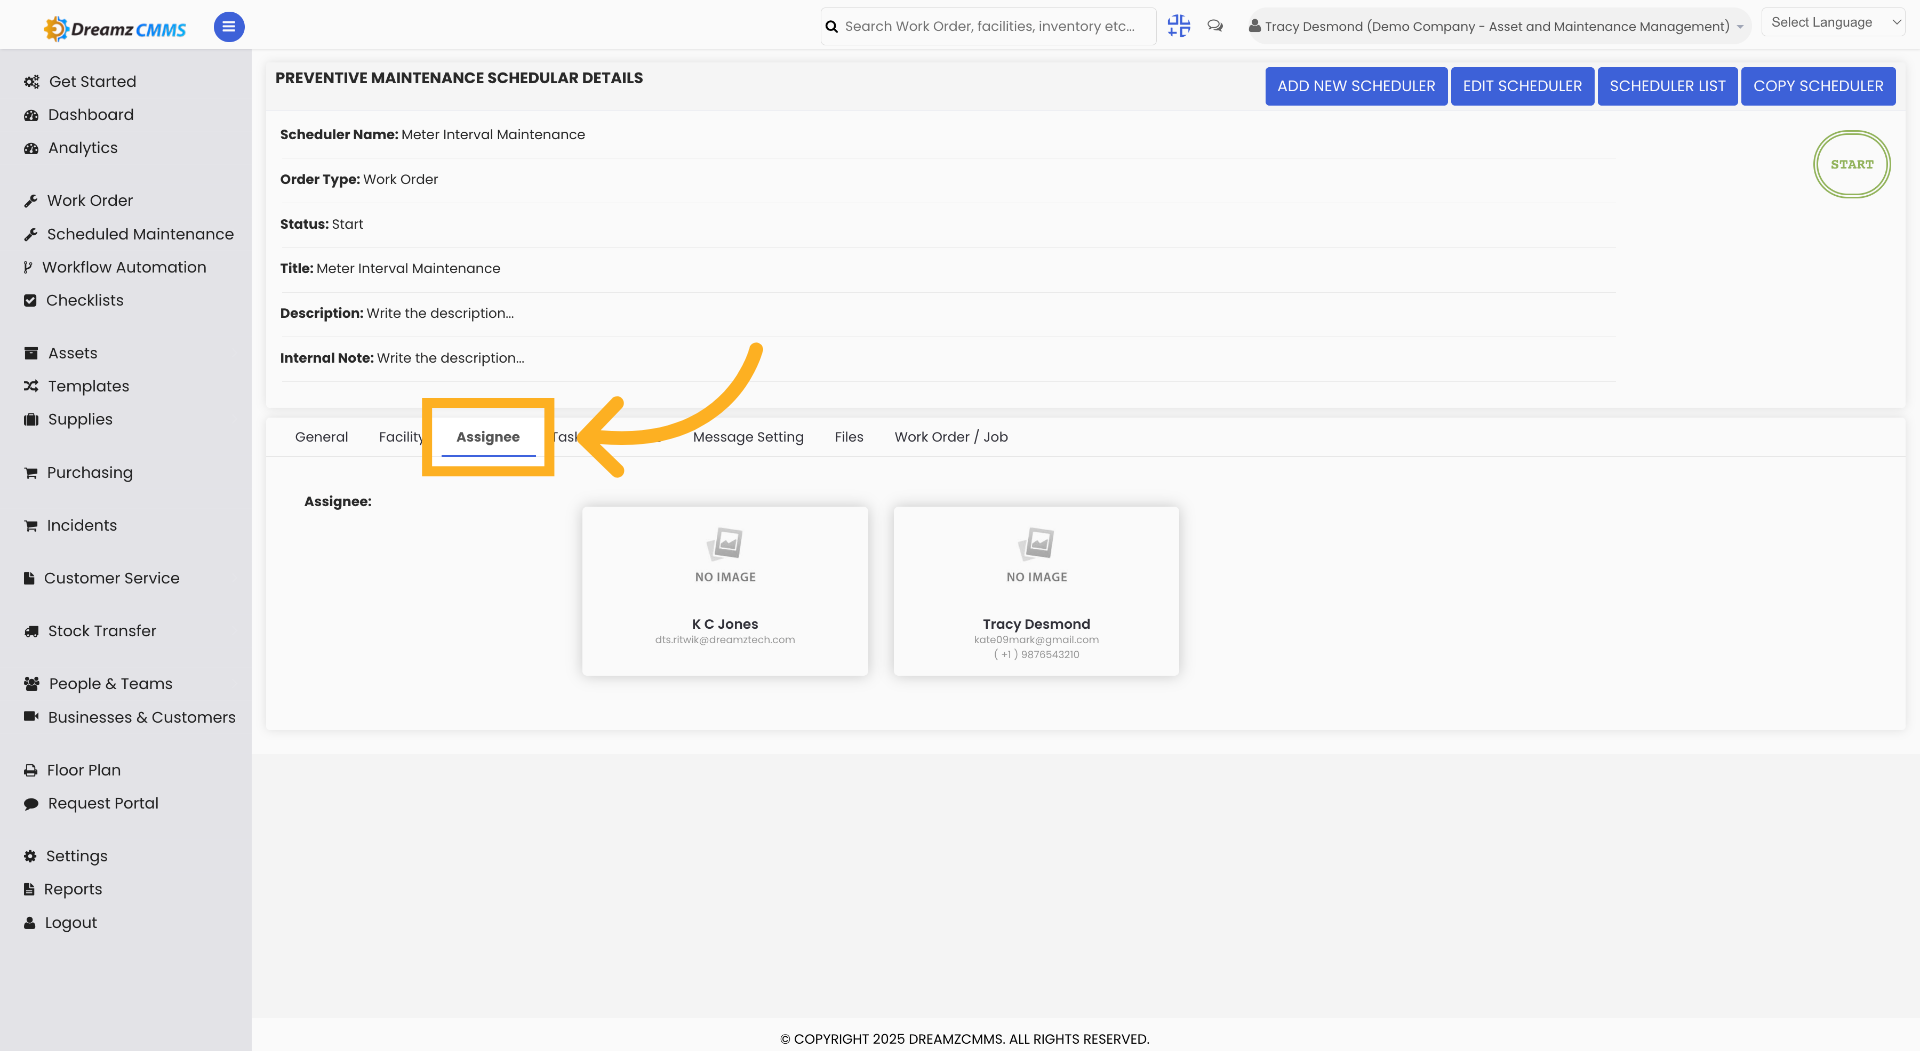
Step 7 – Open Assignee Tab
Click "Assignee" to view the personnel assigned to this metering schedule.
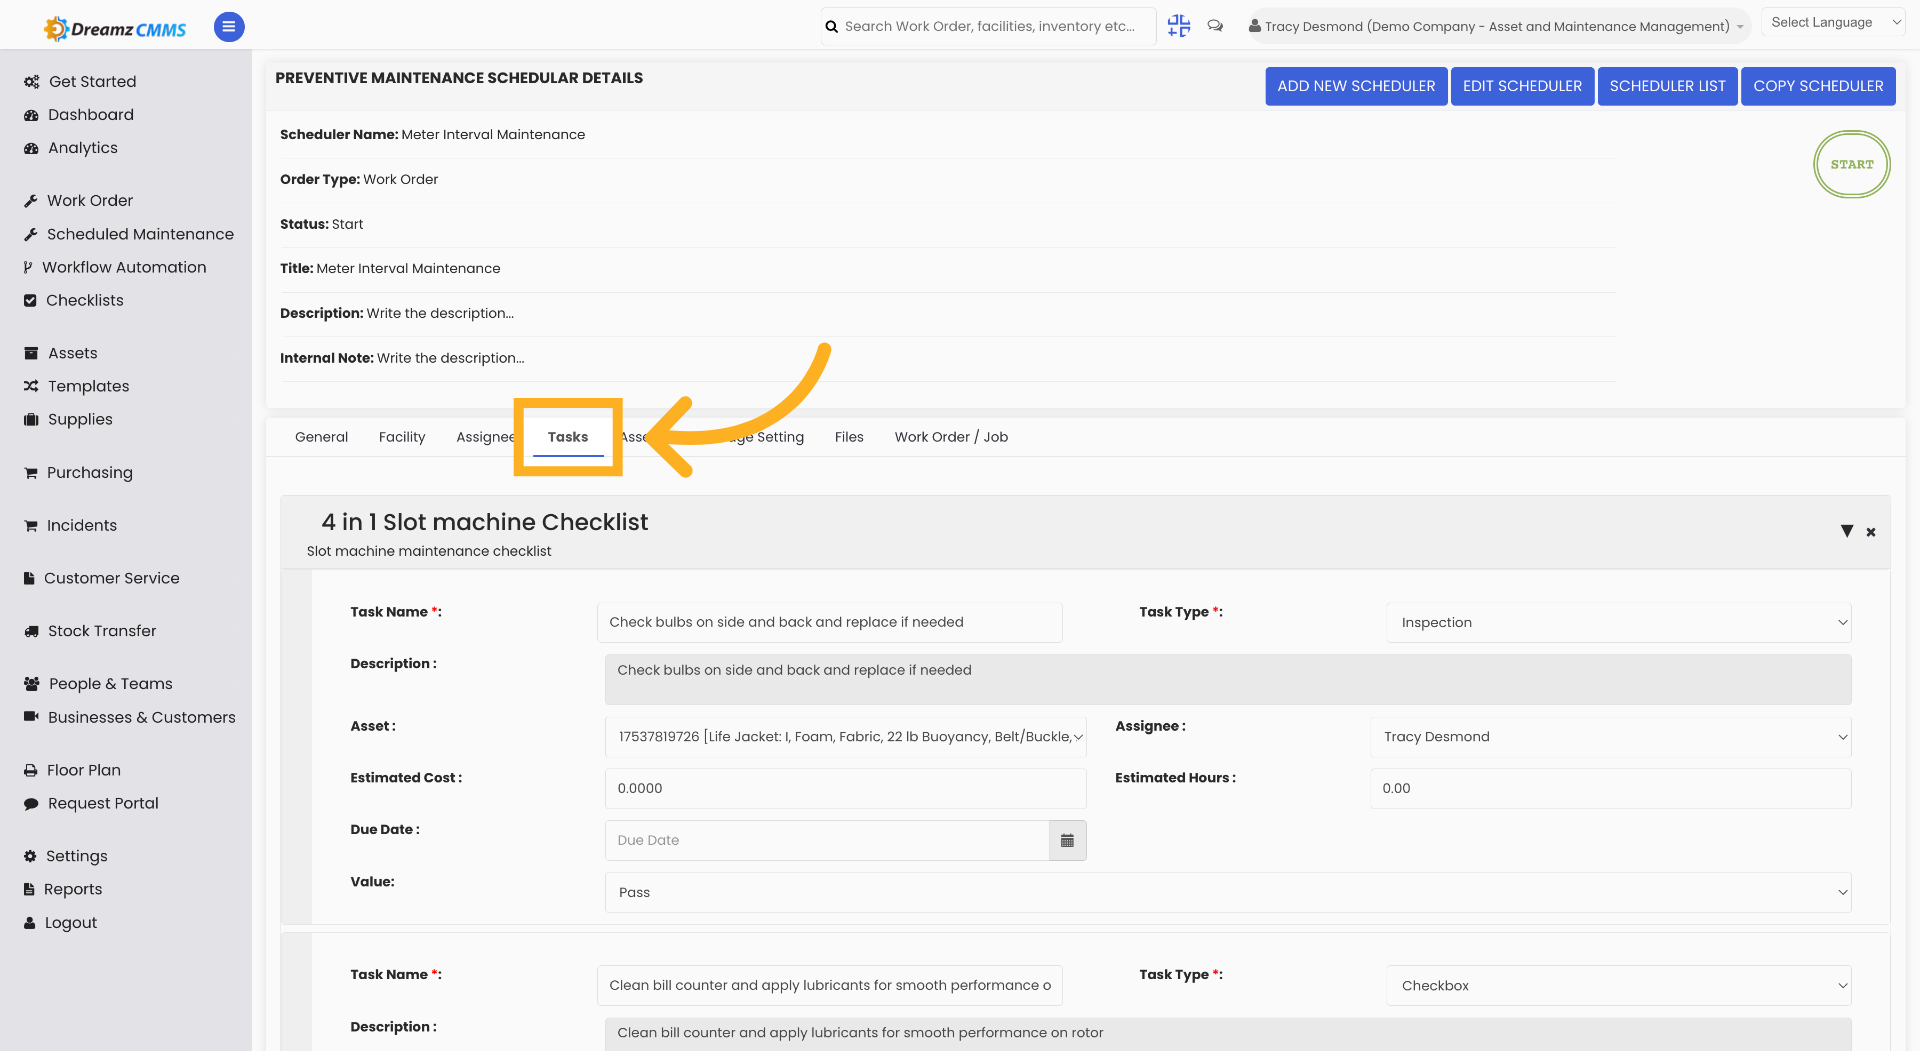
Step 8 – Access Tasks Section
Click "Tasks" to view the tasks associated with the scheduler.
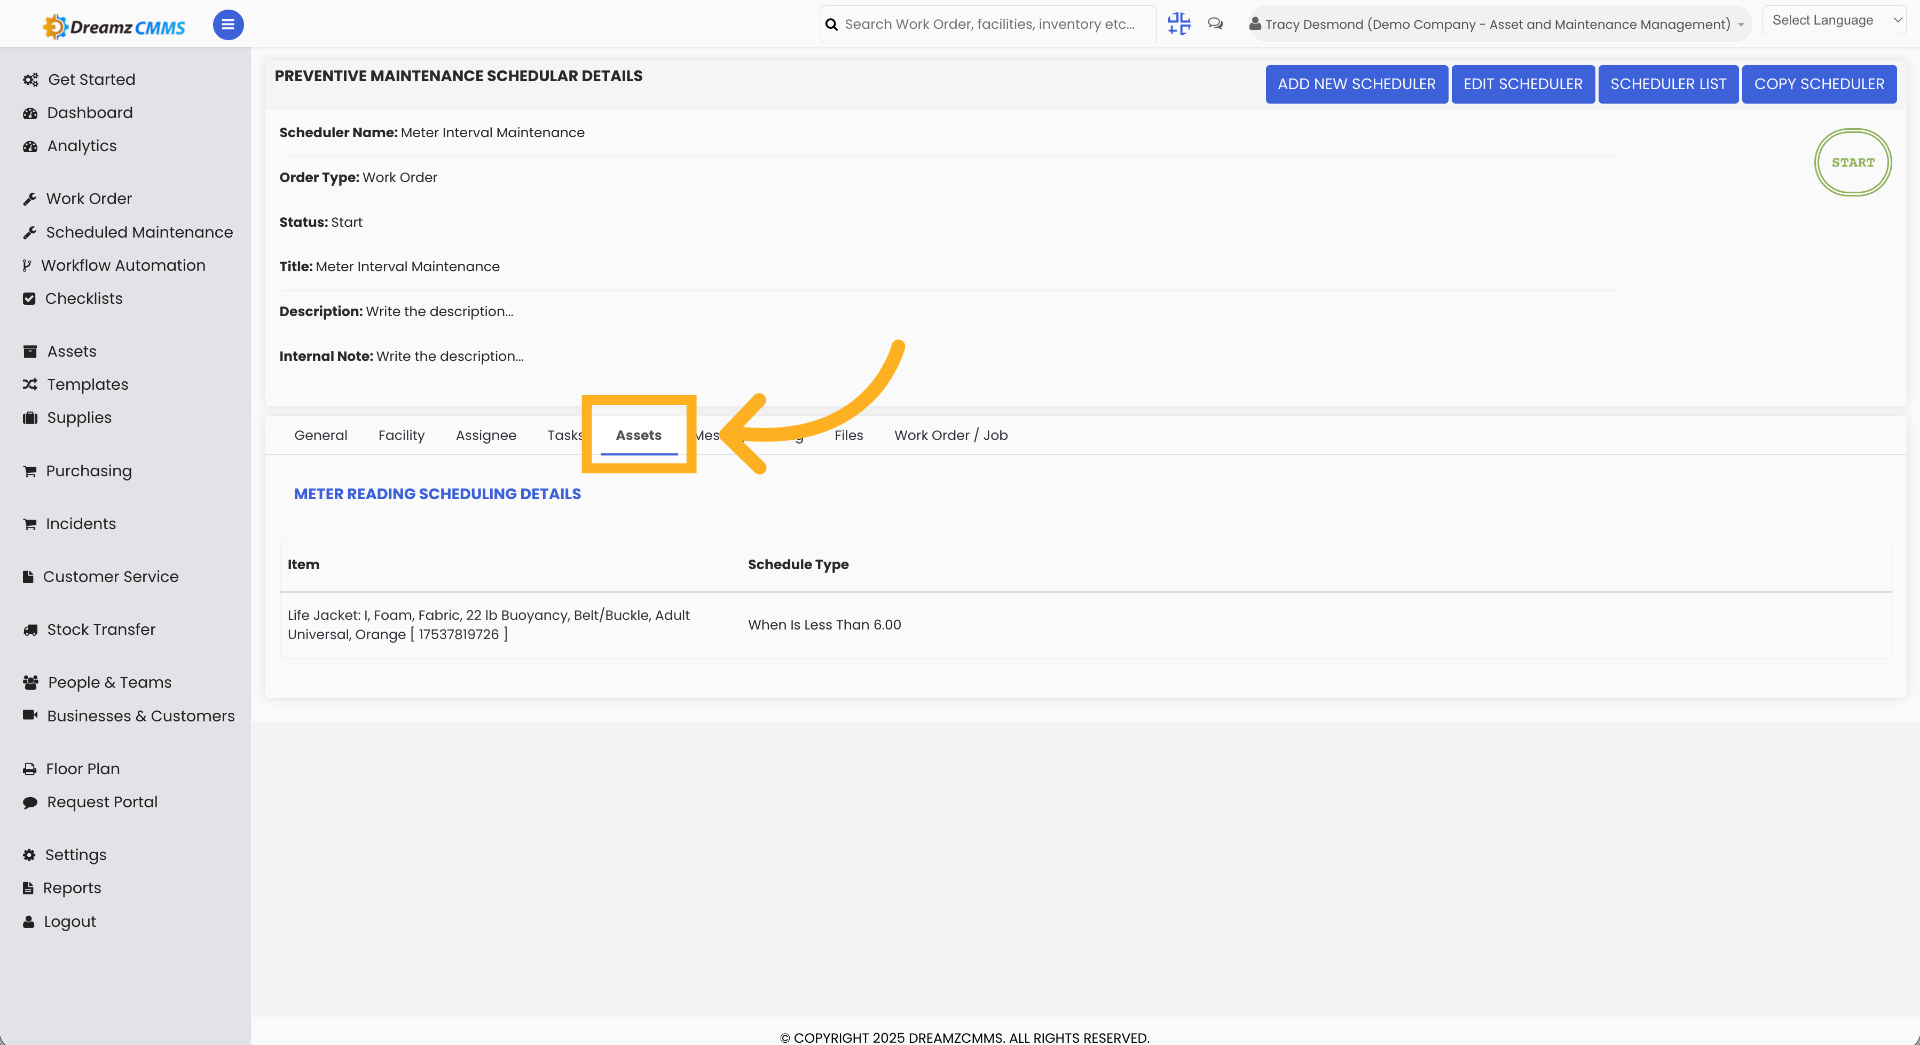
Step 9 – View Assets Tab
Click "Assets" to see assets linked to the metering scheduler.
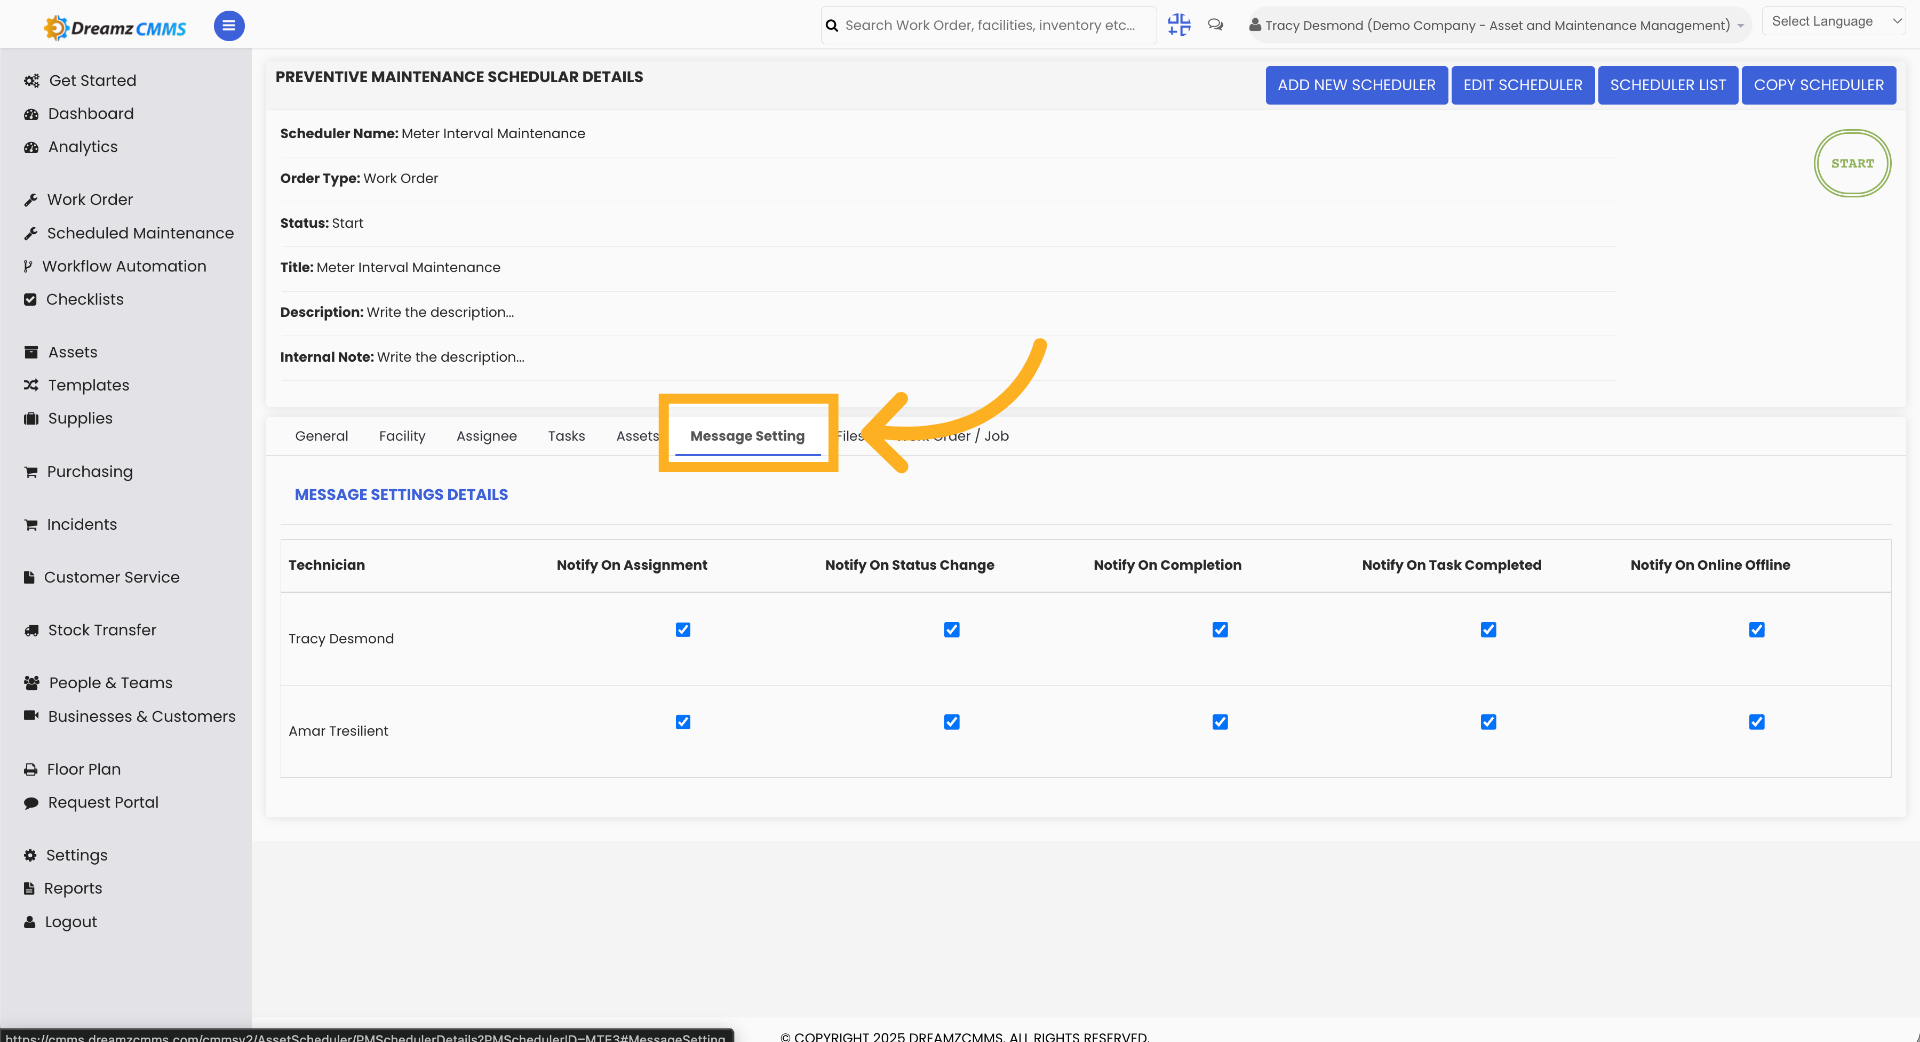
Step 10 – Open Message Settings
Click "Message Setting" to view notifications and messaging options.
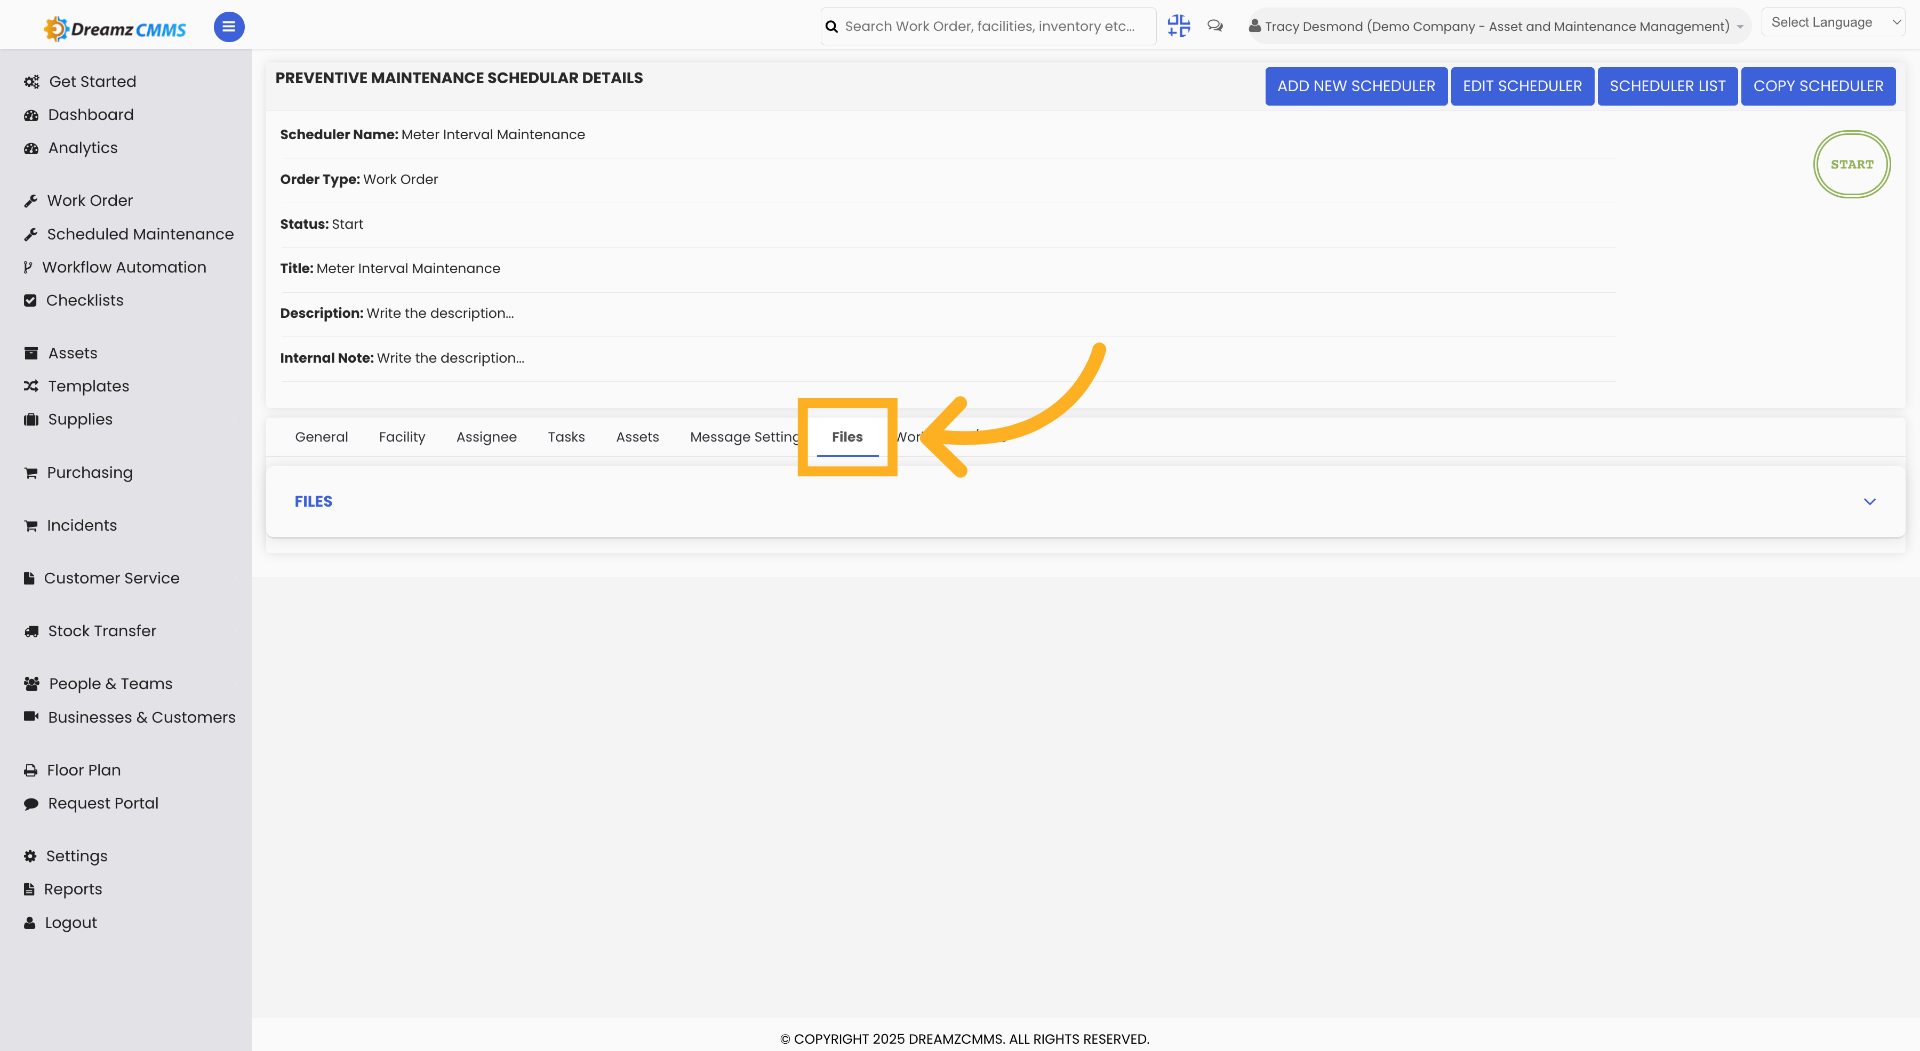
Step 11 – Access Files Tab
Click "Files" to view uploaded files related to the scheduler.
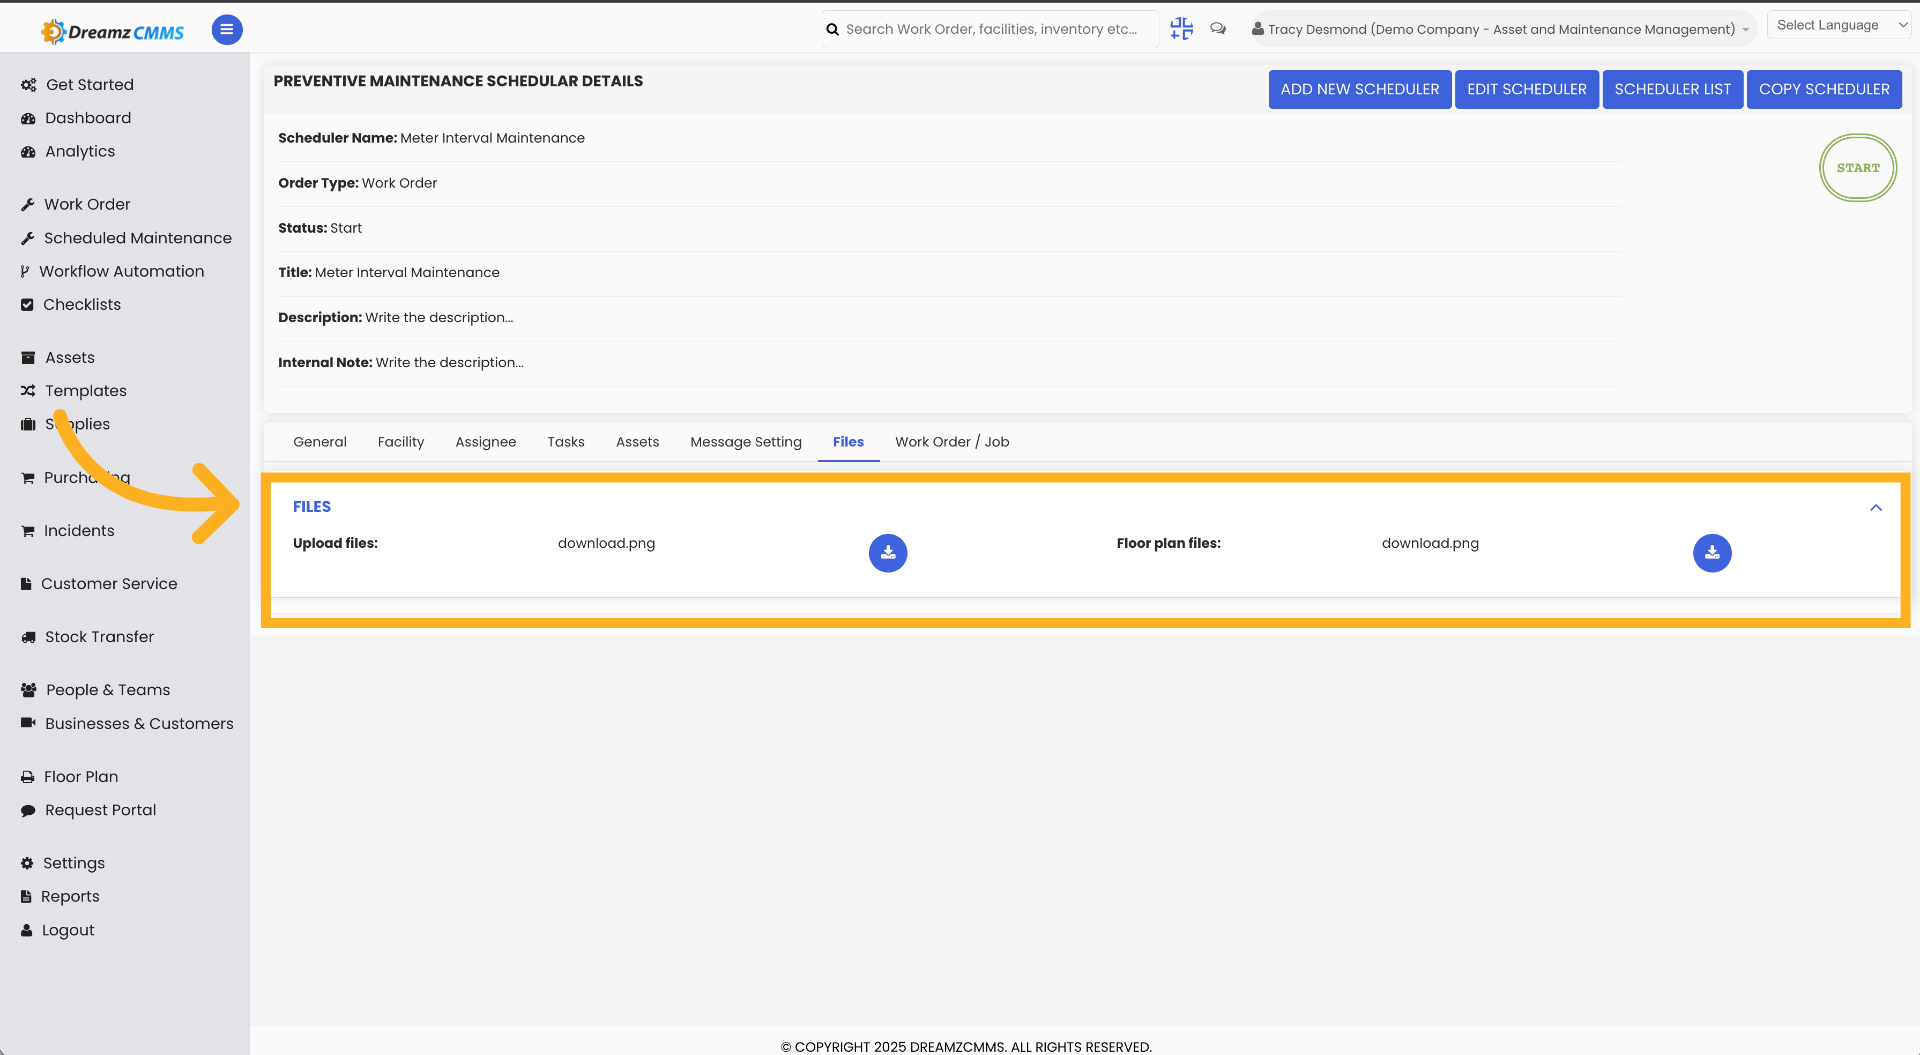
Step 12 – Open Files Section
Click "Files" again to view attached documents and files.
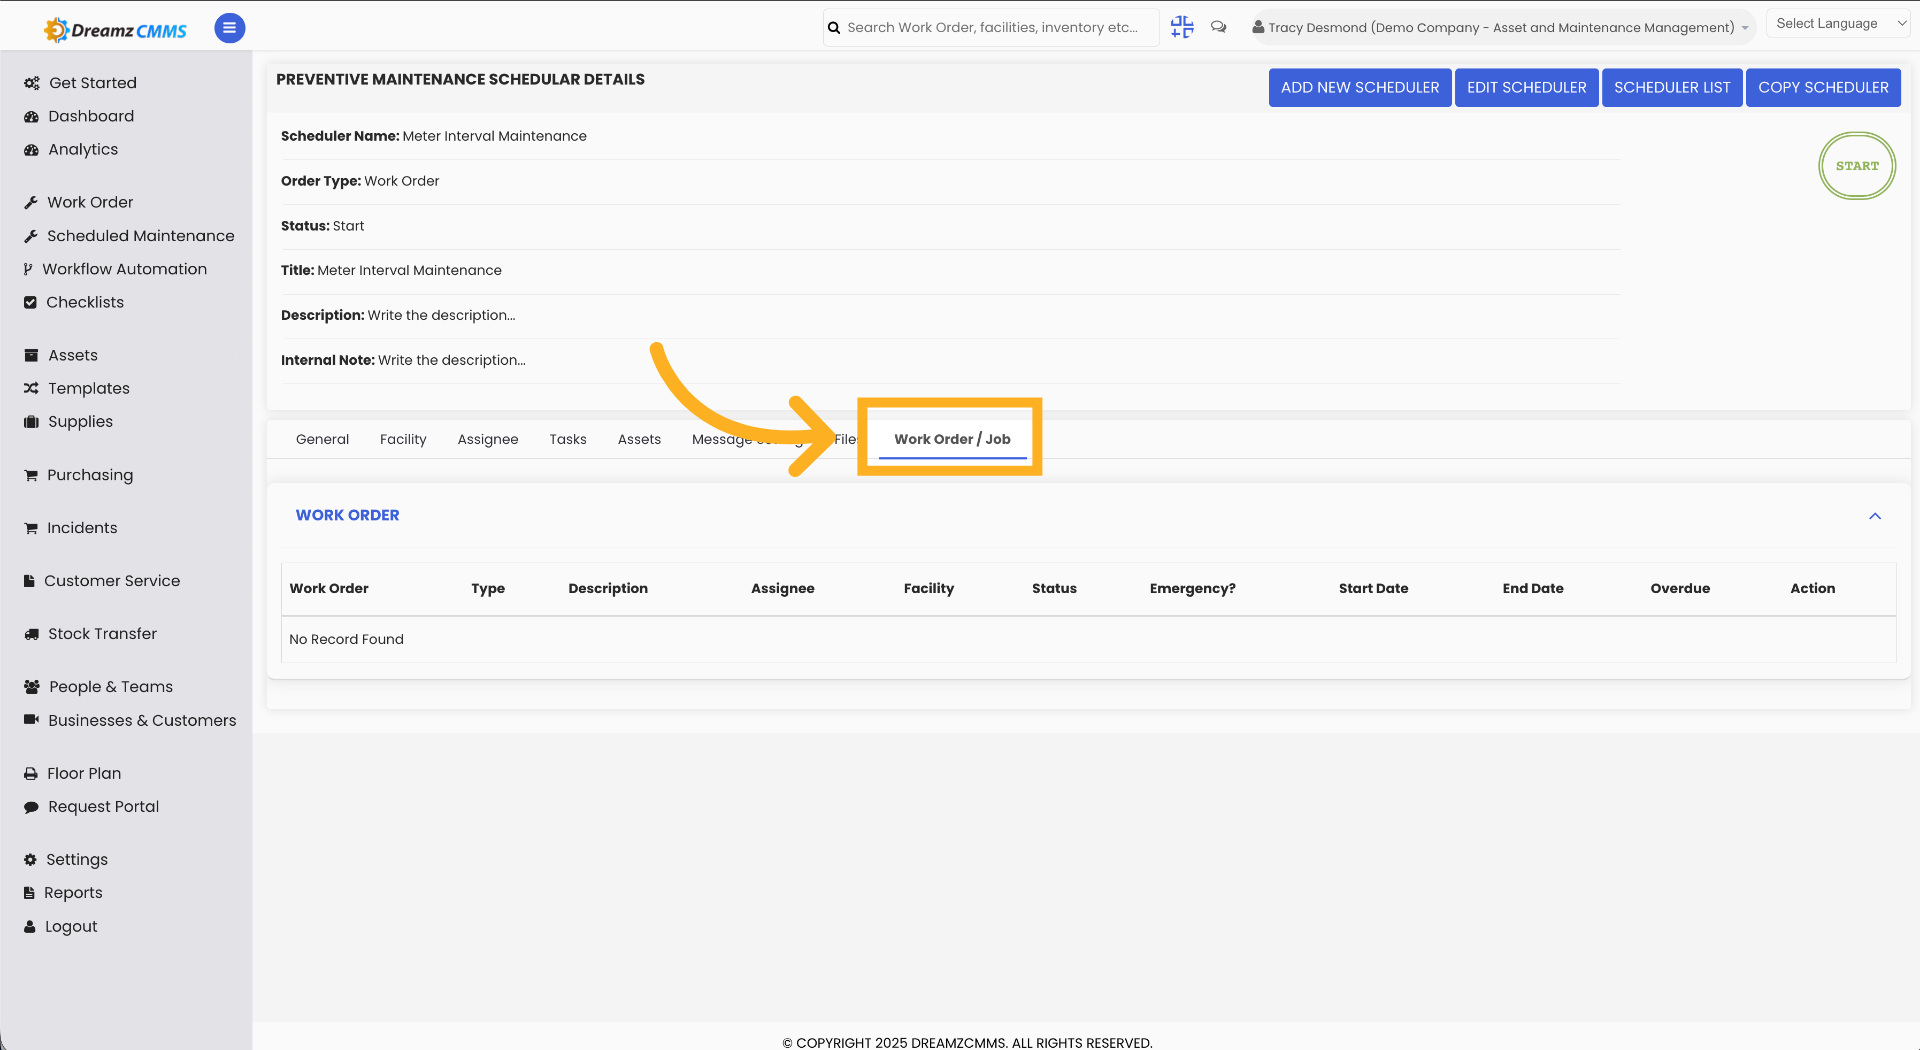
Step 13 – View Work Order Details
Click "Work Order / Job" to access work order information linked to the scheduler.
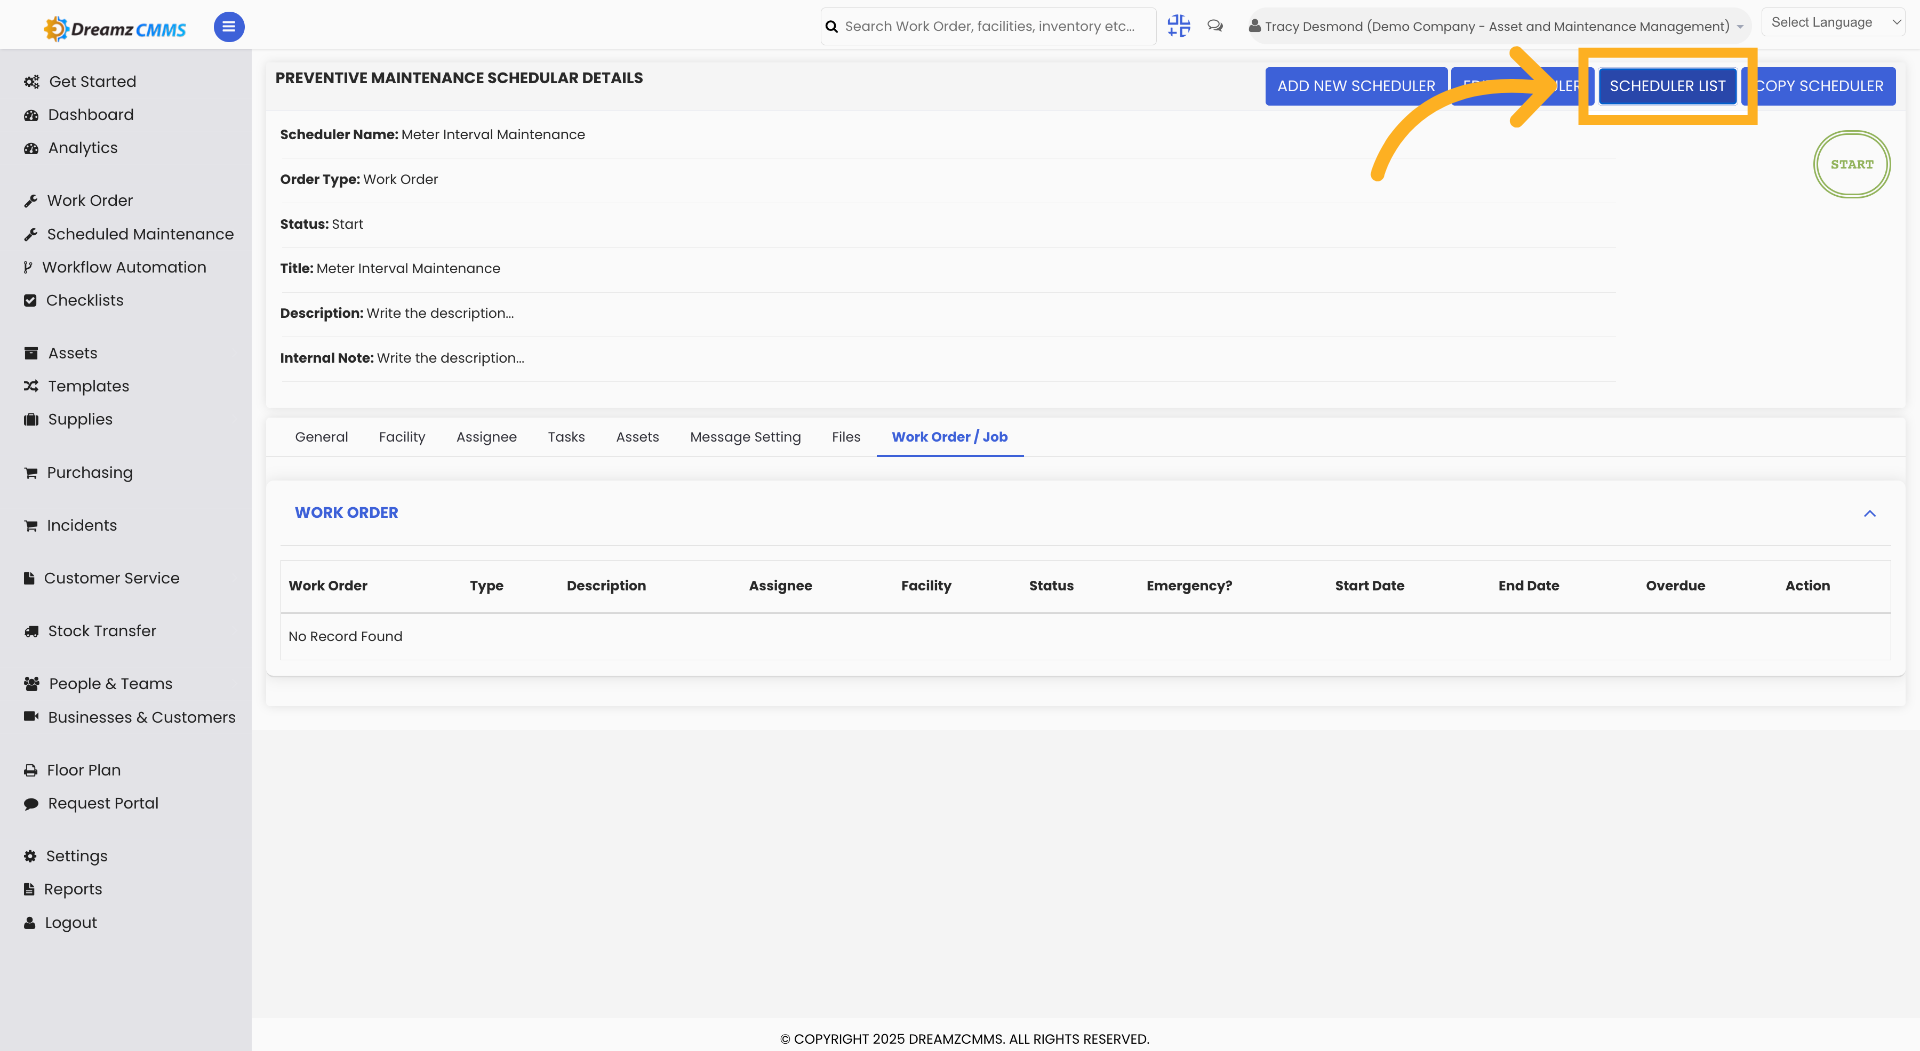
Step 14 – Return to Scheduler List
Click "Scheduler List" to go back to the list of all schedulers.
How to Edit an Existing Metering Scheduler
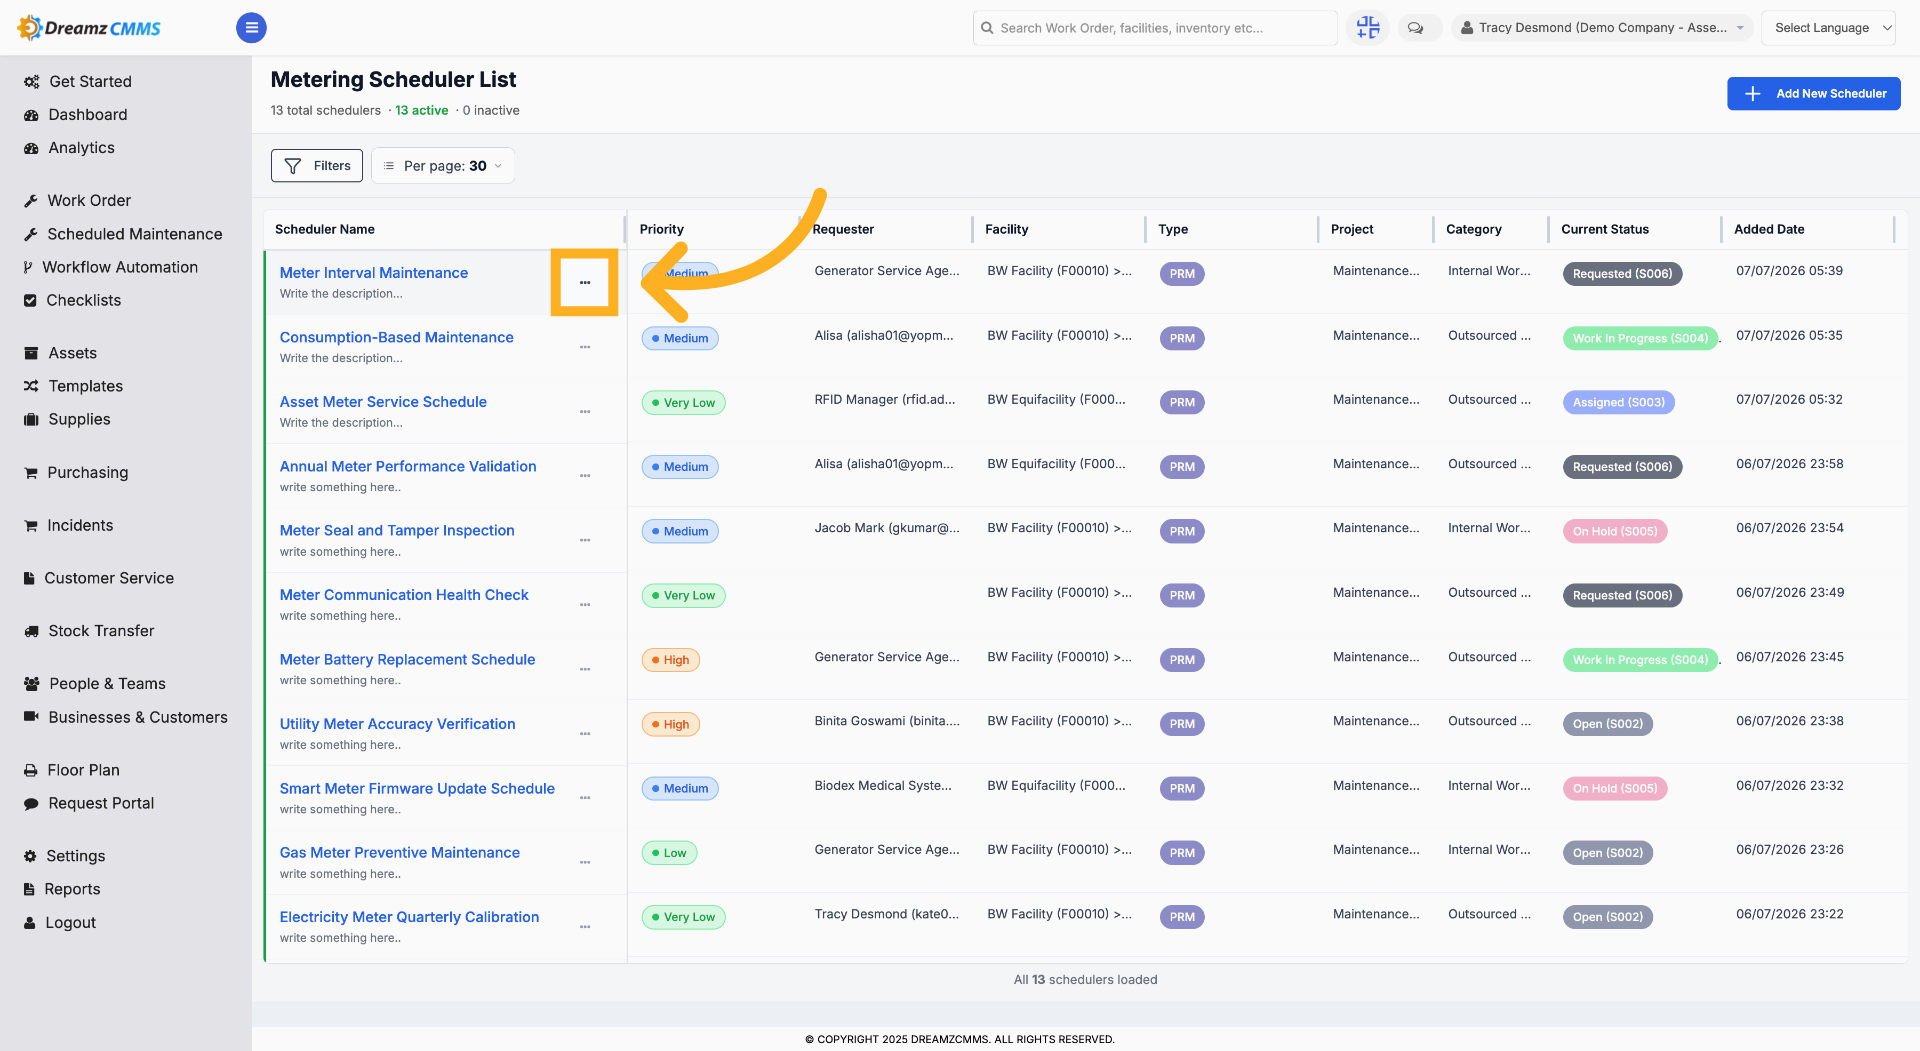
Step 1 – Open the 3-Dot Menu
Click the three dots to open the menu again for that particular metering scheduler.
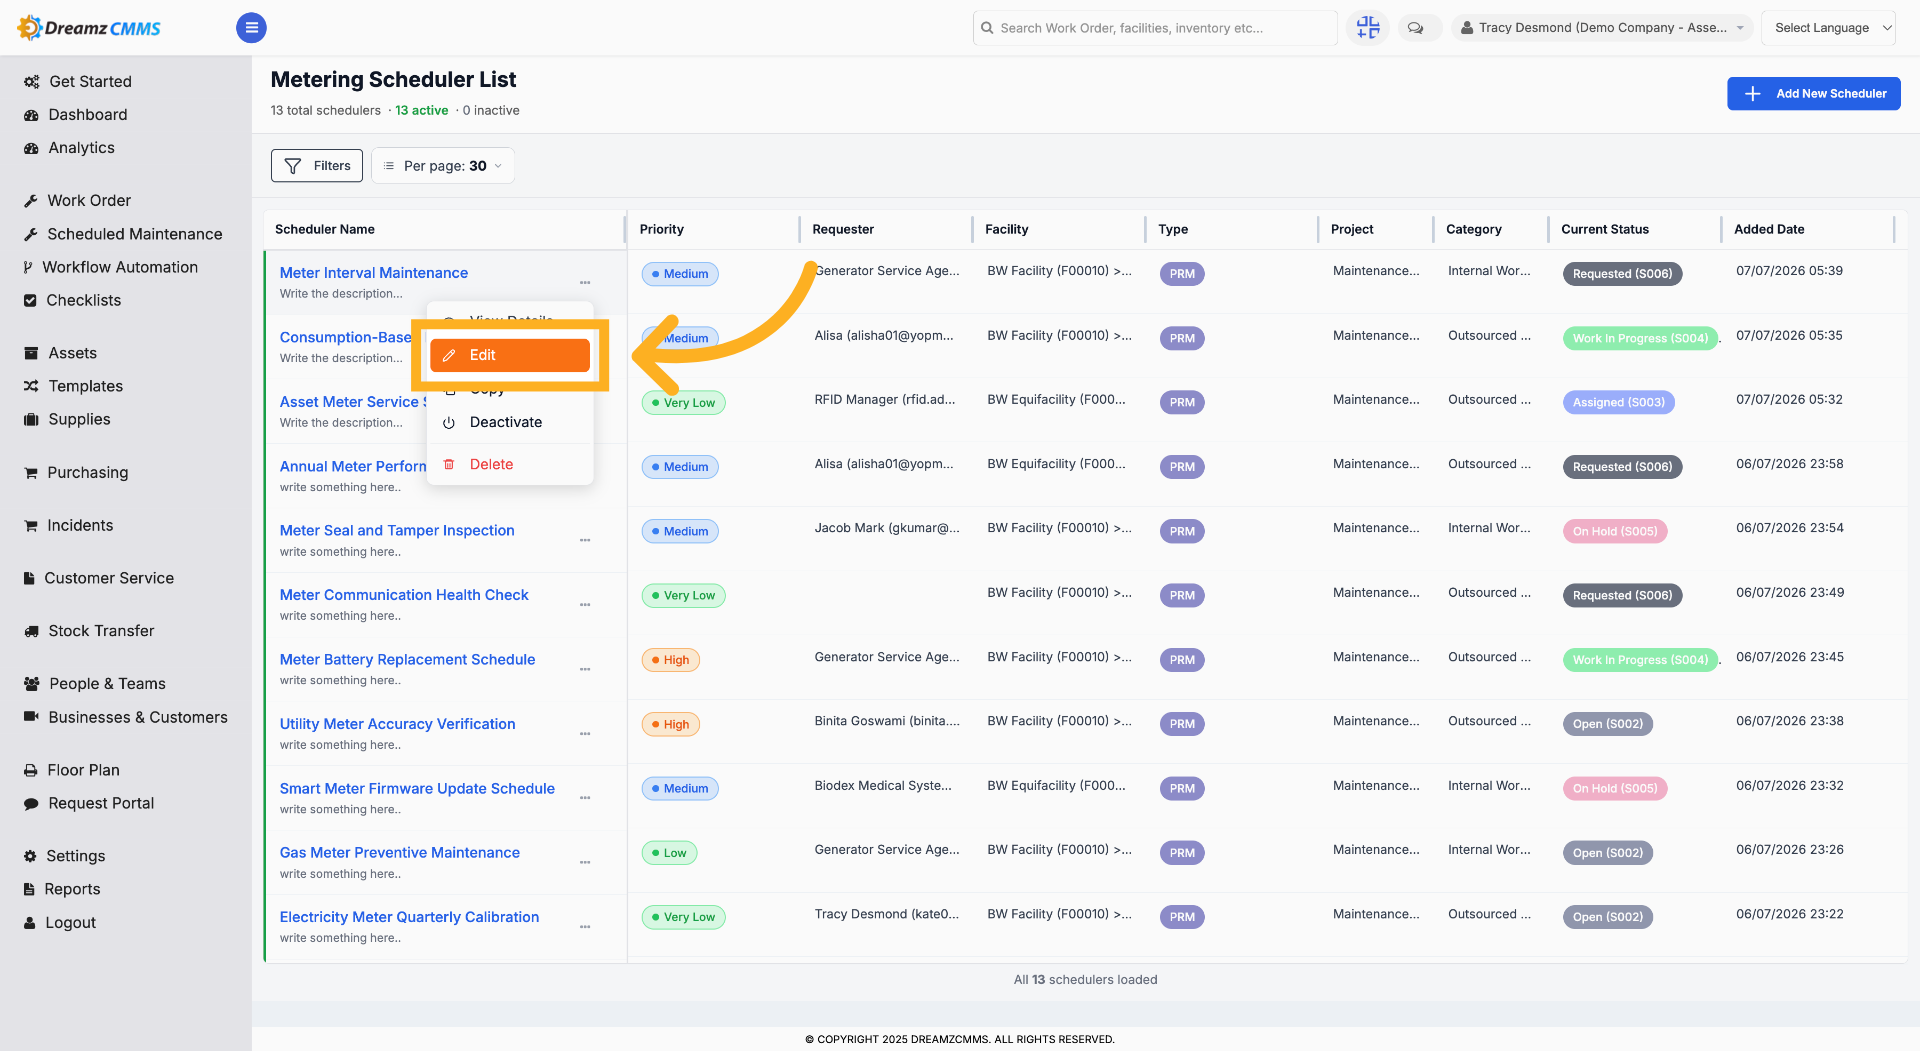
Step 2 – Edit Scheduler Entry
Click "Edit" to modify the selected scheduler's details.
Step 3 – Open Scheduler Details
Click "Details" to view detailed information for the scheduler being modified.
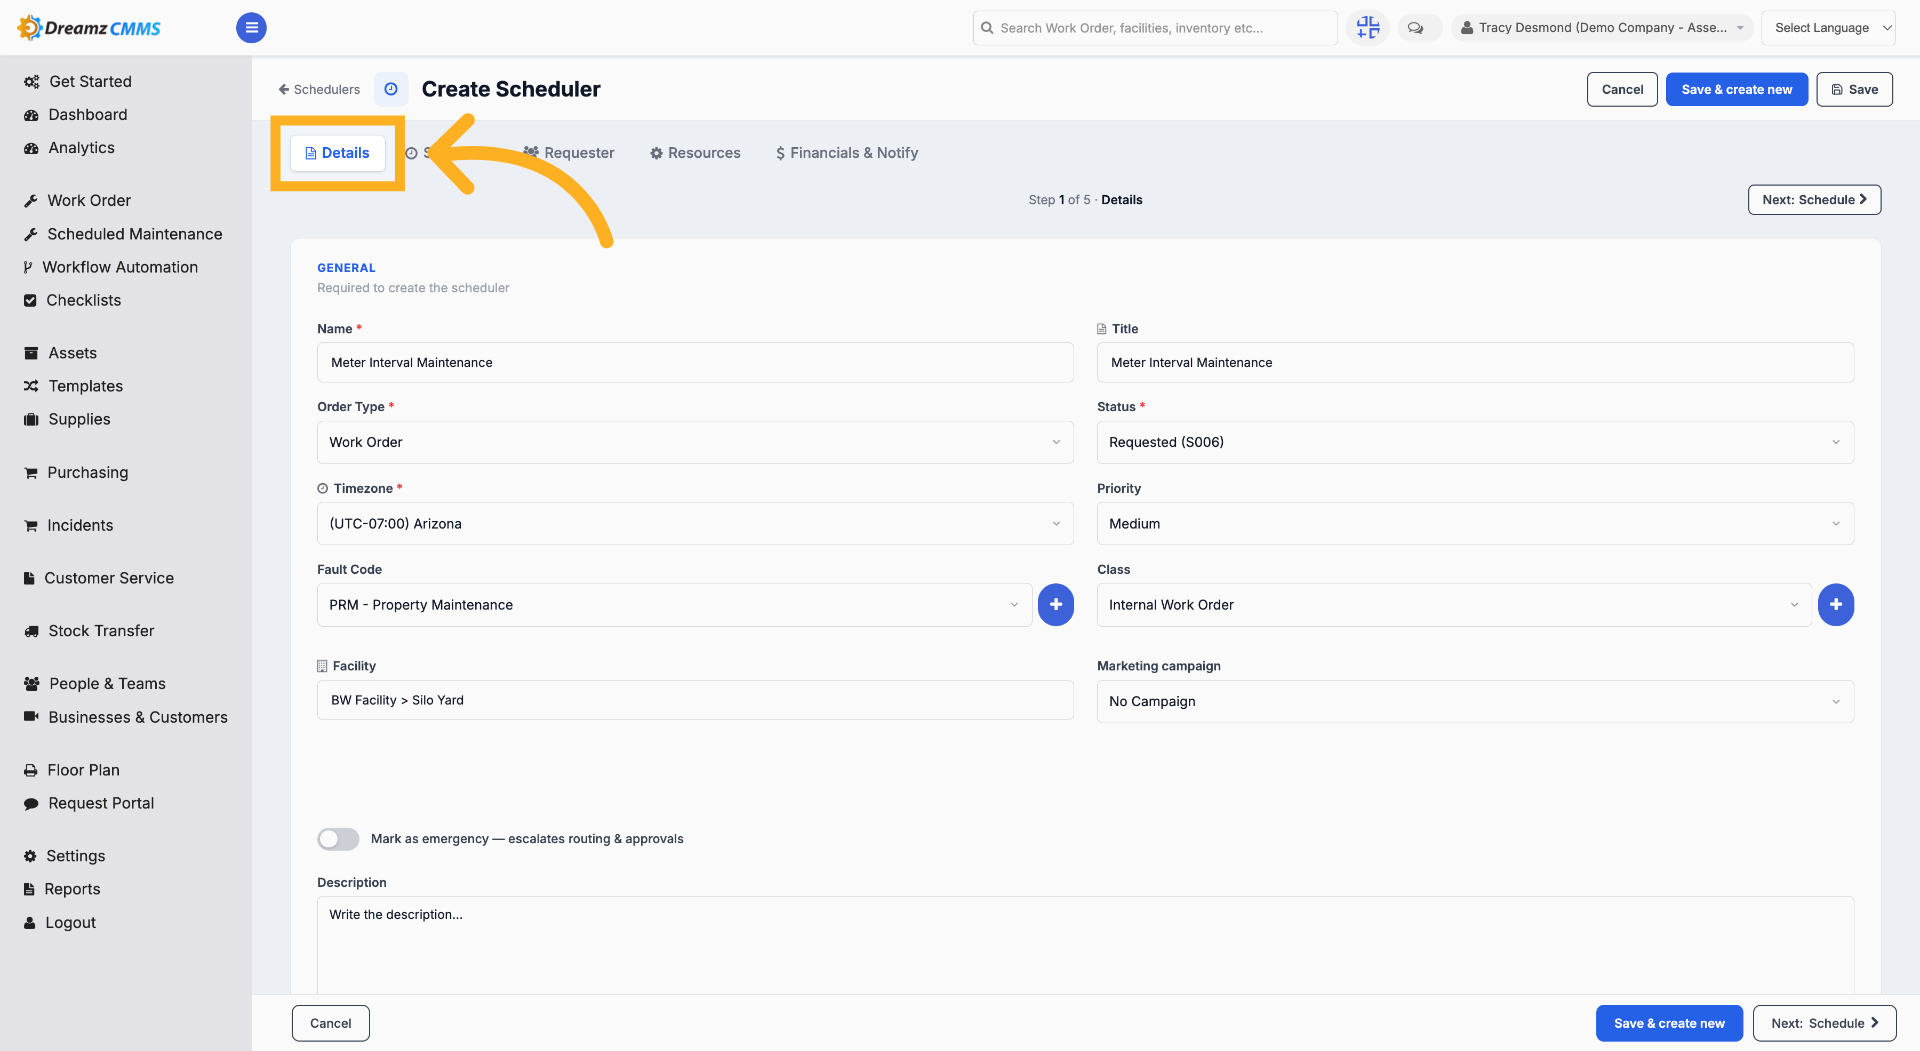
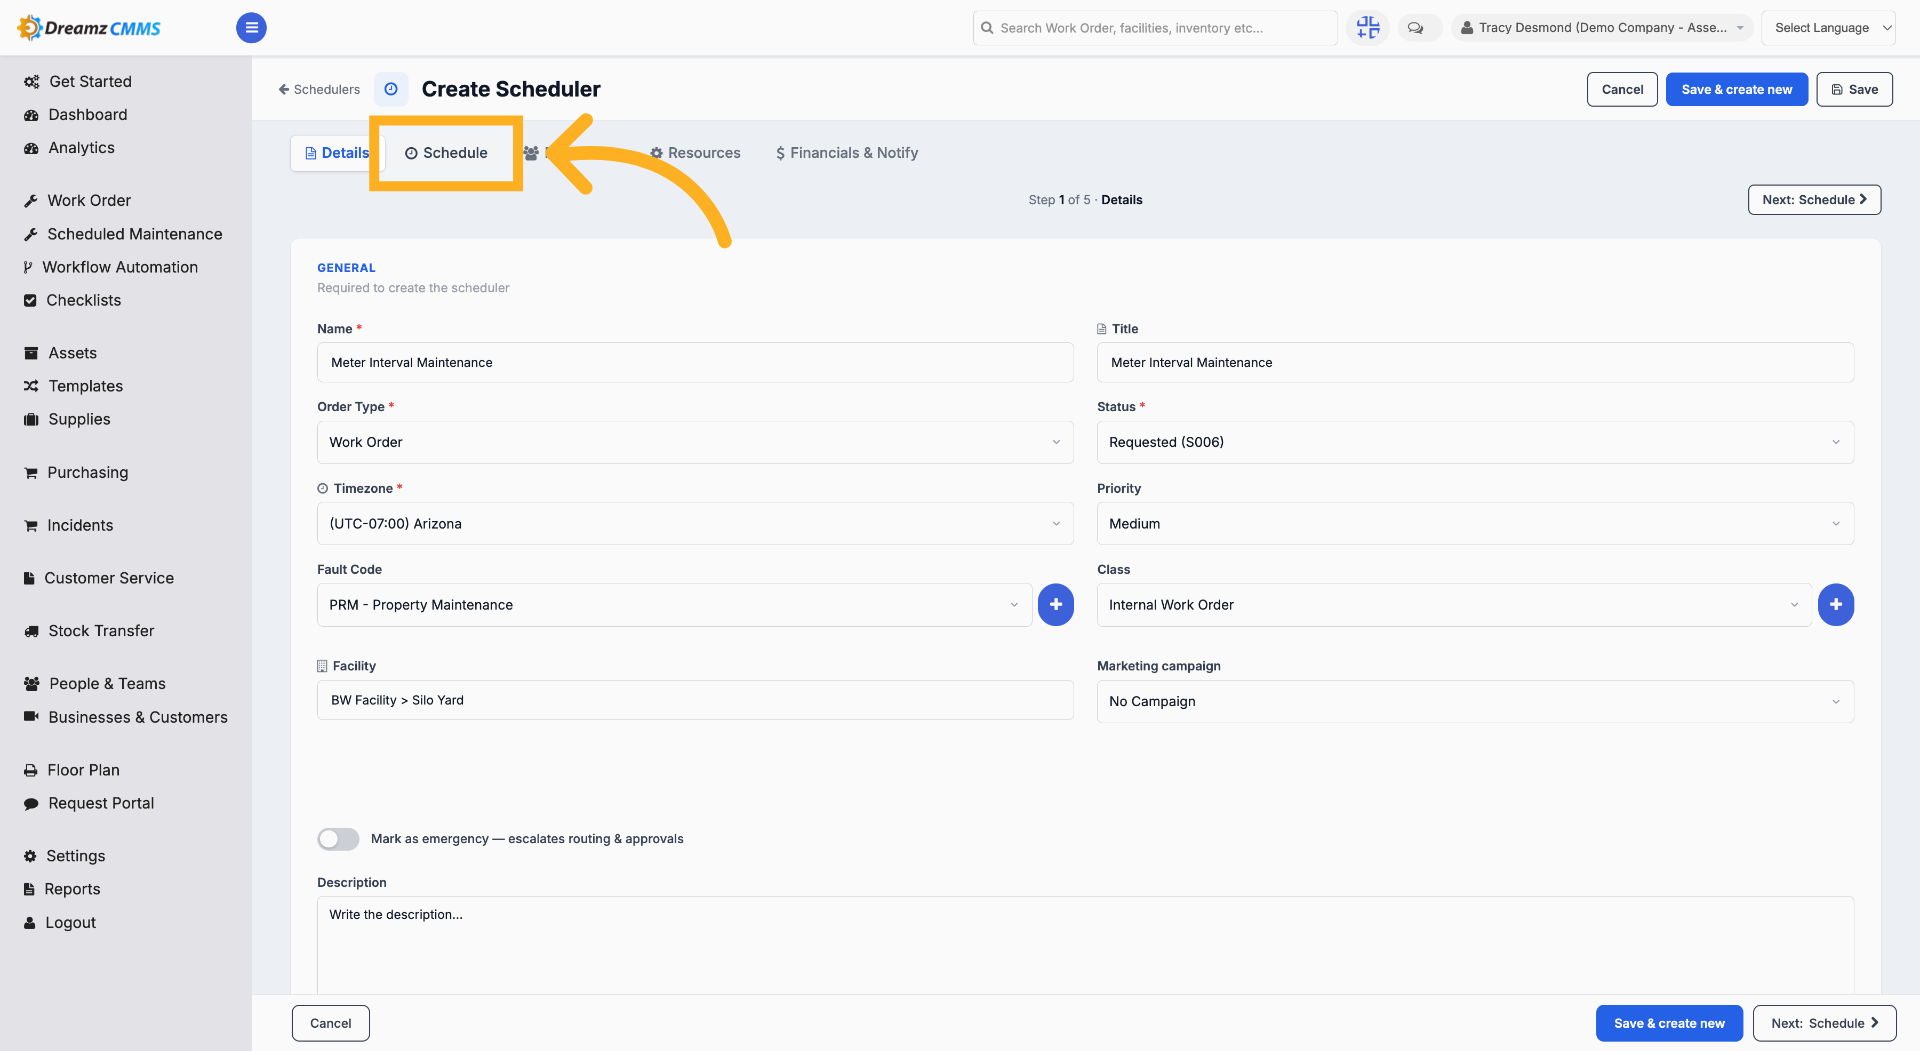
Step 4 – Open Schedule Tab
Click "Schedule" to configure scheduling details for meter readings.
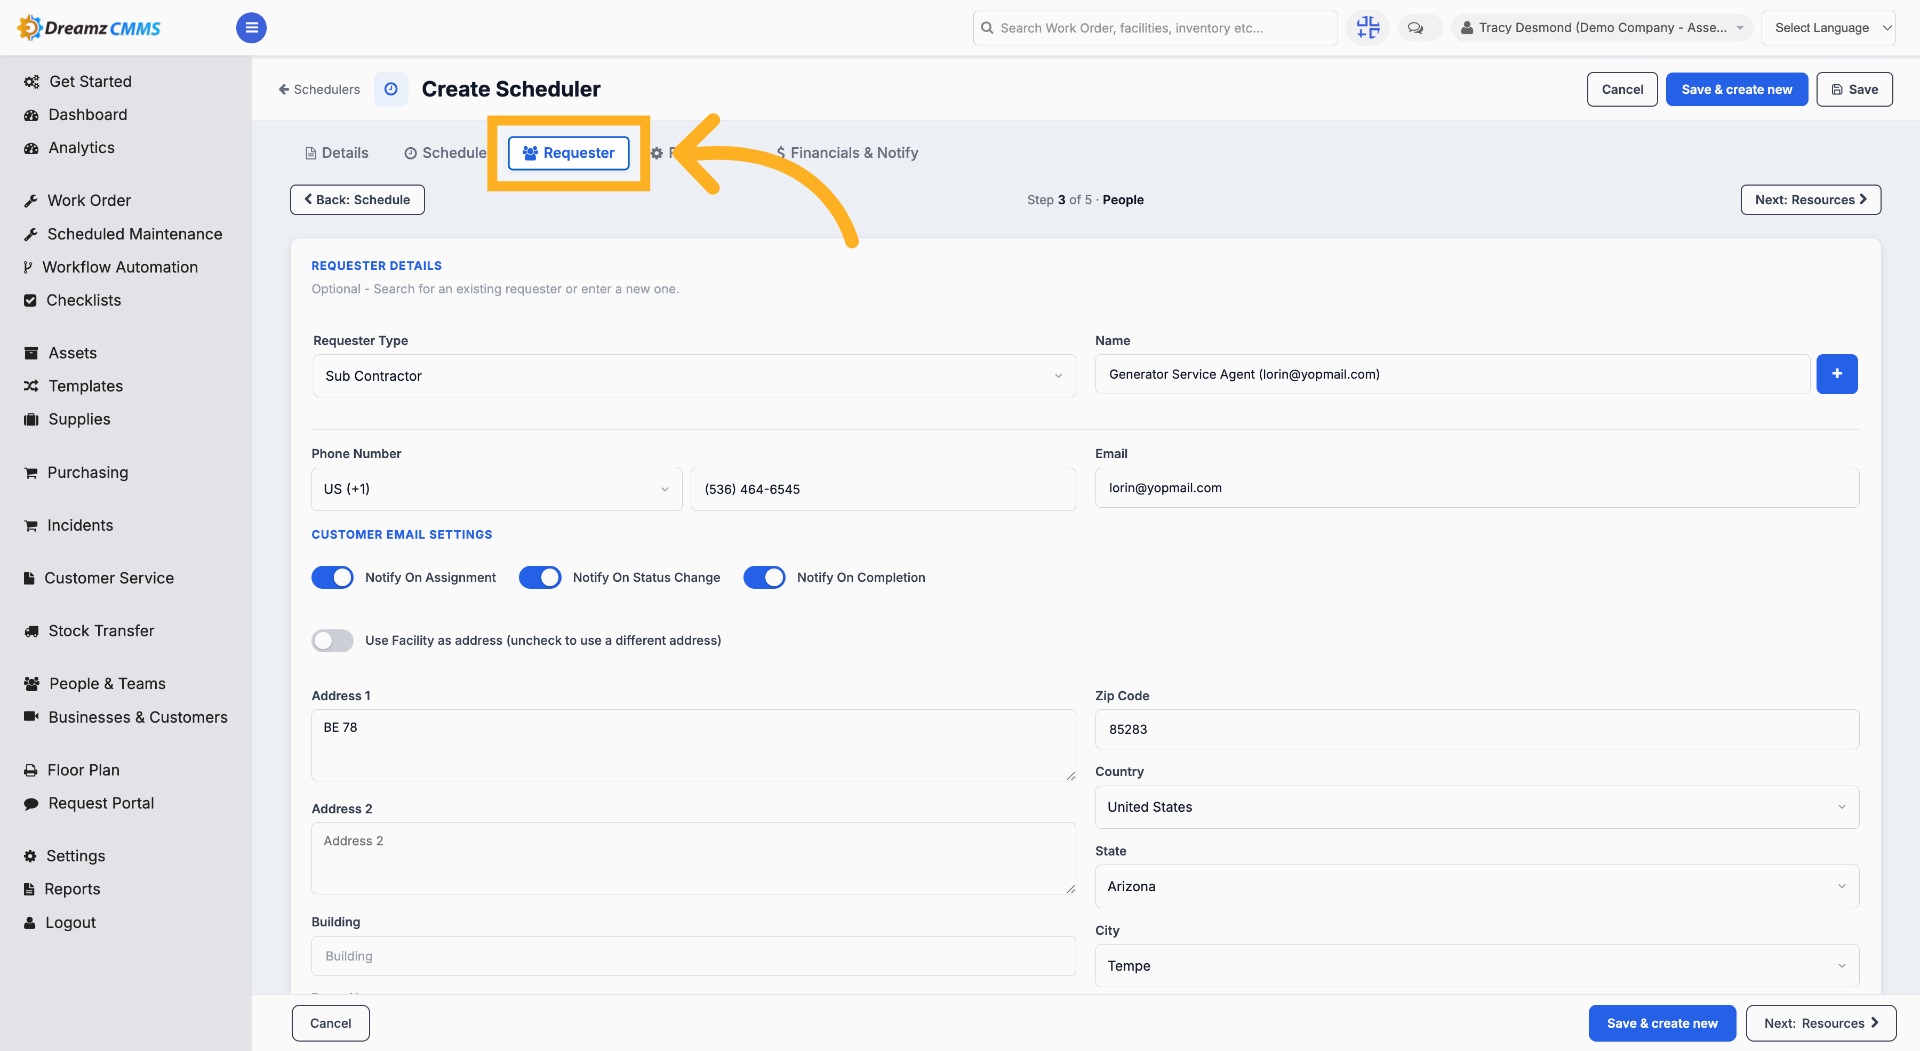
Step 5 – Access Requester Tab
Click "Requester" to specify requester information for the scheduler.
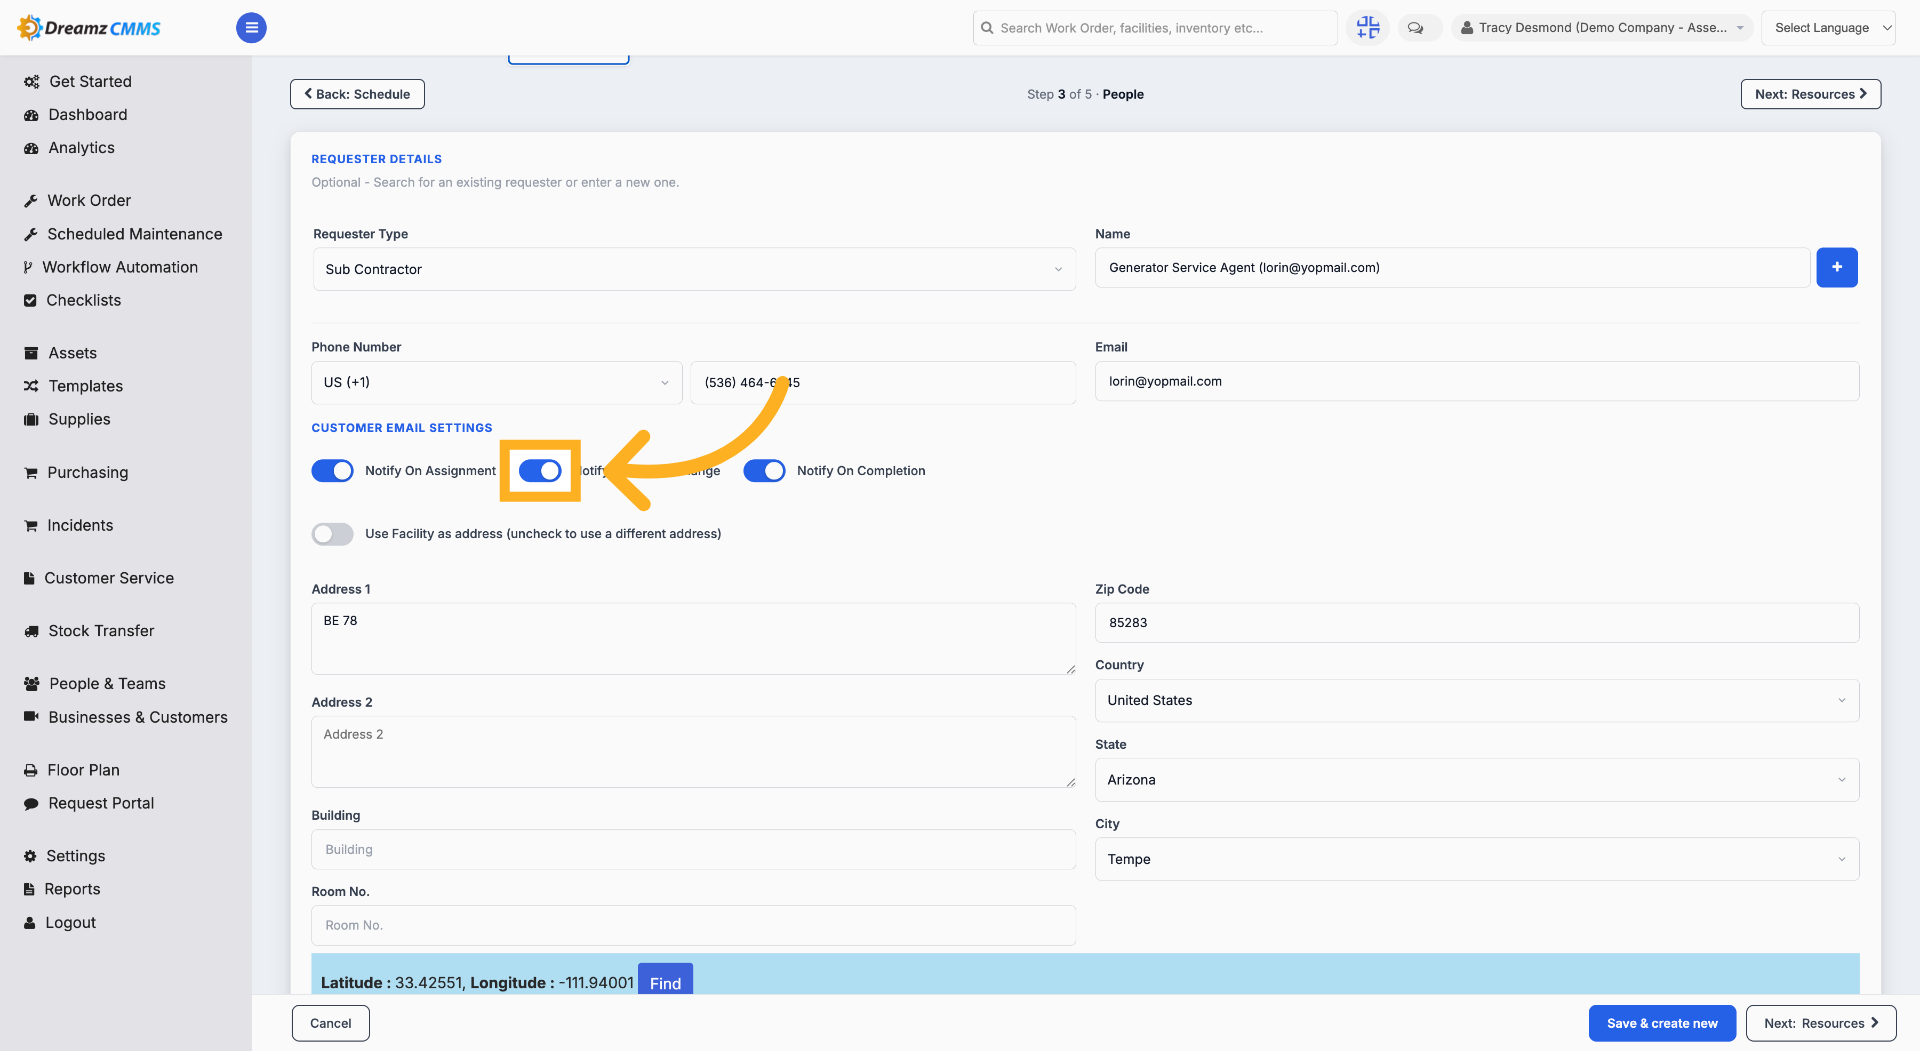
Step 6 – Set Customer Email Notifications
Click the toggles to set customer email notification settings.
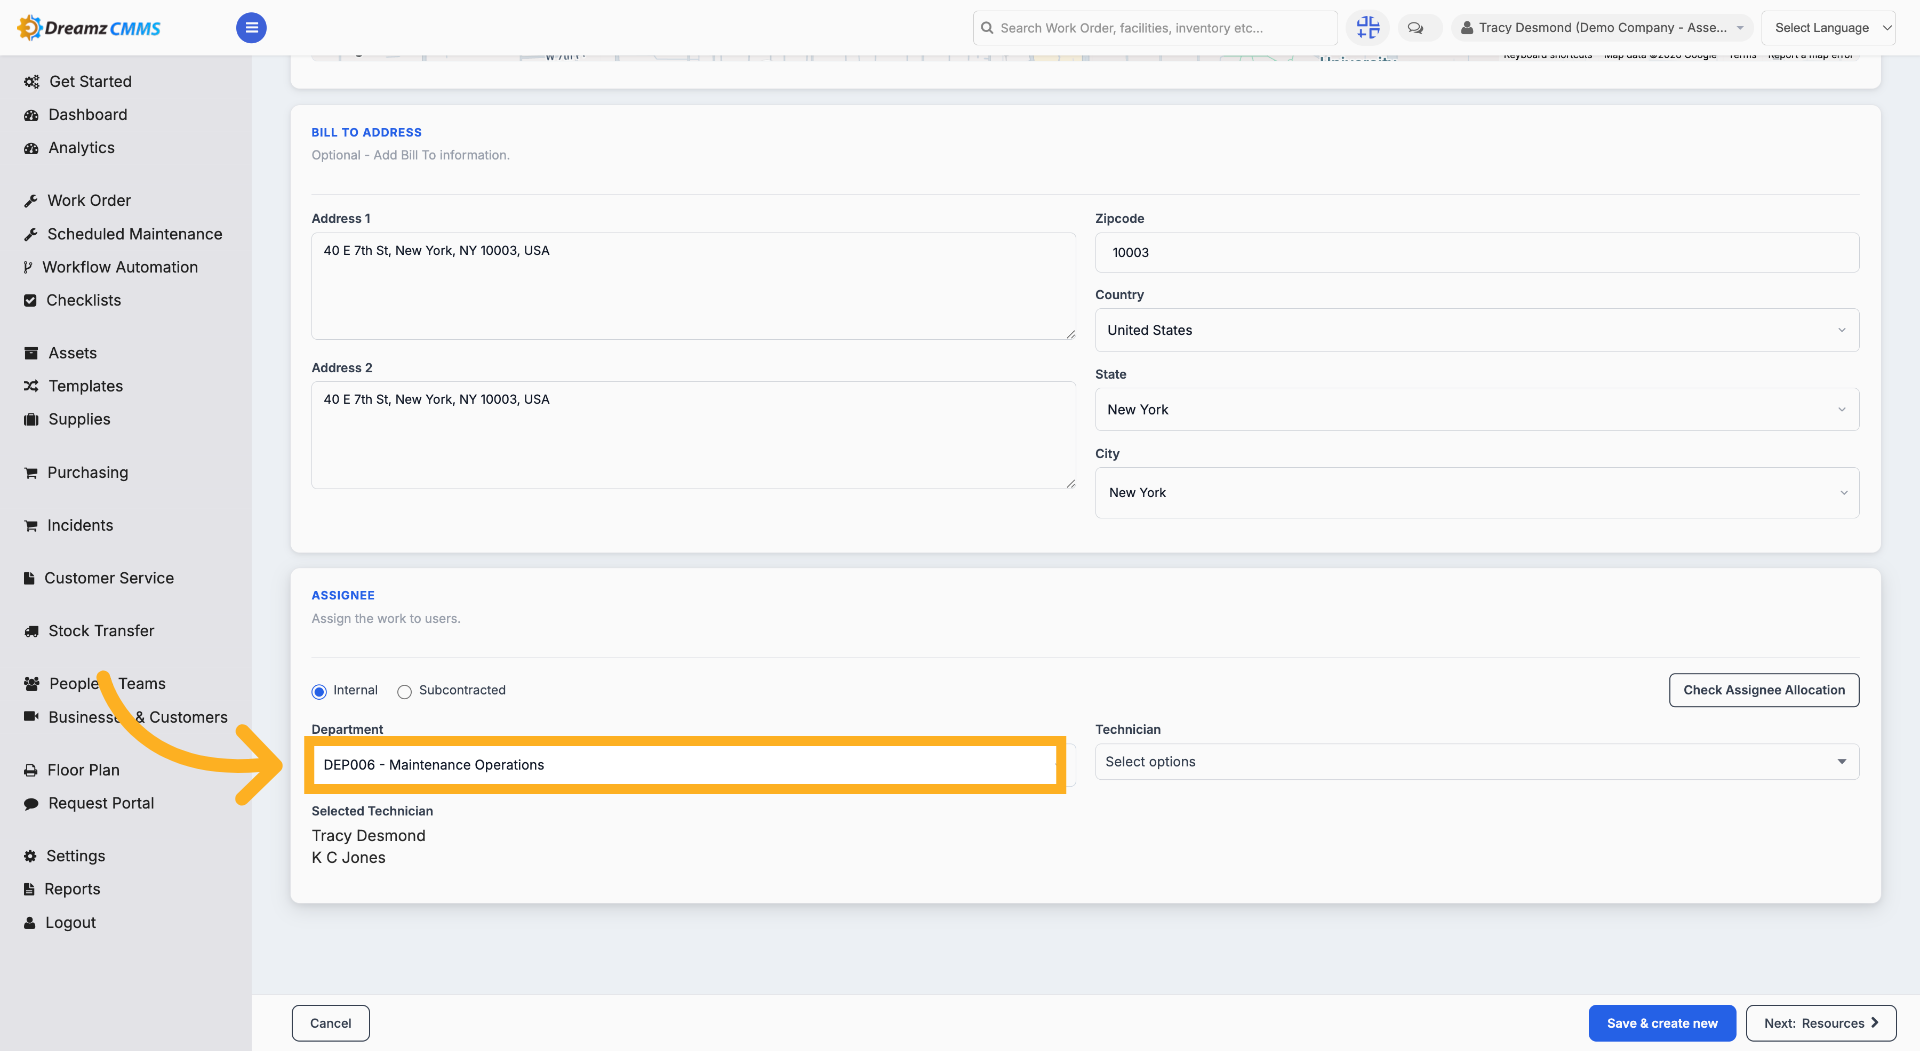
Step 7 – Choose Department
Click a department (for example, "Maintenance Operations") from the department list to assign the department responsible for the scheduler.
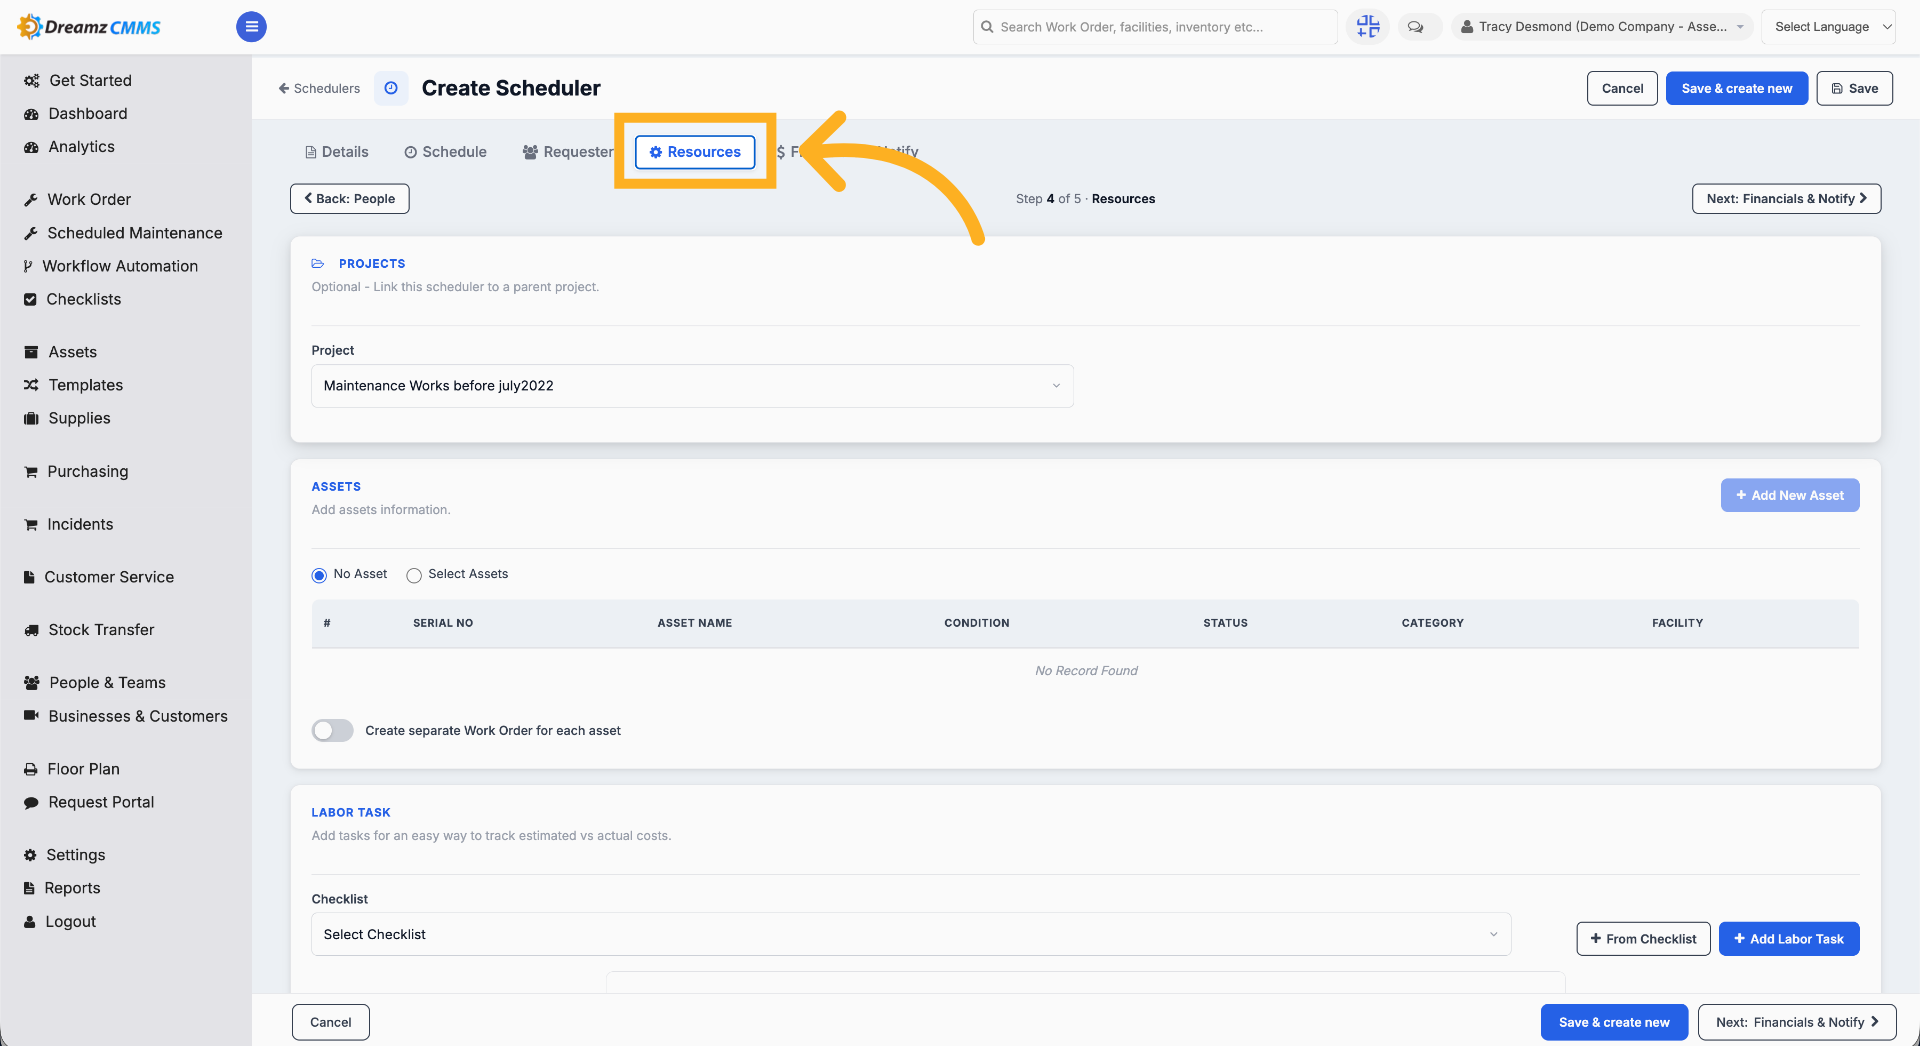
Step 8 – Open Resources Tab
Click "Resources" to manage resources like projects, assets, and checklists associated with the metering scheduler.
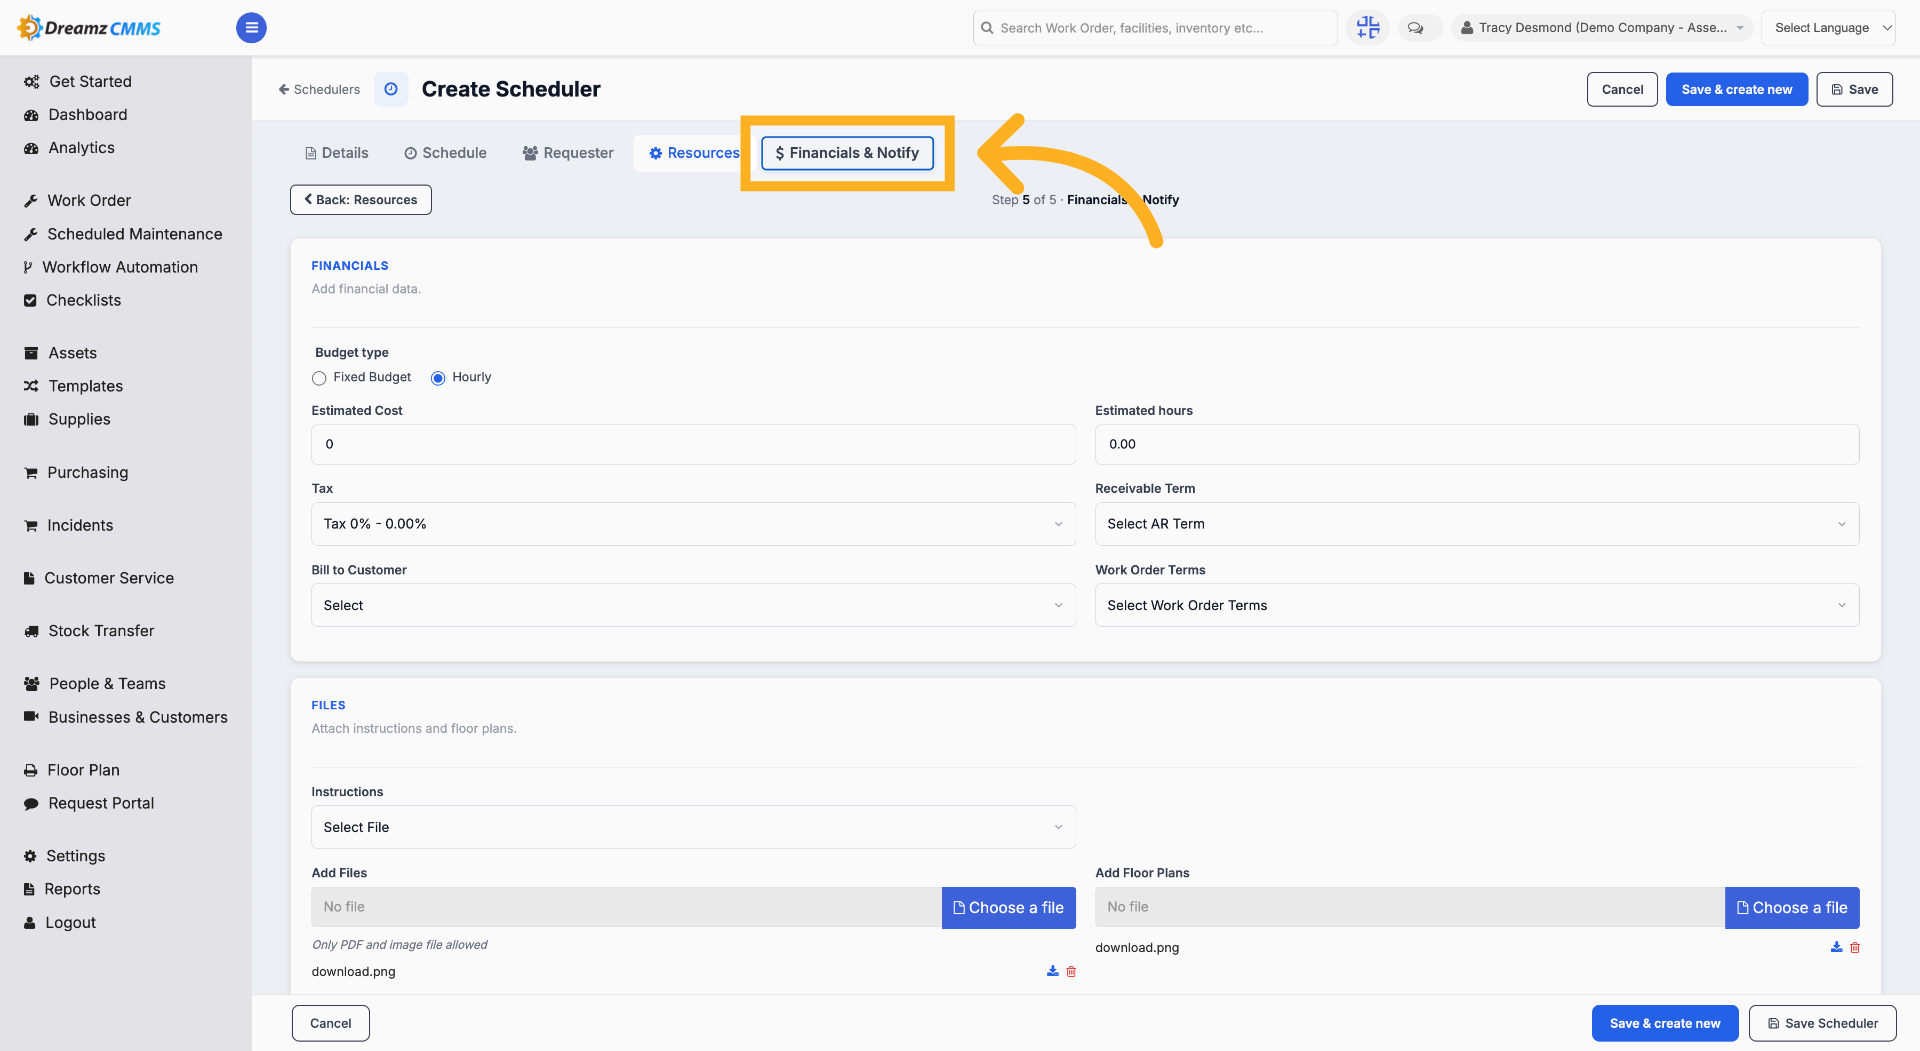
Step 9 – Access Financials & Notifications
Click "Financials & Notify" to configure financial details and notifications. Here you can set the budget type, estimated cost, and other options for your metering scheduler.
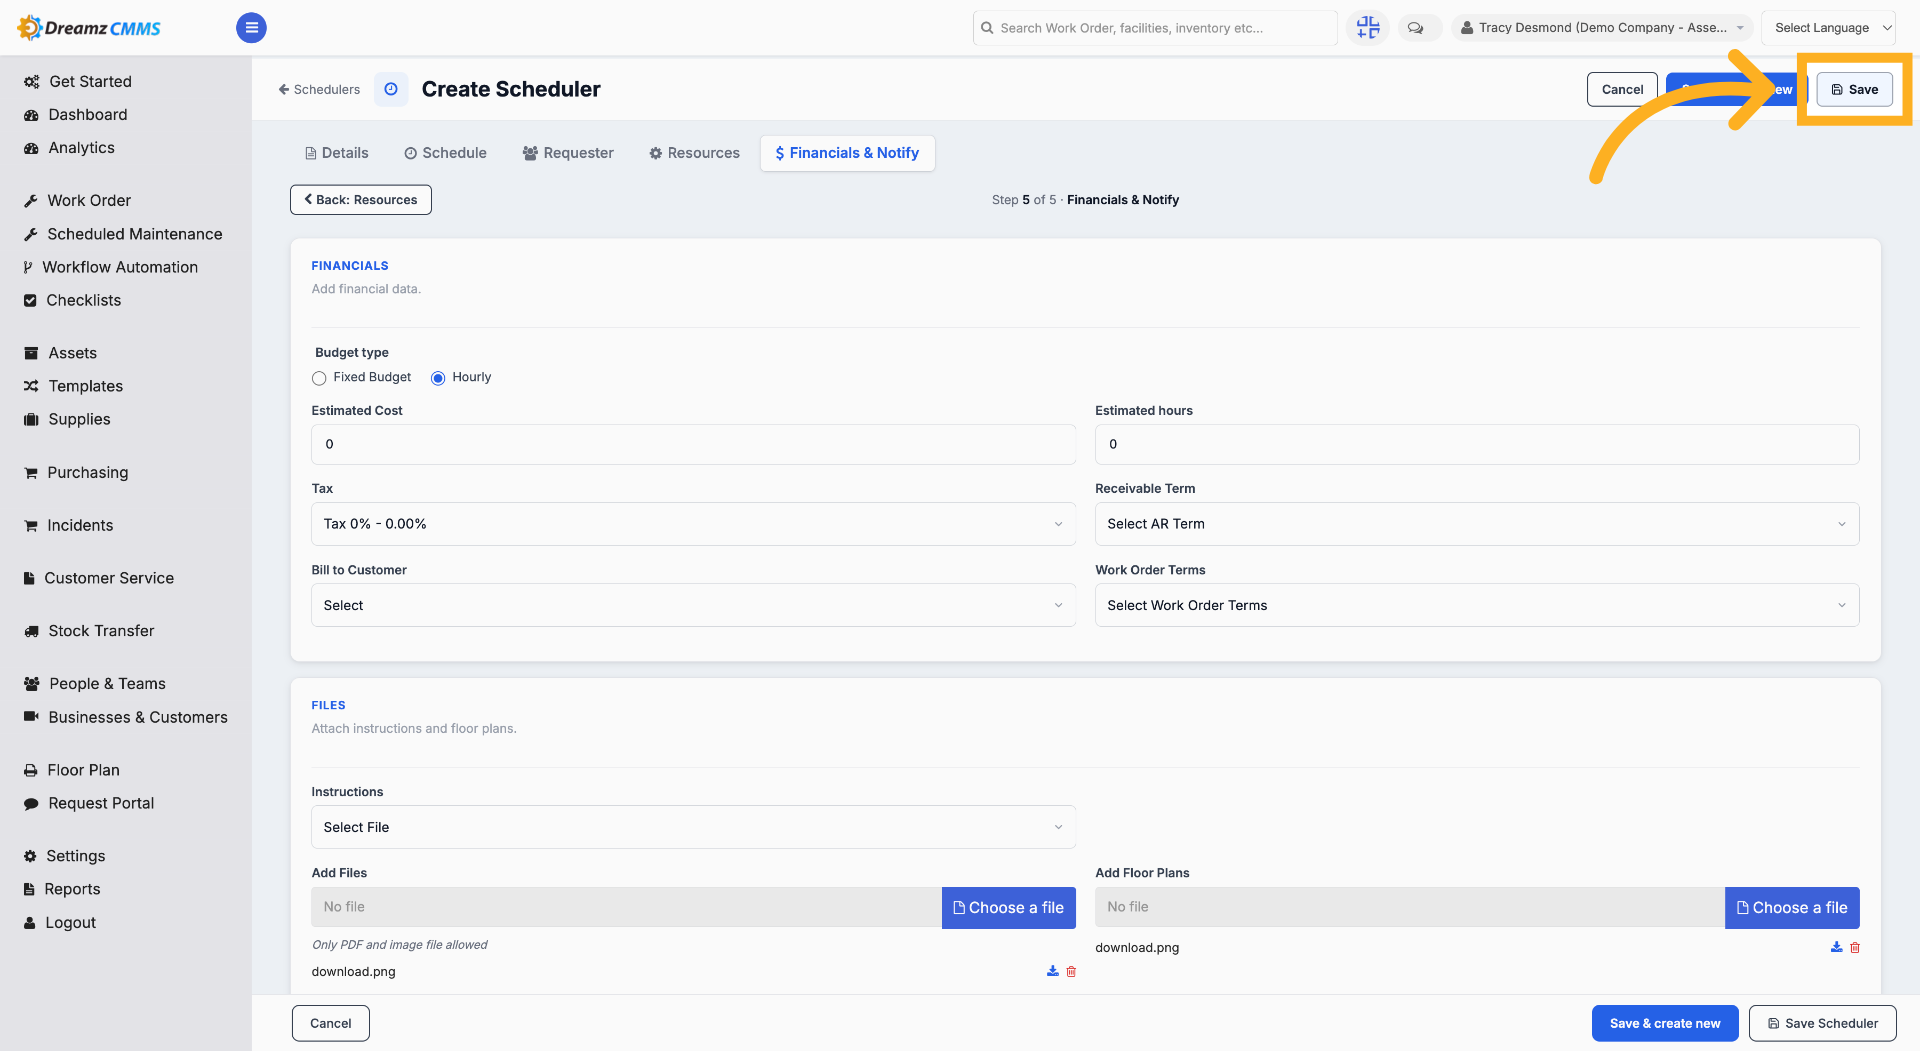
Step 10 – Save Scheduler
Click "Save" to save the modified metering scheduler configuration.
How to Create a New Metering Scheduler
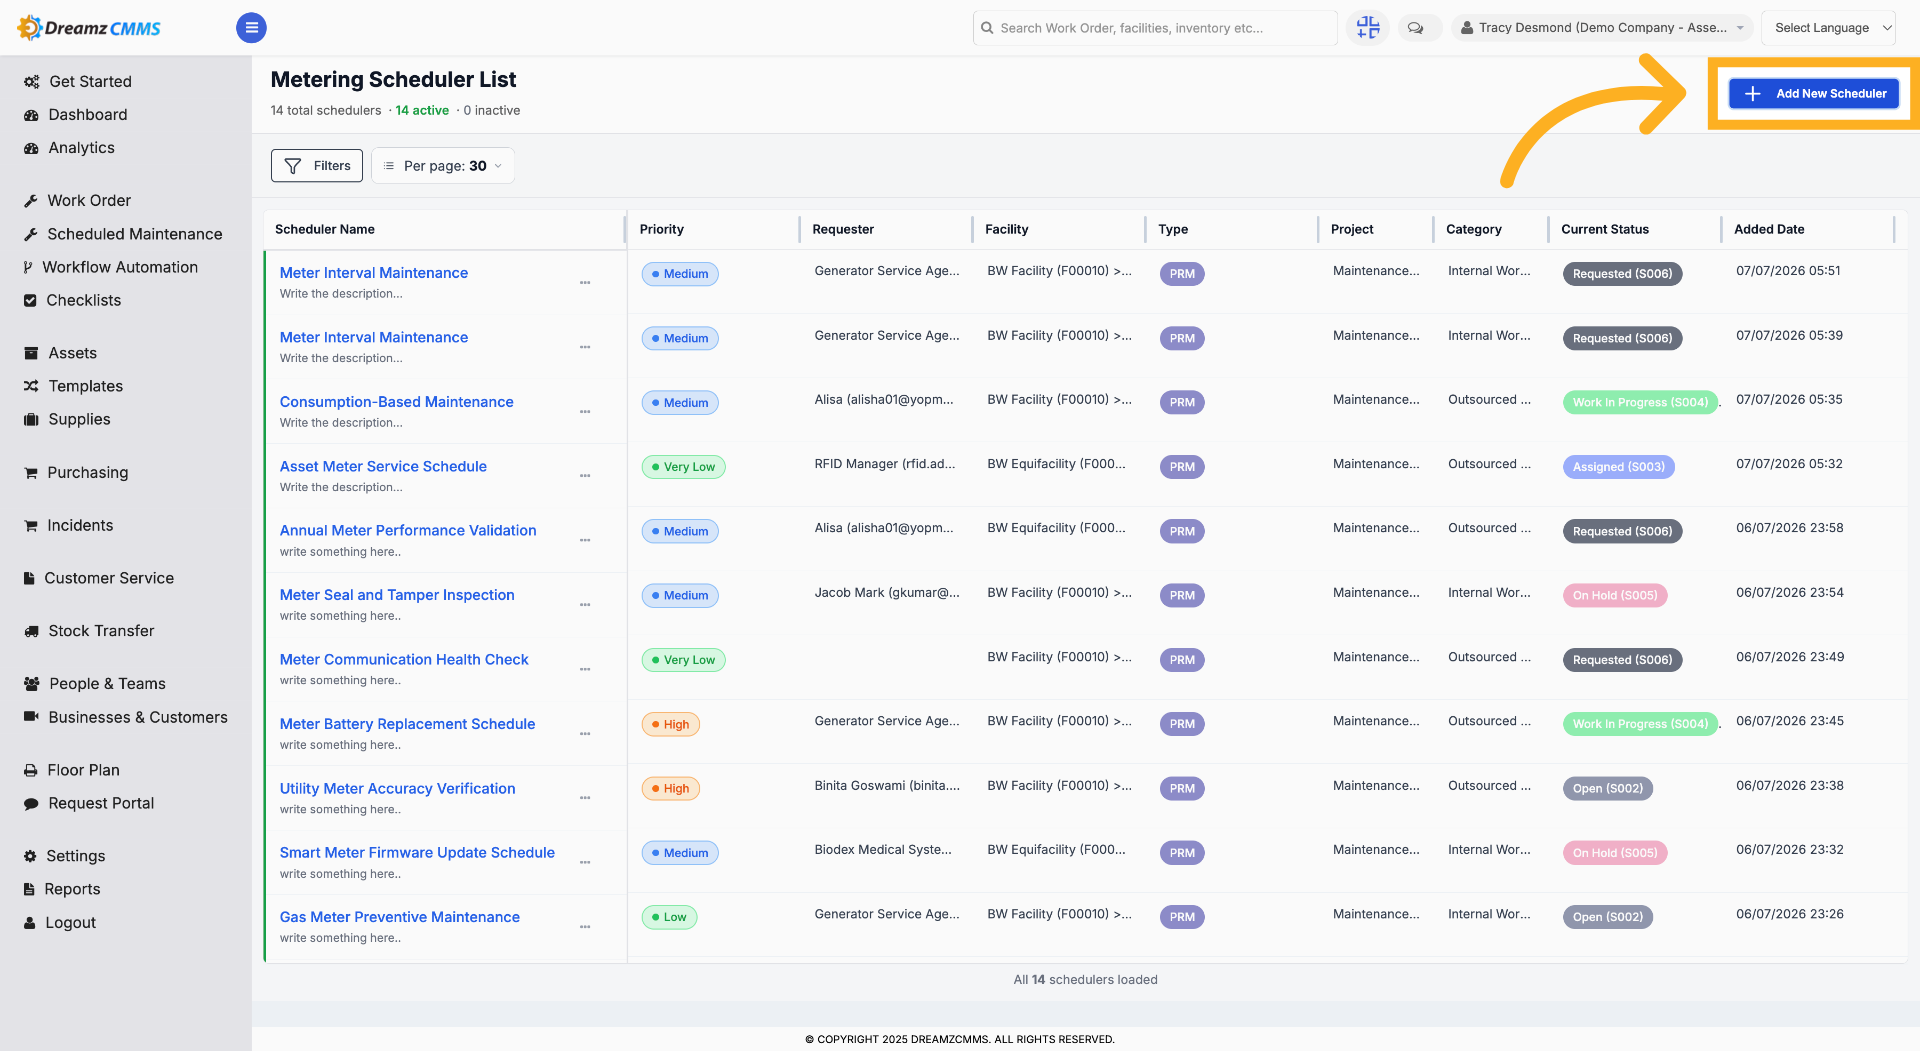
Step 1 – Add New Scheduler
Click "Add New Scheduler" to start creating a new metering scheduler.
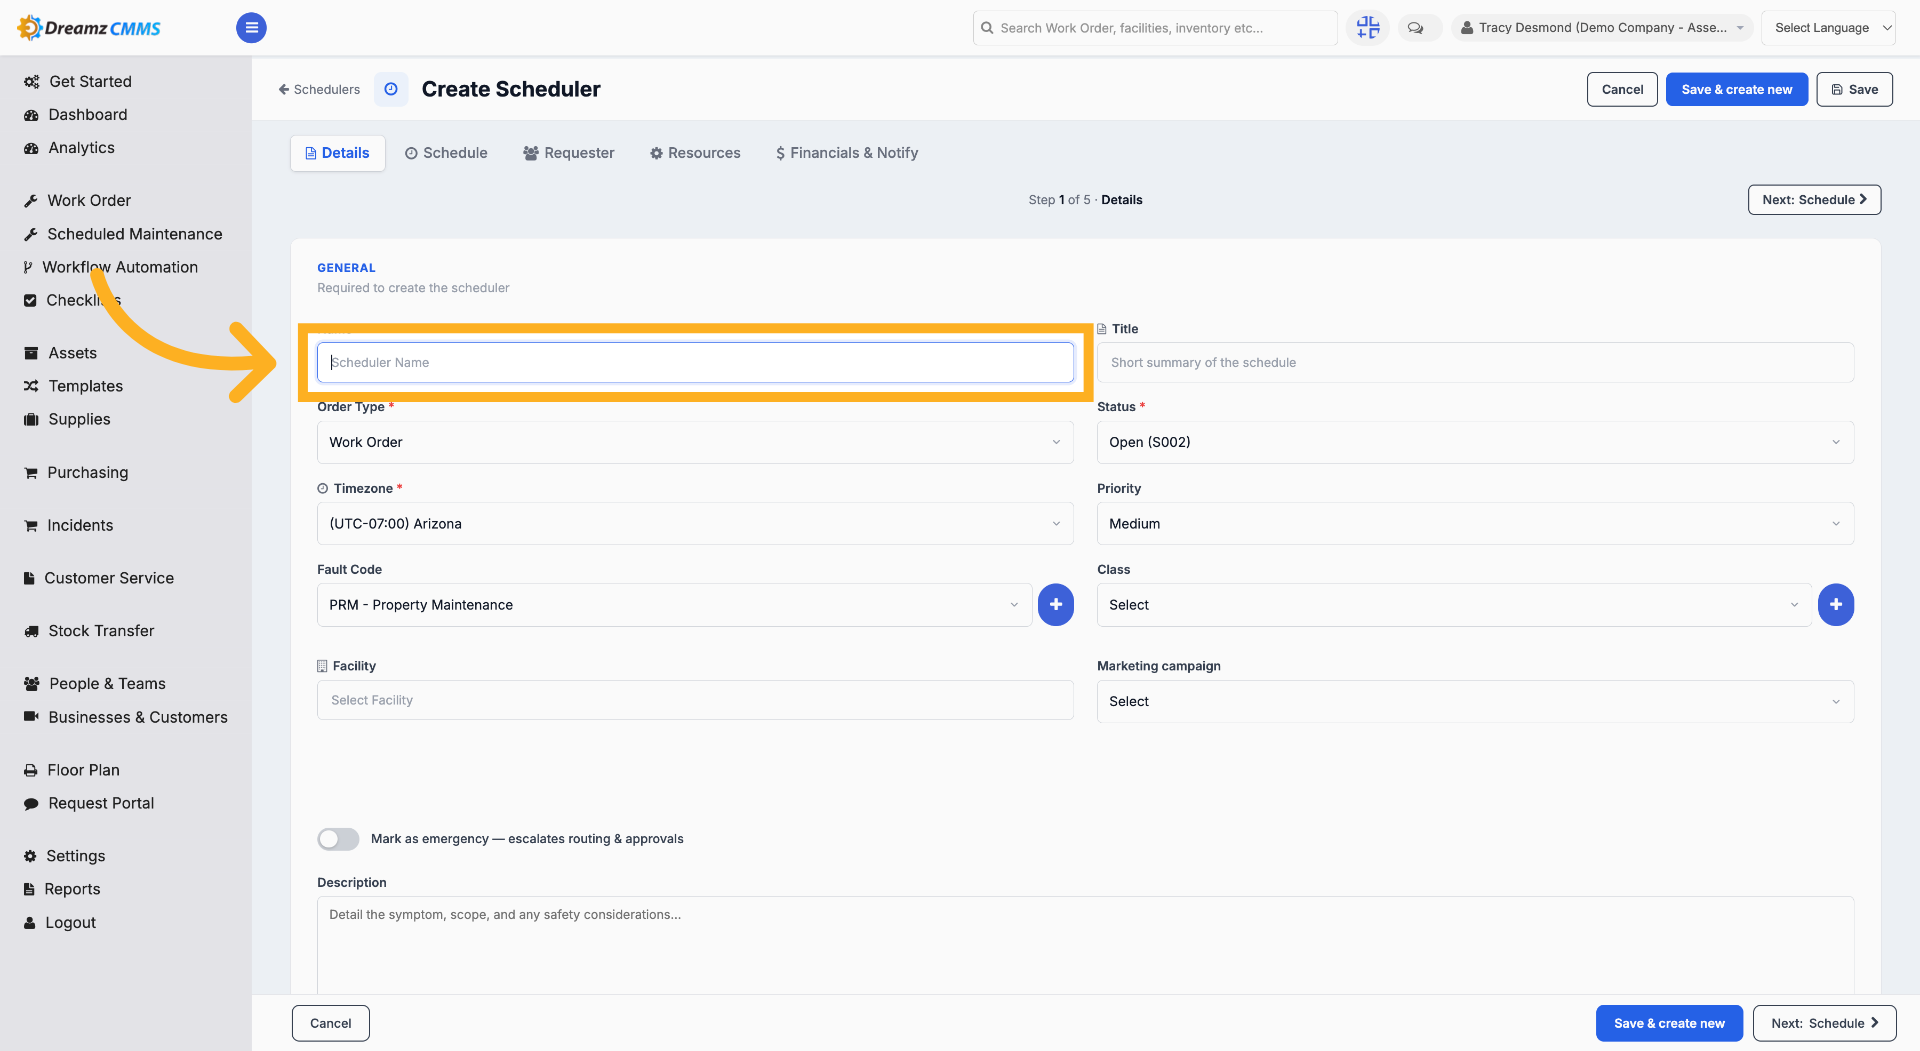
Step 2 – Select Scheduler Name Field
Click "Scheduler Name" to enter a name for the new scheduler.
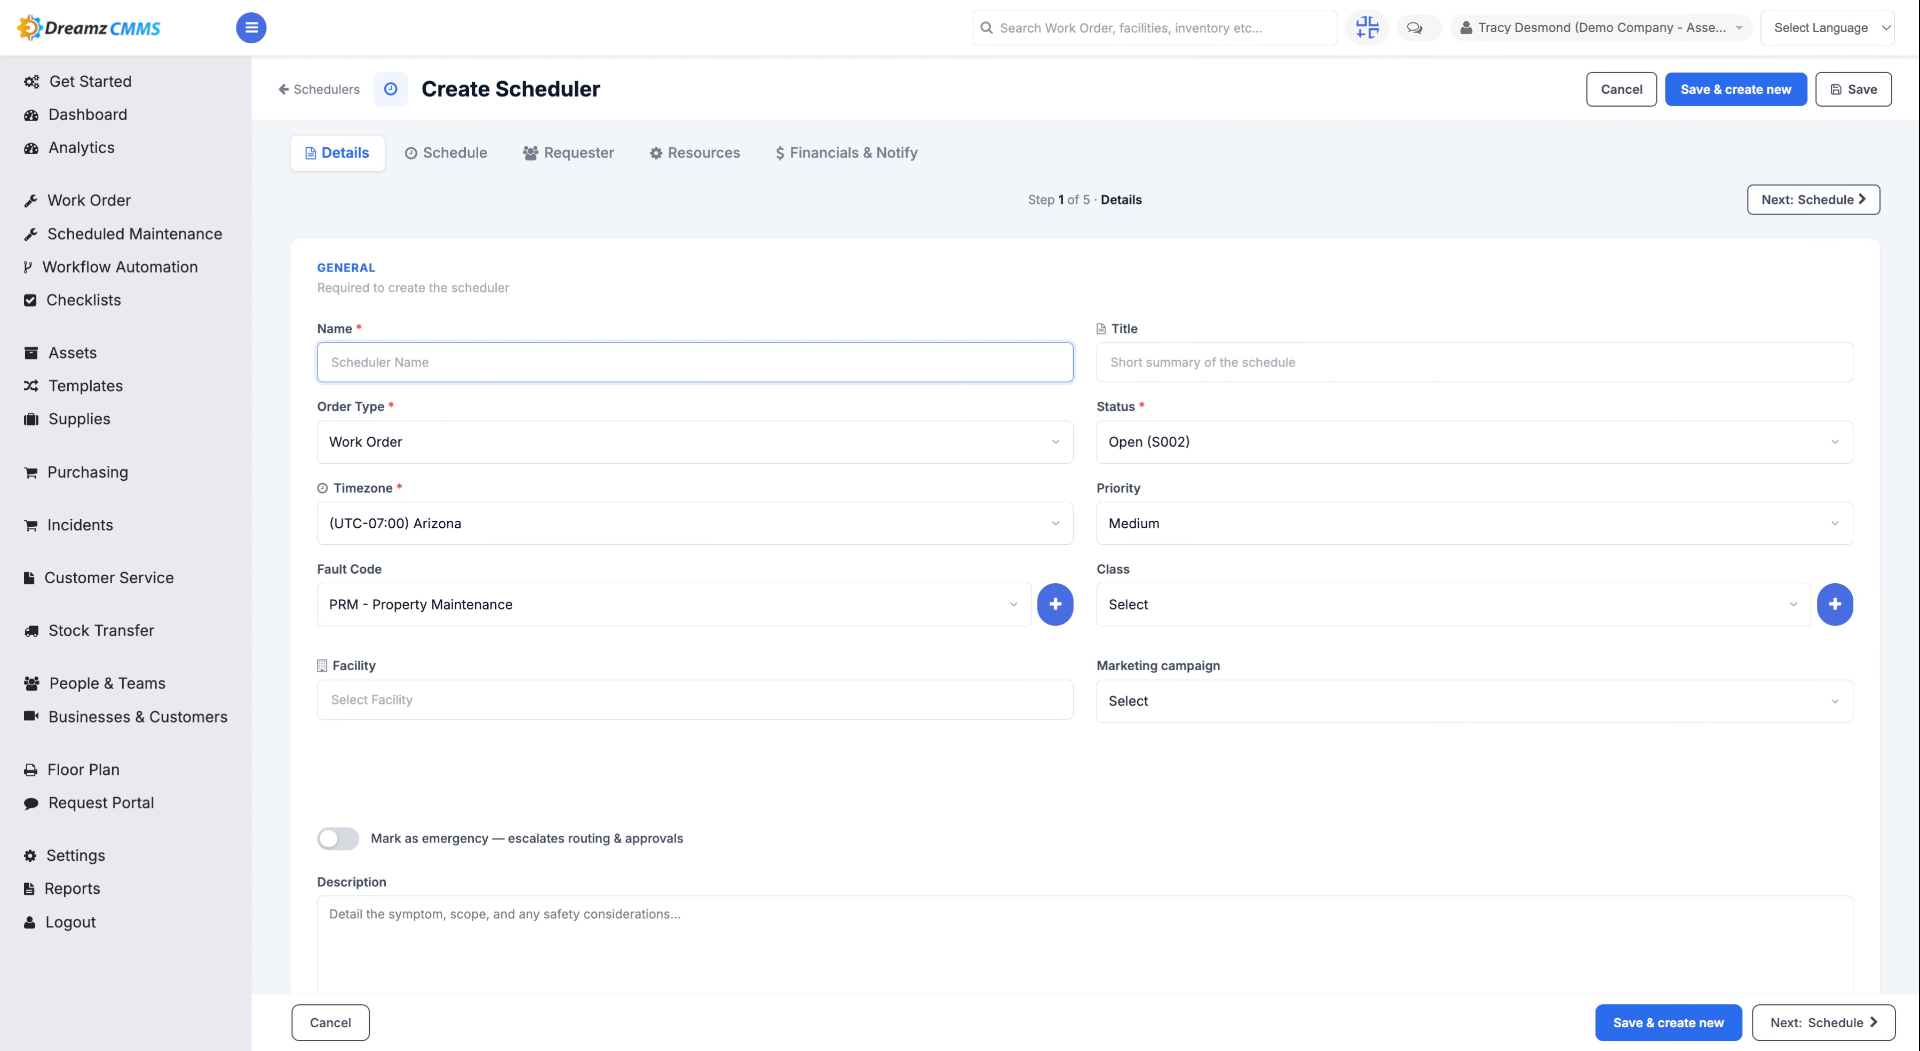
Step 3 – Enter Scheduler Name
Fill in a name (for example, "Demo Scheduler") for the new scheduler.
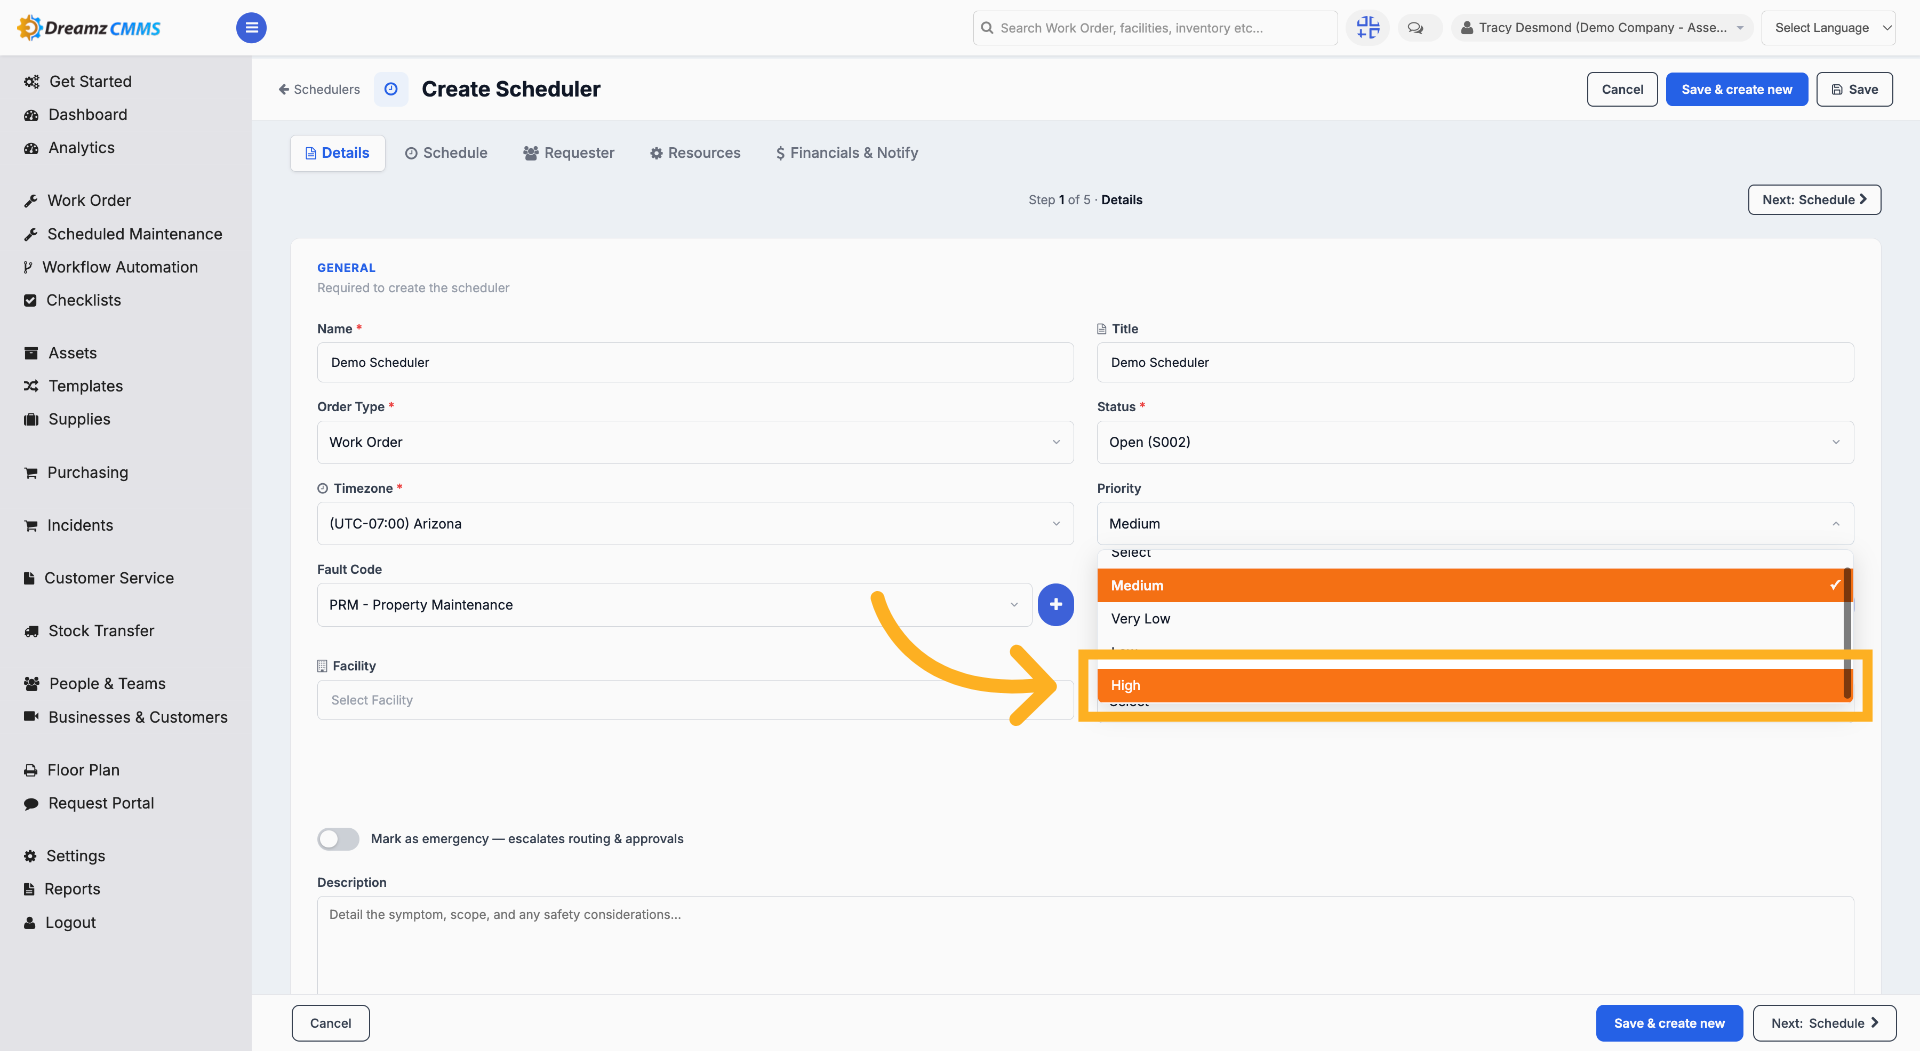
Step 4 – Choose Priority
In the priority column, select High (or the appropriate priority) for the metering scheduler.
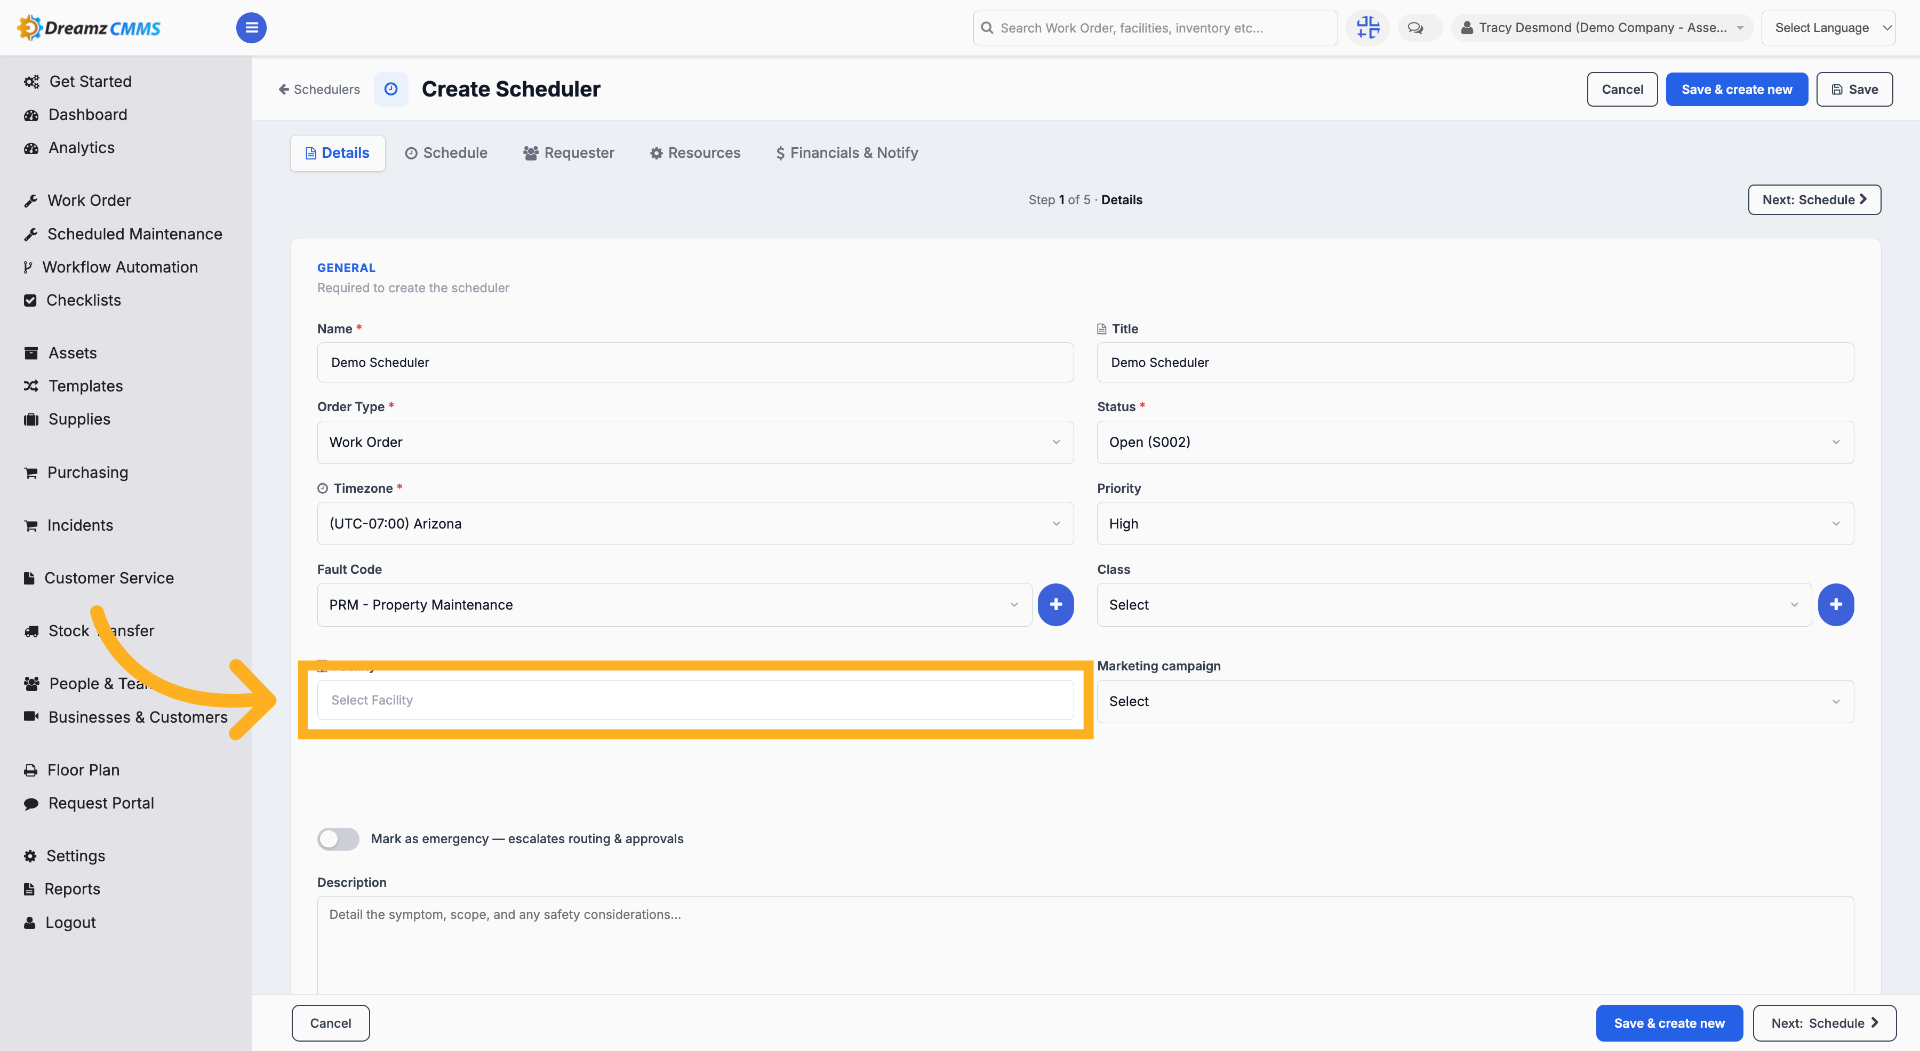
Step 5 – Select Facility
Click "Select Facility" to choose the facility associated with the metering scheduler from the facility list.
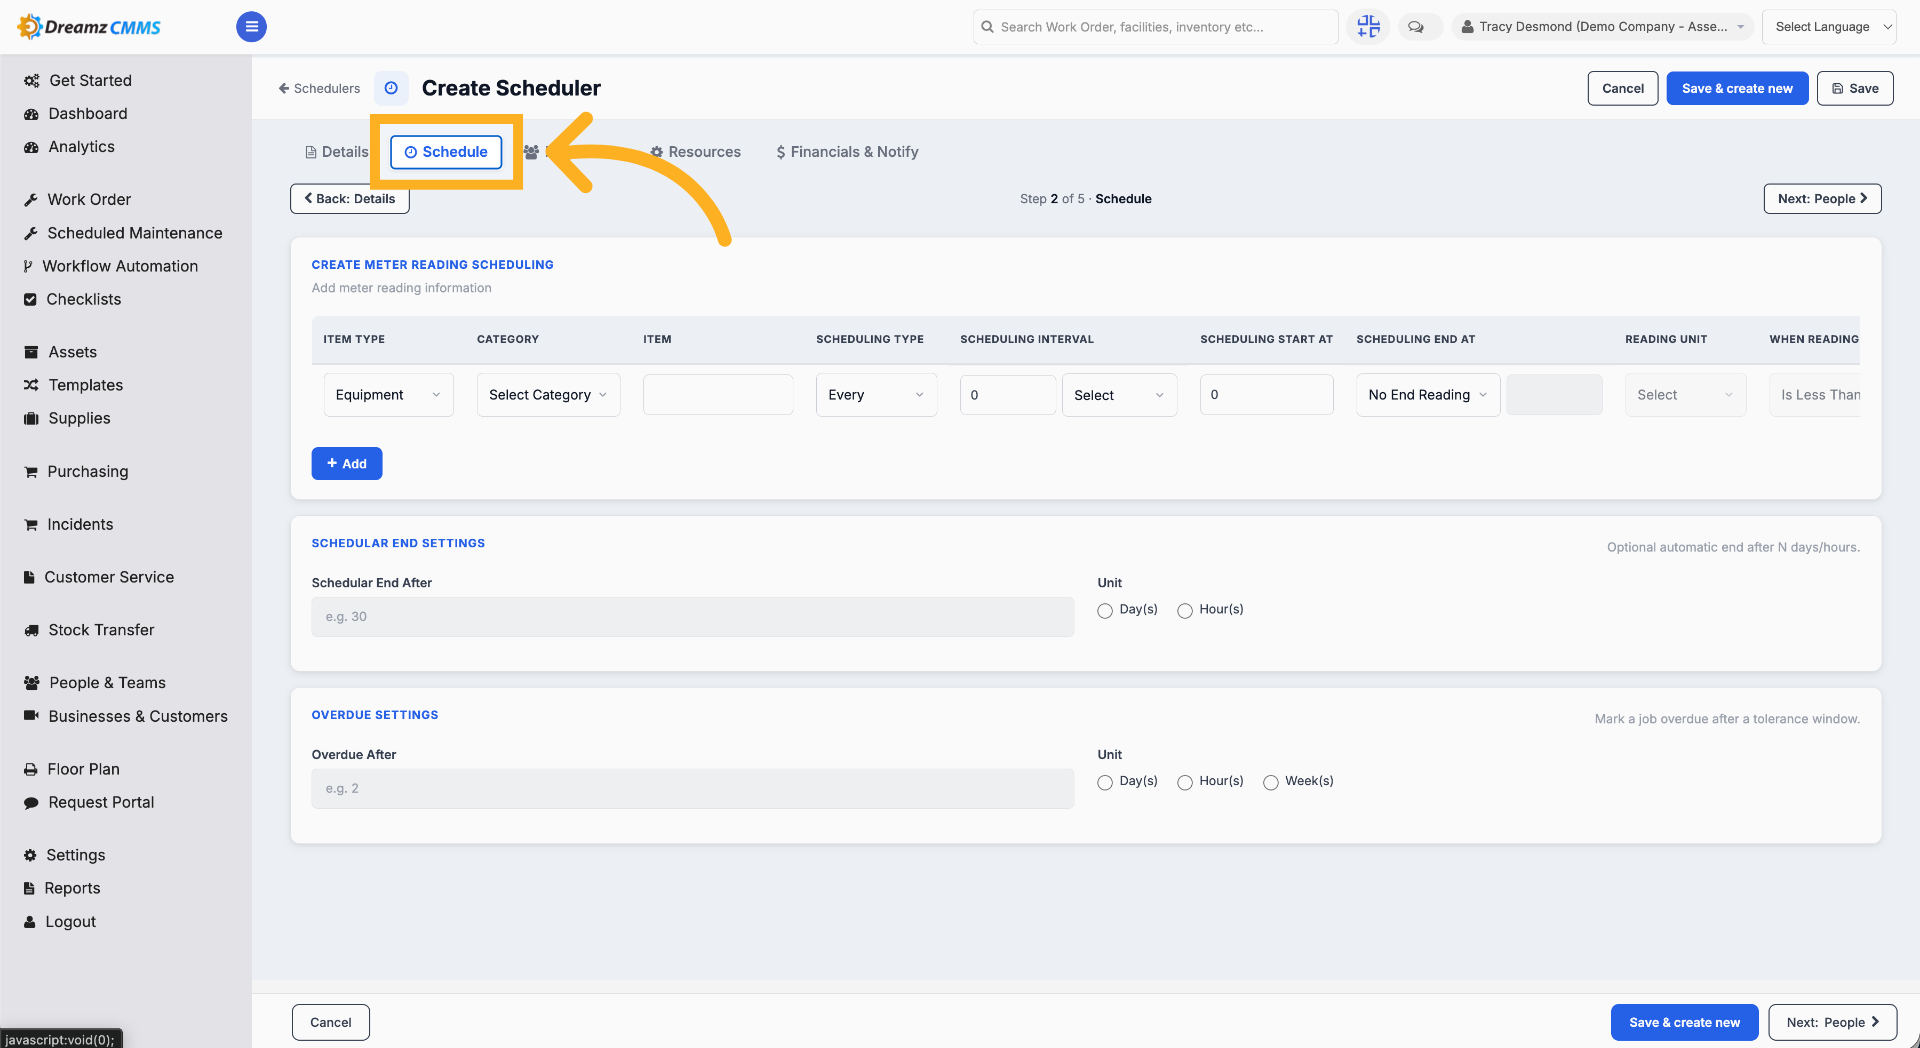
Step 6 – Open Schedule Settings
Click "Schedule" to configure detailed scheduling options.
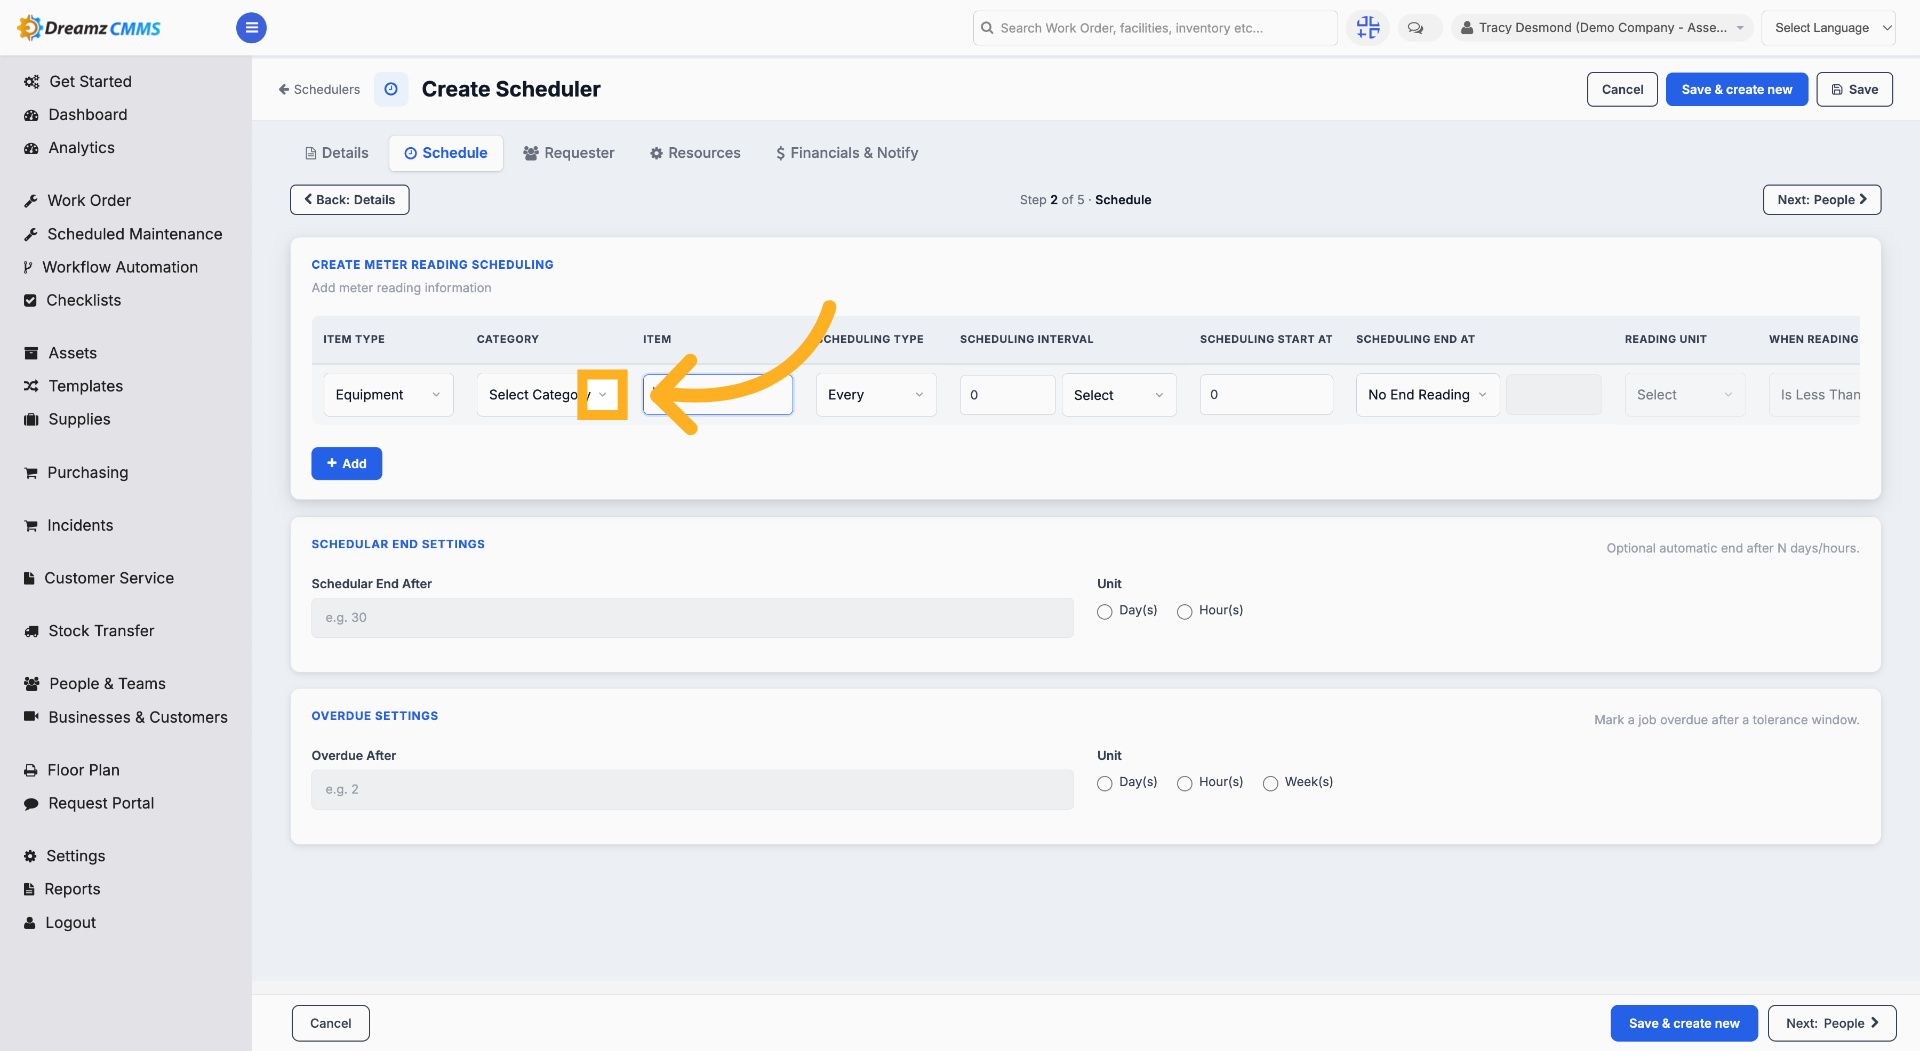
Step 7 – Choose the Category
Click here to choose the category option in the scheduler configuration.
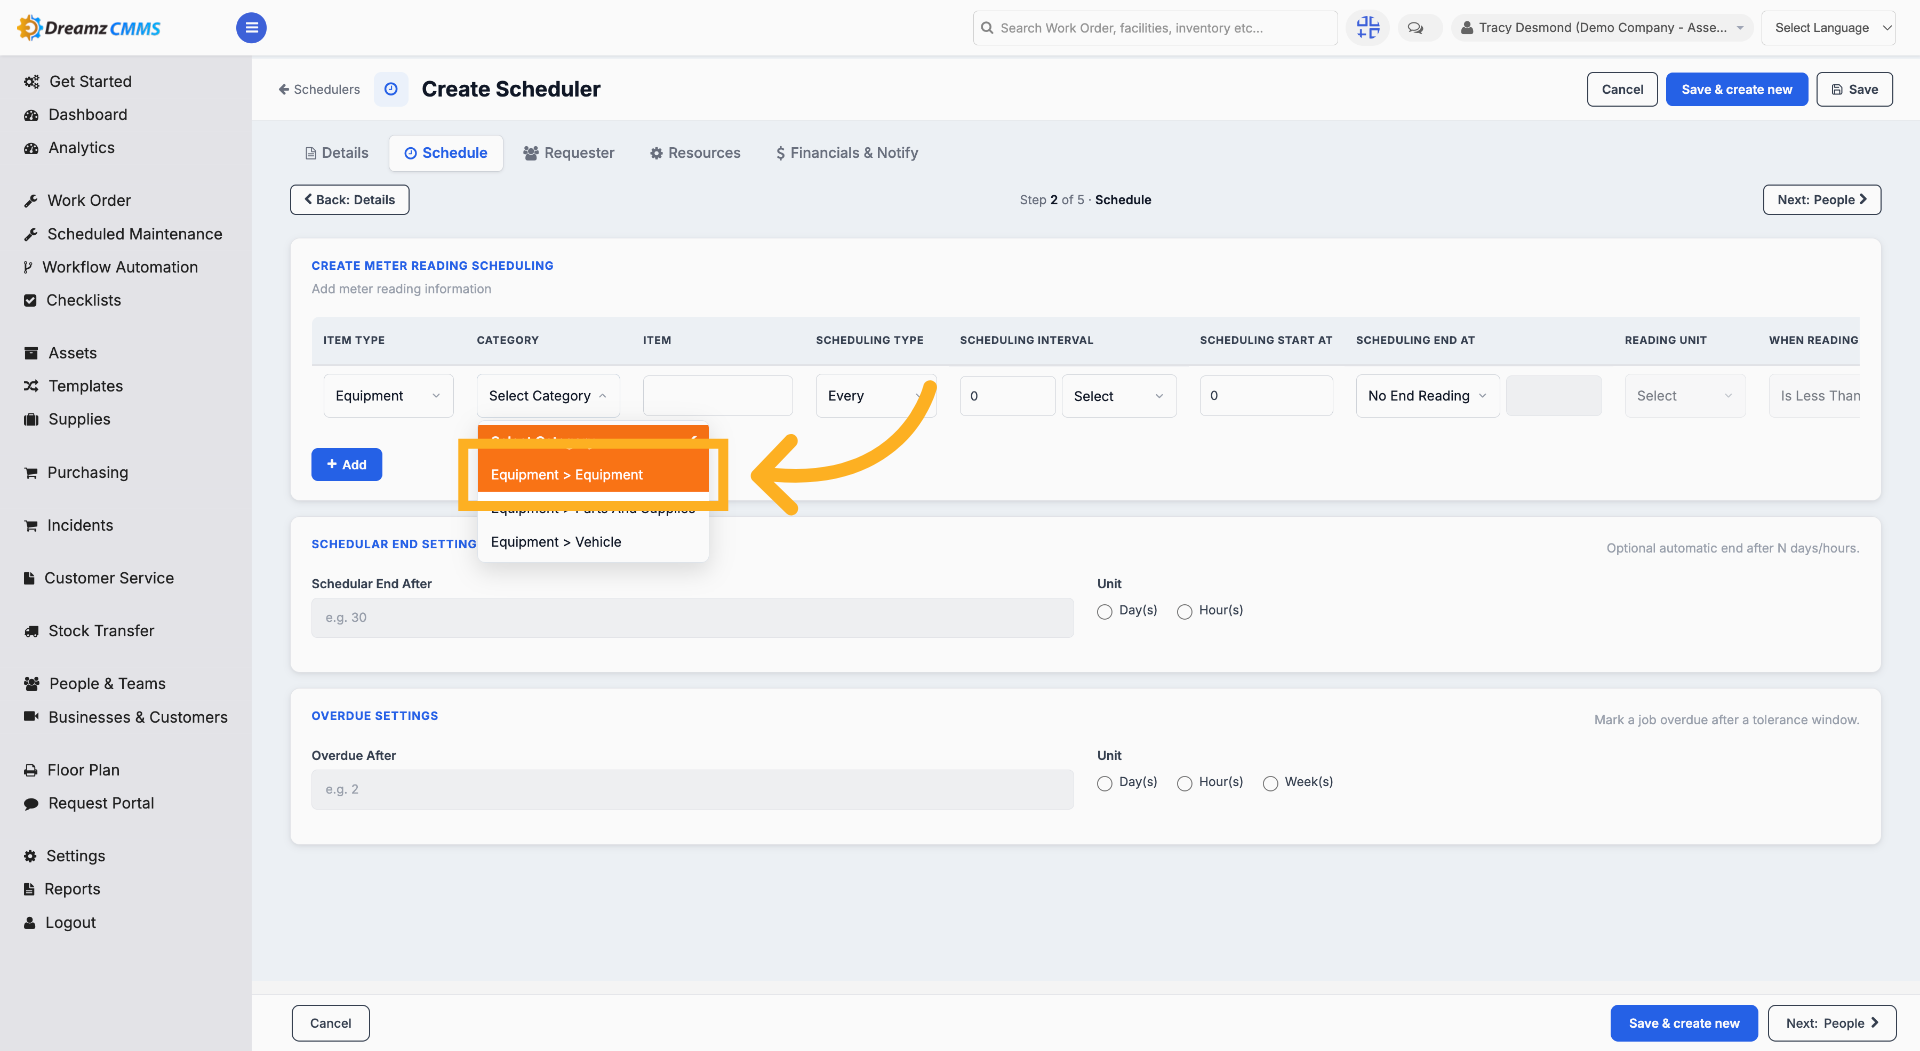
Step 8 – Access Equipment Section
Click "Equipment > Equipment" to manage equipment linked to the scheduler.
Step 9 – Select an Asset from the Listing
Click here to select an asset from the asset listing.
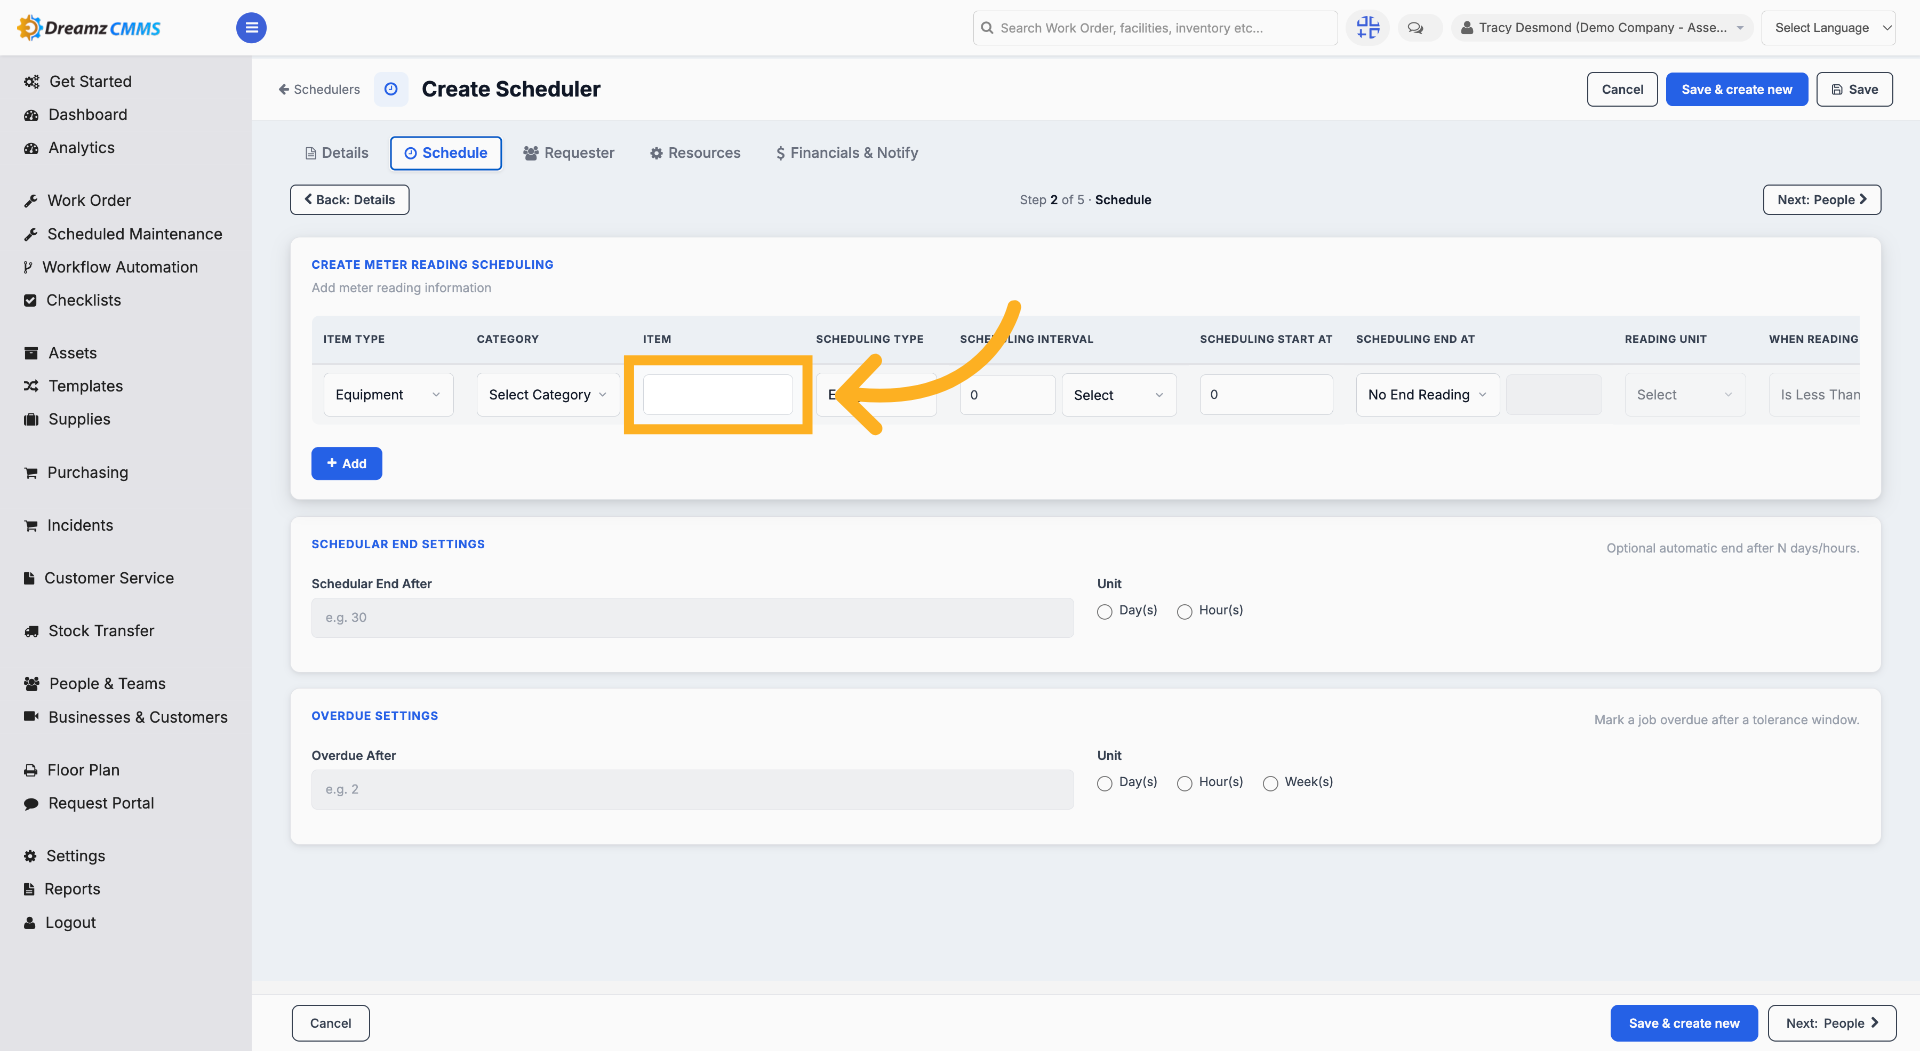
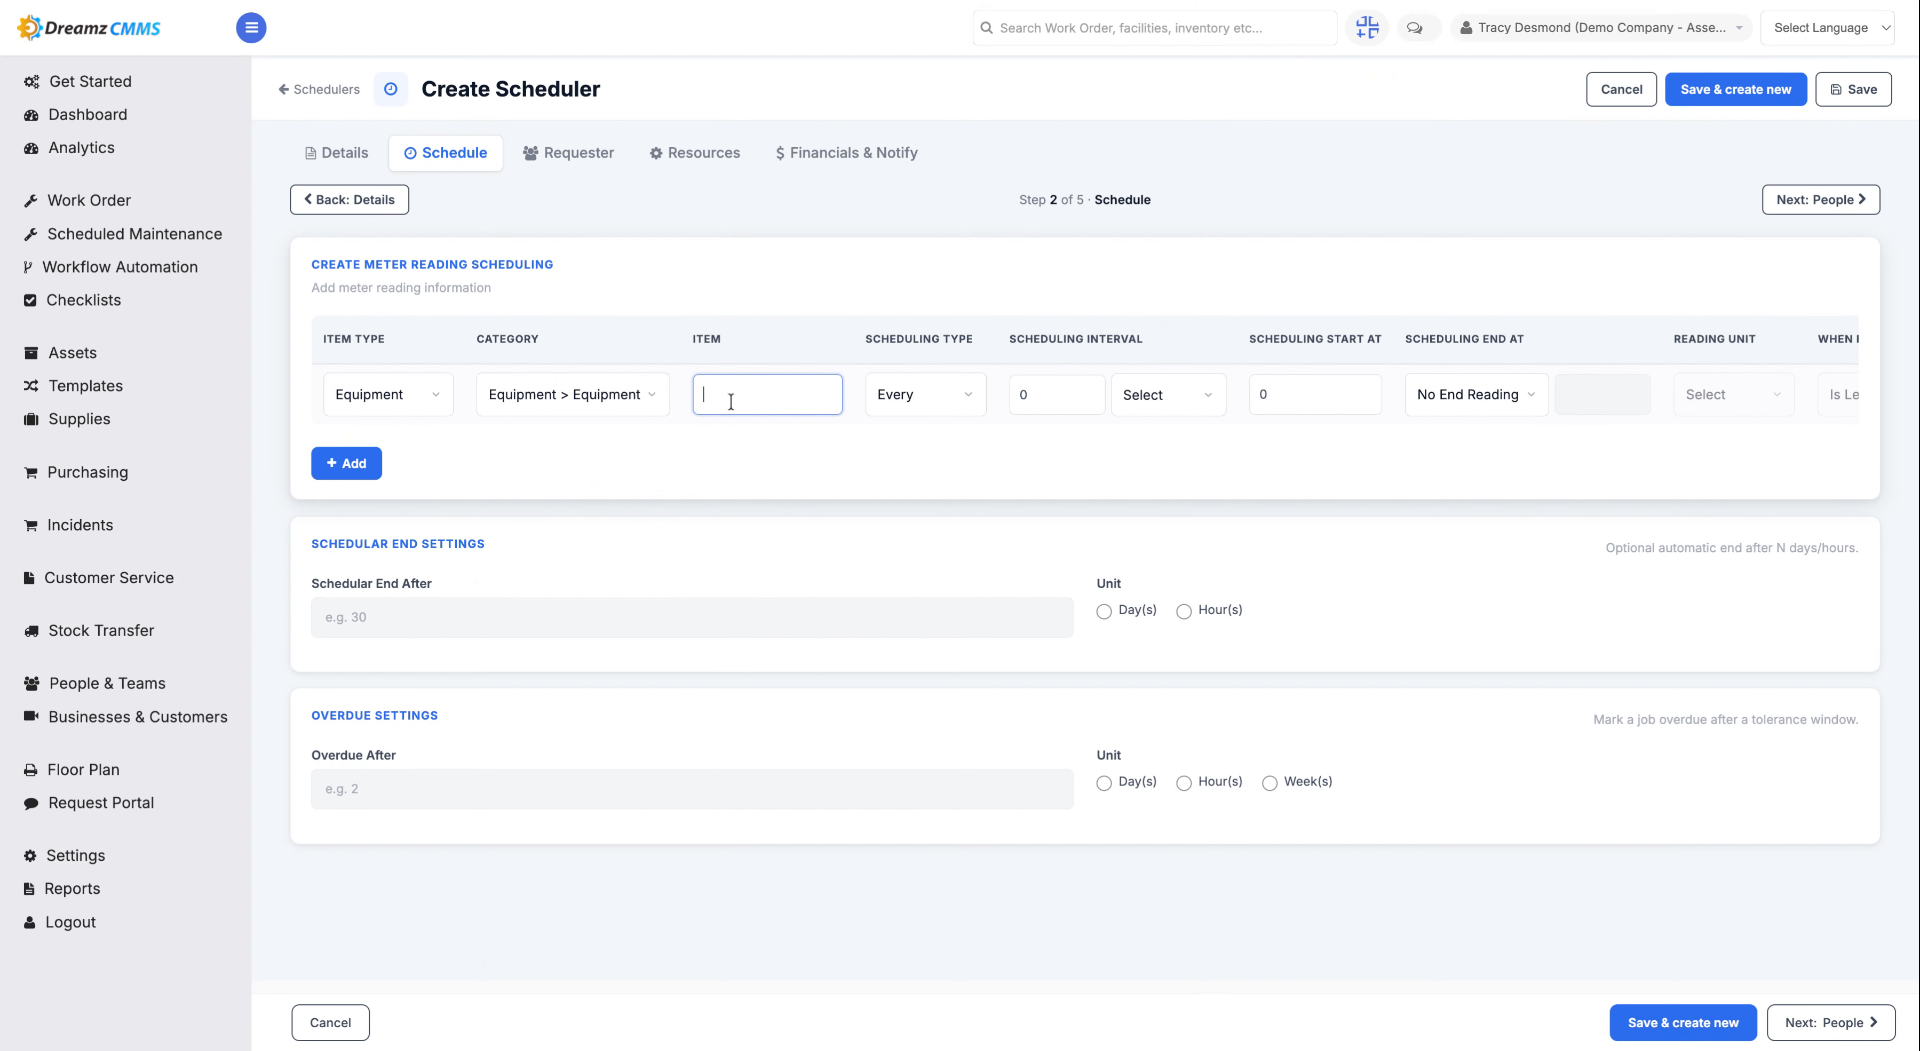
Step 10 – Search for an Asset
Search for an asset in the item field to attach that asset to the metering schedule.
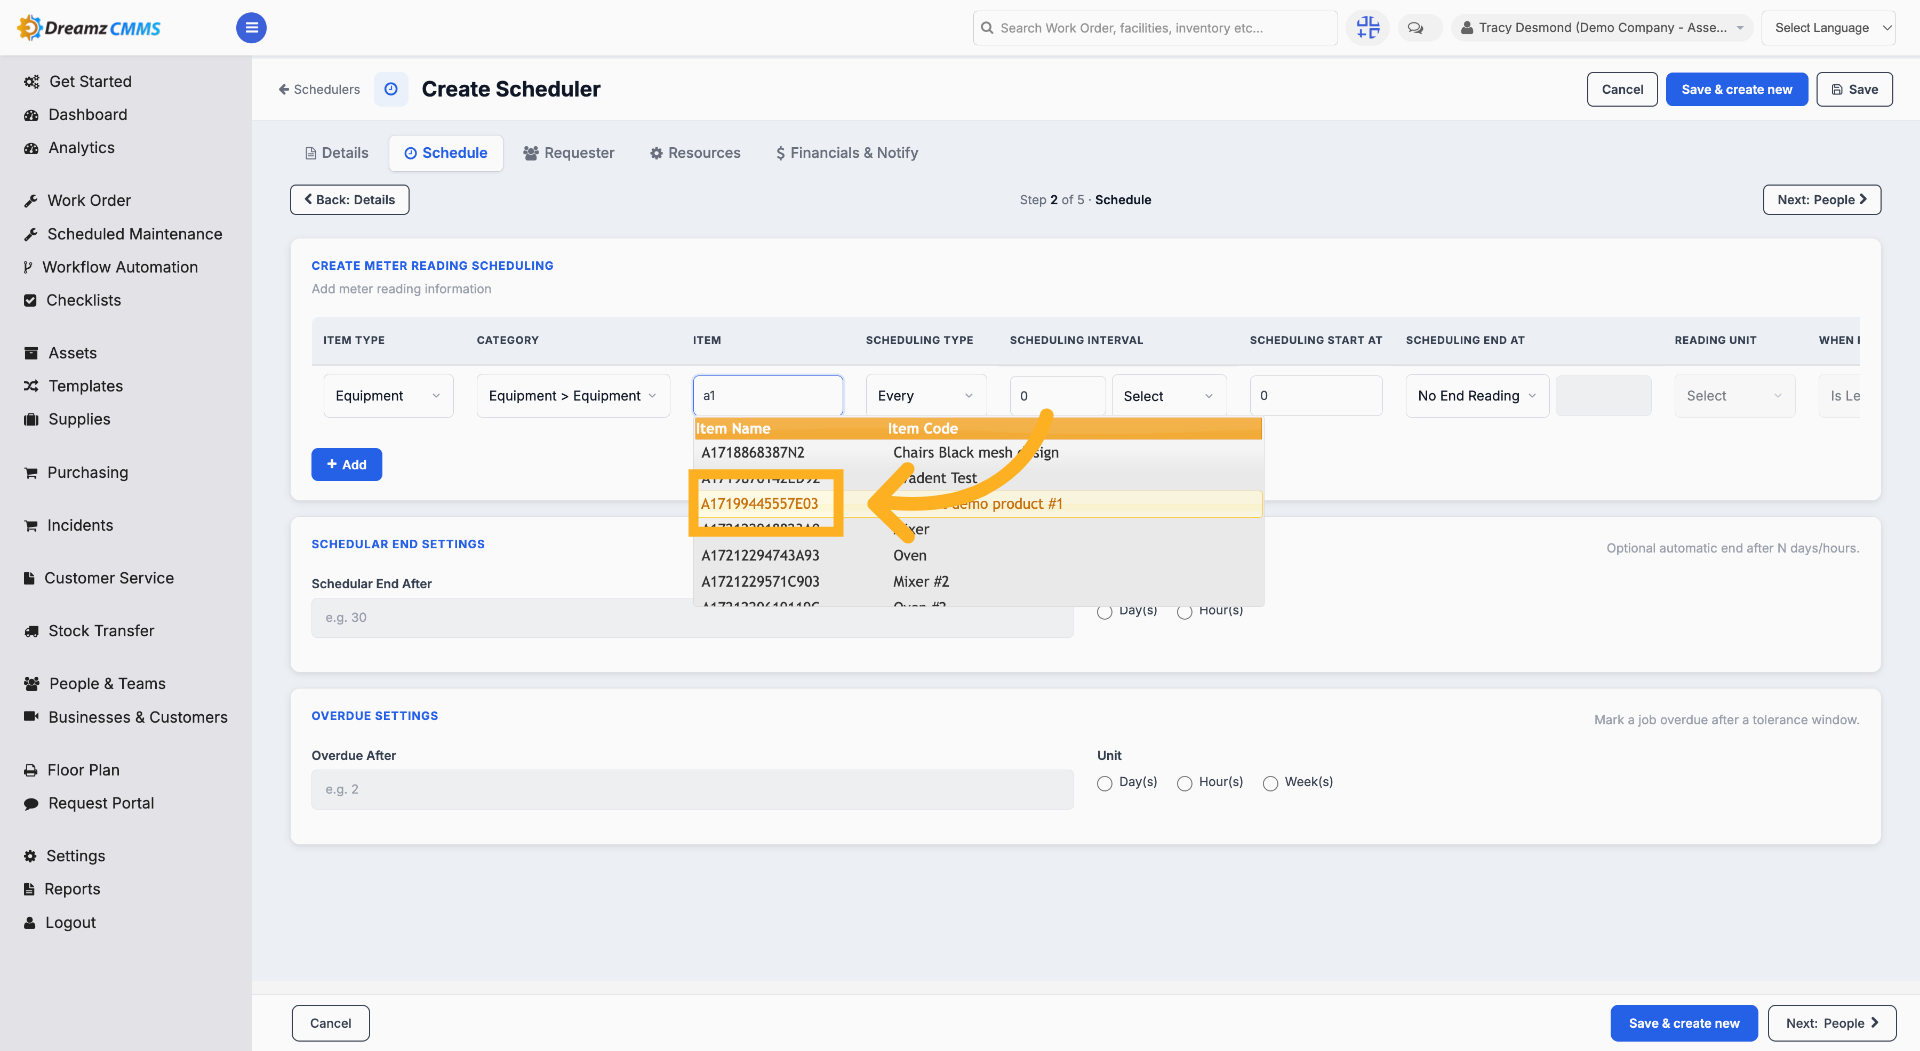
Step 11 – Select Equipment
Click the equipment from the equipment list to choose the specific equipment and attach it to the metering scheduler.
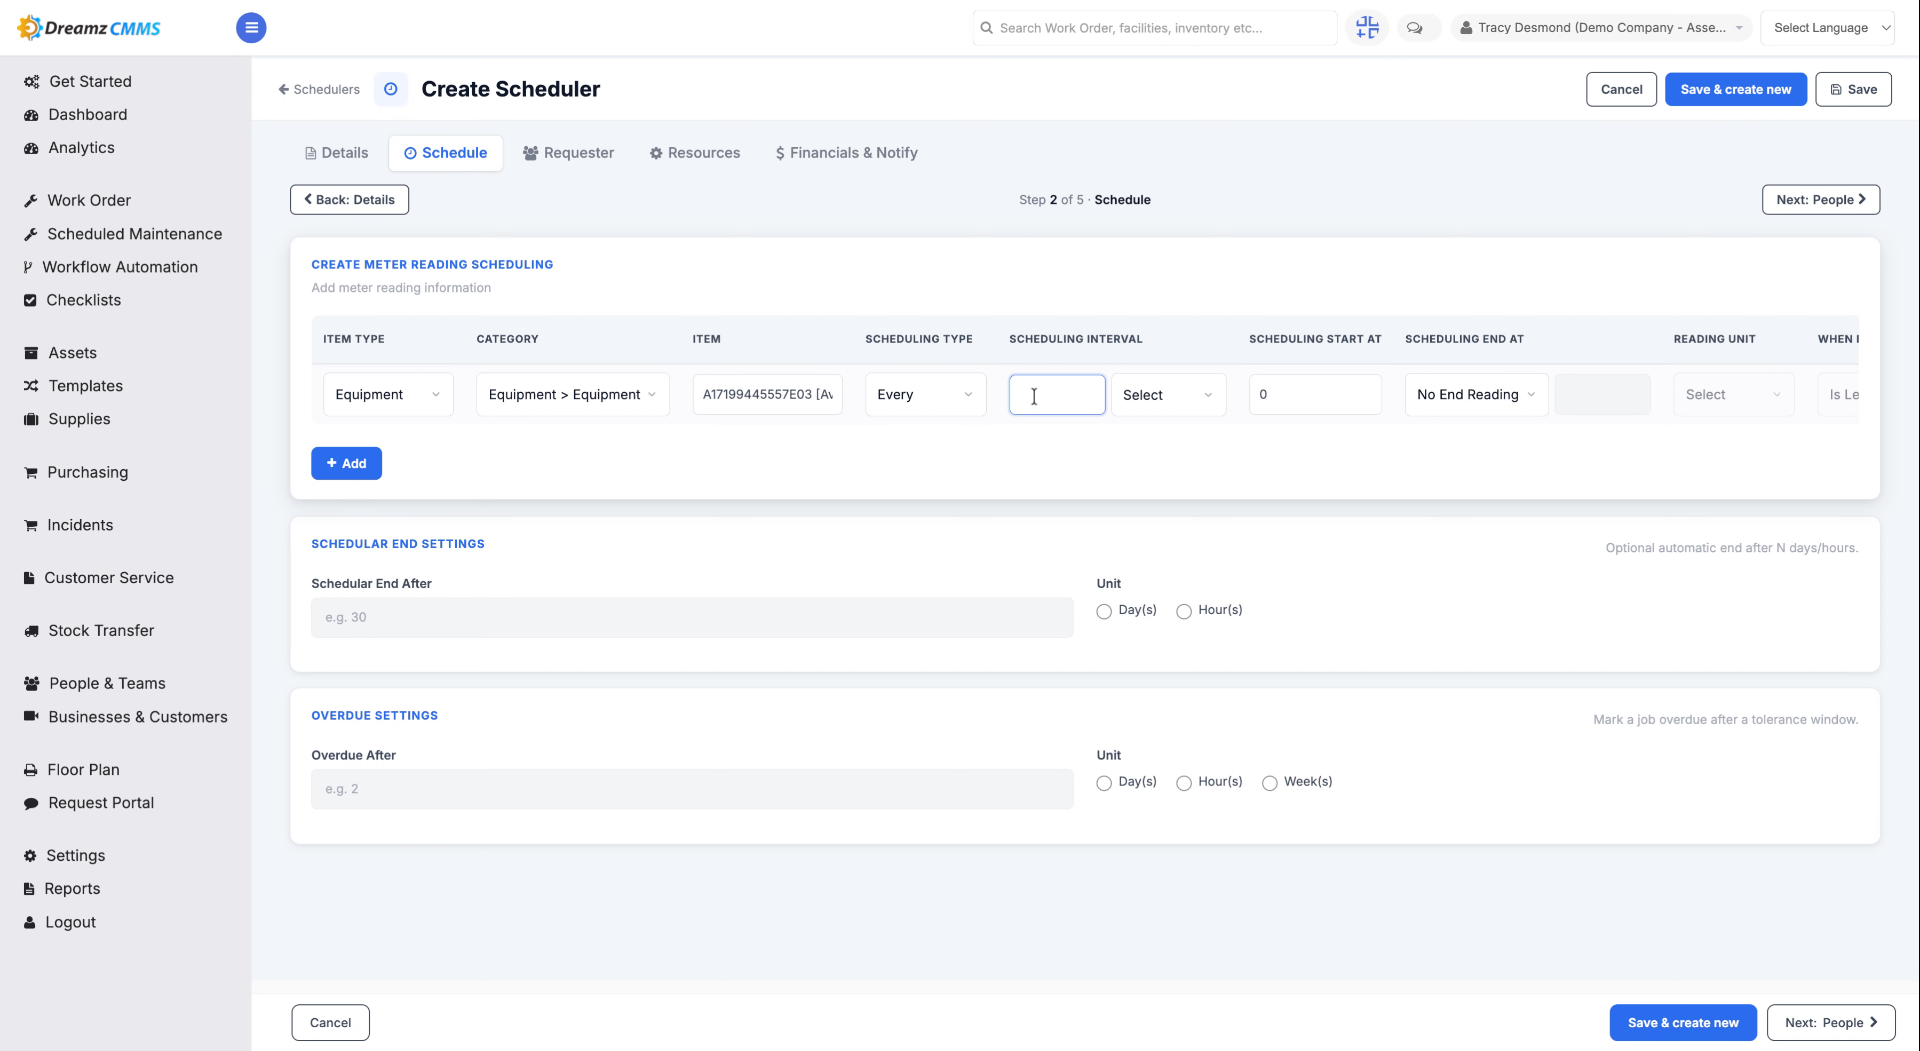
Step 12 – Enter Scheduling Interval
Fill in the scheduling interval for the metering scheduler.
Step 13 – Choose Time Unit
Click "Hours" to set the time unit for scheduling.
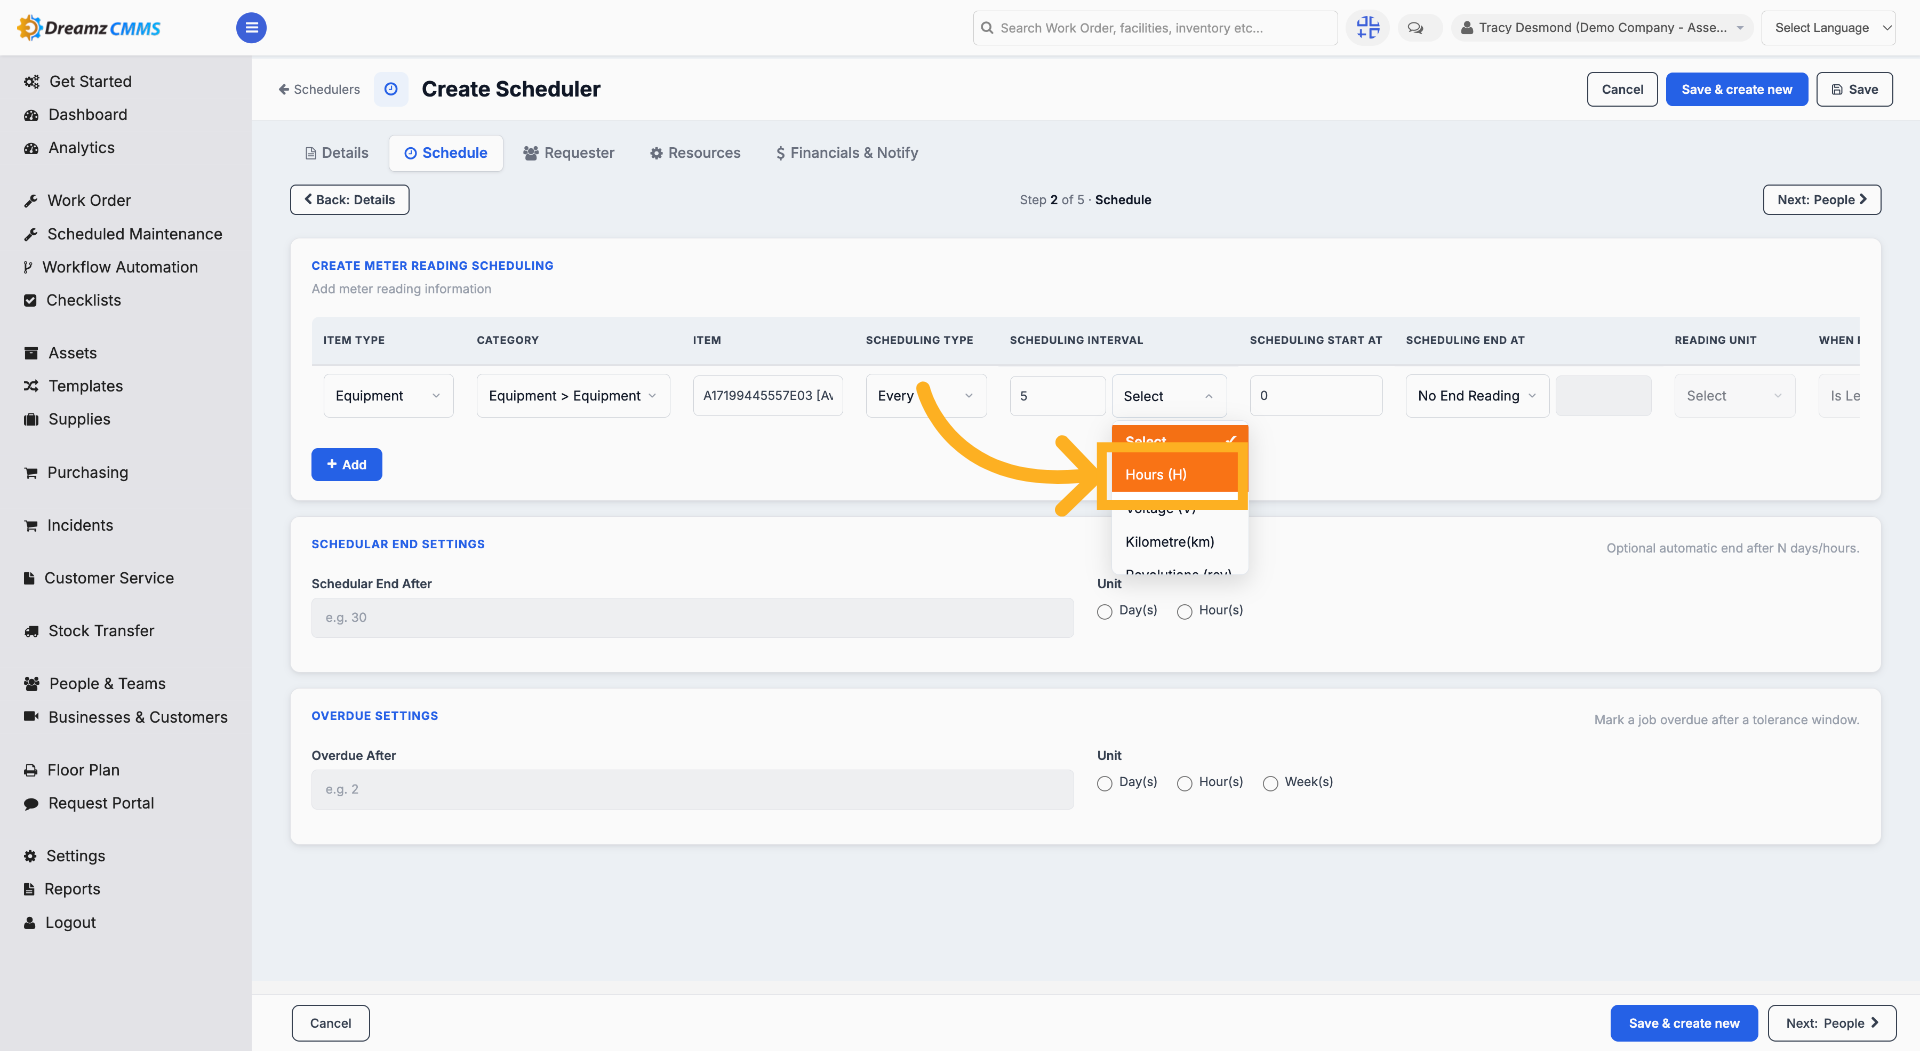
Step 14 – Enter Scheduling Start At
Fill in the Scheduling Start At value to specify when the schedule will run.
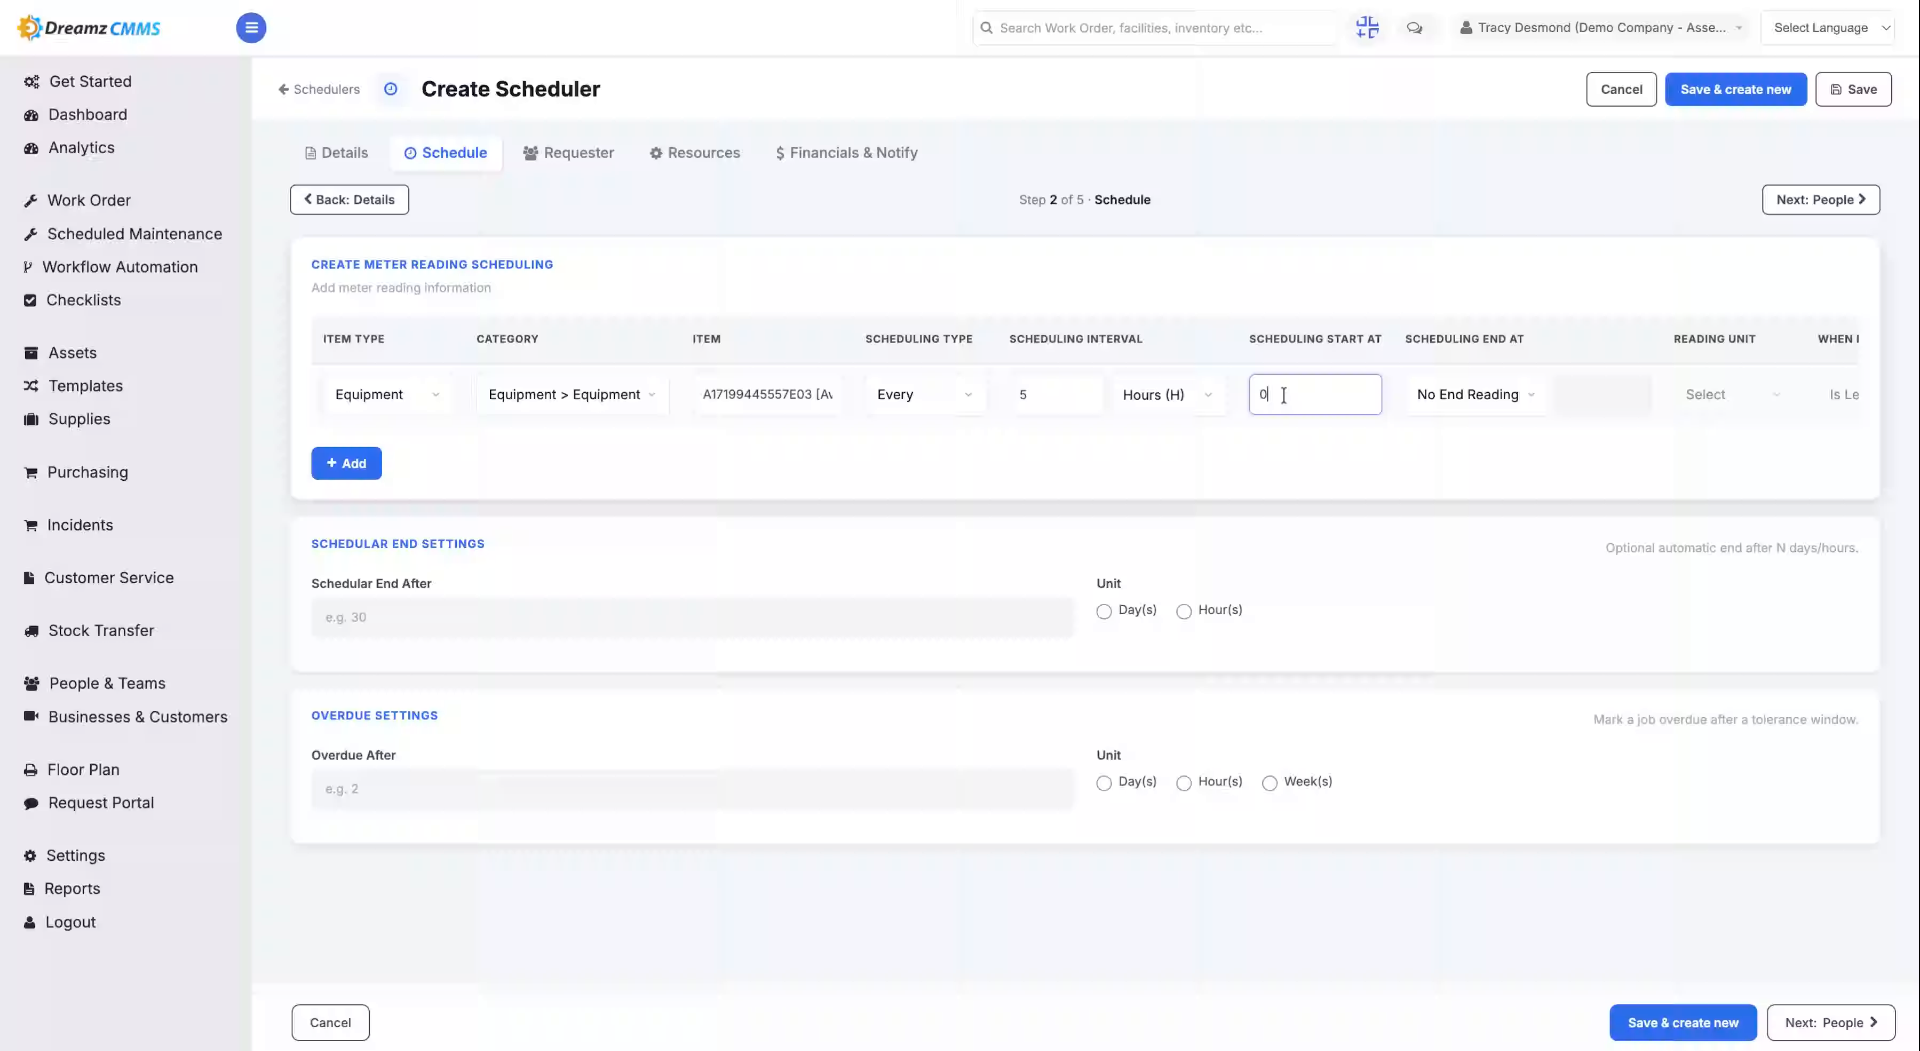
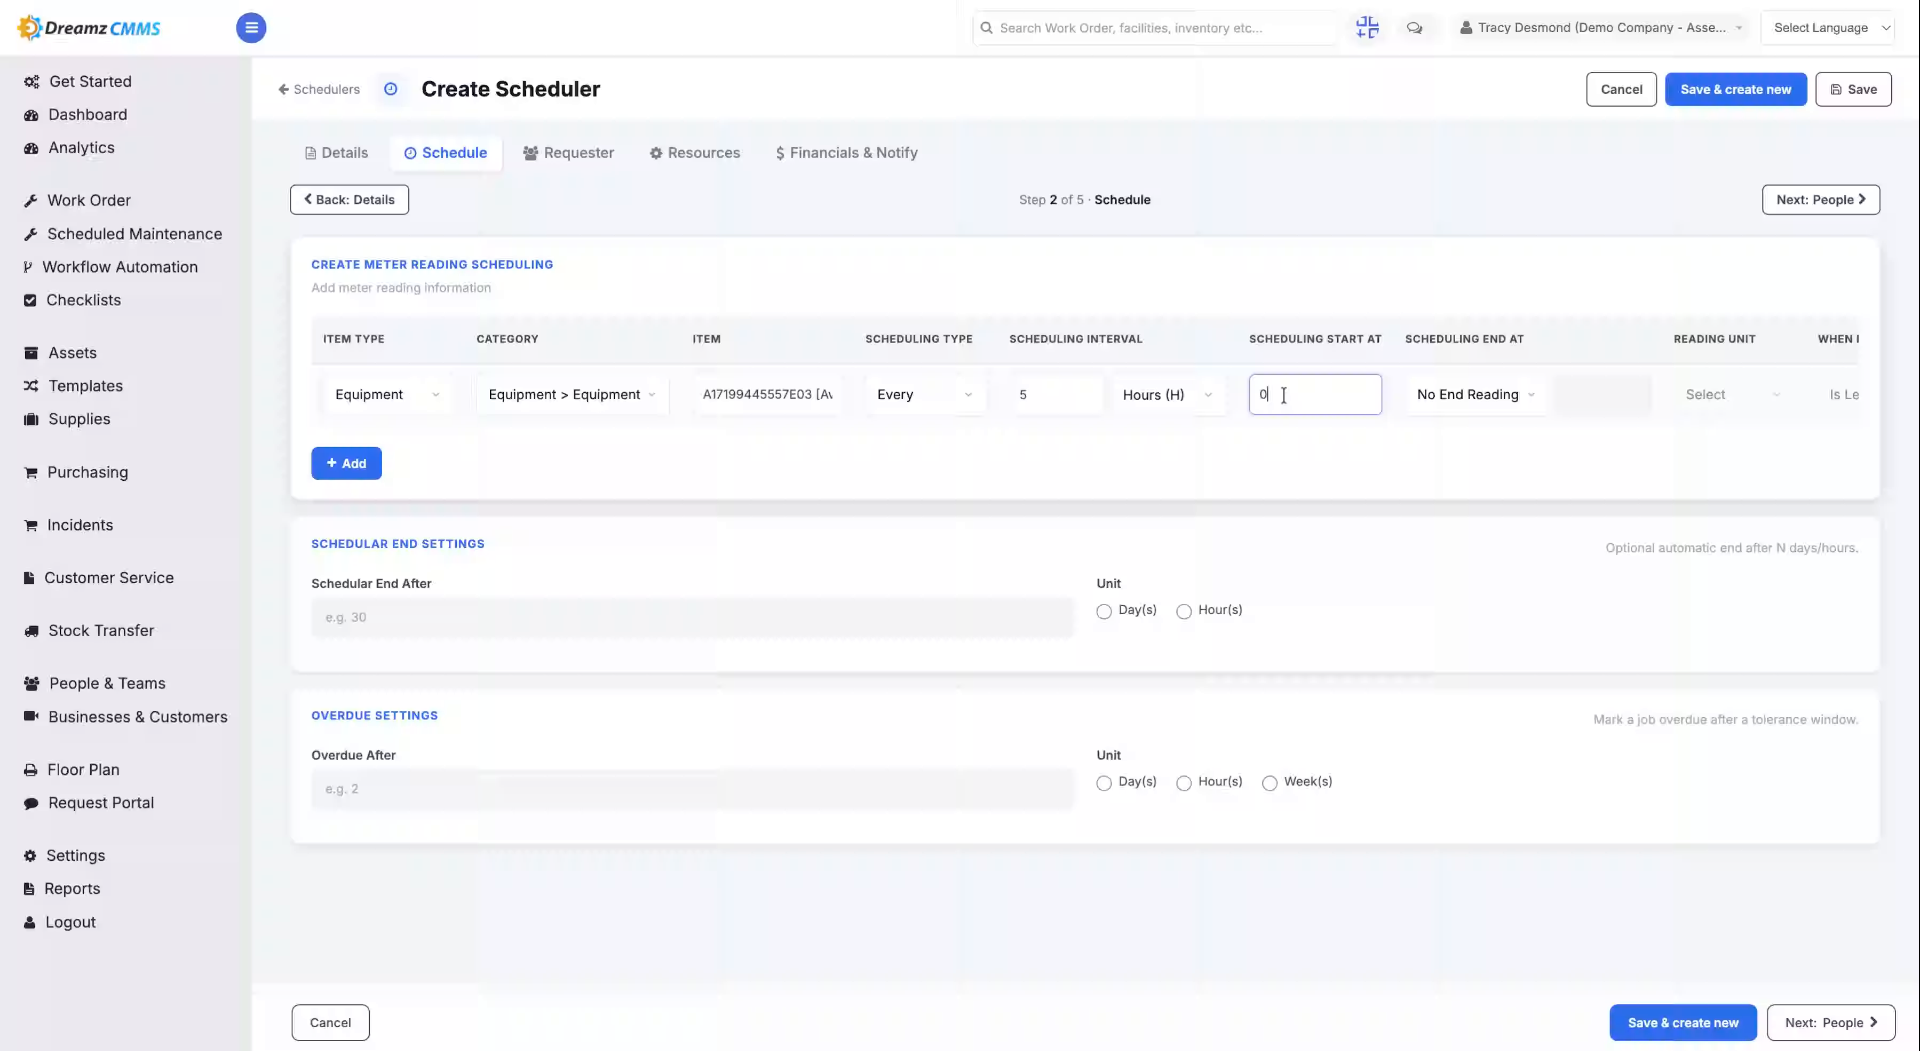
Step 15 – Understand the Metering Scheduler Workflow
This metering scheduler will automatically trigger when the equipment meets the criteria you've defined.
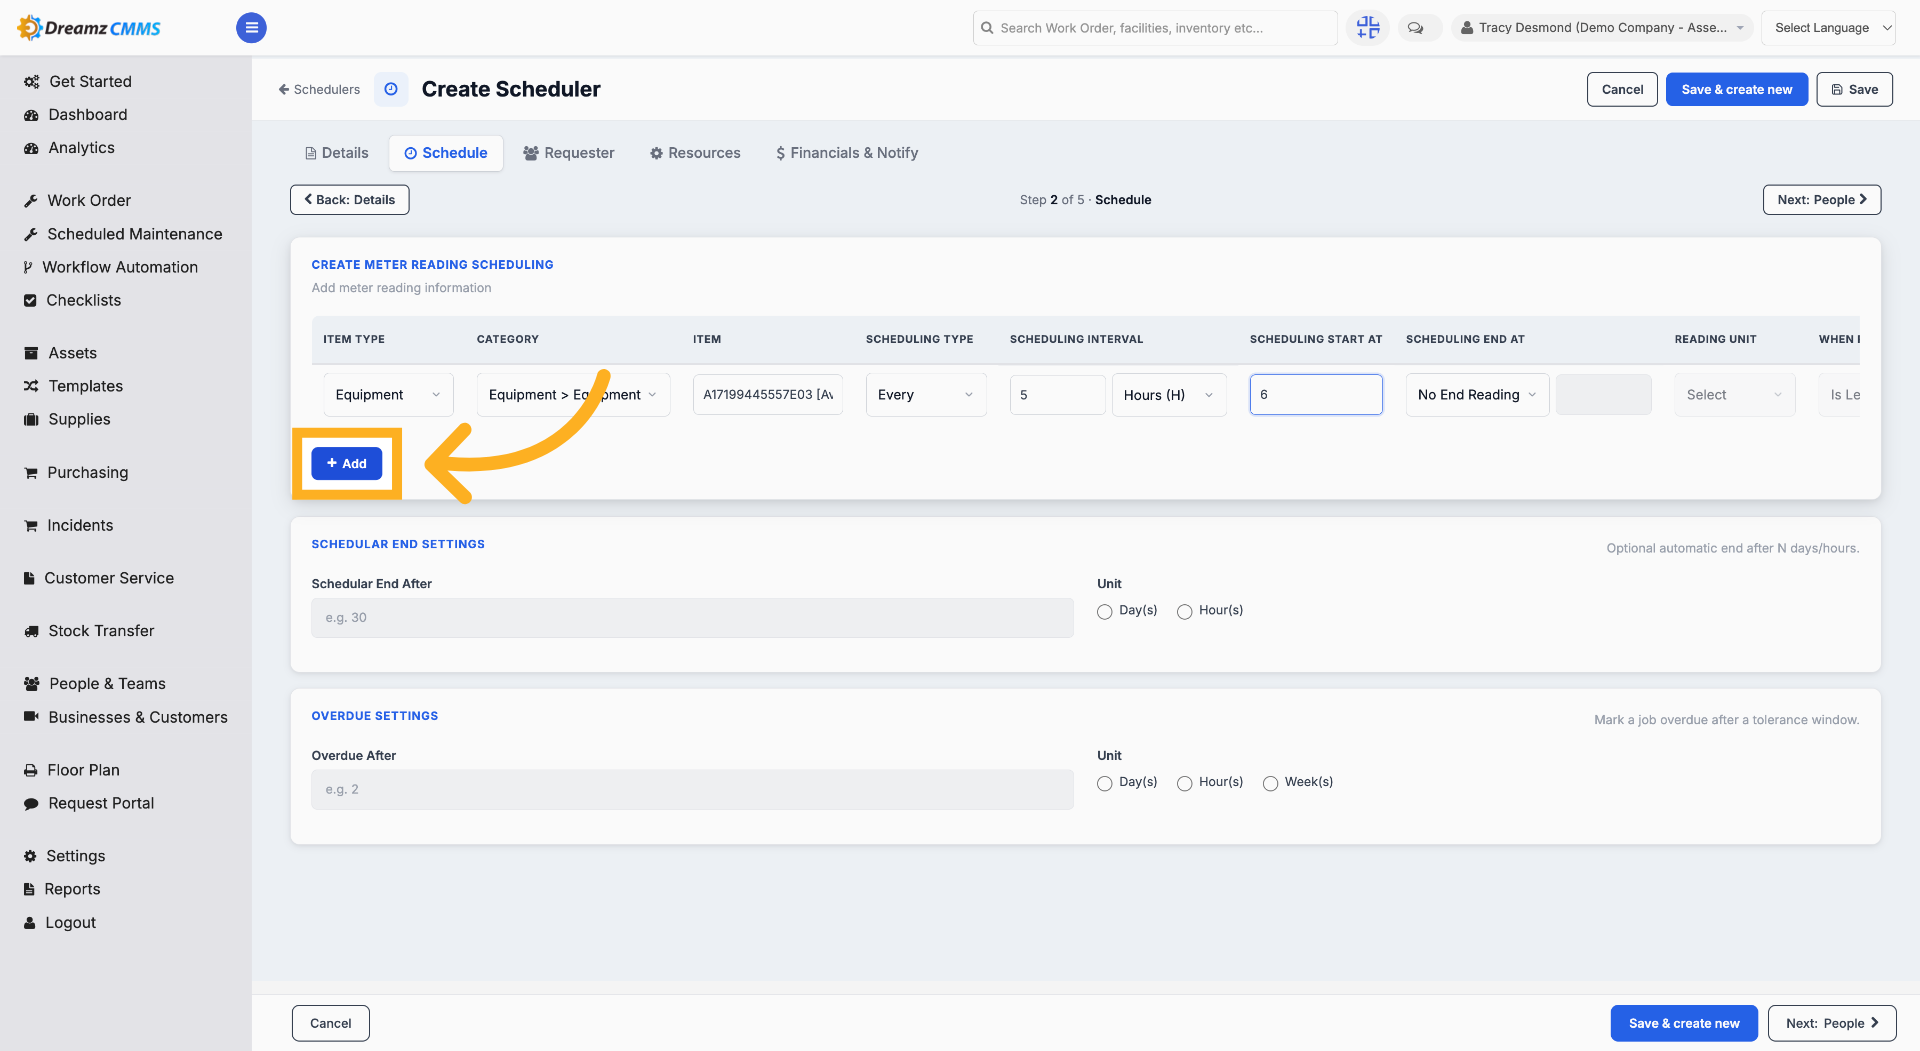
Step 16 – Add Another Scheduler Entry
Click "Add" to add another entry to the list.
Step 17 – Delete a Scheduler Entry
Click "Delete" to remove the selected scheduler entry.
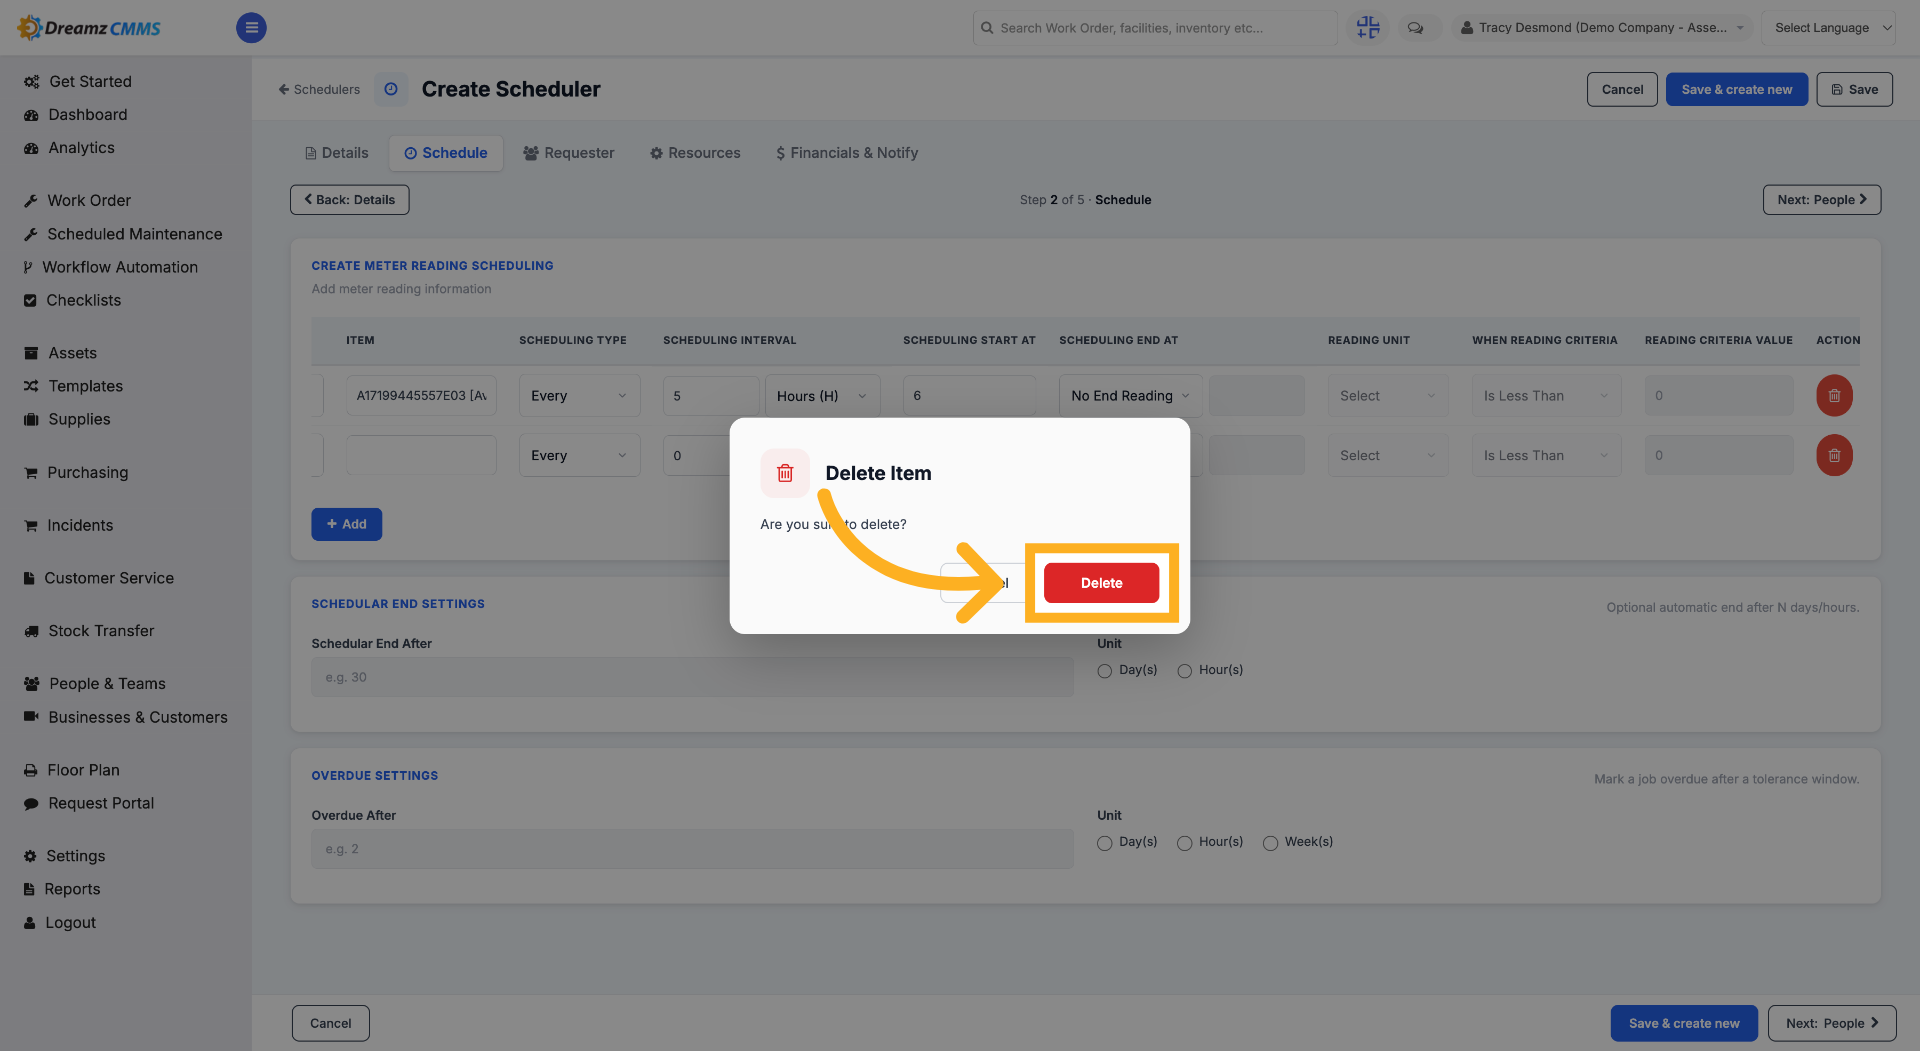
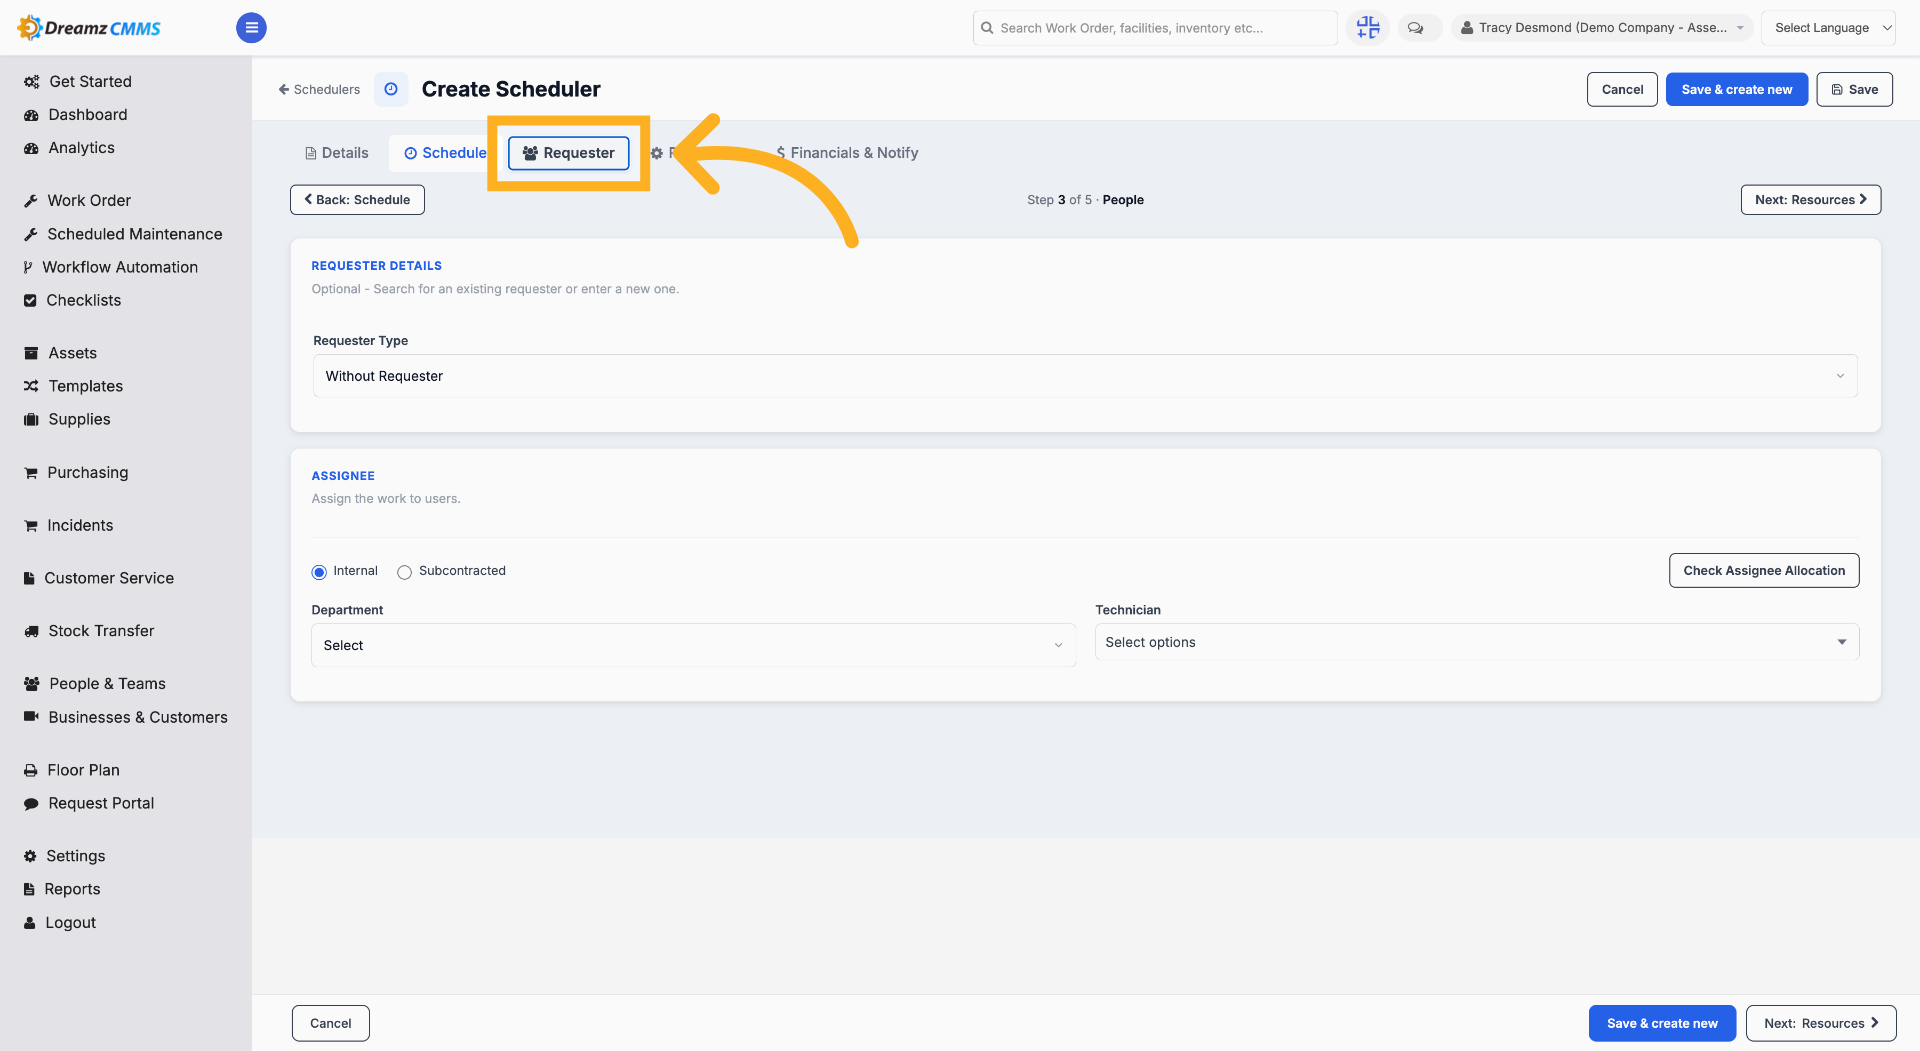
Step 18 – Access Requester Tab
Click "Requester" to manage requester information for the scheduler.
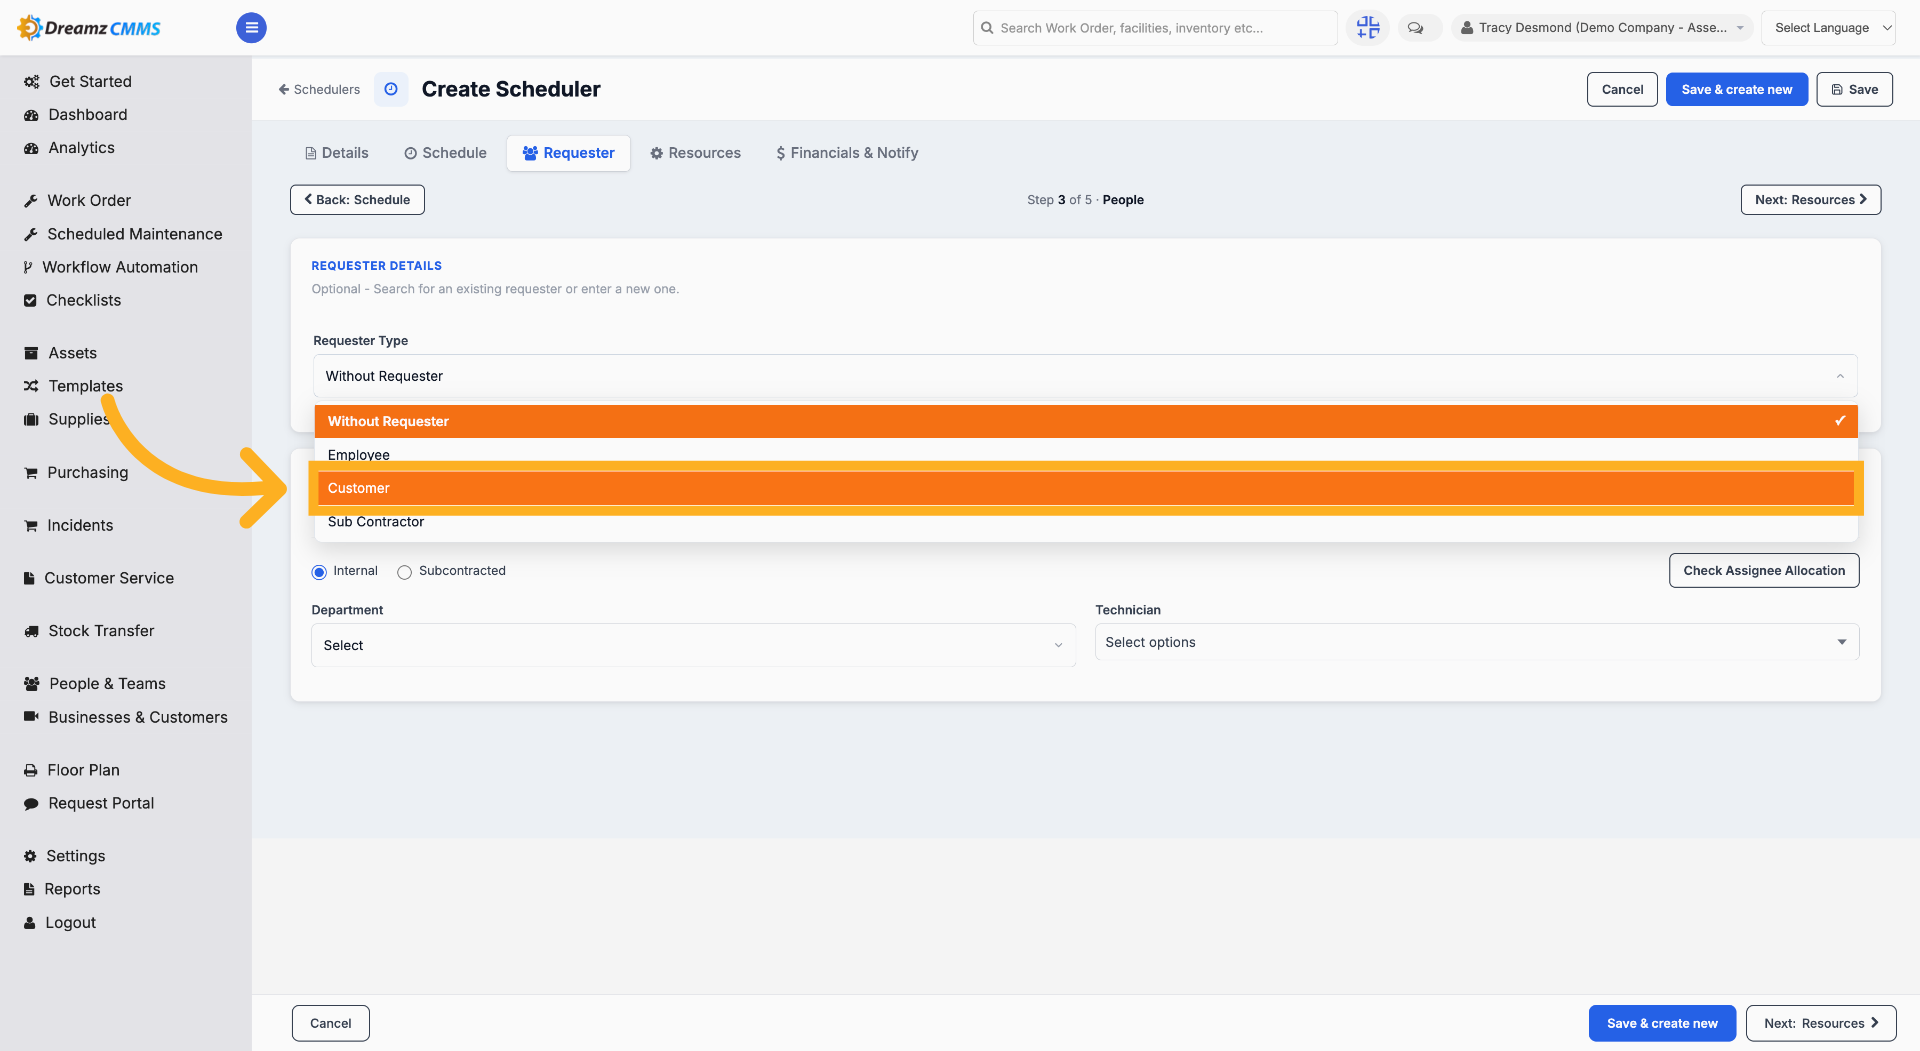
Step 19 – Open Customer Tab
Click "Customer" to view or assign customer details to this metering scheduler.
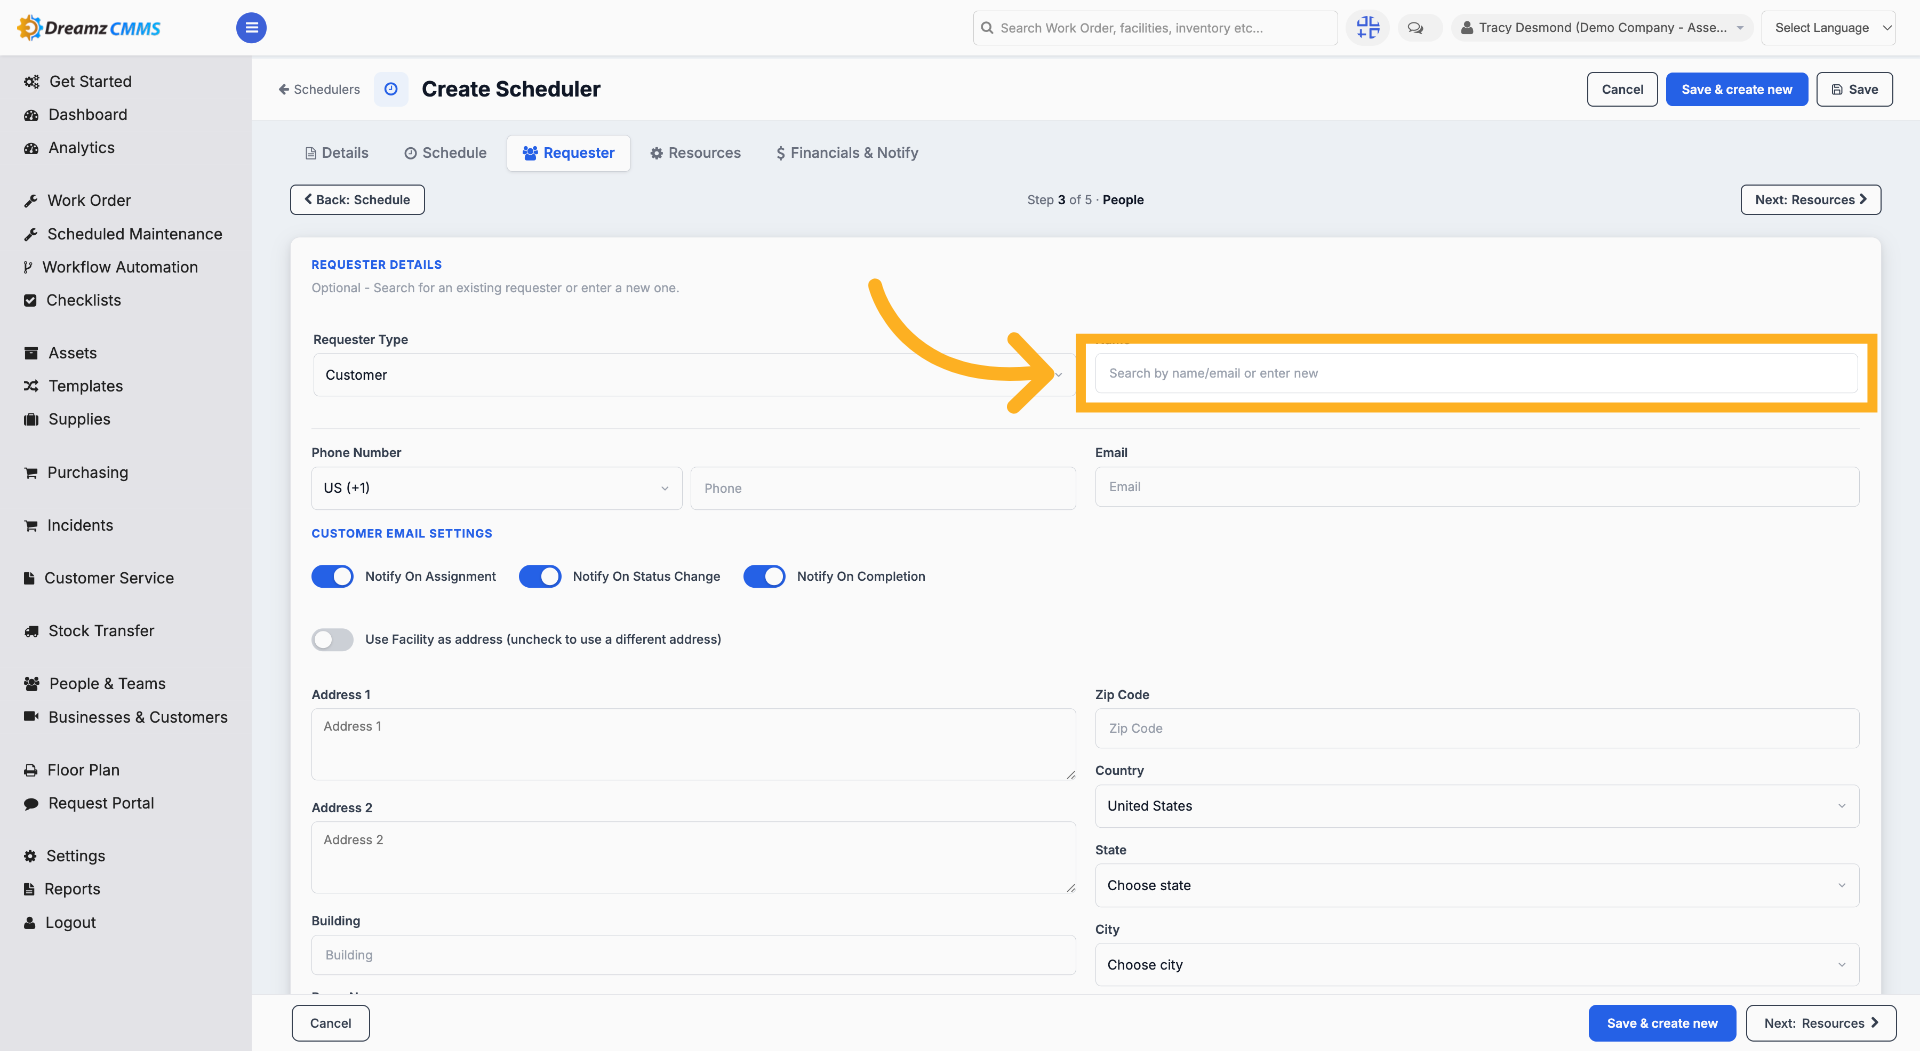
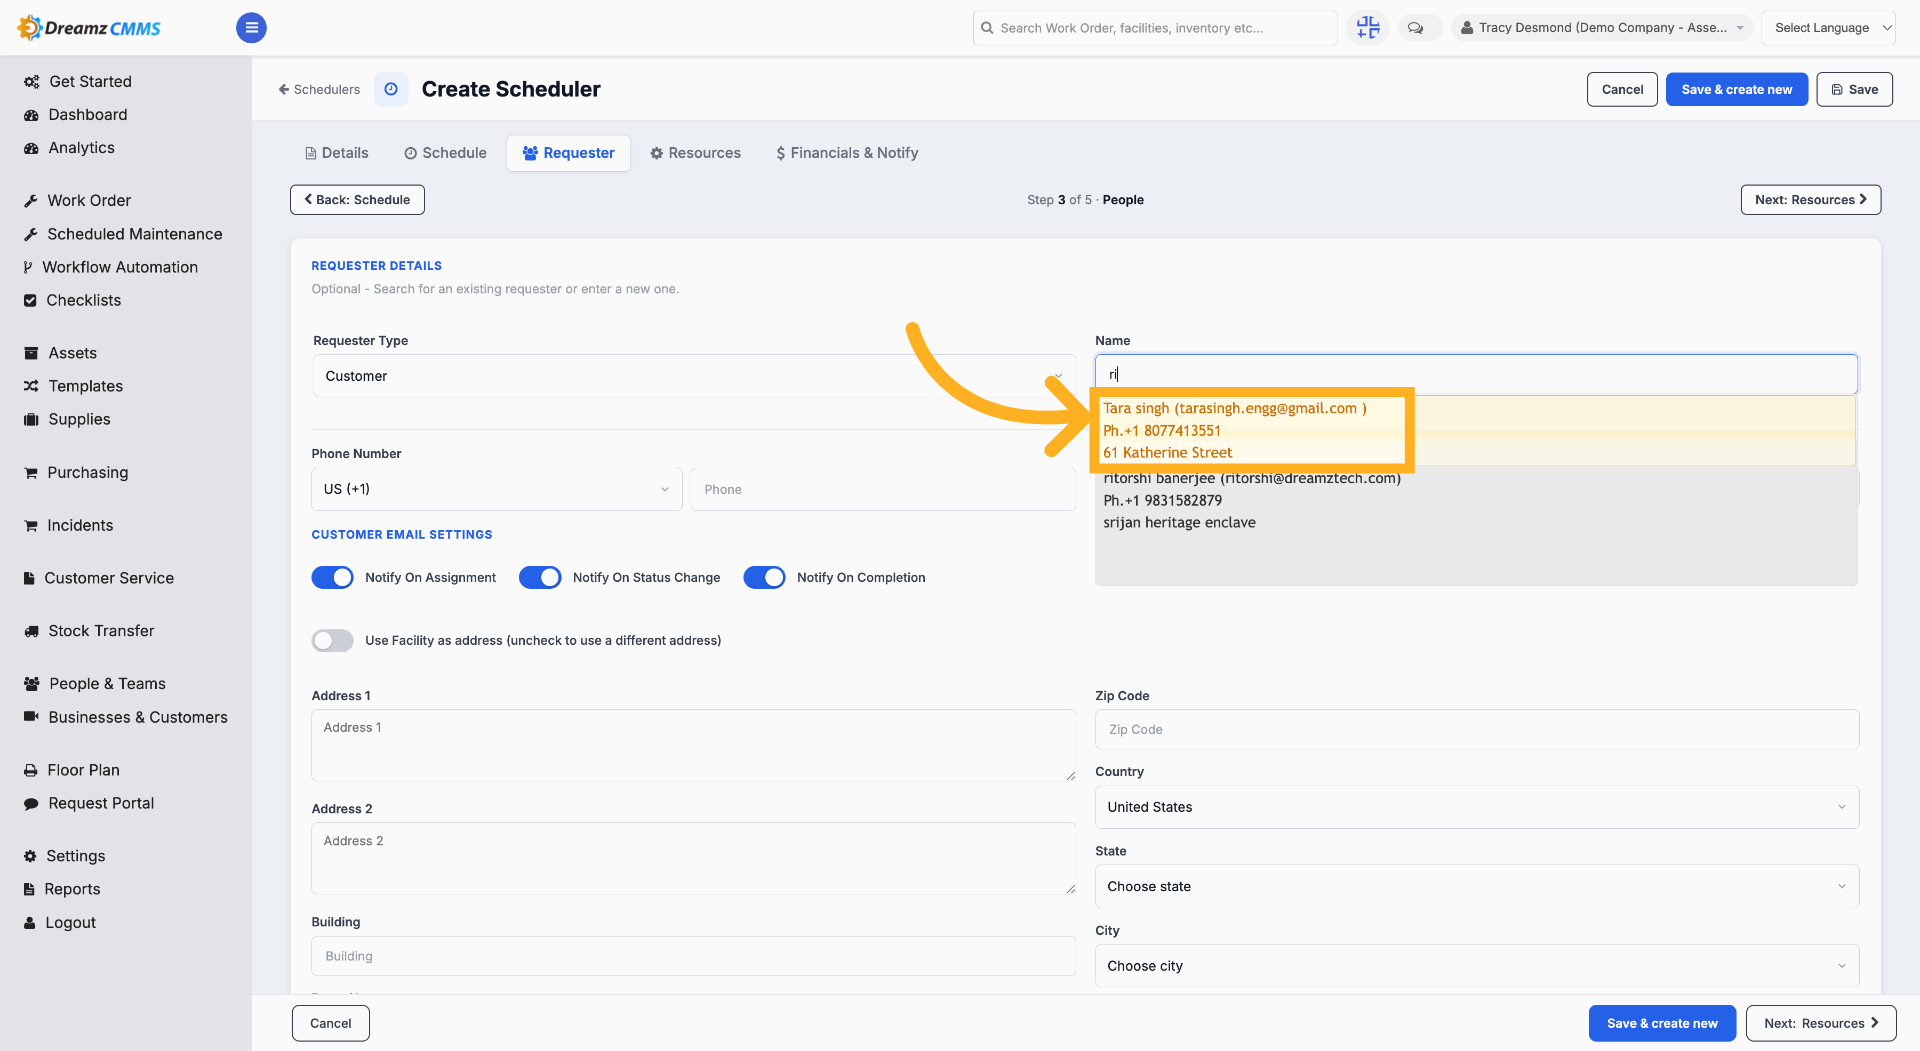
Step 20 – Search for a Customer
Click "Search by name/email" to find a customer for this metering schedule.
Step 21 – Select Customer
Select the customer from the customer list to assign them to this metering schedule.
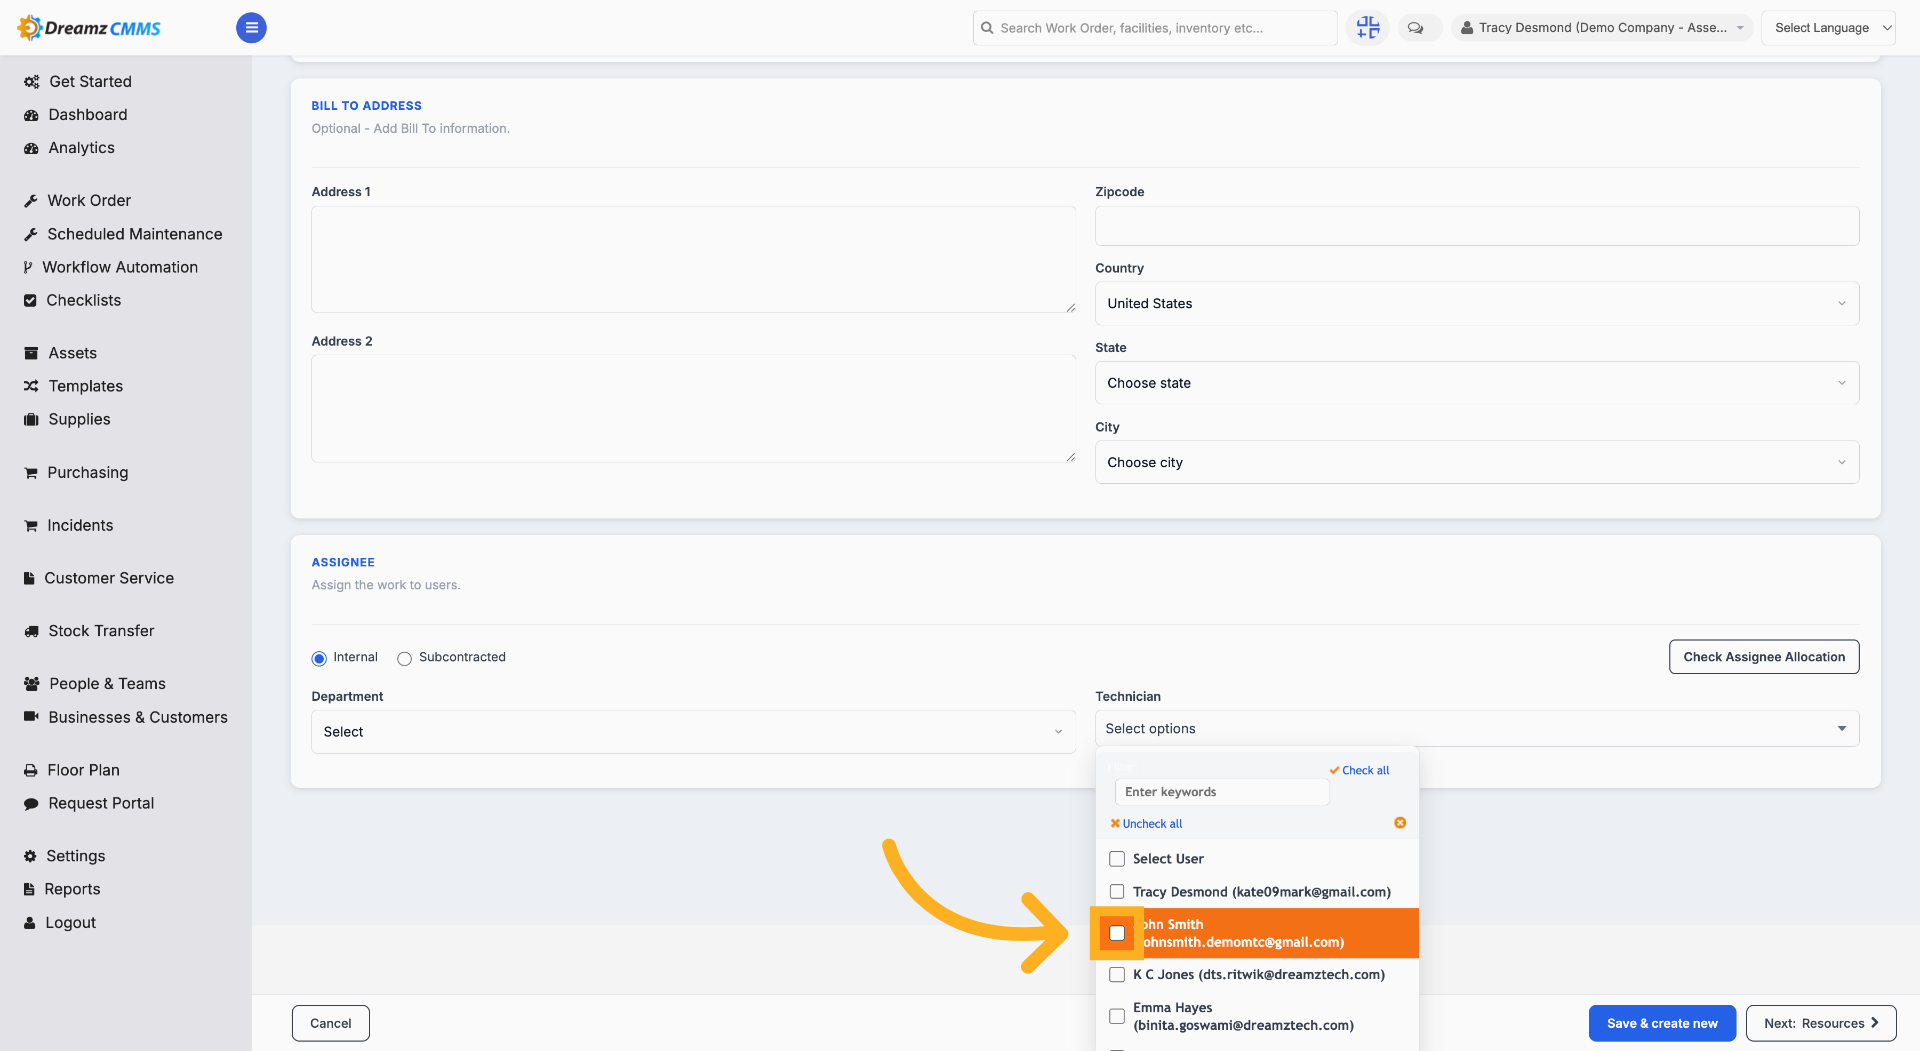
Step 22 – Choose an Assignee
Click the appropriate user (for example, "John Smith") as the assignee for this metering schedule.
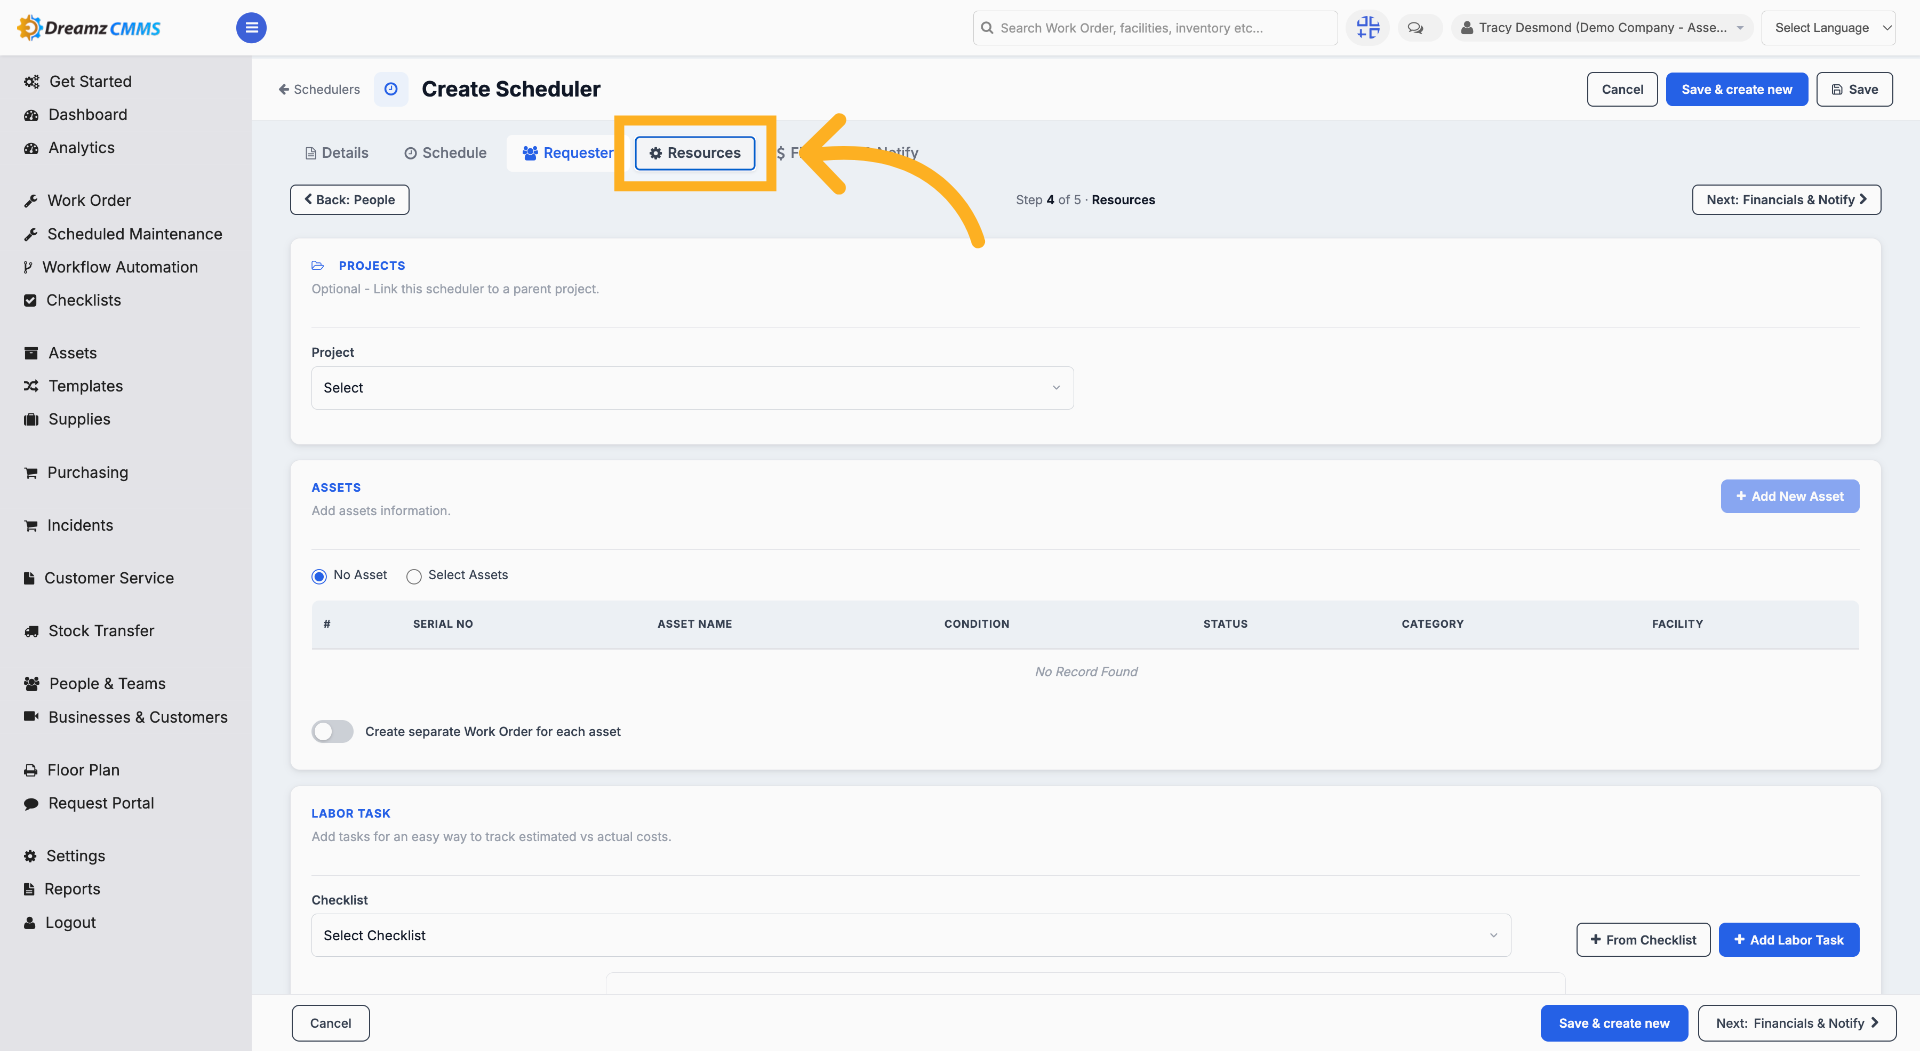
Step 23 – Access Resources Tab
Click "Resources" to manage resources linked to the scheduler.
Step 24 – Open Asset Selection
Click "Select Assets" to choose assets for the scheduler.
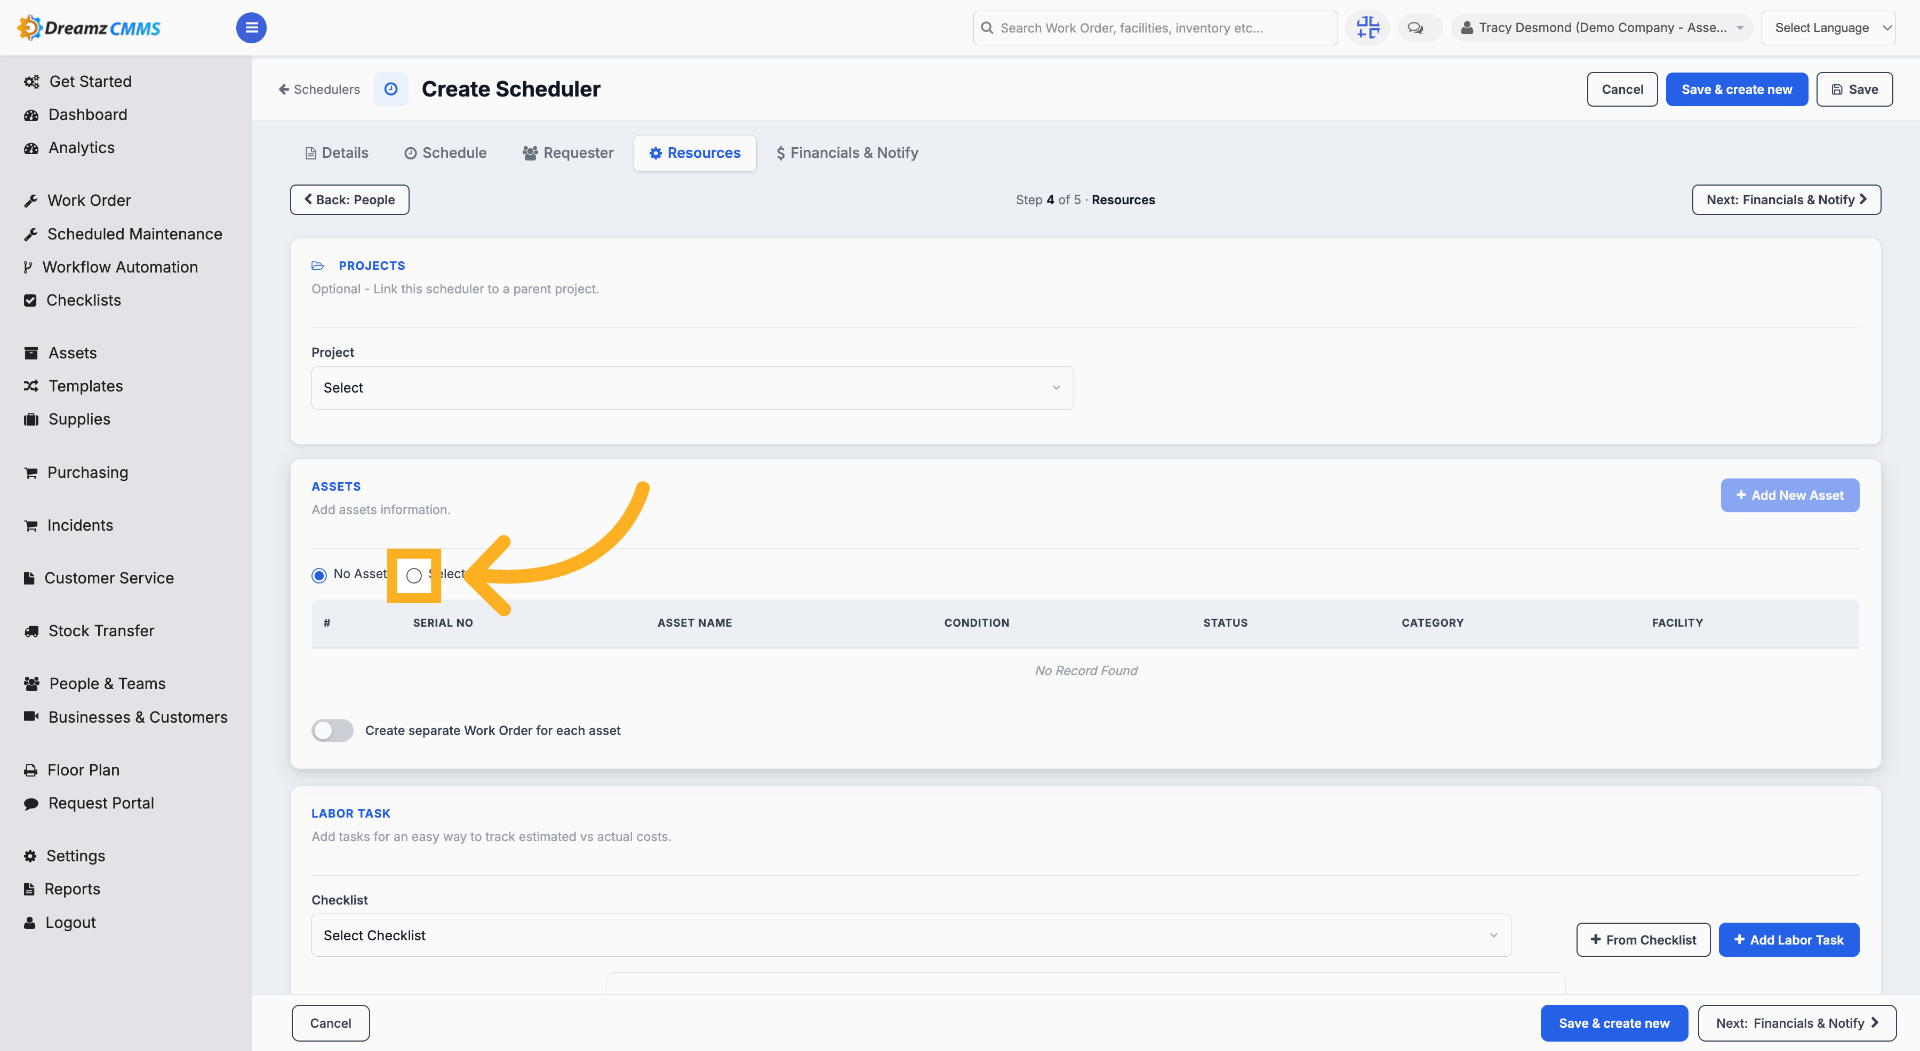
Step 25 – Add Assets to the Schedule
Click "Select Assets" to add assets to the schedule.
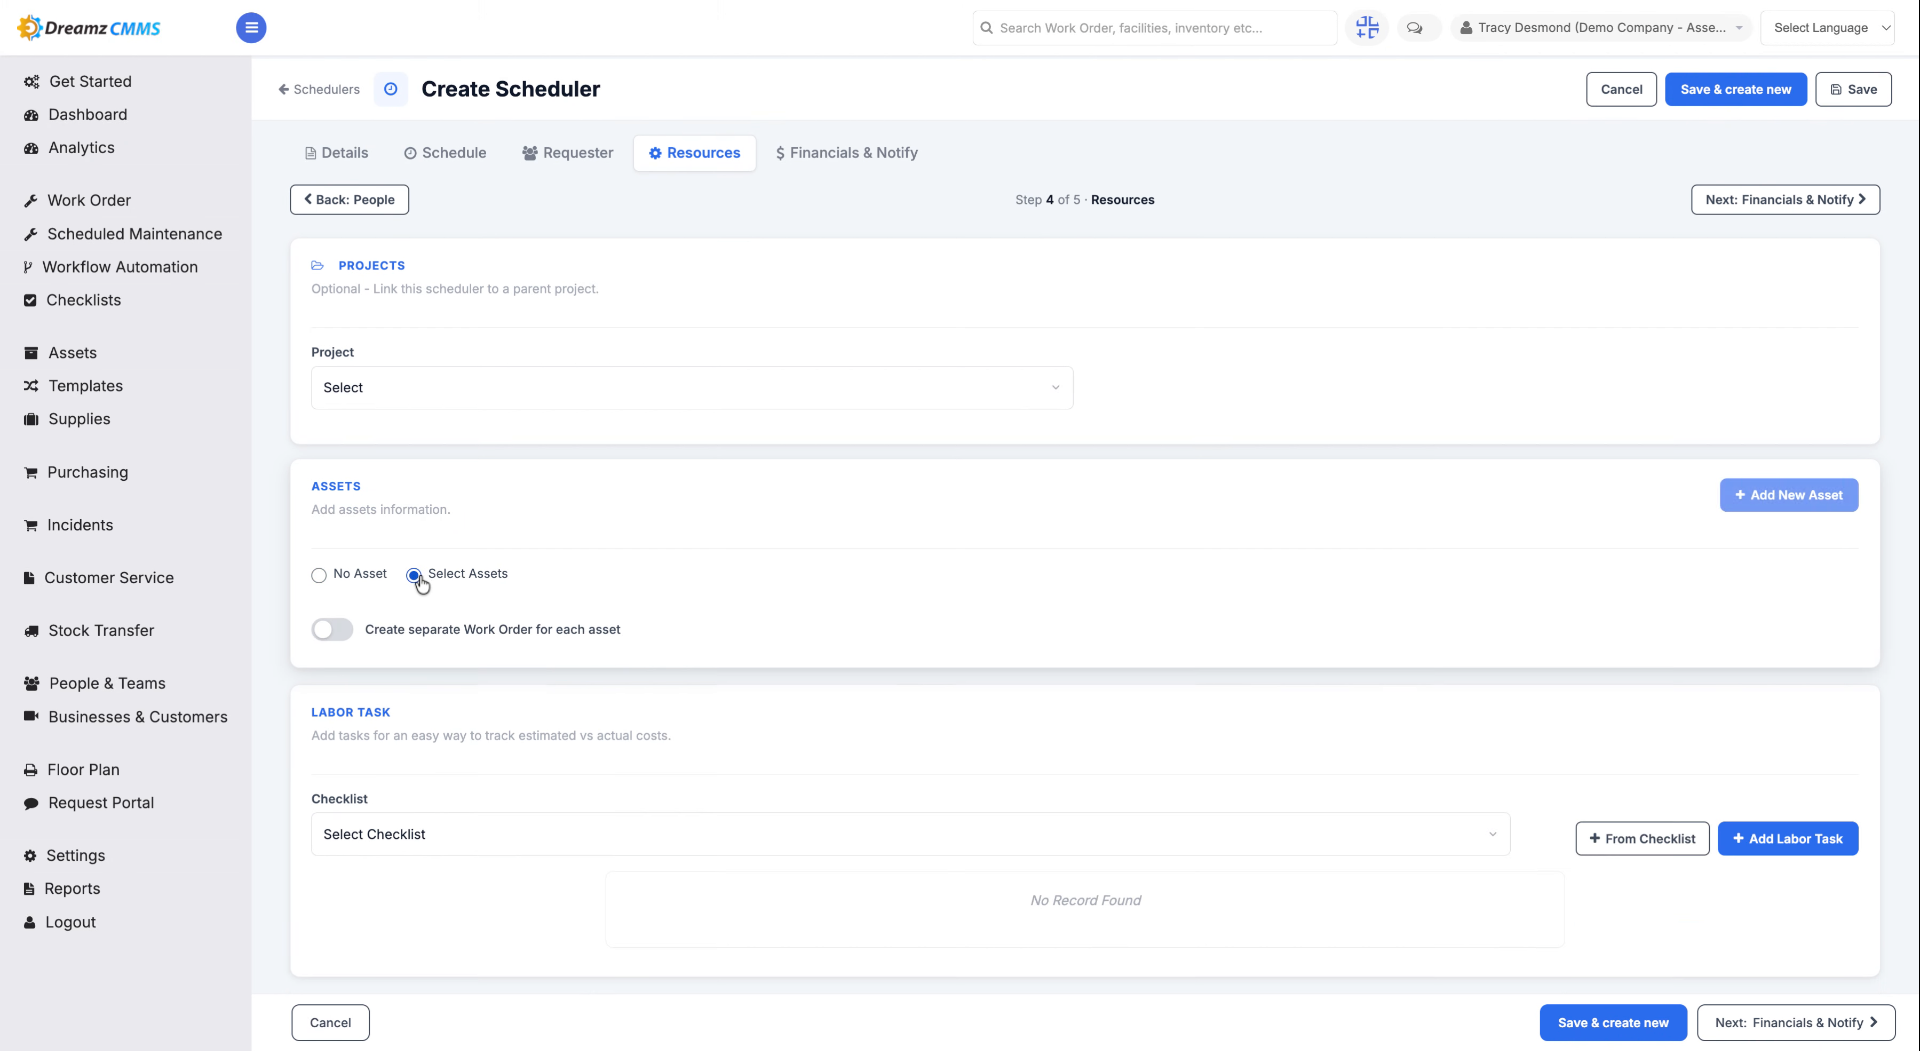
Step 26 – Add New Asset
Click "Add New Asset" to include a new asset in the scheduler.
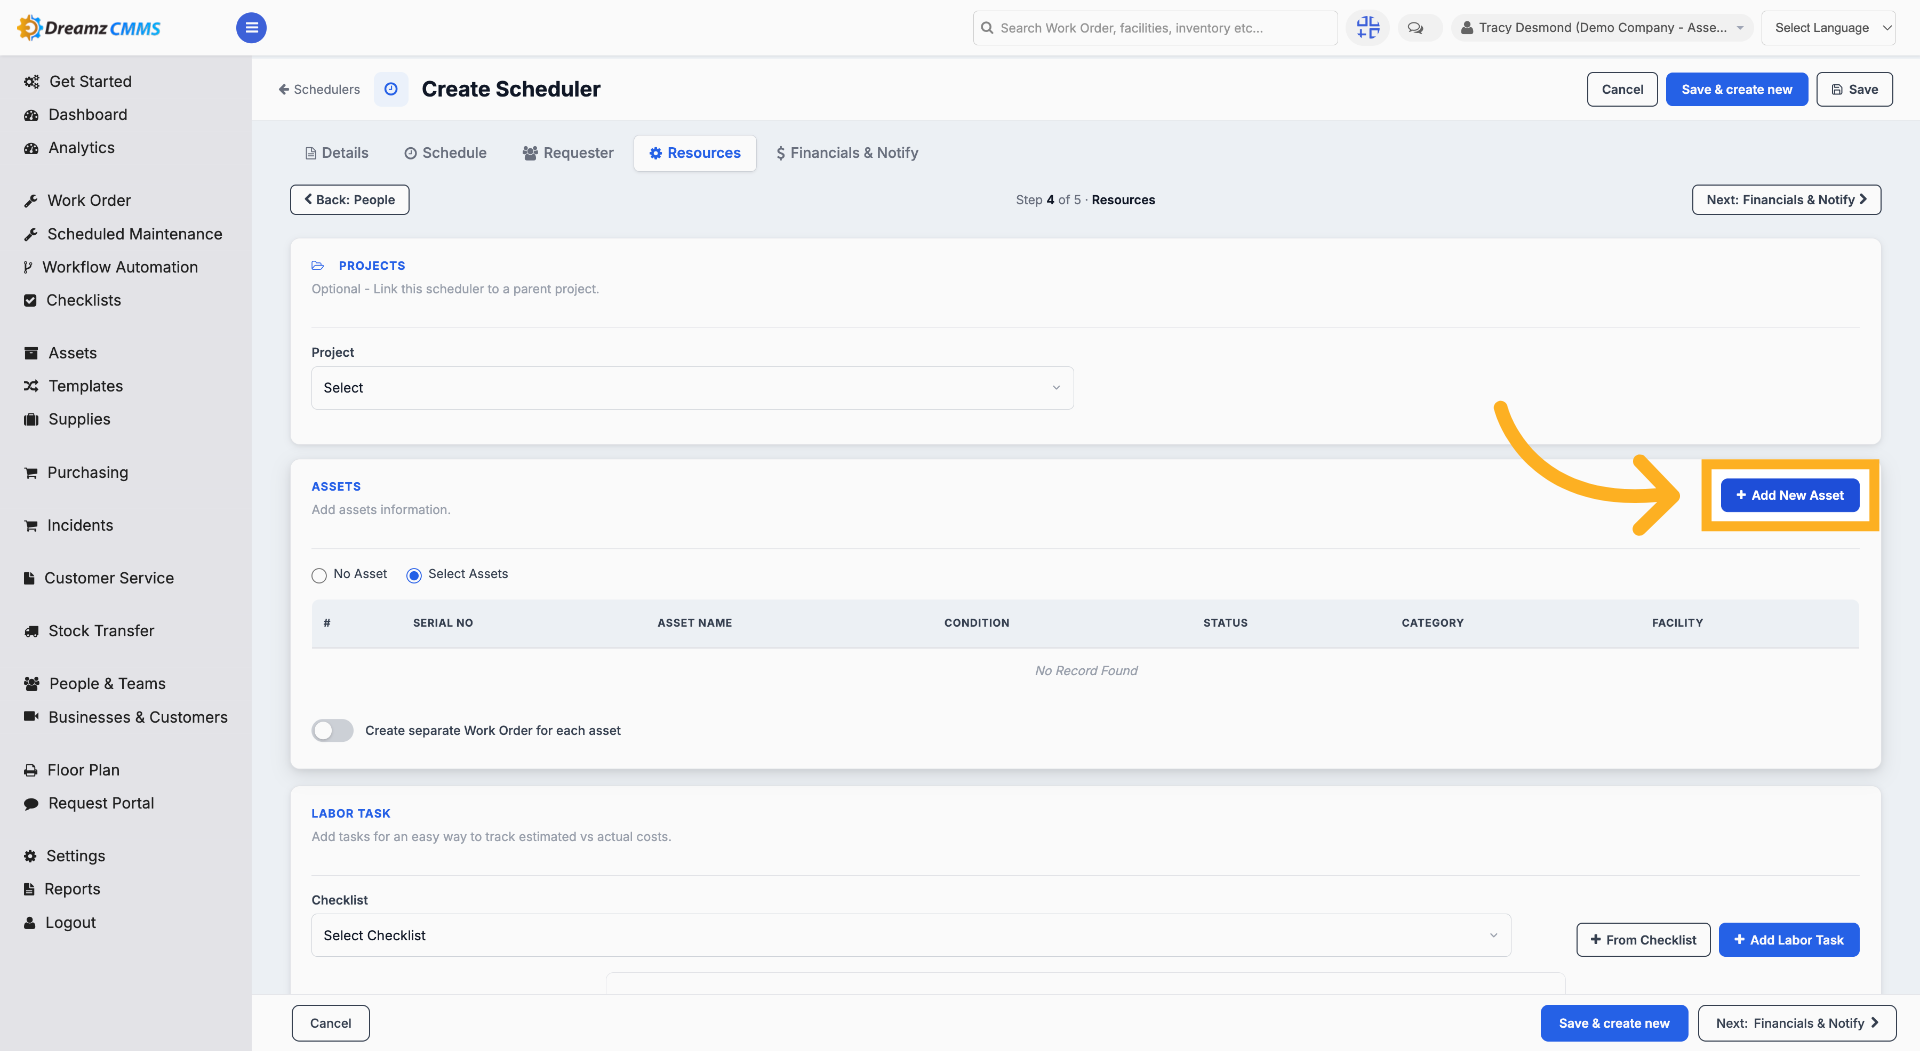
Step 27 – Select Assets
Select one or more assets from the asset list.
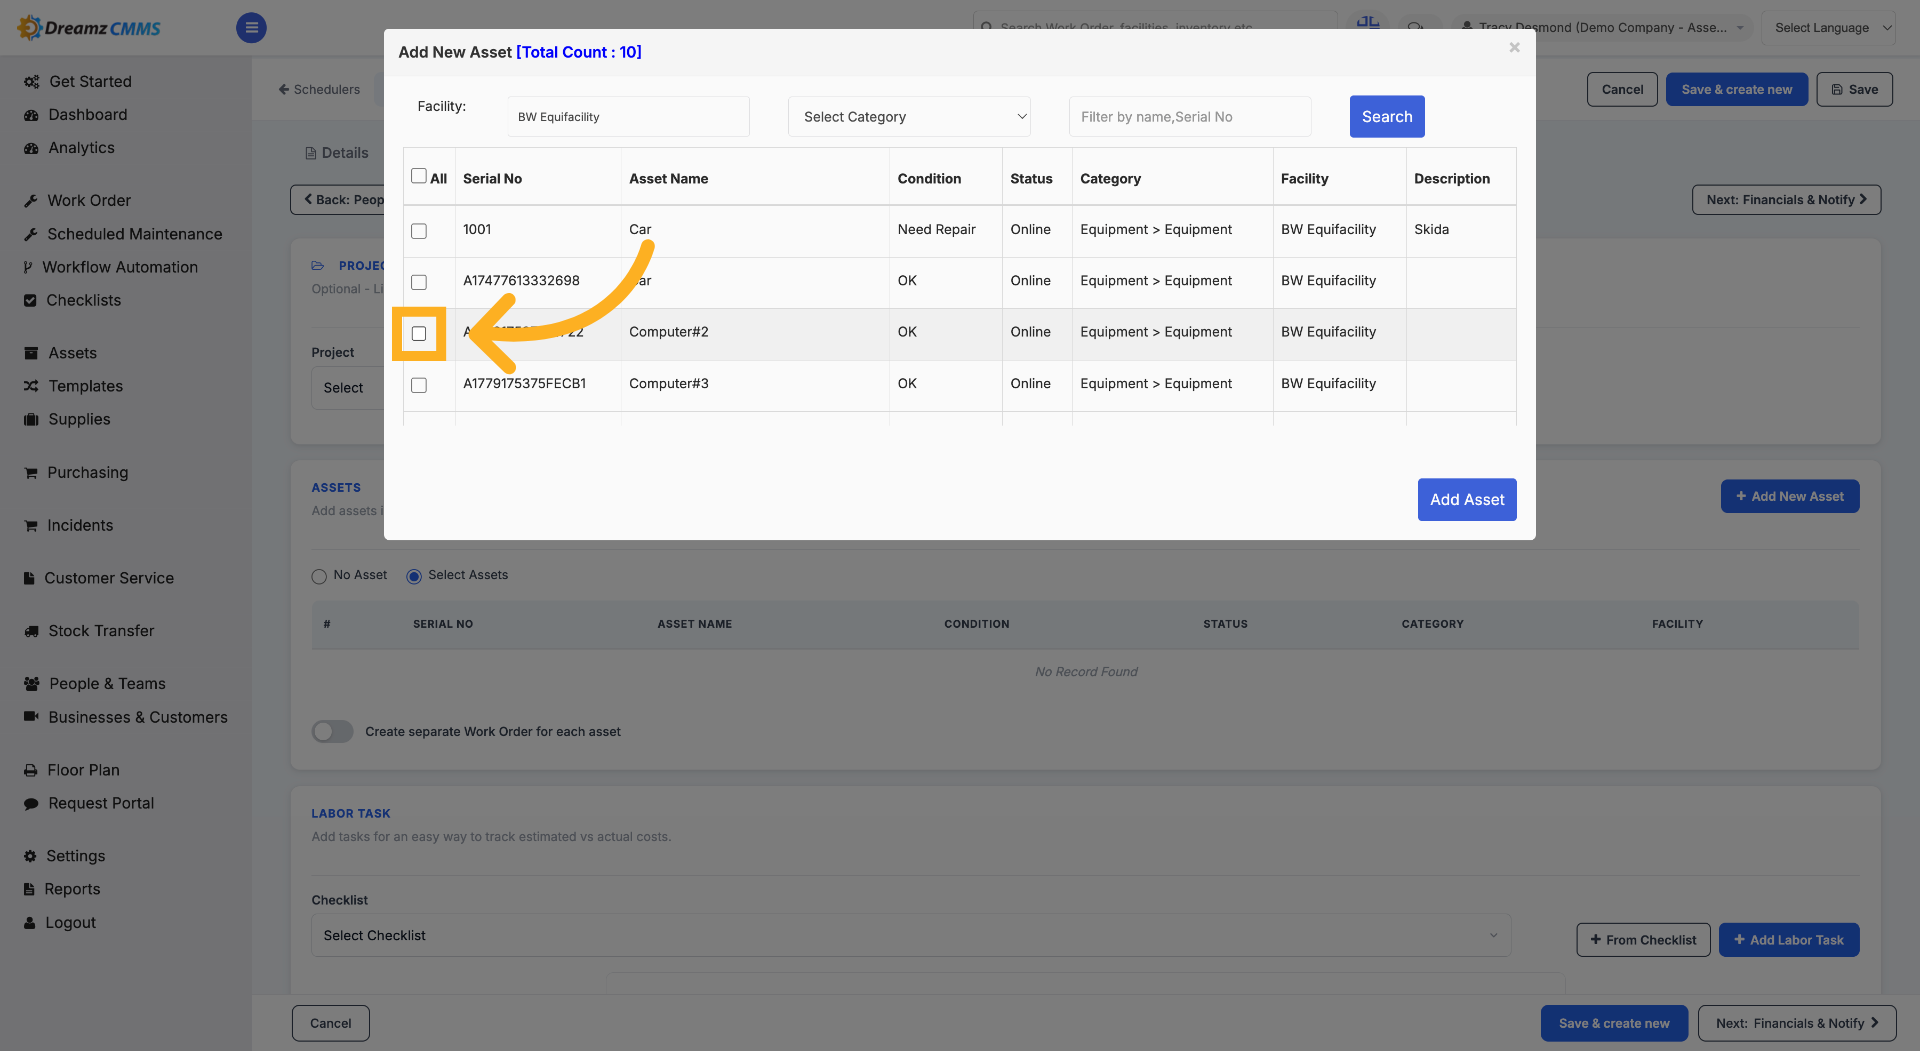
Step 28 – Confirm Asset Addition
Click "Add Asset" to include the asset in the scheduler.
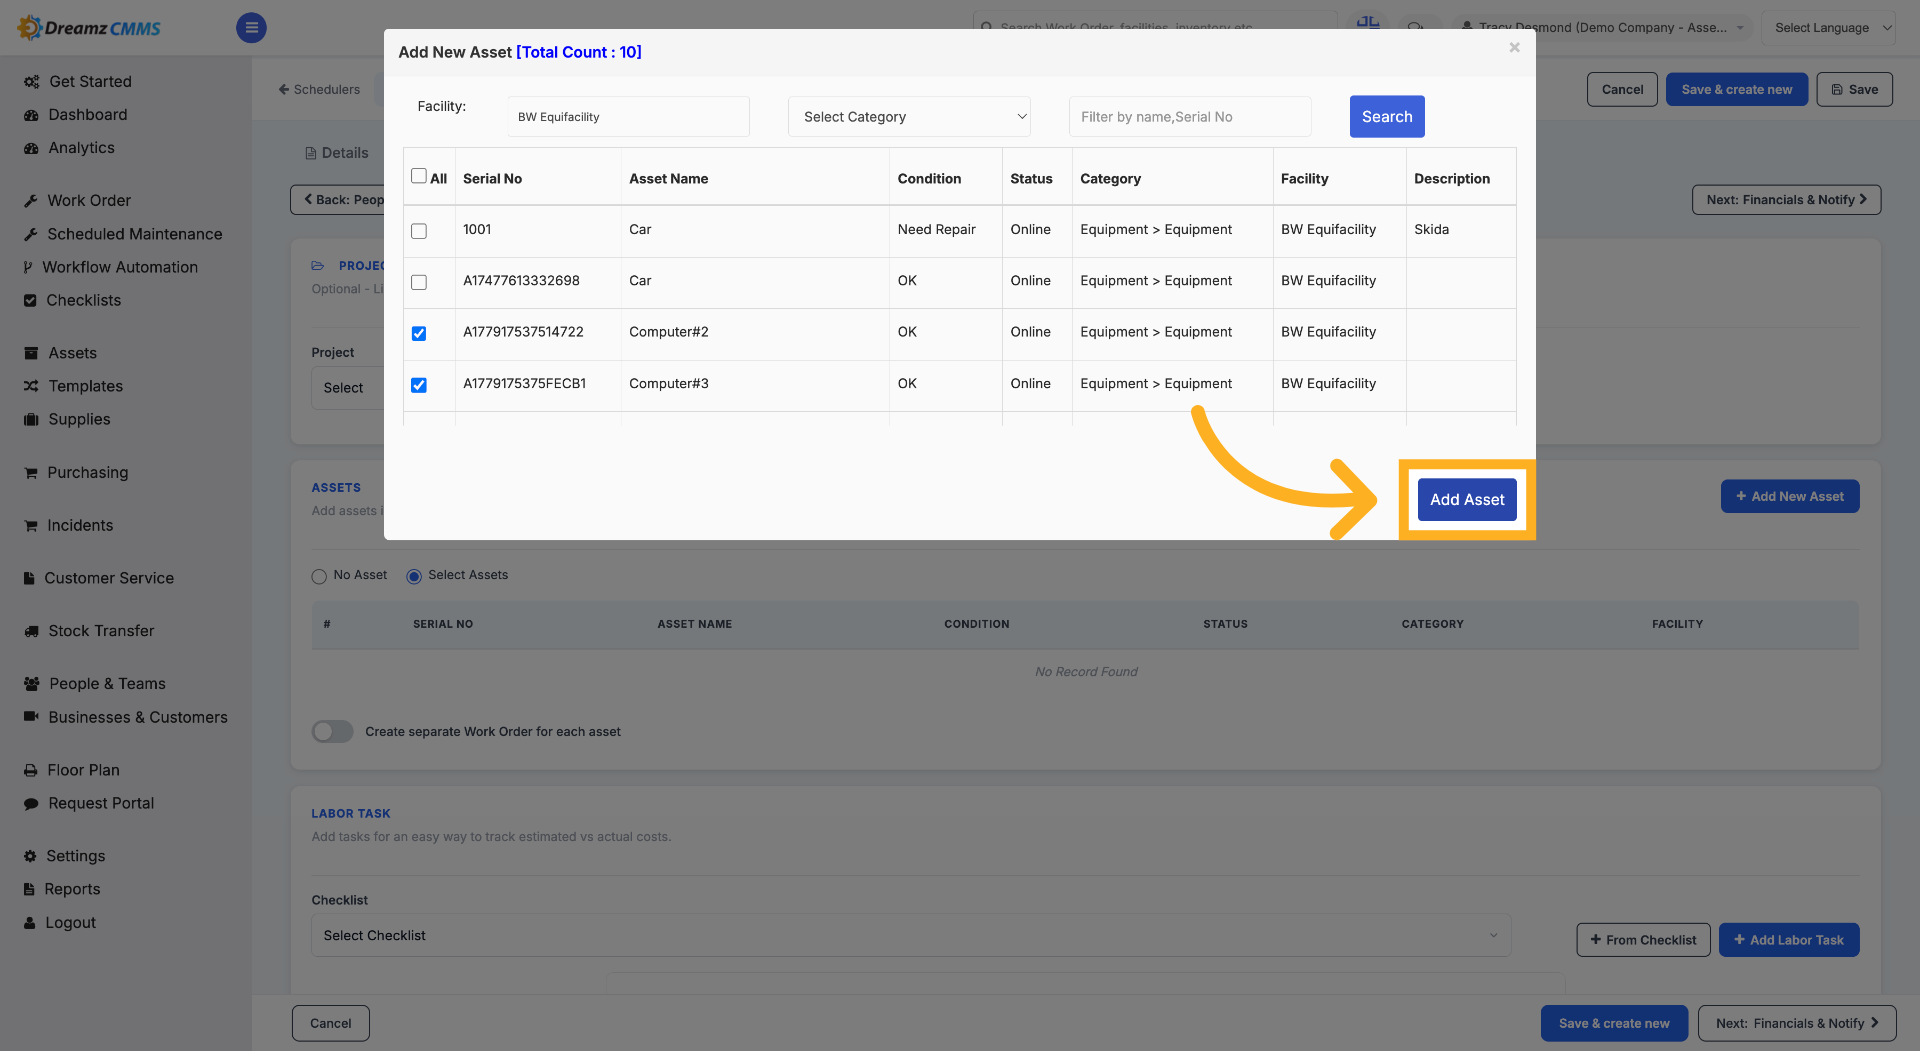
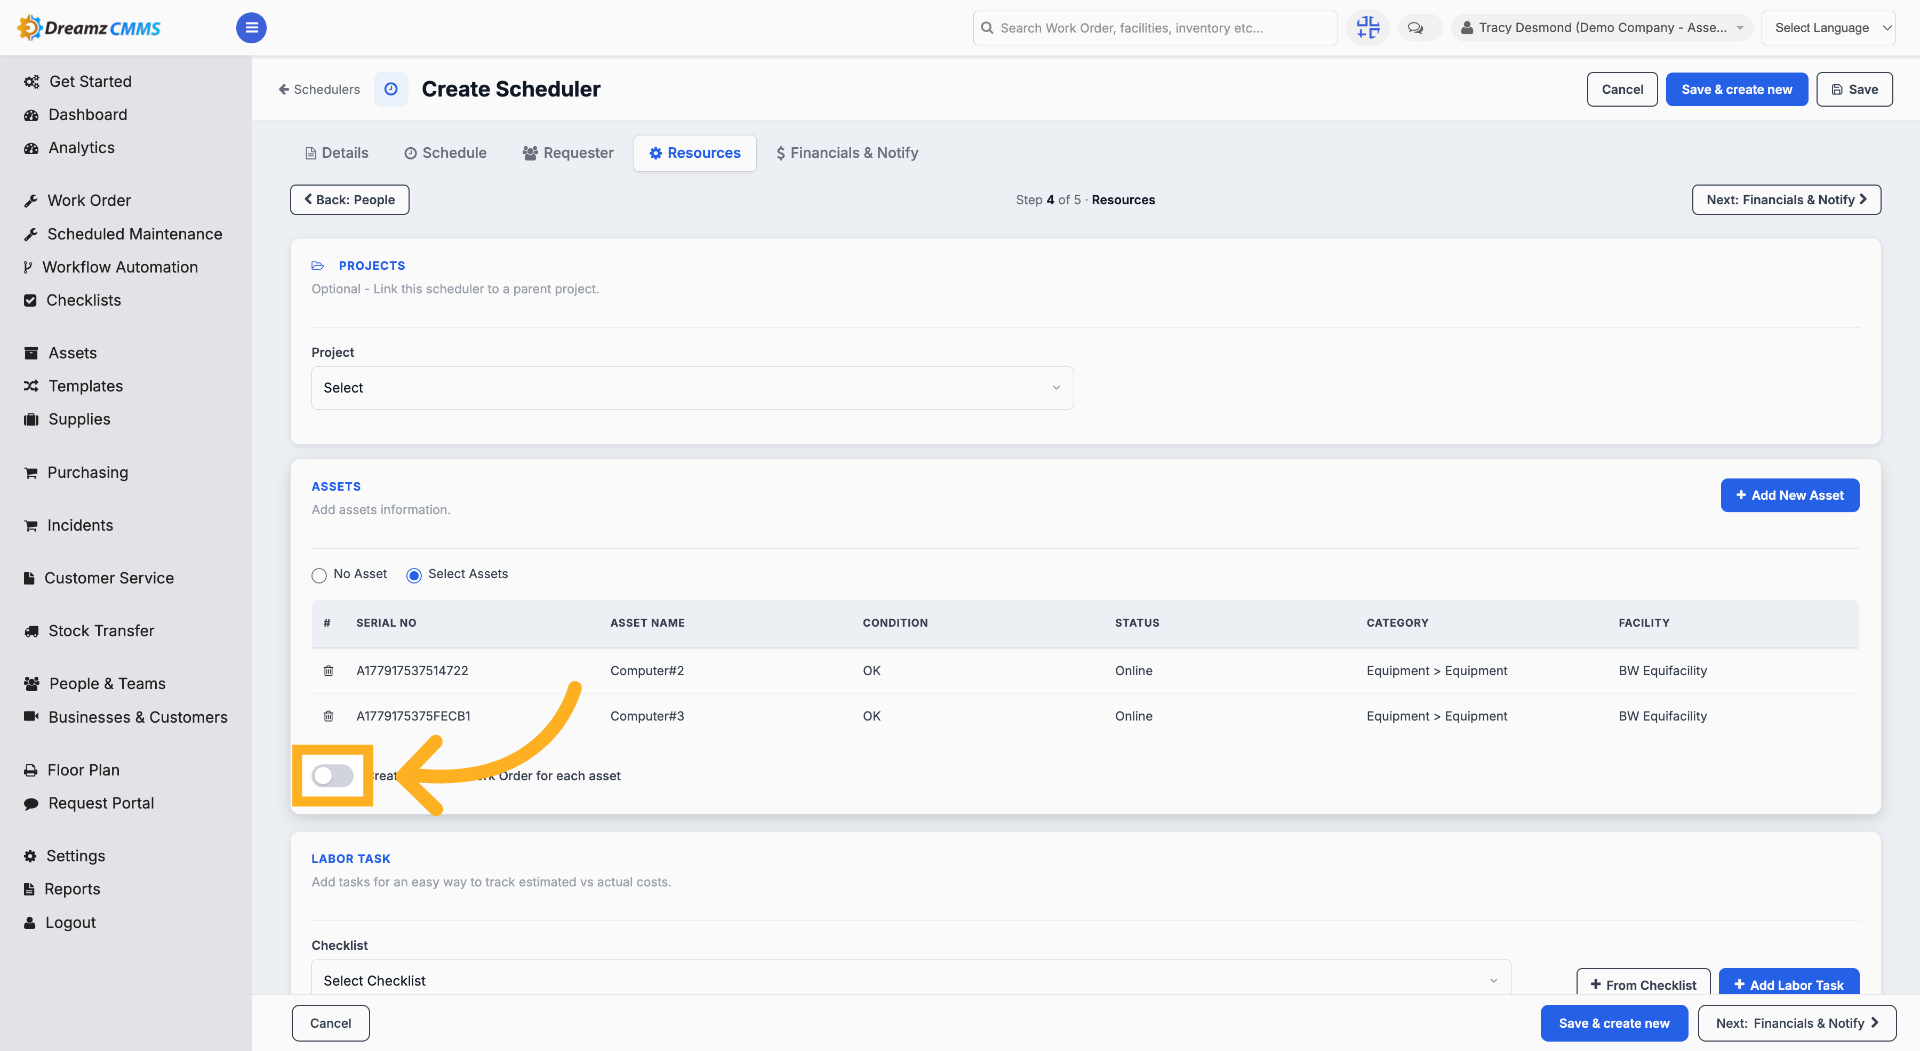
Step 29 – Toggle Work Order Behavior
Toggle the "Create Separate Work Order for Each Asset" option to create multiple work orders or a single work order, as needed.
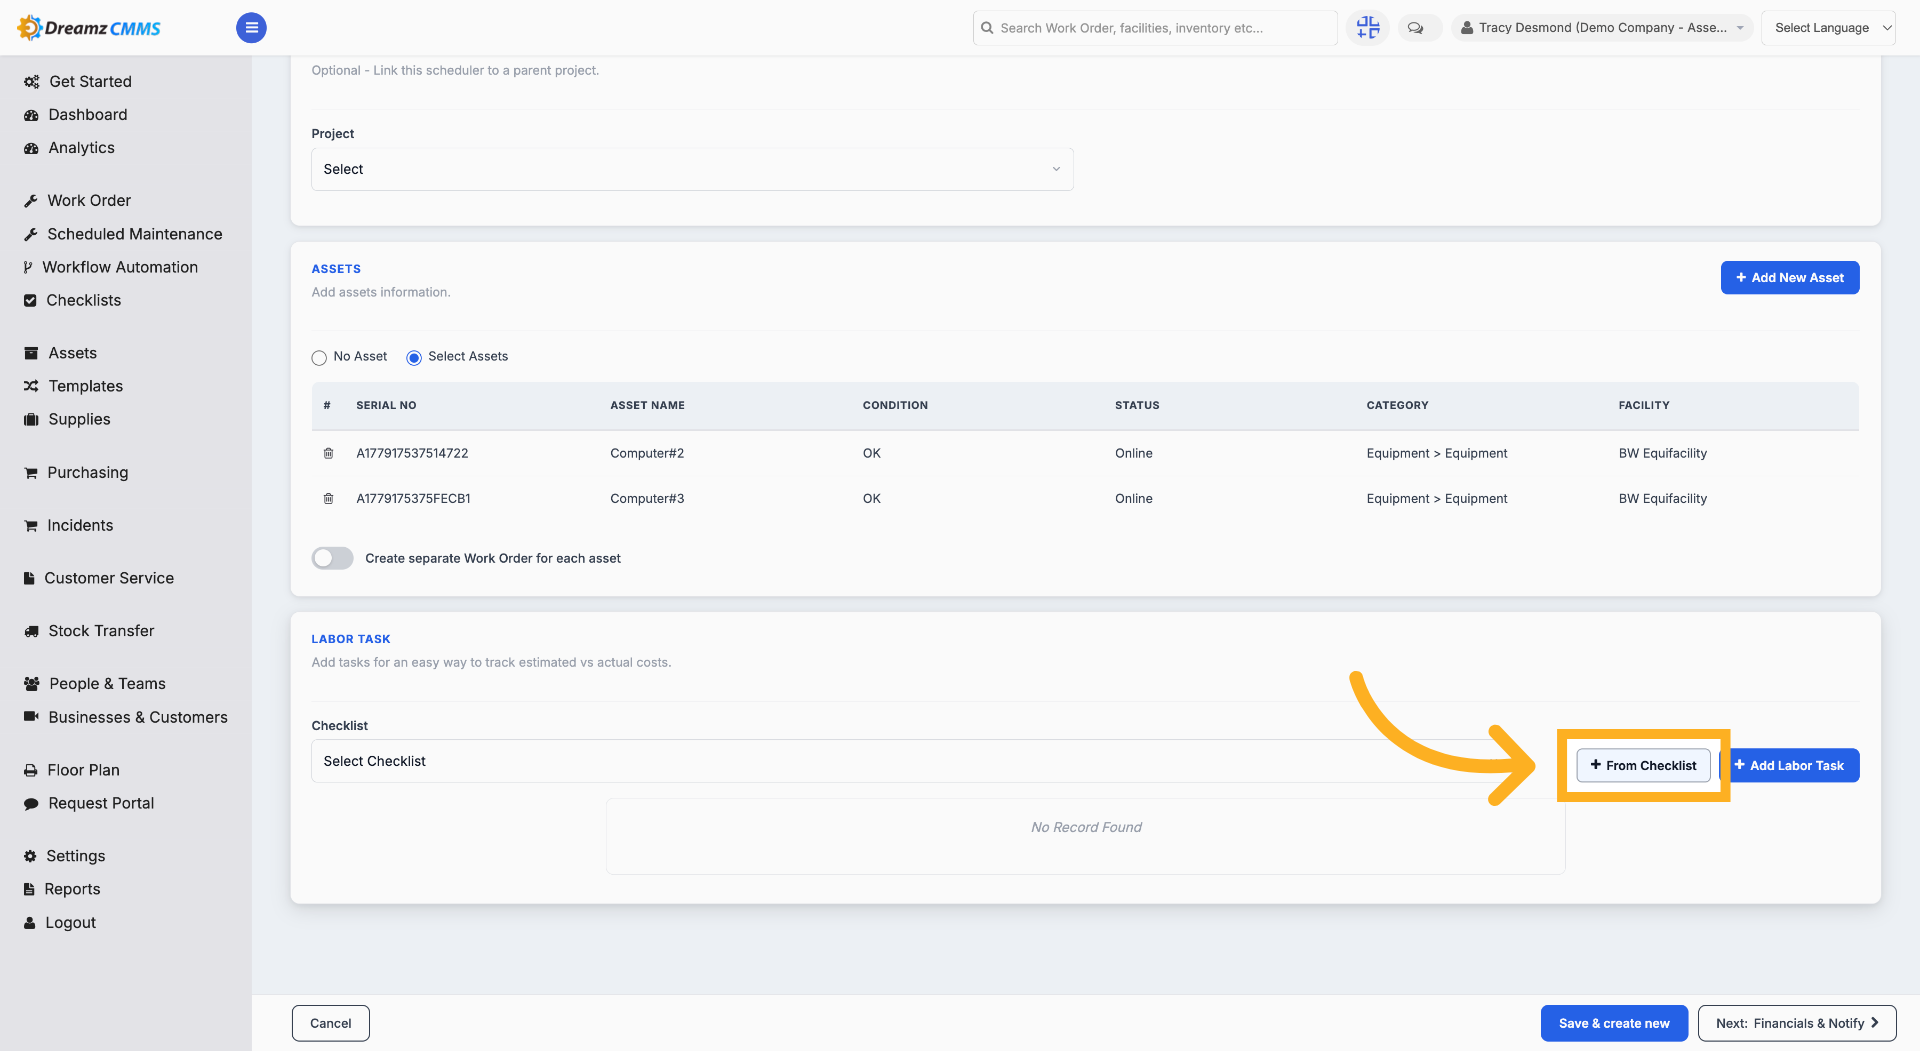
Step 30 – Select From Checklist
Click "From Checklist" to choose items from a predefined checklist.
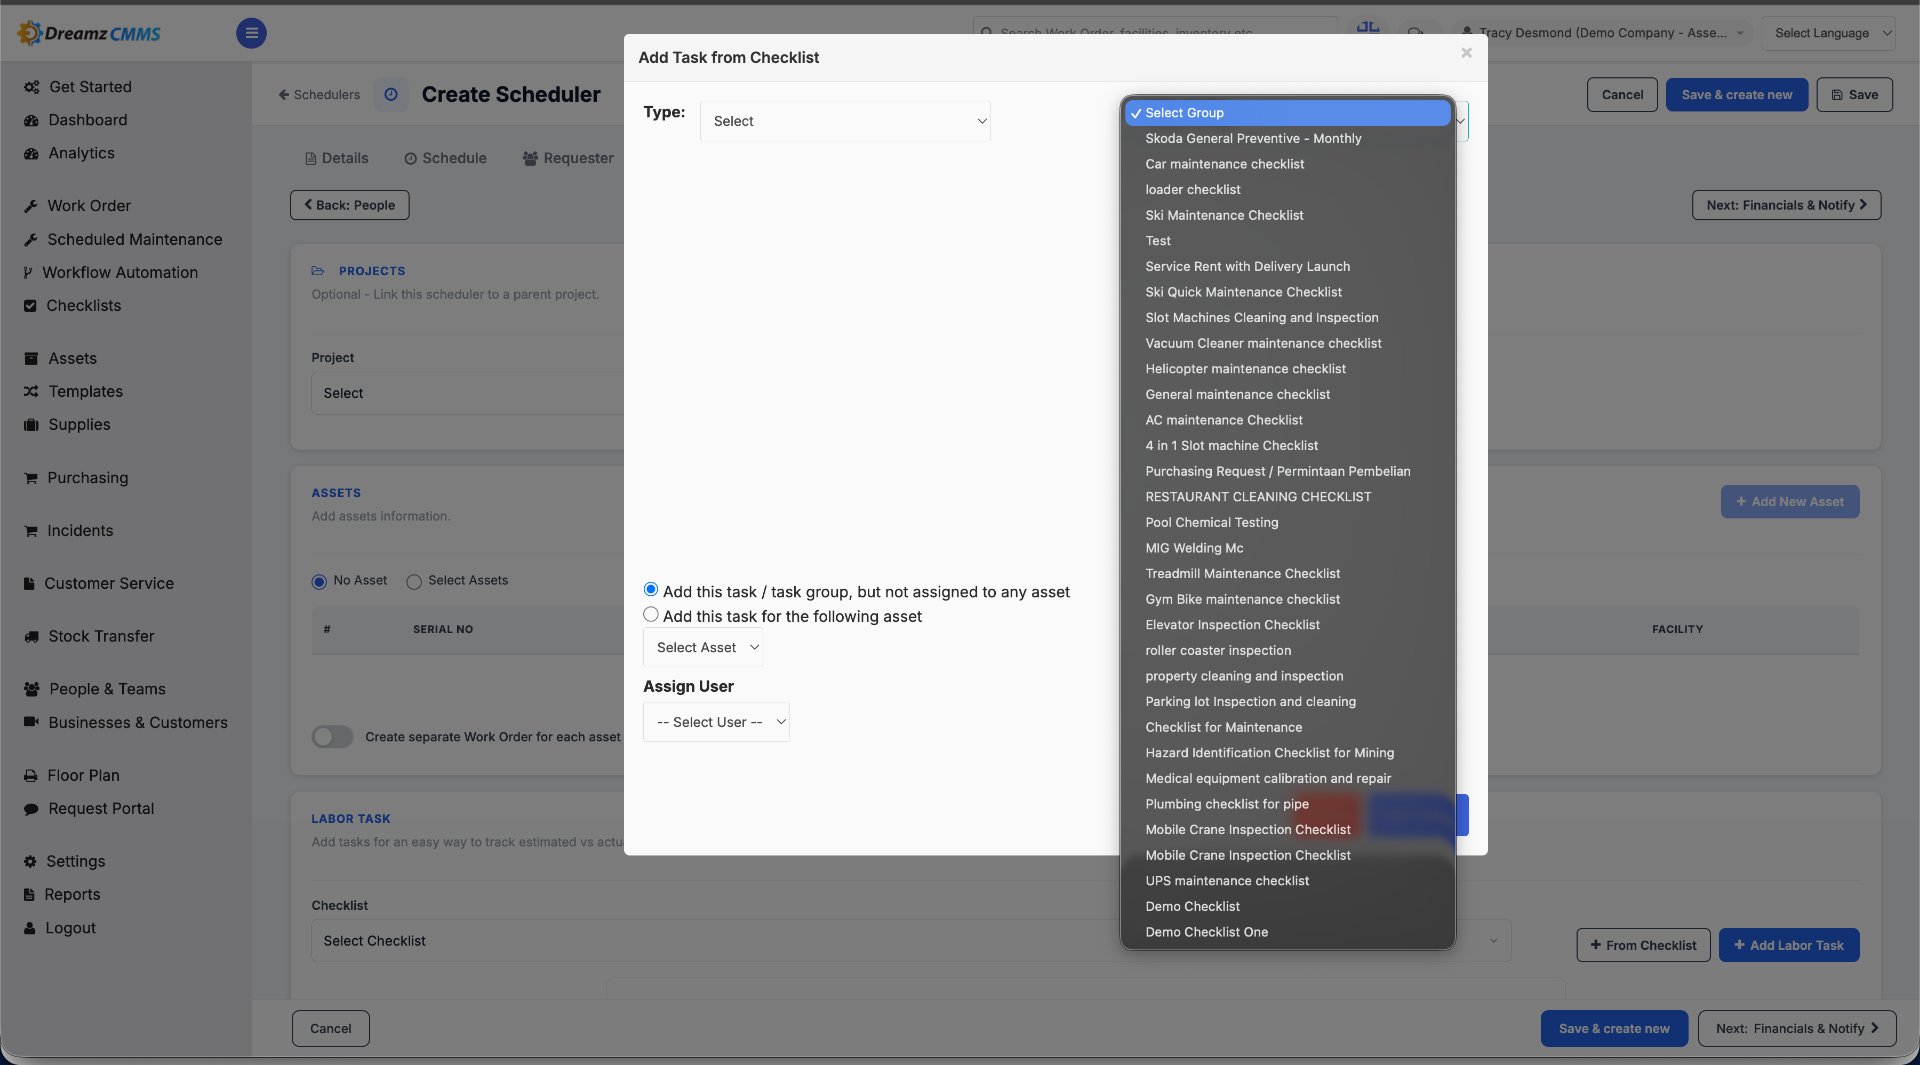
Step 31 – Select a Checklist
Select a checklist from the checklist listing to attach to the metering scheduler.
Step 32 – Confirm Asset Selection
Select the asset from the asset list that has been chosen for this metering schedule.
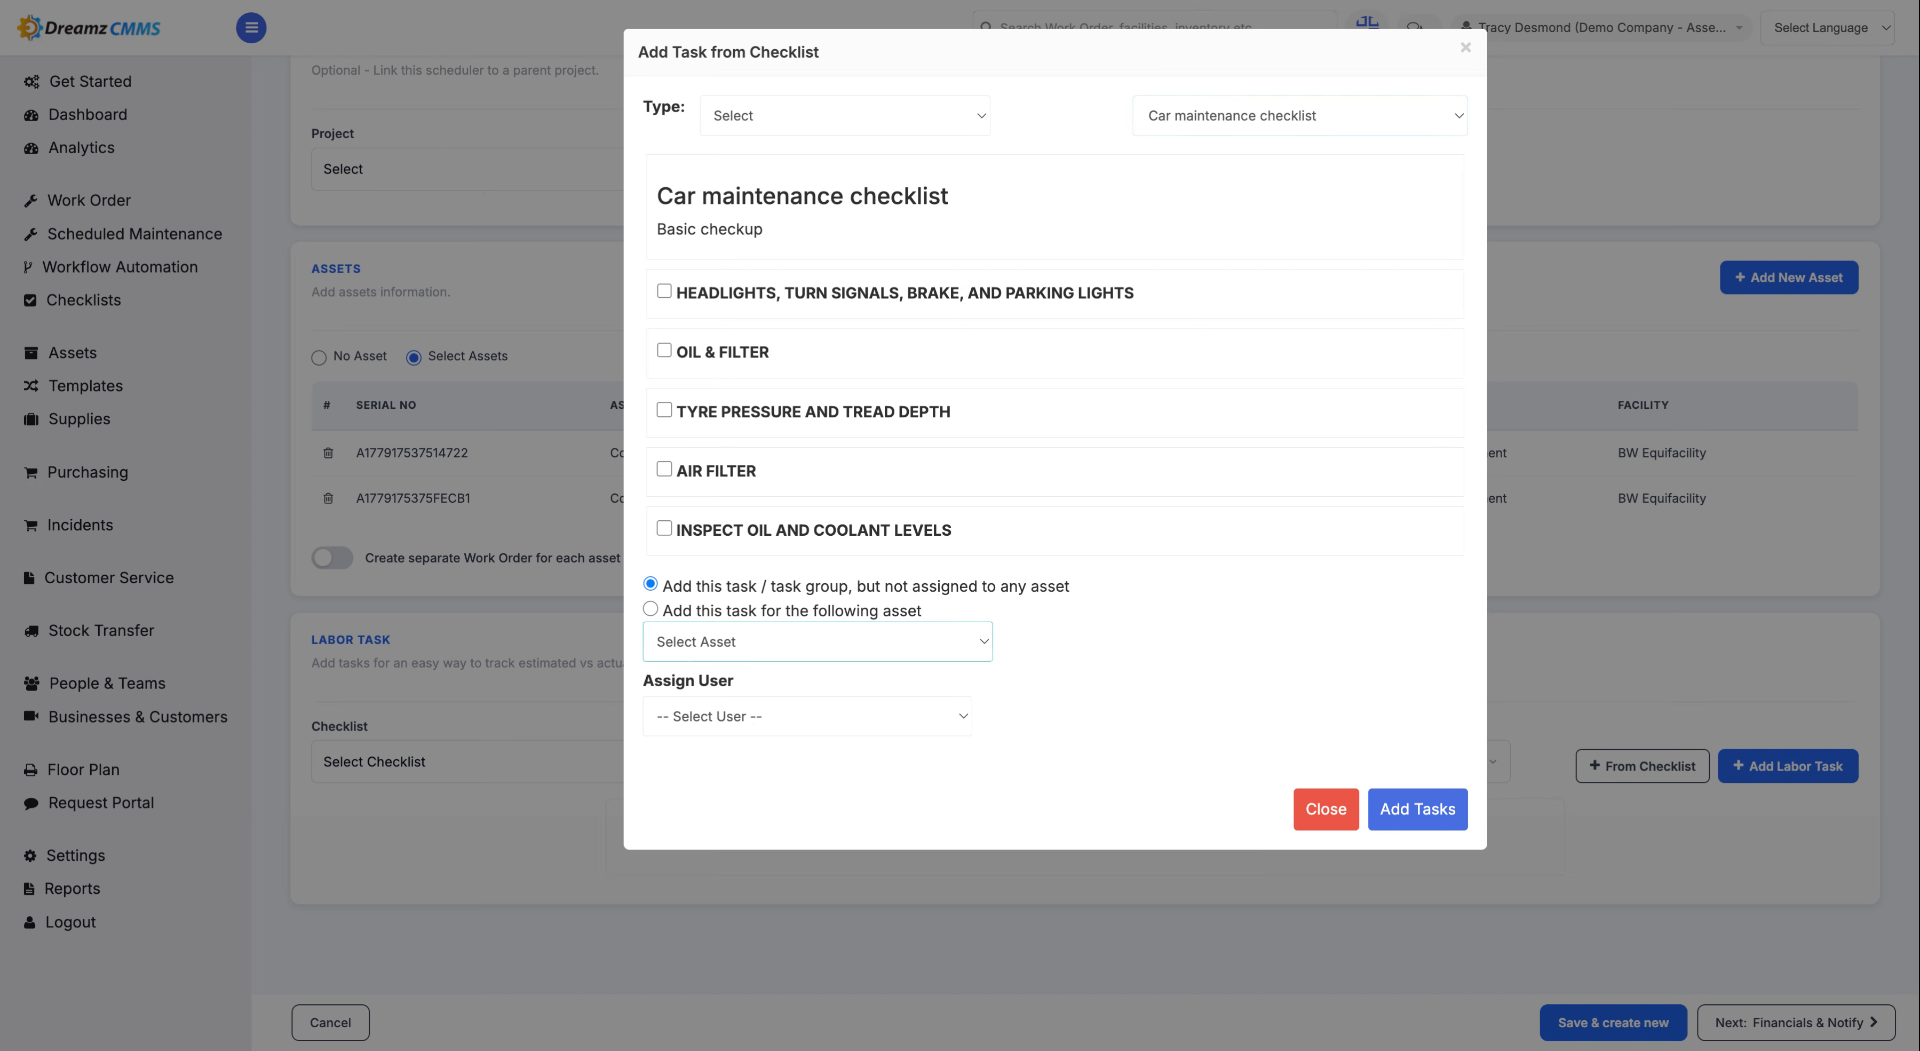
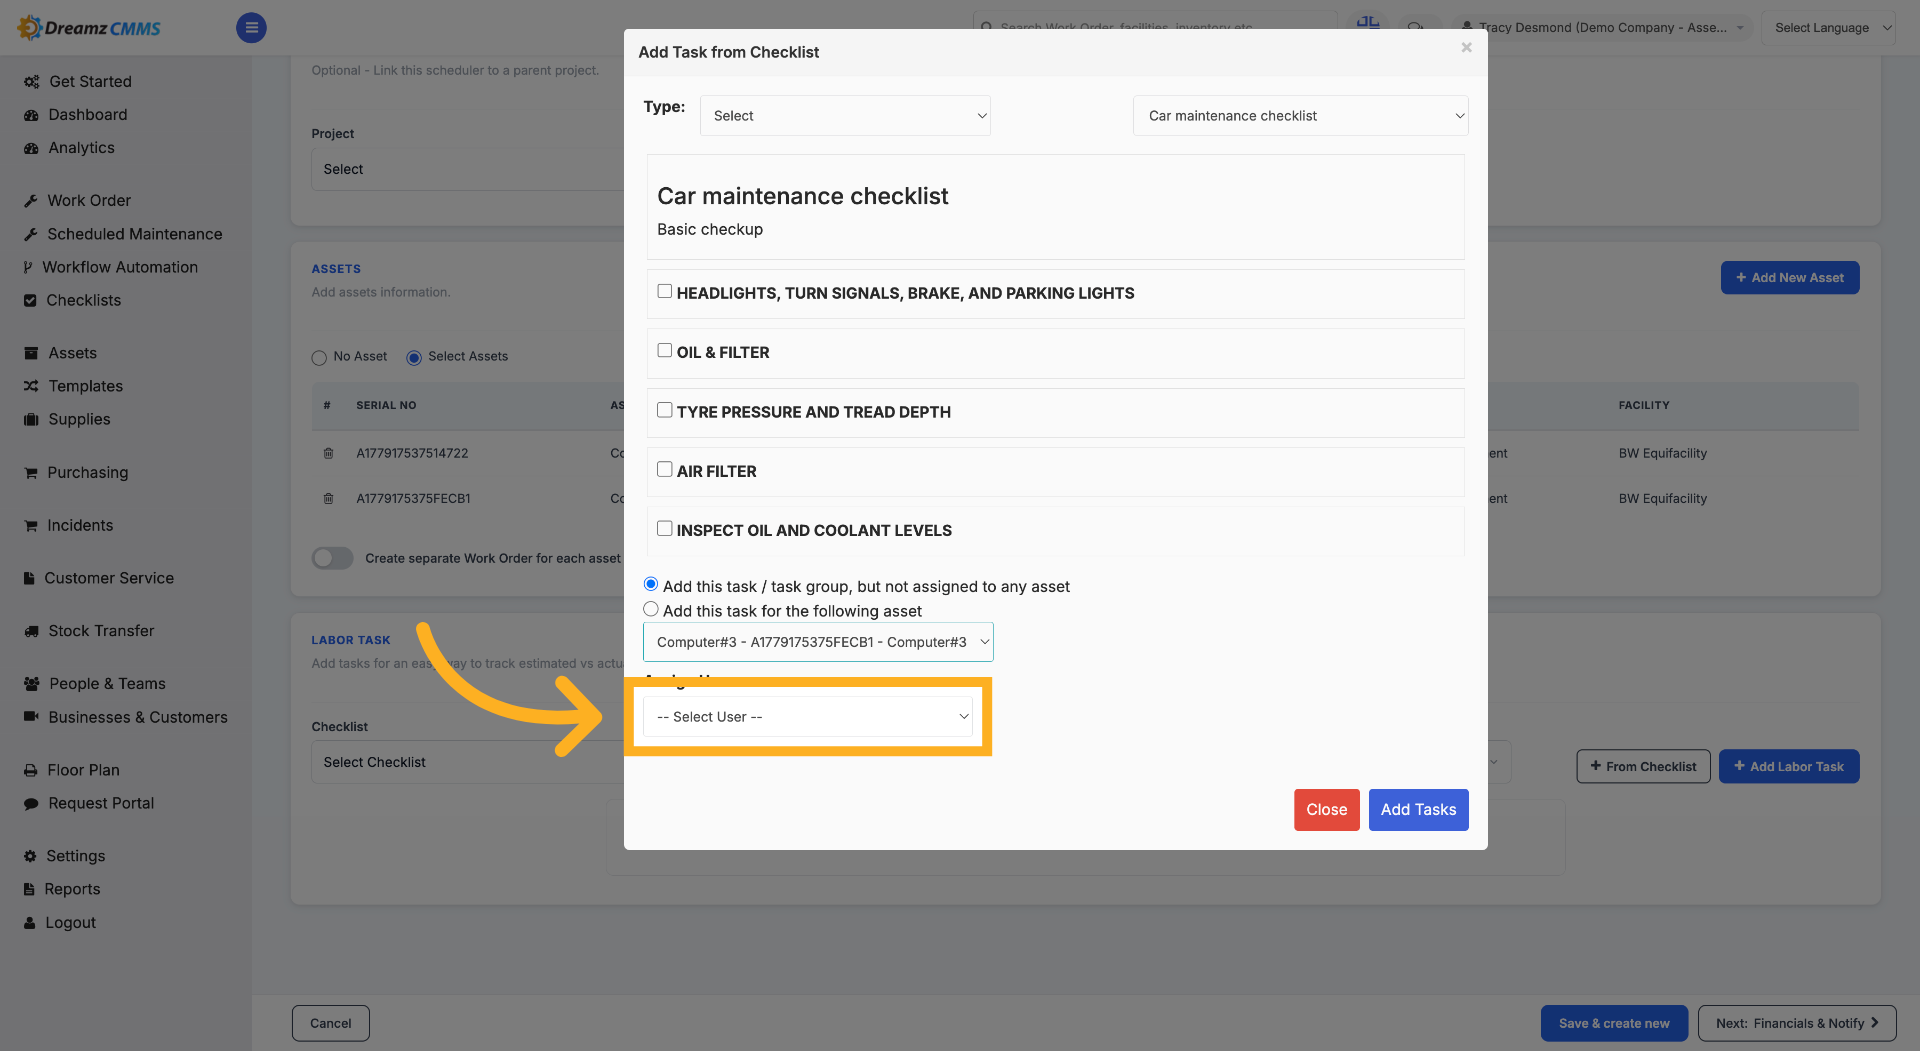
Step 33 – Choose the Assignee
Click the appropriate user (for example, "John Smith") to select the assignee for this metering scheduler.
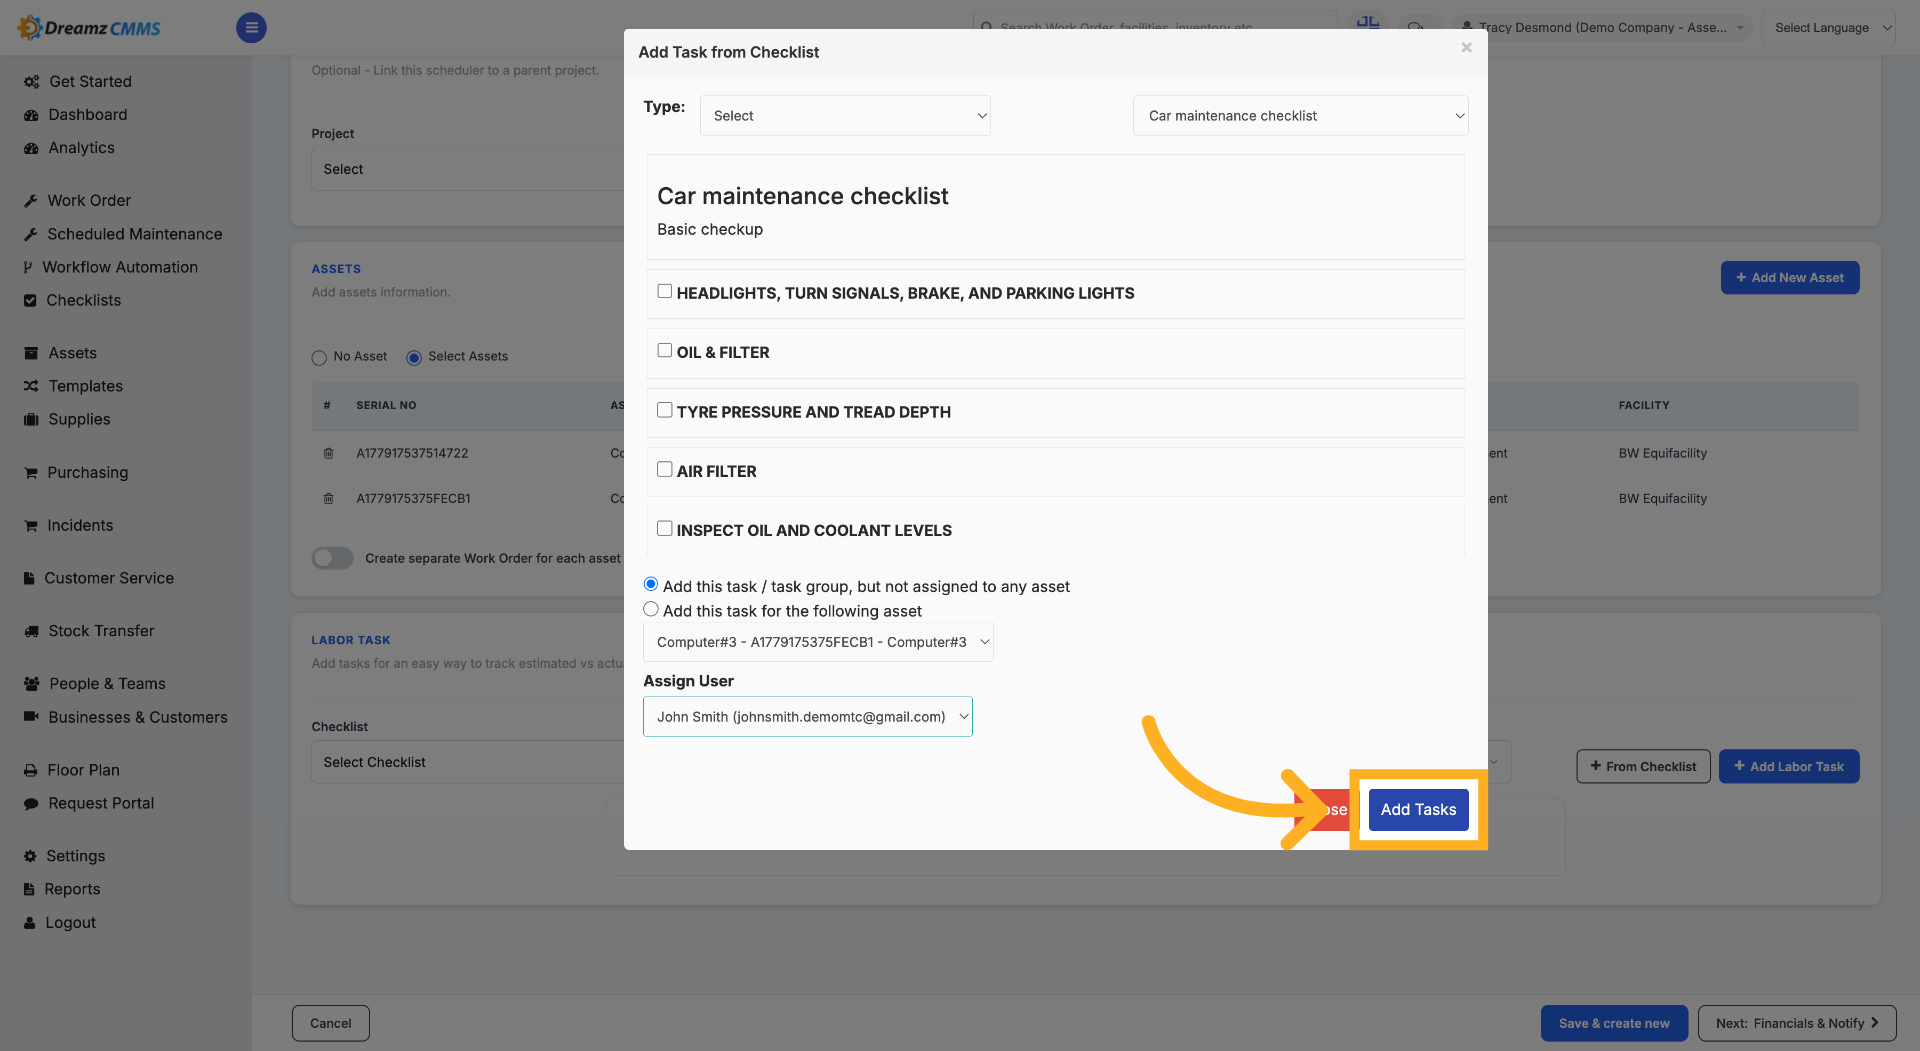
Step 34 – Add Tasks to the Scheduler
Click "Add Tasks" to include tasks in the meter reading scheduler.
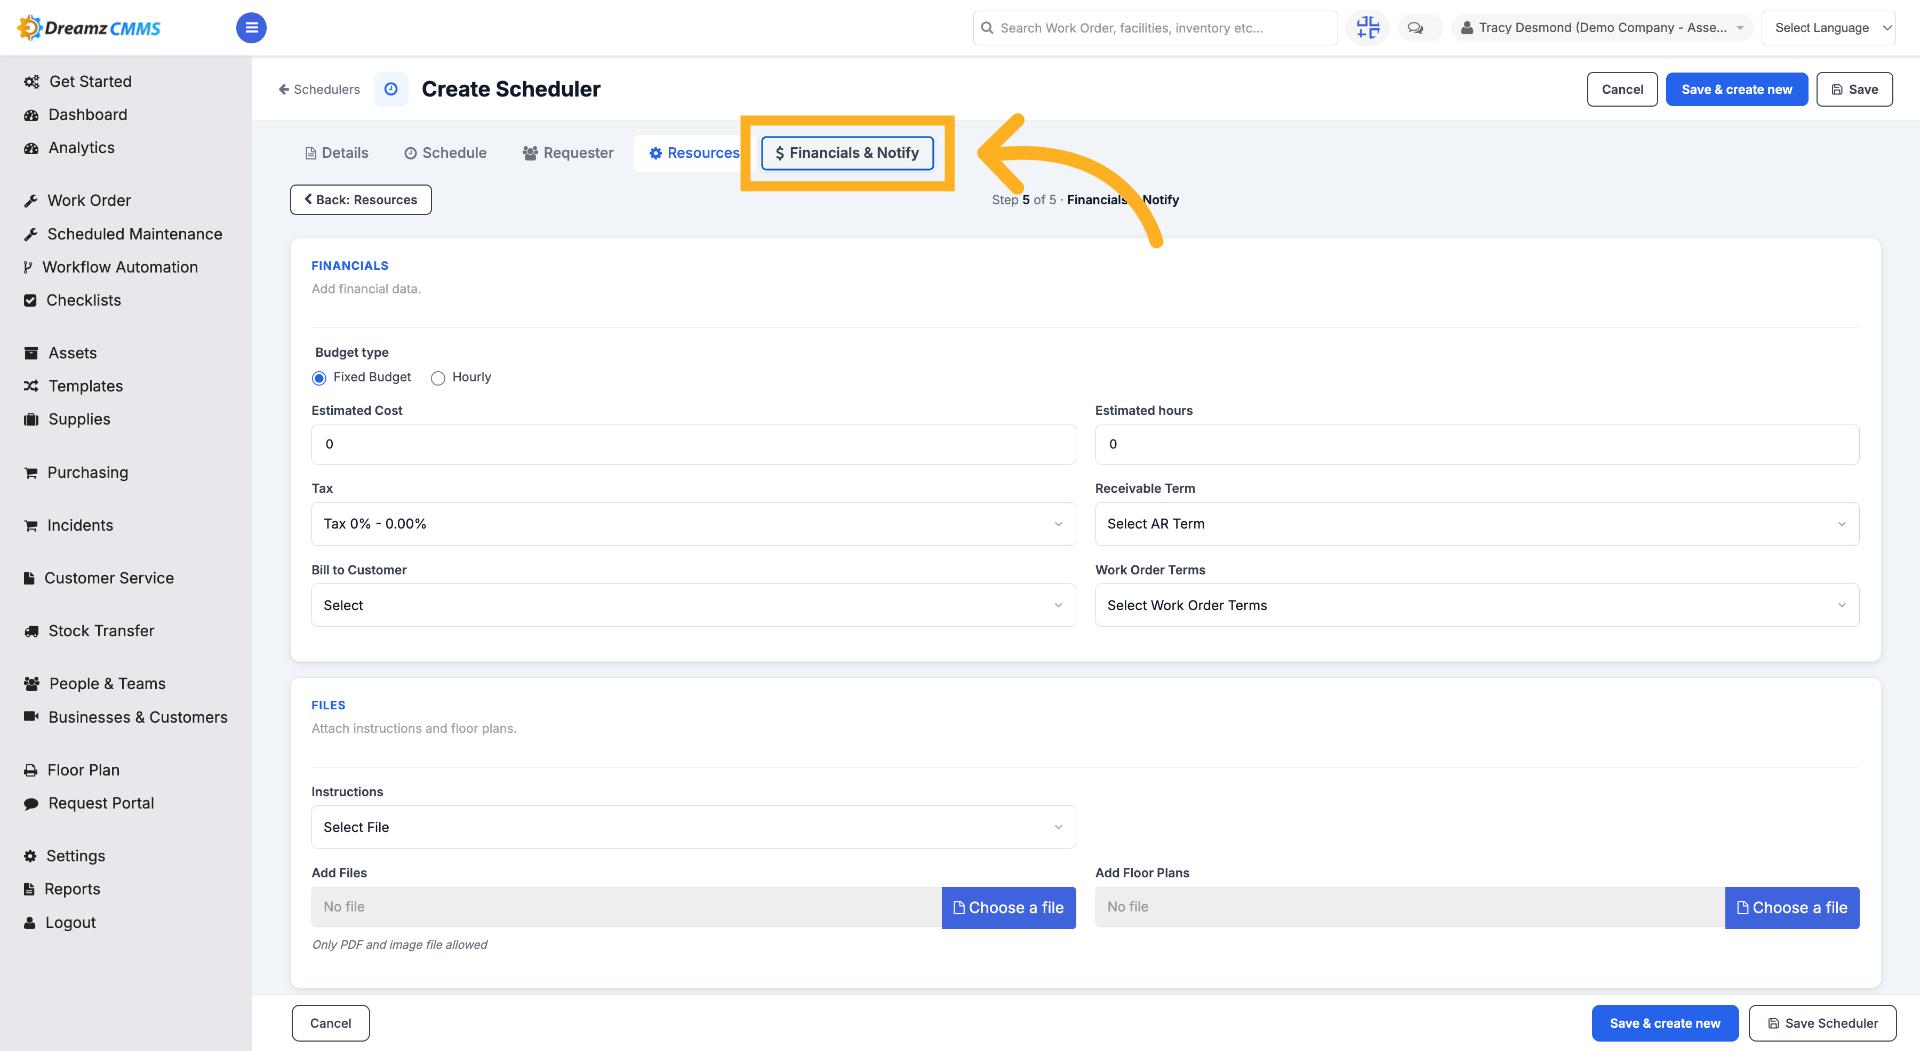
How to Finalize Financials and Save the Scheduler
Step 1 – Access Financials & Notify Tab
Click "Financials & Notify" to open the financial settings for the meter reading scheduler. Here you can manage the budget, estimated cost, estimated hours, and other financial options.
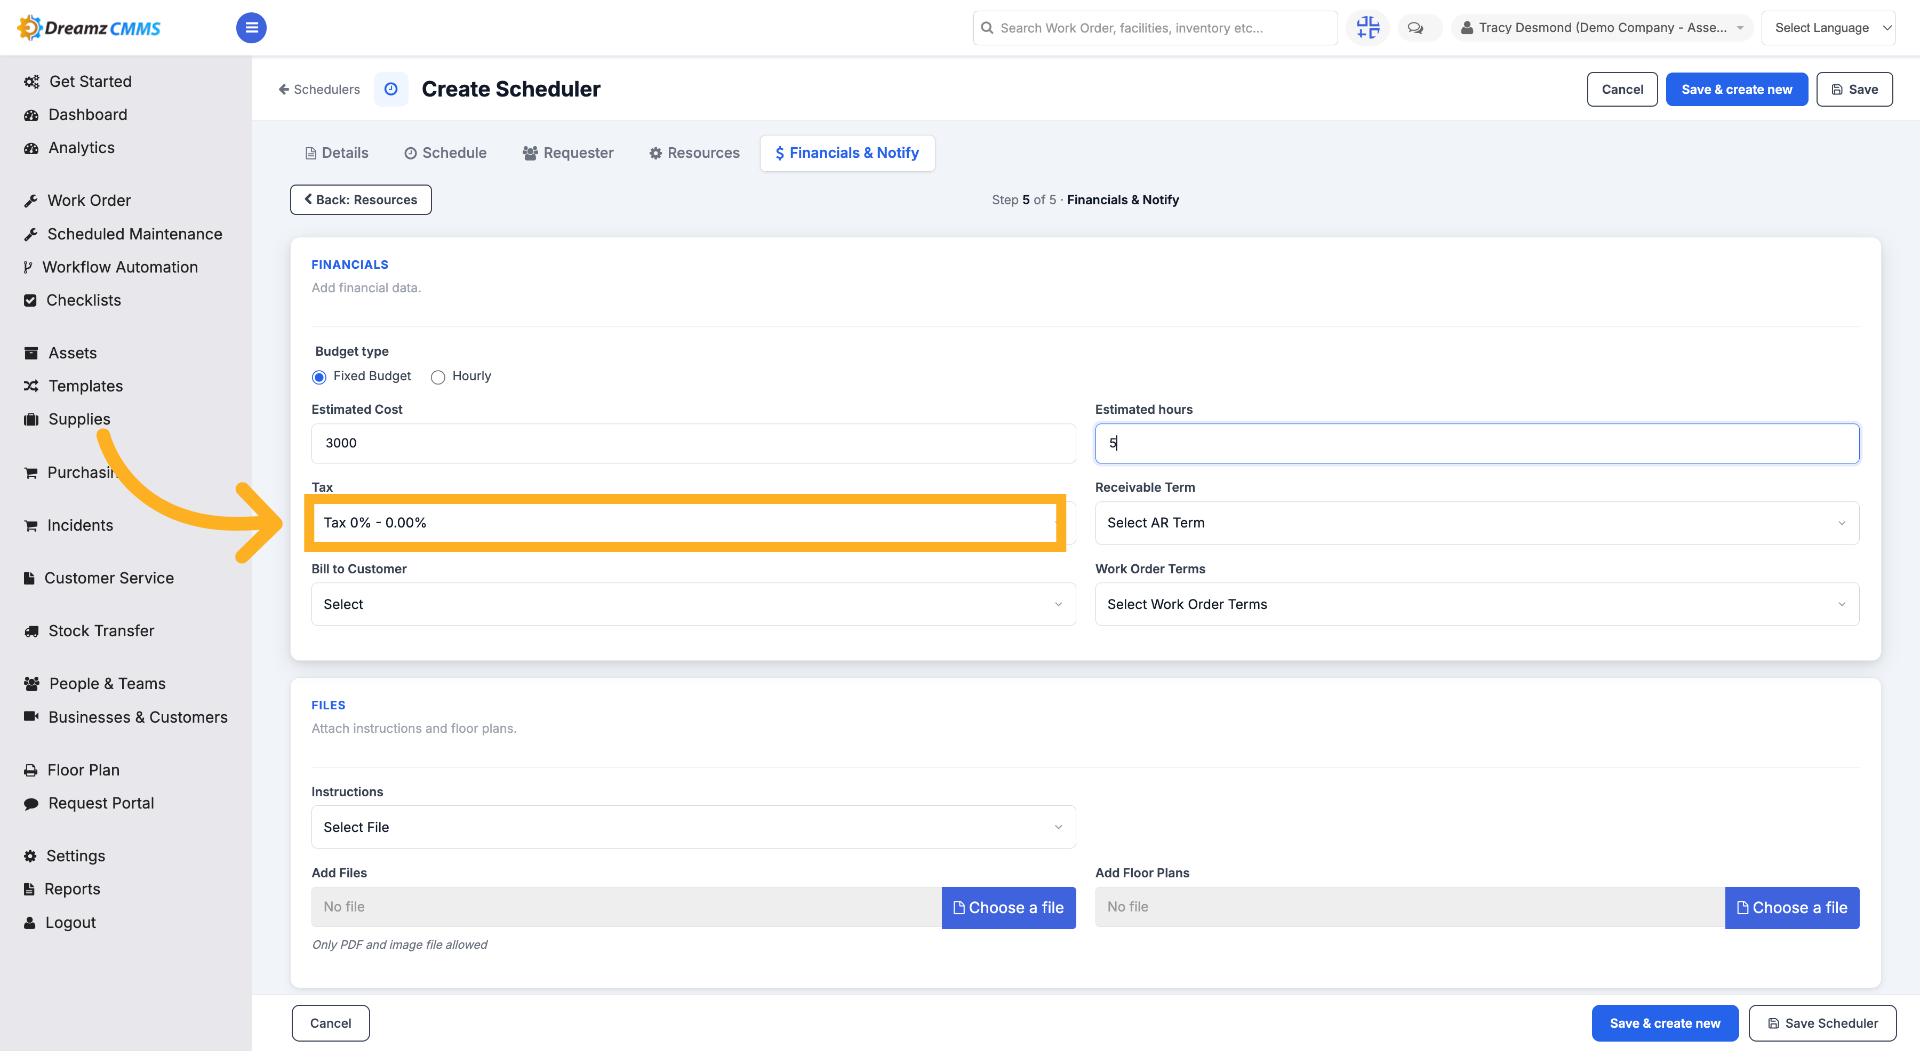
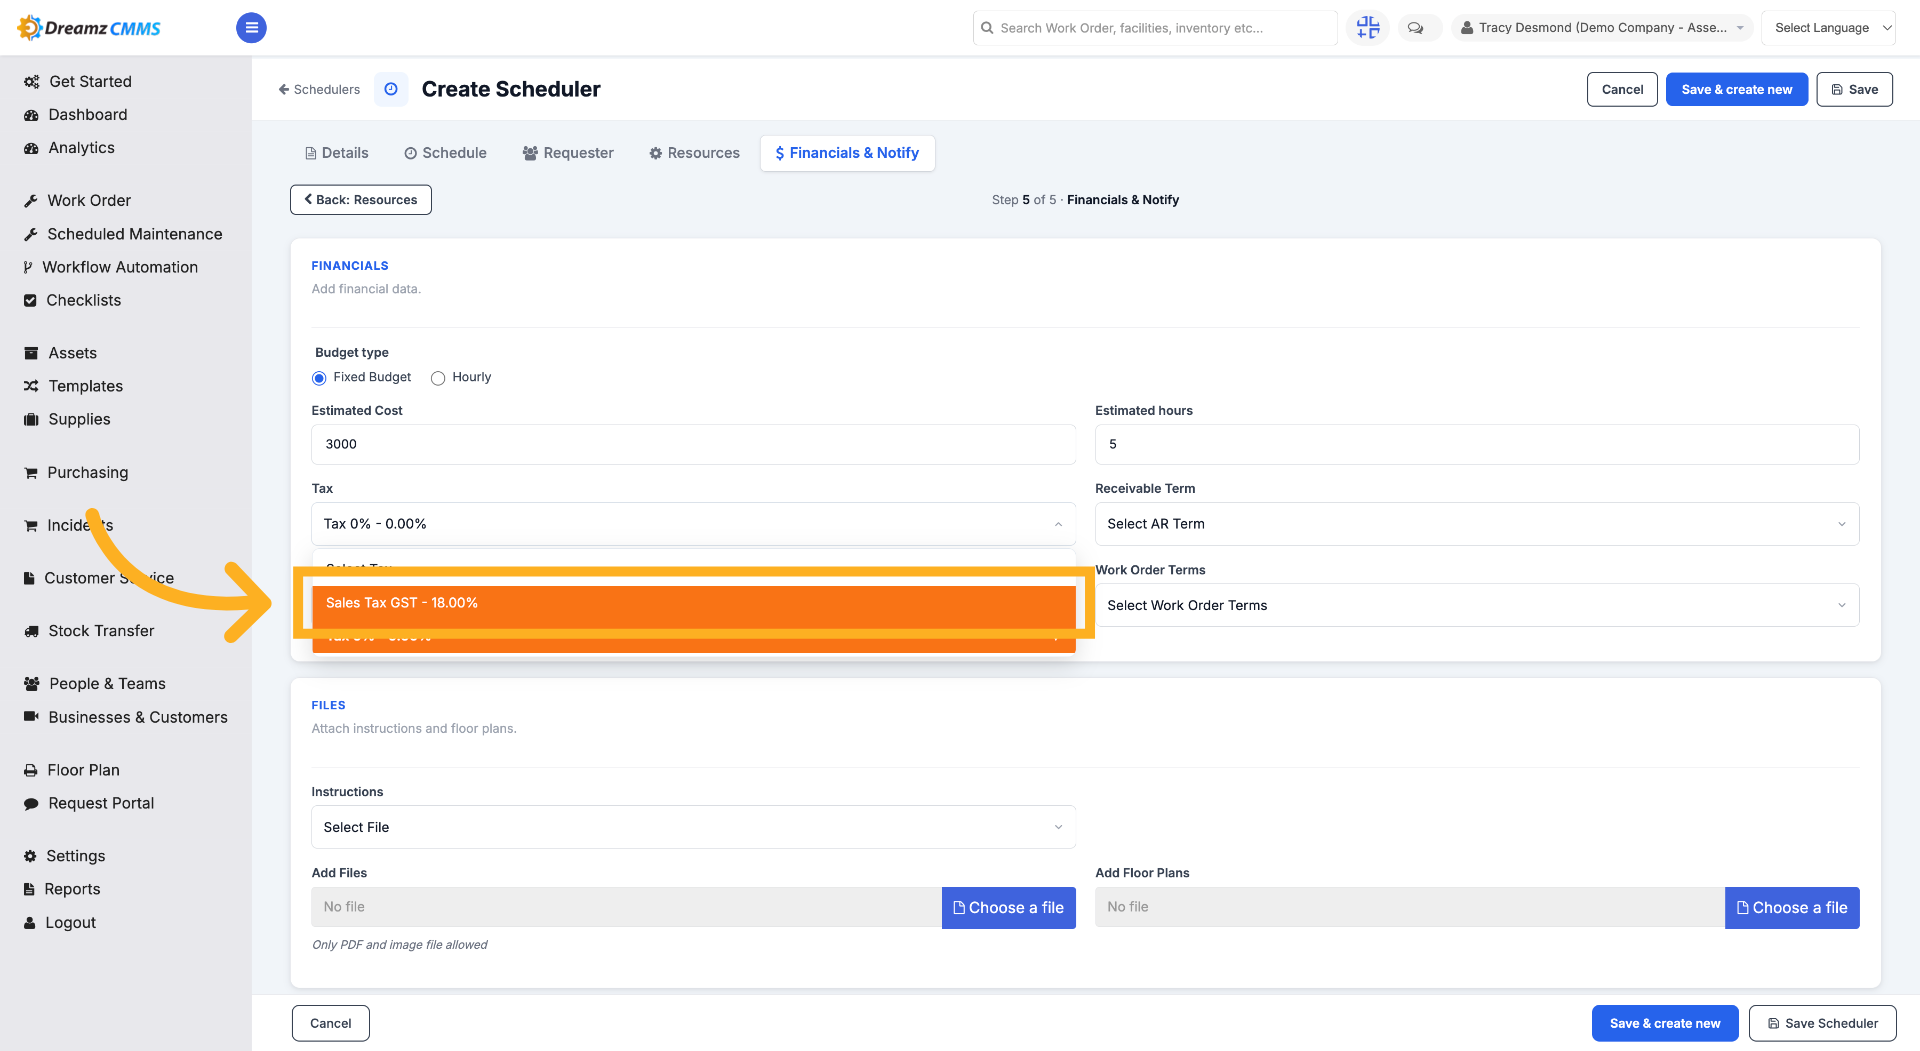
Step 2 – Open Tax Dropdown Menu
Click the tax dropdown to open the tax selection options.
Step 3 – Choose Sales Tax Option
Click the applicable tax rate from the tax dropdown.
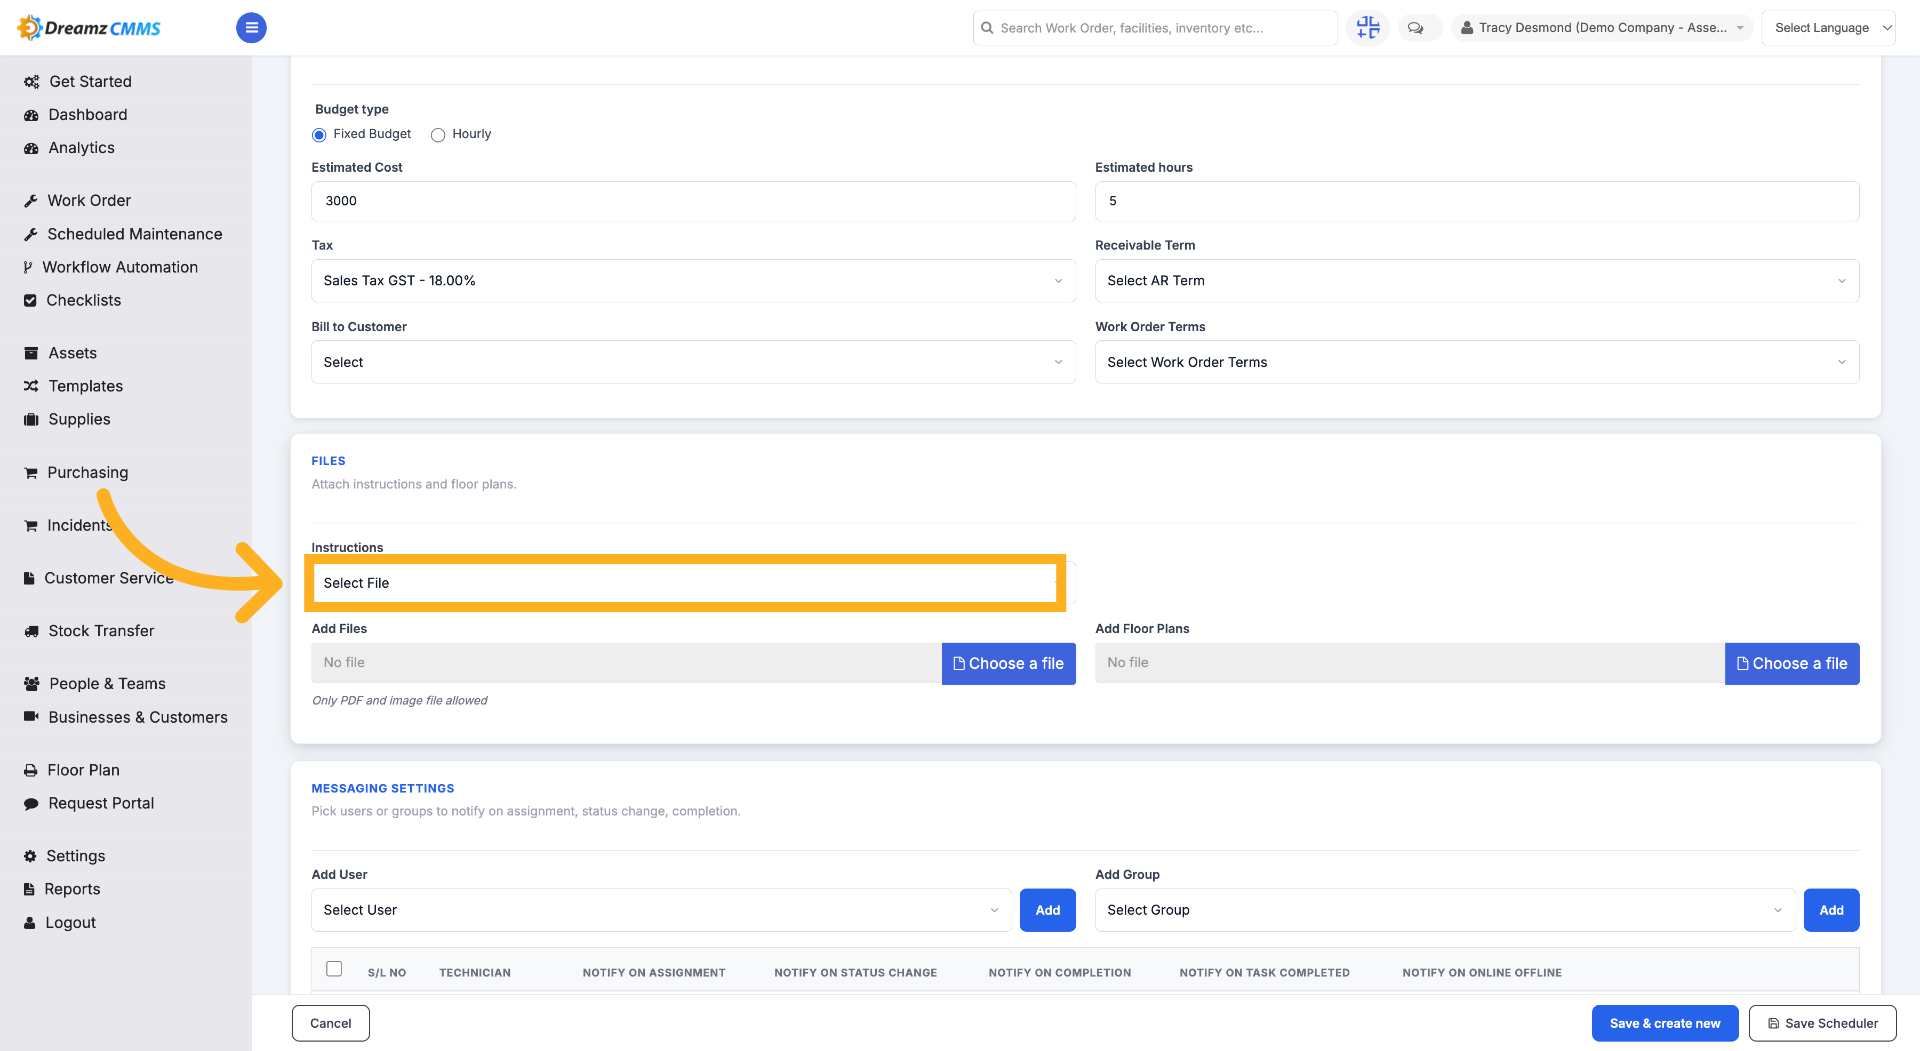
Step 4 – Open File Selection Dialog
Click "Select File" to open the file selection dialog for uploading documents.
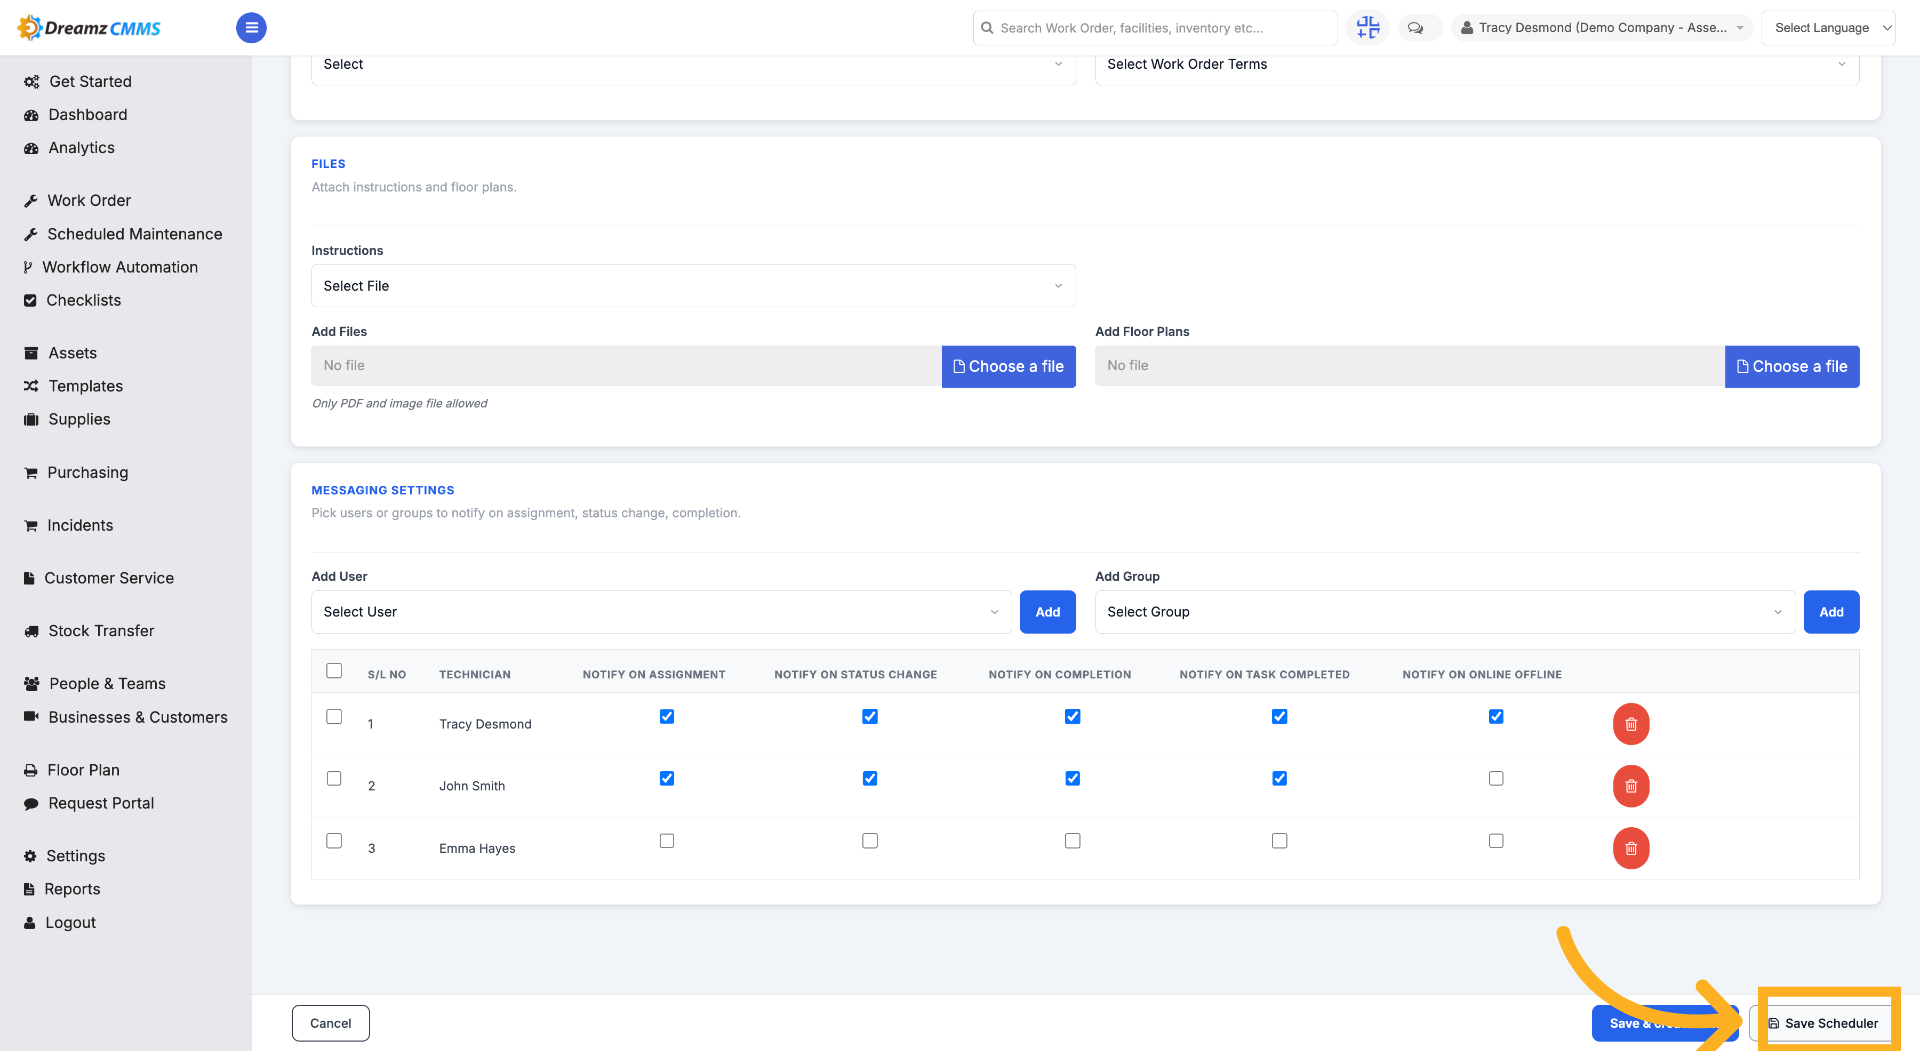
Step 5 – Save Scheduler Configuration
Click "Save Scheduler" to save the meter reading scheduler settings. You'll be redirected to the listing page.
How to Deactivate or Delete a Metering Scheduler
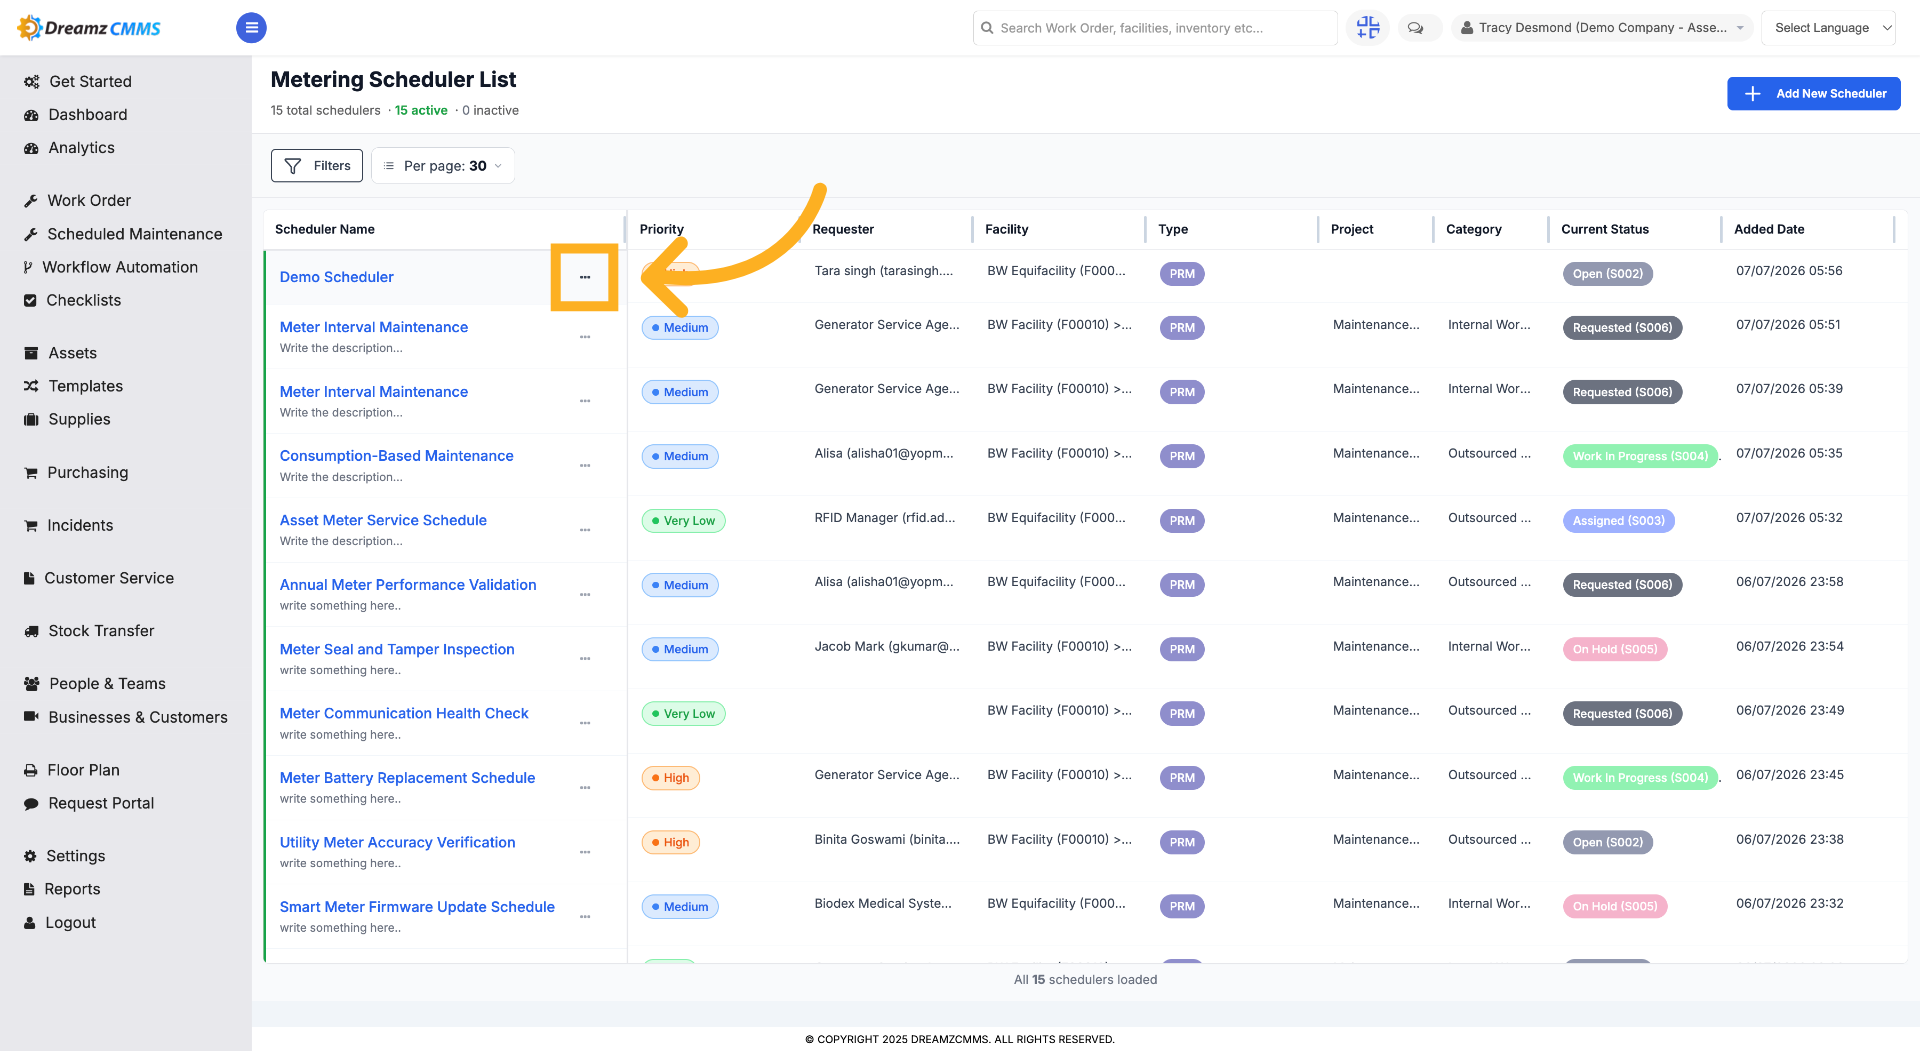
Step 1 – Open the 3-Dot Menu
Click the three dots menu on the metering scheduler list to open additional options.
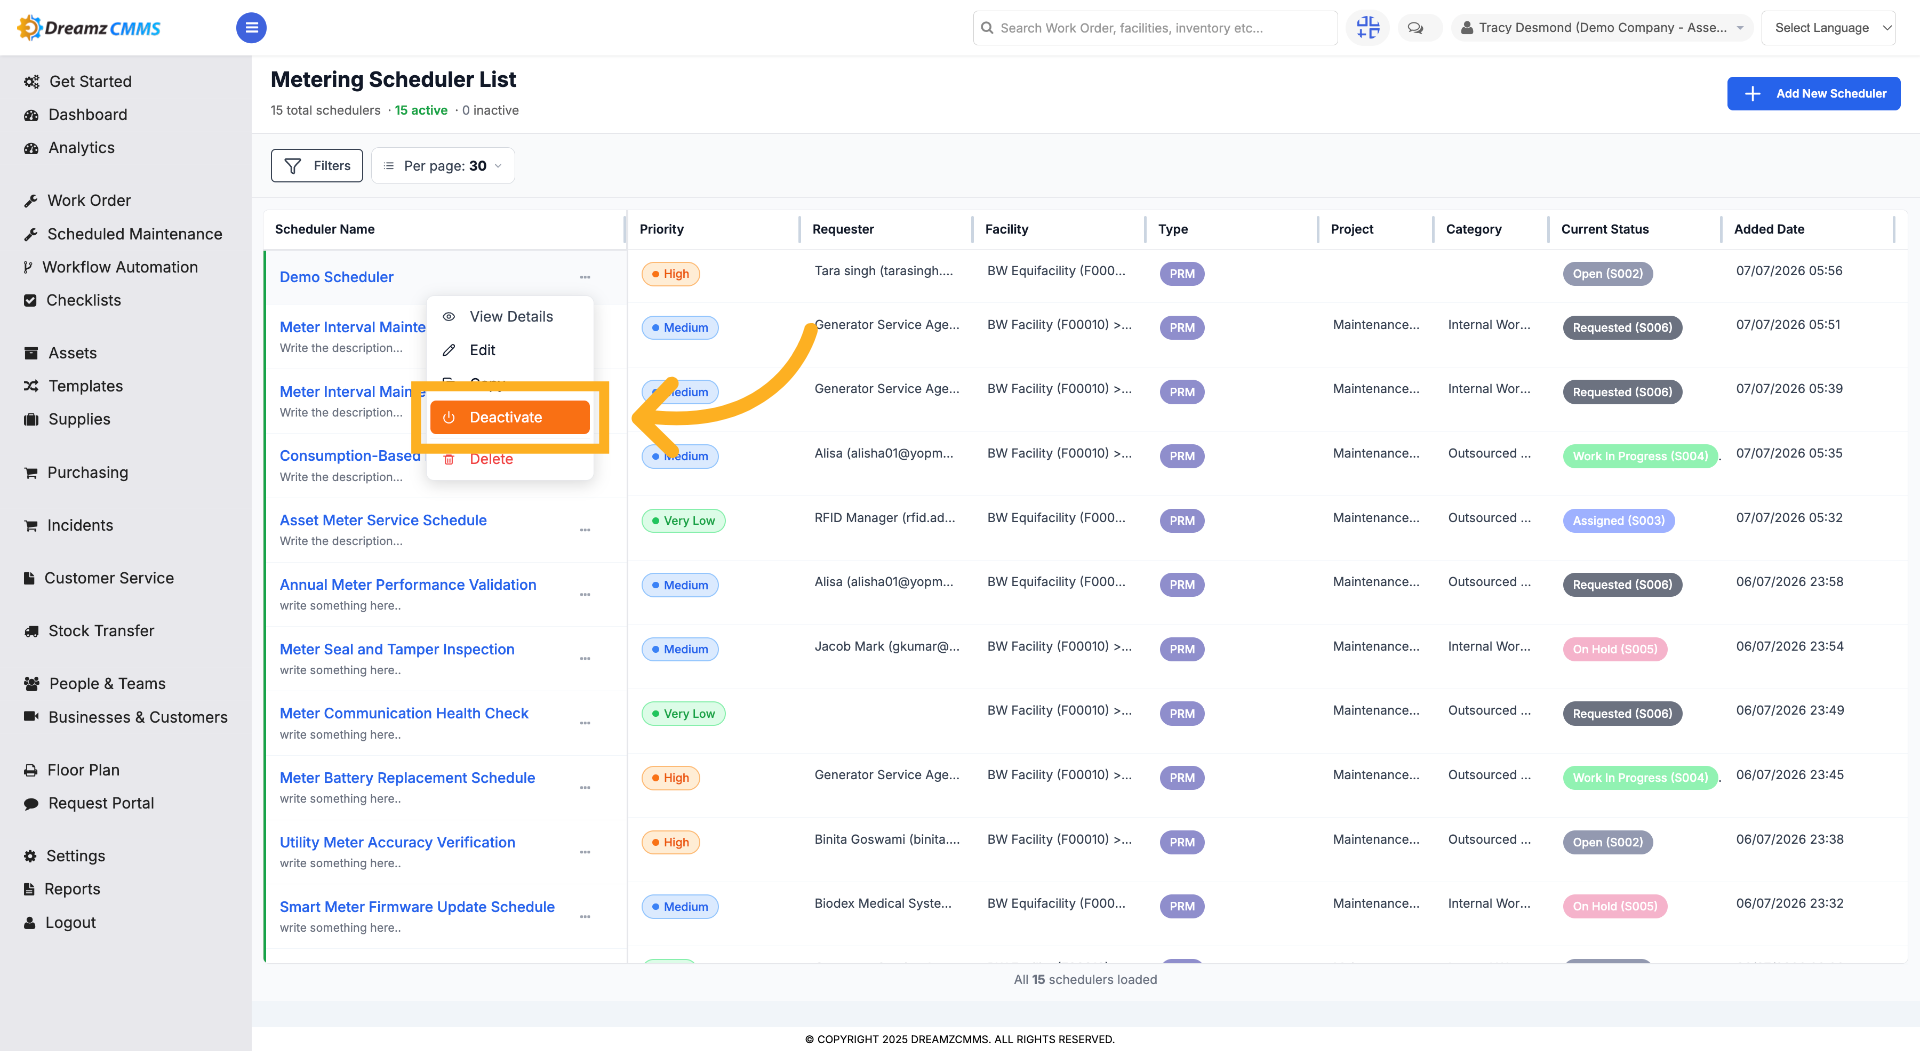
Step 2 – Deactivate the Selected Scheduler
Click "Deactivate" to disable the selected metering scheduler.
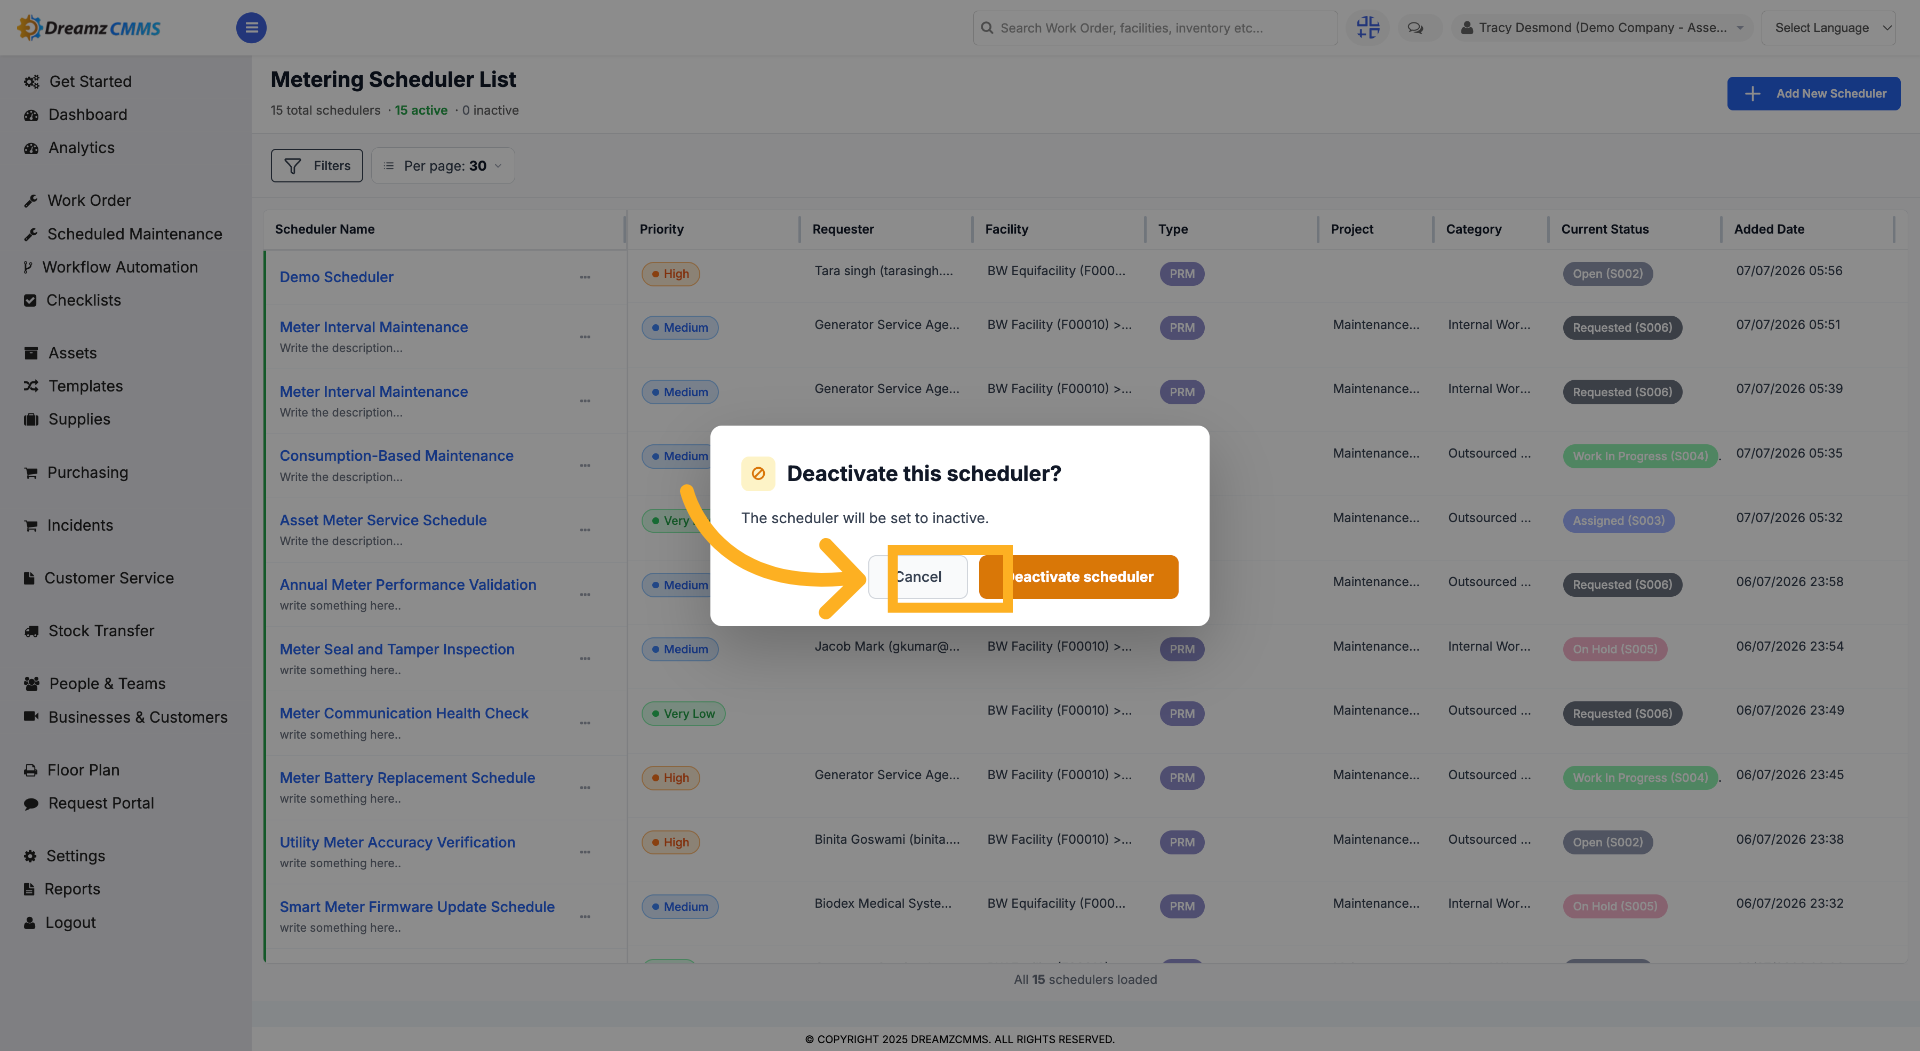
Step 3 – Cancel the Deactivation, if Needed
Click "Cancel" to abort the deactivation process and return to the scheduler list.
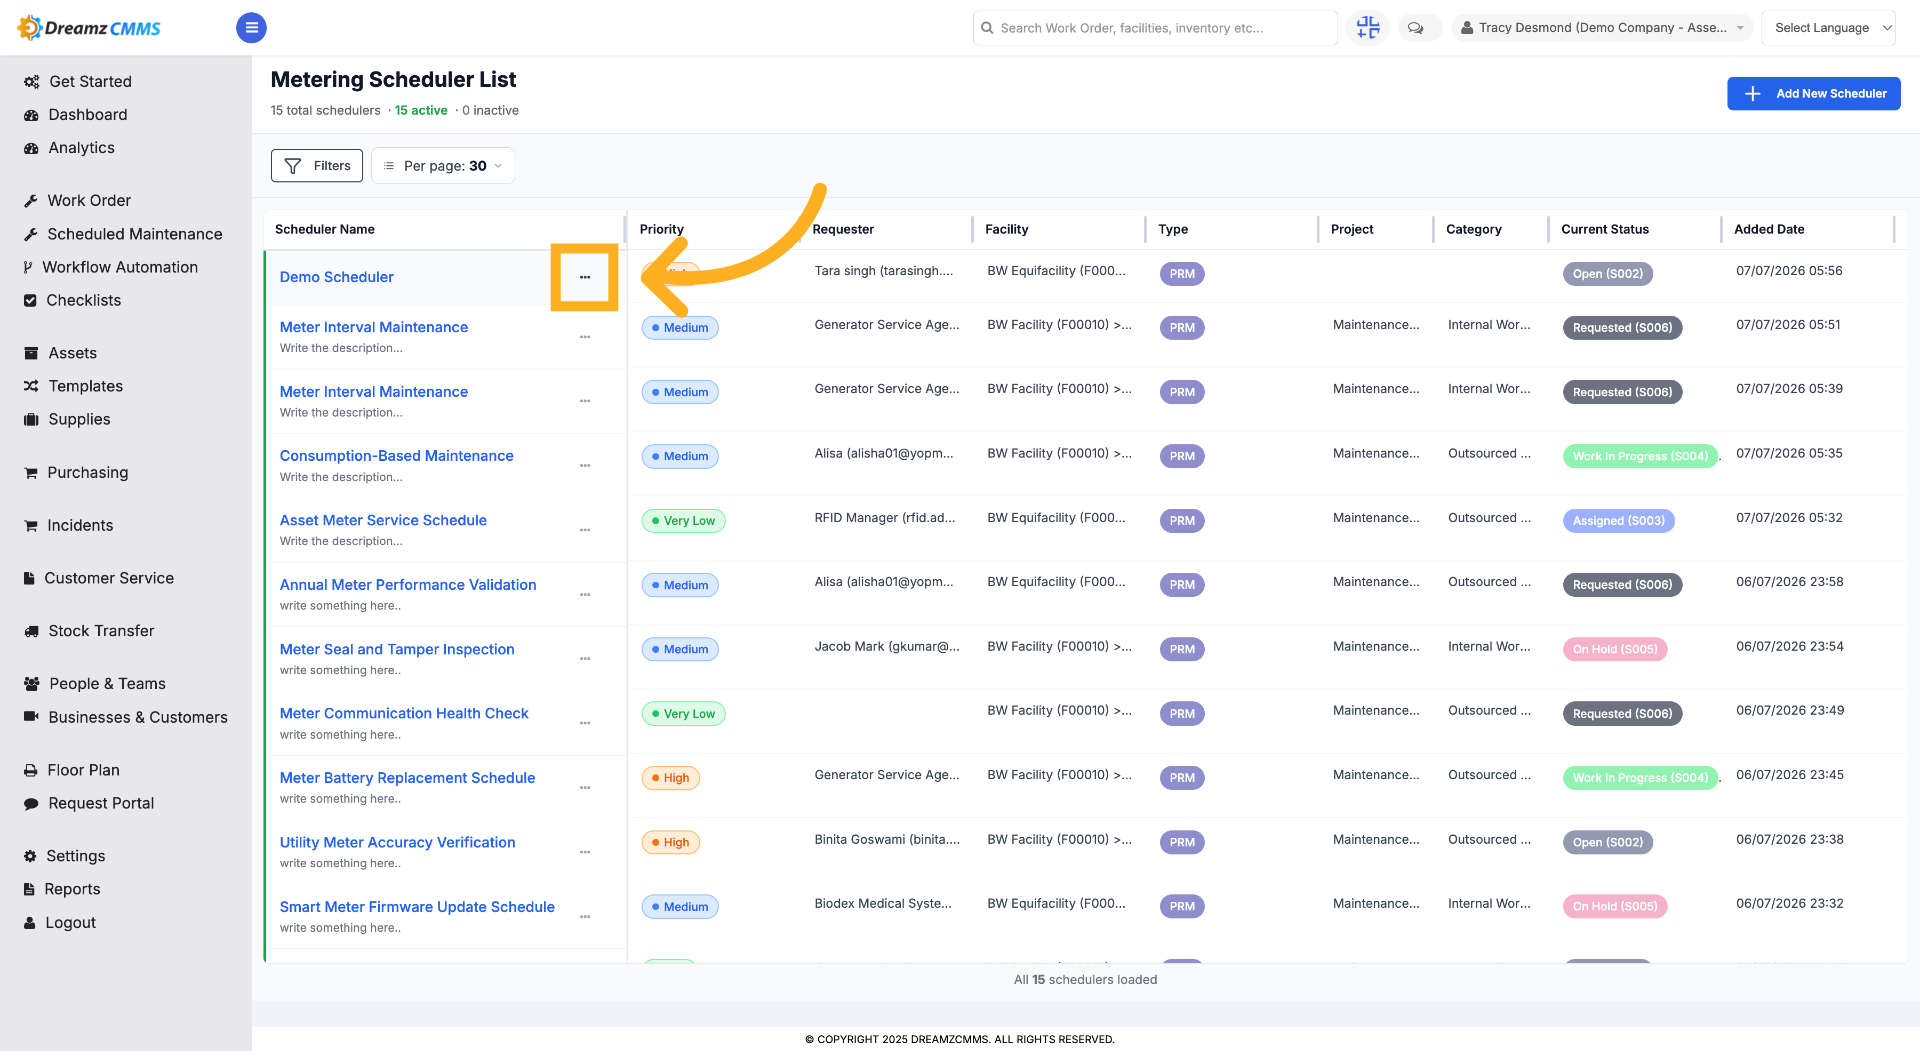
Step 4 – Select a Scheduler for Deletion
Click here to select the scheduler you want to delete from the list.
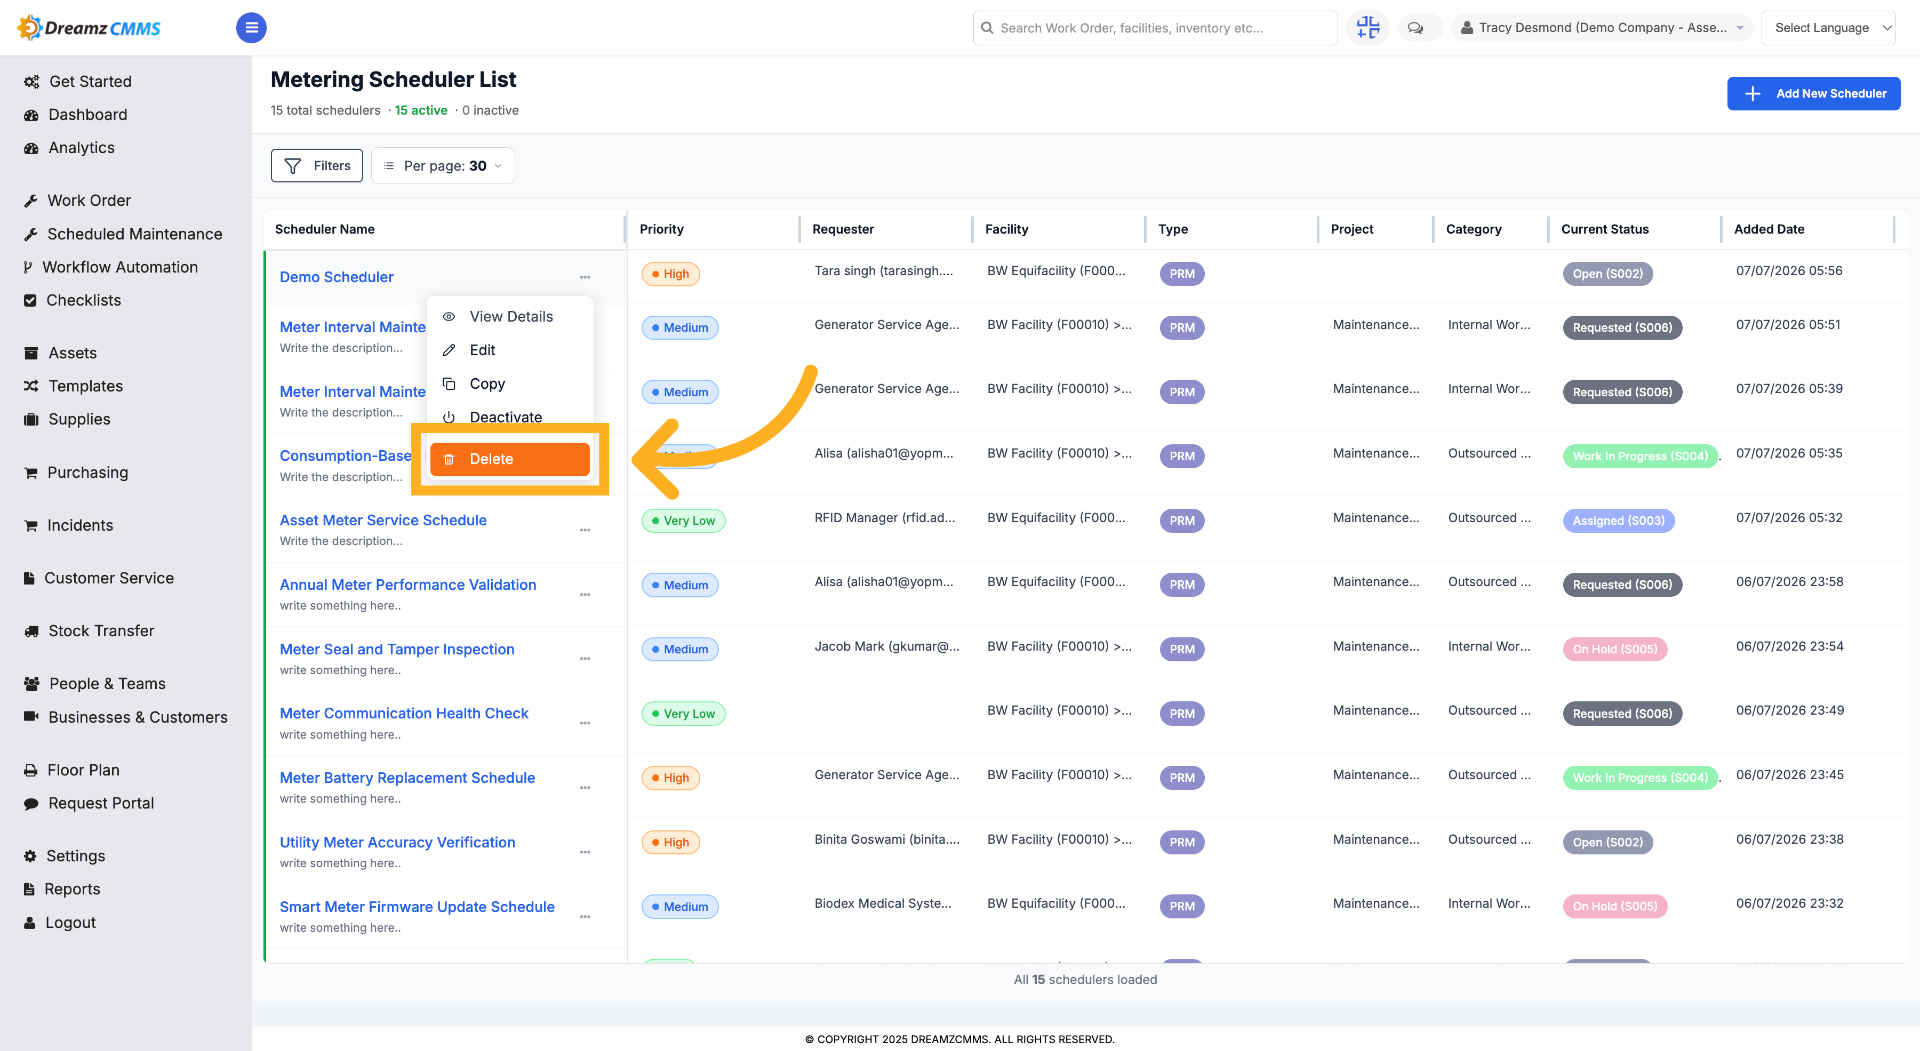
Step 5 – Initiate Scheduler Deletion
Click "Delete" to begin the process of removing the selected scheduler.
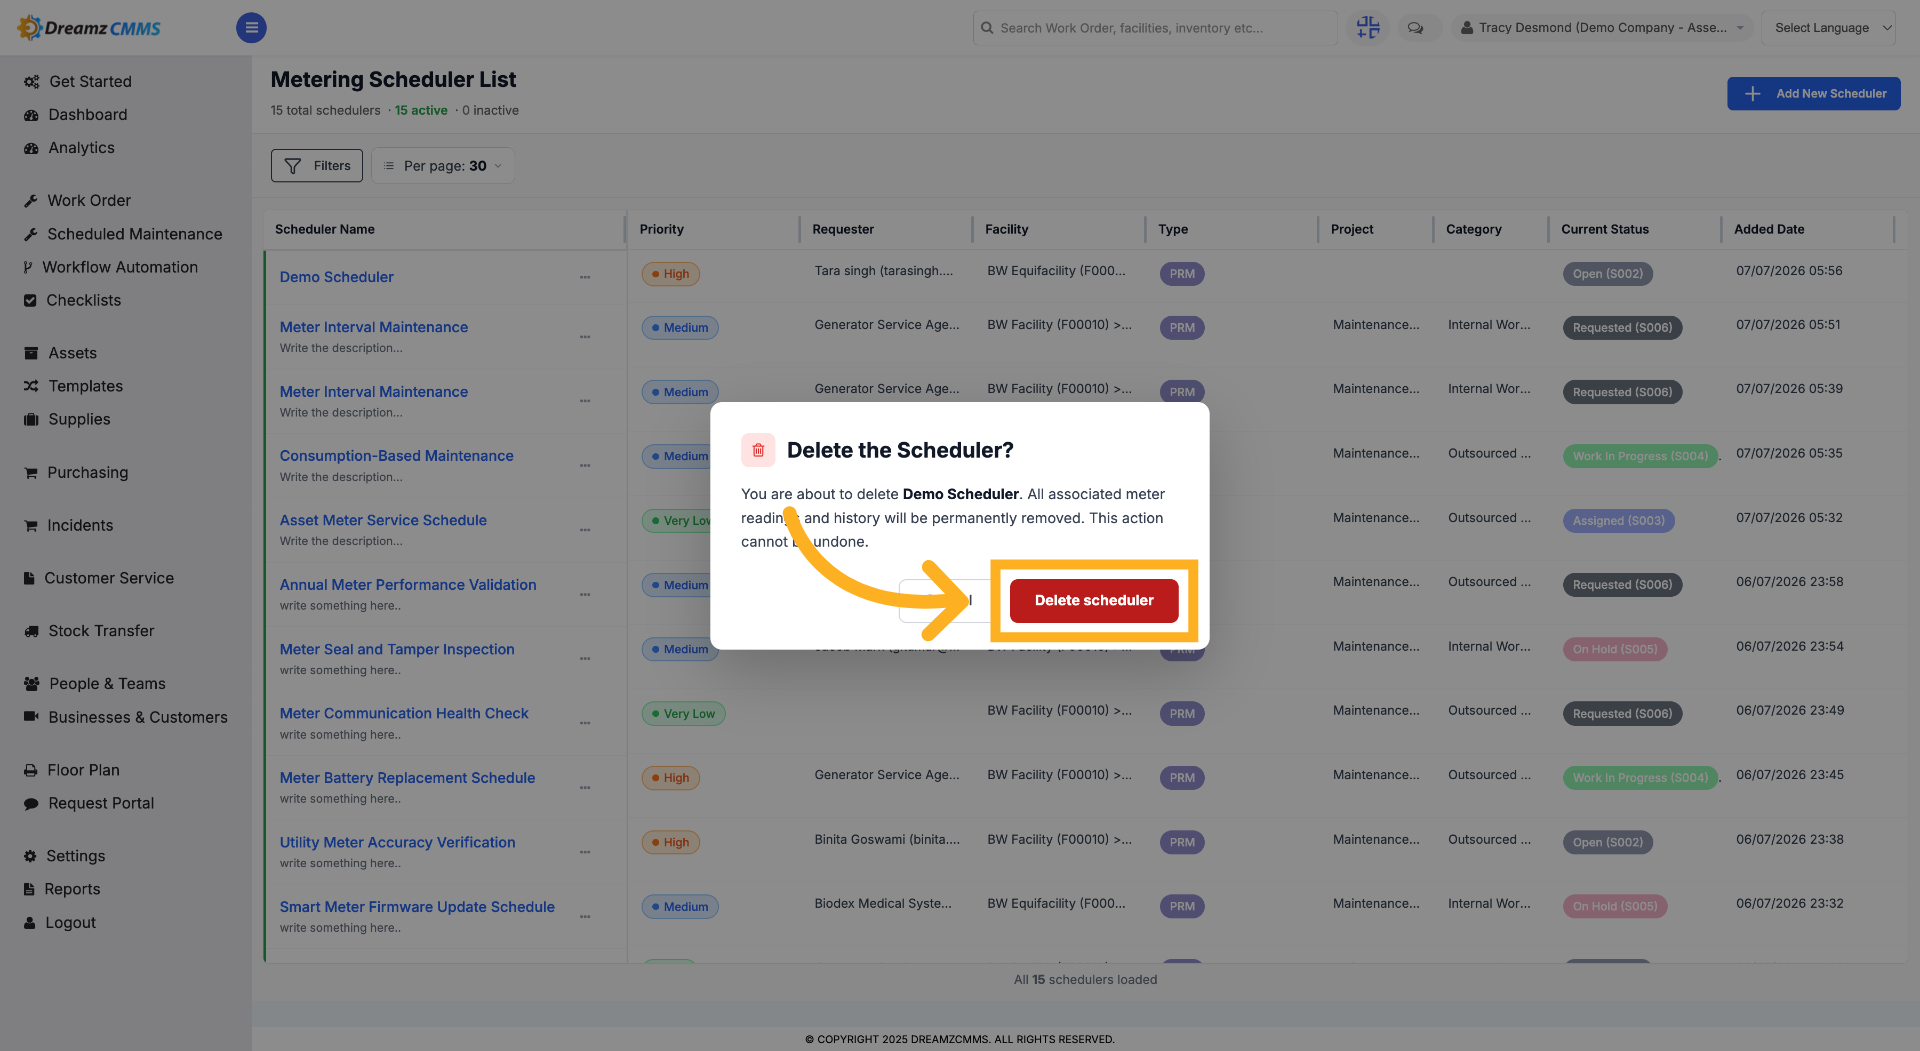
Step 6 – Confirm Scheduler Deletion
Click "Delete Scheduler" to confirm and permanently delete the meter reading scheduler.
Tips for Metering Scheduled Maintenance
- Set the scheduling interval and time unit carefully — this is what determines when the scheduler triggers based on meter readings.
- Link checklists and tasks to your metering scheduler so technicians know exactly what to do when the schedule fires.
- Use the "Create Separate Work Order for Each Asset" toggle if you need individual tracking per asset rather than one combined work order.
- Deactivate a scheduler instead of deleting it if you may need it again later — deletion is permanent.
Frequently Asked Questions
What triggers a metering scheduler to run?
It triggers automatically when the linked equipment's meter reading meets the criteria you've configured, such as a set number of hours.
Can I edit a metering scheduler after it's created?
Yes. Use the three-dot menu on the scheduler list, select Edit, and update any of its tabs (Schedule, Requester, Department, Resources, or Financials).
Can I link multiple assets to one metering scheduler?
Yes. Use the Resources tab to select and add multiple assets, and choose whether to generate a separate work order for each one.
What's the difference between deactivating and deleting a scheduler?
Deactivating disables the scheduler without removing it, so it can be reactivated later. Deleting permanently removes it.