Create Purchase Receipts from an Approved Purchase Order
Purchase Receipts in DreamzCMMS record what you actually received against an approved Purchase Order (PO). When goods arrive, you create a receipt to capture quantities (full or partial), lot and serial numbers, expiry and QC status, and supporting attachments such as a GRN or delivery challan. The system then automatically updates your on-hand inventory. You can receive items into a single location or distribute them across multiple locations in one step.
Overview
The Purchase Receipt step closes the loop on your procurement workflow — confirming that ordered items have physically arrived and updating stock levels accordingly. Partial receipts are supported, so you can record deliveries as they come in without waiting for a complete order. Once receipted, the inventory is updated and the record is linked to the original PO for a full procurement audit trail.
Here is a reference video:
Before You Begin
- The Purchase Order must already be Approved before a Purchase Receipt can be created from it.
- The destination location(s) where items will be received must already exist in the system.
- Have your physical delivery documents ready (e.g., GRN, delivery challan) if you plan to attach them to the receipt.
- You must have the appropriate permissions to create Purchase Receipts.
How to Create a Purchase Receipt
Step 1 – Navigate to Purchase Orders
From the main menu, click Purchasing, then click Purchase Orders. This opens the Purchase Orders listing page.
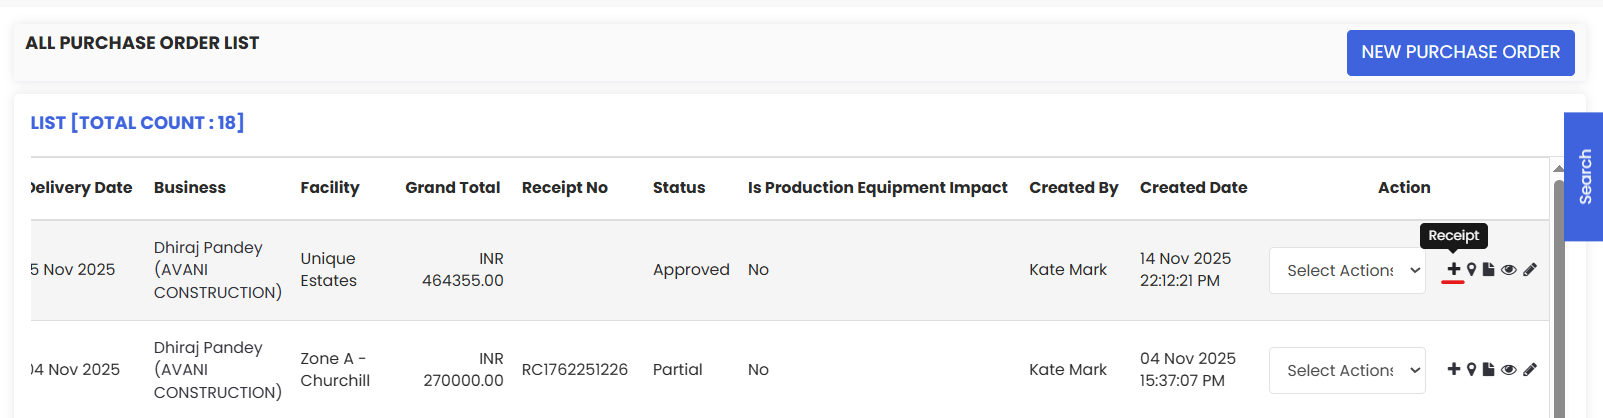

Step 2 – Click the + Icon to Create a Receipt
Find the approved Purchase Order in the listing and click the + icon in its action column. The Purchase Receipt page will open, pre-populated with the item details from the PO.
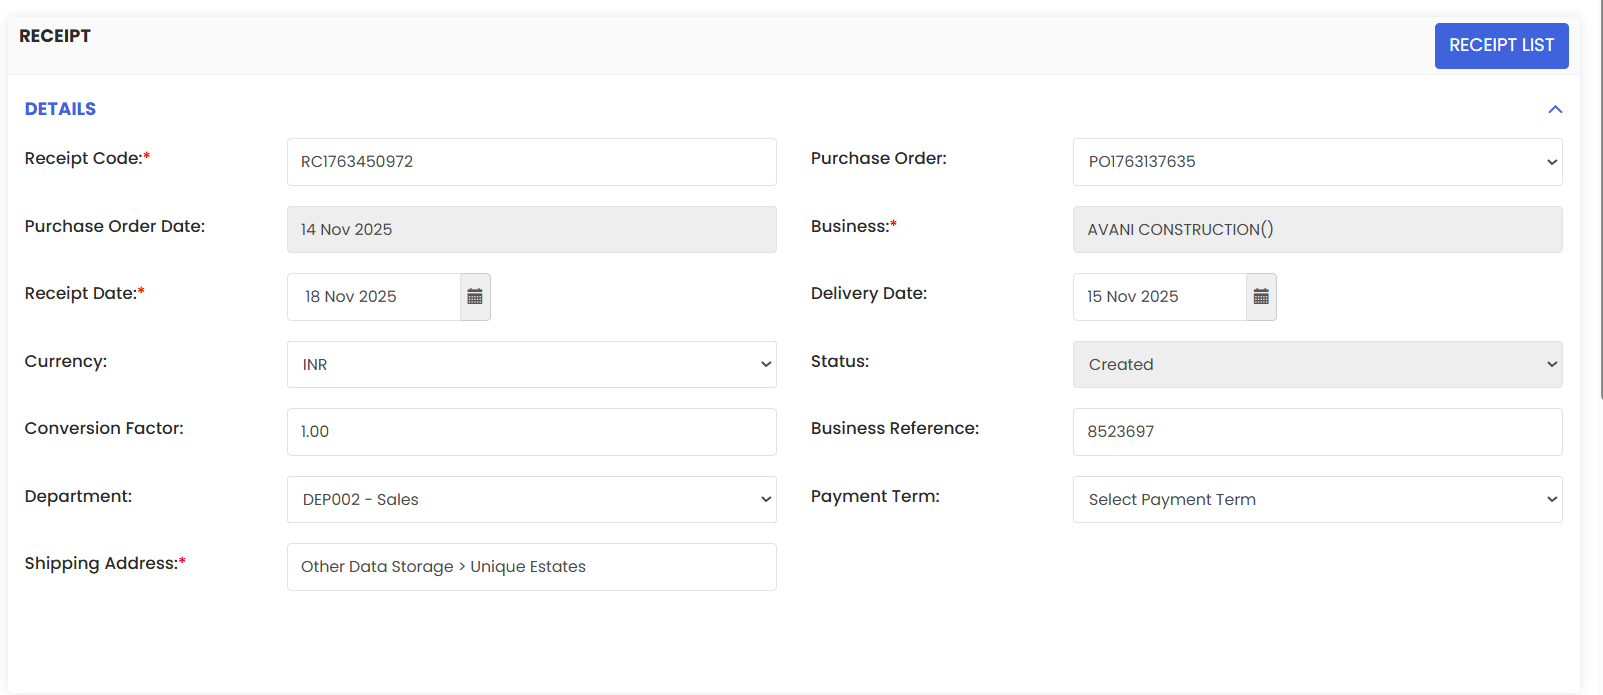
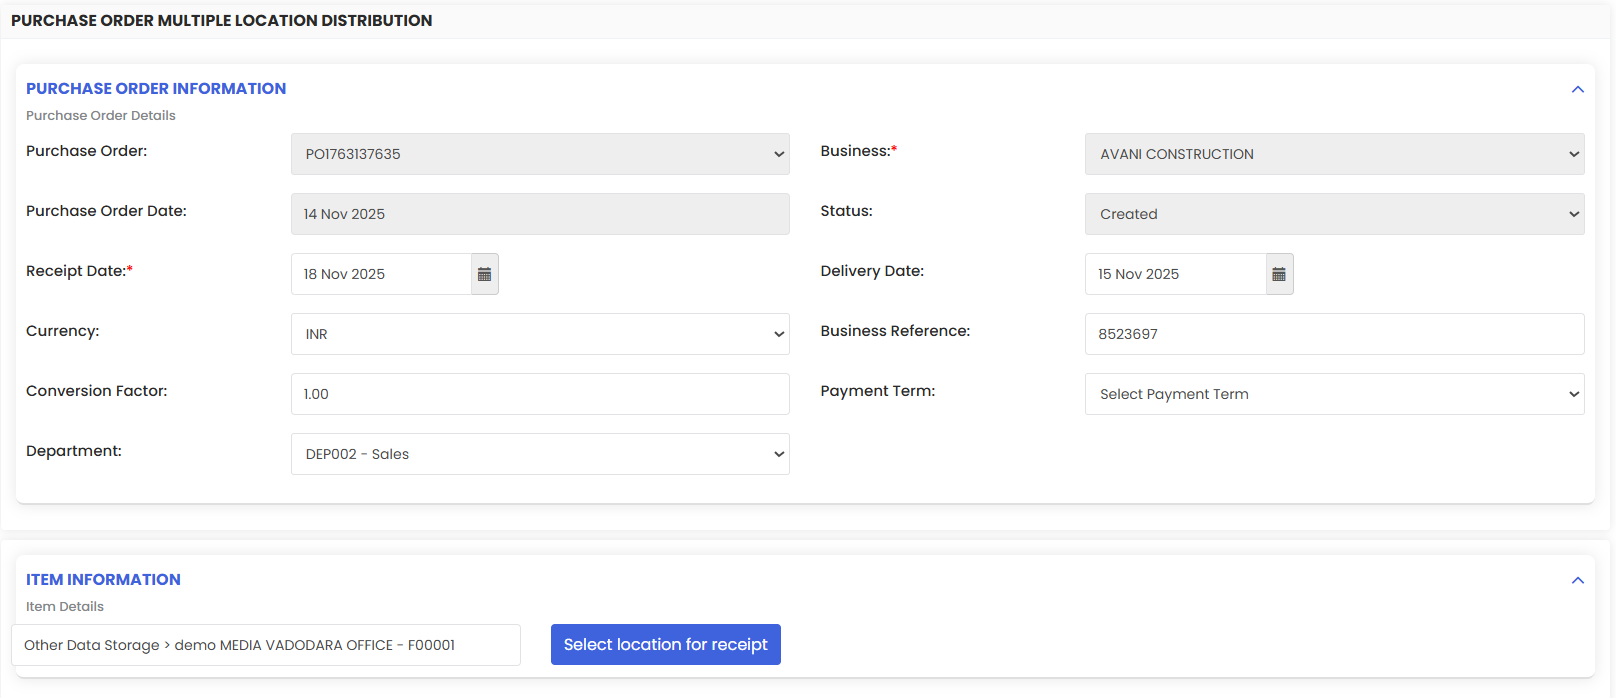
Step 3 – Review and Confirm Item Details
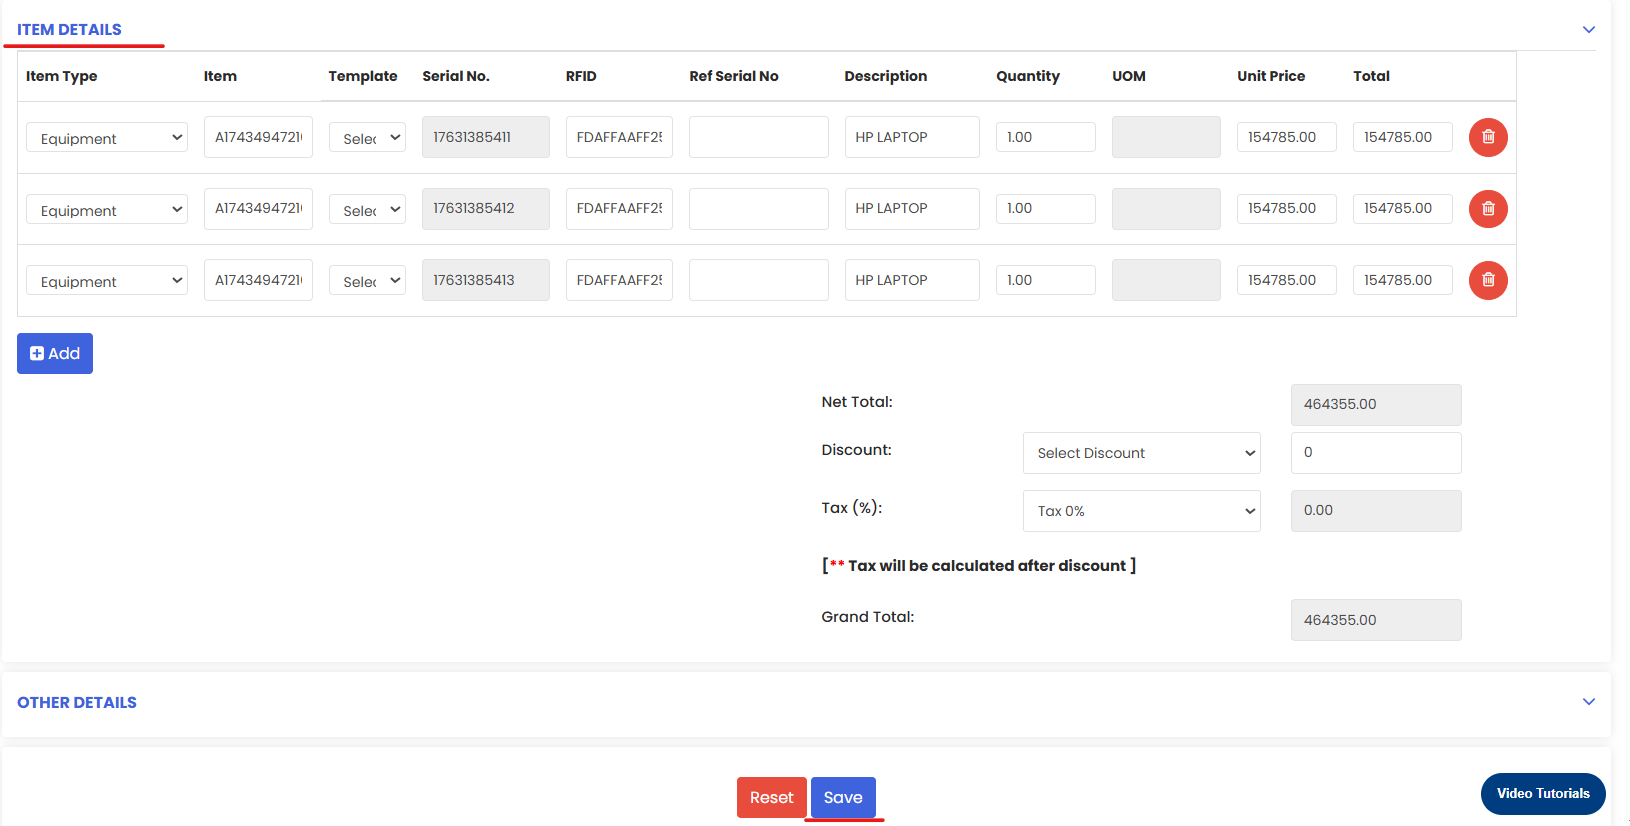
On the Receipt page, review the item details pulled from the Purchase Order. Confirm or update the following for each item being received:
- Quantity Received — Enter the actual quantity received. This can be the full ordered quantity or a partial amount if the delivery is incomplete.
- Lot / Serial Numbers — Enter lot or serial numbers if applicable for traceability.
- Expiry Date — Record the expiry date for items with a shelf life.
- QC Status — Mark the quality control status of the received items.
- Attachments — Upload supporting documents such as a GRN or delivery challan.
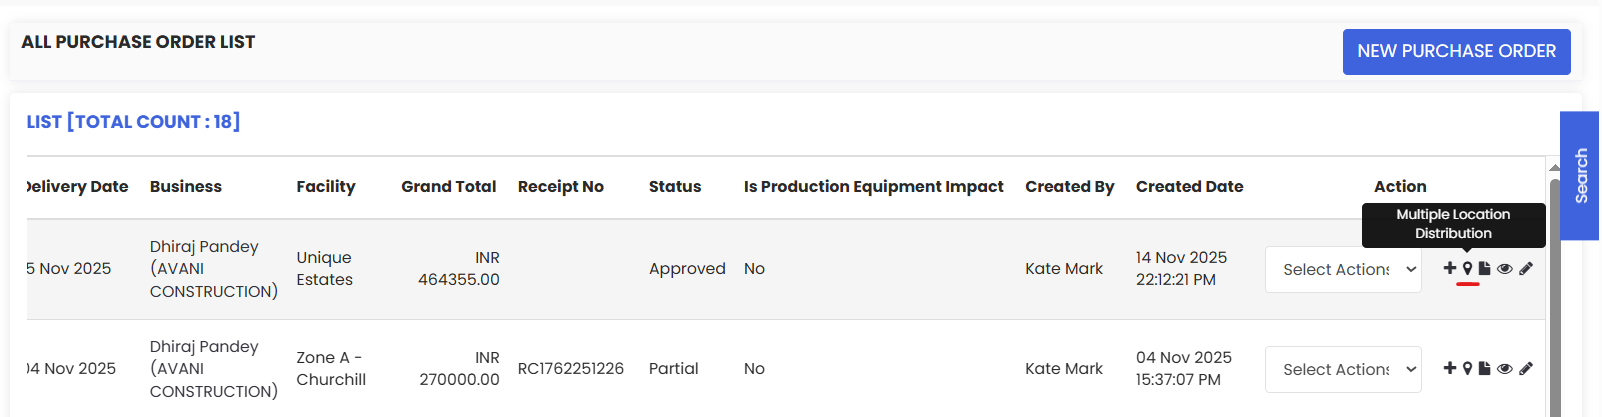
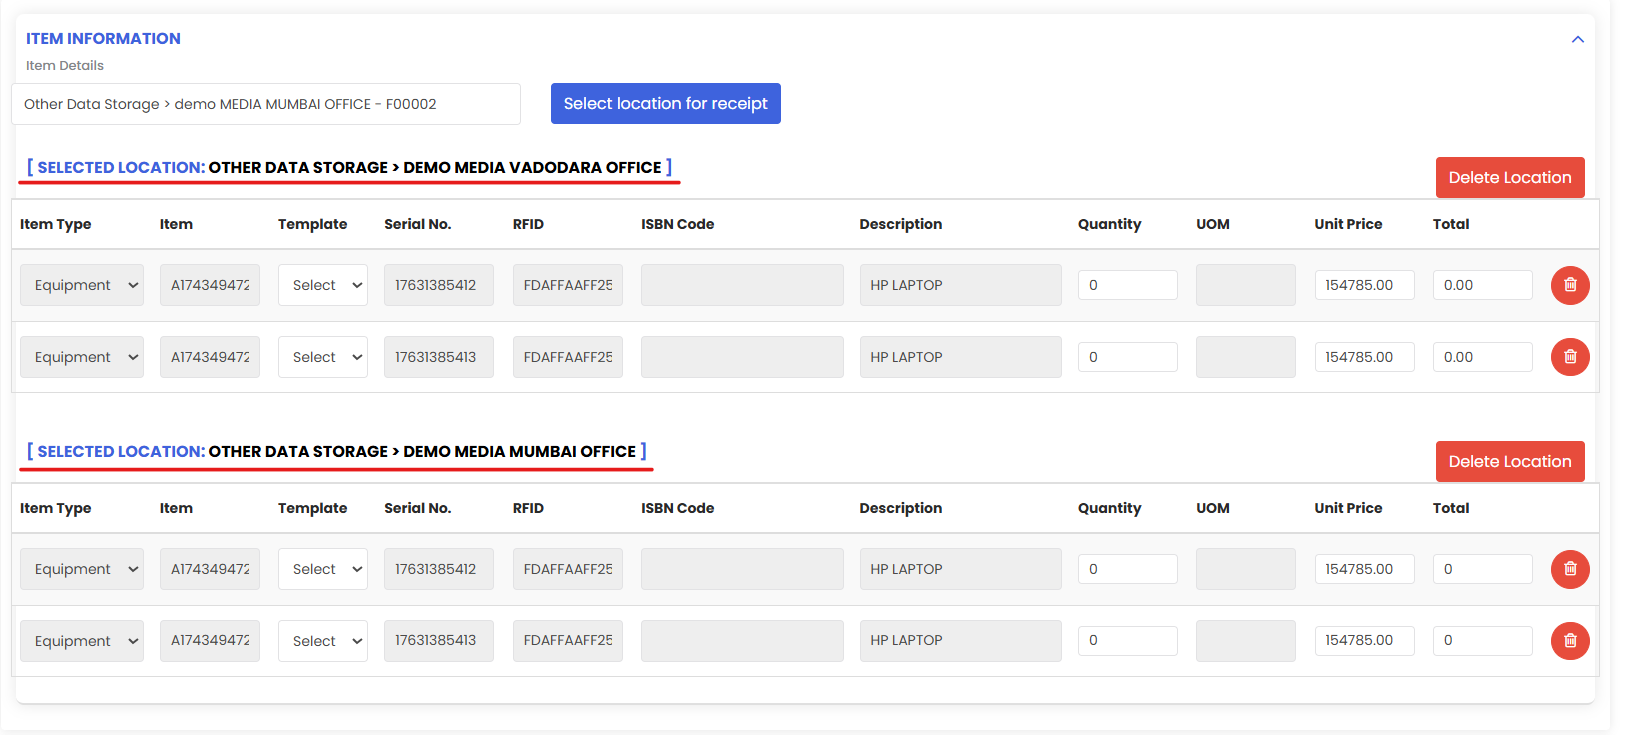
Step 4 – (Optional) Enable Multiple Location Distribution
If the received items need to be distributed across more than one location, enable the Multiple Location Distribution option.
For each location:
- Select the Location — Choose the facility or location to receive items into.
- Enter the Quantity — Specify how many units of the item are going to that location.
Click Add to include additional locations as needed. The total quantities distributed must match the quantity being received.
Note: You can add as many locations as needed in a single receipt. The system will update inventory at each location individually once the receipt is saved.
Step 5 – Save the Receipt
Once all item details and location assignments are confirmed, click Save to create the Purchase Receipt. The system will automatically update on-hand inventory at the specified location(s) and link the receipt to the original Purchase Order.
After Creating the Receipt — What's Next?
- Verify updated stock levels at the receiving location(s) to confirm inventory has been correctly updated — see Manage Stock Levels.
- Create a Purchase Invoice to complete the procurement-to-payment cycle against this PO — see Purchase Invoices.
- Record a partial receipt for any outstanding items by creating a new receipt against the same PO once the remaining goods arrive.
Tips for Managing Purchase Receipts
- Always record receipts promptly when goods arrive. Delays in receipting cause inventory discrepancies and can block invoicing.
- Use partial receipts for split deliveries rather than waiting for the full order — this keeps your inventory accurate in real time.
- Attach the delivery challan or GRN at the time of receipting. This keeps all delivery documentation linked to the PO for easy auditing and dispute resolution.
- Use Multiple Location Distribution when items are destined for different sites or departments — this saves time compared to creating separate receipts for each location.
Frequently Asked Questions
Can I create a receipt for a partial delivery?
Yes. Enter only the quantity actually received in the Quantity Received field. You can create additional receipts against the same PO as the remaining items arrive.
Does the system update inventory automatically when a receipt is saved?
Yes. Once the receipt is saved, DreamzCMMS automatically updates the on-hand inventory at the specified location(s), reflecting the received quantities immediately.
Can I receive items into more than one location at once?
Yes. Enable the Multiple Location Distribution option and specify the location and quantity for each destination. The system will update each location's inventory individually.
Can I attach delivery documents to the receipt?
Yes. Use the Attachments field on the receipt form to upload documents such as a GRN, delivery challan, or inspection report.
Related Articles
- Creating Purchase Orders after Finalizing RFQ
- Create RFQ from an Approved Purchase Request
- Purchase Invoices
- Manage Stock Levels