Create RFQ from an Approved Purchase Request
A Request for Quotation (RFQ) in DreamzCMMS lets you turn an approved Purchase Request into competitive vendor quotes. From the approved Purchase Request, you select items, choose suppliers, and send RFQs with quantities, specifications, and due dates. Vendors respond with pricing, taxes, lead times, and terms. You can then compare quotes side-by-side, record negotiations, and award the best offer — automatically creating a Purchase Order (PO) with a full PR → RFQ → PO audit trail.
Overview
The RFQ process connects your approved procurement needs directly to your supplier network. Rather than creating purchase orders manually, the RFQ workflow ensures you collect and compare vendor offers before committing to a purchase — helping your team make cost-effective, well-documented buying decisions every time.
Here is a reference video:
Before You Begin
- The Purchase Request must already be Approved before an RFQ can be created from it.
- The suppliers (businesses) you plan to send the RFQ to must already be set up in your system.
- Ensure you have the appropriate permissions to manage Purchase Requests and RFQs.
- If you have not yet created and approved a Purchase Request, see Create and Approve a Purchase Request first.
Part 1 — Creating the RFQ
Step 1 – Click the Add RFQ Icon
From the main menu, go to Purchasing → Purchase Requests. In the Purchase Request list, find the approved request and click the Add RFQ icon in its action column.

Step 2 – Fill in the RFQ Details
The Request for Quotation page will open. Complete the following fields:
- Expected Delivery Date — The date by which you need the items delivered.
- Expected Response Date — The deadline by which vendors must submit their quotes.
- Location — The facility or location where the items are required.
![]()
Step 3 – Select Supplier Businesses
Select one or more Business names from the supplier list — these are the vendors you want to invite to quote. You can select multiple businesses to run a competitive RFQ process.

Step 4 – Save the RFQ
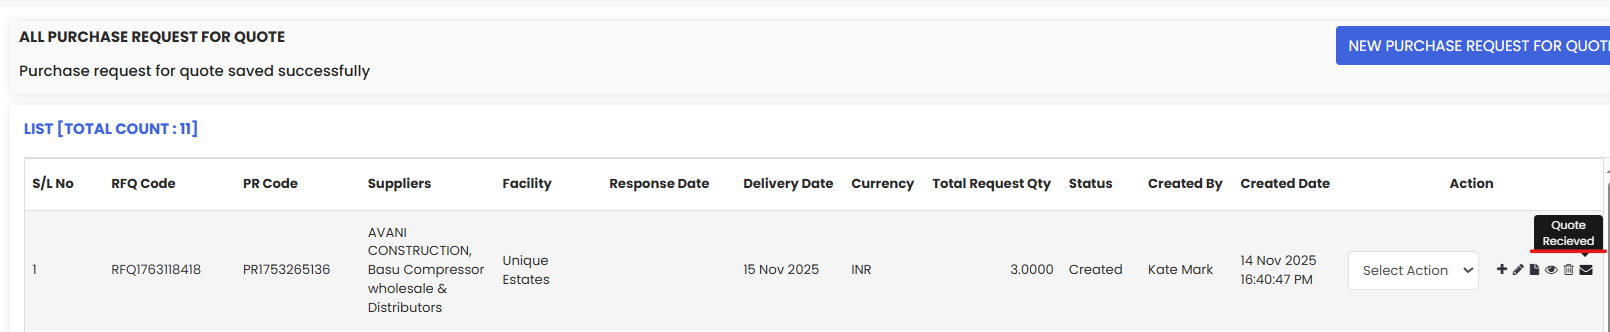
Click Save to create the RFQ. The RFQ is now successfully saved and new action buttons will appear on the record.

Part 2 — Recording Vendor Quotes
Step 5 – Click the Quote Received Icon
Once vendors have responded, click the Quote Received icon on the right side of the RFQ record to begin entering the vendor's pricing.
Step 6 – Choose the Business and Enter Quote Details
Select the Business (vendor) whose quote you want to record. If you sent RFQs to multiple companies, add quotes for each one by selecting them from the list one at a time.
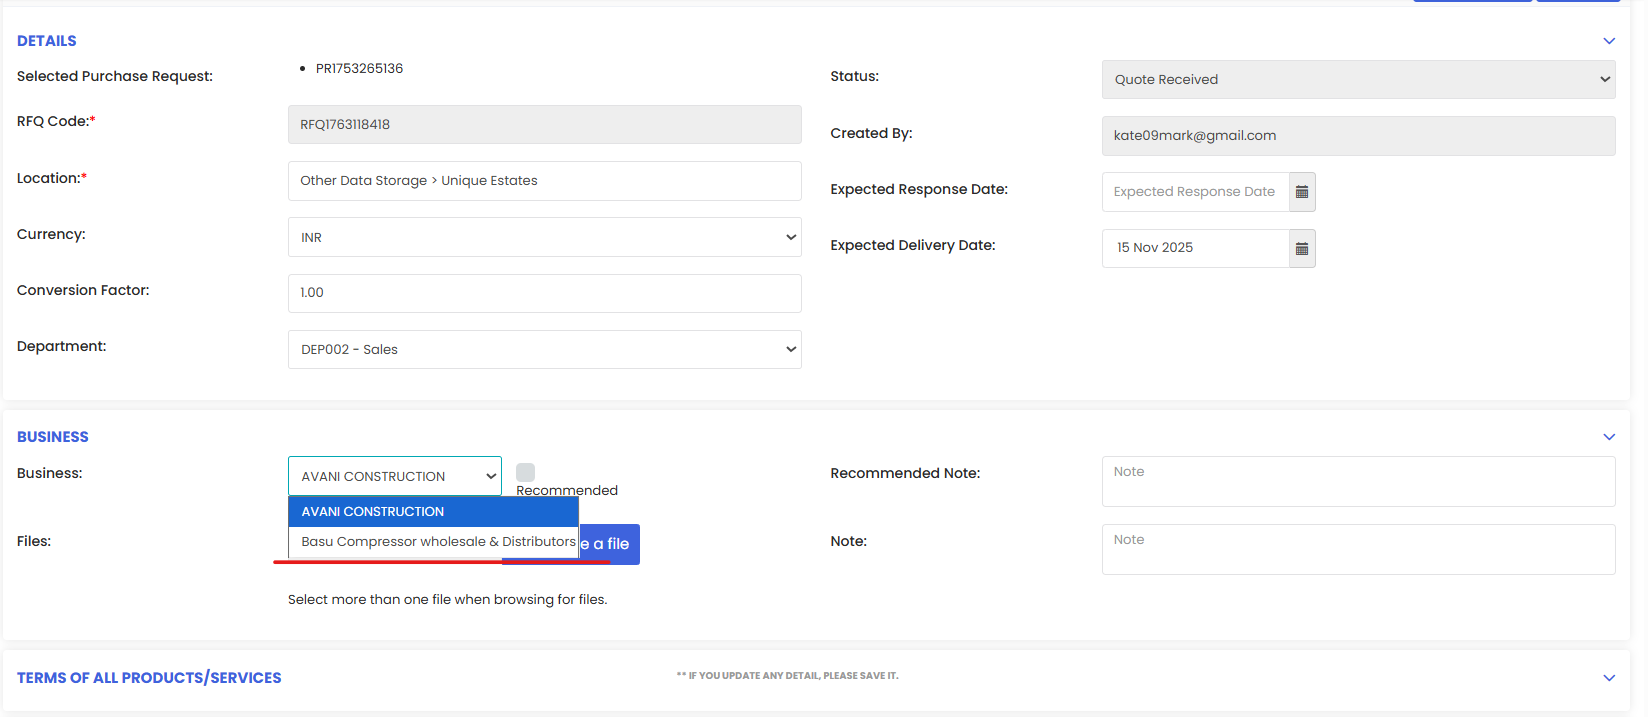
Fill in the relevant quote details for this vendor, including:
- Description — Any notes or product specifications from the vendor.
- Warranty — Warranty terms offered by the vendor.
- Any other relevant factors that may influence the final vendor selection.

Note: Check Applied for all products to apply the same conditions to all items in the RFQ at once. You can also enable notifications to alert the vendor and yourself directly from this screen.

Step 7 – Enter Vendor Prices and Update the RFQ
Add the vendor's price for each item listed and click Update RFQ to save the quote details for this vendor.
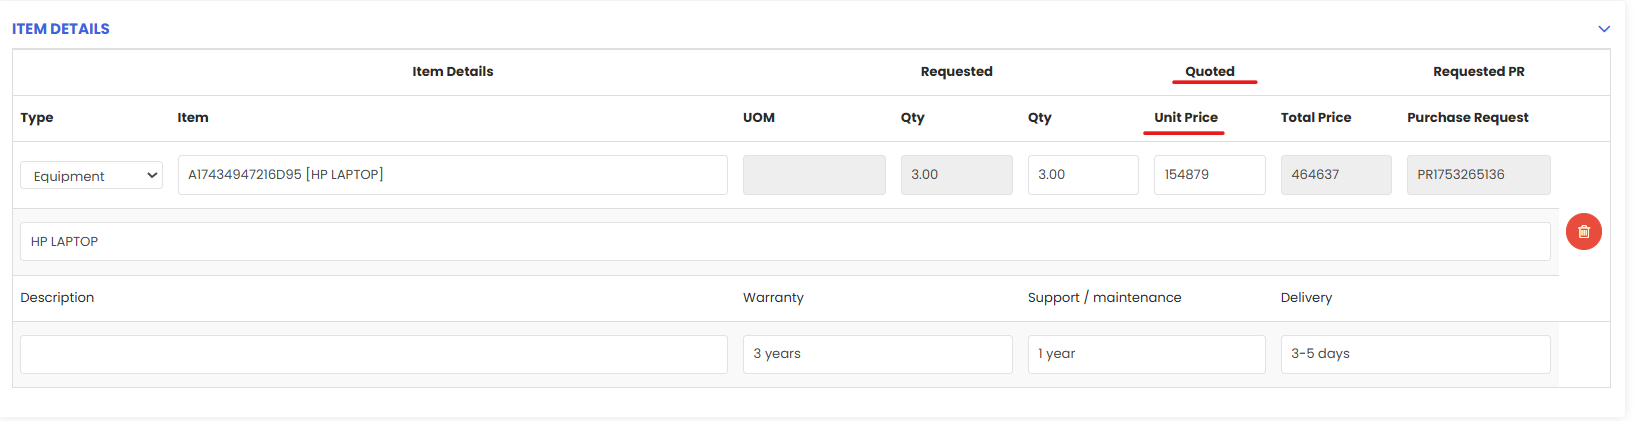
You can mark any business as Recommended — this flag will be visible during the quote comparison to help guide the final decision.

You can also add separate terms and conditions for individual items if they differ from the overall terms. Repeat Steps 6 and 7 for each vendor in the list.

Part 3 — Comparing Quotes and Finalising
Step 8 – Open RFQ Compare
From the Purchase Request list, click RFQ Compare to open the side-by-side quote comparison view.

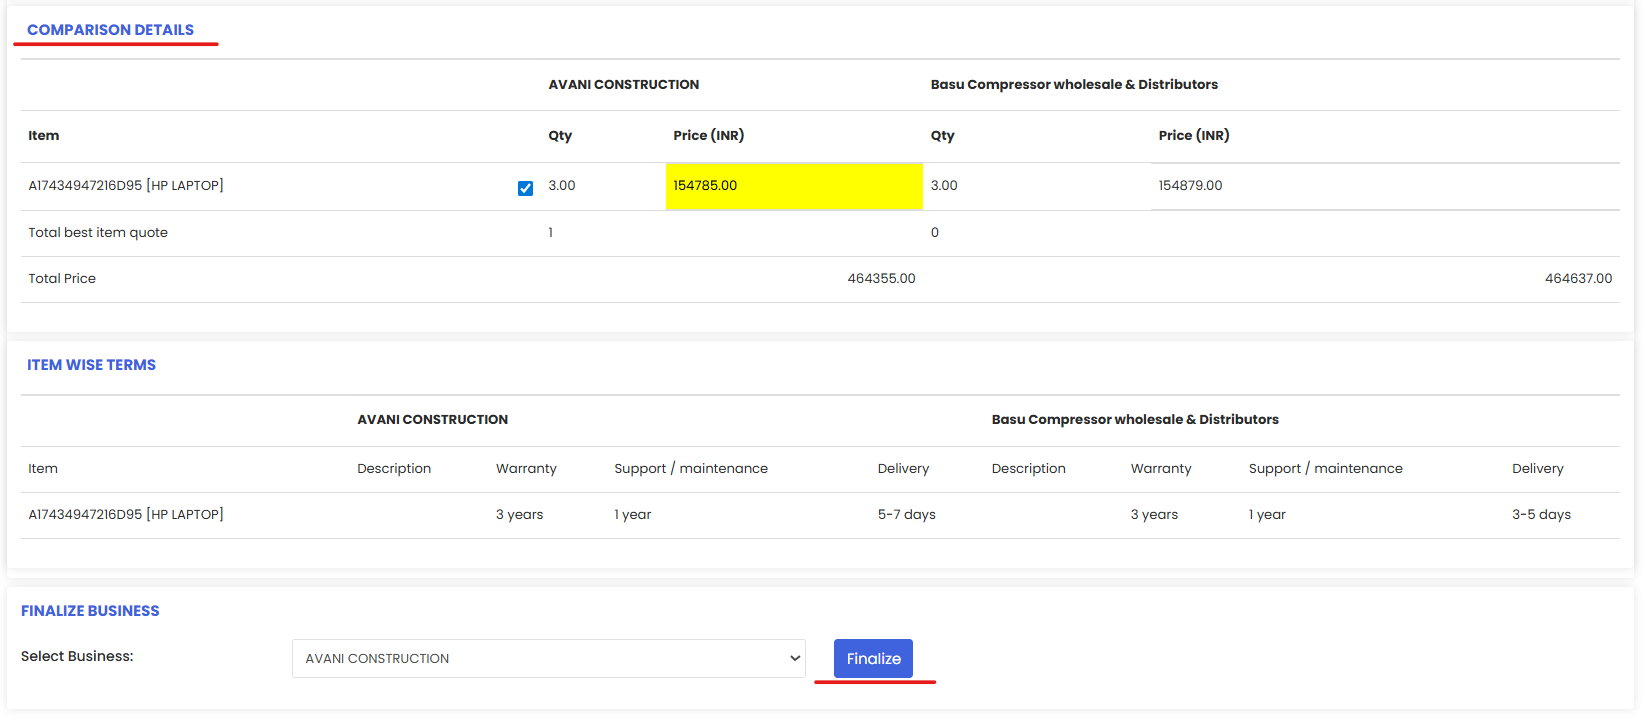
Step 9 – Compare and Select Vendors
The comparison view displays all vendor quotes with full details including Description, Warranty, and pricing — with prices highlighted to make it easy to identify the best offer. Select which vendor you want to use for each item. You can choose one vendor for all items, or split items across different vendors.
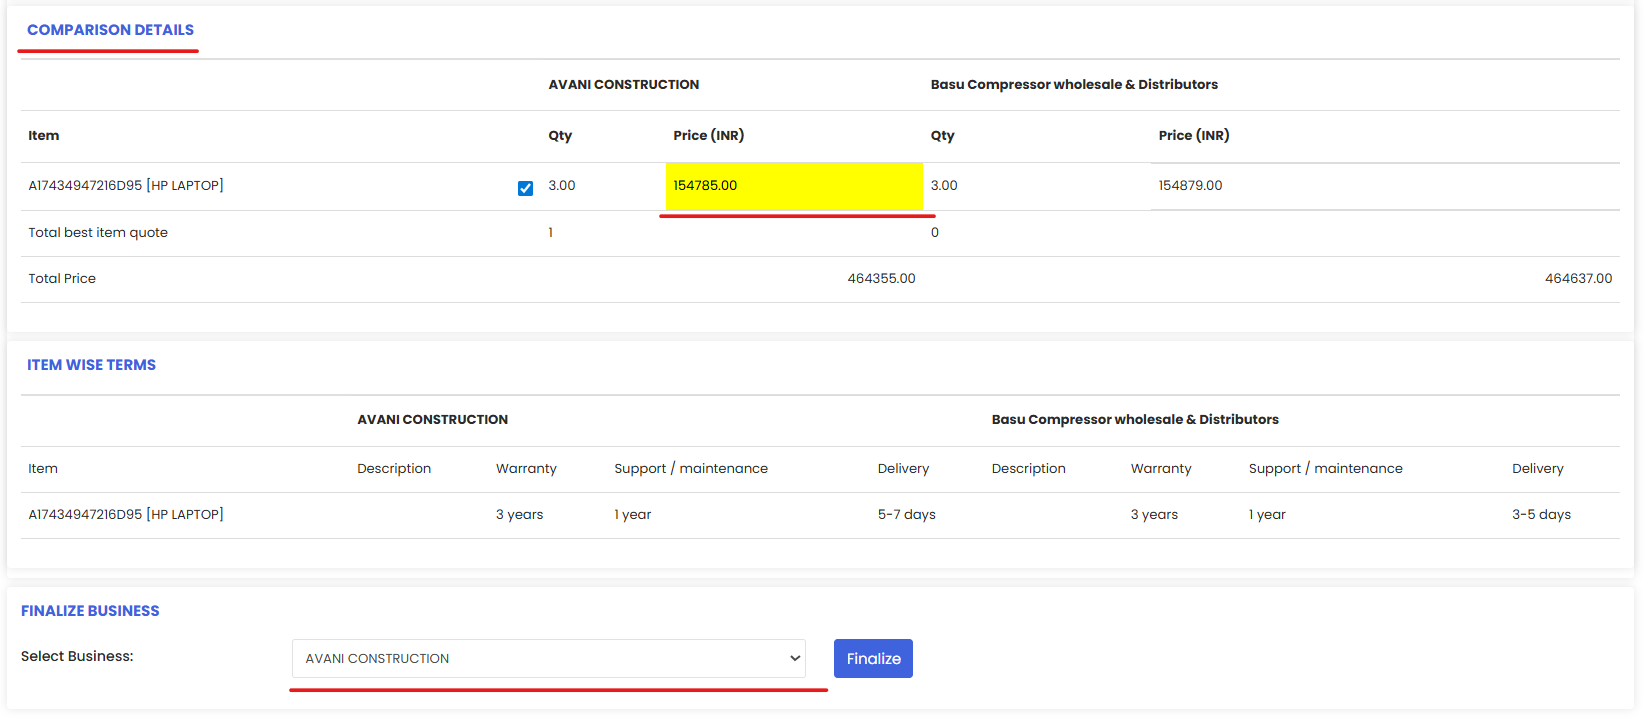
Step 10 – Click Finalize to Create the Purchase Order
Once you have selected your preferred vendor(s), click Finalize. The system will automatically create a Purchase Order (PO) for the selected vendor. If items are split across multiple vendors, separate Purchase Orders will be generated accordingly. The full PR → RFQ → PO audit trail is maintained in the system.
After Finalising — What's Next?
- Review the generated Purchase Order(s) to confirm all details are correct before sending to the supplier — see Manage Purchase Orders.
- Track delivery by updating the Purchase Order status as items are received.
- Update stock levels once items arrive to keep your inventory accurate — see Manage Stock Levels.
Tips for Managing RFQs
- Always set a realistic Expected Response Date. Give vendors enough time to prepare competitive quotes without delaying your procurement timeline.
- Invite at least two or three vendors per RFQ to ensure genuine competition and better pricing outcomes.
- Use the Recommended flag to highlight your preferred vendor during comparison — this is especially useful when multiple team members are involved in the decision.
- Use item-level terms and conditions when different items have different warranty, delivery, or specification requirements across vendors.
Frequently Asked Questions
Can I create an RFQ from a Purchase Request that is not yet approved?
No. The Purchase Request must have a status of Approved before the Add RFQ option becomes available.
Can I send the RFQ to multiple vendors at once?
Yes. You can select multiple businesses when creating the RFQ. Each vendor will receive their own quote request, and you can record and compare their responses individually.
Can I split items across different vendors when finalising?
Yes. During the comparison step you can select different vendors for different items. The system will generate separate Purchase Orders for each vendor accordingly.
What happens to the Purchase Request after the RFQ is finalised?
The Purchase Request remains in the system and is linked to the RFQ and the resulting Purchase Order(s), maintaining the full procurement audit trail.