How to Create and Manage Checklists
This tutorial guides you through creating and customizing checklists in DreamzCMMS. You will learn how to build checklists from scratch, use templates, import checklists, and save your checklists effectively.
Overview
Checklists in DreamzCMMS let you define a structured set of tasks — with the specific input type each task requires, such as a checkbox, meter reading, or signature — for use in inspections, audits, maintenance, and more. You can build a checklist from scratch, start from a template, import one from Excel, or link a checklist directly to specific assets.
Before You Begin
- You must have access to the Checklists section in your account.
- Decide which checklist type and task input types you'll need before you start building, since these determine what information is captured at each step.
- If you plan to import checklists via Excel, download and use the sample file format provided in the Excel Import screen.
How to Create a Checklist from Scratch
Step 1 – Access Checklists Section
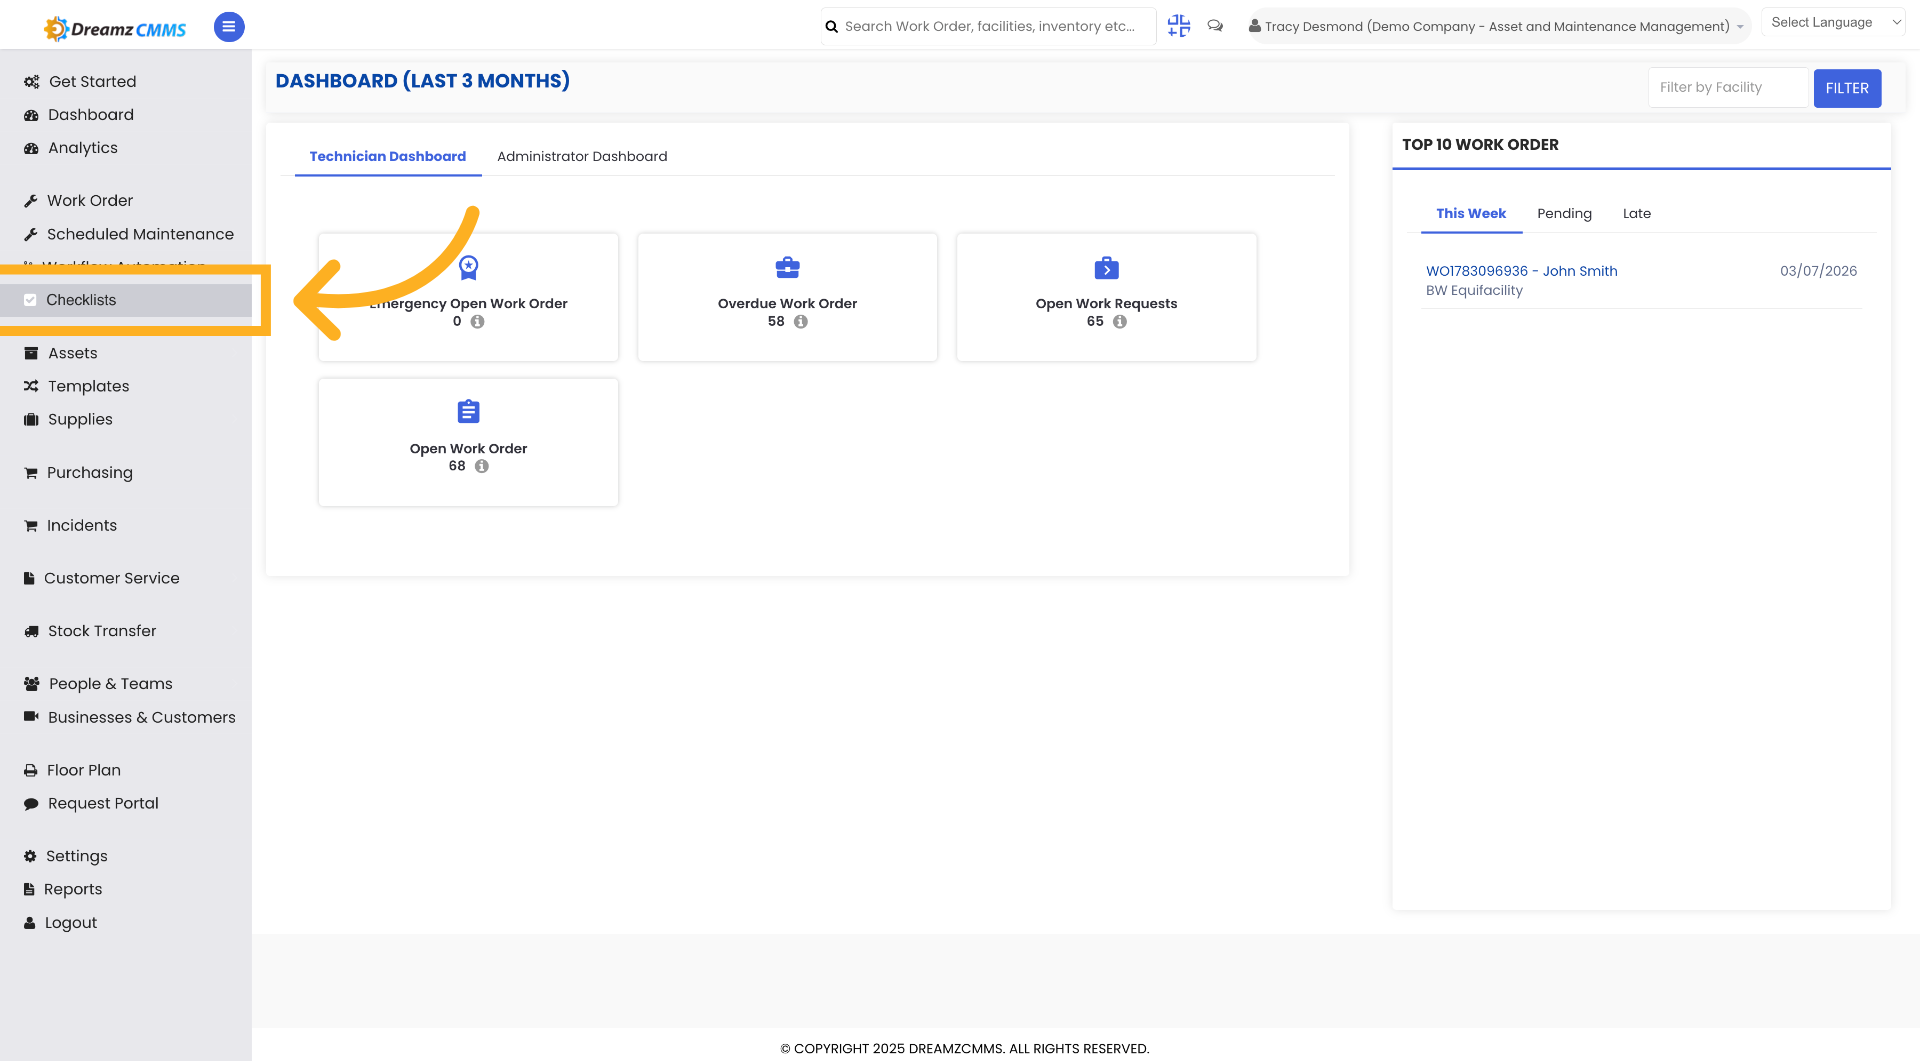
Click the Checklists section on the Dashboard to begin managing your checklists.
Step 2 – Start Blank Checklist
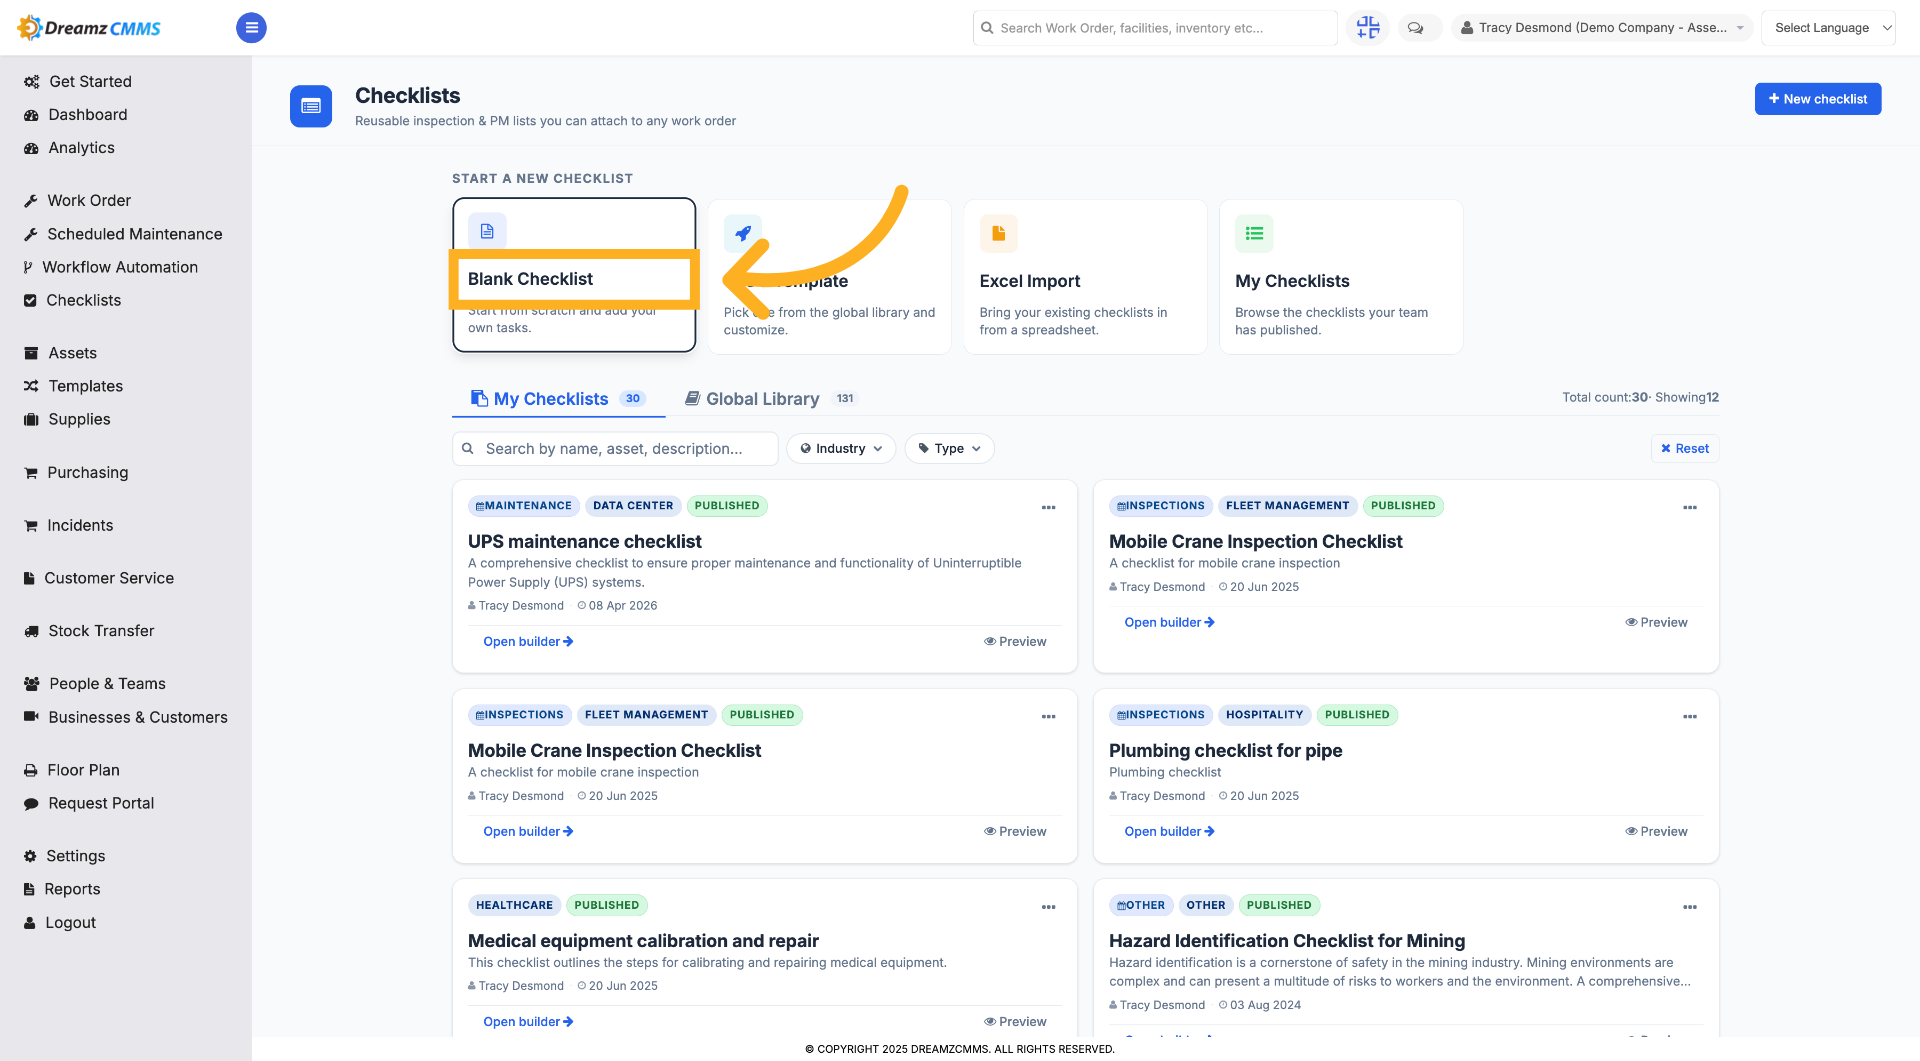
Click Blank Checklist to create a new checklist from scratch without using a template.
Step 3 – Select Checklist Name Field
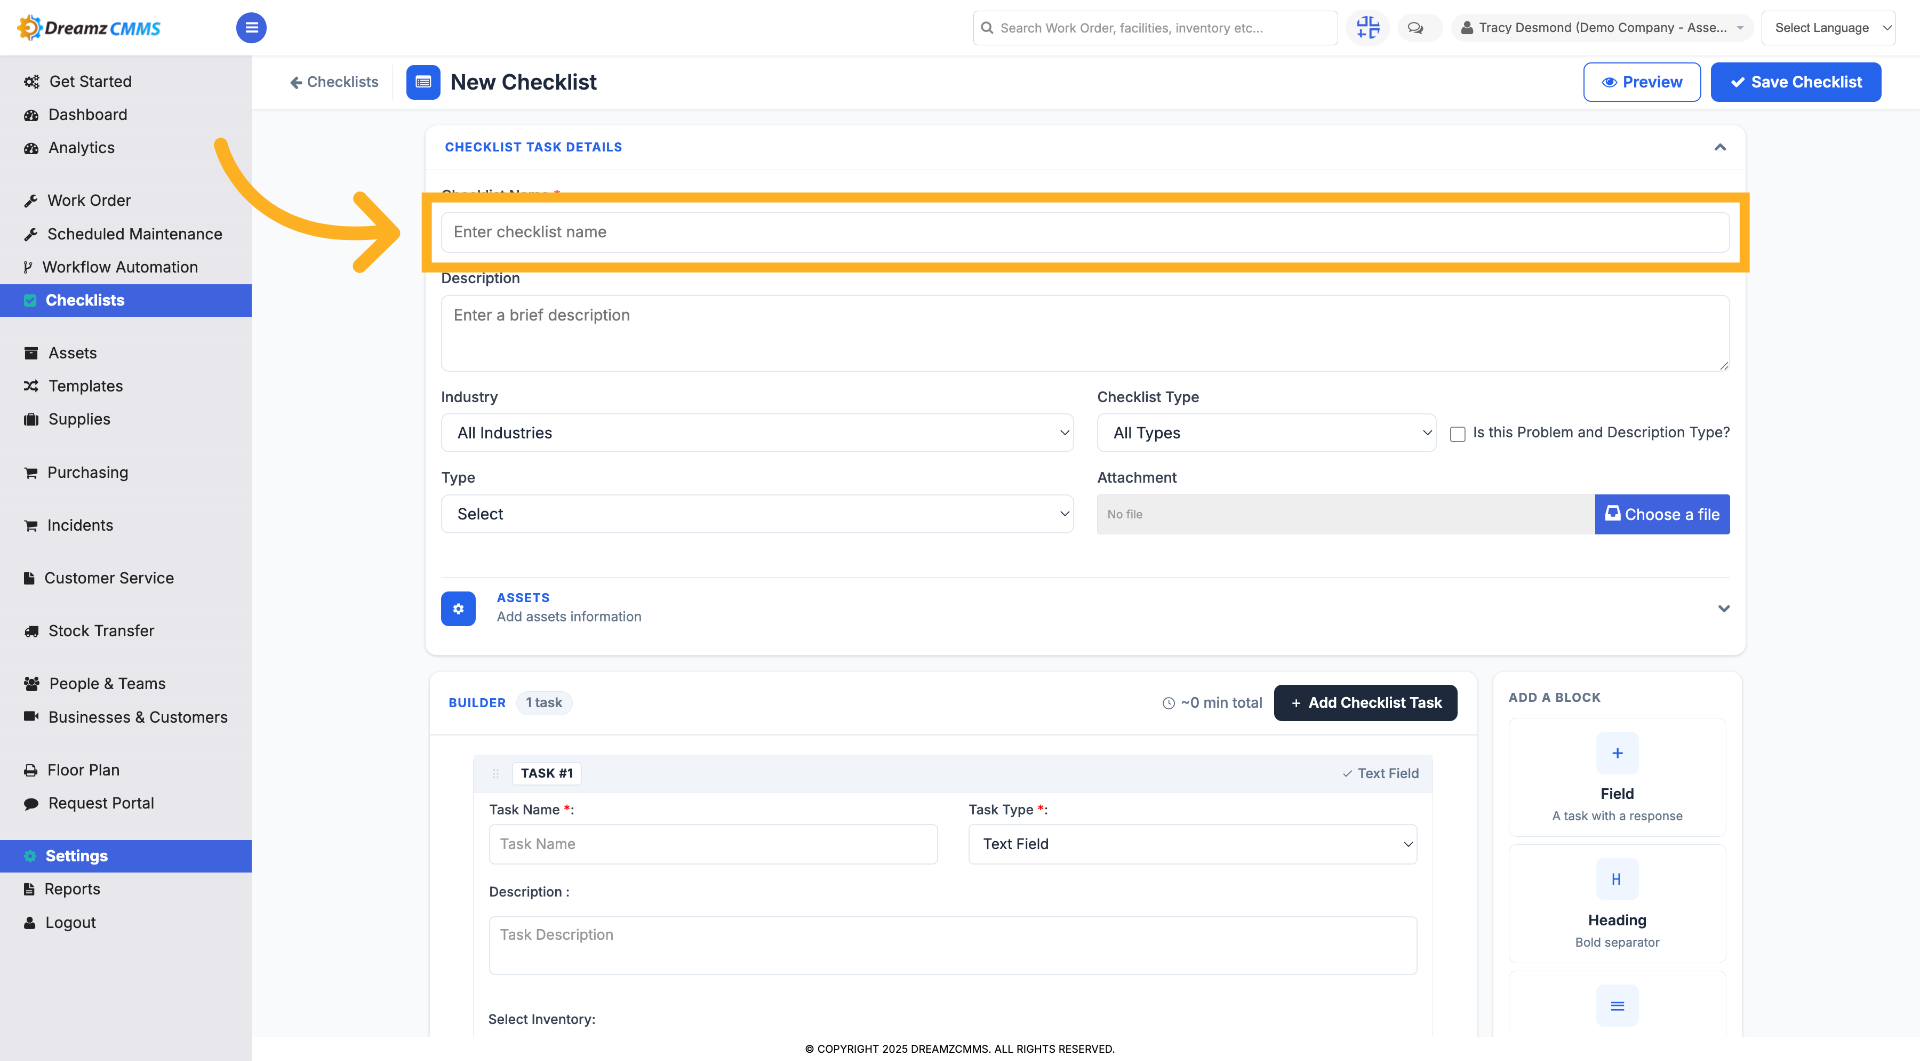
Click the field to enter the checklist name to identify your new checklist.
Step 4 – Select Description Field
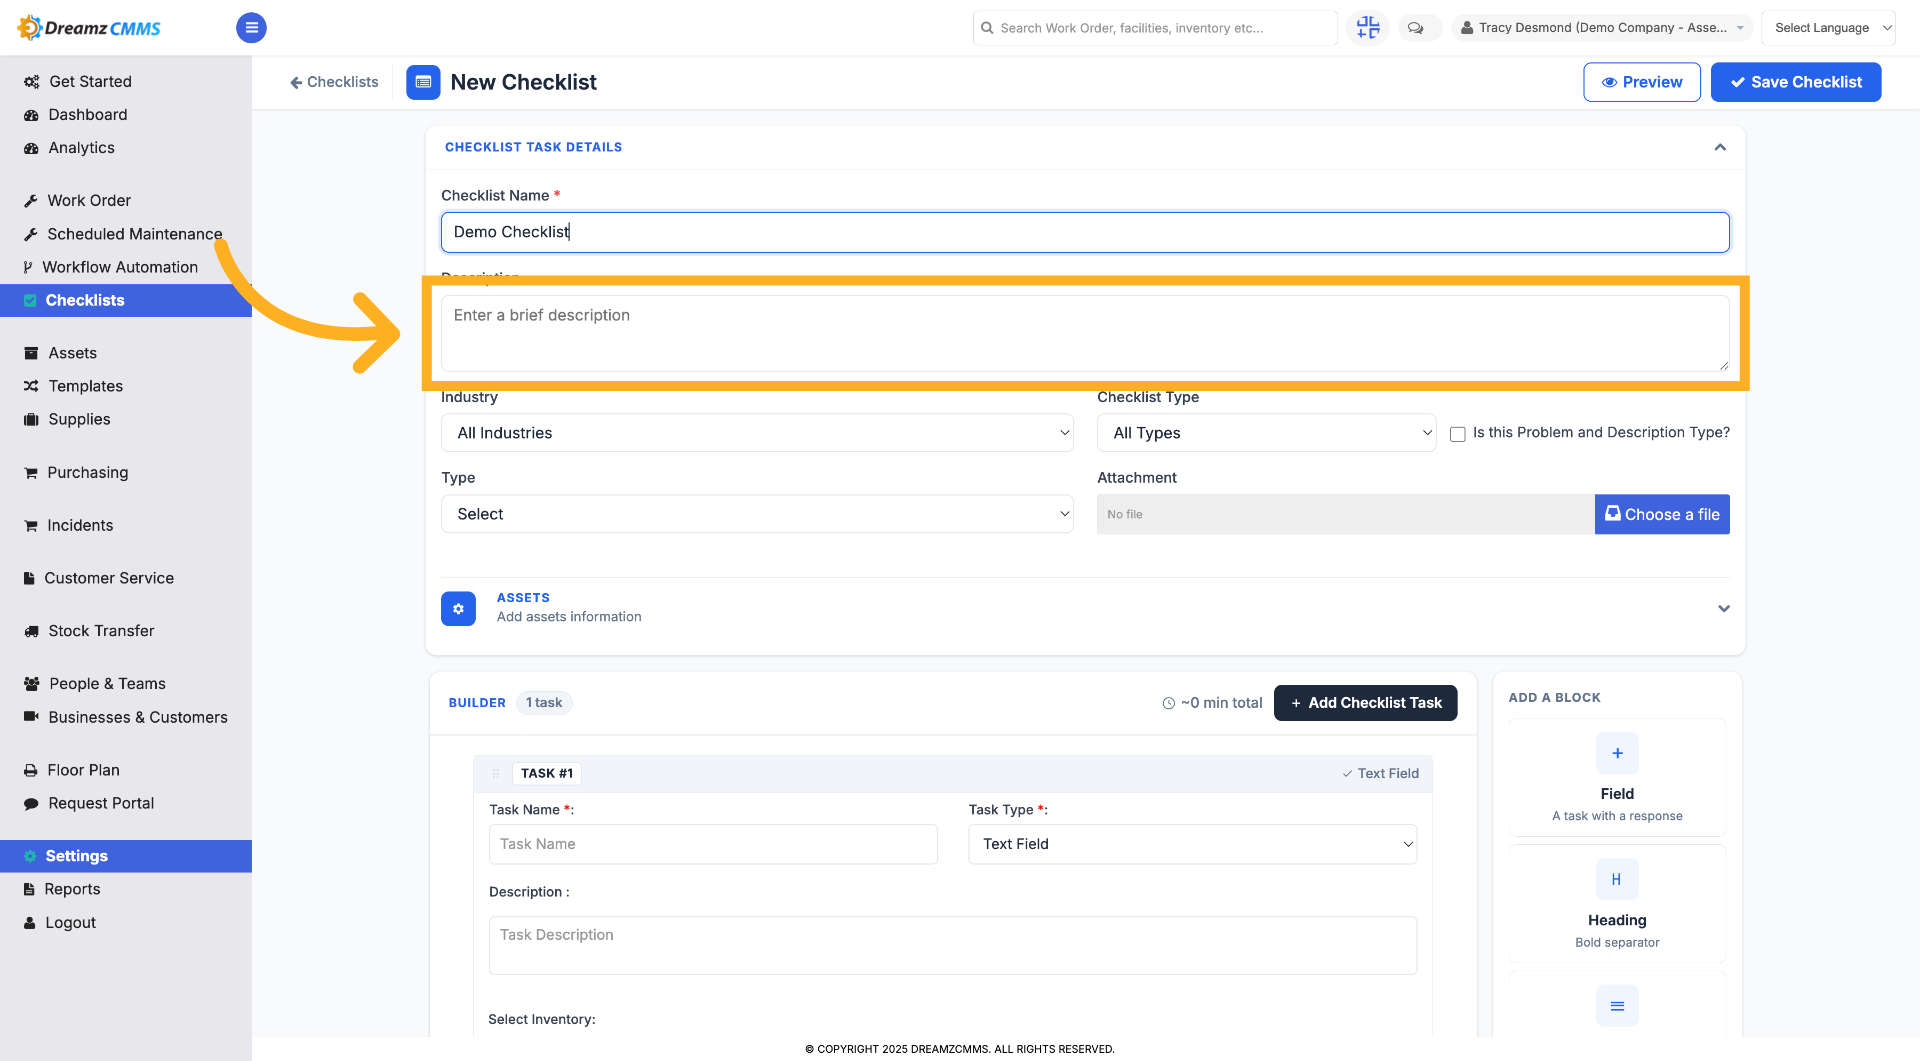
Click the field to enter a brief description that summarizes the checklist's purpose.
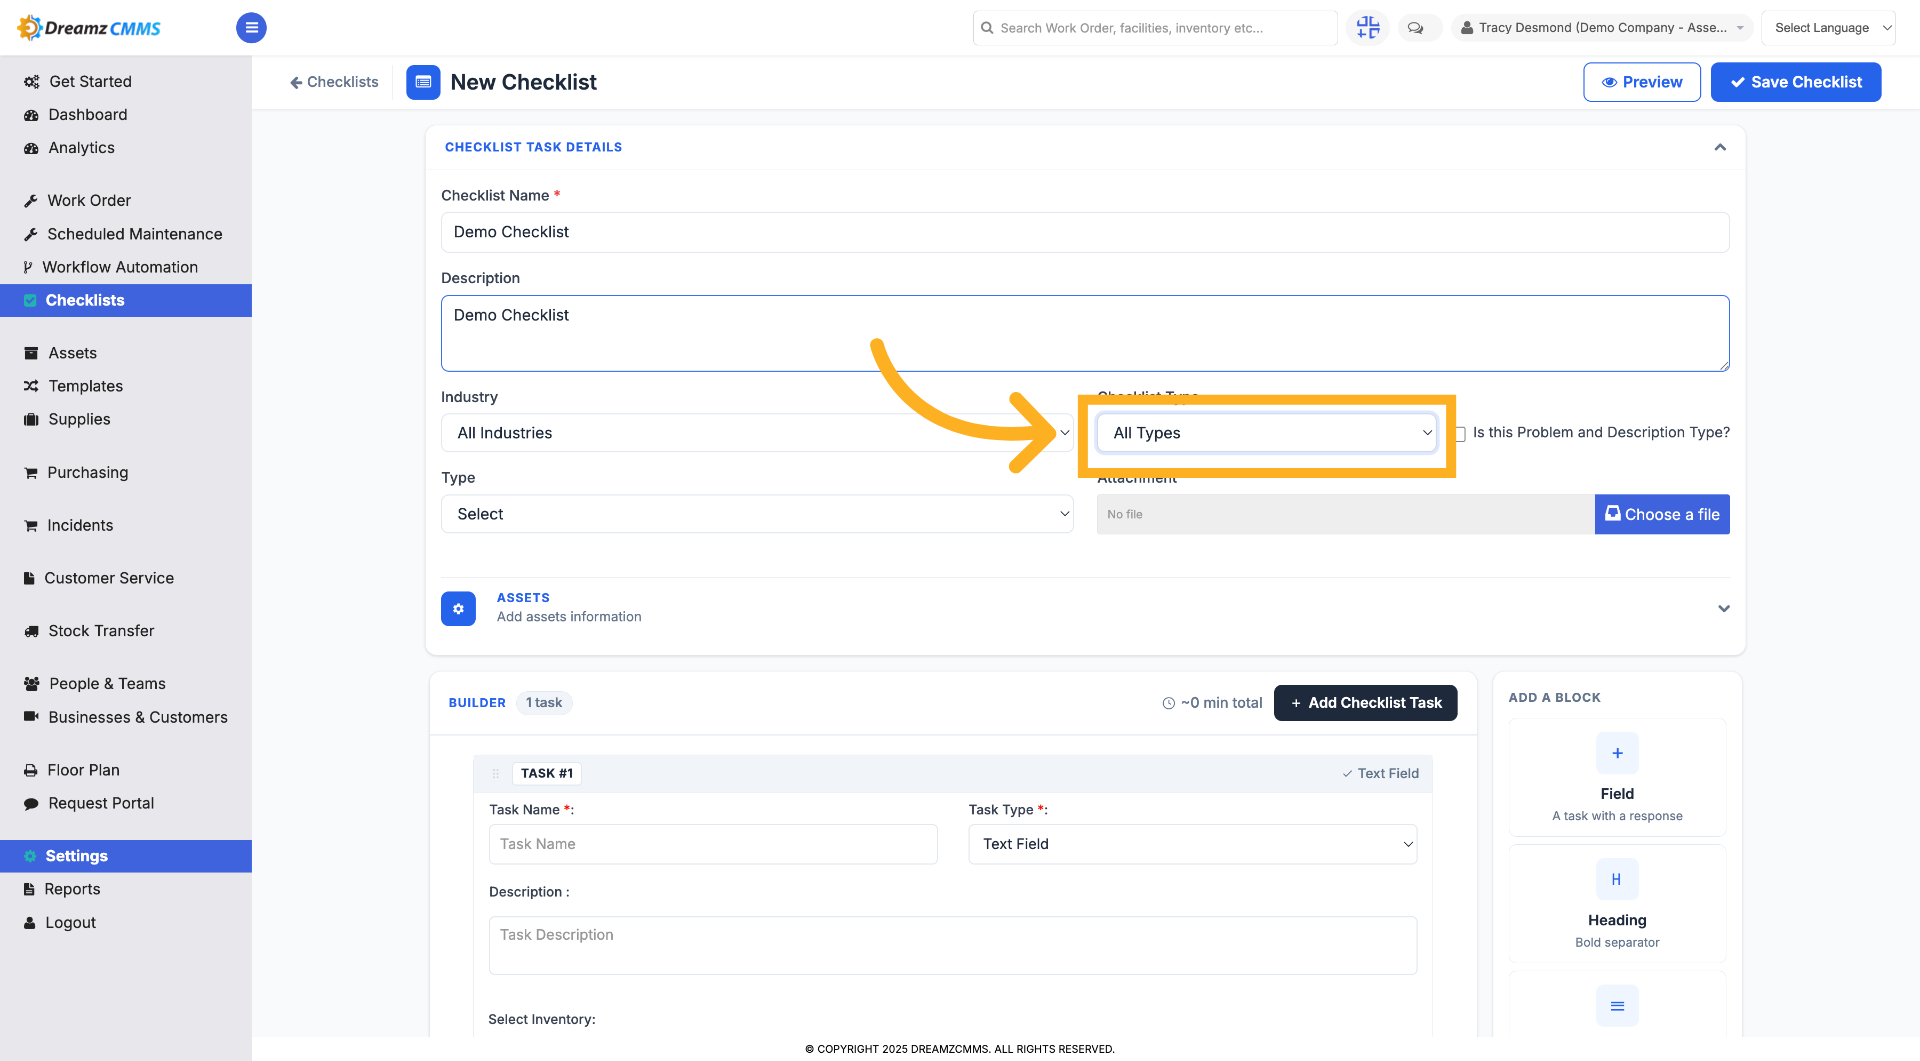
Step 5 – Choose Checklist Type
Click to select the checklist type from options like Other, Audits, Instruction Manual, Inspections, or Maintenance.
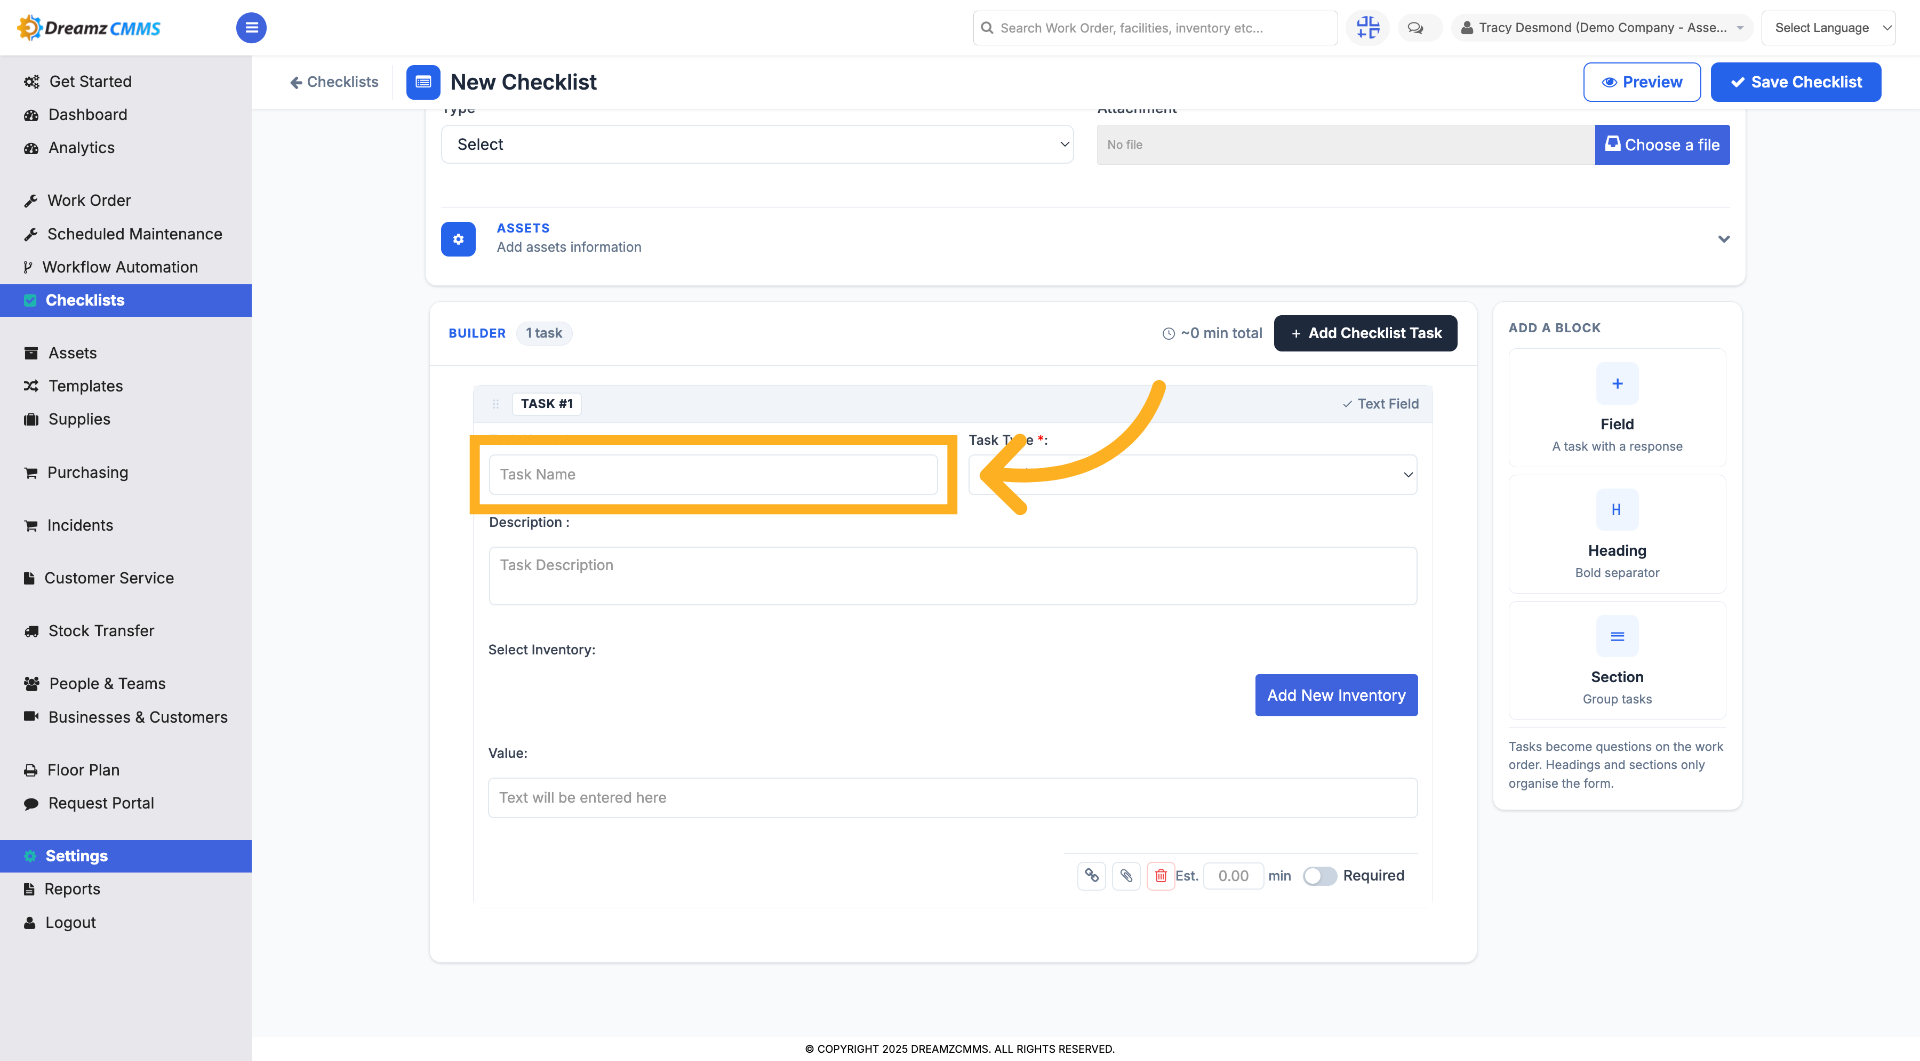
Step 6 – Select Task Name Field
Click the Task Name field to begin adding a task to your checklist.
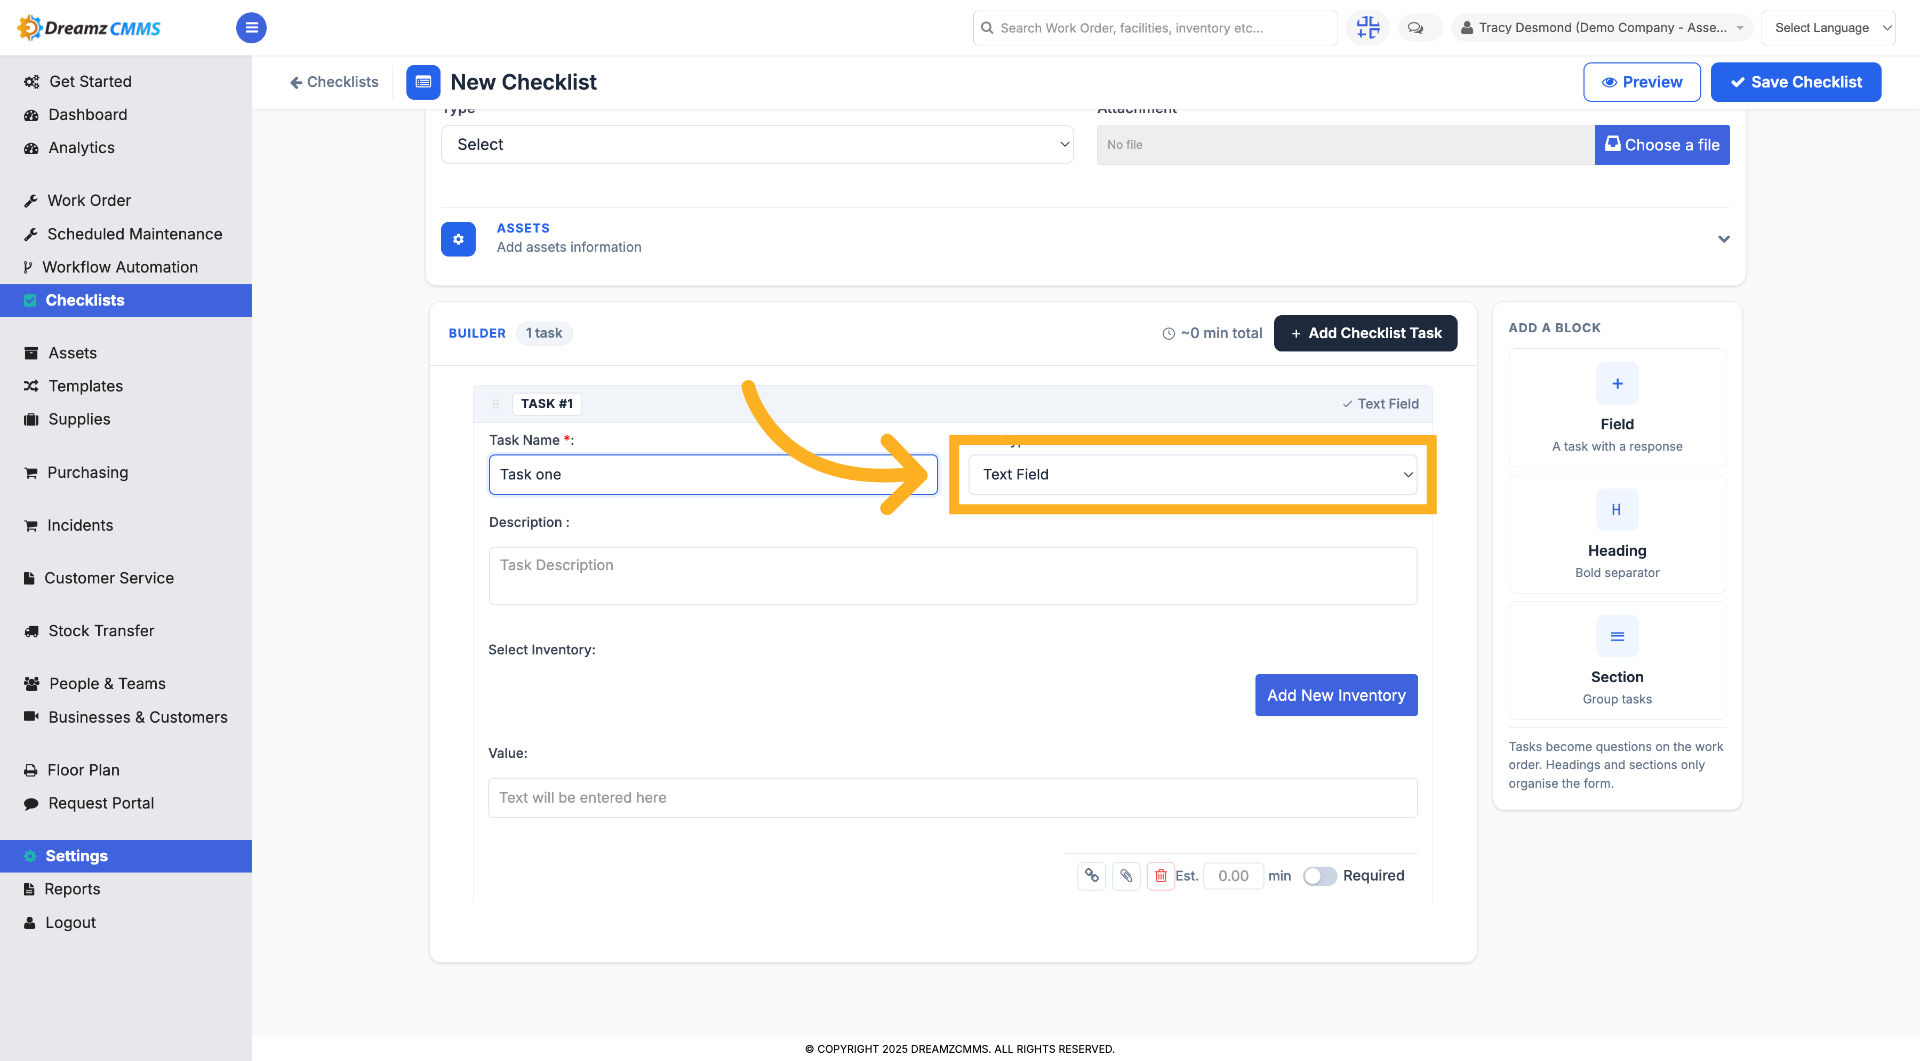
Step 7 – Choose Task Input Type
Click to select the input type for the task, such as Checkbox, Text Field, Meter Reading, Yes/No/N/A, Number Field, Inspection, Multiple Choice, Amount, Checklist, Picture/File Add, Signature Block, or Date.
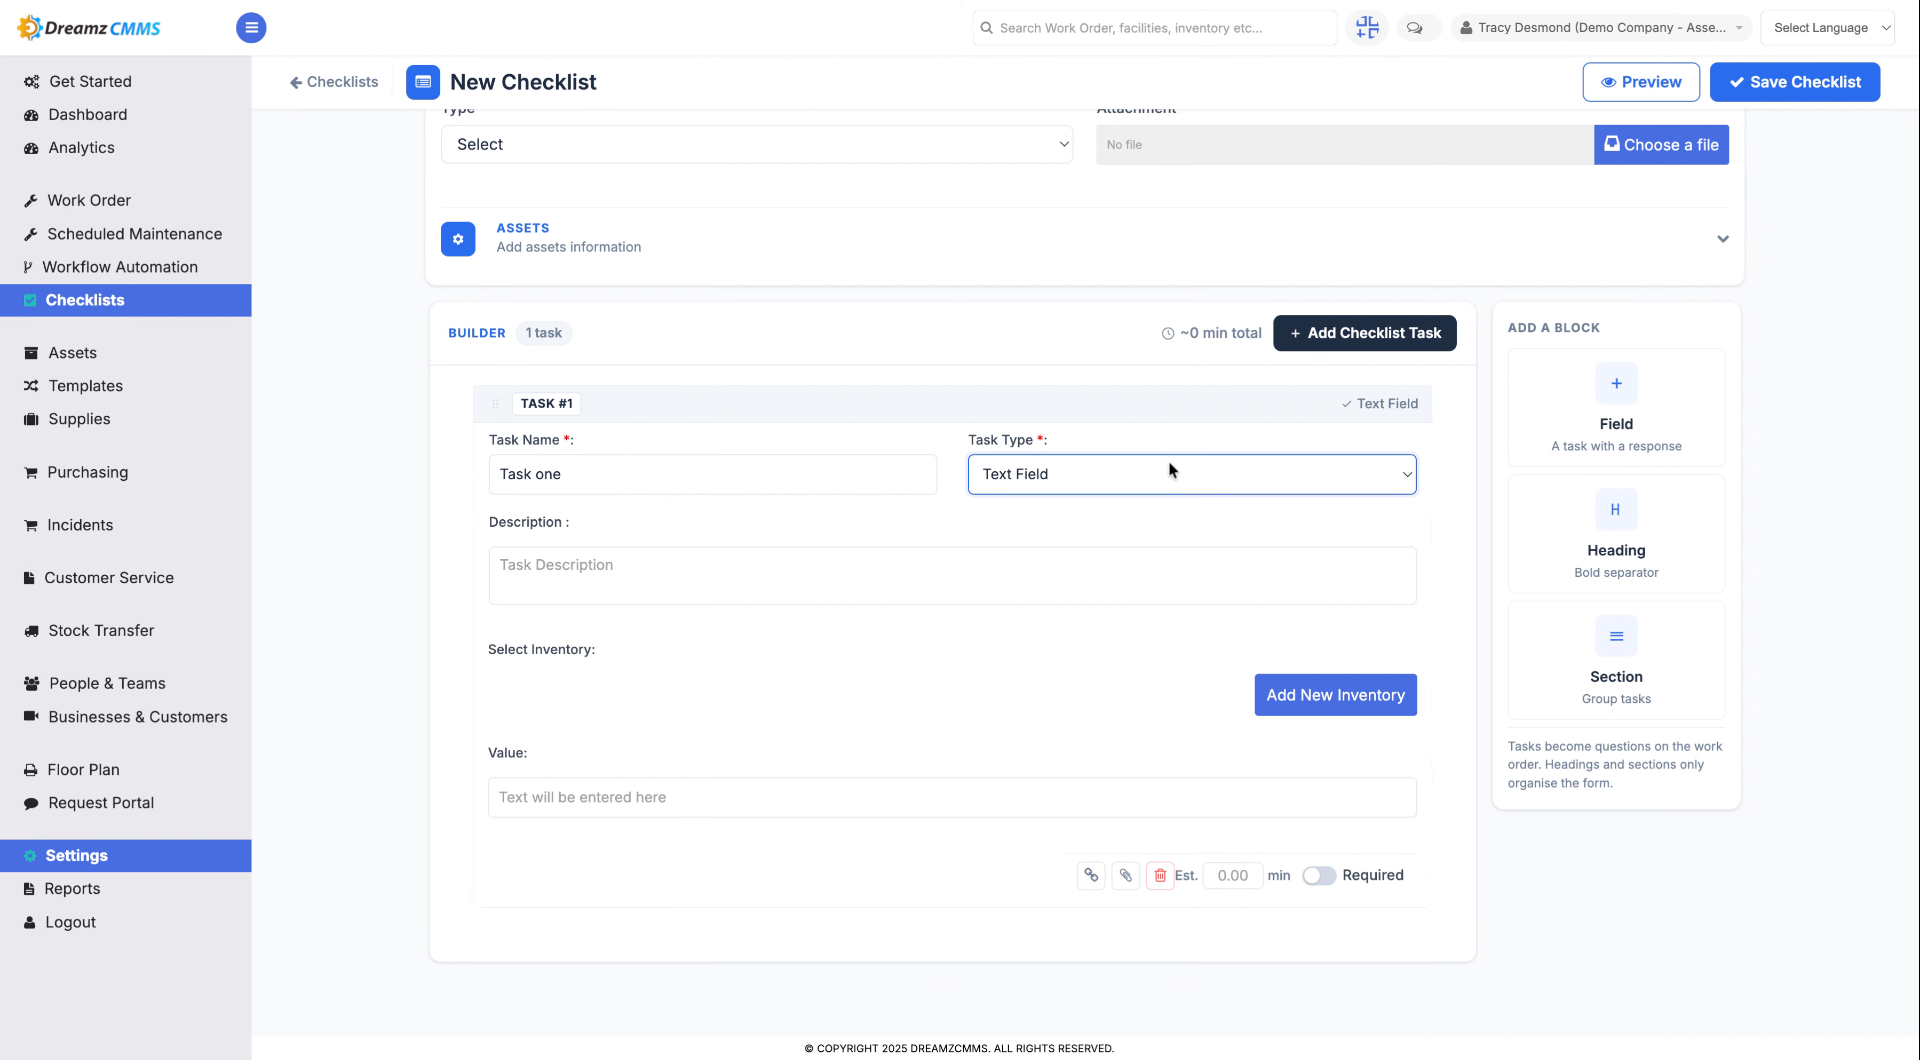
Step 8 – Fill Task Input Options
Fill in the details or options for the selected task input type to define task requirements.
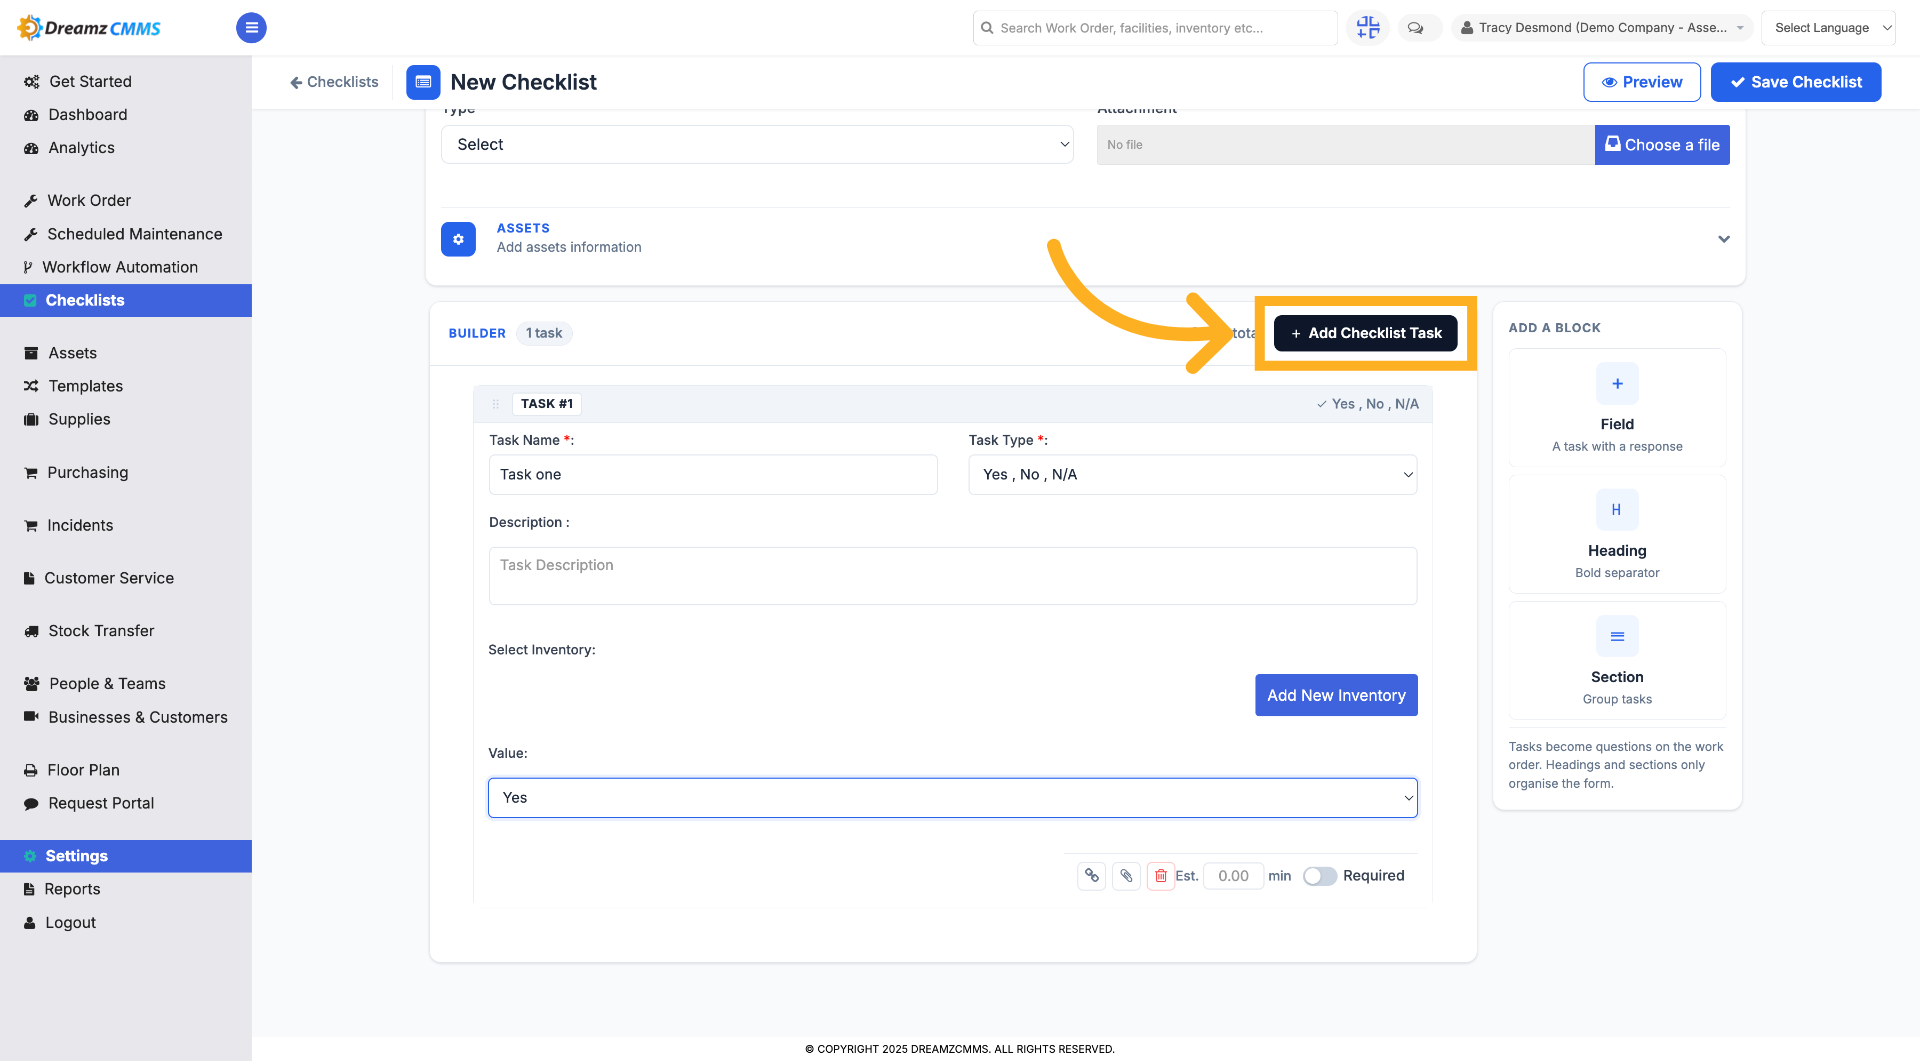
Step 9 – Add New Checklist Task
Click Add Checklist Task to include another task in your checklist.
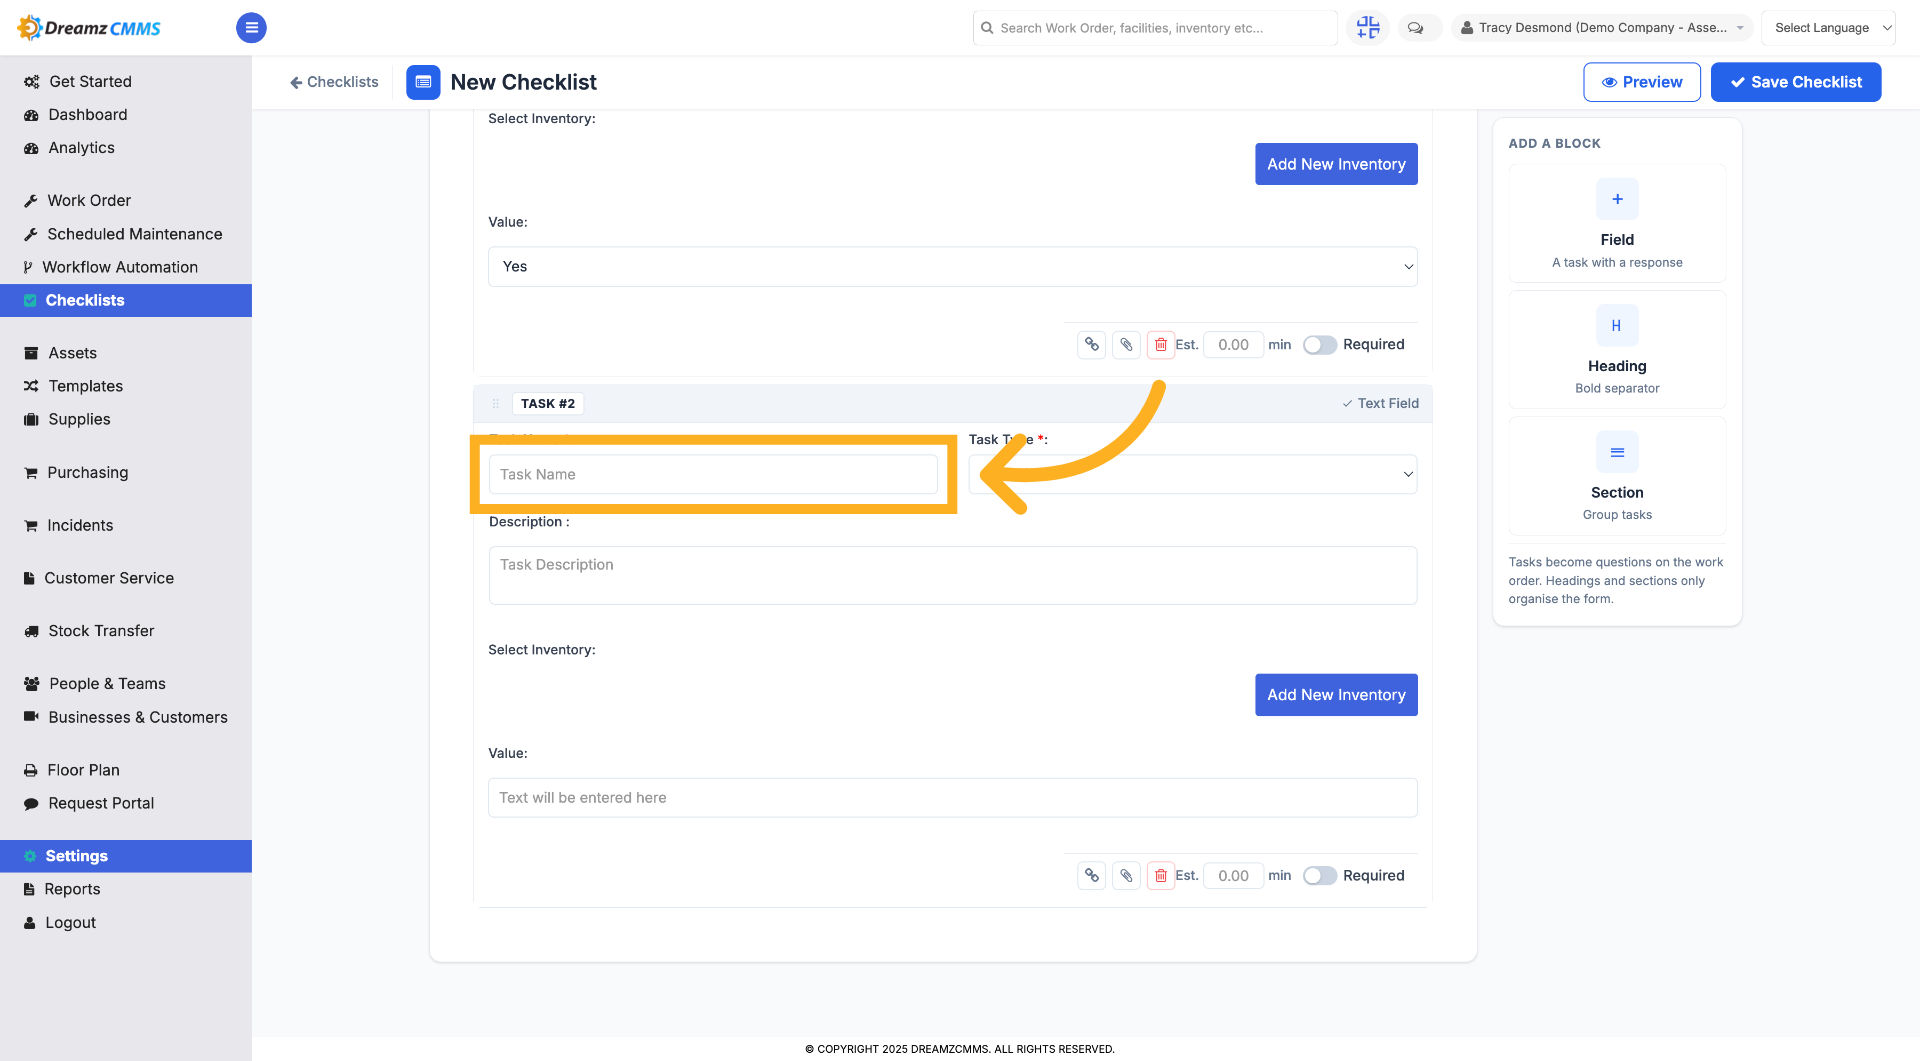
Step 10 – Select Second Task Name Field
Click the Task Name field to add the second task to your checklist.
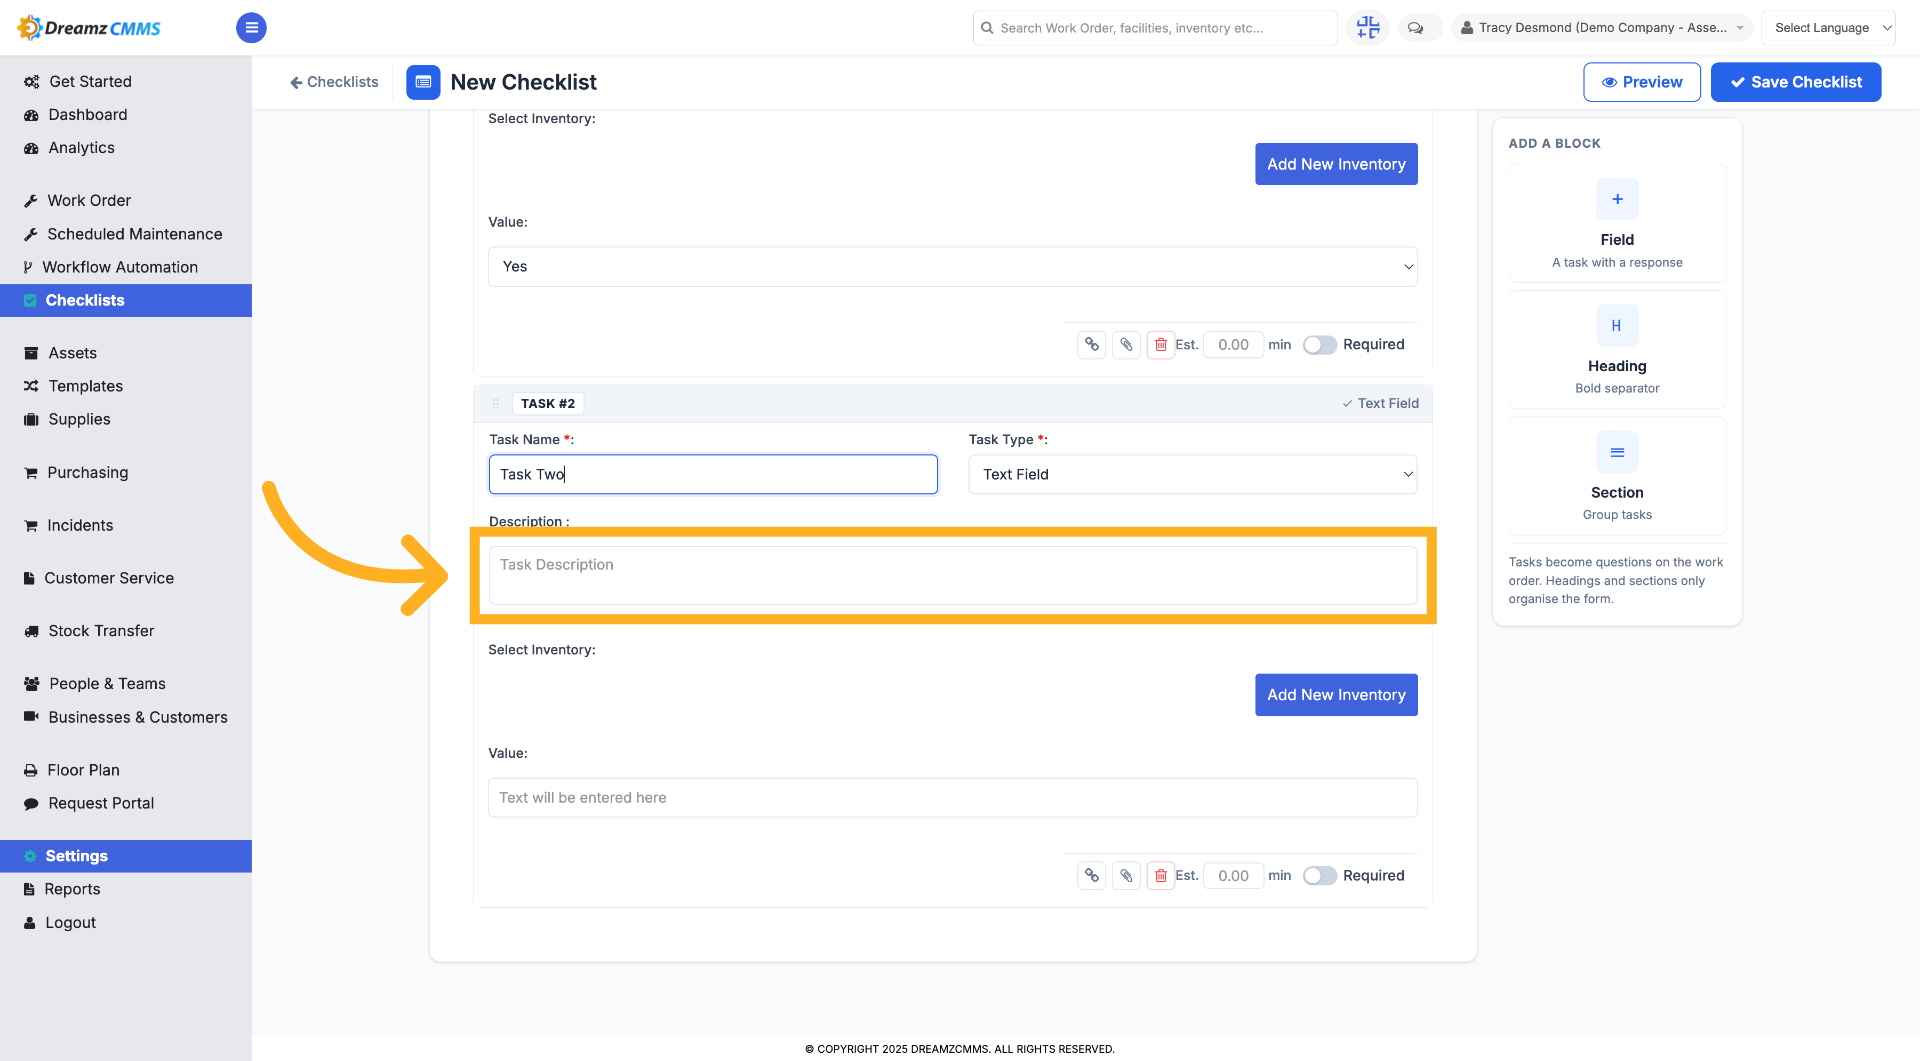
Step 11 – Select Task Description Field
Click the Task Description field to provide details about the second task.
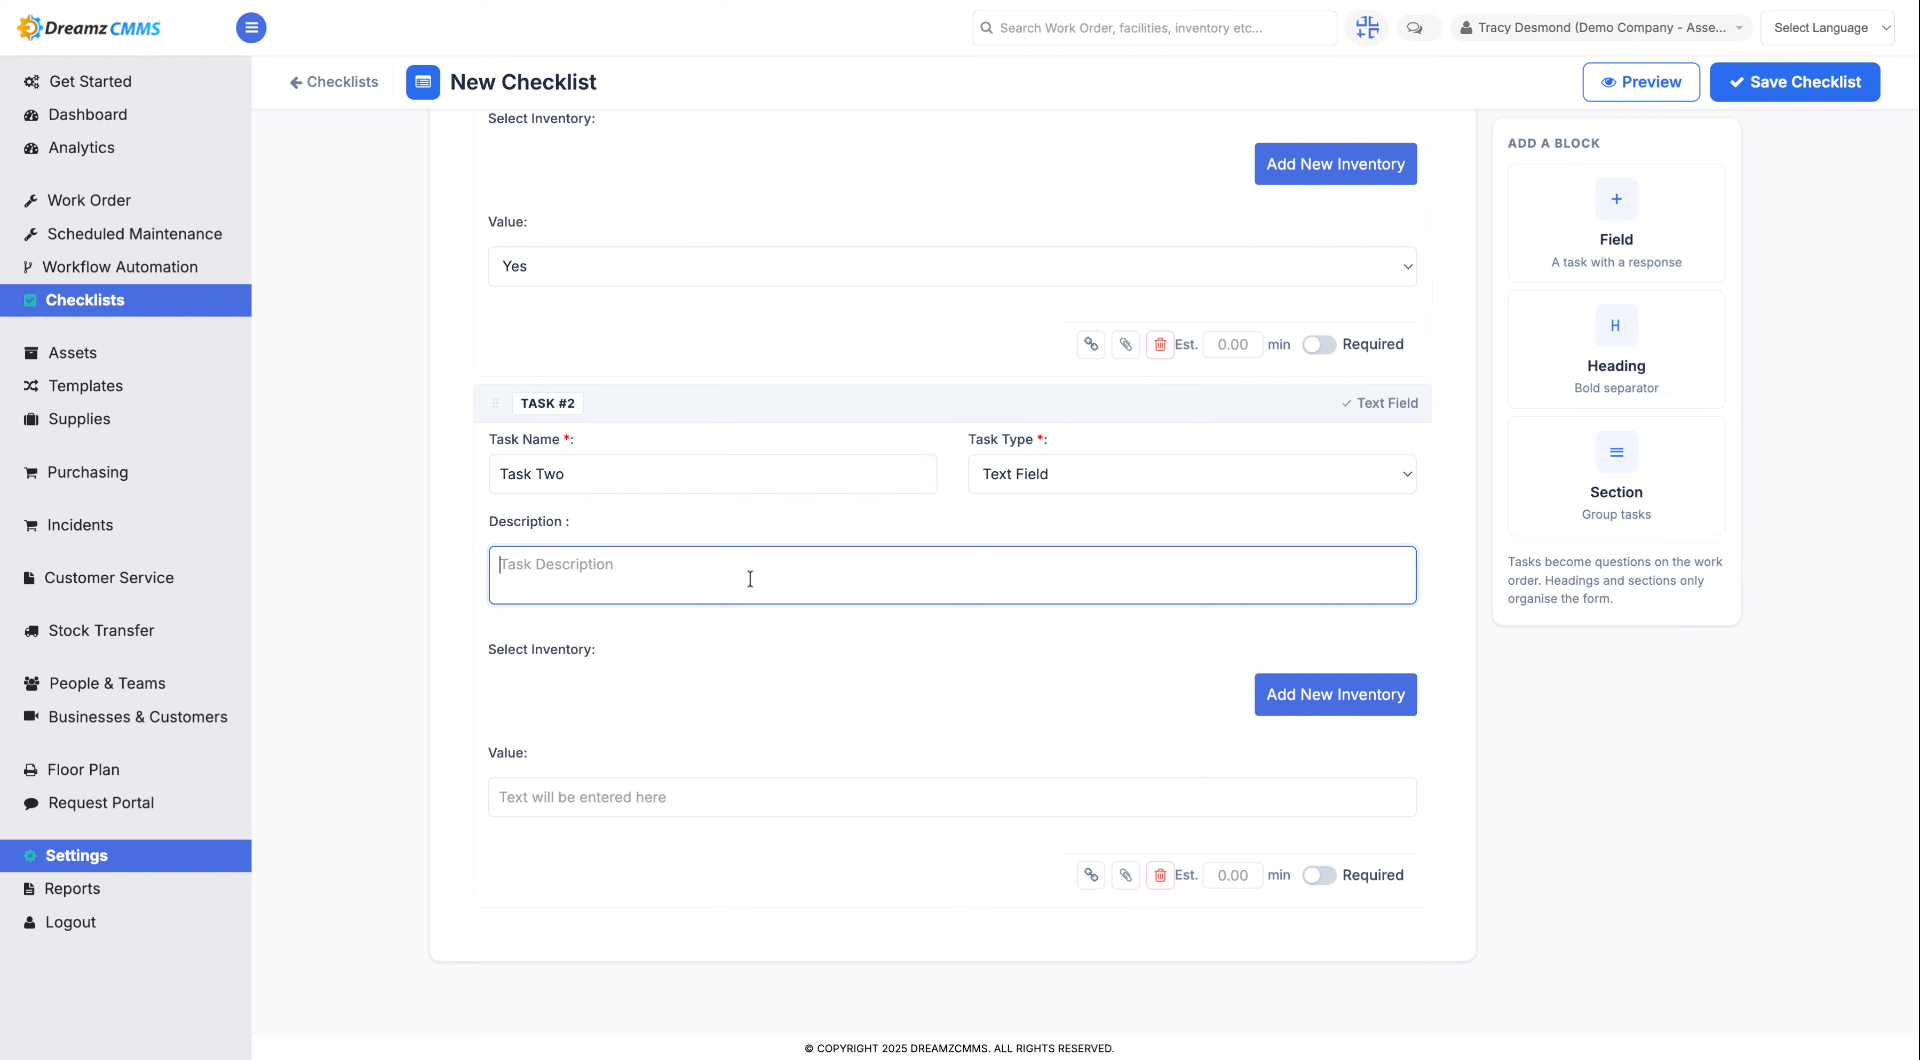
Step 12 – Enter Second Task Description
Enter a description for the second task to clarify its requirements.
Step 13 – Choose Second Task Input Type
Click to select the input type for the second task from the available options.
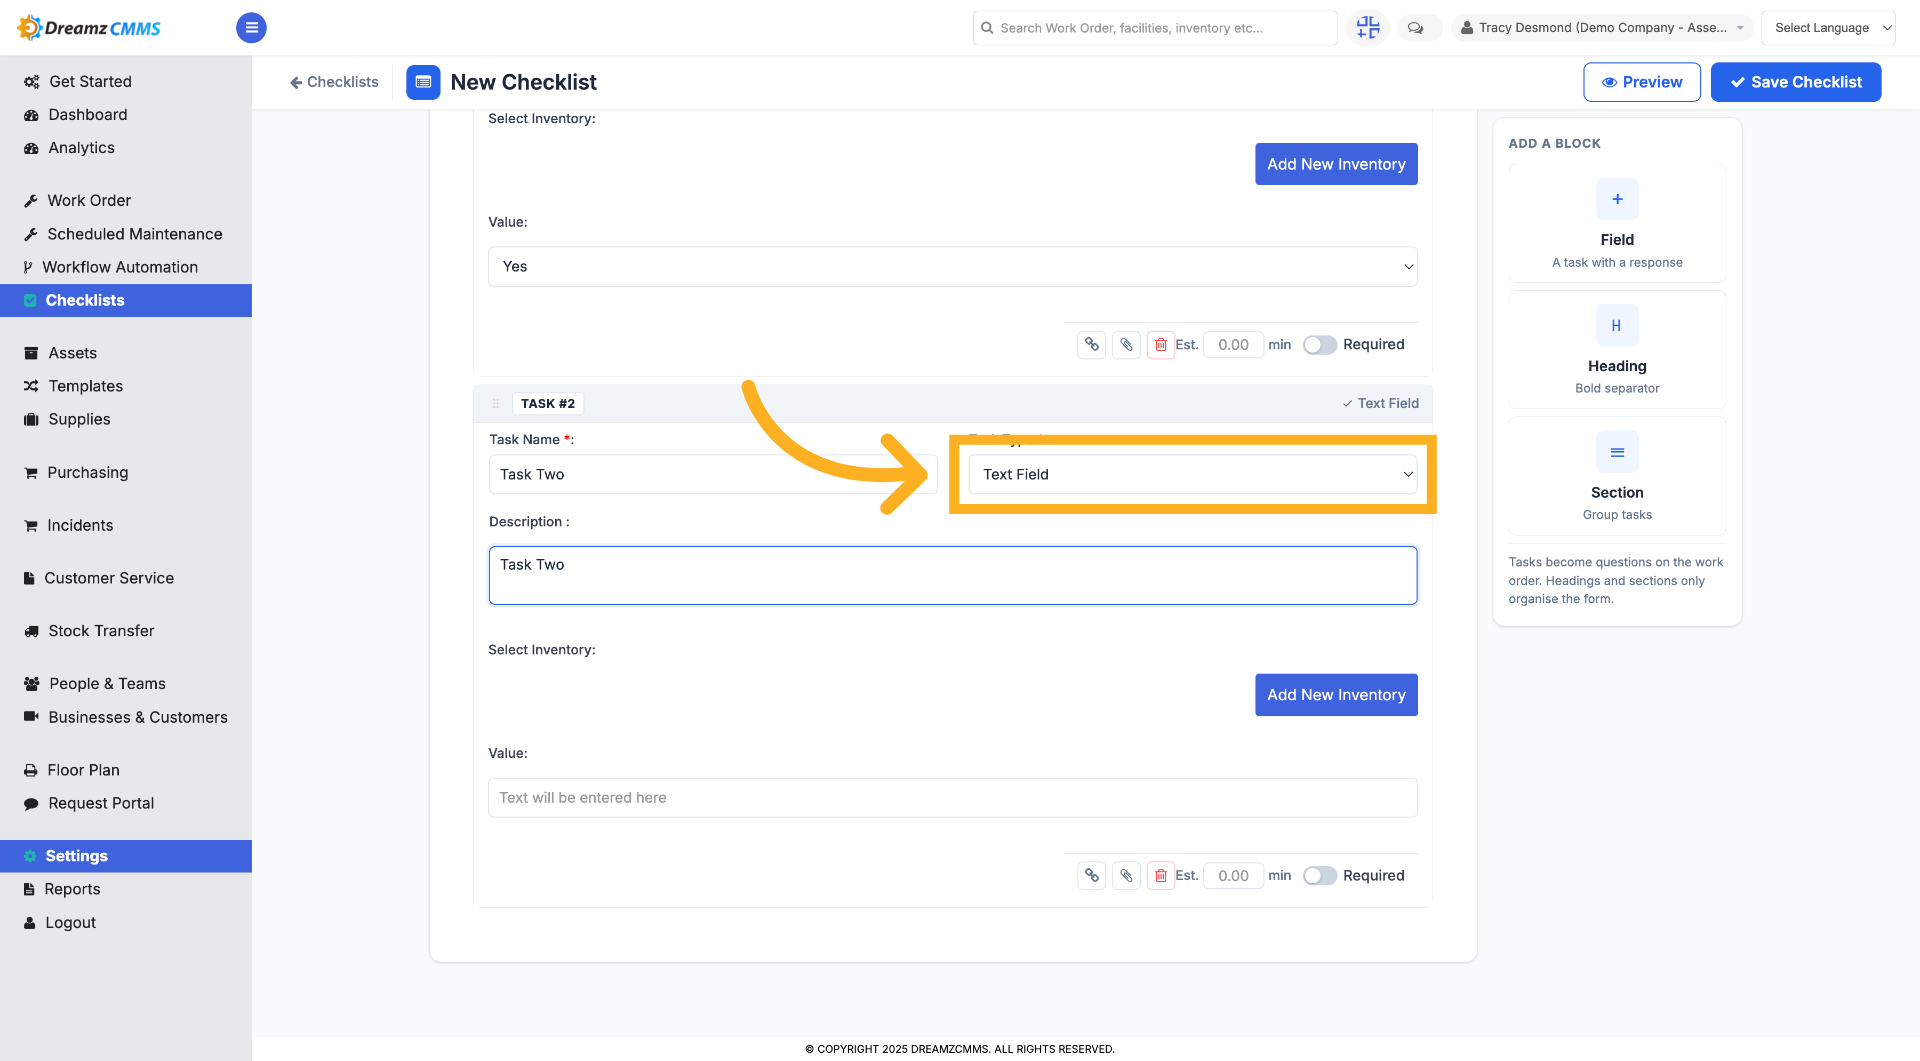
Step 14 – Fill Second Task Input Details
Fill in the necessary details for the second task's input type to specify task criteria.
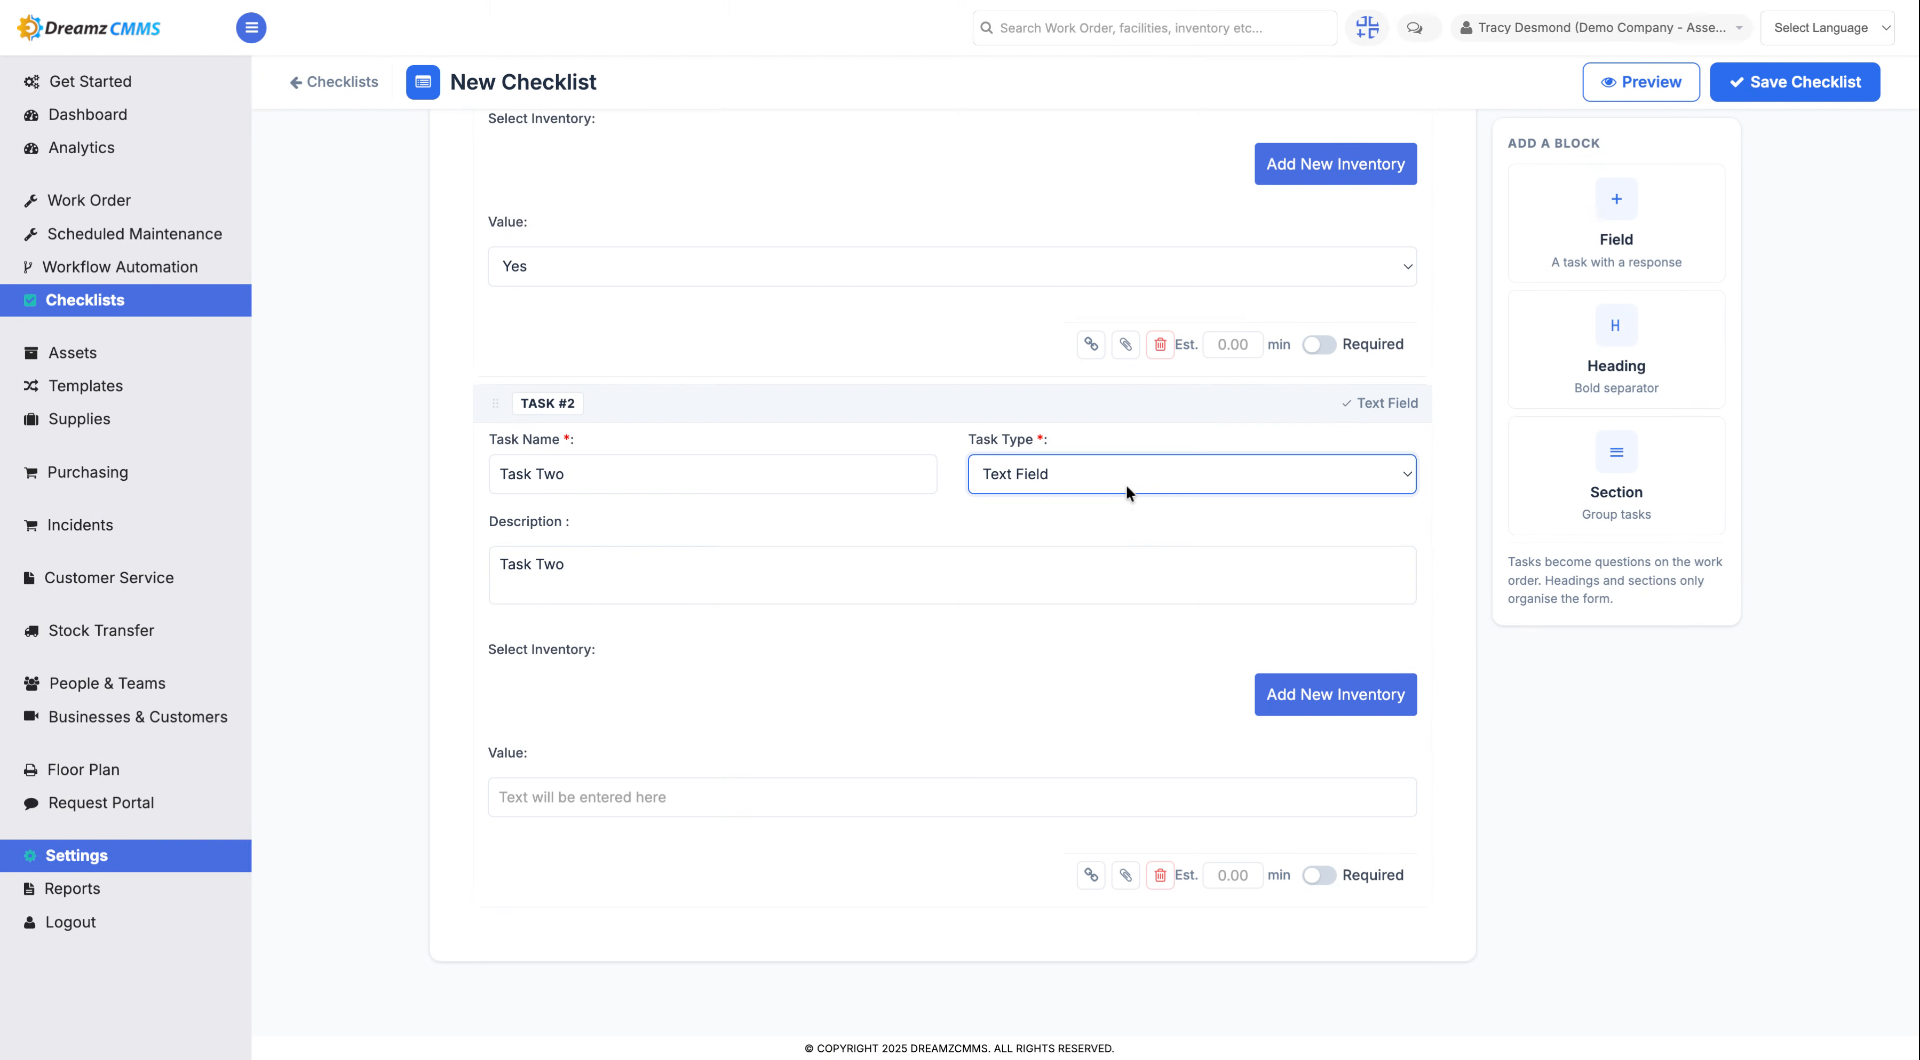
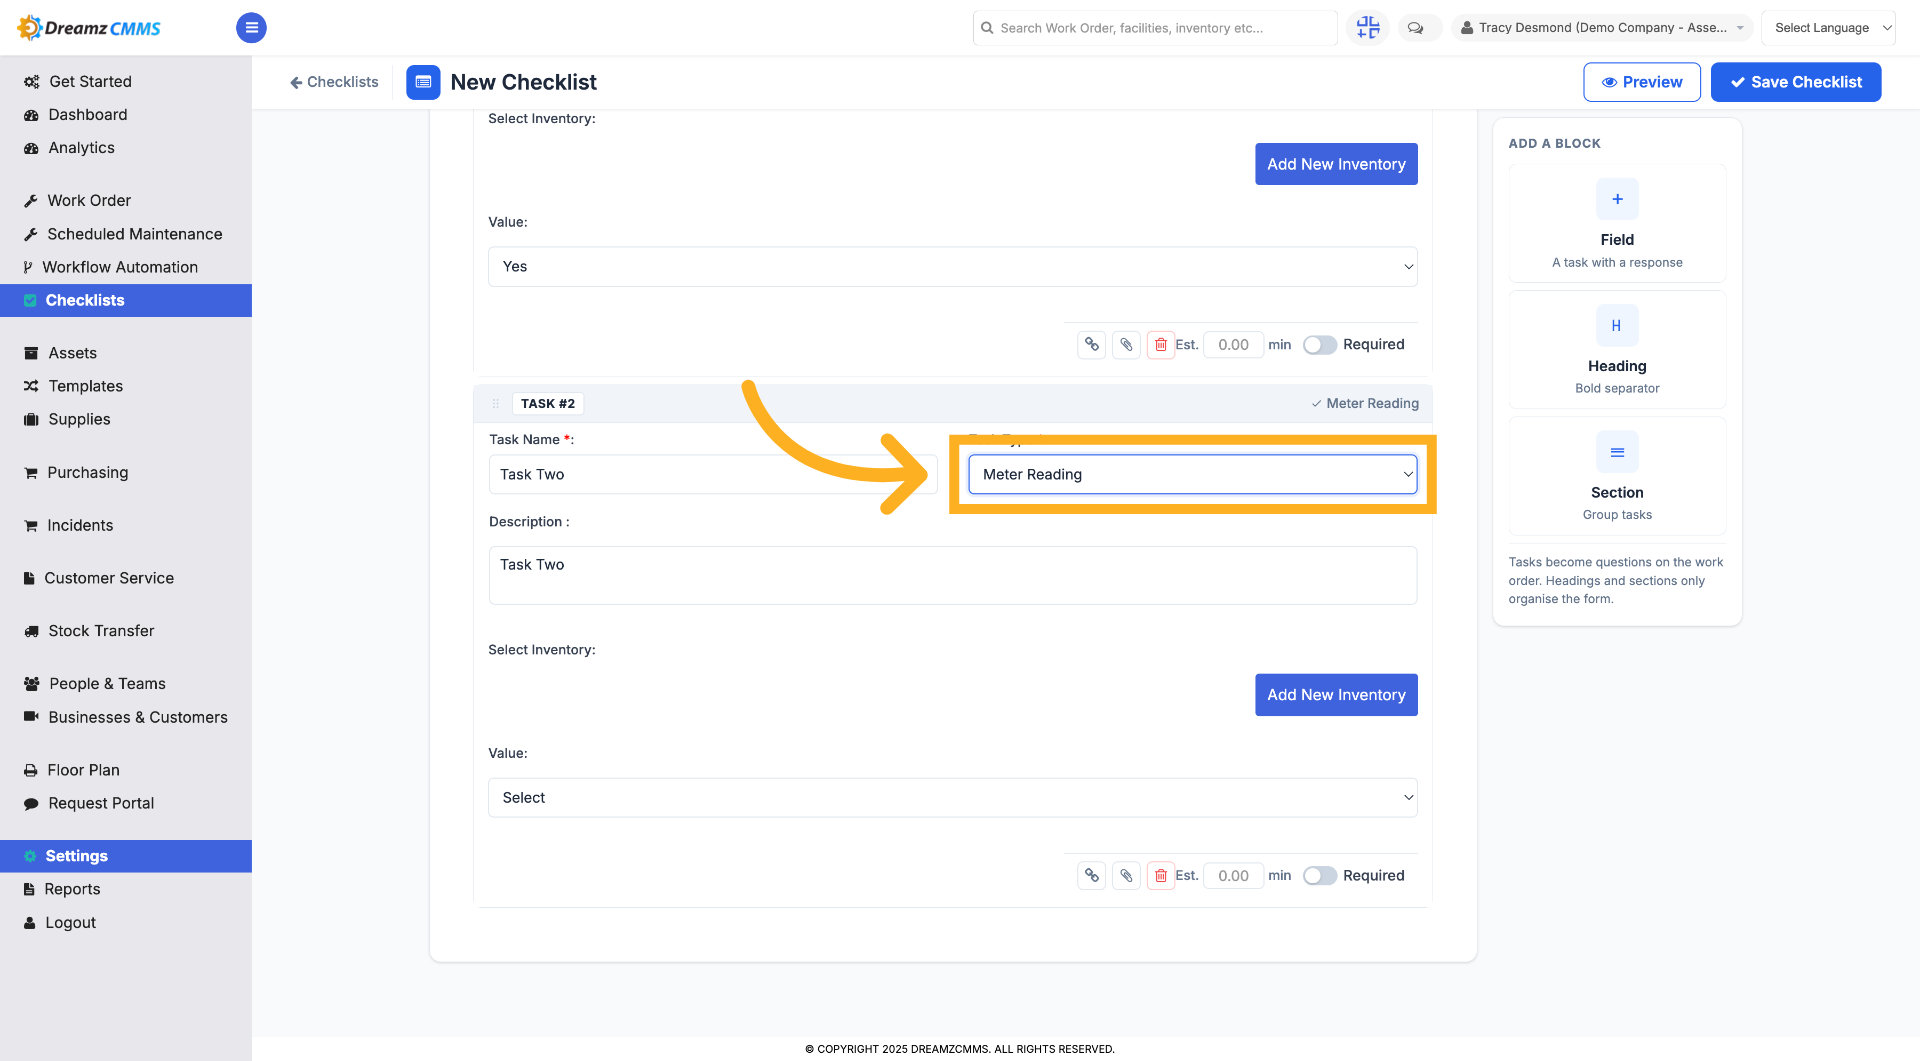
Step 15 – Select Task Input Type Again
Click again to confirm or adjust the input type for the second task as needed.
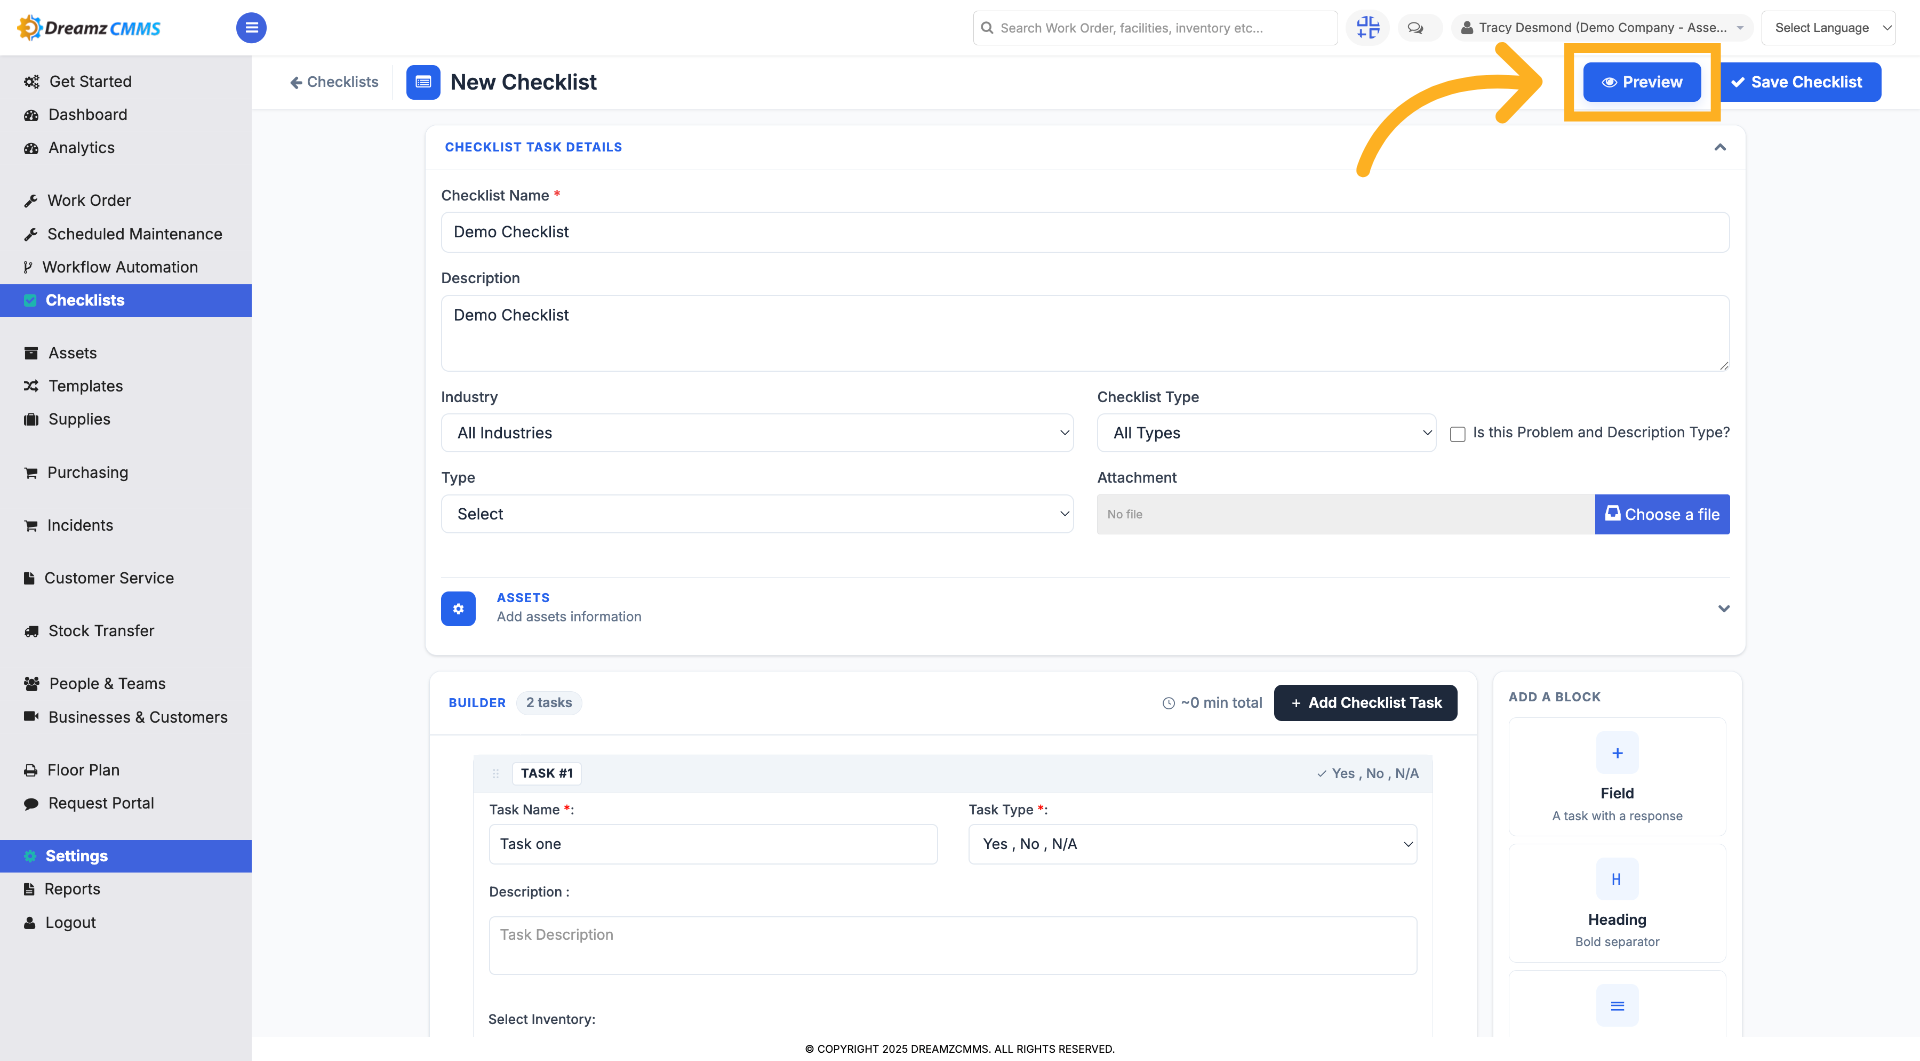
Step 16 – Preview Checklist
Click Preview to review your checklist and verify all tasks and inputs are correct before saving.
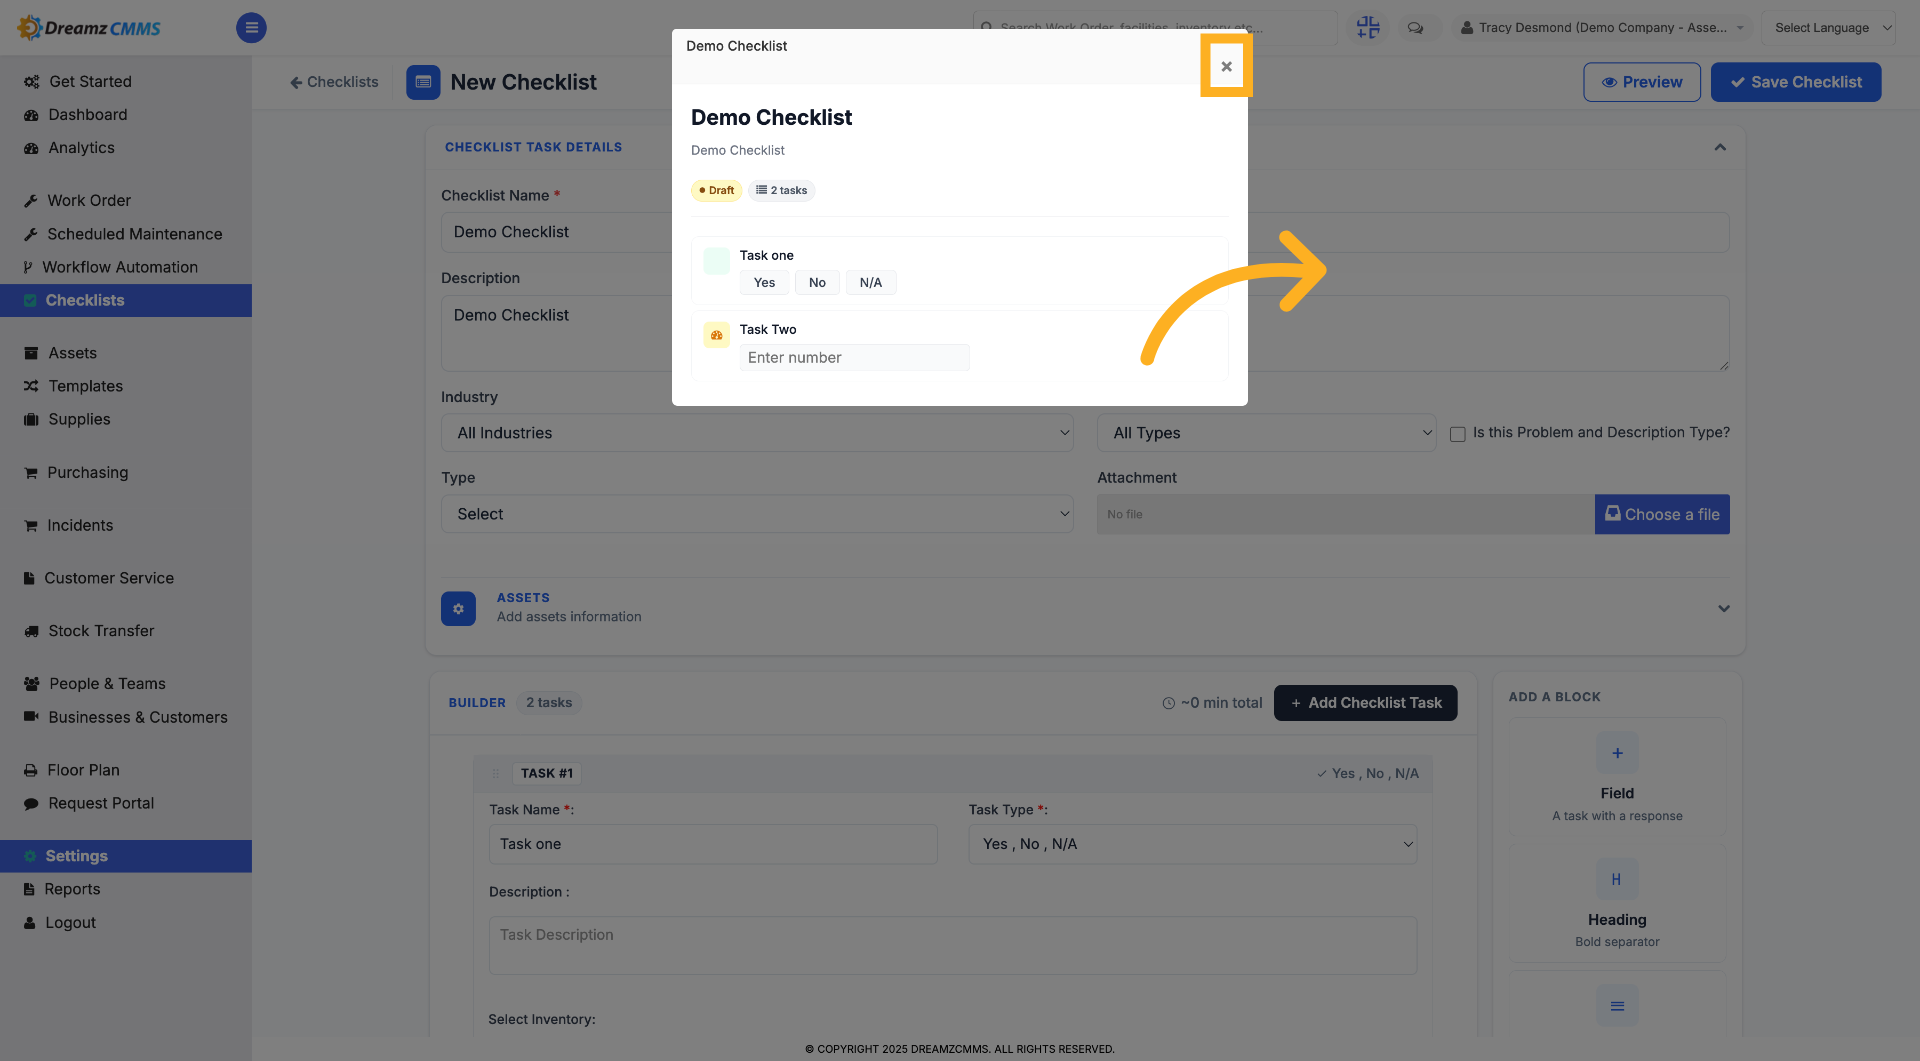
Step 17 – Close Preview Window
Click the × button to close the preview window and return to editing your checklist.
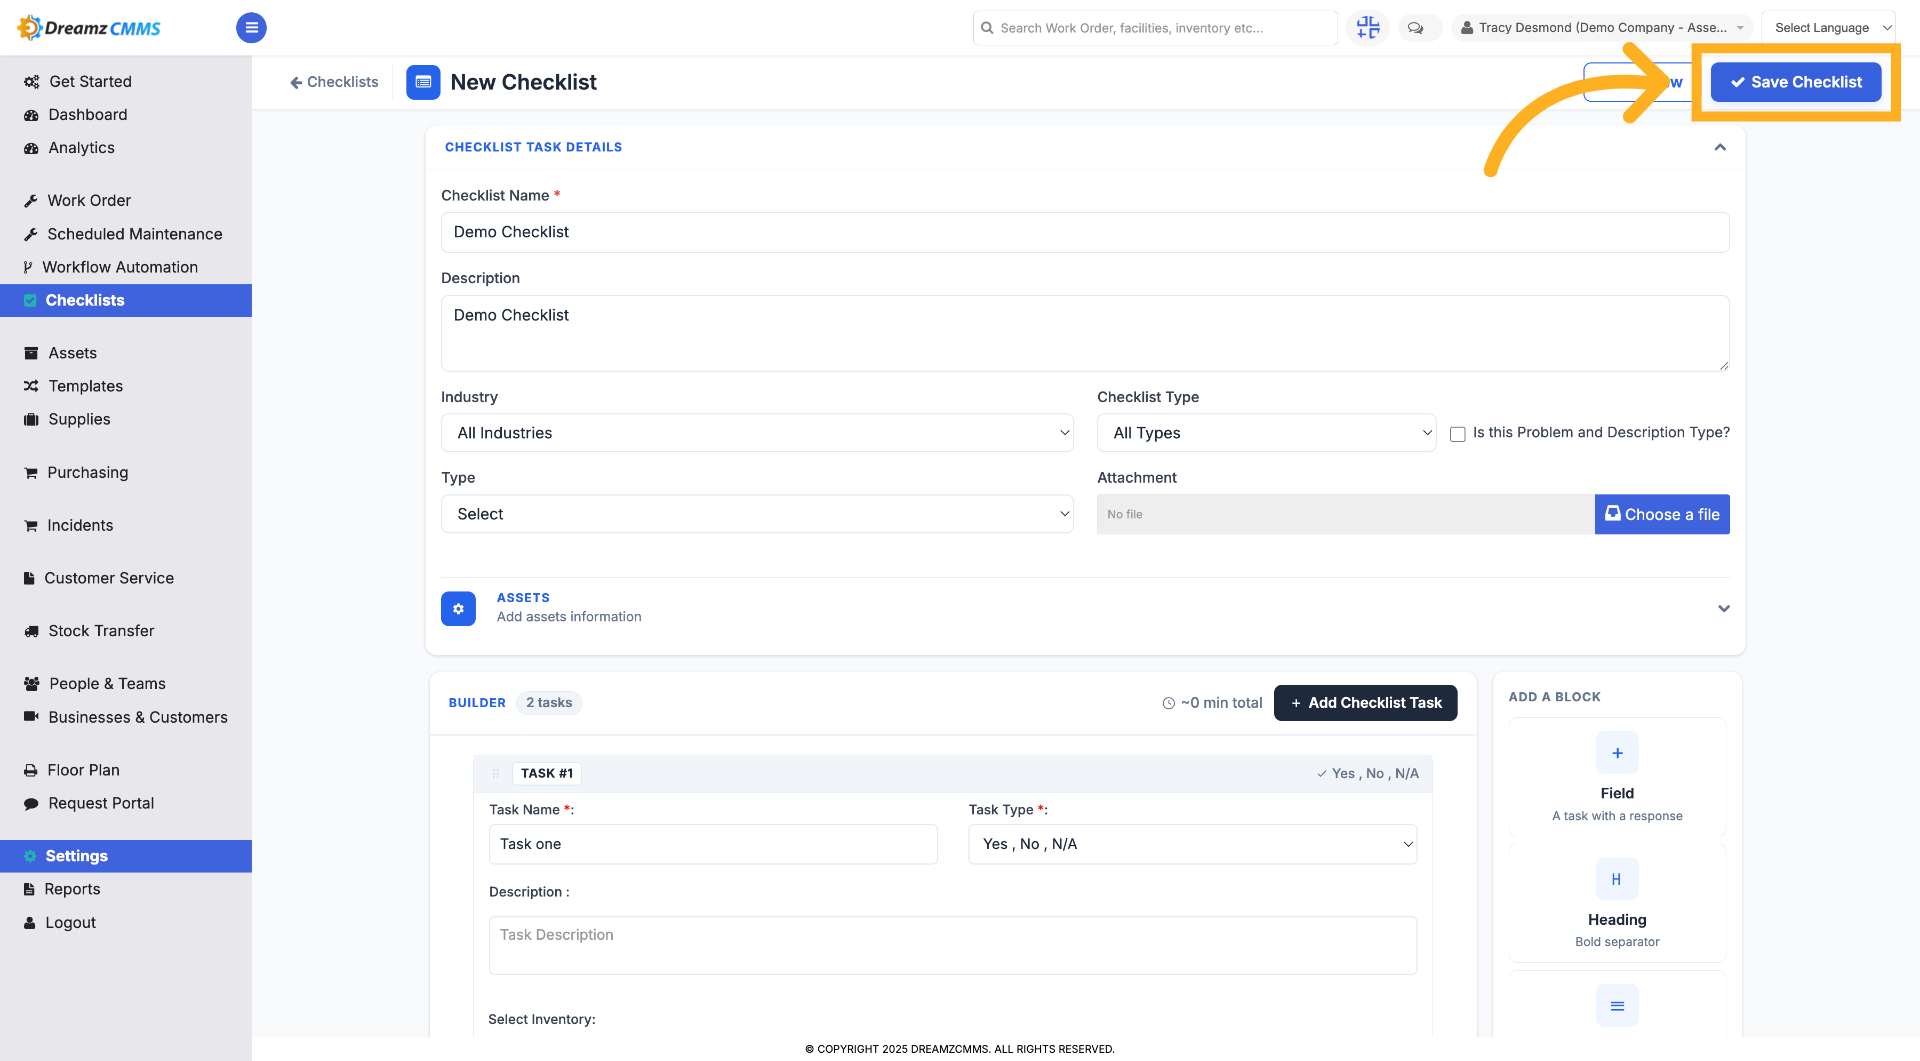
Step 18 – Save Checklist
Click Save Checklist to store your checklist and make it available for use.
How to Create a Checklist Using a Template
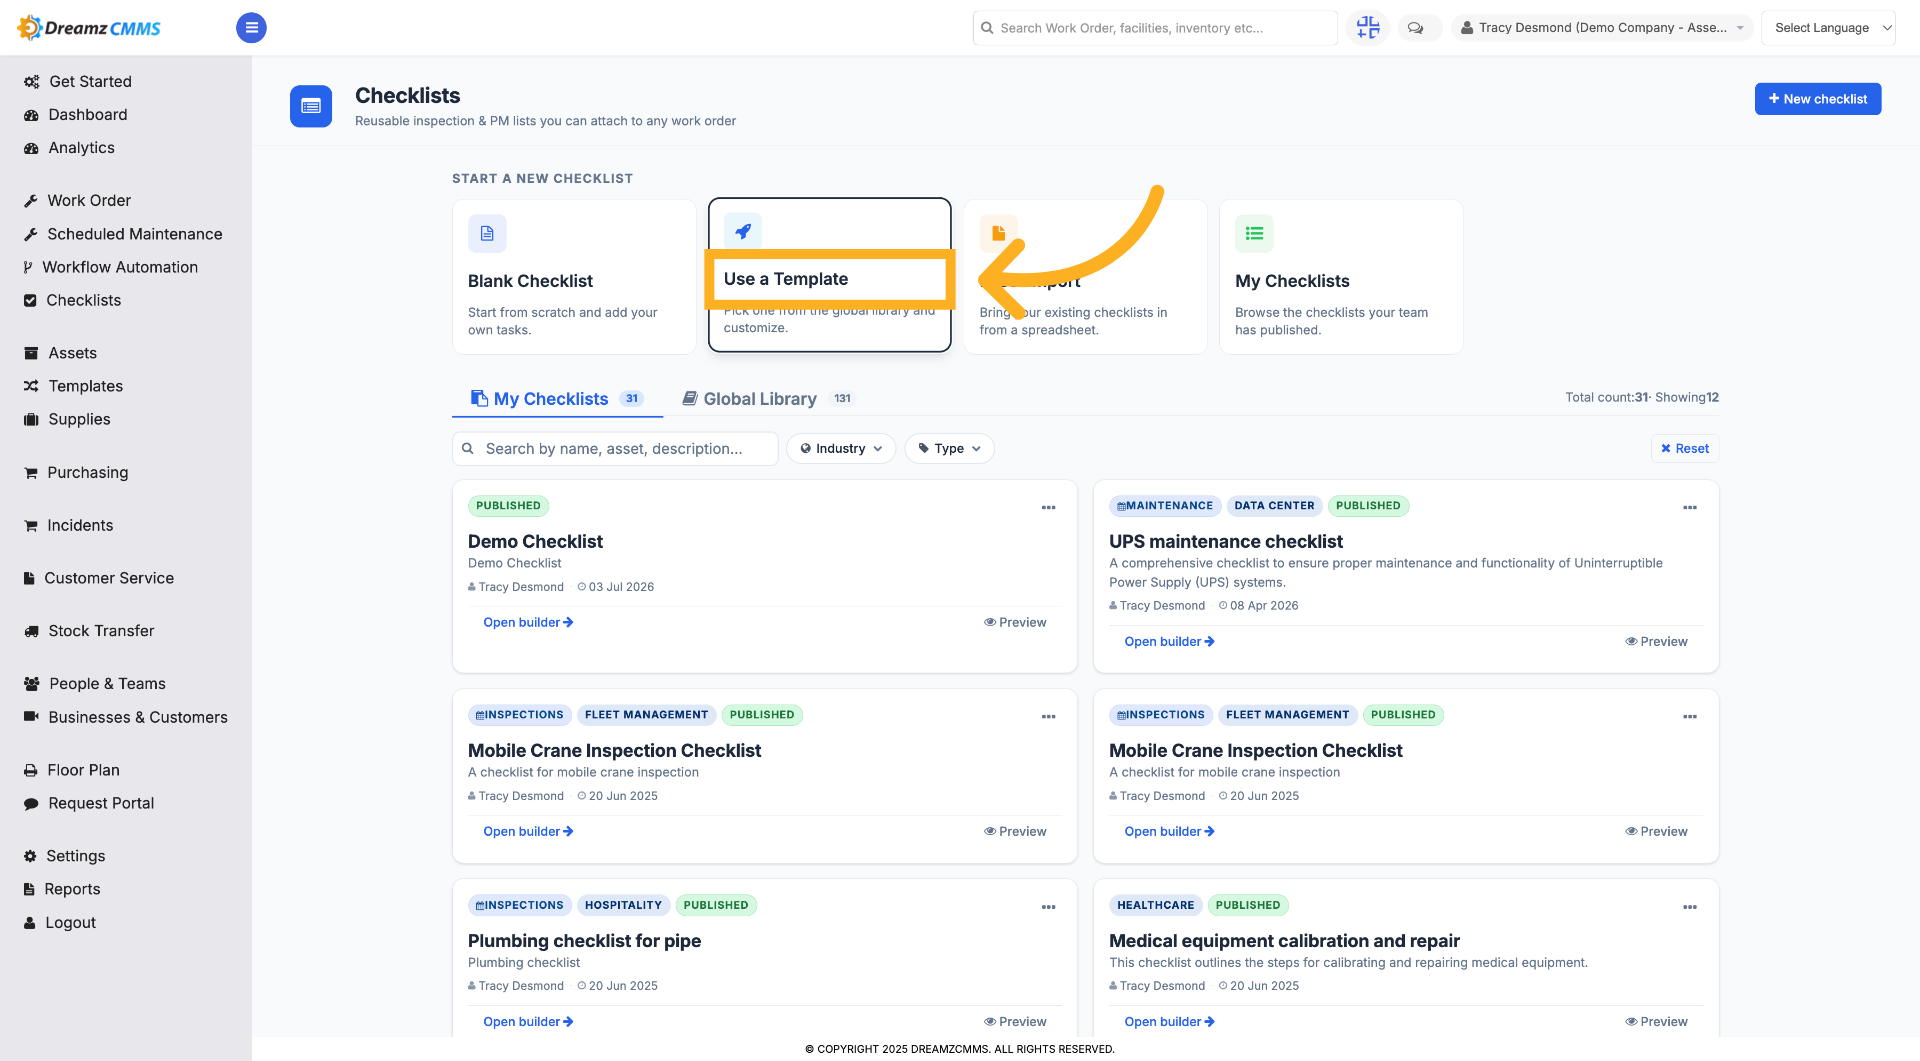
Step 1 – Use Checklist Template
Click Use a Template to start creating a checklist based on predefined templates for faster setup.
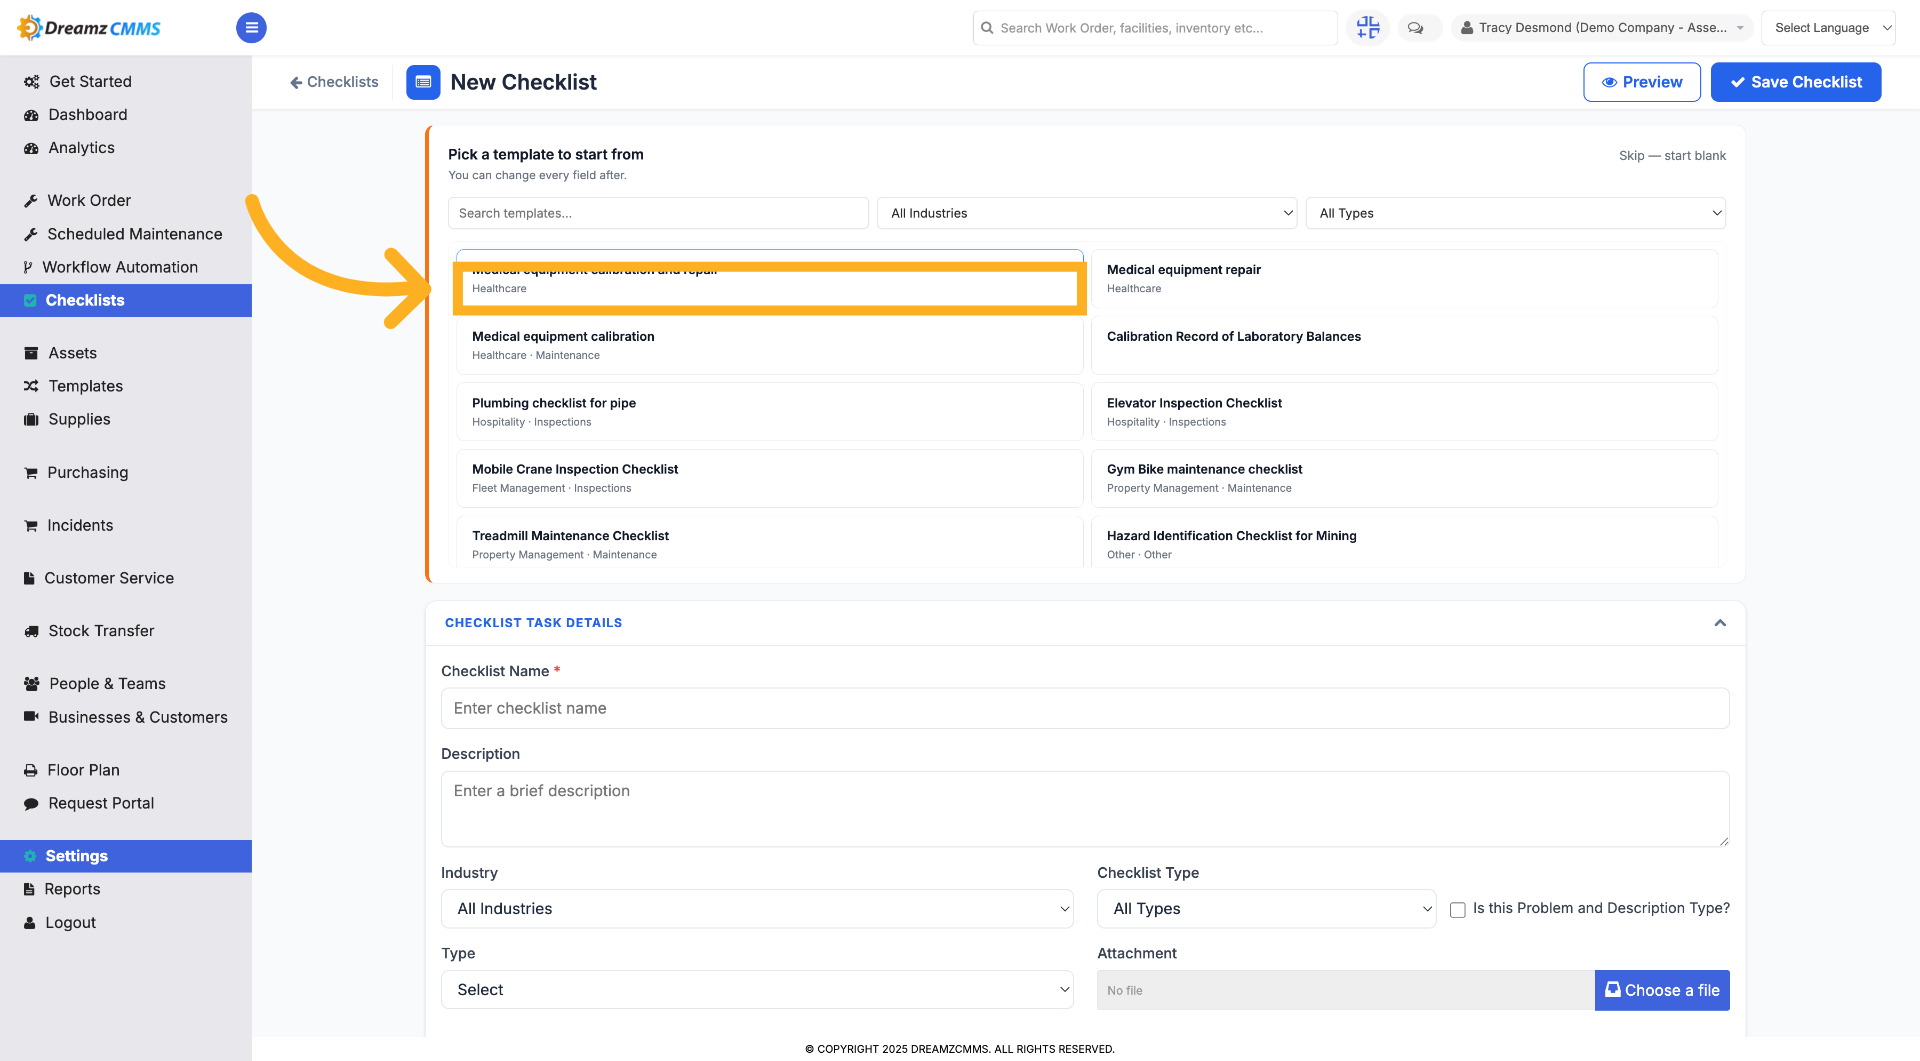
Step 2 – Select Healthcare Template
Click Healthcare to choose the template tailored for healthcare-related checklists (or another category relevant to your needs).
Step 3 – Return to Checklists
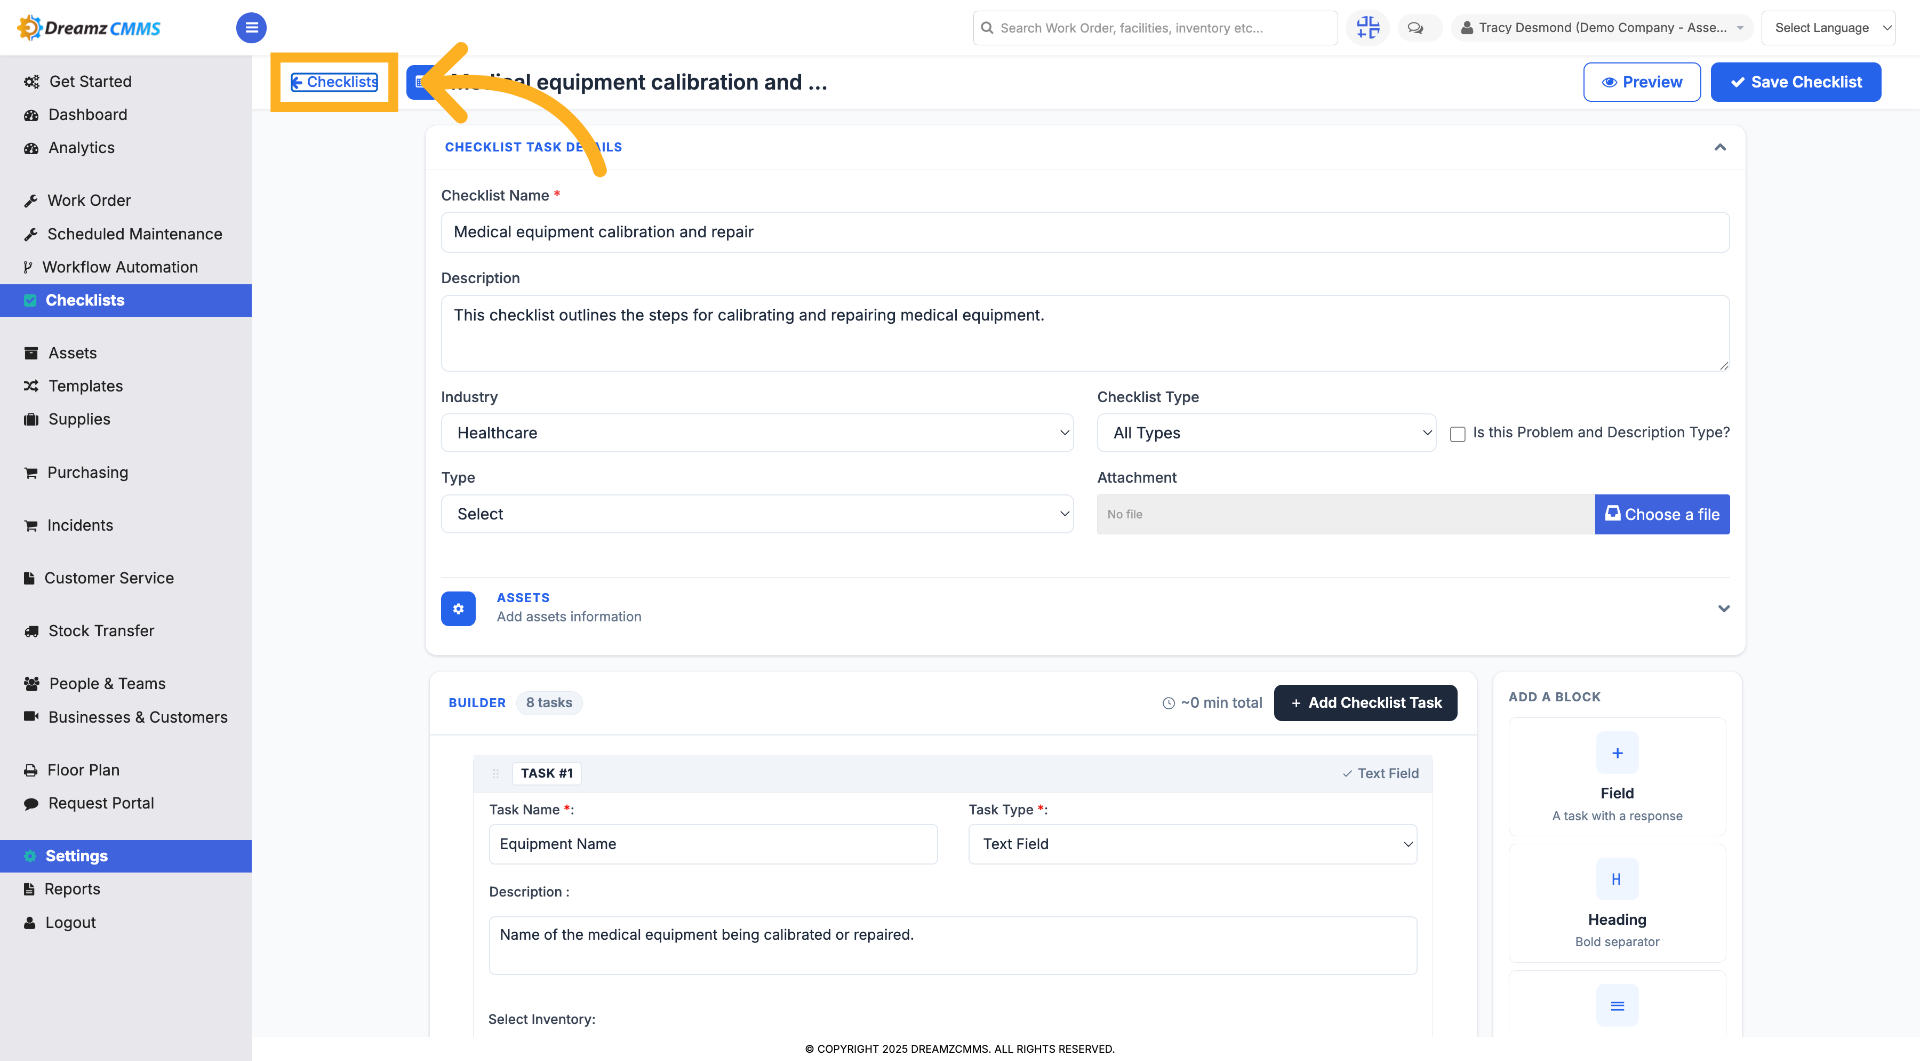
Click the Checklists breadcrumb to go back to the main checklist management page.
How to Import Checklists via Excel
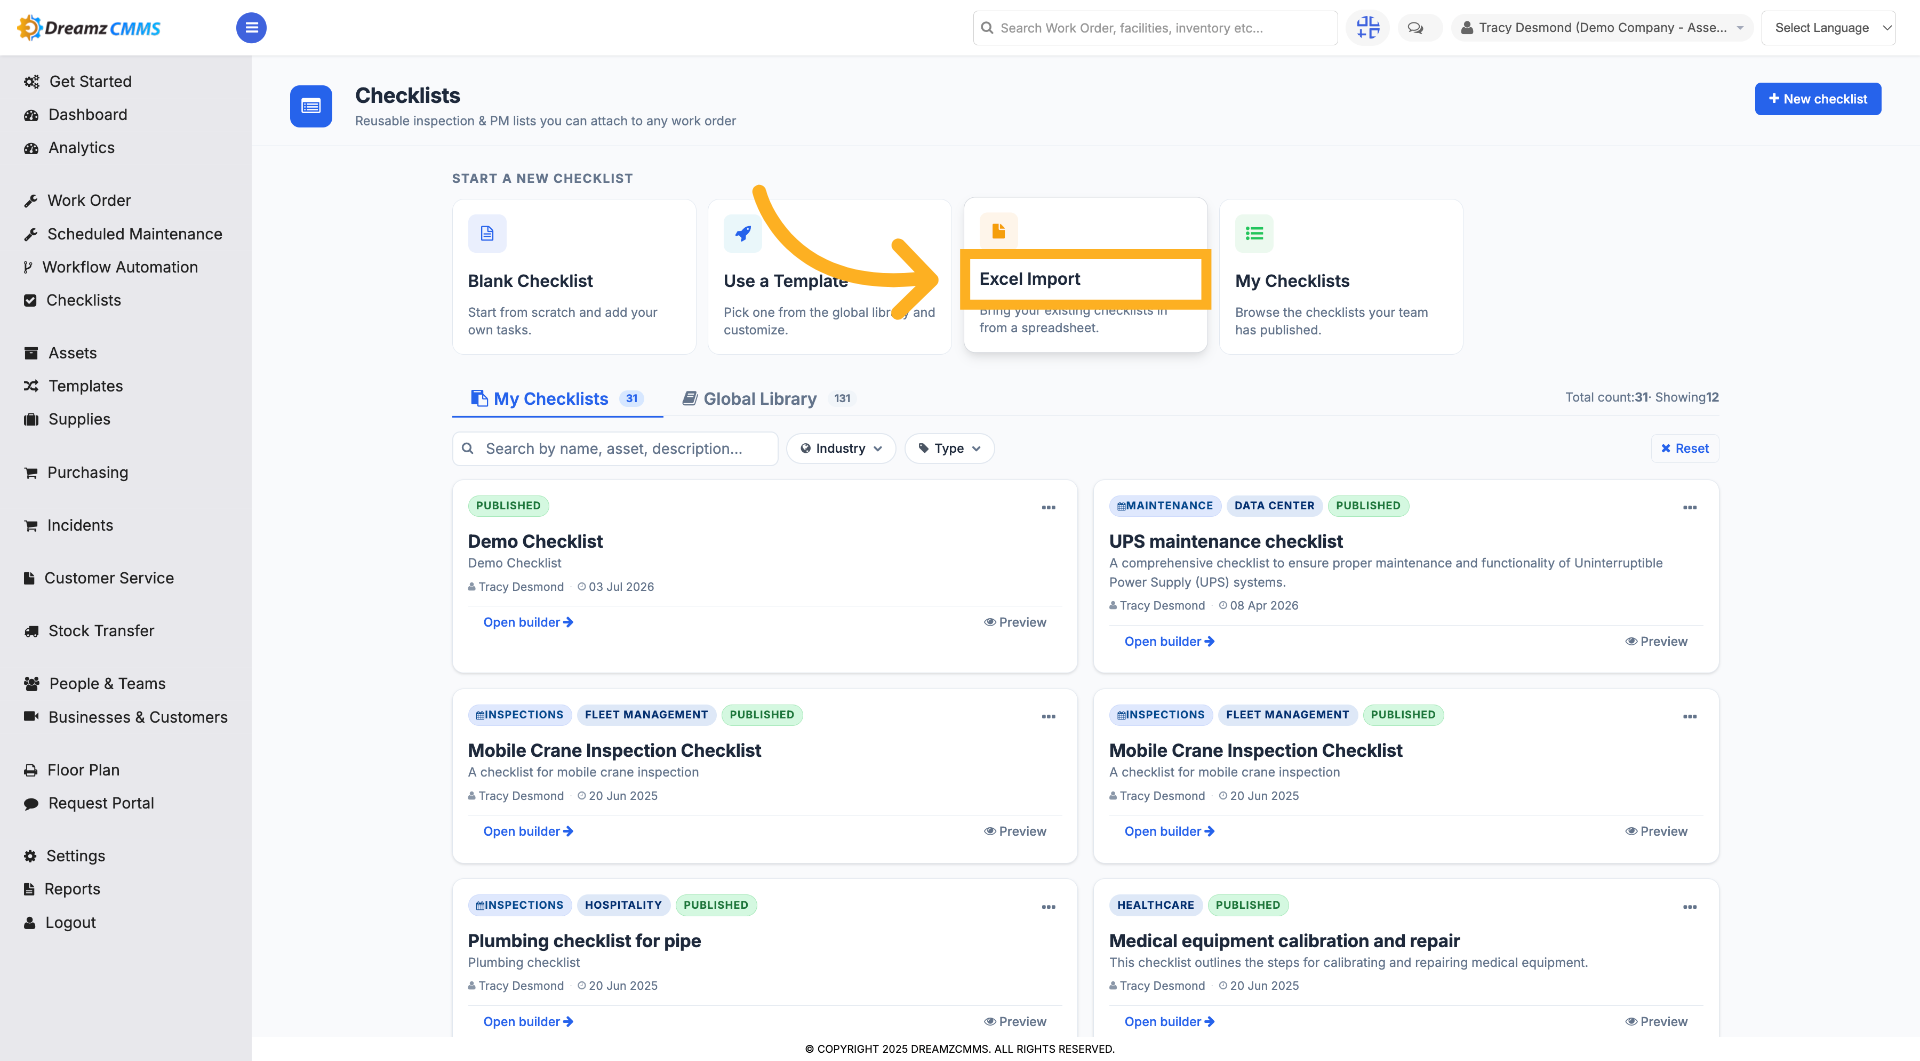
Step 1 – Open Excel Import
Click Excel Import to upload checklist data from an Excel file for bulk import of your checklists.
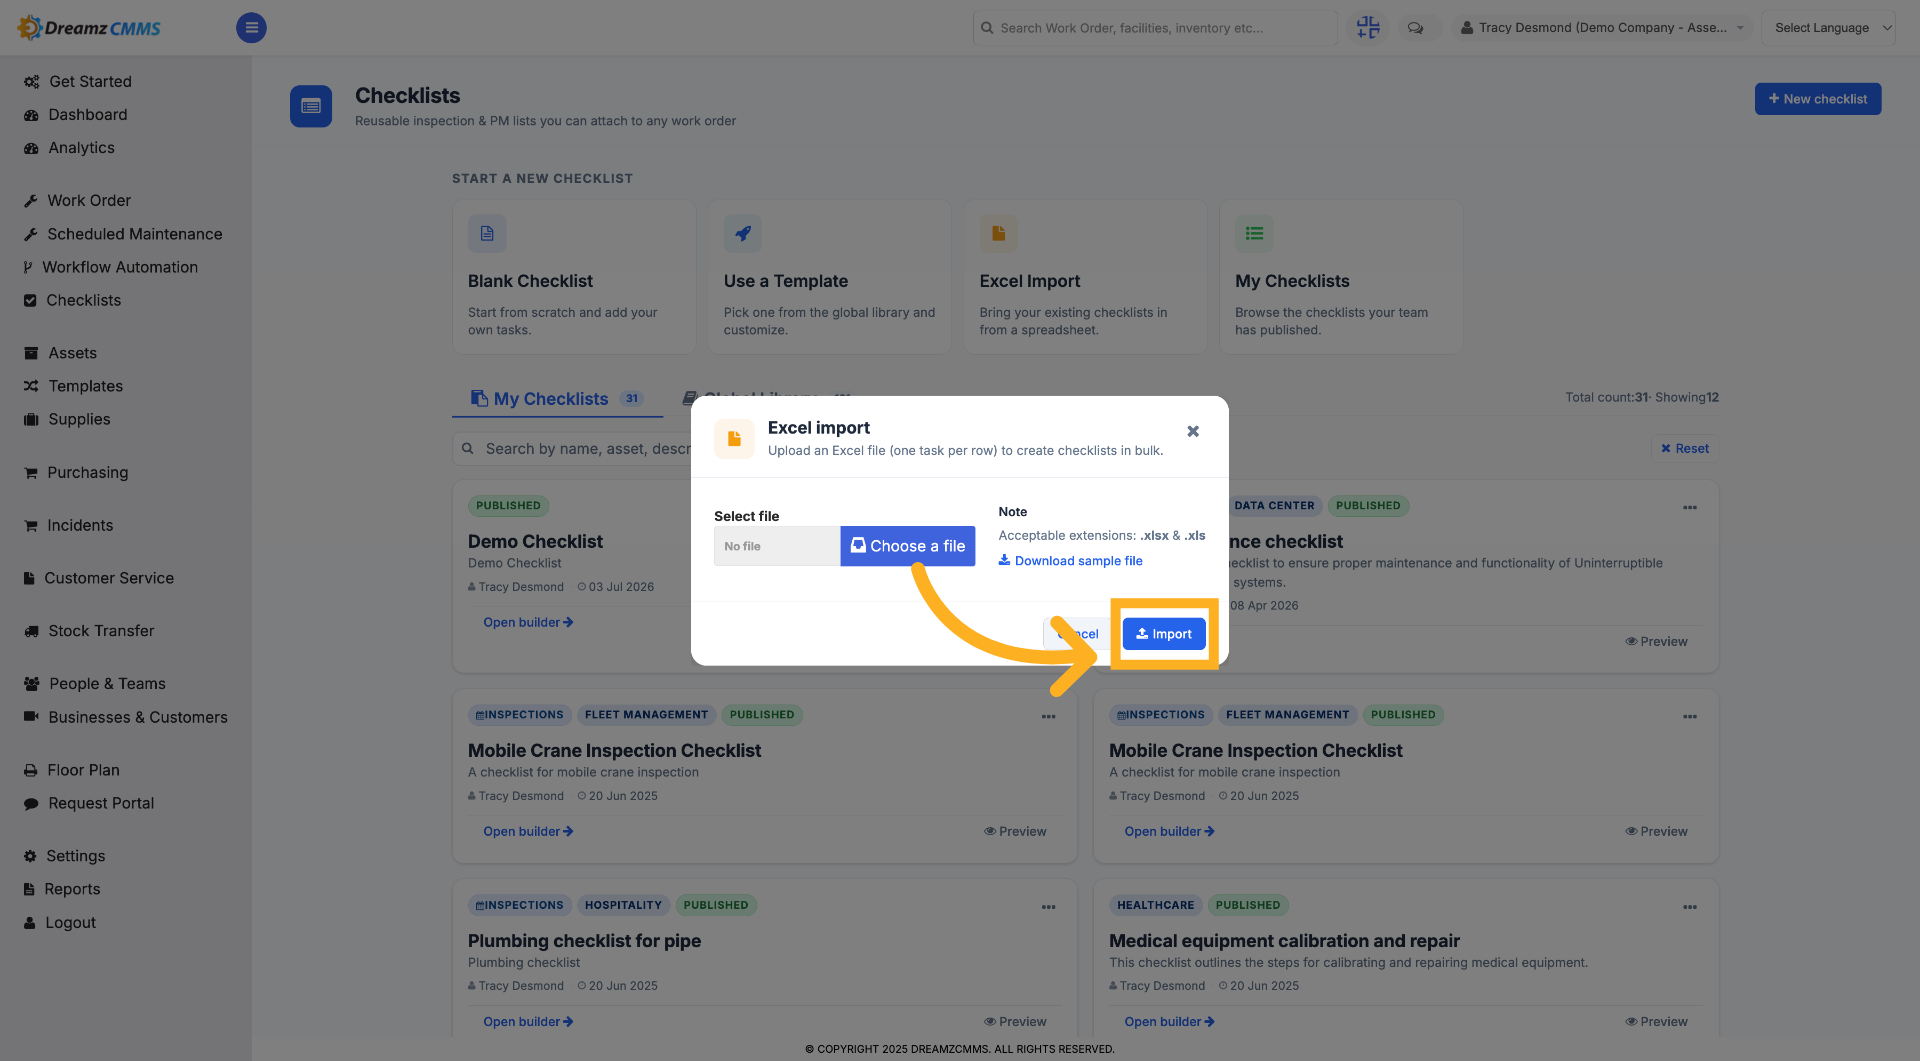
Step 2 – Import Checklist
Once you fill in your checklist as per the sample file provided, click Import to bring your checklists into DreamzCMMS.
How to View my already created checklists
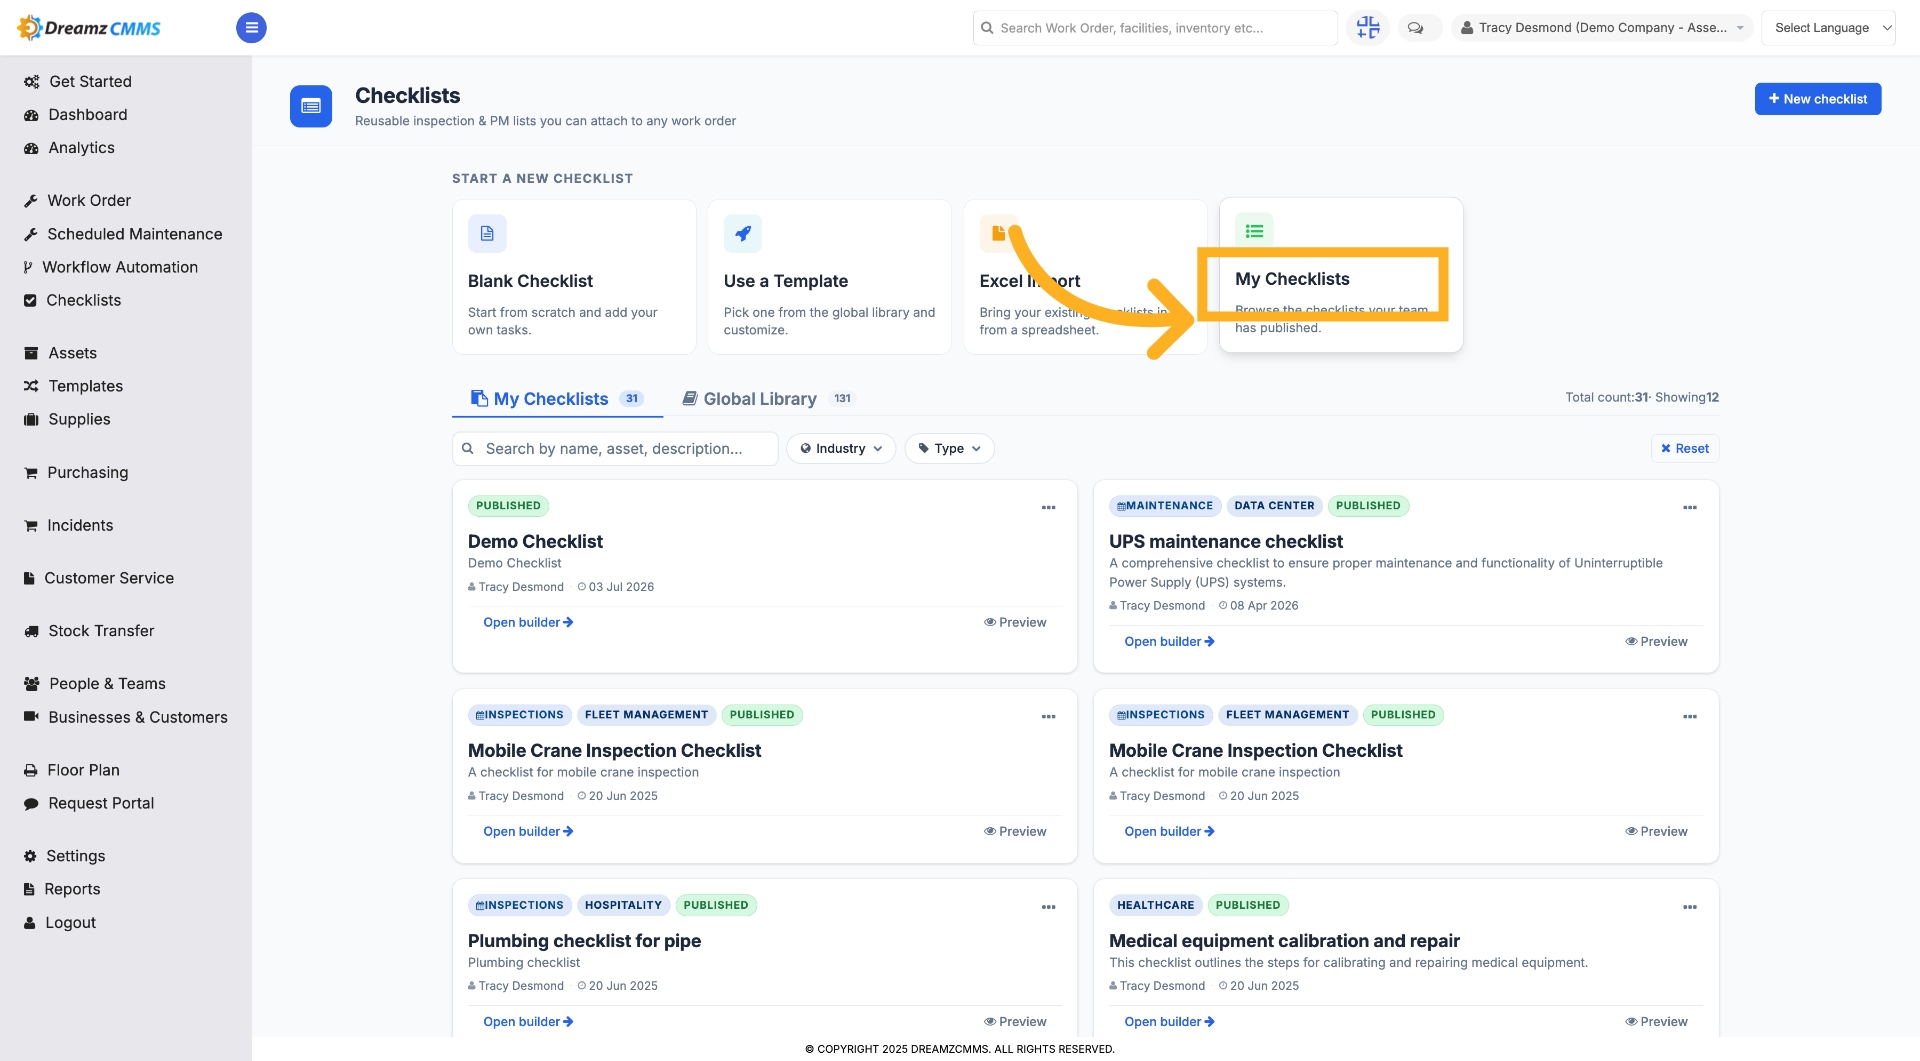
Step 1 – My Checklists
Click My Checklists to see all the checklists created by you or your team.
How to Create a Checklist with Linked Assets
Step 1 – Create New Checklist
Click New Checklist to start building a new checklist from the beginning.
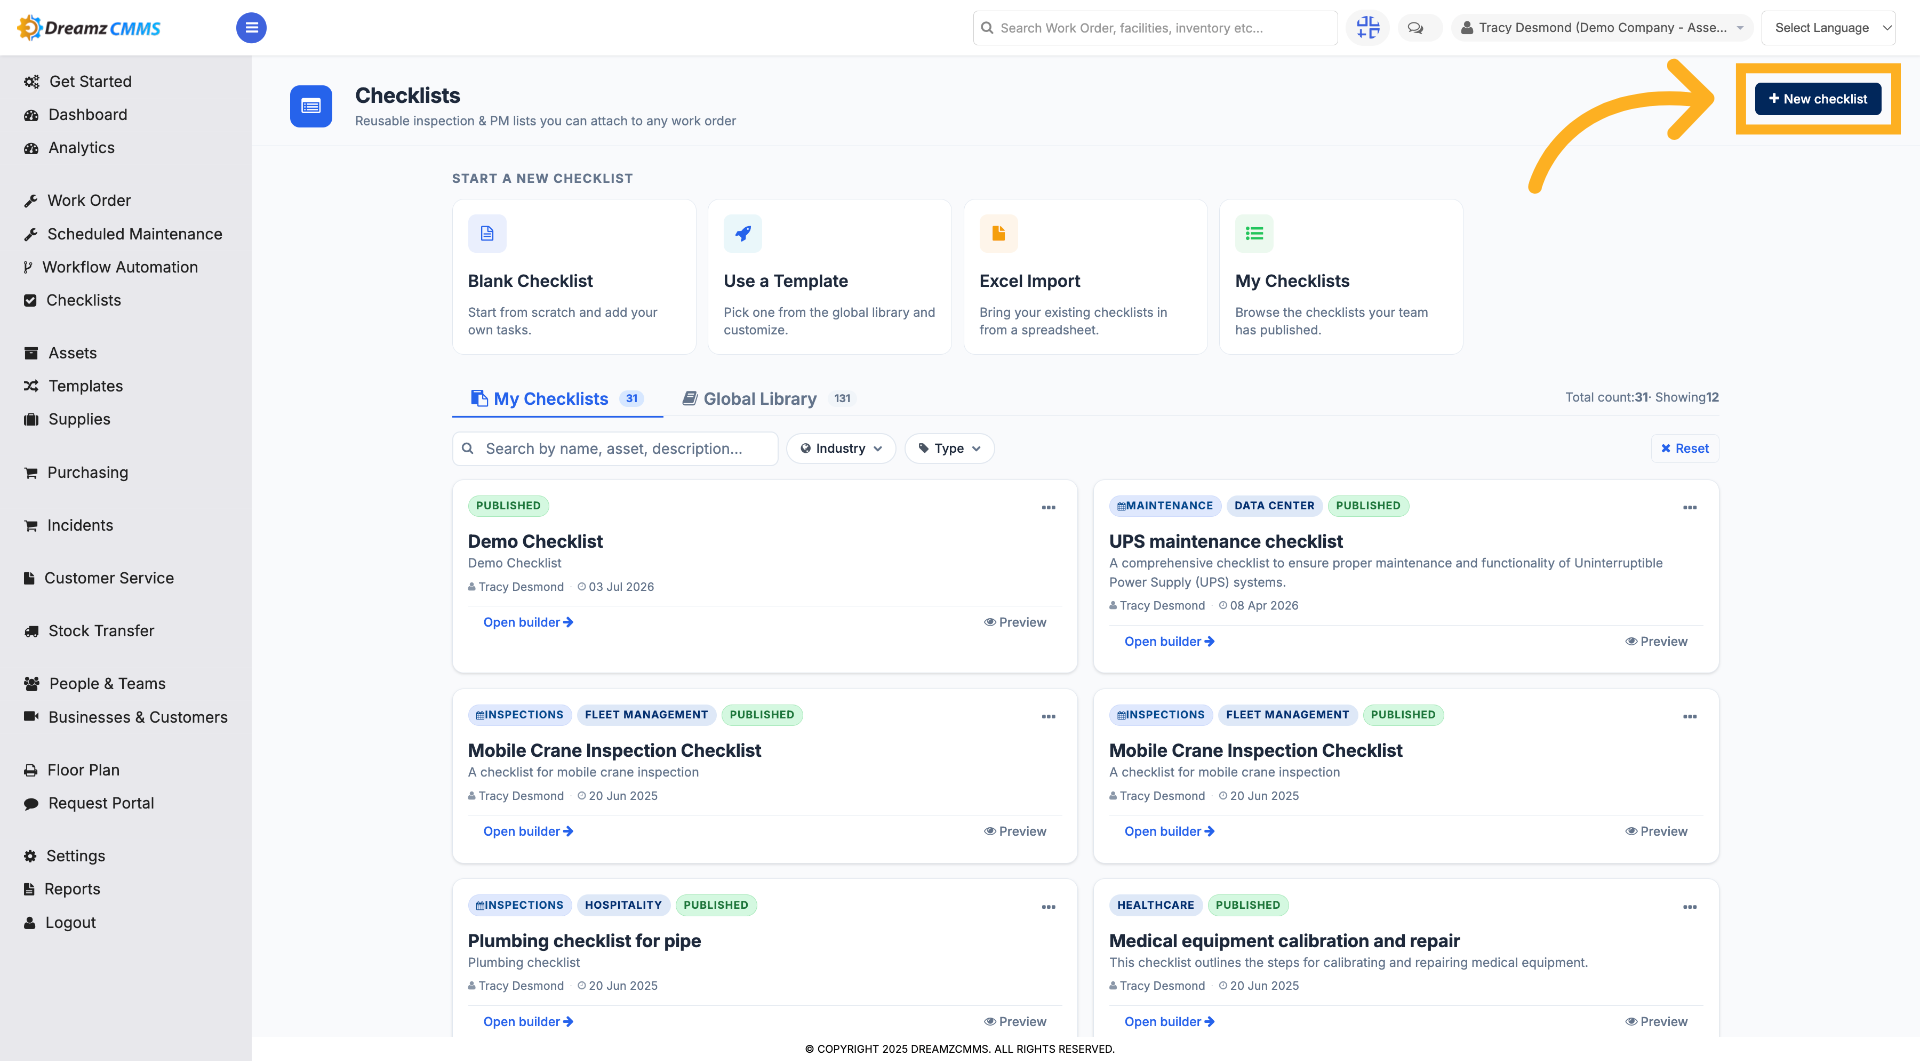
Step 2 – Select Checklist Name Field
Click the field to enter the name for your new checklist.
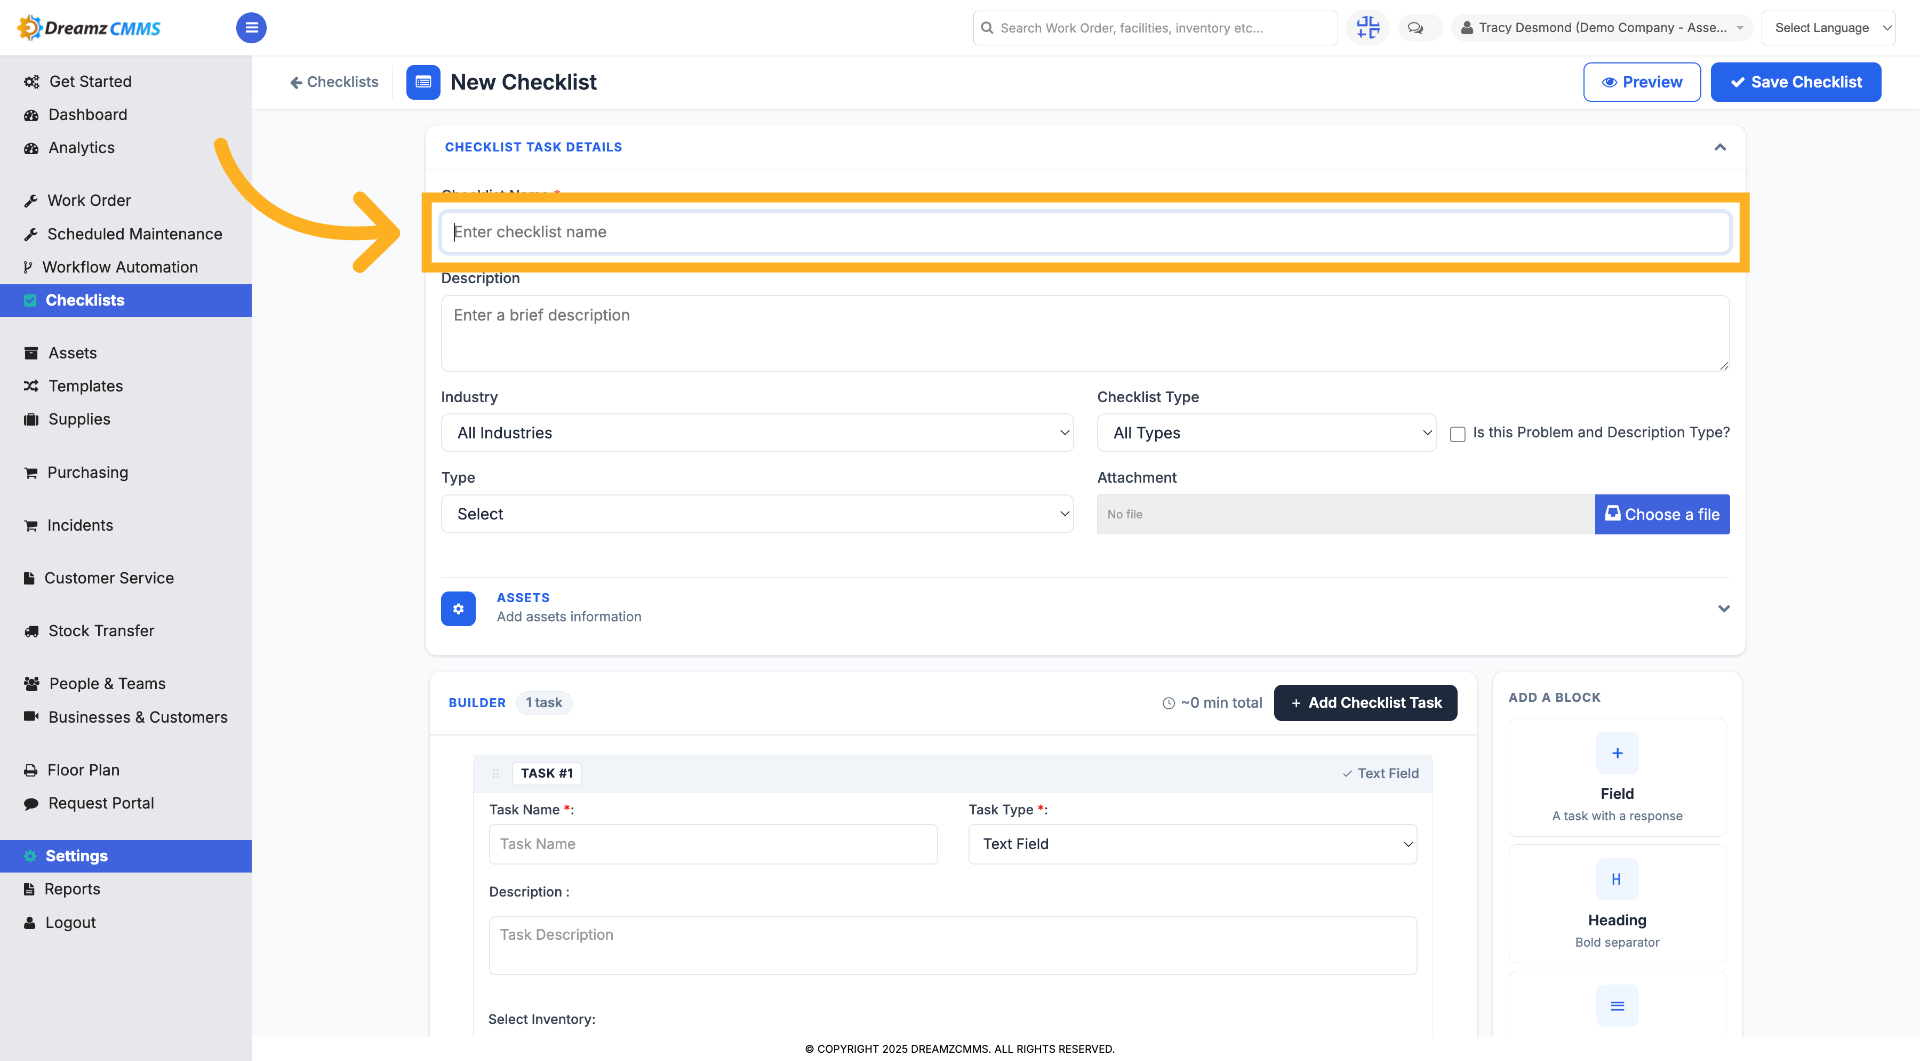
Step 3 – Select Description Field
Click the field to add a brief description for your checklist.
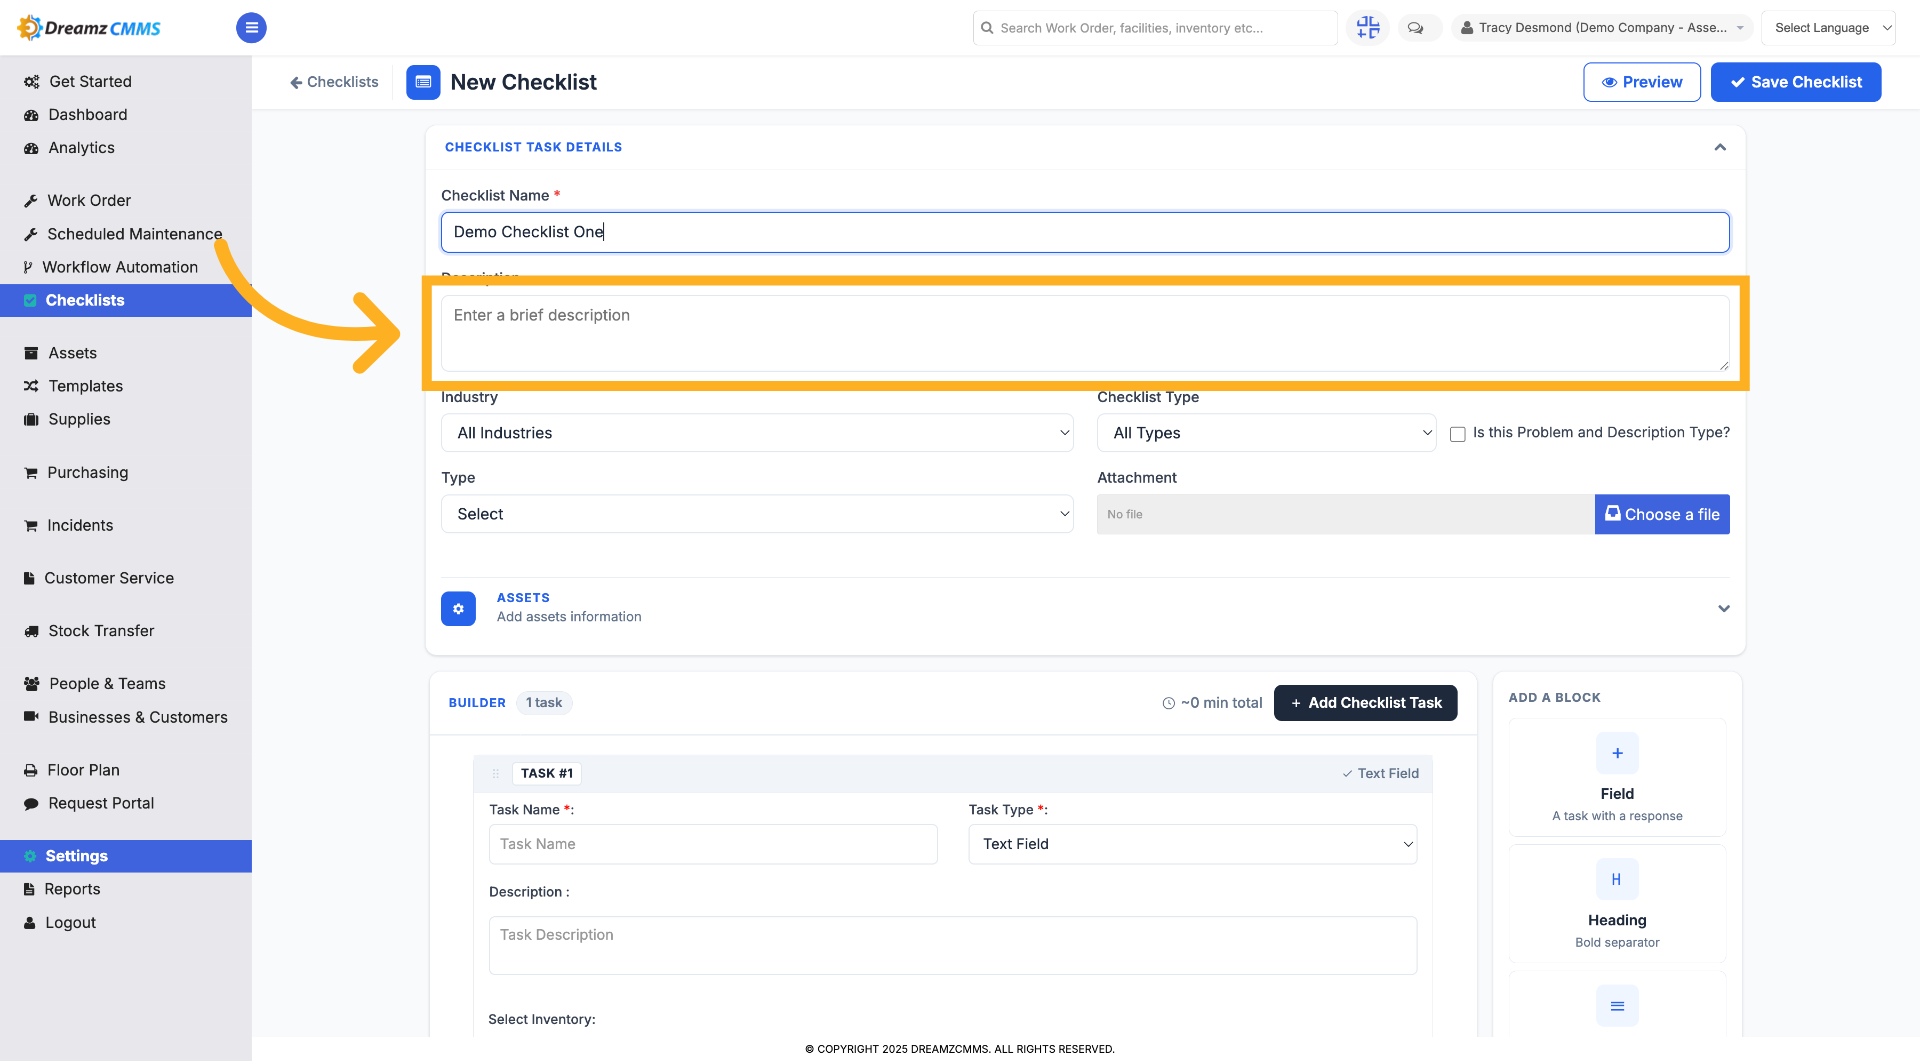
Step 4 – Choose Industry Category
Click to select the industry category, such as Data Center, Healthcare, Hospitality, or others relevant to your checklist.
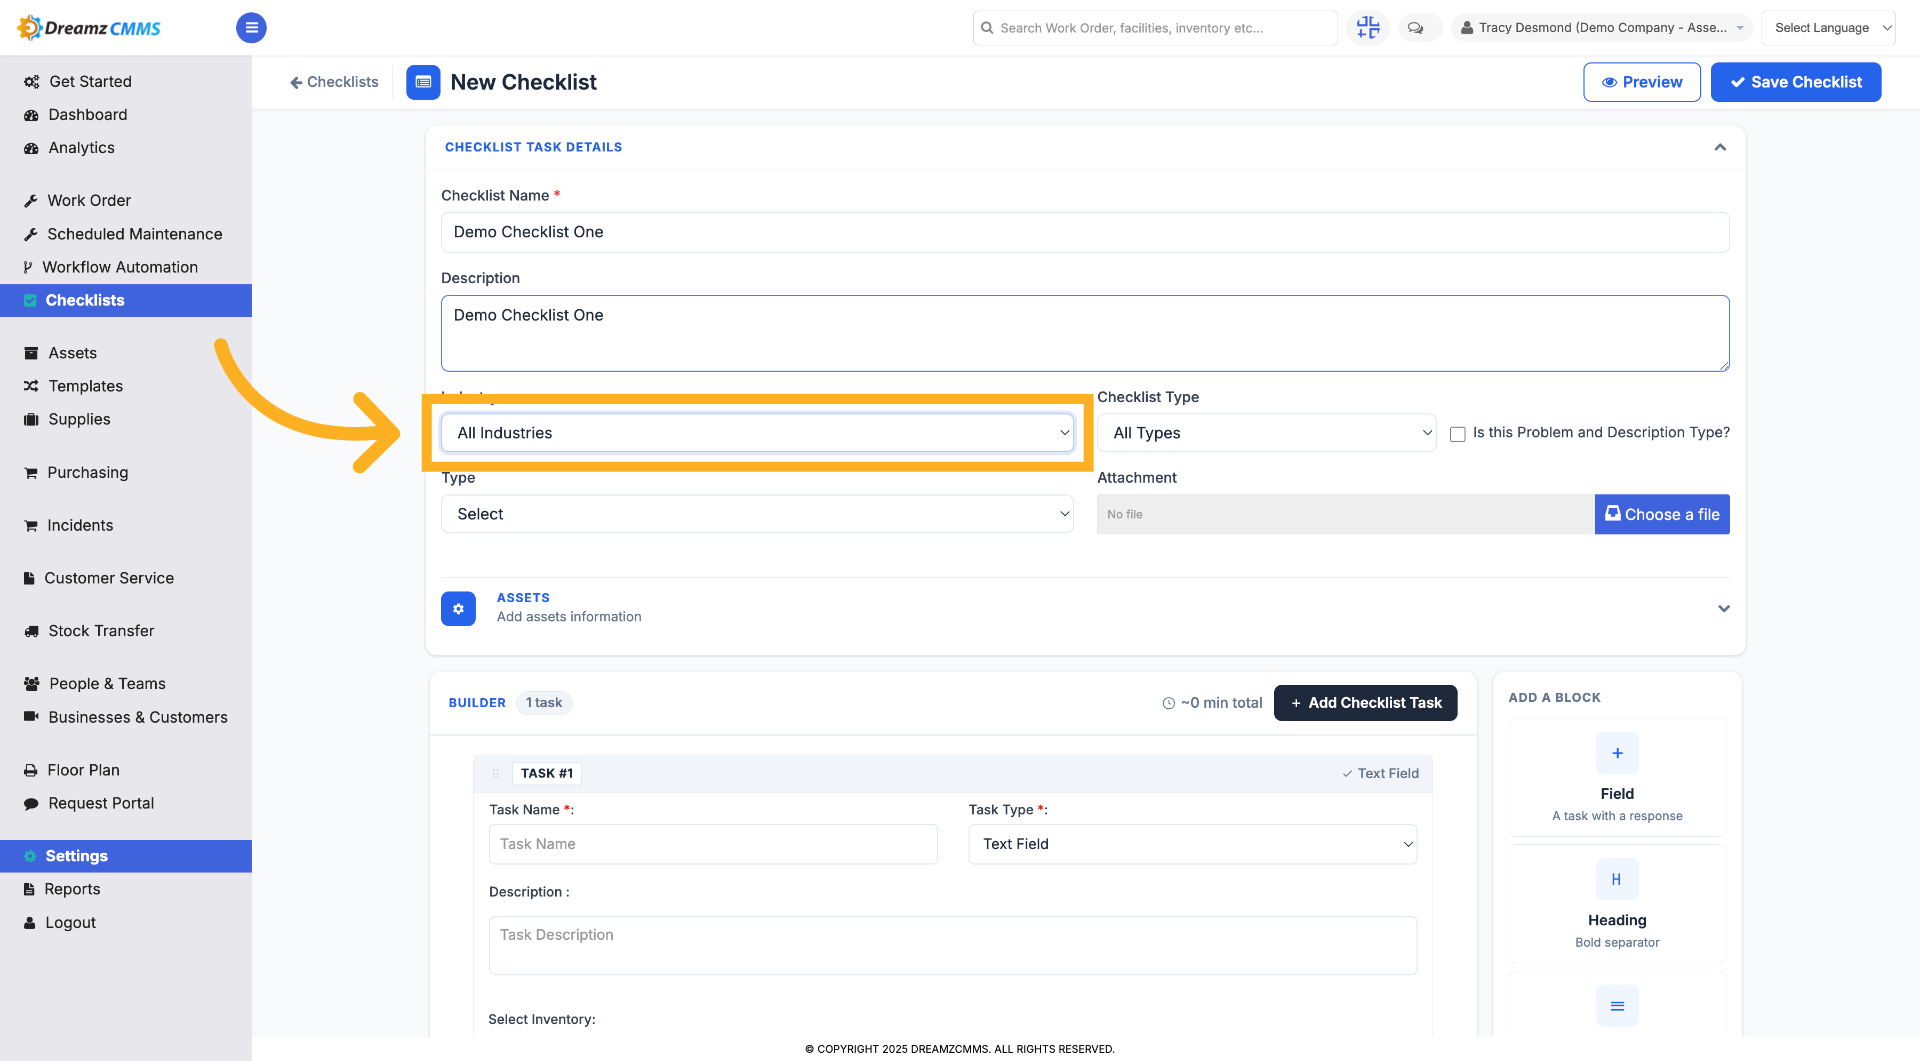
Step 5 – Choose Checklist Type
Click to select the checklist type from options like Other, Audits, Instruction Manual, Inspections, or Maintenance.
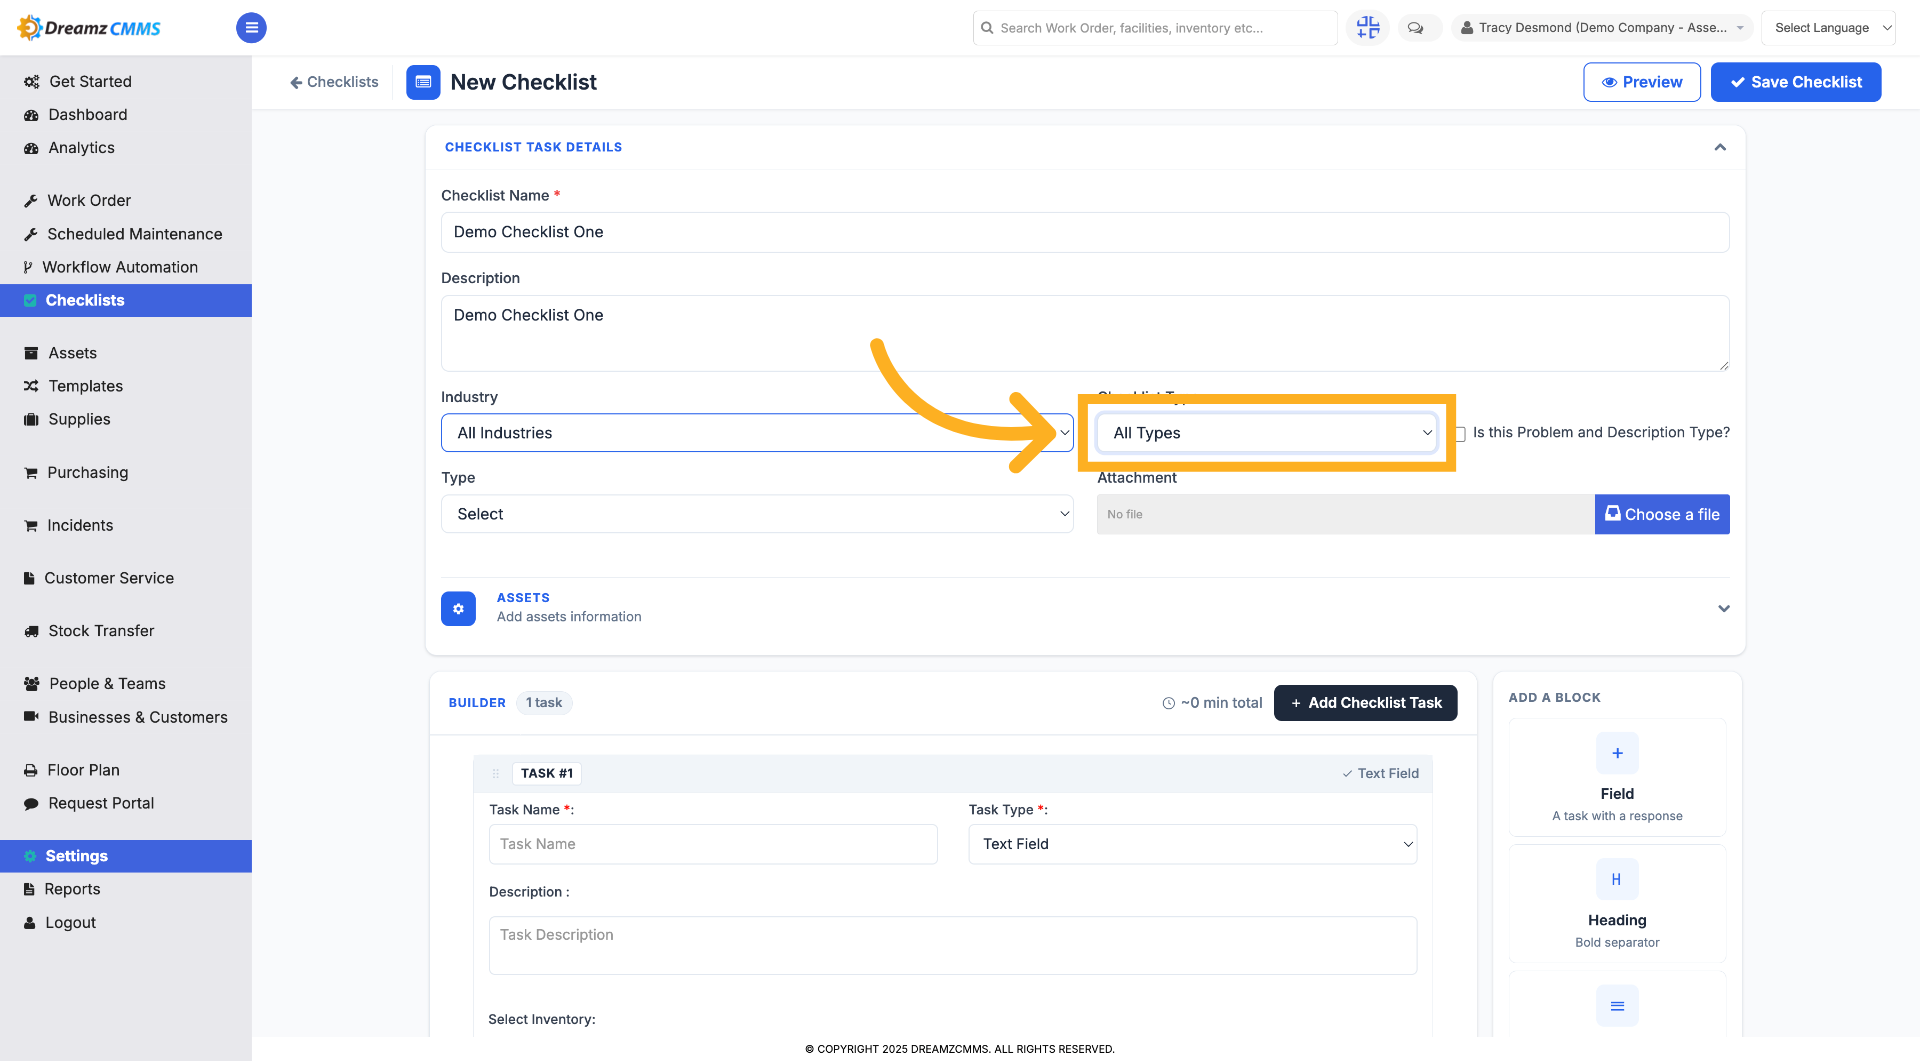
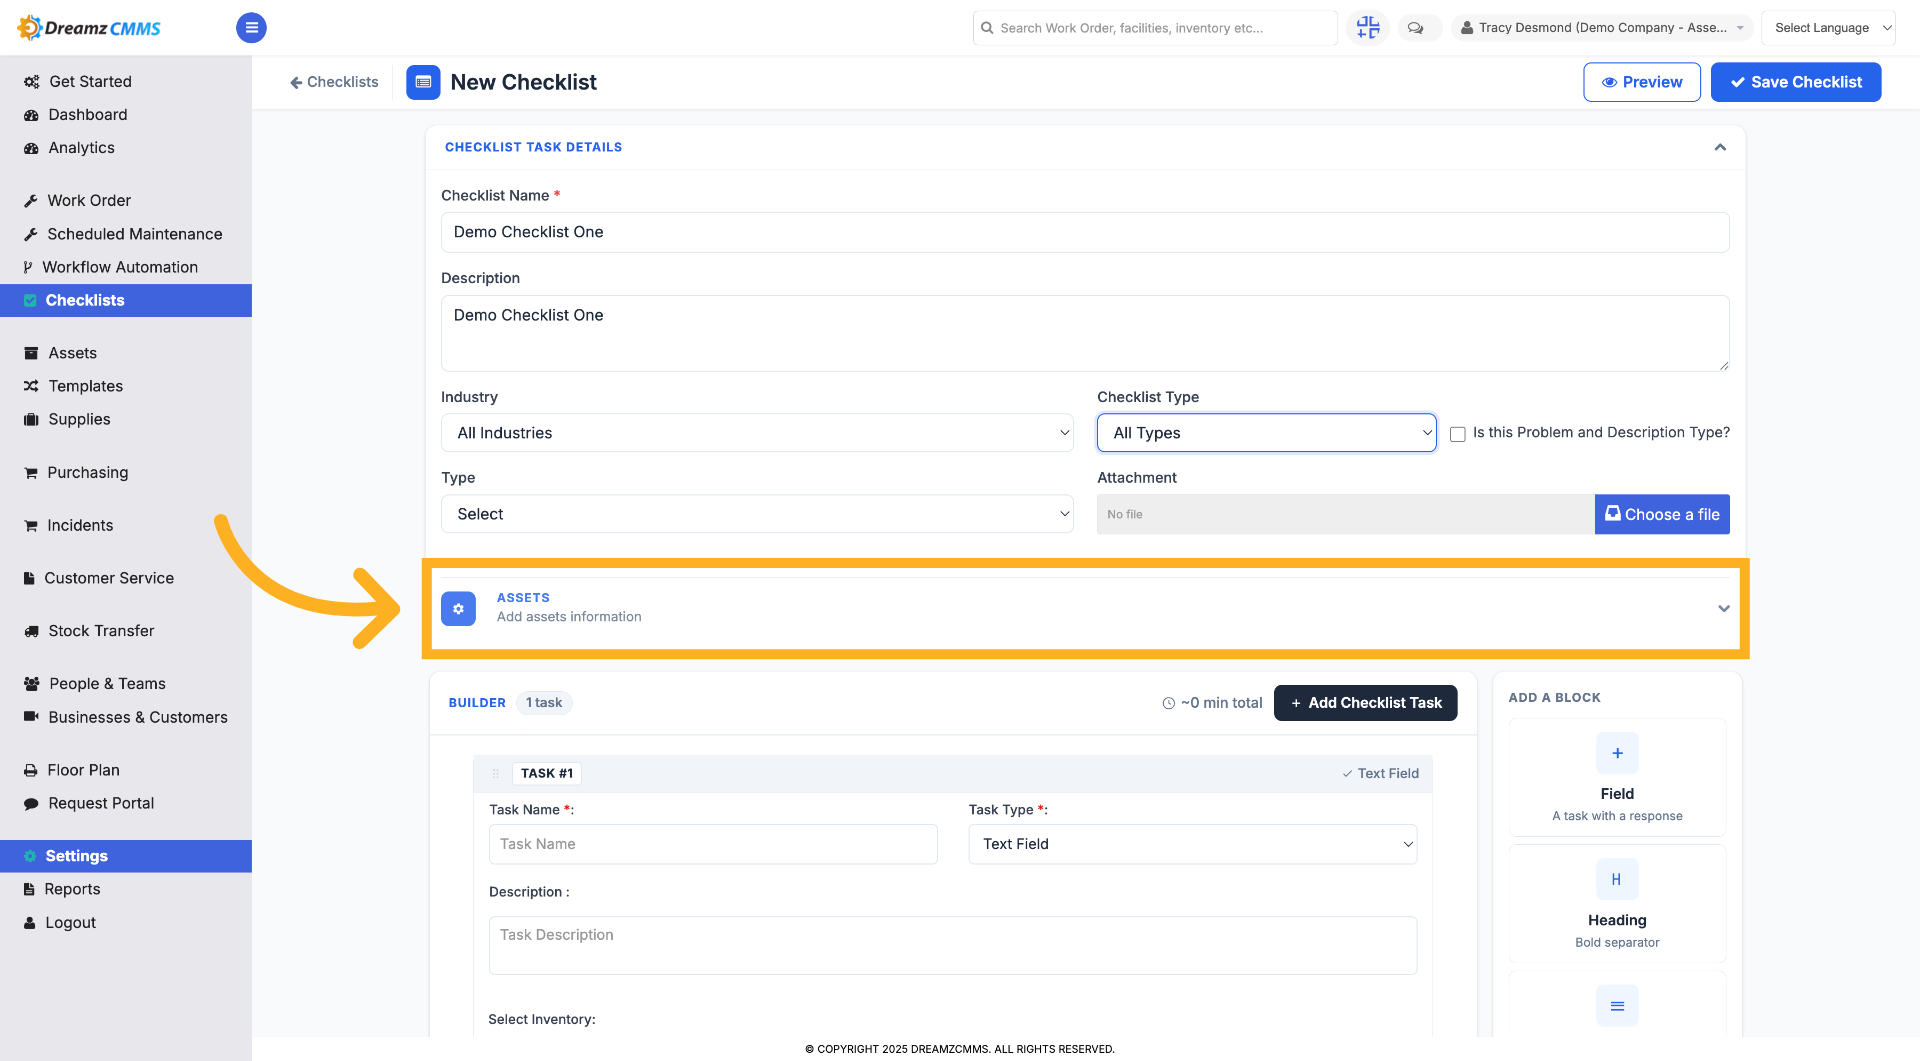
Step 6 – Access Assets Section
Click ASSETS to add asset information related to your checklist tasks.
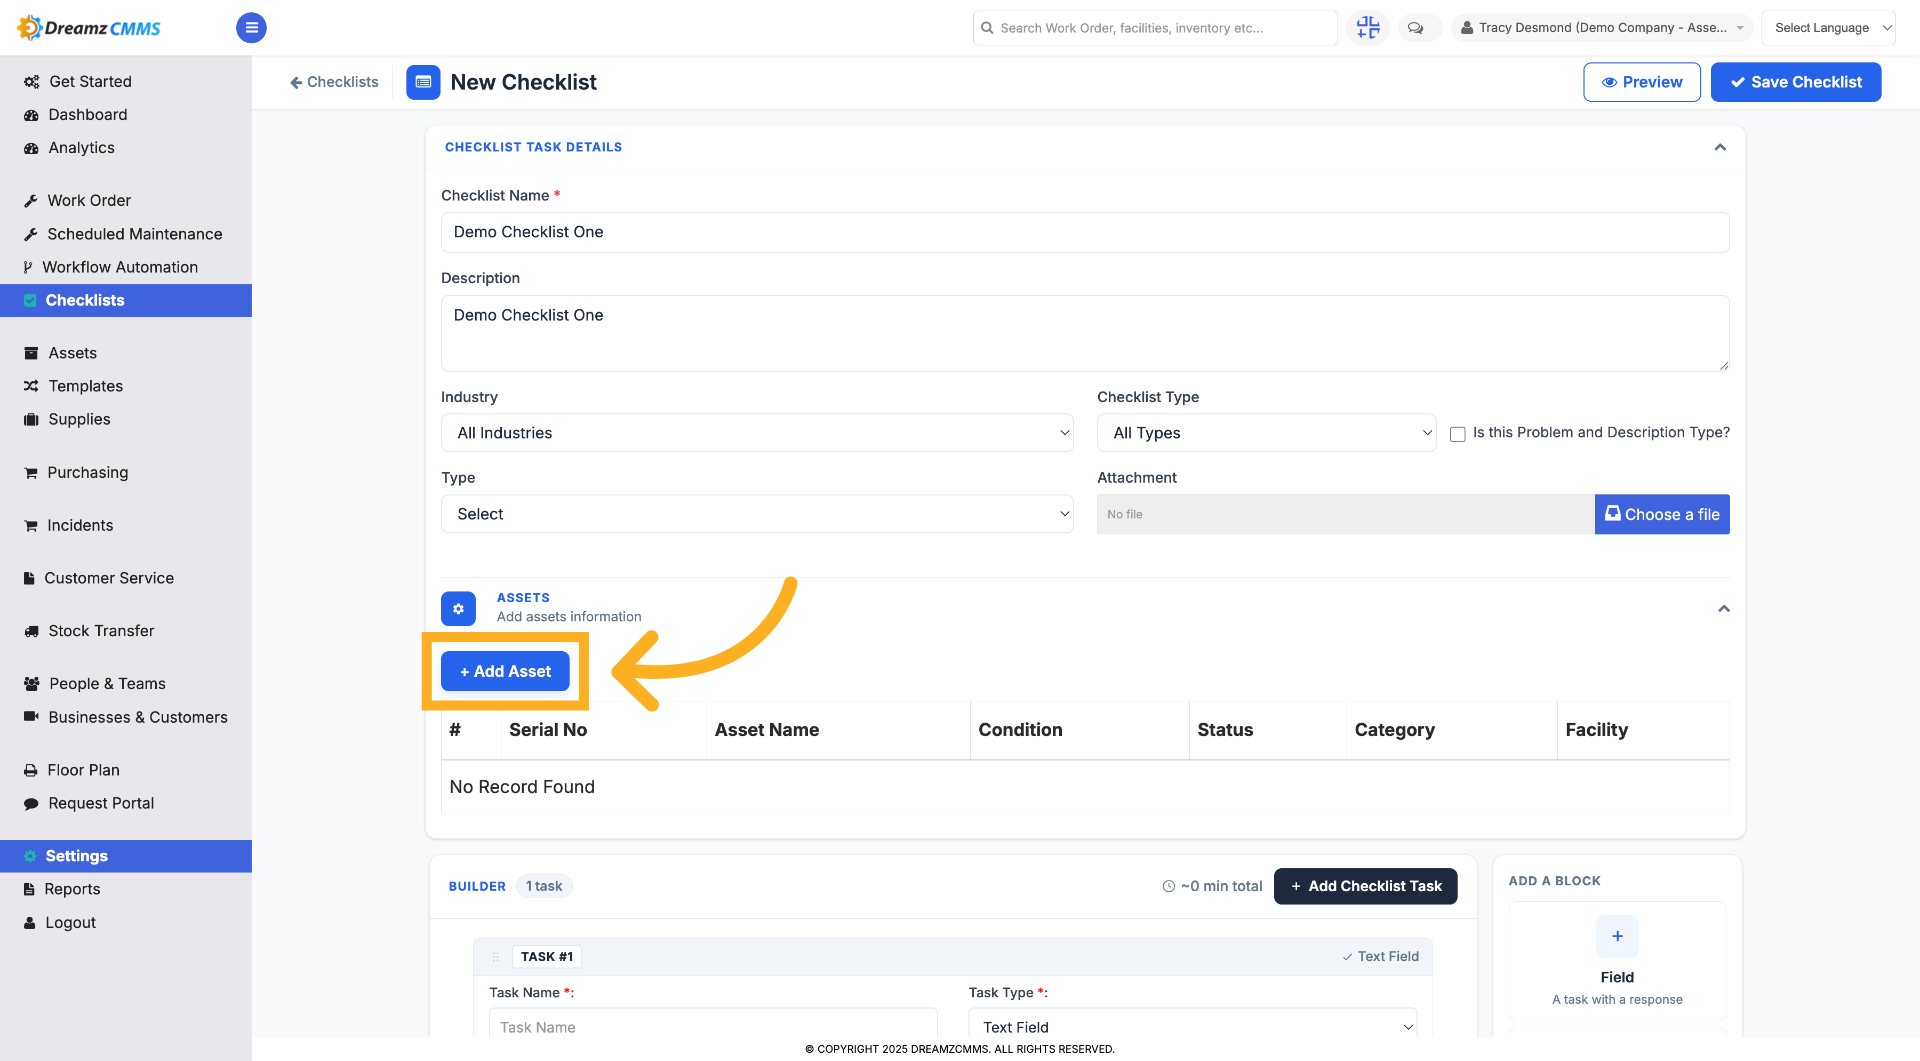
Step 7 – Add New Asset
Click the Add Asset button to include a new asset in your checklist.
Step 8 – Enter Asset ID
Enter the asset ID number to identify the asset within your checklist.
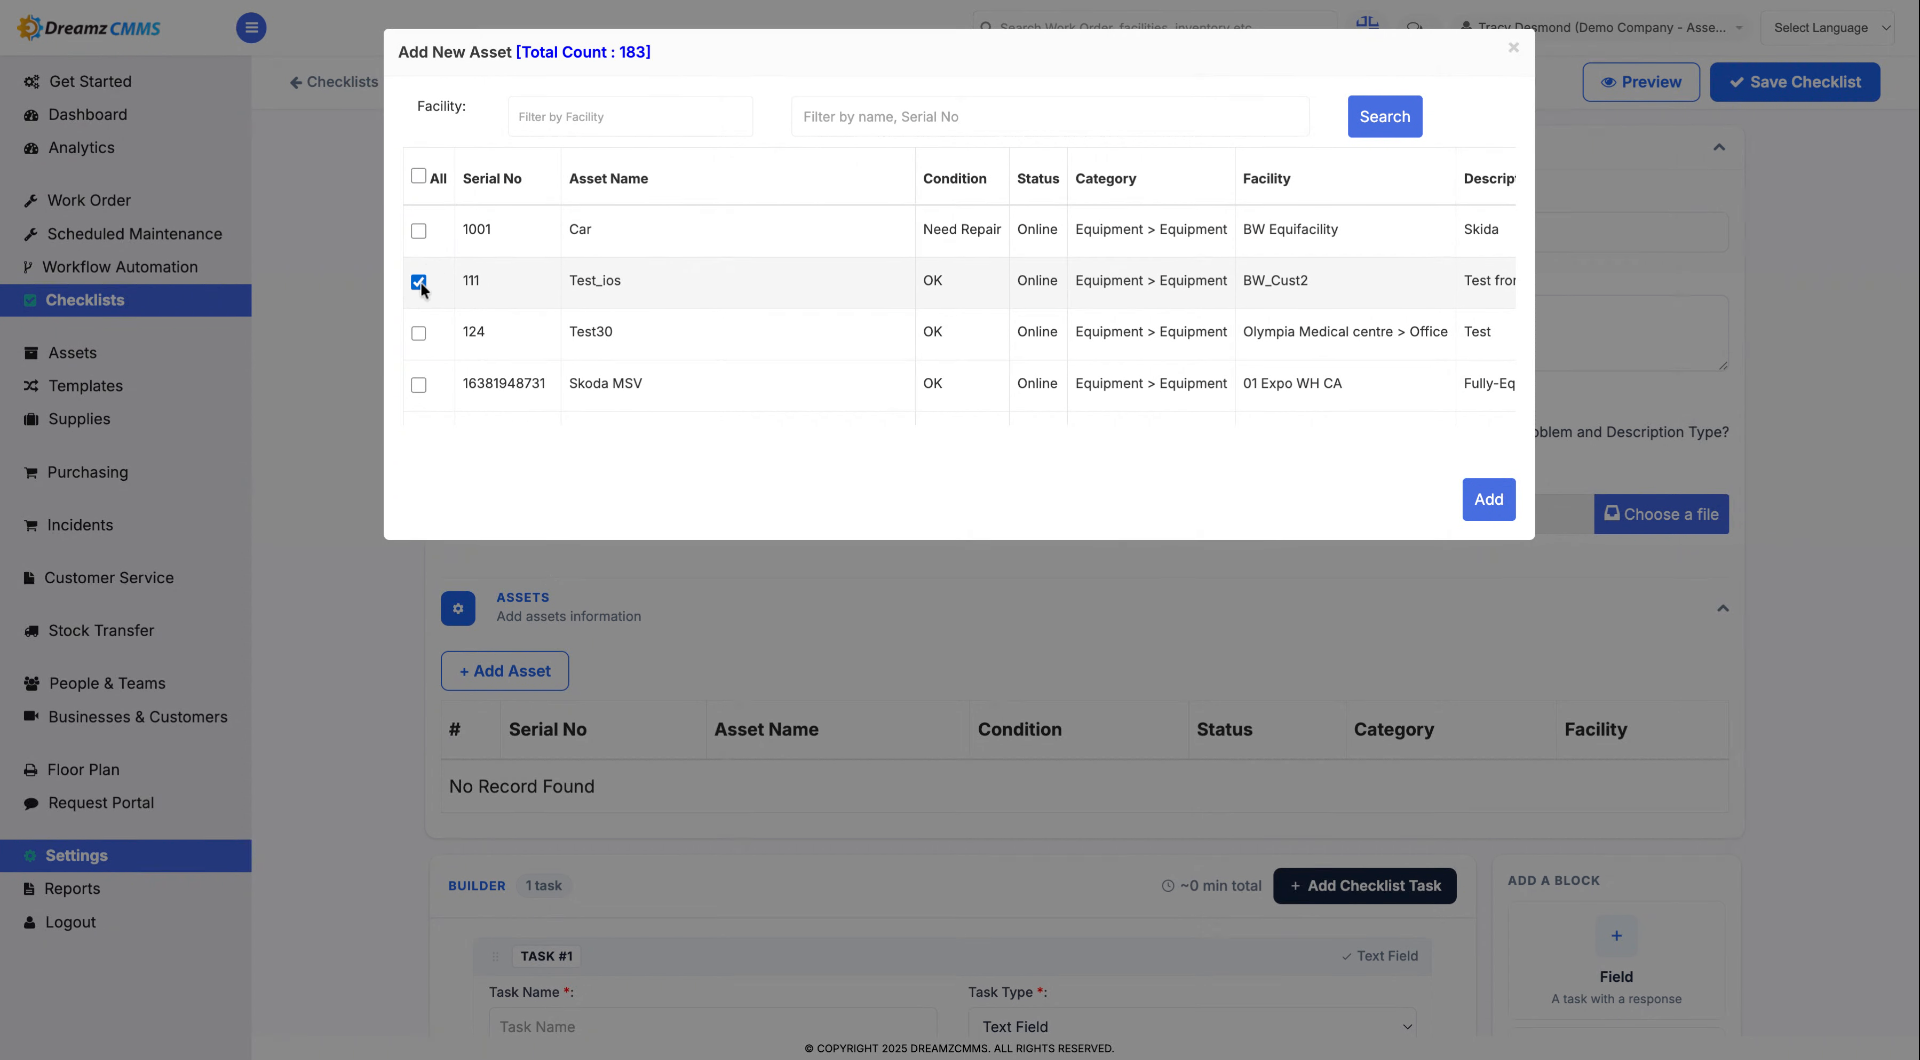
Step 9 – Enter Additional Asset ID
Enter another asset ID number to add multiple assets to your checklist.
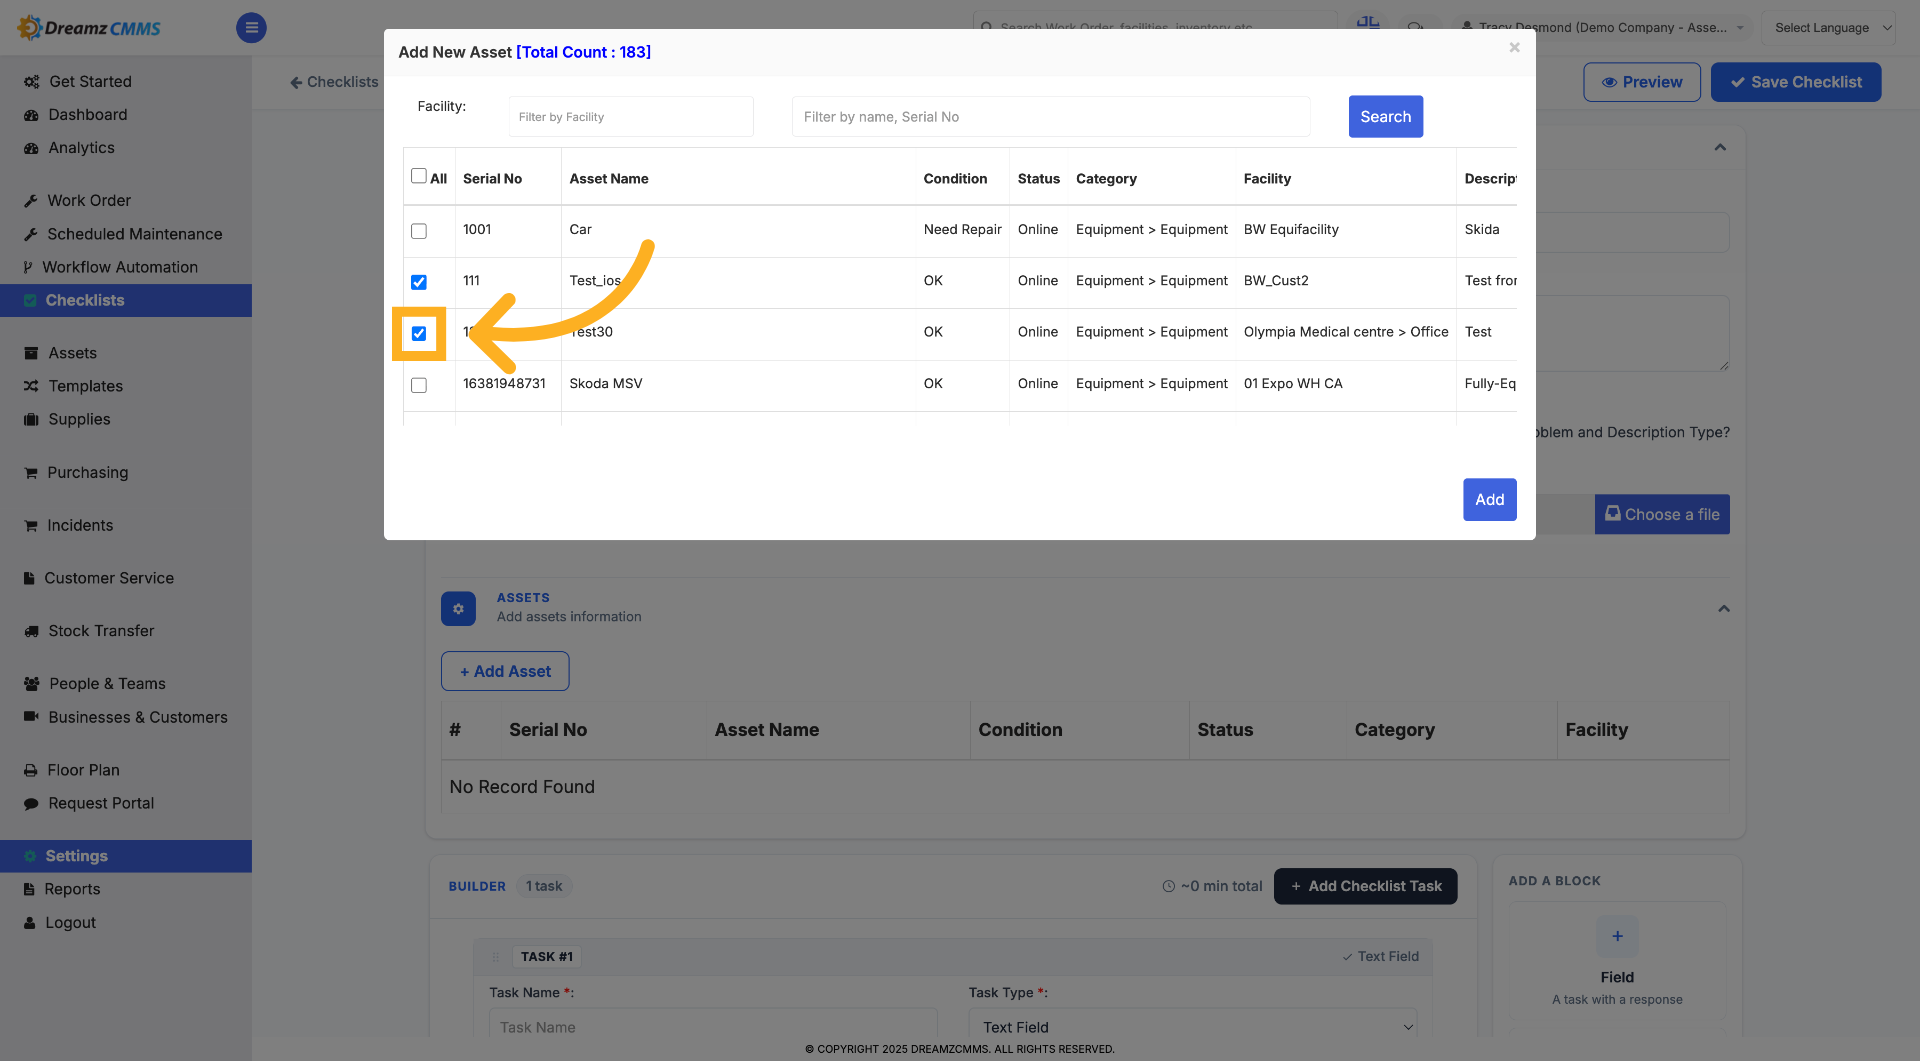
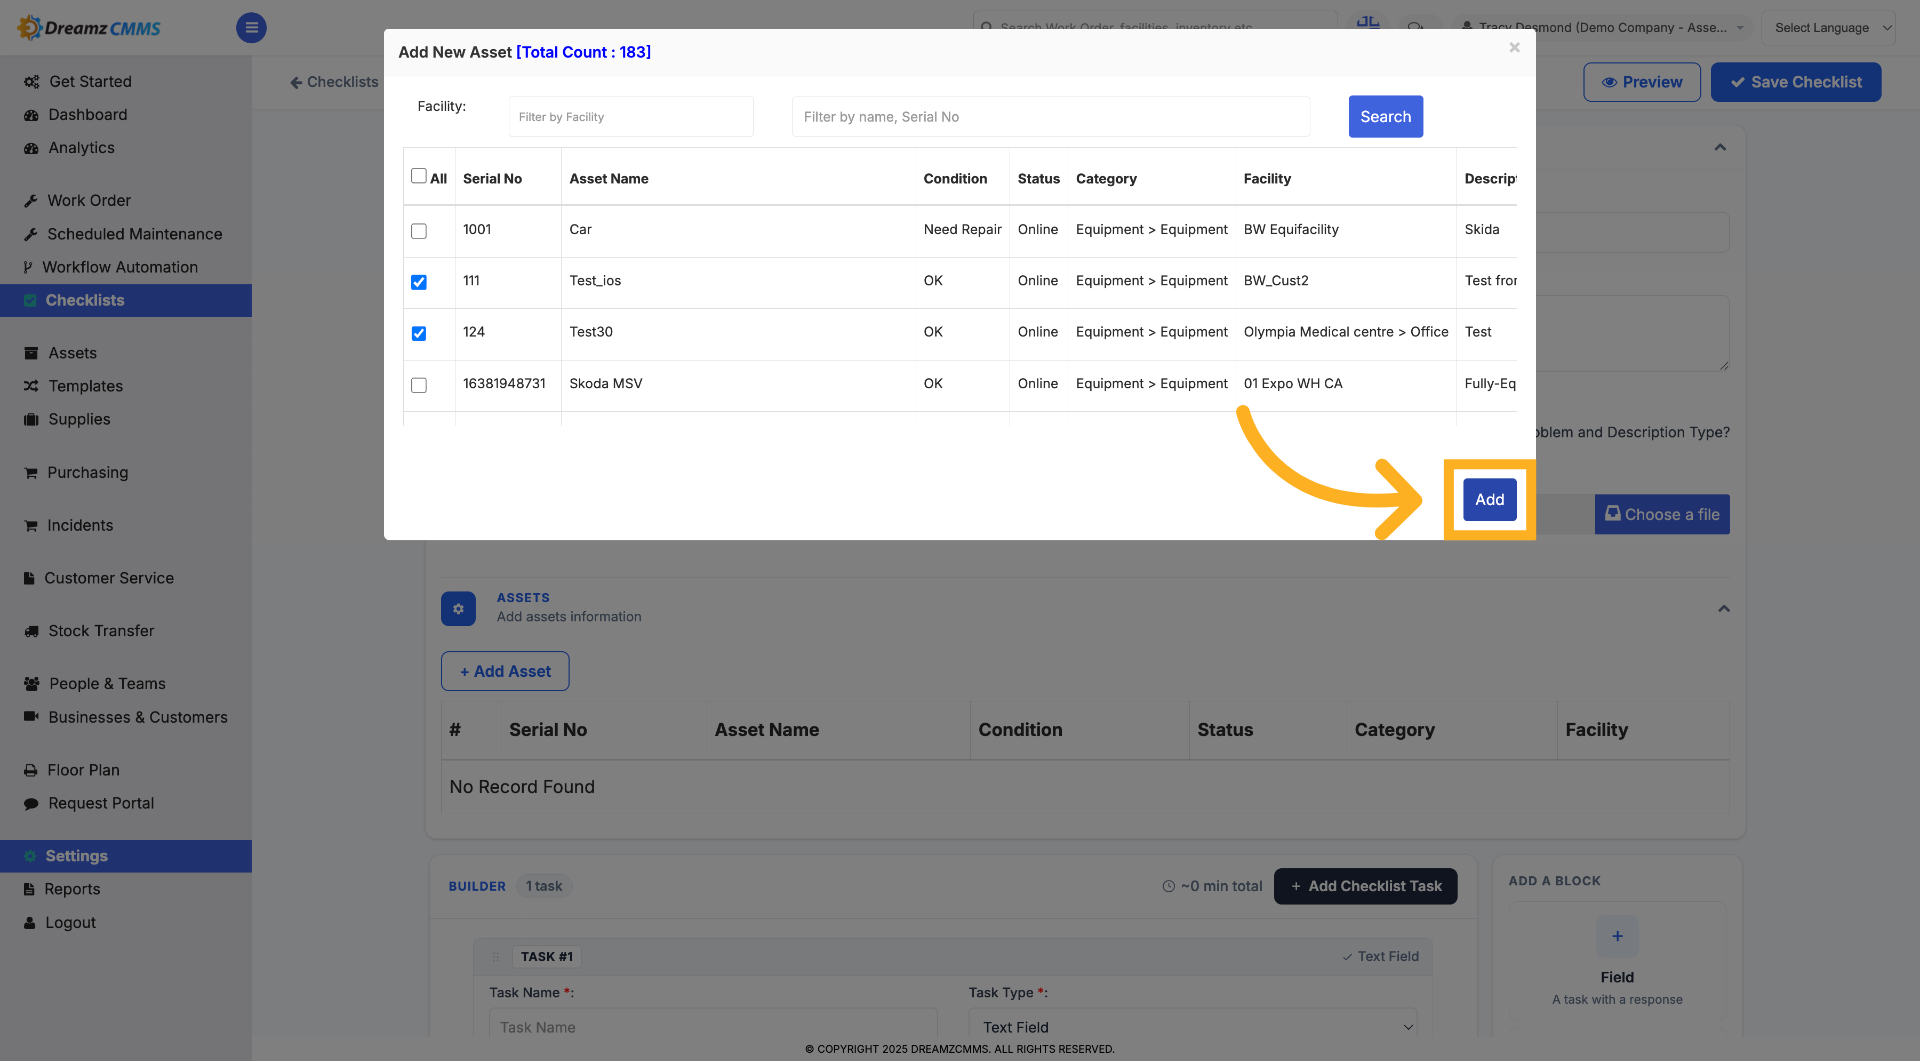
Step 10 – Confirm Asset Addition
Click Add to confirm and include the selected assets in your checklist.
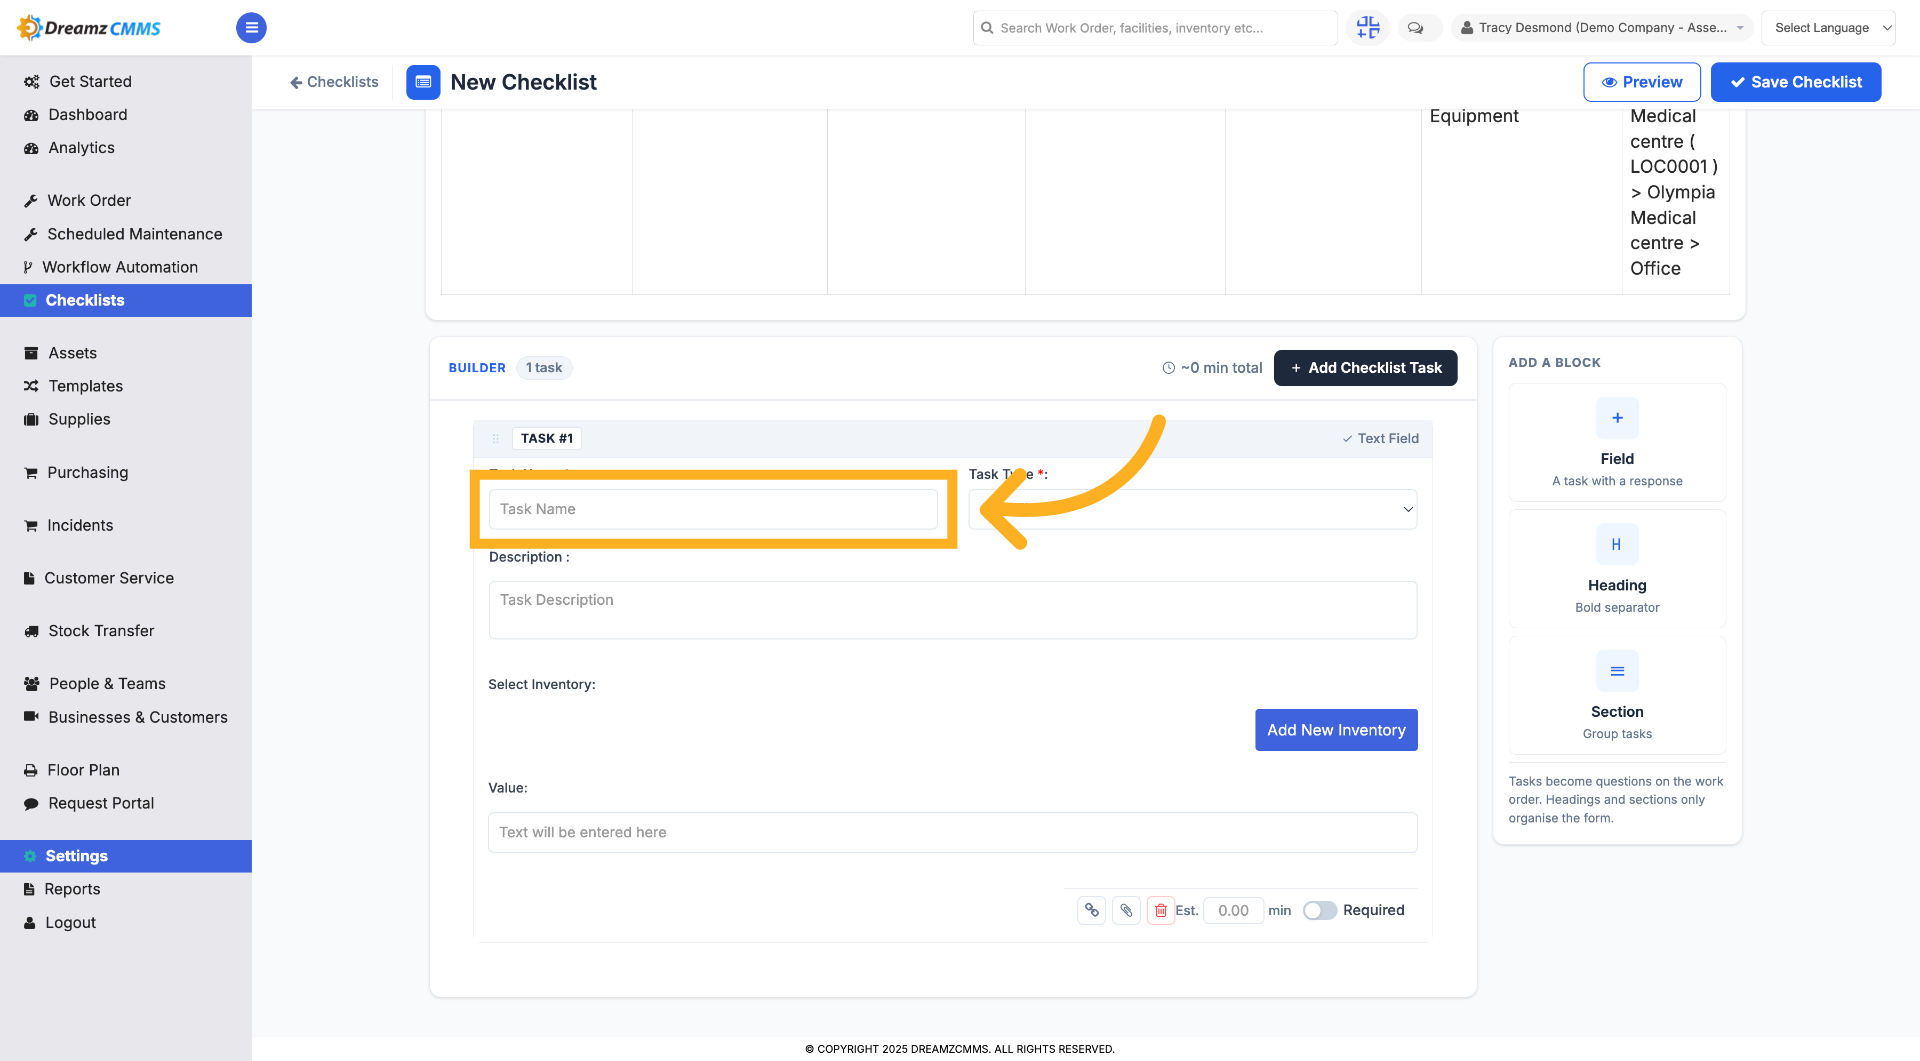
Step 11 – Select Task Name Field
Click the Task Name field to add a task associated with the selected assets.
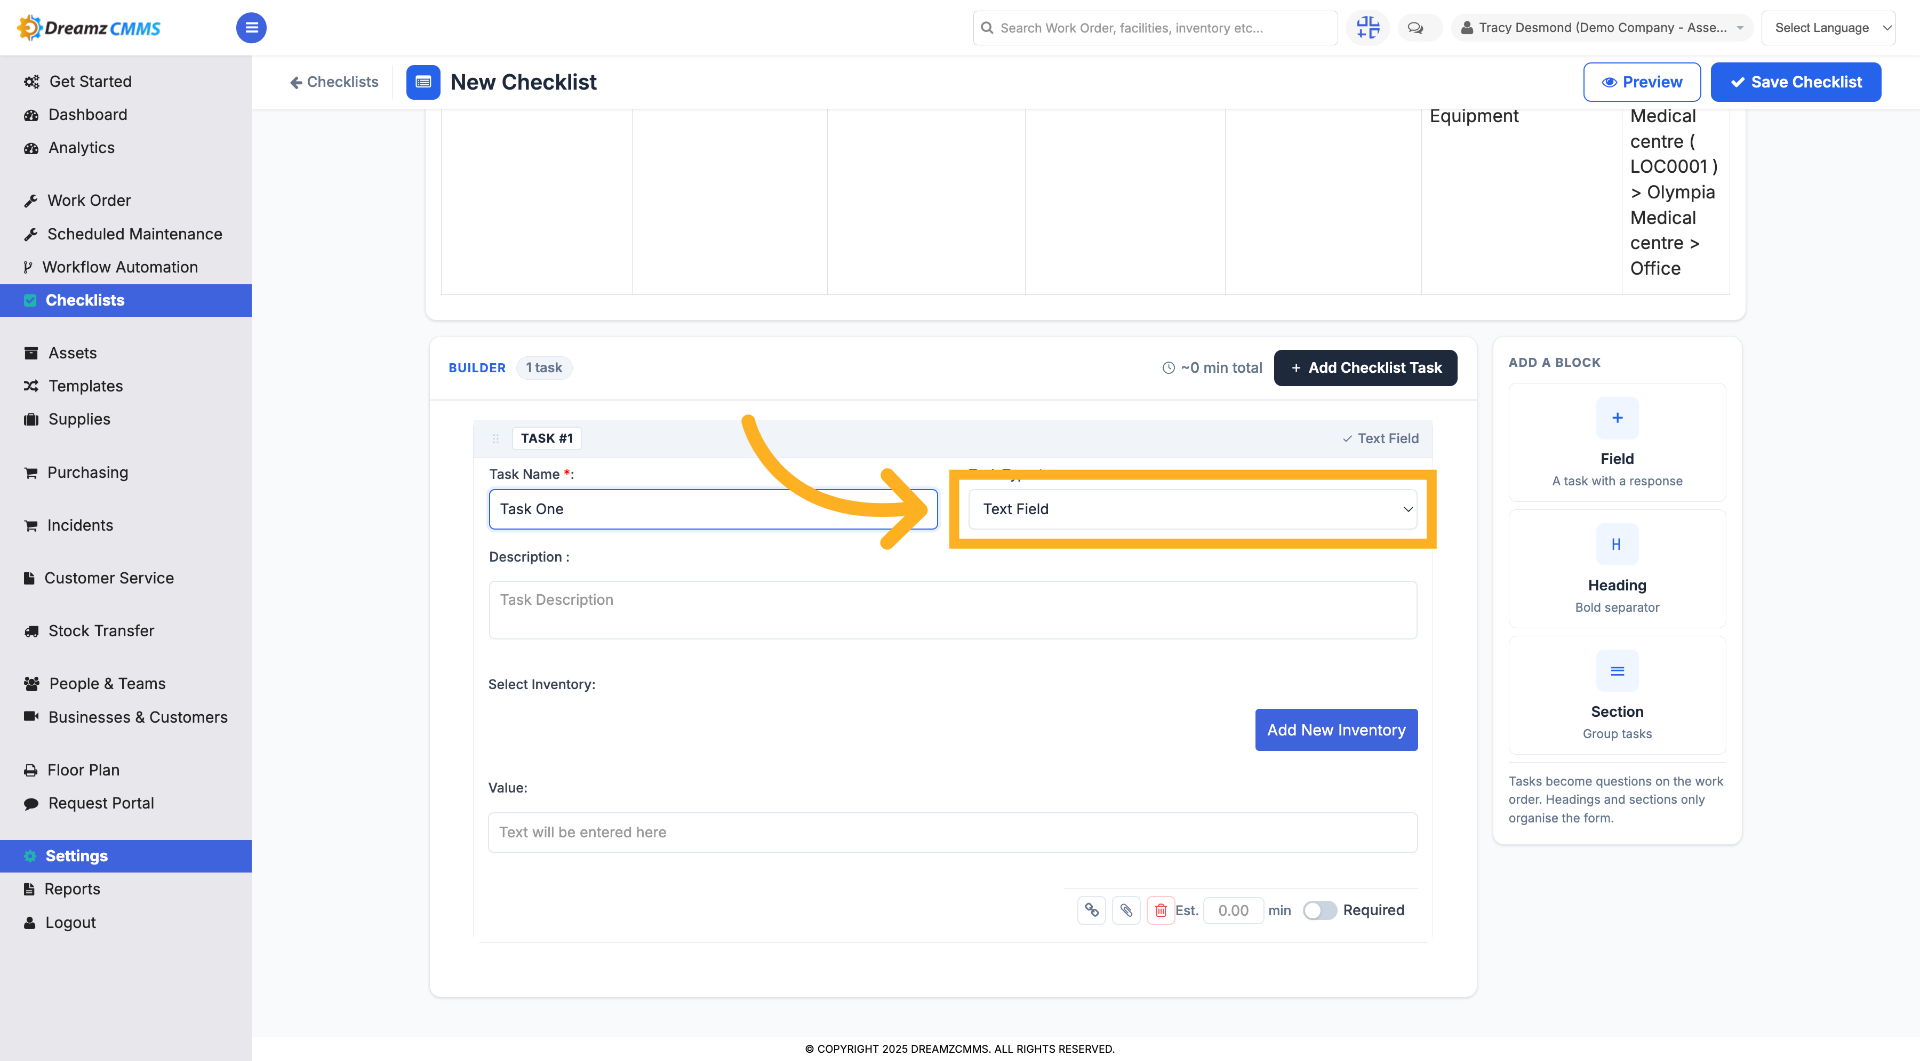
Step 12 – Choose Task Input Type
Click to select the input type for the task, such as Checkbox, Text Field, Meter Reading, Yes/No/N/A, Number Field, Inspection, Multiple Choice, Amount, Checklist, Picture/File Add, Signature Block, or Date.
Step 13– Fill Task Input Details
Fill in the details or options for the selected task input type to specify task requirements.
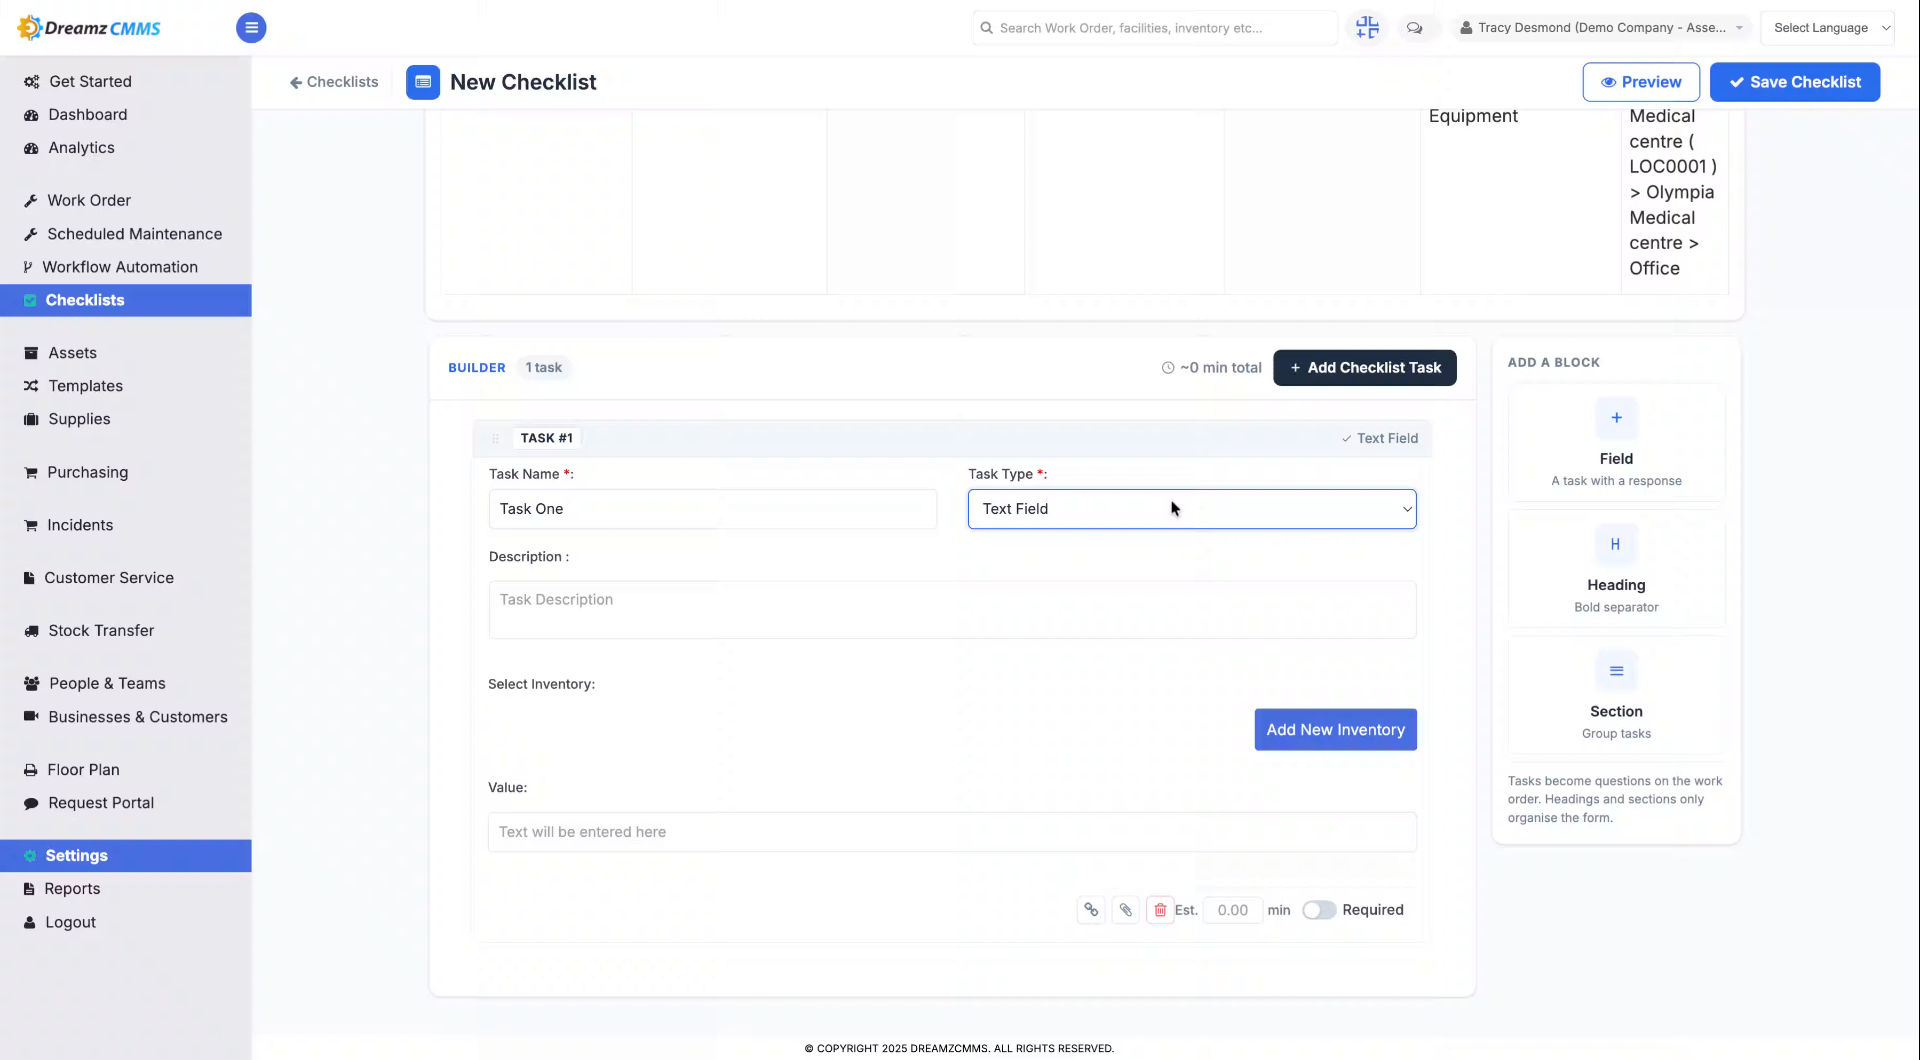
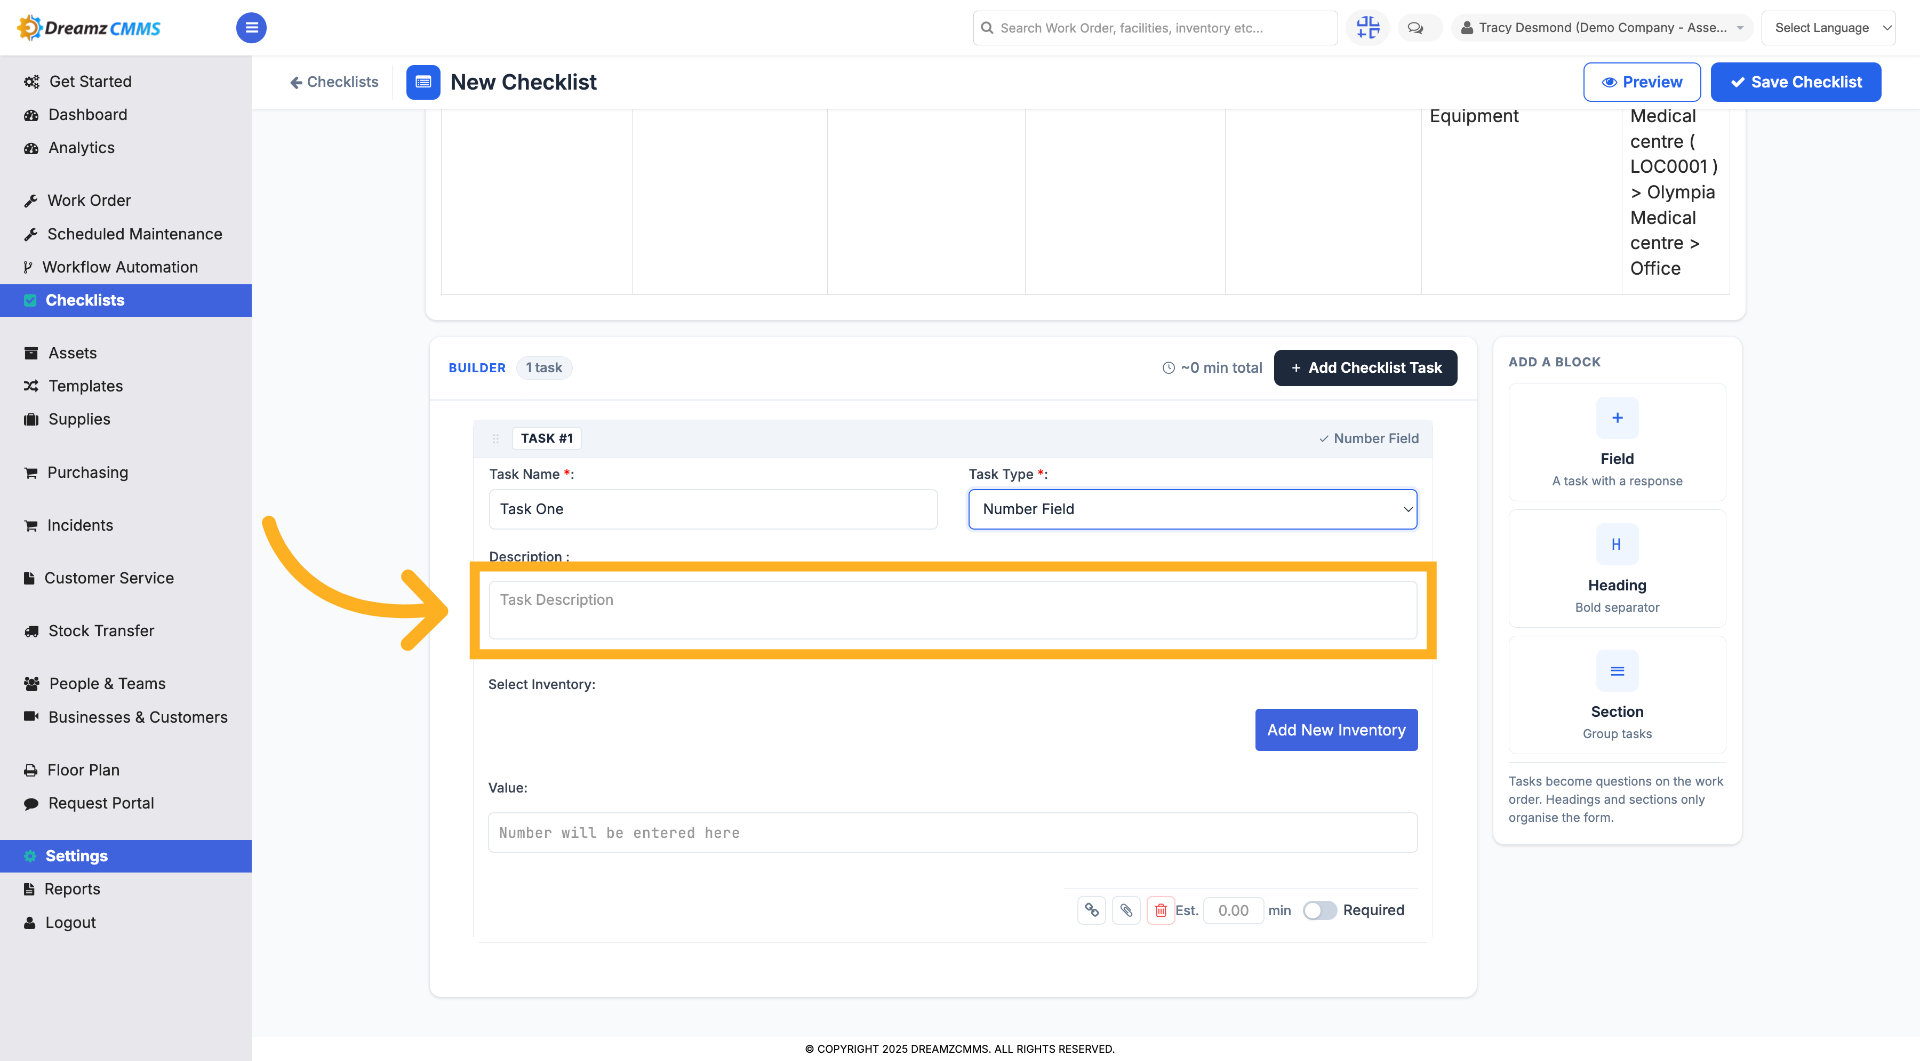
Step 14 – Select Task Description Field
Click the Task Description field to provide additional information about the task.
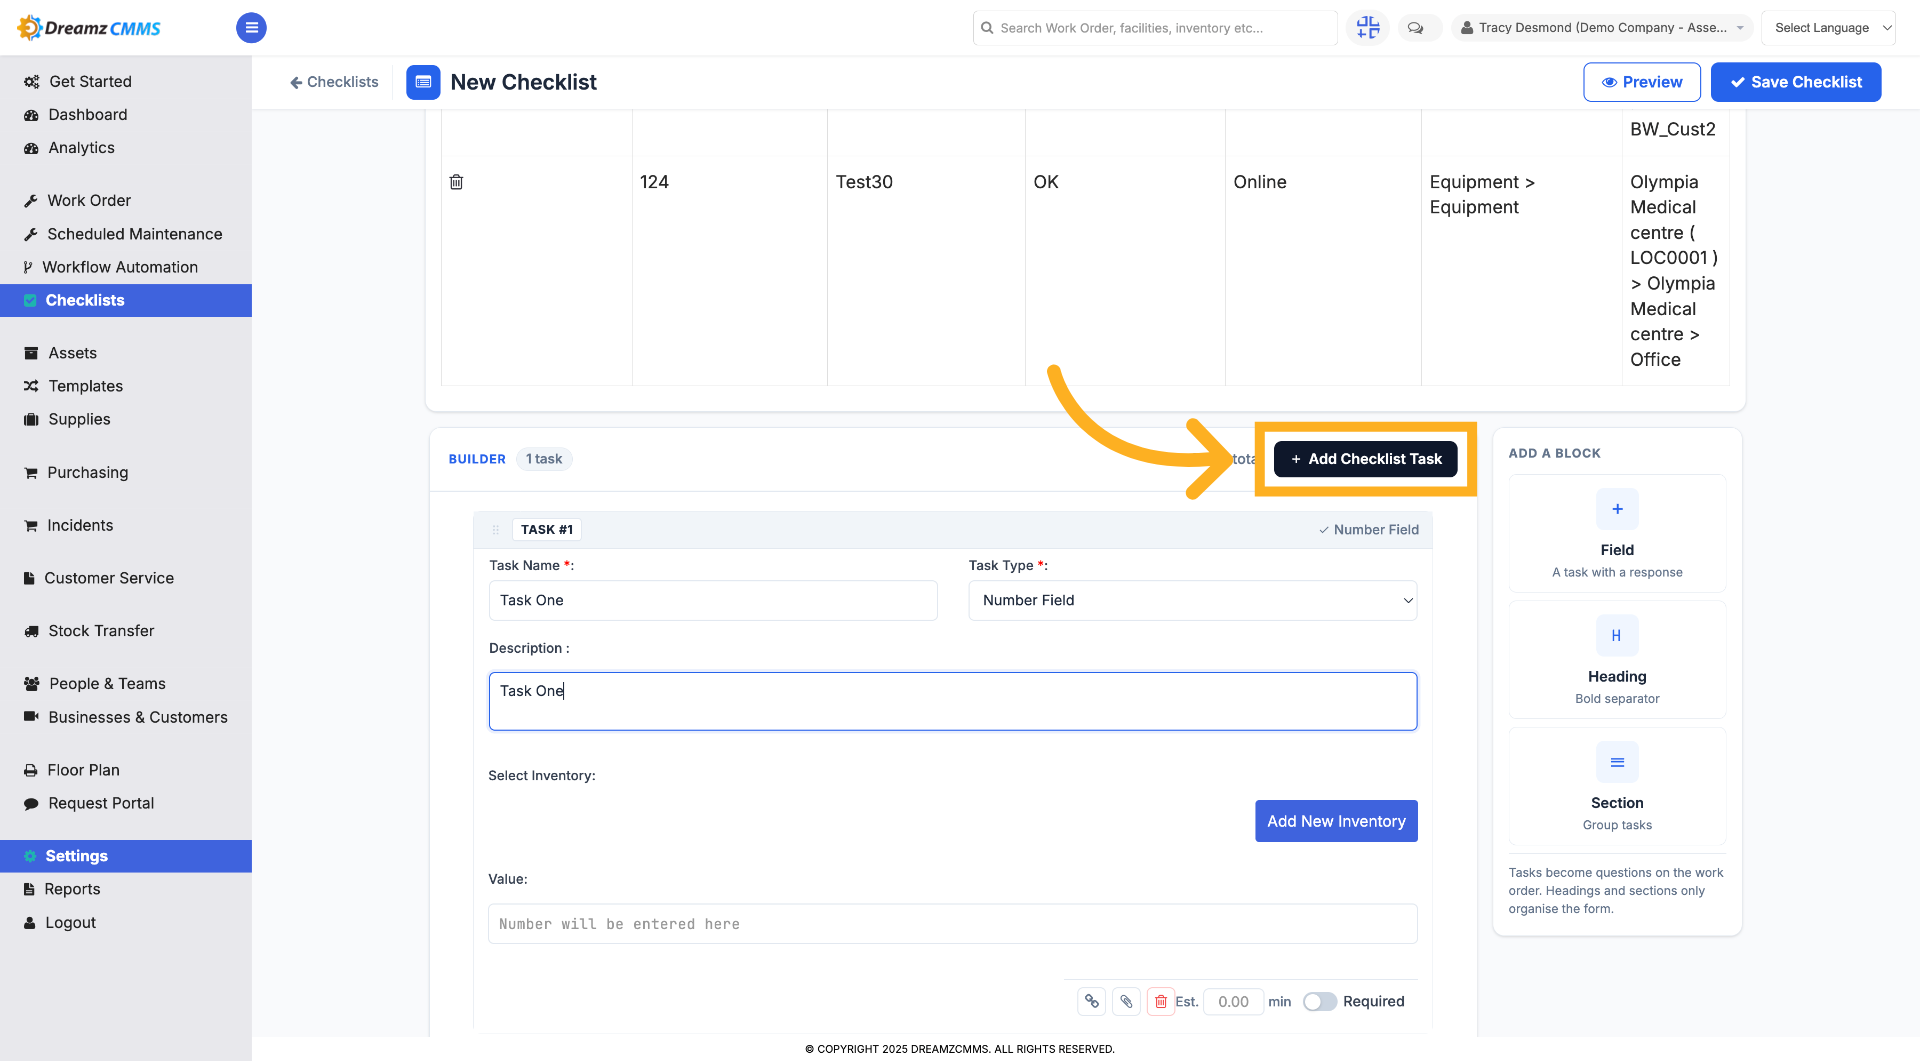
Step 15 – Add Another Checklist Task
Click Add Checklist Task to include more tasks in your checklist.
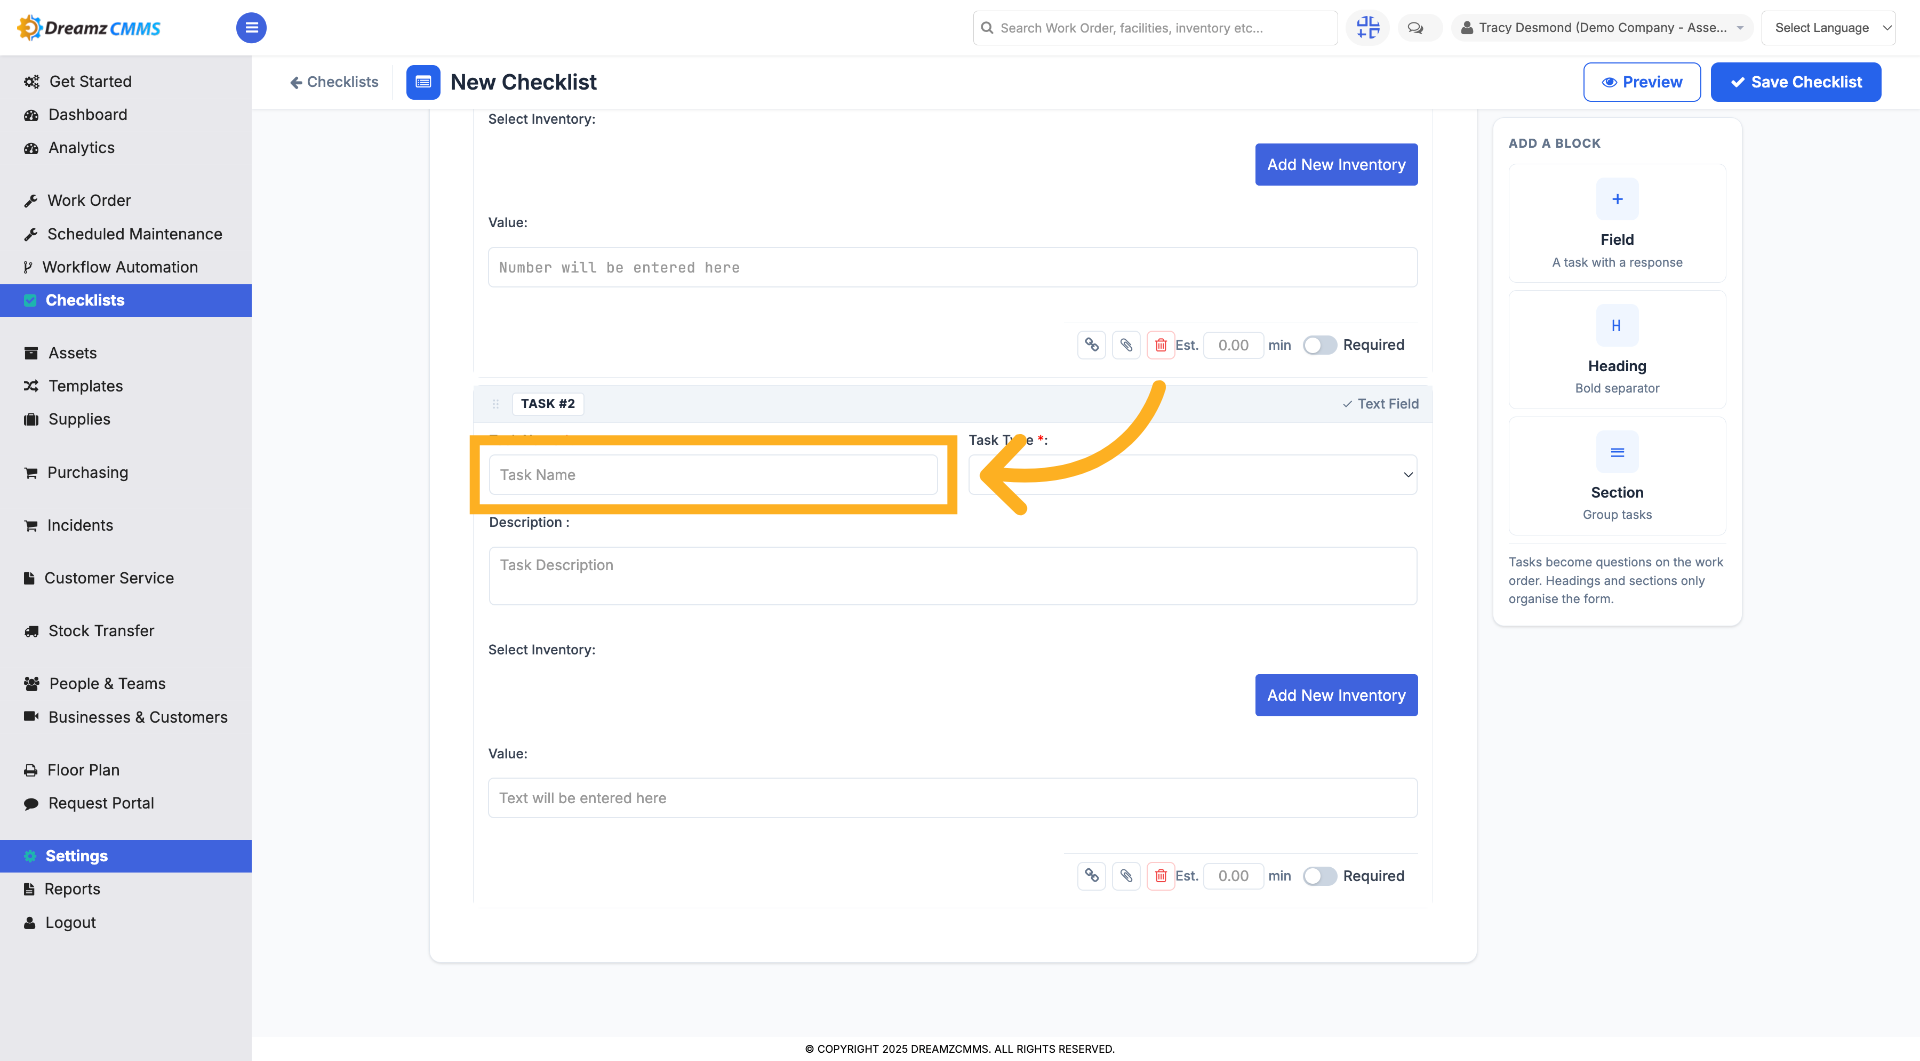
Step 16 – Select Next Task Name Field
Click the Task Name field to add the next task to your checklist.
Step 17 – Choose Next Task Input Type
Click to select the input type for the next task from the available options.
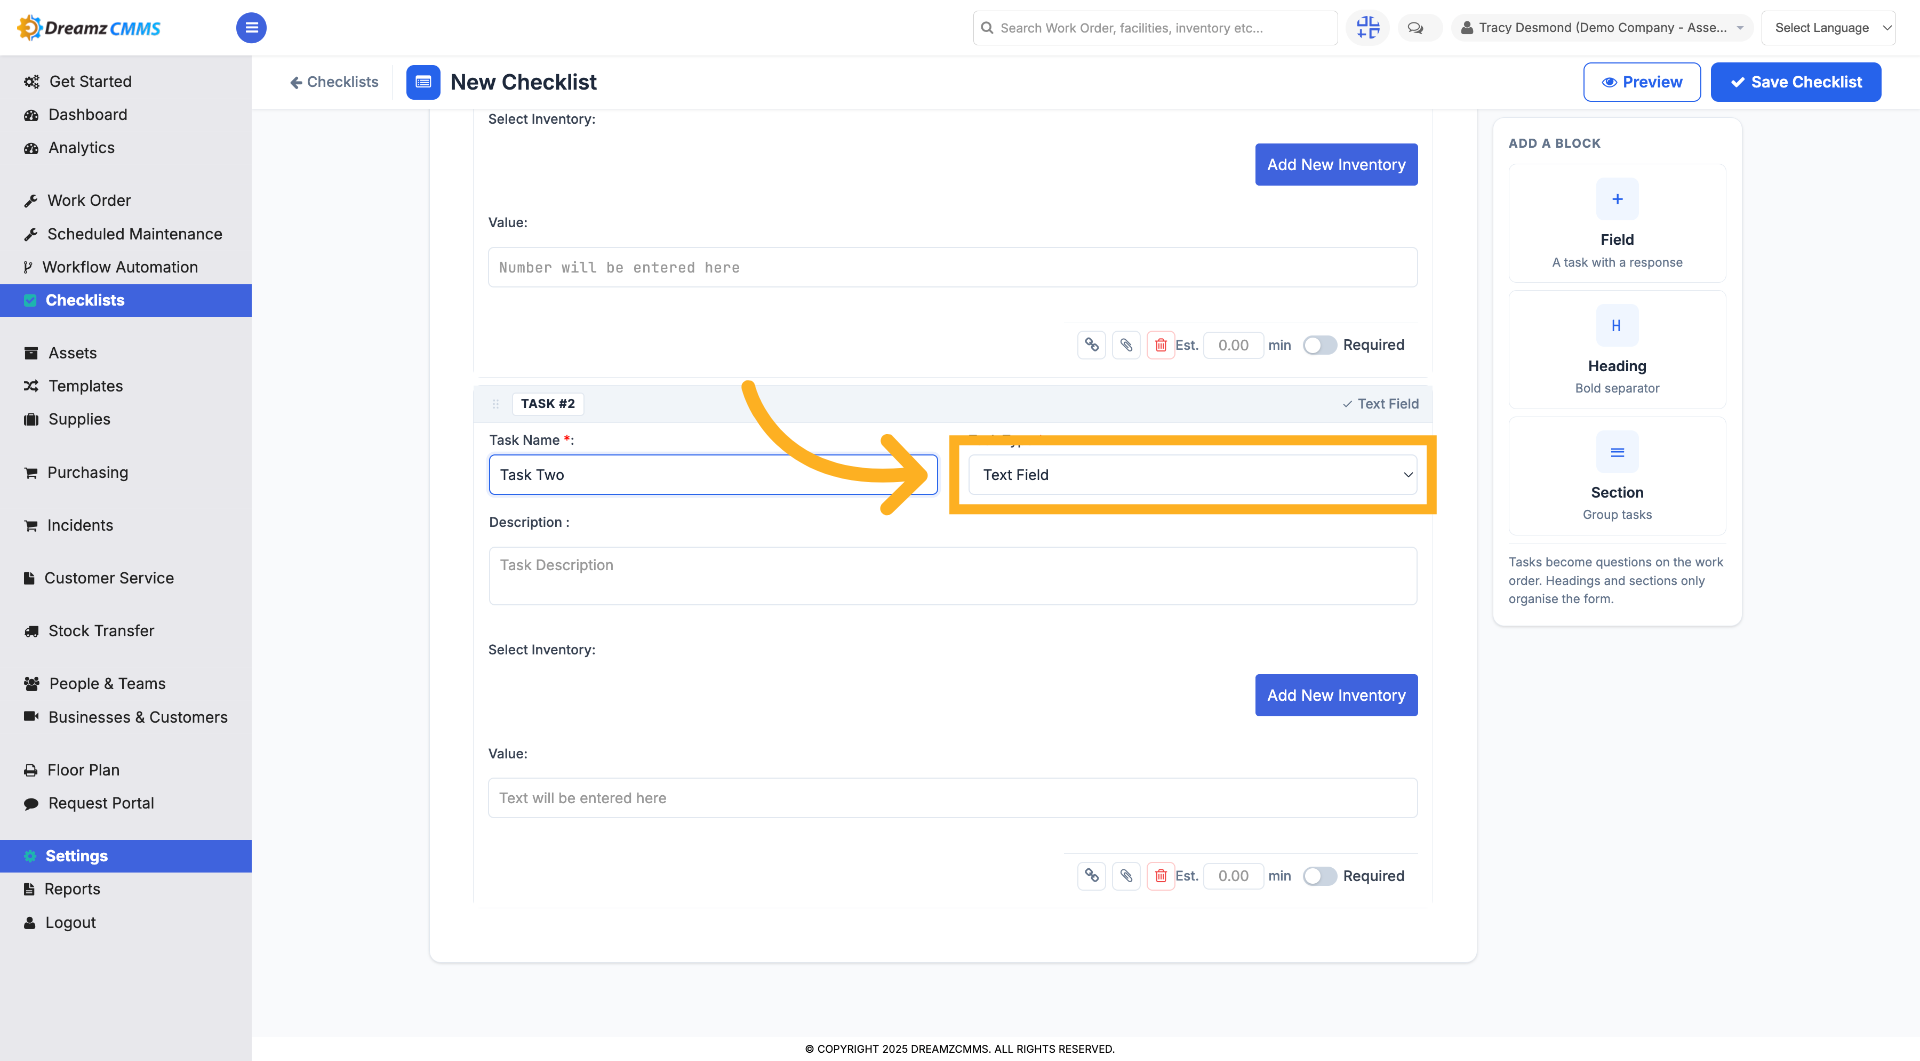
Step 18 – Fill Next Task Input Details
Fill in the necessary details for the next task's input type to define task criteria.
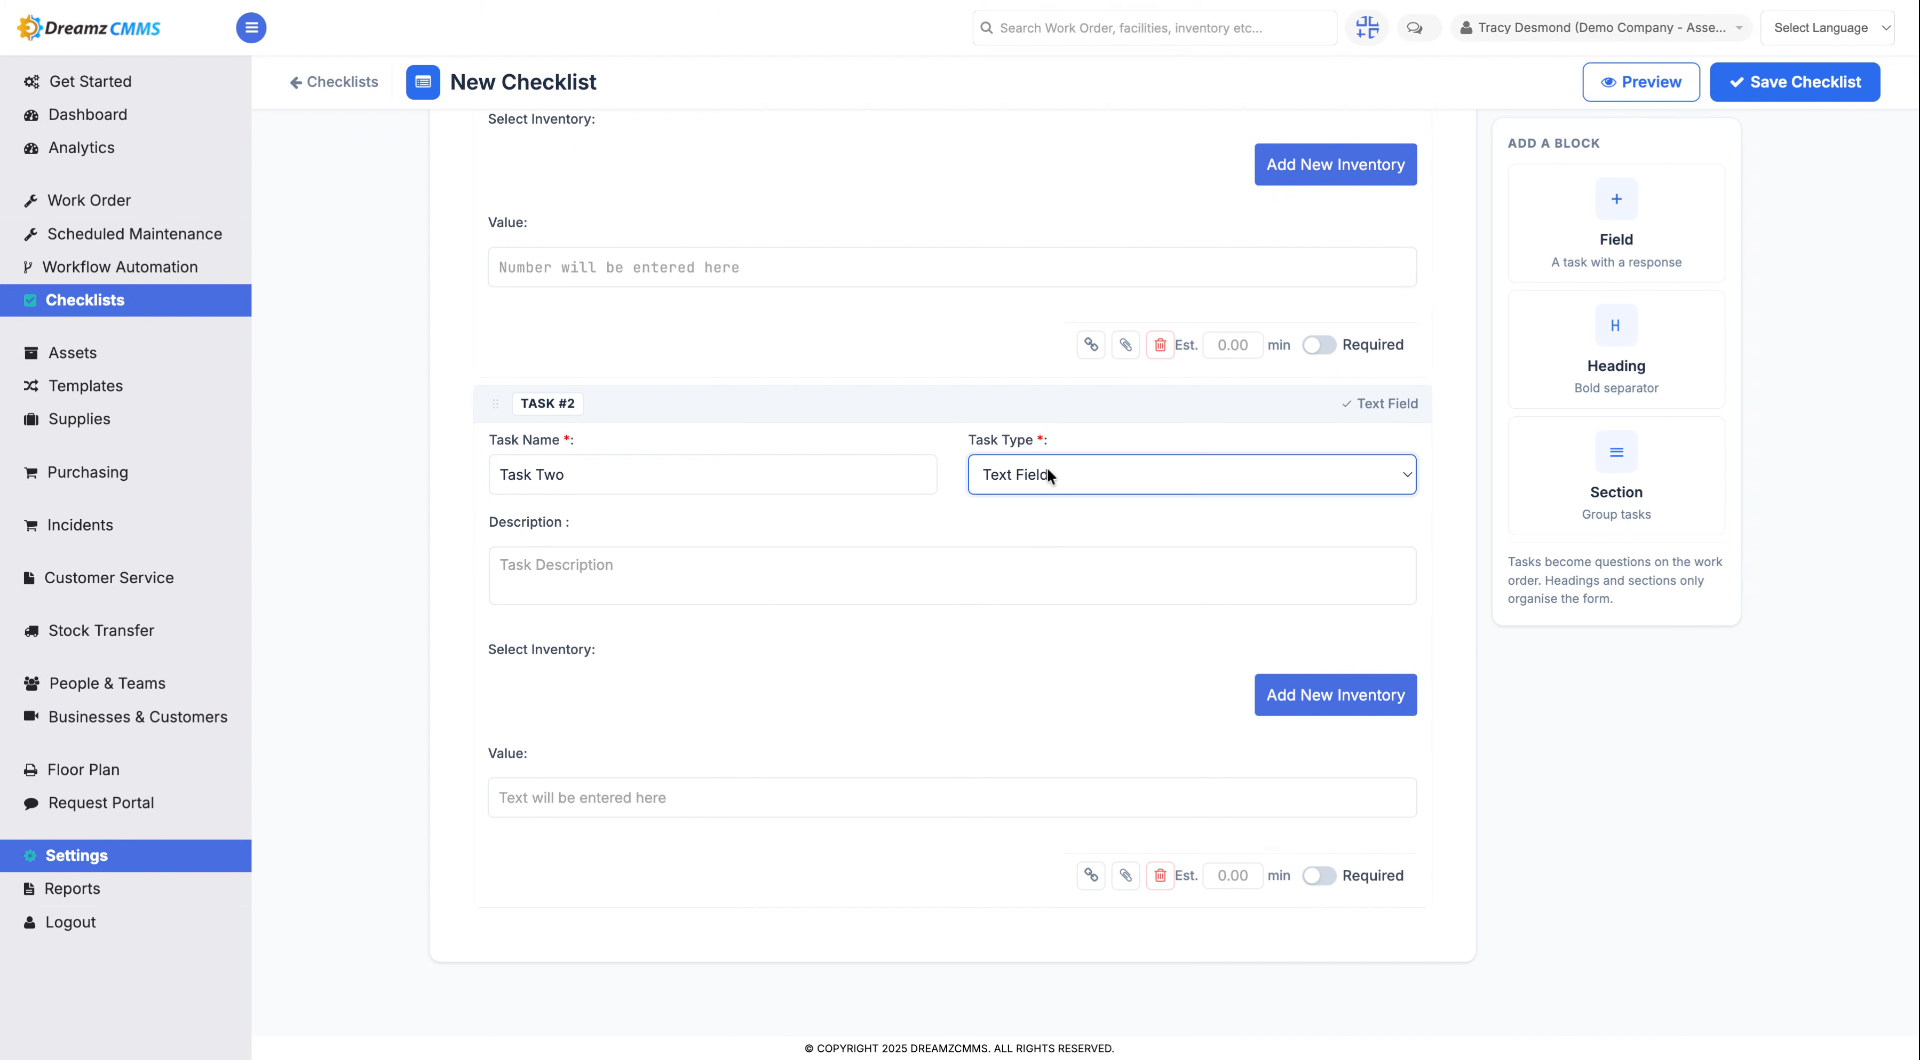
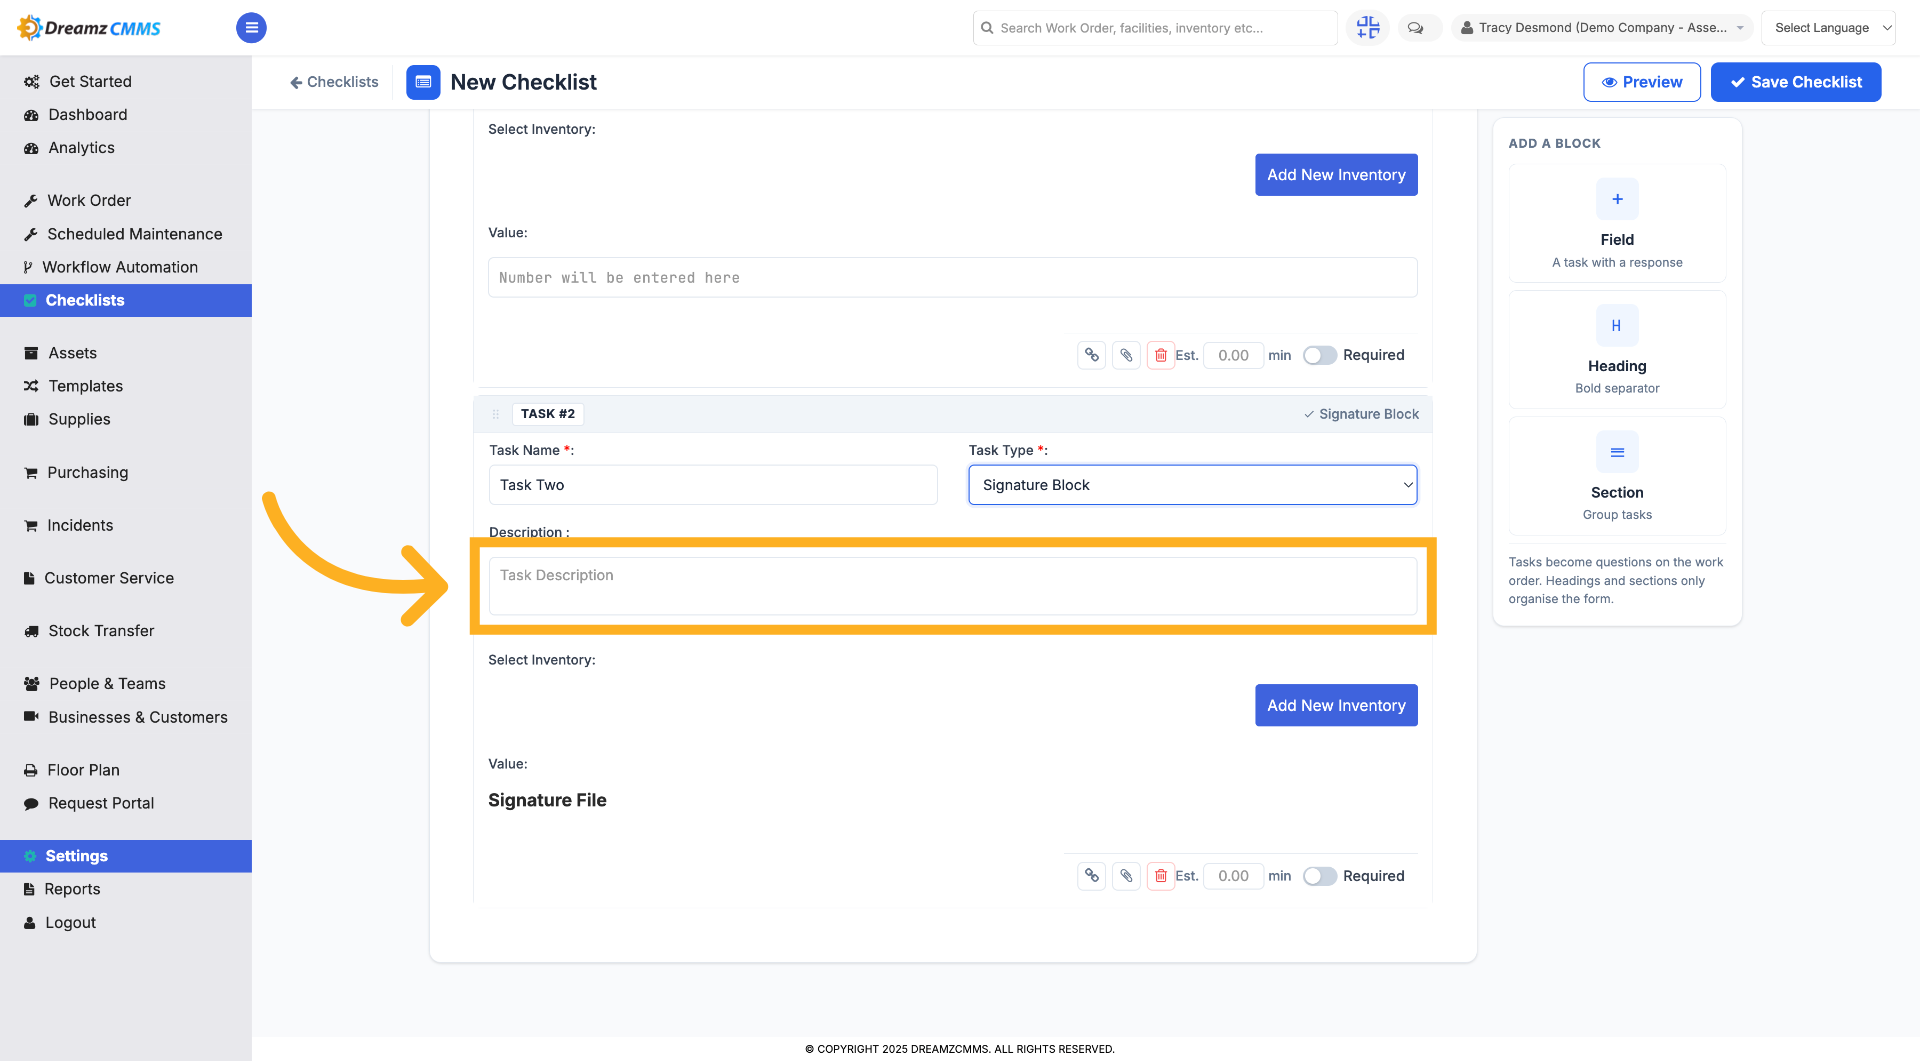
Step 19 – Select Task Description Field
Click the Task Description field to add details for the next task.
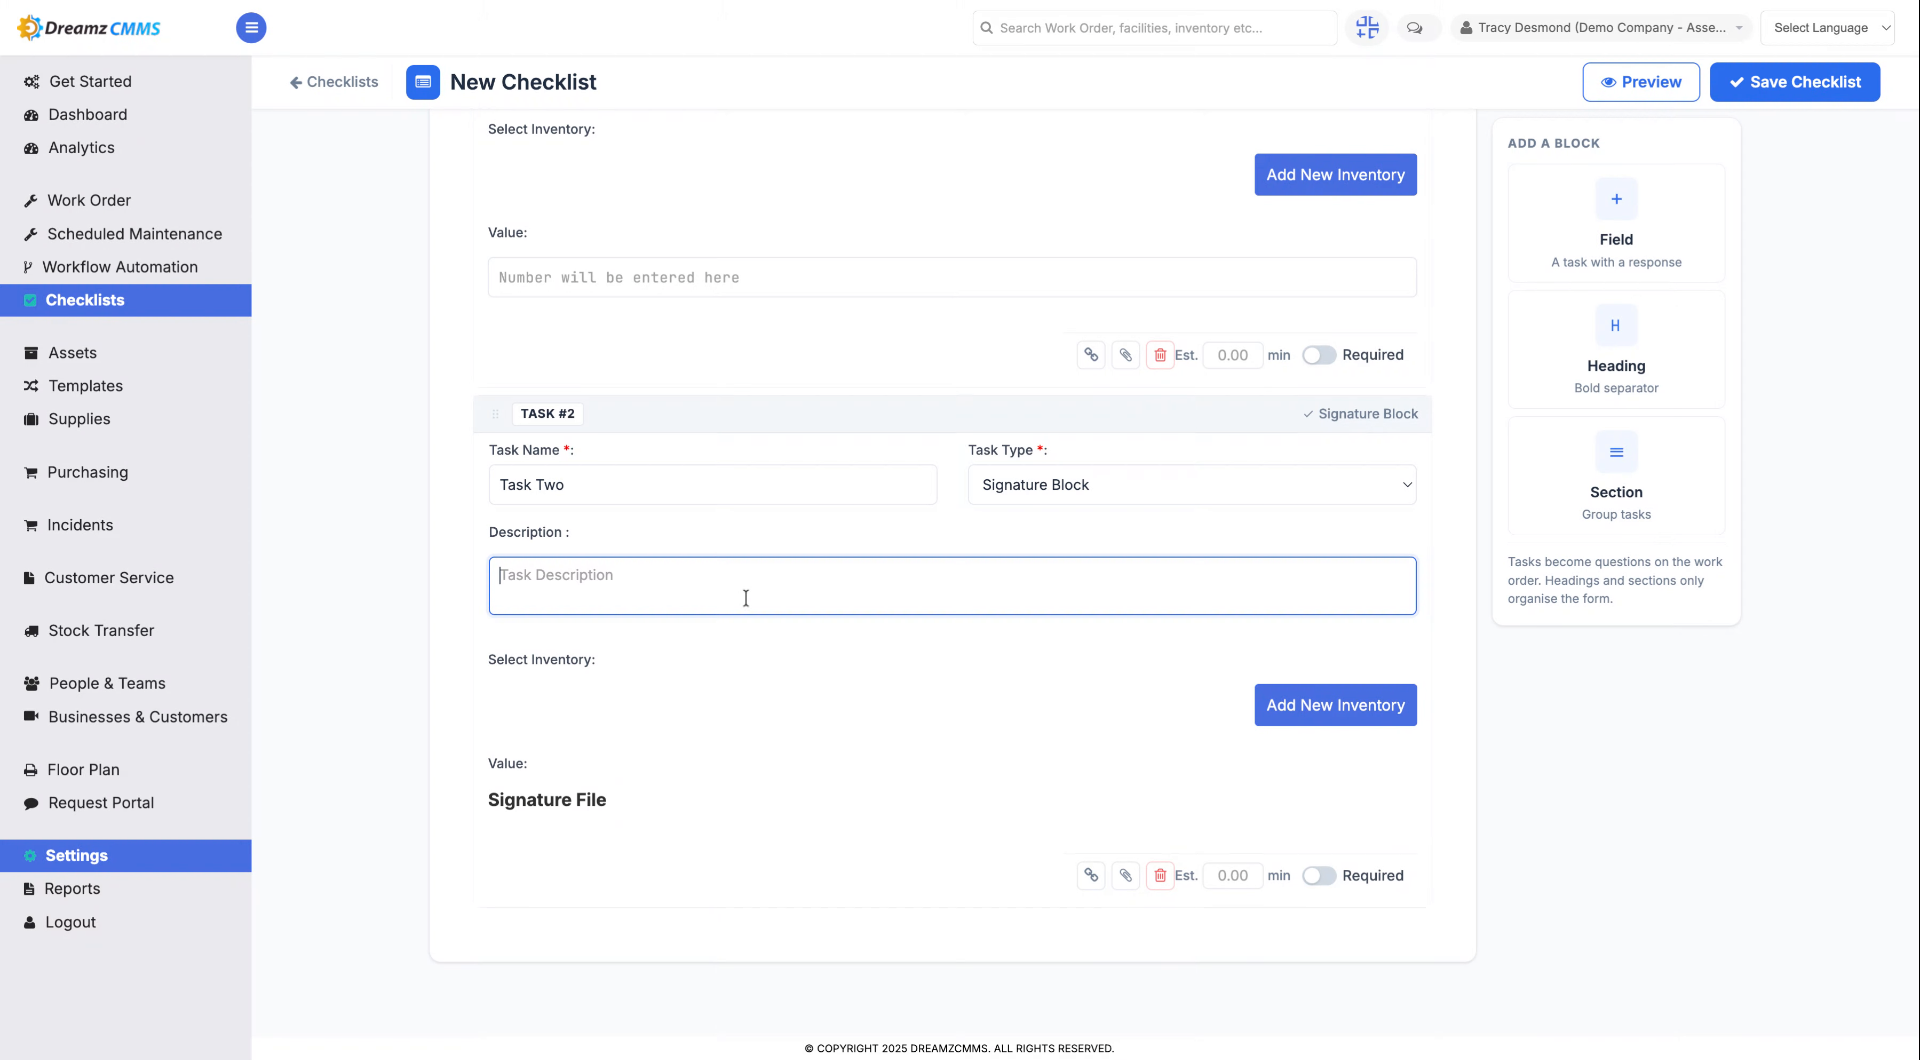
Step 20 – Enter Task Description
Enter a description to explain the next task's requirements clearly.
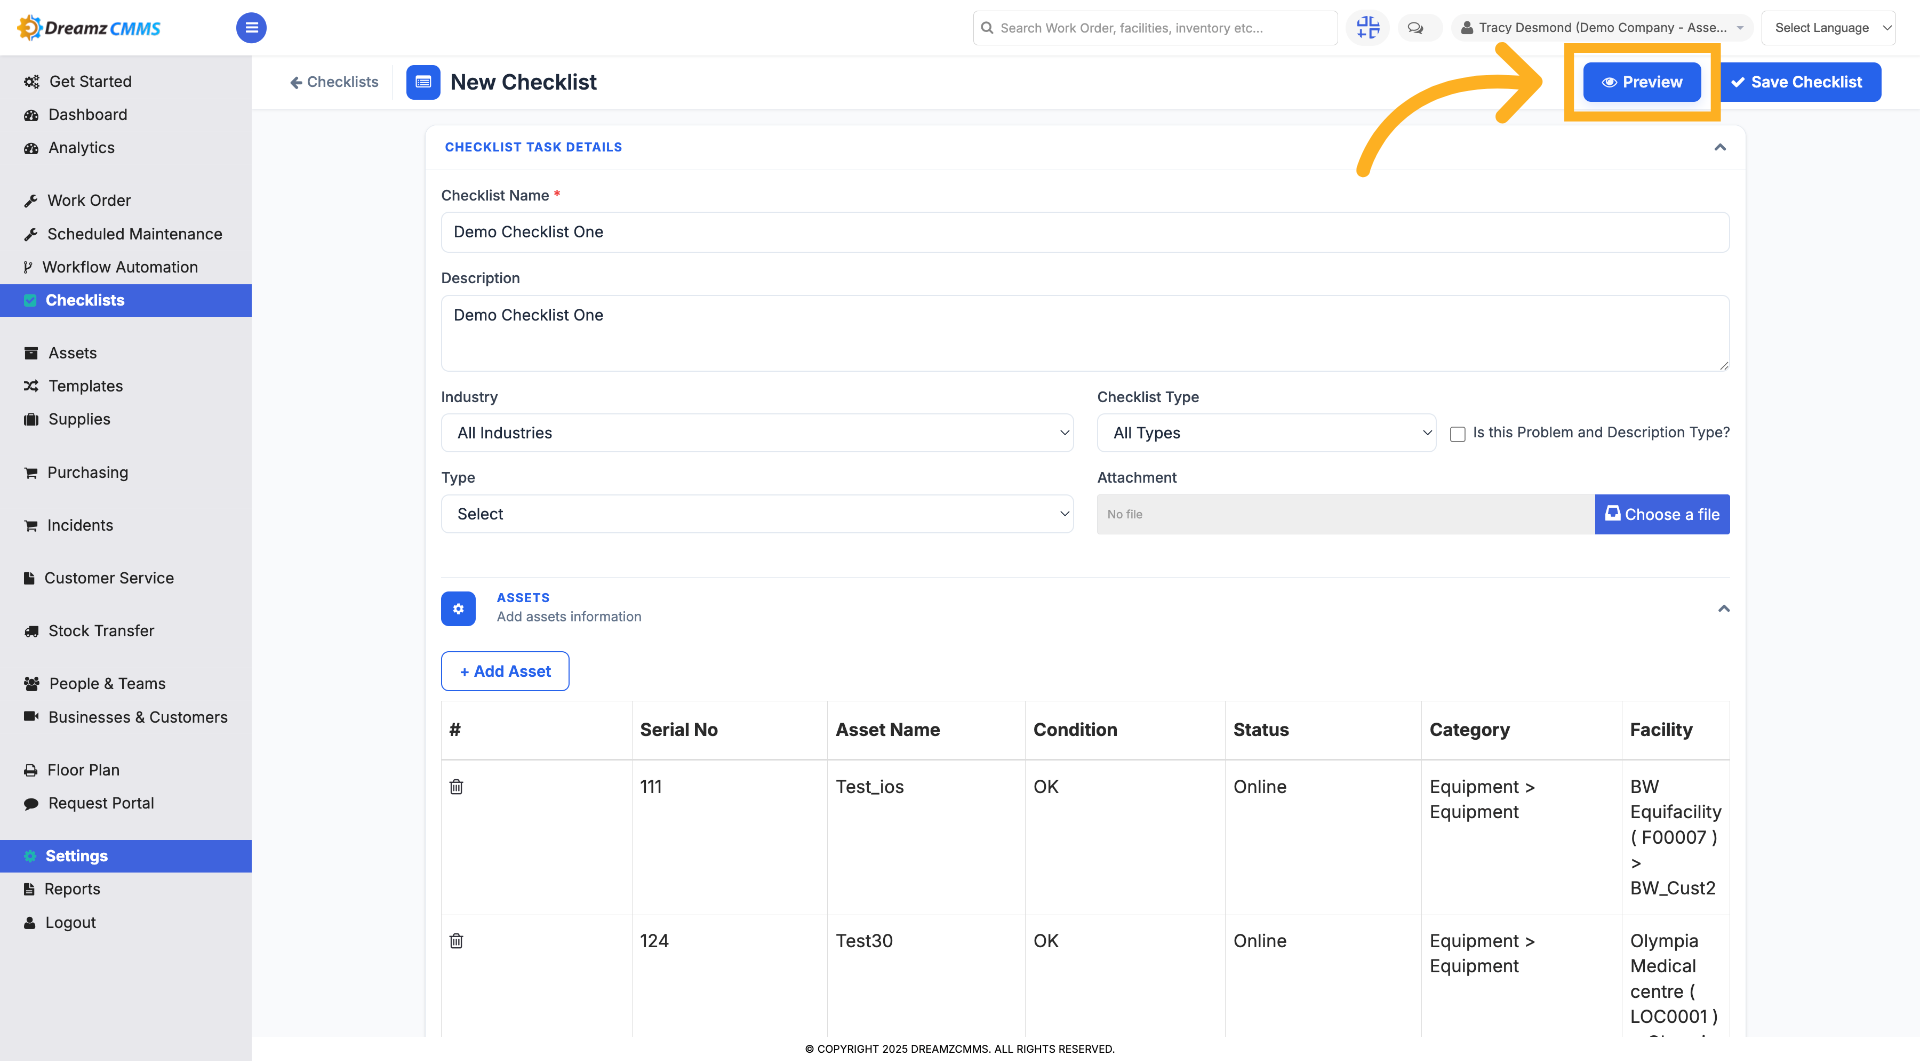
Step 21 – Preview Checklist
Click Preview to review the entire checklist and ensure all tasks and inputs are correctly configured.
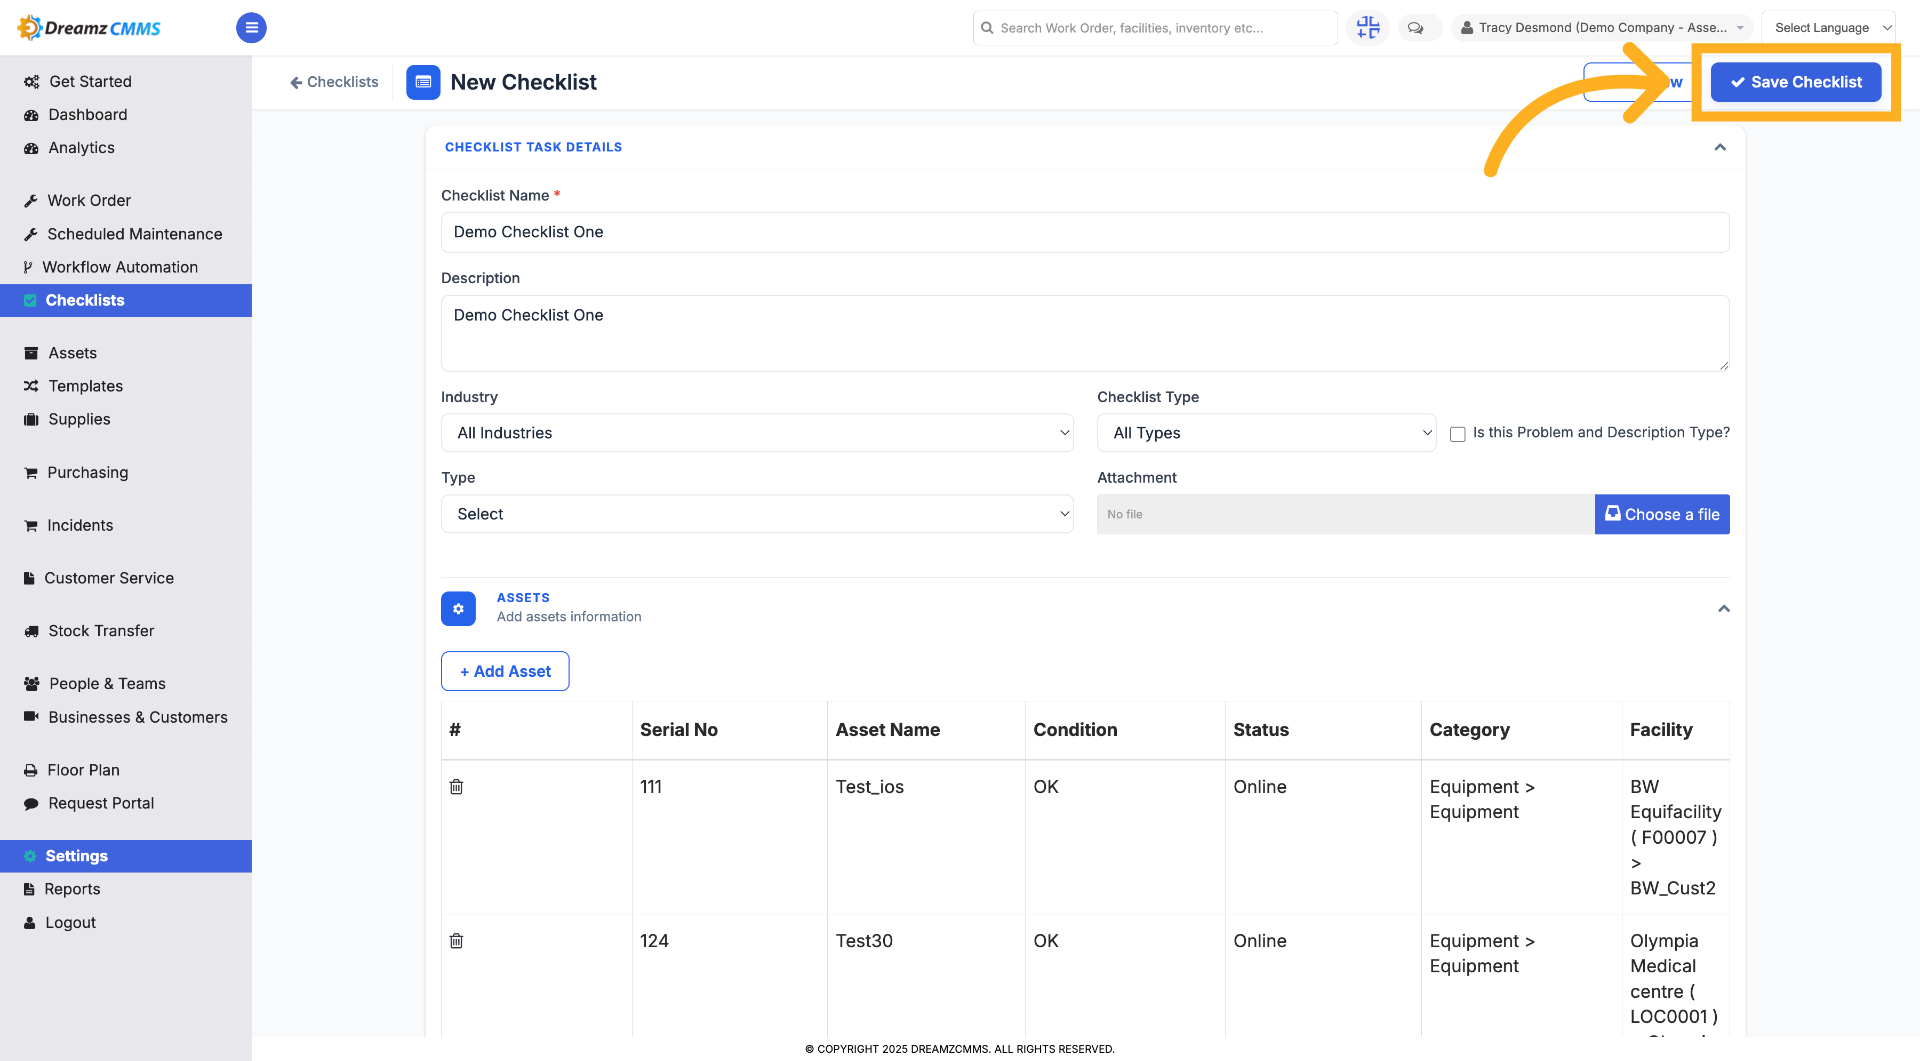
Step 22 – Save Checklist
Click Save Checklist to save your completed checklist and make it available for use.
How to Manage Existing Checklists
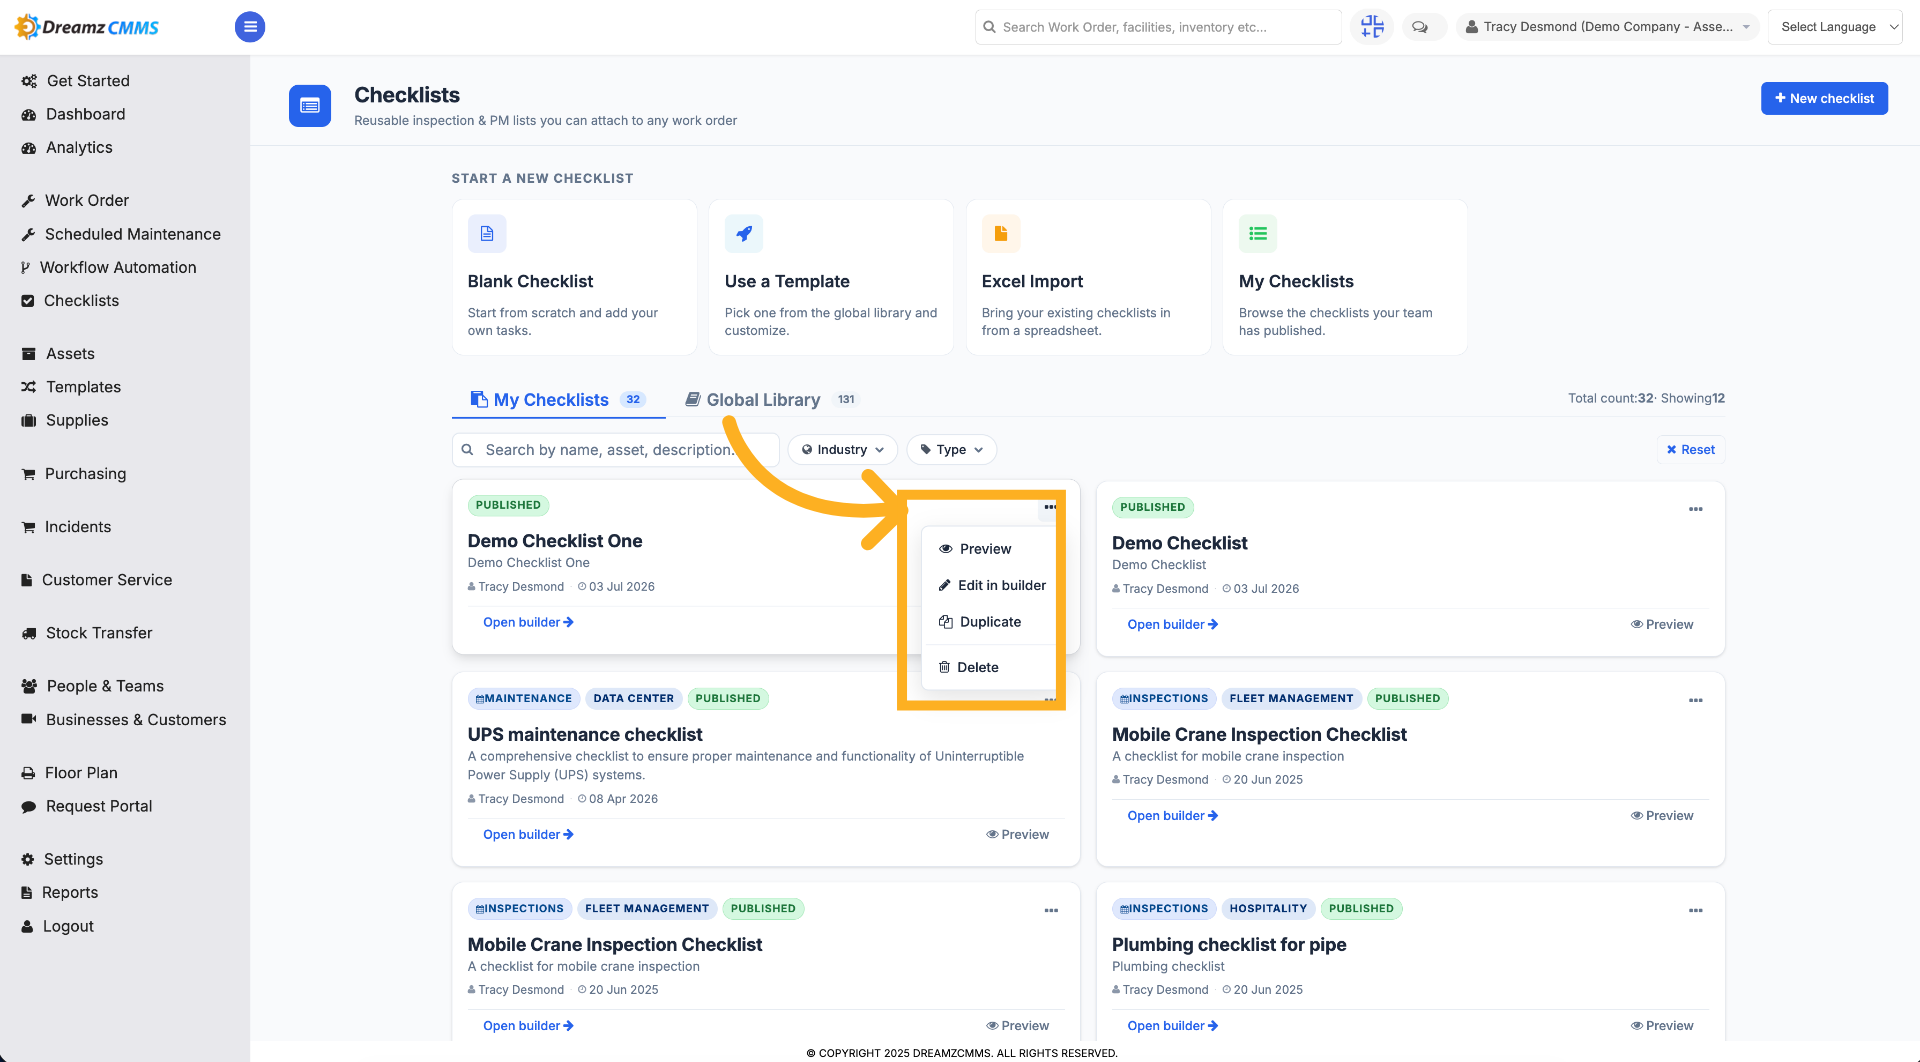
Step 1 – Perform Tasks from the 3-Dot Menu
Click on the three dots menu to preview, edit, duplicate, or delete a checklist.
Tips for Creating Checklists
- Choose the task input type carefully — it determines how technicians will interact with each task in the field (checkbox, meter reading, signature, etc.).
- Use a template when a checklist type closely matches your industry (e.g., Healthcare) to save setup time.
- Link relevant assets to a checklist so technicians know exactly what equipment each task applies to.
- Always preview your checklist before saving to confirm the tasks and inputs are configured correctly.
- Use Excel Import for bulk checklist creation instead of building each one manually.
Frequently Asked Questions
Can I create a checklist without using a template?
Yes. Choose Blank Checklist to build one from scratch, adding your own name, description, type, and tasks.
Can I import multiple checklists at once?
Yes. Use the Excel Import option, fill in your checklist details using the sample file format, and click Import.
Can I link specific assets to a checklist?
Yes. Use the Assets section within a checklist to add one or more asset IDs.
Can I edit, duplicate, or delete a checklist after saving it?
Yes. Use the three-dot menu next to a checklist to preview, edit, duplicate, or delete it.
What types of task inputs are available?
Options include Checkbox, Text Field, Meter Reading, Yes/No/N/A, Number Field, Inspection, Multiple Choice, Amount, Checklist, Picture/File Add, Signature Block, and Date.