Create Asset Locations
Managing asset locations involves systematically organizing and tracking assets across your sites to ensure availability, minimize loss, and optimize operational efficiency. Setting up locations correctly from the start helps your team reduce downtime and make informed decisions on asset allocation.
Overview
In DreamzCMMS, Locations (also called Facilities) represent the physical spaces where your assets are housed — such as a building, floor, room, or job site. Once a location is created, it can be assigned to assets, work orders, and personnel, giving your entire team clear visibility into where equipment is at all times.
Here is a reference video:
Before You Begin
- You must have the appropriate Admin or Manager permissions to create and manage locations.
- If you plan to create a location hierarchy, set up your top-level (parent) location first, then add sub-locations under it.
- If you have many locations to set up at once, consider using the bulk import feature instead — see Import Asset Locations
How to Create an Asset Location
Step 1 – Go to Assets in the Left Menu
From the left-hand navigation menu, click on Assets.

Step 2 – Select Facilities
Under the Assets menu, click on Facilities. This will take you to the Facility listing page, where all your existing locations are displayed.

Step 3 – Click "New Asset"
On the Facility listing page, click the New Asset button in the top area of the screen.

Step 4 – Select "Locations or Facilities"
A popup menu will appear. Select Locations or Facilities from the options provided.

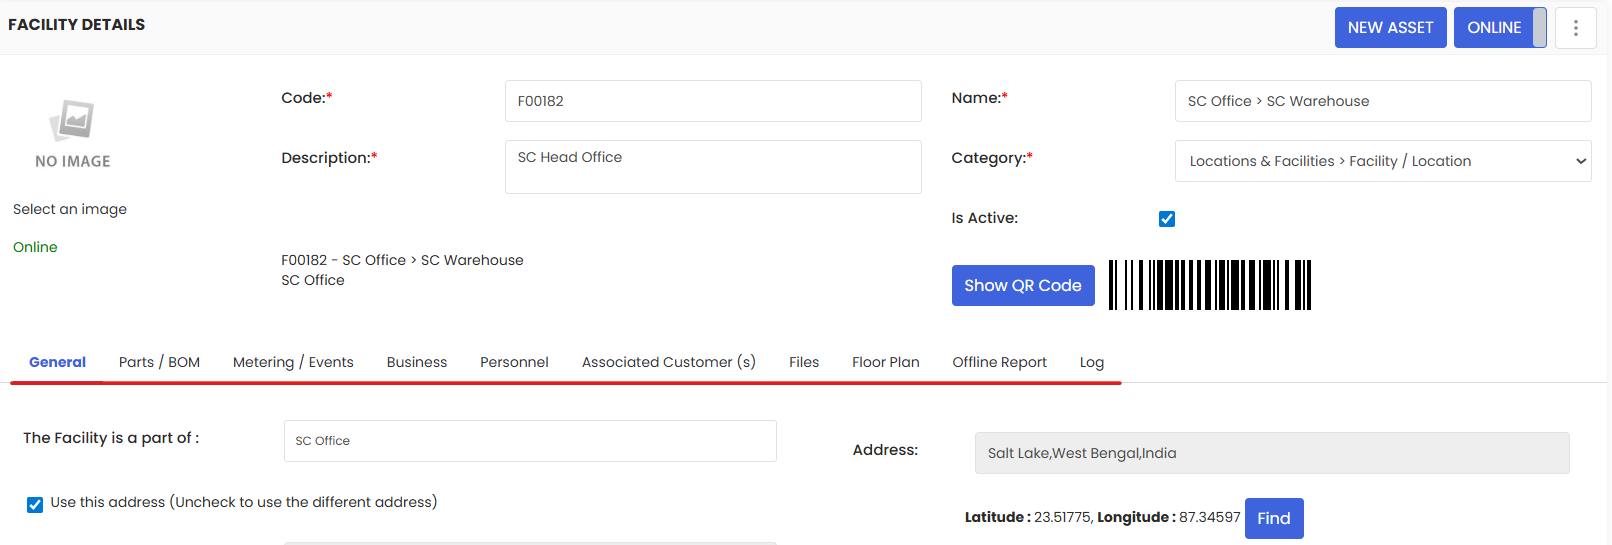
Step 5 – Fill in the Location Details
You will be taken to a location creation form. Fill in the necessary details, which may include:
- Location Name (required) — Enter a clear, descriptive name (e.g., "Warehouse B", "Production Floor", "Server Room 204").
- Parent Location (optional) — Select a parent if this is a sub-location within a larger facility.
- Address (optional) — Add a physical address if the location is a separate site or building.
- Description (optional) — Include notes your team may find useful, such as access instructions or area details.

Note: A barcode and QR code are automatically generated for each location. These can be printed and used later for quick scanning and asset identification in the field.


Step 6 – Save the Location
Once all the necessary details are filled in, click the Save button.
After saving, the remaining tabs at the bottom of the page will become enabled, allowing you to add more details such as assigned personnel, associated assets, and more.
After Saving — What's Next?
Once the basic information is saved, several additional tabs will become available on the location page. These allow you to:
- Assign Personnel to the location — see How to Assign Personnel to a Location/Facility
- Link Assets that reside in this location
- Attach Documents such as floor plans or compliance records
- View Work Order History associated with the location — see Create and Manage Work Orders
Take some time to fill out these additional details to get the most out of your location records.
Tips for Organizing Locations
- Use a consistent naming convention across your team to avoid duplicates (e.g., always use "Bldg" or always use "Building" — pick one and stick with it).
- Build from the top down. Create sites or buildings first, then add floors or rooms as sub-locations beneath them.
- Keep hierarchies simple. Two to three levels is typically enough for most facilities.
- Use the auto-generated QR codes — print and post them at each location so field technicians can quickly scan and pull up location and asset details on mobile.
Frequently Asked Questions
Can I edit a location after it has been created?
Yes. Navigate to Assets → Facilities, find the location, and click on it to open and edit the details.
Can I delete a location?
Yes, but only if no active assets or work orders are currently assigned to it. Reassign or archive those records first before deleting.
Can I import multiple locations at once?
Yes. DreamzCMMS supports bulk importing of locations. Refer to the Import Asset Locations article for step-by-step instructions.
Can I assign a team member to a location?
Yes. After saving the location, use the Personnel tab to assign staff members responsible for that area.
Related Articles
- Import Asset Locations
- How to Add BOM to a Facility/Location
- How to Assign Personnel to a Location/Facility
- Create and Manage Work Orders