Manage Stock Adjustments Efficiently in DreamzCMMS
This tutorial guides you through managing stock adjustments within DreamzCMMS. You will learn how to create and update stock adjustment records to maintain accurate inventory levels.
Overview
Stock Adjustments let you record changes to your inventory levels — such as a stock take, restock, consumption, or sale — so your on-hand quantities always reflect what's actually in stock. Each adjustment is tied to a facility and can include one or more items, quantities, and supporting files.
Before You Begin
- You must have access to the Supplies section in your account.
- Know the facility, adjustment type, and item quantities you need to record before starting.
How to Create a Stock Adjustment
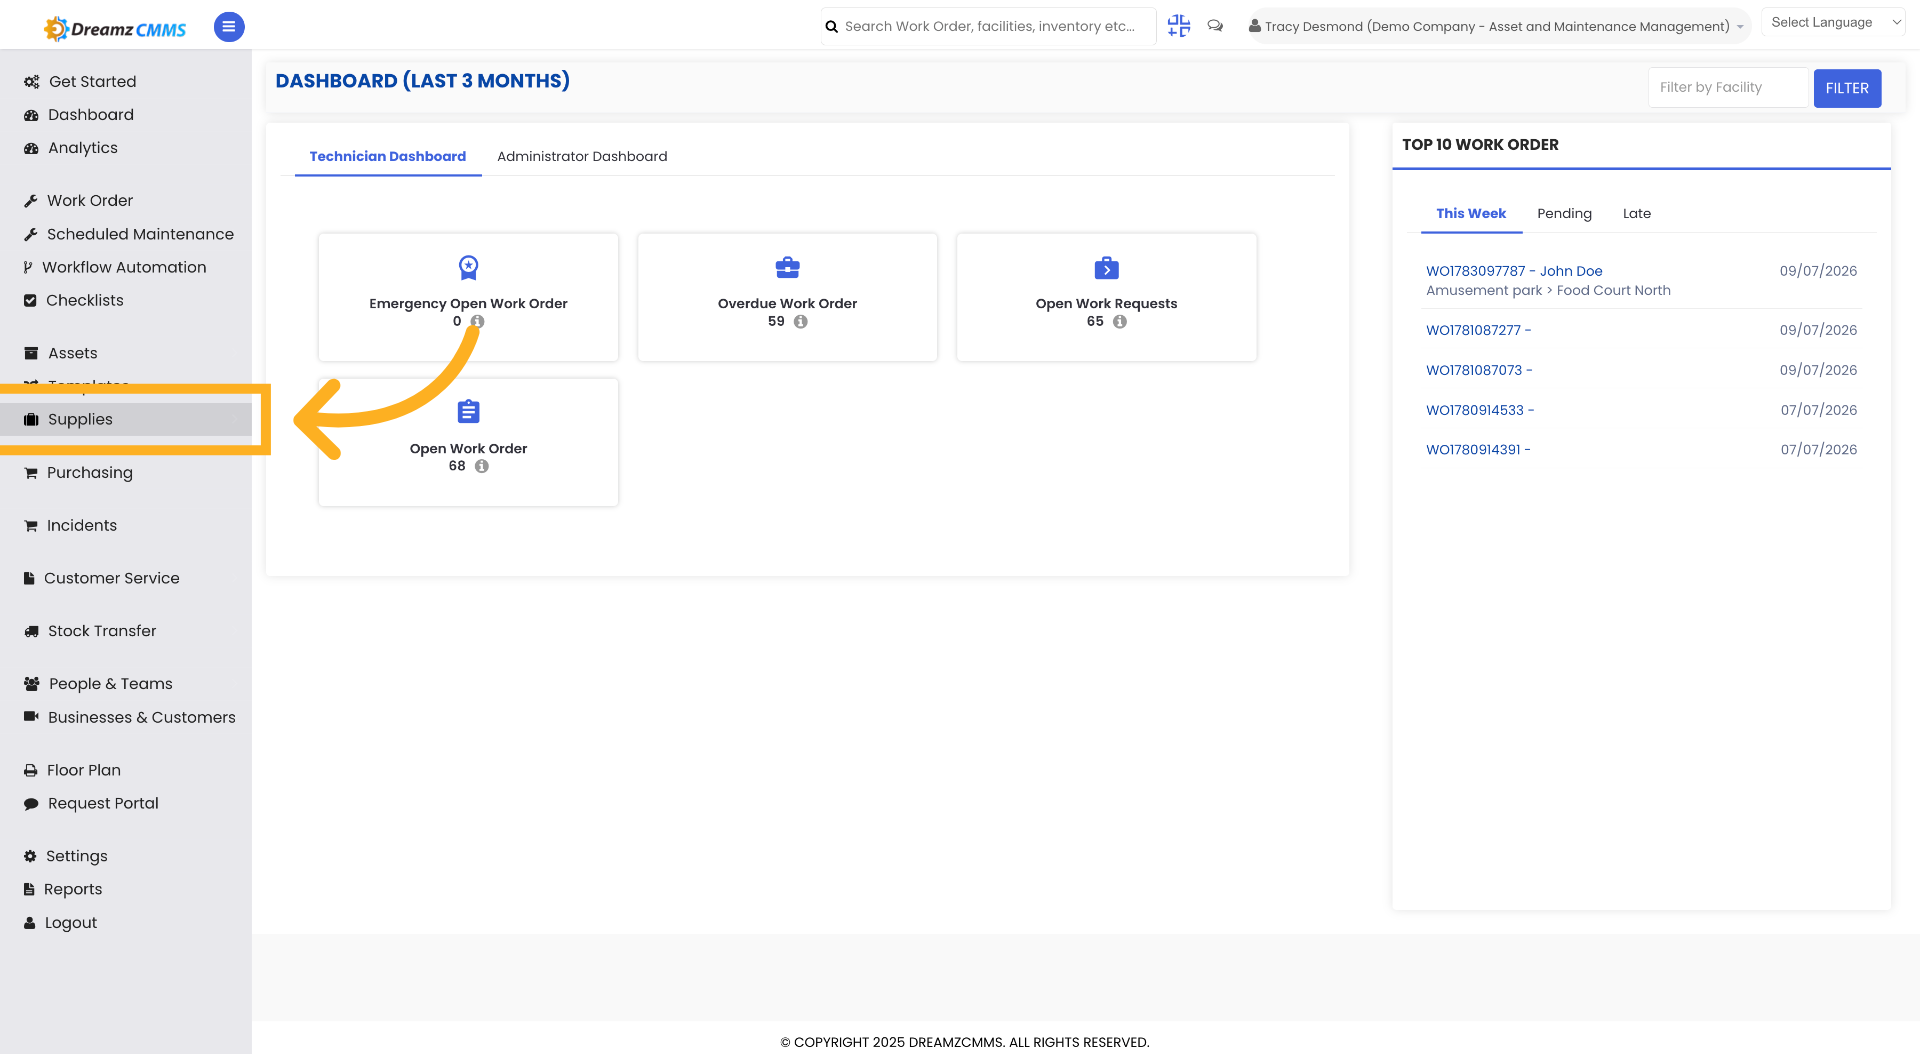
Step 1 – Access Supplies Section
Click "Supplies" to open the supplies management area in DreamzCMMS.
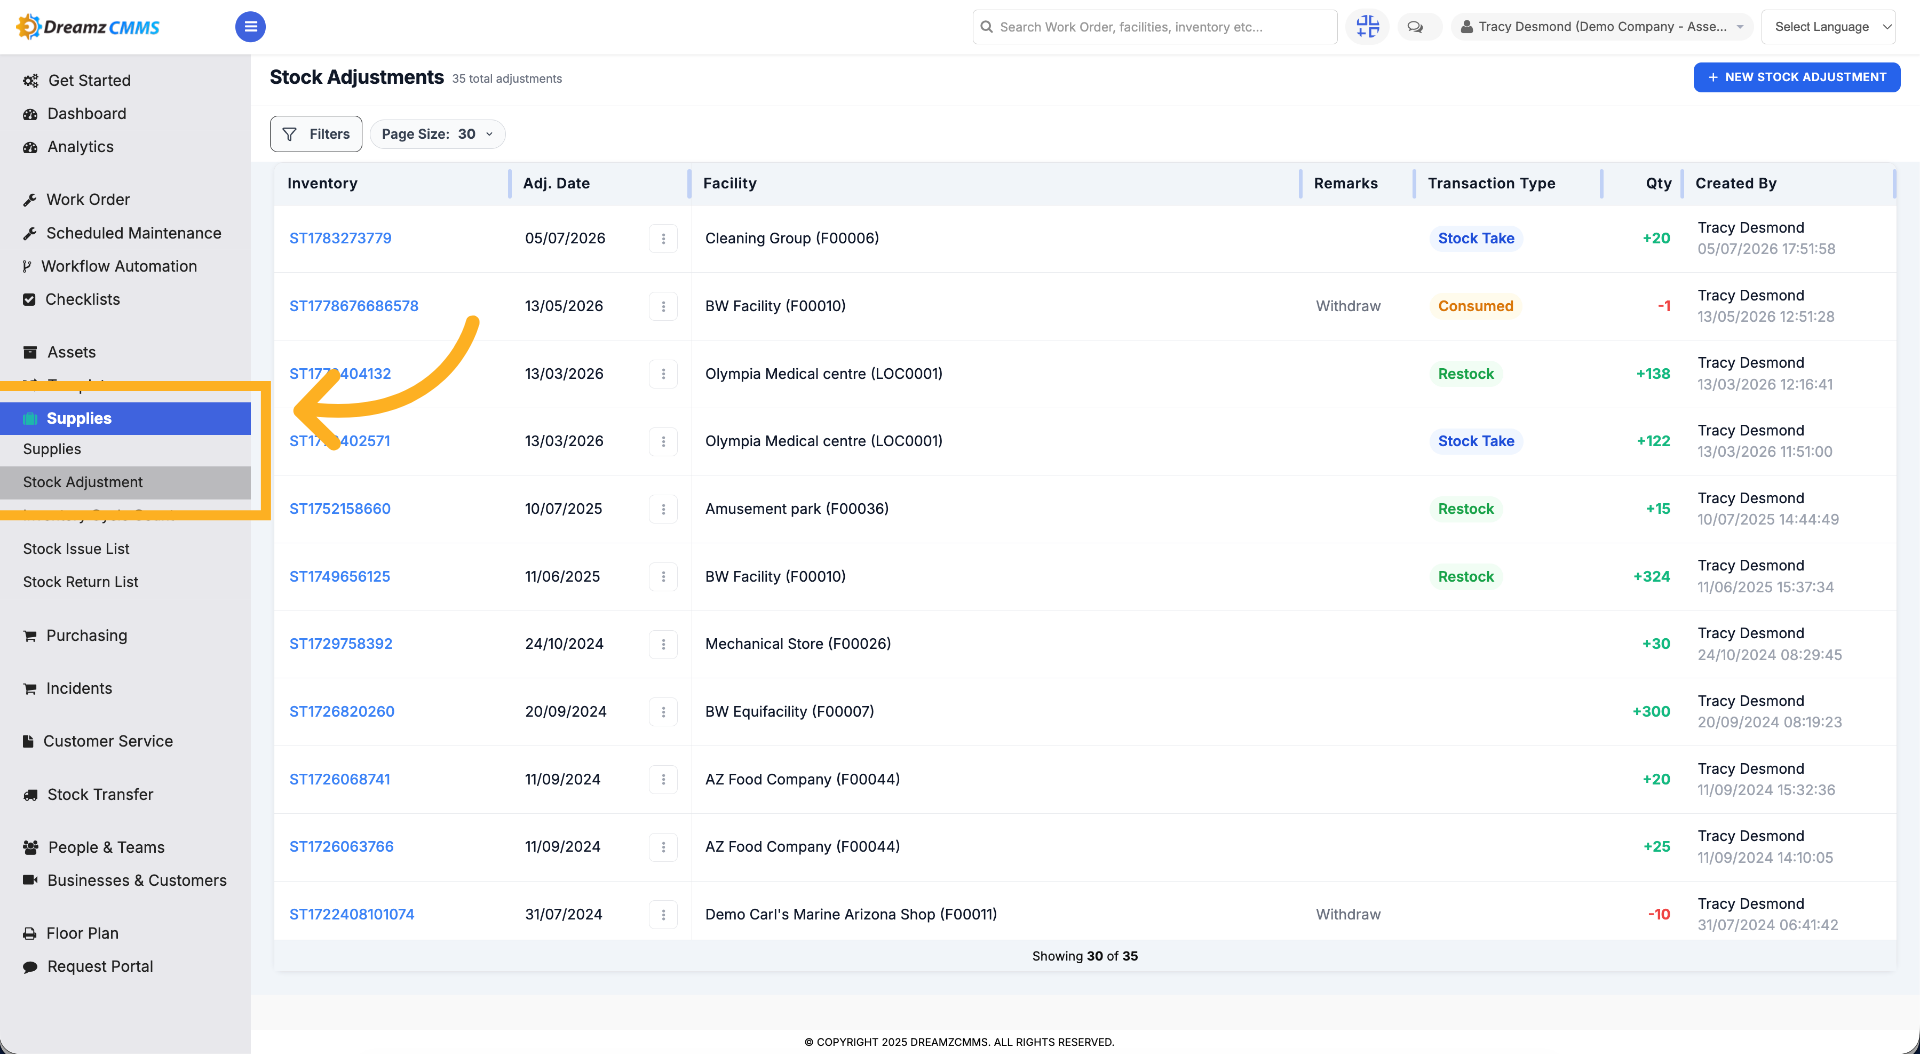
Step 2 – Open Stock Adjustment Page
Click "Stock Adjustment" to navigate to the stock adjustment listing page.
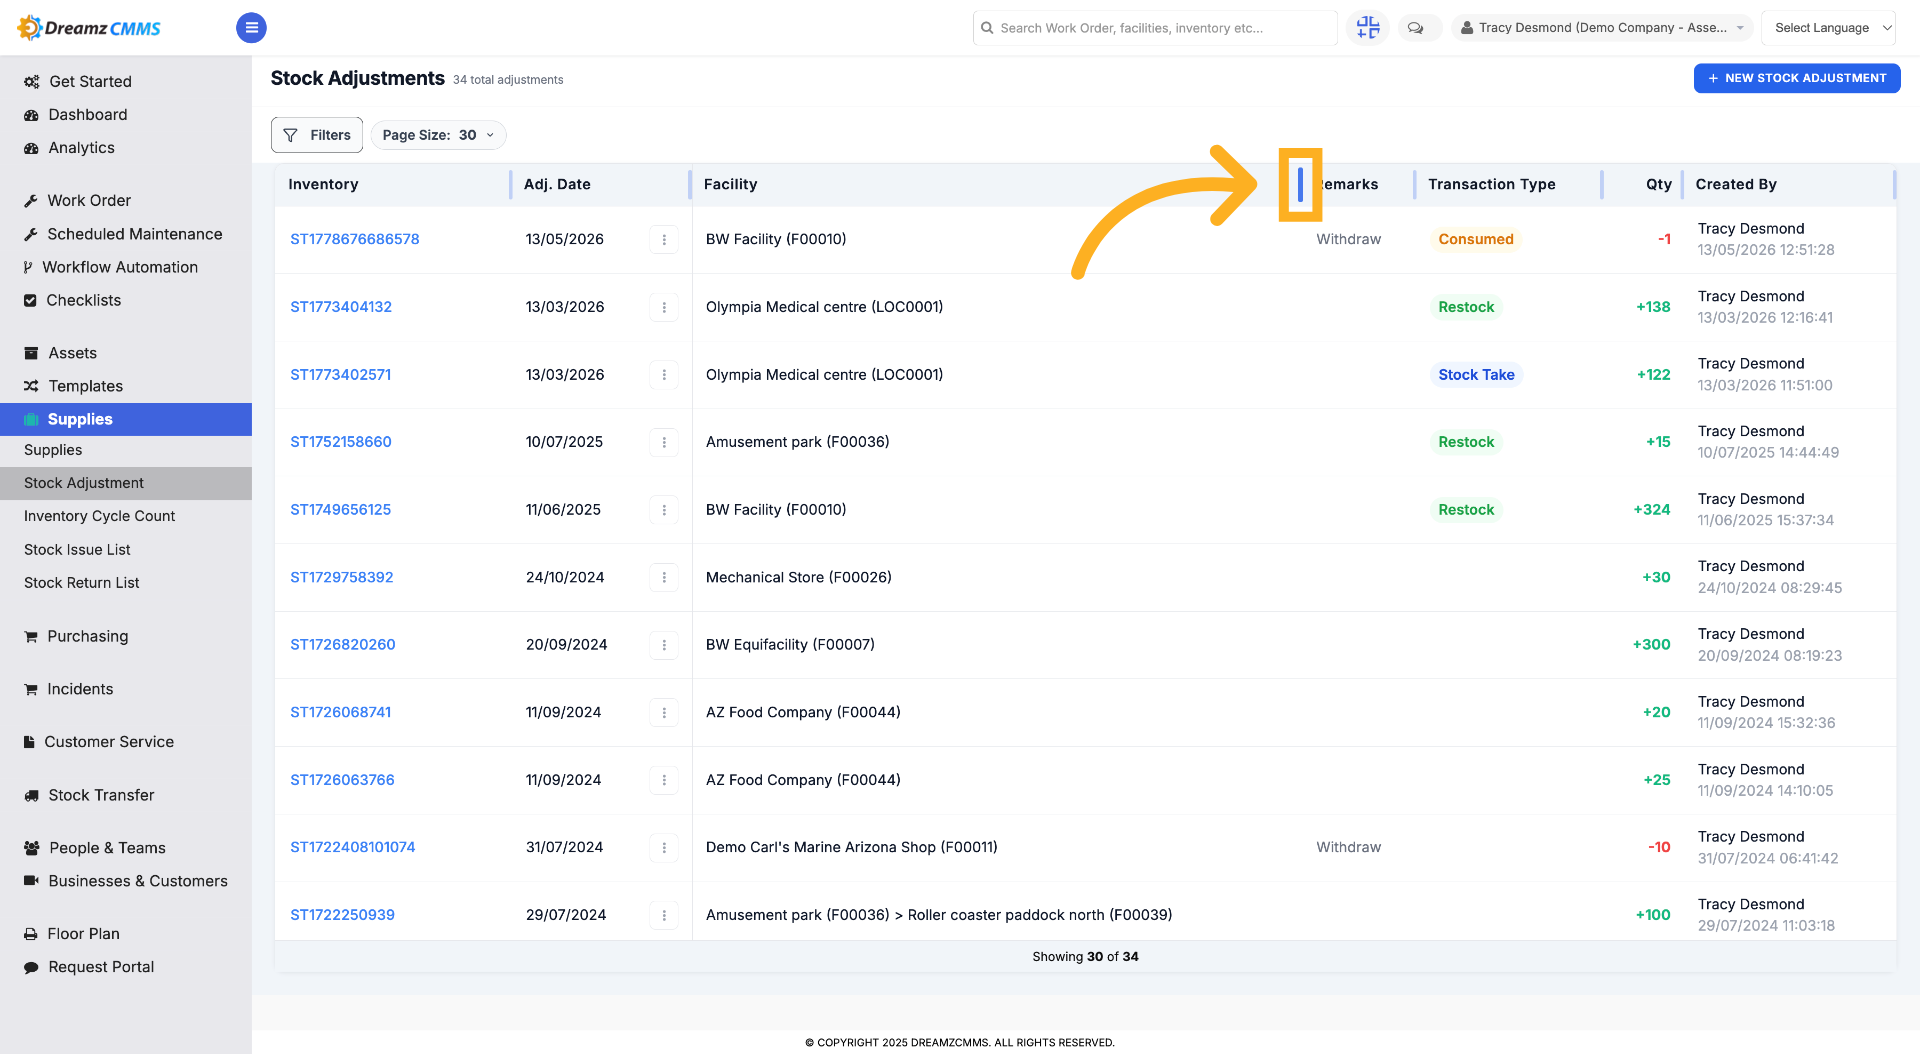
Step 3 – Use the Splitter Option
Drag the splitter option to increase or decrease column width.
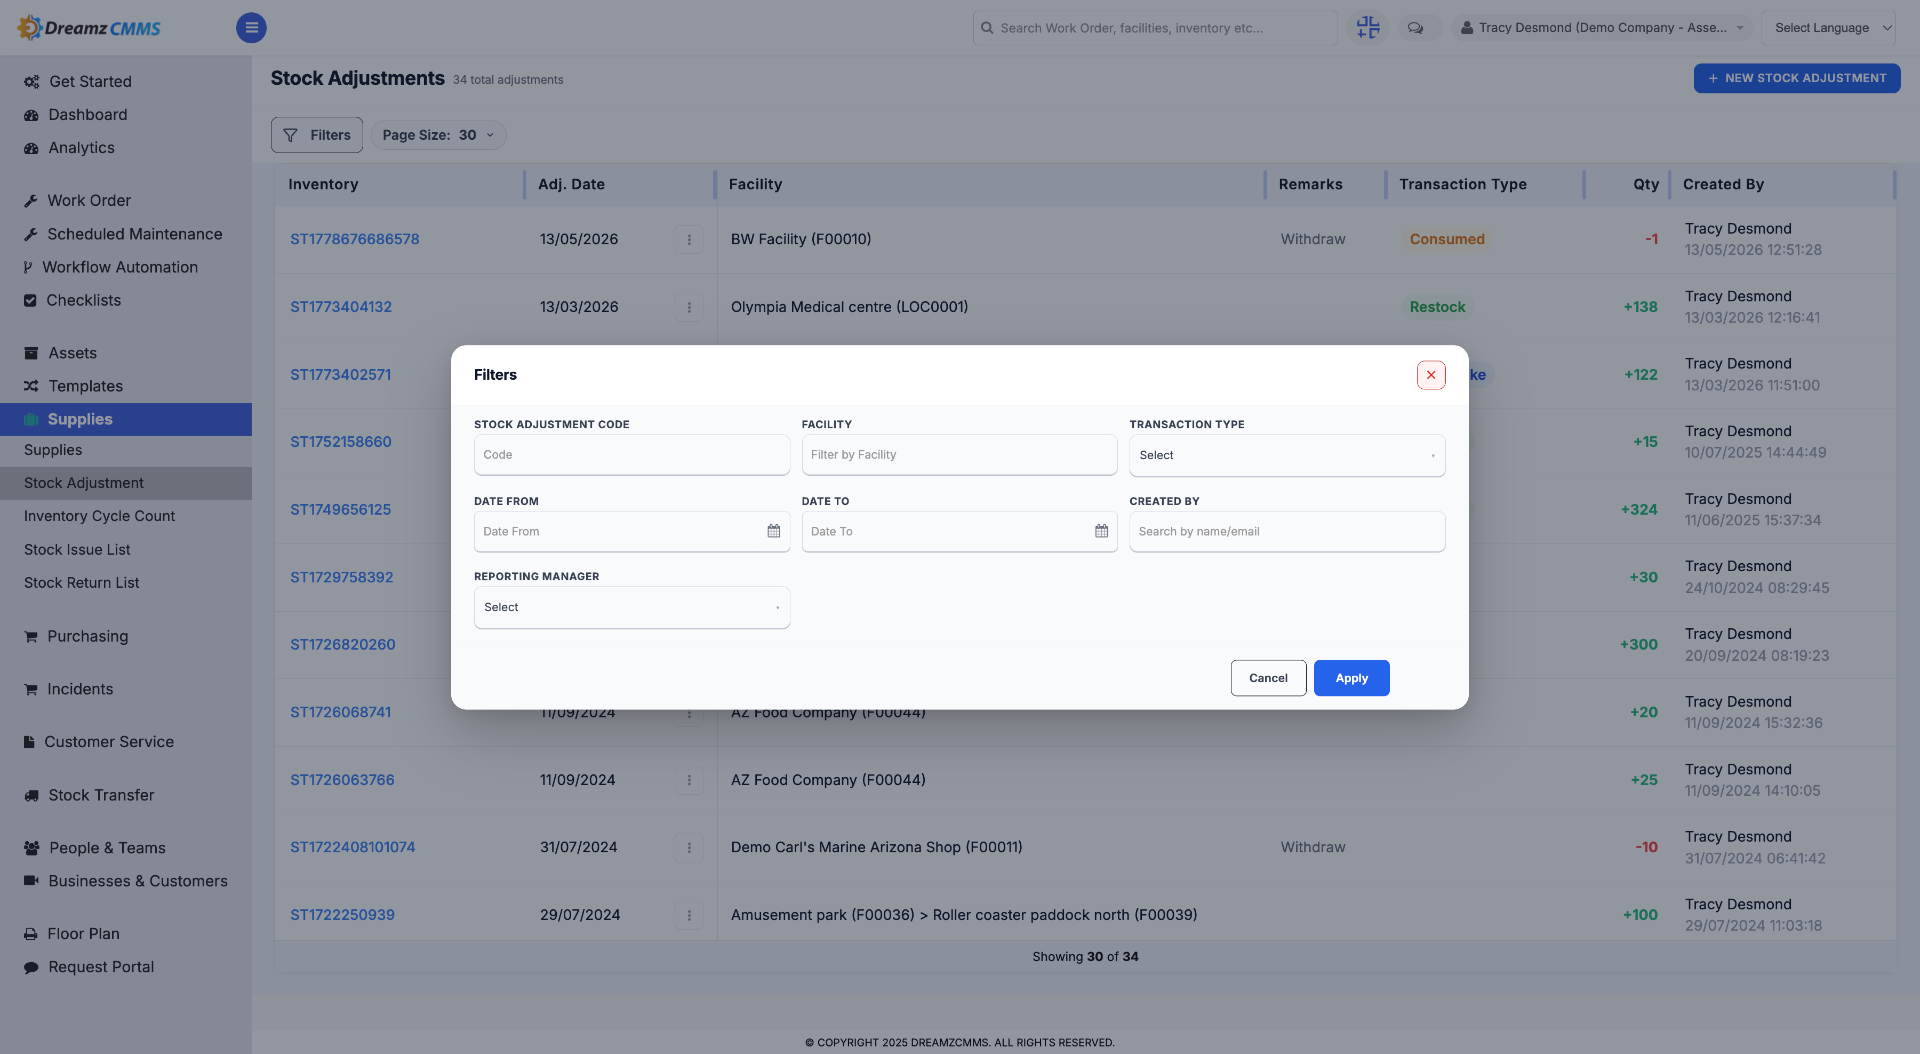
Step 4 – Access Additional Options
Click the filter option to filter the Stock Adjustment list by Stock Adjustment Code, Facility, and other criteria.
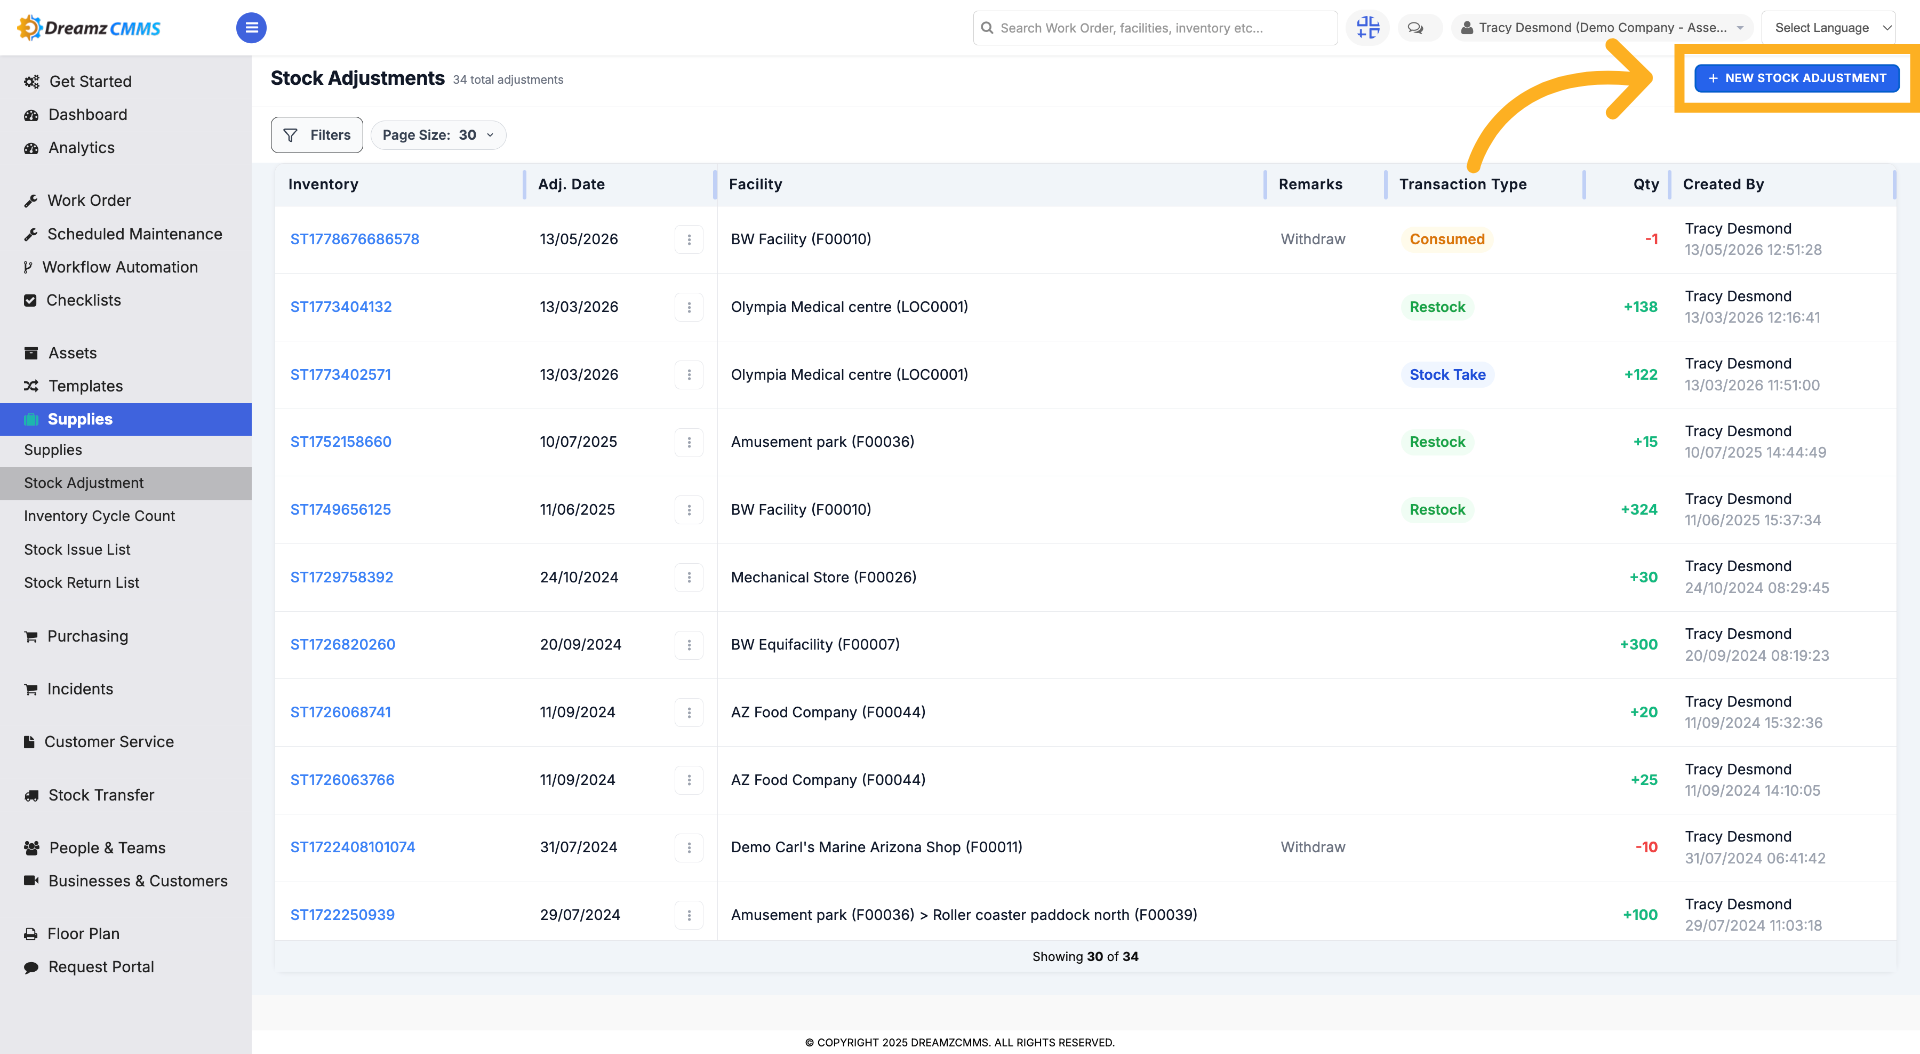
Step 5 – Create New Stock Adjustment
Click "New Stock Adjustment" to start a new inventory adjustment process.
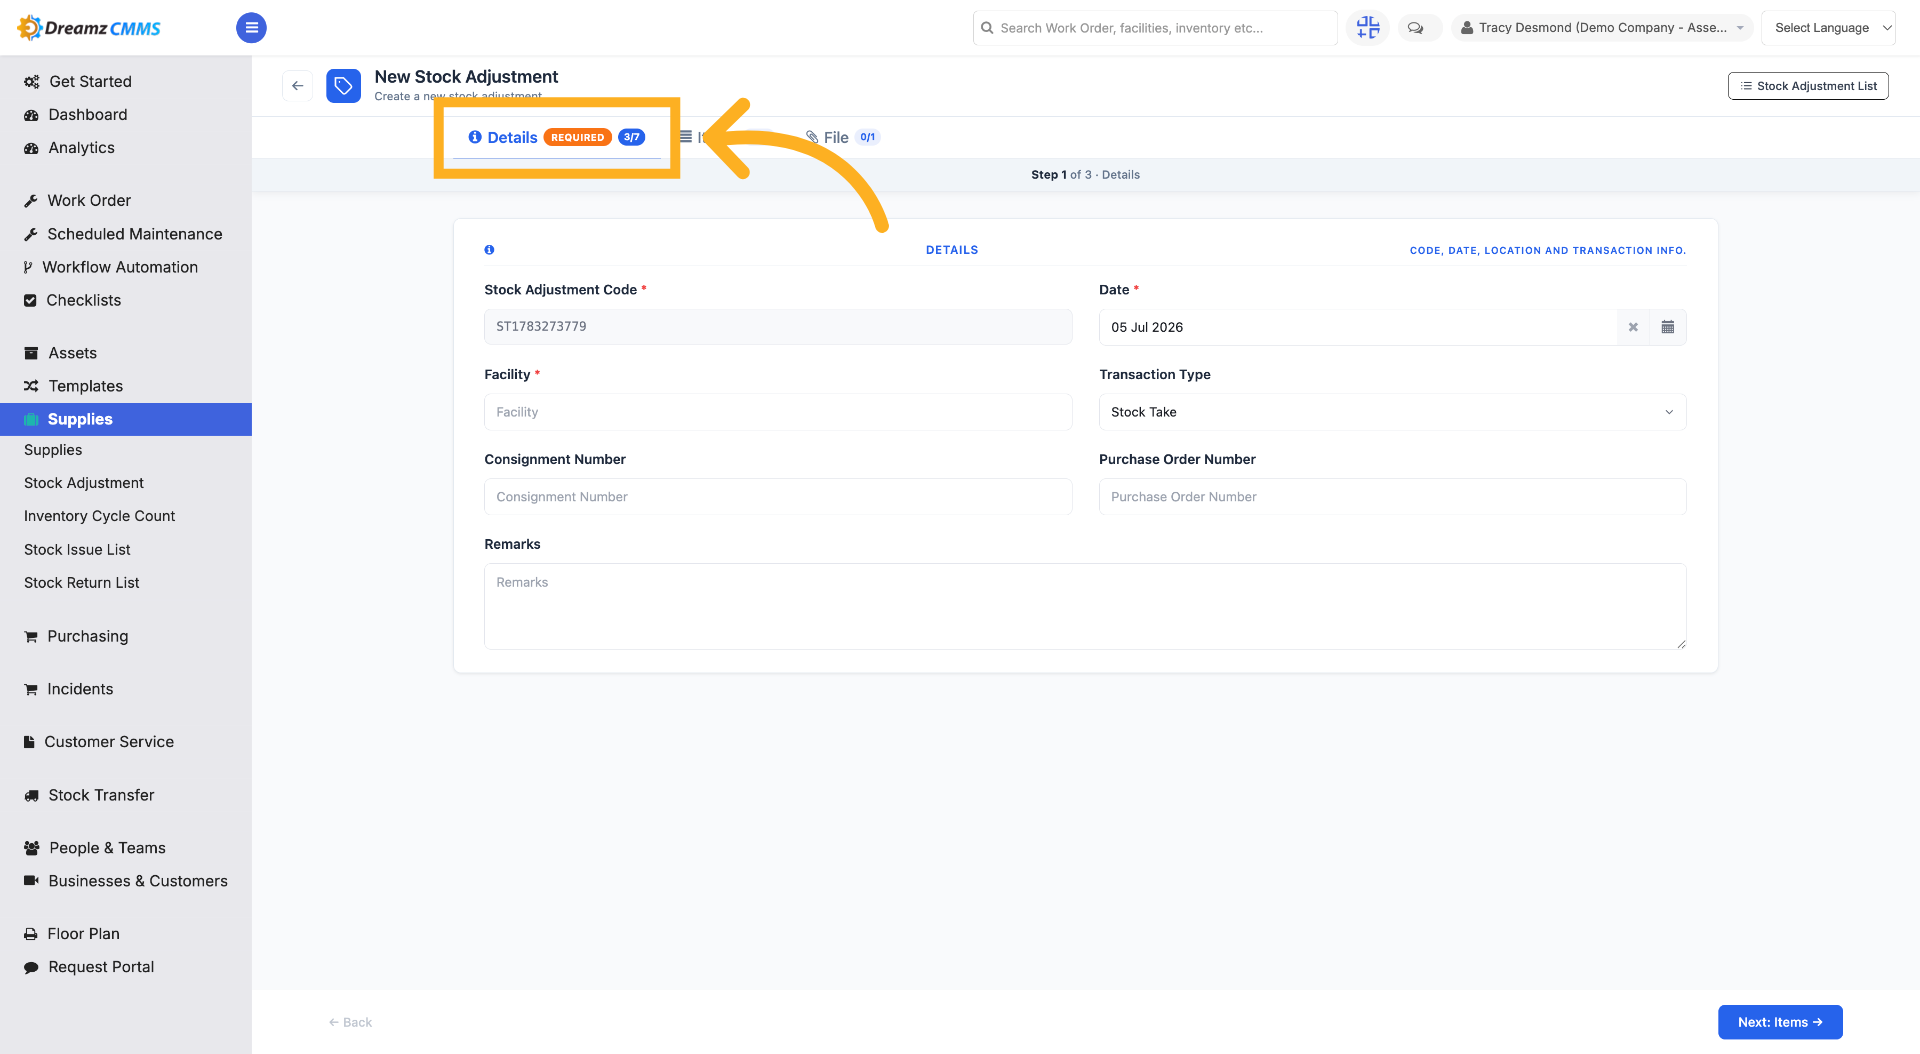
Step 6 – Fill in Required Details
Click to add and complete the mandatory fields for the stock adjustment.
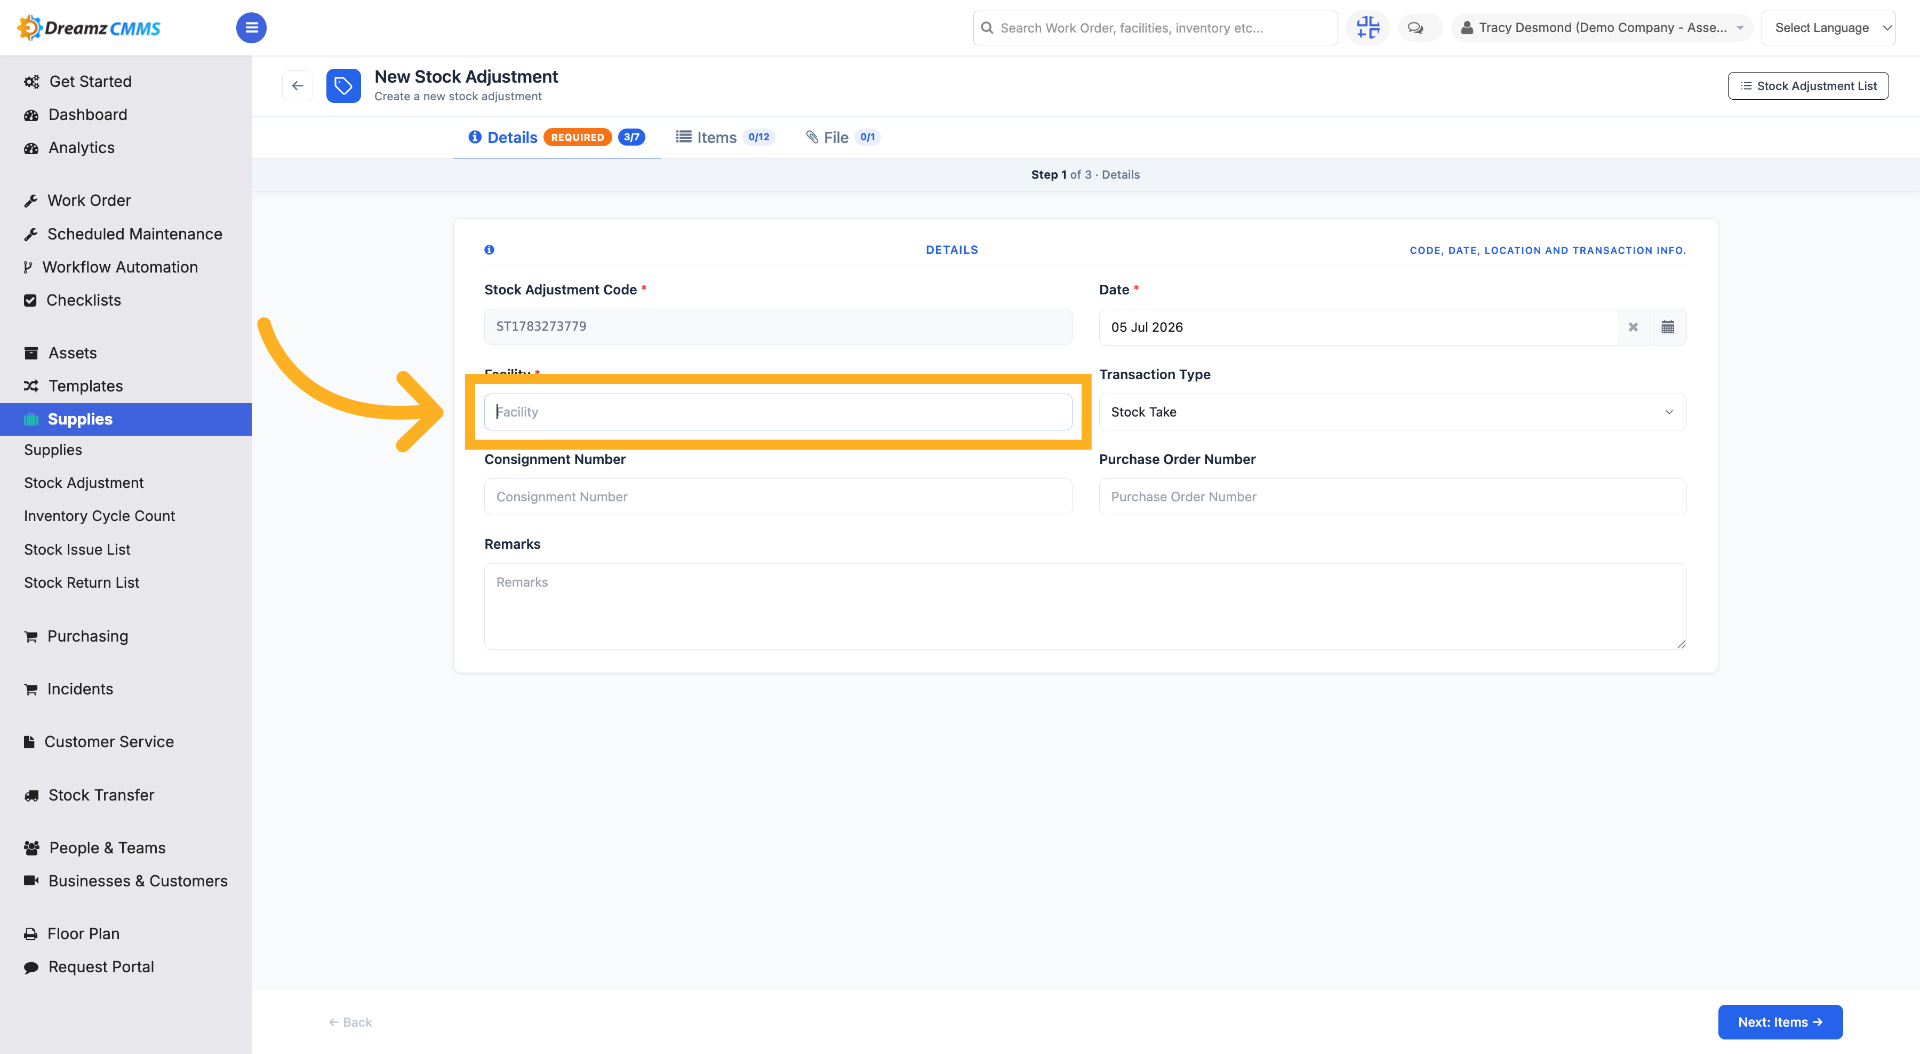
Step 7 – Select Facility
Click "Facility" to choose the location associated with this stock adjustment.
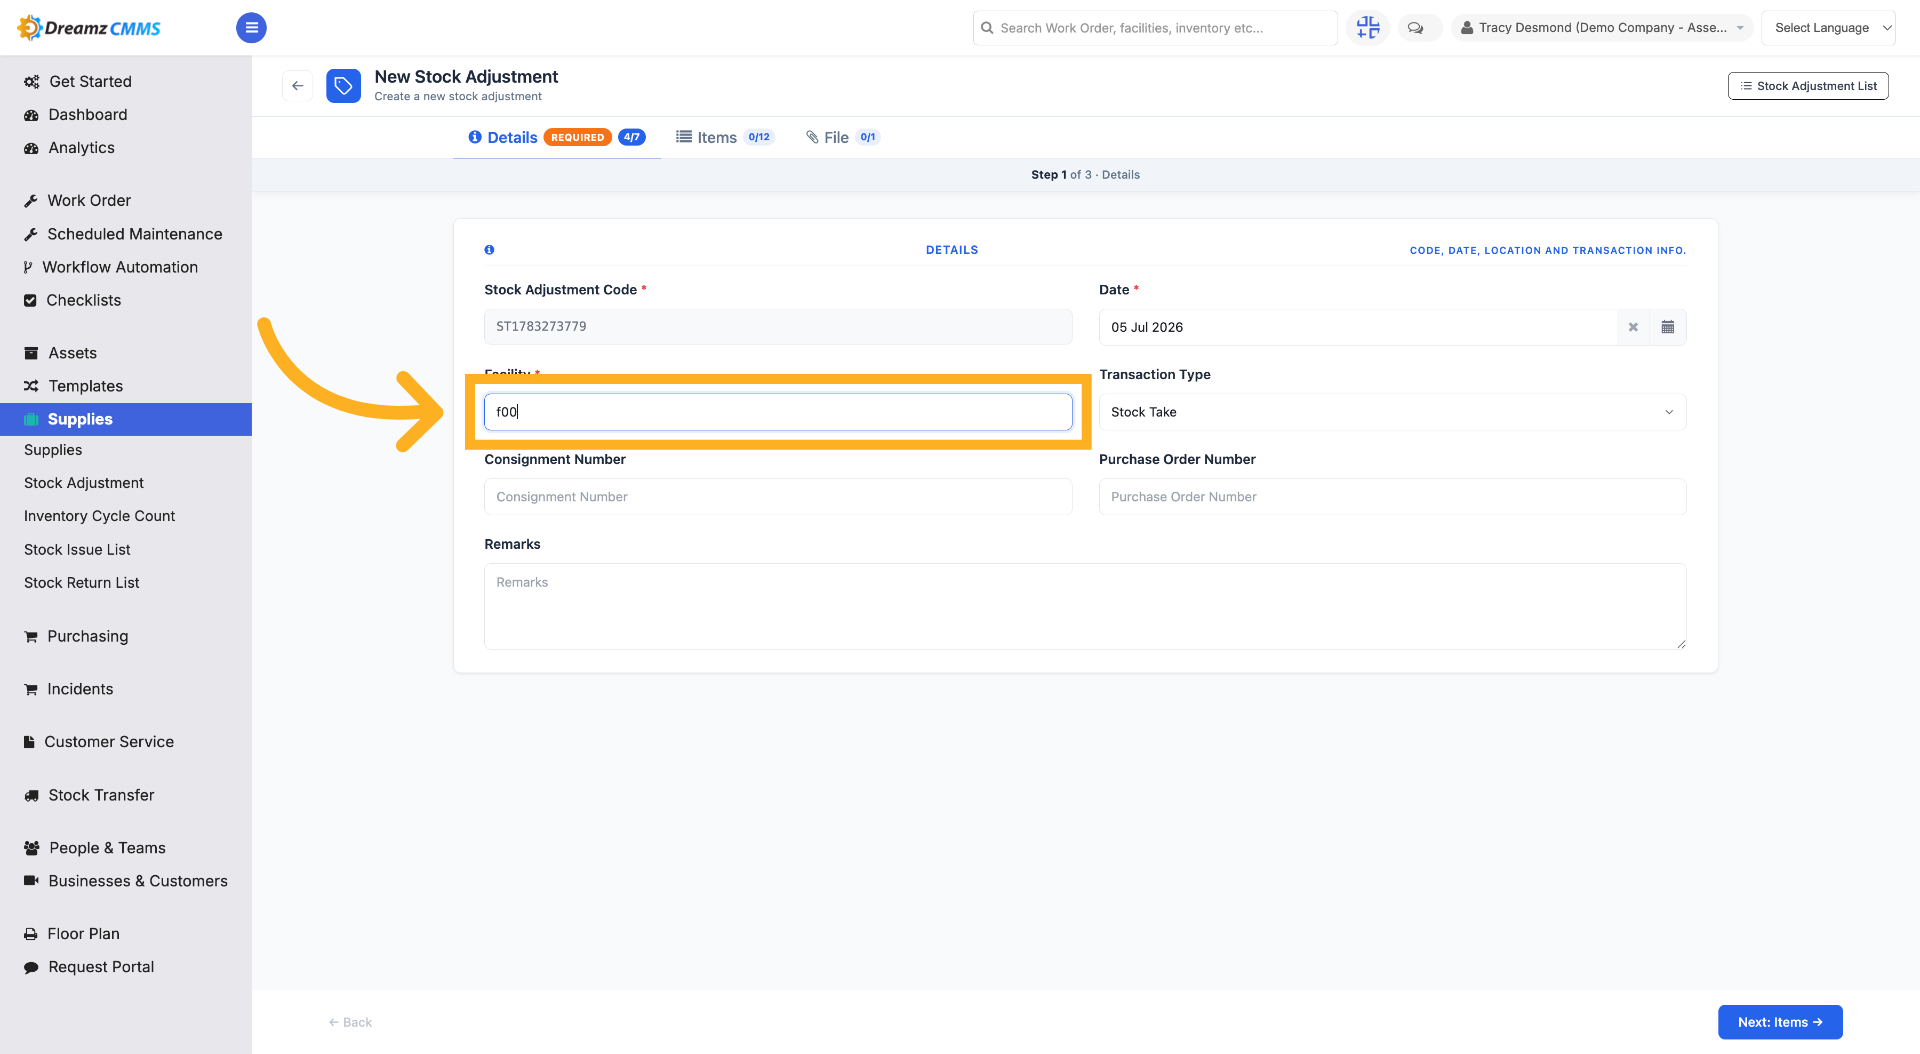
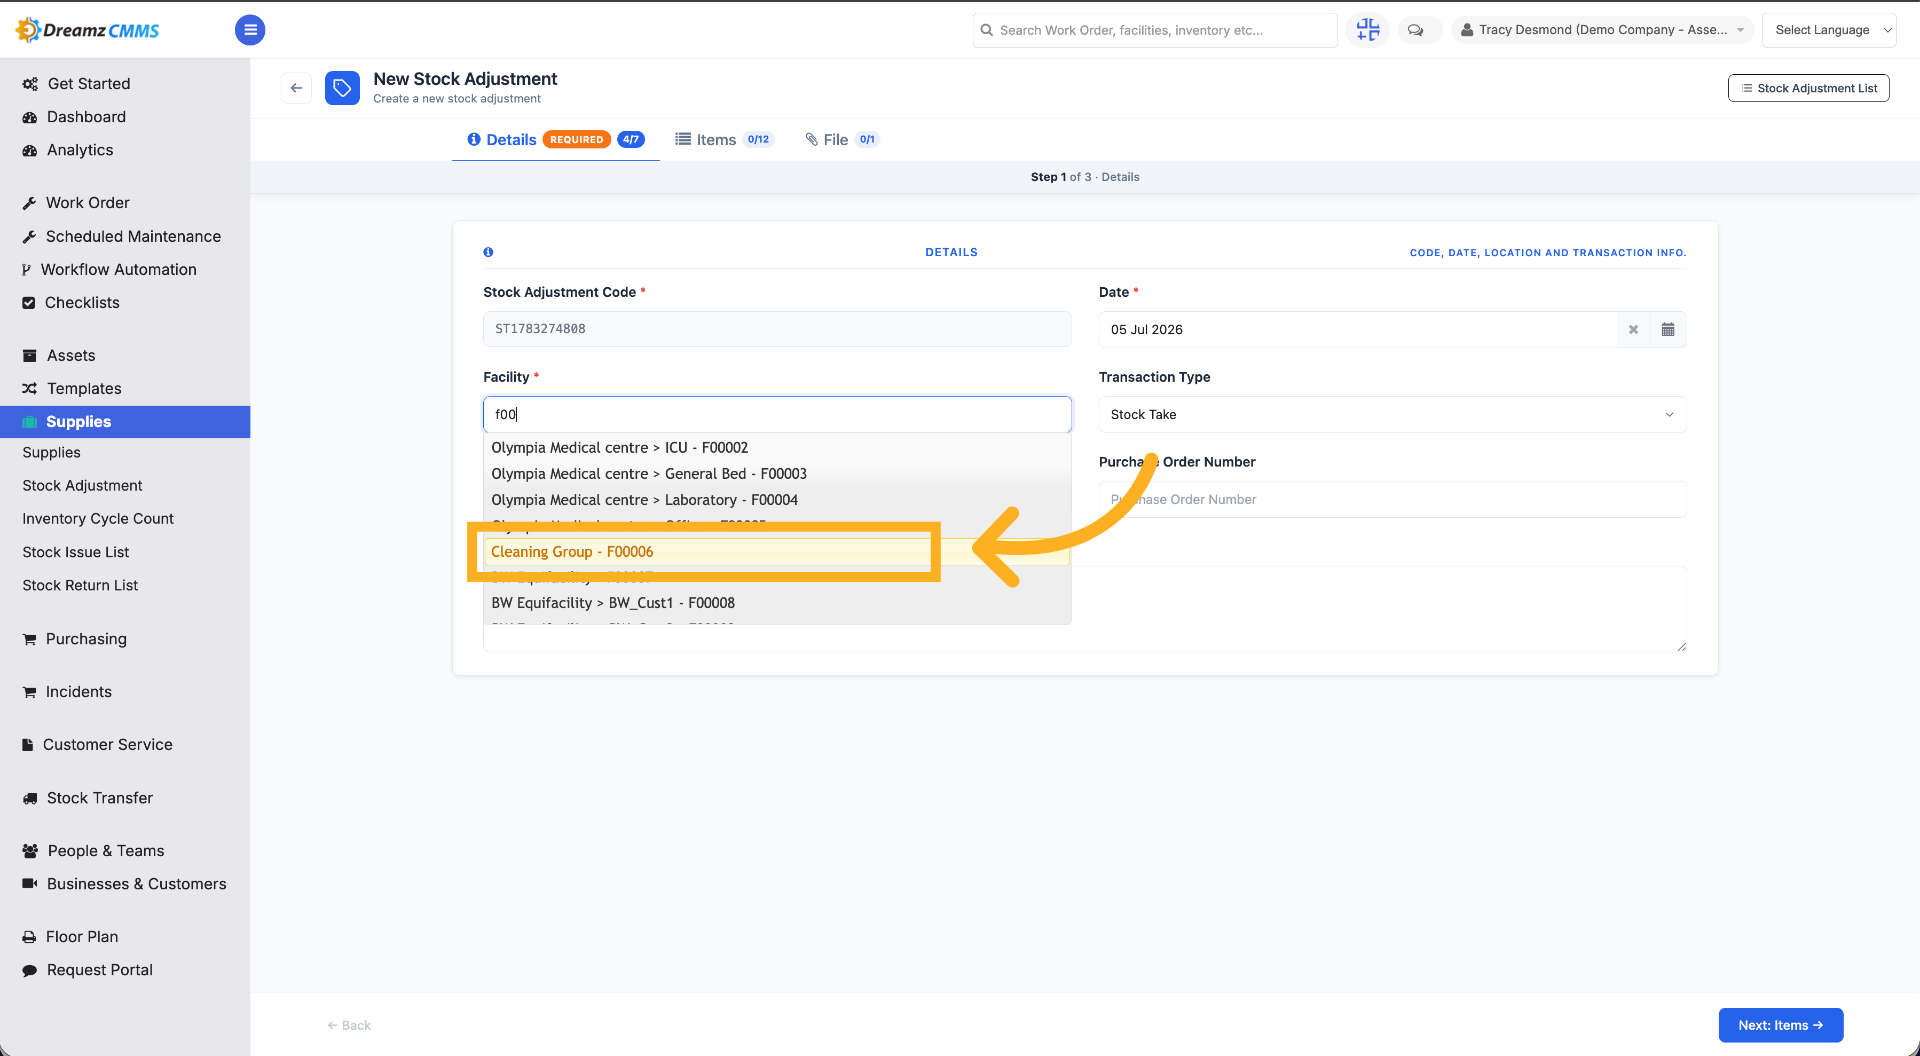
Step 8 – Complete the Facility Code
Fill in the facility code to complete accurate location identification for the facility.
Step 9 – Choose the Facility
Choose the facility from the facility listing.
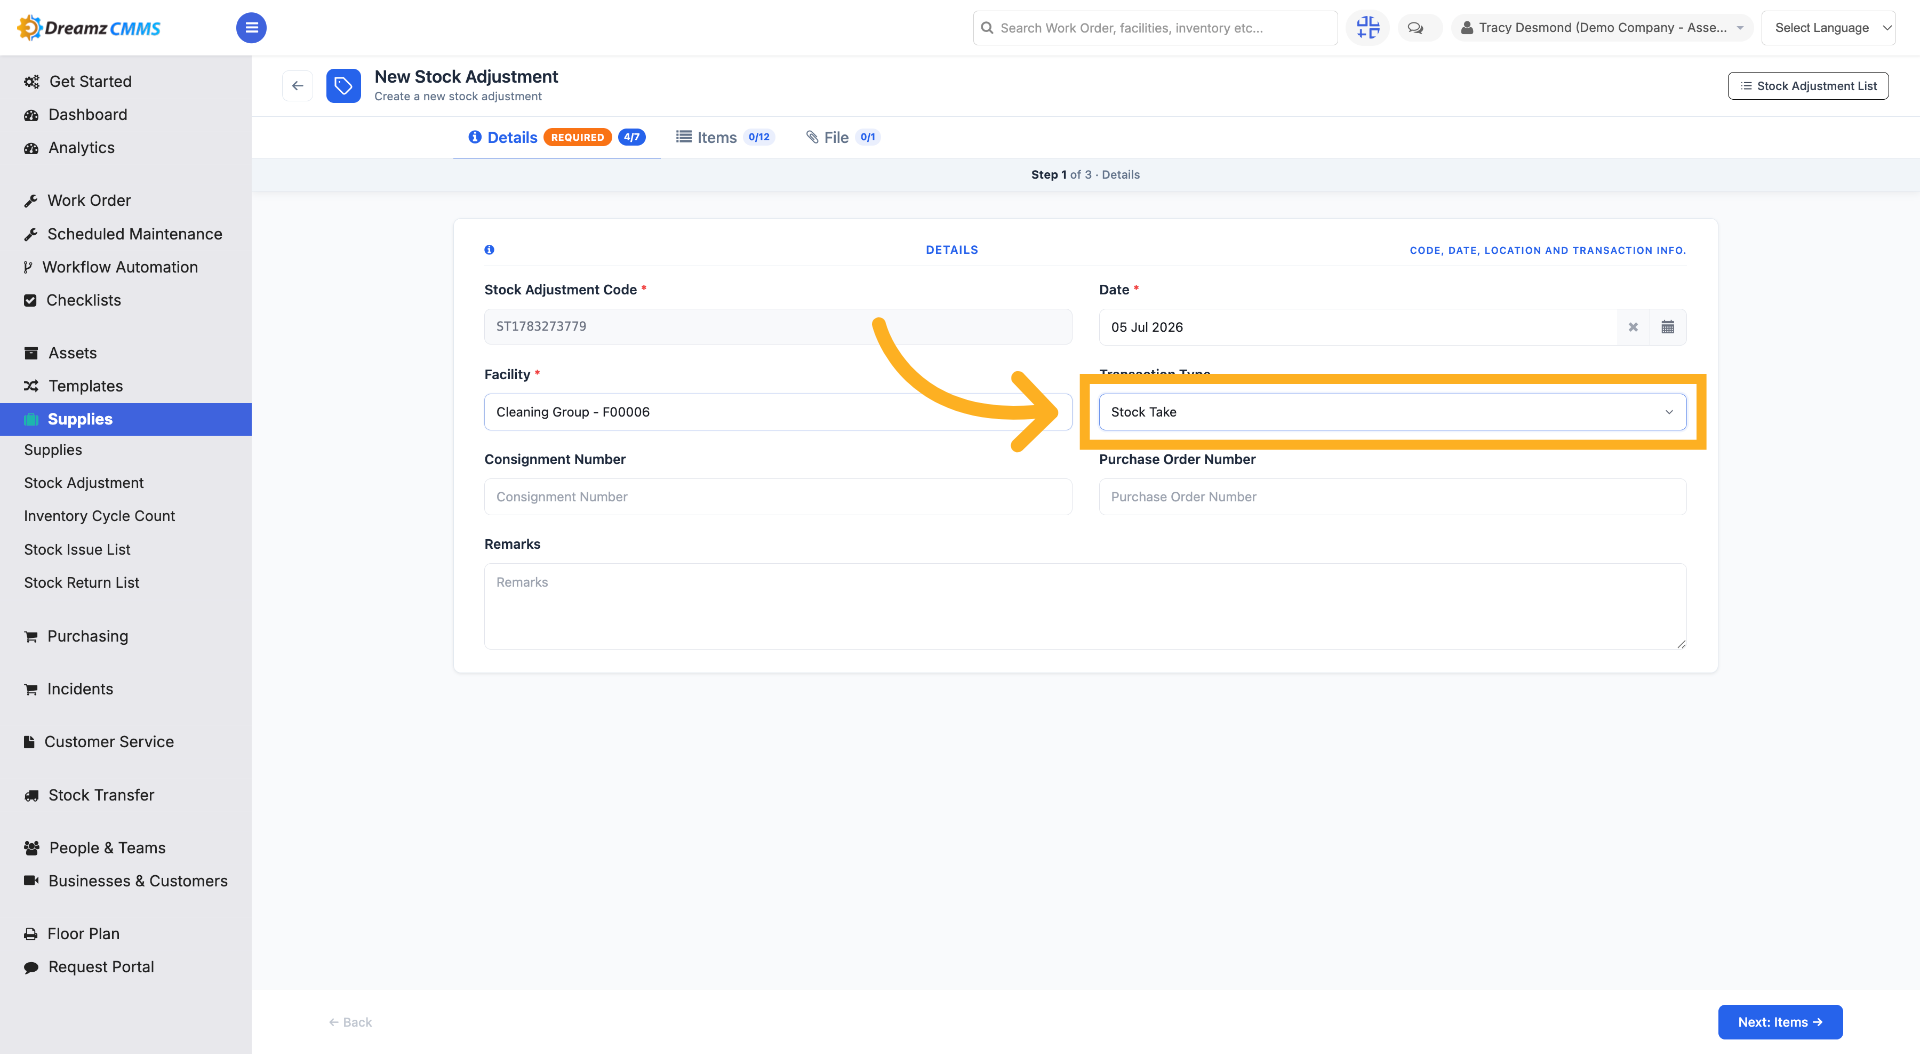
Step 10 – Select Adjustment Type
Click Stock Take, Restock, Consumed, or Sold to specify the type of stock adjustment being made.
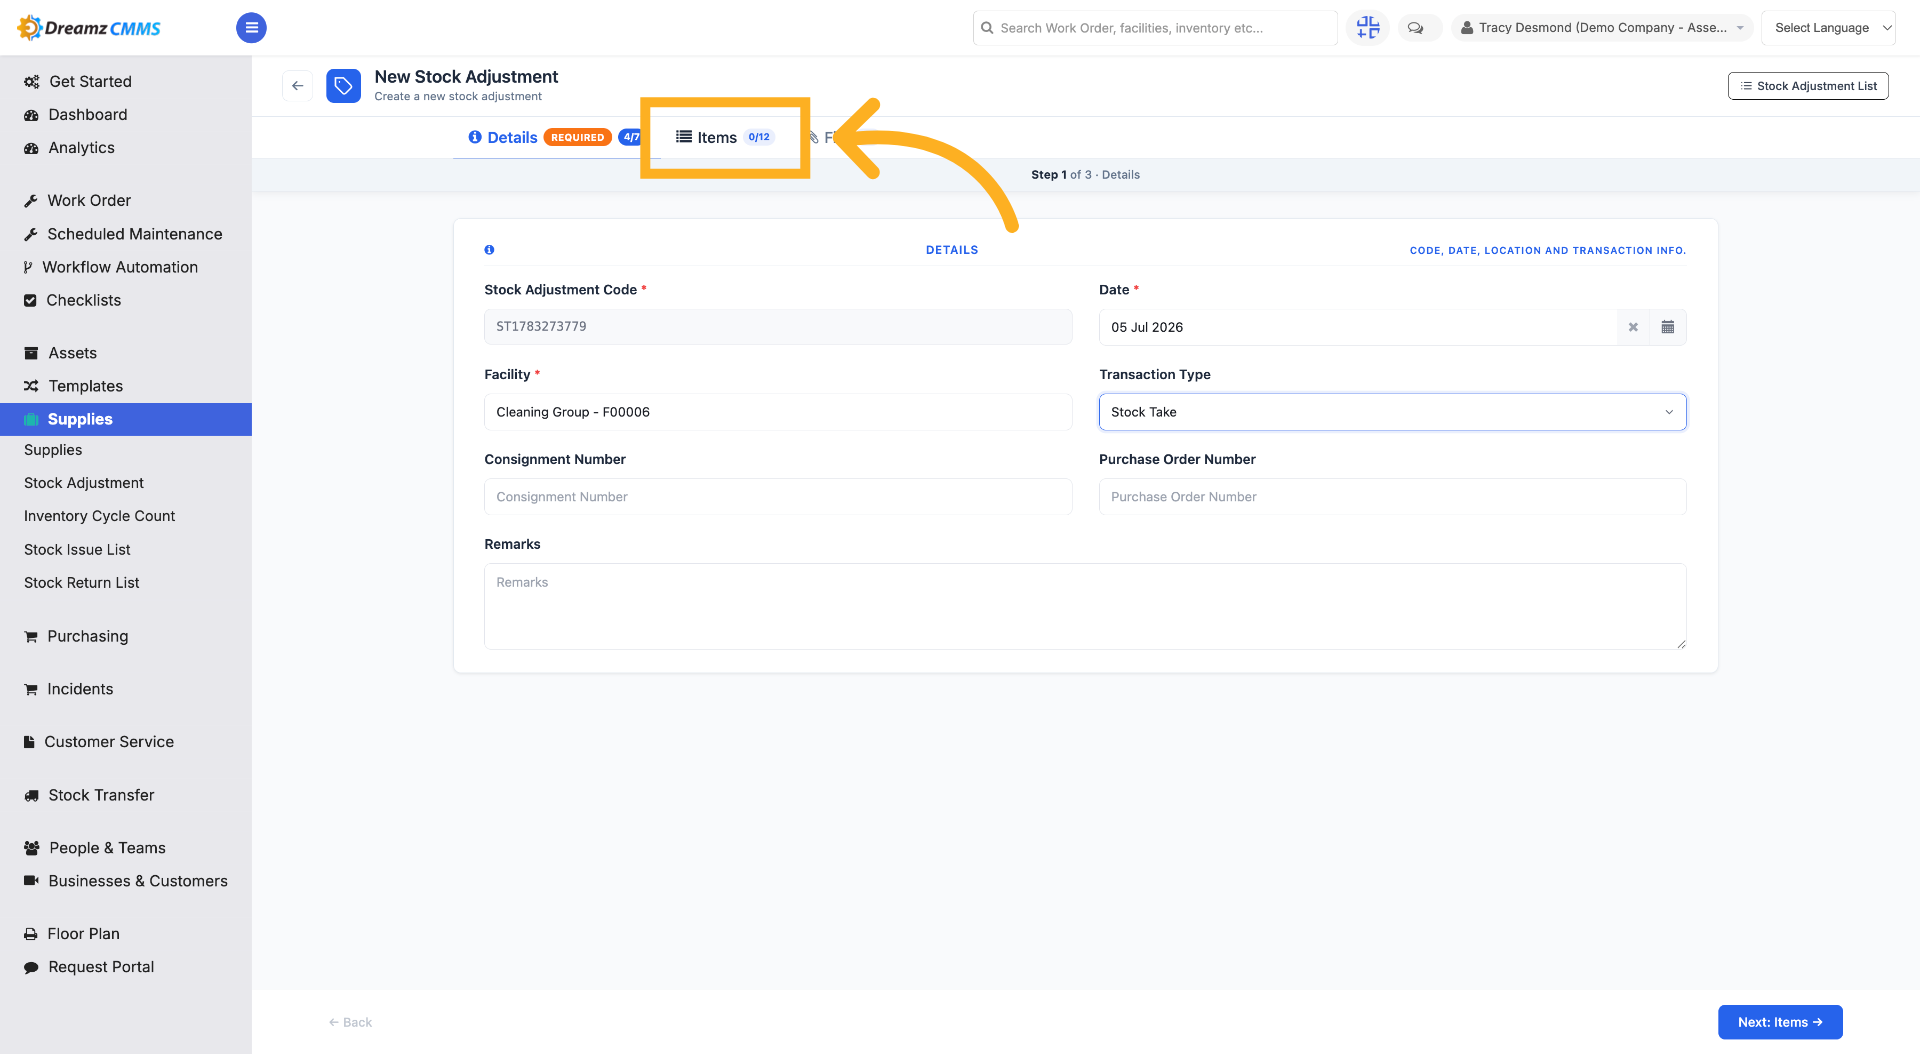
Step 11 – Access Items Section
Click "Items" to manage the items involved in this stock adjustment.
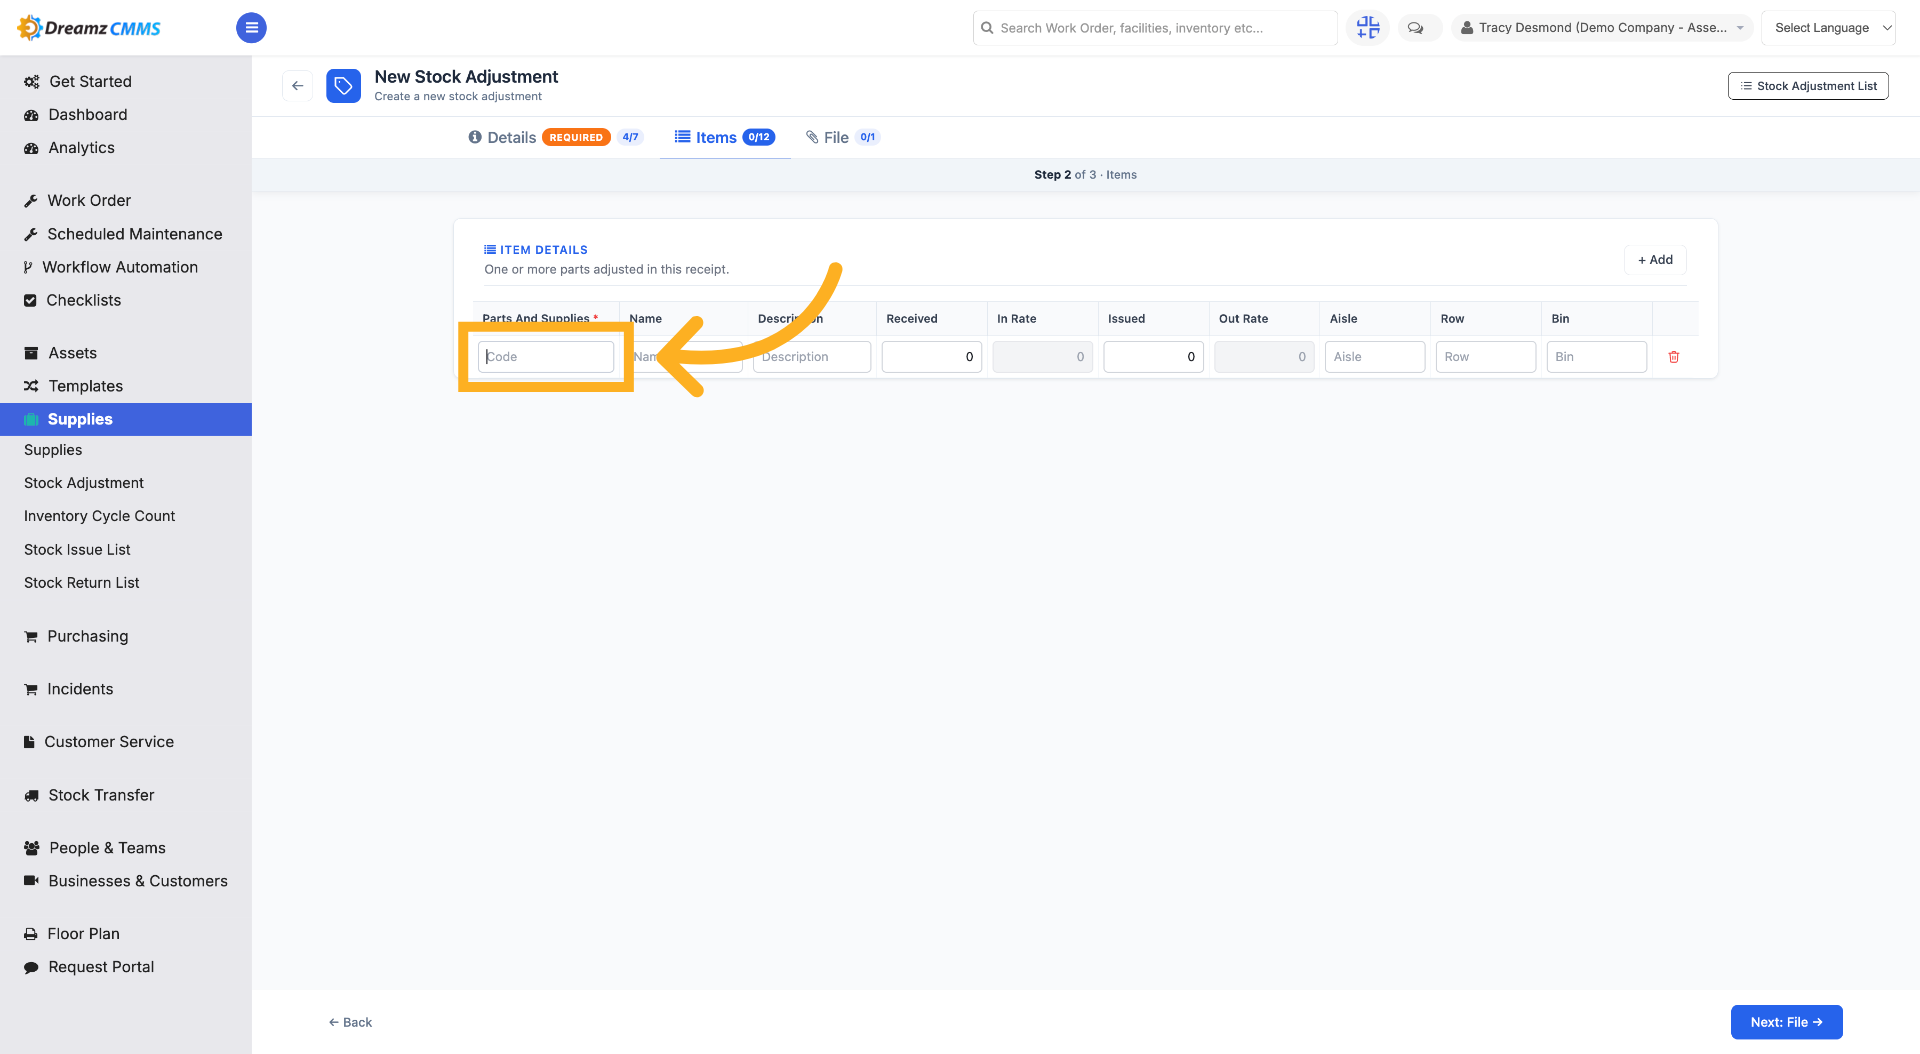
Step 12 – Sort by Code
Click "Code" to sort or filter items by their code identifiers.
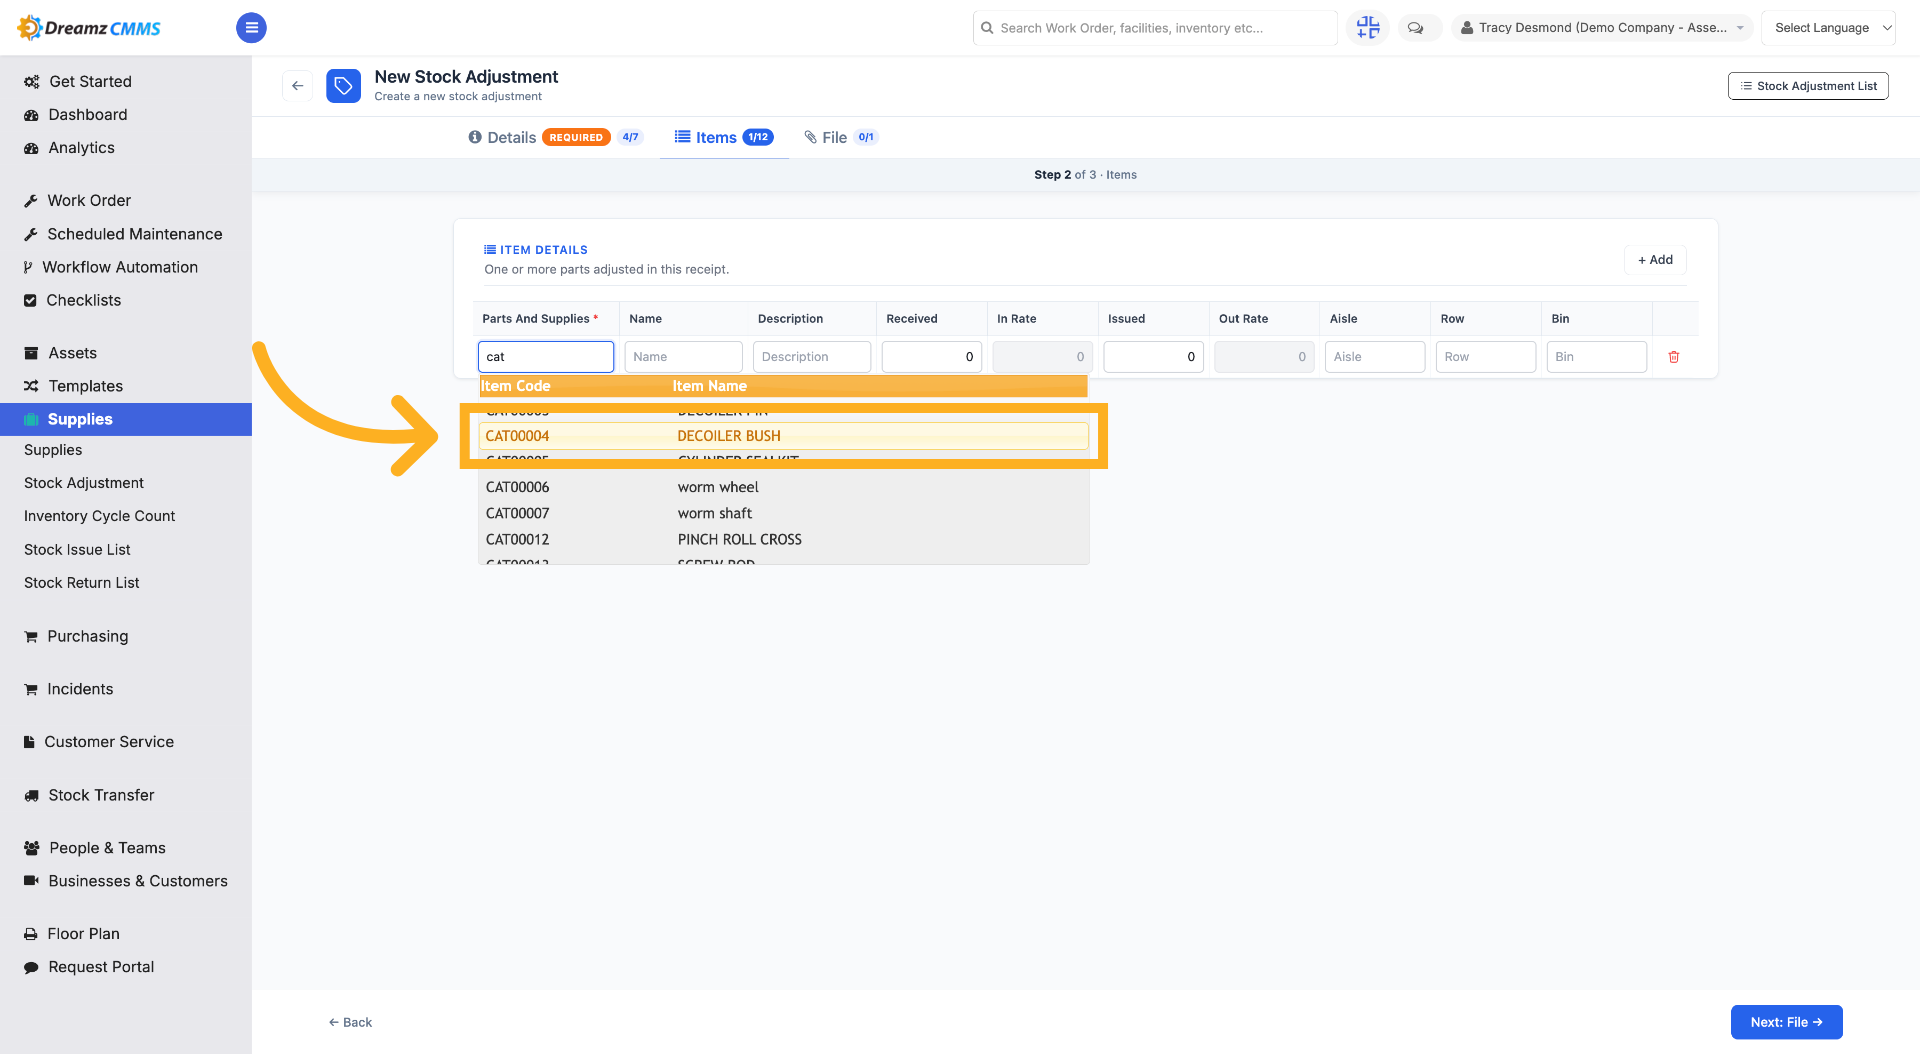
Step 13 – Select the Specific Item
Click the item you want (for example, "Decoiler Bush") to choose the specific item from the list for stock adjustment.
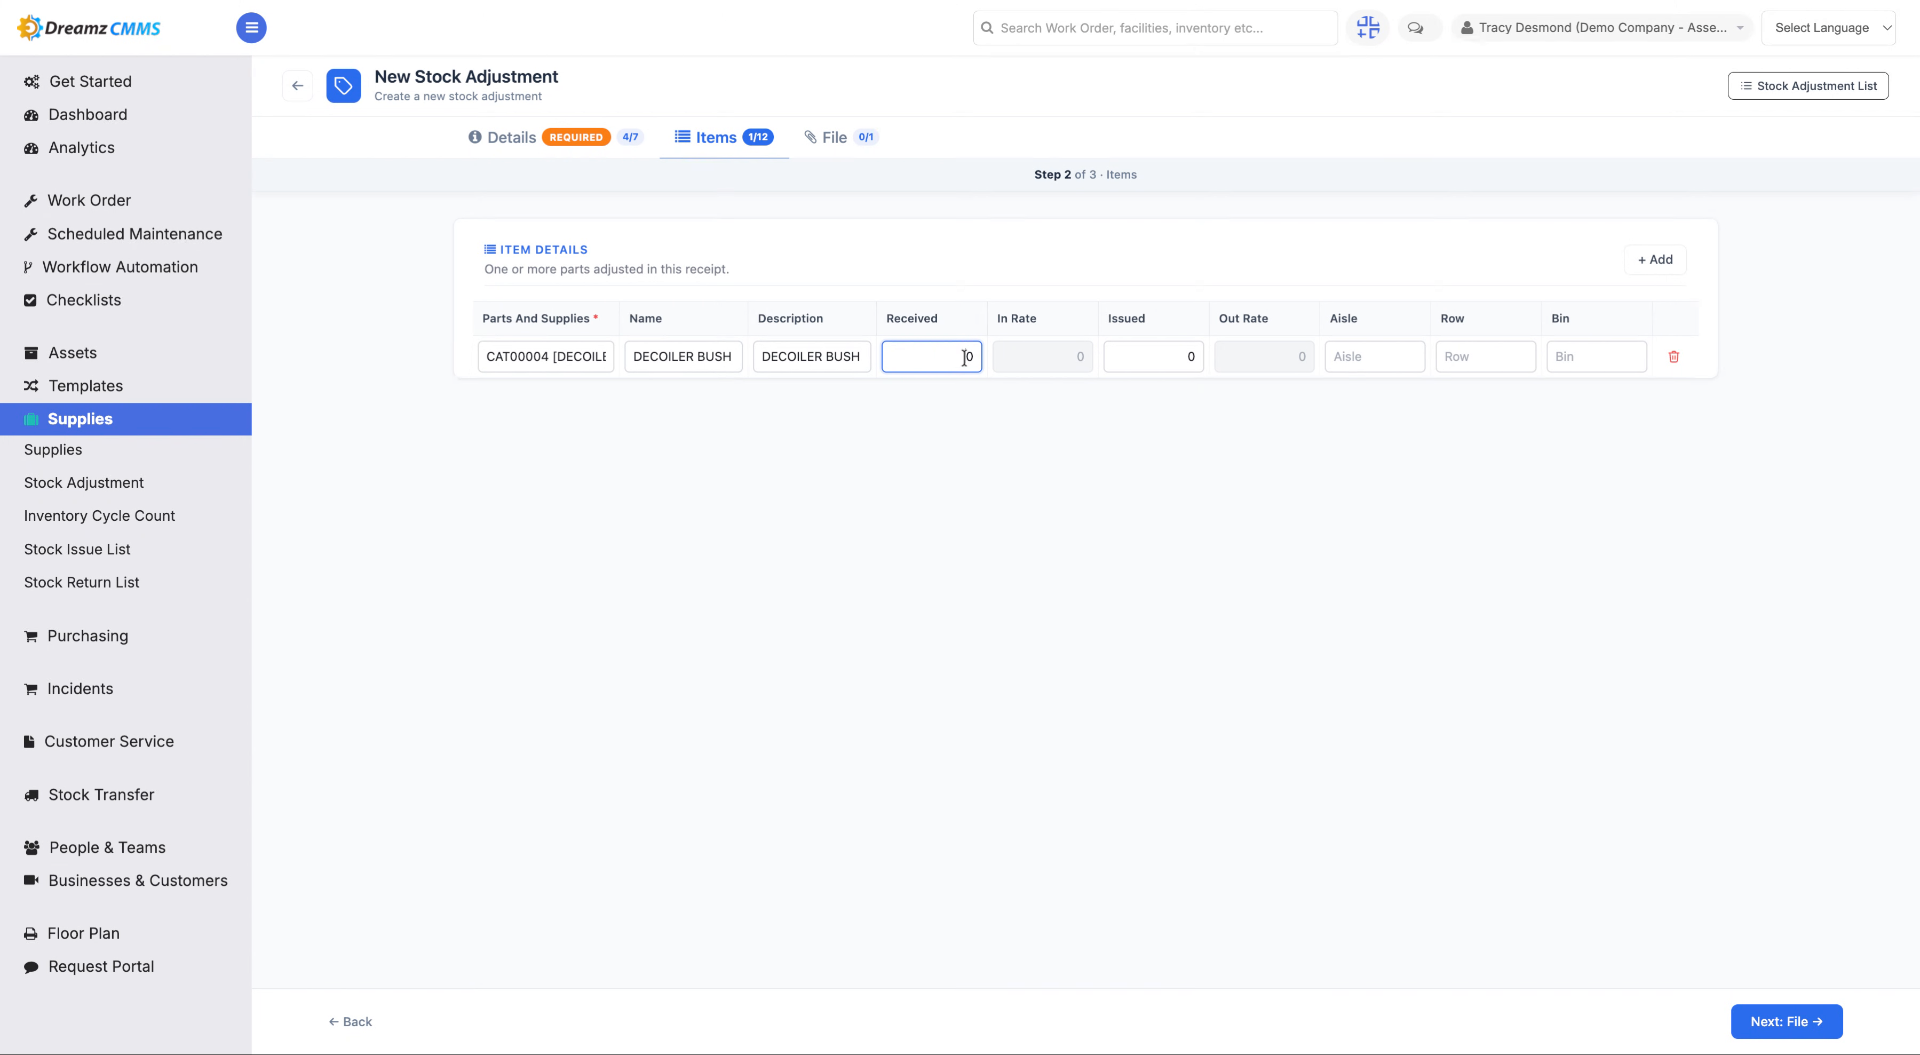
Step 14 – Enter Quantity
Fill in the received quantity (for example, "20") to specify the quantity for the stock adjustment.
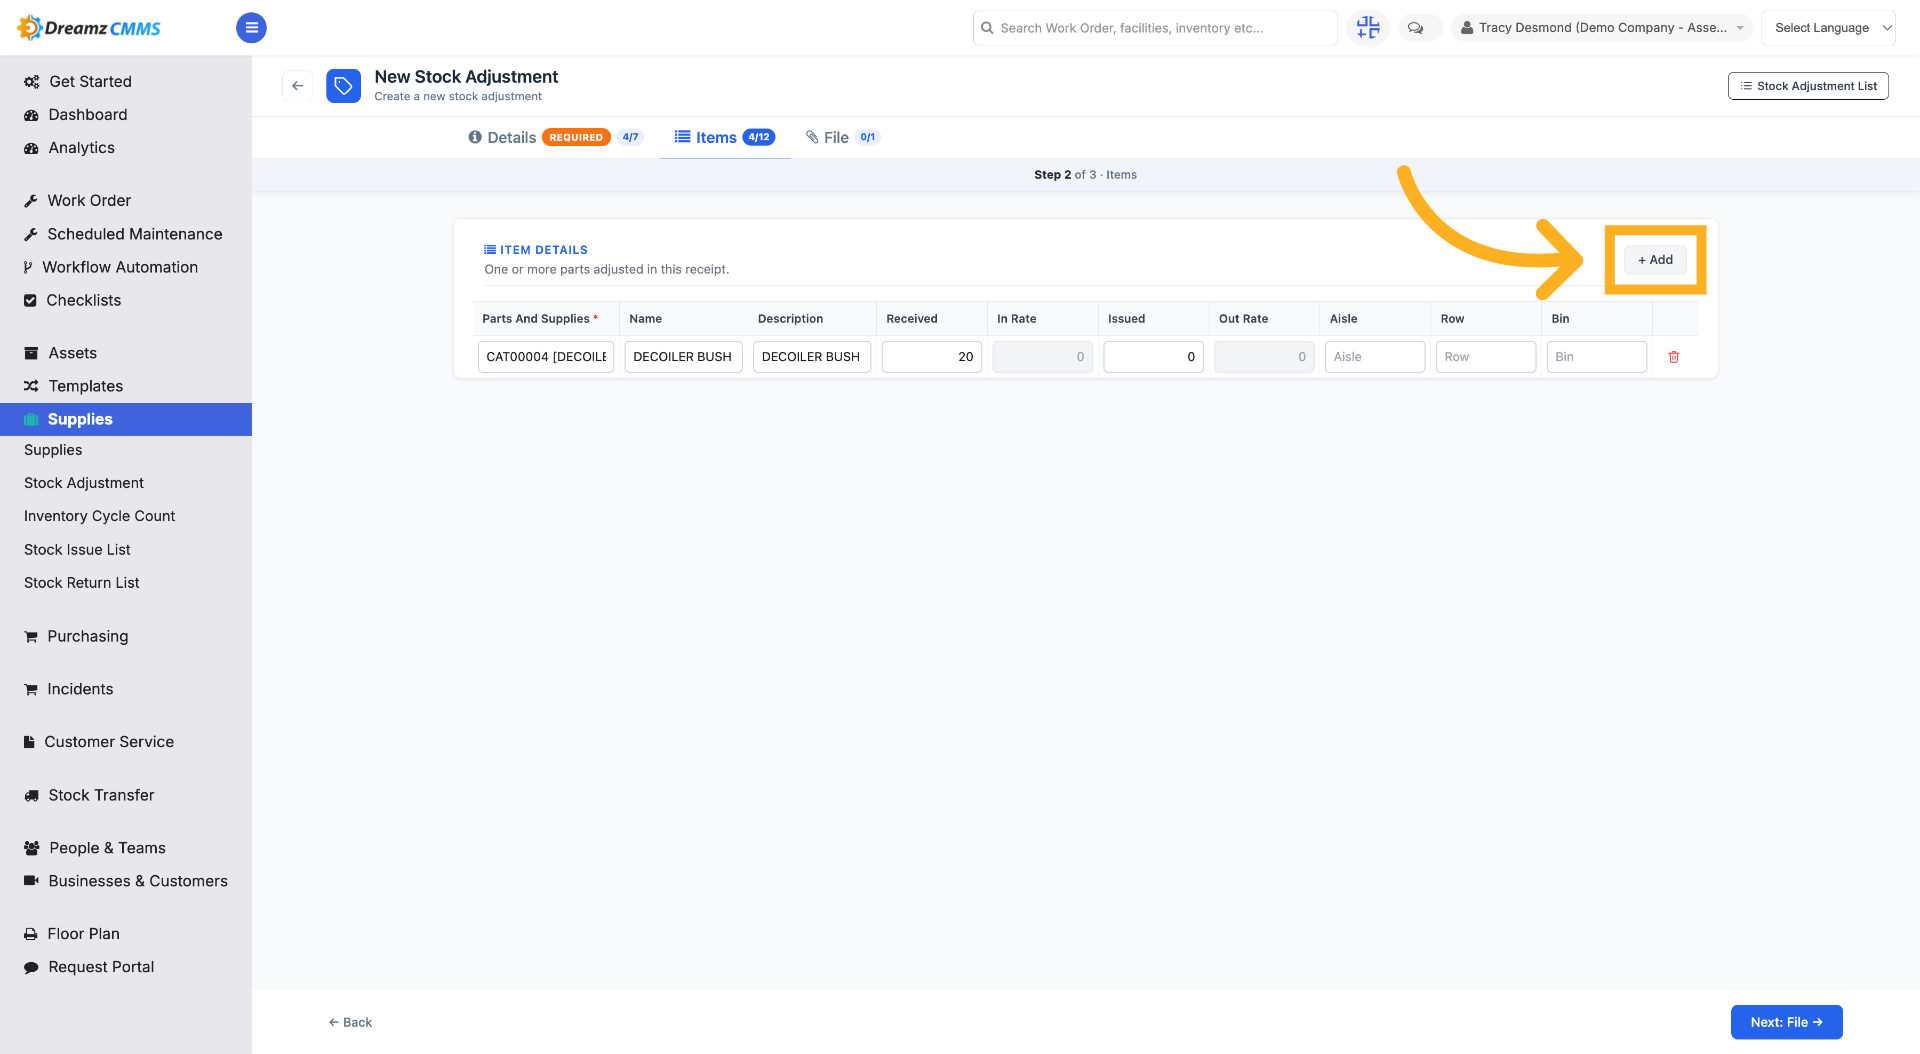
Step 15 – Add Another Item
Click "Add" to include an additional item in the stock adjustment.
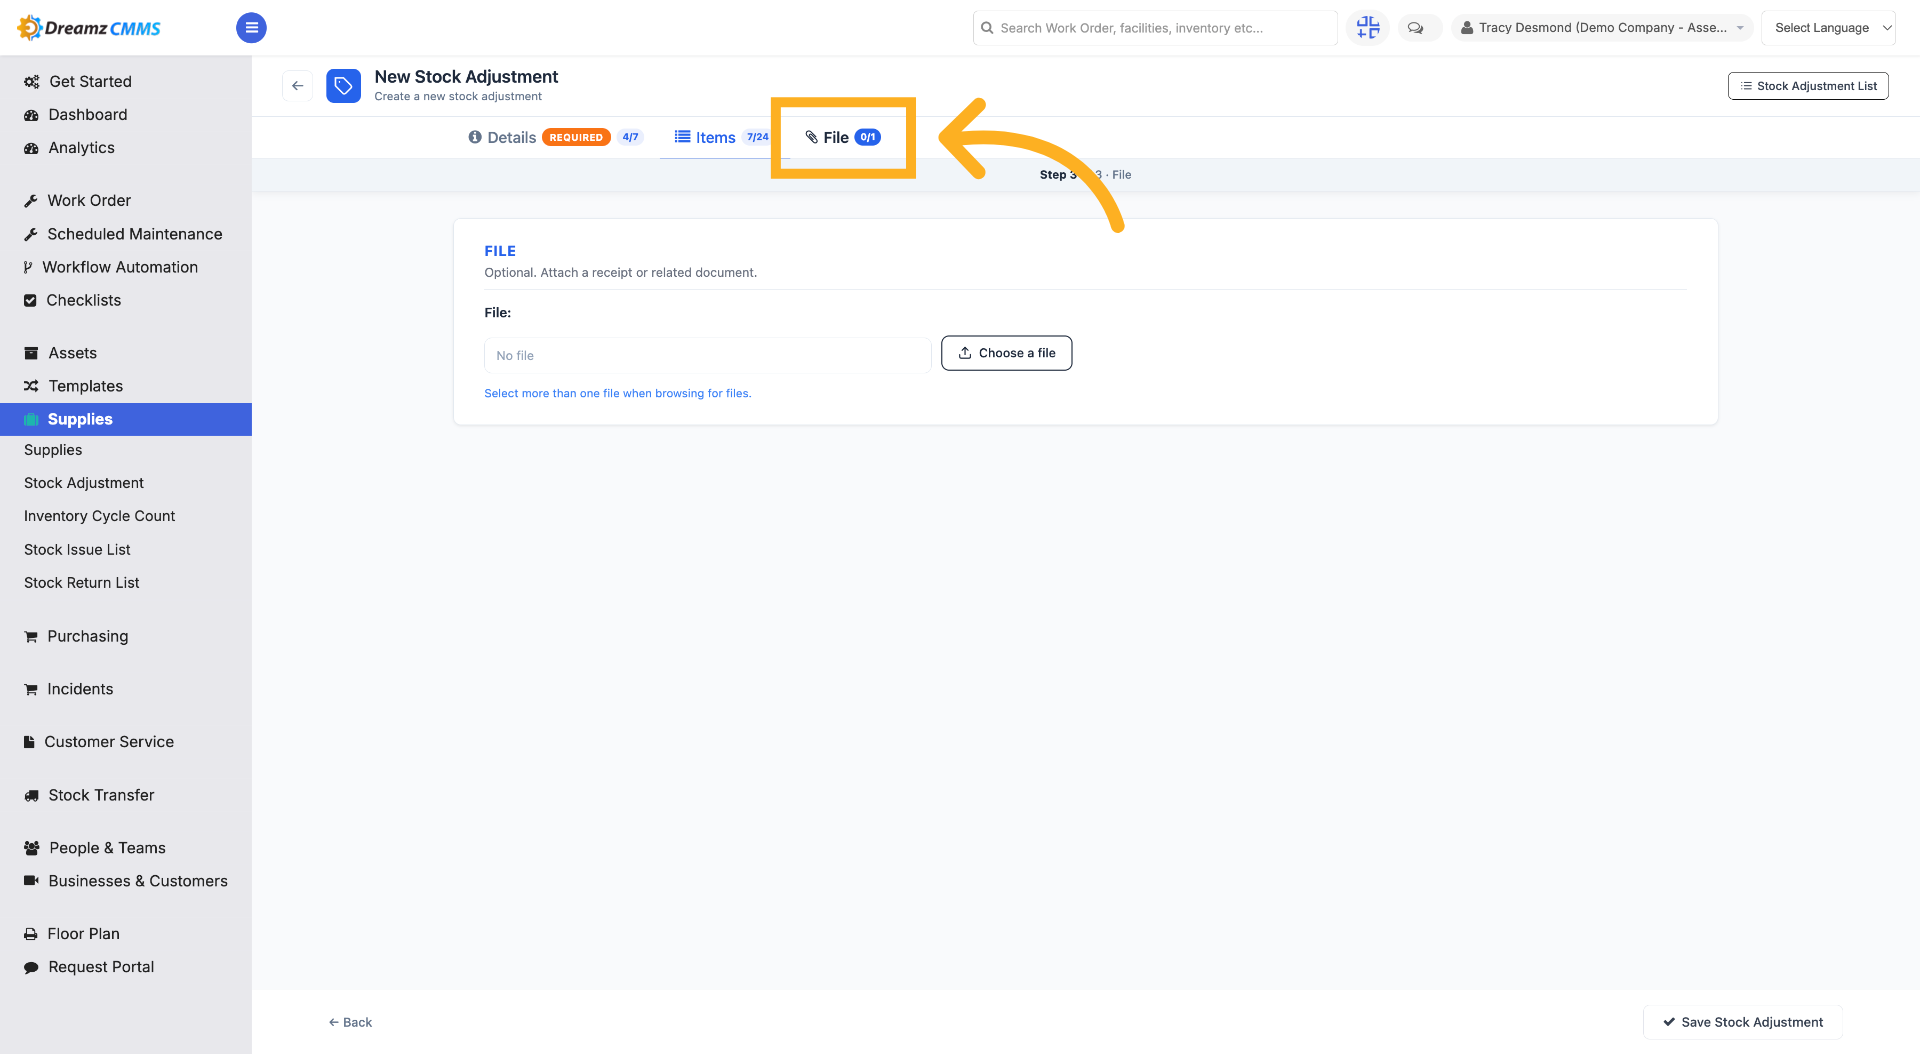
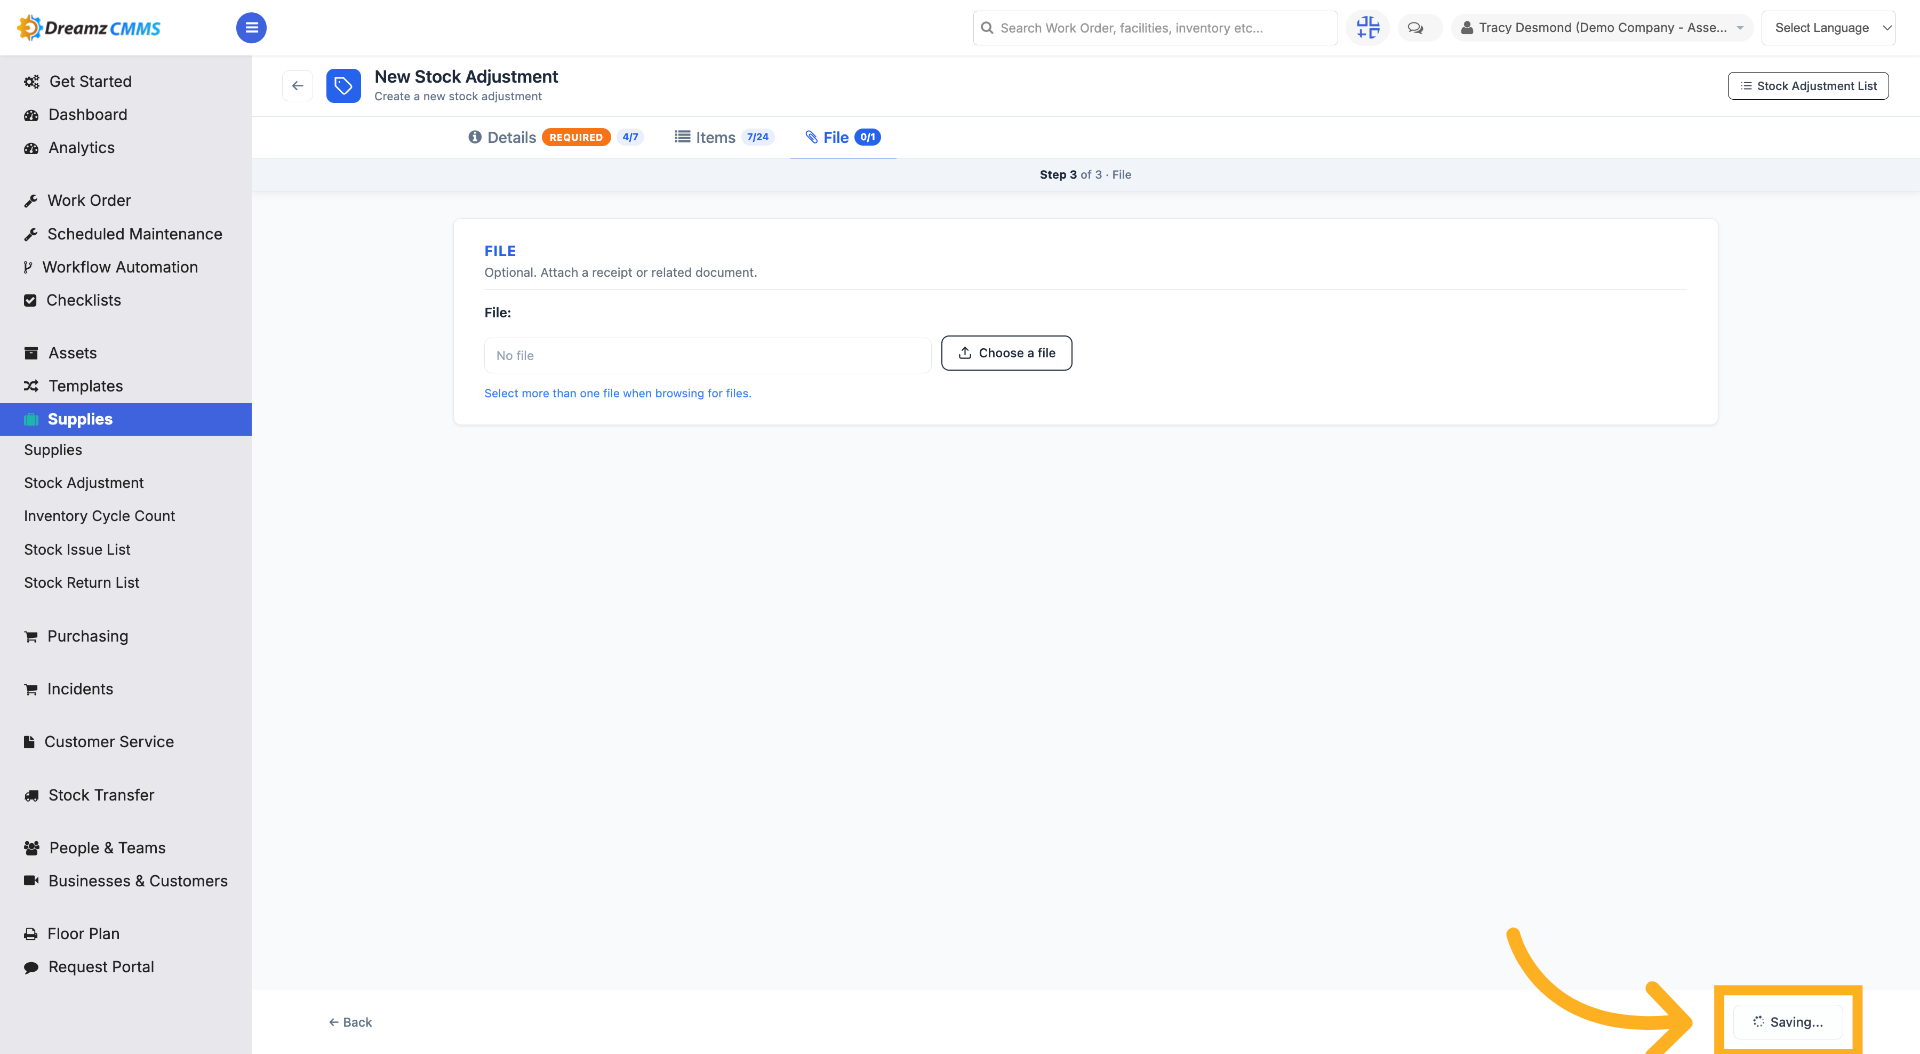
Step 16 – Access the Files Section
Click the "Files" tab to manage files related to this stock adjustment.
Step 17 – Save the Stock Adjustment
Click "Save" to save the stock adjustment and update your inventory records.
How to Manage Existing Stock Adjustments
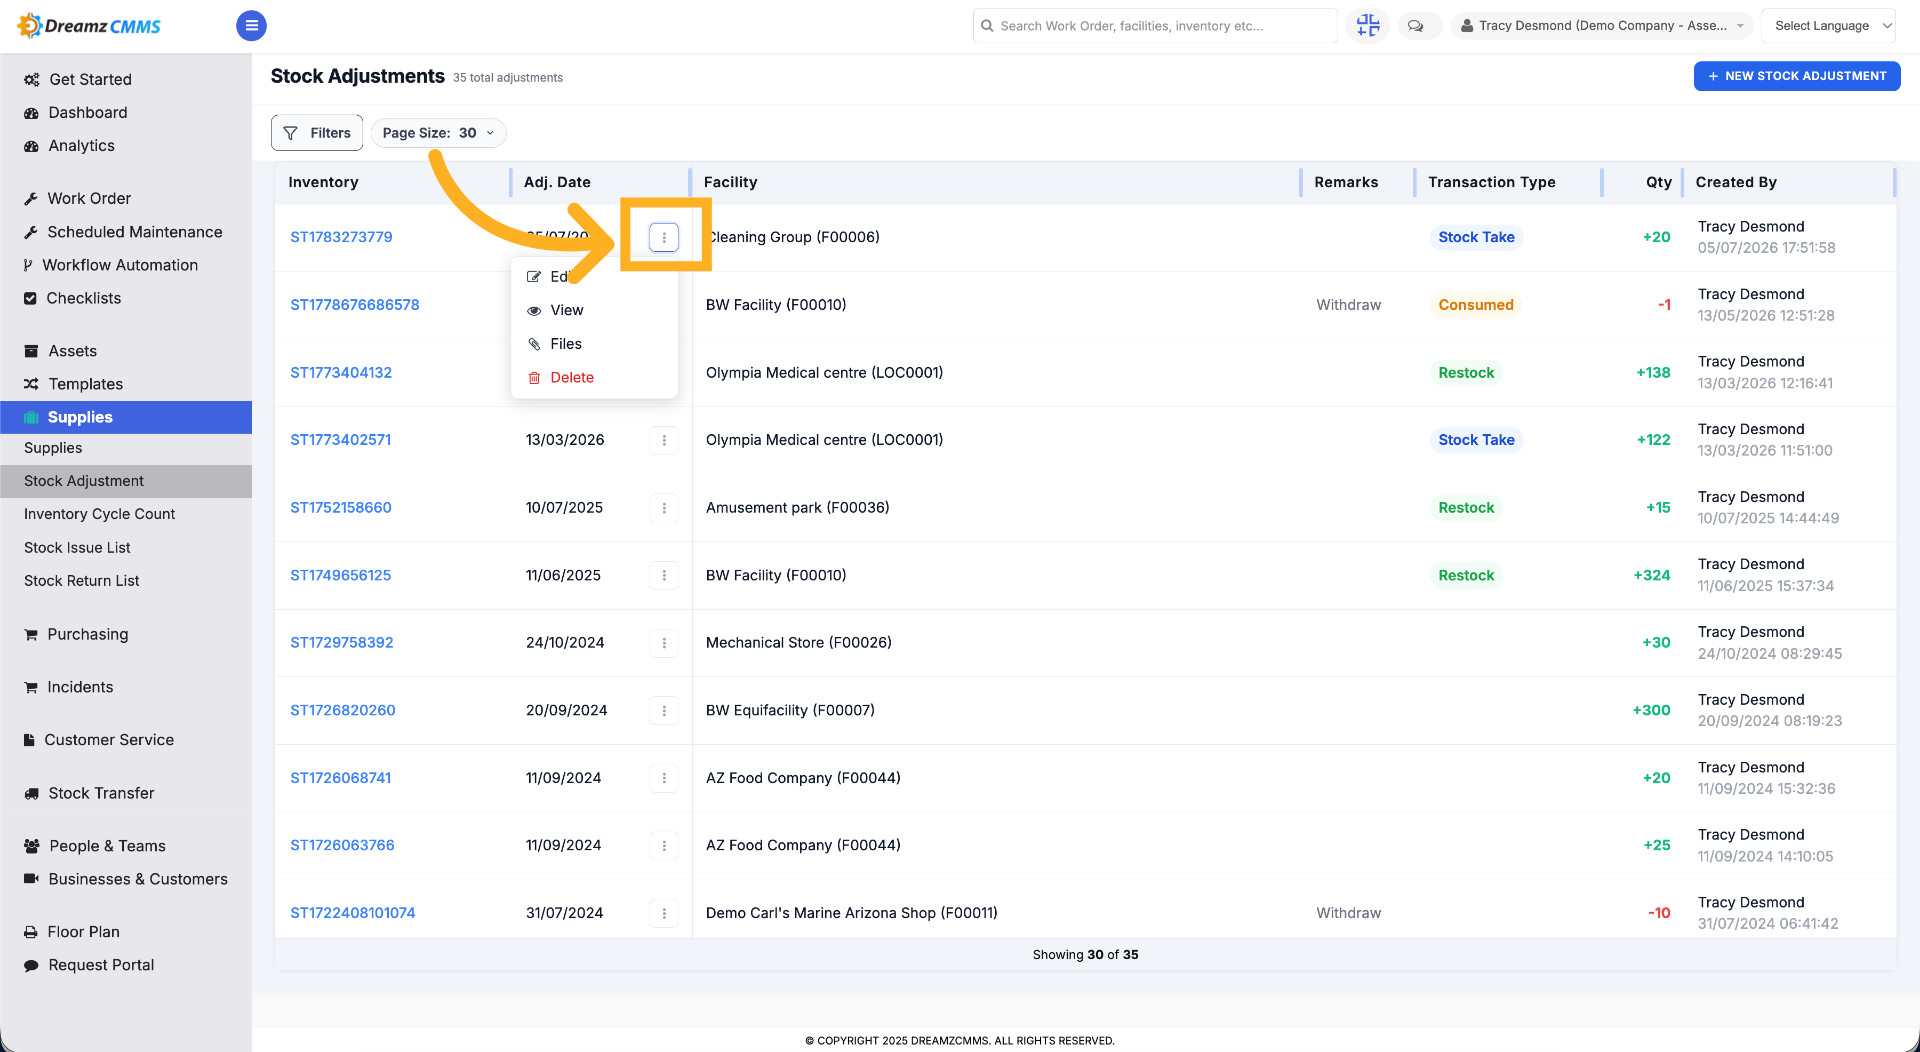
Step 1 – Click the 3-Dot Menu
Click the three dots option to open the other menu options associated with a stock adjustment.
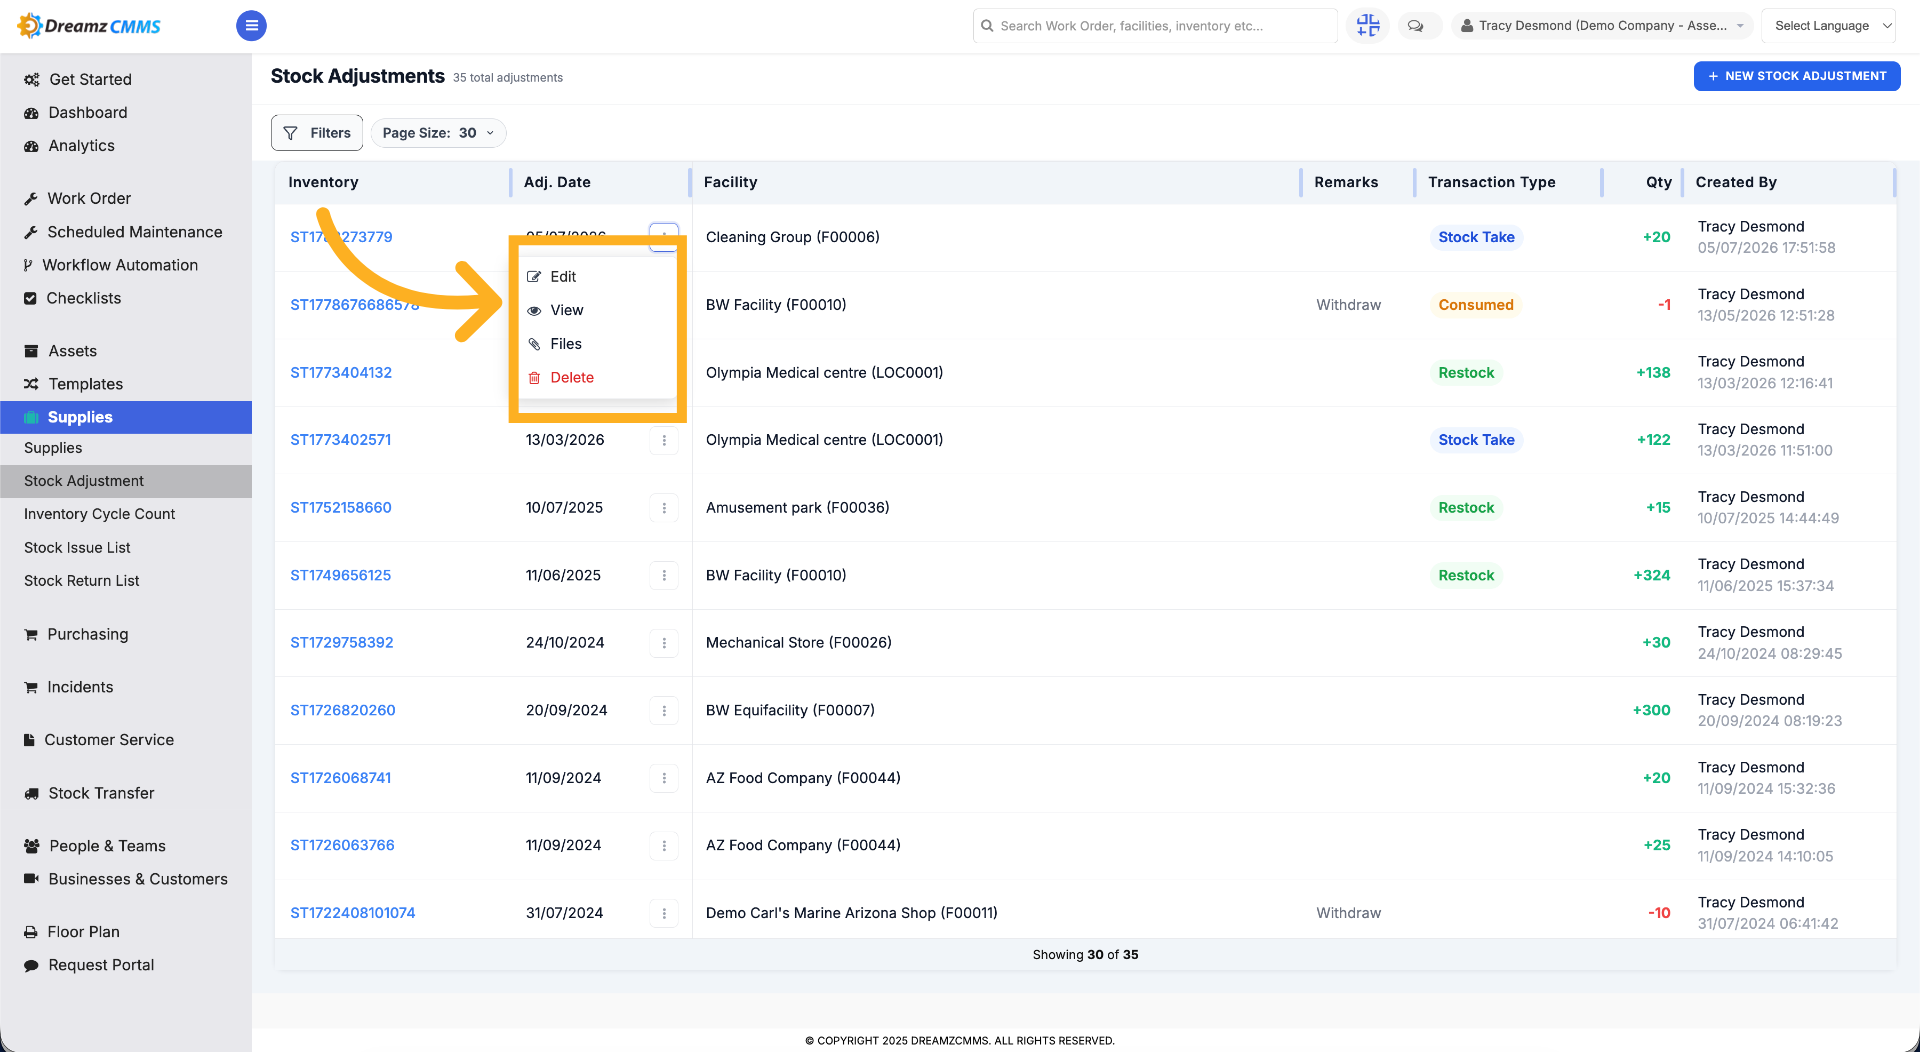
Step 2 – Use the Other Menu Options
From the menu options, you can edit, view, see the files associated with that stock adjustment, or delete the stock adjustment.
Tips for Managing Stock Adjustments
- Choose the correct adjustment type (Stock Take, Restock, Consumed, or Sold) so your inventory history accurately reflects why levels changed.
- Use the filter options to quickly locate a past stock adjustment by code or facility.
- Attach supporting files (like receipts or counts) to a stock adjustment for an auditable record.
- Add multiple items to a single adjustment when reconciling several parts from the same stock take.
Frequently Asked Questions
What types of stock adjustments can I record?
You can record a Stock Take, Restock, Consumed, or Sold adjustment, depending on why the inventory level changed.
Can I add more than one item to a single stock adjustment?
Yes. Use the Items section to add and adjust quantities for multiple items within the same adjustment.
Can I attach files to a stock adjustment?
Yes. Use the Files tab to attach supporting documents to the adjustment record.
Can I edit or delete a stock adjustment after saving it?
Yes. Use the three-dot menu next to a stock adjustment to edit, view, see attached files, or delete it.