Manage Stock Issue and Return in DreamzCMMS
This tutorial guides you through managing stock issues and returns using DreamzCMMS. You will learn how to create new stock issues and handle stock returns efficiently.
Overview
Stock Issues let you record inventory being issued out — to an employee, work order, or other recipient — along with quantity, price, and payment details. Stock Returns let you bring issued items back into inventory, with a documented reason and quantity. Both processes keep your inventory records accurate and auditable.
Before You Begin
- You must have access to the Supplies section in your account.
- Know who the stock is being issued to, which items and quantities are involved, and the applicable payment method before starting.
How to Create a New Stock Issue
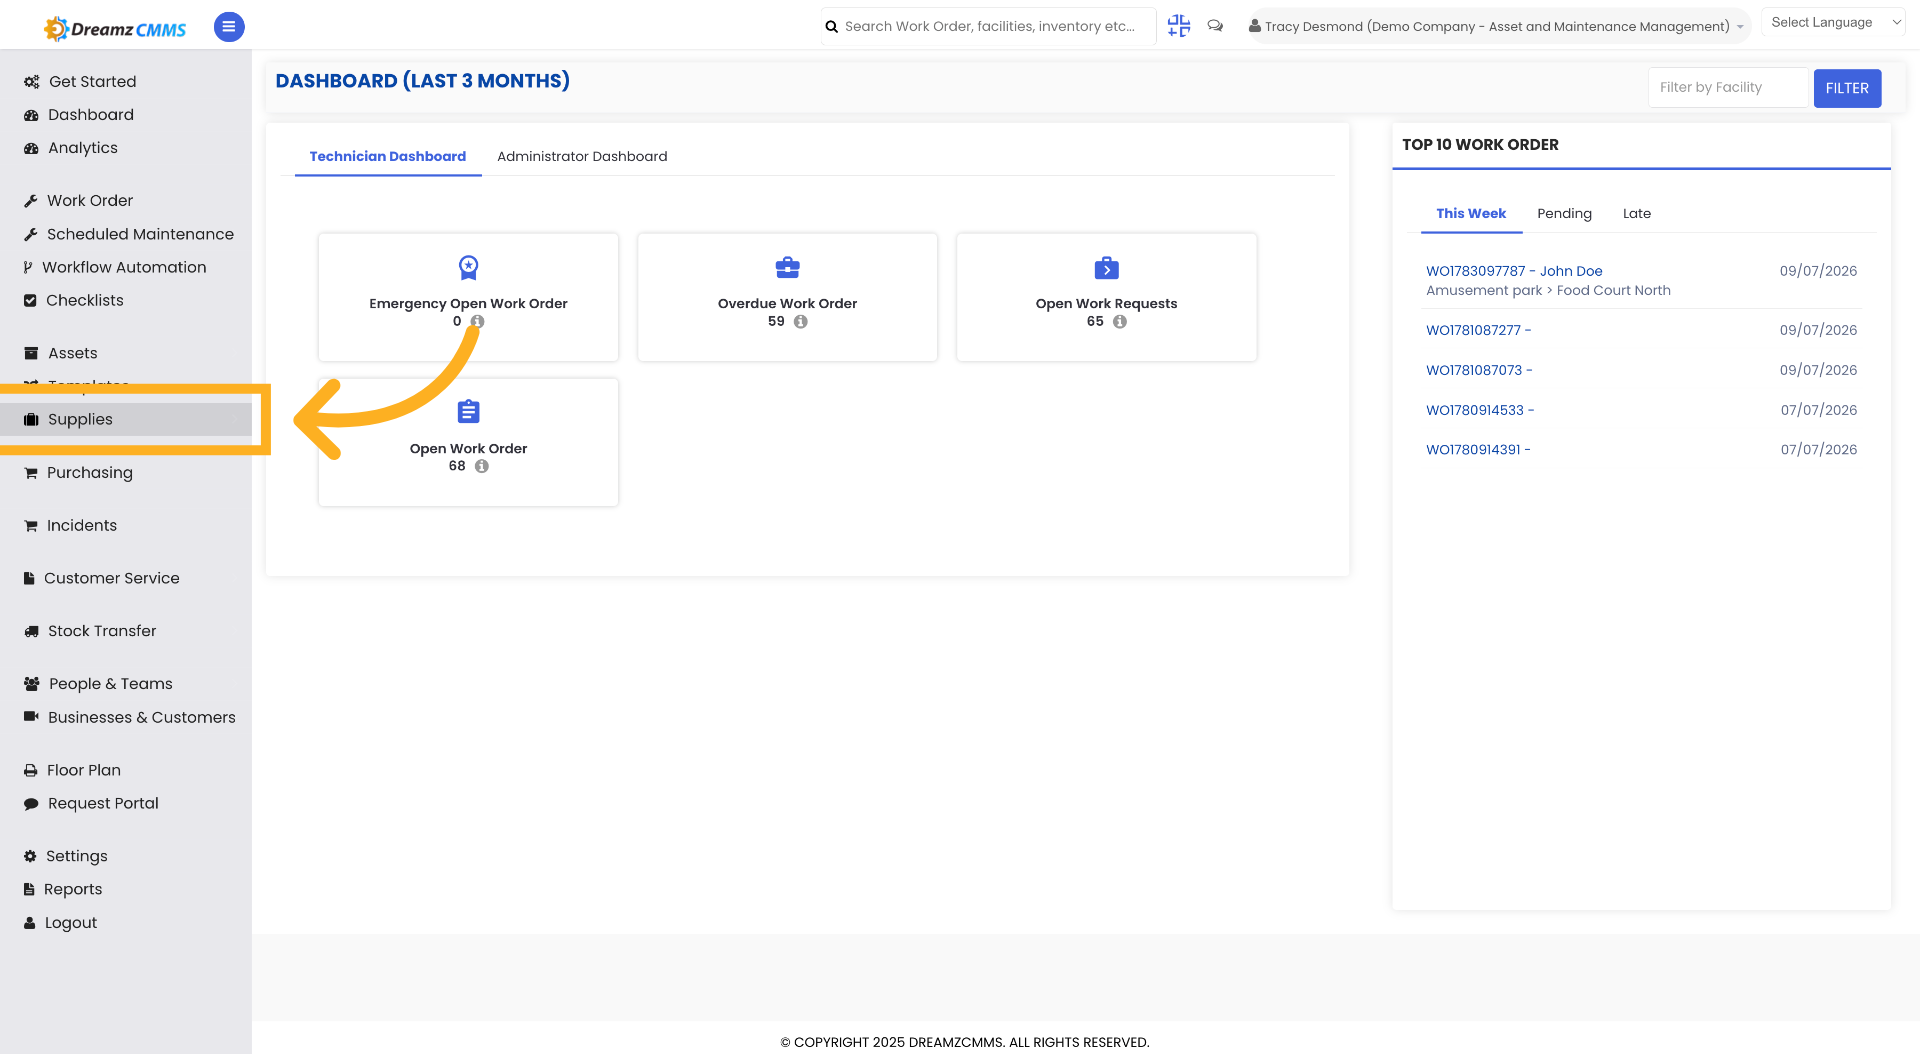
Step 1 – Access Supplies Section
Click "Supplies" to open the supplies management section in the dashboard.
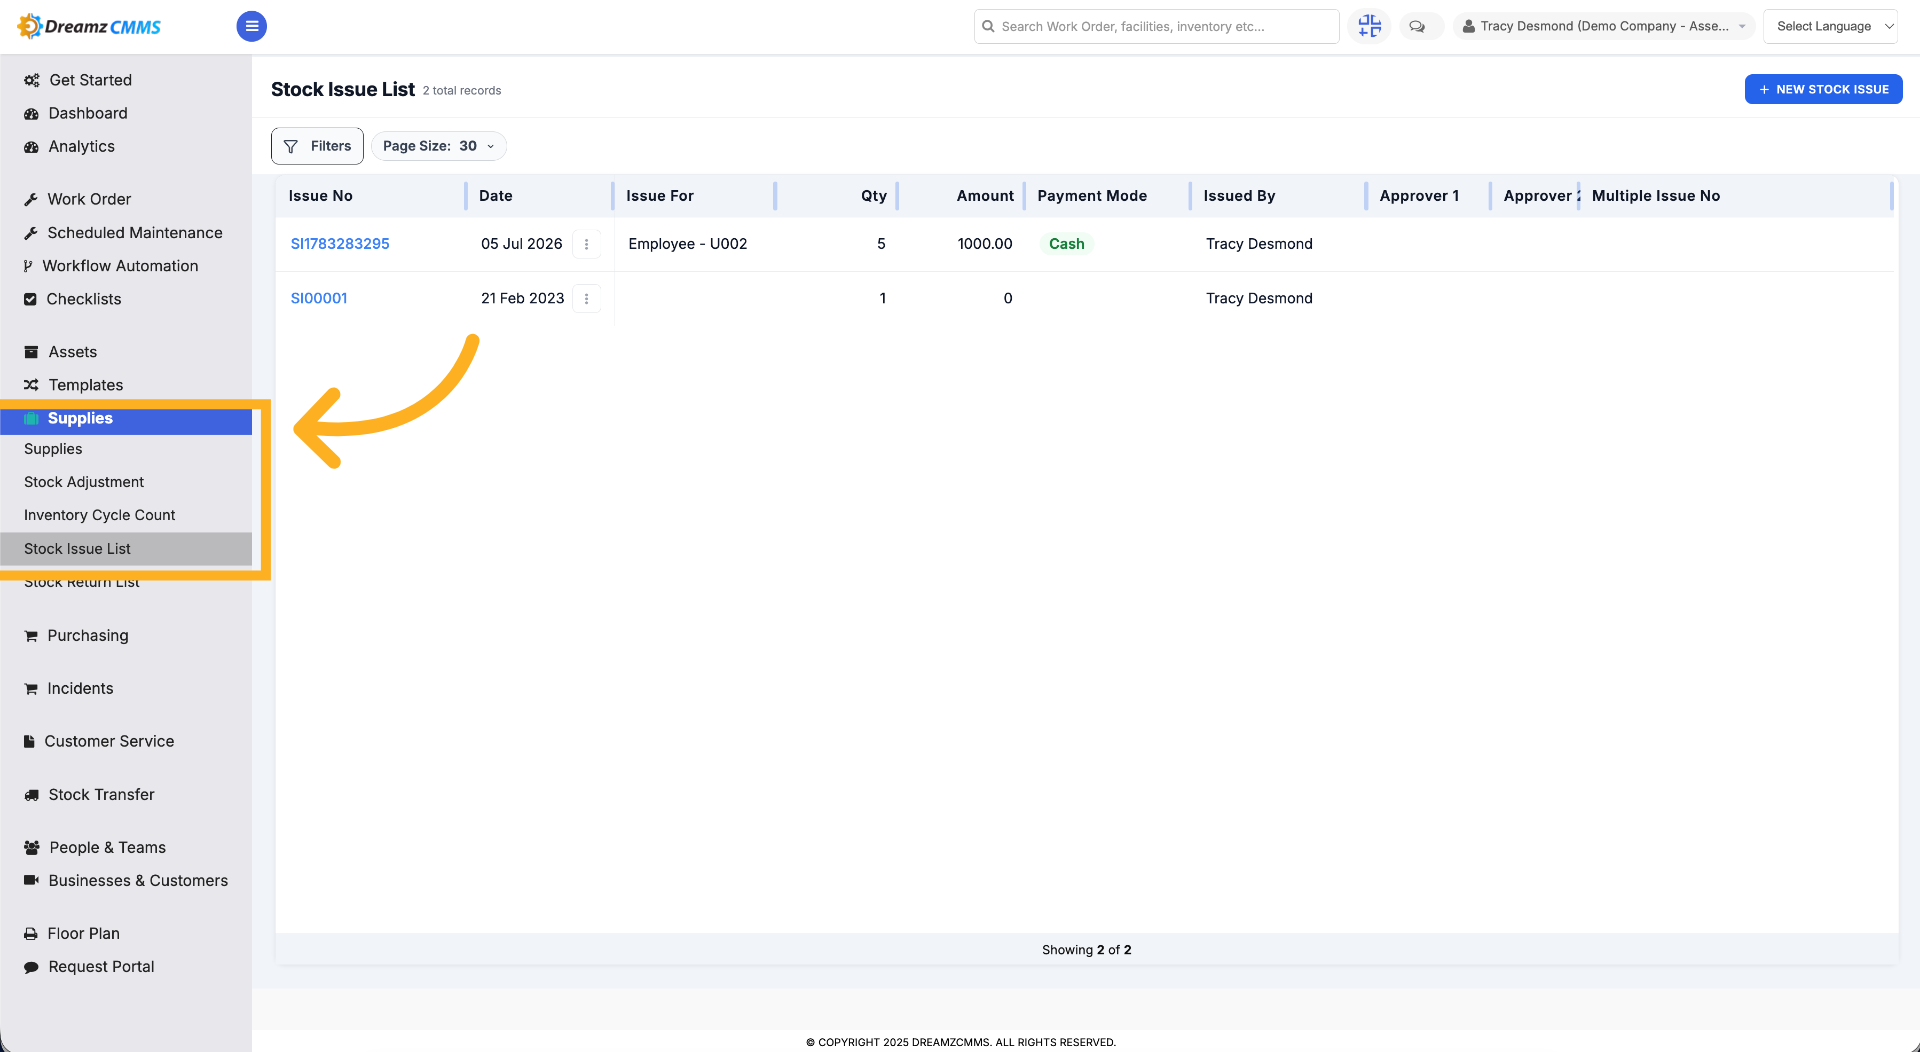
Step 2 – Open Stock Issue List
Click "Stock Issue List" to view all current stock issues and their details.
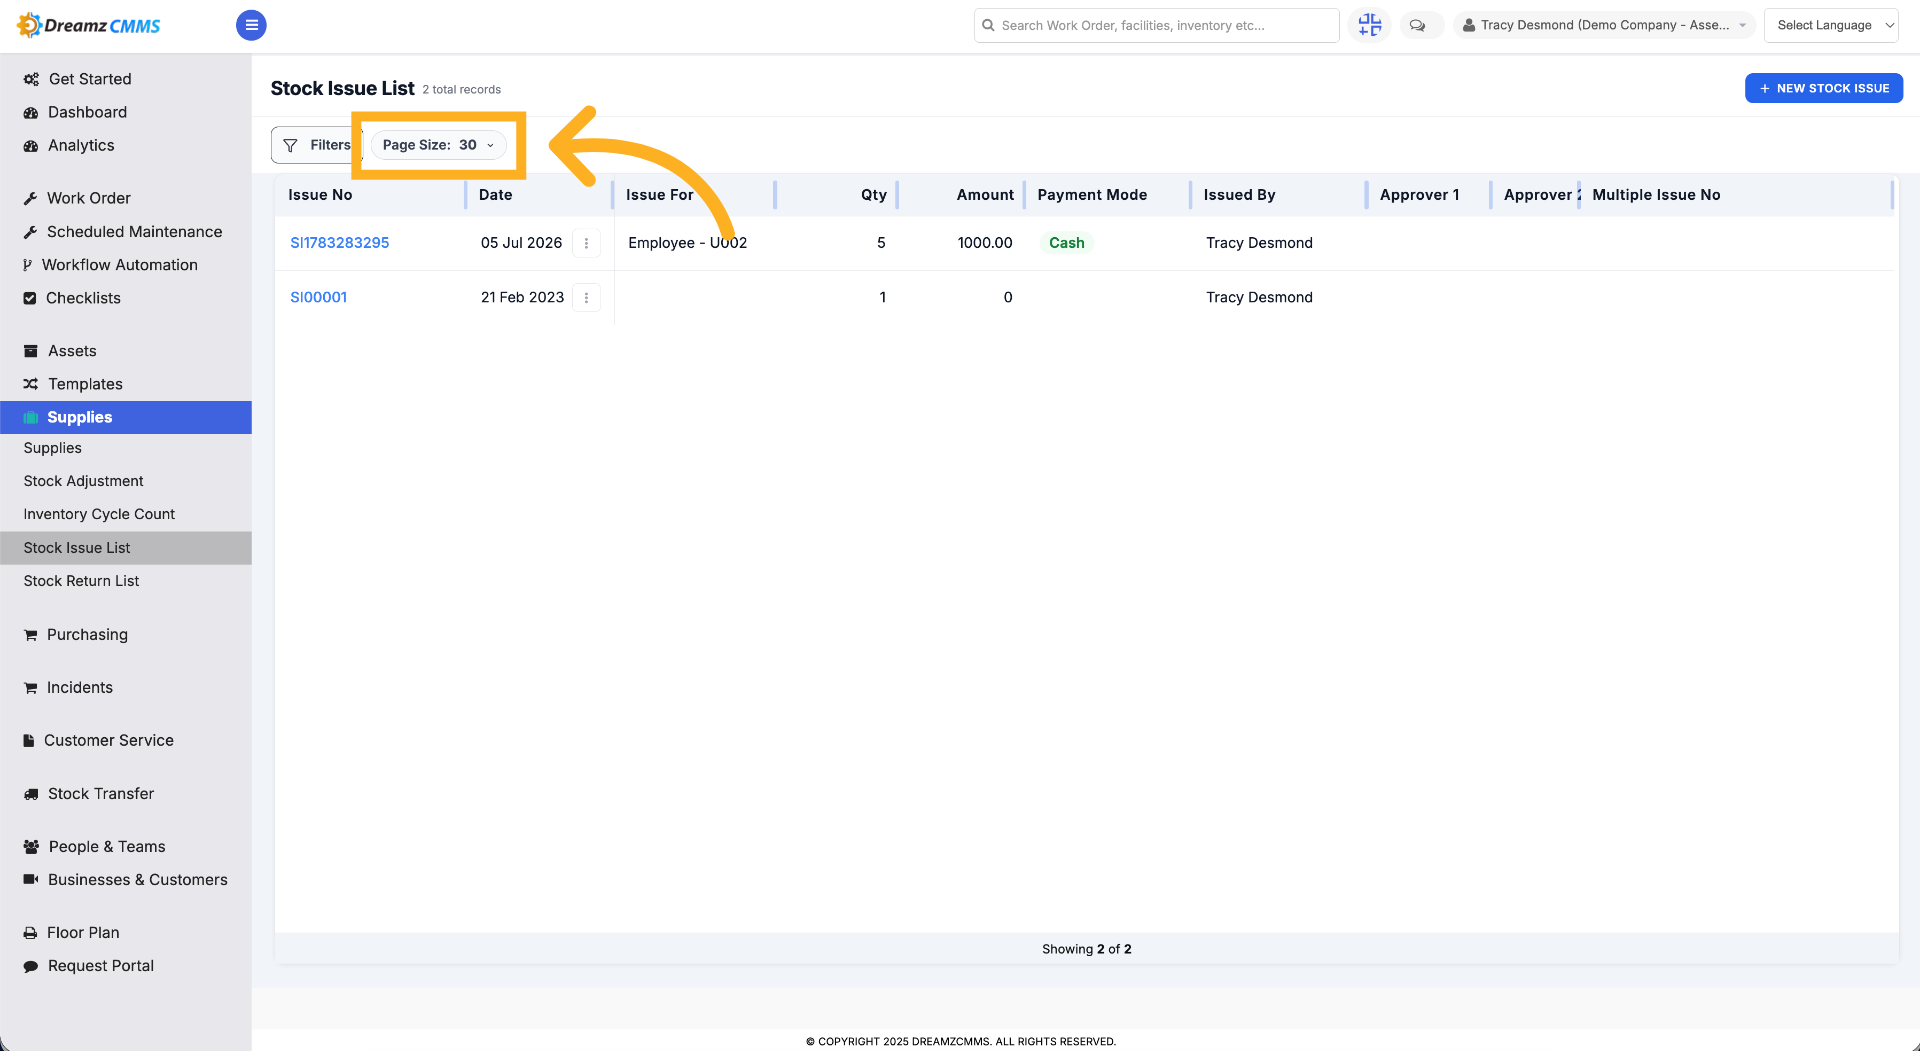
Step 3 – Adjust Page Size
Click "Page Size" to modify the number of entries displayed per page.
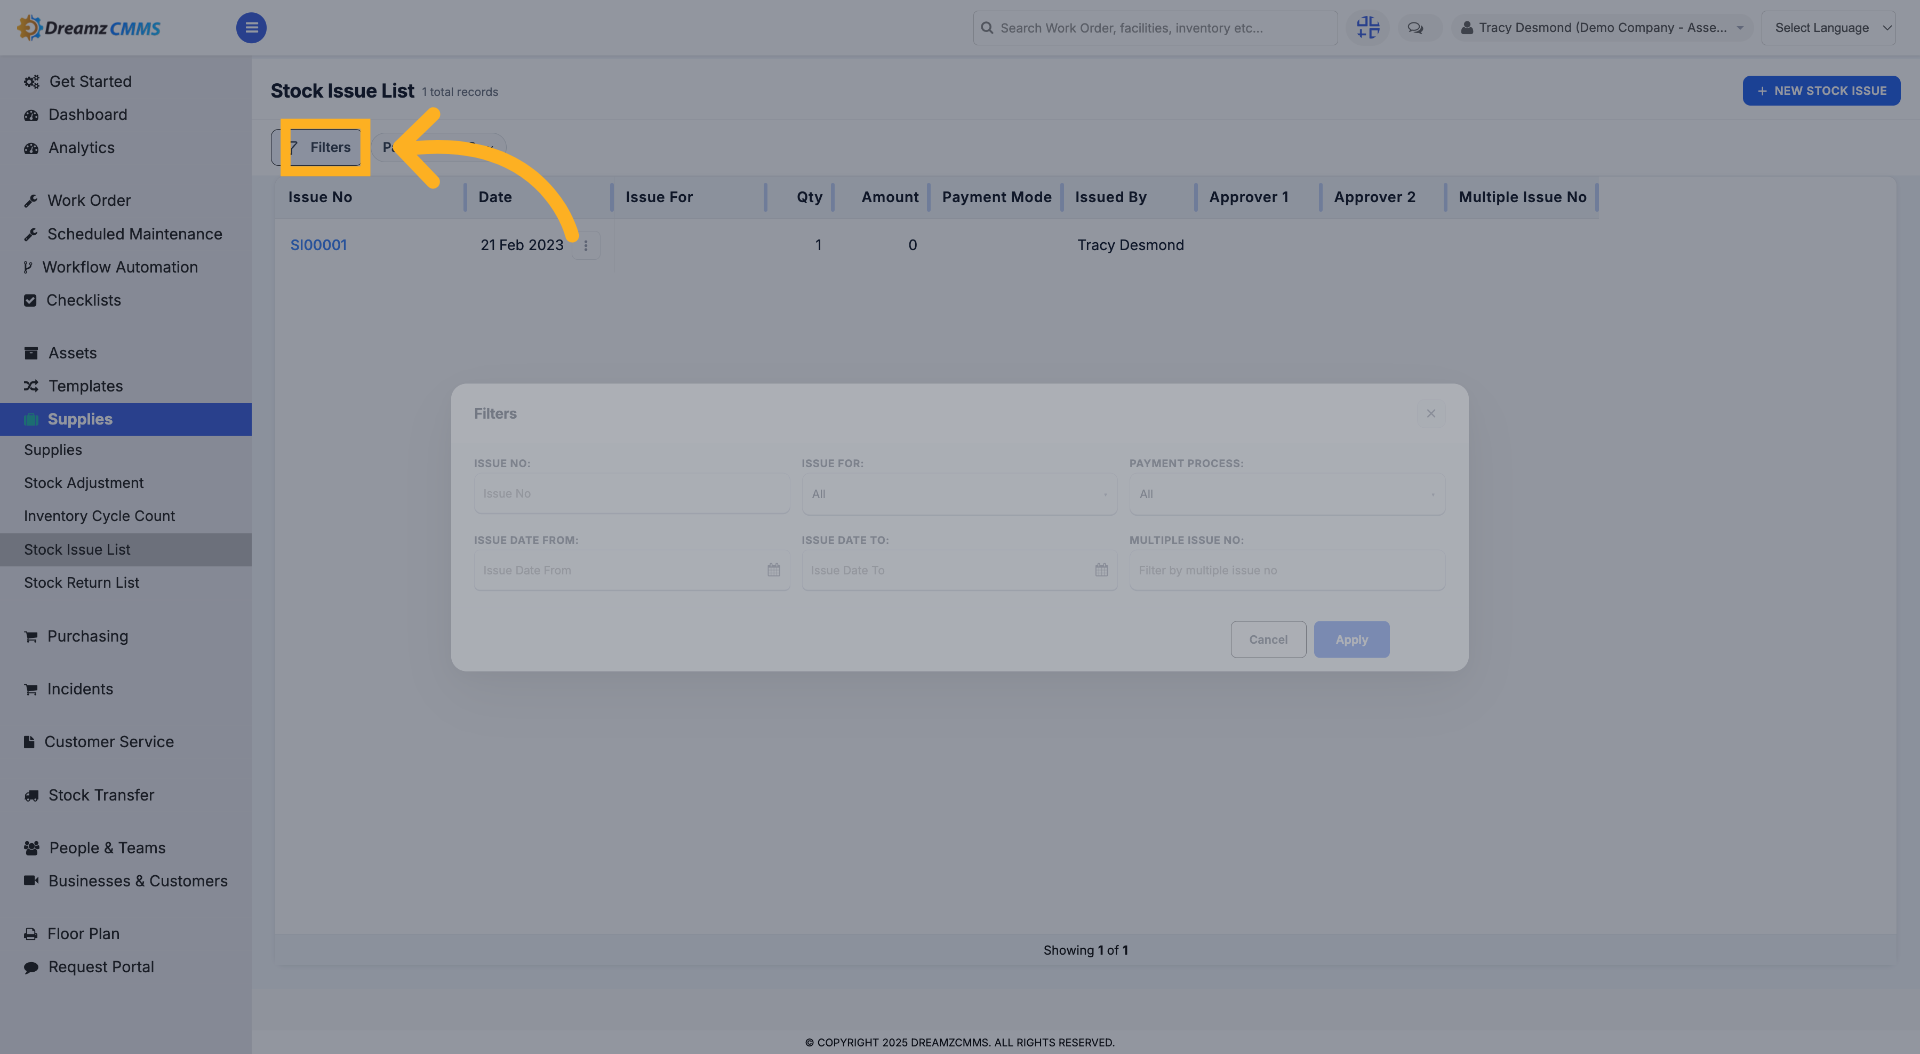
Step 4 – Open Filters Menu
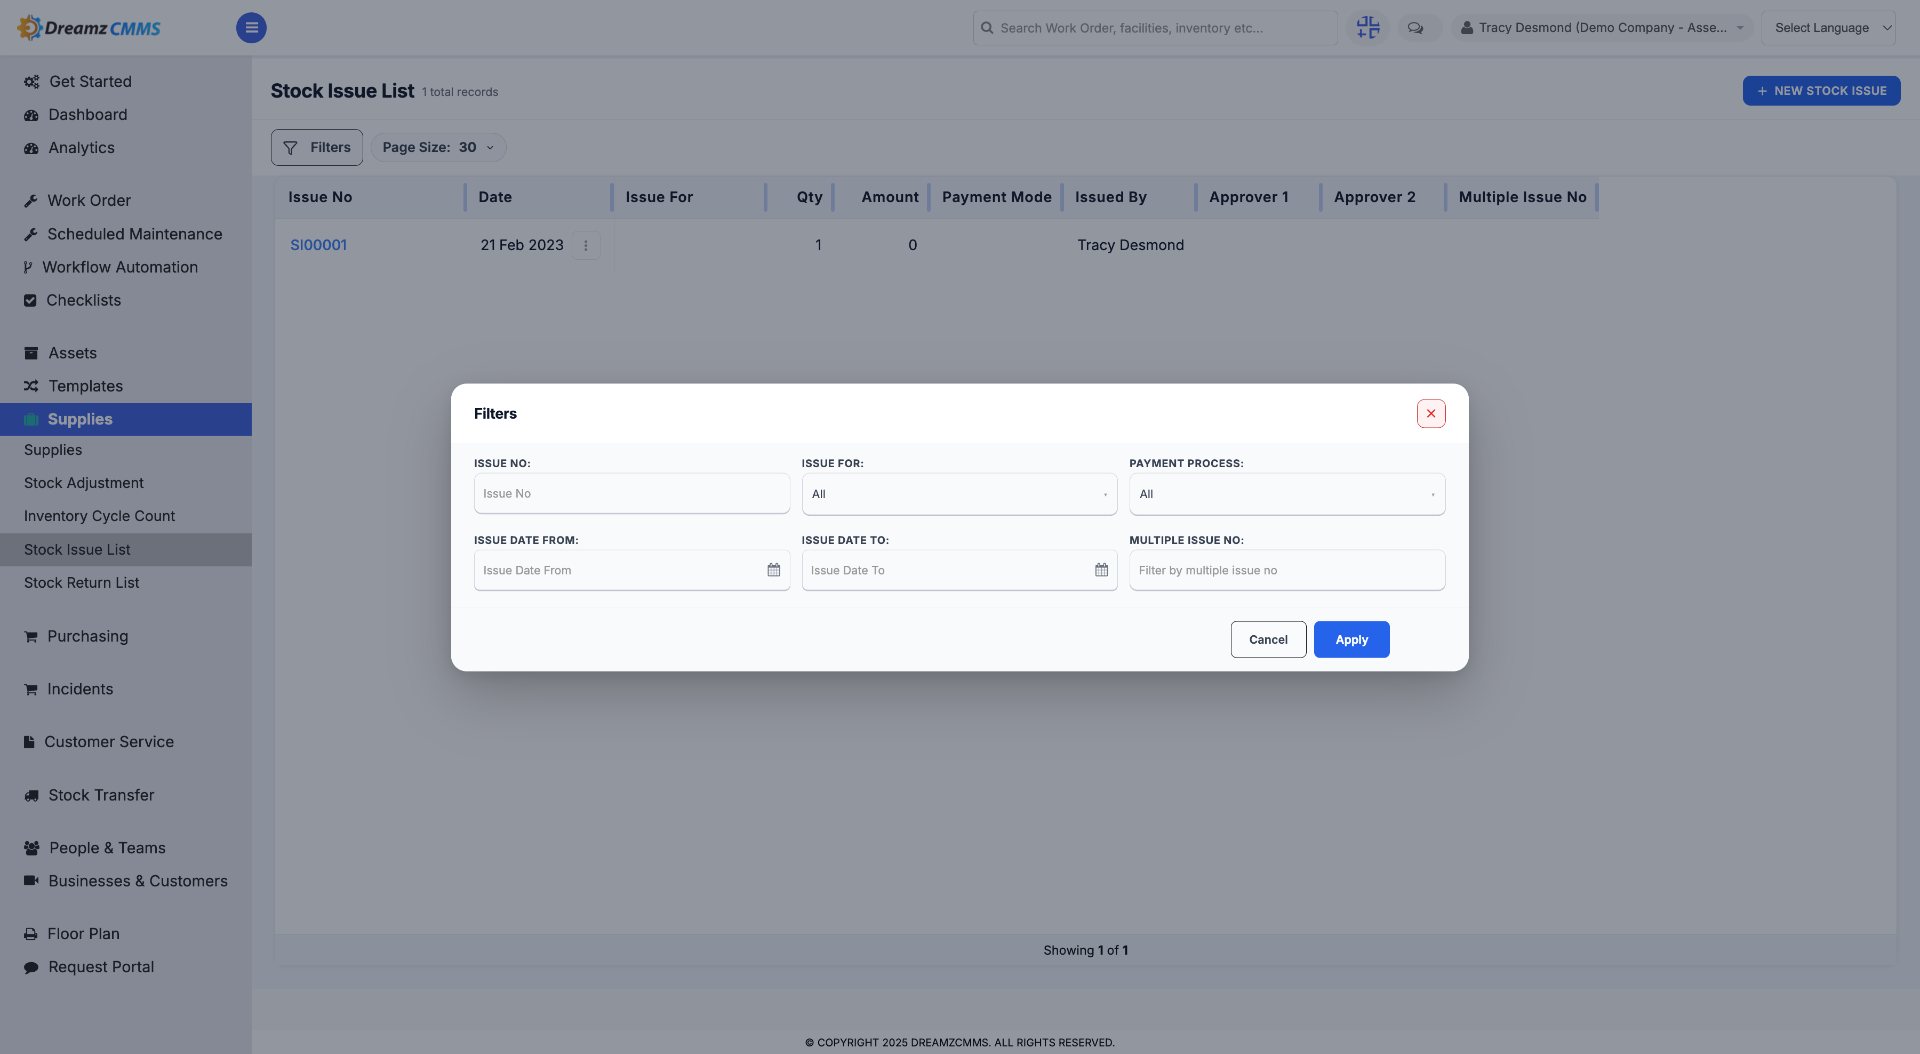
Click "Filters" to access filtering options for refining the stock issue list.
Step 5 – Interact with Filter Options
Click here to select or modify specific filter criteria within the stock issue list.
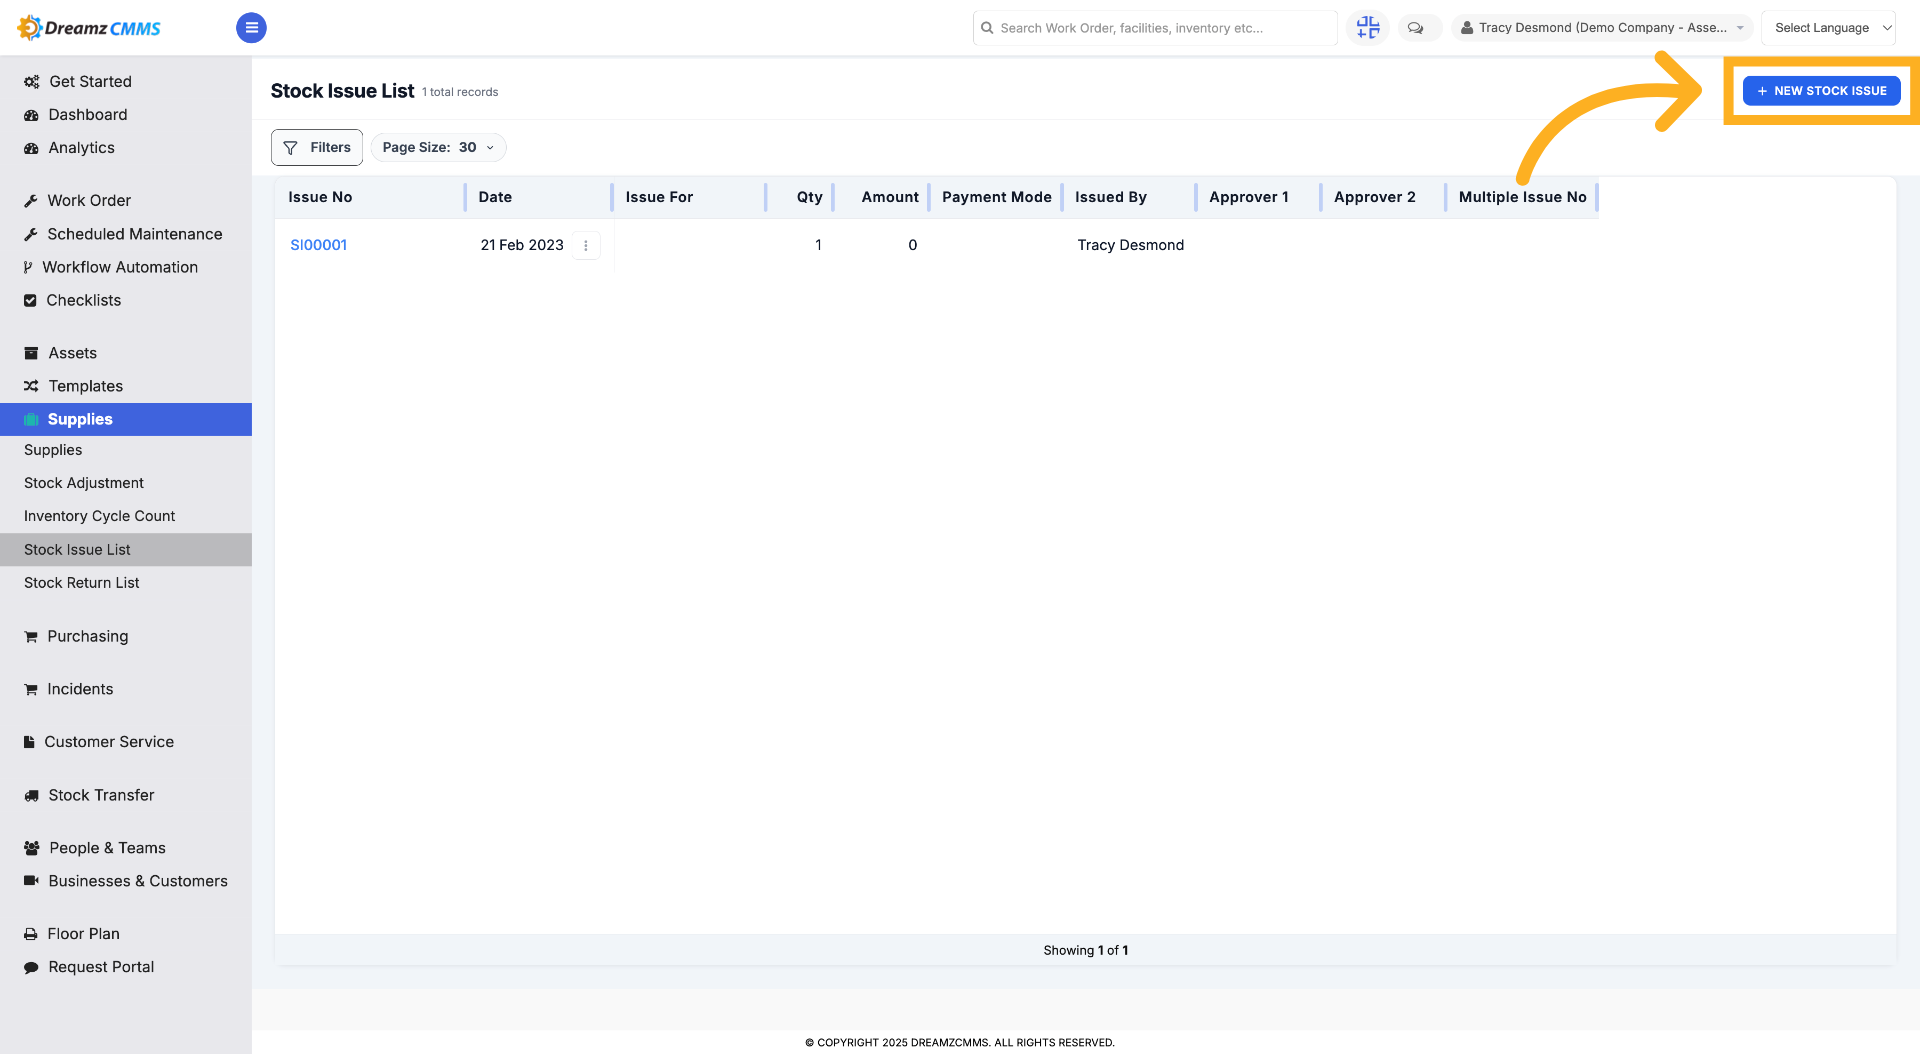
Step 6 – Create New Stock Issue
Click "New Stock Issue" to start creating a new stock issue record.
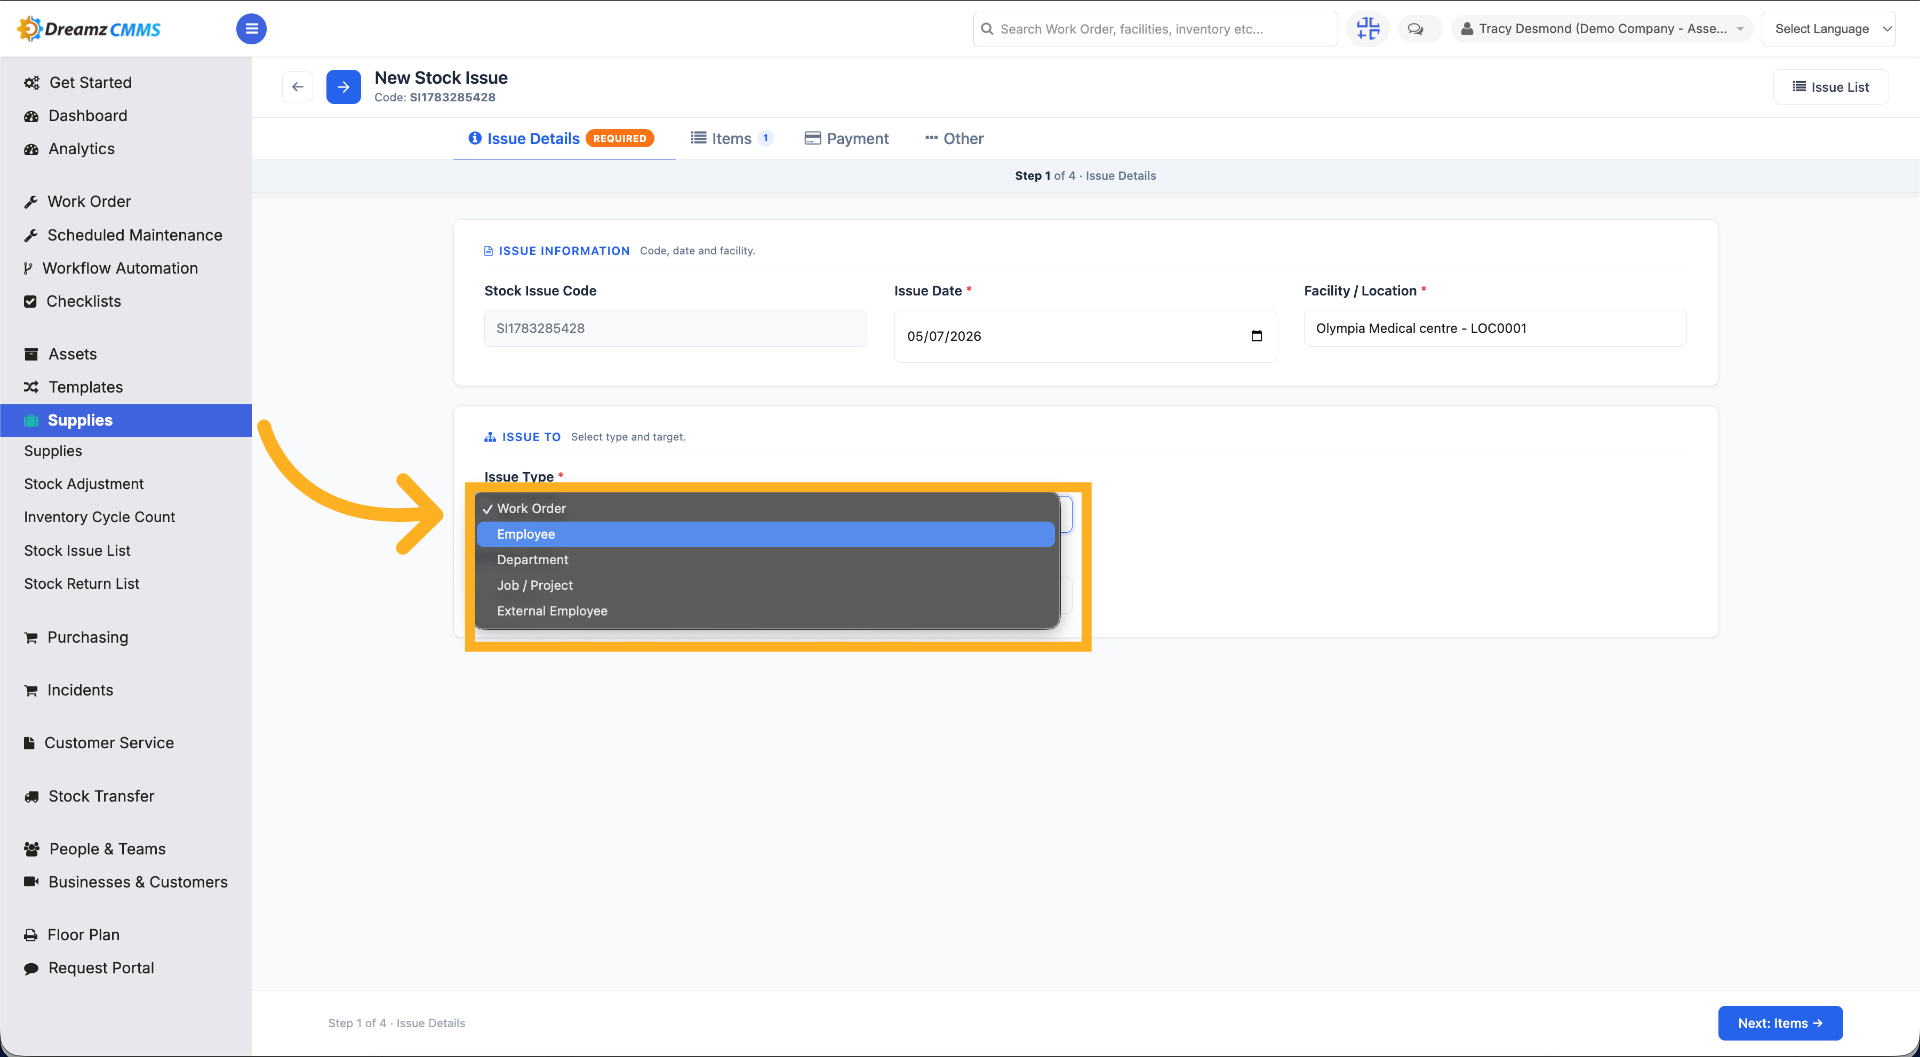
Step 7 – Select the Stock Issue To Field
Select the stock issue type from the list to specify against what the stock is being issued.
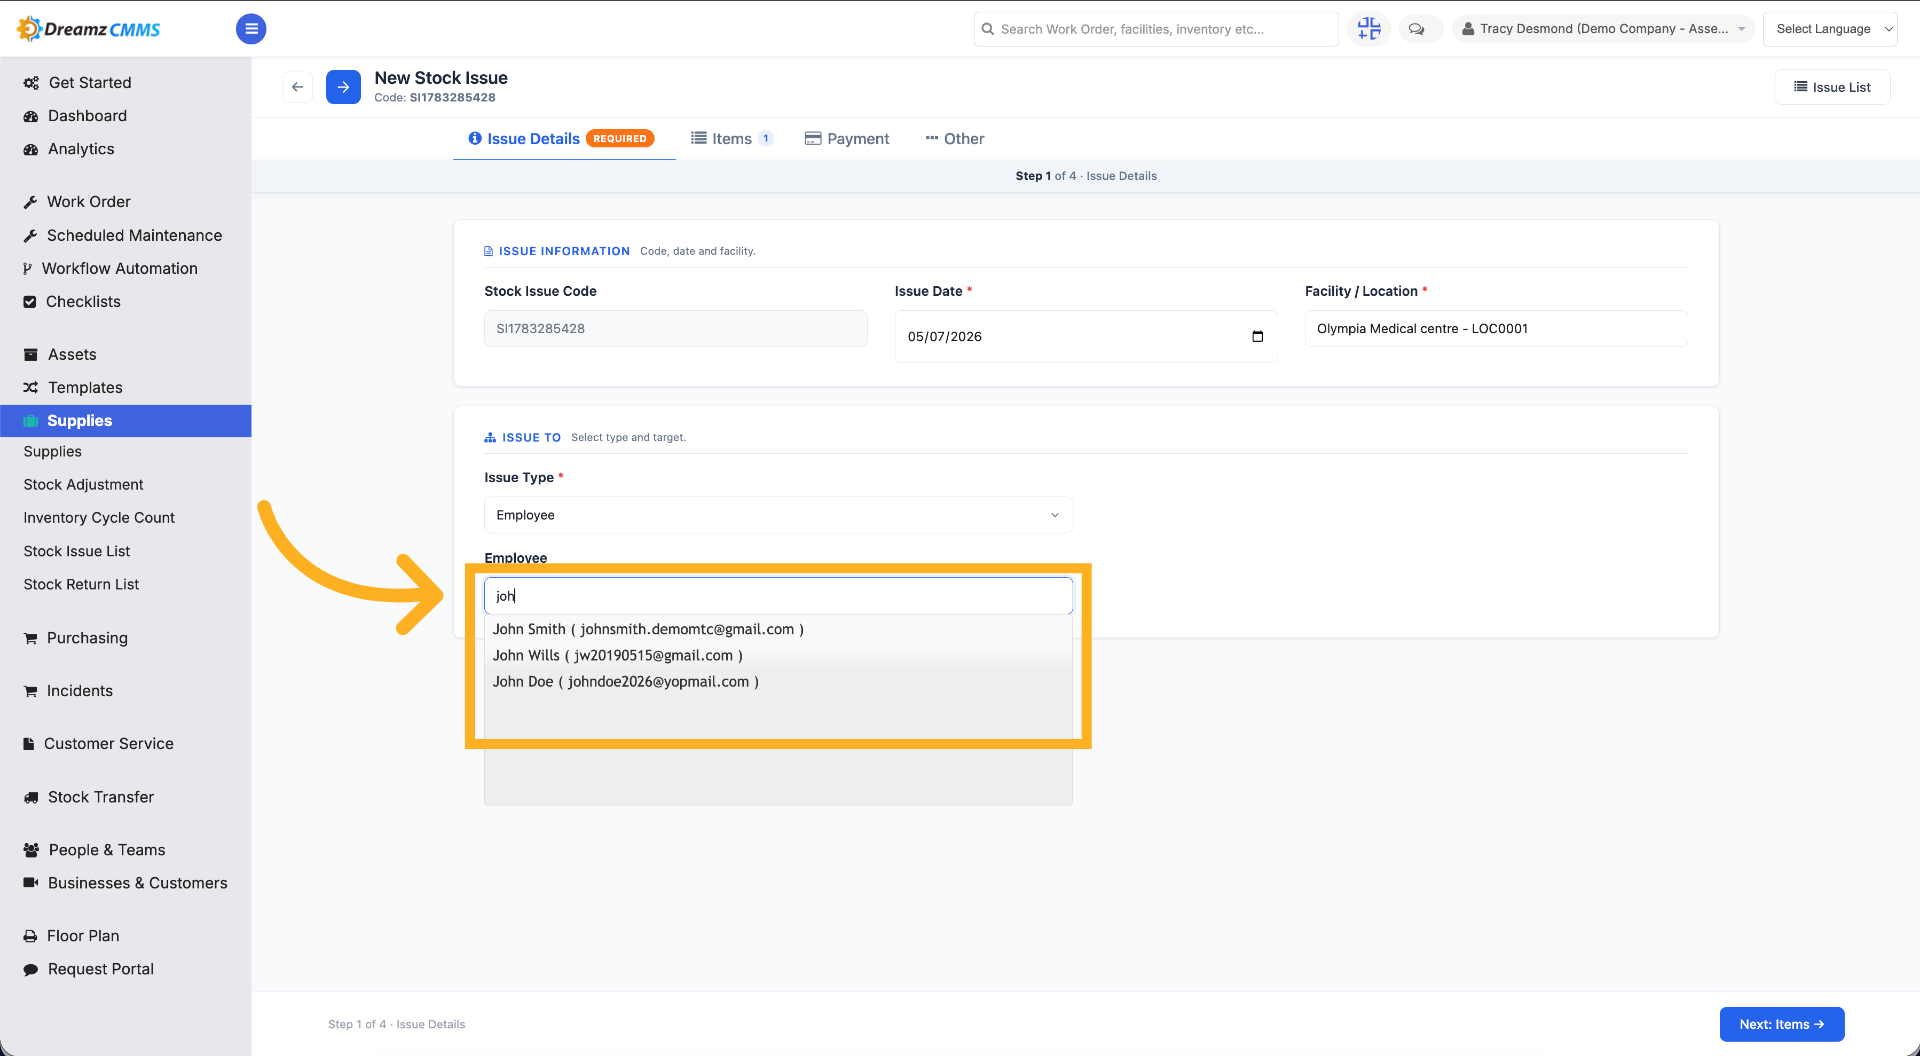
Step 8 – Search for Employee
Search the employee list to find and select the employee associated with the stock issue.
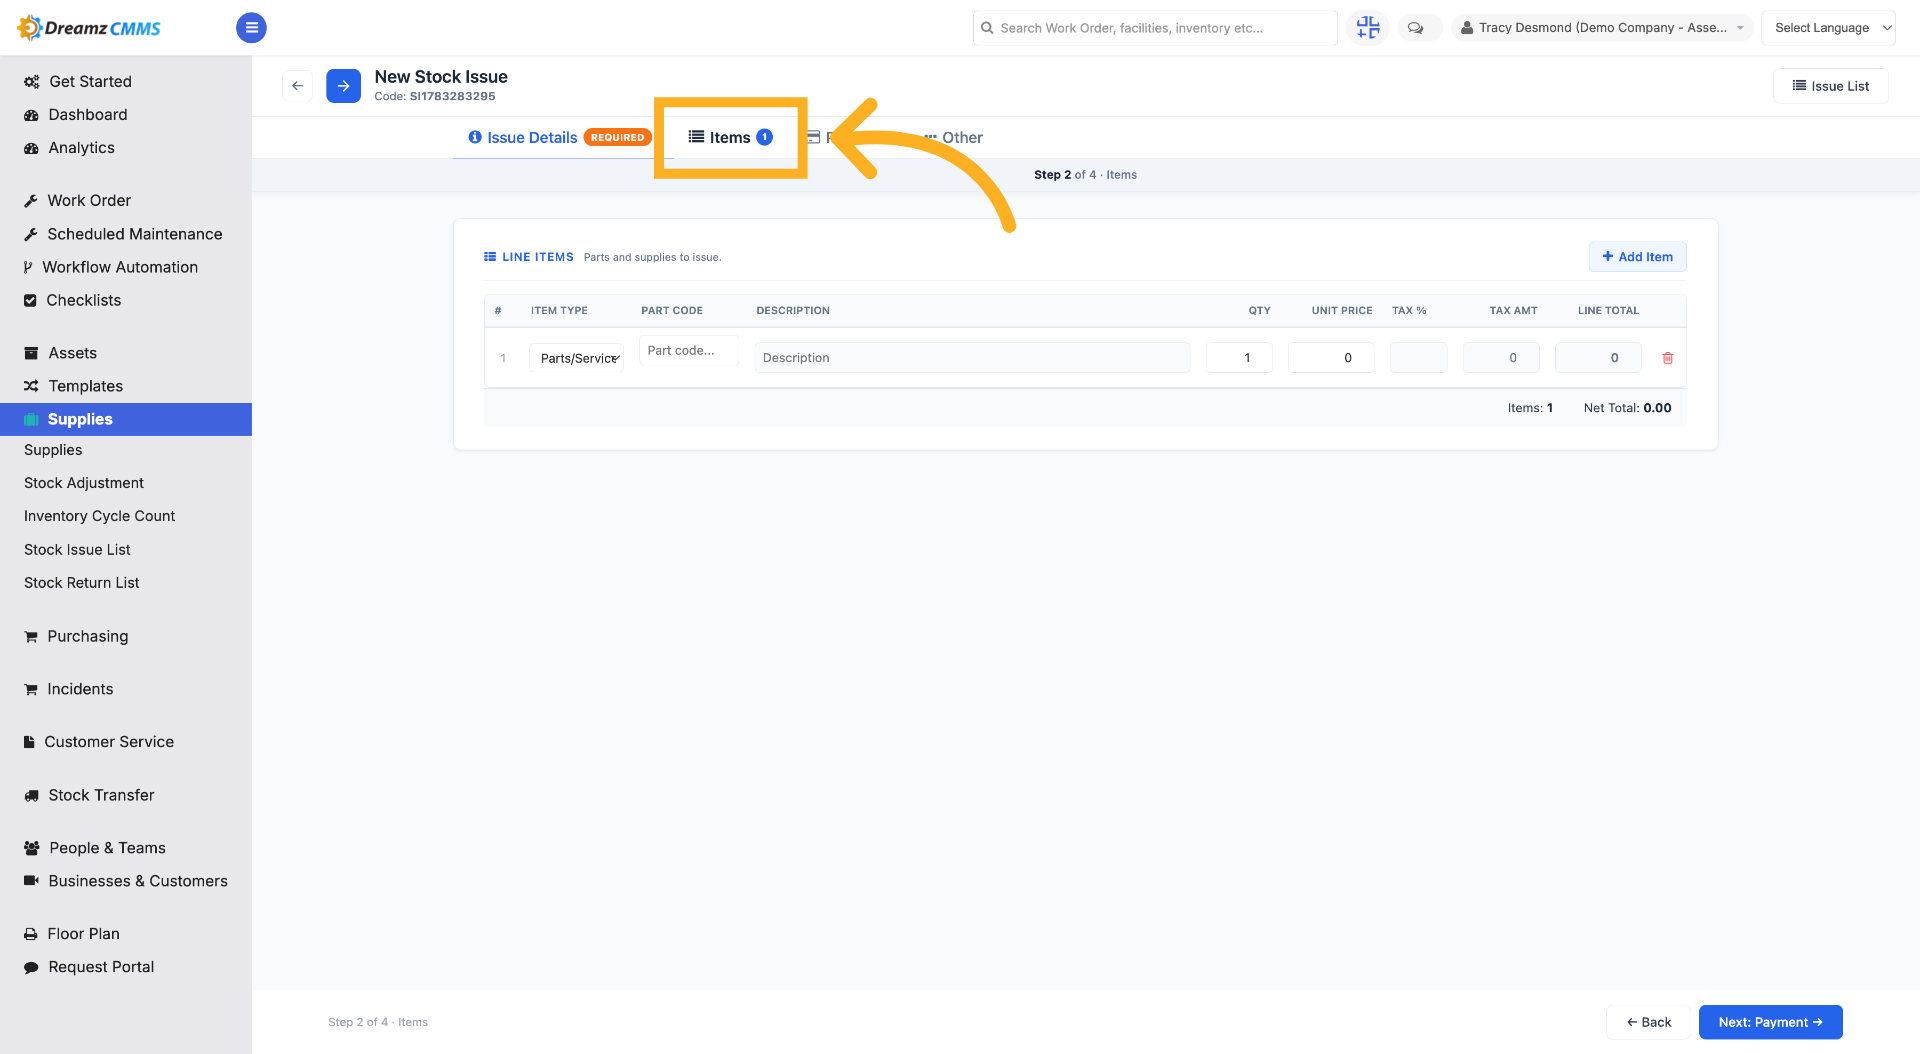
Step 9 – Access Items Section
Click "Items" to view and manage the inventory included in the stock issue.
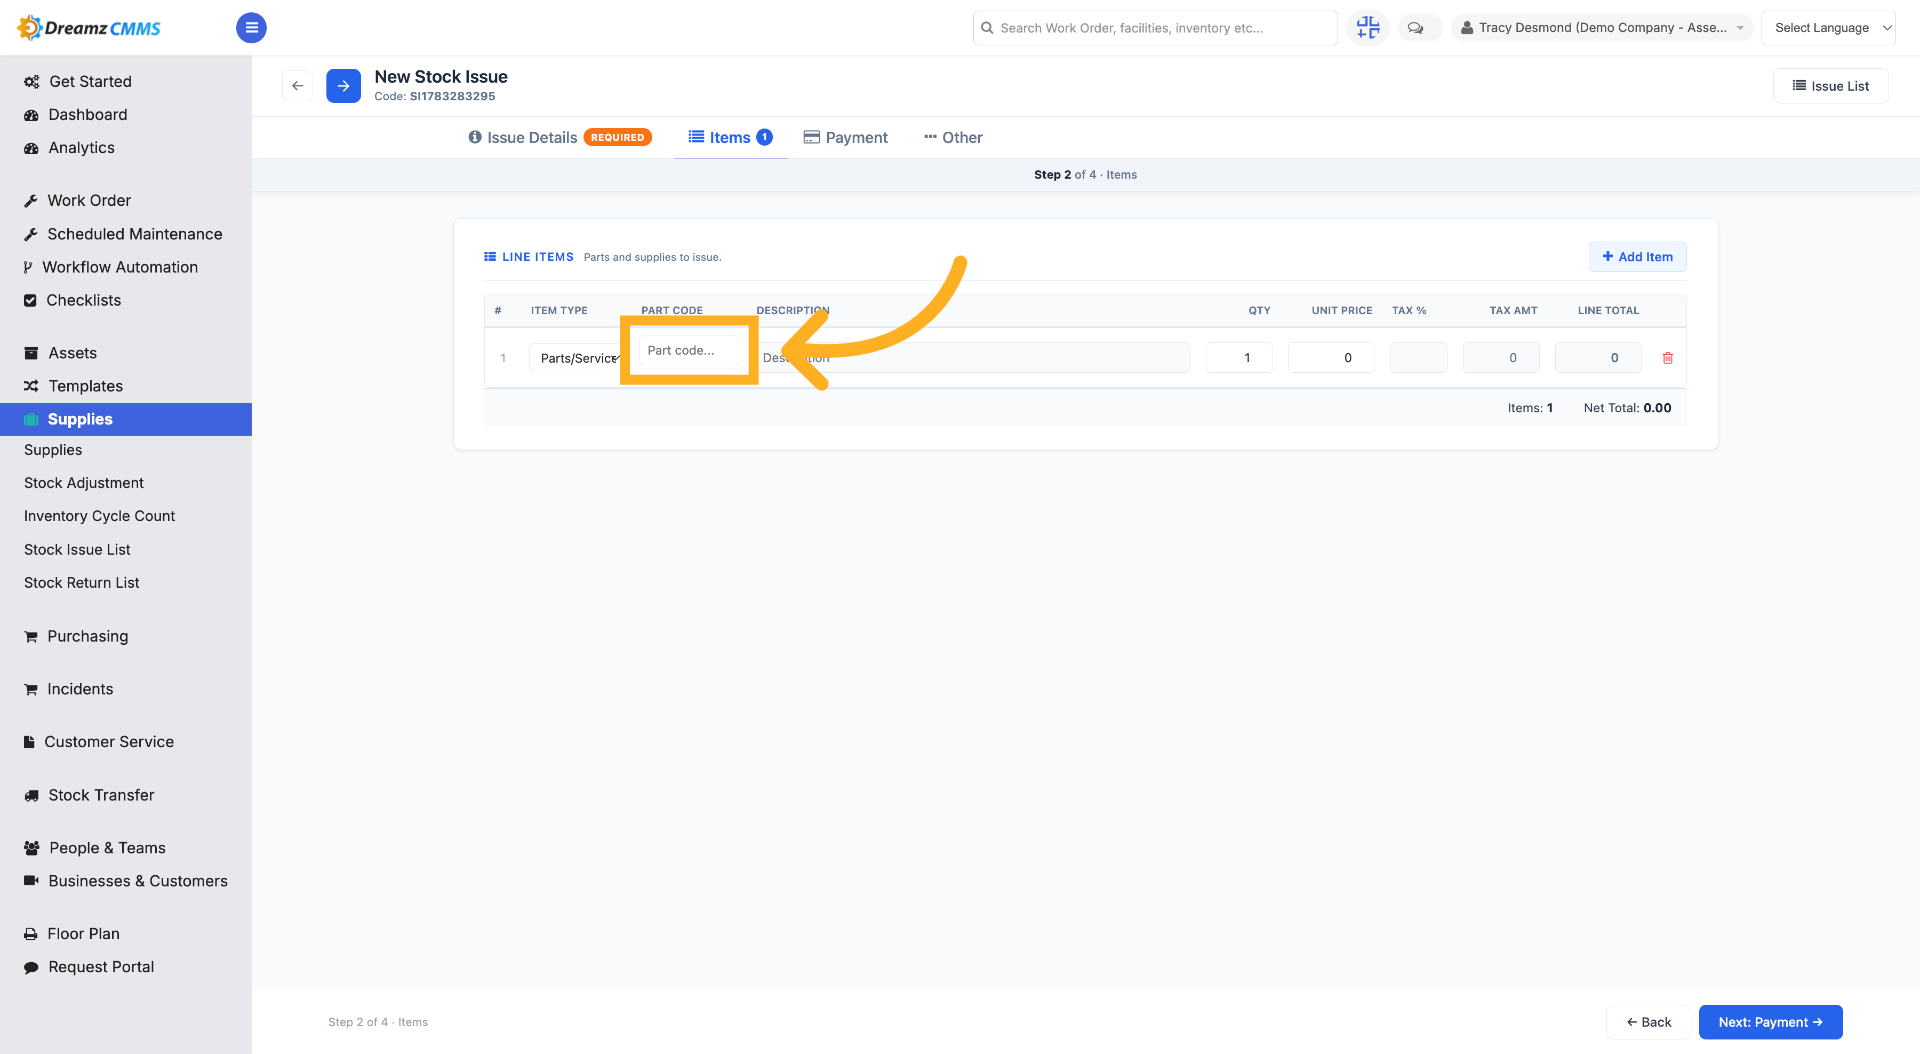
Step 10 – Open Inventory Code Field
Click "Inventory Code" to search for the inventory to add to the stock issue.
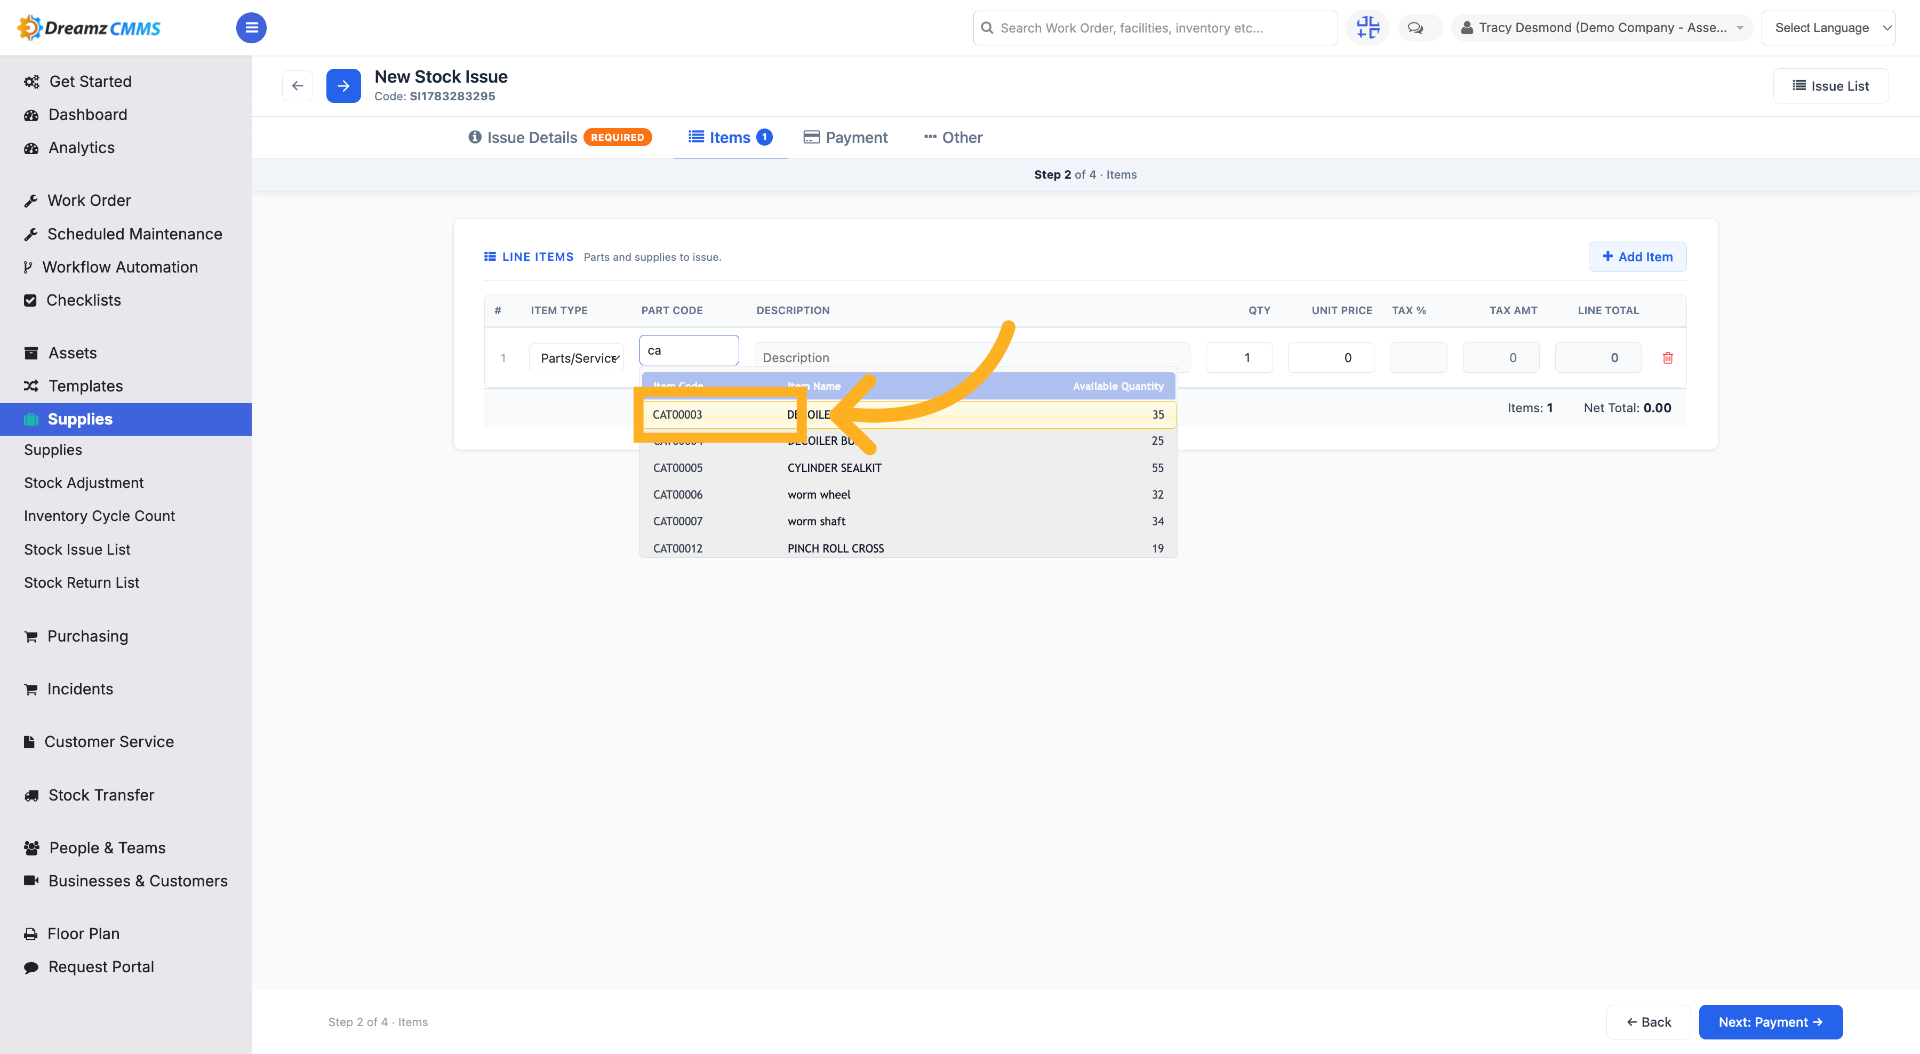
Step 11 – Select Inventory
Choose the inventory item from the populated inventory list for the stock issue.
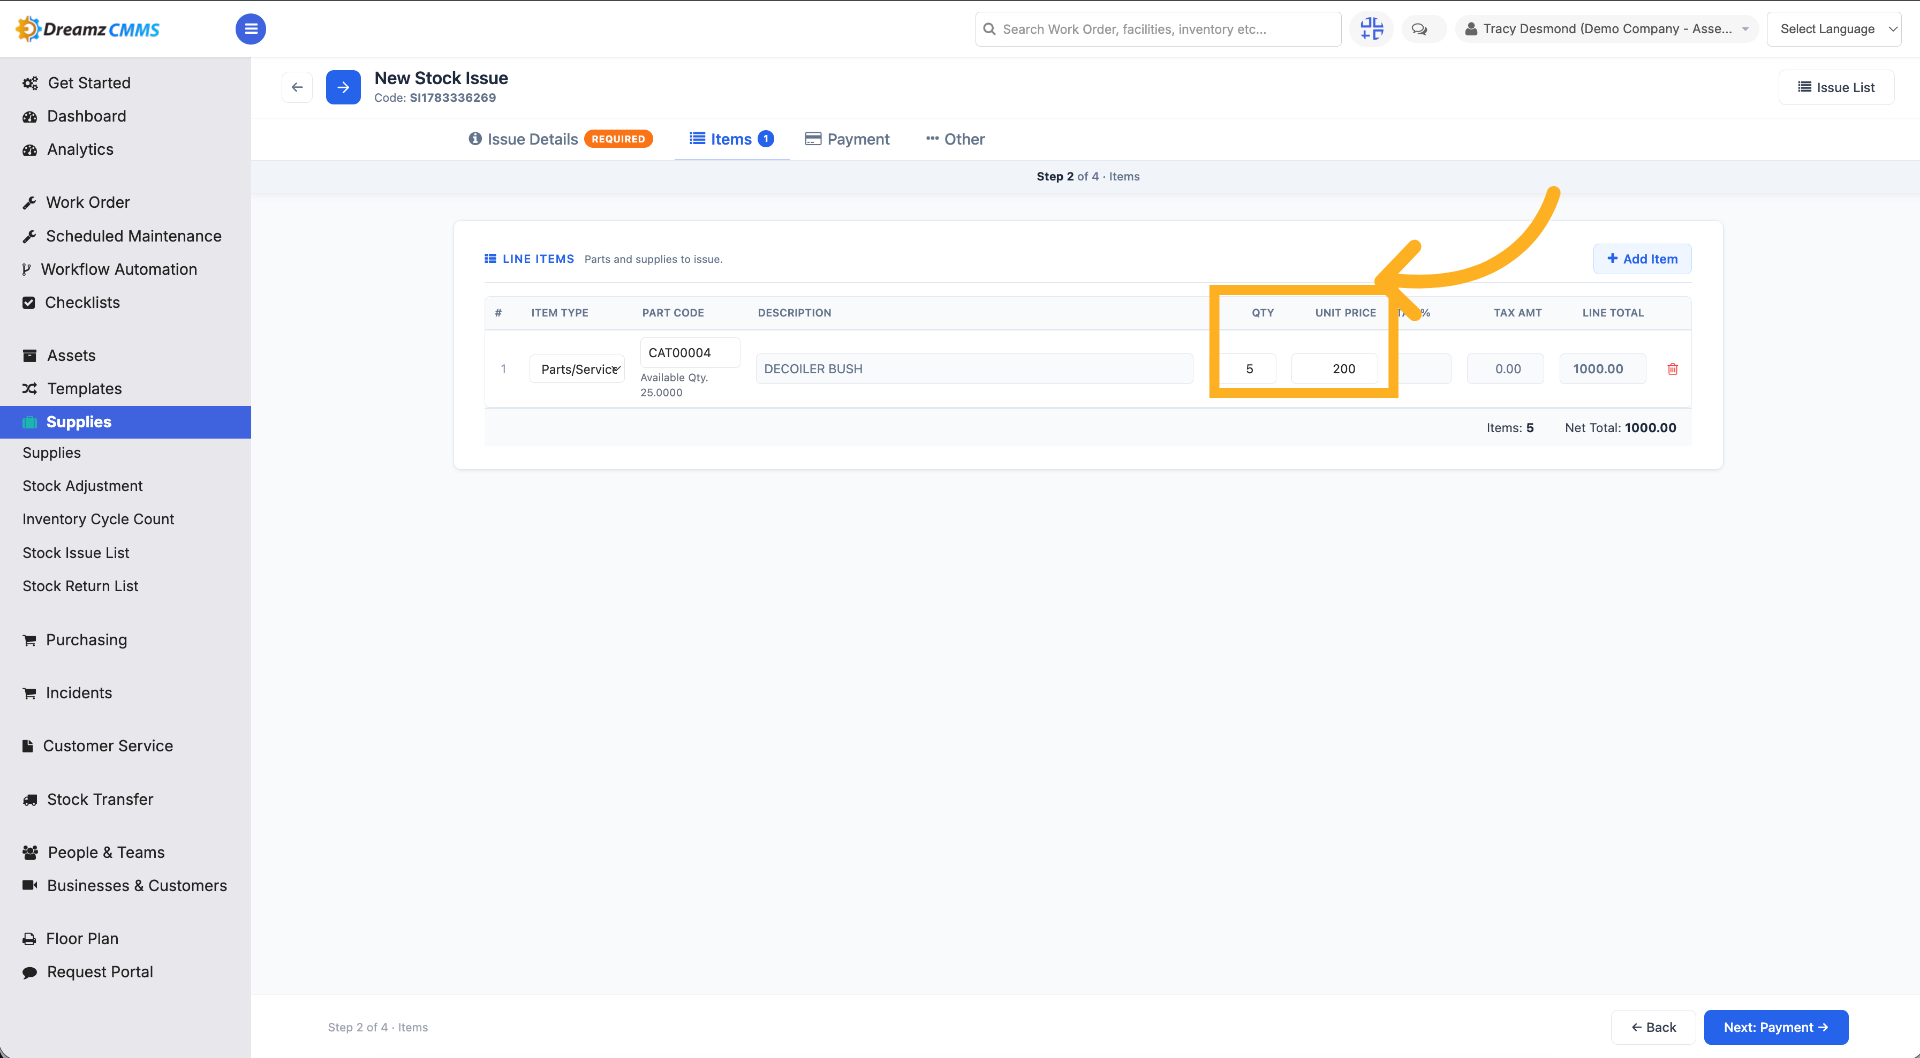
Step 12 – Enter Inventory Details
After selecting the inventory, enter the quantity and price for the stock issue.
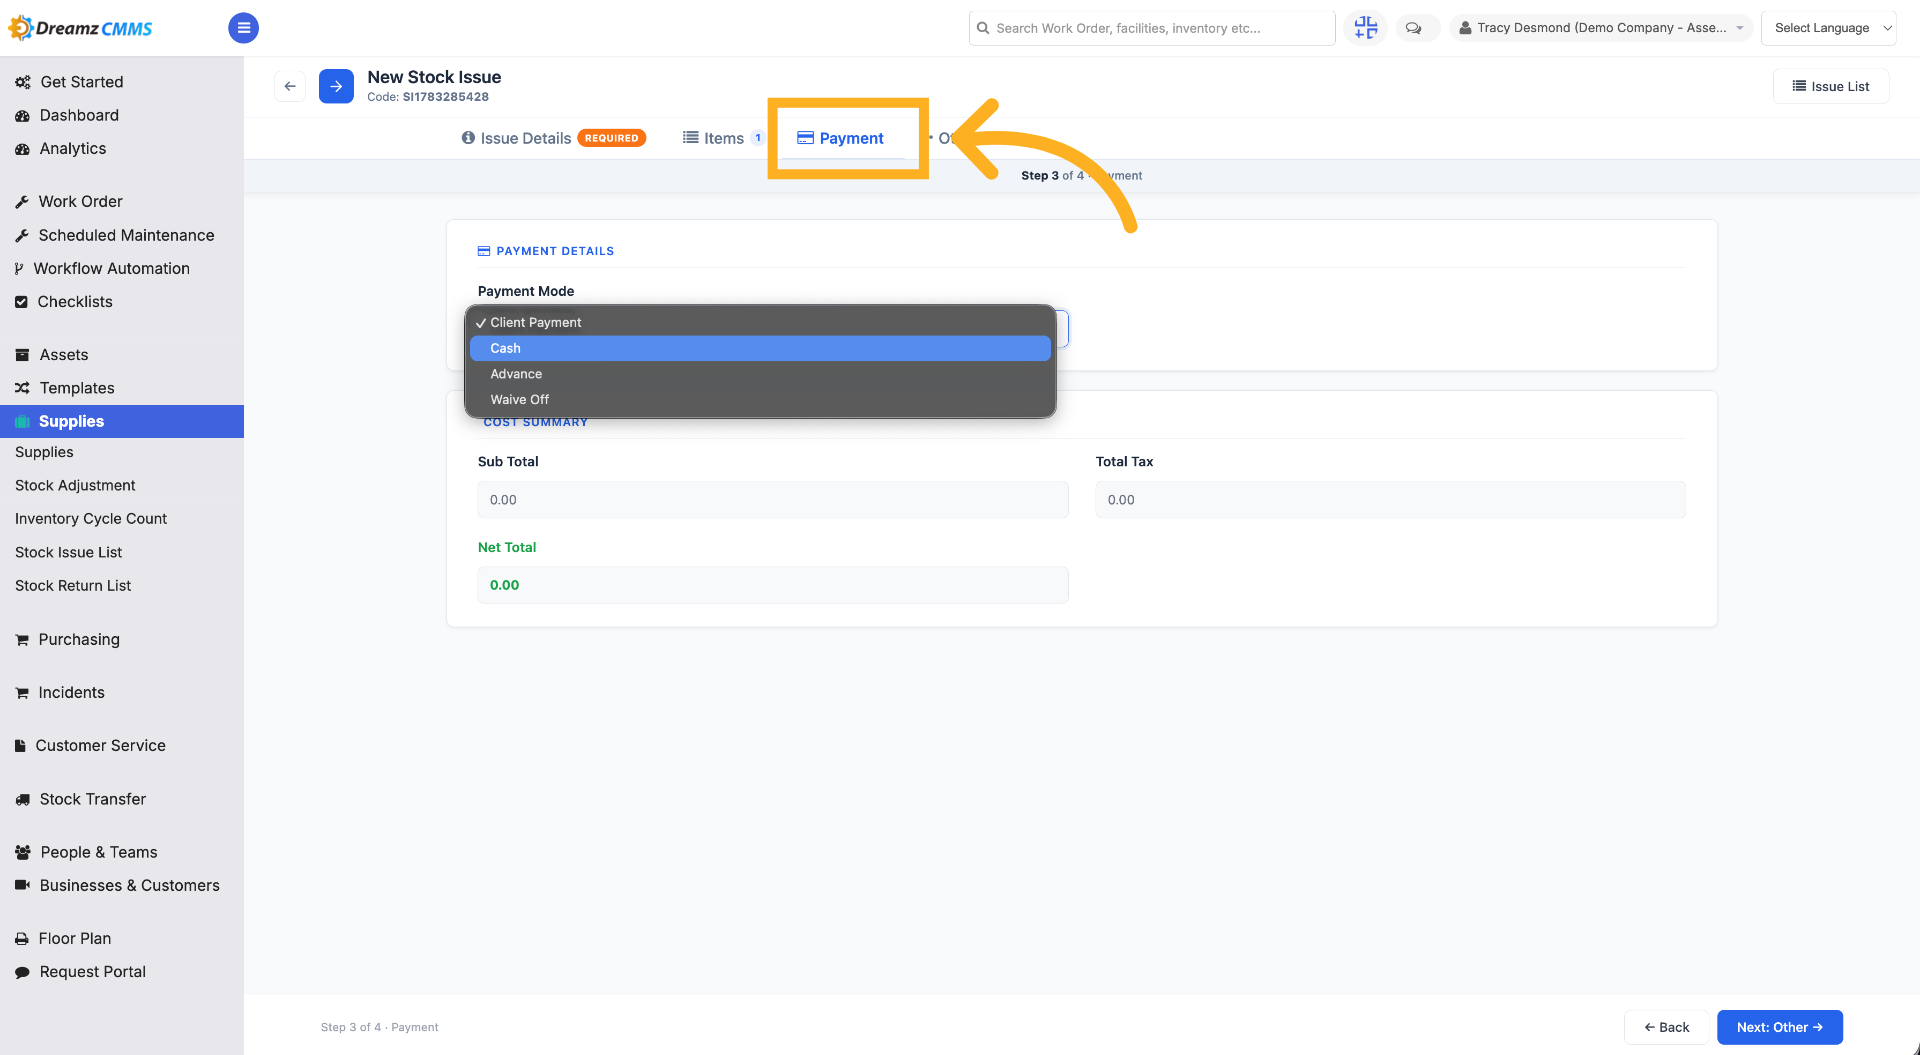
Step 13 – Open Payment Section
Click "Payment" to access payment options related to the stock issue.
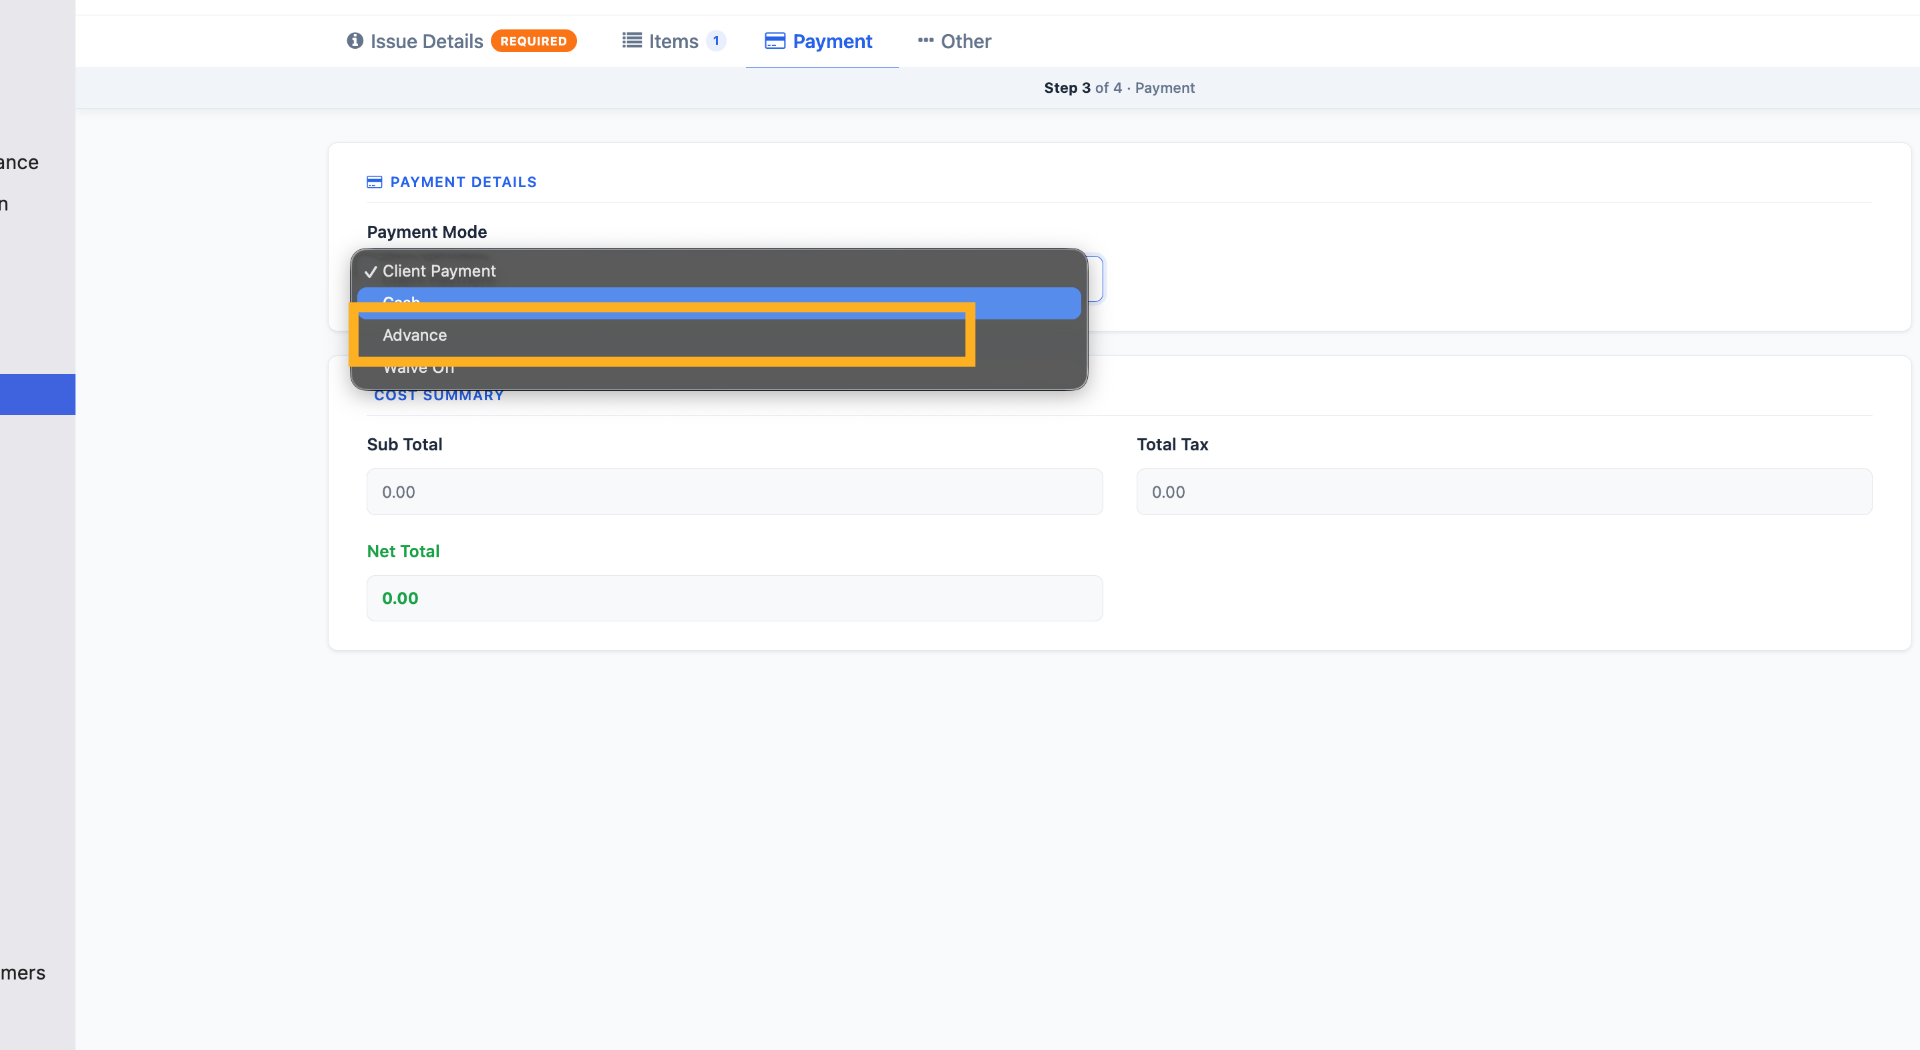
Step 14 – Choose Payment Option
From the payment options, select the preferred payment mode, such as Advance.
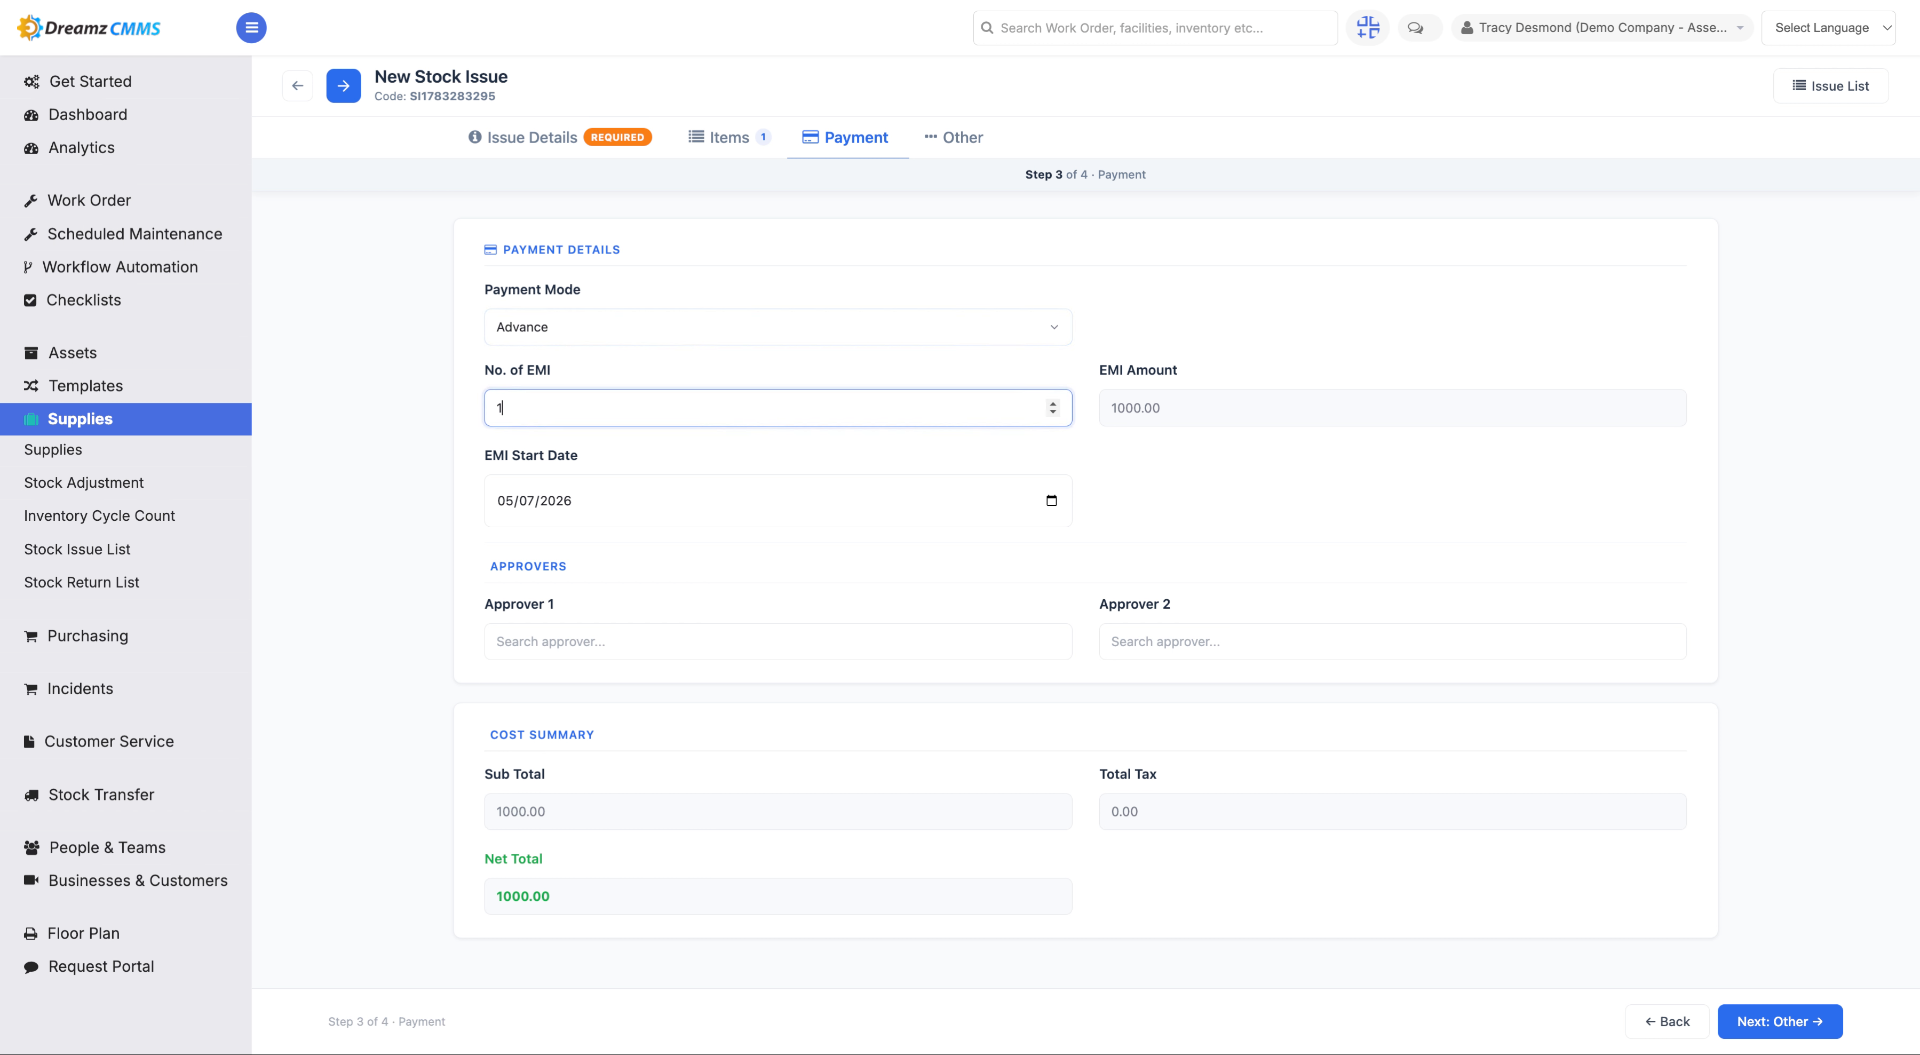
Step 15 – Complete Payment Details
Depending on the payment mode selected, additional fields will appear: Advance shows an Approver and EMI section, Waive Off shows an Approver section, while Client Payment and Cash have no additional fields.
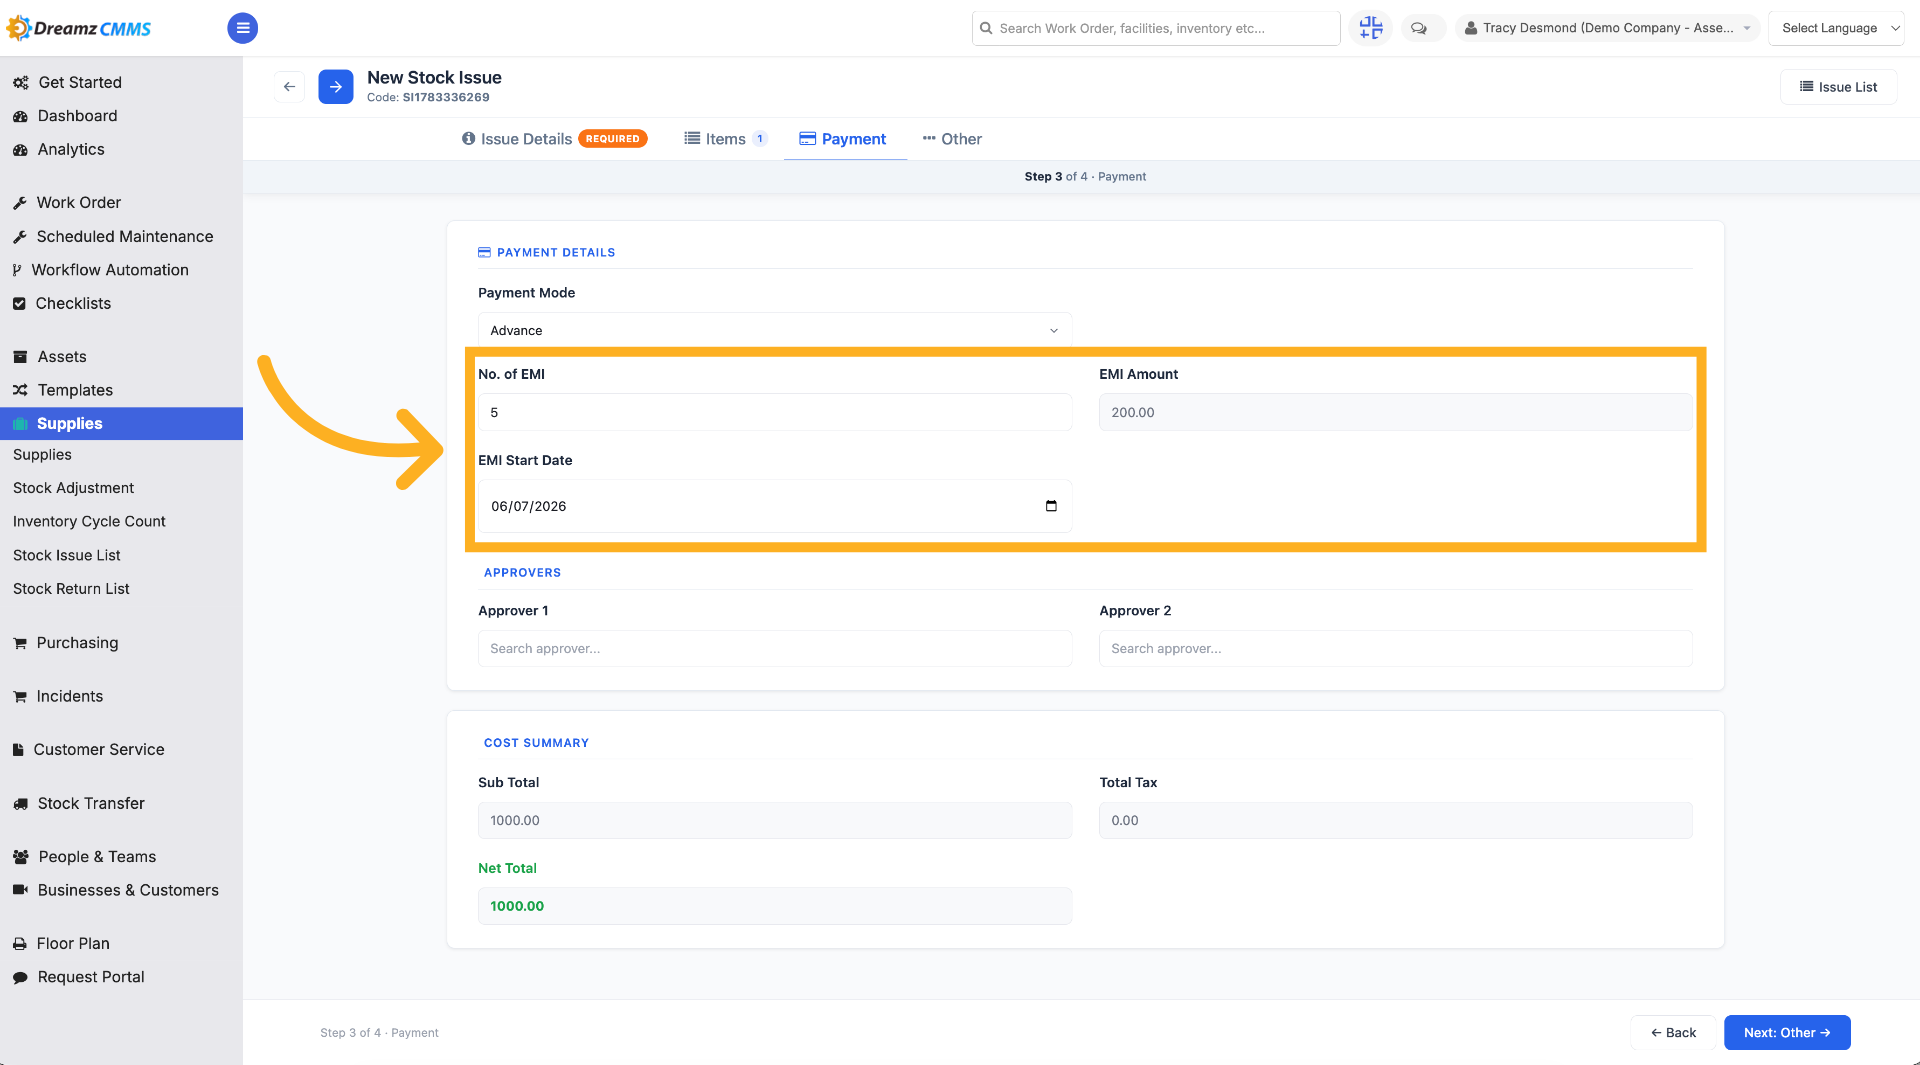
Step 16 – Enter EMI Details
Input the number of EMIs, and the EMI amount will auto-populate based on the number entered.
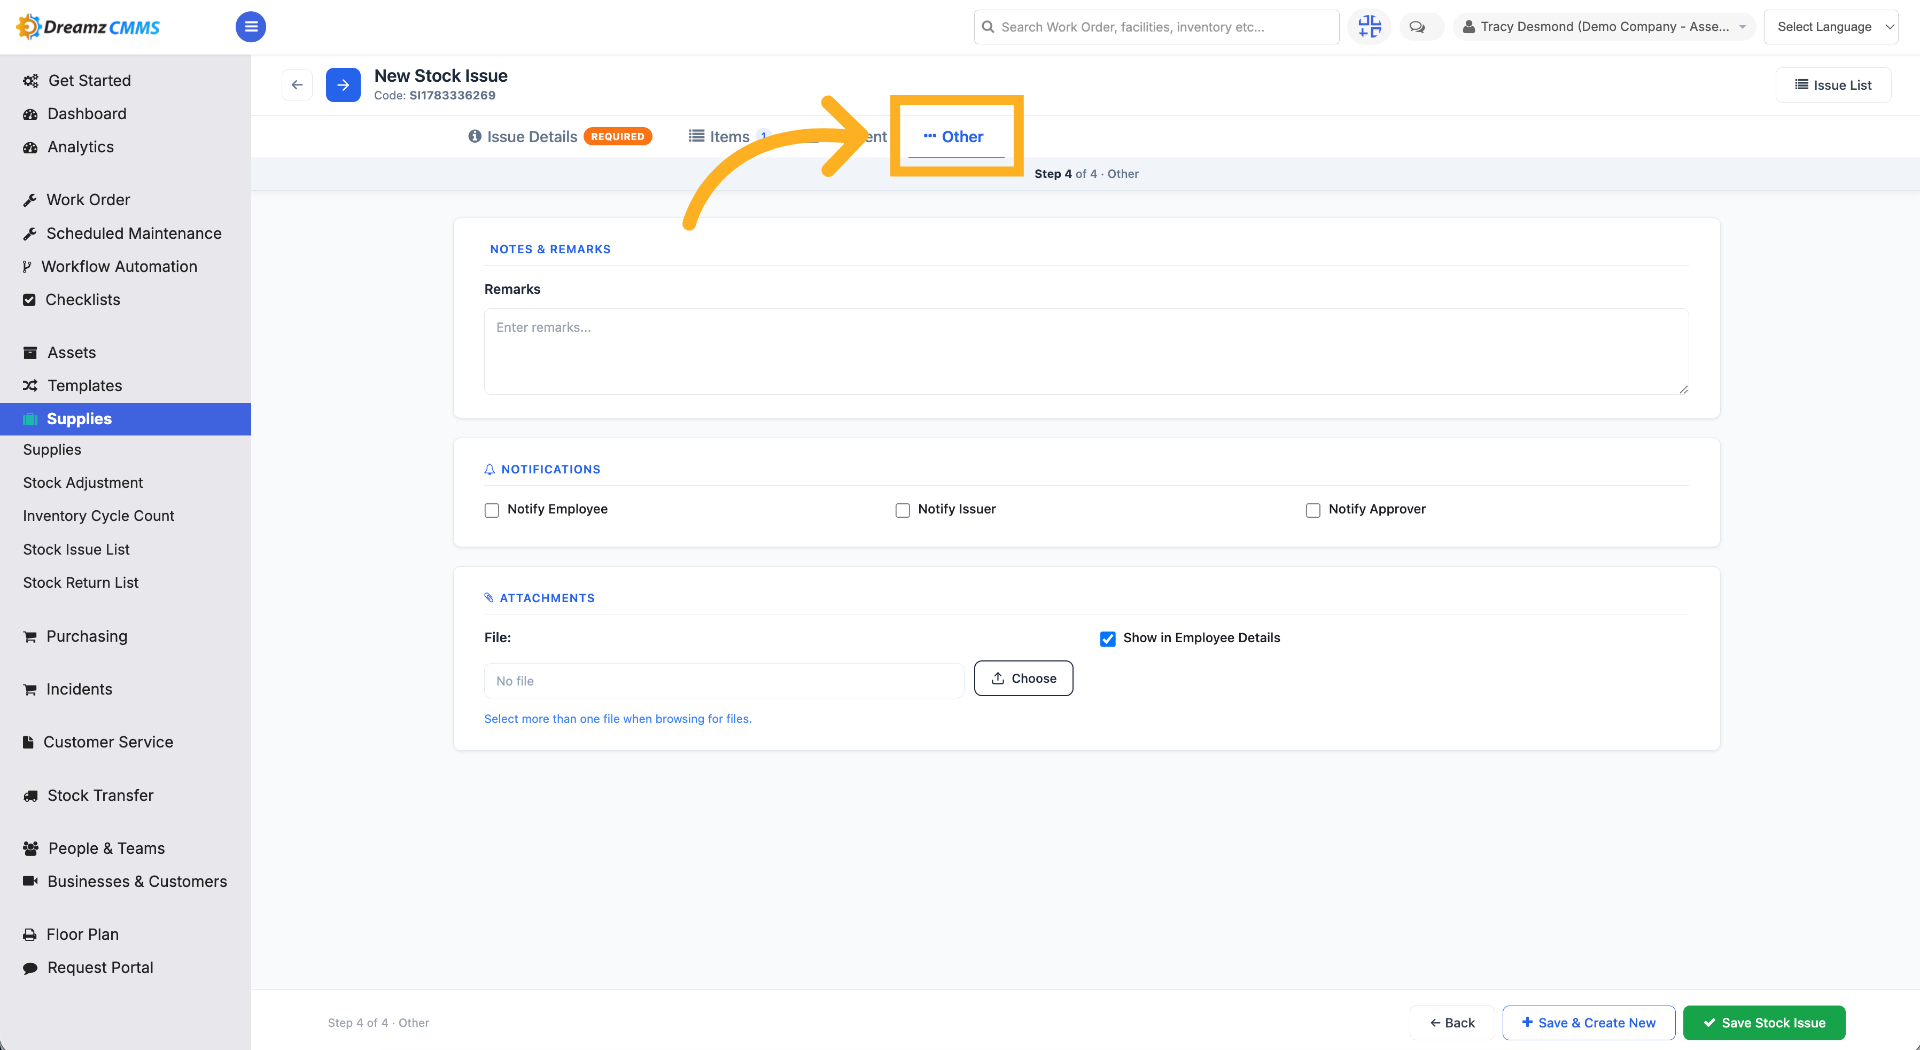
Step 17 – Select the Other Tab
Click "Other" to go to the tab where you can add remarks, choose notification settings, and attach files related to this stock issue.
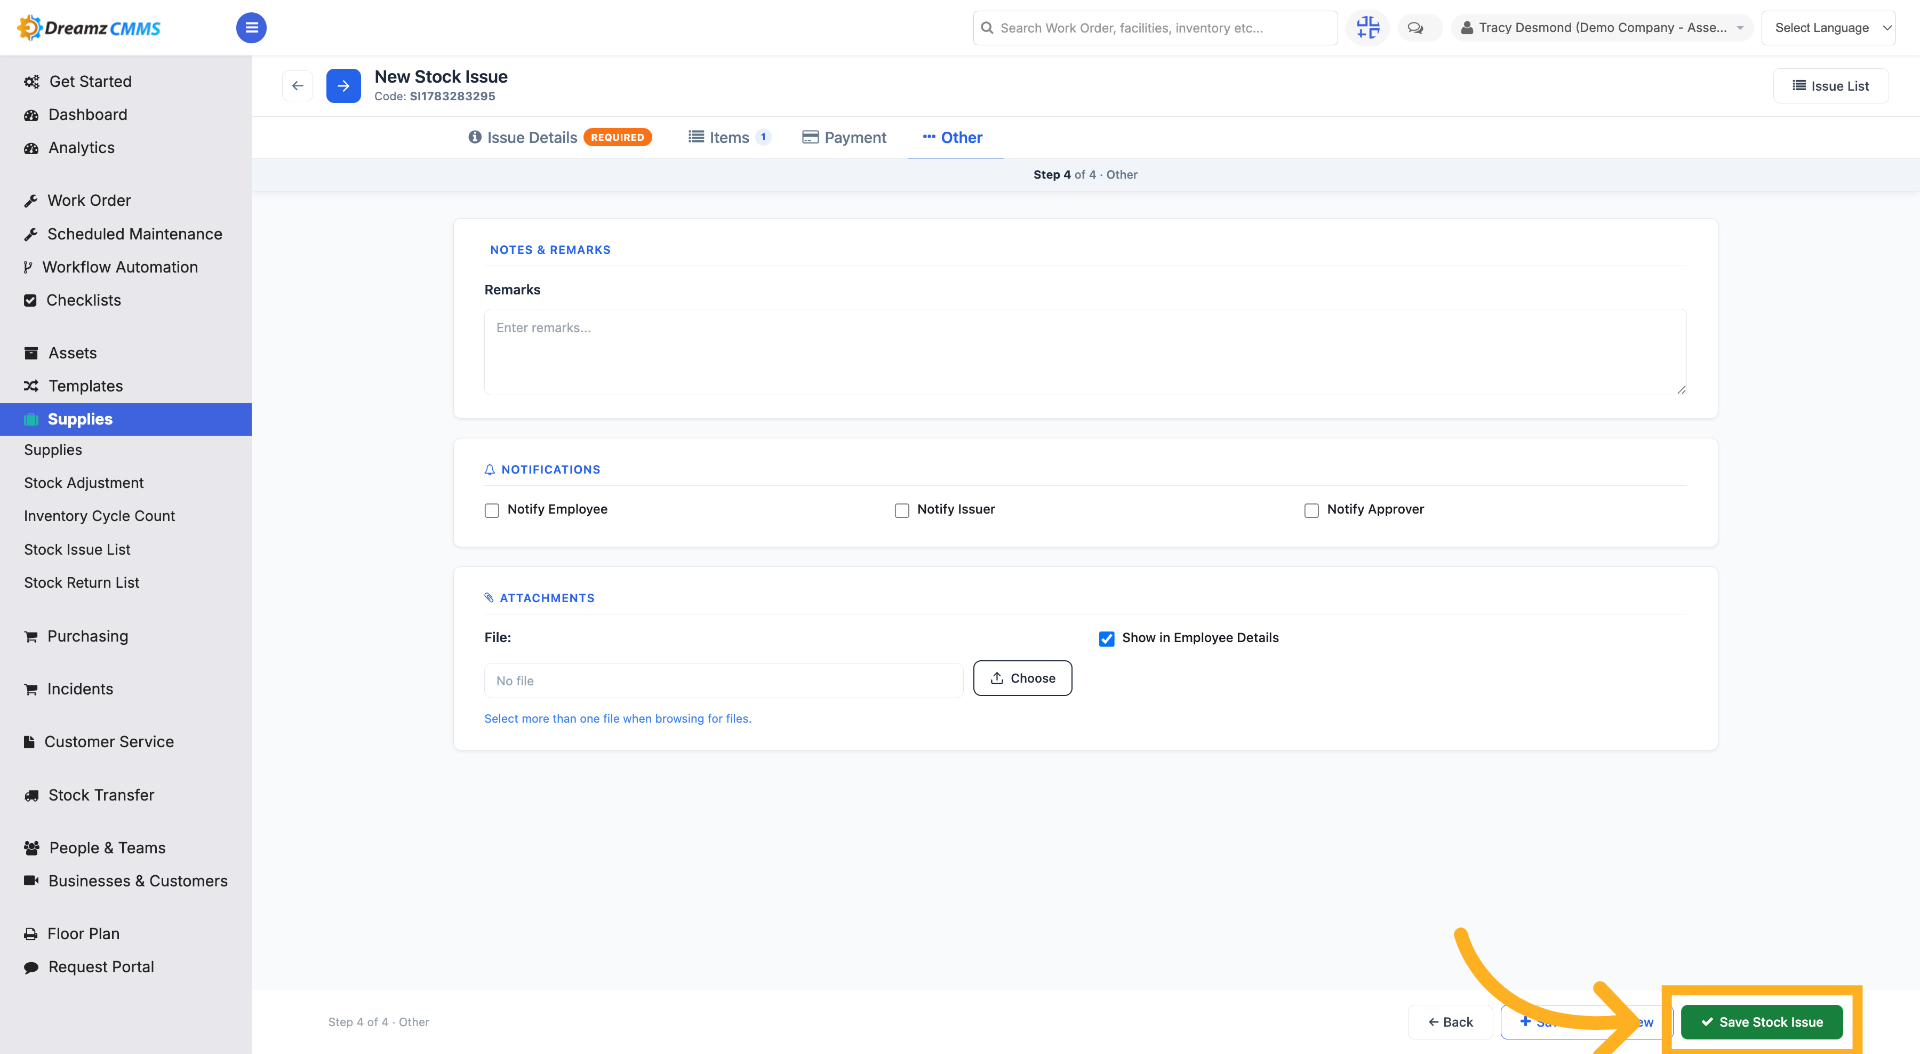
Step 18 – Save Stock Issue
Click "Save Stock Issue" to finalize the record. You'll be redirected to the stock issue list.
How to Process a Stock Return
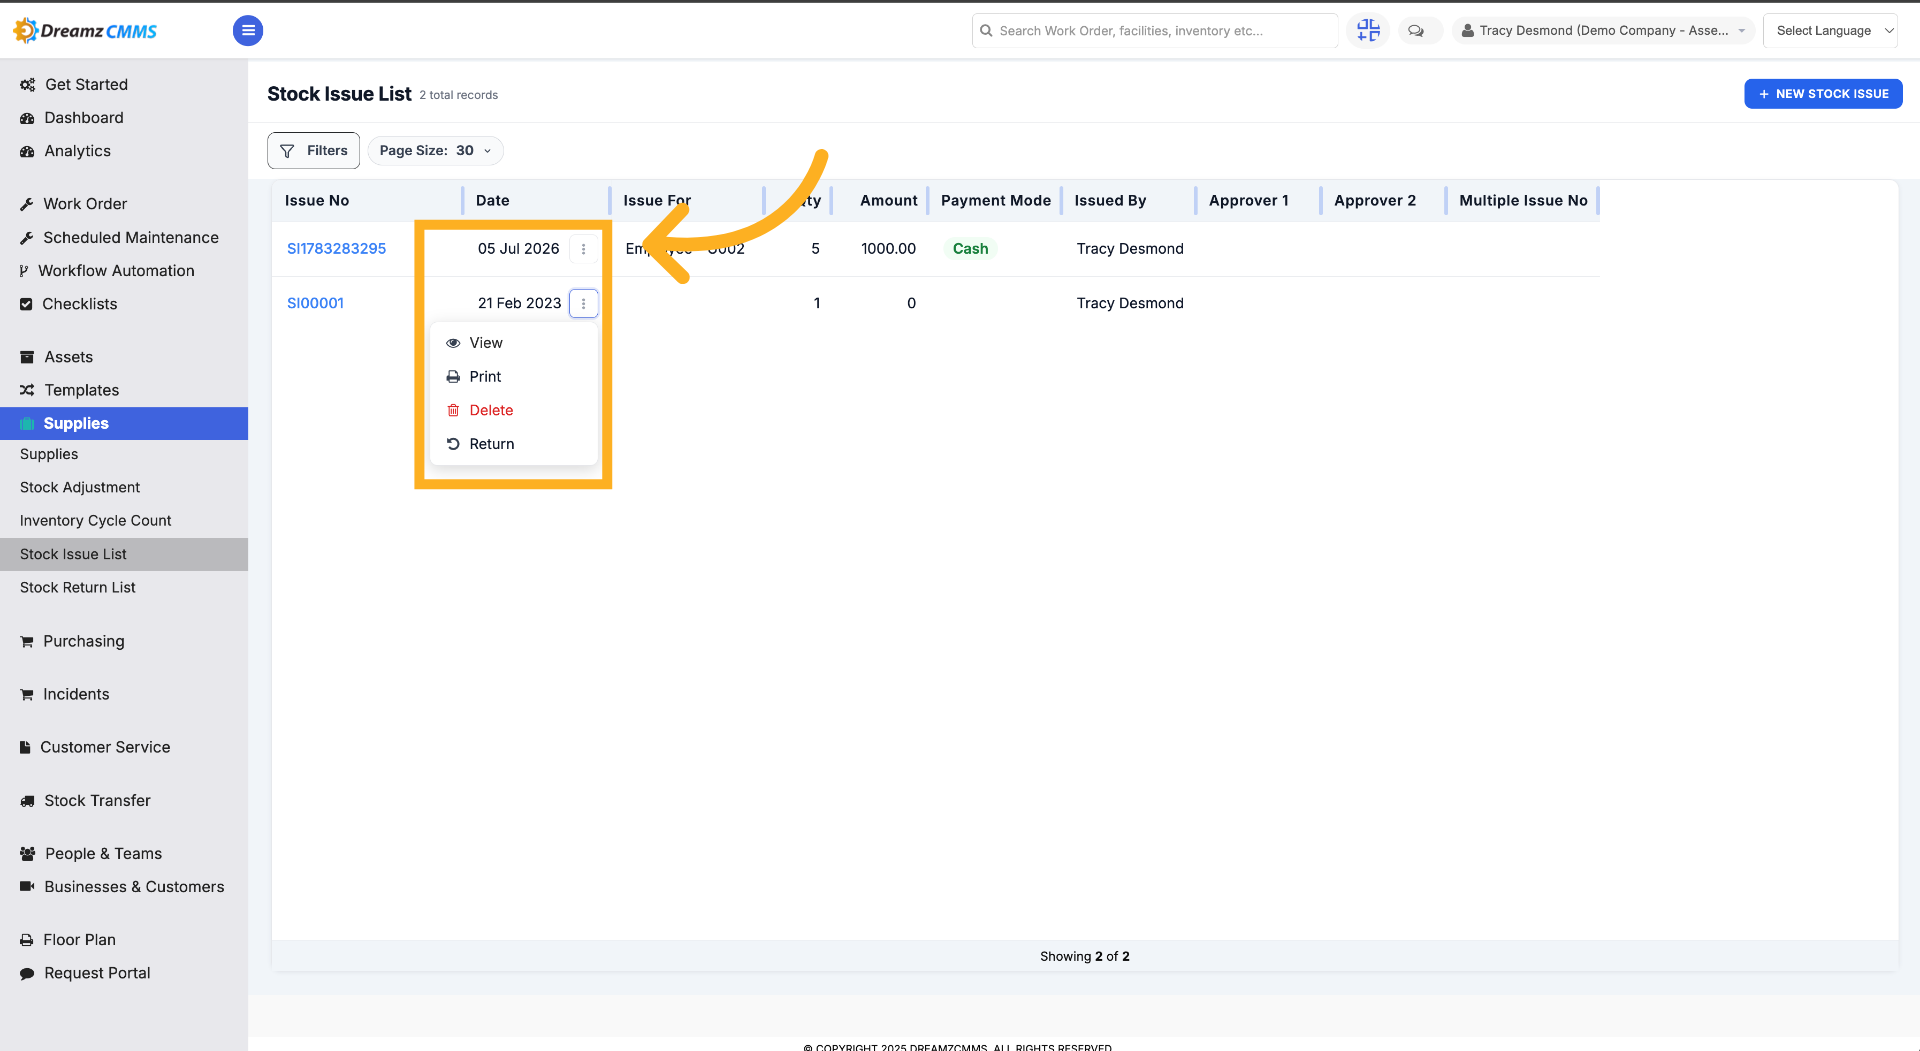
Step 1 – Use the 3-Dot Menu on the Stock Issue List
Click the three dots to view additional actions related to a stock issue, such as View, Print, Delete, and Return.
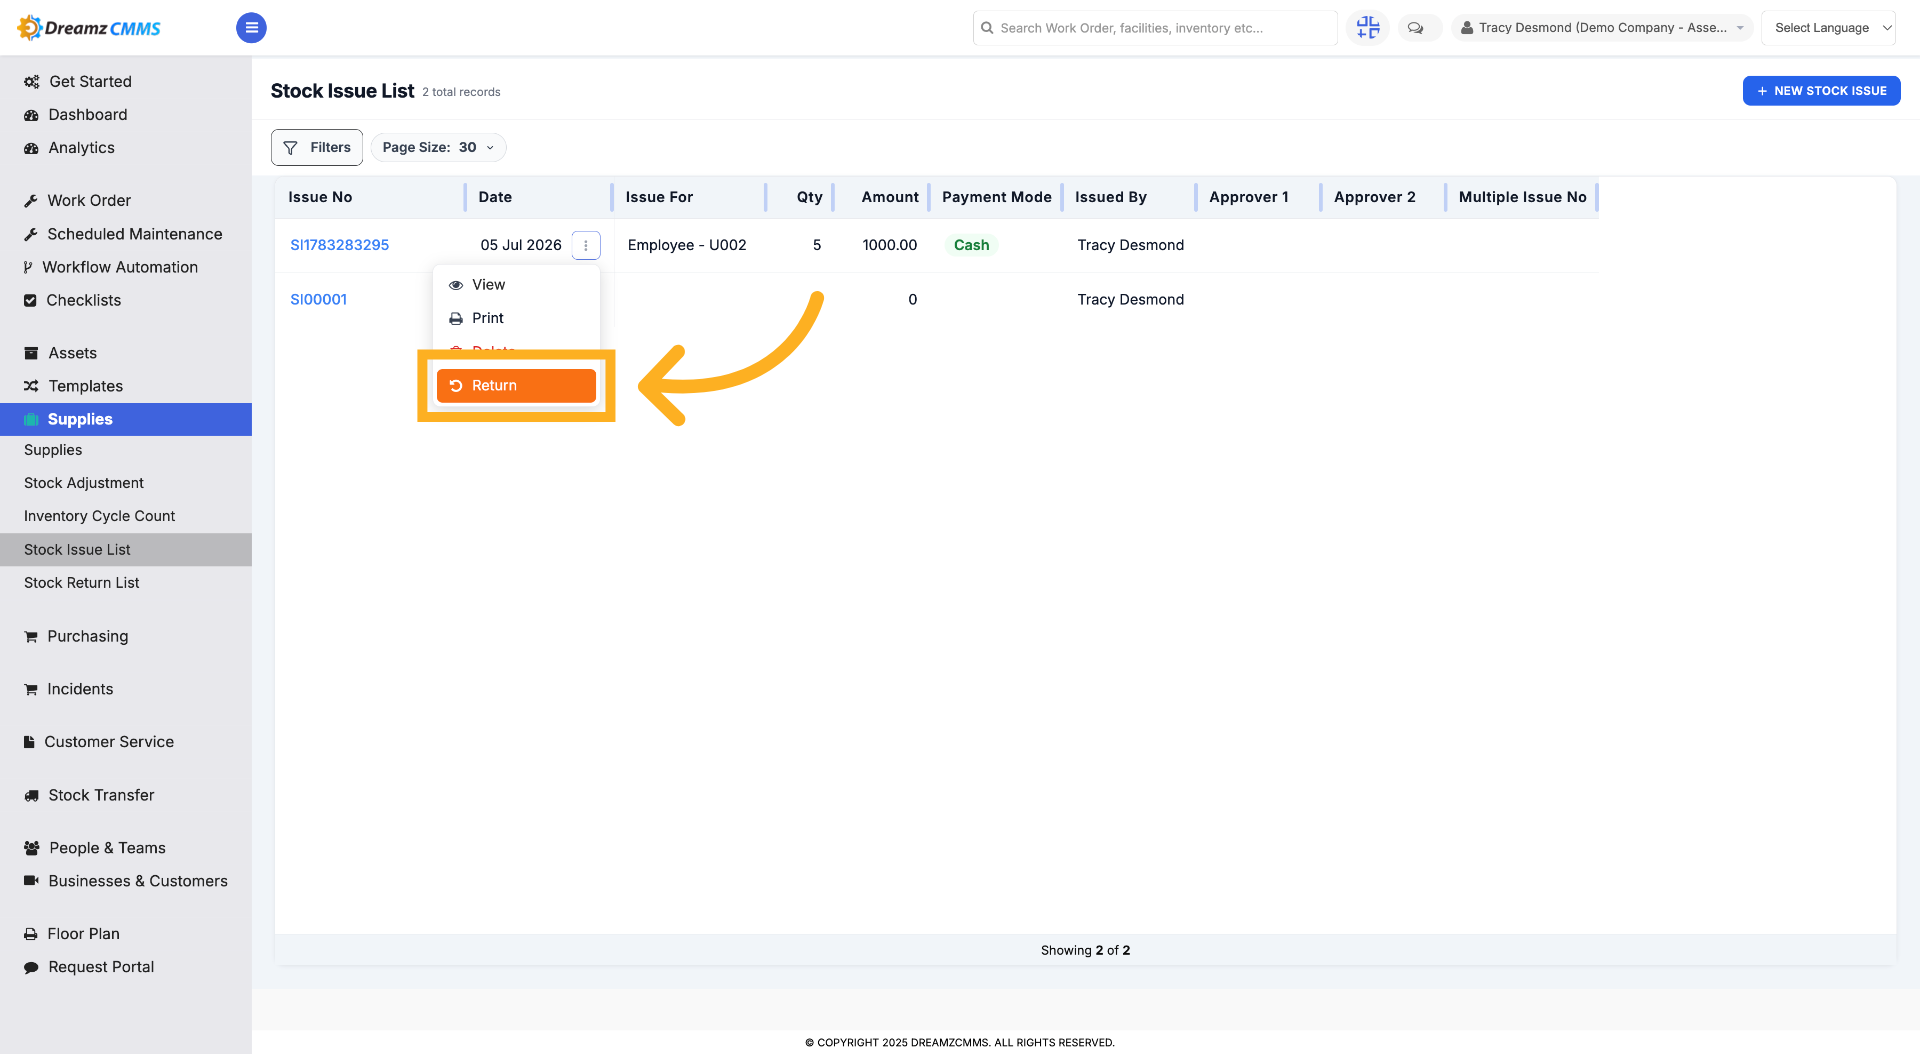
Step 2 – Access Return Section
Click "Return" to begin processing a stock return.
Step 3 – Select Return Reason
Choose the return reason from the list.
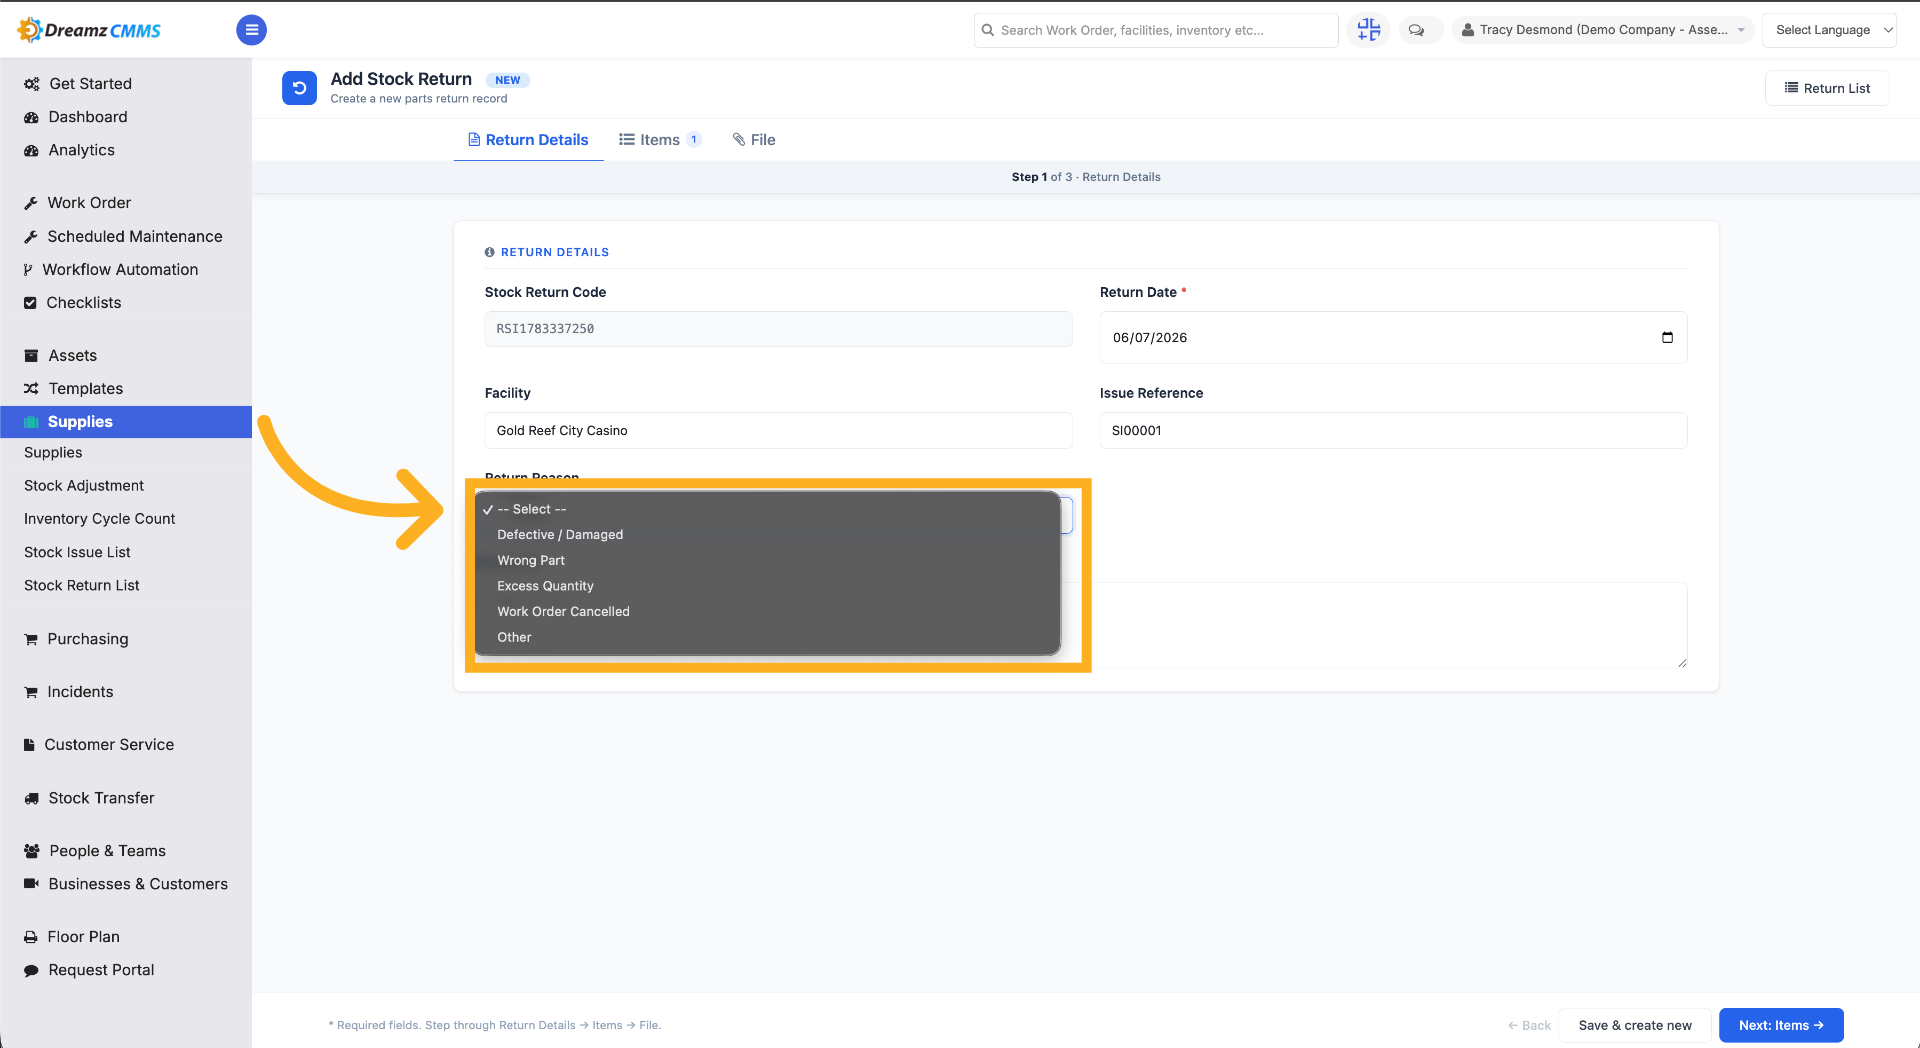
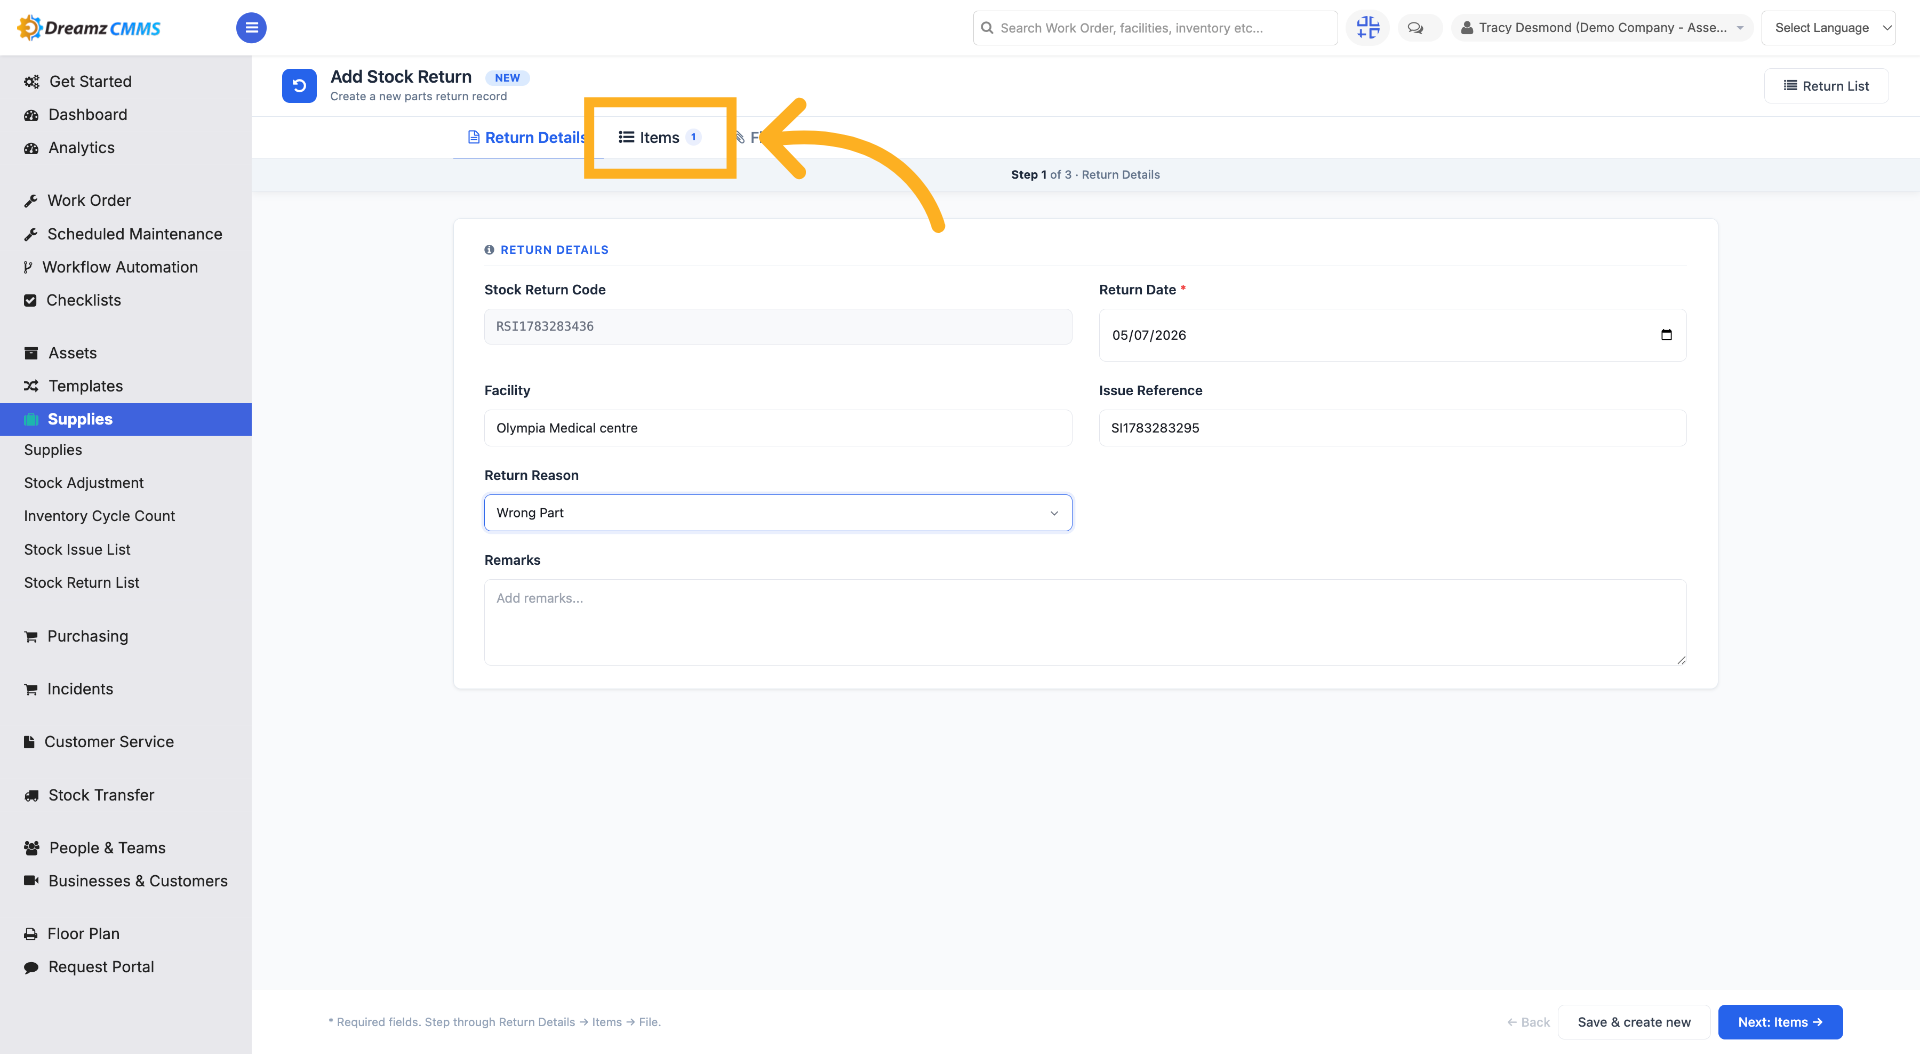
Step 4 – Open Return Items
Click "Items" to view and manage the items being returned.
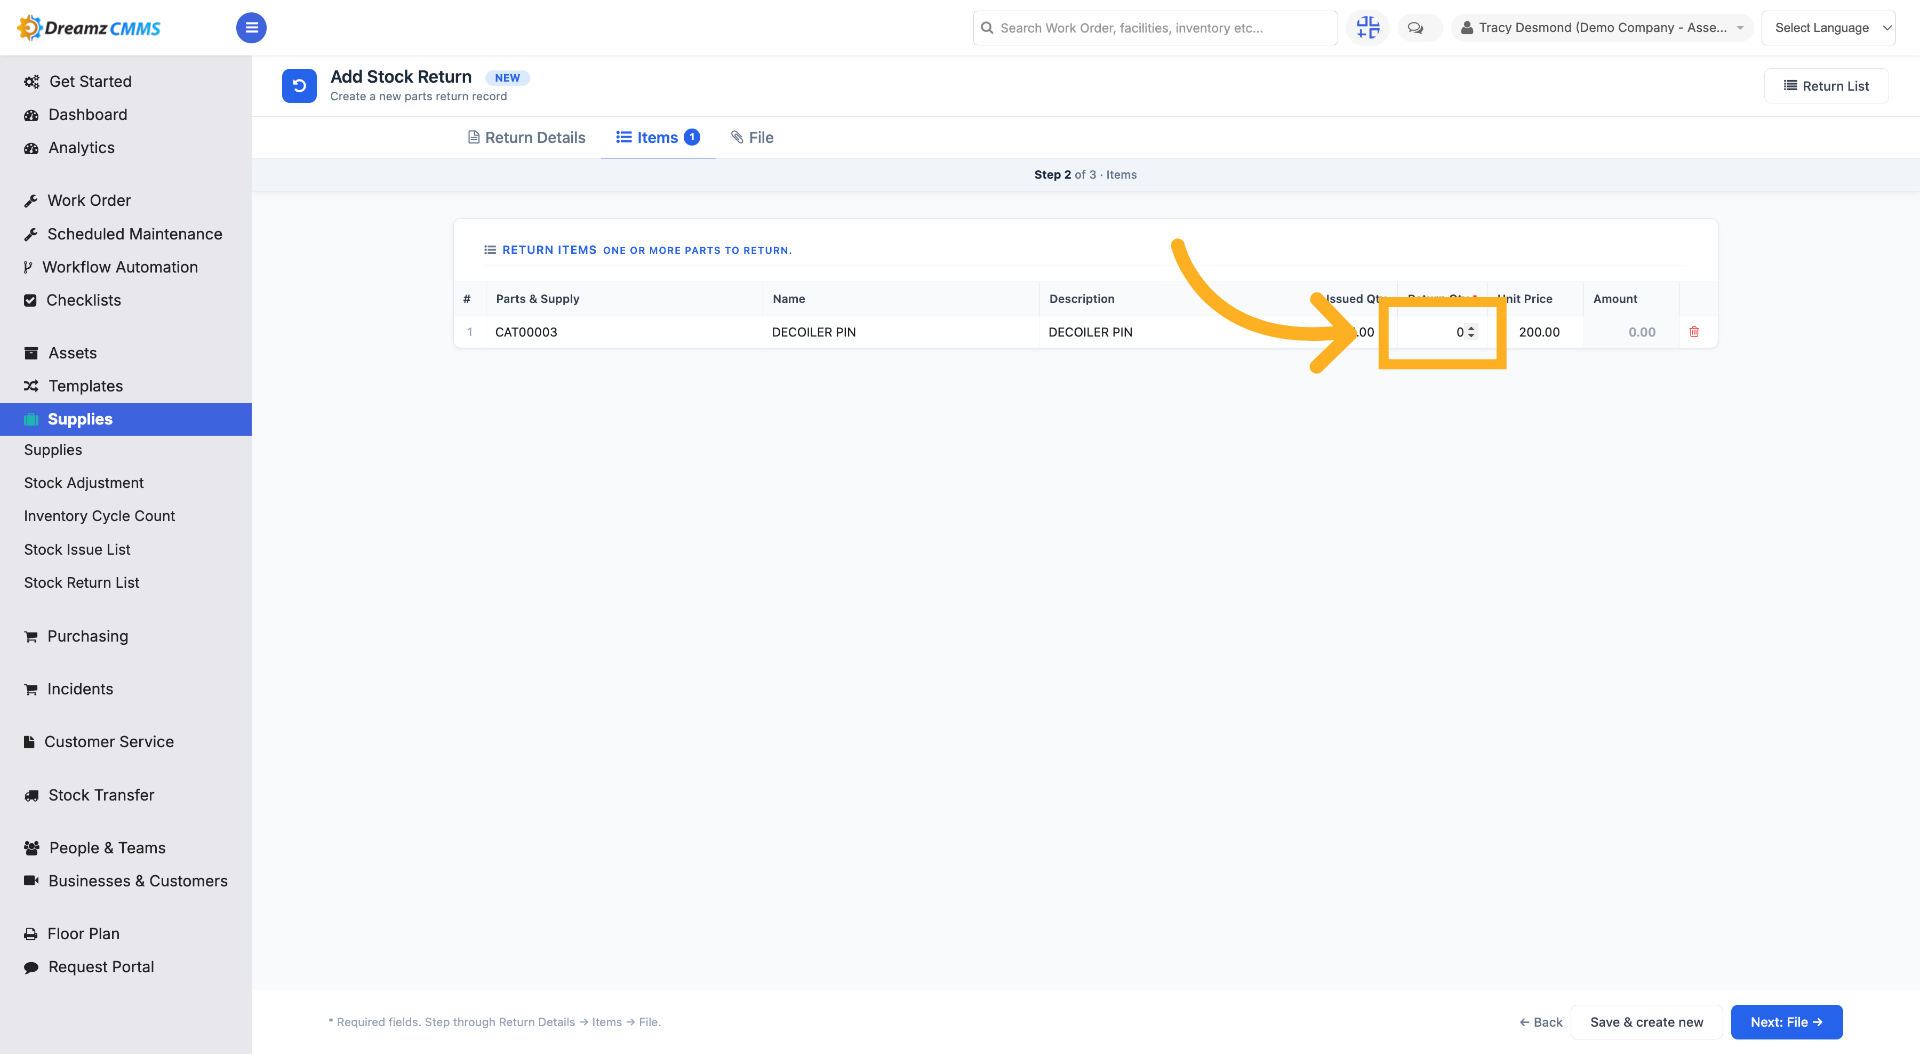
Step 5 – Enter Return Quantity
Enter the number of units to specify the quantity of items to return.
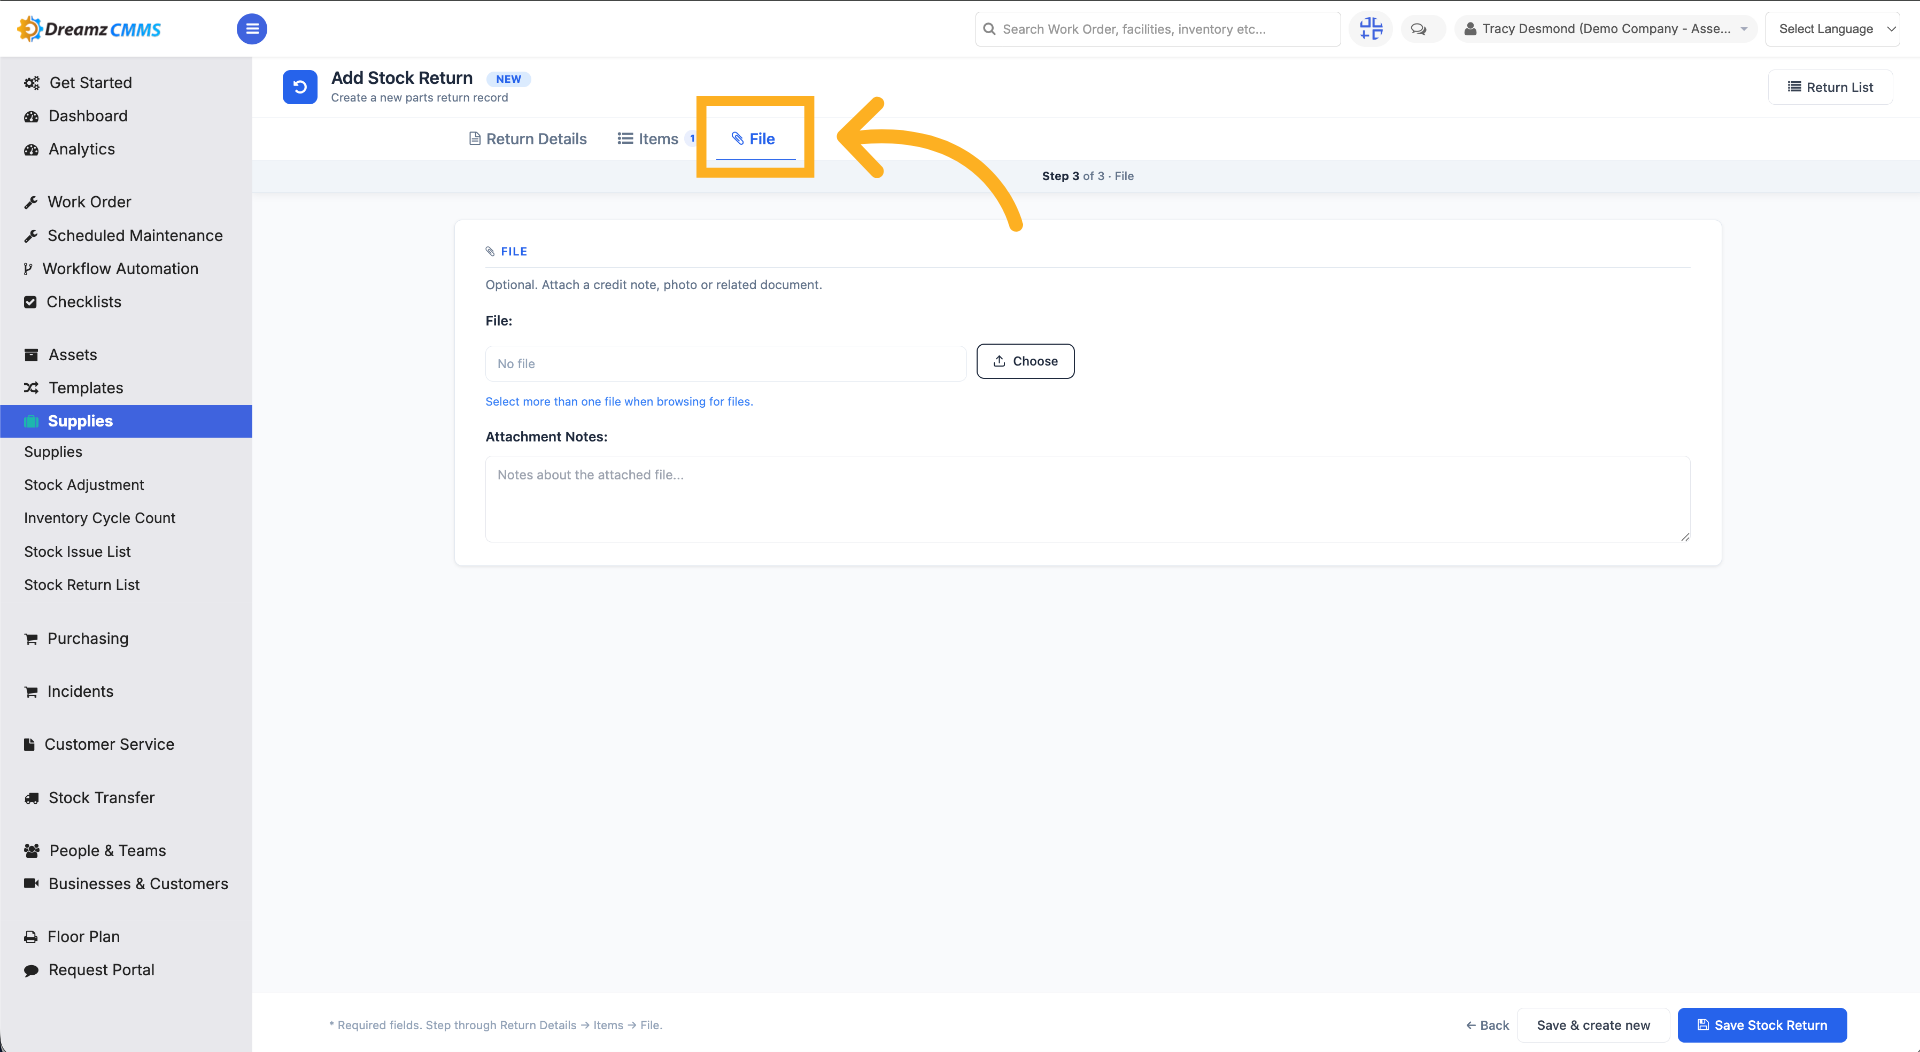
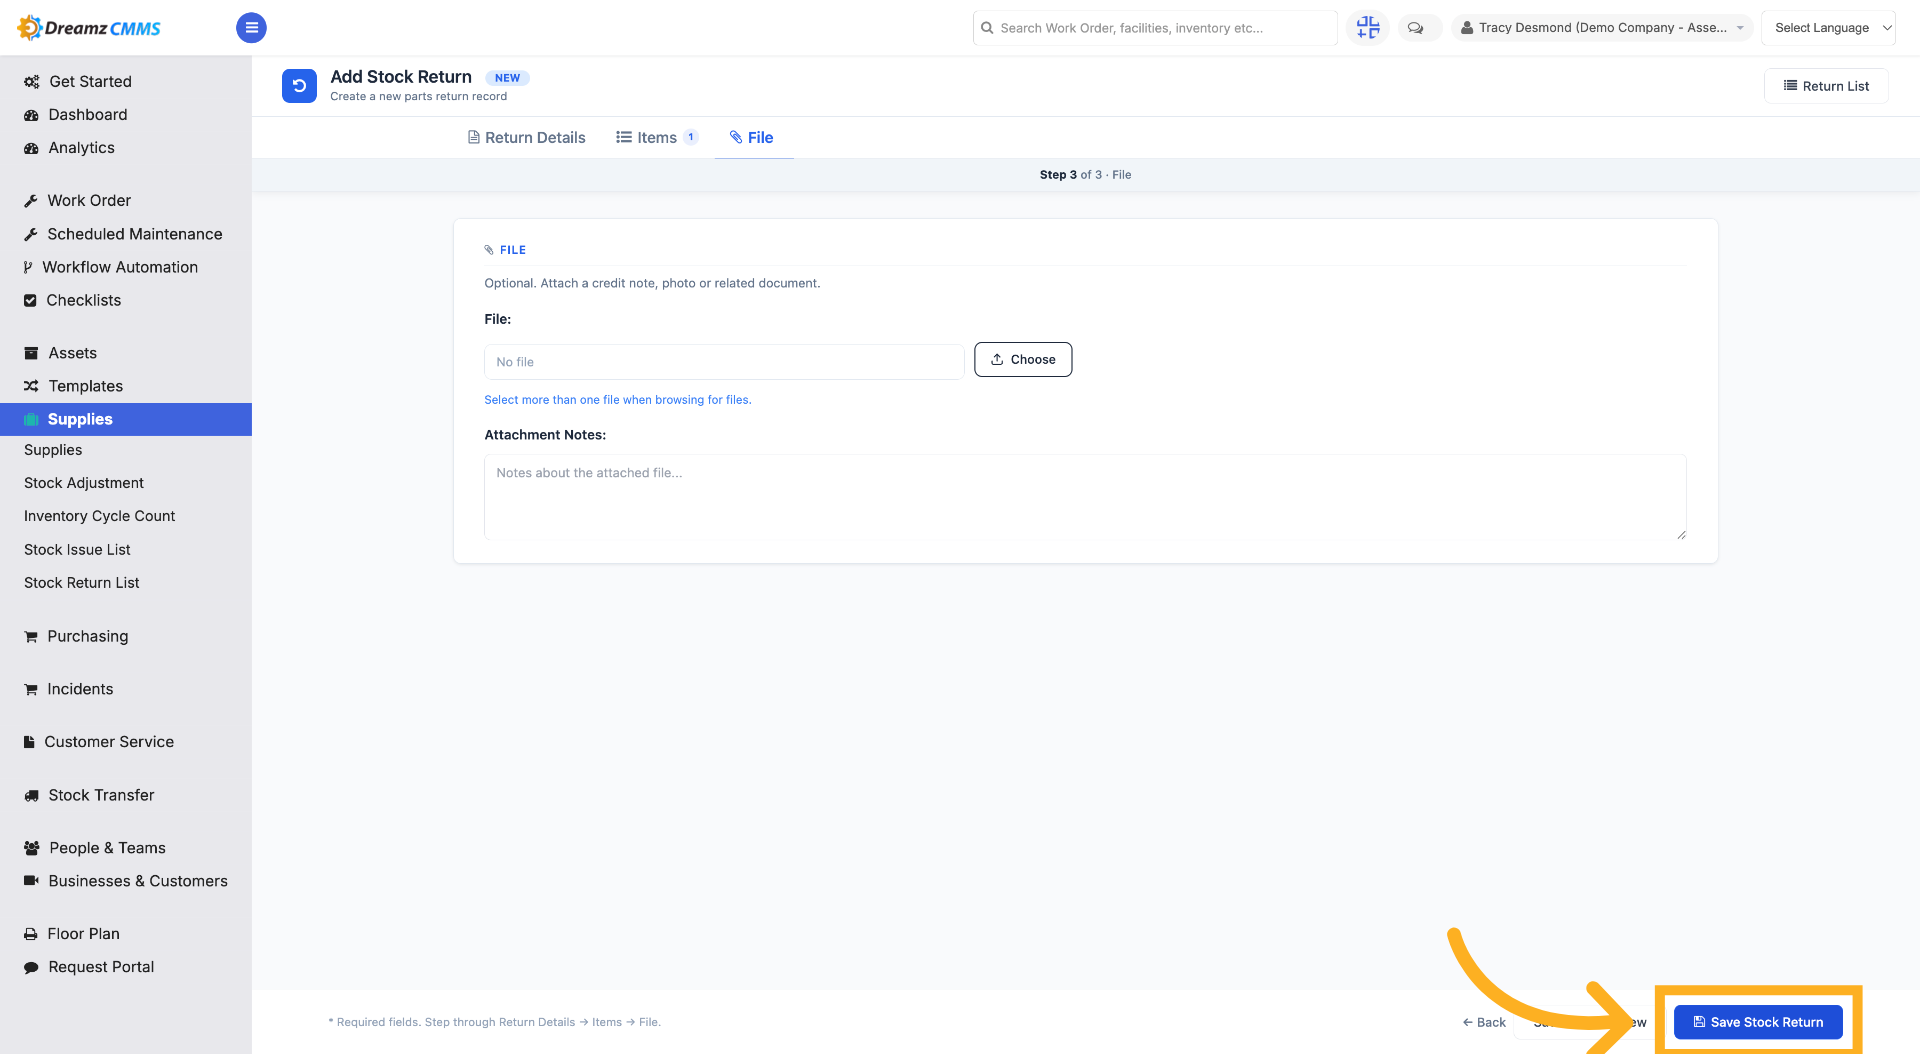
Step 6 – Open File Menu
Click "File" to access file options related to the stock return process. Here you can upload a file related to the return.
Step 7 – Save Stock Return
Click "Save Stock Return" to complete and save the stock return record.
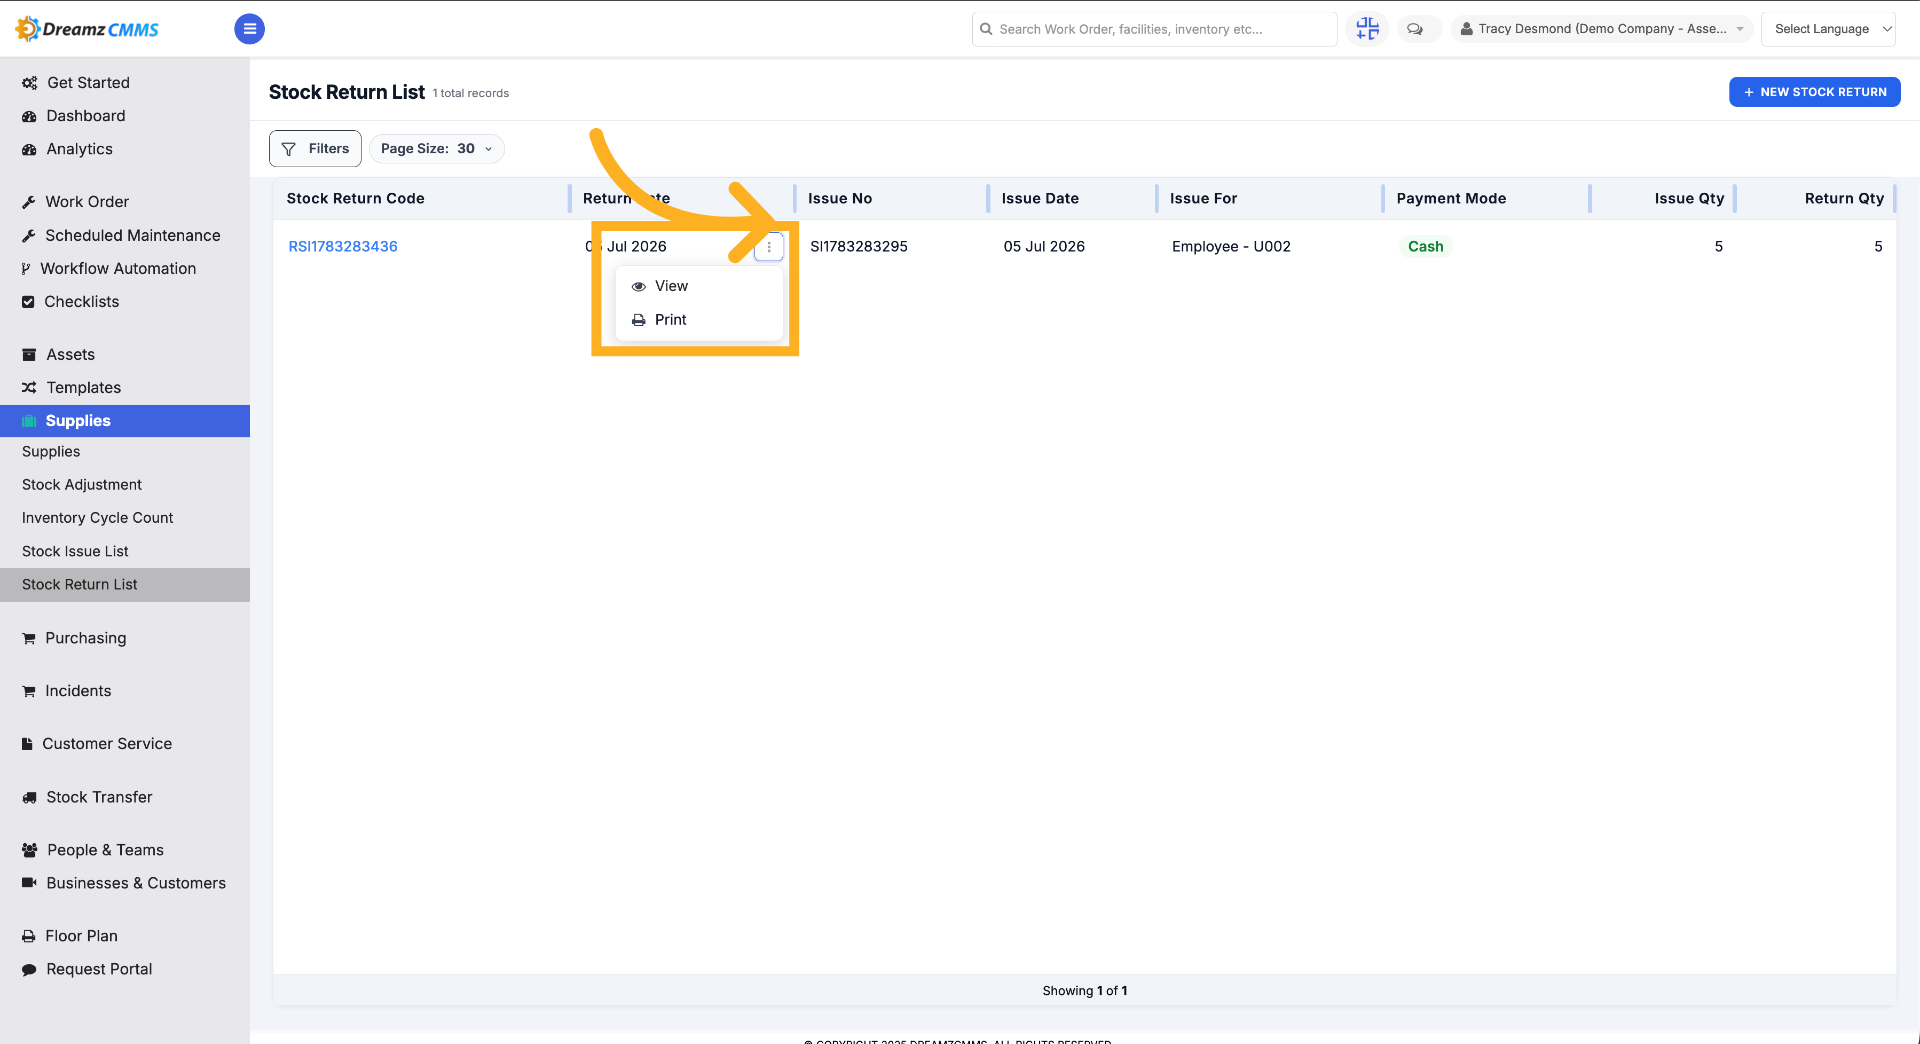
Step 8 – Use the 3-Dot Menu on the Stock Return List
On the stock return listing page, click the three dots to view more options, such as View or Print.
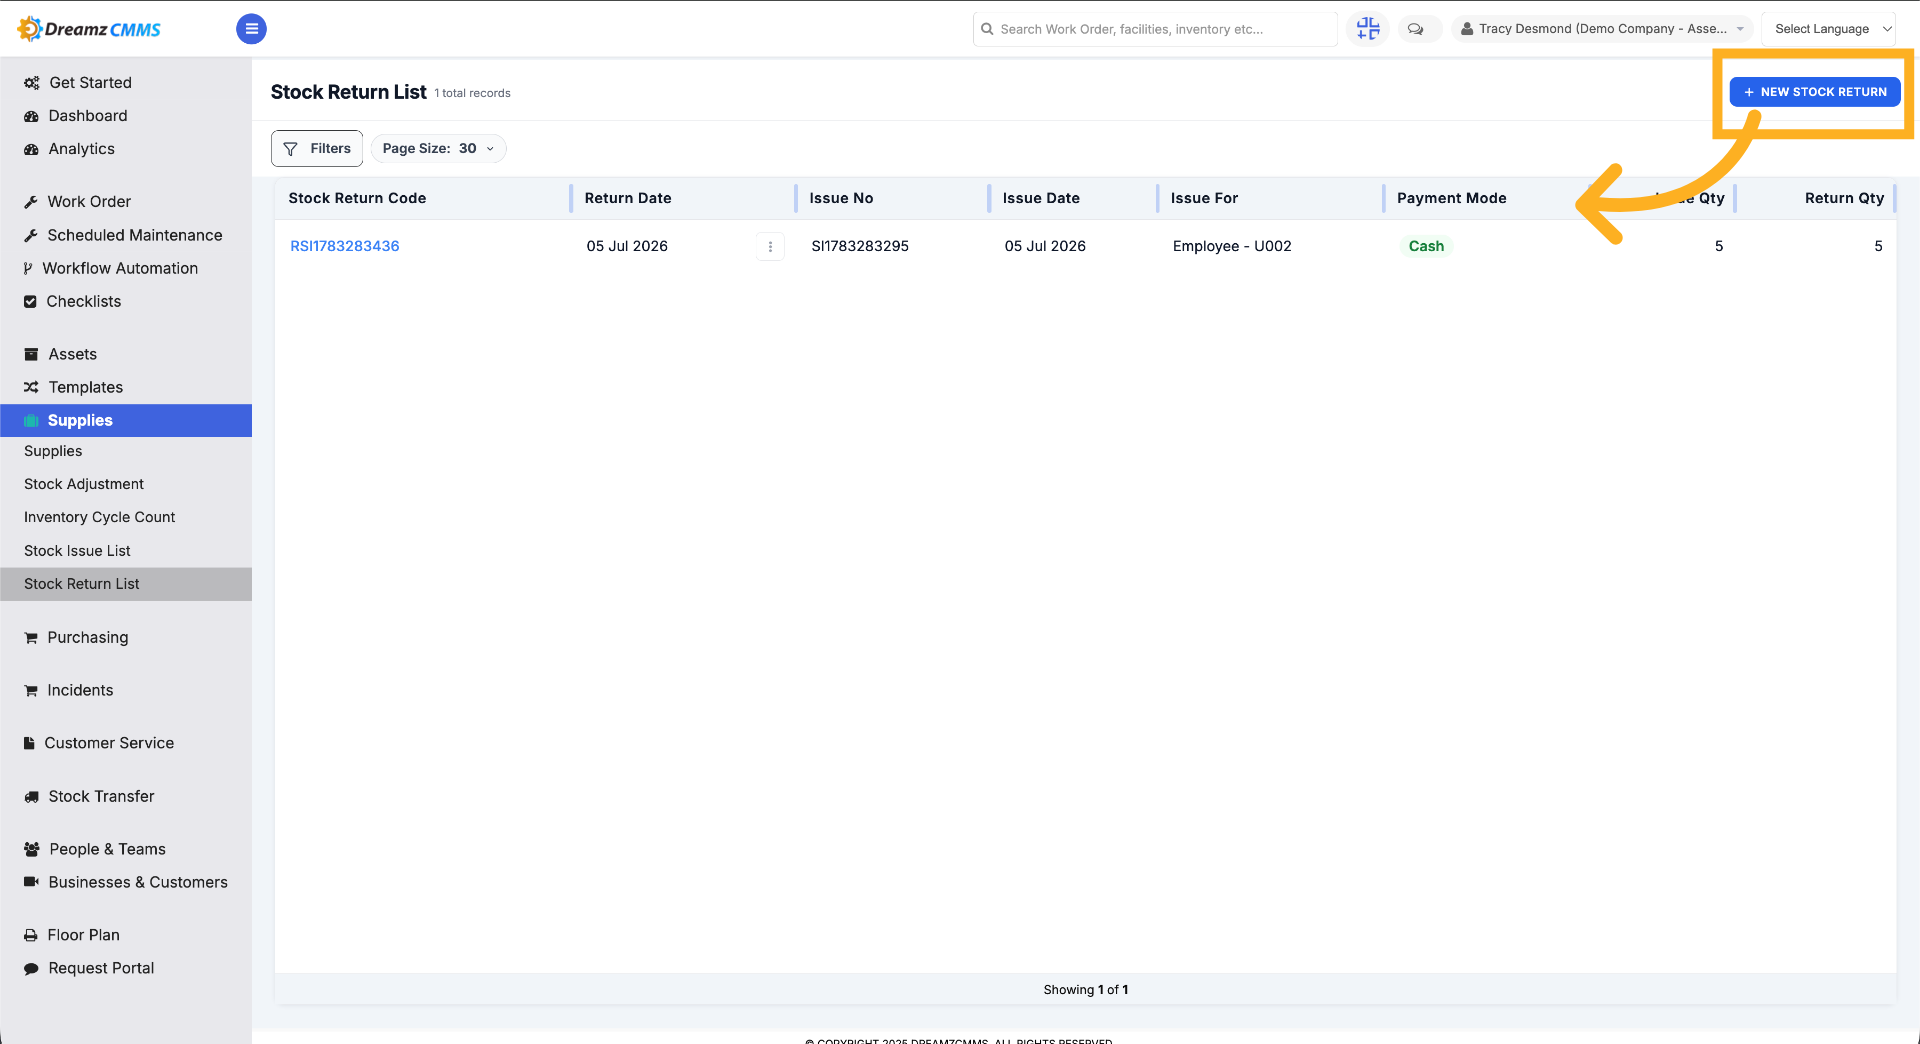
Step 9 – Add a Stock Return Directly
Click "New Stock Return" to start creating a new stock return record directly, following the same process as a stock issue.
Tips for Managing Stock Issues and Returns
- Choose the correct payment mode up front — Advance and Waive Off both require an approver, so confirm this is set before saving.
- Use the Other tab to attach supporting files and remarks so the stock issue record is fully documented.
- Process returns from the original stock issue's three-dot menu to keep the return linked to its source issue.
- You can also create a stock return directly from the Stock Return list without starting from an existing issue.
Frequently Asked Questions
What payment modes are available for a stock issue?
Options include Advance, Waive Off, Client Payment, and Cash. Advance and Waive Off both include an approver field, and Advance also includes an EMI section.
Can I return part of a stock issue?
Yes. When processing a return, you specify the quantity of items being returned for each item.
Do I need to start from a stock issue to create a return?
No. You can process a return from an existing stock issue's three-dot menu, or create a new stock return directly from the Stock Return list.
Can I attach files to a stock issue or return?
Yes. Use the Other tab on a stock issue, or the File option on a stock return, to attach supporting documents.