Manage Supplies and Inventory in DreamzCMMS
This tutorial guides you through managing parts and supplies within DreamzCMMS. You will learn how to navigate the supplies section, adjust filters, and update inventory details effectively.
Overview
The Supplies section is where you manage your parts and inventory — tracking stock levels, suppliers, bills of materials, and financial and facility details for every item. From here you can also filter, search, and organize your inventory list, and add new supply items as needed.
Before You Begin
- You must have access to the Supplies section in your account.
- Know which facility, category, and supplier details apply to the items you're managing, since these are used throughout the inventory forms.
How to Navigate and Filter the Parts and Supplies List
Step 1 – Open Supplies Menu
Click Supplies to ensure you are in the inventory management area.
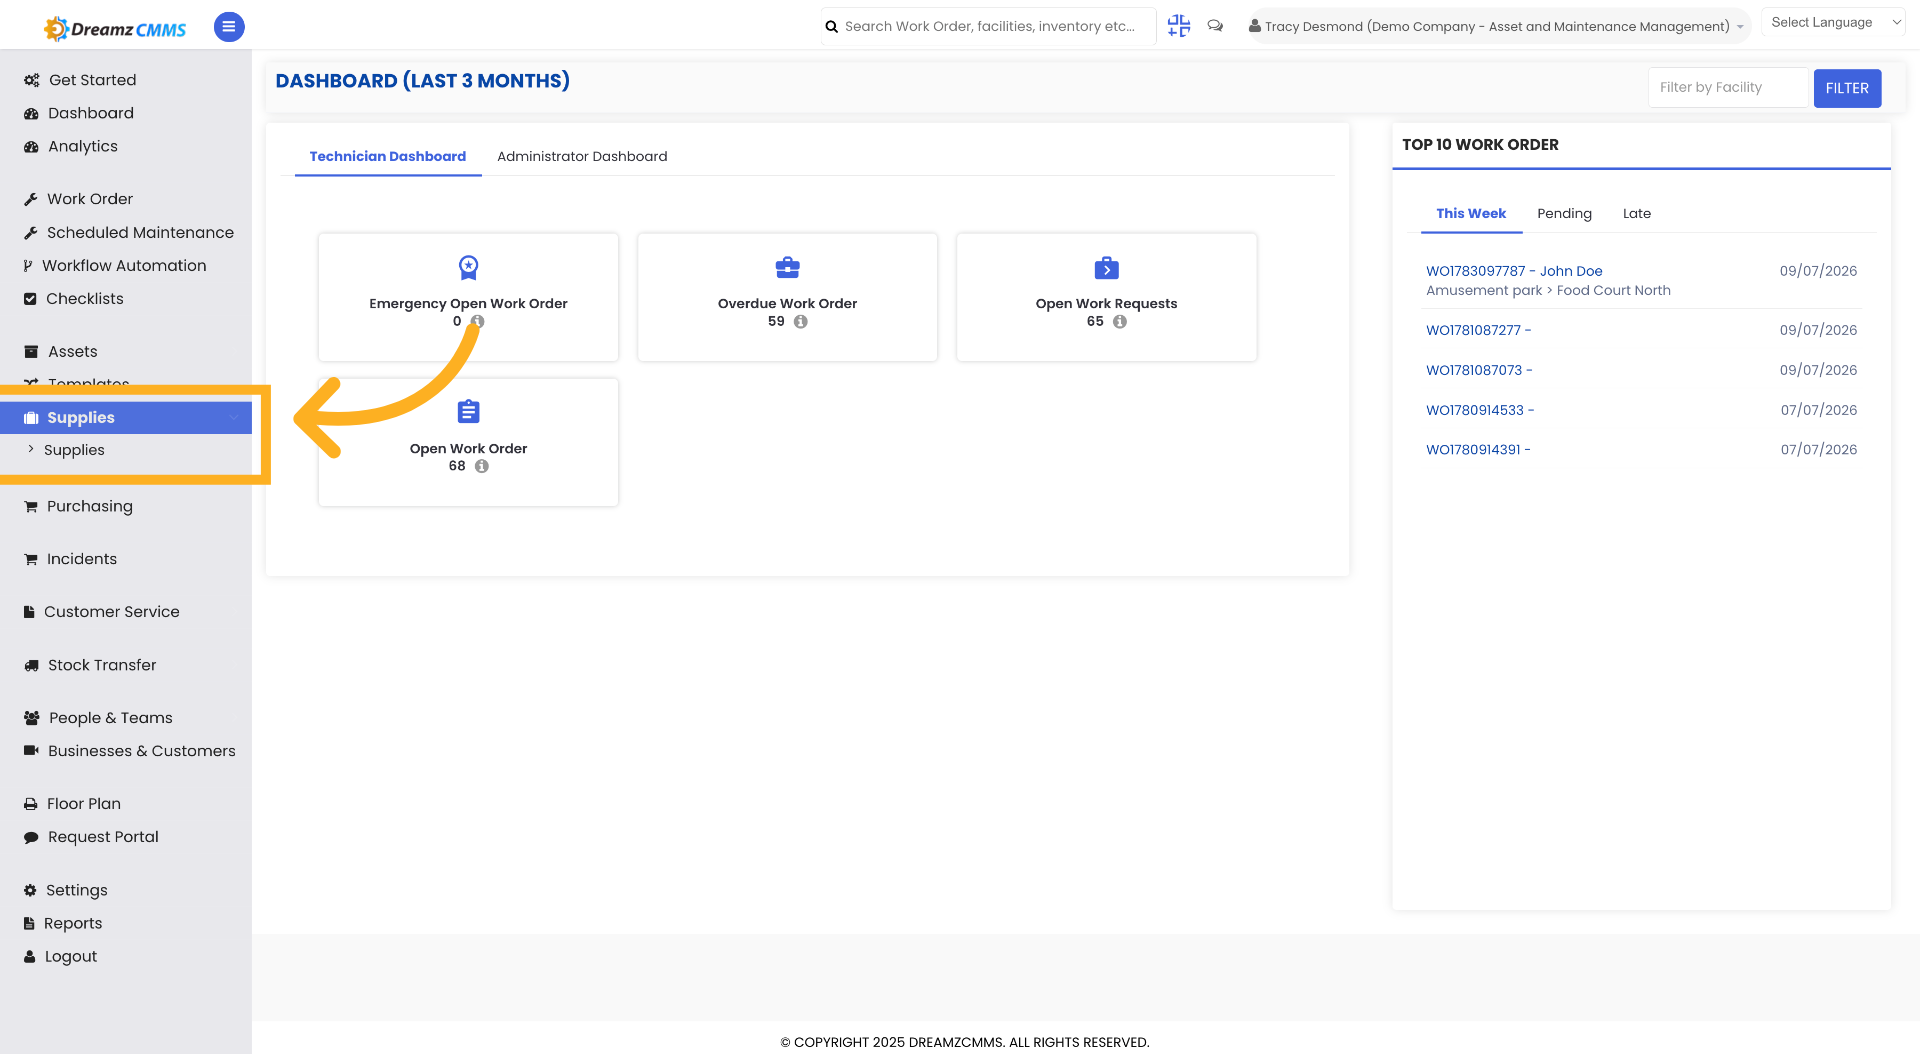
Step 2 – Inventory Listing Page
Clicking the Supplies menu redirects you to the Inventory listing page.
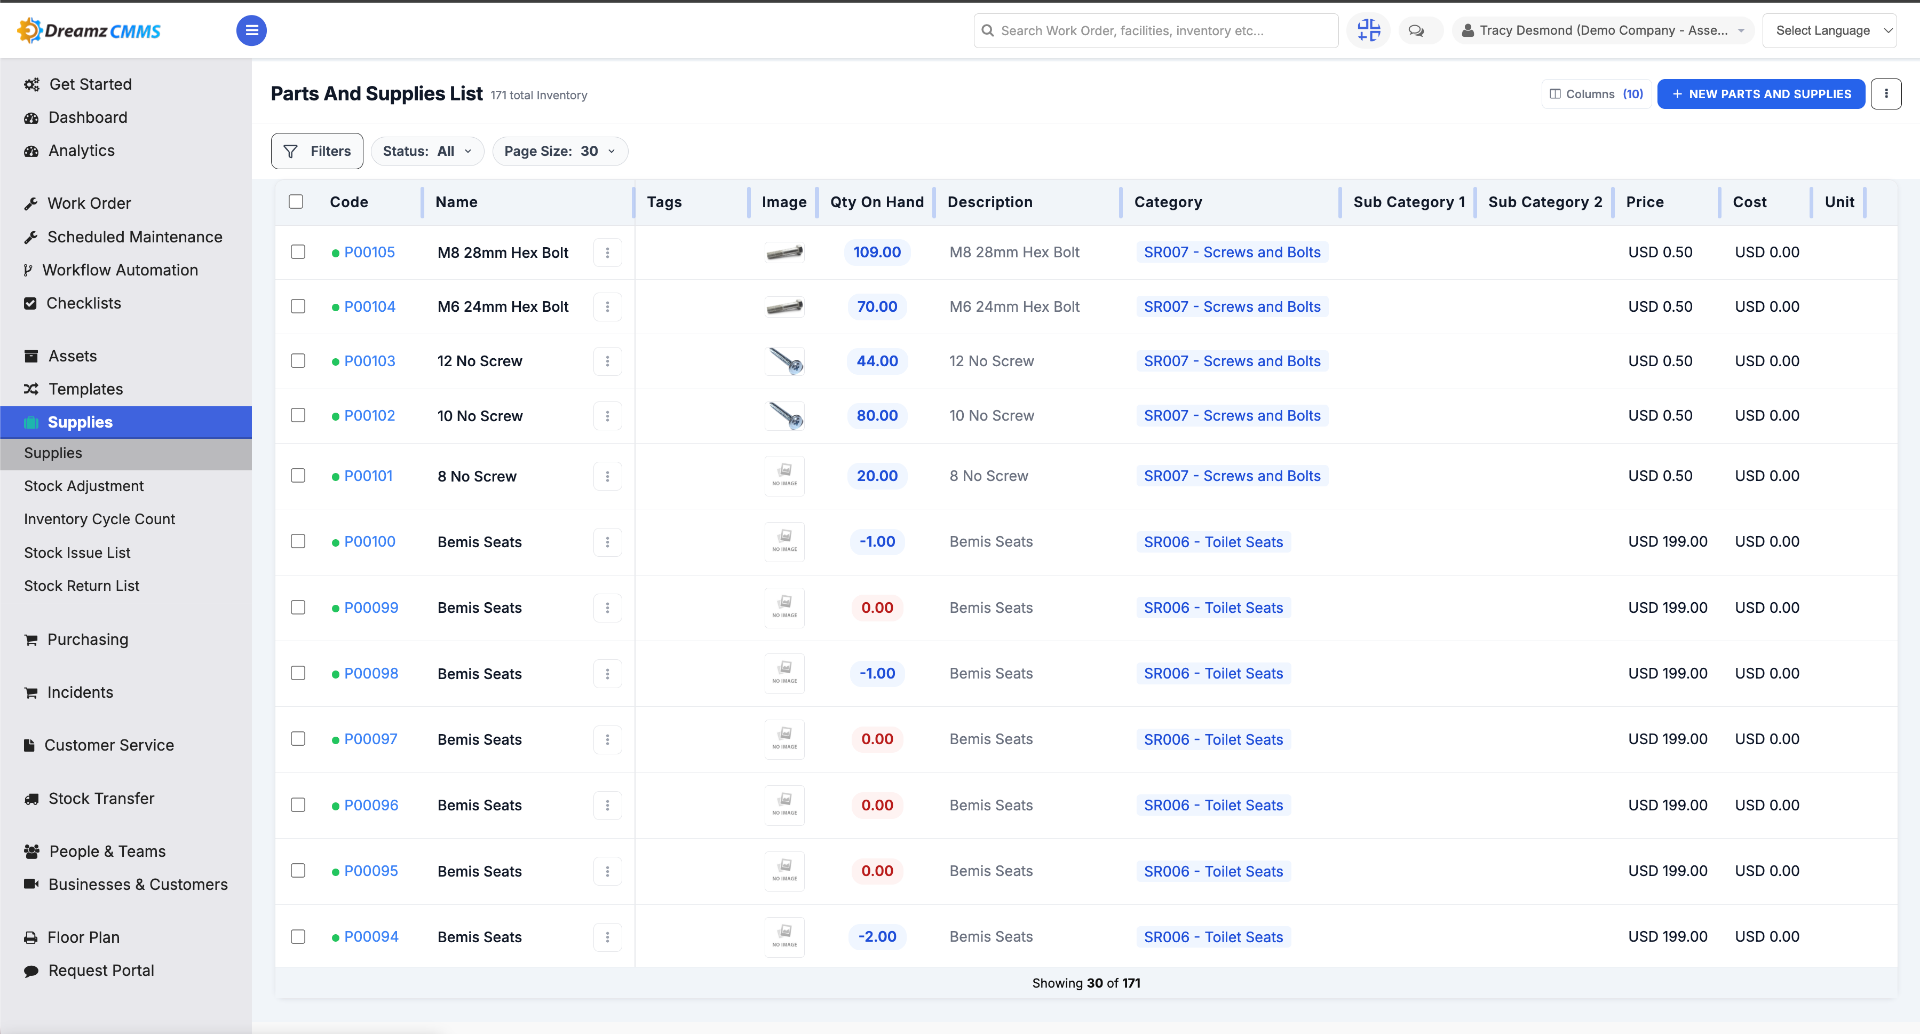
Step 3 – Splitter Function
Select the splitter and drag it to decrease or increase the size of a column.
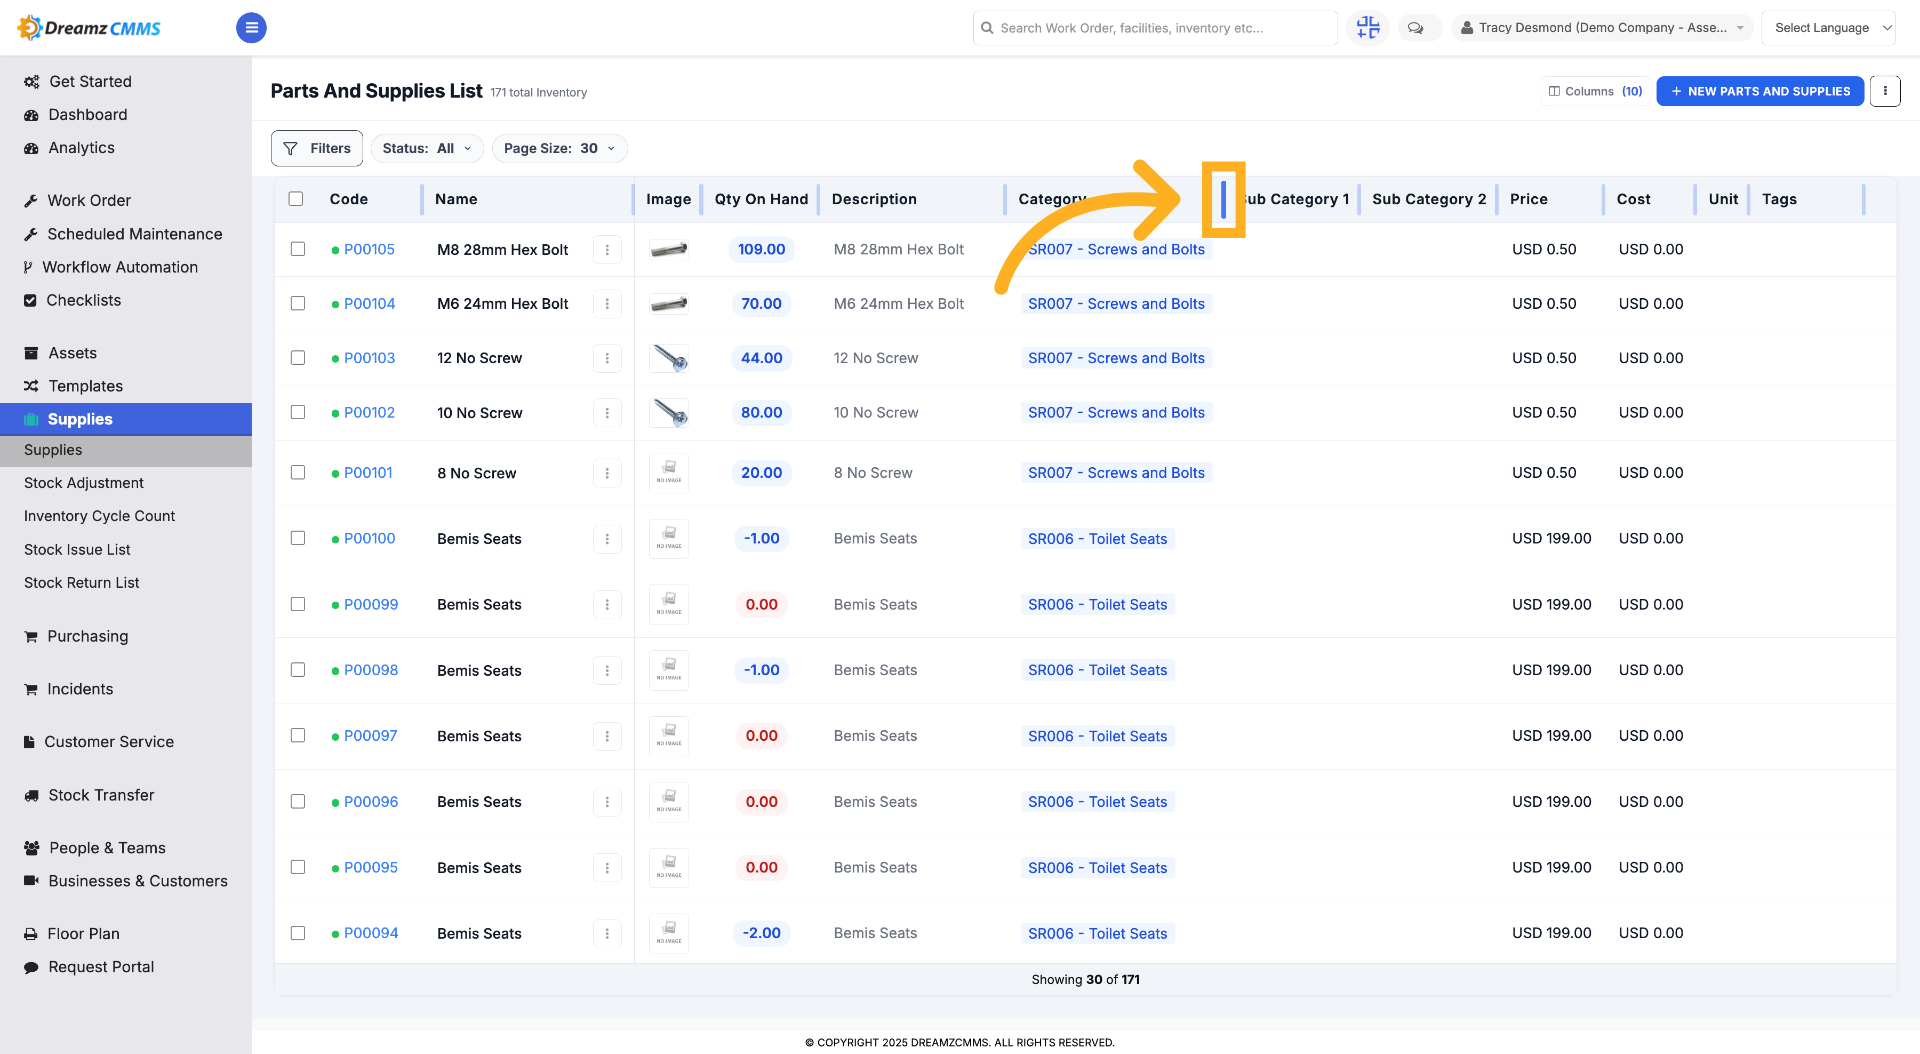
Step 4 – Adjust Columns Display
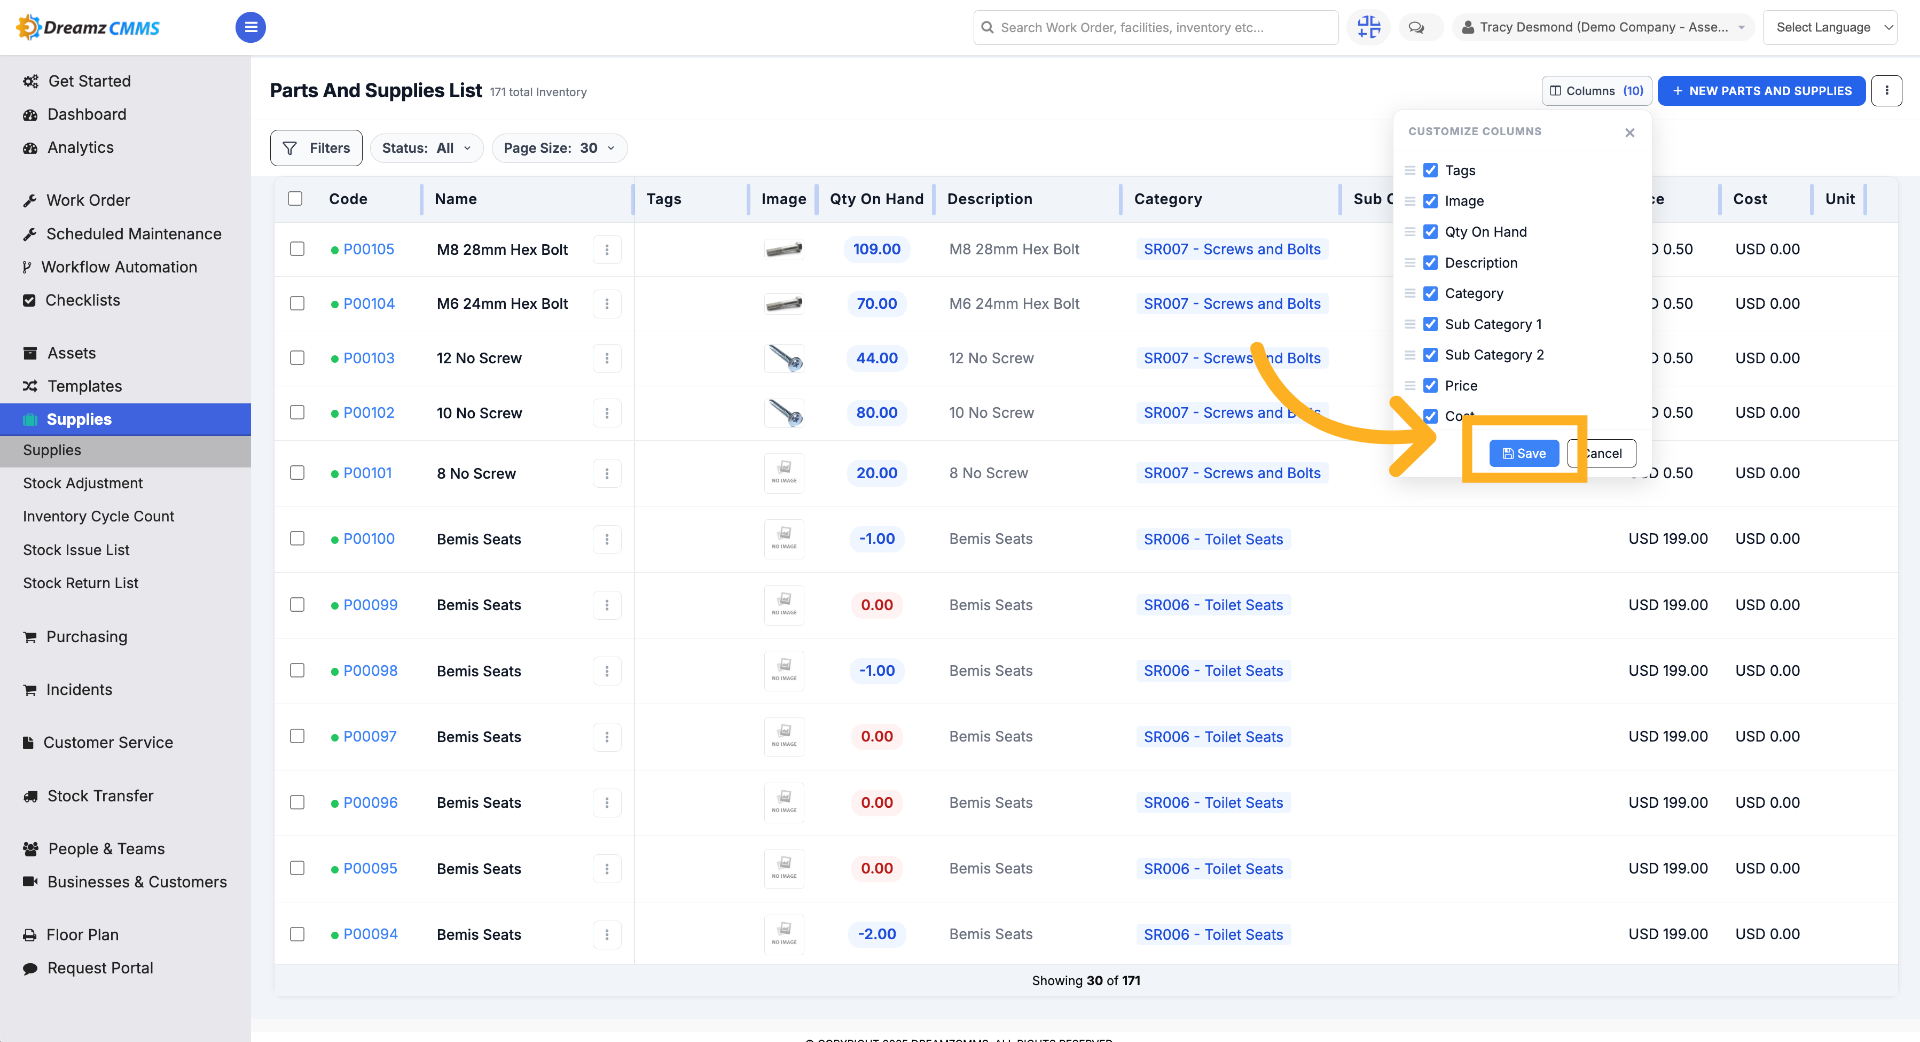
Click Columns to customize which columns are visible in the parts and supply list.
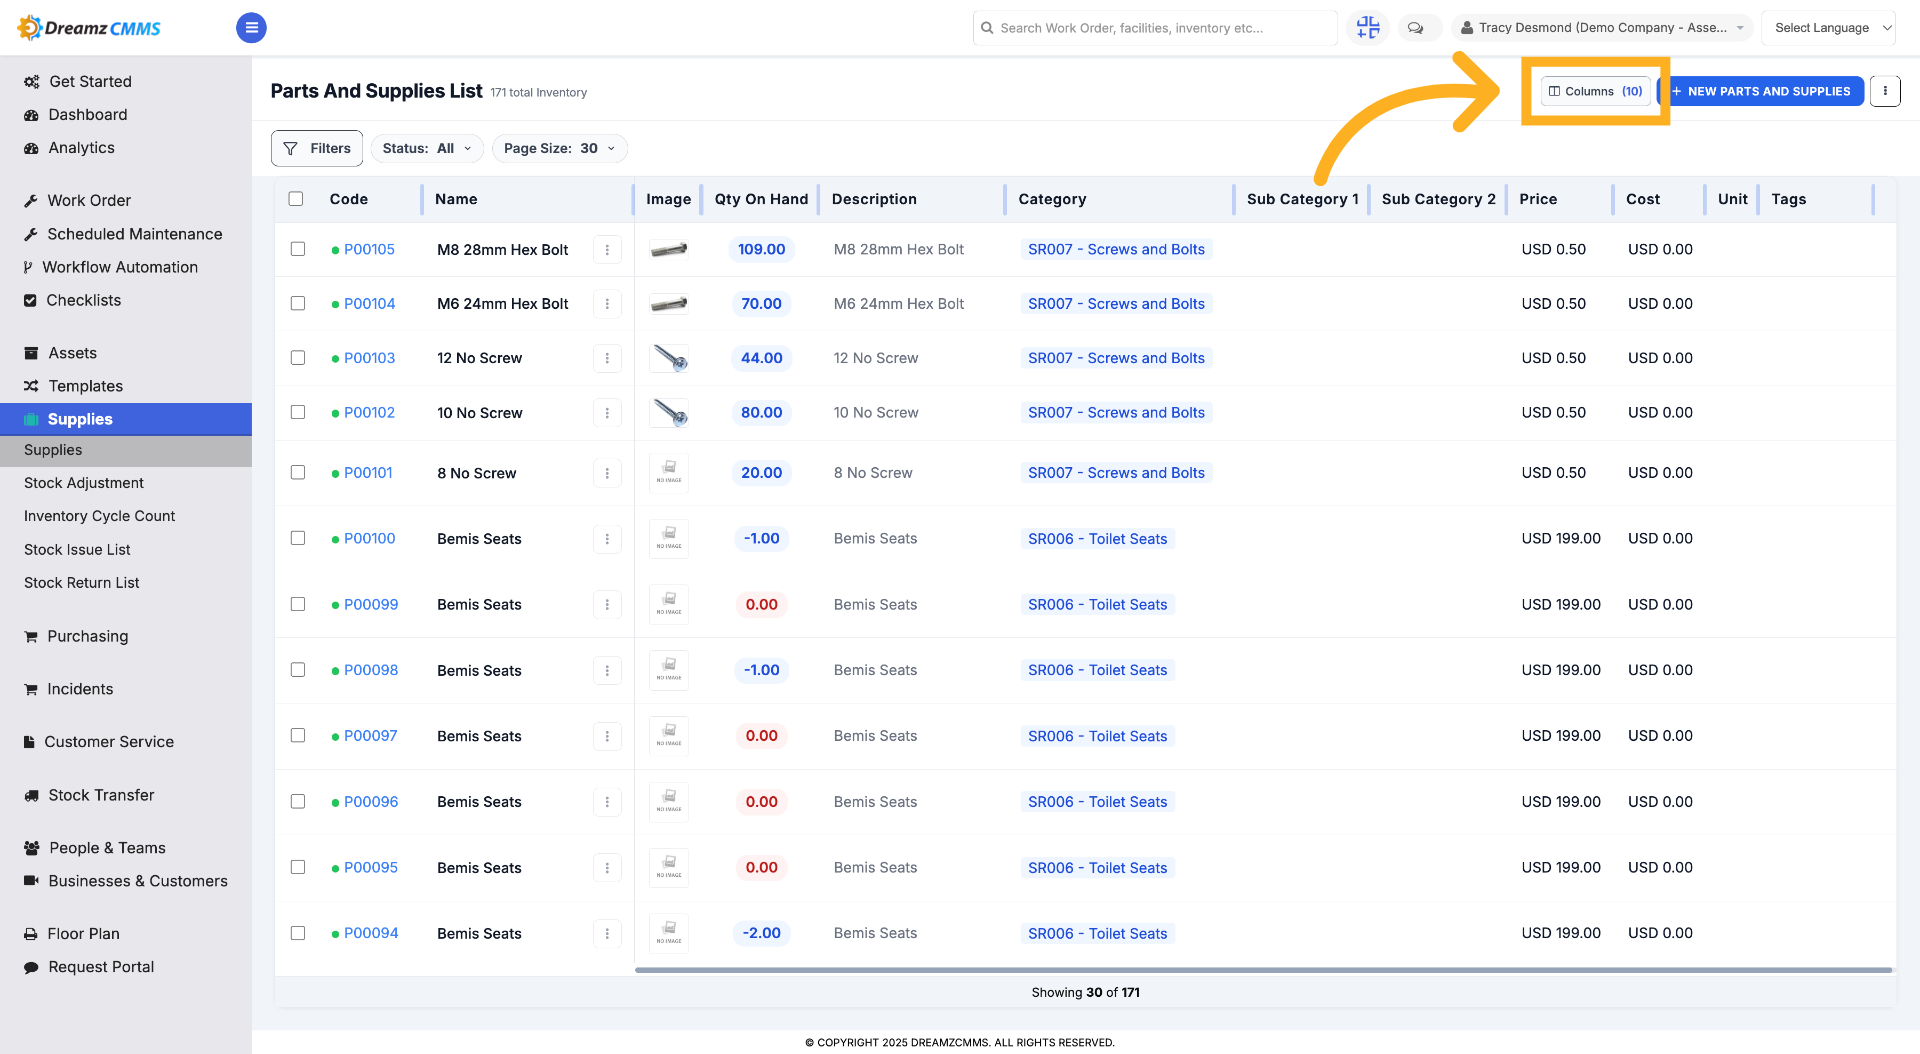
Step 5 – Save Column Settings
Click Save to apply your column display preferences to the supply list view.
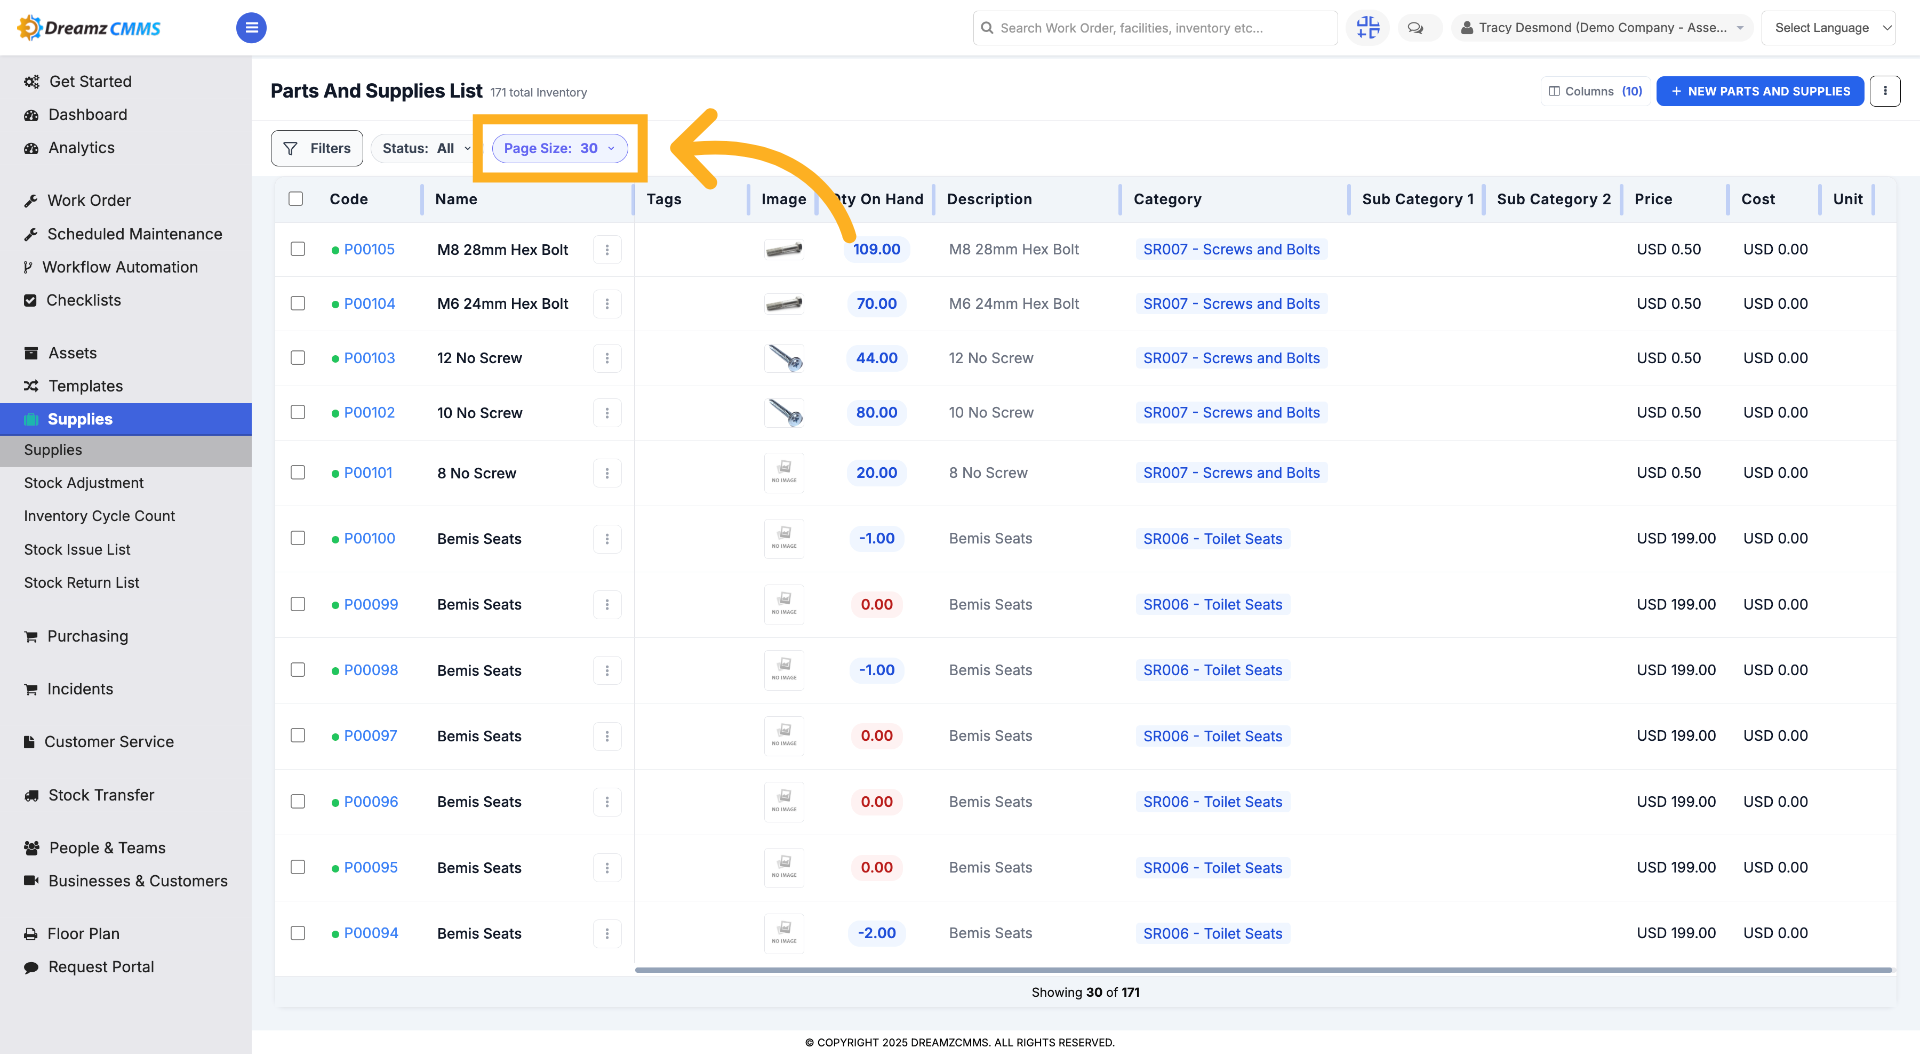
Step 6 – Change Page Size
Click Page Size to modify the number of items displayed per page in the supply list.
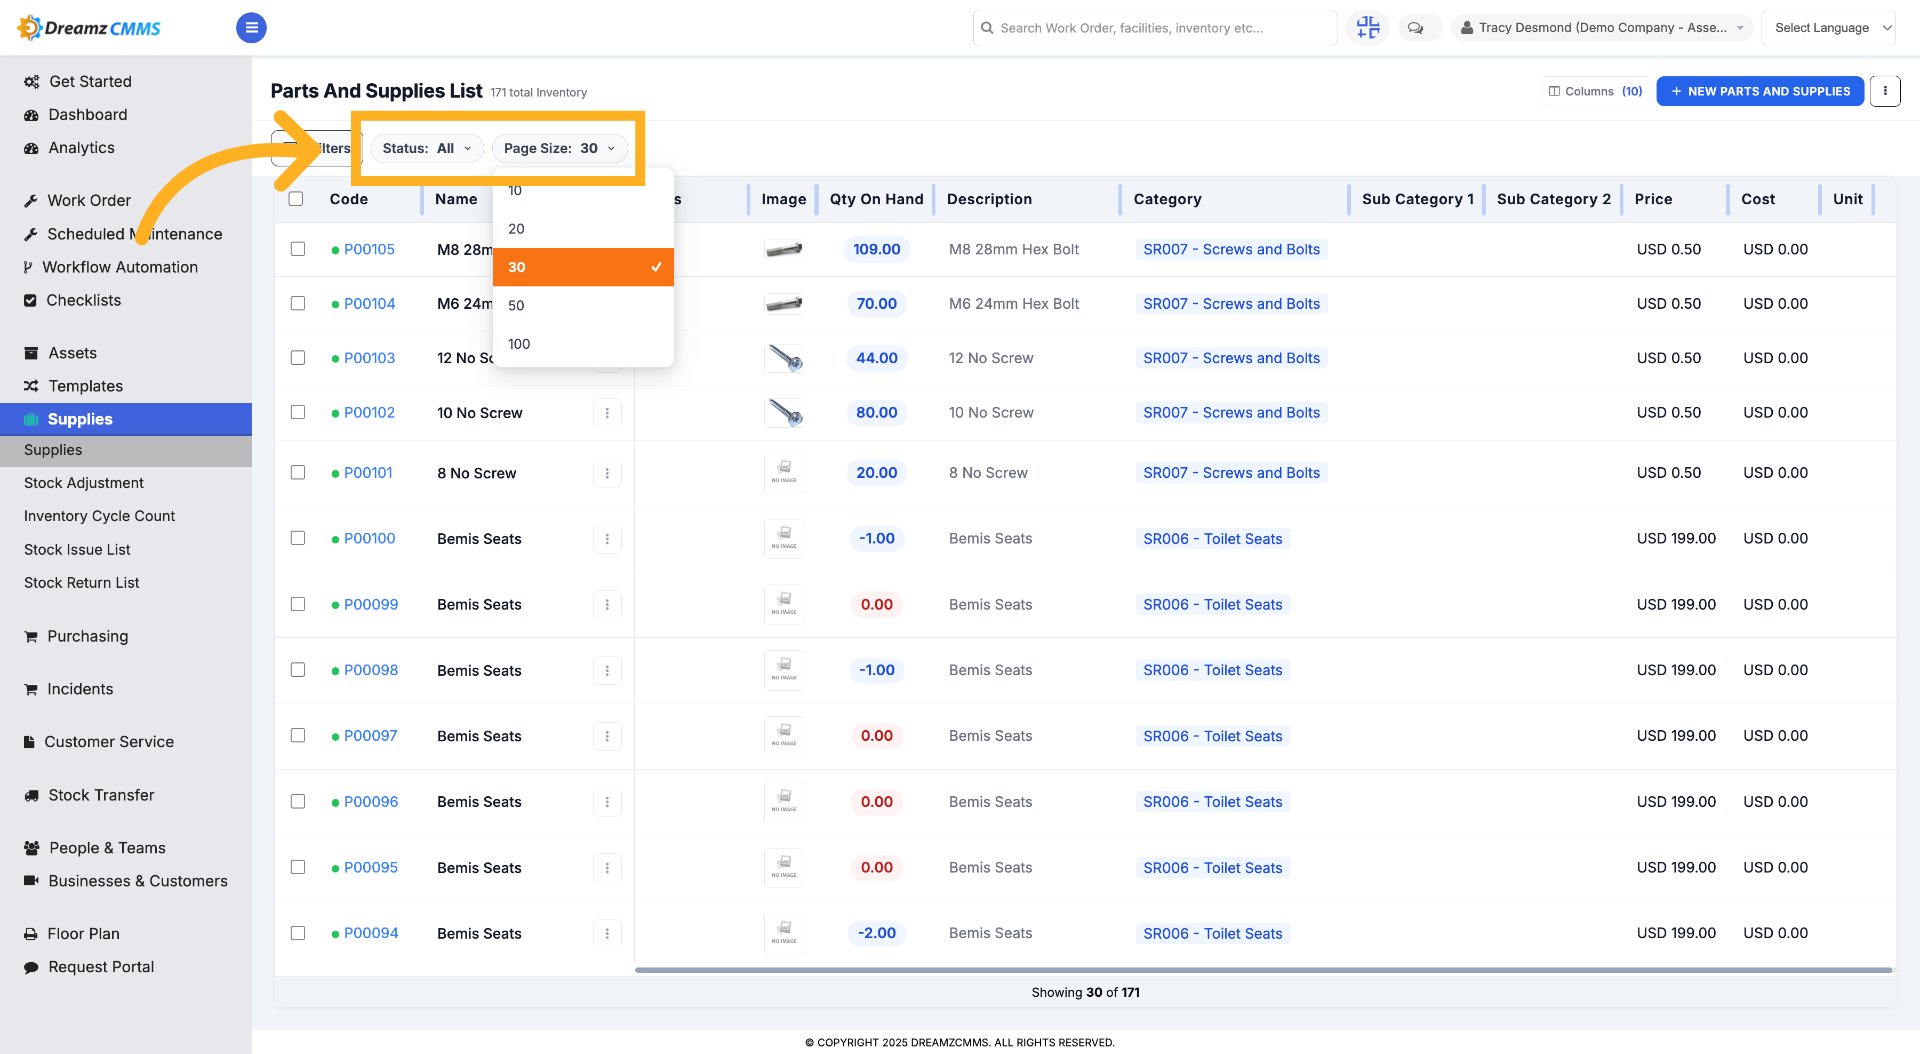
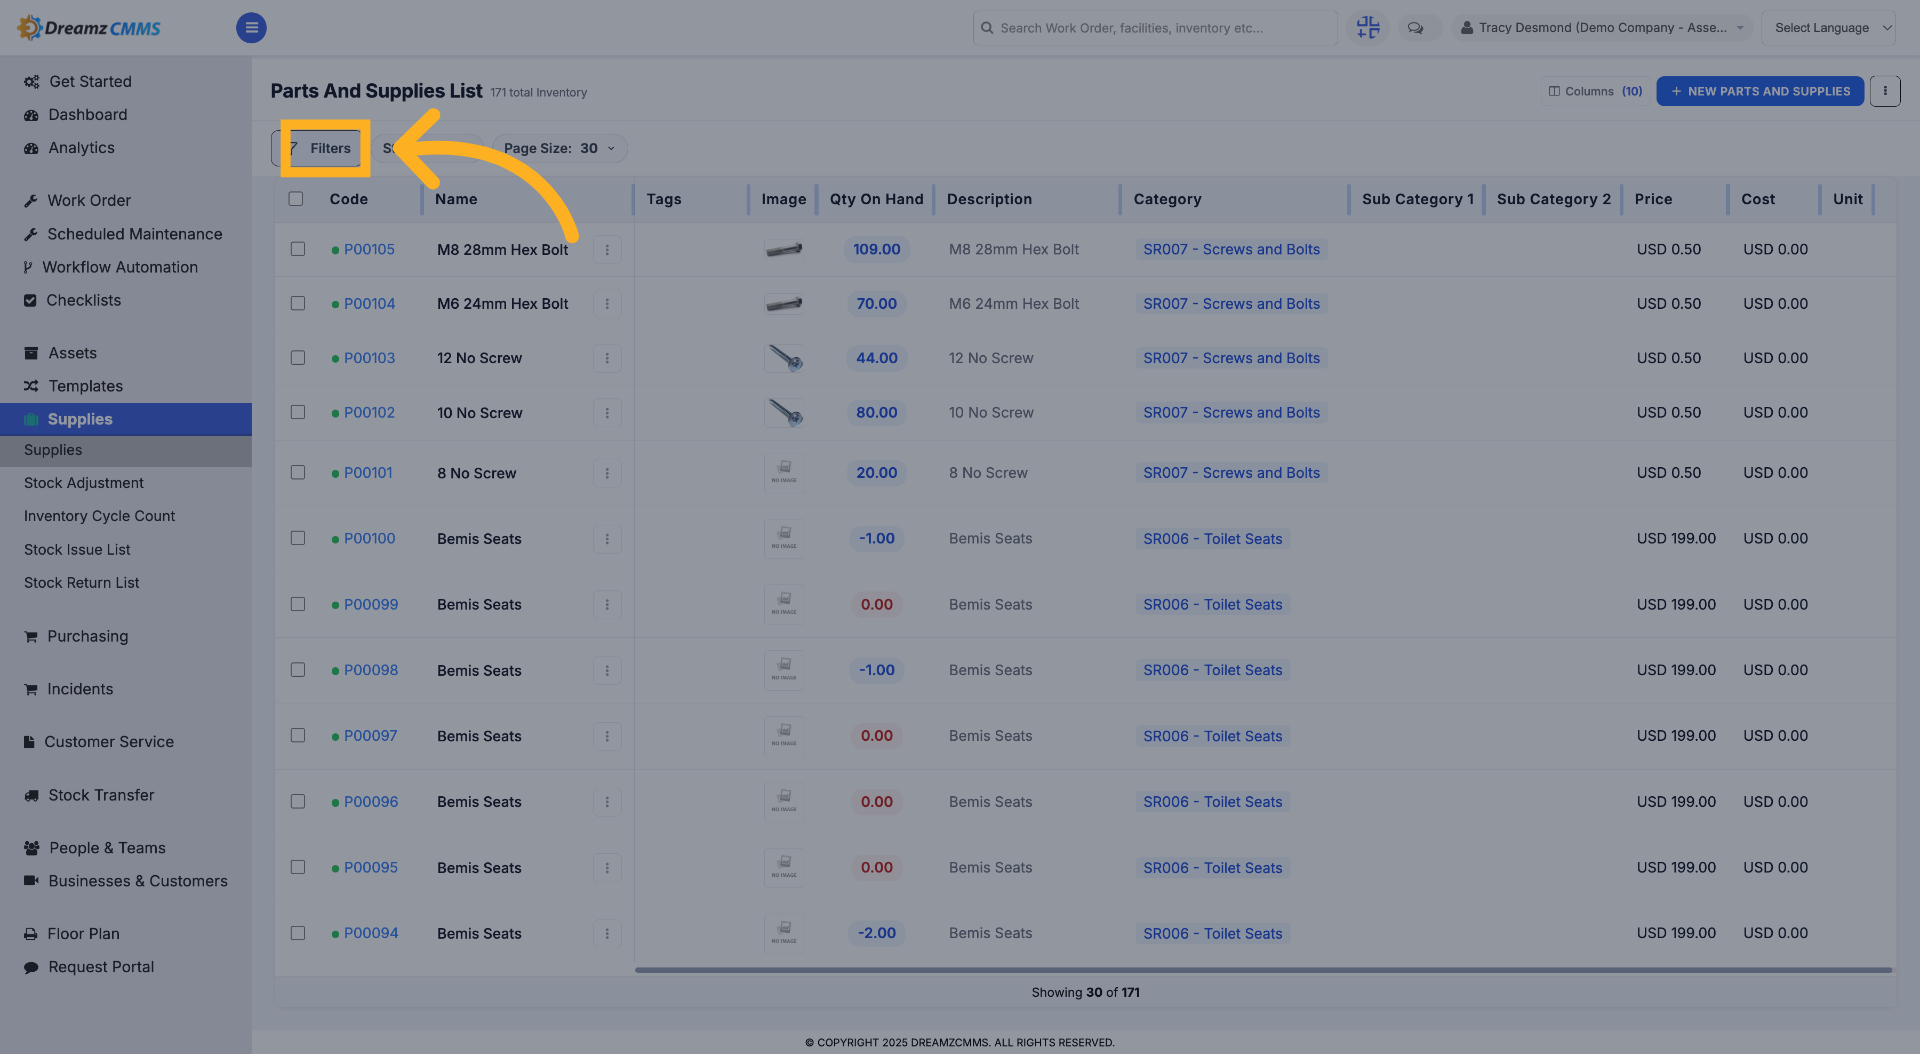
Step 7 – Open Filters Menu
Click Filters to access filtering options for refining the parts and supply list.
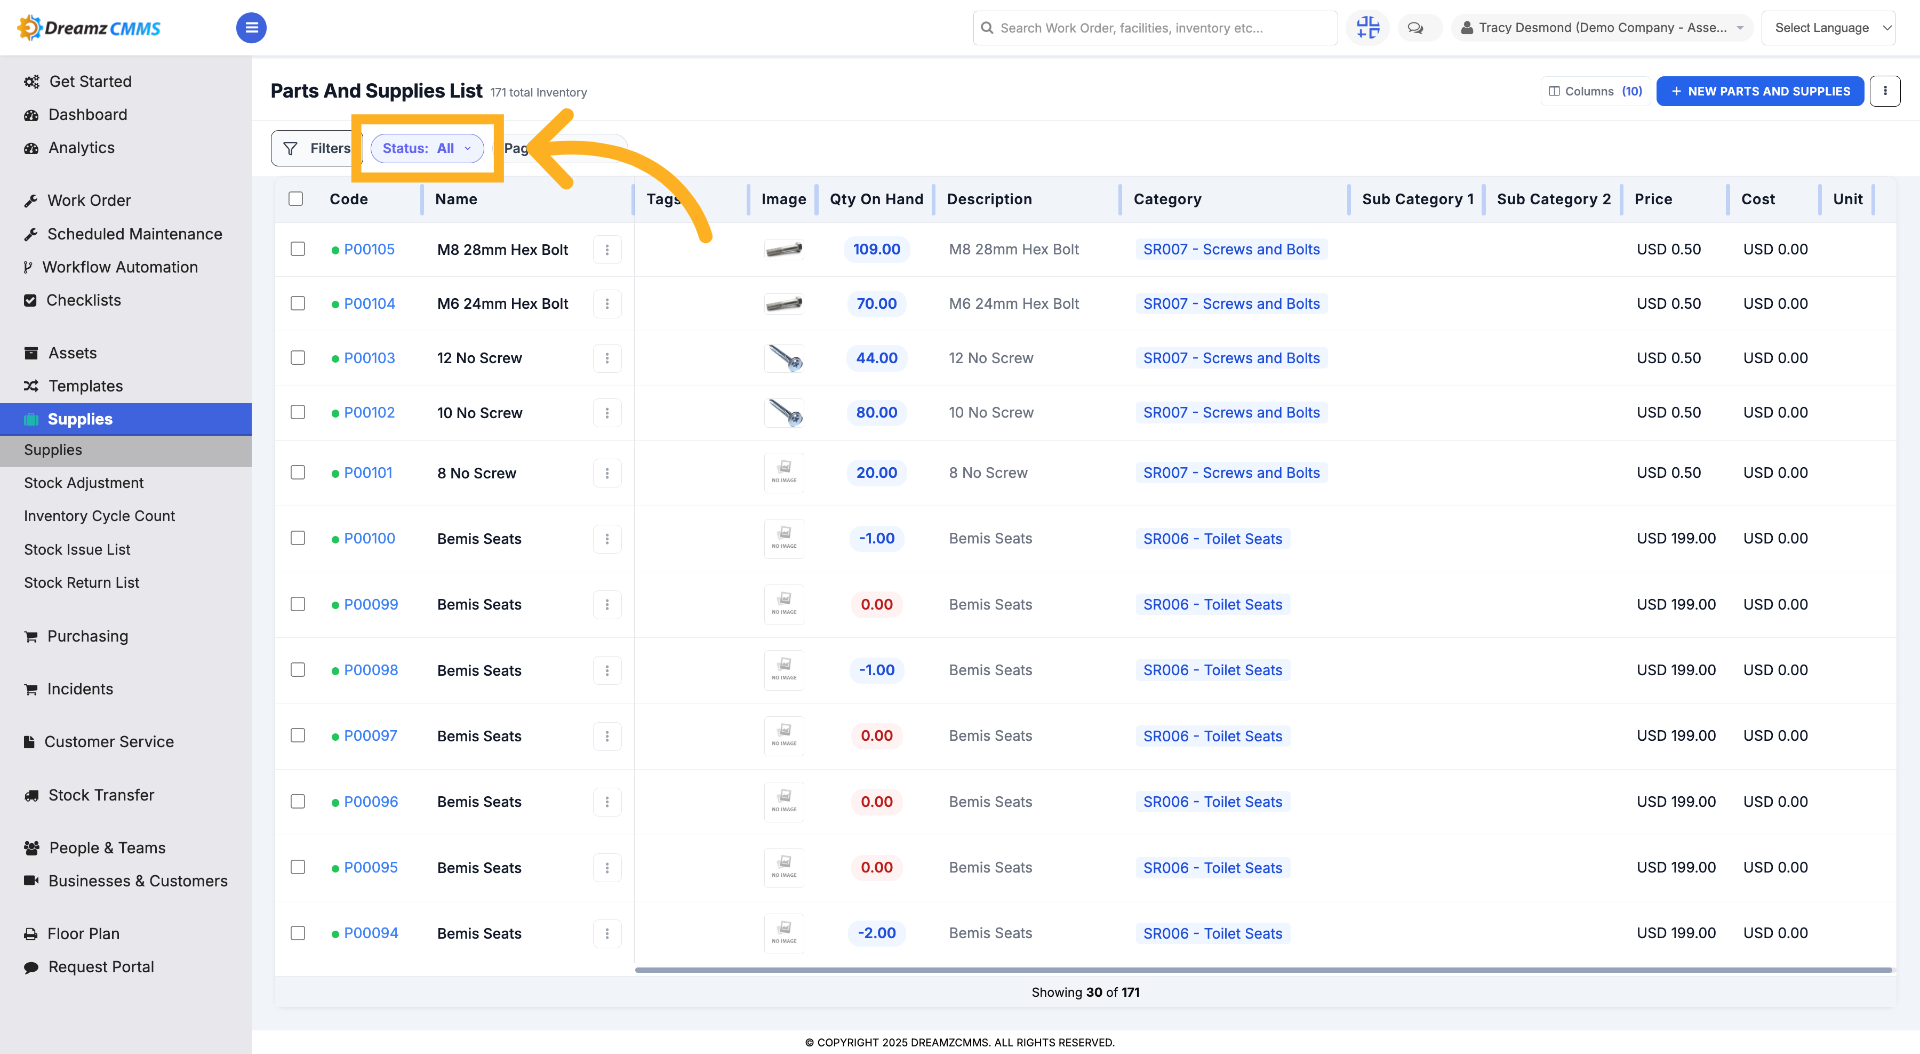
Step 8 – Select Status Filter
Click Status to choose specific status filters for the inventory items.
Step 9 – Access Additional Filters
Click Filters to open the additional filter section and adjust your filtering criteria for the supply list.
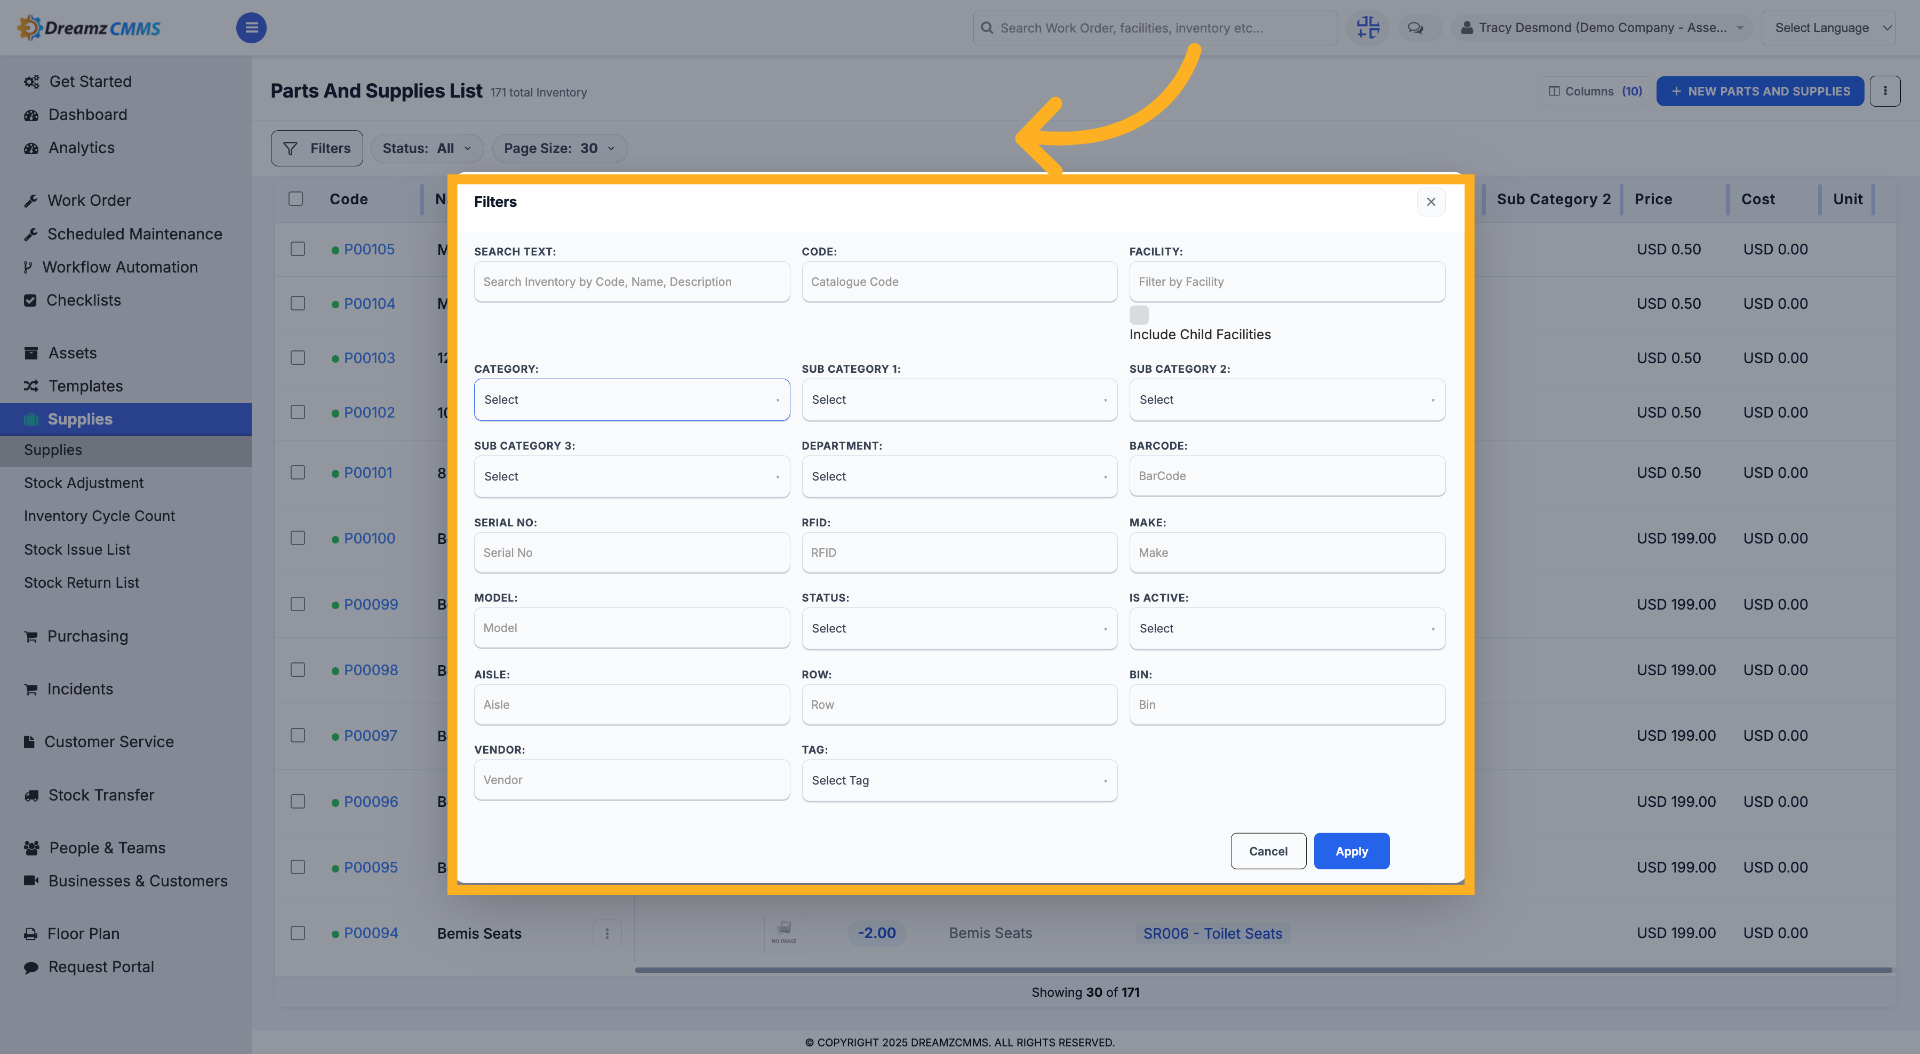
Step 10 – Set Additional Filter Options
Choose from additional filter options such as Inventory Code, Facility, and others to filter the inventory listing page, then click Apply to apply the filter.
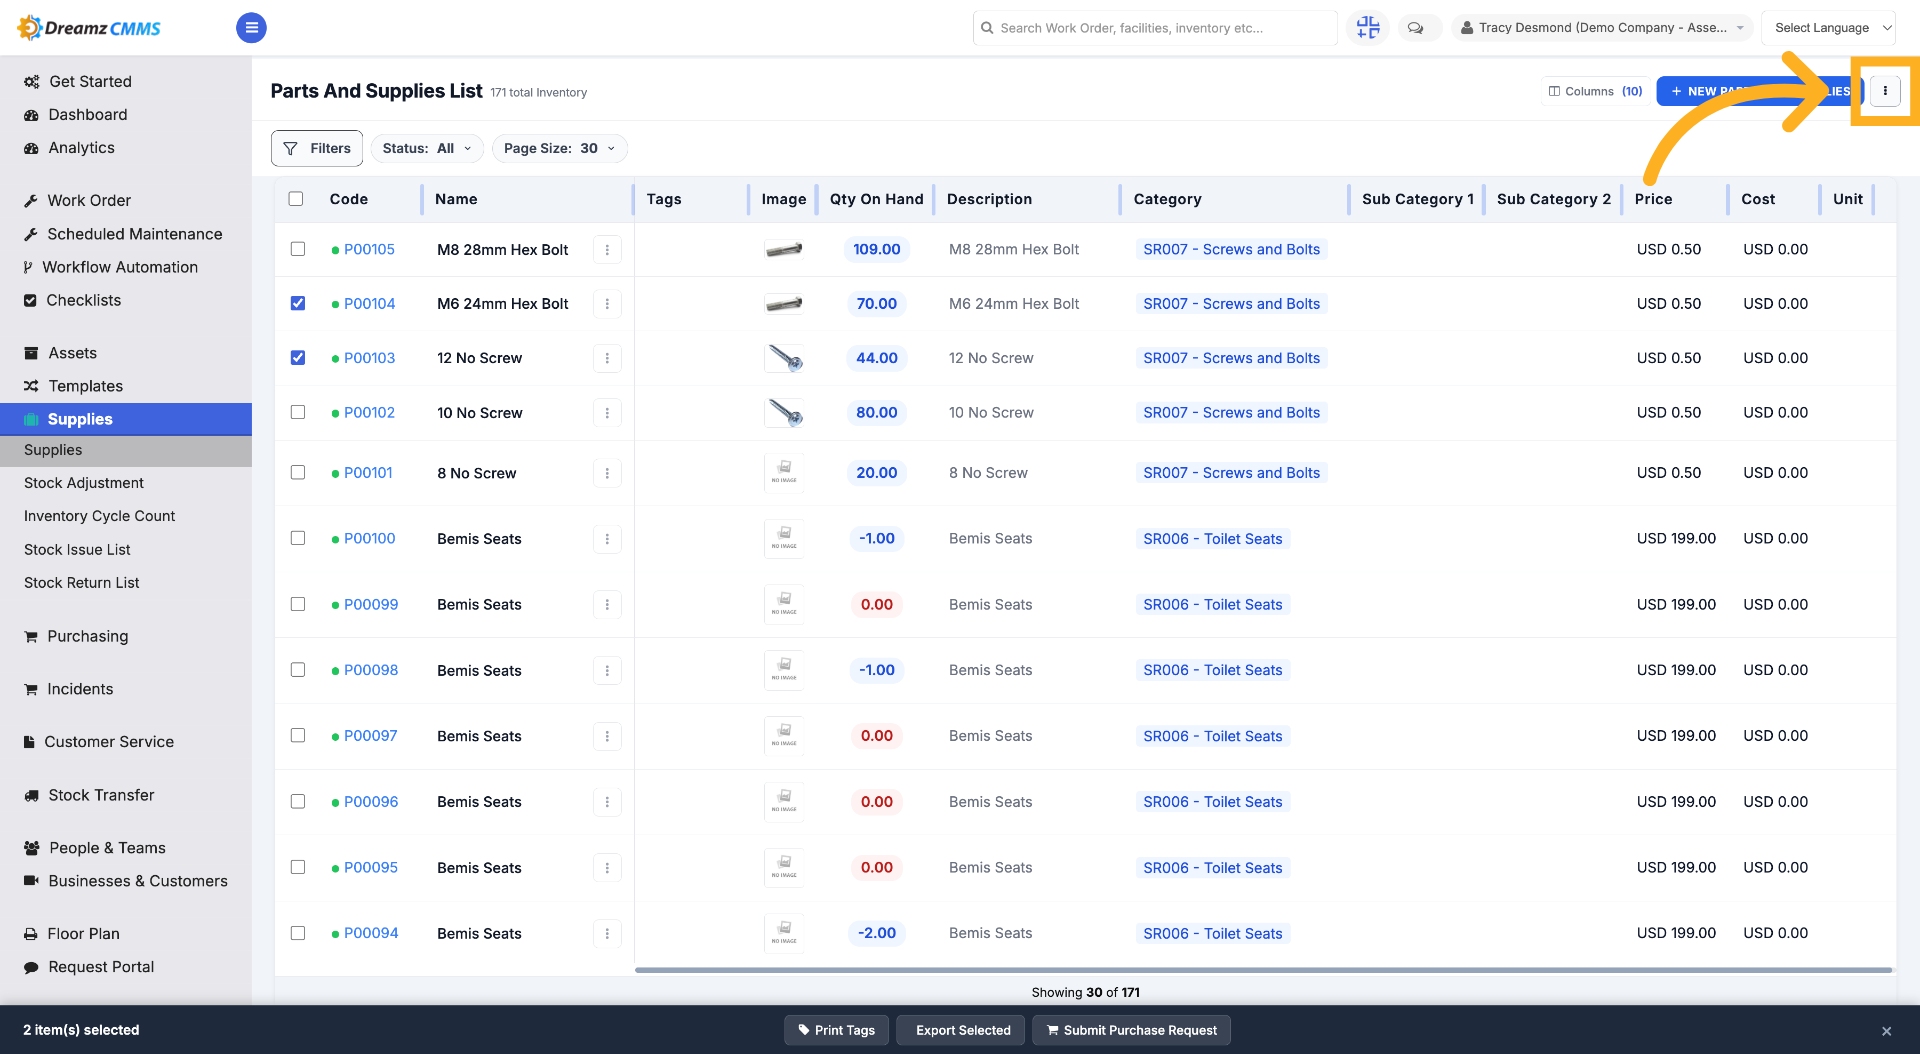
Step 11 – Access More Options
Click the three dots menu in the top right-hand corner to open additional options for the parts and supply list.
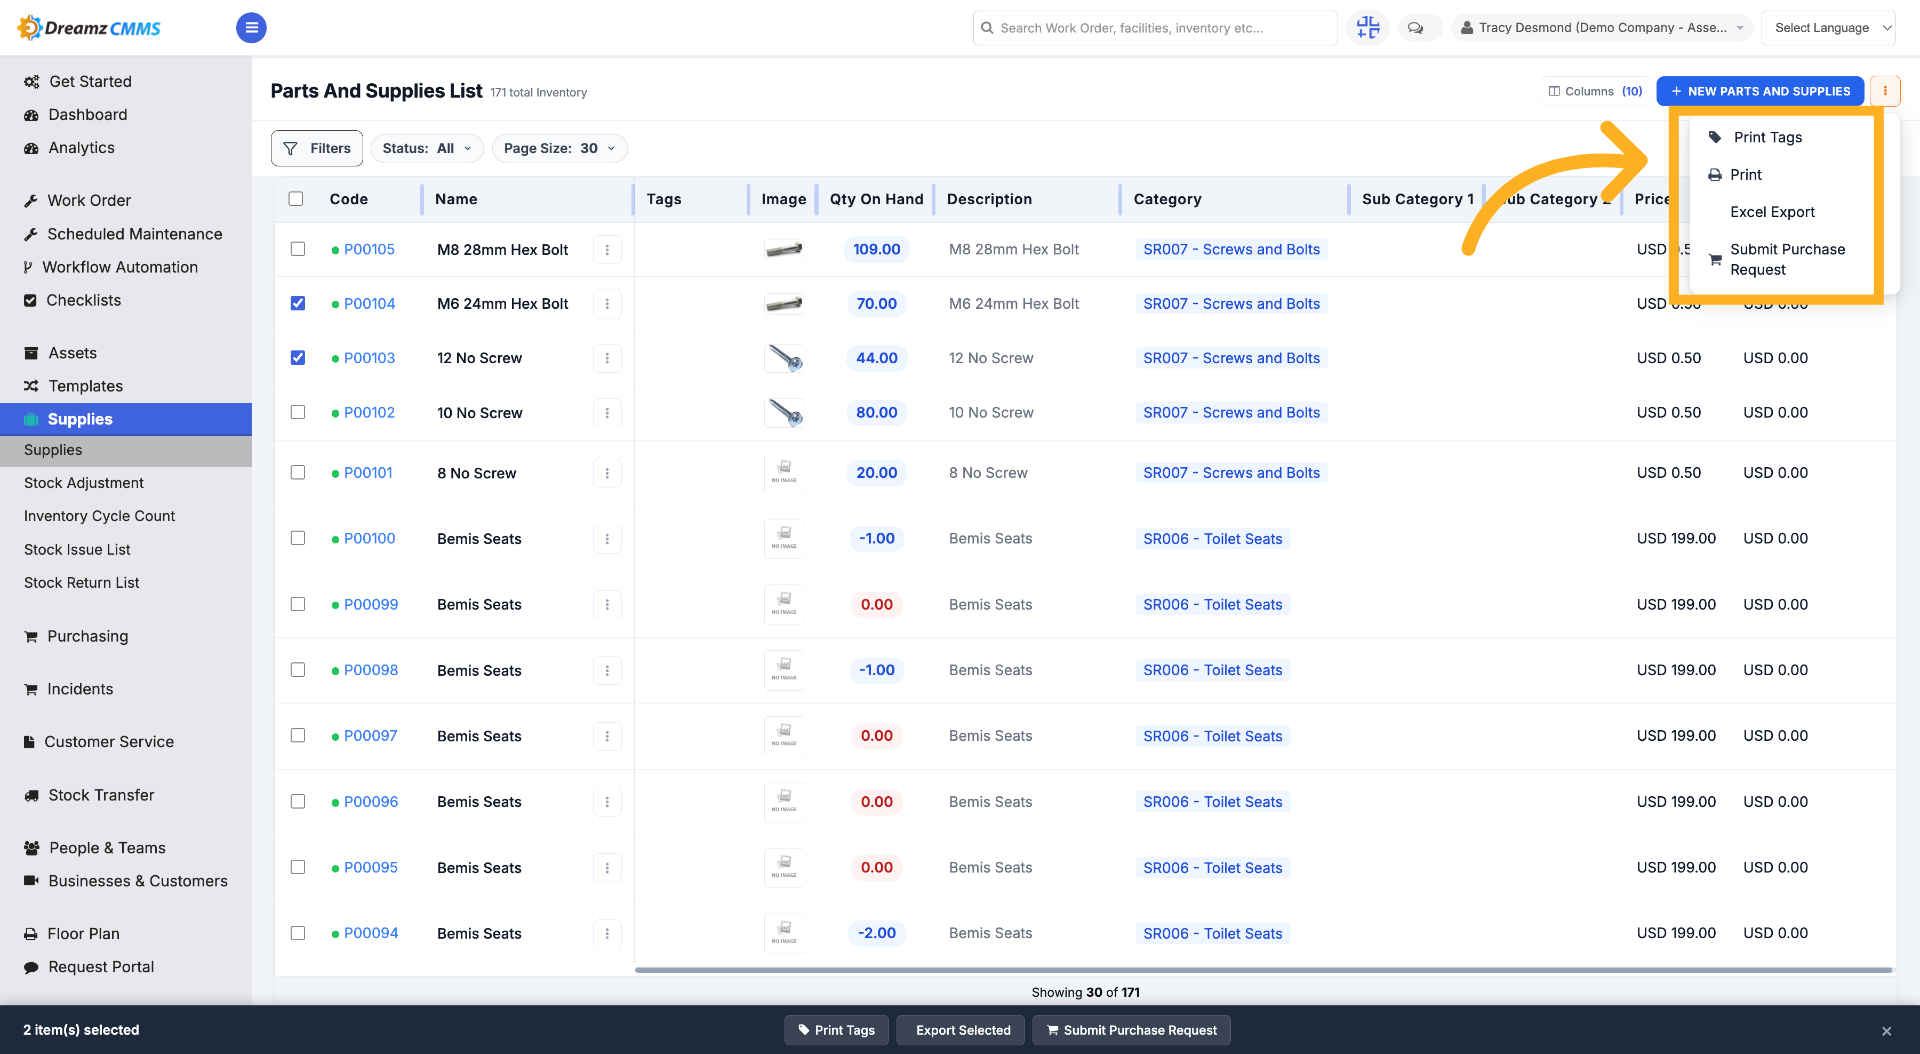
Step 12 – Use the 3-Dot Menu List
From that menu, you can print or export the inventory list, or create a purchase request.
How to View and Edit an Existing Inventory Item
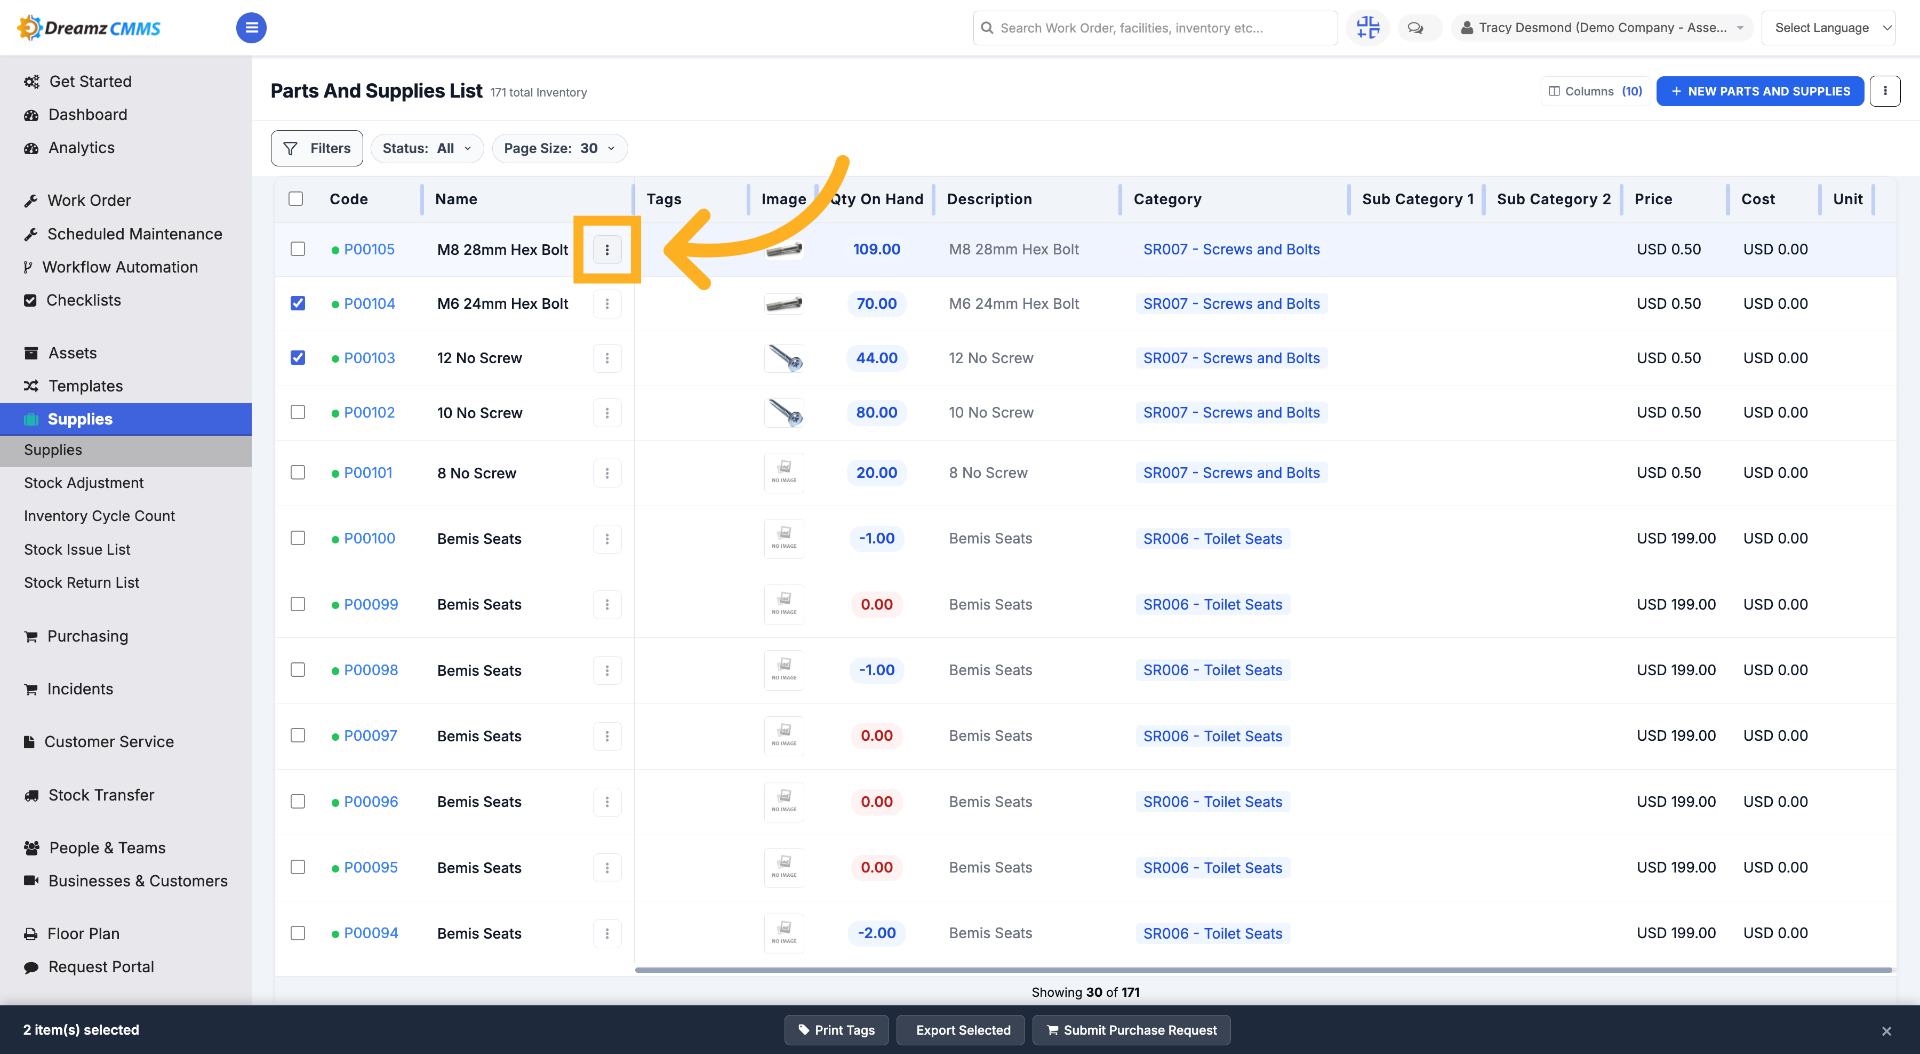
Step 1 – Open Inventory Item
Click here to view or edit details of a specific inventory item.
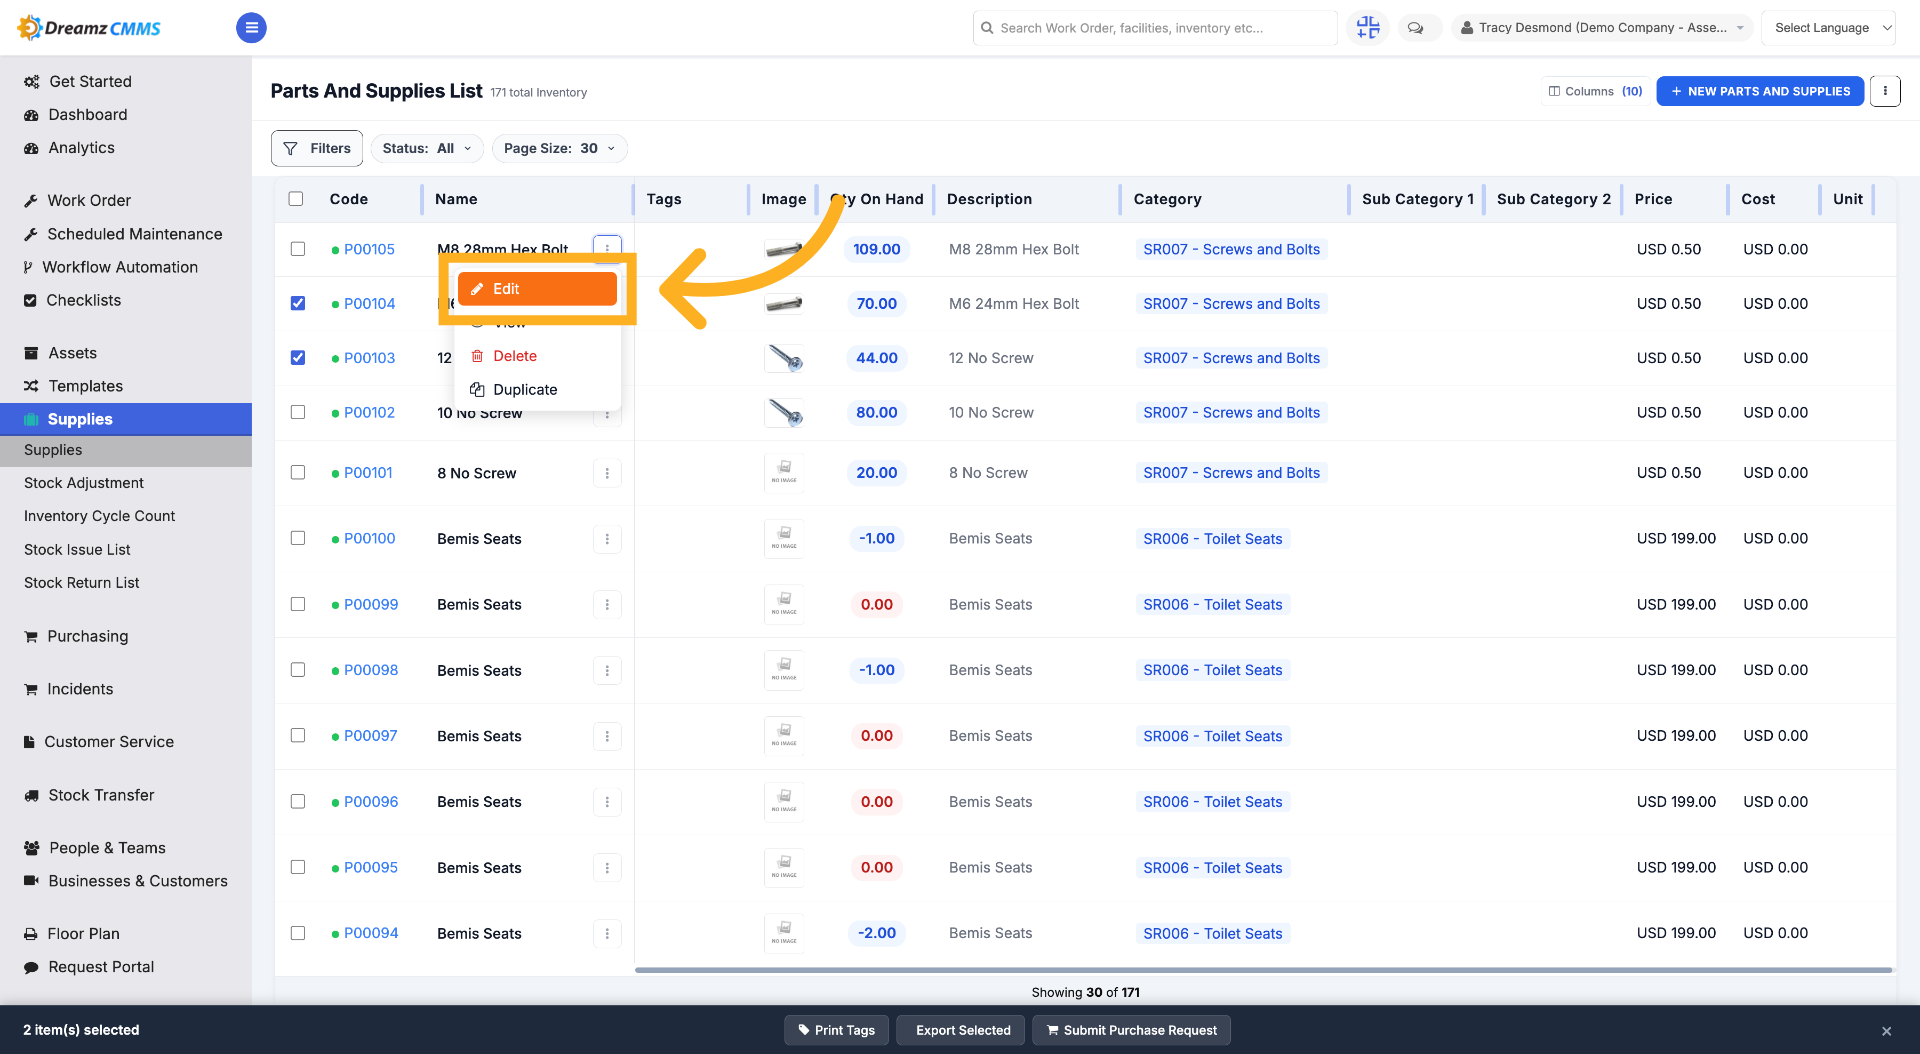
Step 2 – Edit Inventory Item
Click Edit to modify the selected inventory item's information.
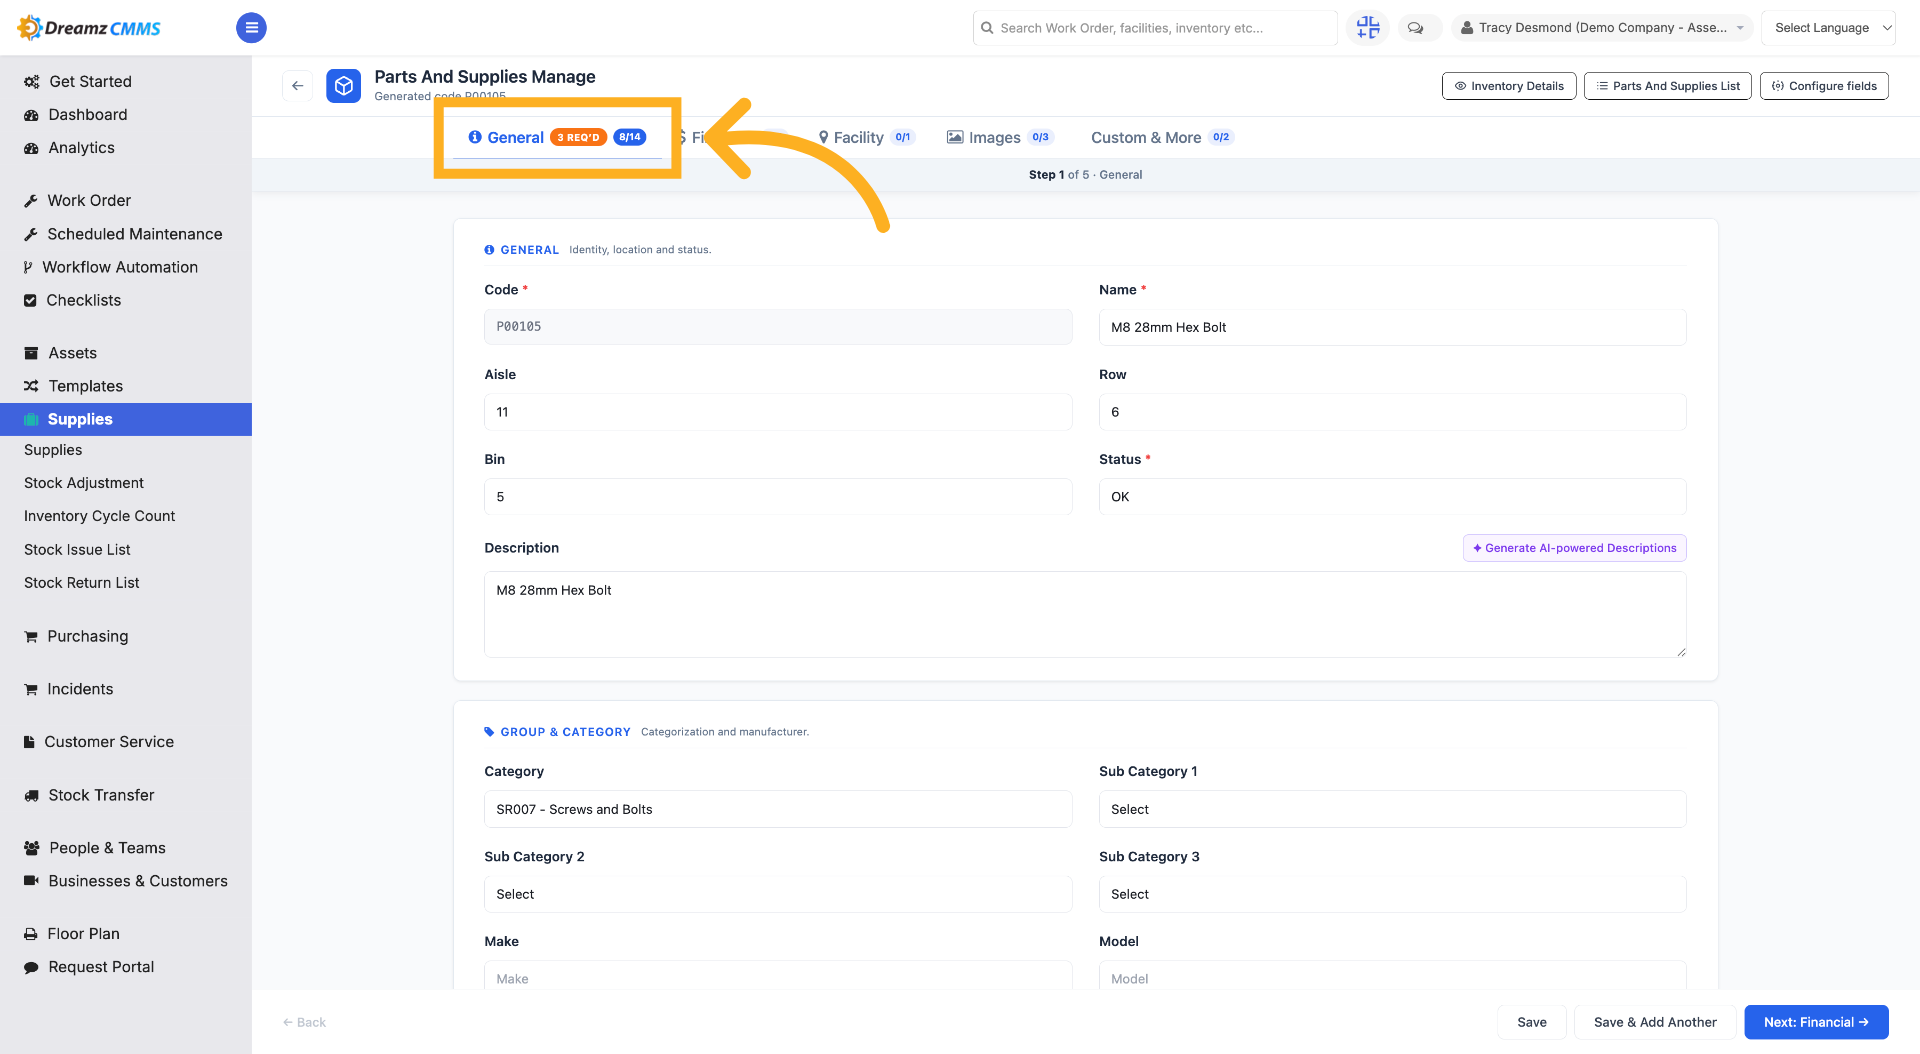
Step 3 – Access General Requirements
Review the General details, such as code, name, and category, for that particular inventory item.
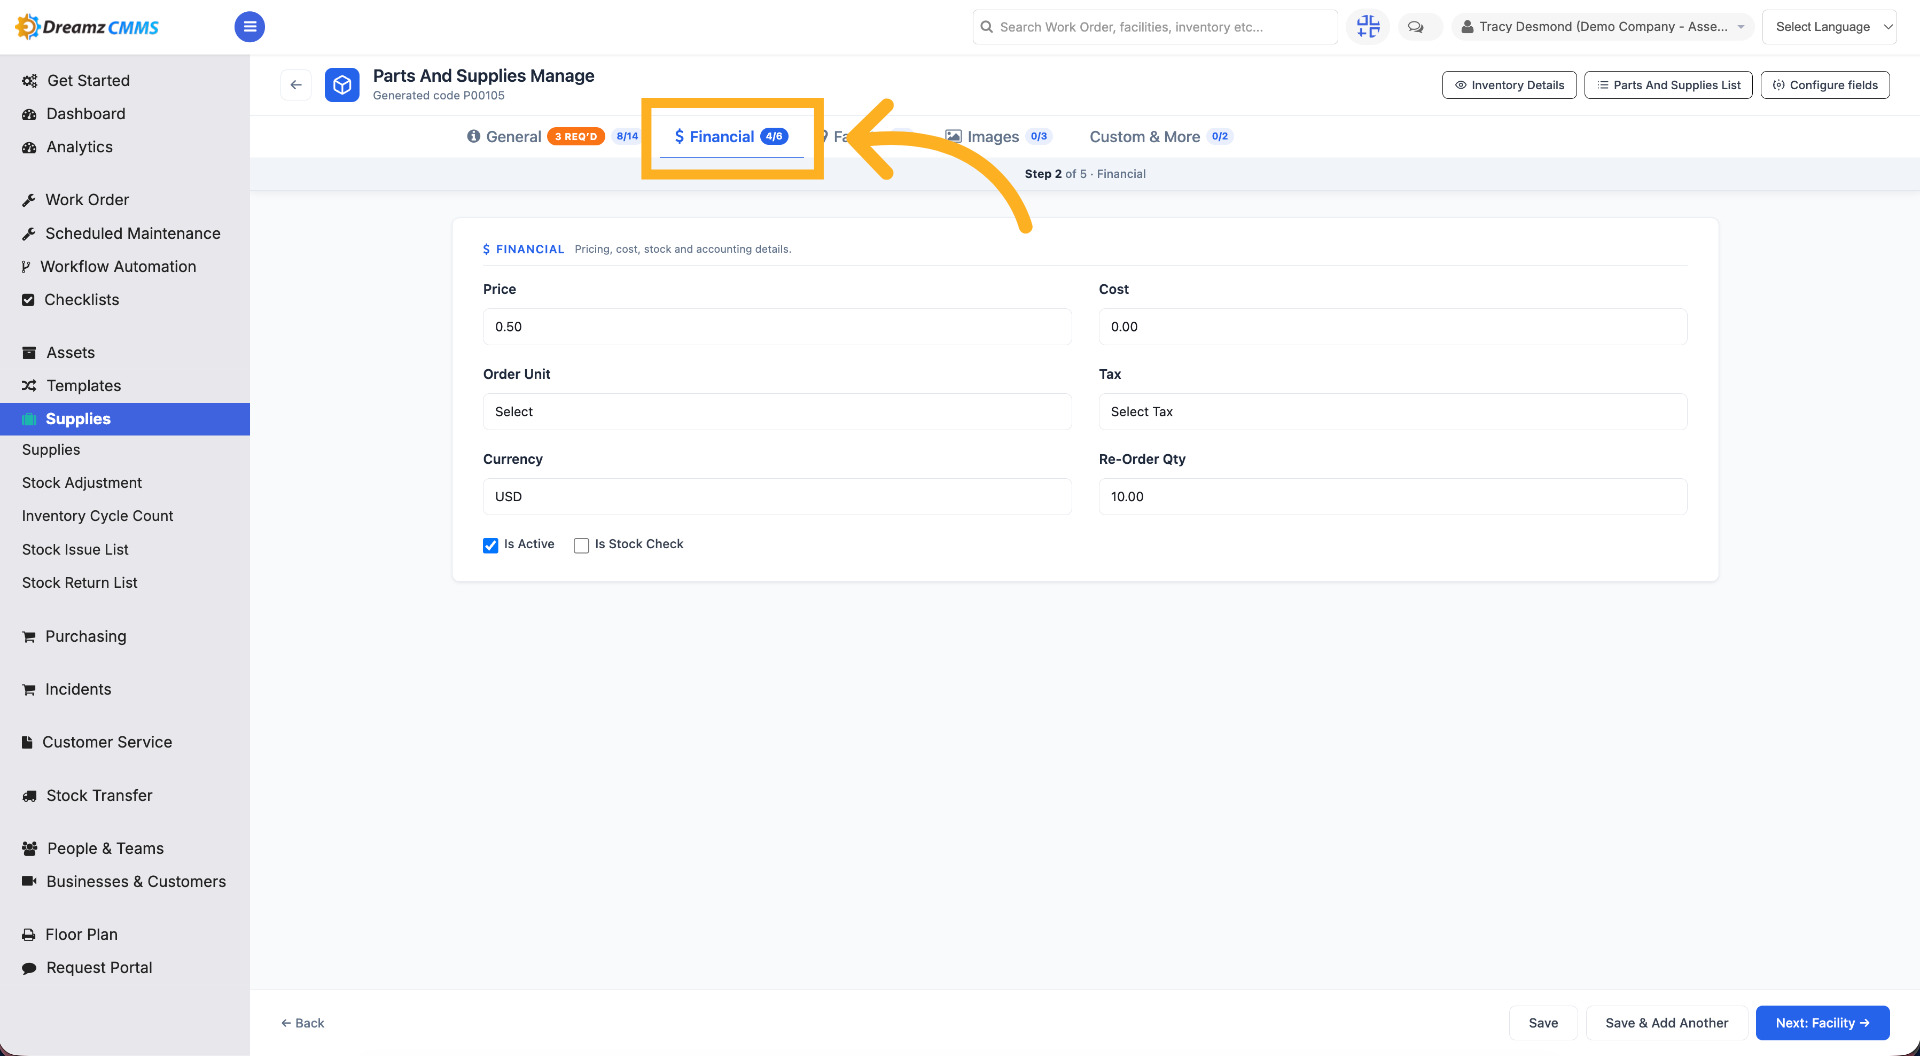
Step 4 – View Financial Requirements
Click the Financial tab to check financial details related to the inventory, such as price, cost, and other details.
Step 5 – Check Facility Requirements
Click Facility to check which facility this inventory belongs to.
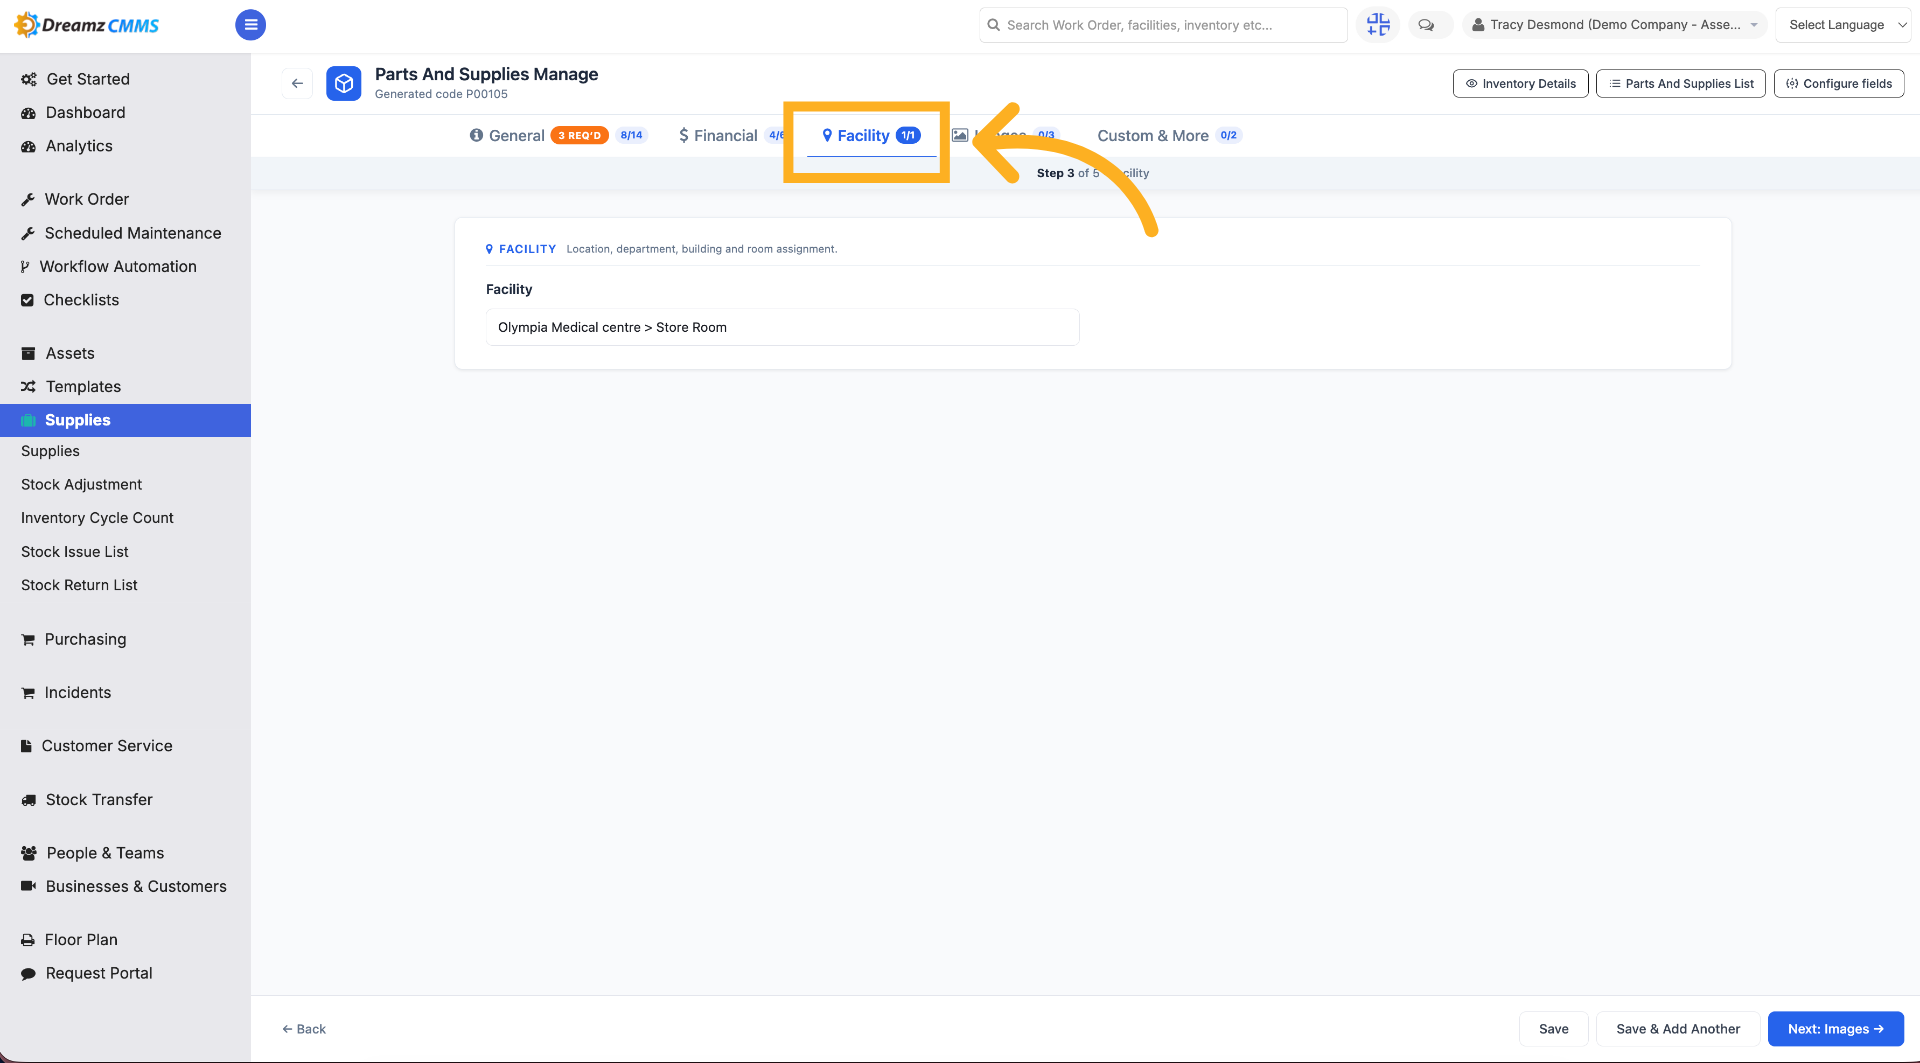
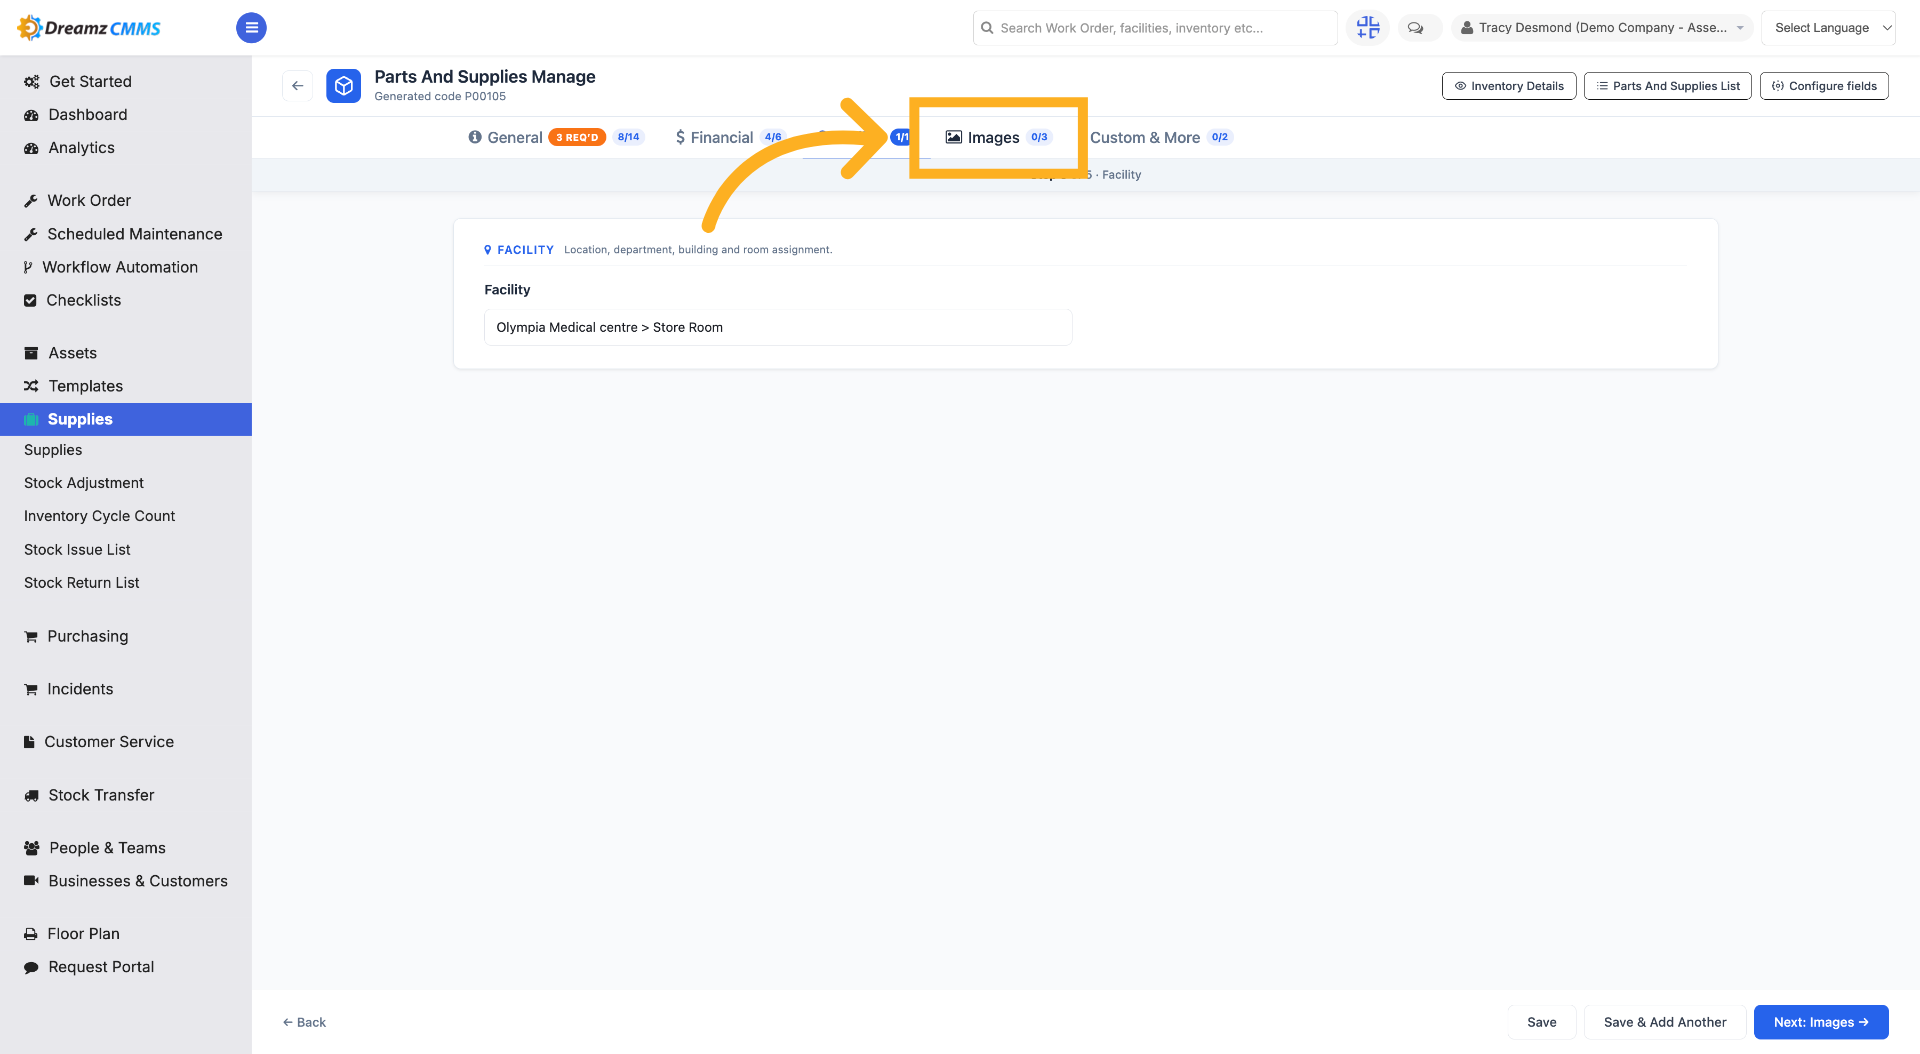
Step 6 – View Image Requirements
Click the Images tab to check image attachments attached to this particular inventory item.
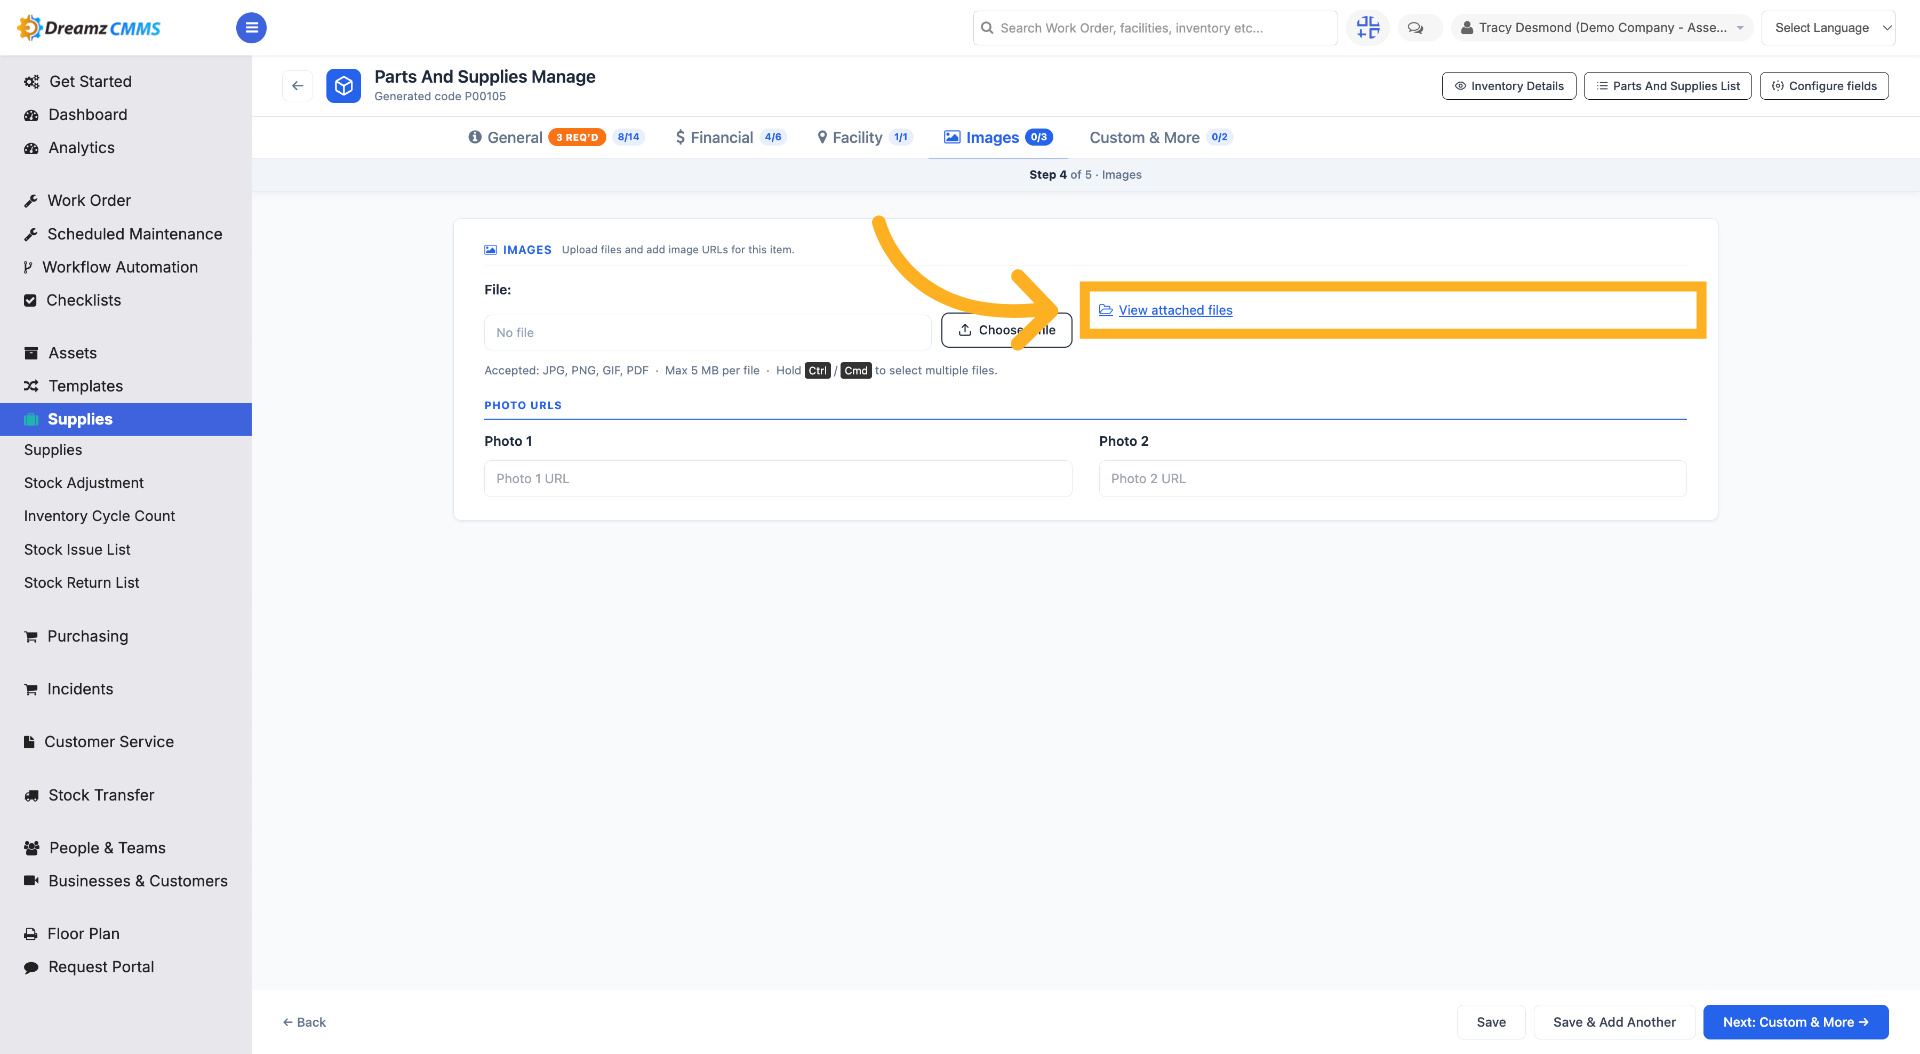
Step 7 – View Attached Files
Click View Attached Files to see files related to the inventory item.
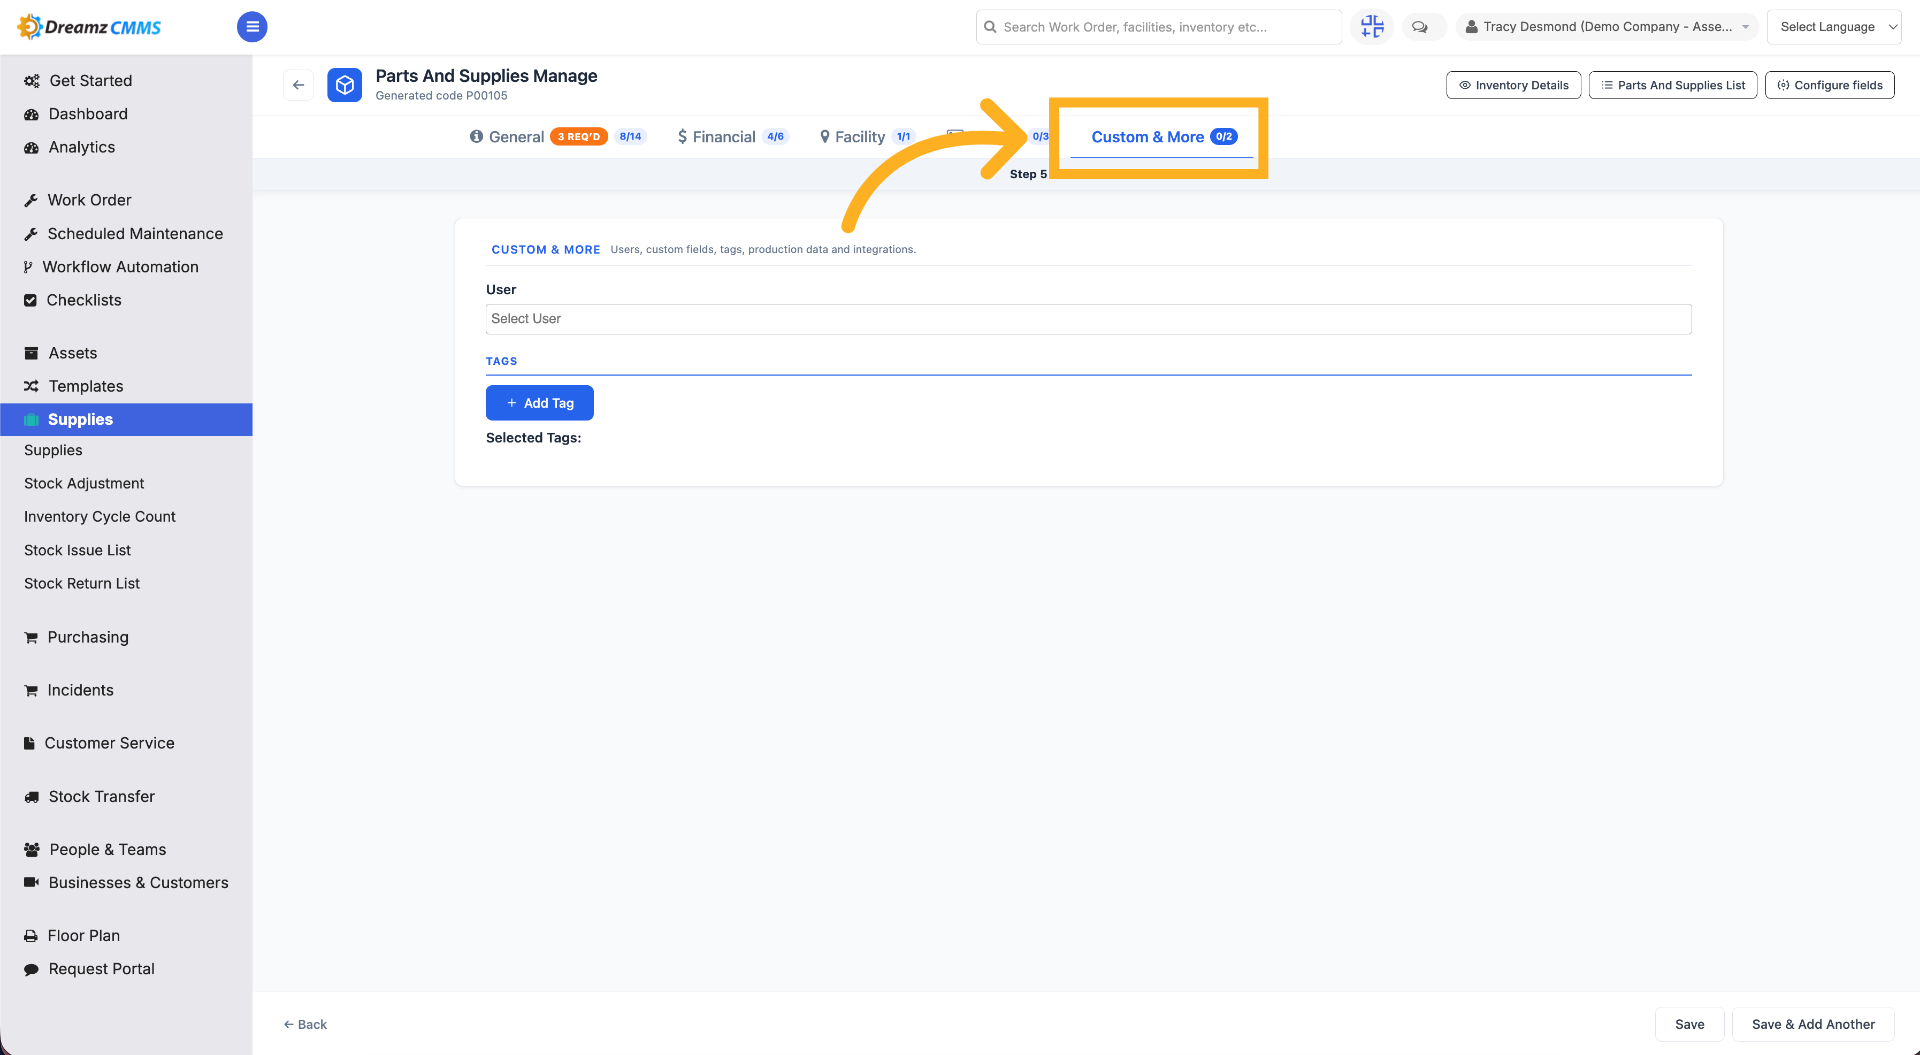
Step 8 – Open Custom Fields
Click the Custom & More tab to manage custom fields and additional data.
Step 9 – Initiate Search
Click Search to begin looking for a specific person.
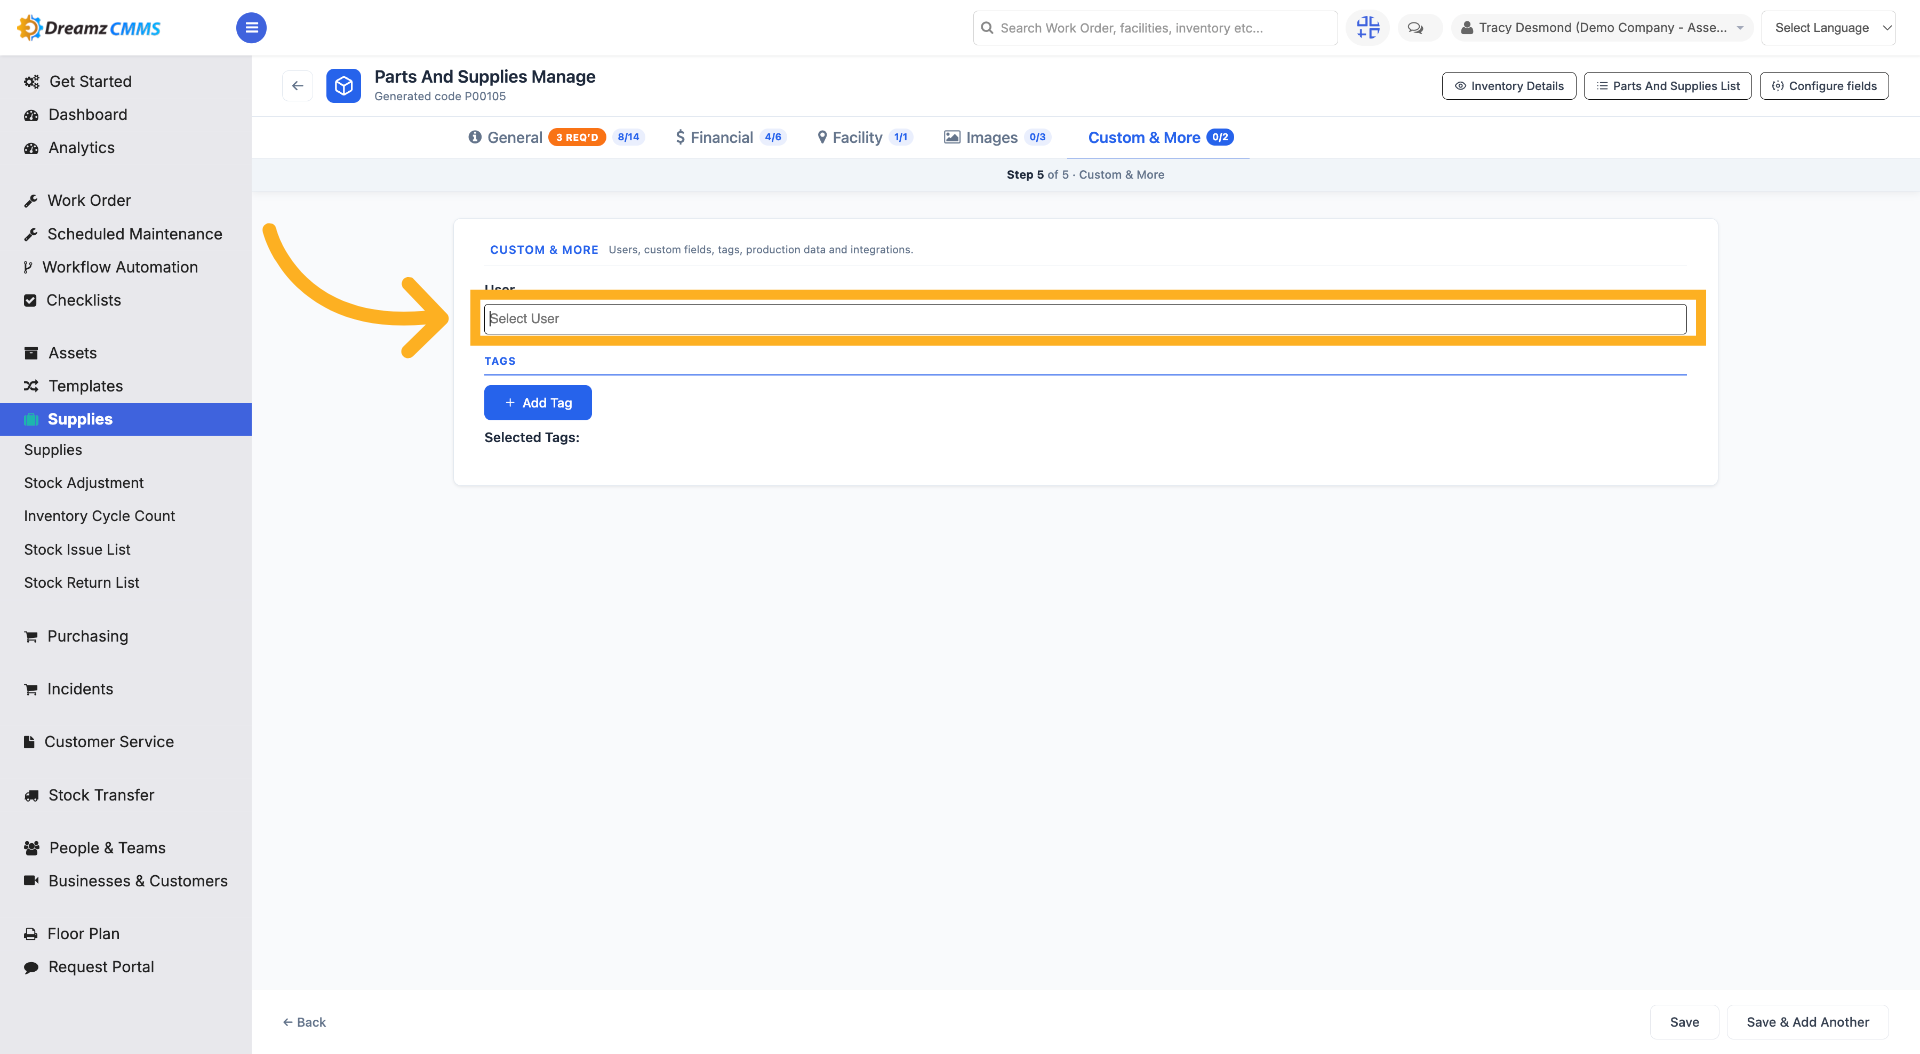
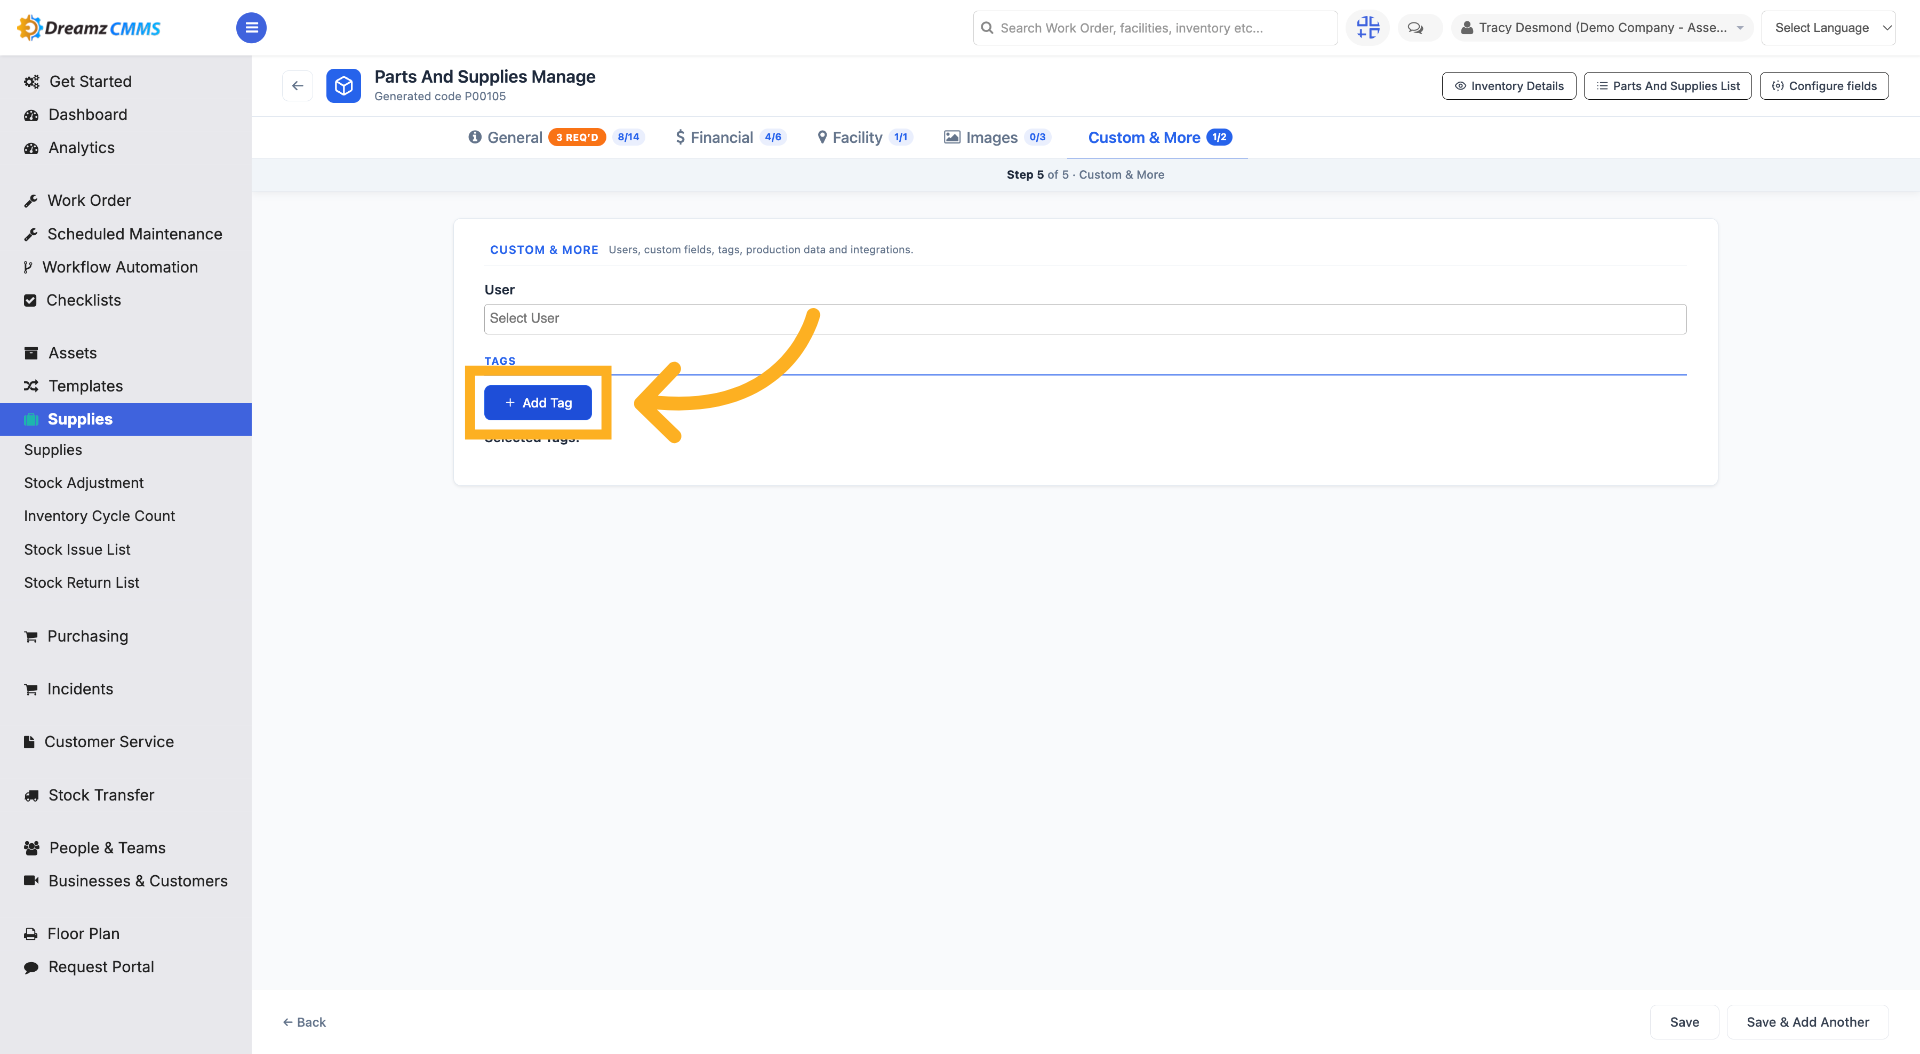
Step 10 – Add New Tag
Click Add Tag to create a new tag for categorizing inventory items.
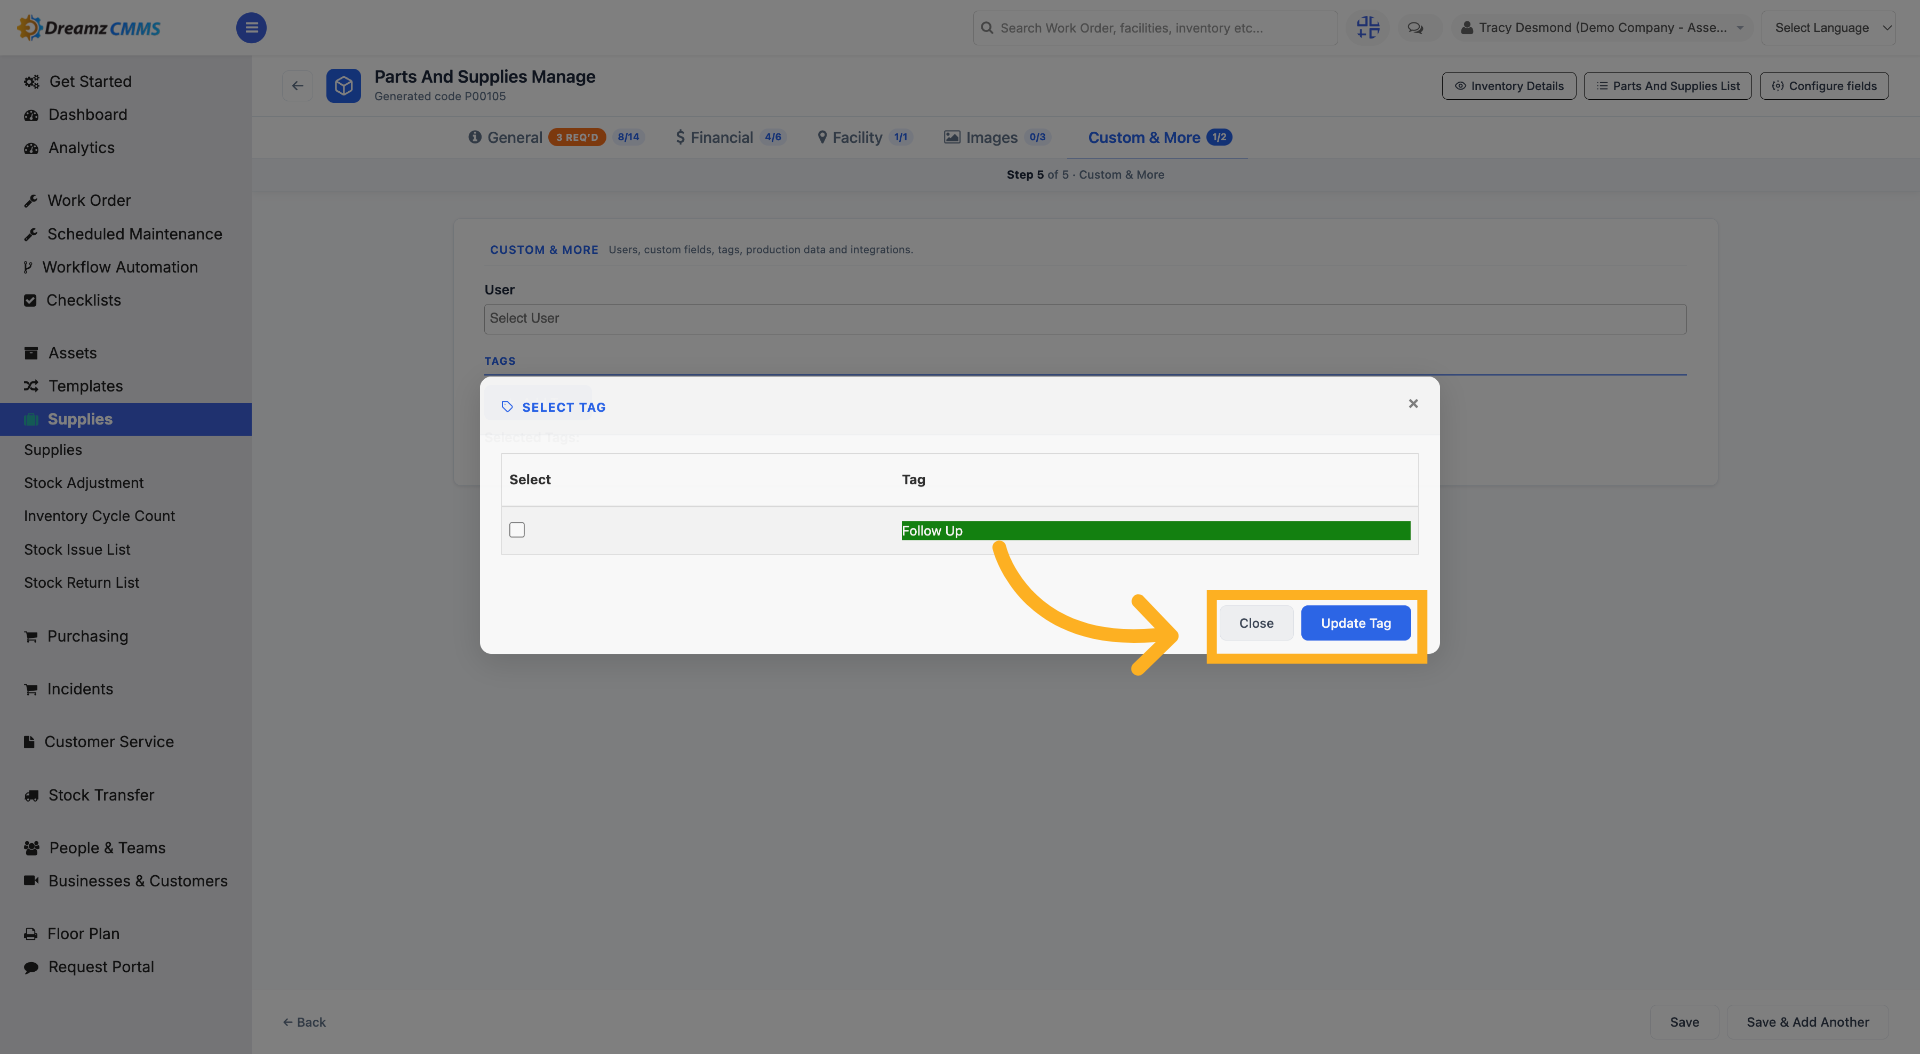
Step 11 – Update Tag Window
Click Close, or update the tag, to exit the tag management interface and return to the previous screen.
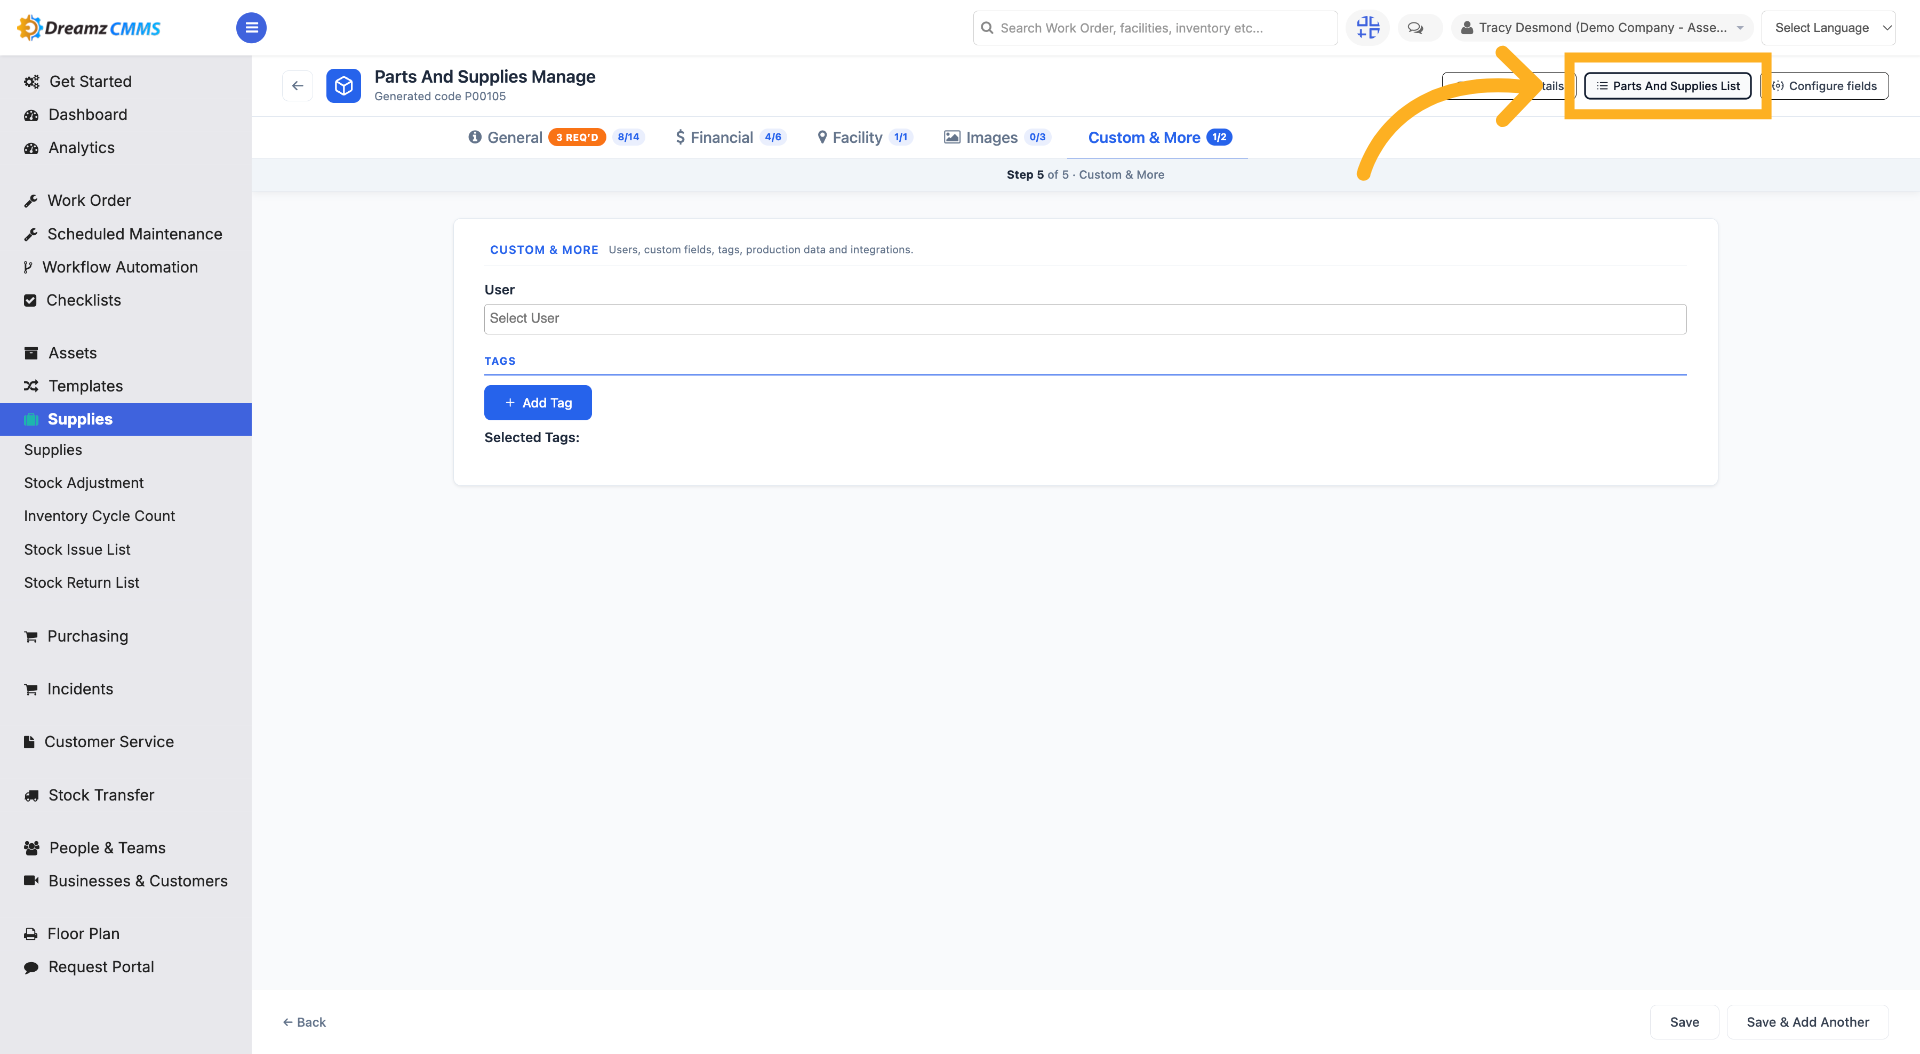
Step 12 – Return to Supply List
Click Parts and Supplies List to go back to the main inventory overview.
How to Manage Item Details, Procurement, and BOM
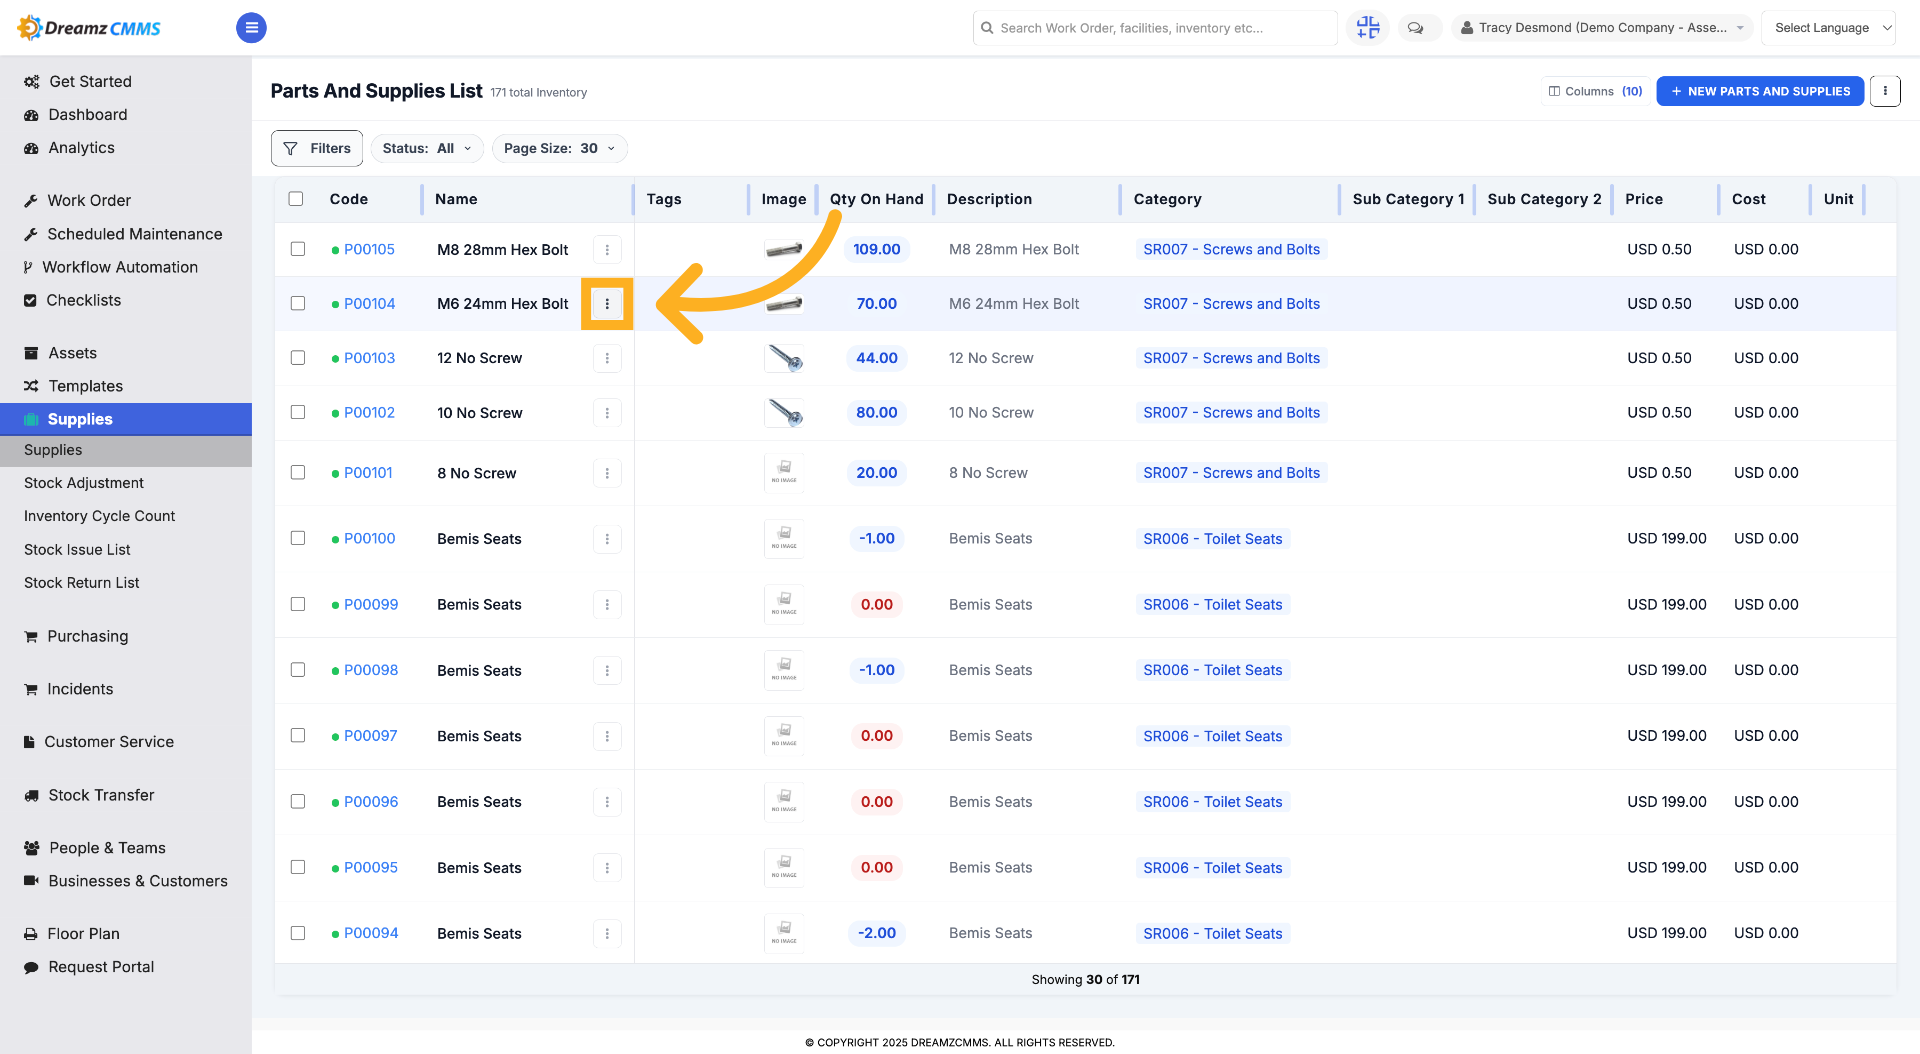
Step 1 – Open Item Options
Click here to access options related to a specific supply item.
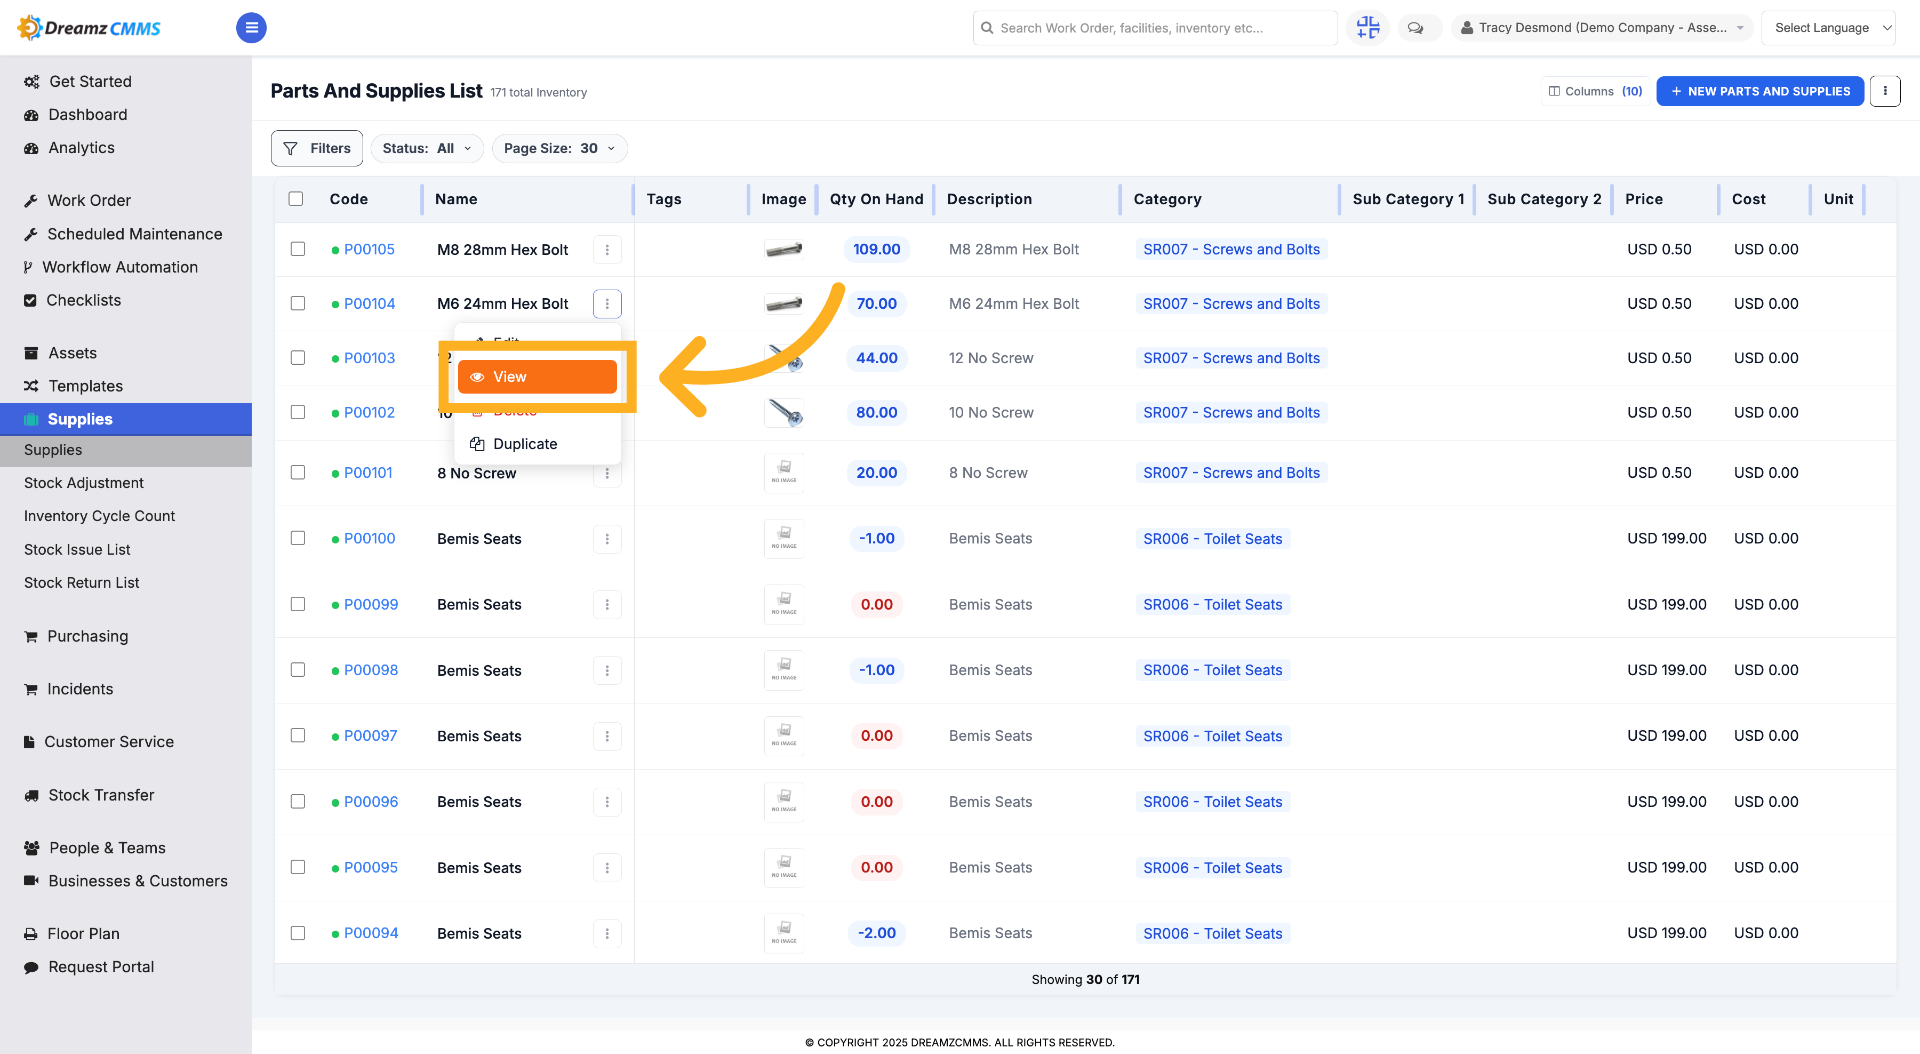
Step 2 – View Item Details
Click View to see detailed information about the selected supply item.
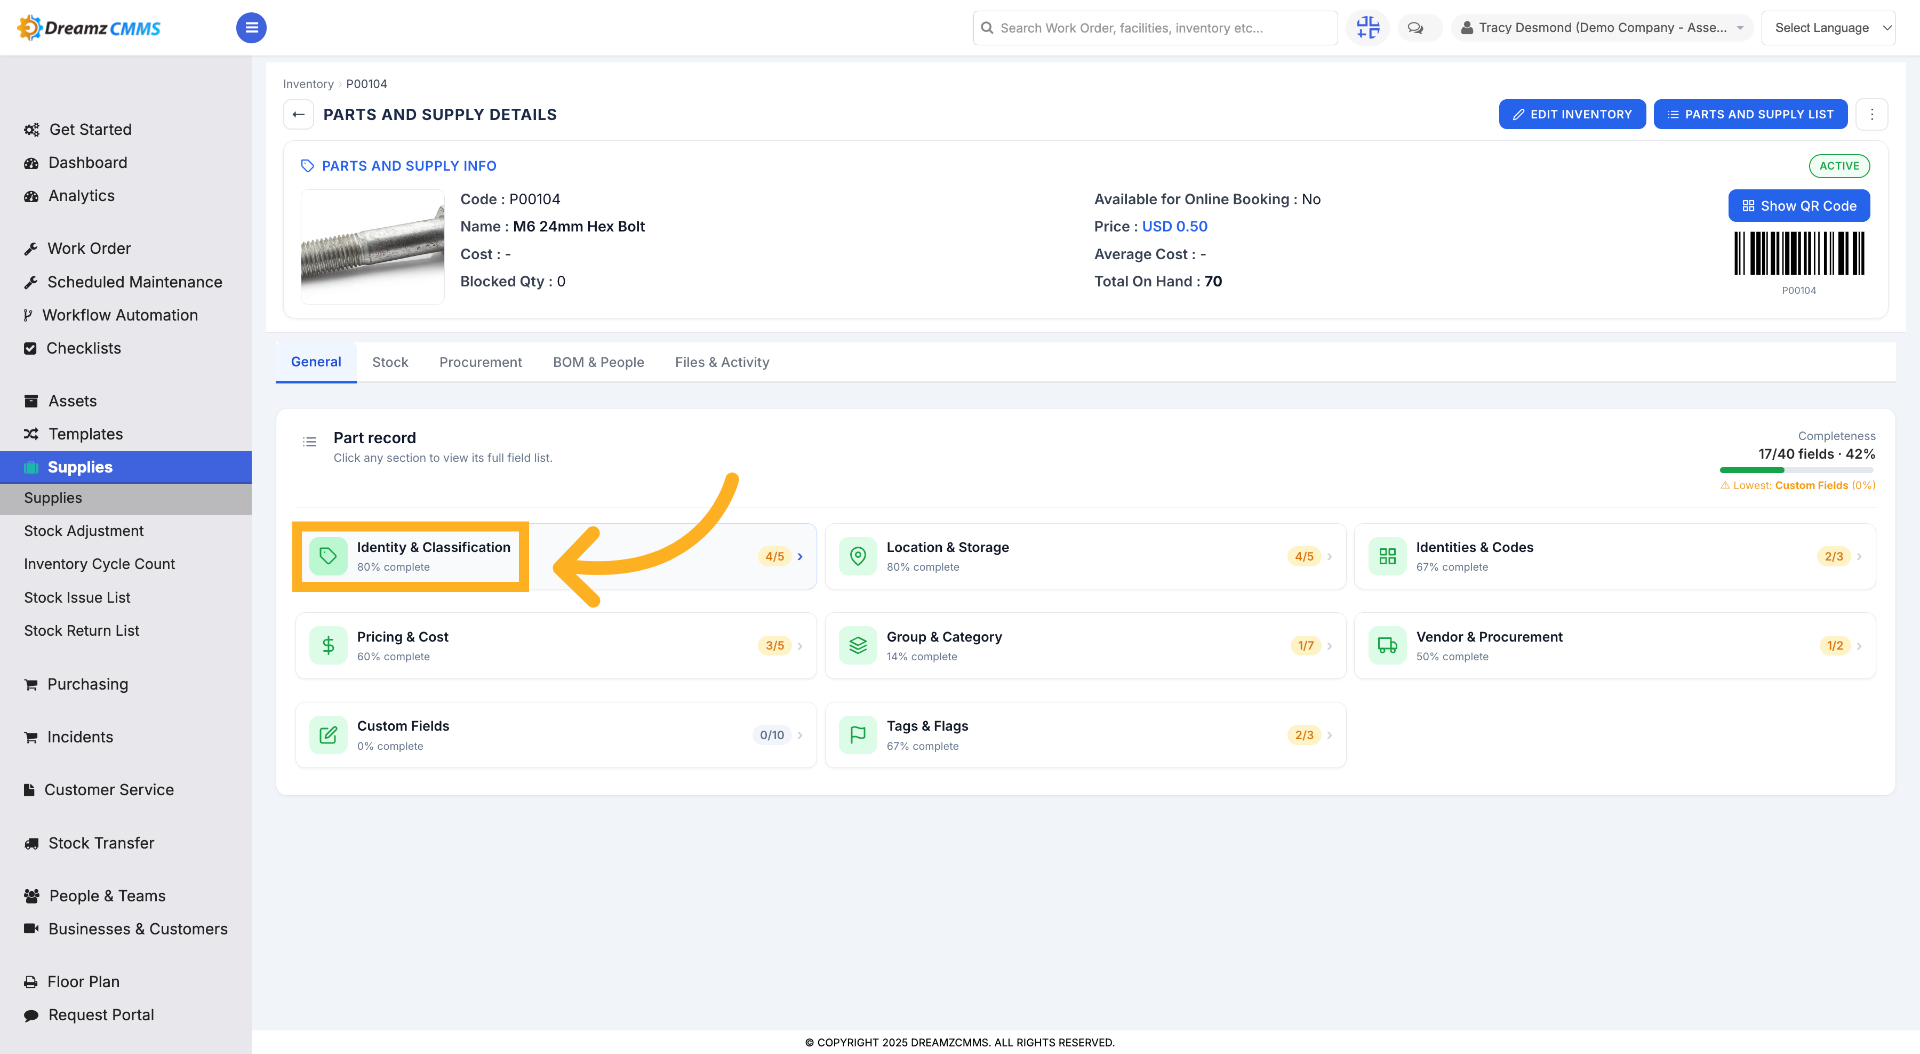
Step 3 – View Identity & Classification
Click to view Identity & Classification for this particular inventory, which opens a popup.
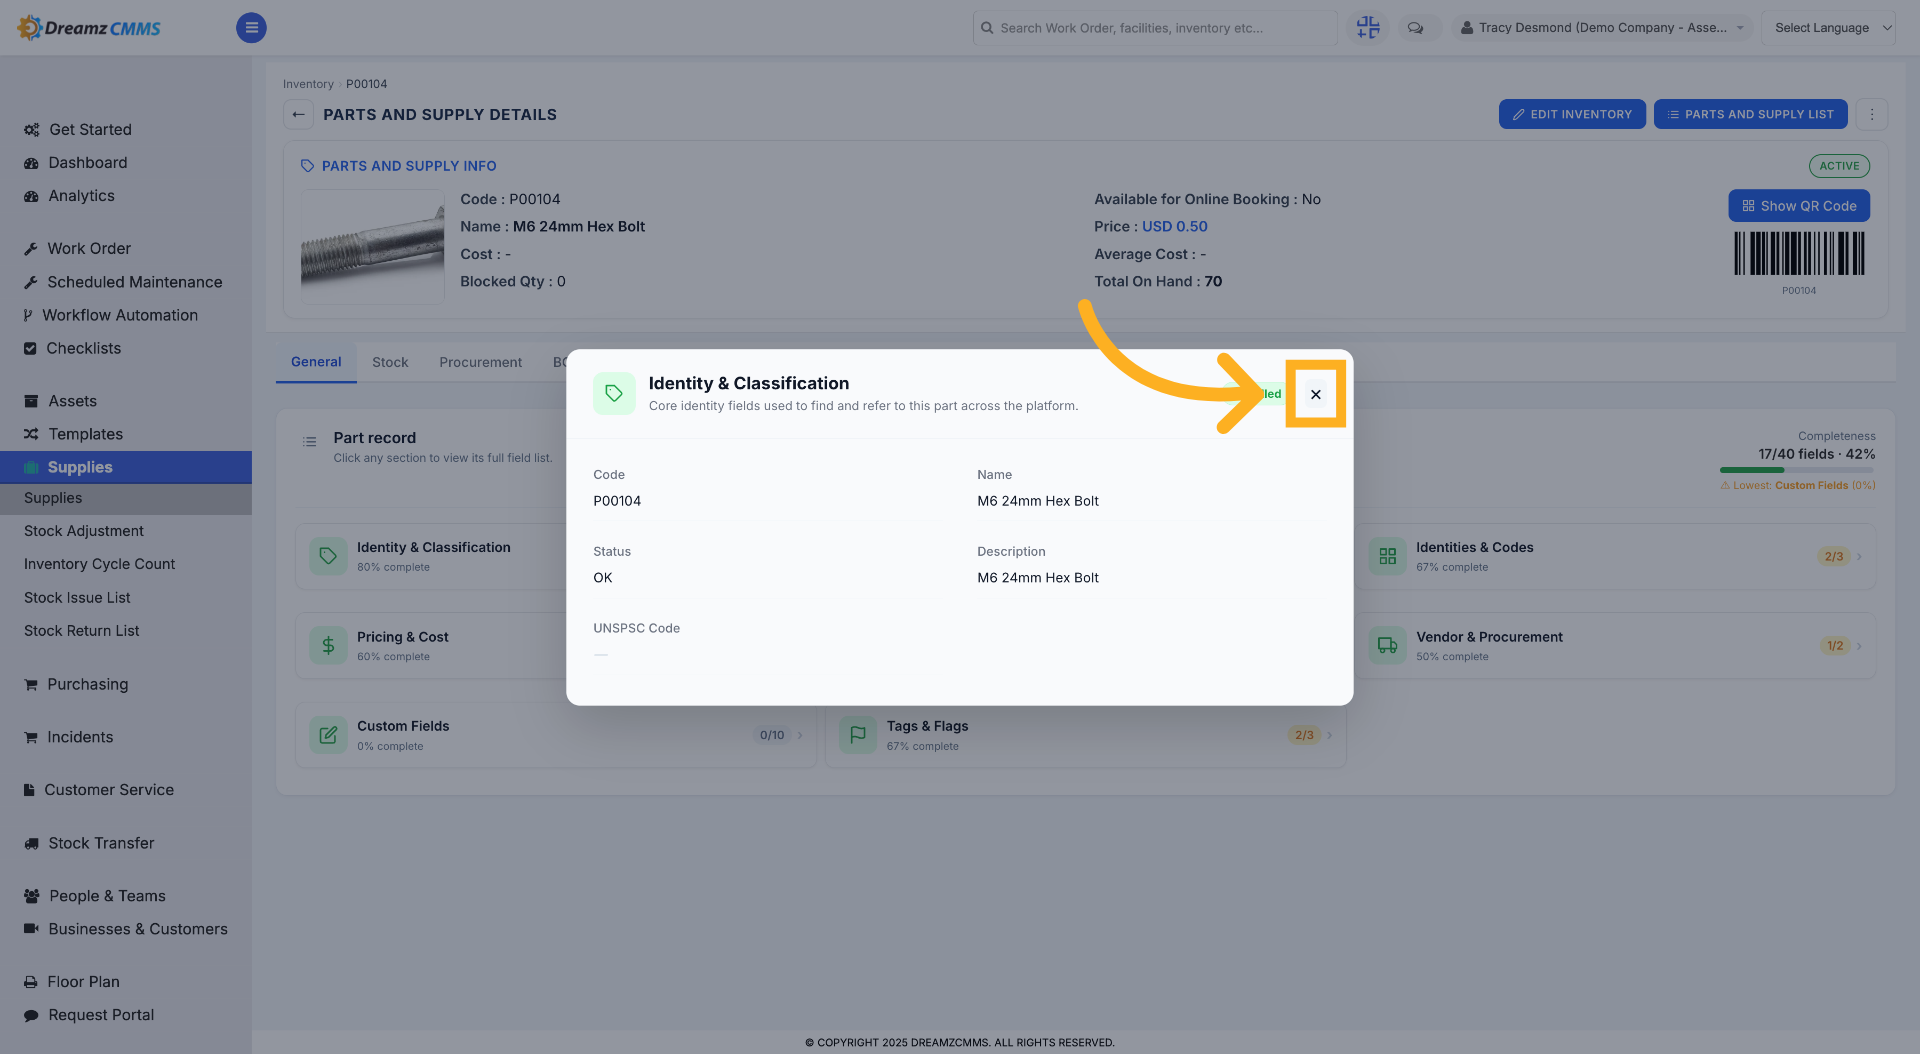
Step 4 – Close Status Window
Click × to close the completion status window and return to the details page.
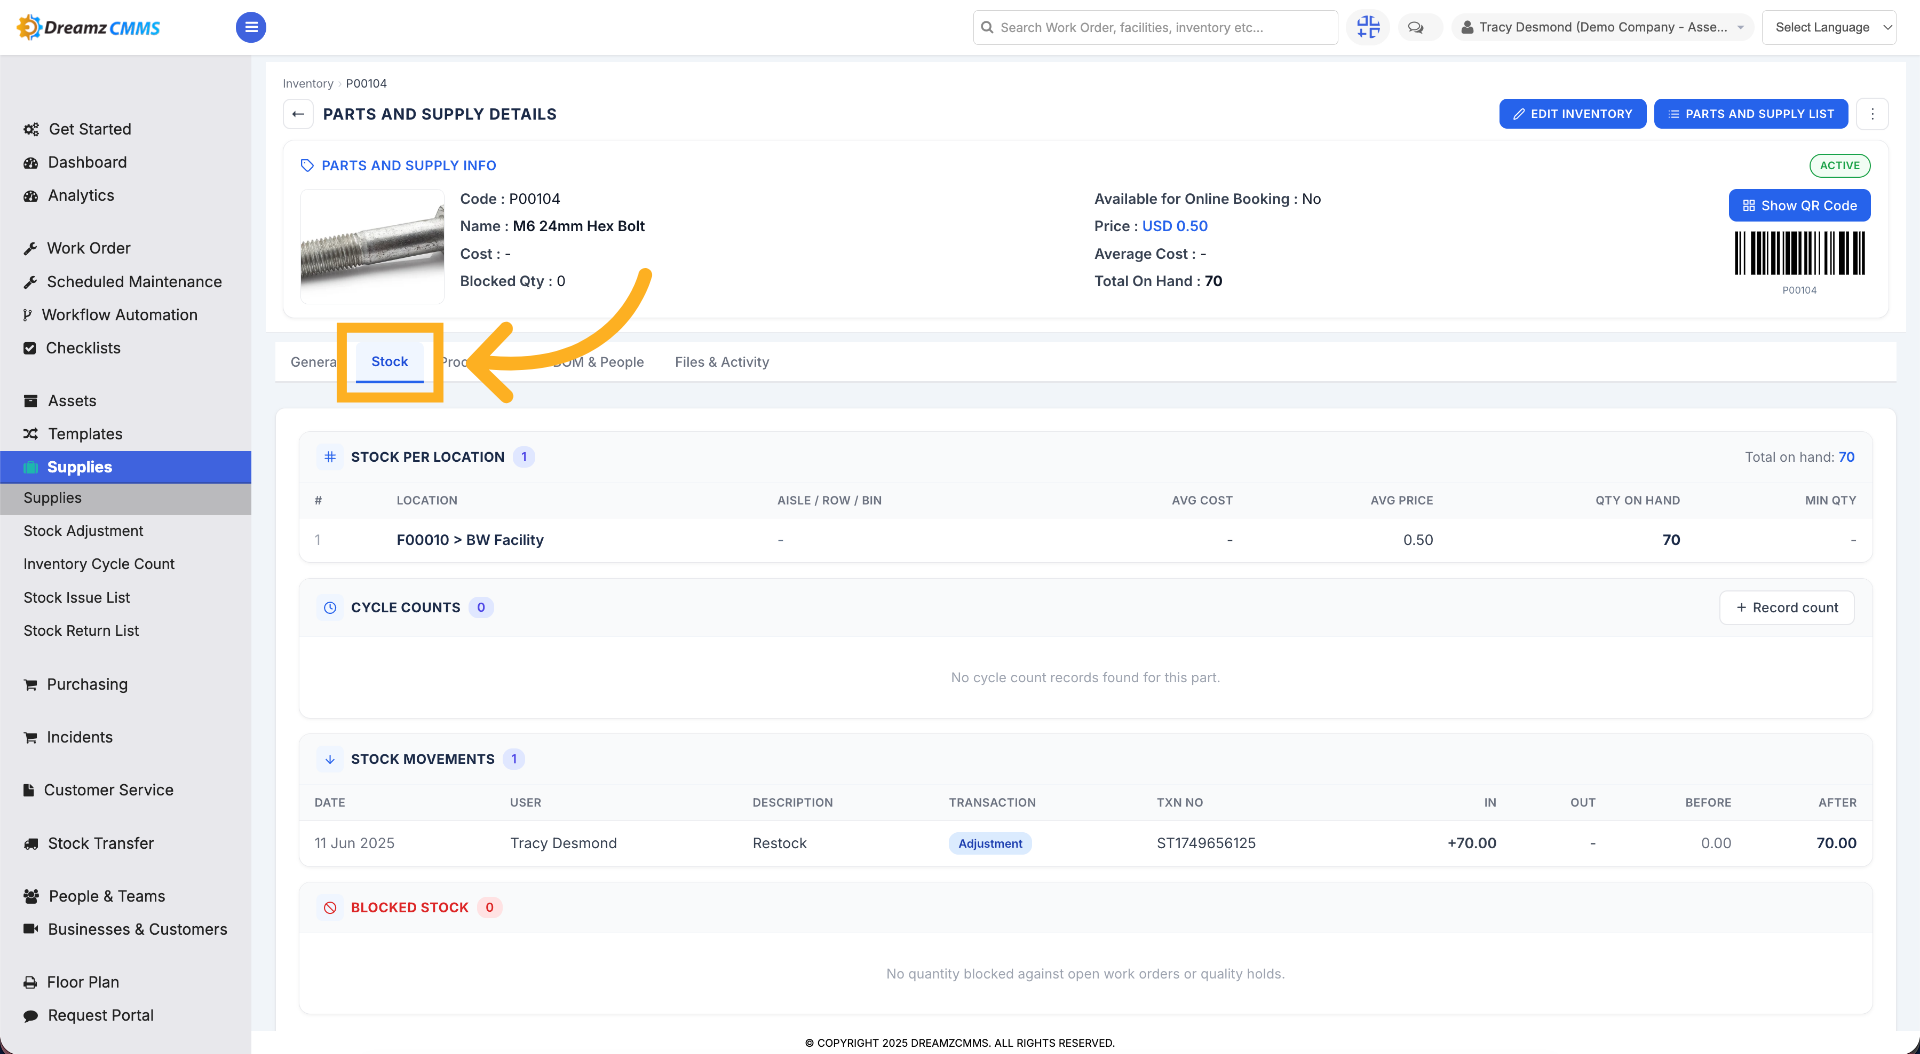
Step 5 – Access Stock Tab
Click Stock to view stock levels and inventory quantities for the item.
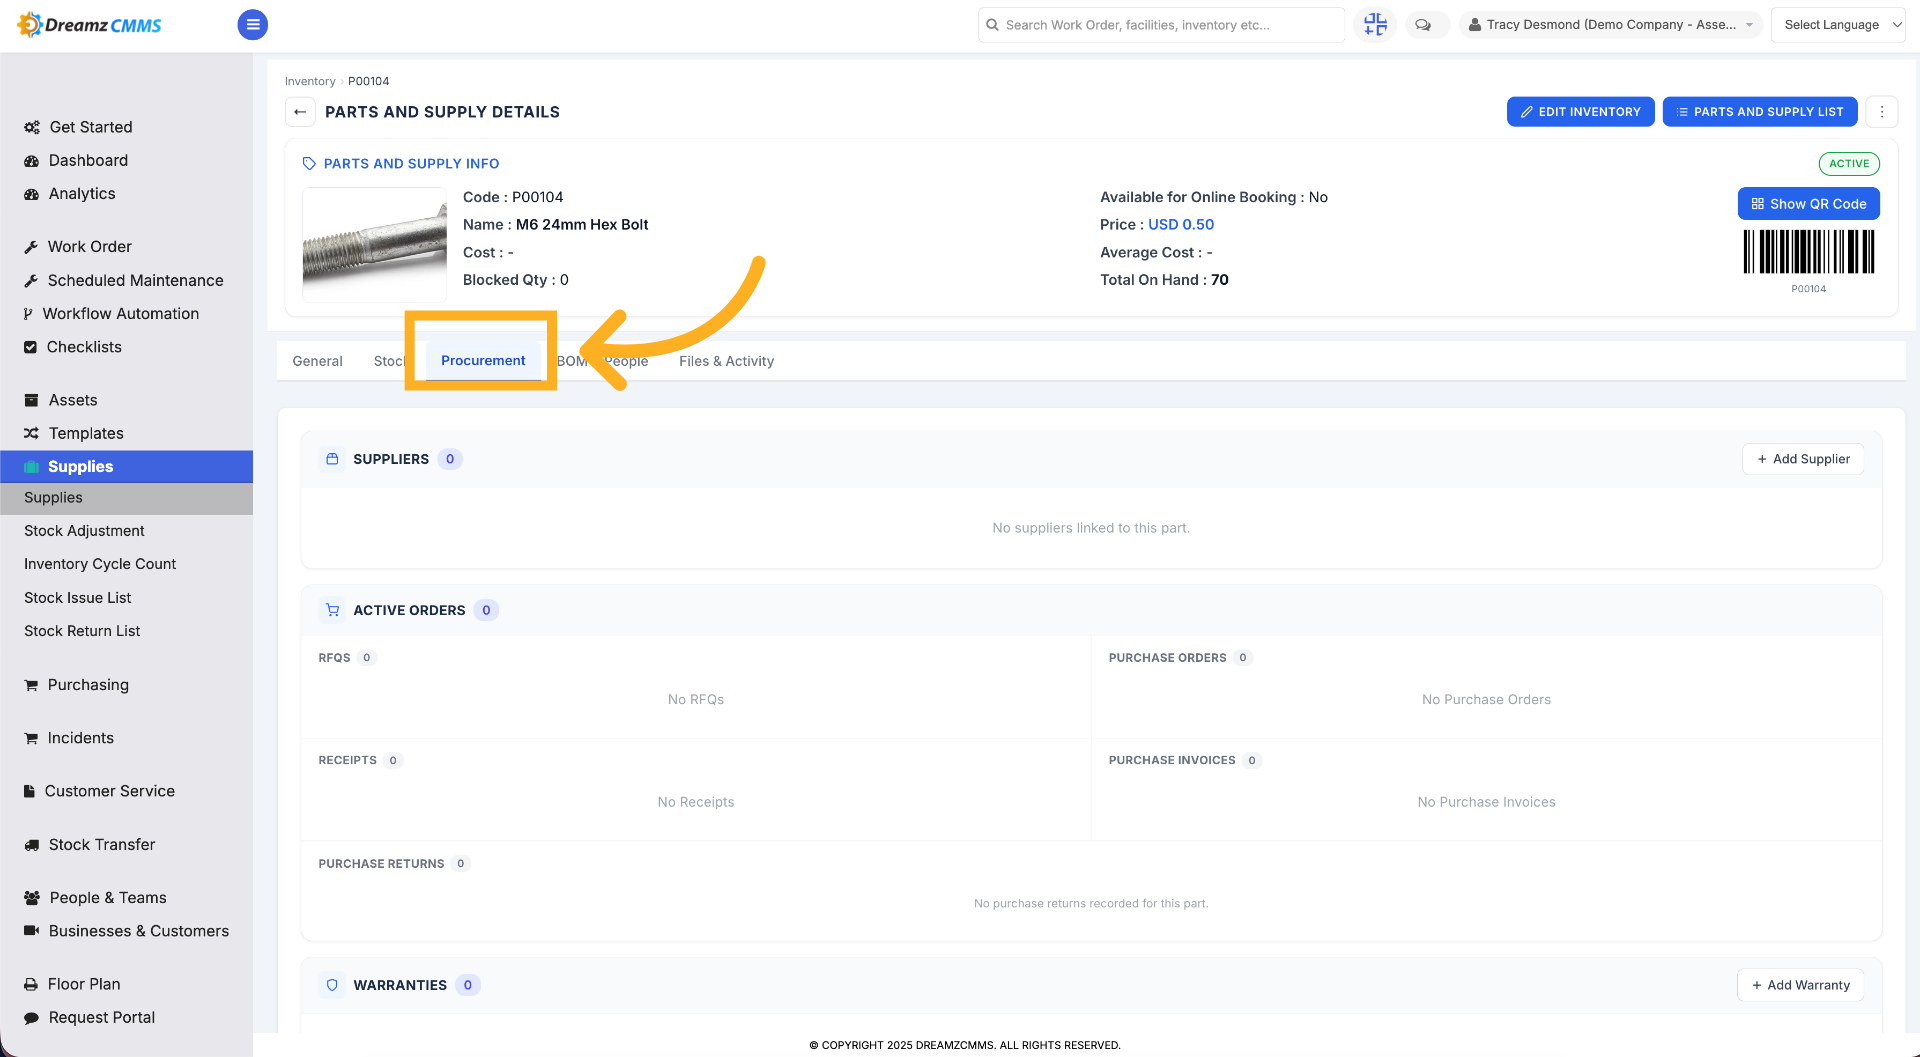
Step 6 – Open Procurement Tab
Click Procurement to manage purchasing and supplier information for the inventory.
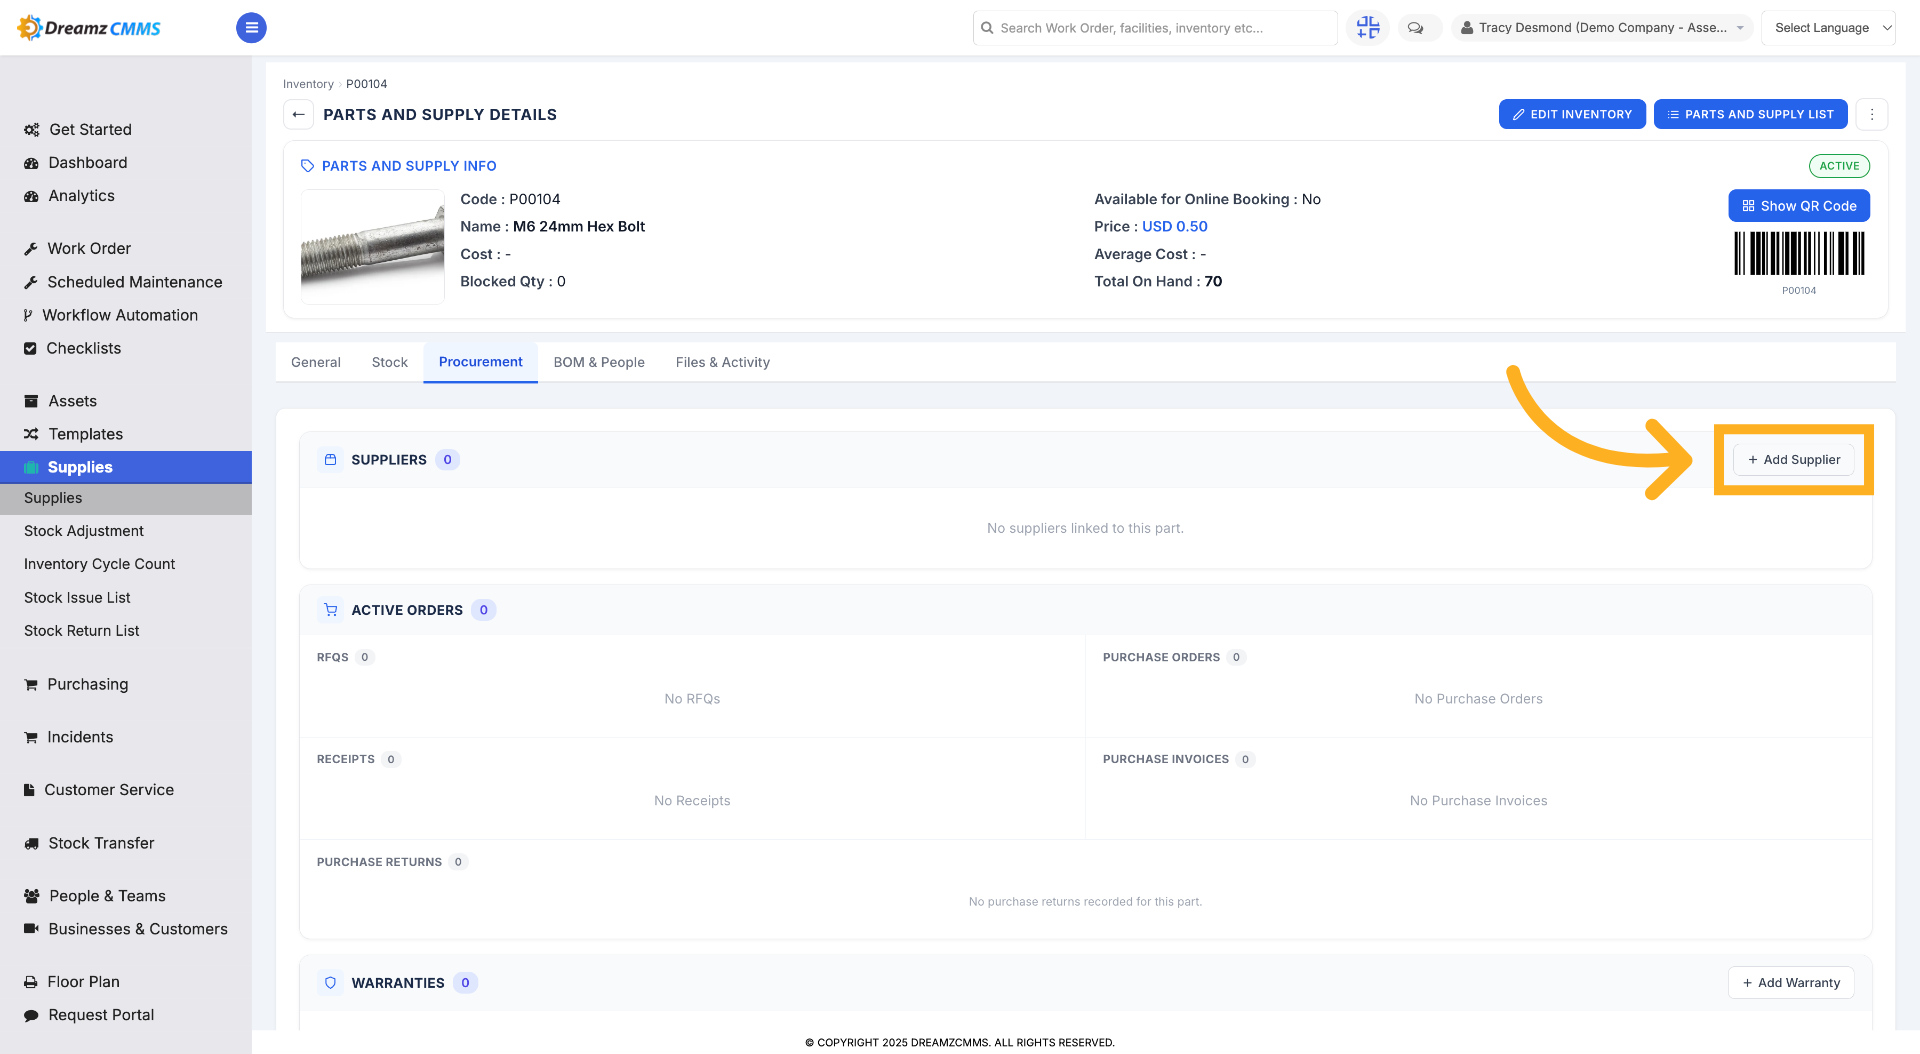
Step 7 – Add Supplier for This Inventory
Click Add Supplier to include a new supplier for the selected inventory item.
Step 8 – Select Supplier Business
Click the Select Business dropdown to choose a supplier from the available business list.
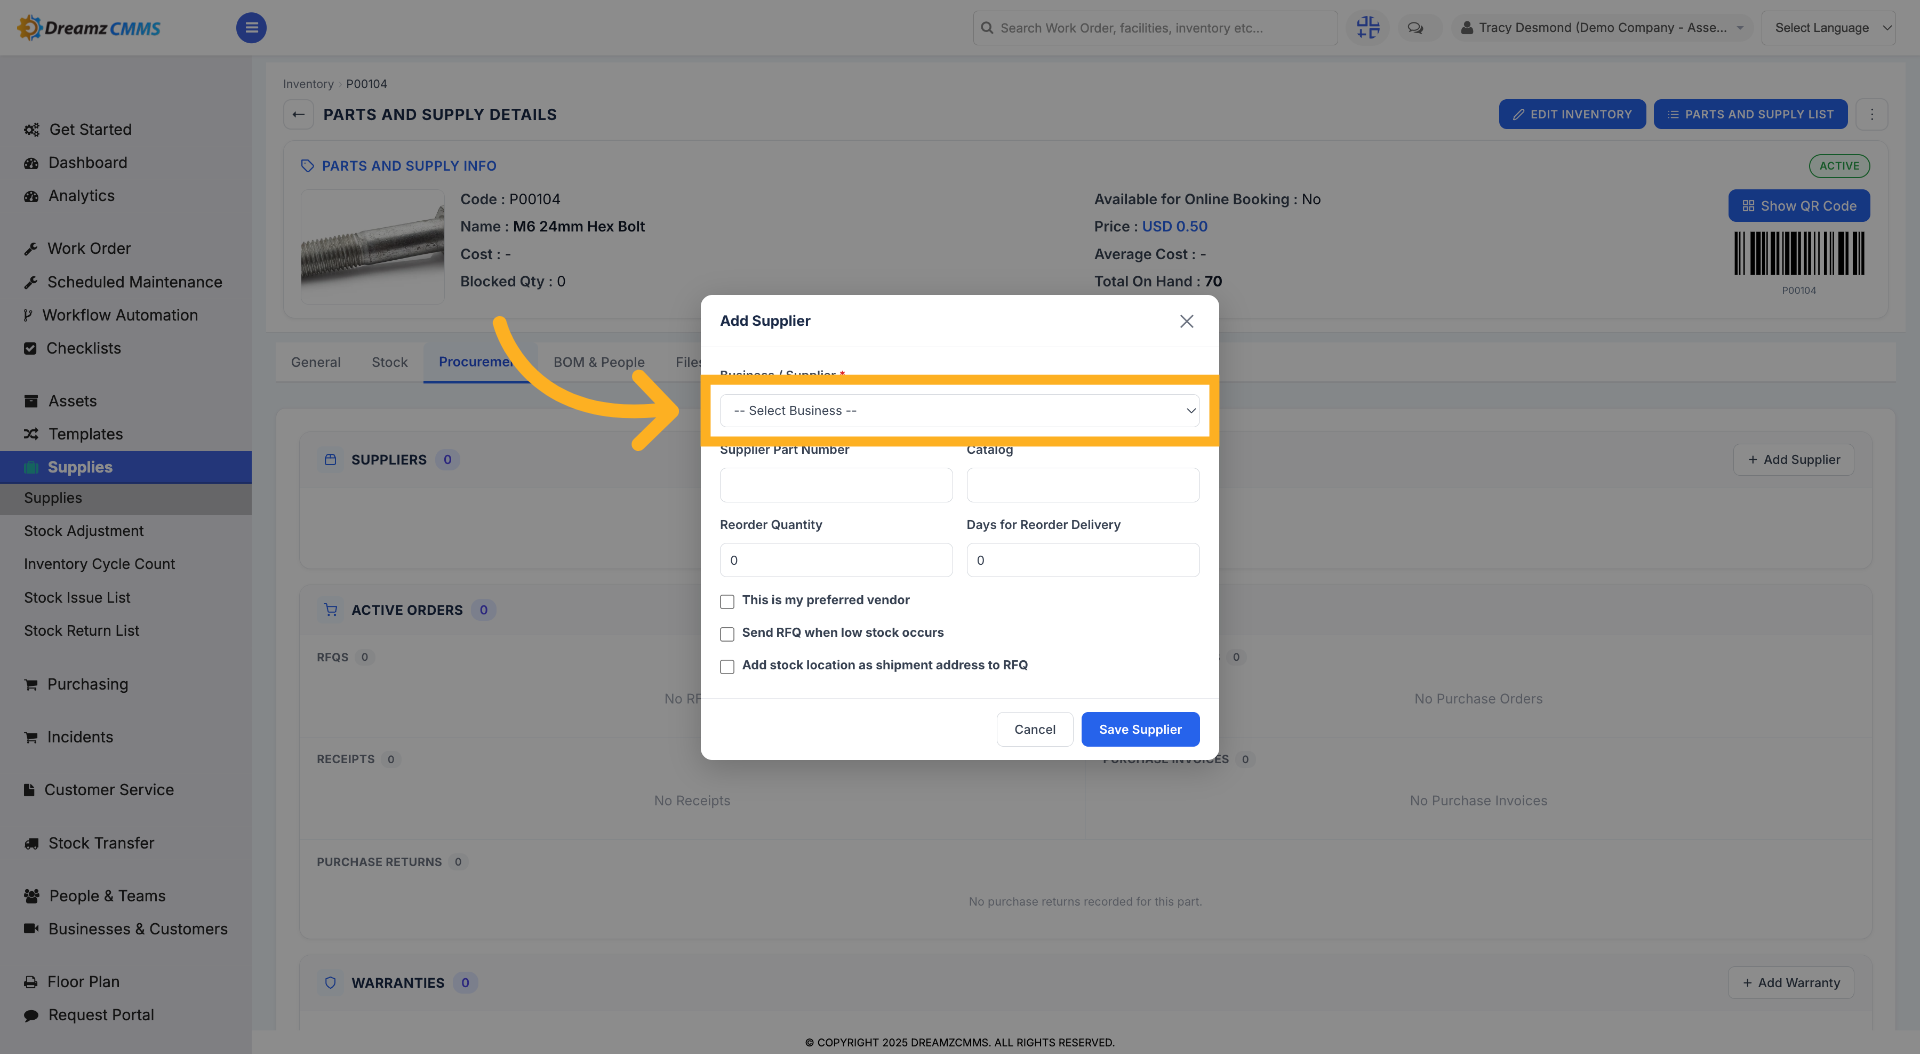
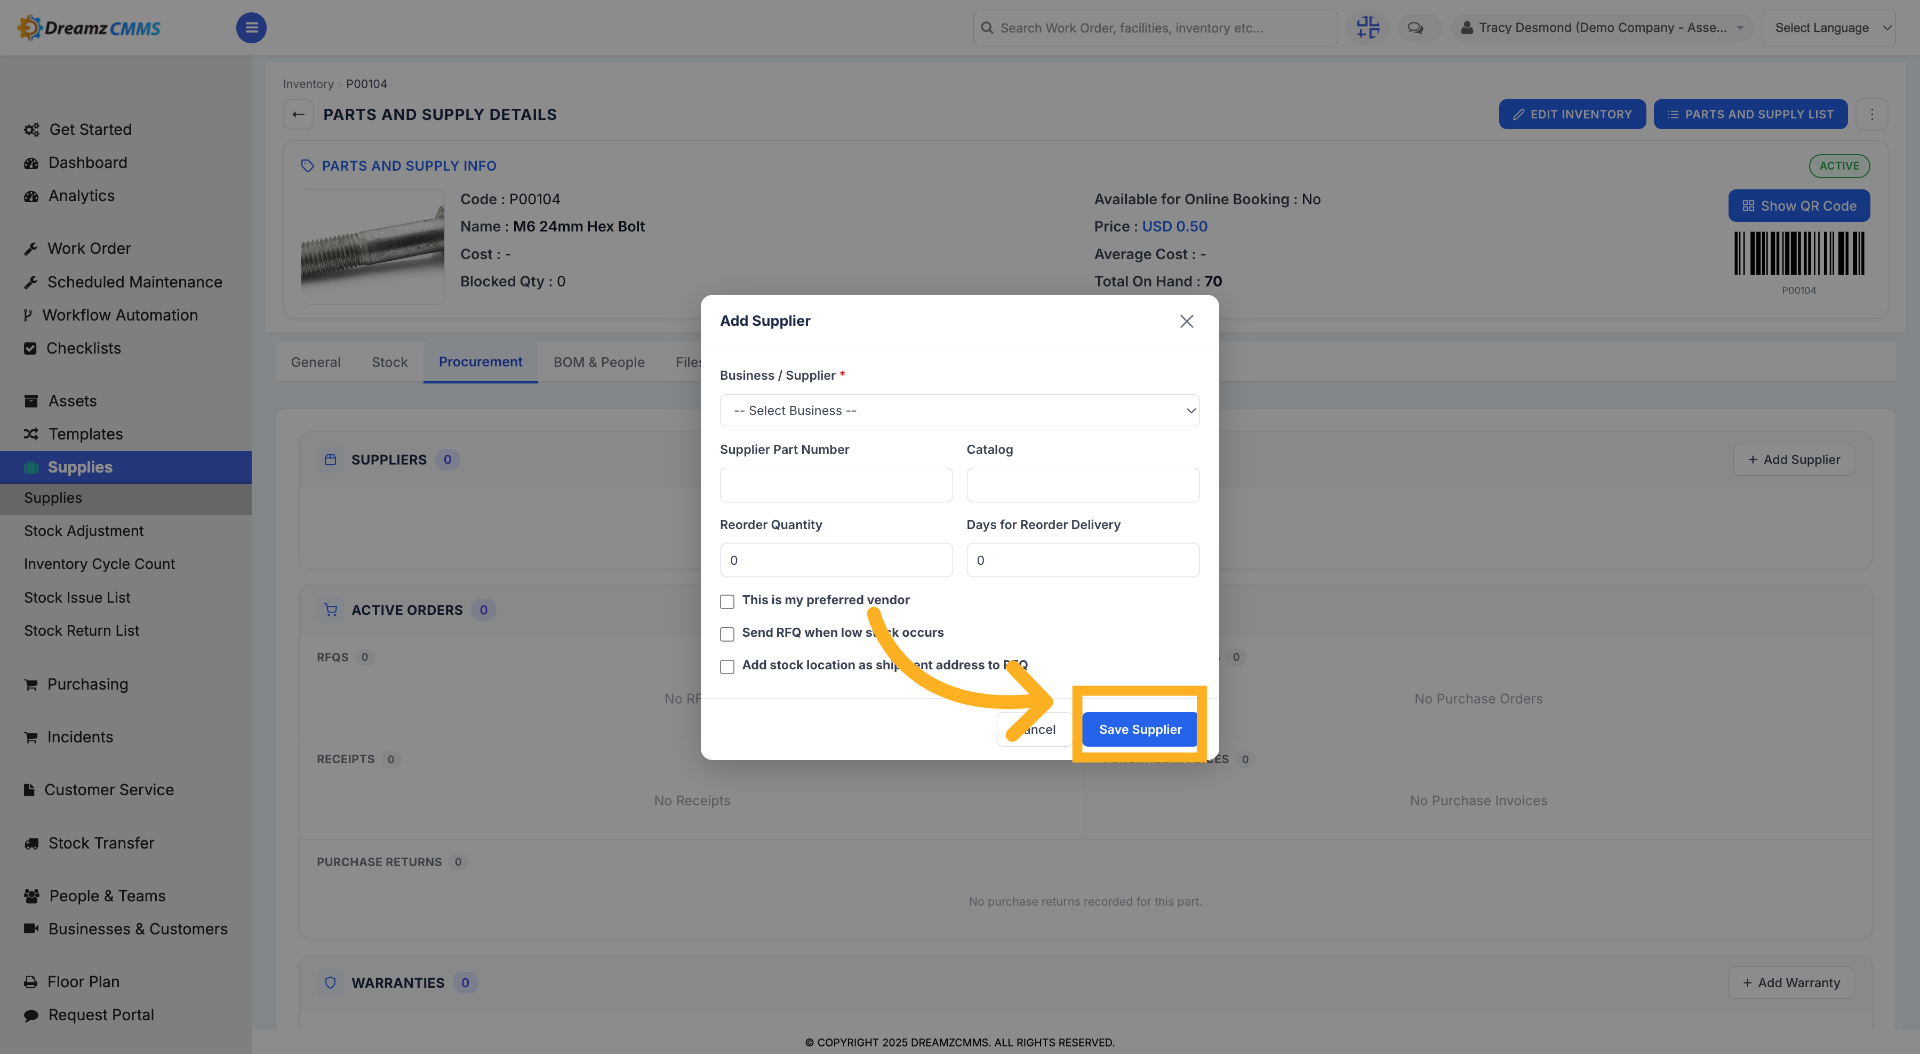
Step 9 – Save Supplier Selection
After the business is selected, click Save Supplier to close the supplier selection window and add the business.
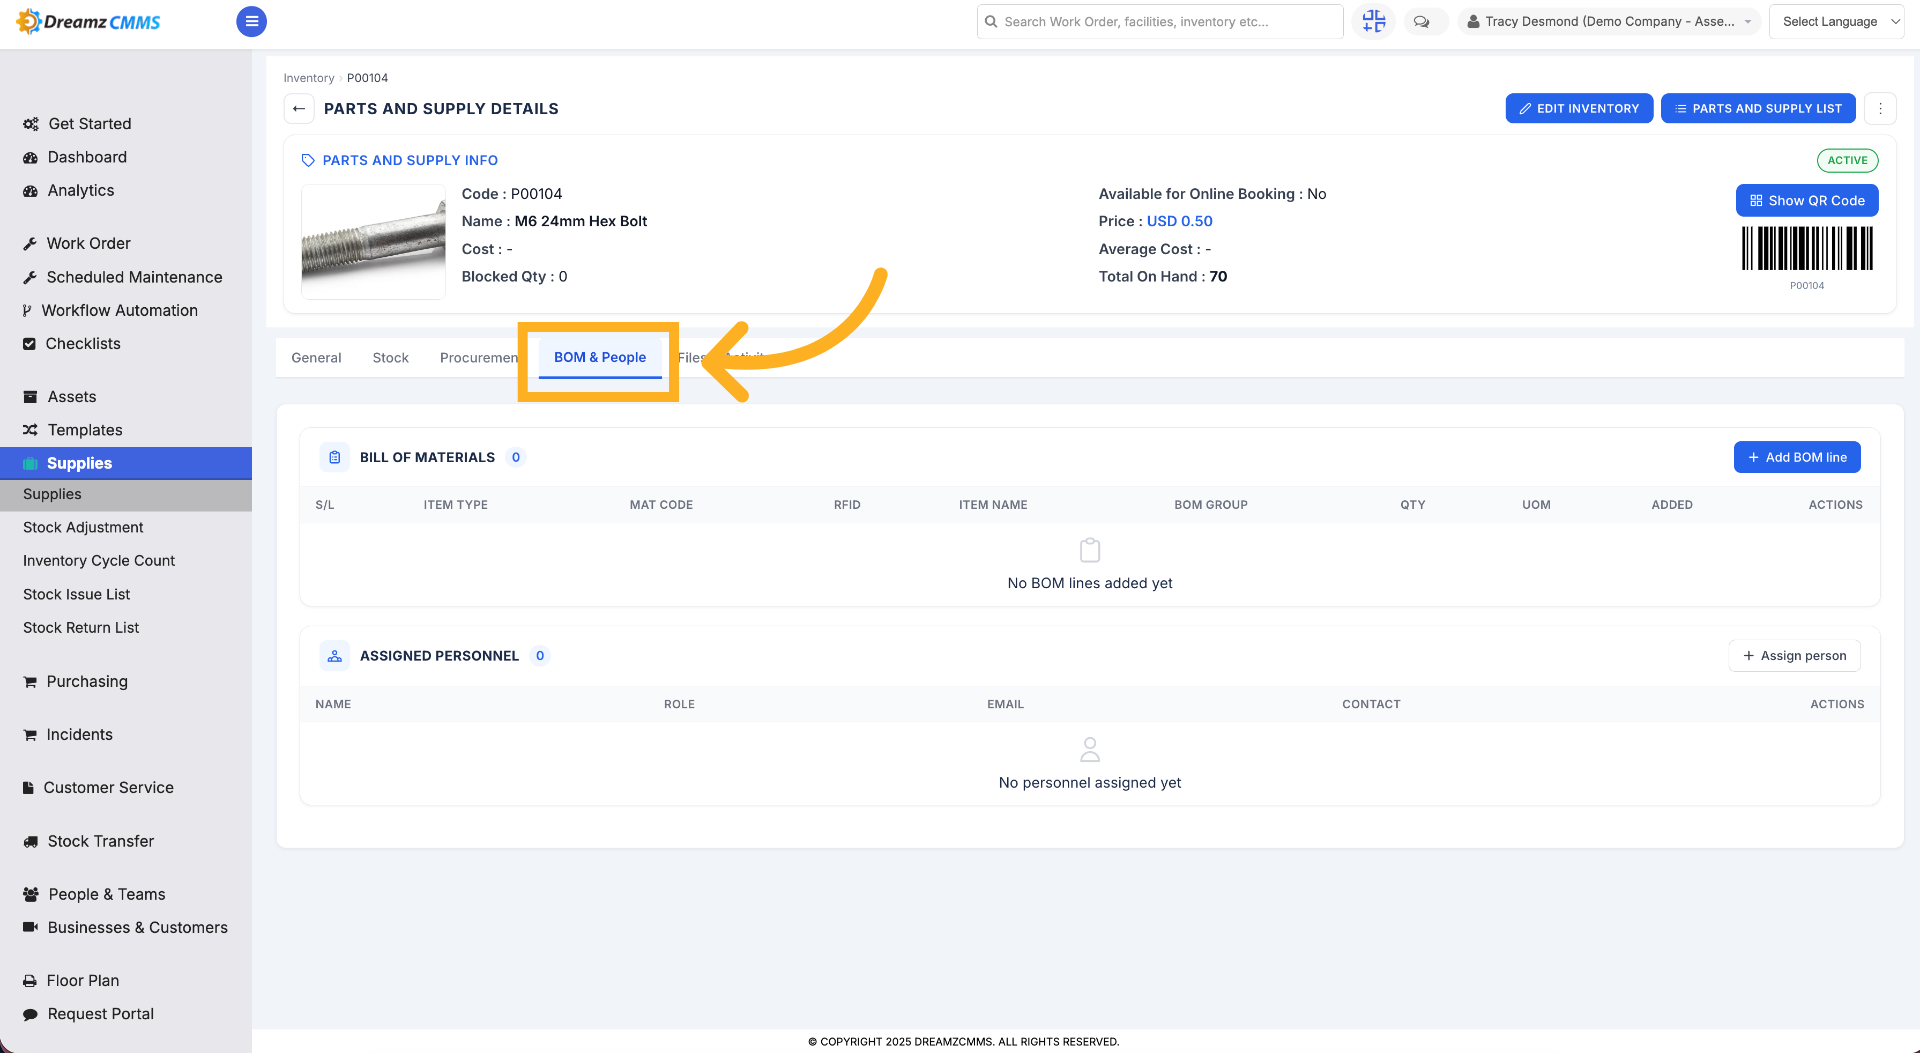
Step 10 – Open BOM & People Tab
Click BOM & People to manage the bill of materials and personnel associated with the item.
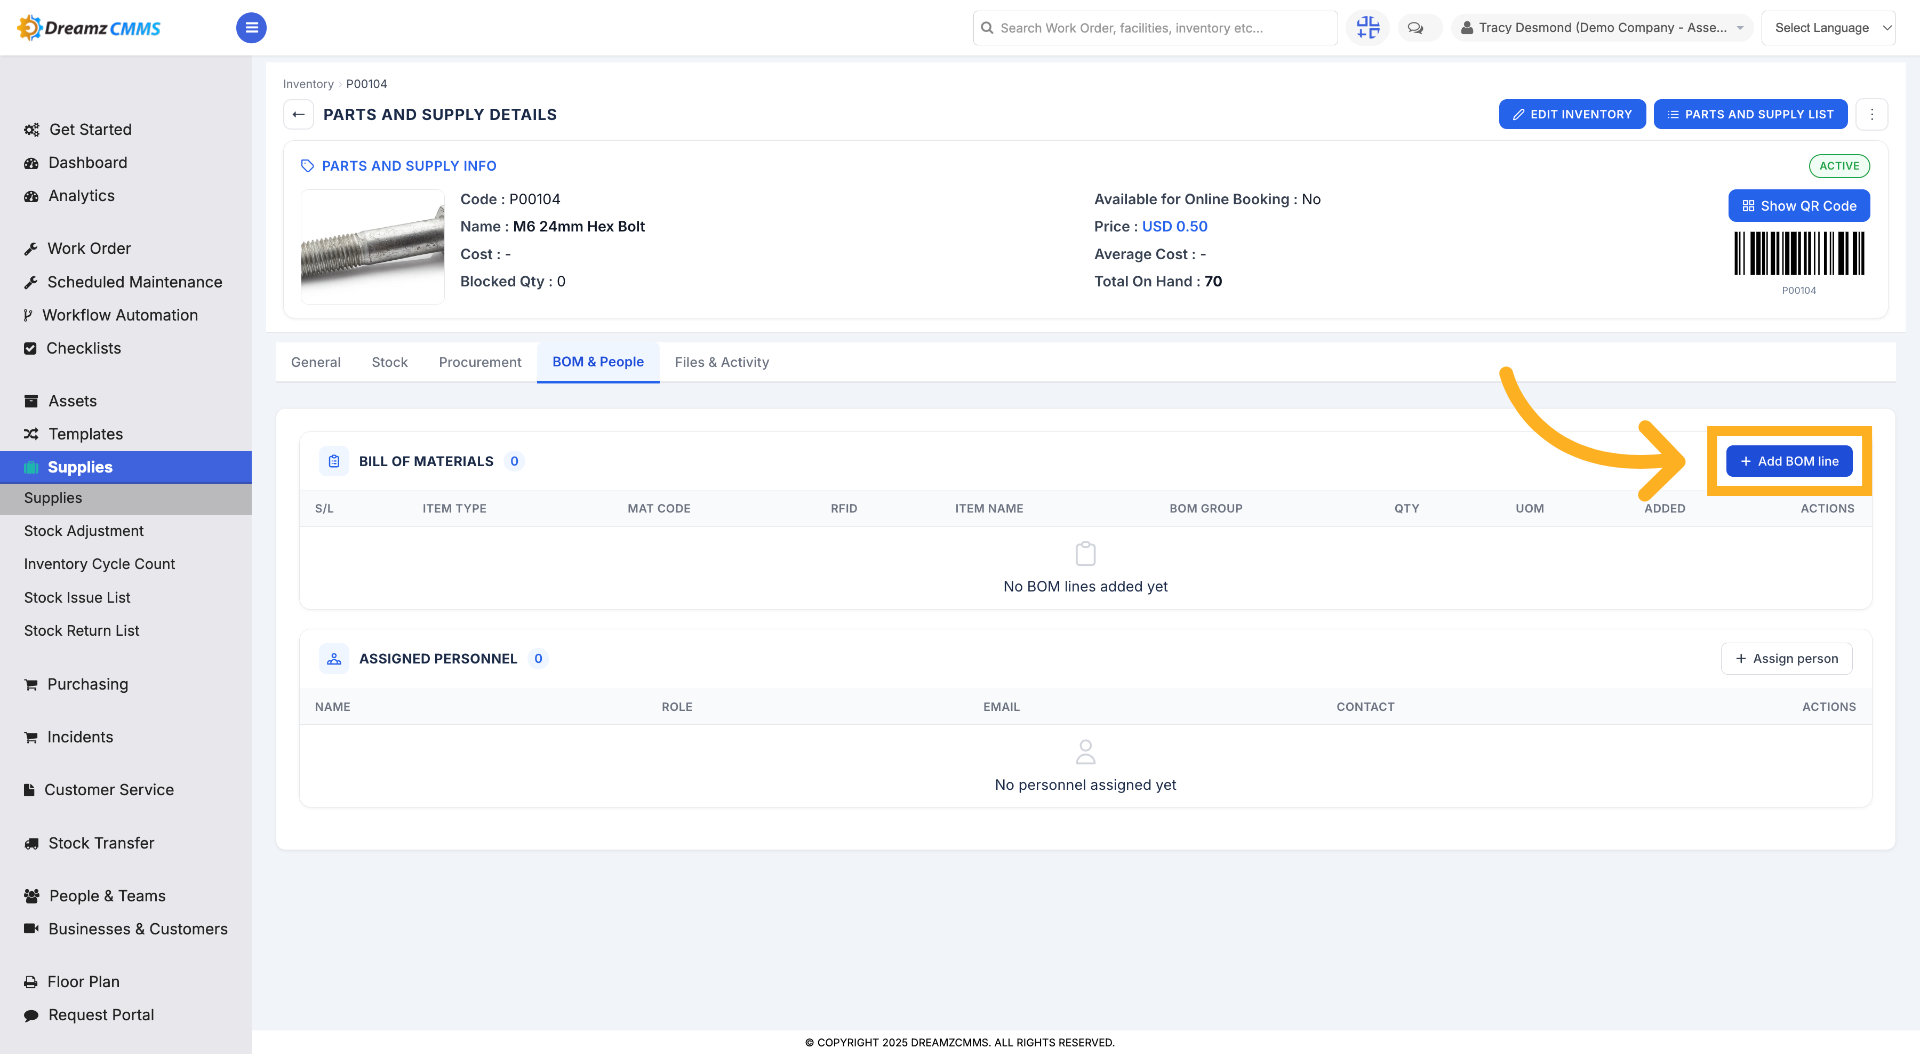
Step 11 – Add BOM Line
Click Add BOM Line to insert a new component or material into the bill of materials.
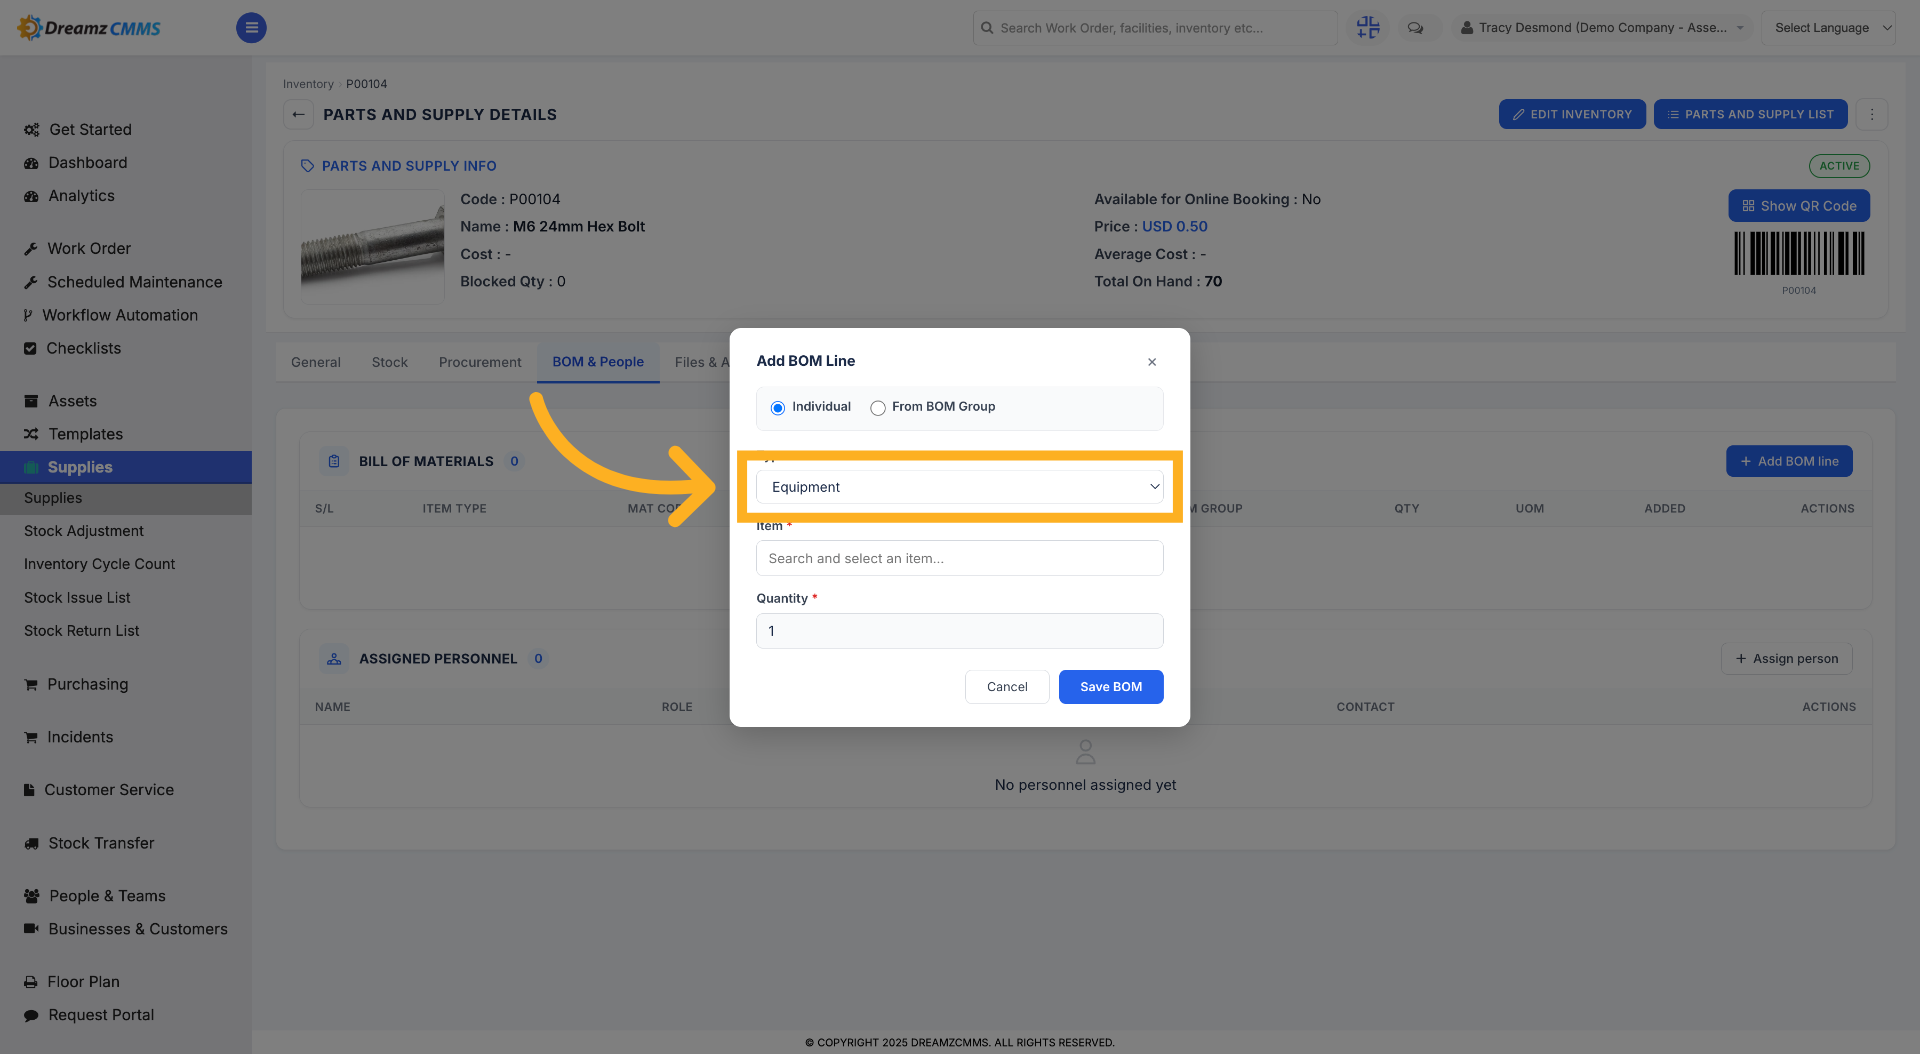
Step 12 – Select Item Type
Click Equipment, Tools, Parts, or Service Item to specify the type of BOM line being added.
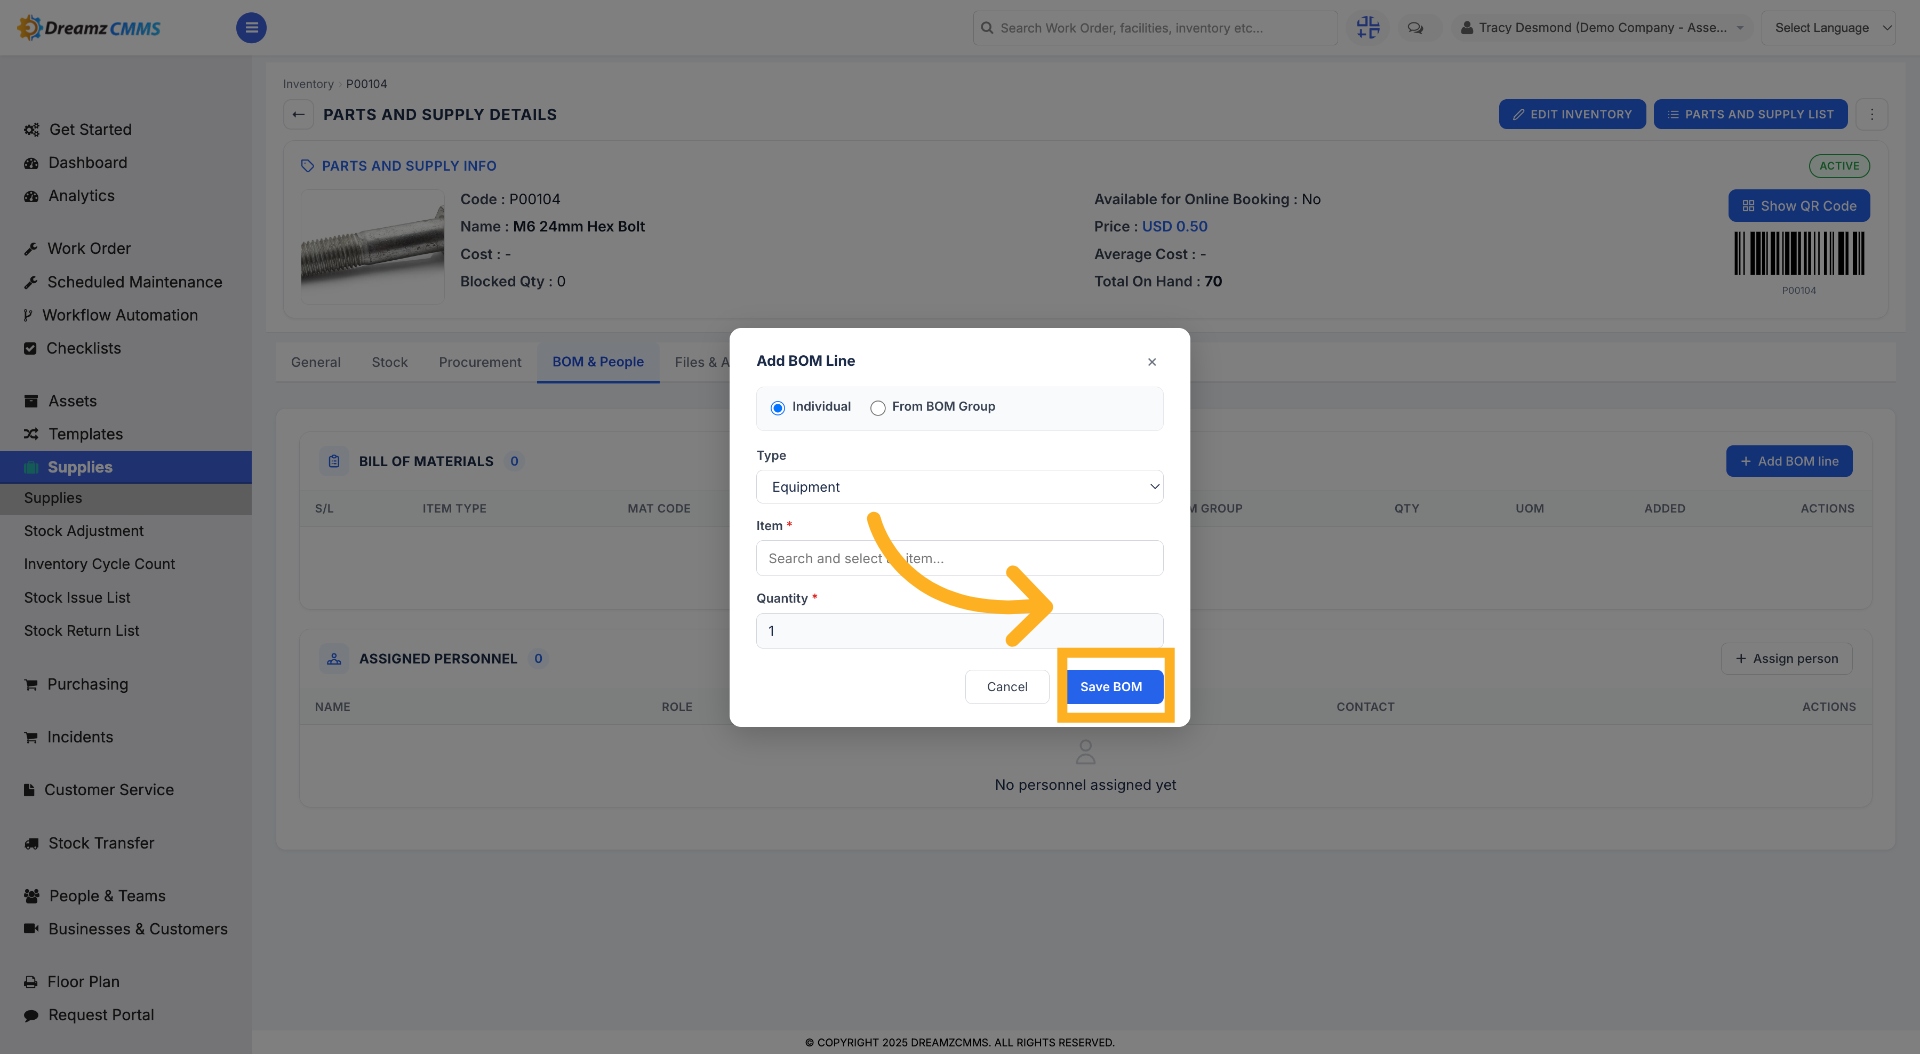
Step 13 – Save the BOM Line
After the BOM item is selected, click Save BOM to close the BOM selection window and add the line.
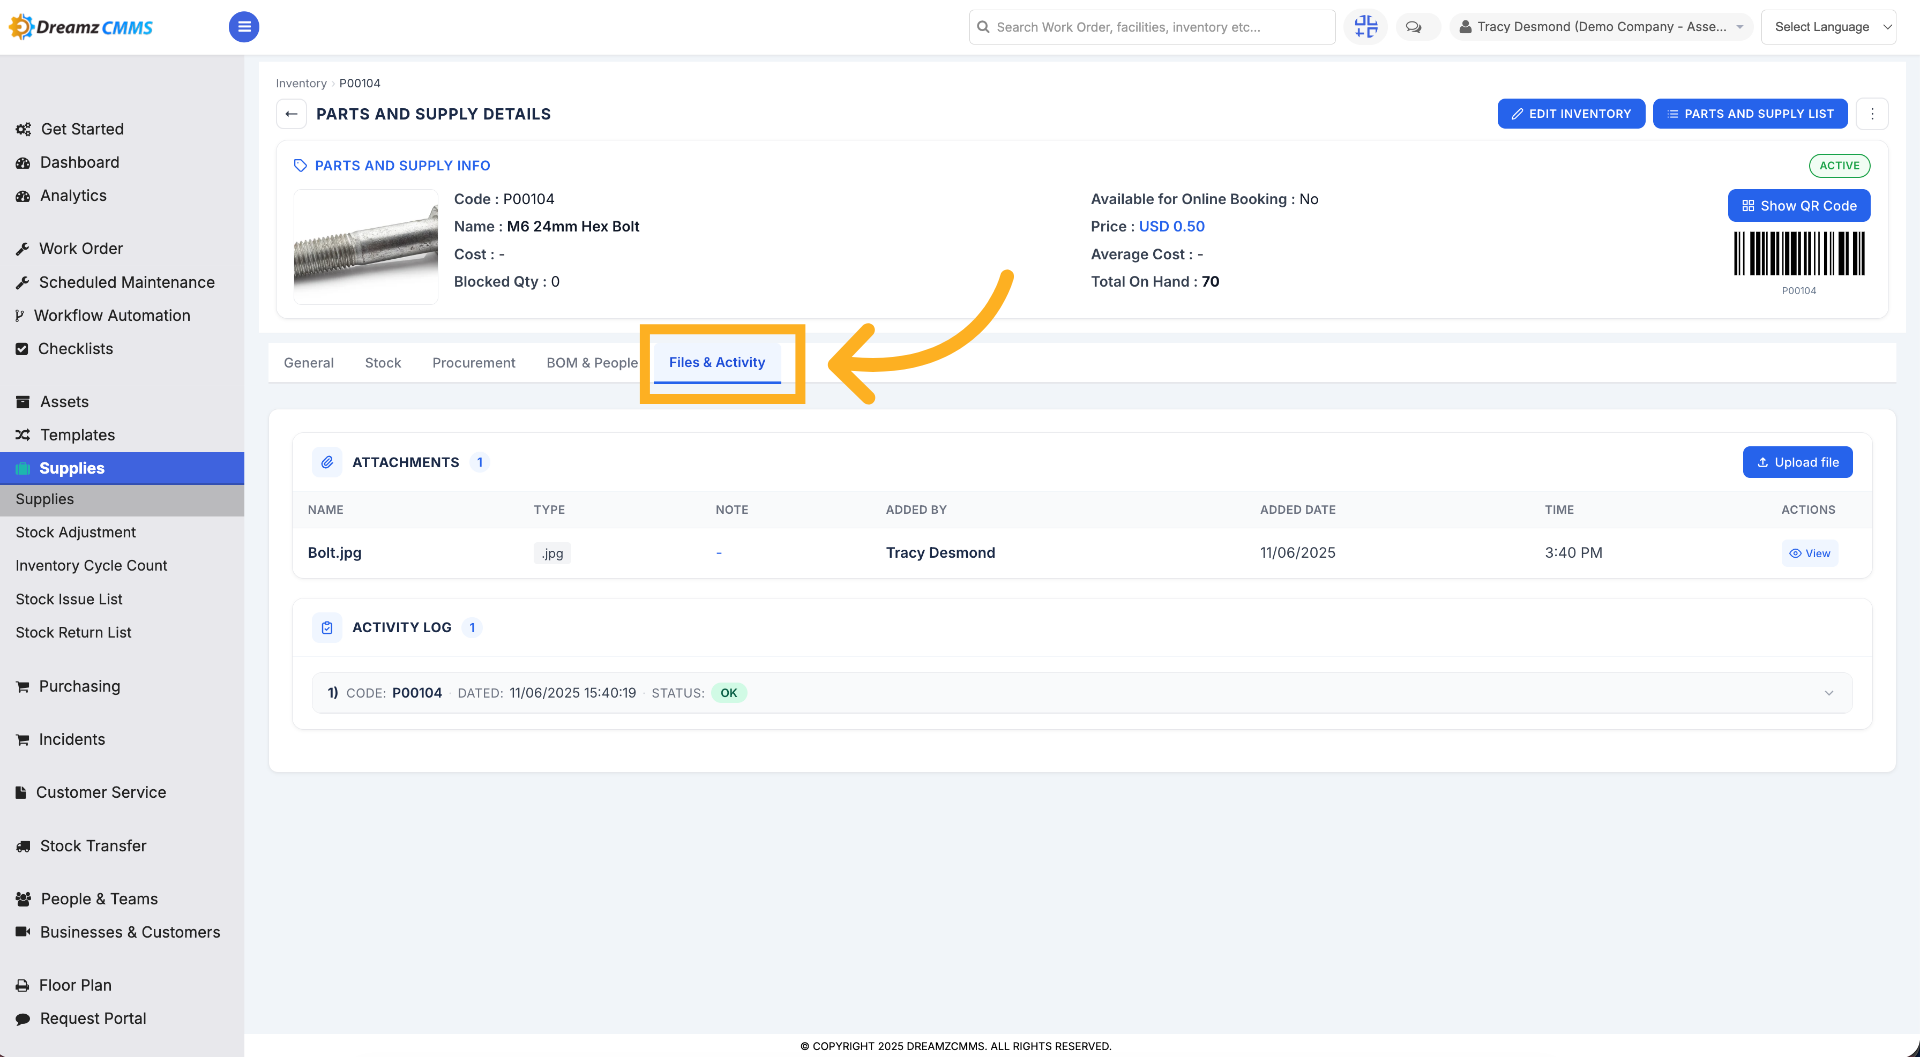
Step 14 – Access Files & Activity
Click Files & Activity to view documents and recent actions related to the supply item.
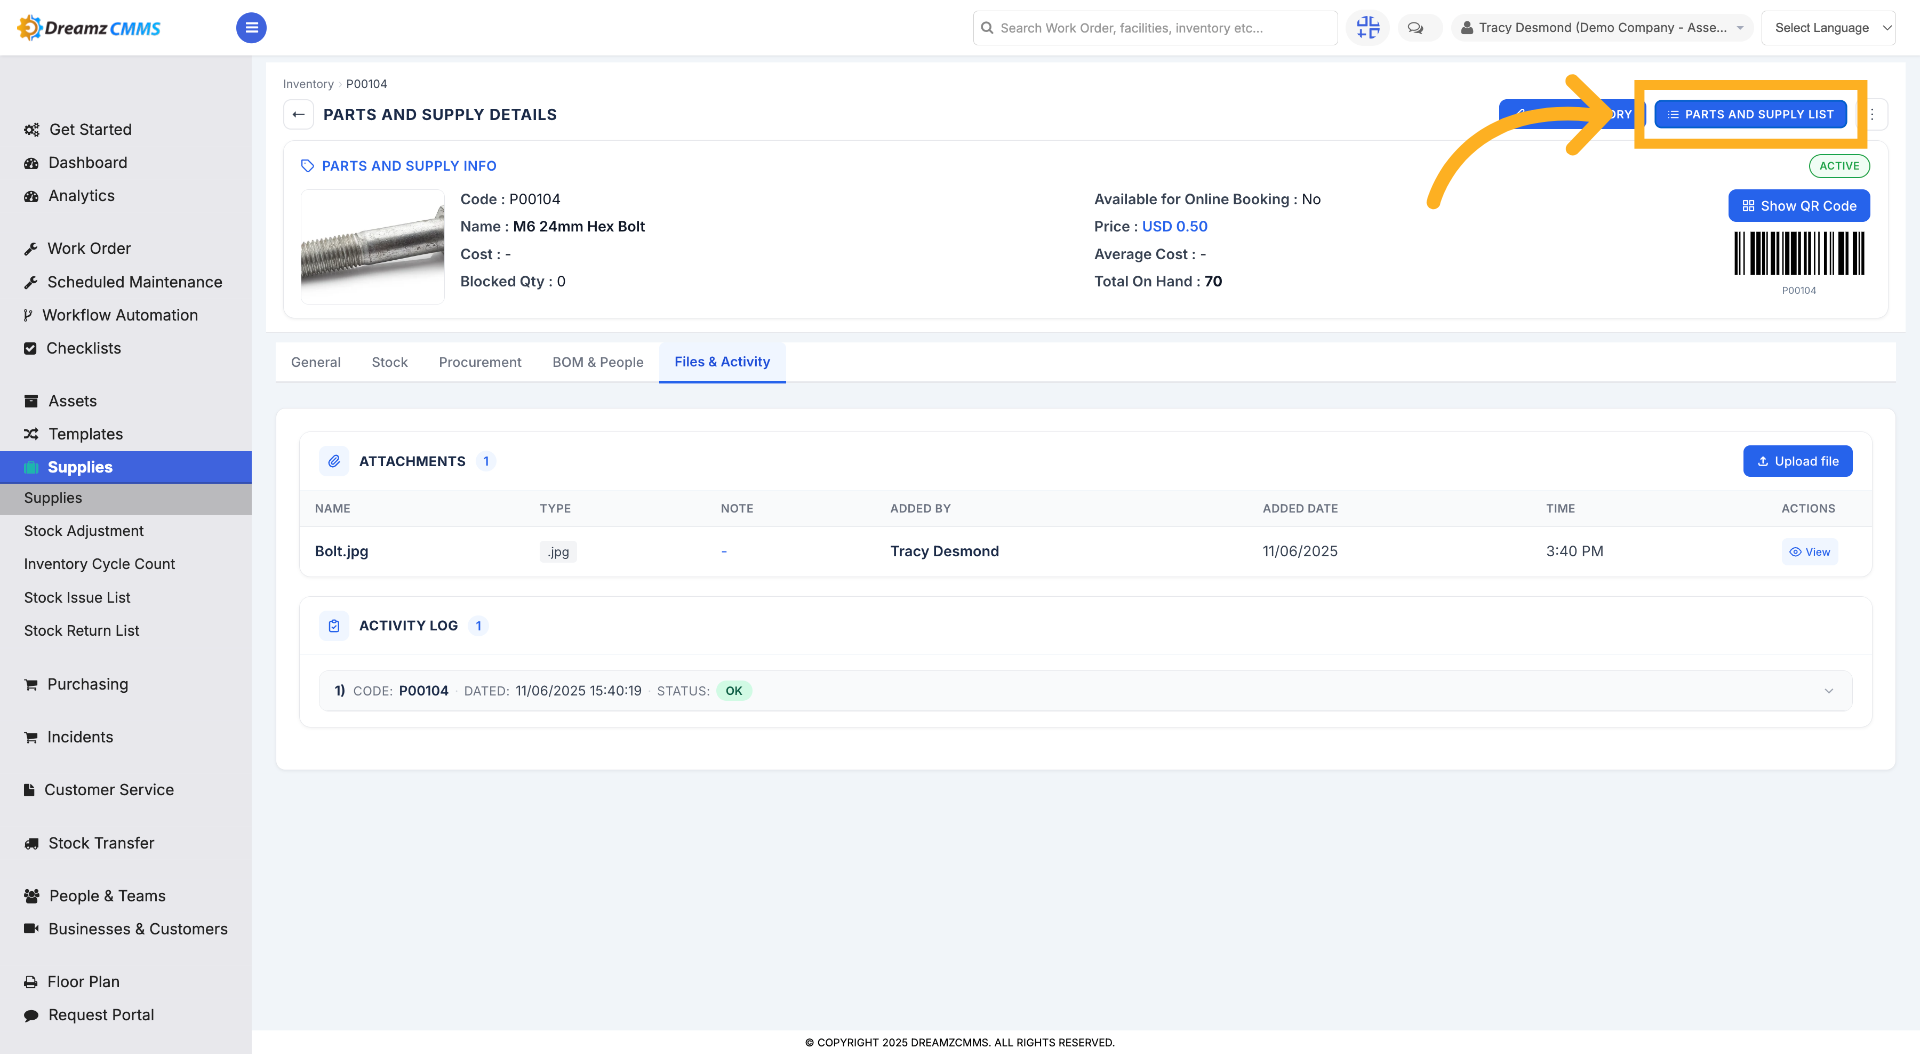
Step 15 – Return to Supply List
Click Parts and Supply List to navigate back to the main inventory overview page.
How to Add a New Supply Item
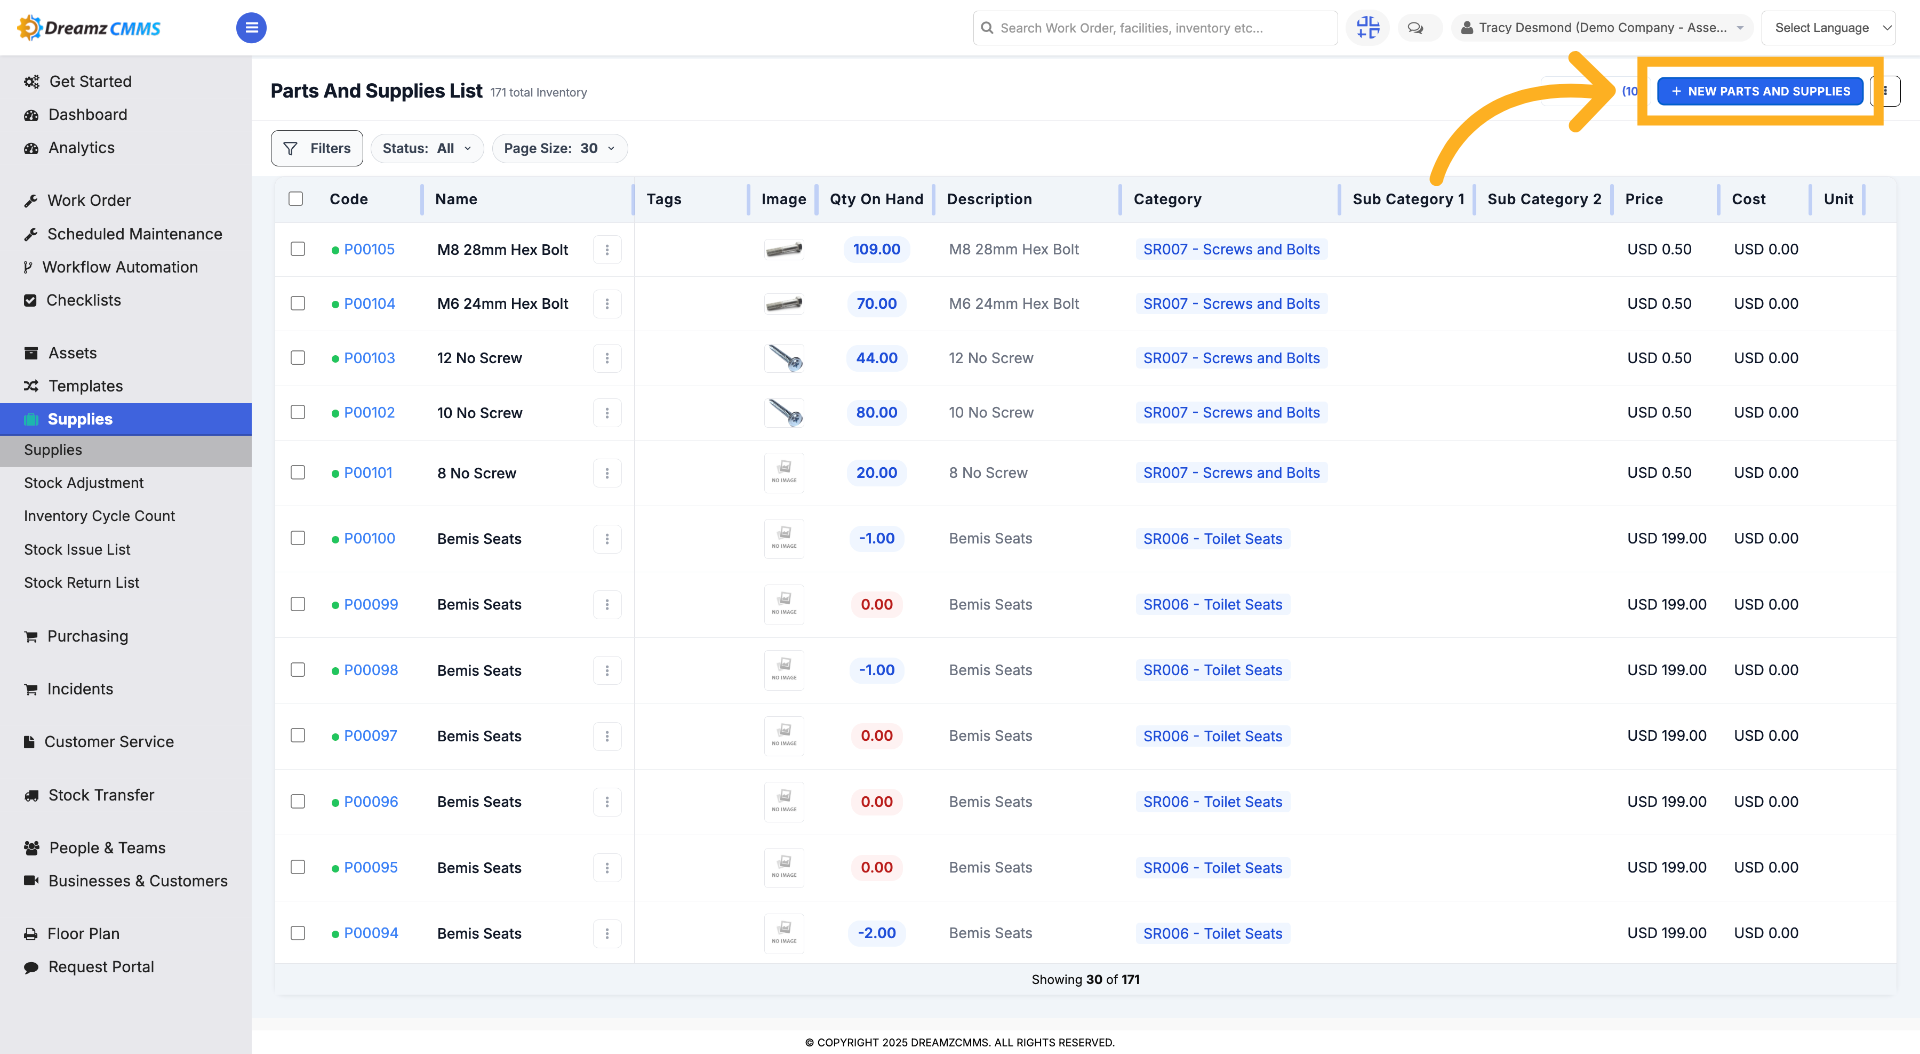
Step 1 – Create New Supply Item
Click New Parts and Supplies to start adding a new inventory item to the system.
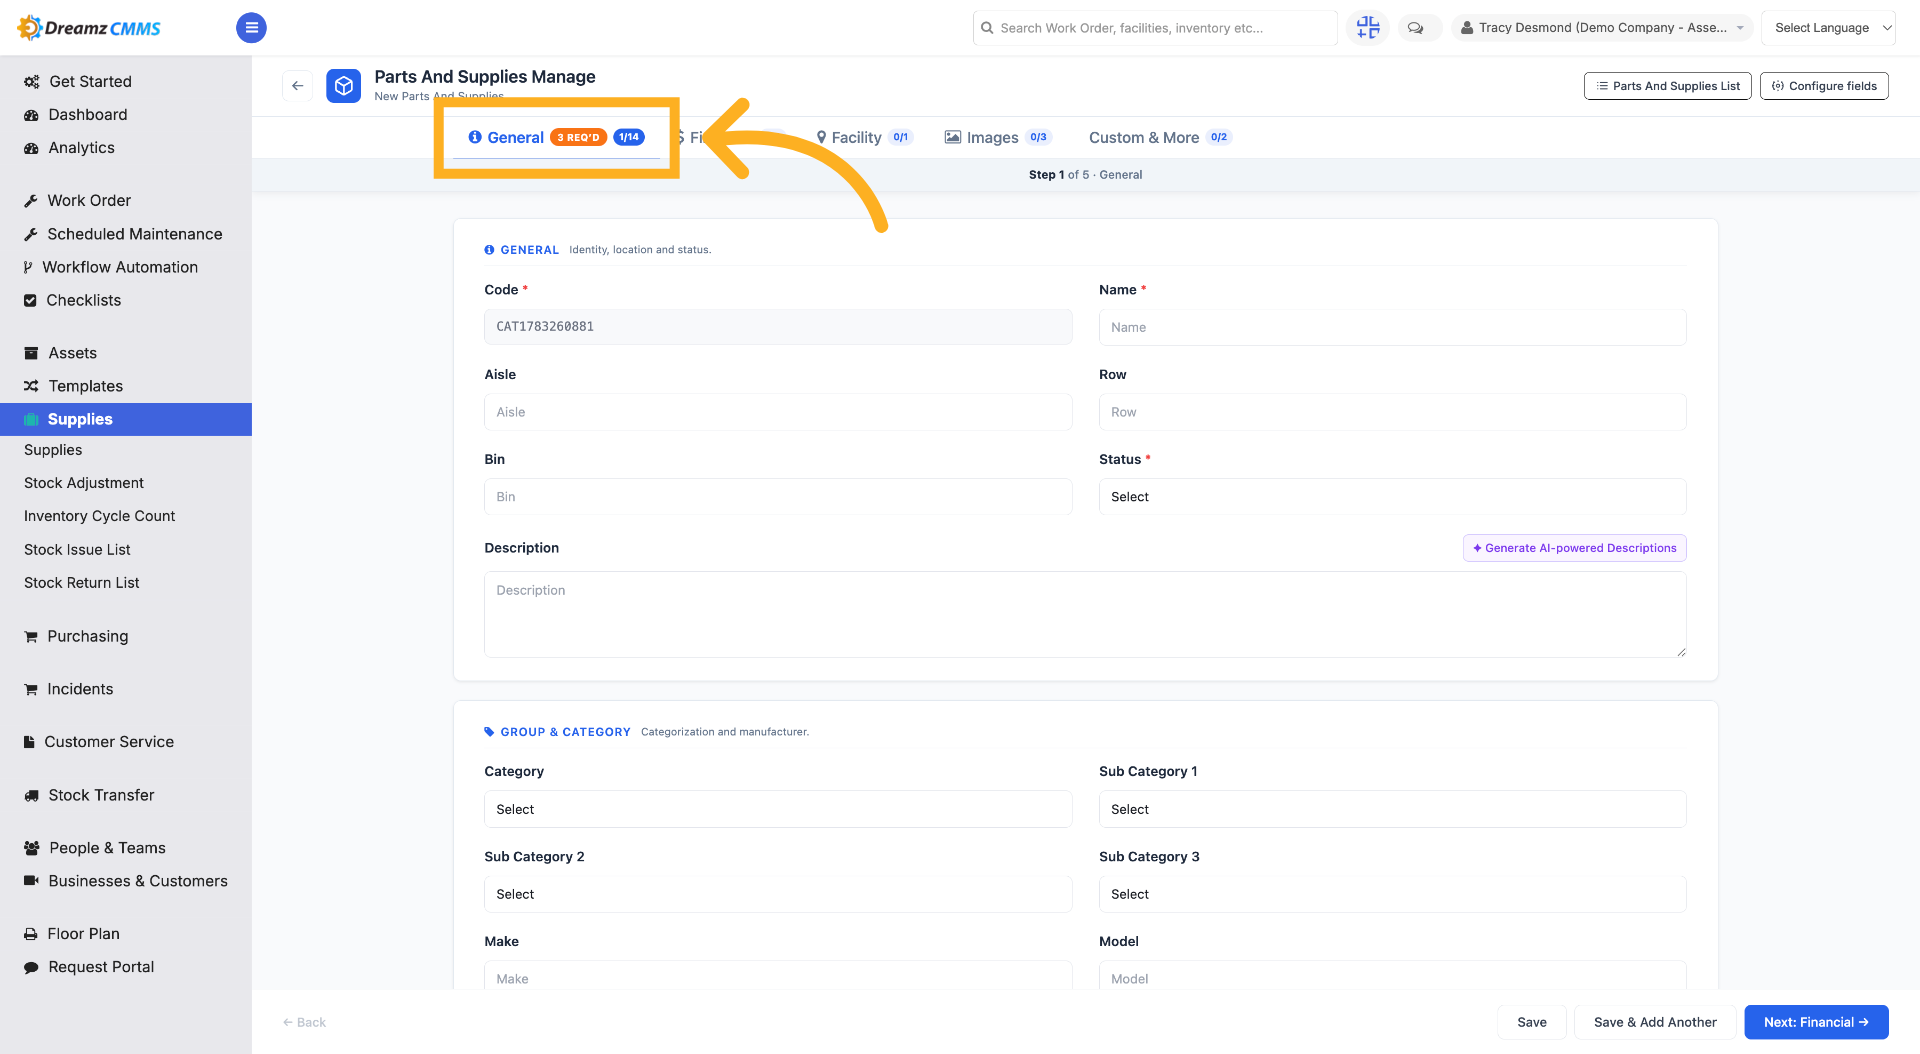
Step 2 – Open General Requirements
Click General to review or update general requirements for the new inventory.
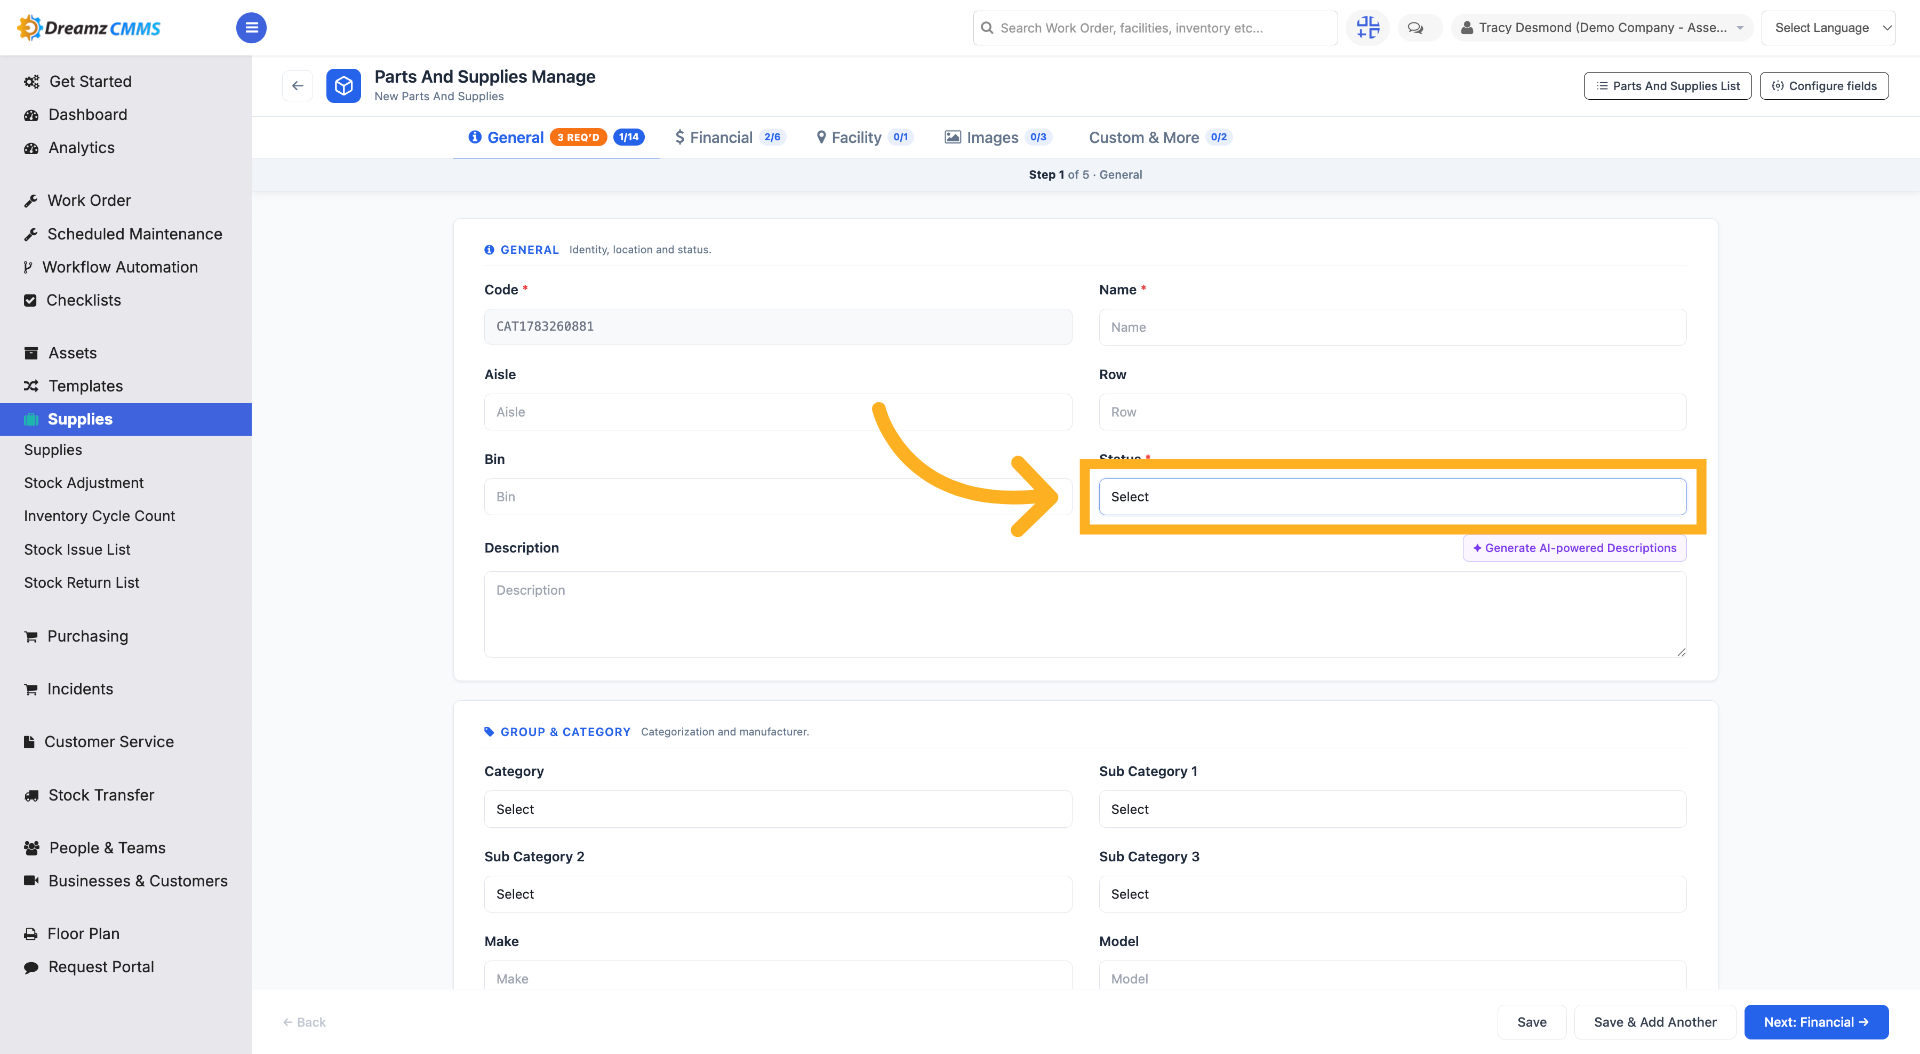
Step 3 – Select Status Option
Click Select to choose the current status of the inventory item from the available options.
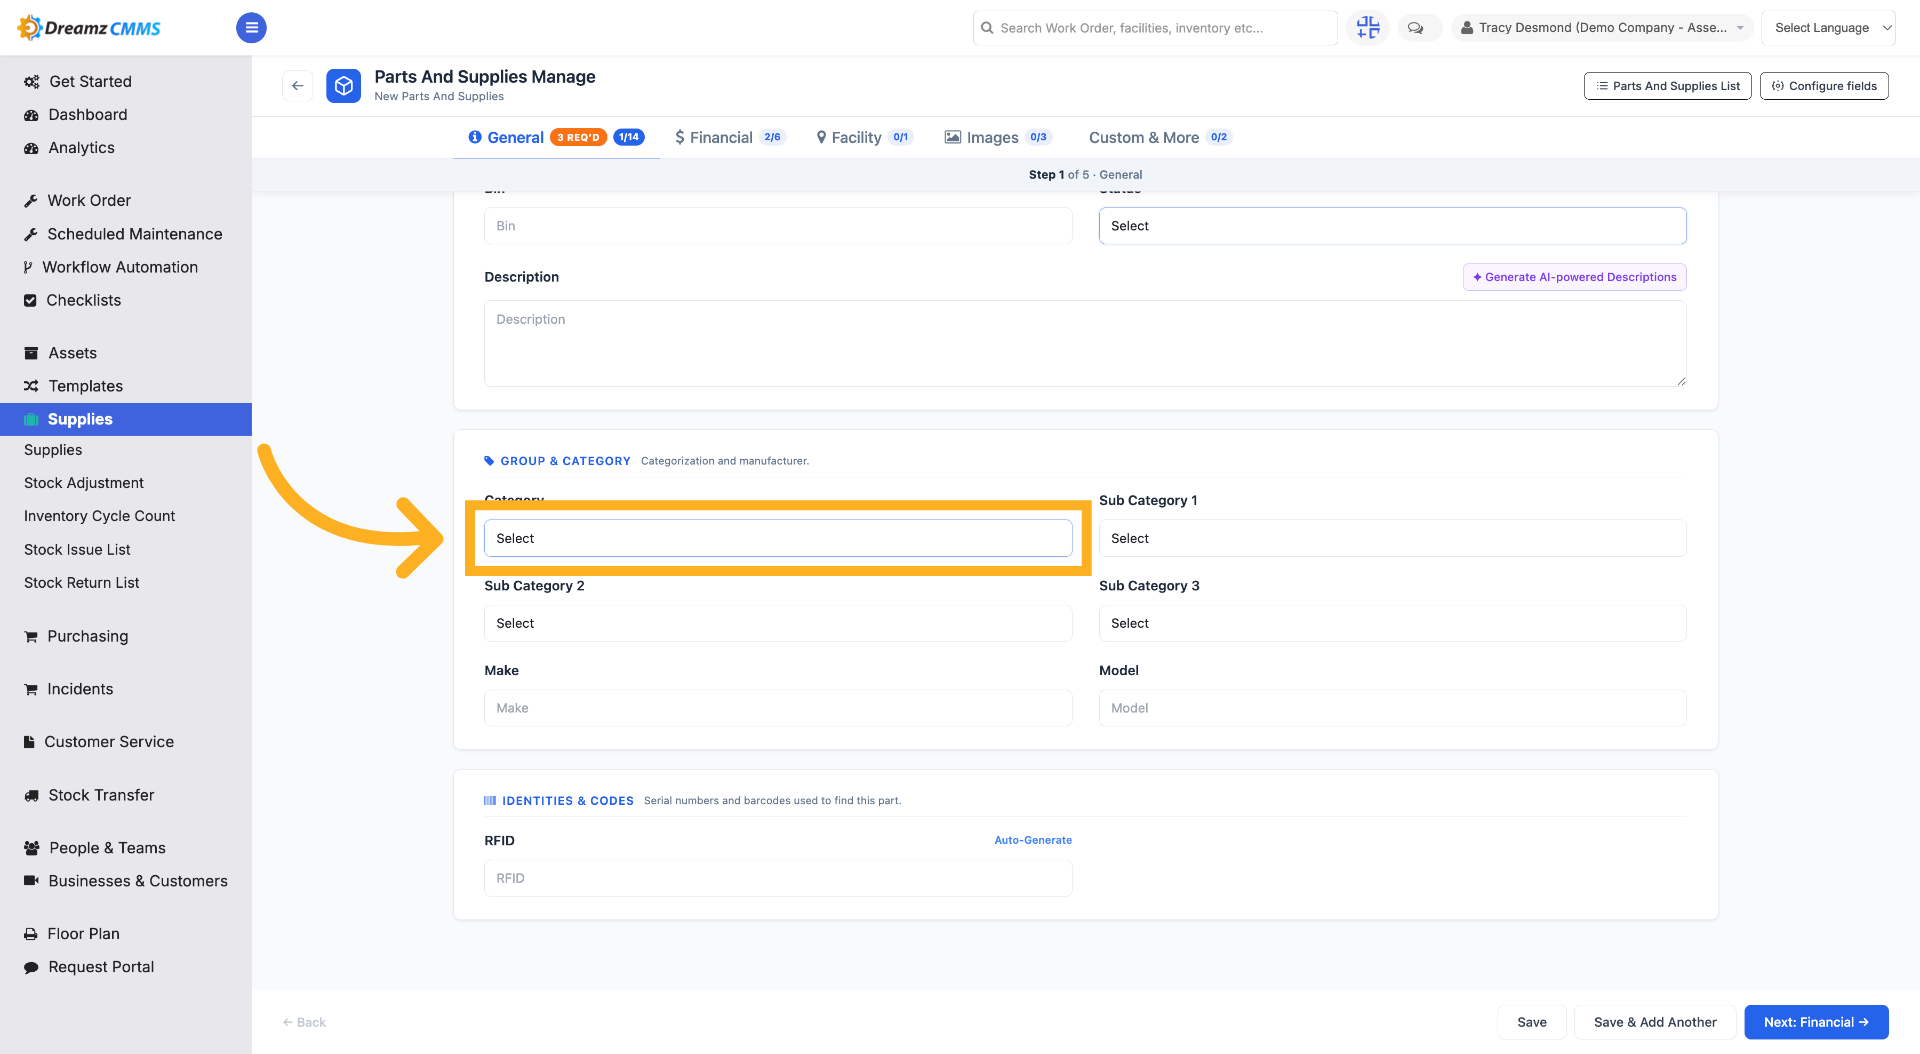
Step 4 – Choose the Category
Click Select to pick the category for the new inventory item.
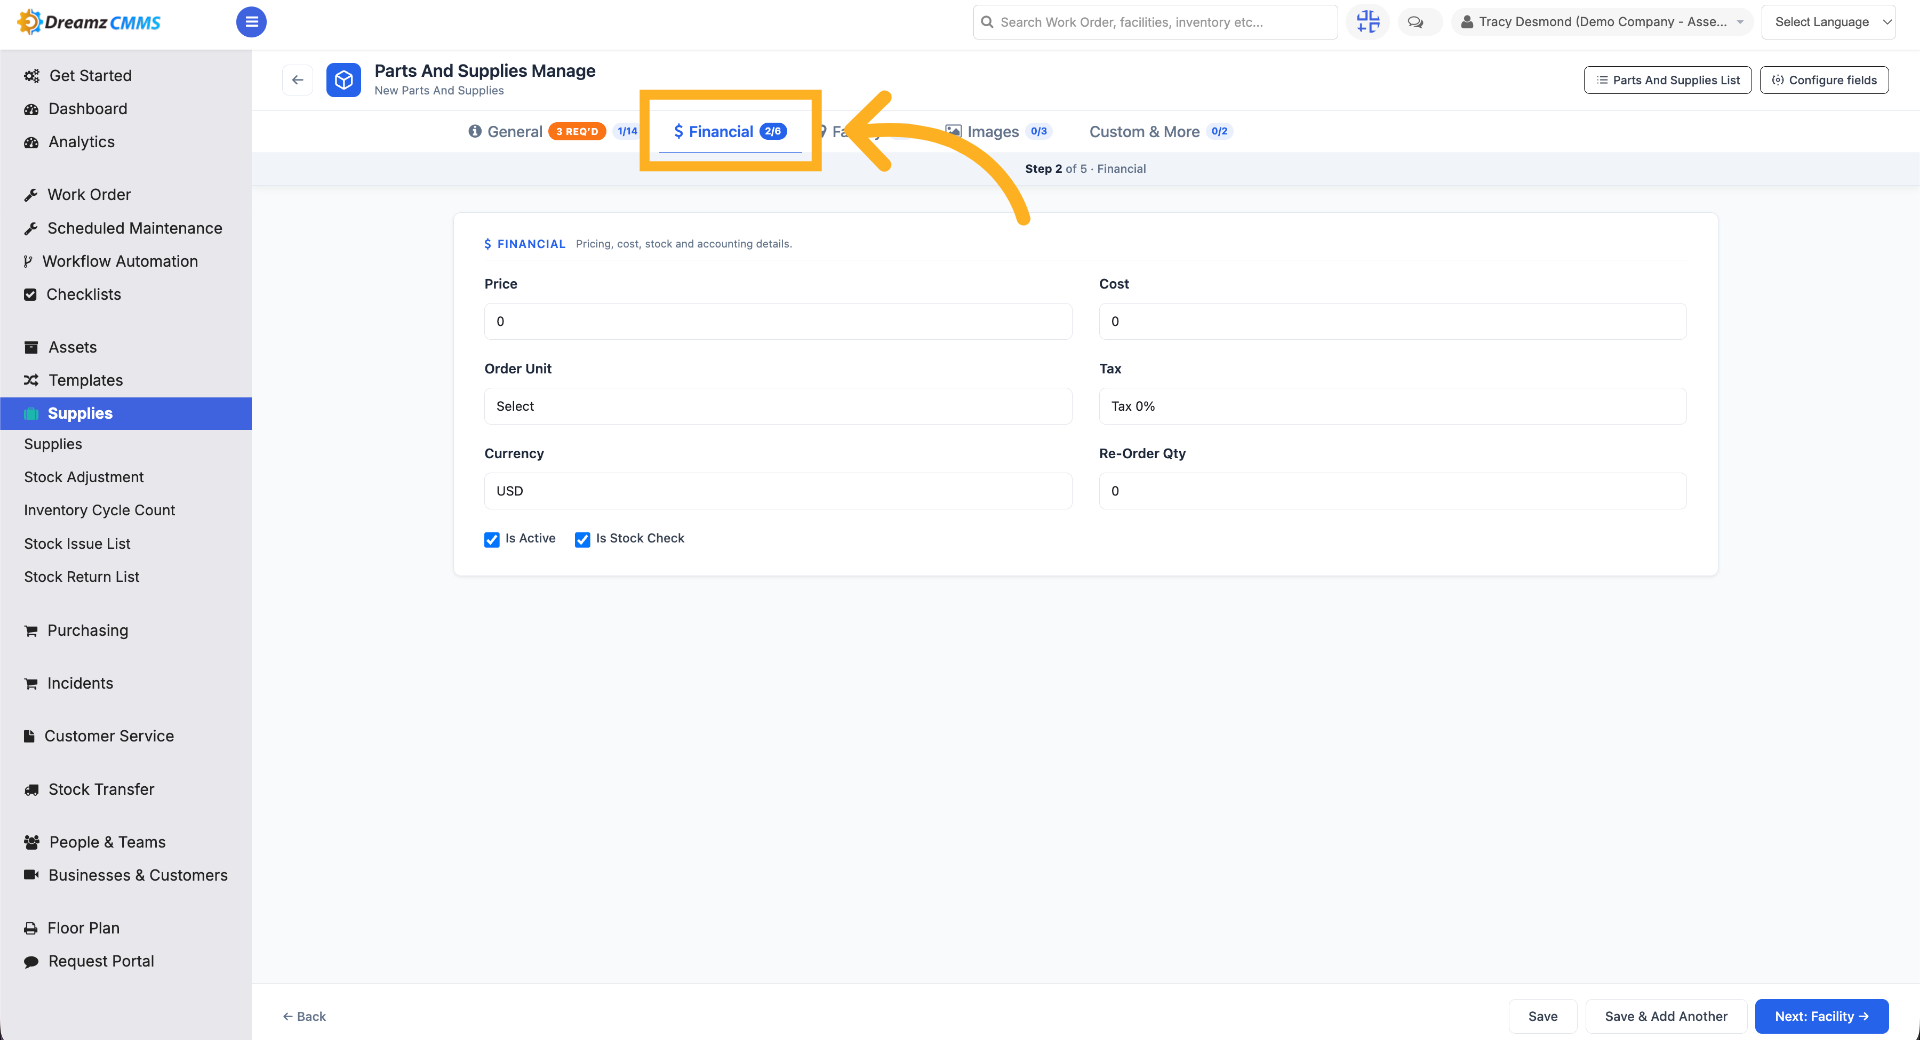
Step 5 – Input Financial Requirements
Click Financial to verify financial details for the new inventory item.
Step 6 – Check Facility Requirements
Click Facility to confirm facility-related requirements for the item.
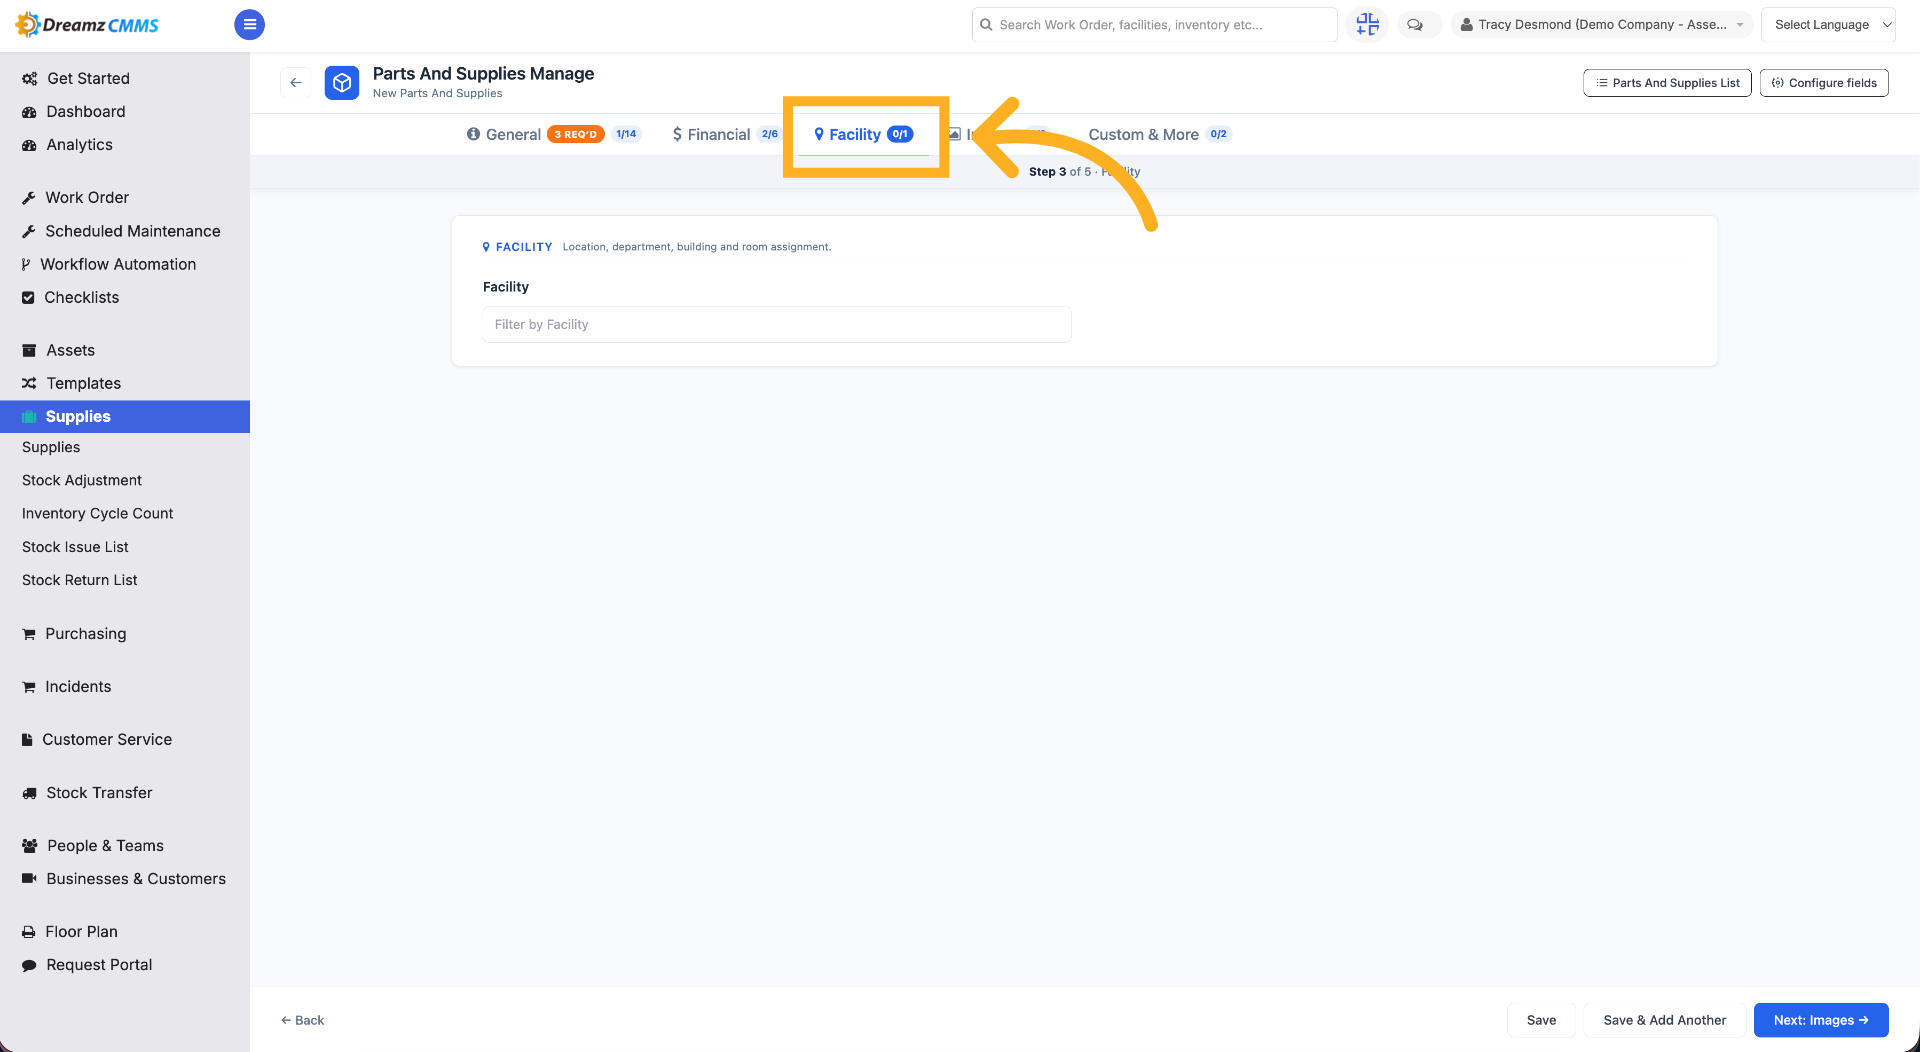
Step 7 – Filter by Facility
Click Filter by Facility to narrow down inventory items based on facility location.
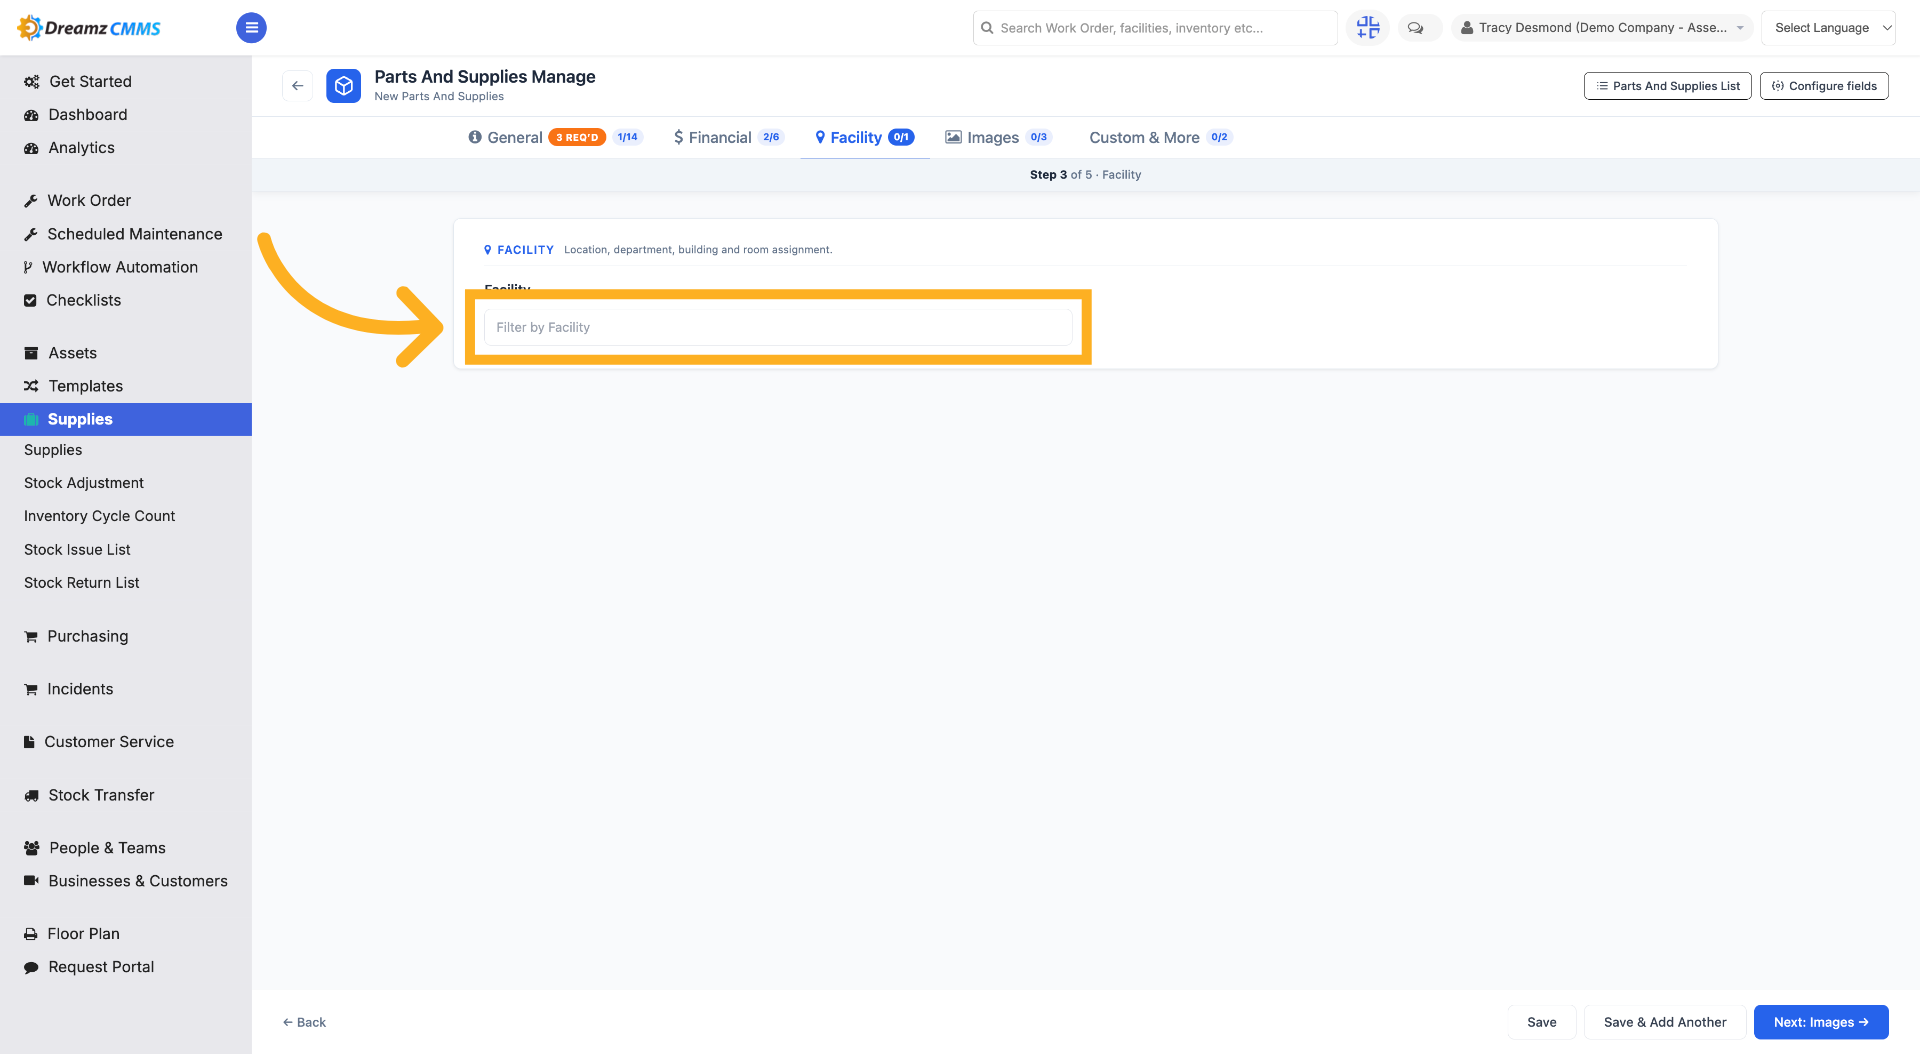
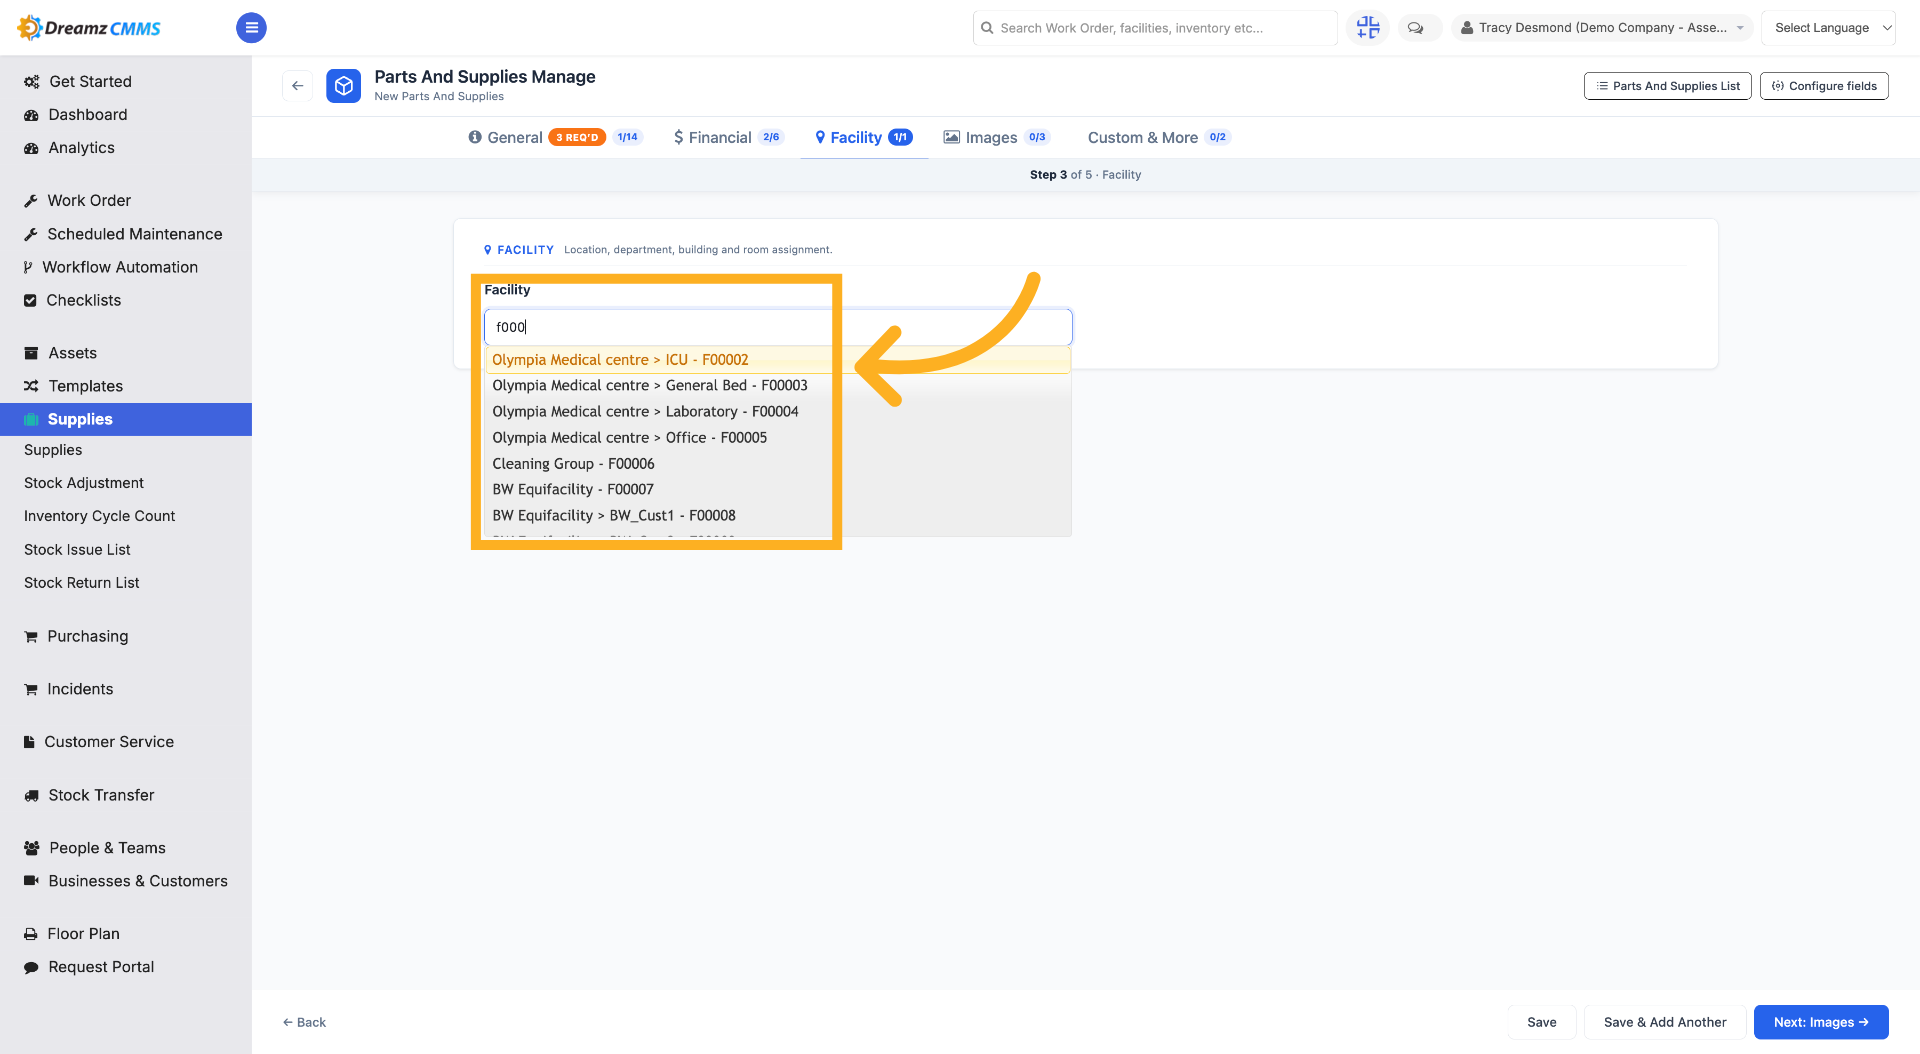
Step 8 – Select Facility Location
Choose from the list of locations to specify the exact facility location.
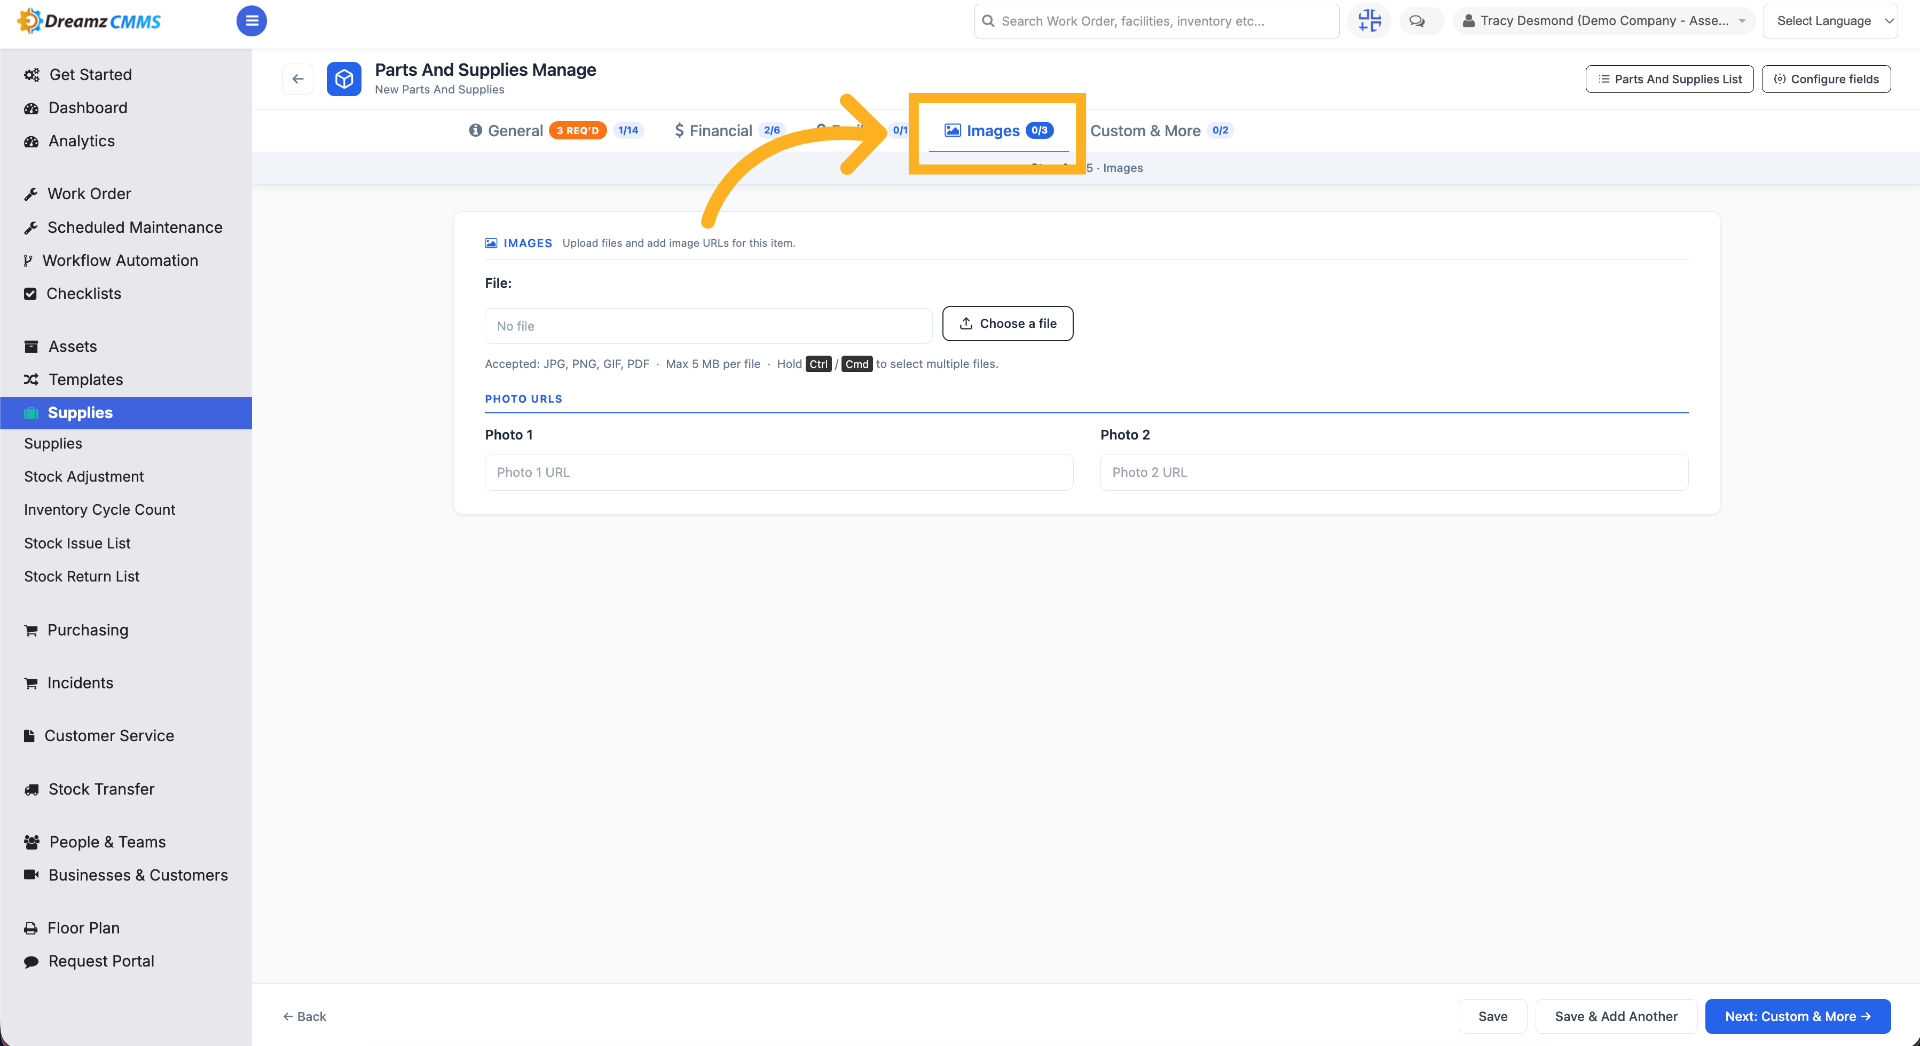
Step 9 – Upload Images
Click to upload images for the newly added inventory item.
Step 10 – Open Custom & More
Click Custom & More to manage additional custom fields and settings for the new inventory.
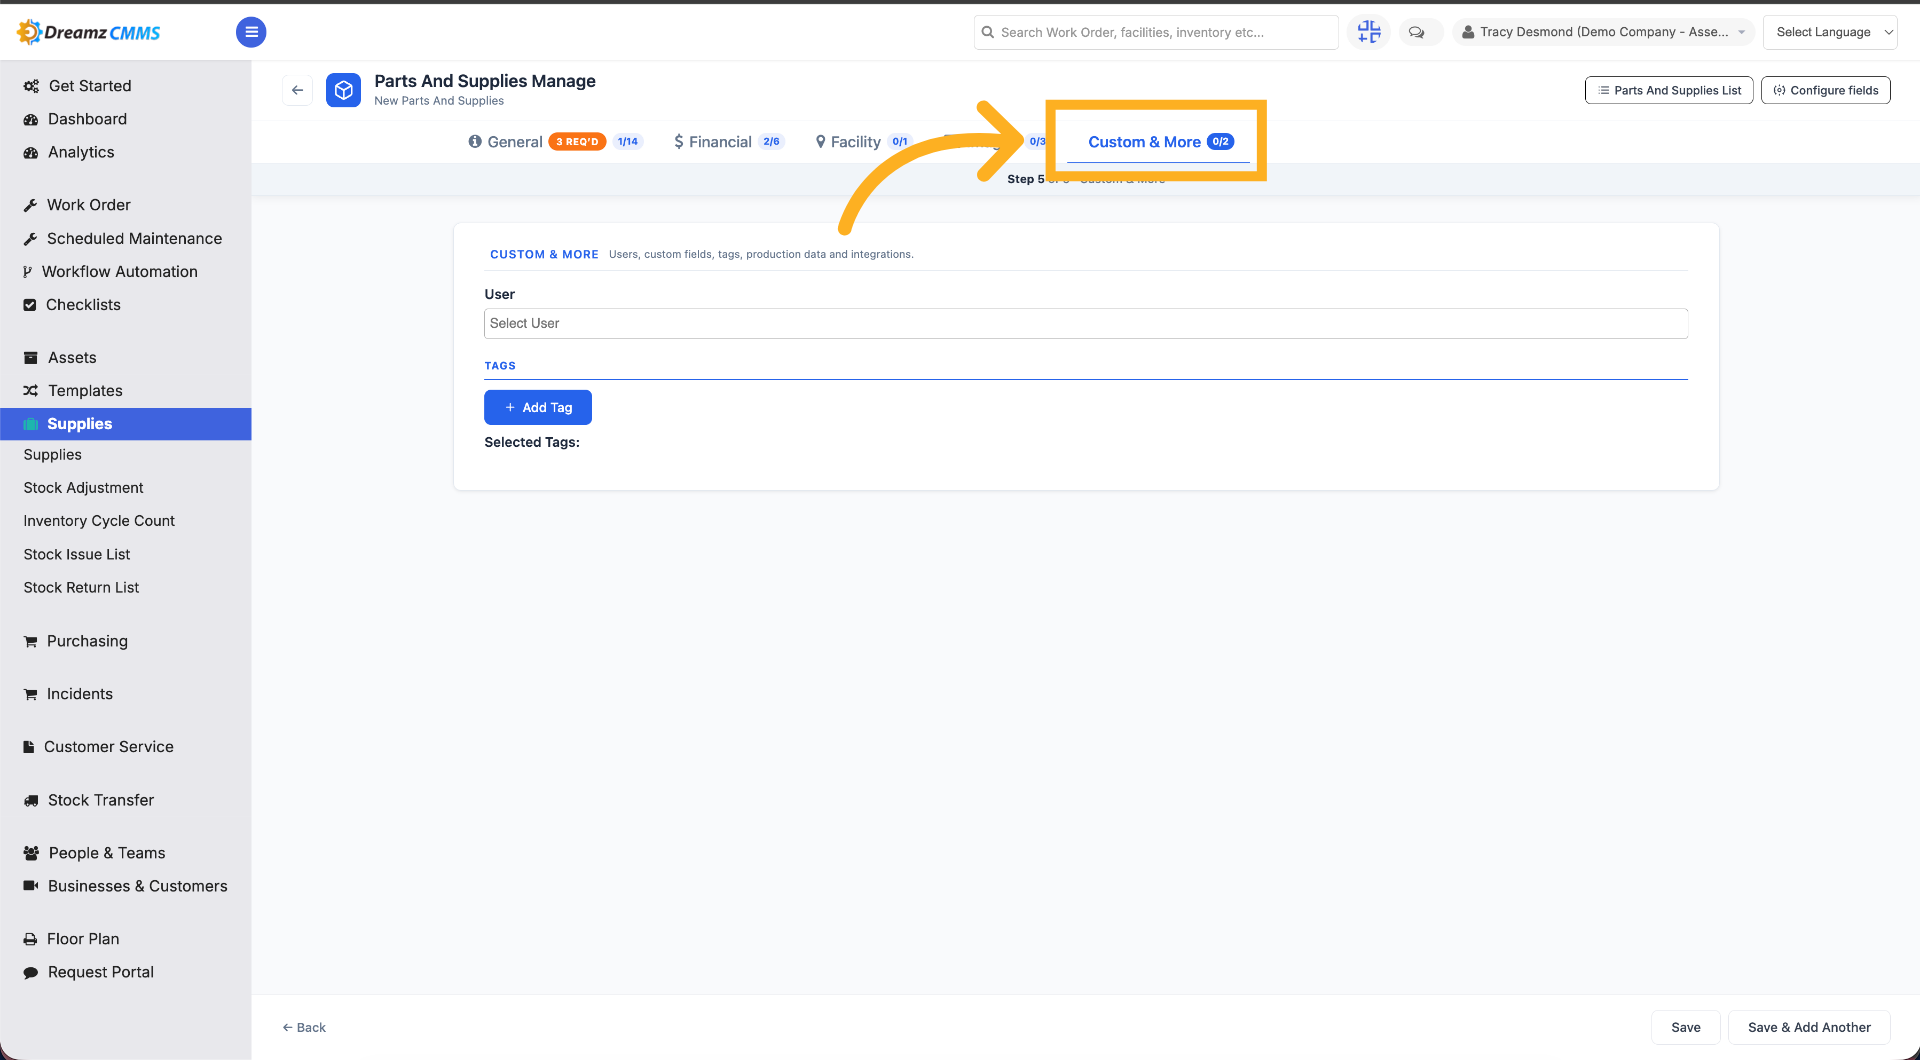
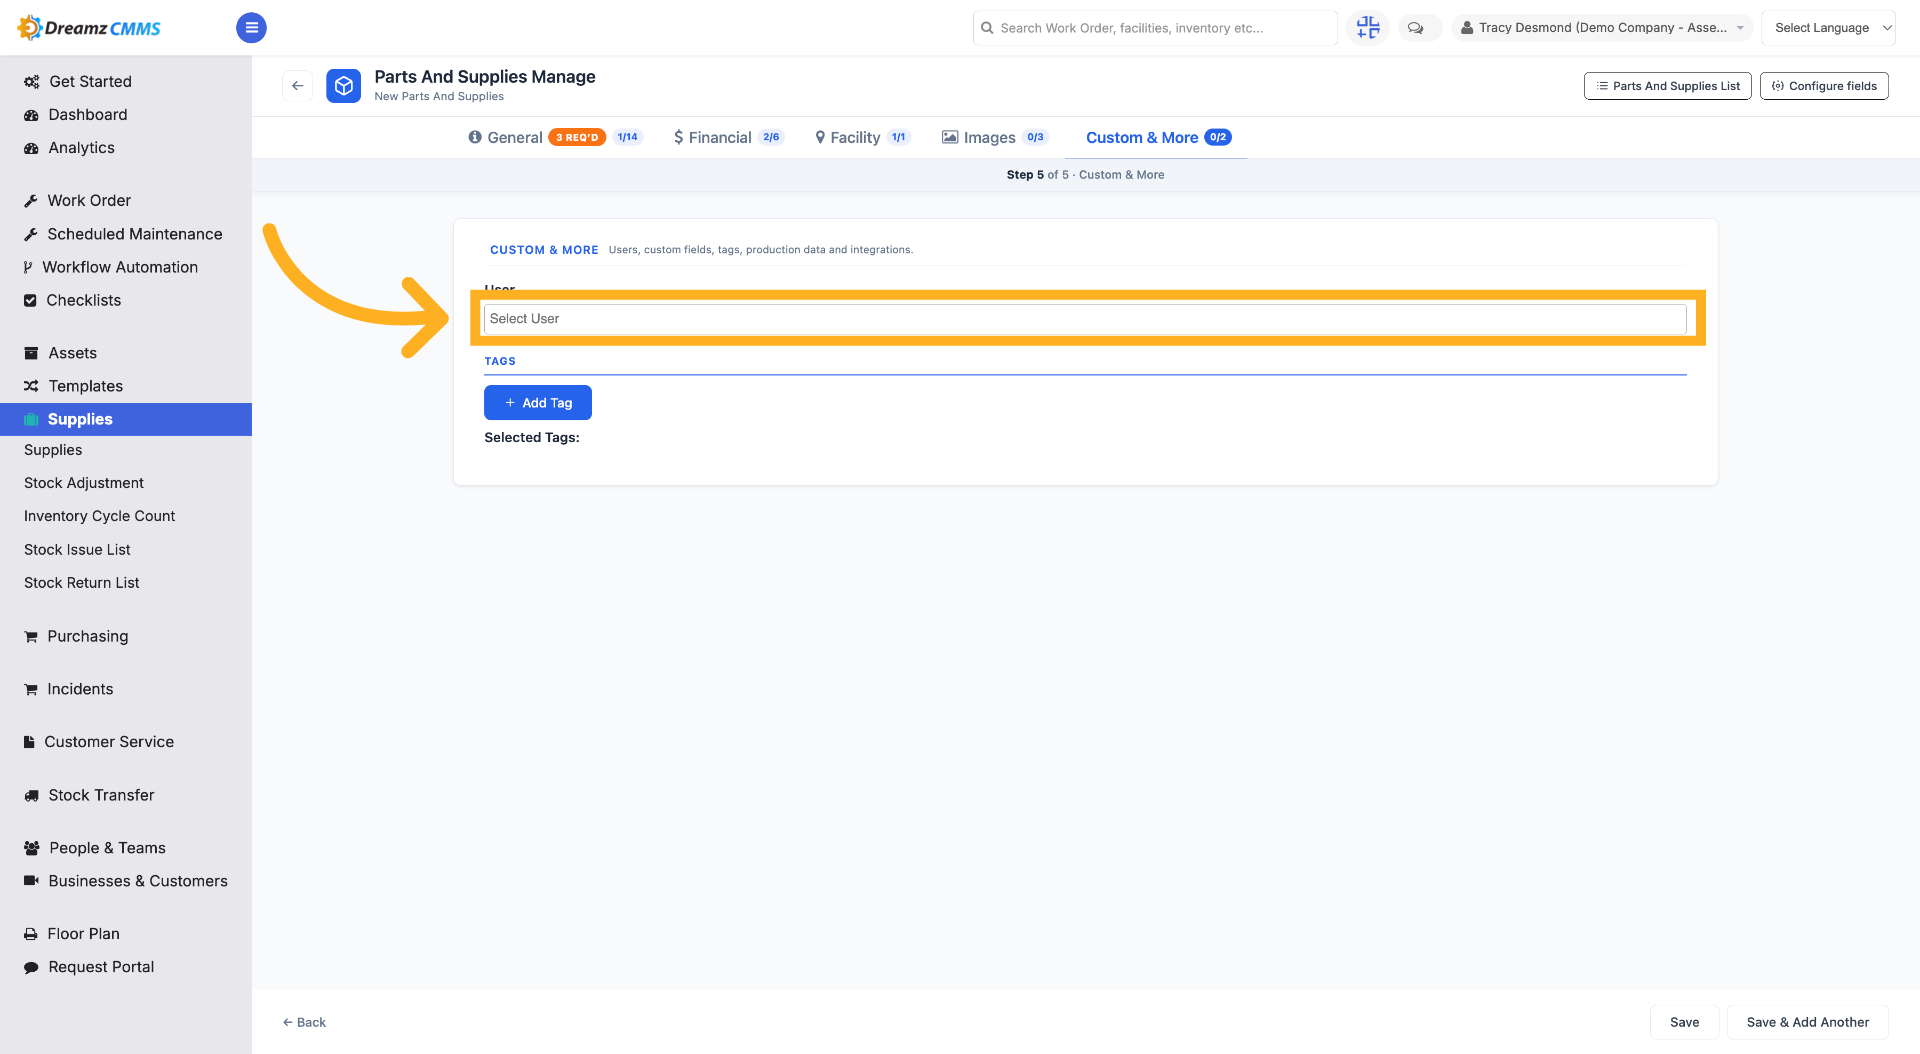
Step 11 – Initiate Search
Click Search to look for specific personnel.
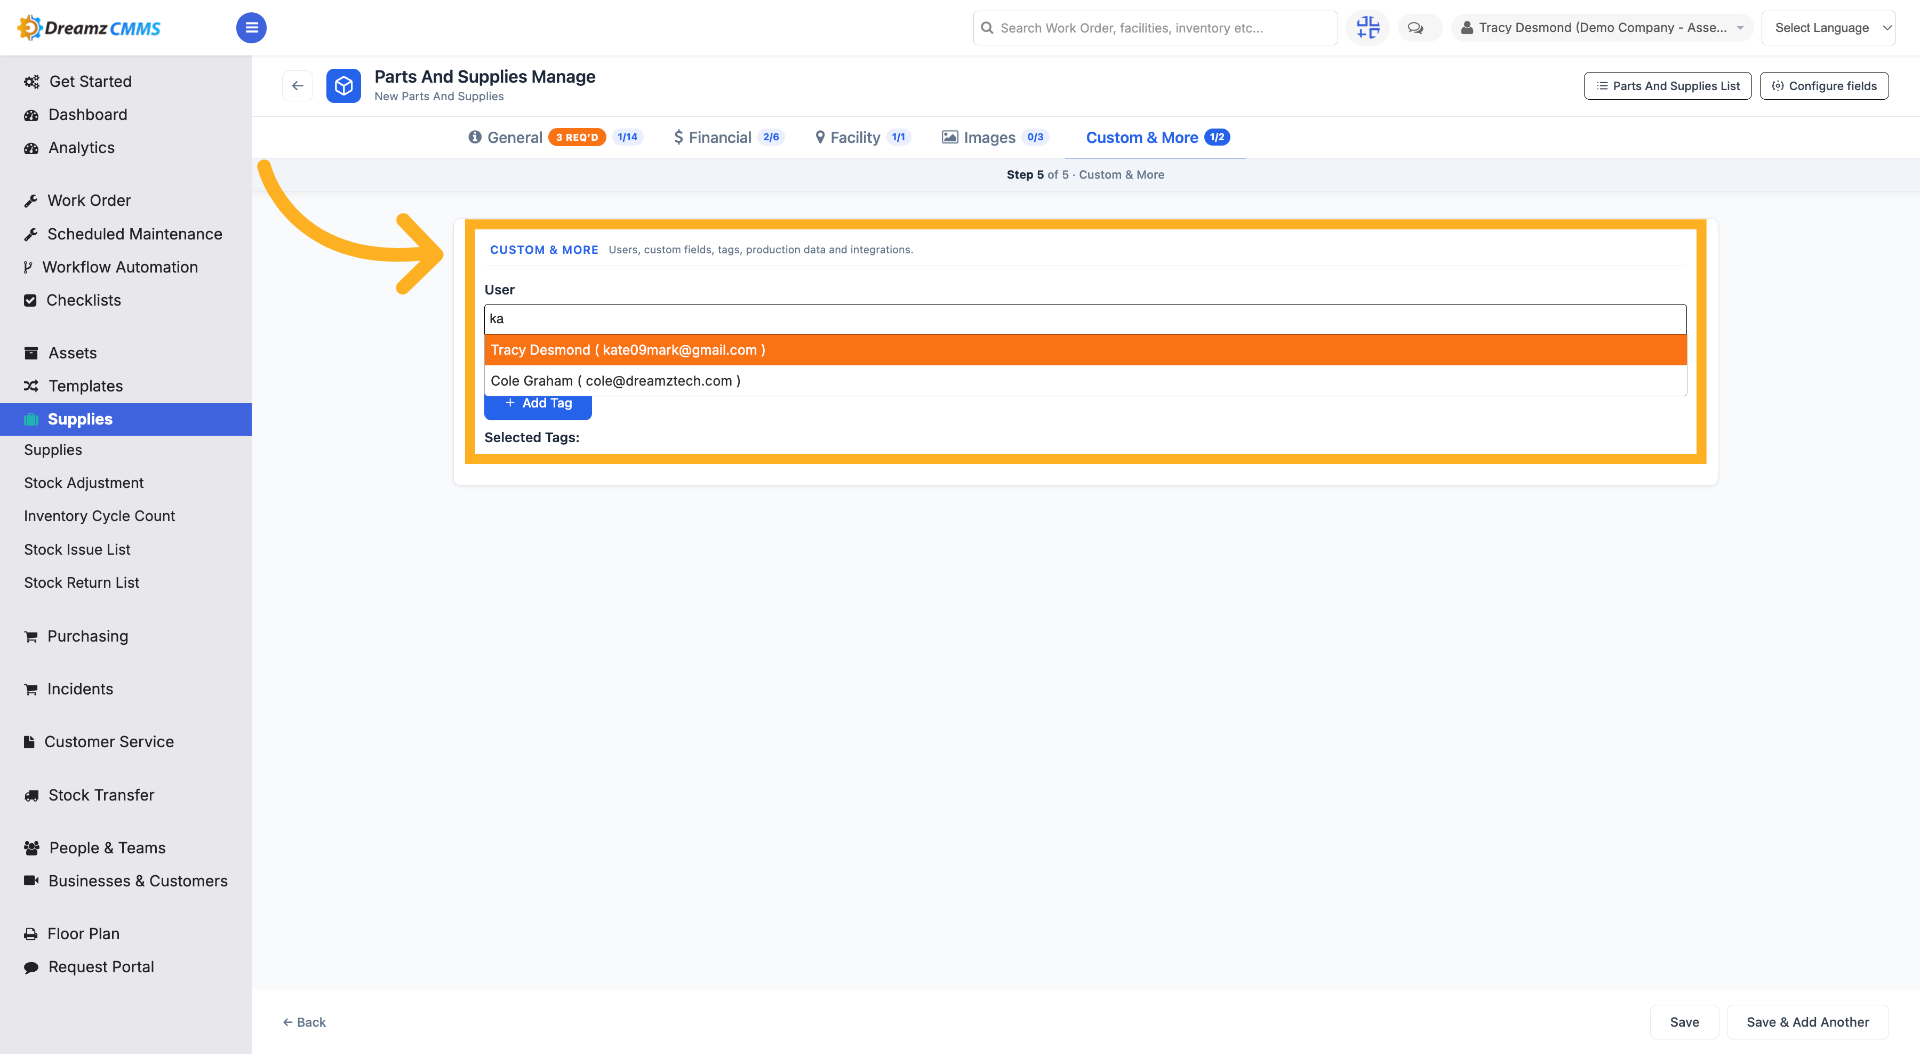
Step 12 – Select an Employee
Start typing to search for users and select one employee from the list.
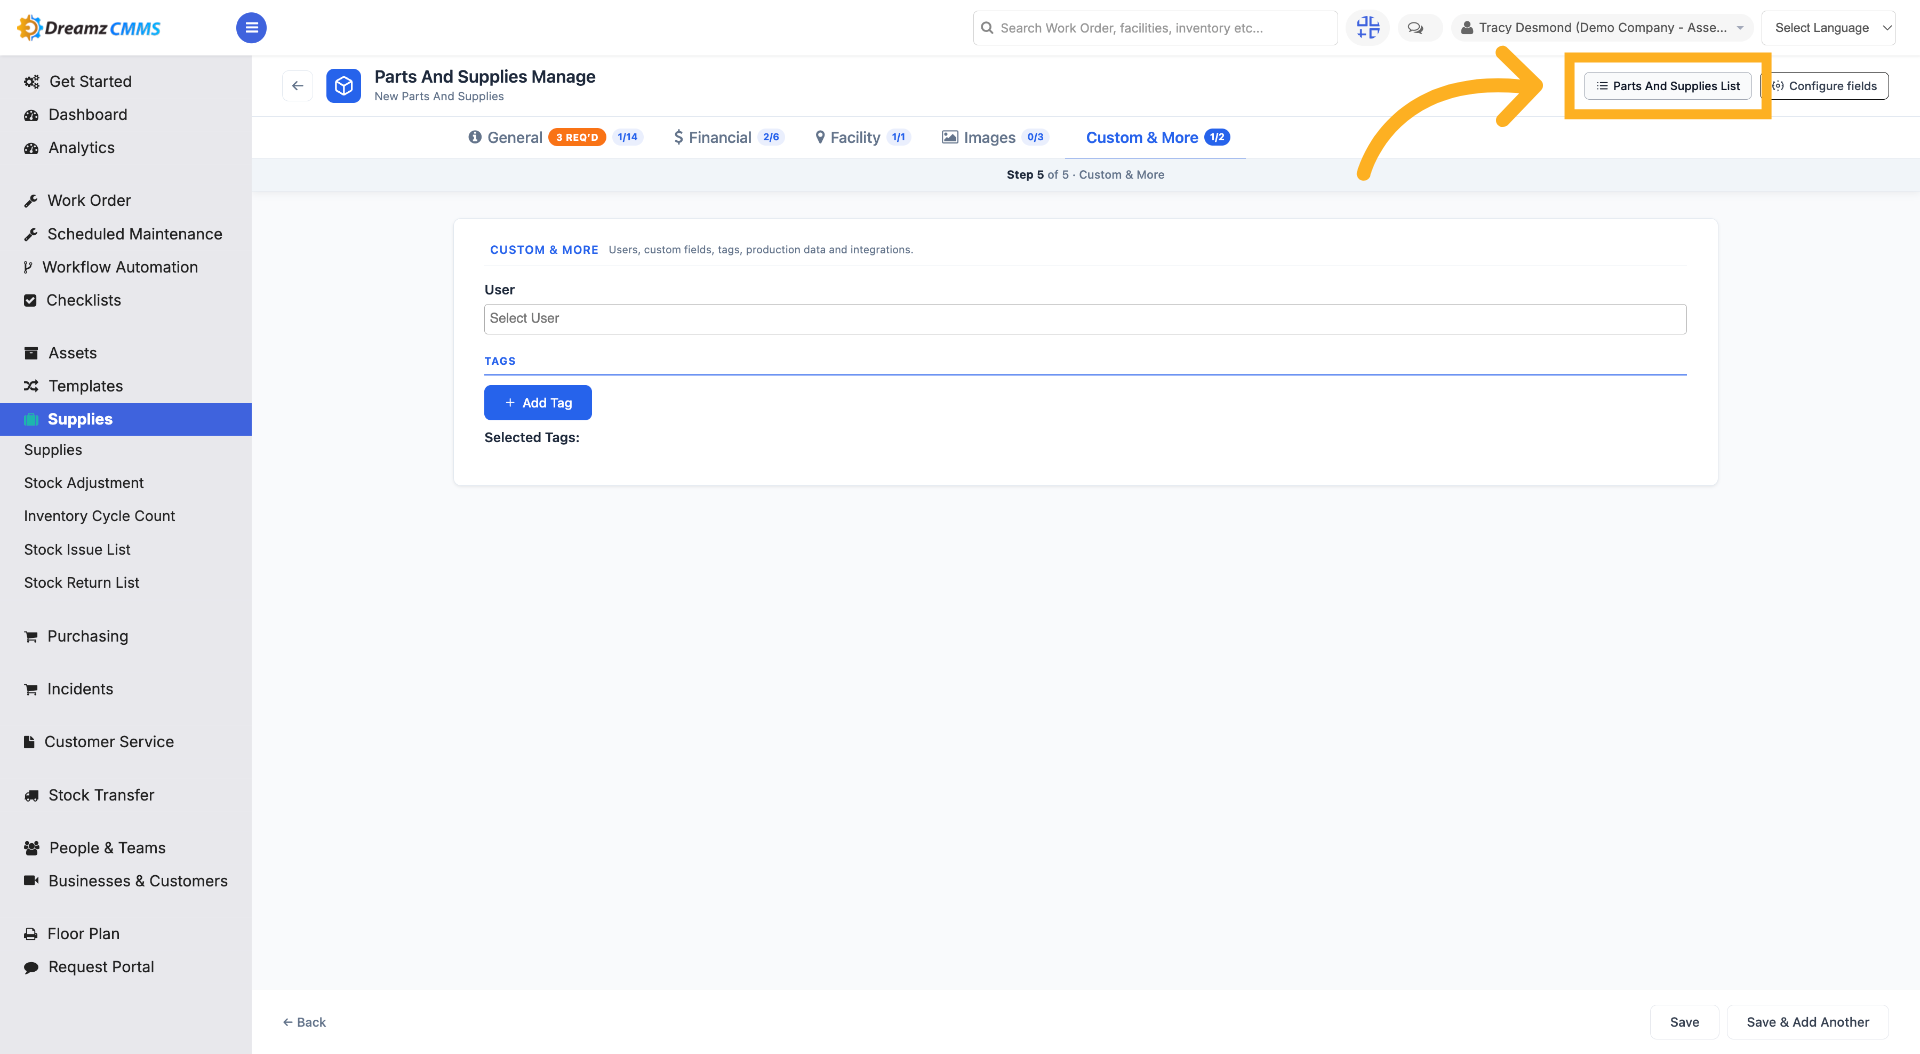
Step 13 – Return to Supply List
Click Parts and Supplies List to go back to the main inventory overview and complete the process.
Tips for Managing Supplies and Inventory
- Customize your visible columns and page size to match how your team reviews inventory day to day.
- Keep supplier and BOM information up to date on each item so procurement and repairs go smoothly.
- Use tags to group related inventory items for faster searching and reporting.
- Attach images and files to inventory items so technicians can quickly identify parts in the field.
- Use the Filter by Facility option when managing inventory across multiple sites.
Frequently Asked Questions
Can I create a purchase request directly from the inventory list?
Yes. Use the three-dot menu in the top right corner of the Parts and Supplies list to create a purchase request, print, or export the list.
Can I link a supplier to a specific inventory item?
Yes. Open the item, go to the Procurement tab, and use Add Supplier to select a supplier business.
Can I add a bill of materials (BOM) to an inventory item?
Yes. Open the item's BOM & People tab and use Add BOM Line to include components, tools, parts, or service items.
Can I filter inventory by facility?
Yes. Use the Filter by Facility option to narrow the list down to a specific facility location.
Where do I check stock levels for an item?
Open the item and go to the Stock tab to view current stock levels and quantities.