Manage and Configure Work Orders in DreamzCMMS
This tutorial guides you through managing work orders using DreamzCMMS. You will learn how to filter, create, update, and track work orders effectively, along with how to view them in map, calendar, and Gantt views.
Overview
Work Orders are the core of your maintenance operations in DreamzCMMS. From the Work Order section, you can filter and sort existing work orders, create new ones with assets, checklists, and financial details, track progress through meter readings and status updates, and view your workload in list, map, calendar, Gantt, or table views.
Before You Begin
- You must have access to the Work Orders section in your account.
- Know the facility, assignee, requester, and any assets or checklists that apply to the work order before you start creating one.
How to Navigate and Filter the Work Order List
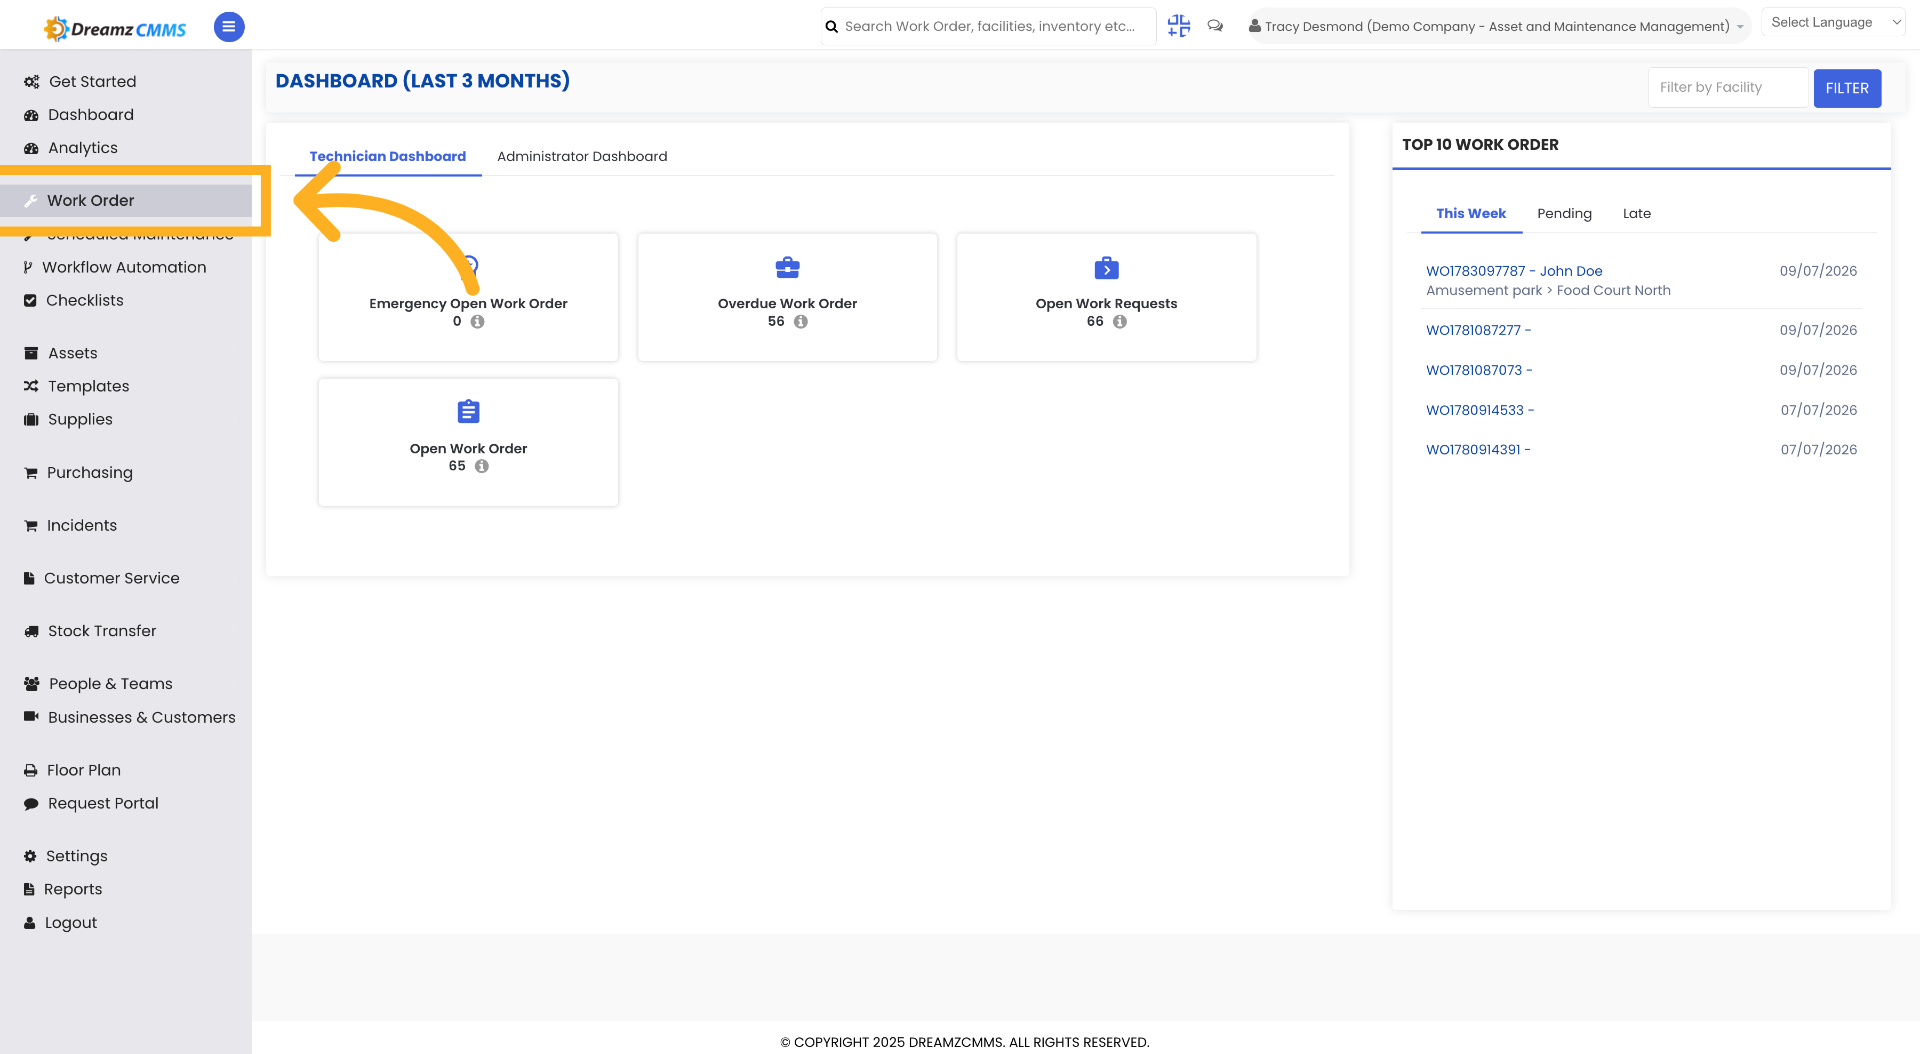
Step 1 – Access Work Orders Section
Click "Work Order" to open the work orders section in the dashboard.
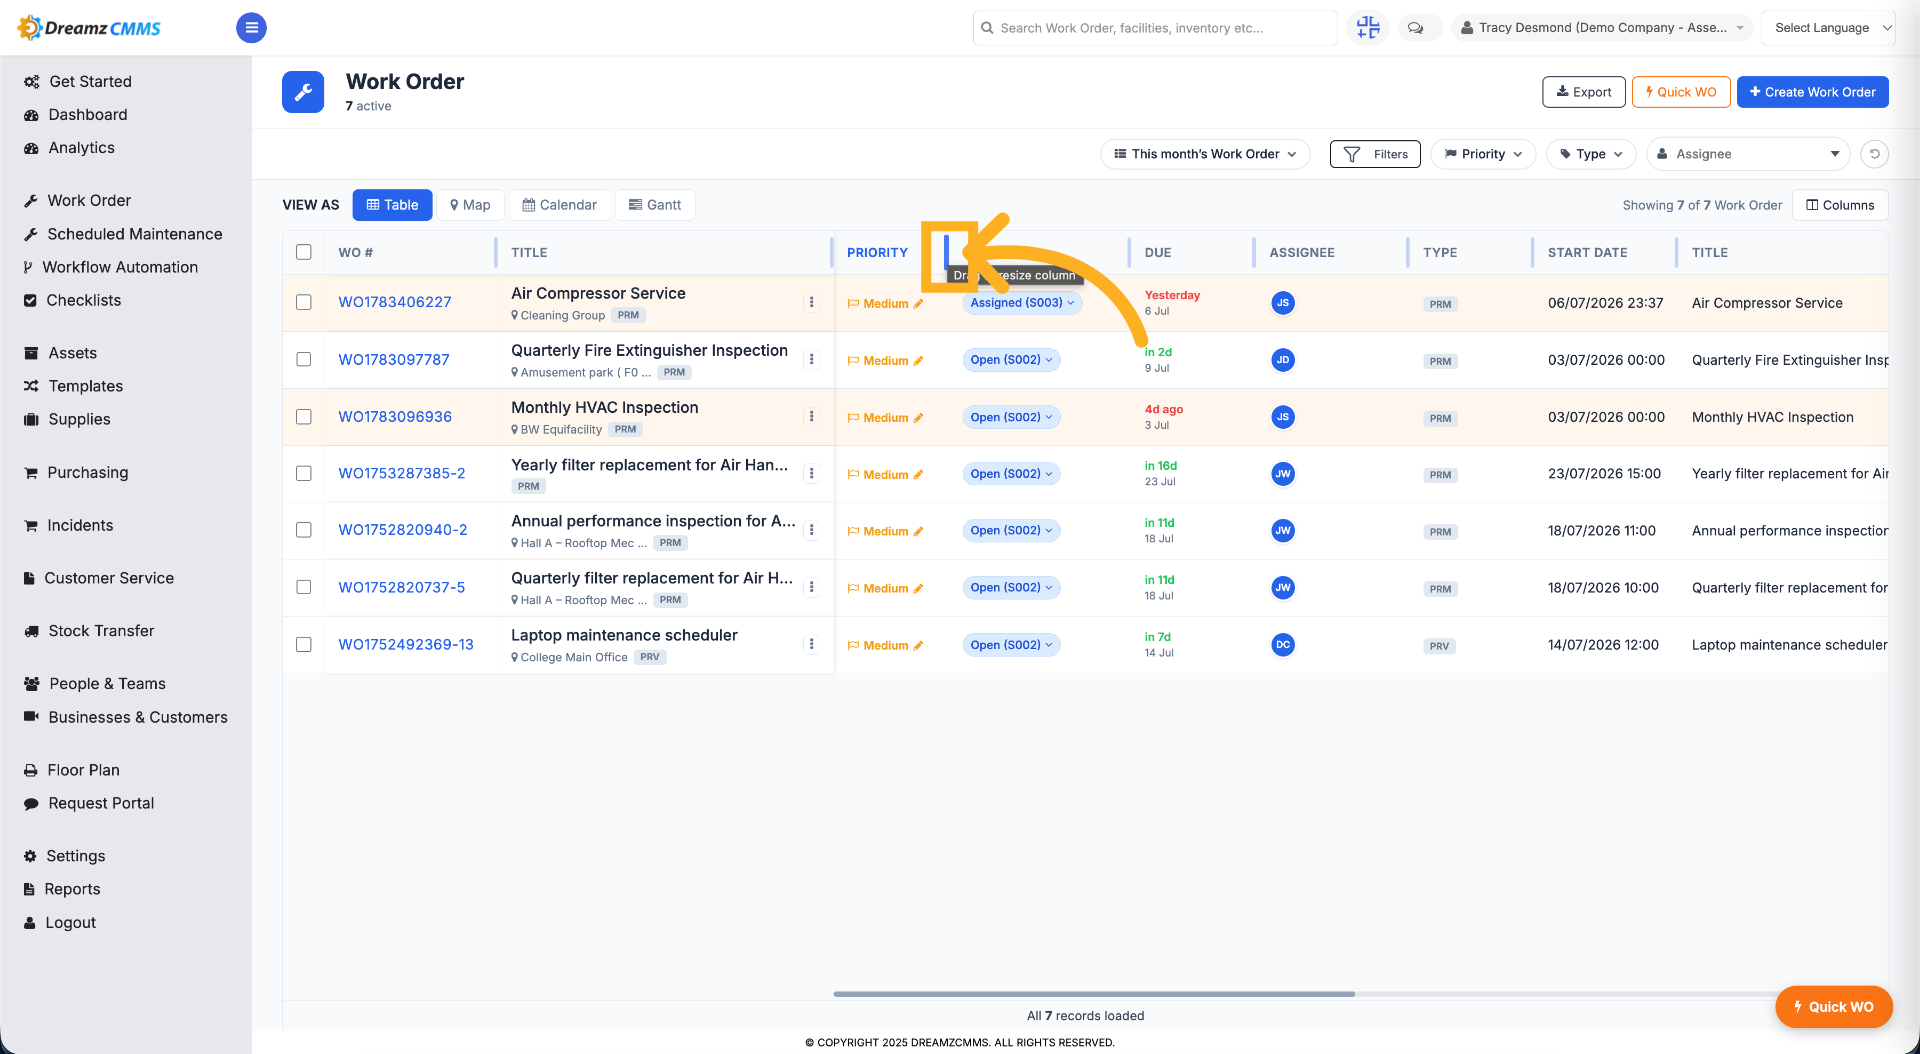
Step 2 – Use the Splitter
Click the splitter and drag to decrease or increase the size of the columns.
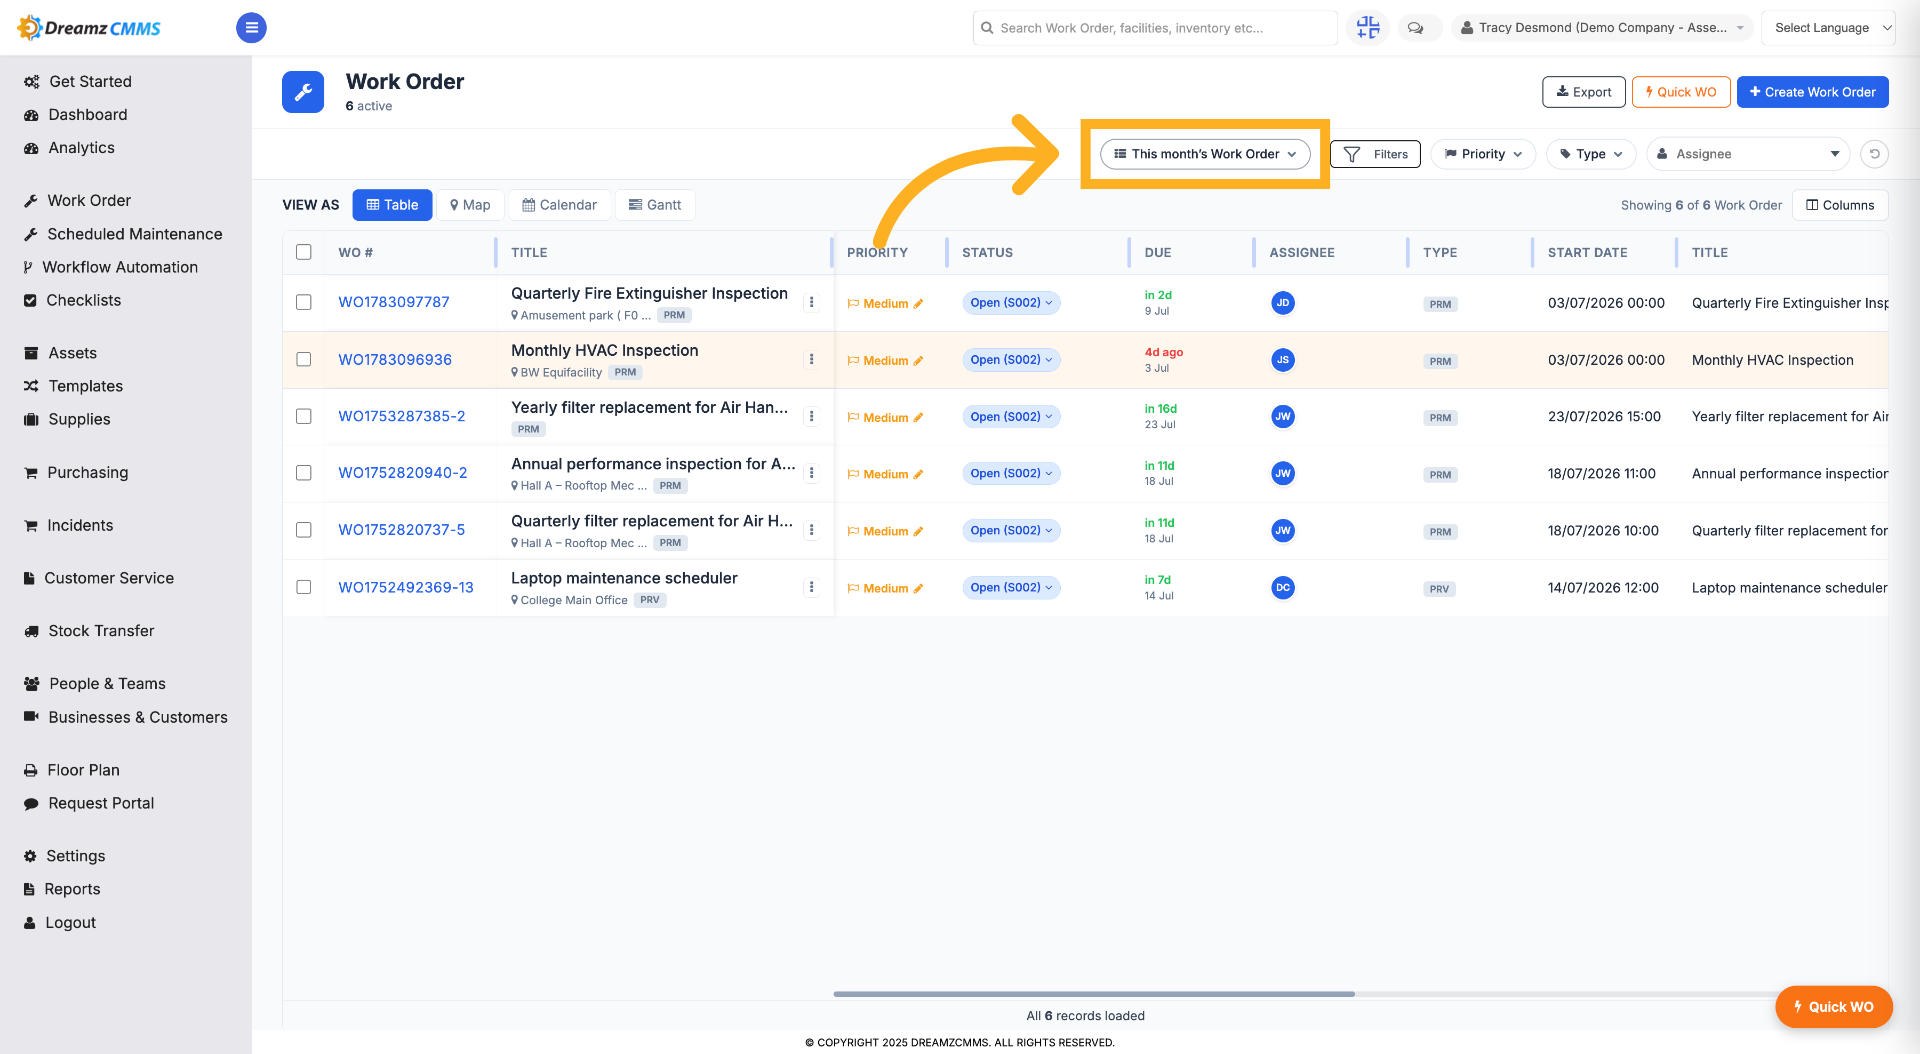
Step 3 – View This Month's Work Orders
Click "This Month's Work Order" to display work orders created in the current month.
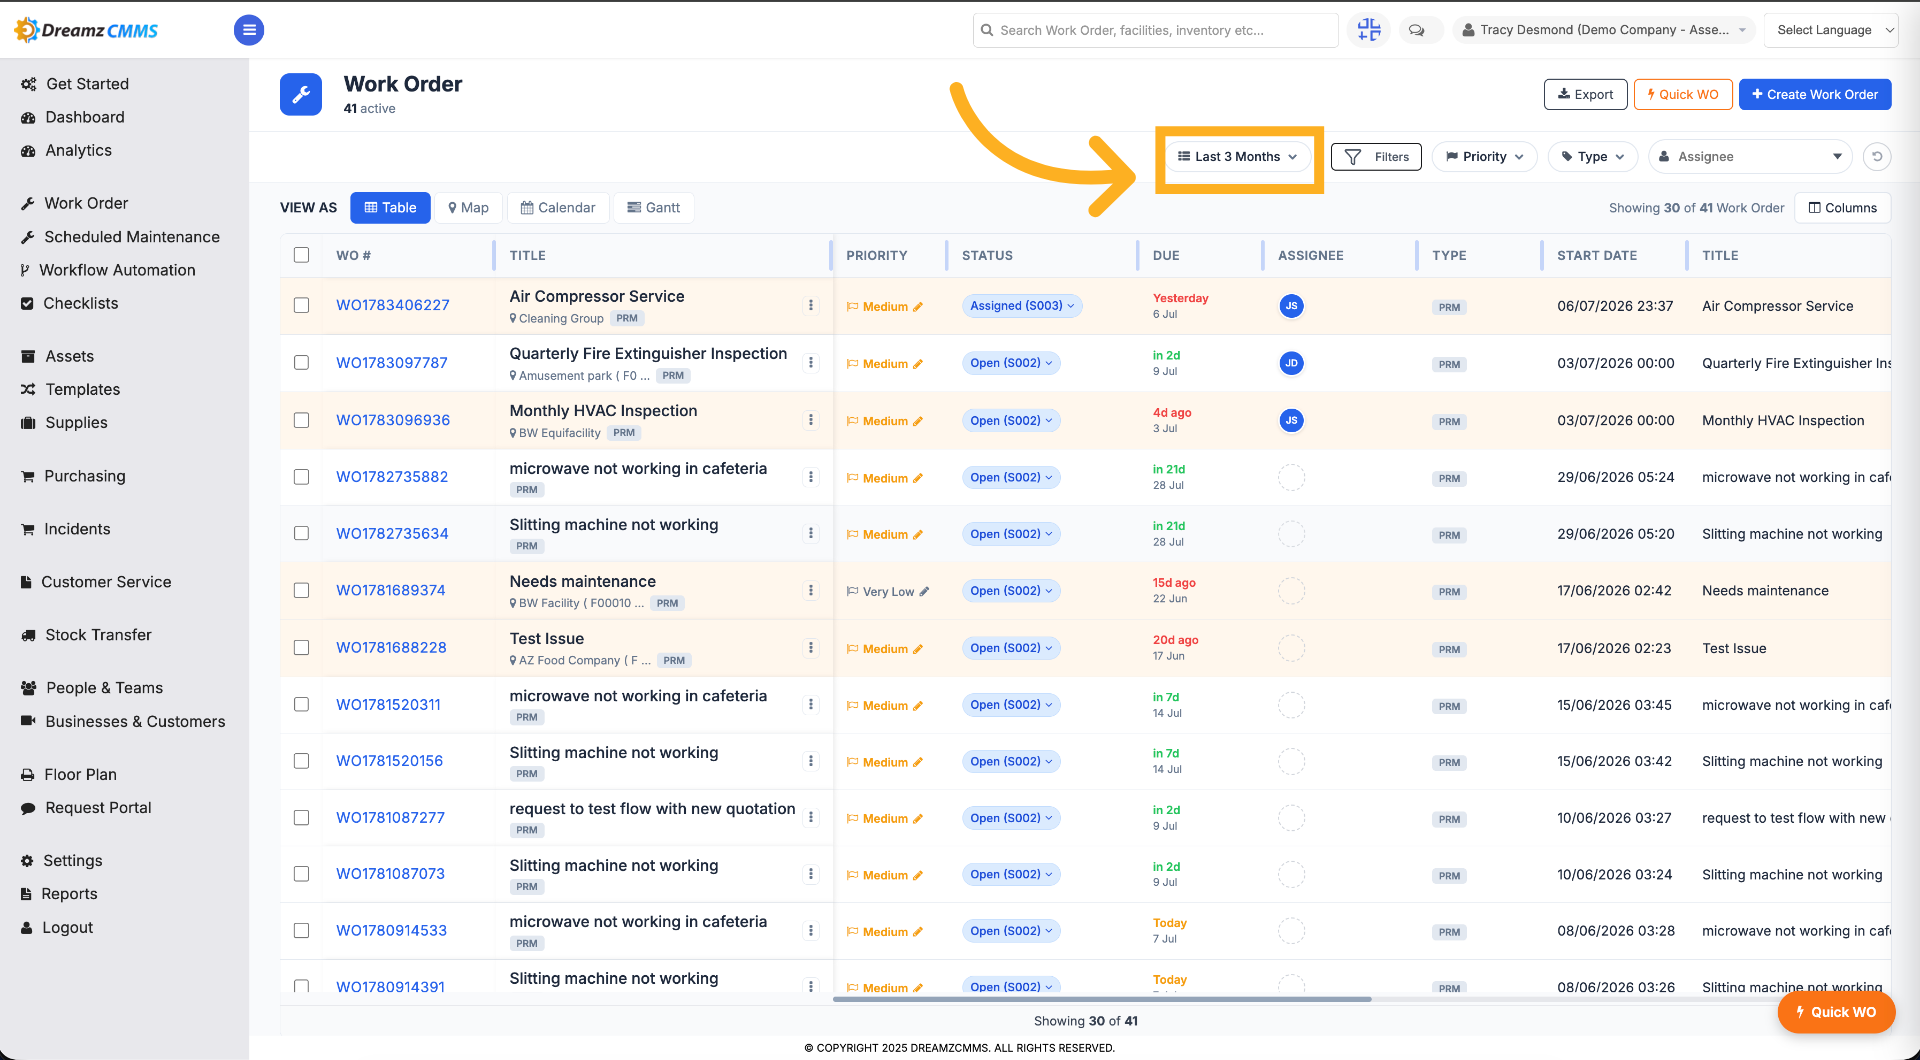
Step 4 – Filter Work Orders by Date Range
Click "Last 3 Months" to filter work orders from the past three months.
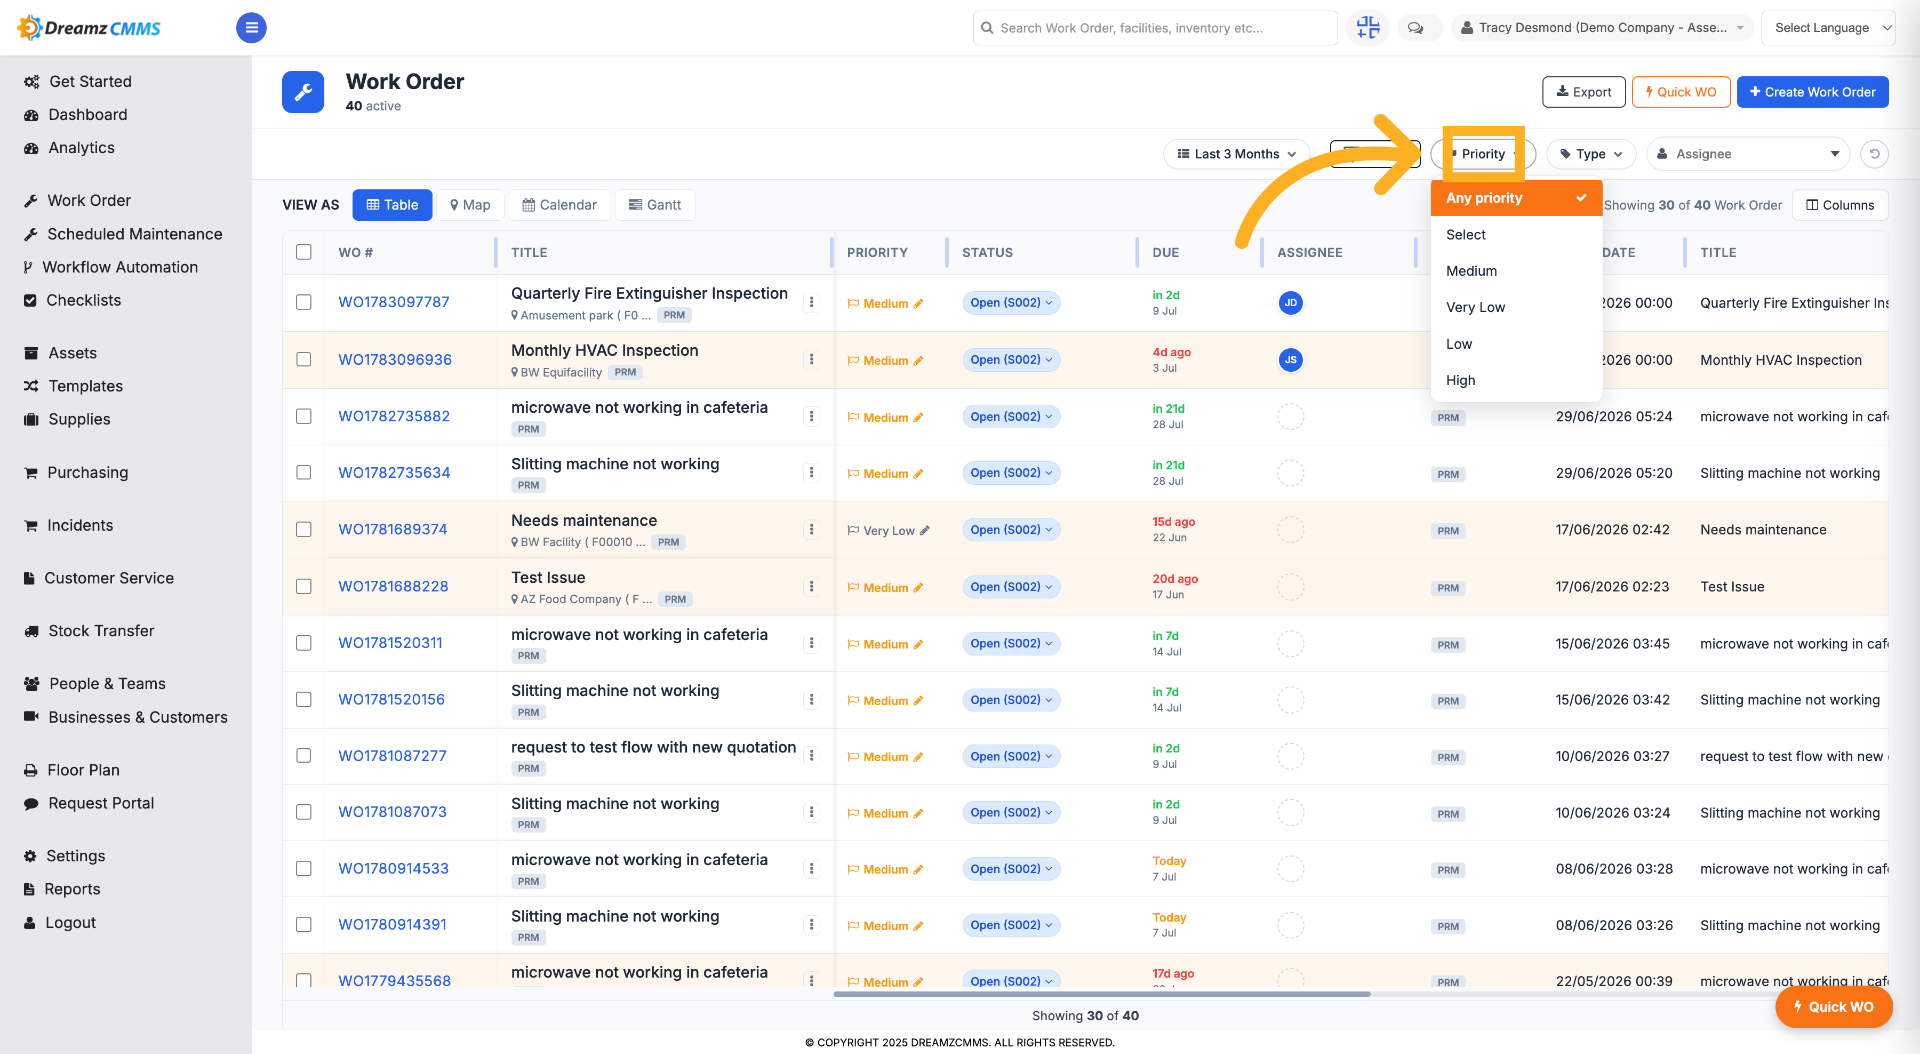
Step 5 – Sort Work Orders by Priority
Click "Priority" to sort work orders by priority level, such as Medium, Low, or High.
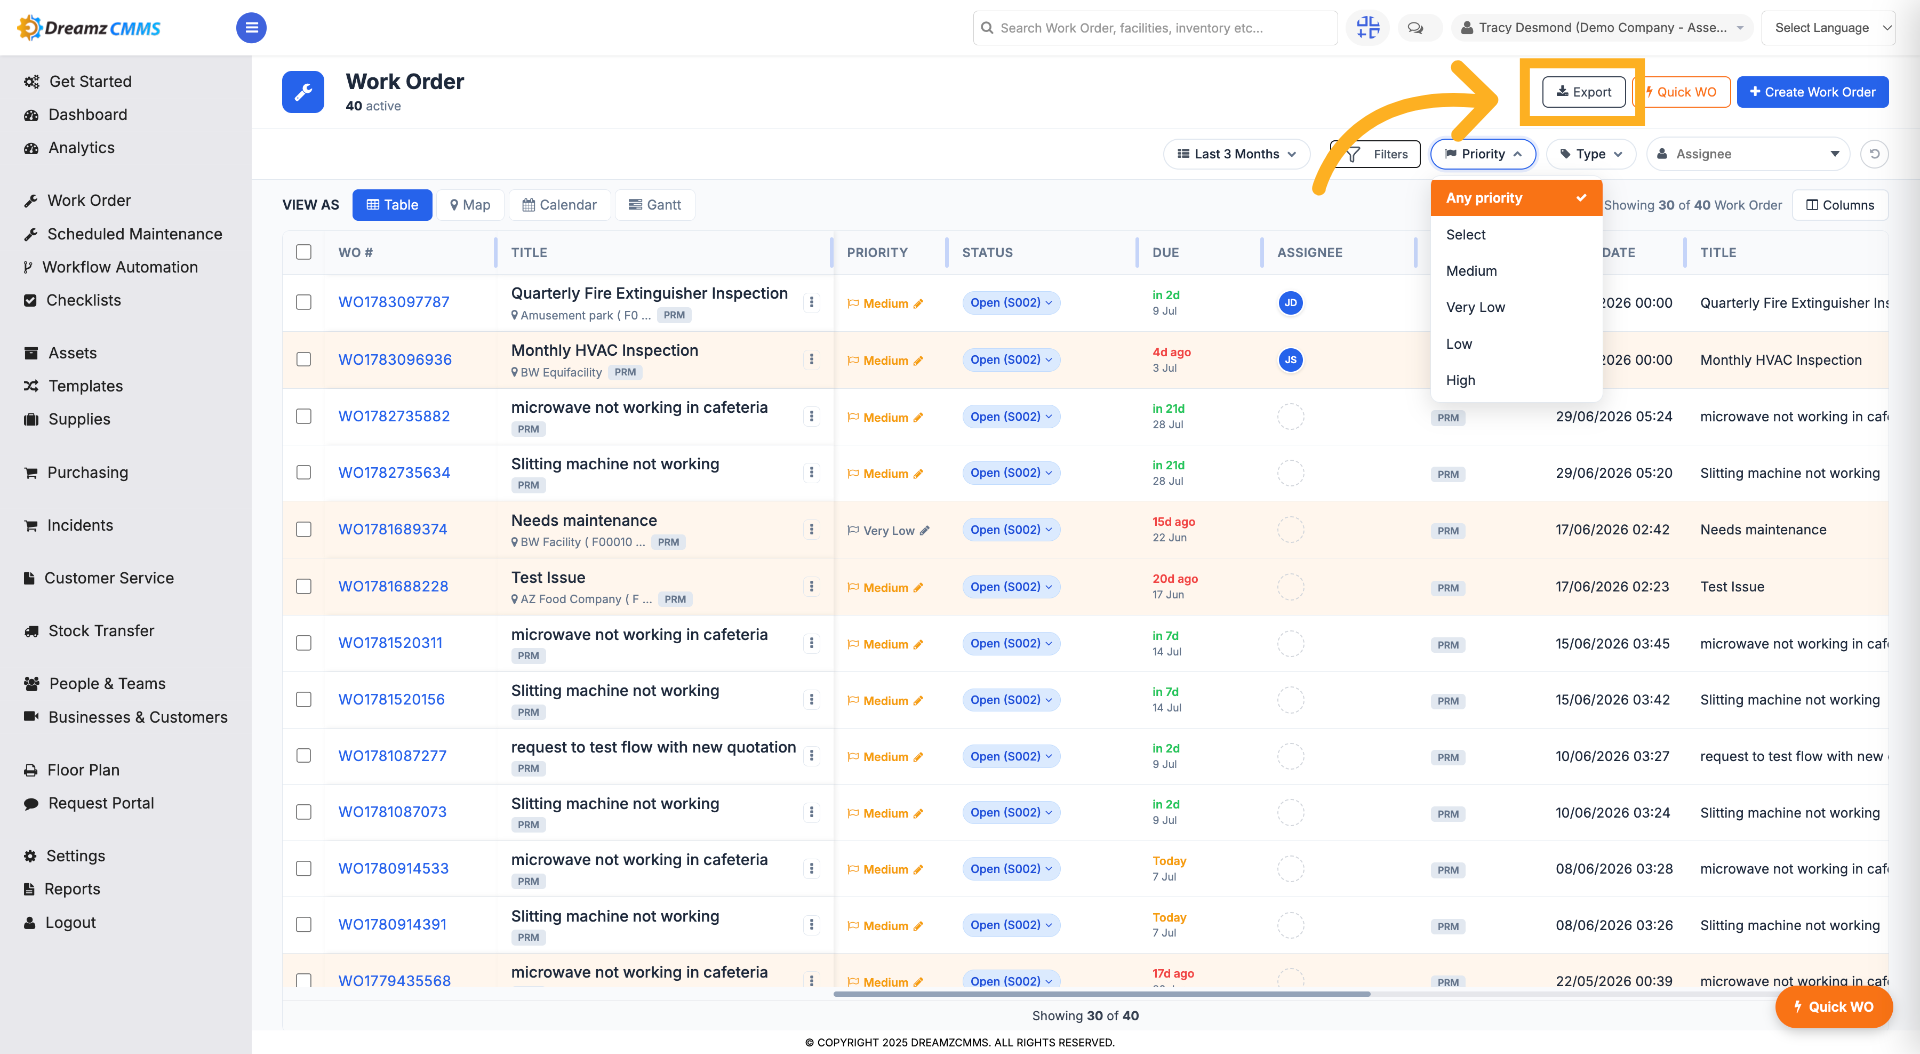
Step 6 – Open Work Order Export Options
Click "Export" to export the work orders.
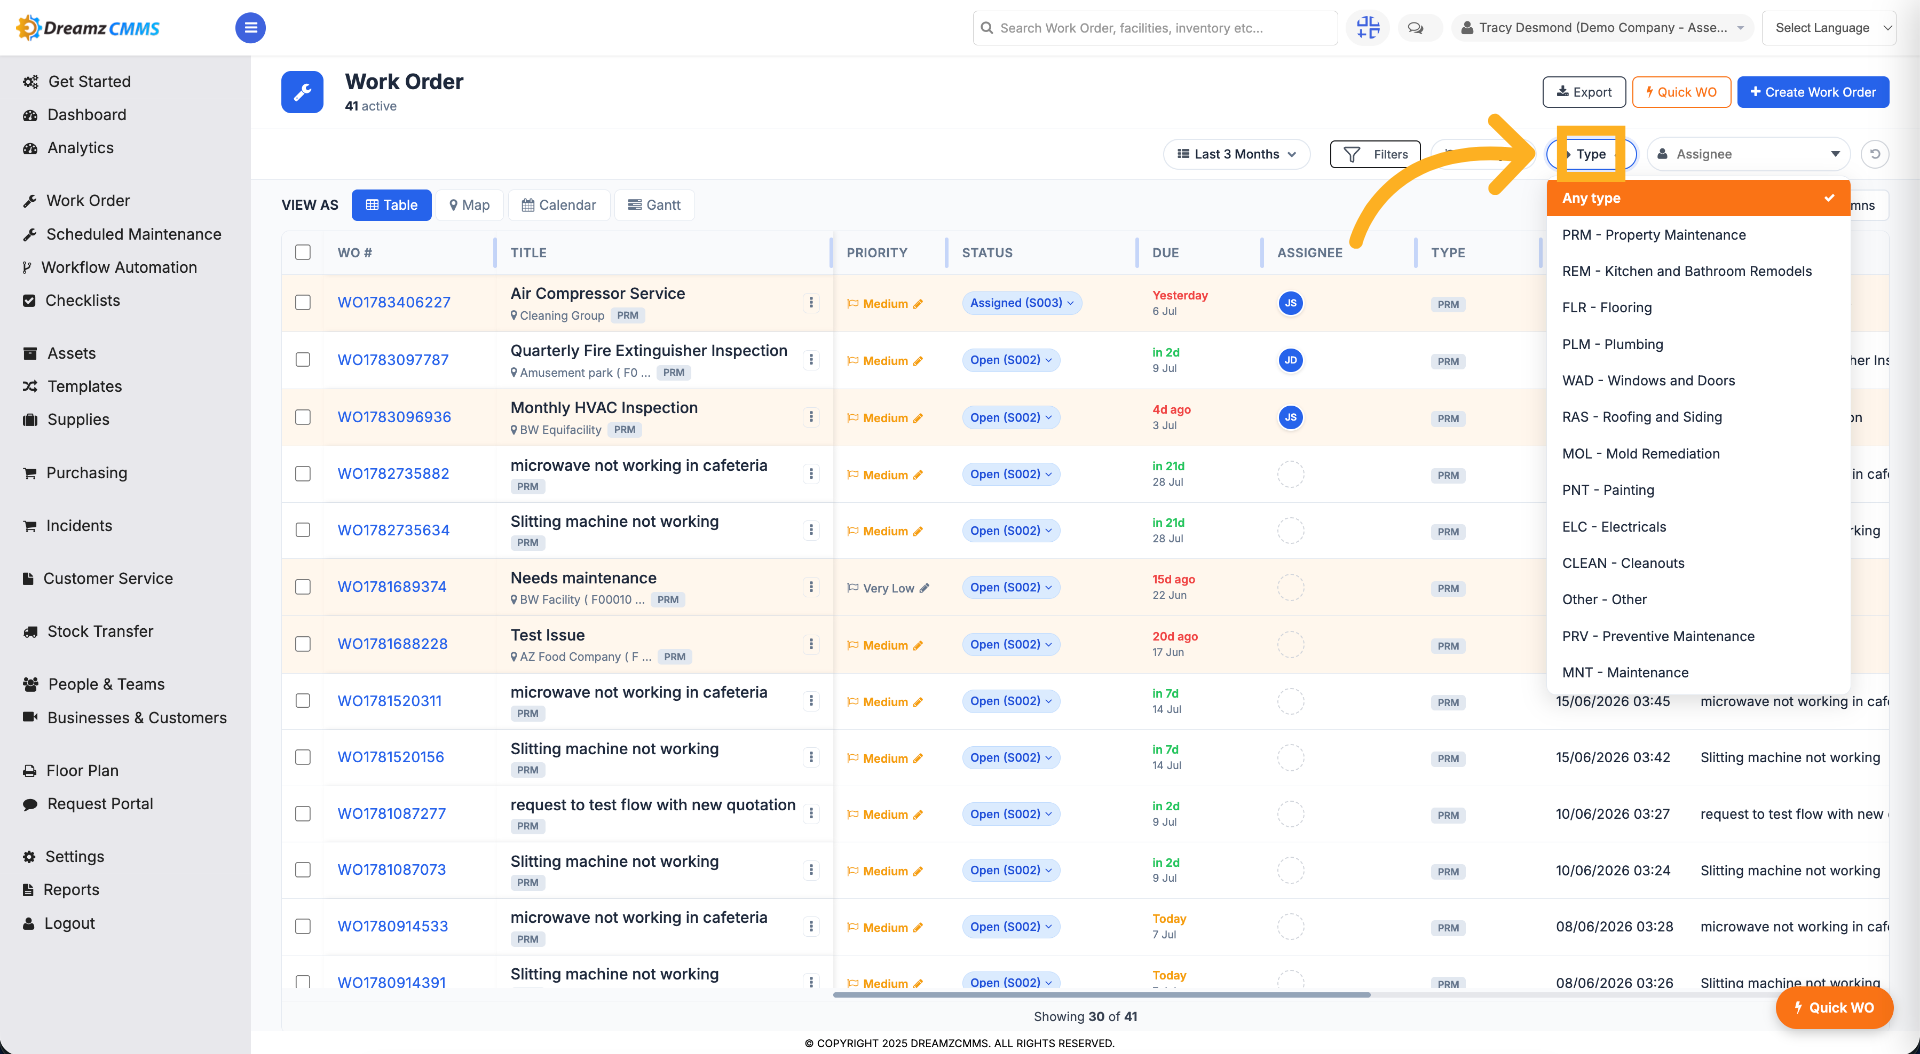
Step 7 – Sort Work Orders by Type
Click "Type" to sort work orders according to their type.
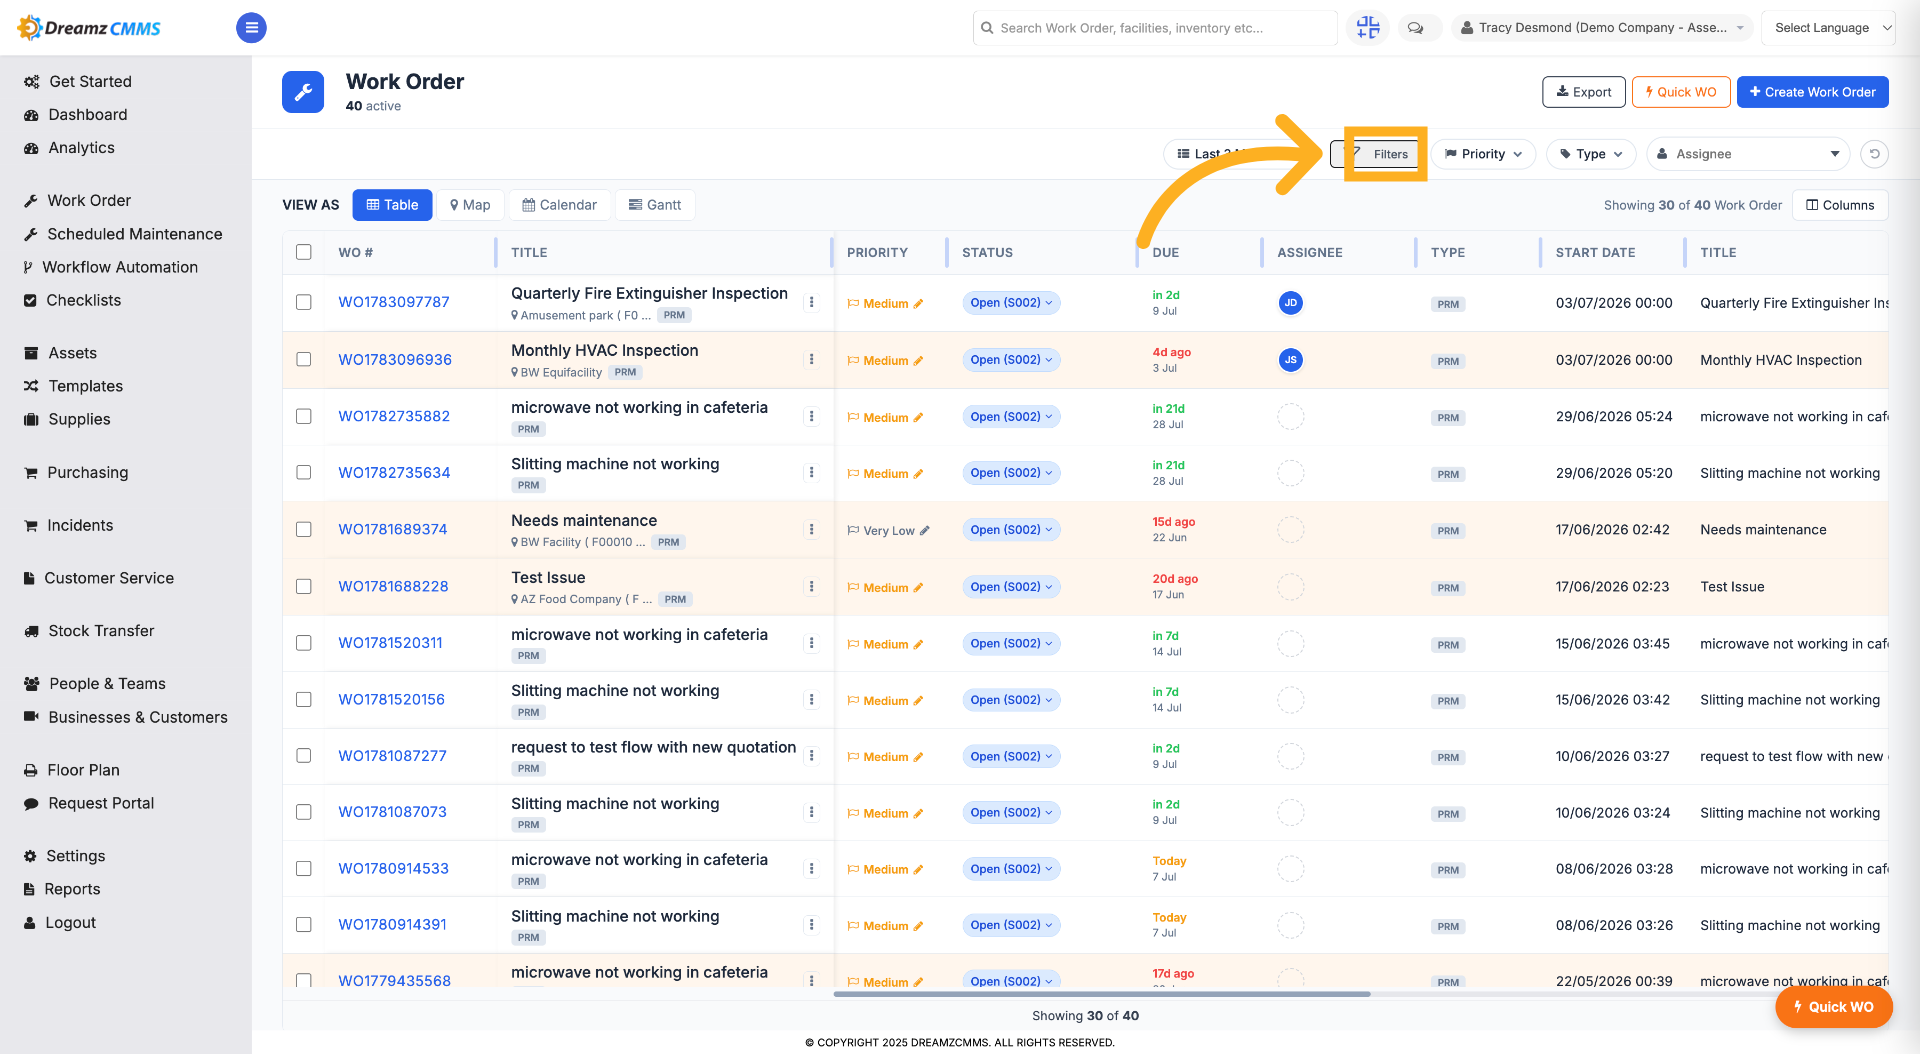
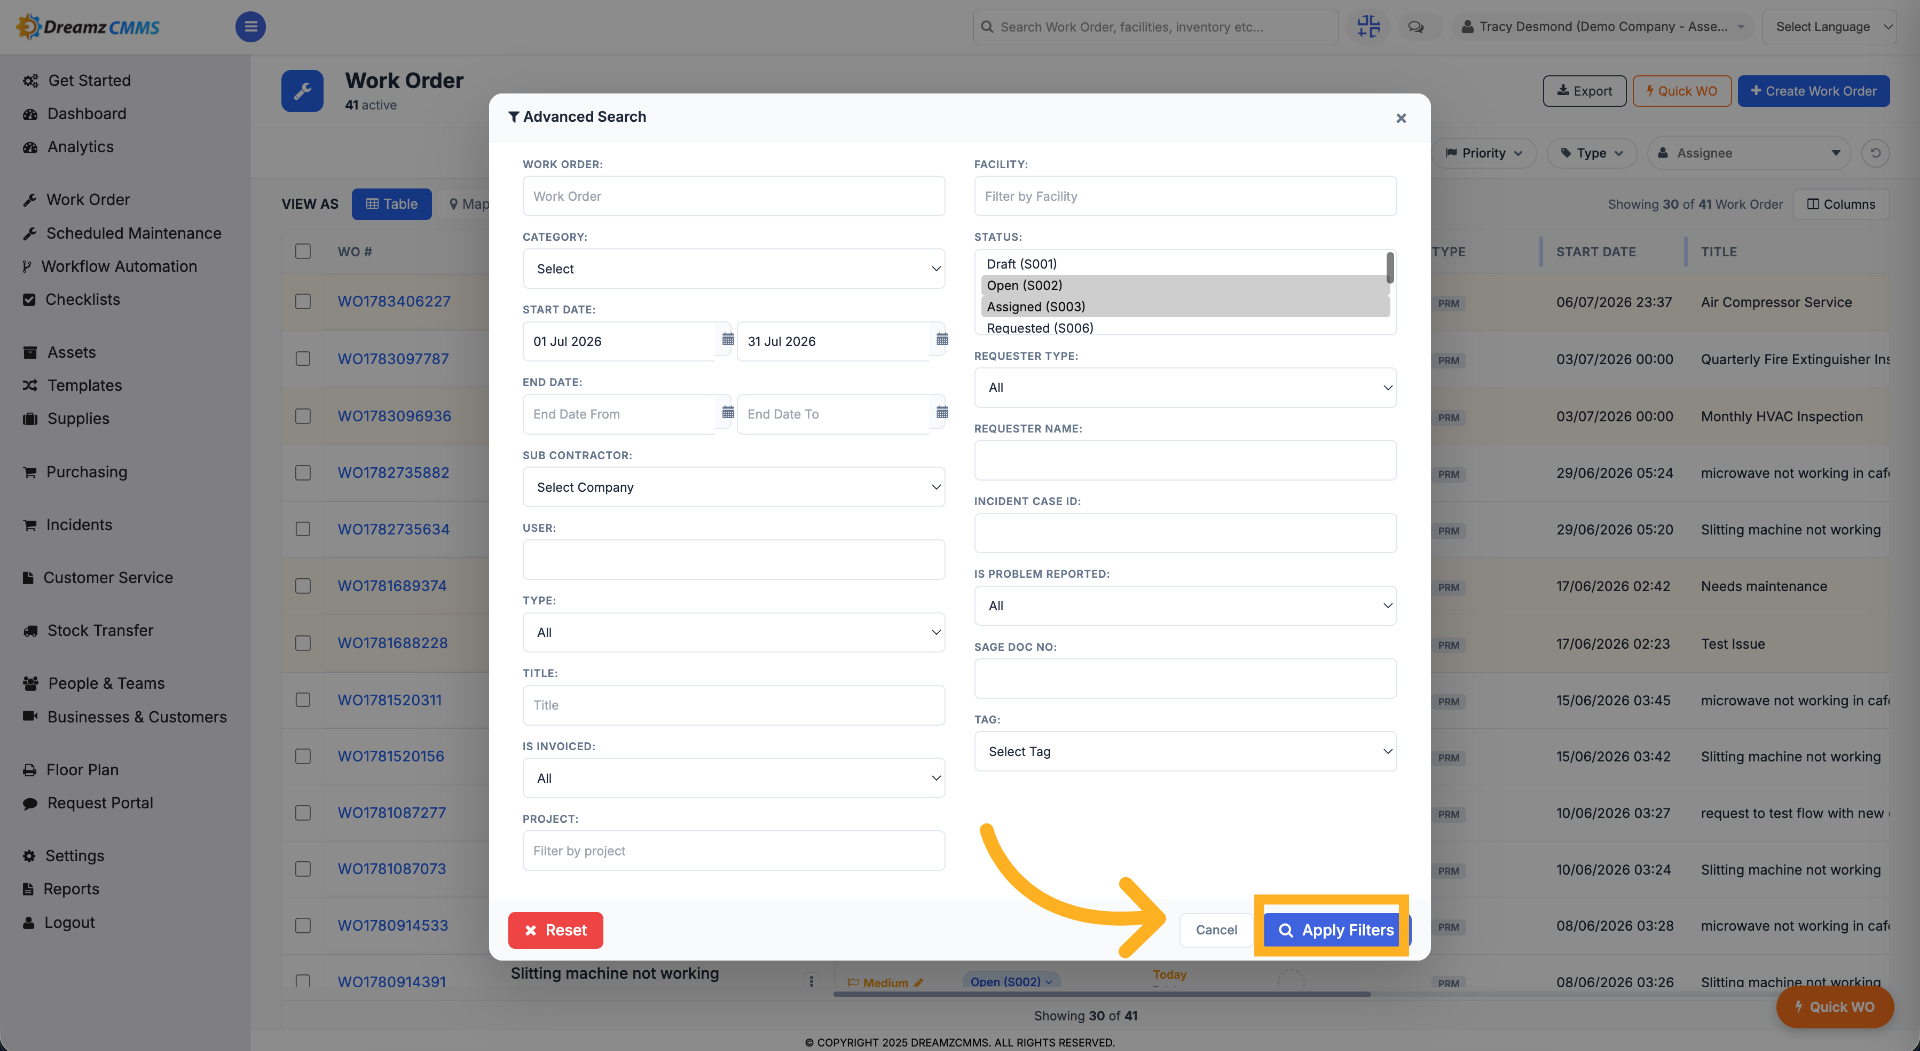
Step 8 – Open Work Order Filters
Click "Filters" to open advanced filtering options for refining work order lists.
Step 9 – Apply Selected Filters
After choosing your search options, click "Apply Filters" to apply them to the work order list.
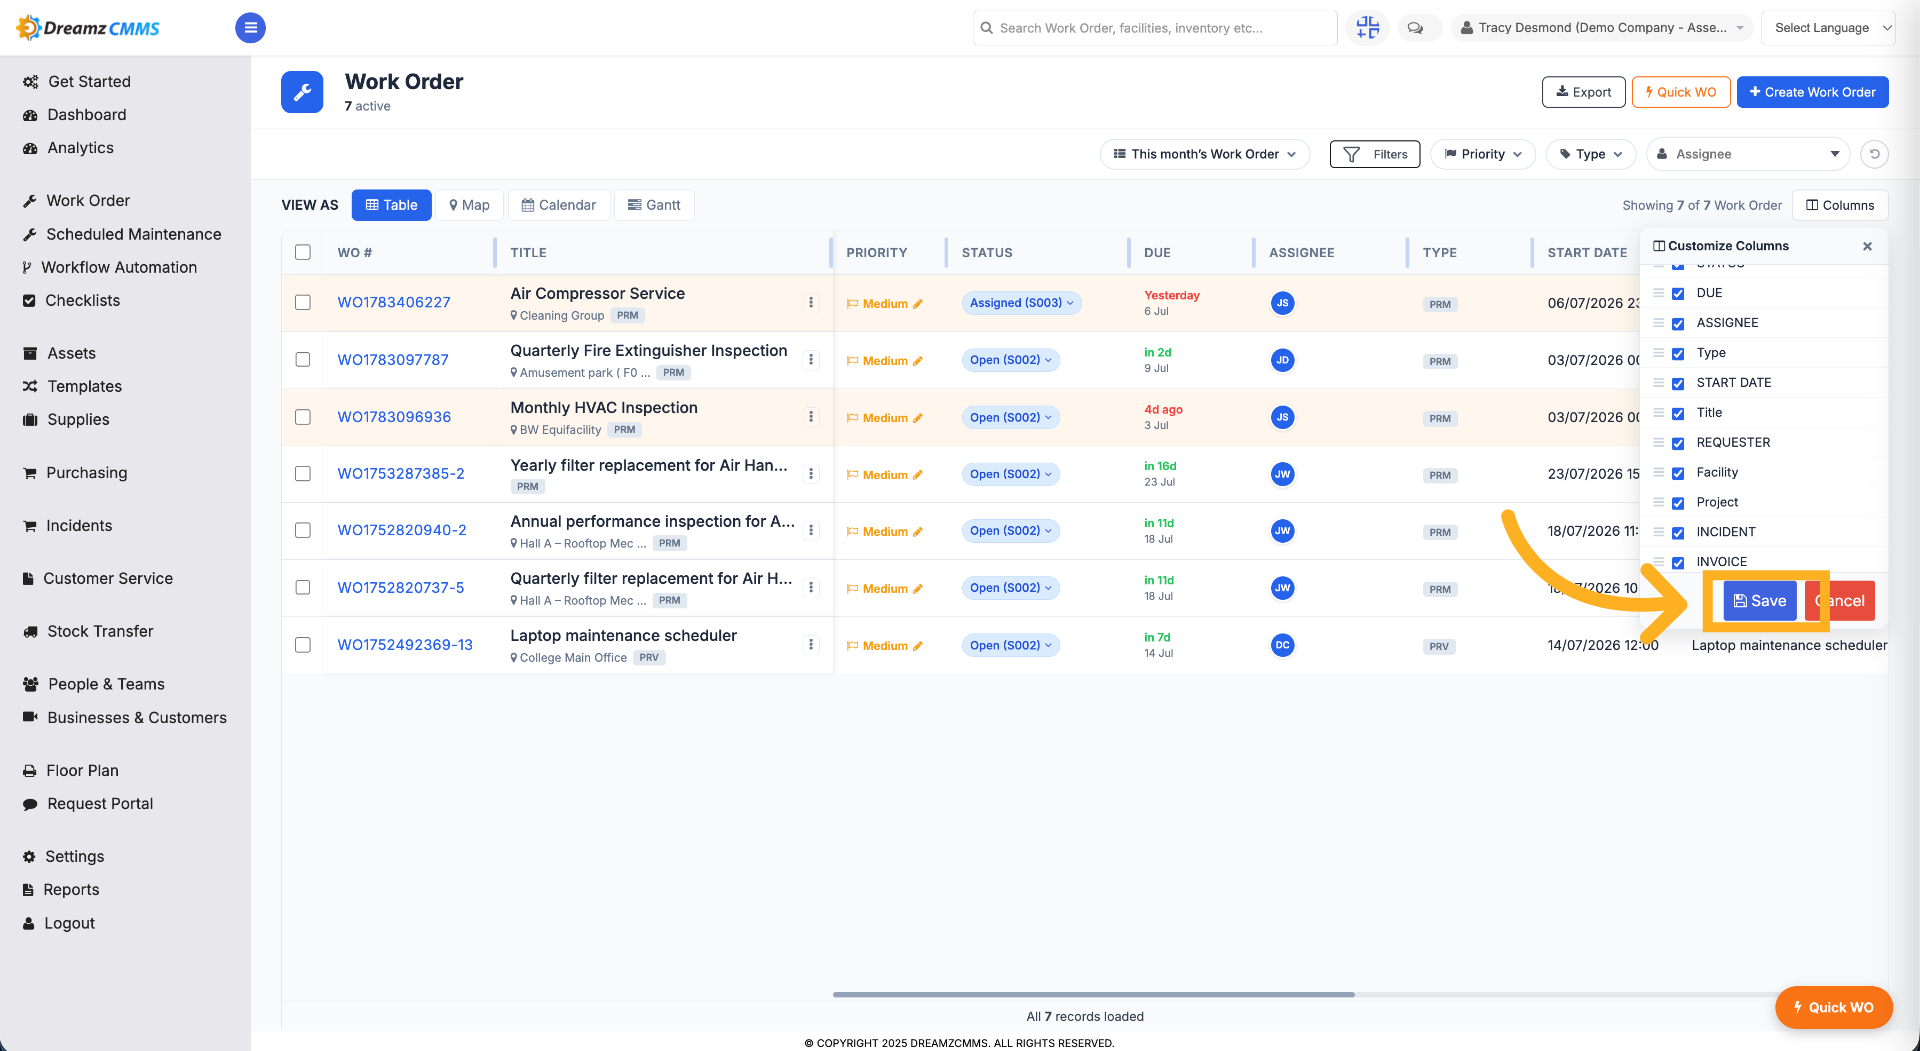
Step 10 – Select or Deselect Columns
In the columns section, check or uncheck column options, then click Save to show your selected columns in the work order grid.
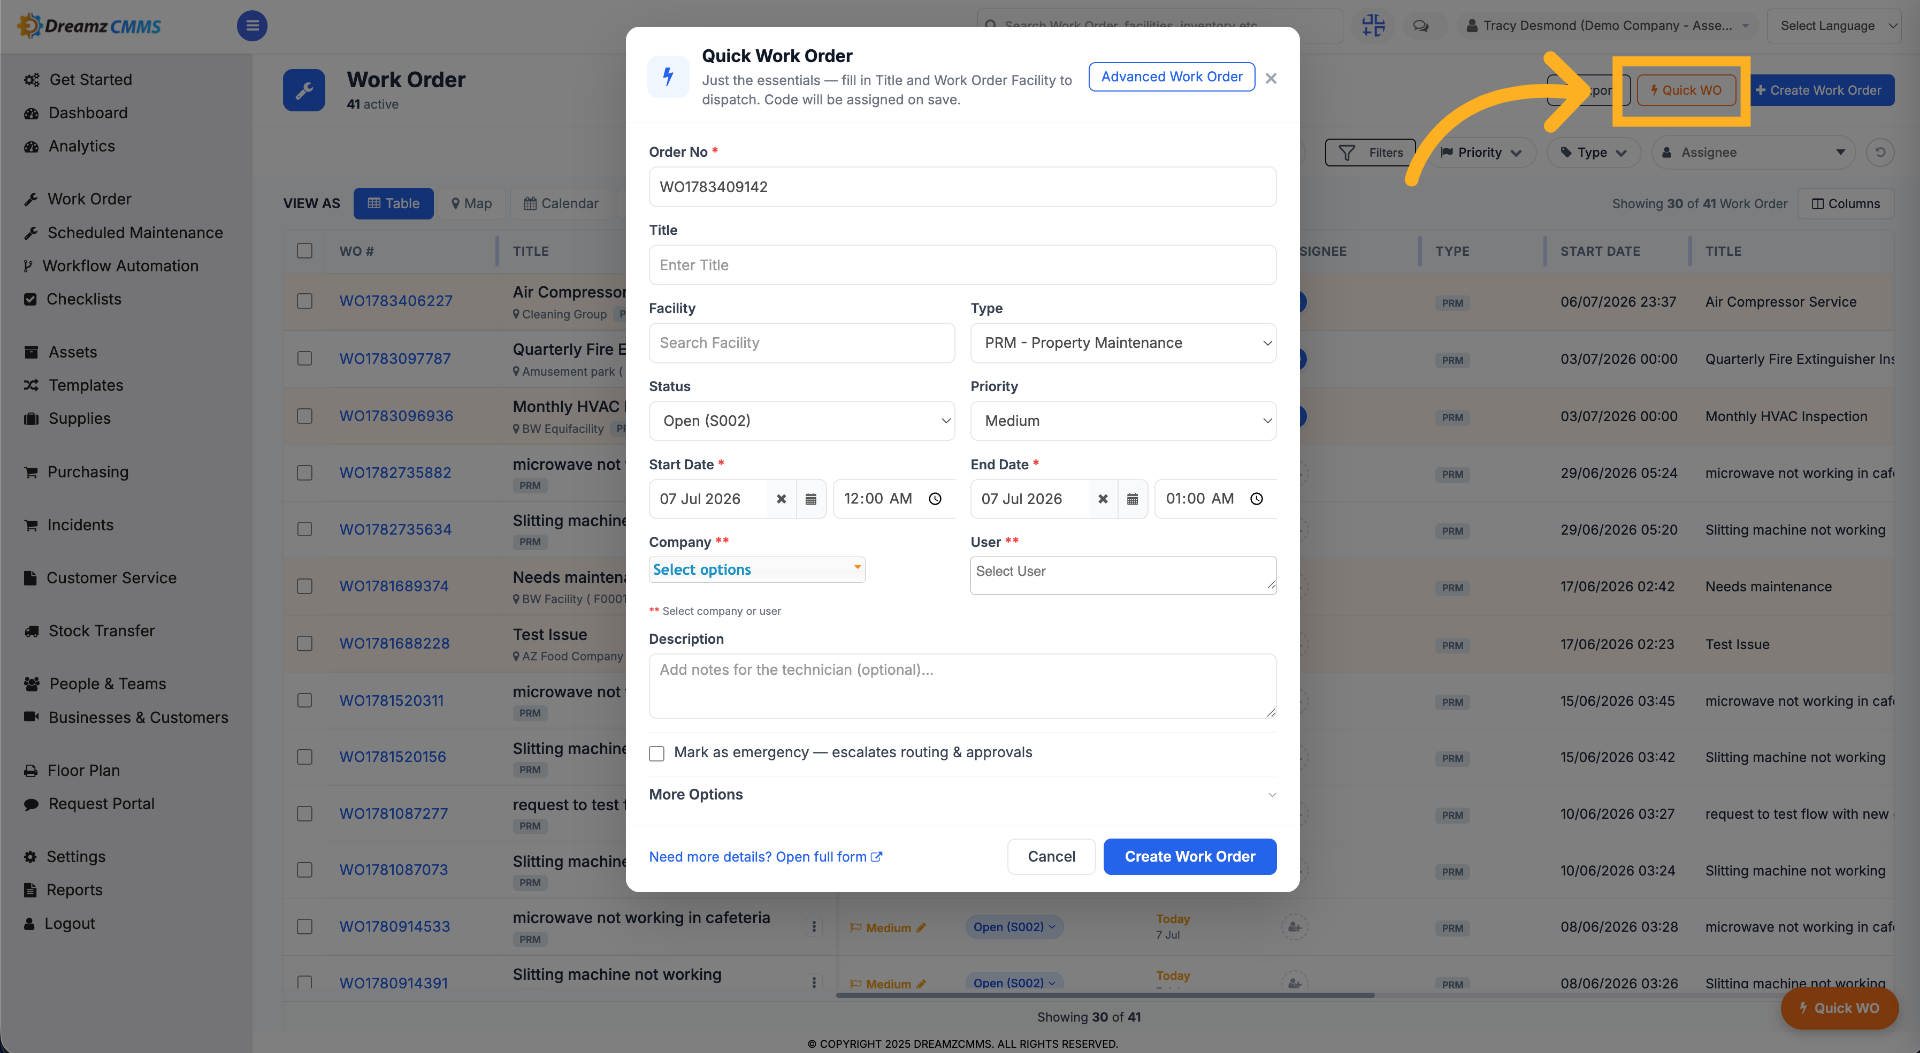
How to Create a Quick Work Order
Step 1 – Access Quick Work Order
Click "Quick Work Order" to quickly create a work order. Only fill the required fields in this and your work order will be ready
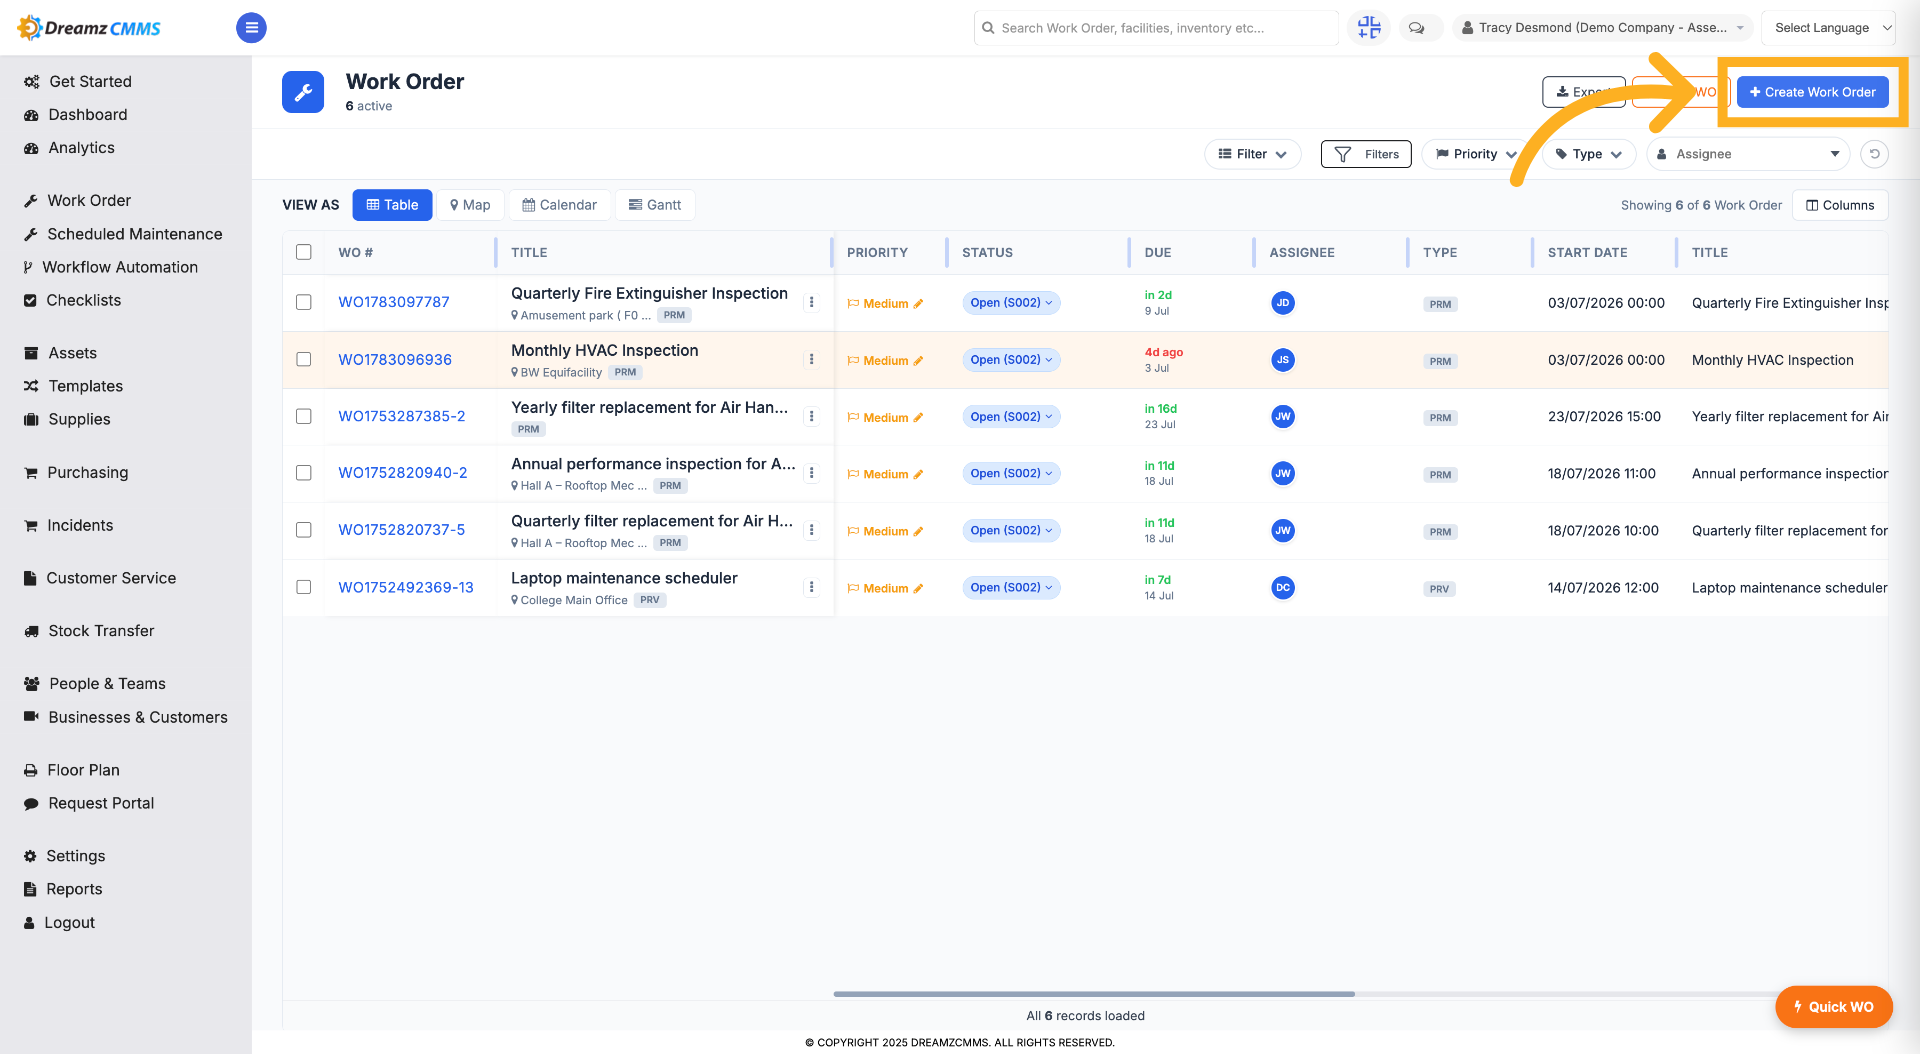
How to Create a Work Order
Step 1 – Initiate Work Order Creation
Click "Create Work Order" to start creating a new work order.
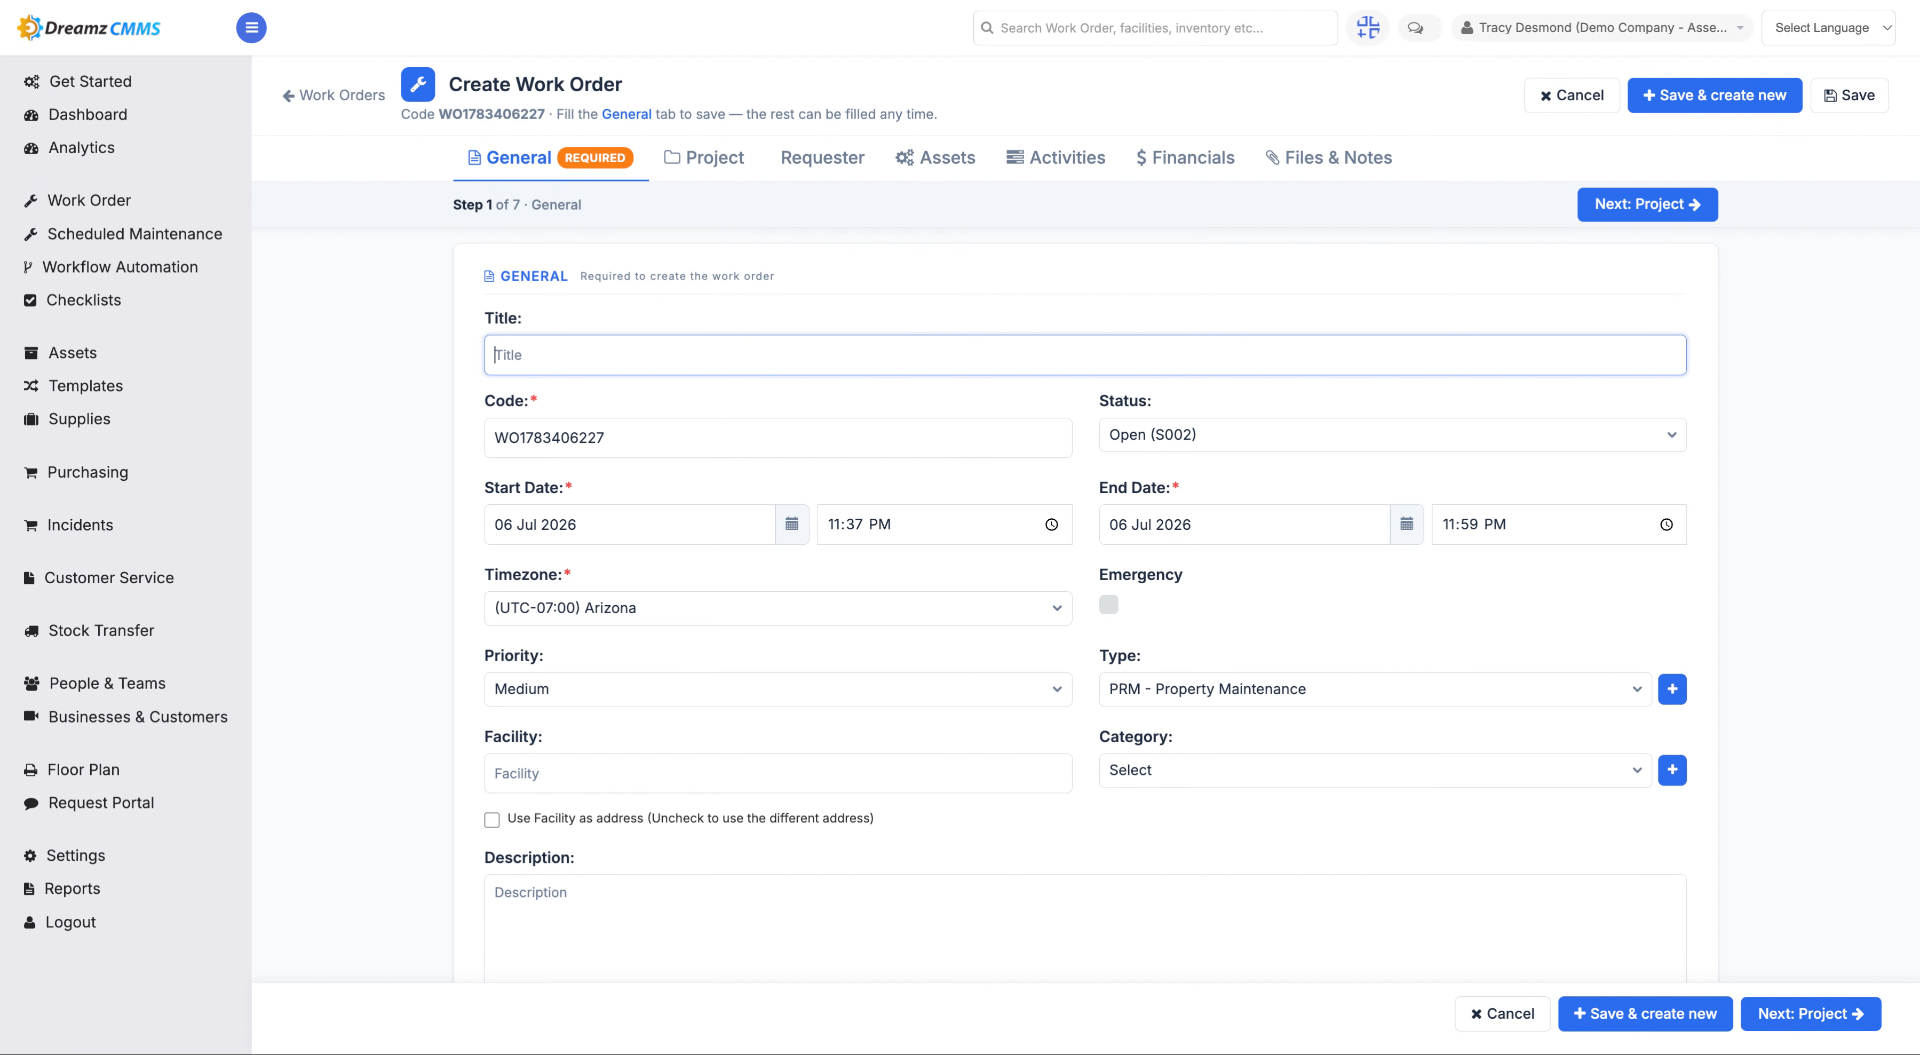
Step 2 – Enter Work Order Title
Enter a title for the work order, such as "Air Compressor Service," or any title you'd like to give it.
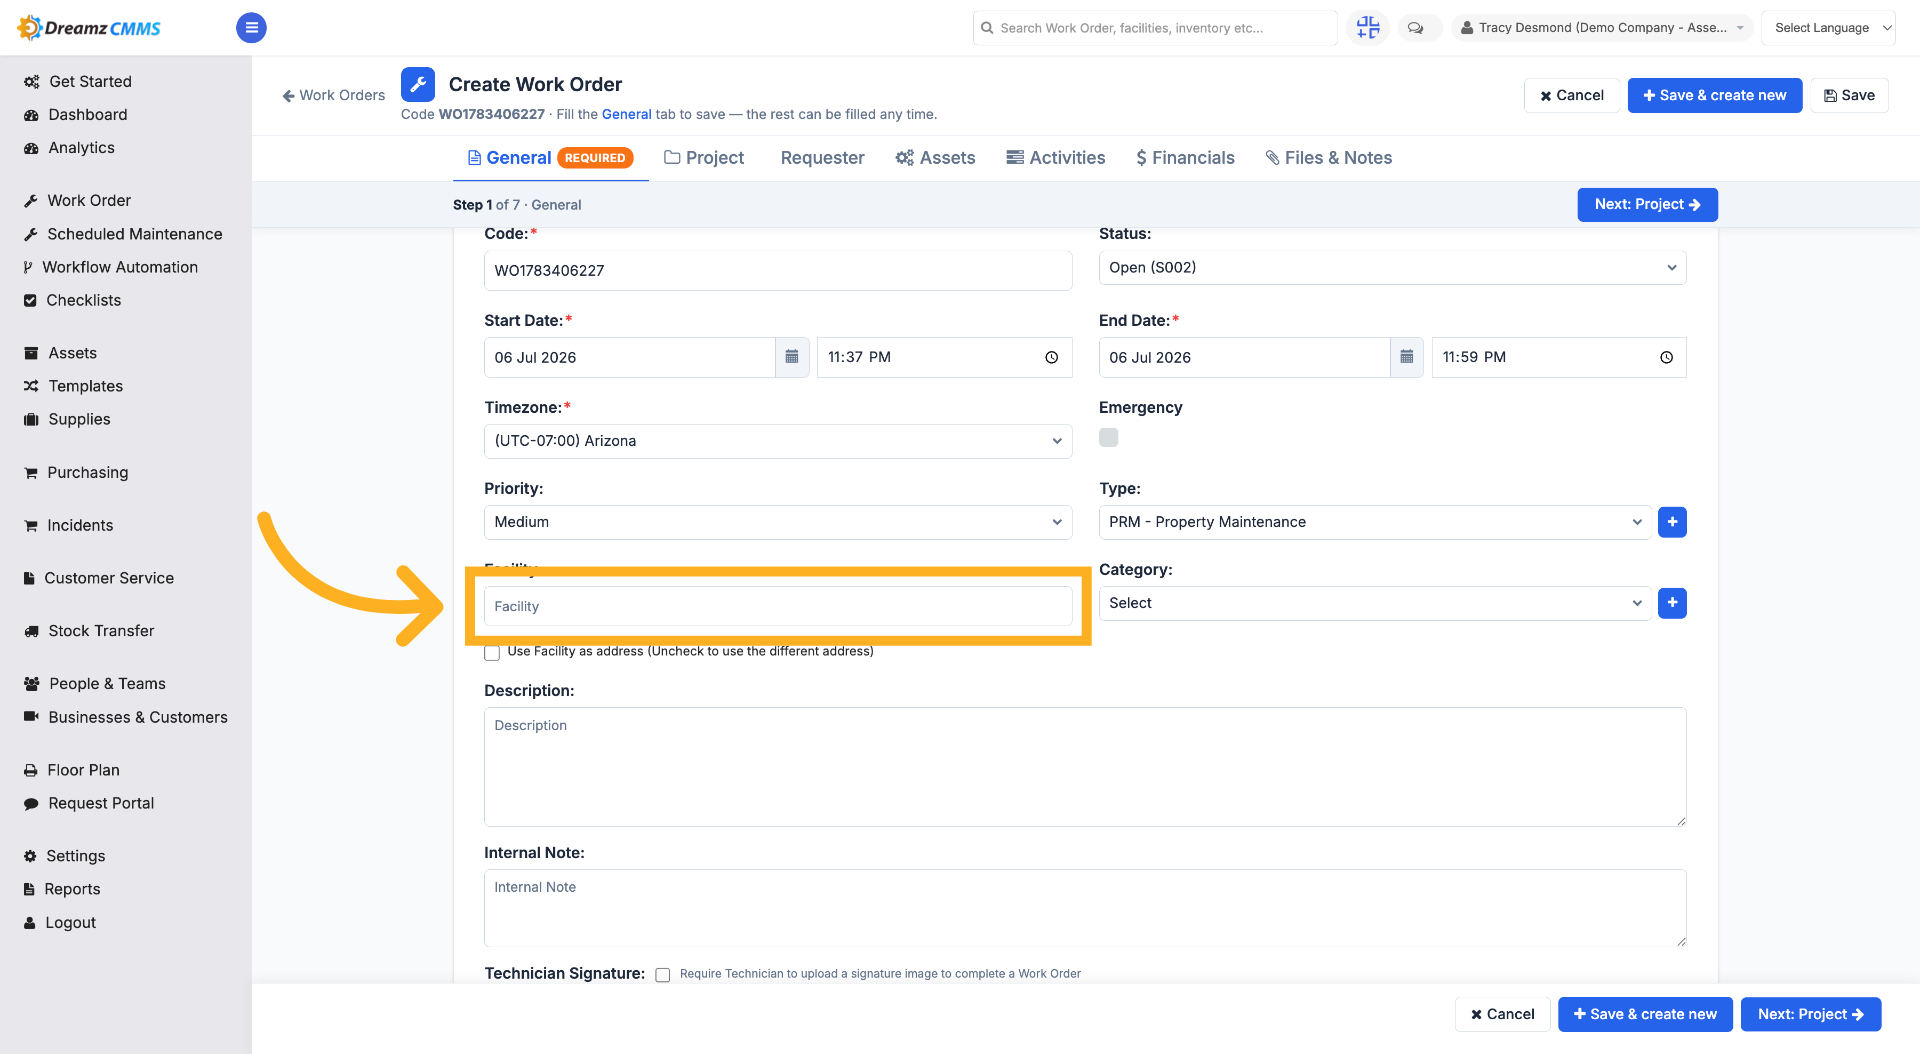
Step 3 – Select Facility Field
Click "Facility" to specify the facility related to the work order.
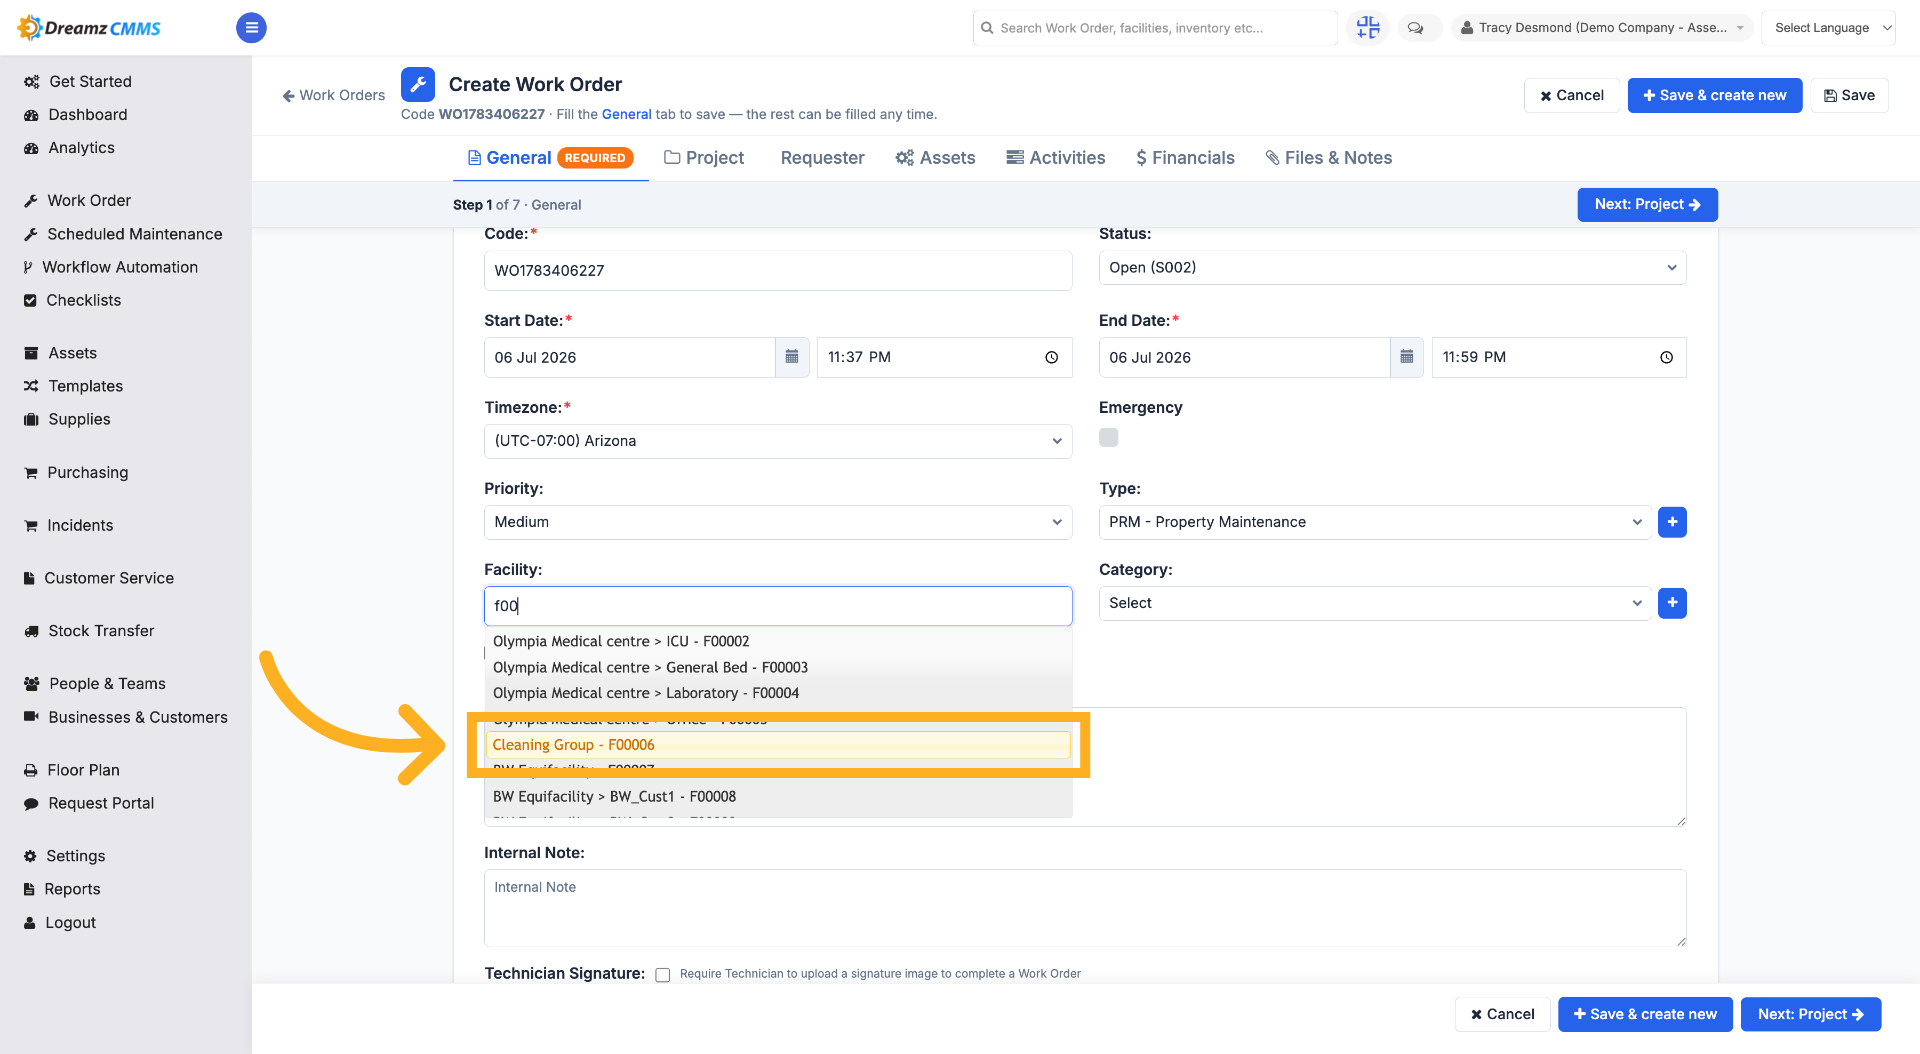
Step 4 – Choose the Facility
Click the facility from the list to assign the work order to that particular facility.
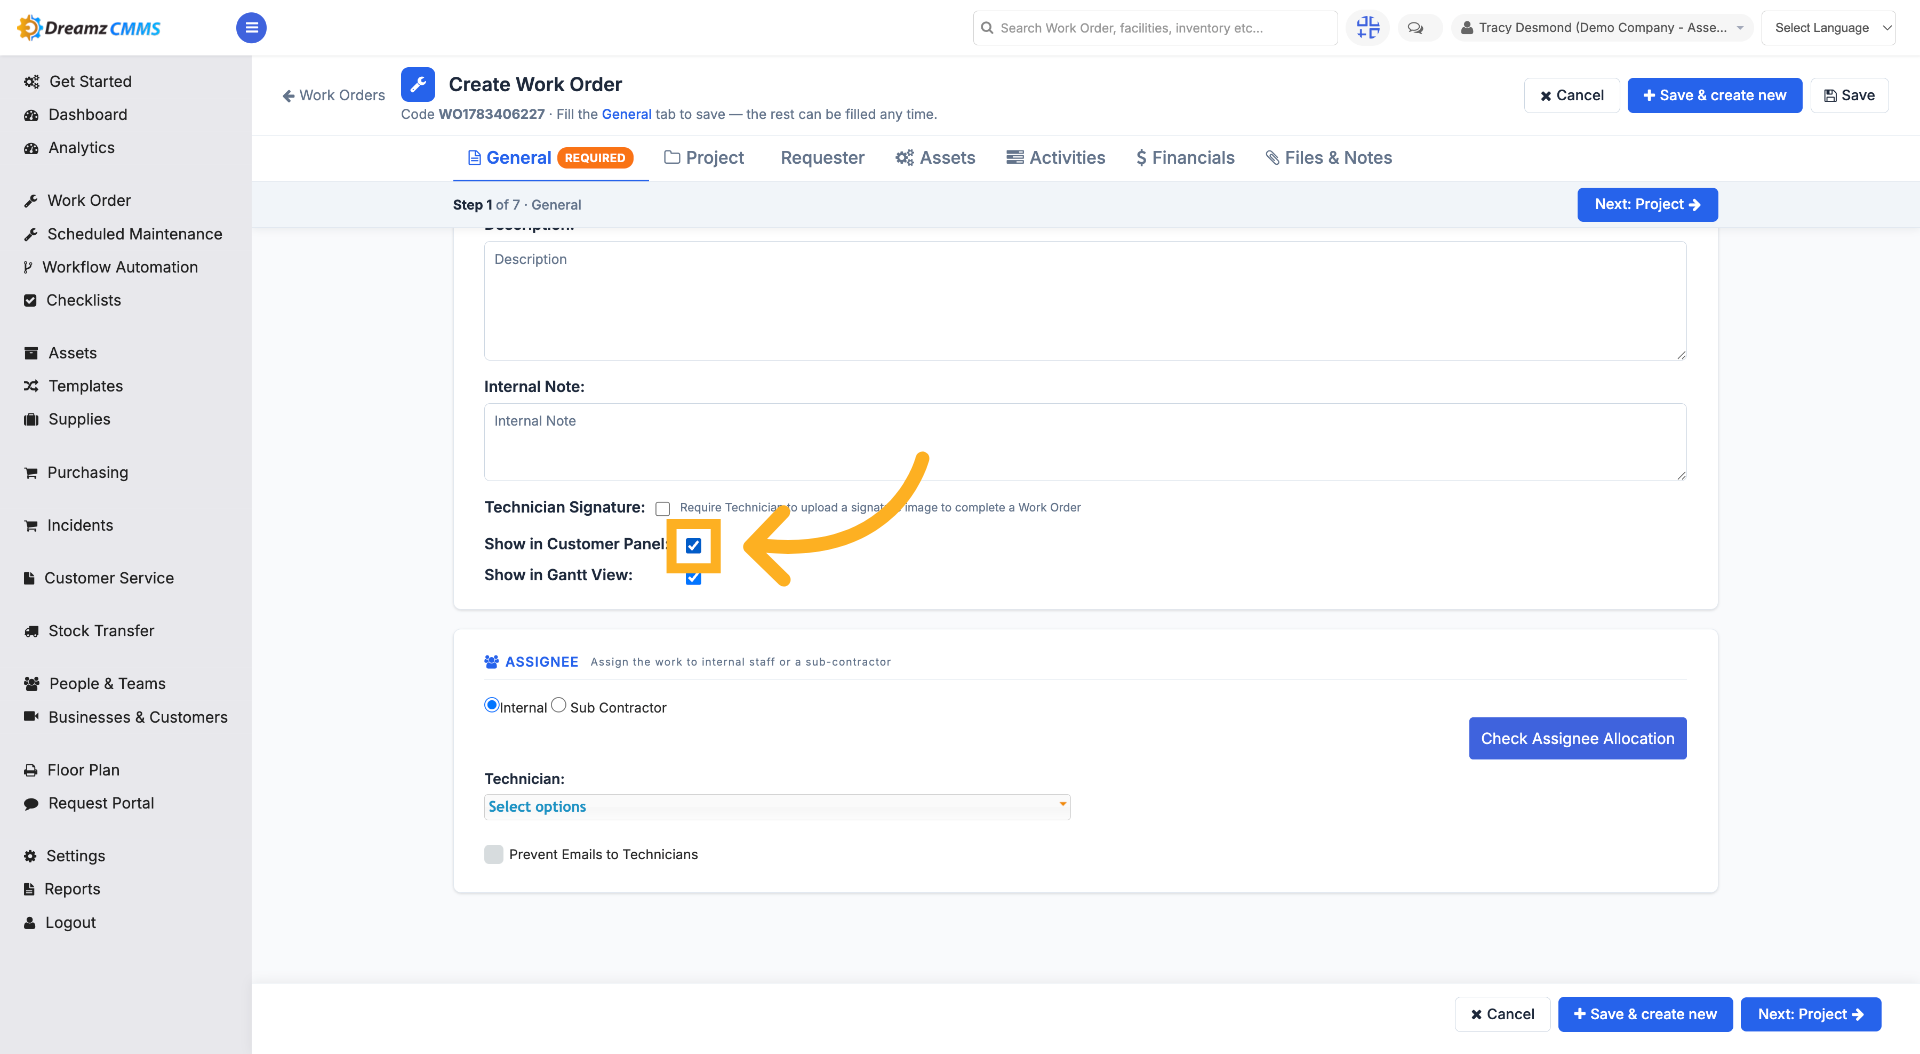
Step 5 – Show Work Order in Customer Panel
Check the checkbox to show the work order in the customer panel.
Step 6 – Show Work Order in Gantt View
Check the checkbox to show the work order in Gantt view.
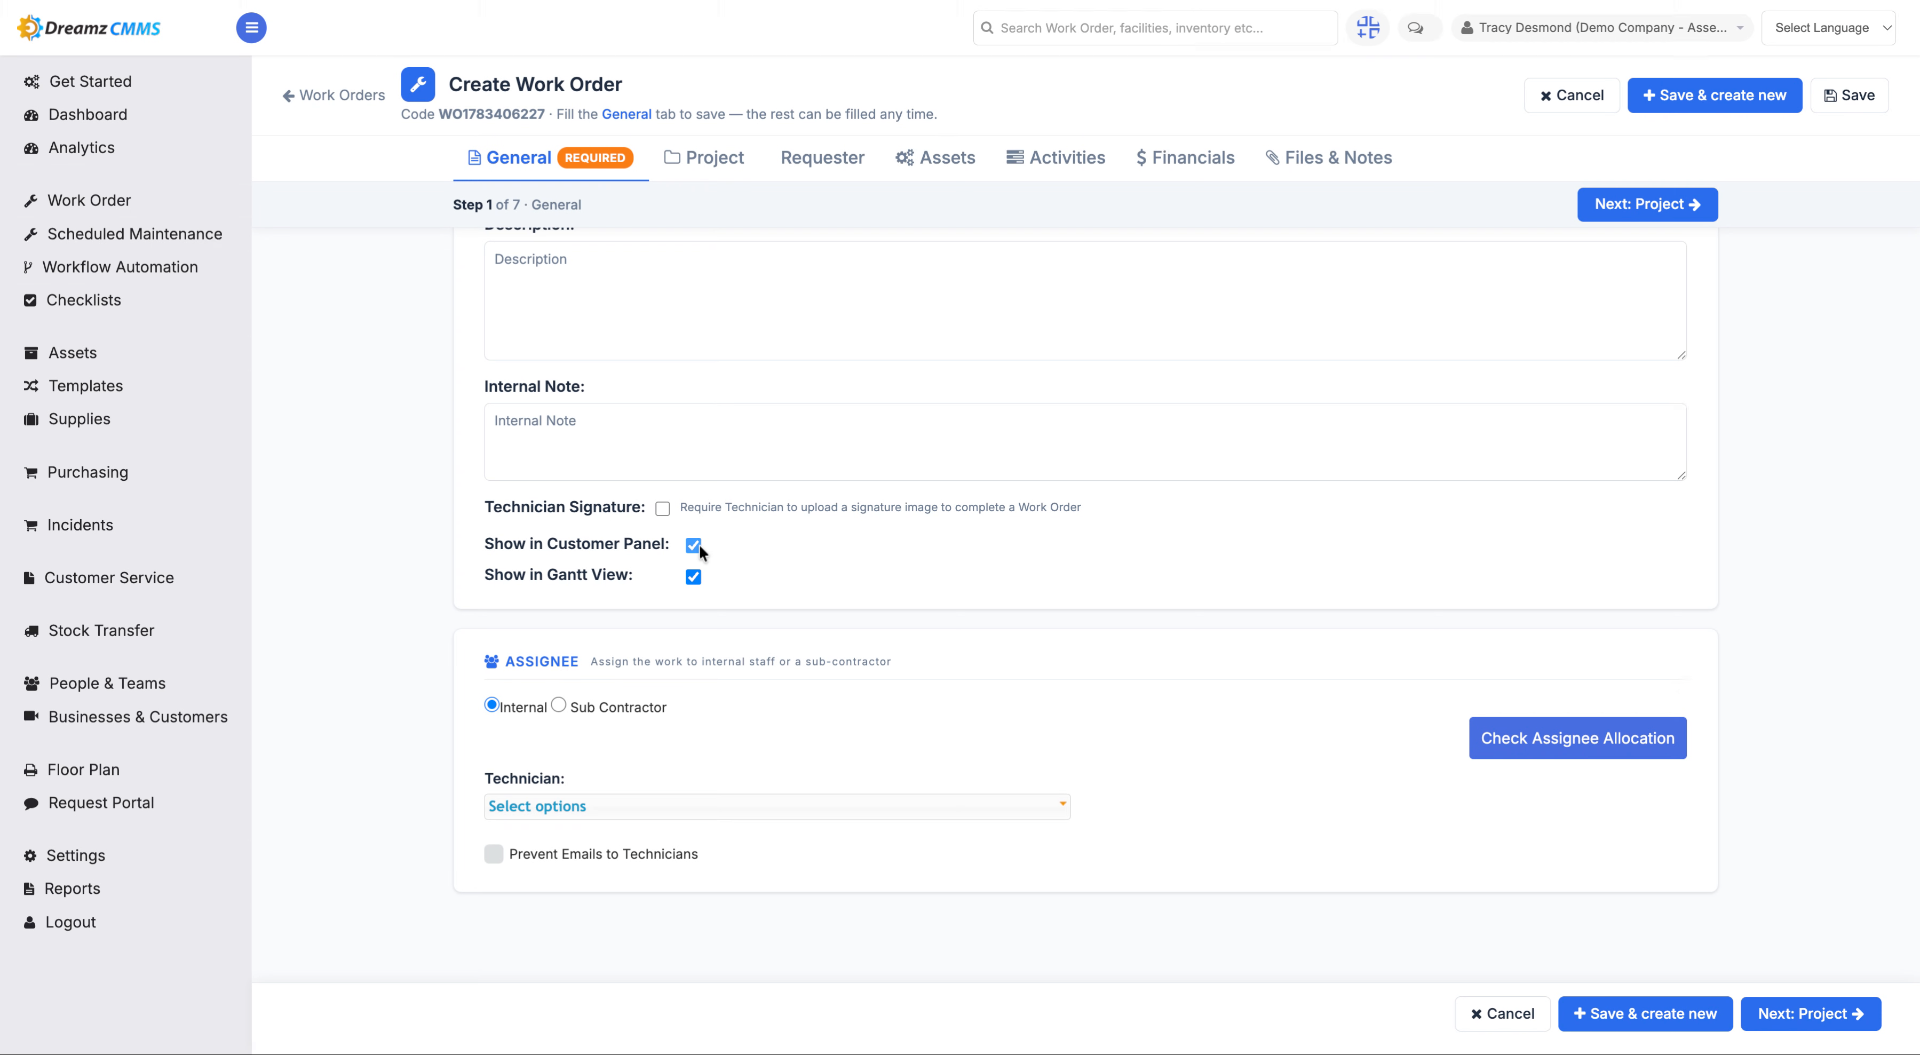
Step 7 – Select Assignee
Under Assignee, select Internal and click the Assignee dropdown to choose who the work order is assigned to.
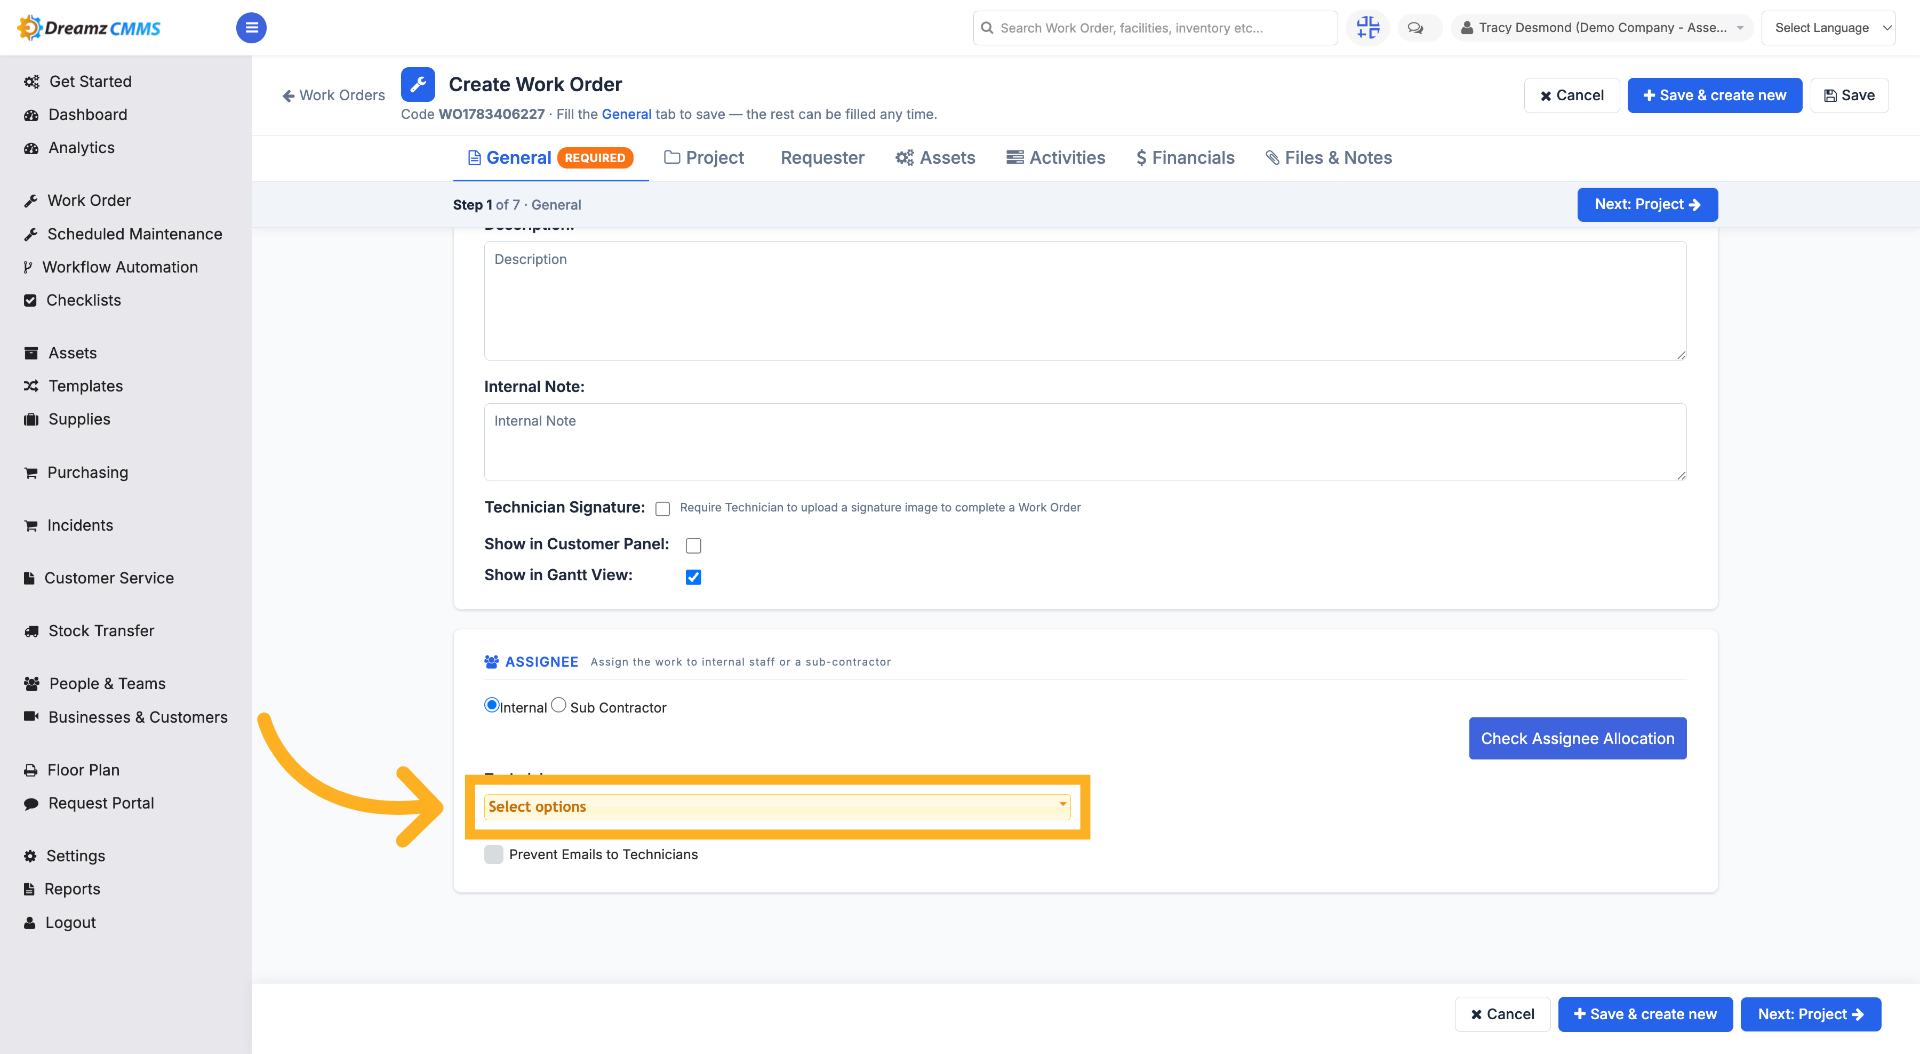
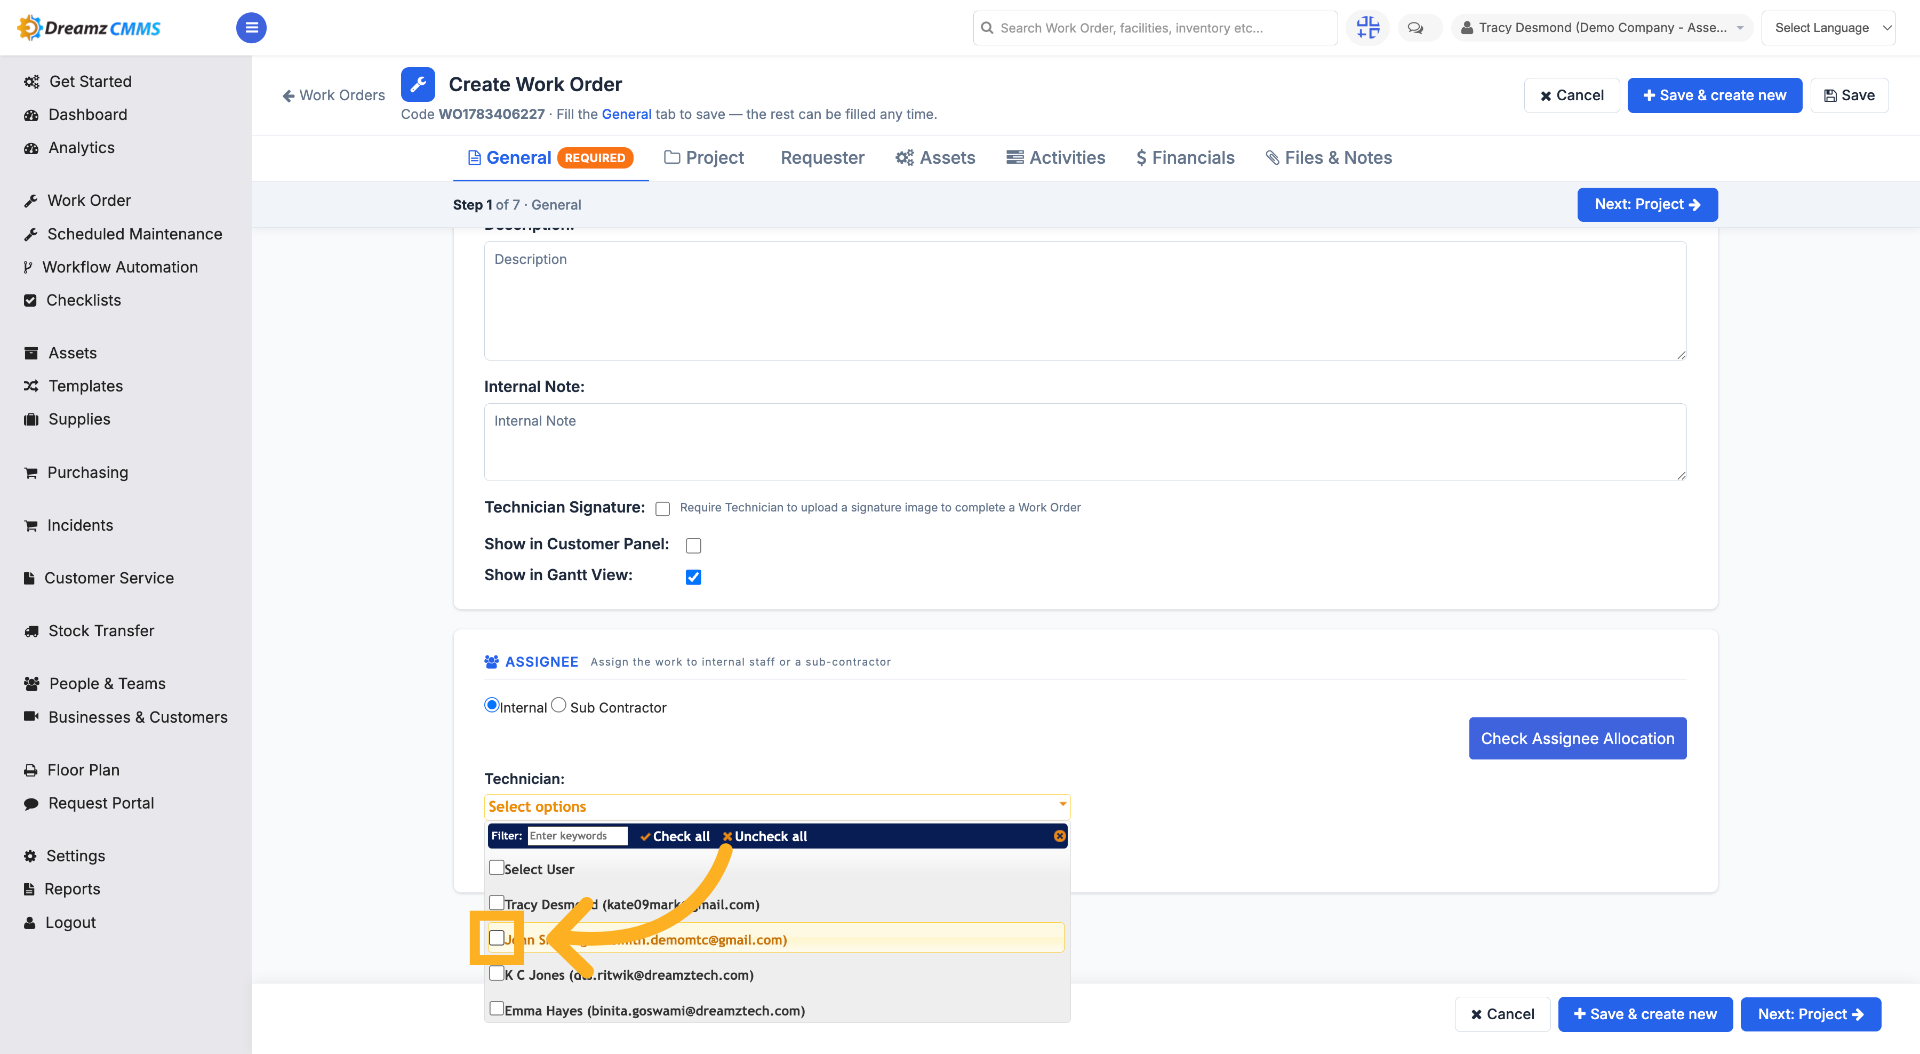
Step 8 – Assign to User
Click a user (for example, "John Smith") to assign the work order to them.
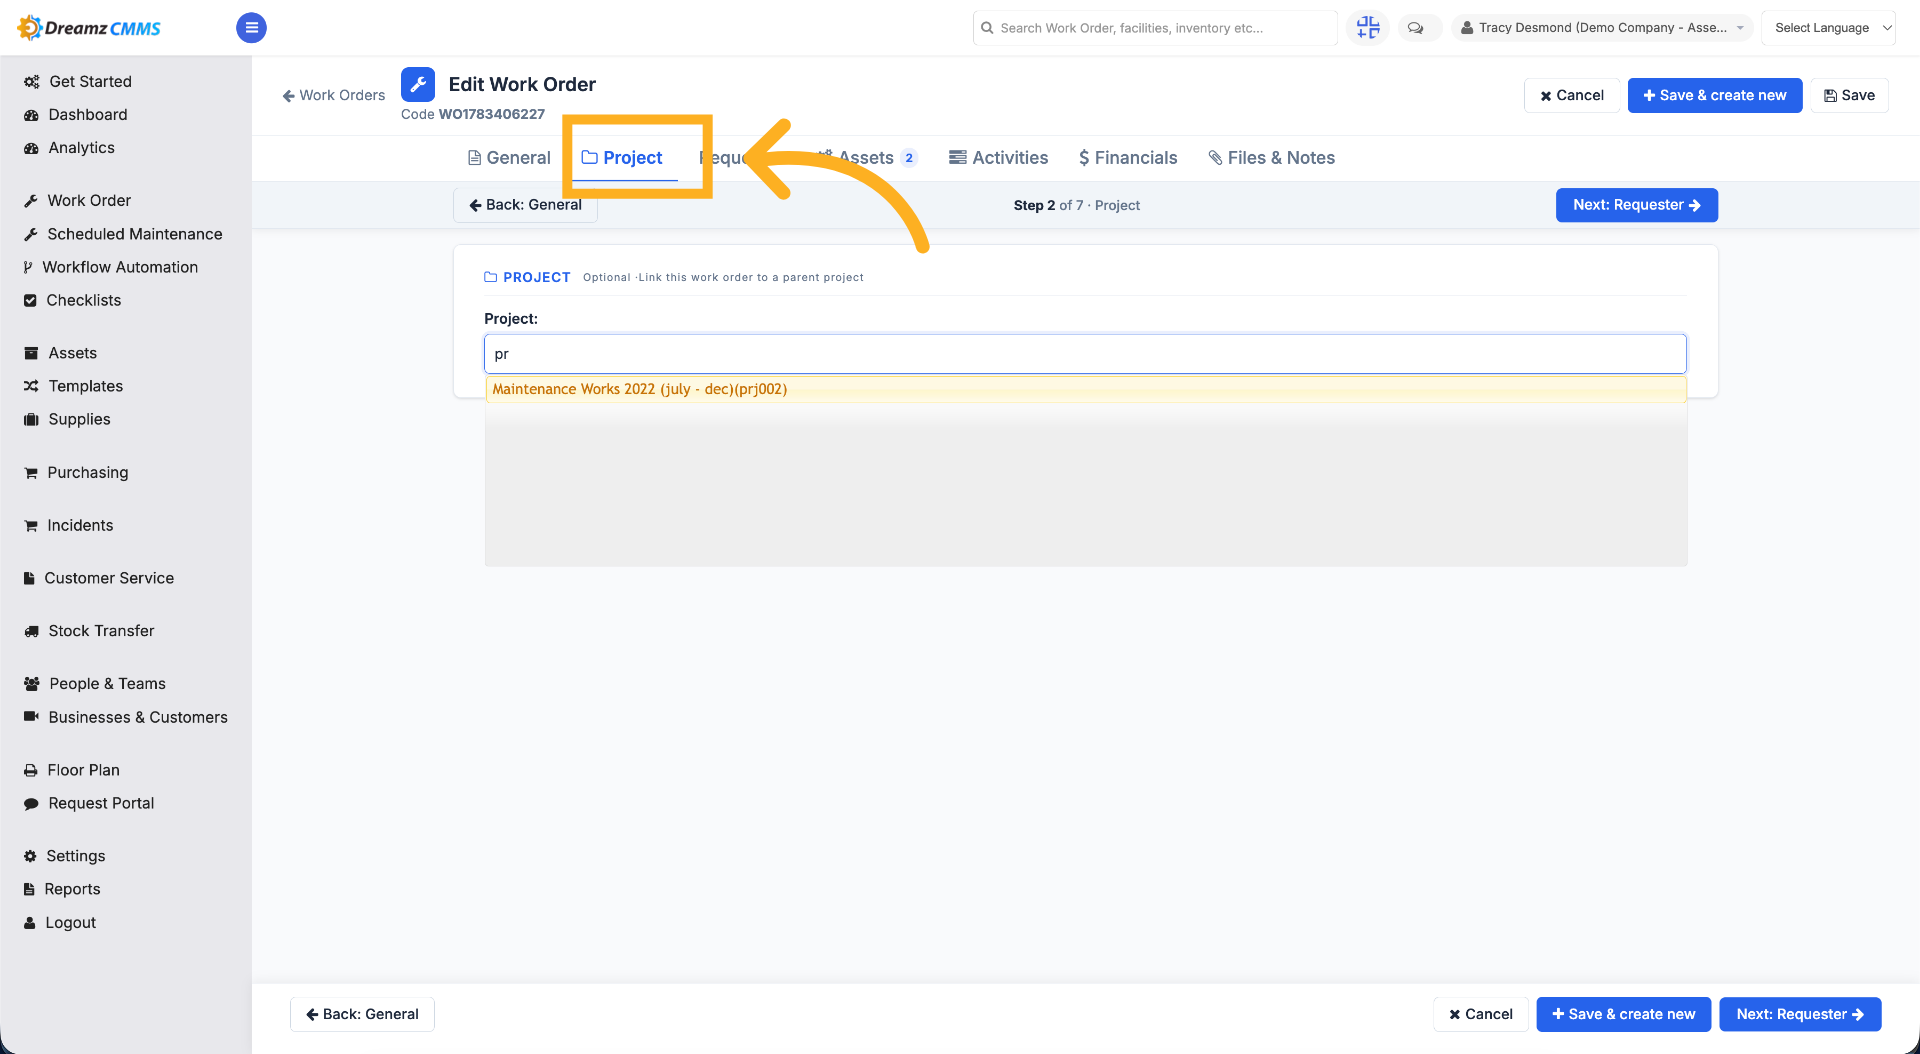
Step 9 – Select Project Field
Click "Project" to choose from the project list and associate that project with the work order.
Step 10 – Select Requester Field
Click "Requester" to specify the requester of the work order.
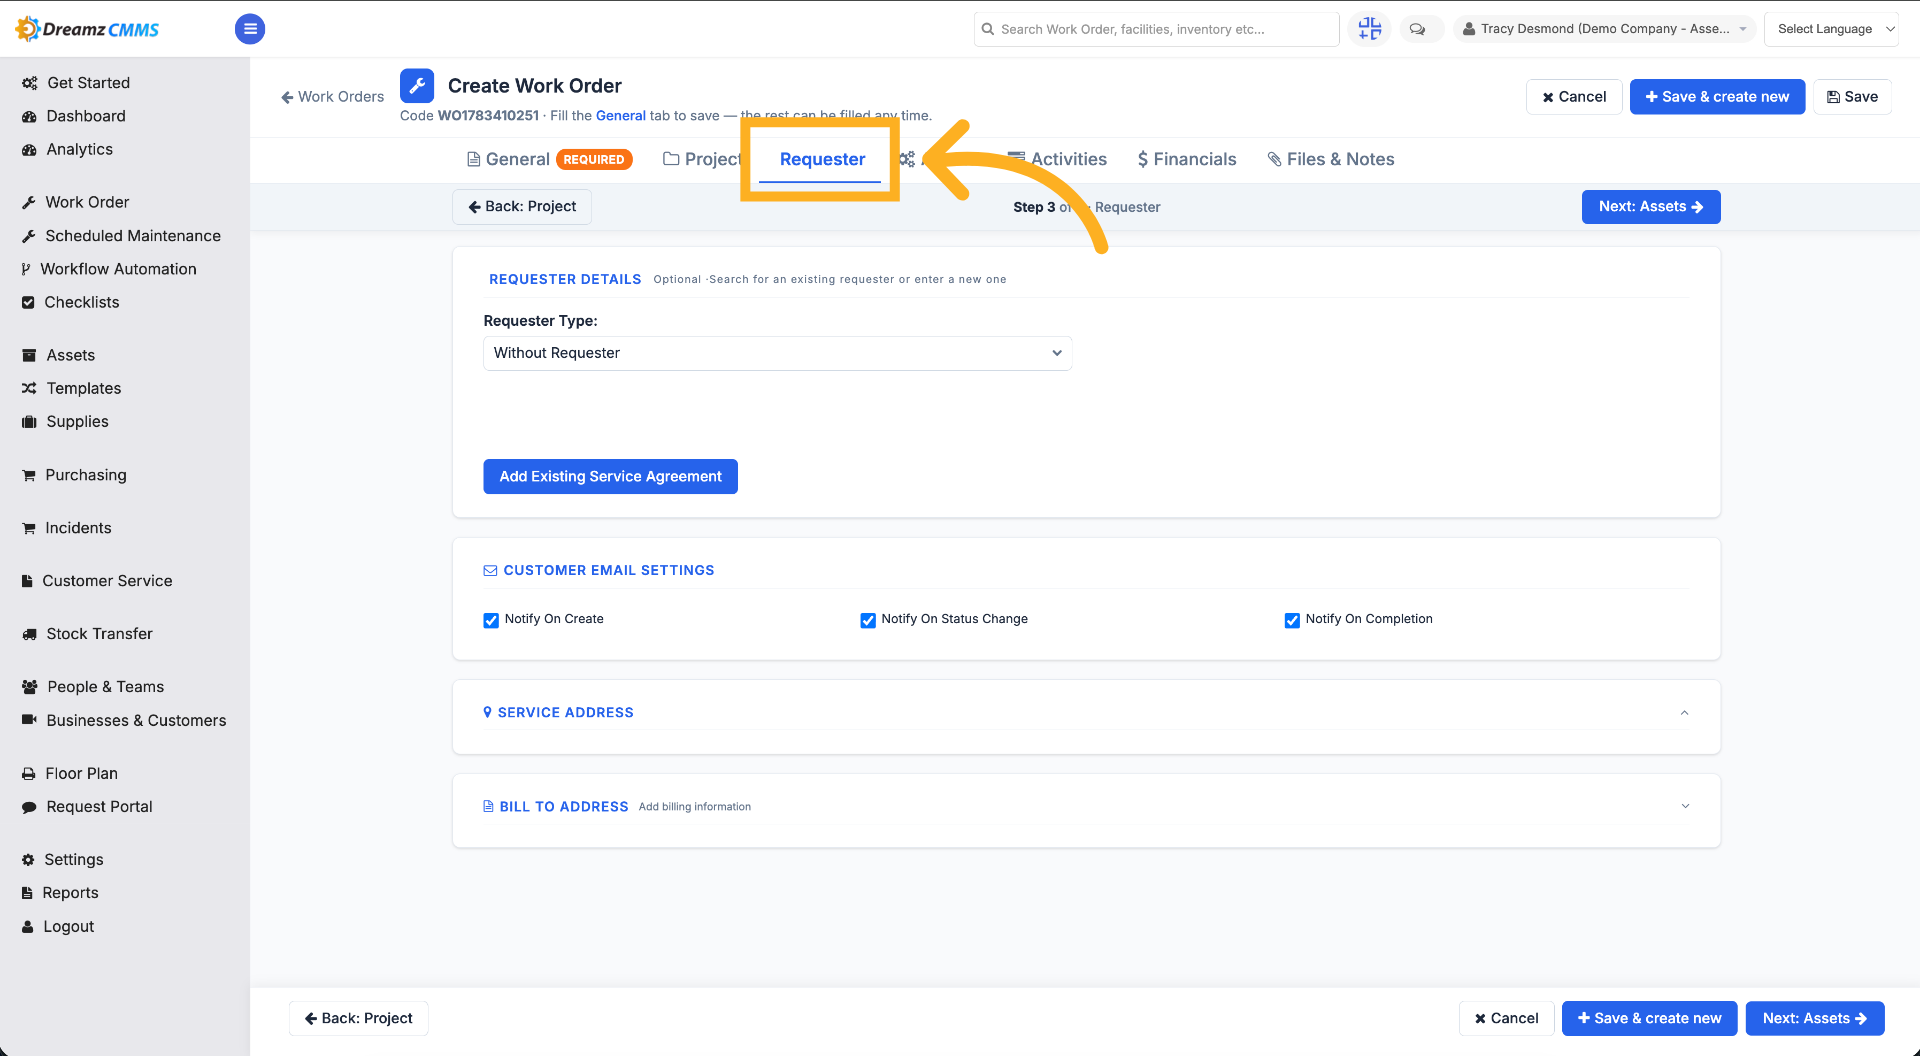
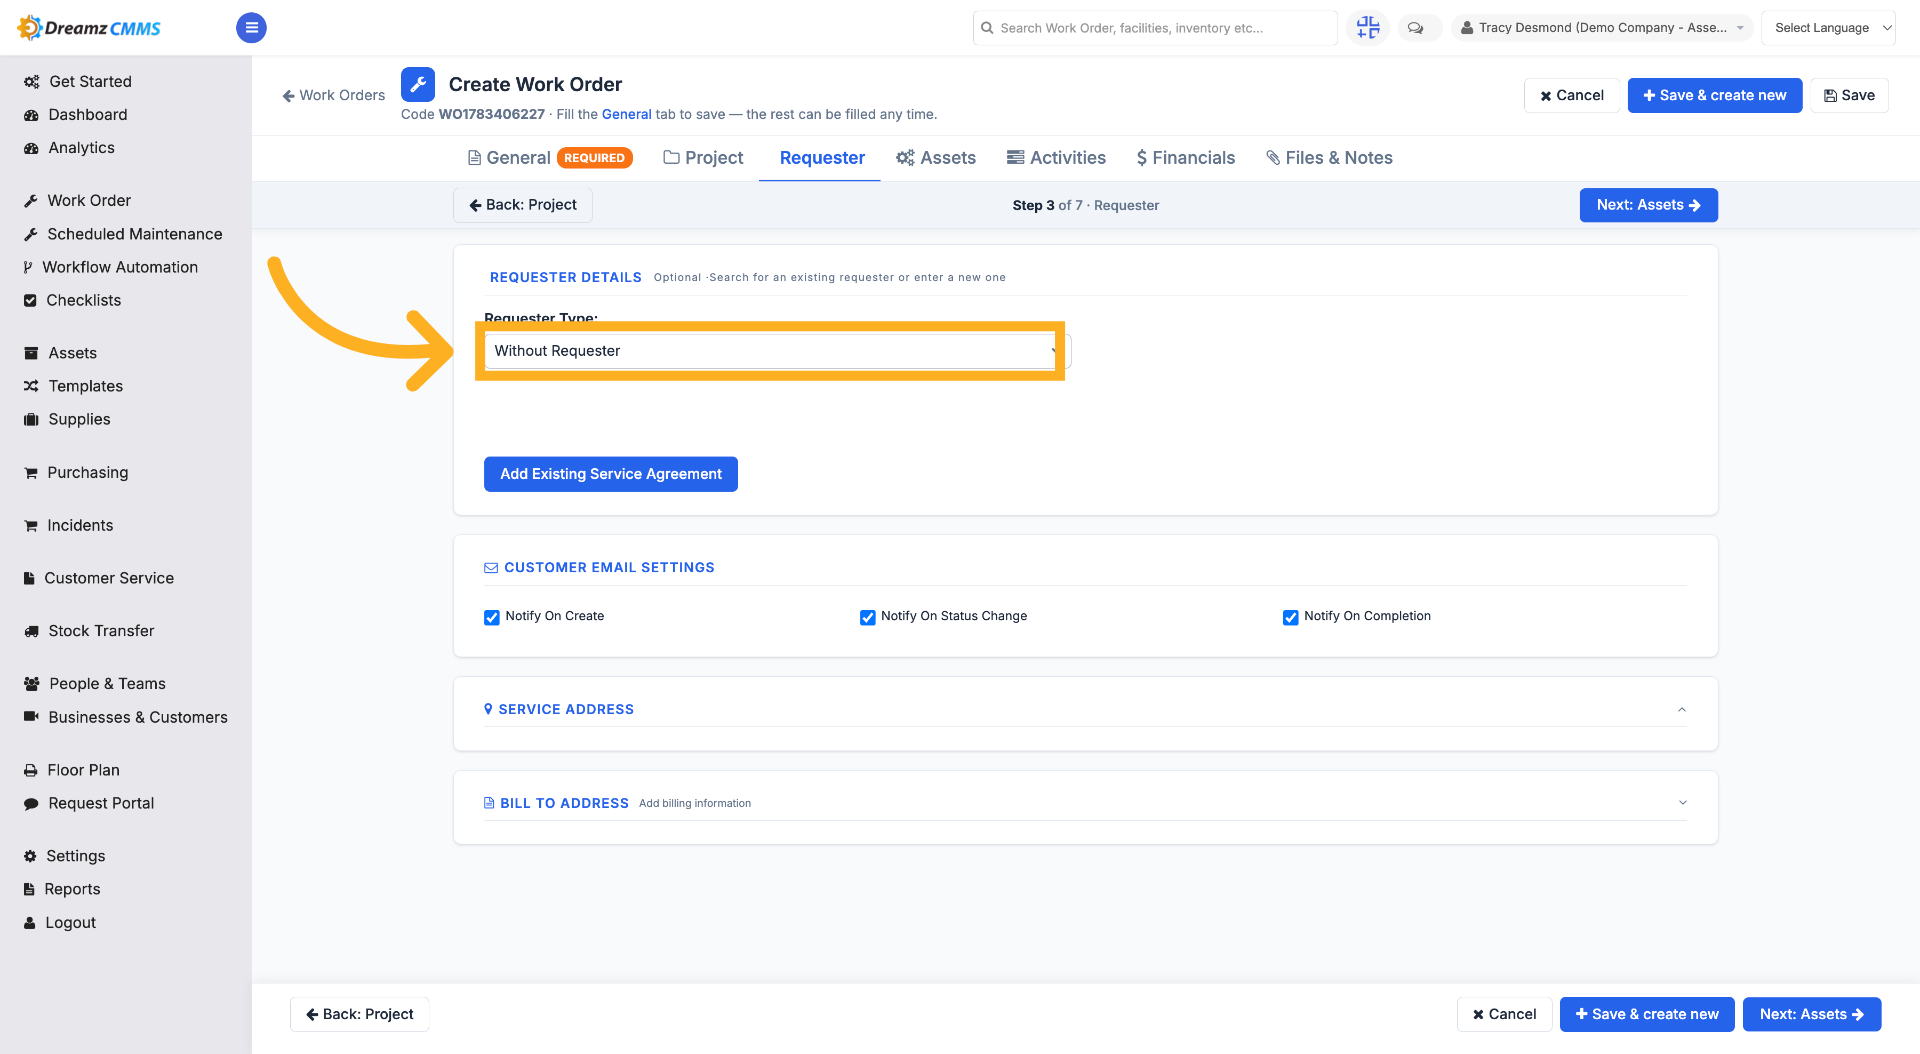
Step 11 – Choose Requester Type
Choose from the requester type list — Without Requester, Employee, Customer, or Sub Contractor — to add a requester to the work order.
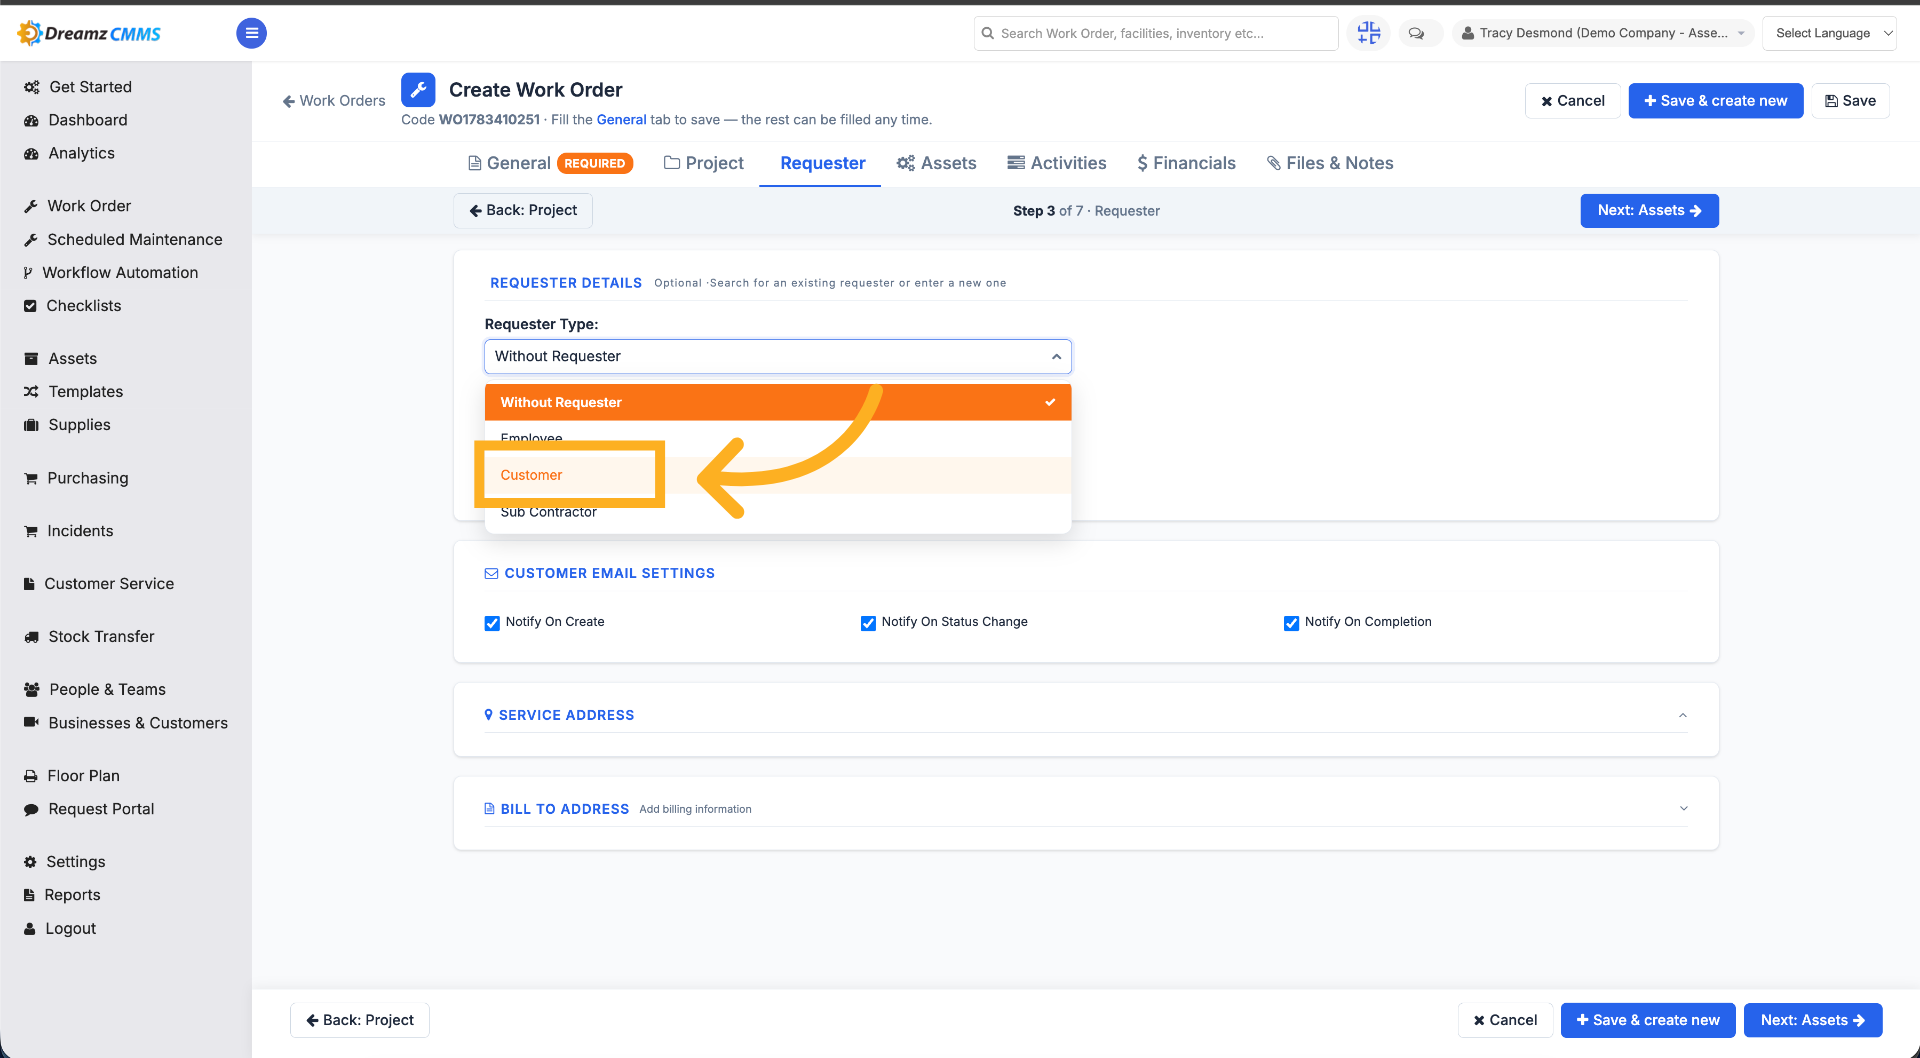
Step 12 – Choose Customer
Choose Customer from the requester type options.
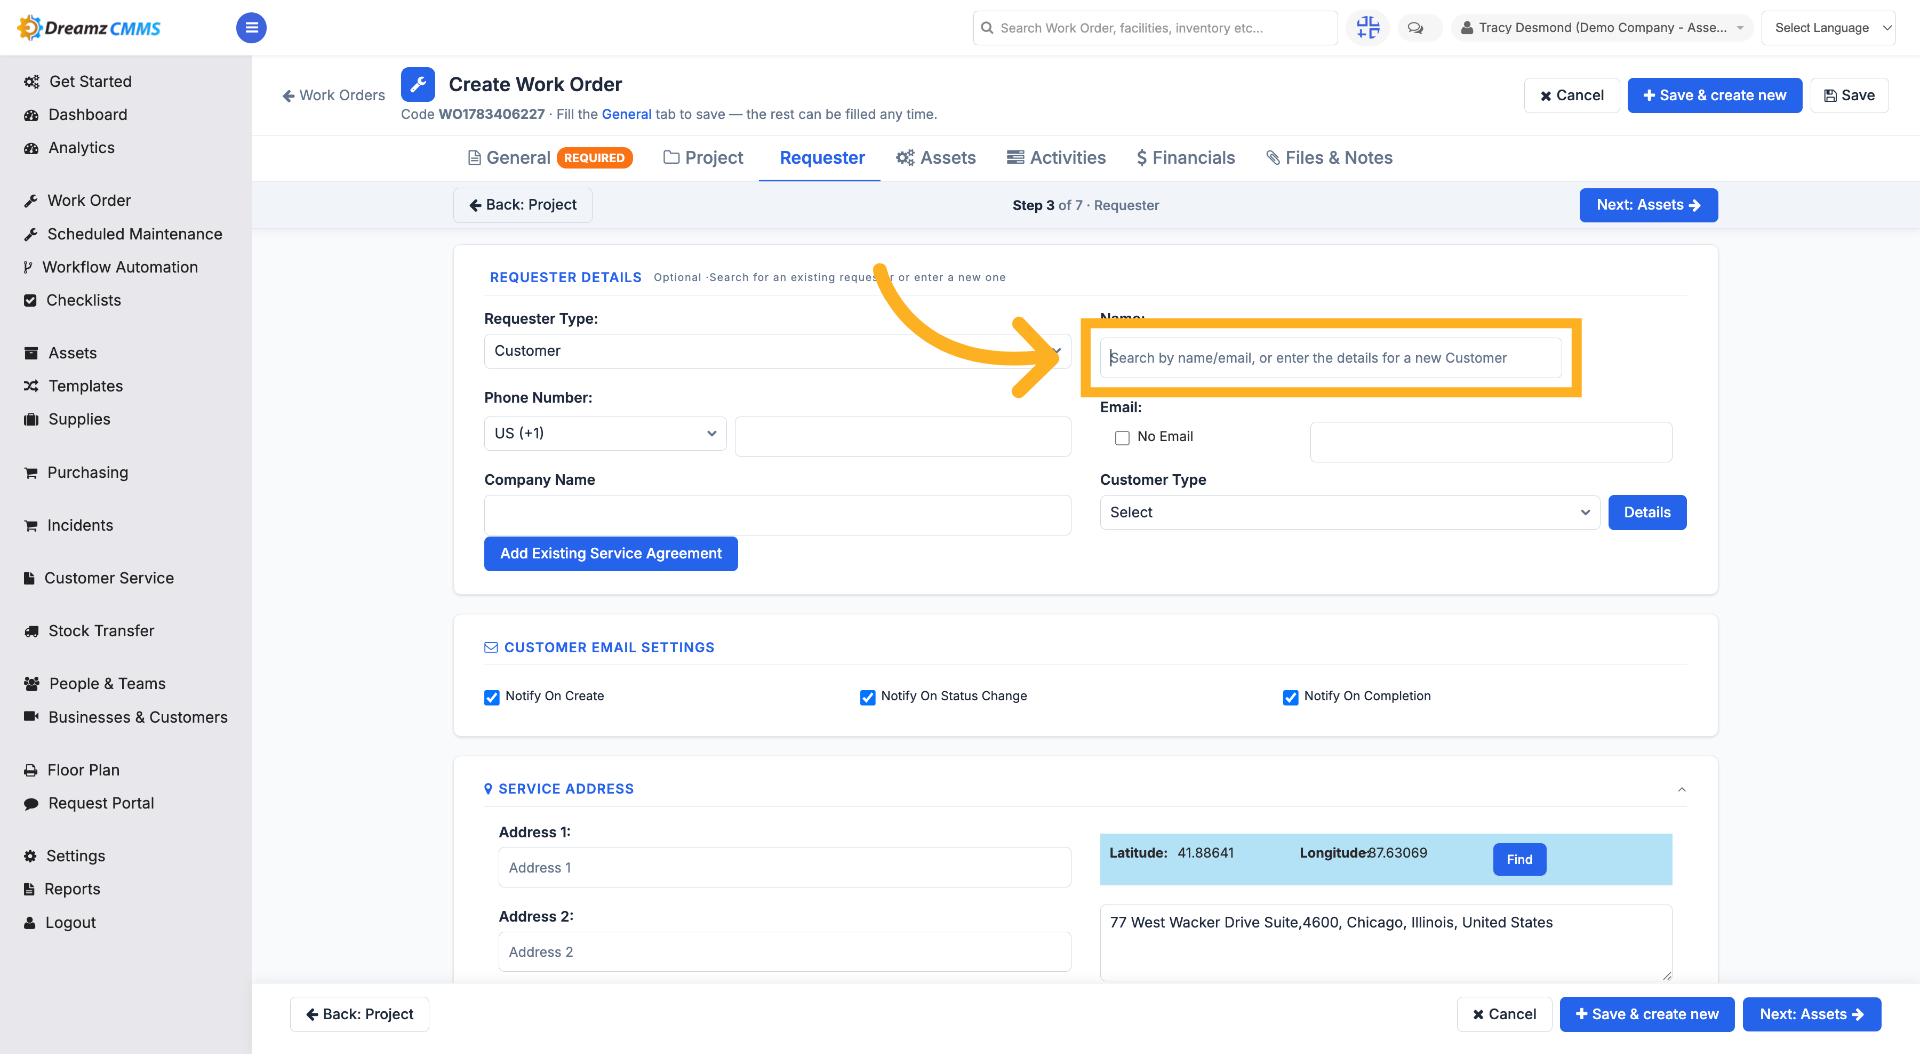
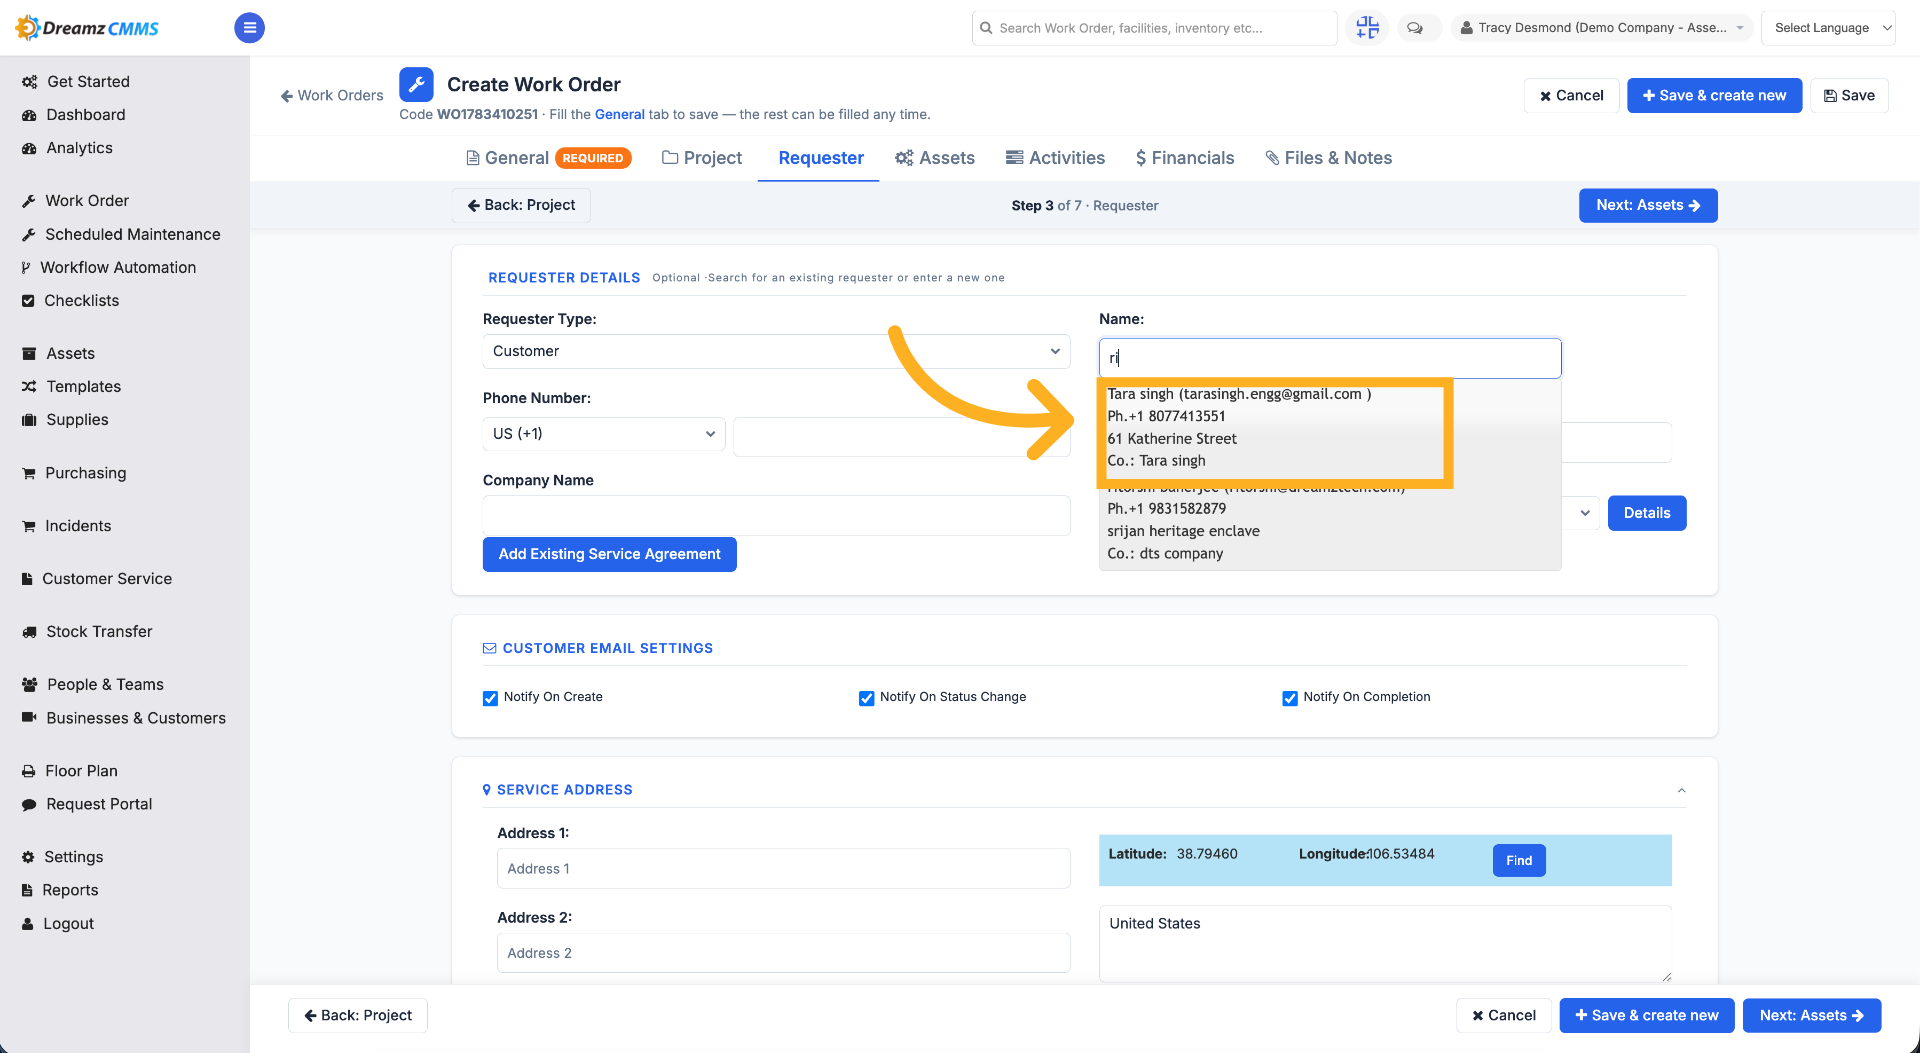
Step 13 – Search for a Customer
Click Search by name to find and add a customer.
Step 14 – Select Customer
Select the customer from the populated customer list to assign them to the work order.
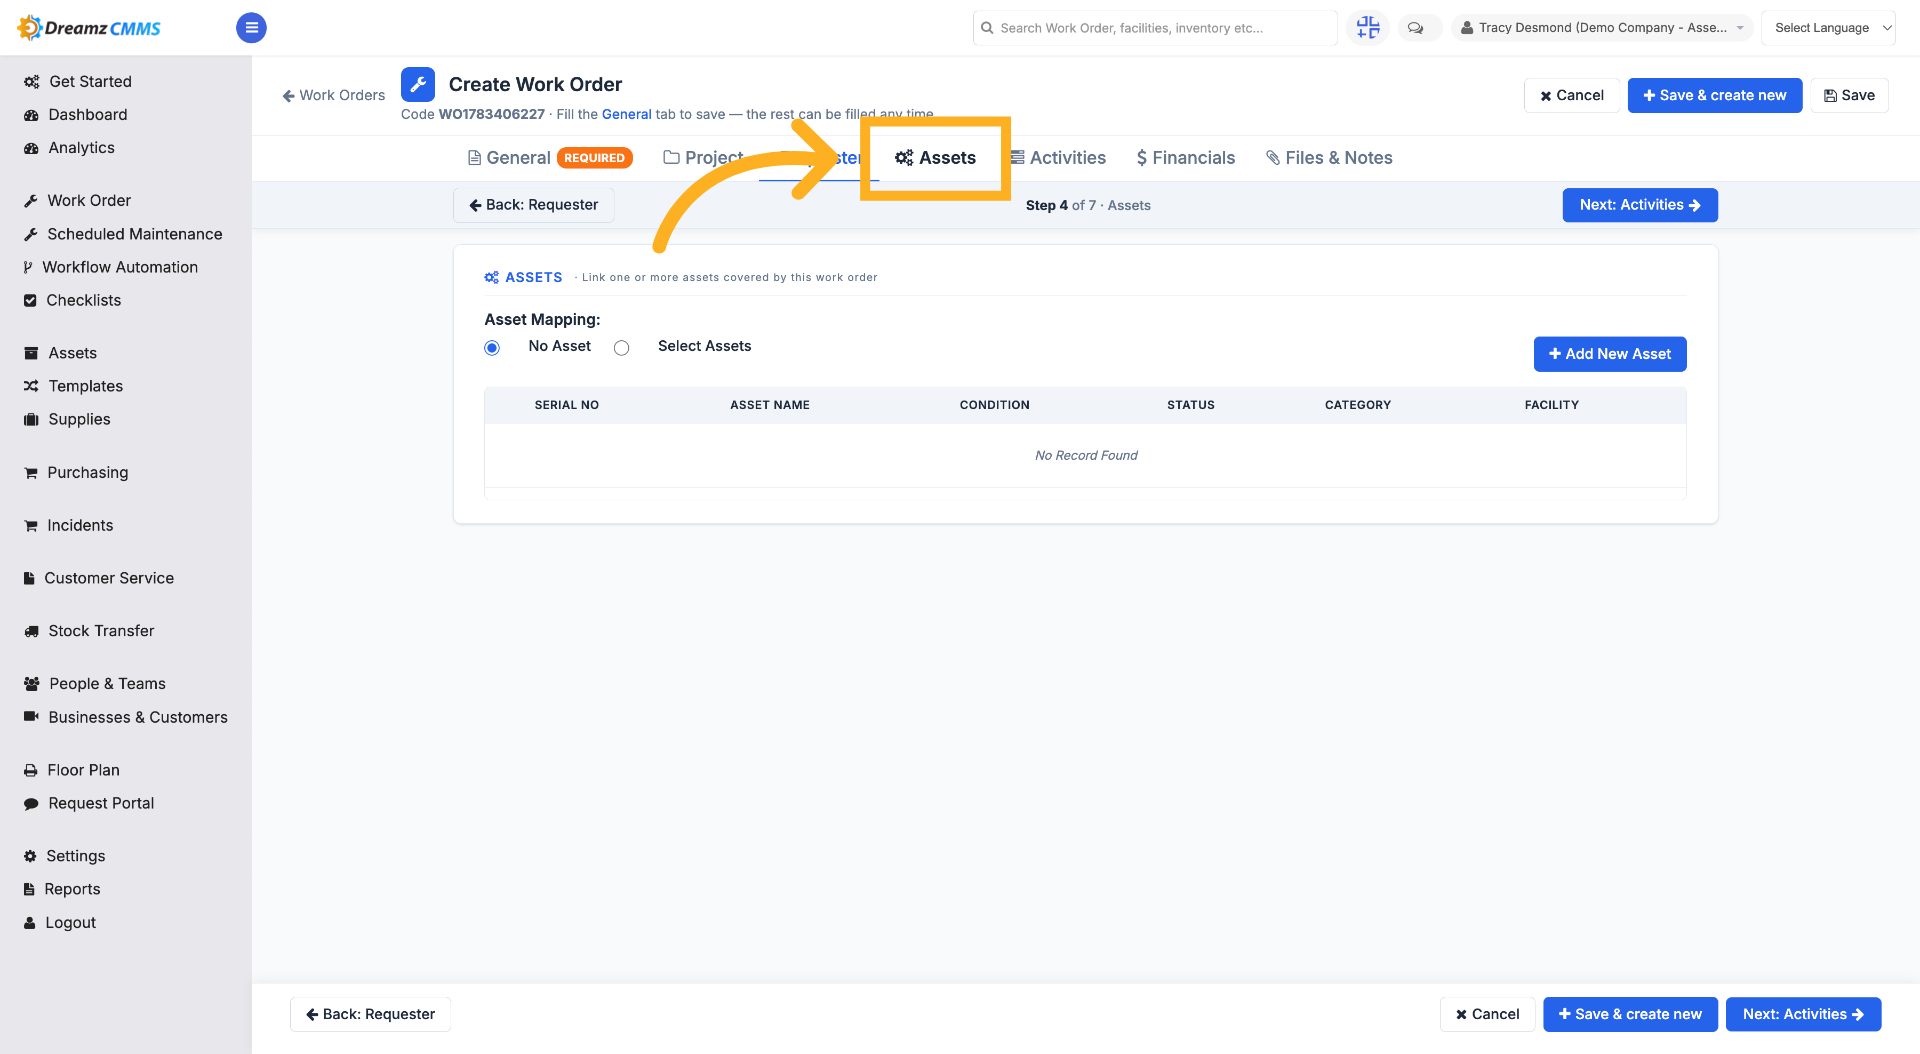
Step 15 – Access Assets Section
Click "Assets" to manage assets related to the work order.
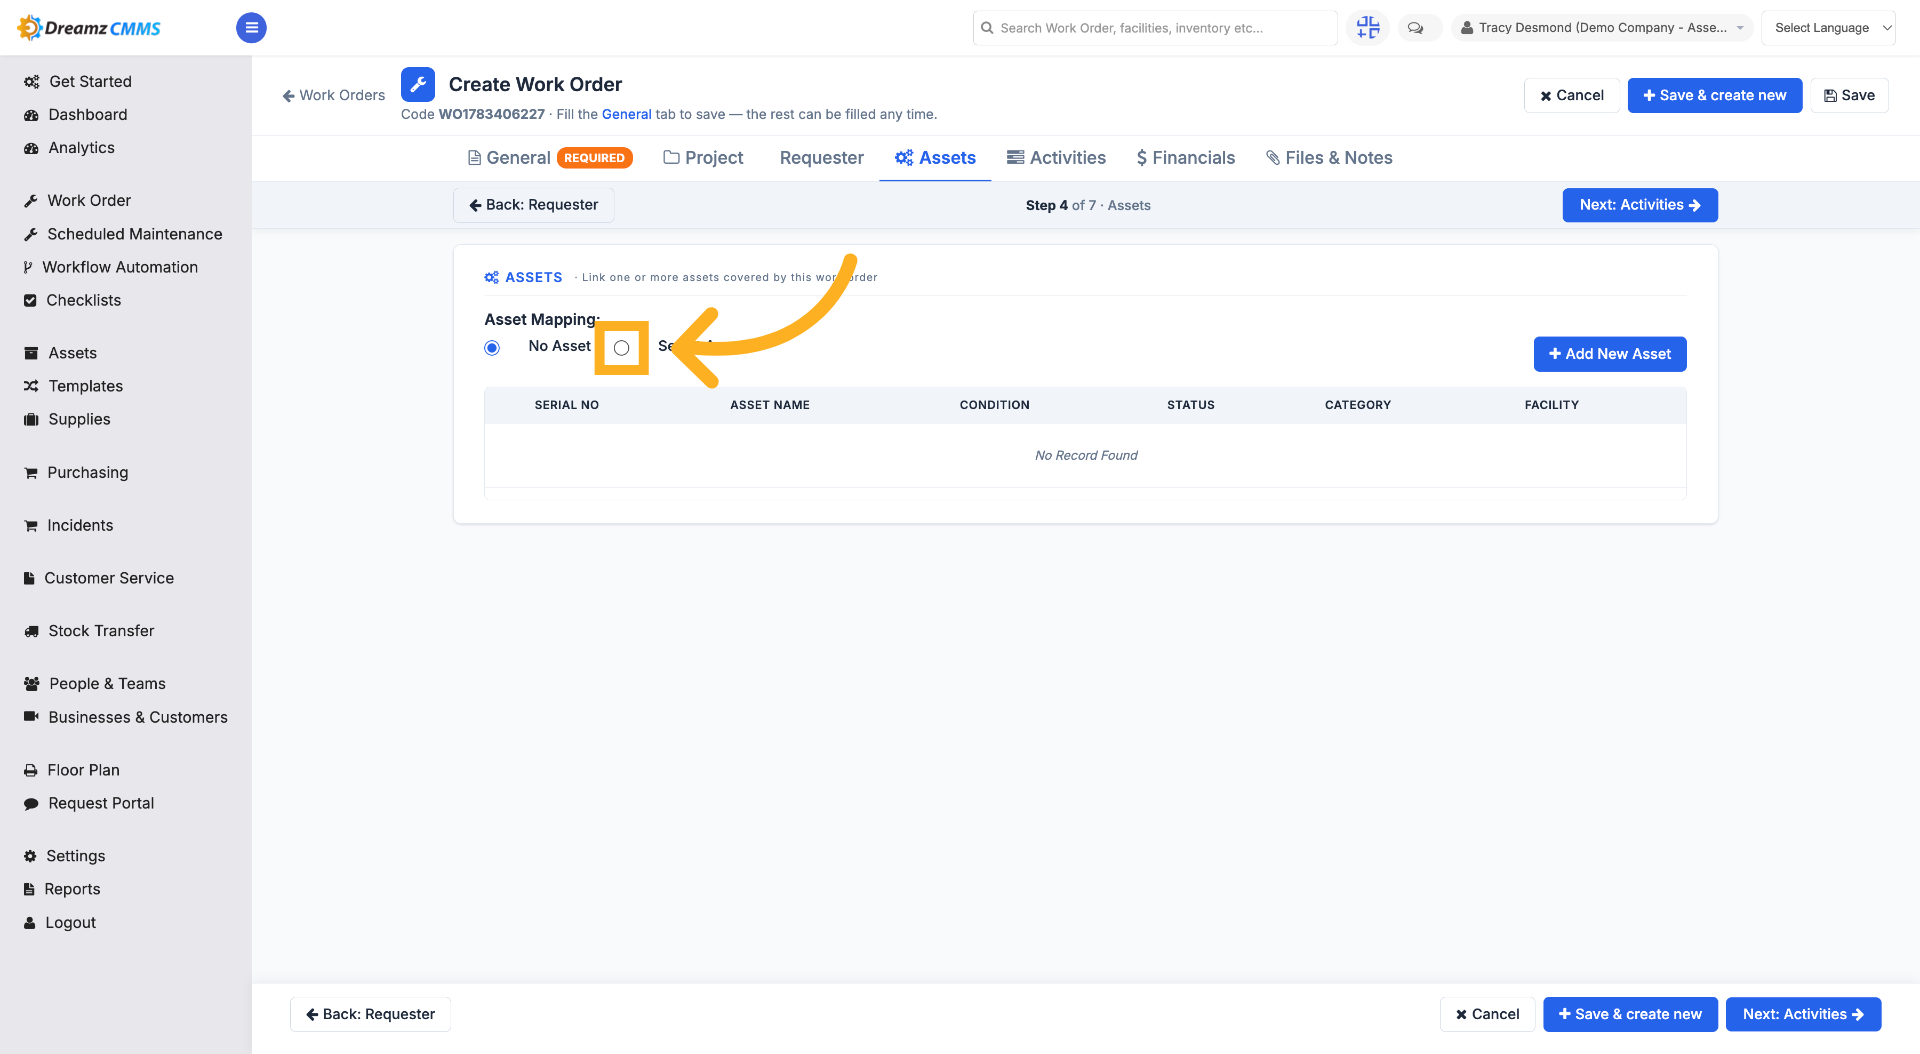
Step 16– Open Asset Selection
Click "Select Assets" to choose assets for the work order.
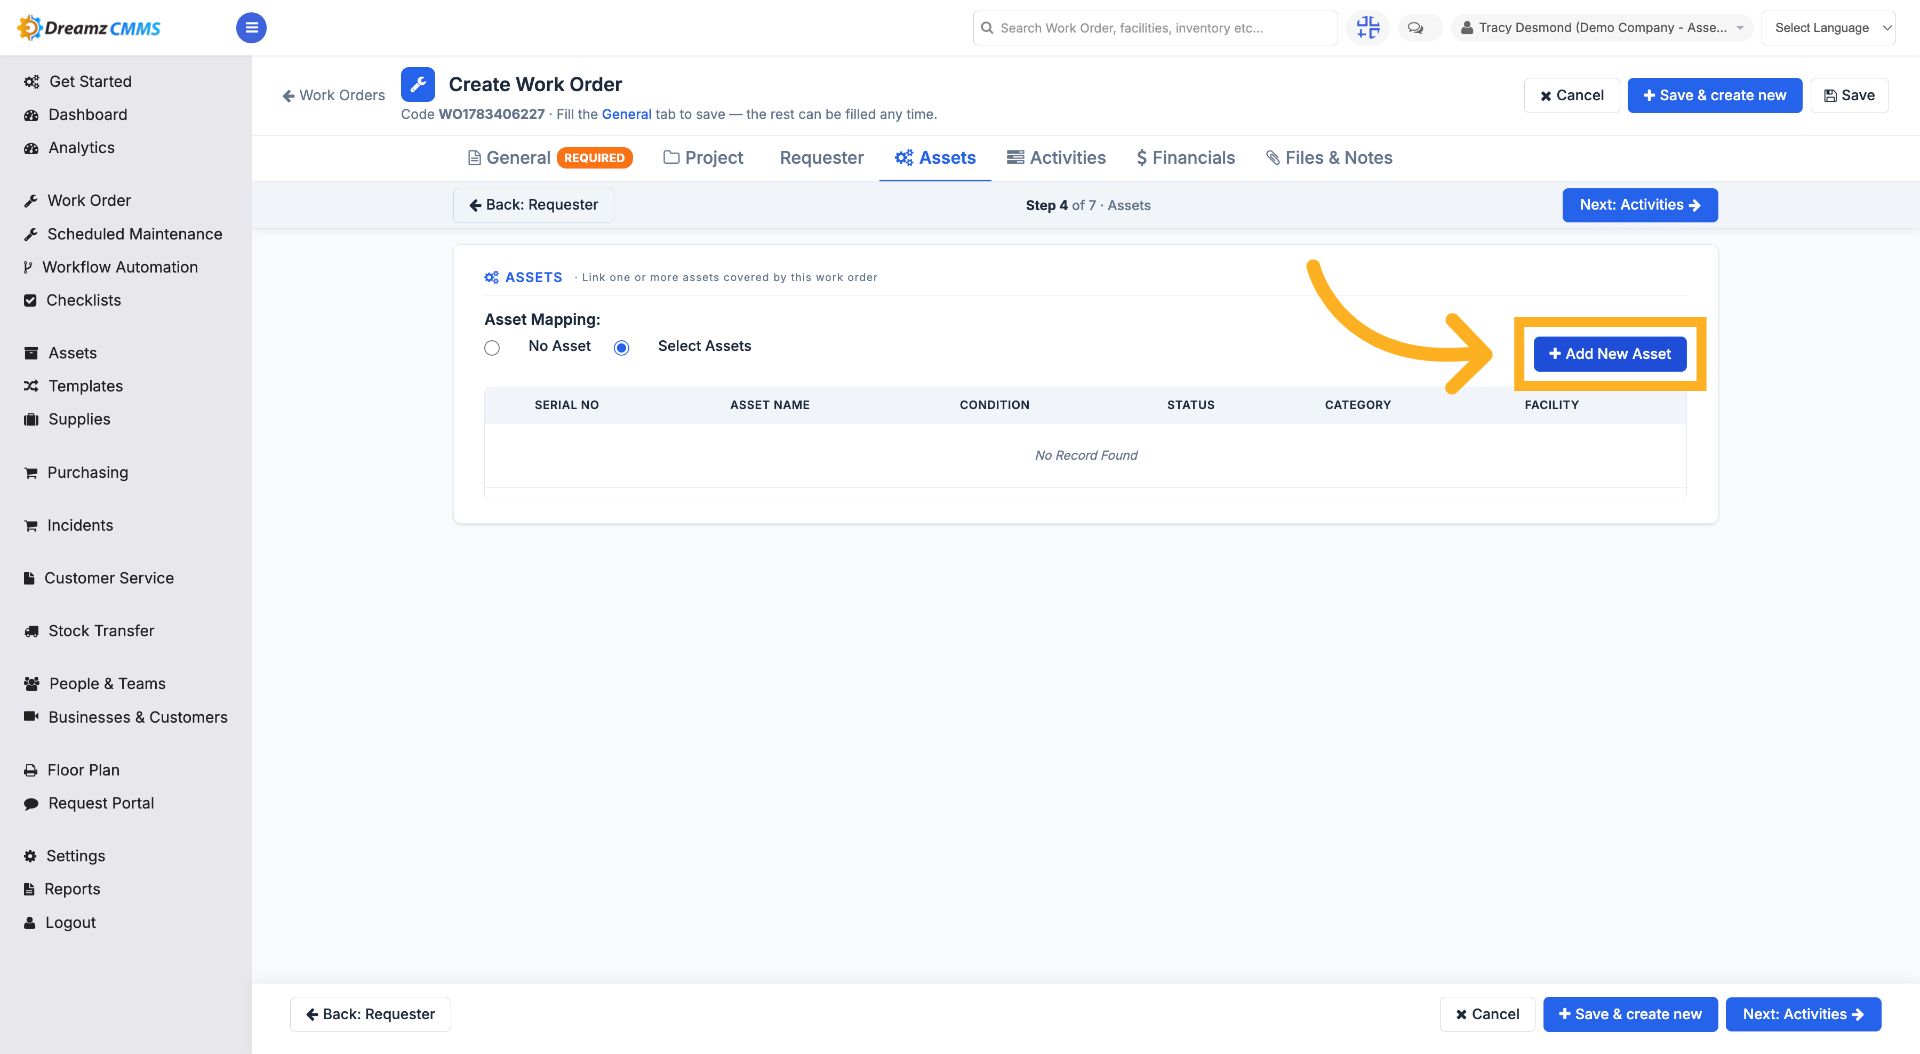
Step 17 – Add New Asset
Click "Add New Asset" to add a new asset entry to the work order
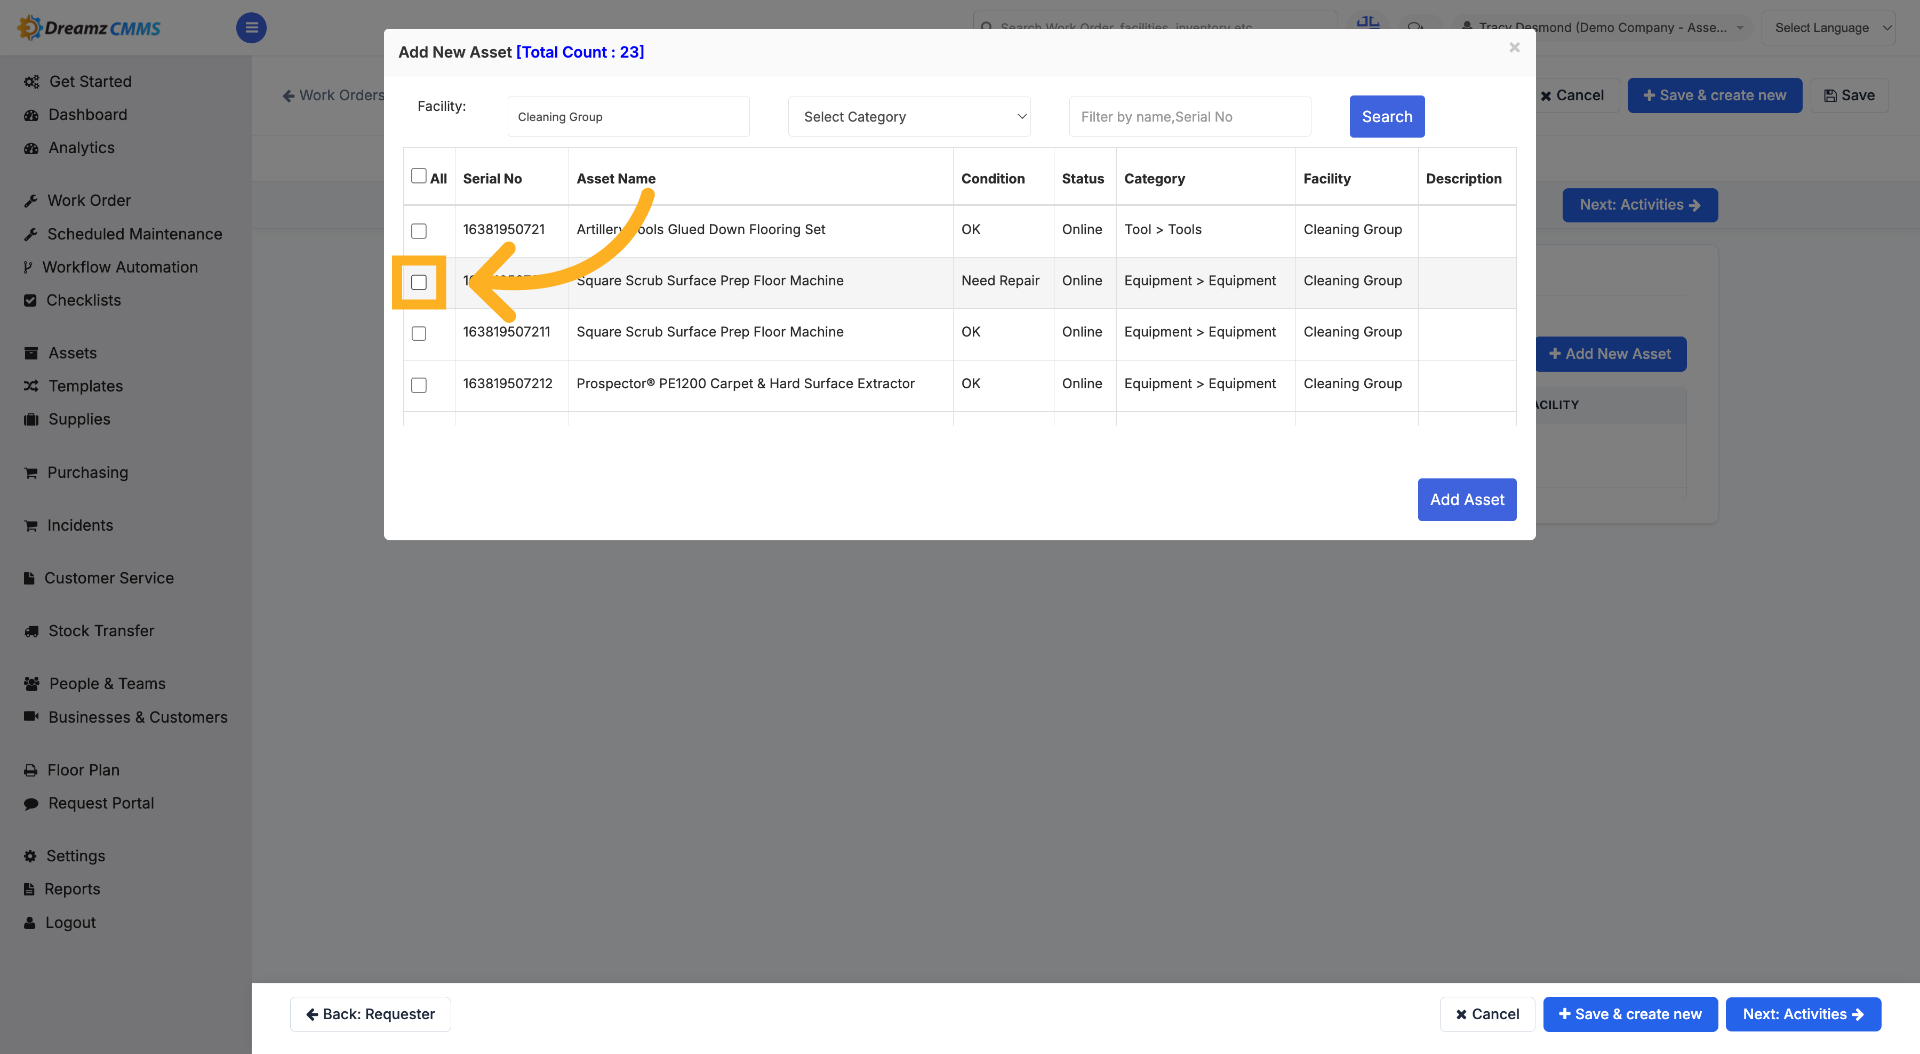
Step 18 – Select Asset
Check the checkbox to select an asset.
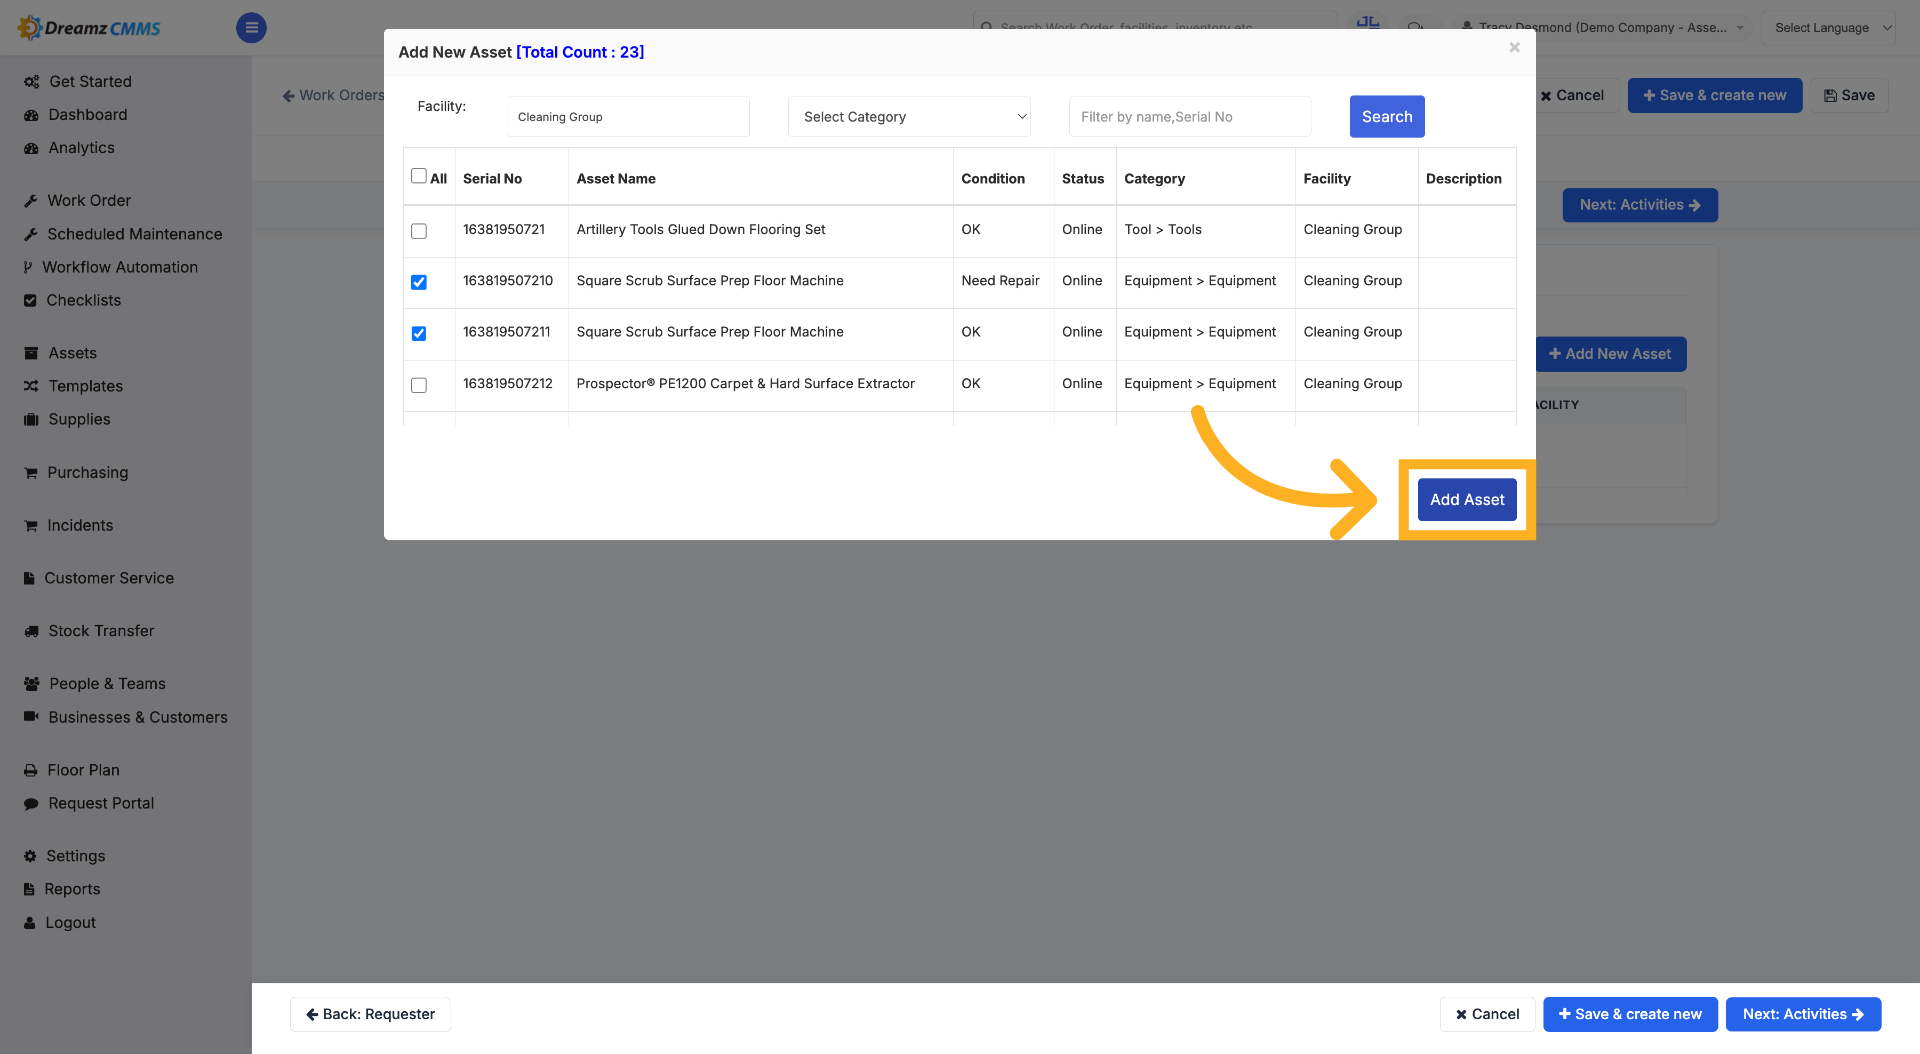
Step 19 – Add Asset to Work Order
Click "Add Asset" to include the selected assets in the work order.
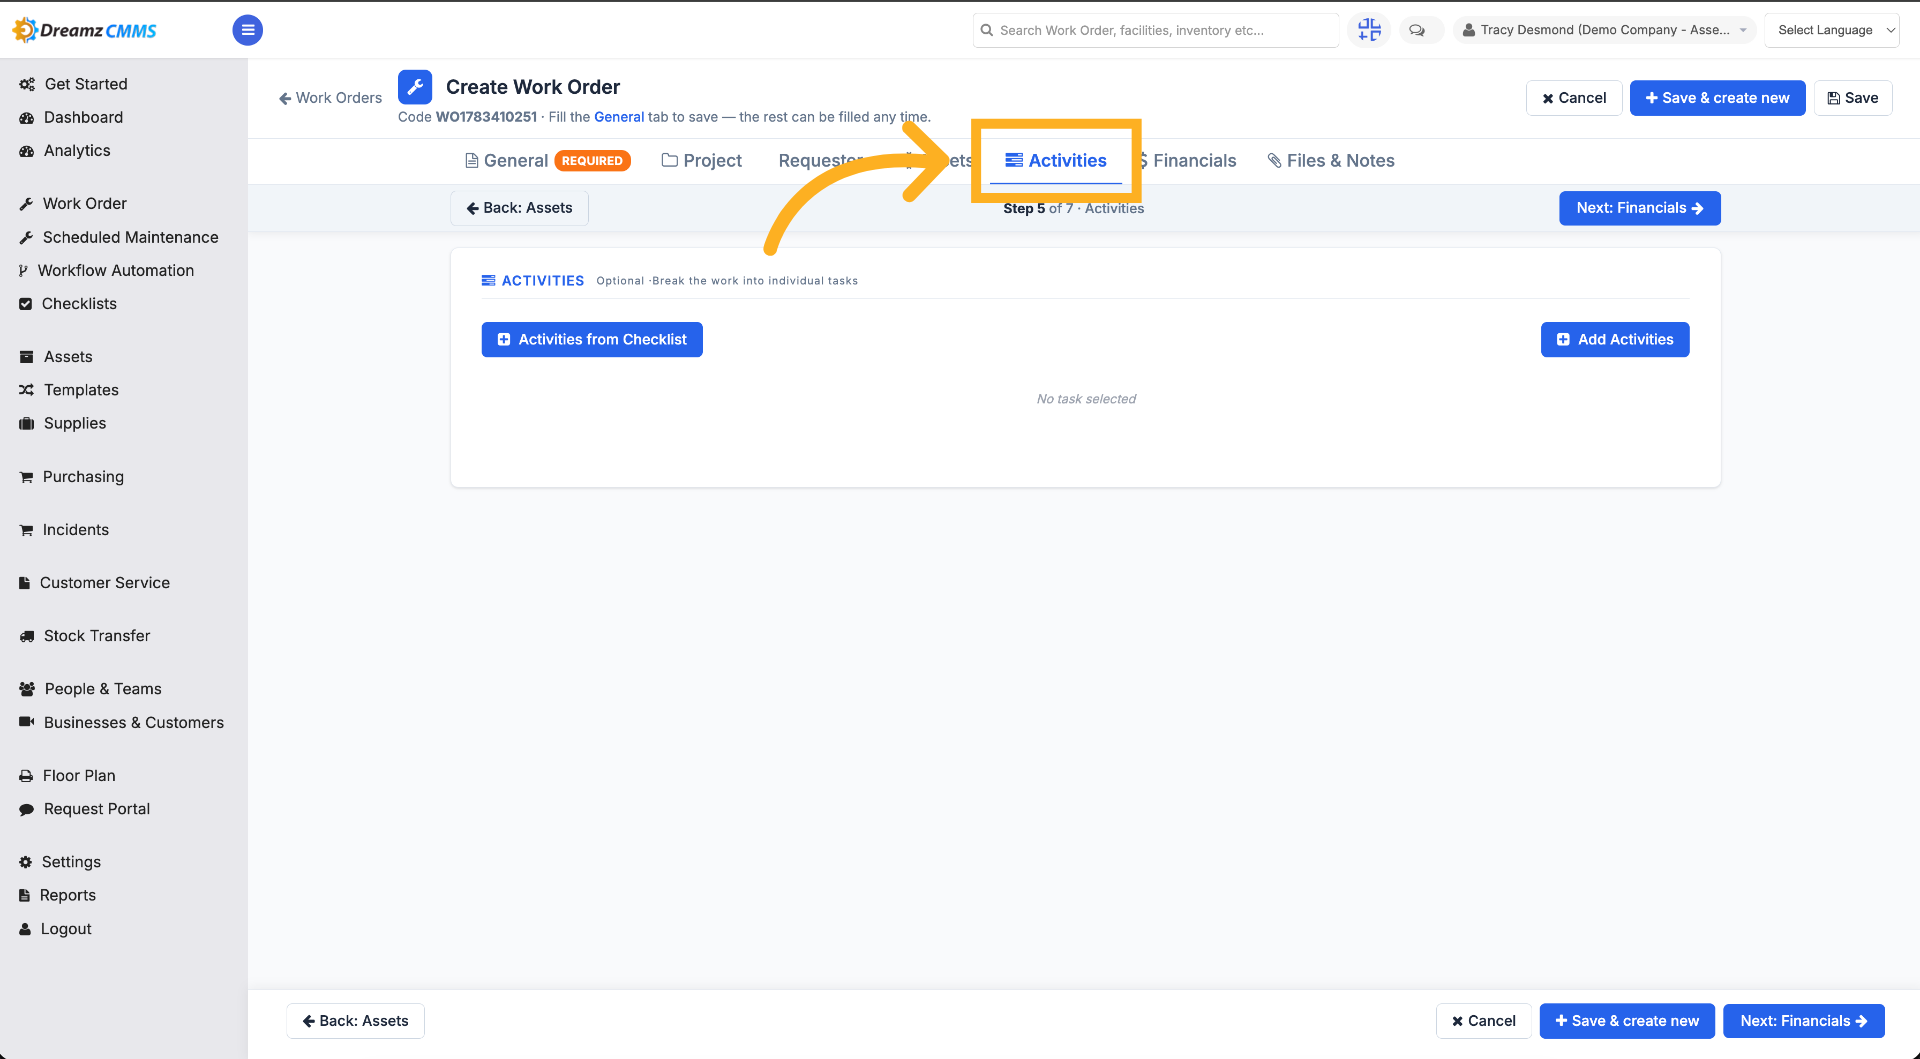
Step 20 – Open Activities Section
Click "Activities" to view or add activities related to the work order.
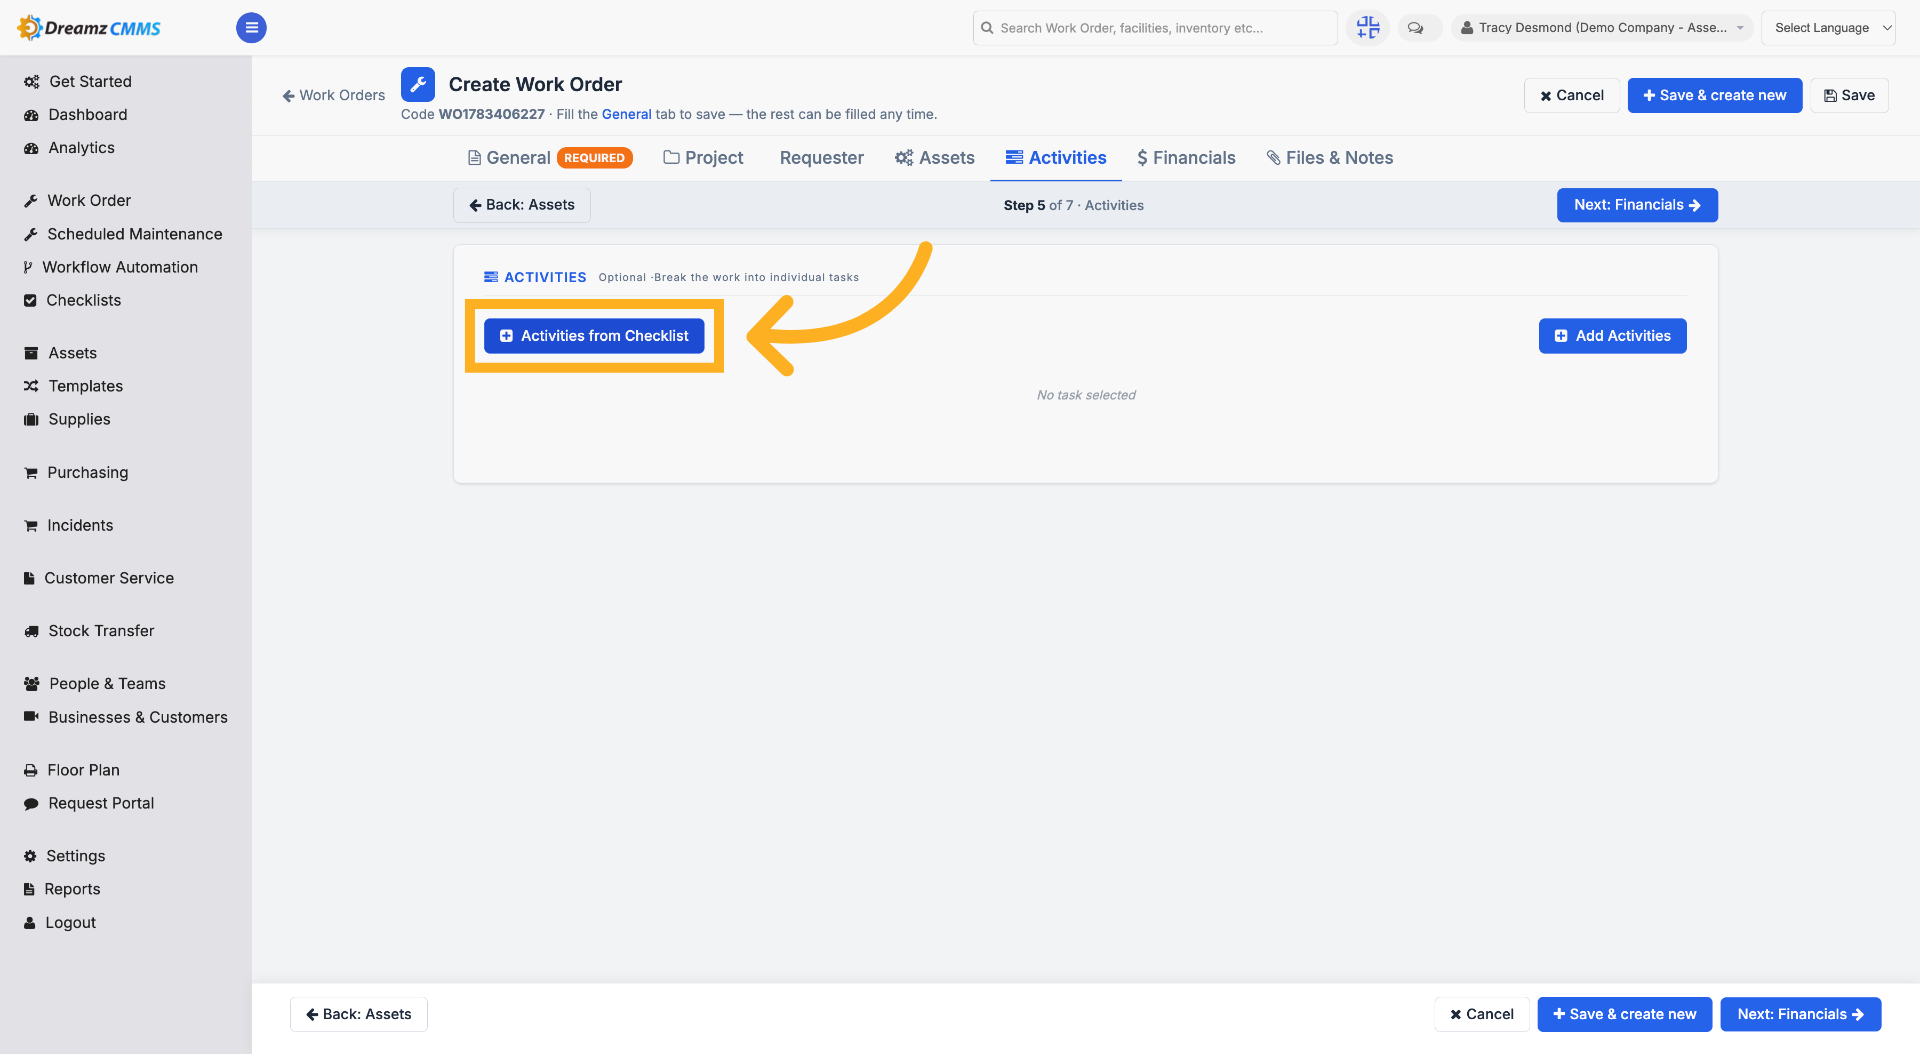
Step 21 – Access Checklist Activities
Click "Activities from Checklist" to add predefined checklists to the work order.
Step 22 – Choose Checklist Group
Choose the checklist to attach to the work order from the checklist dropdown.
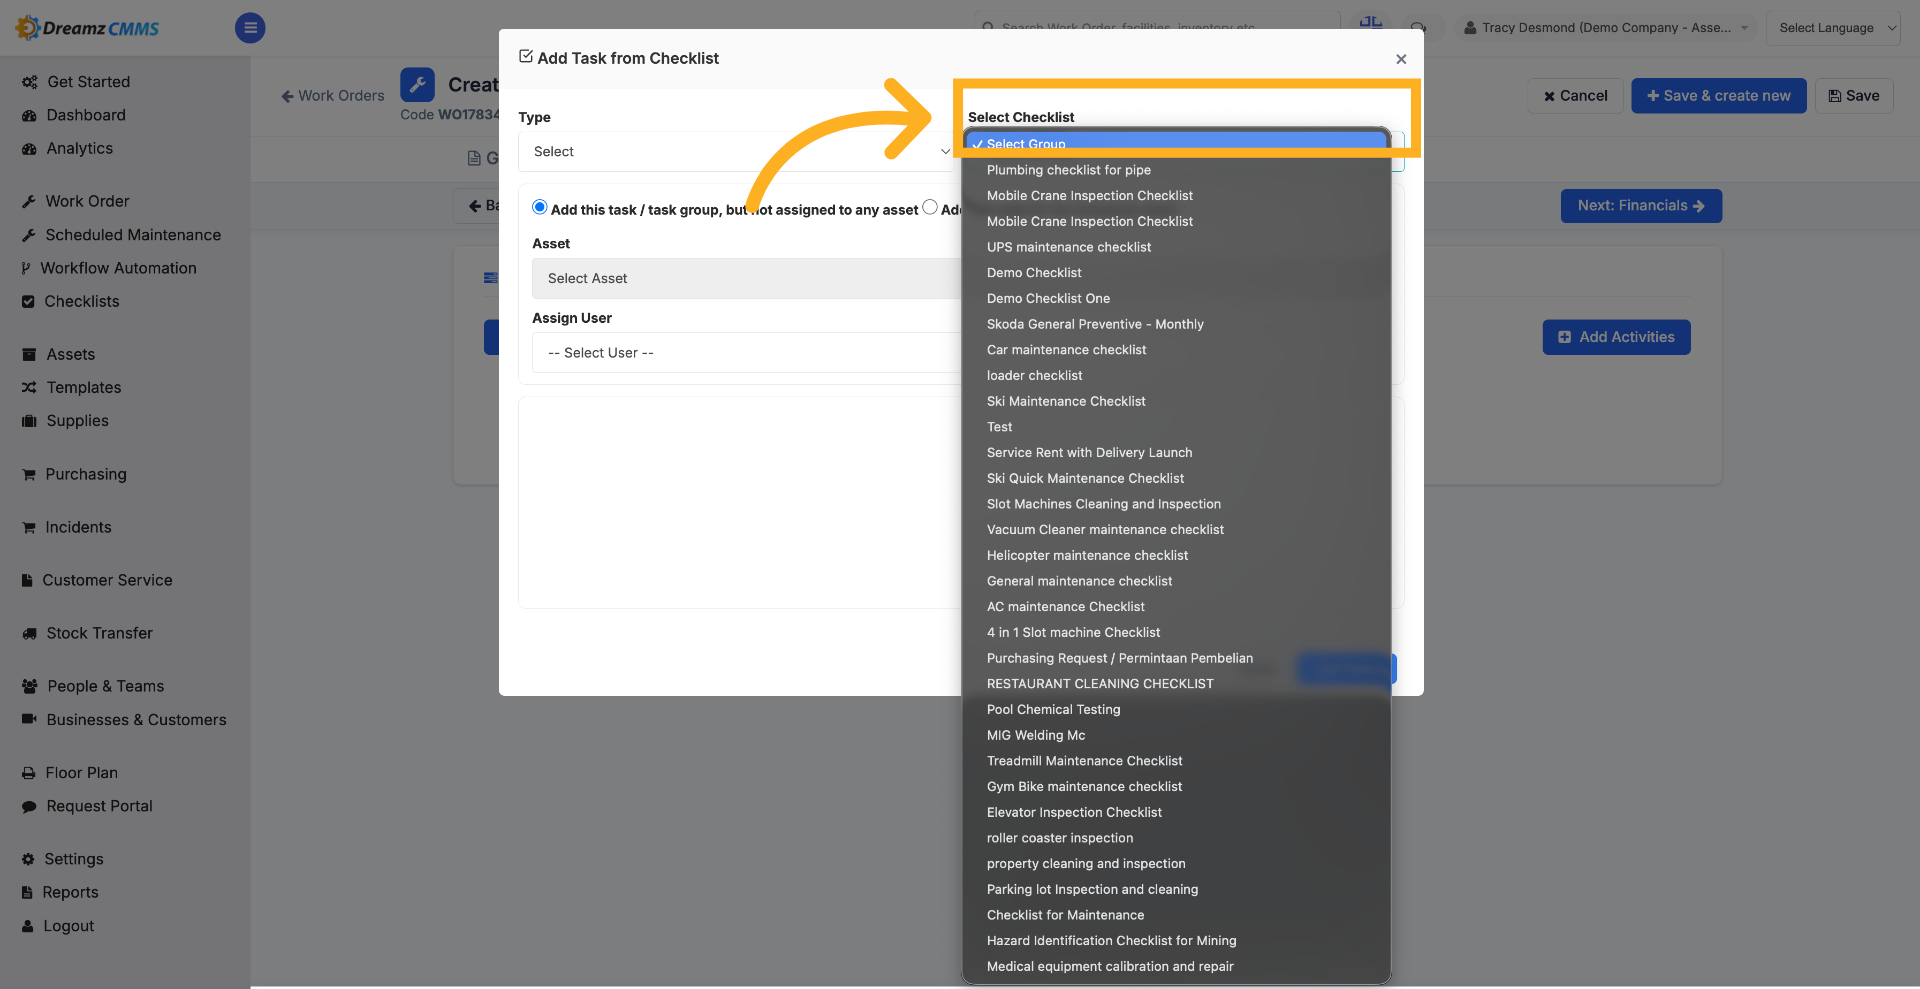
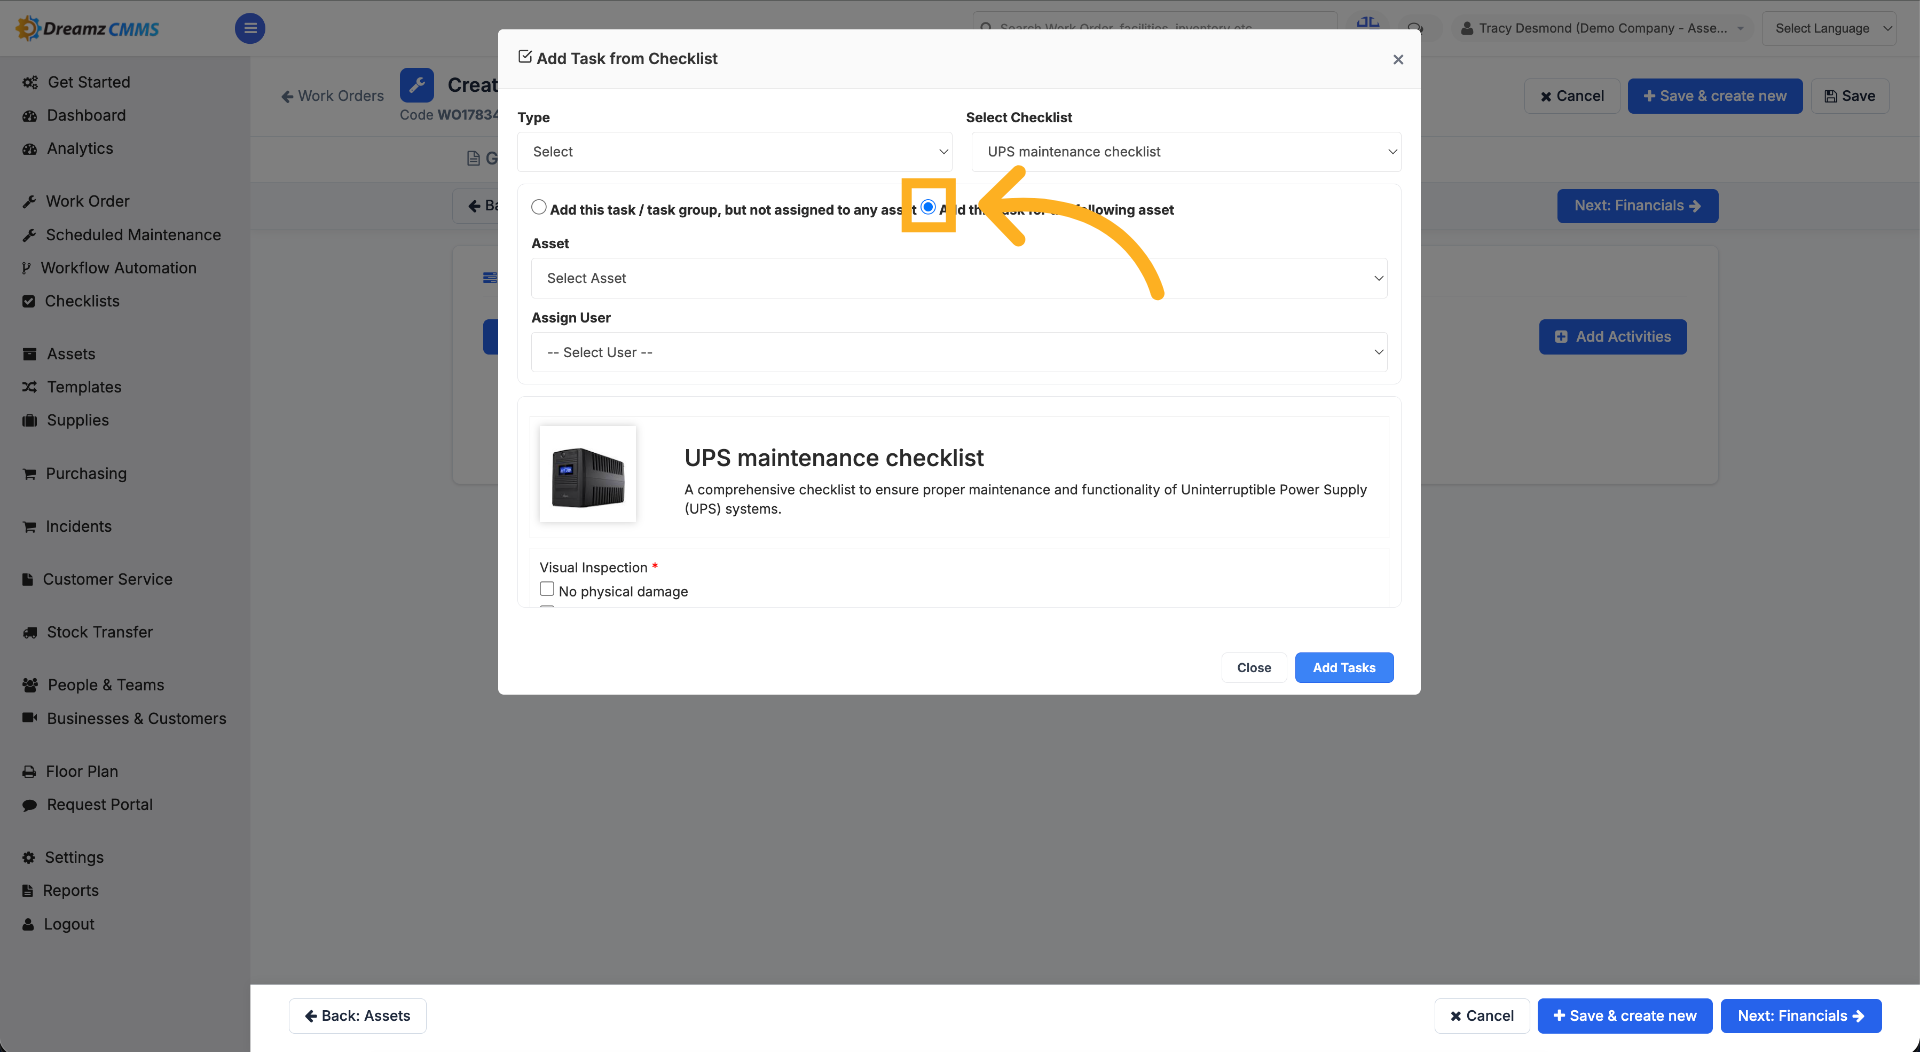
Step 23 – Add Task to Asset
Click "Add this task for the following asset" to assign the task to the selected asset.
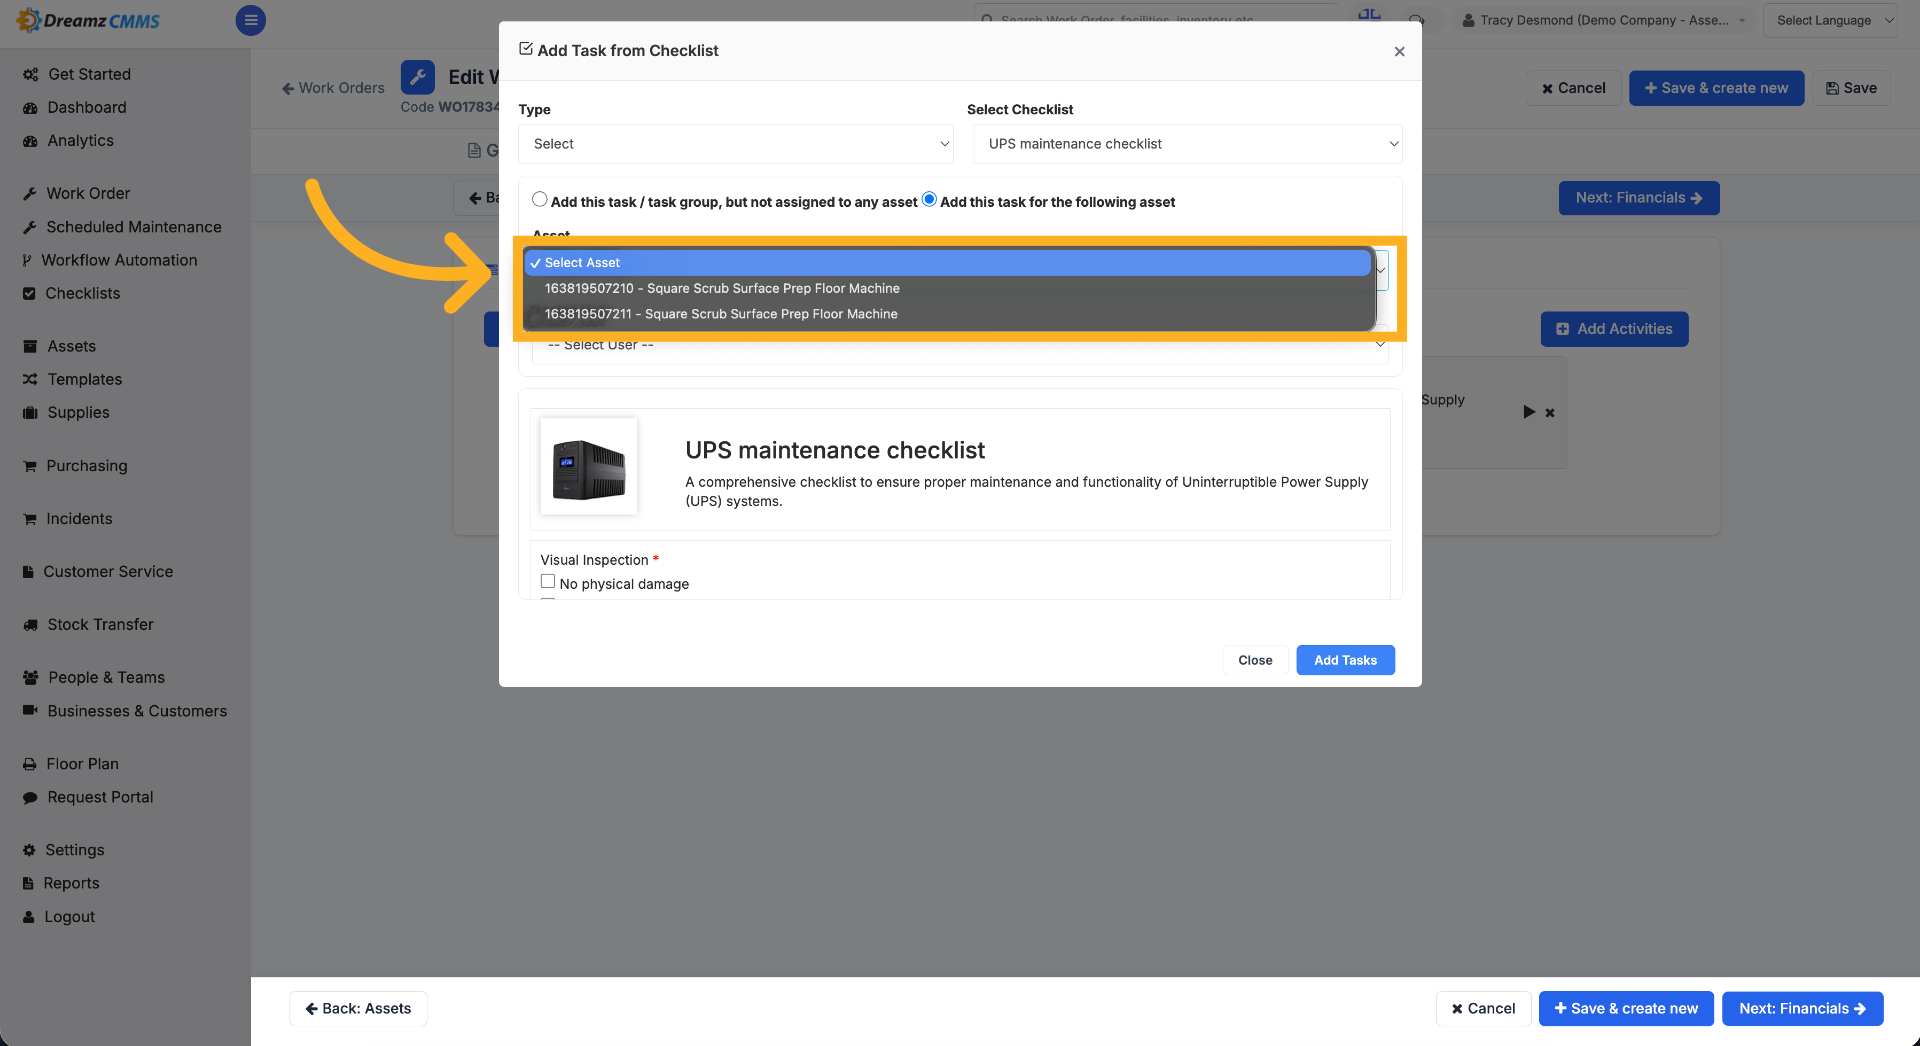
Step 24 – Select Specific Asset
Select from the list of assets populated based on the assets you previously selected for this work order.
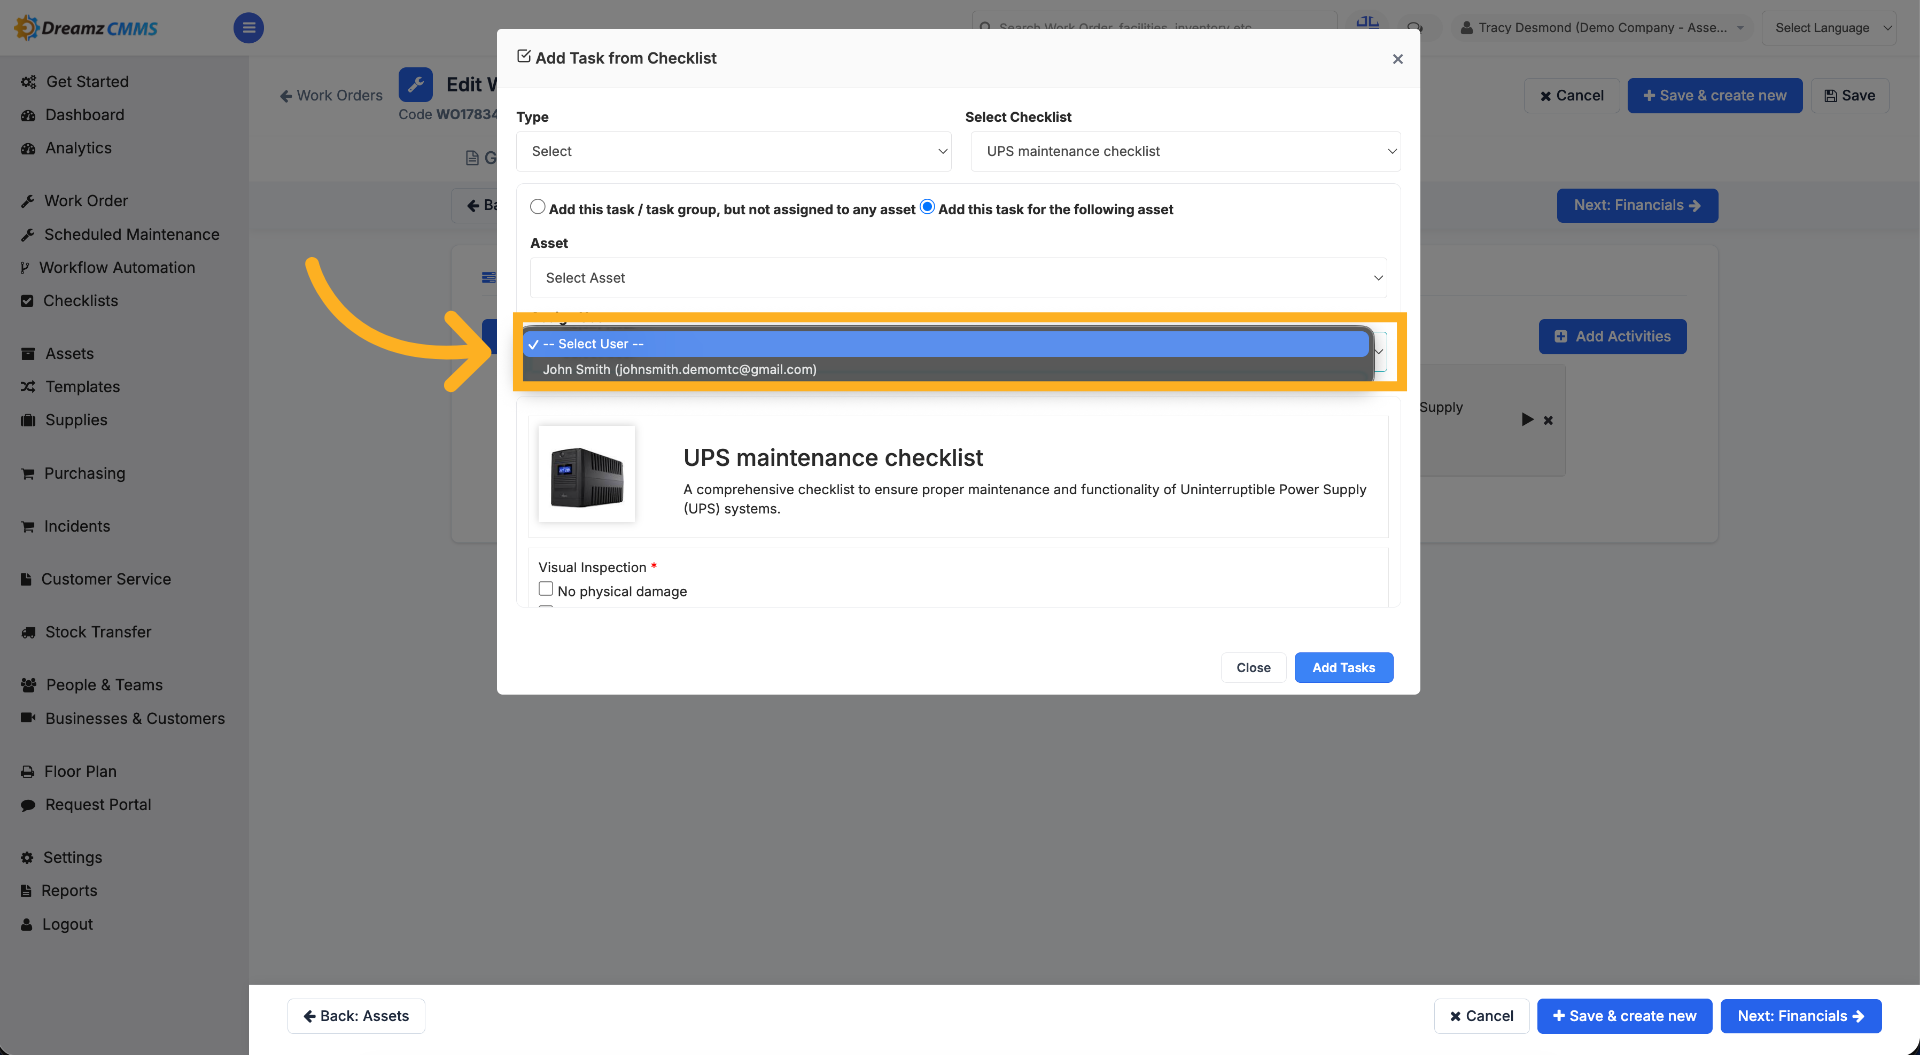
Step 25 – Choose User for Task
Click "John Smith" to assign the task to a user you've chosen as an assignee for this work order.
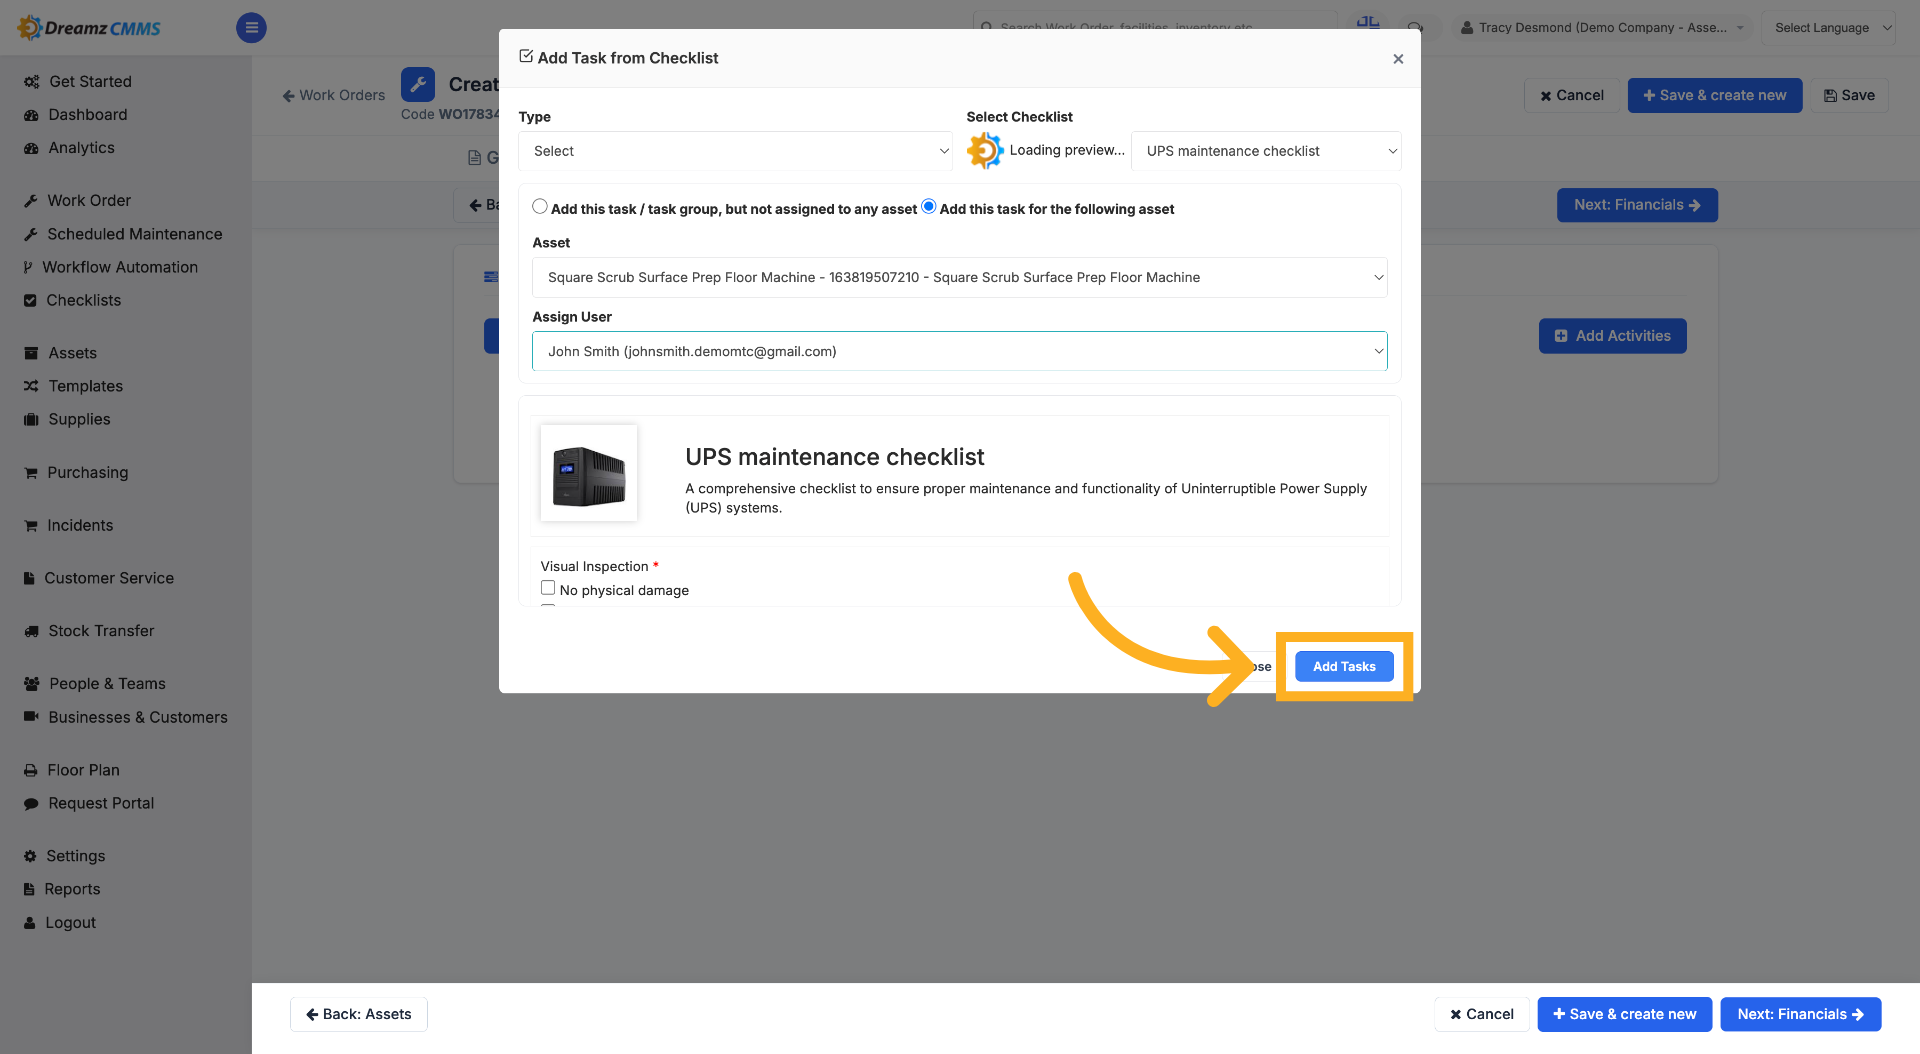
Step 26 – Add Tasks to Work Order
Click "Add Tasks" to include the selected checklist in the work order.
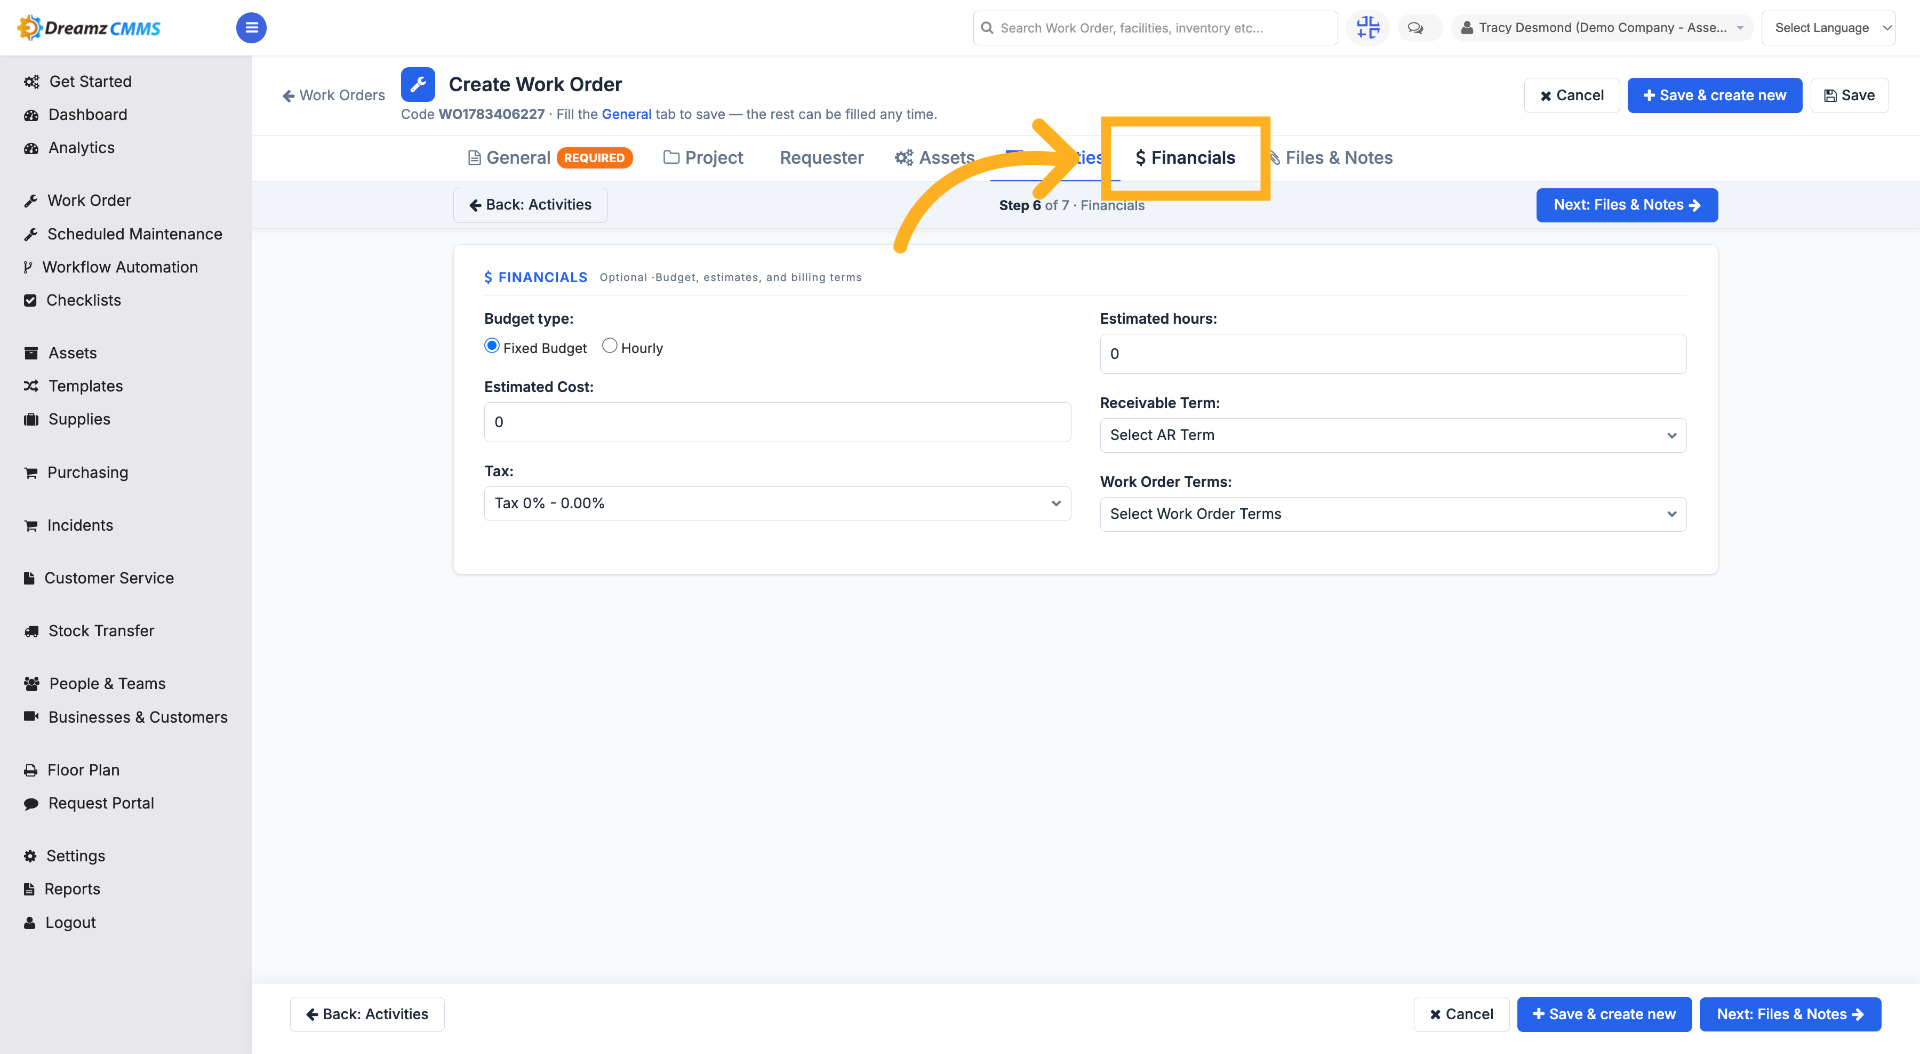
Step 27 – Open Financials Section
Click "Financials" to manage financial details of the work order, such as budget type, estimated hours, and estimated cost.
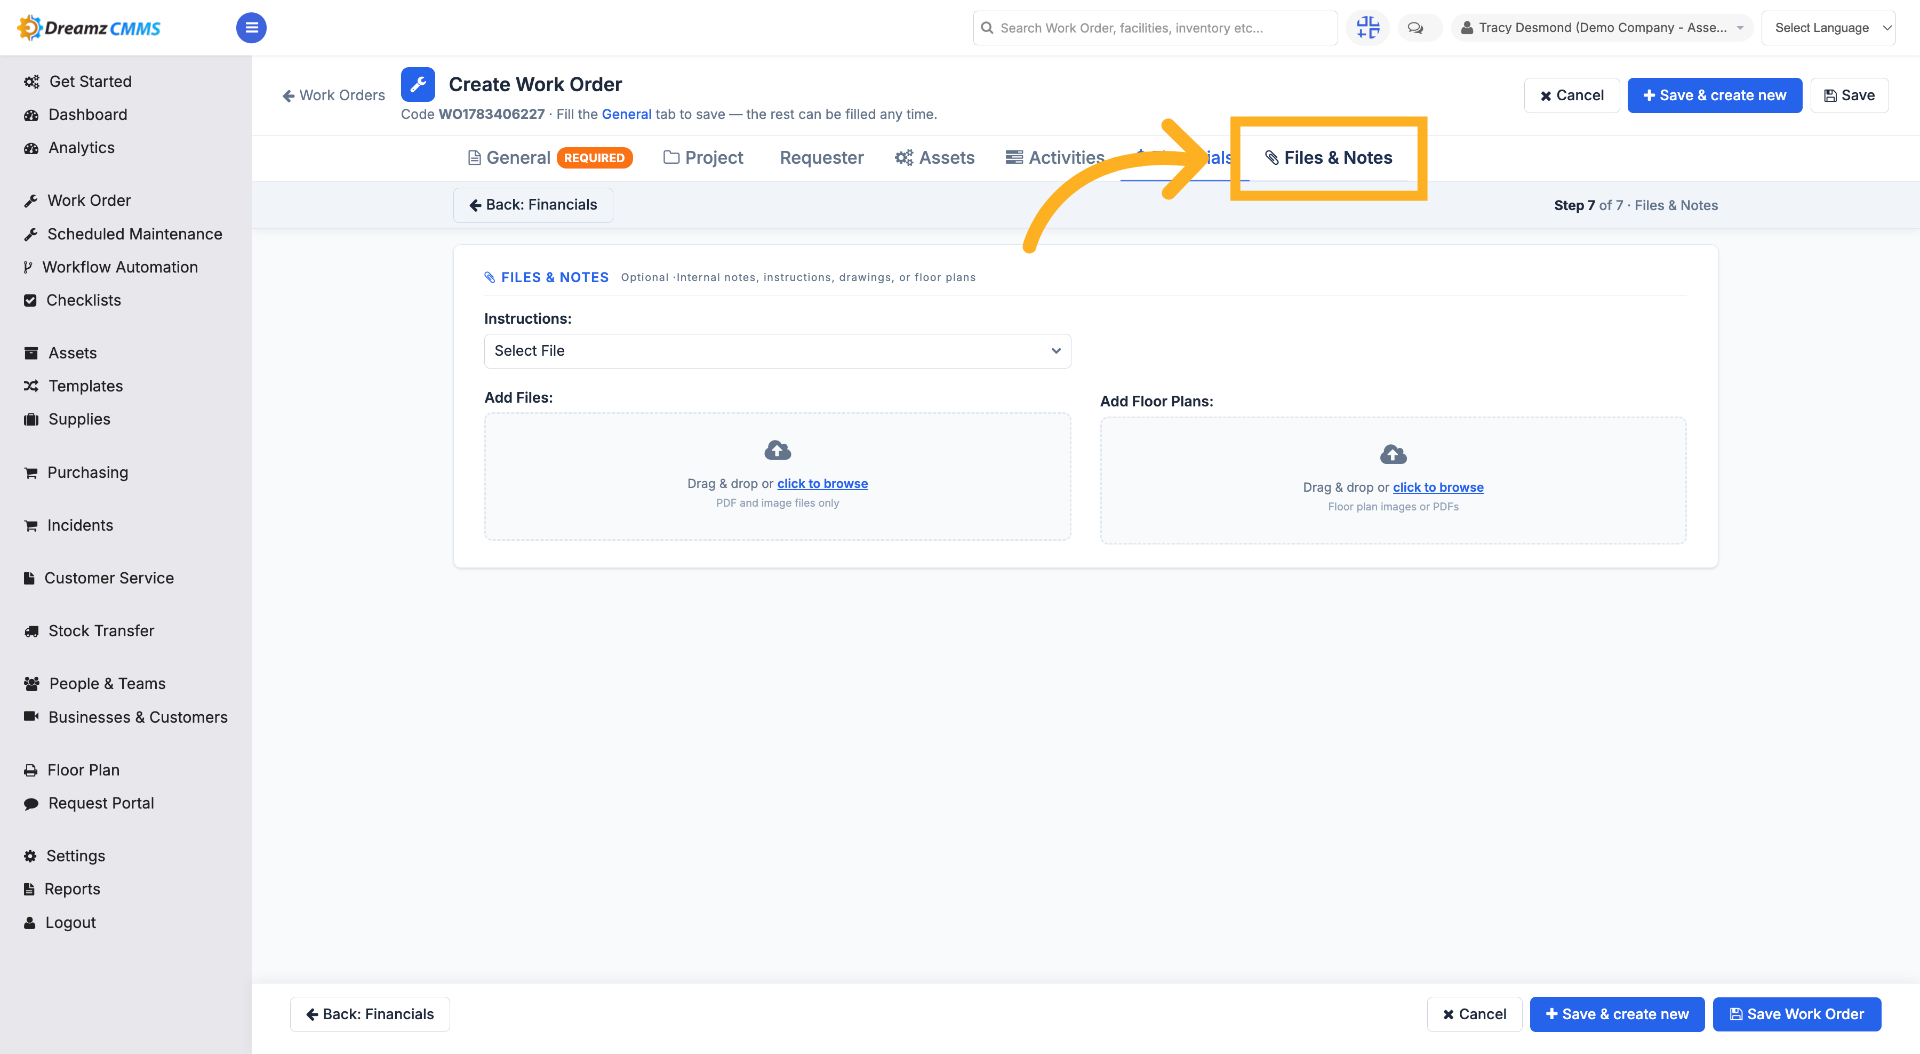
Step 28 – Access Files and Notes
Click "Files & Notes" to view or add files and notes to the work order.
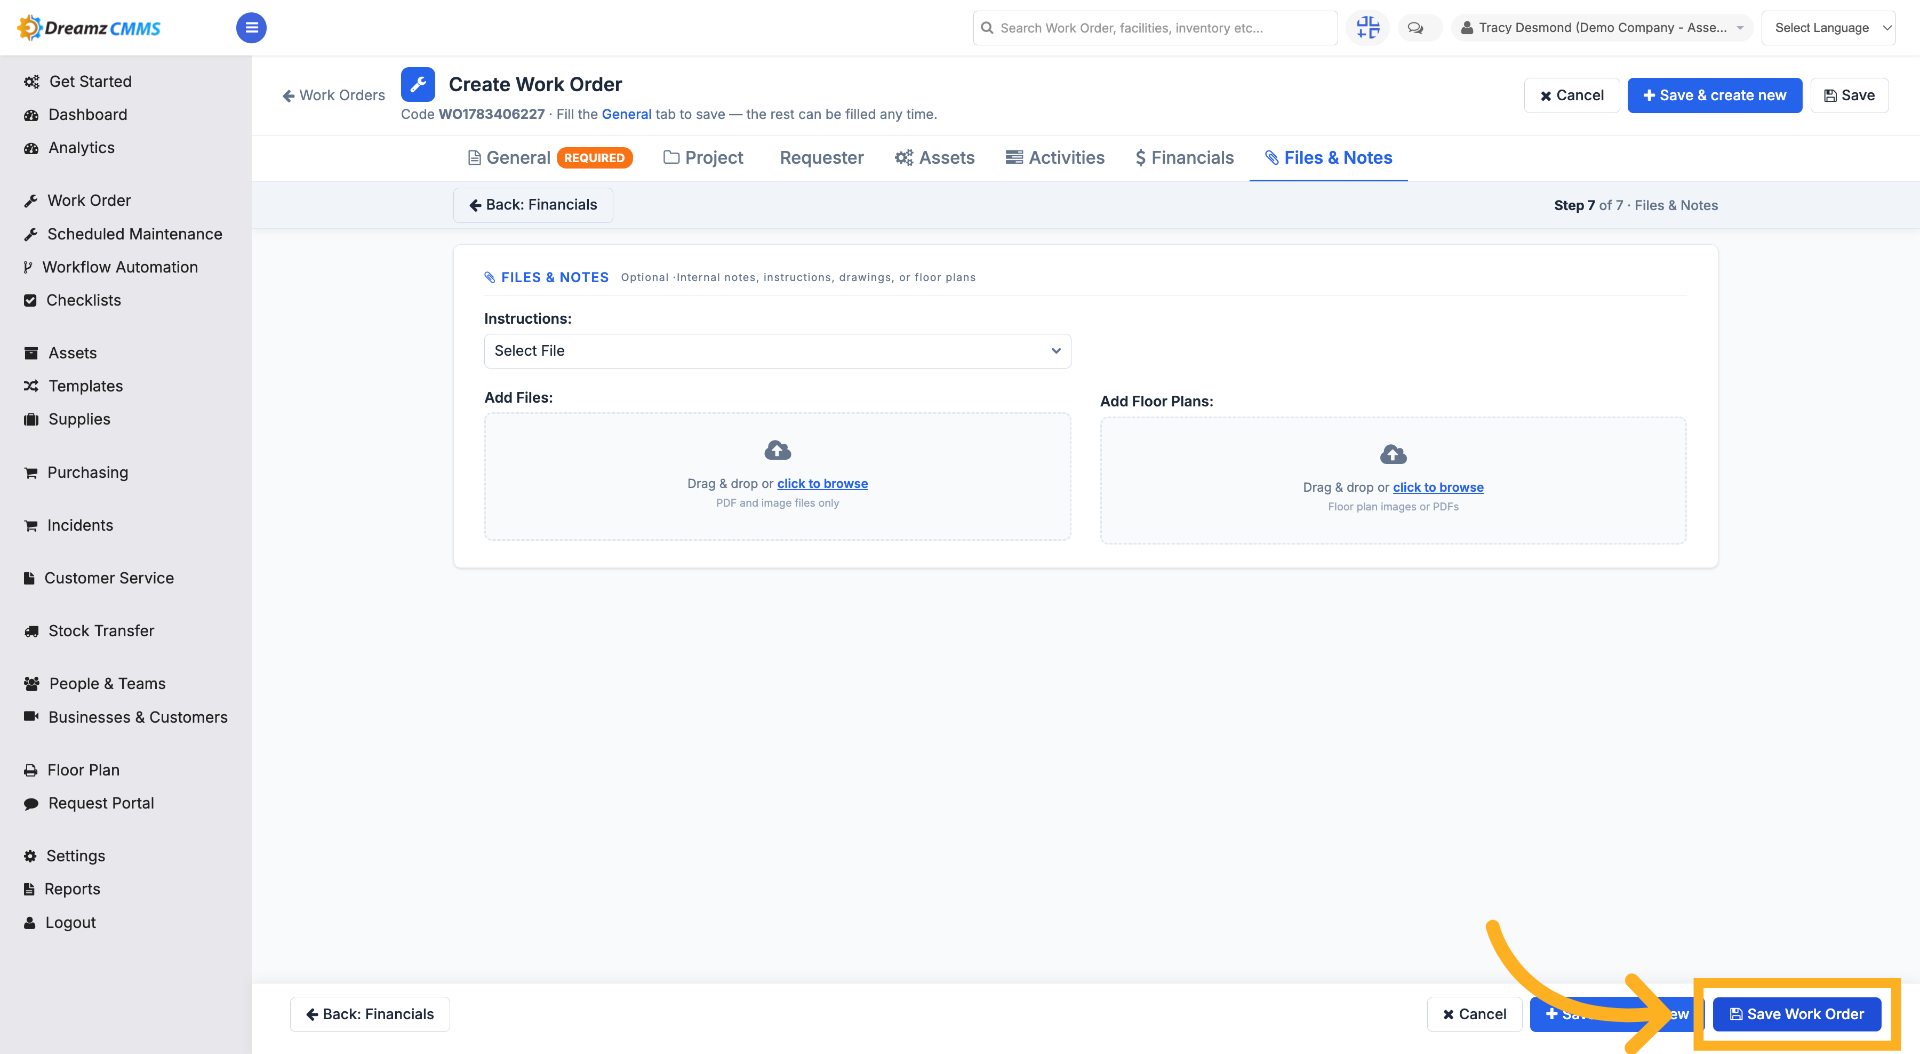
Step 29 – Save Work Order
Click "Save Work Order" to save all entered information and updates.
How to View and Manage an Existing Work Order
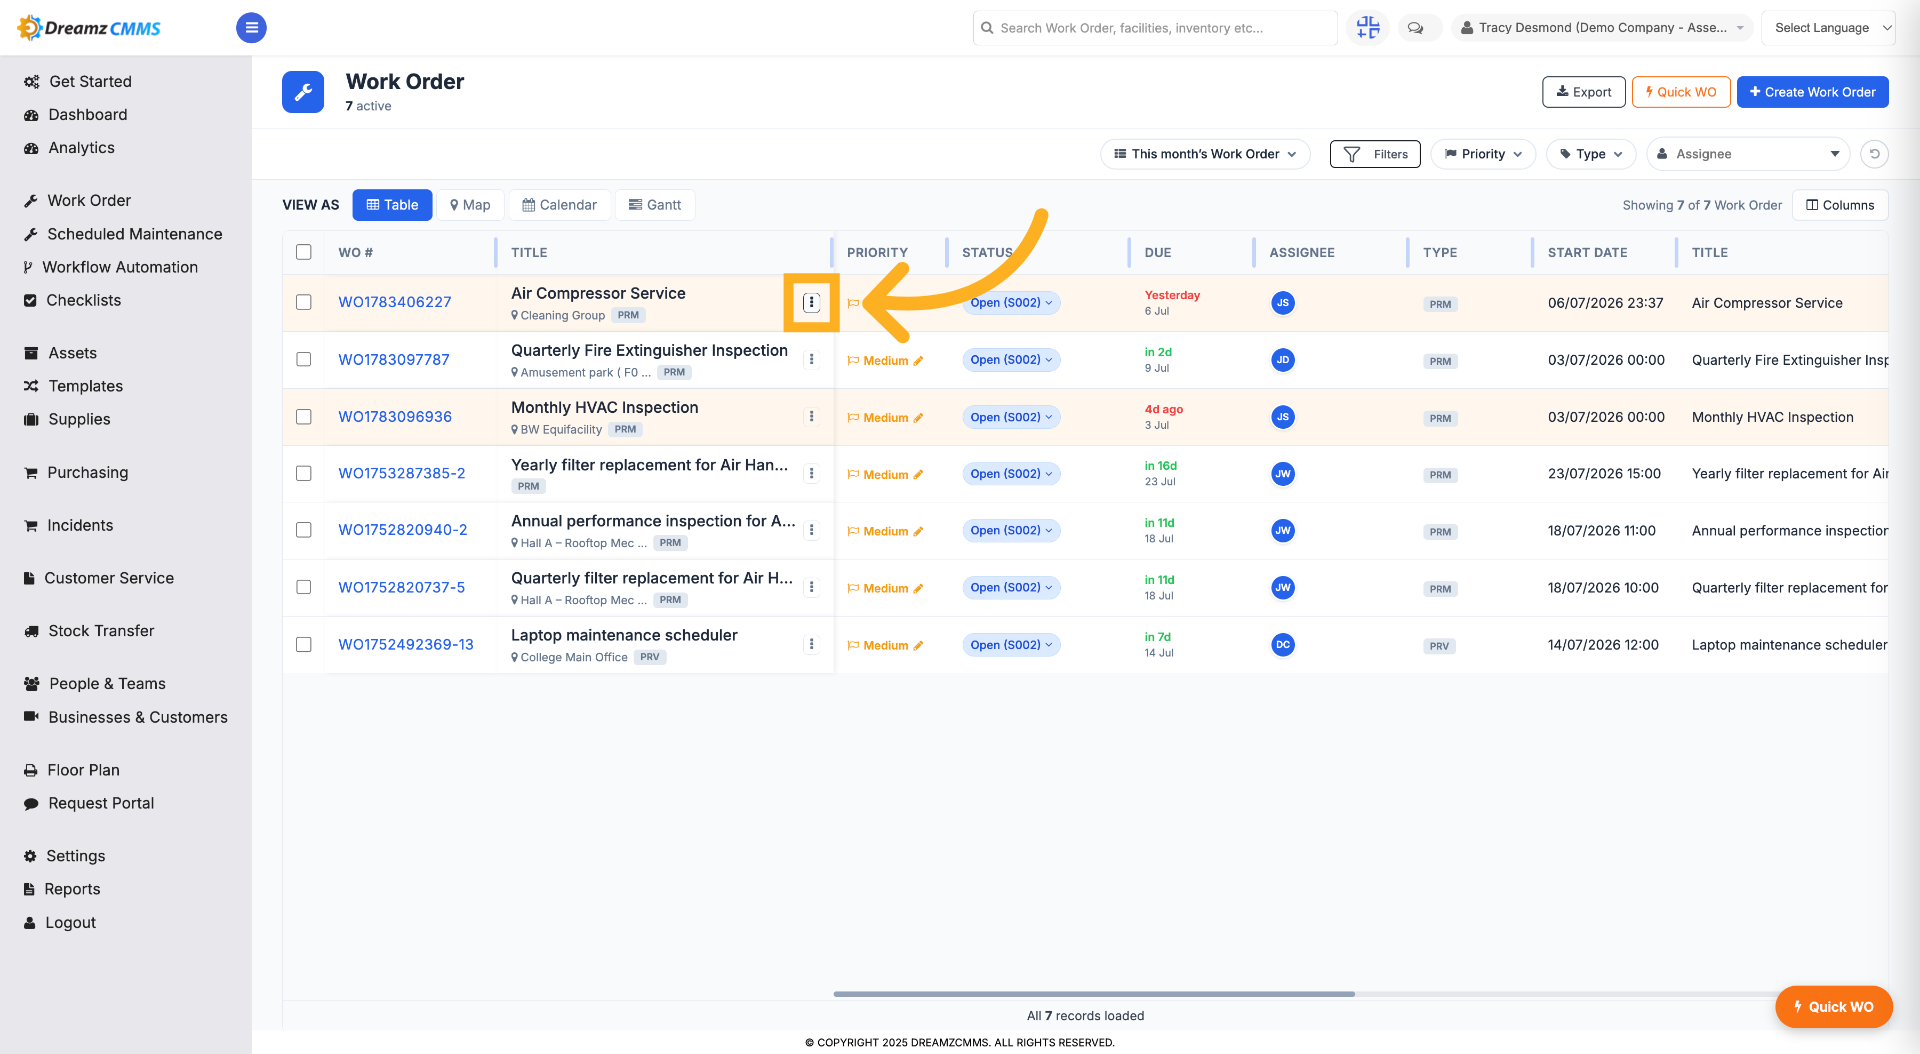
Step 1 – Click the 3-Dot Menu
Click the three dots to perform additional actions against it.
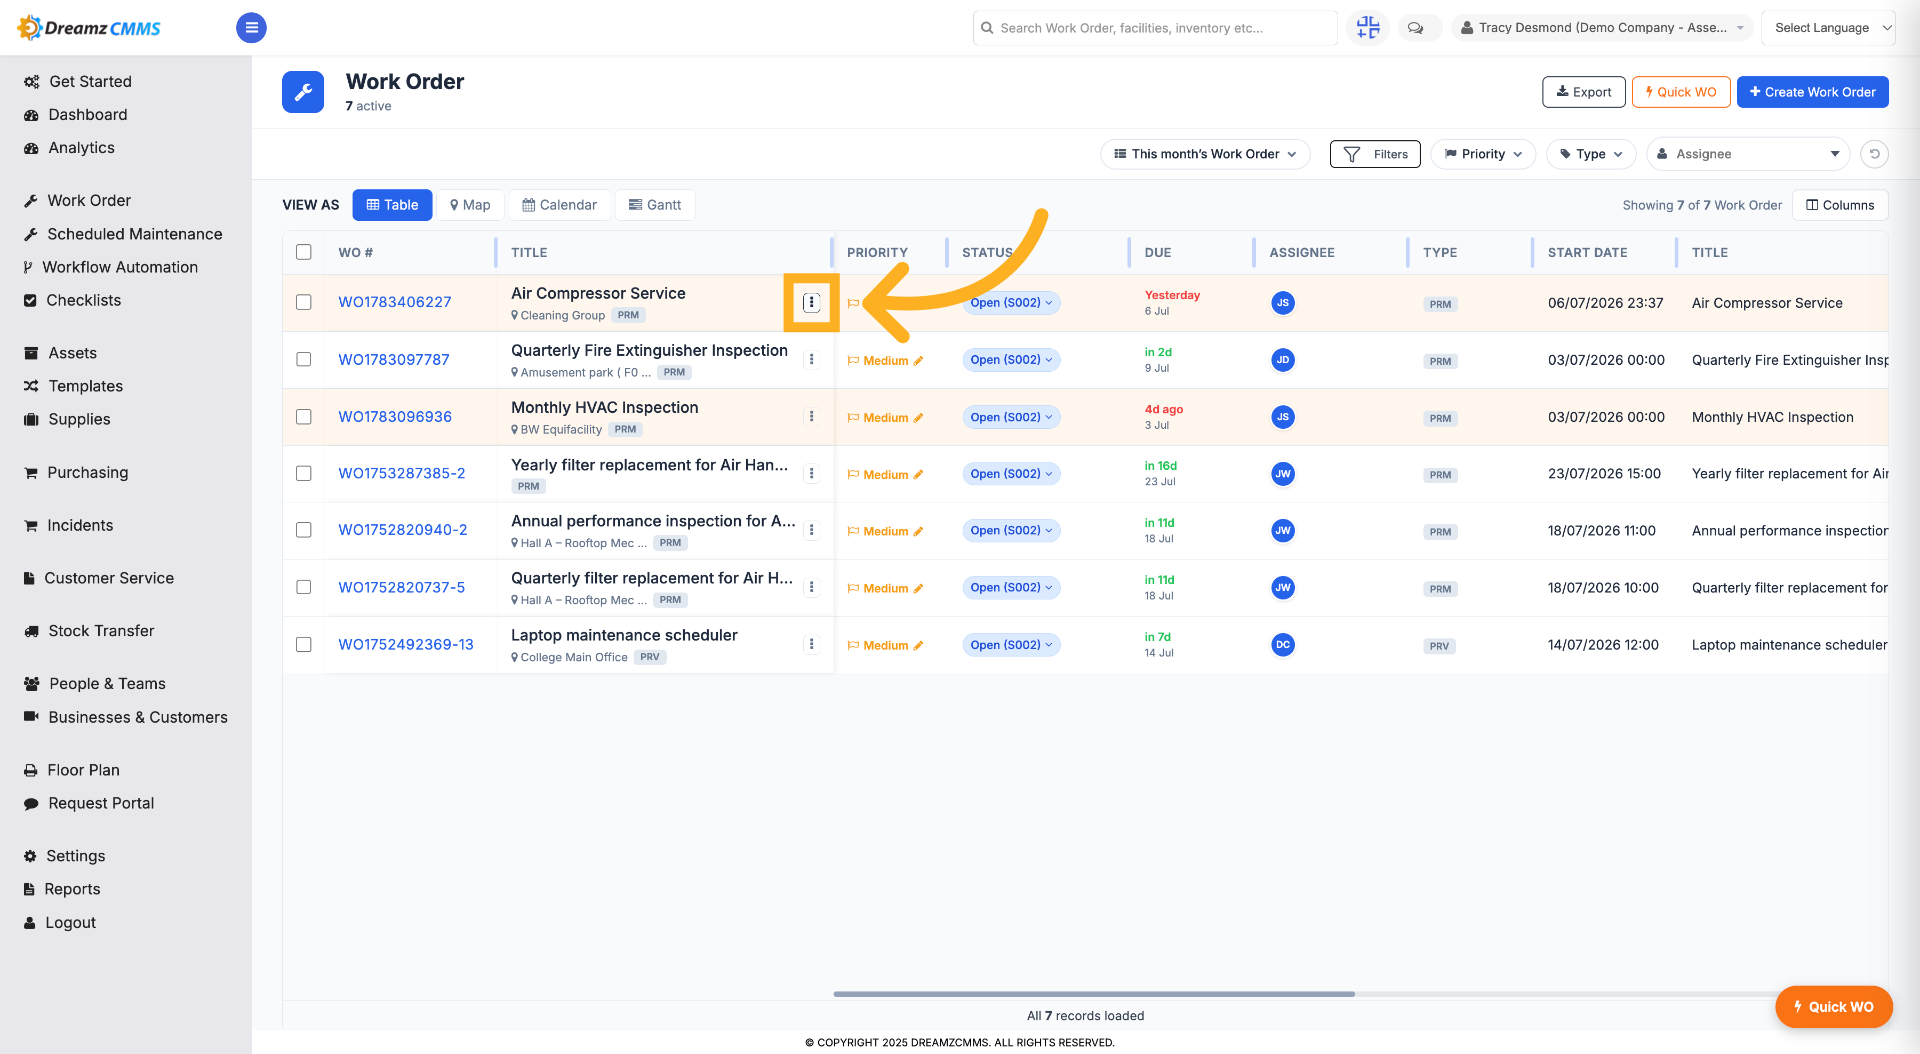
Step 2 – Review the 3-Dot Menu Actions
From the three dots menu, you can preview, edit, print, update the status of the work order, send mail, or delete the work order.
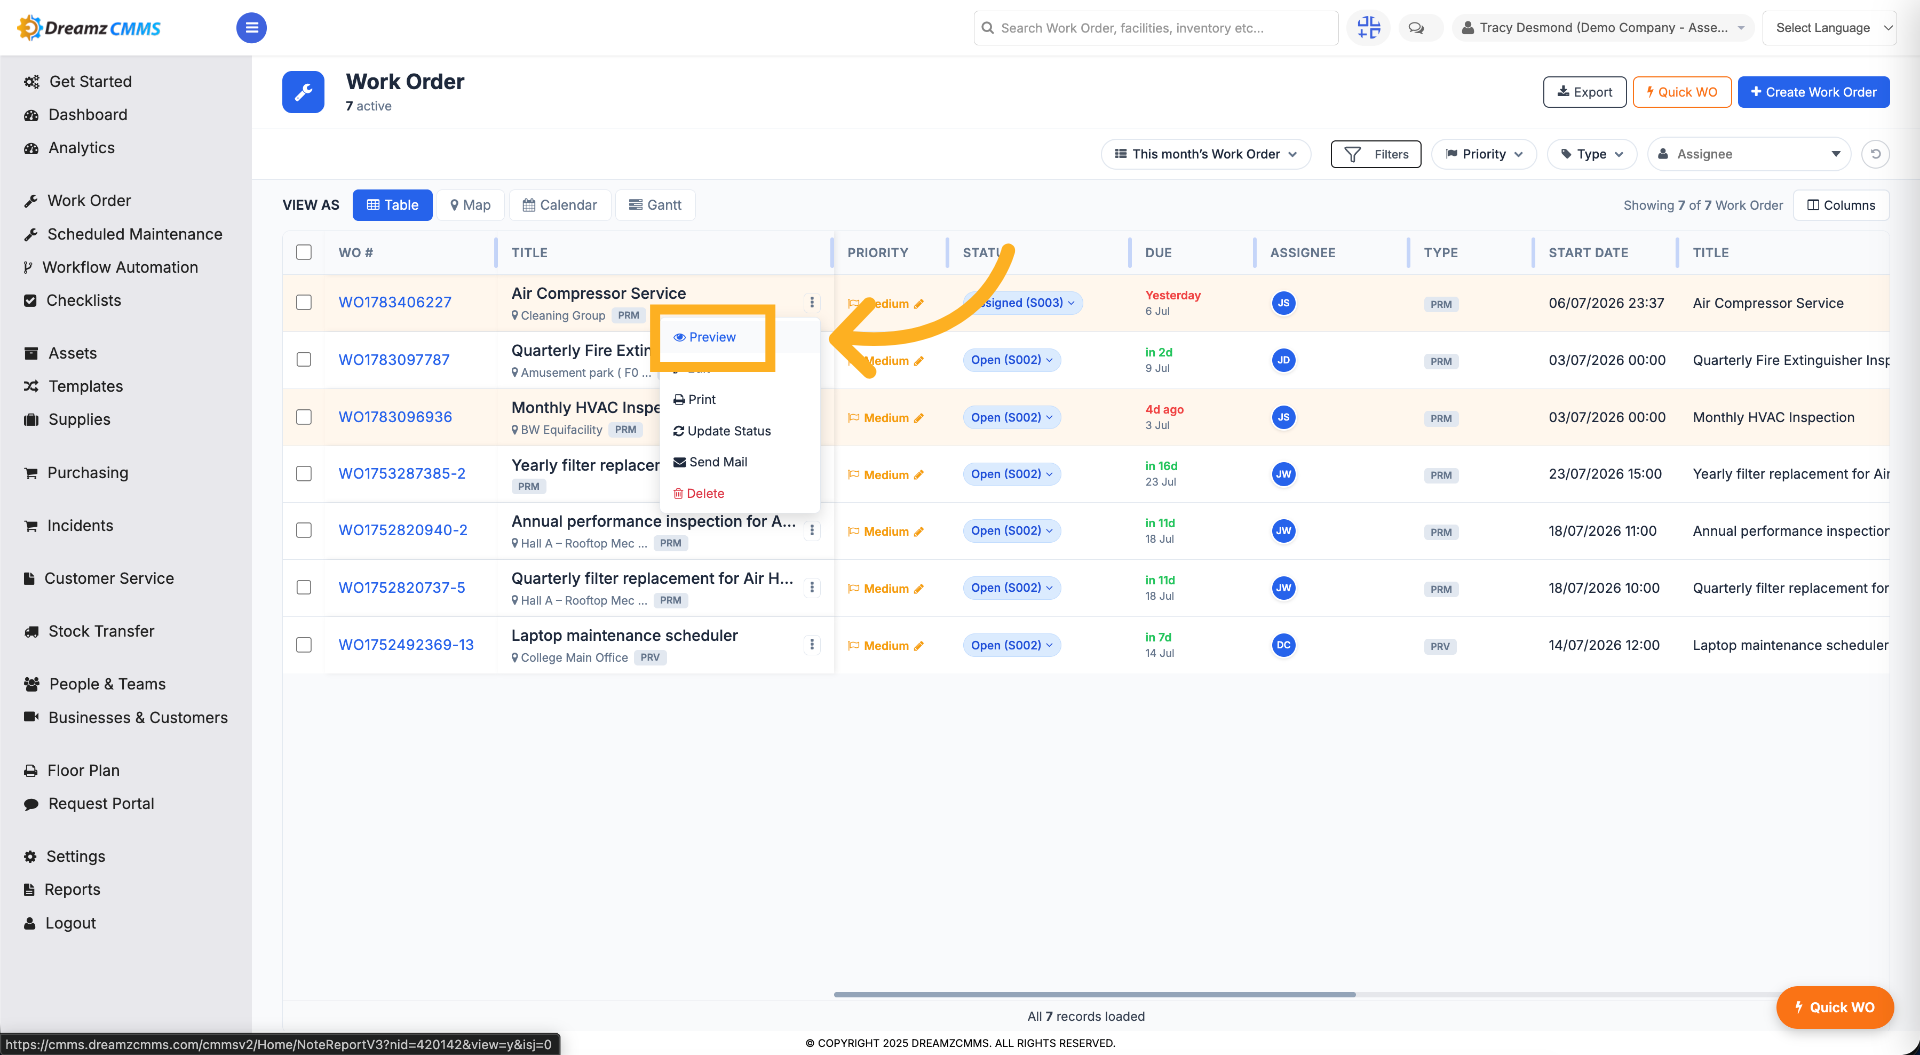
Step 3 – Preview Work Order
Click "Preview" to see the work order in preview mode.
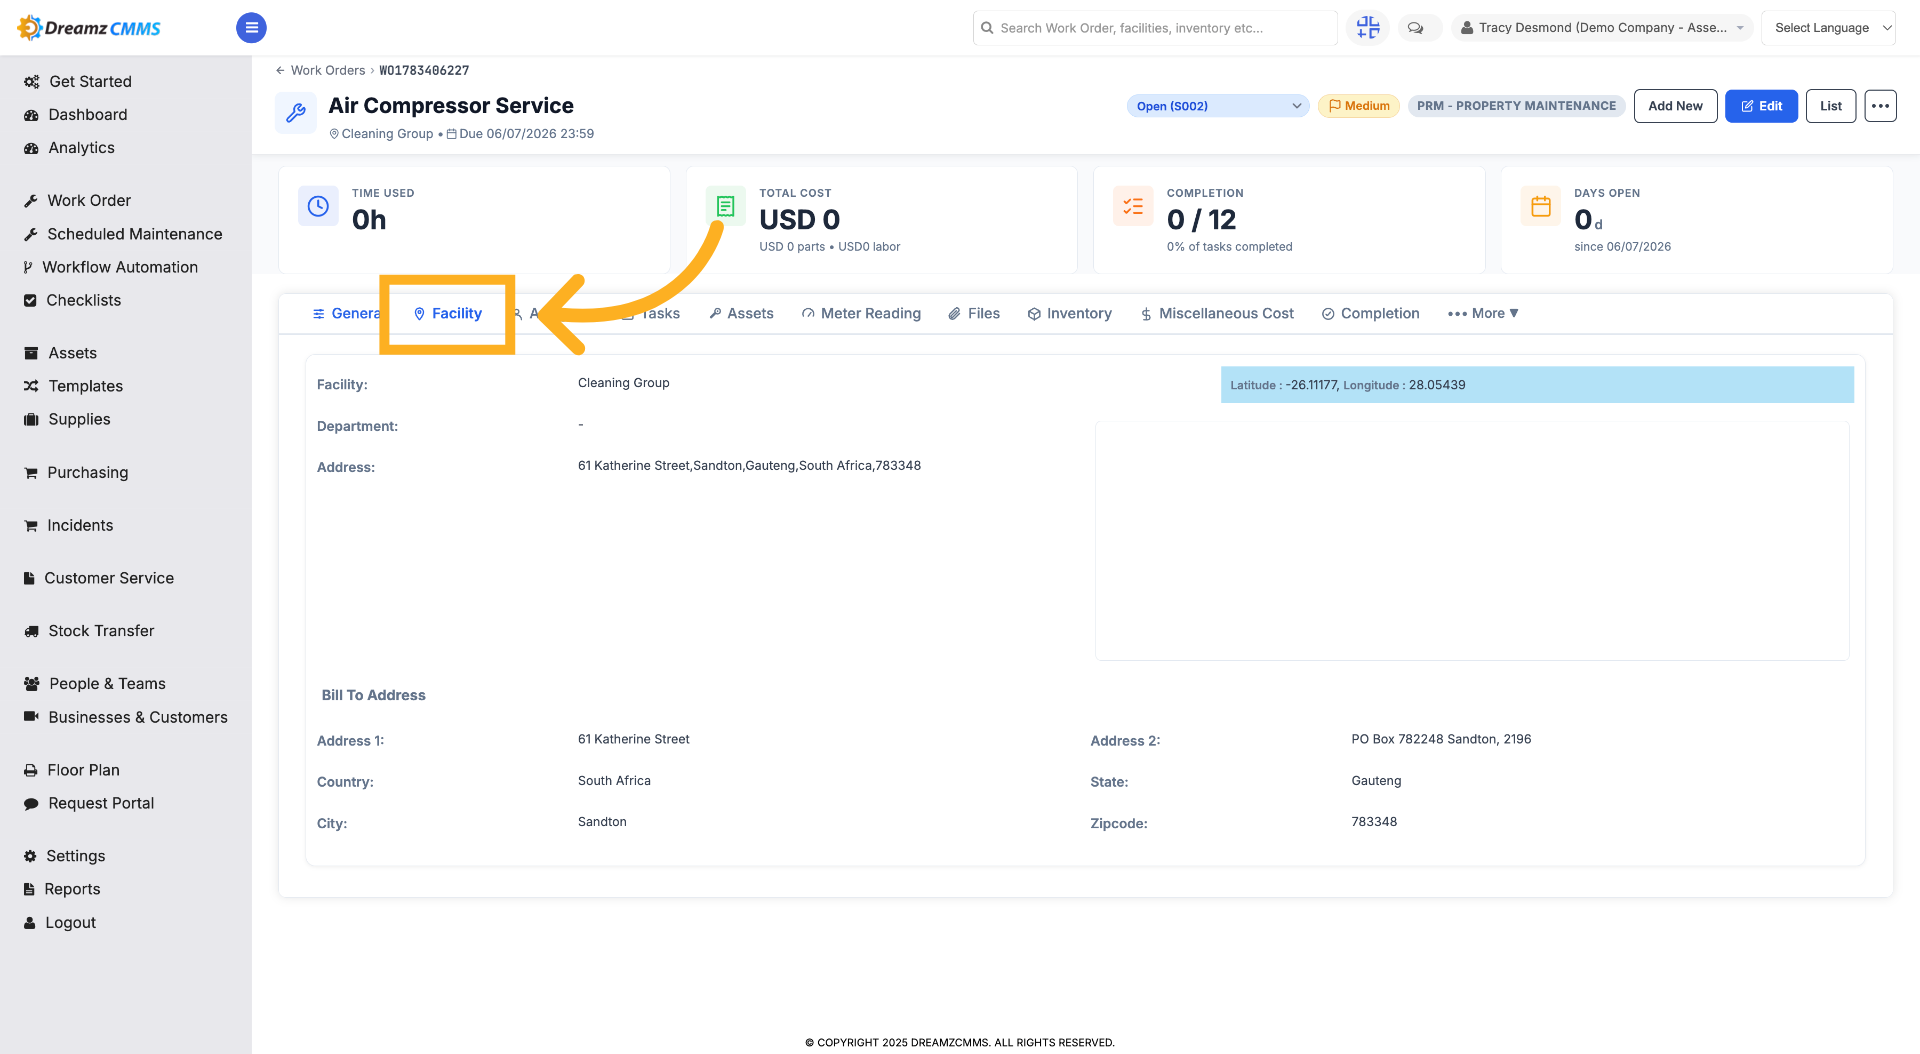
Step 4 – Select Facility in Details
Click "Facility" to view the facility details of the work order.
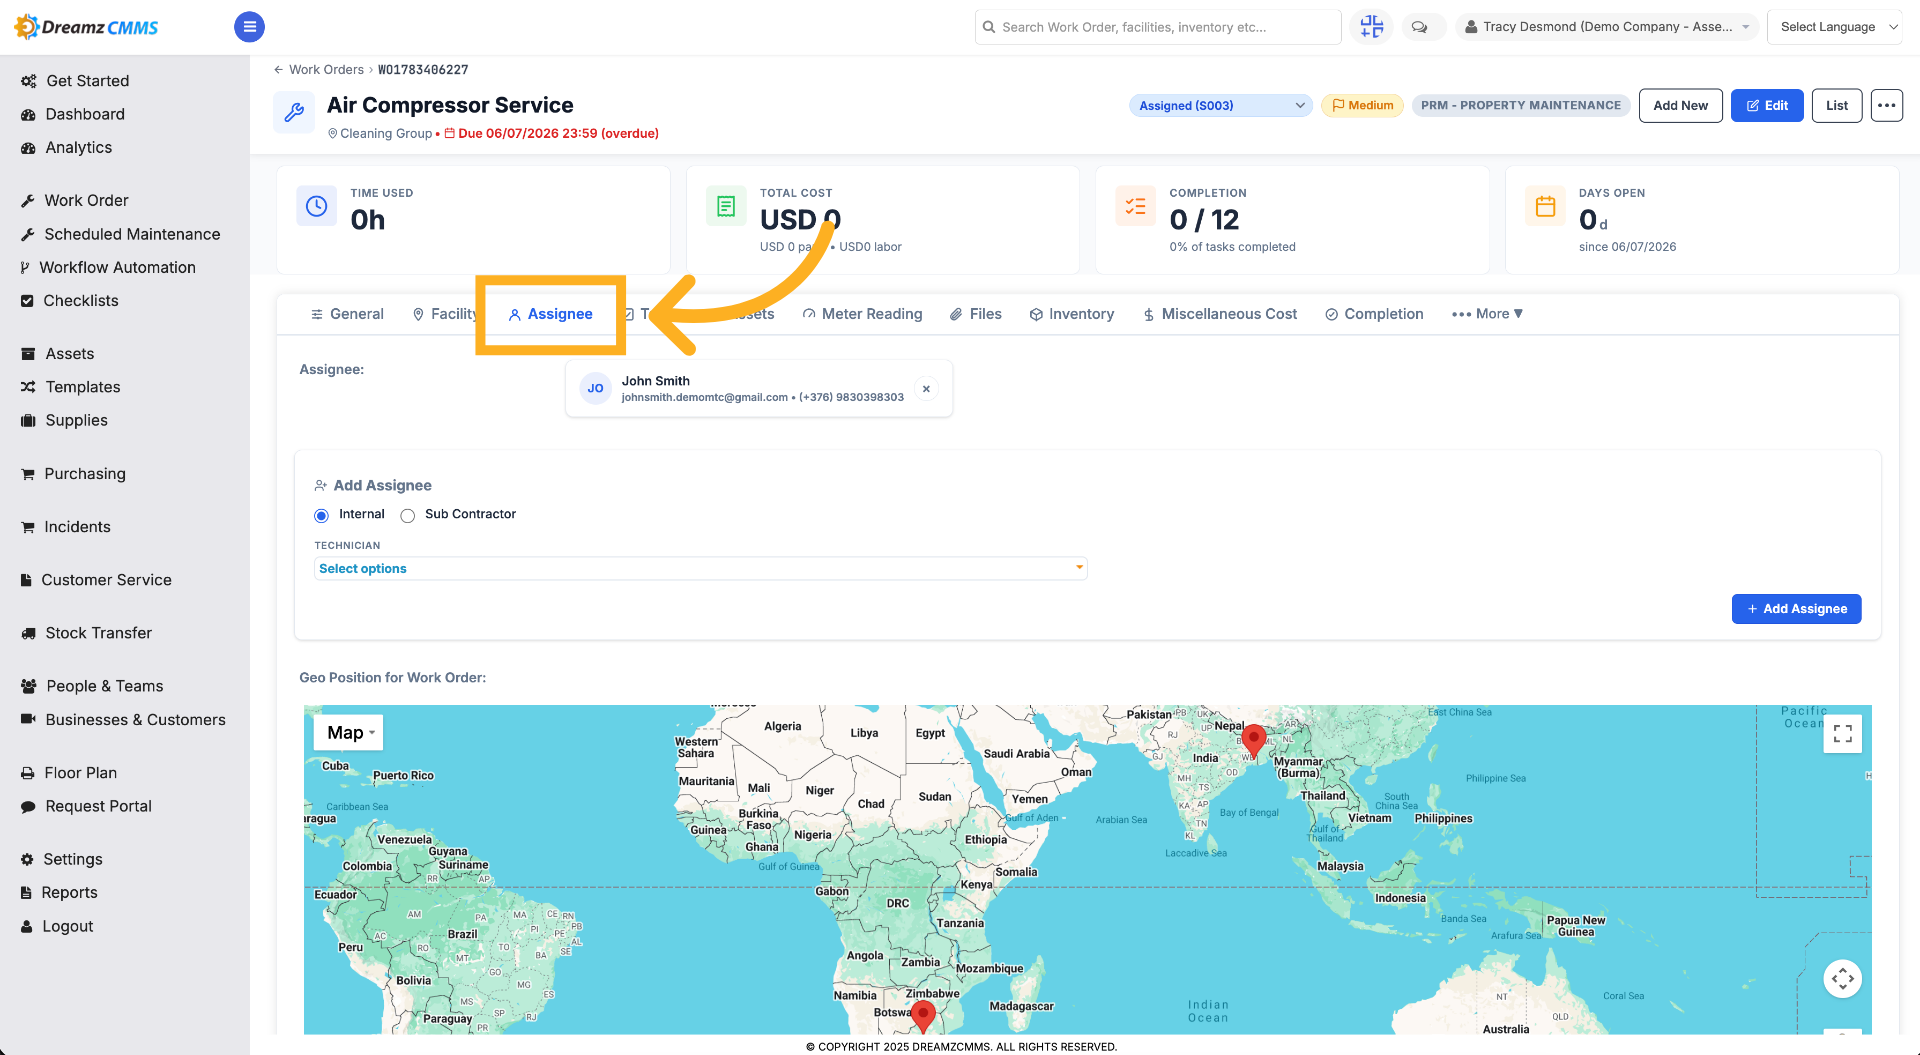
Step 5 – Select Assignee in Details
Click "Assignee" to view or change the assigned user for the work order.
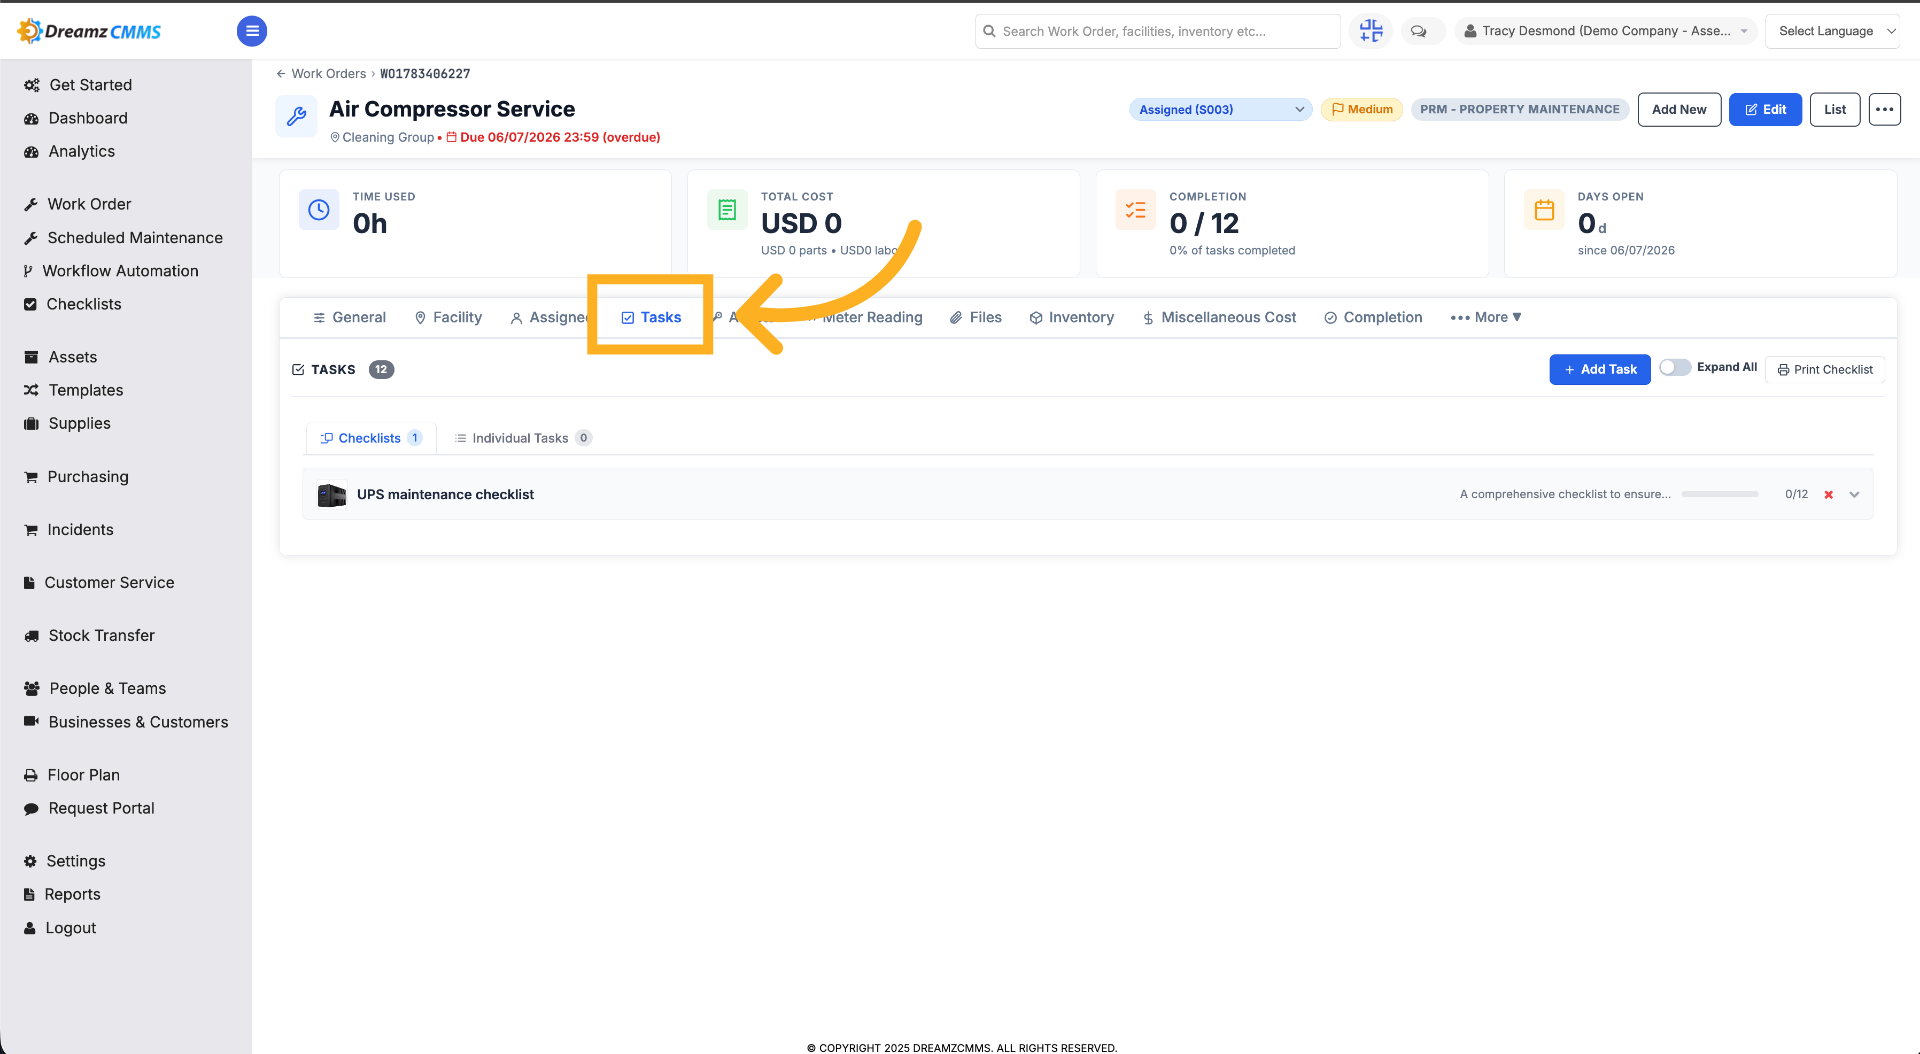
Step 6 – Access Tasks in Details
Click "Tasks" to view checklists and tasks associated with the work order.
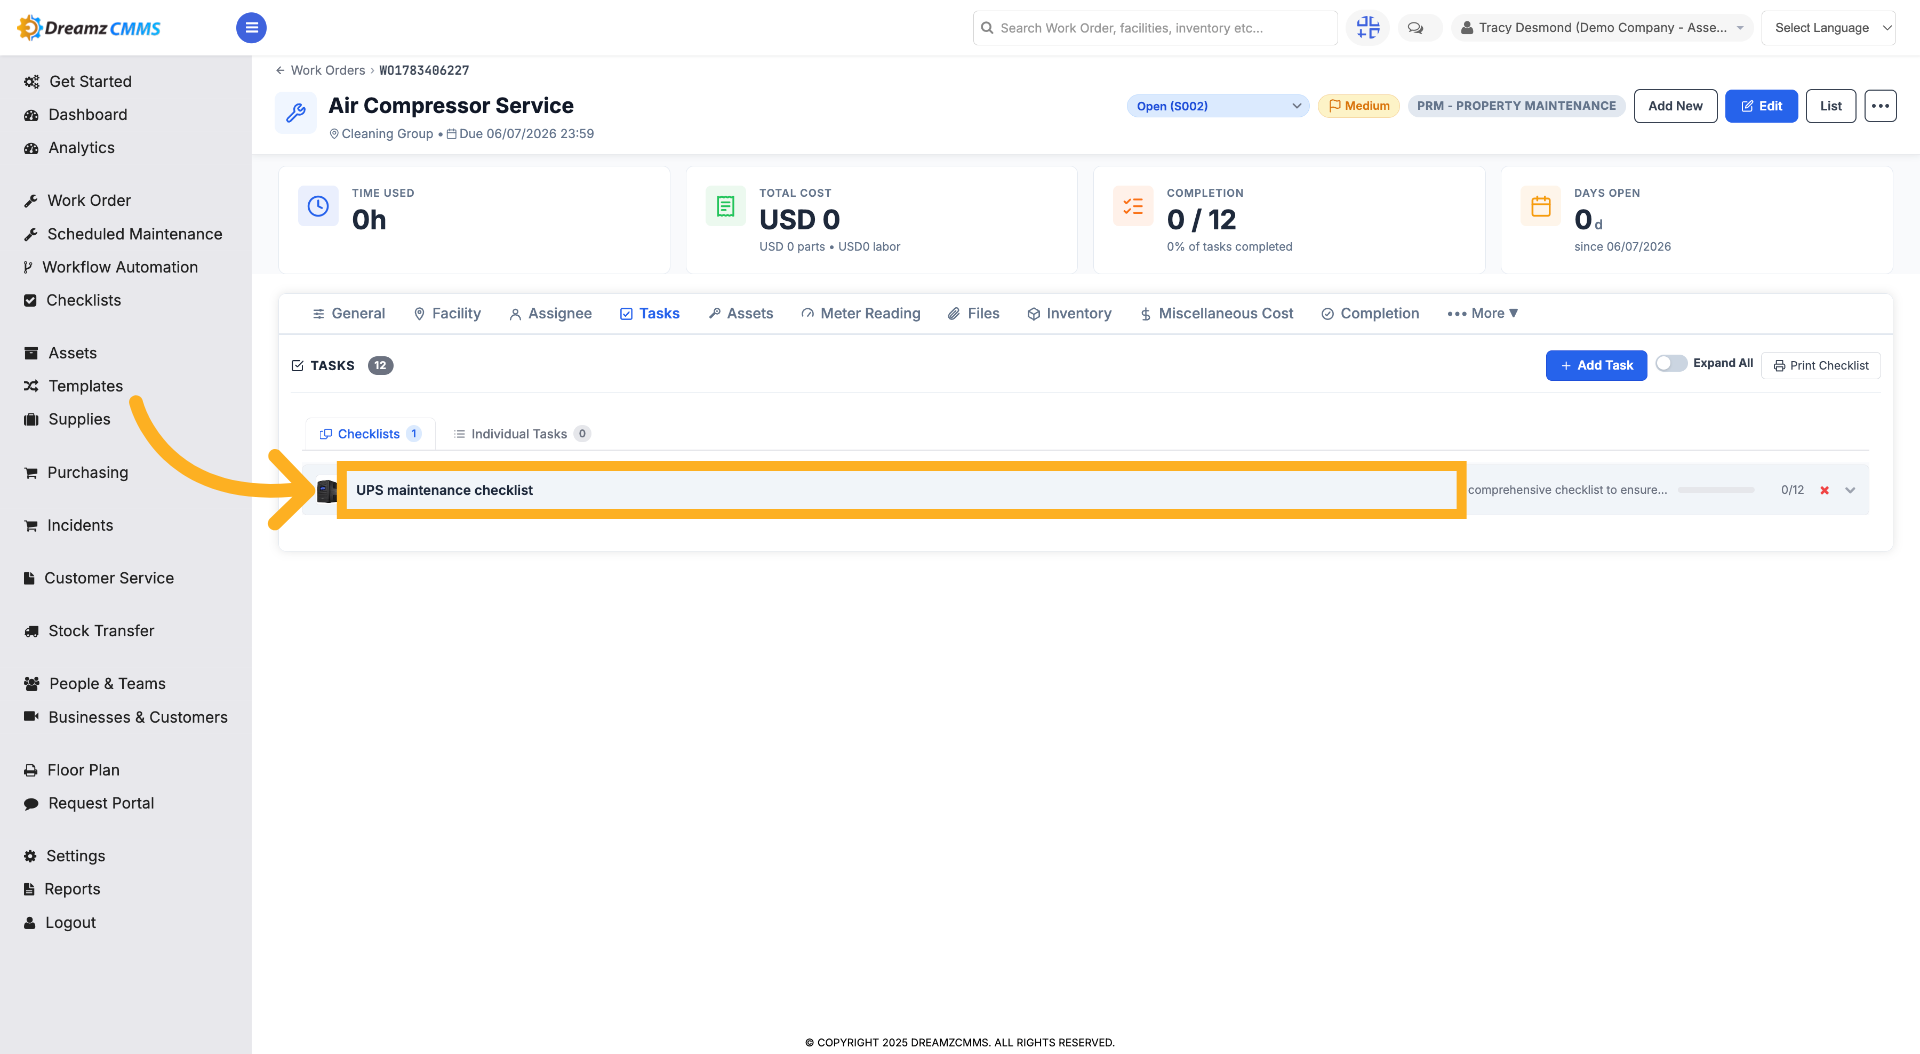
Step 7 – Open Maintenance Checklist
Open the checklist attached to this work order to view the checklist and tasks.
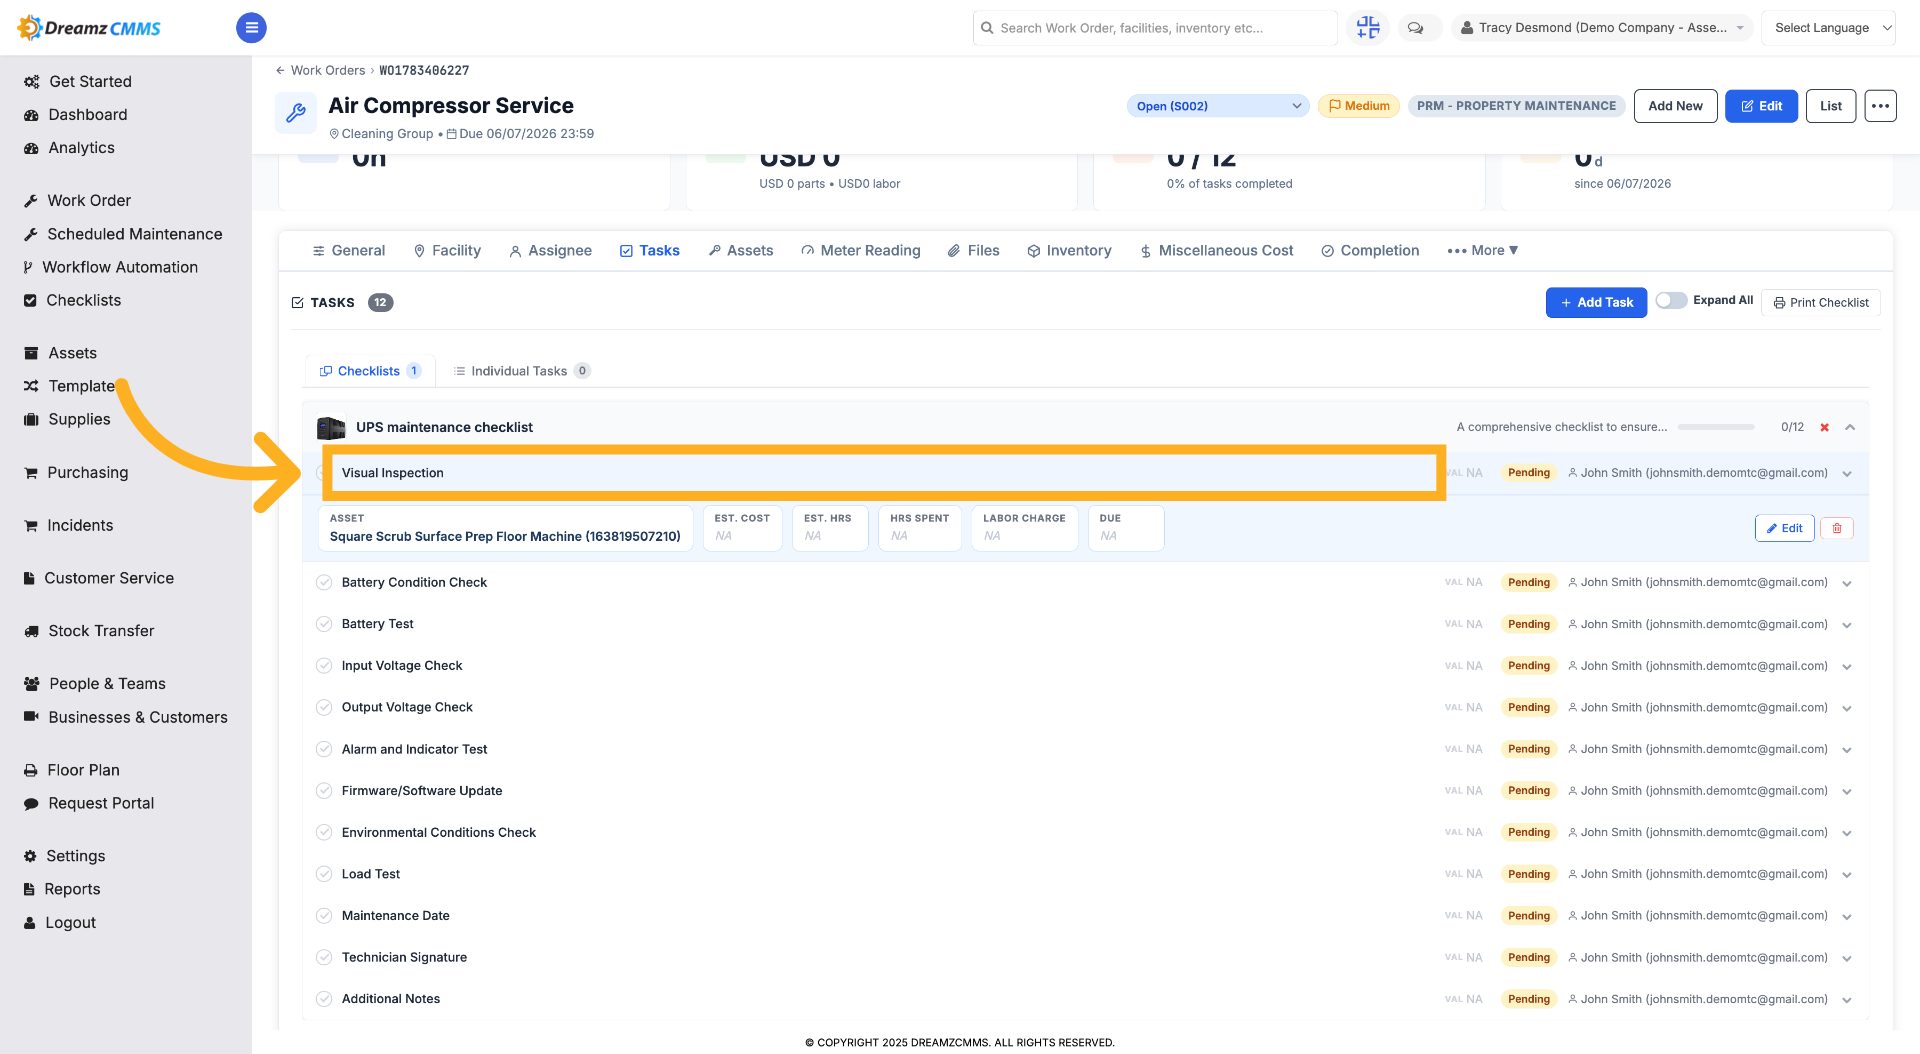
Step 8 – Open a Task Within the Checklist
Open the tasks under the checklist to view, edit, or delete them.
Step 9 – View Assets in Details
Click "Assets" to see assets linked to the work order.
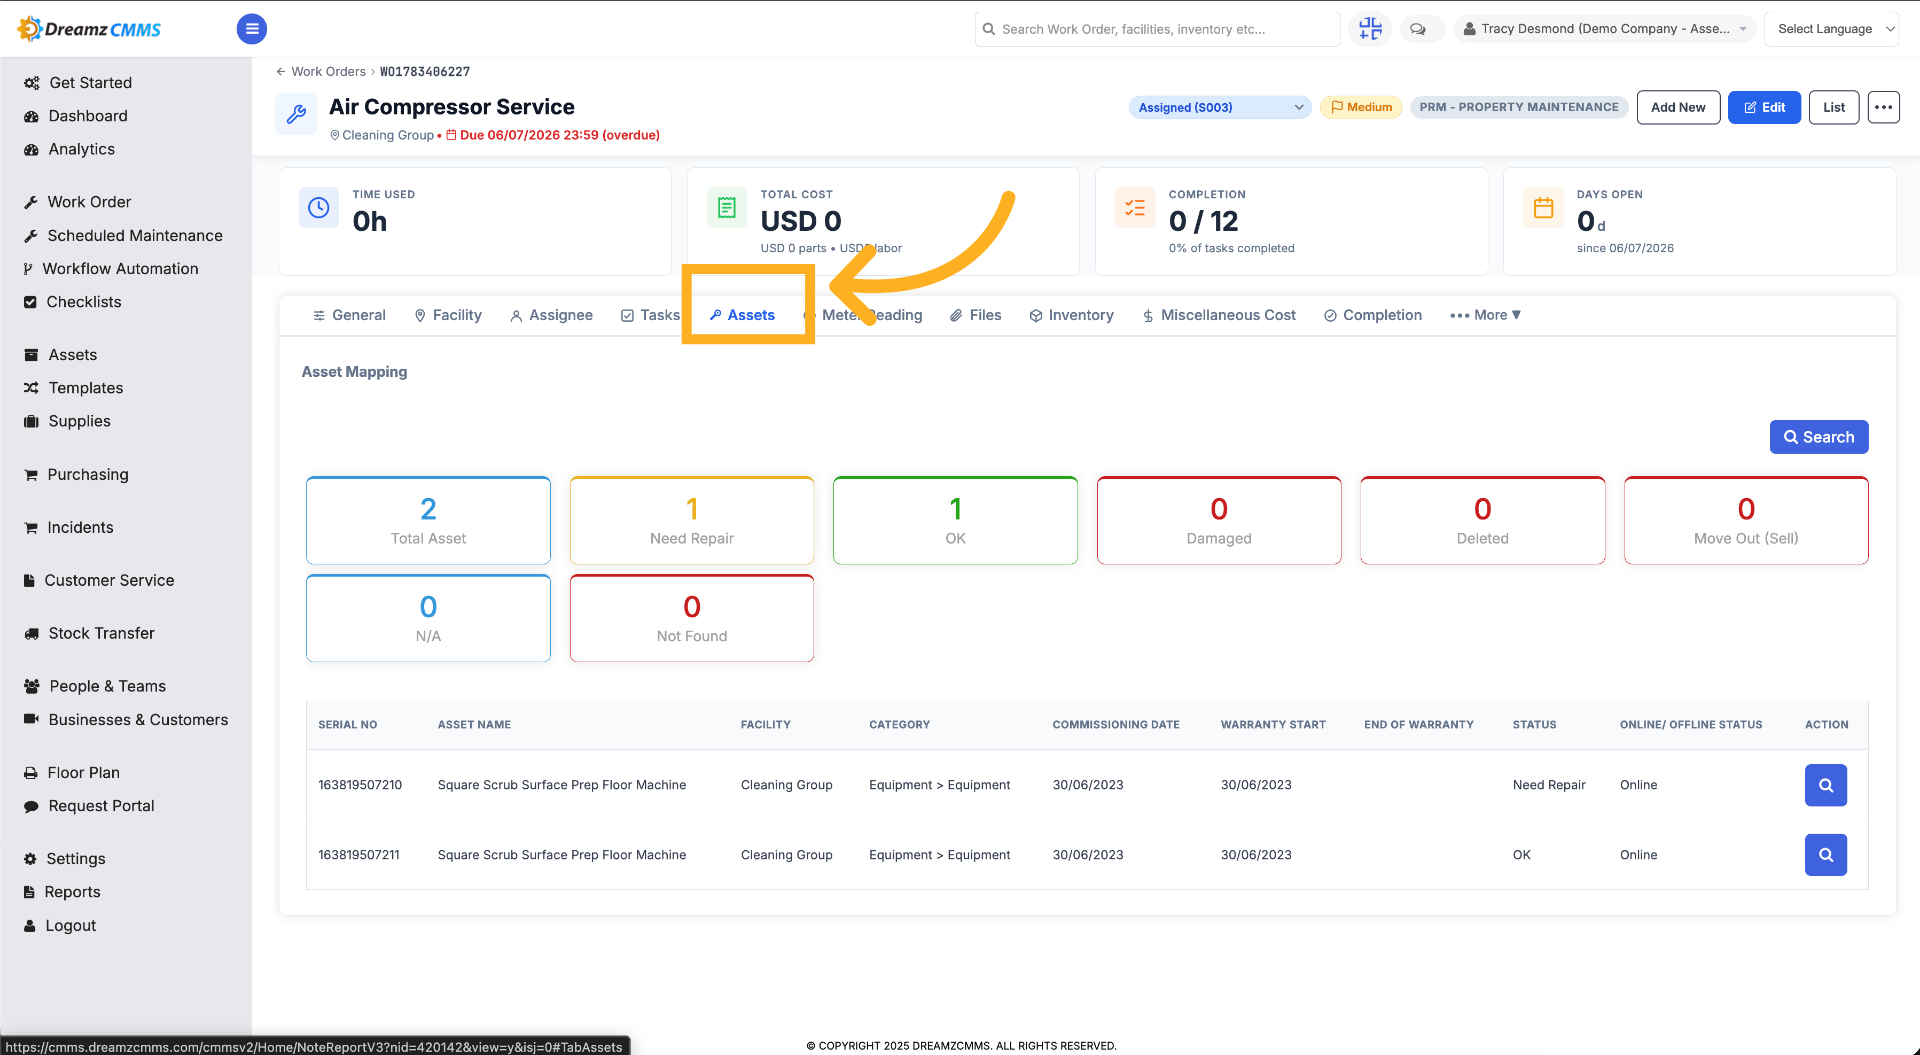
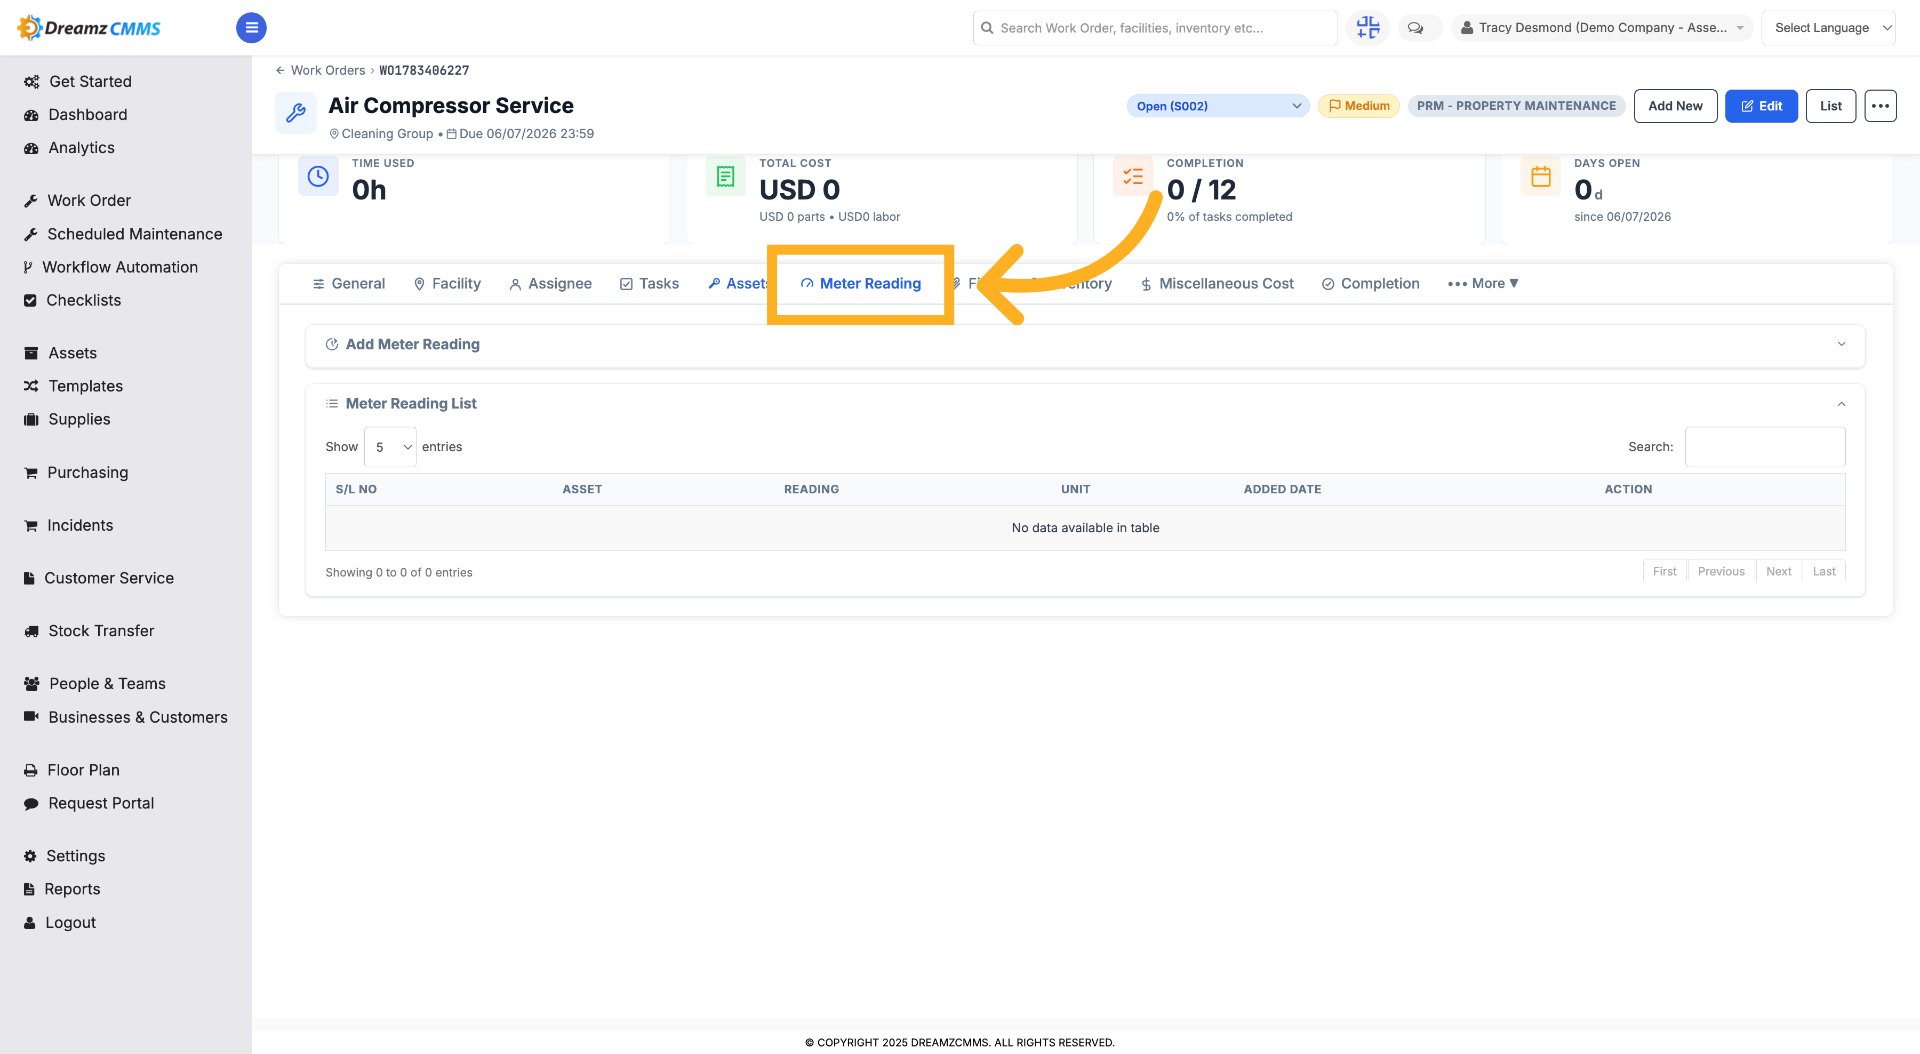
Step 10 – Access Meter Reading
Click "Meter Reading" to view or add meter readings.
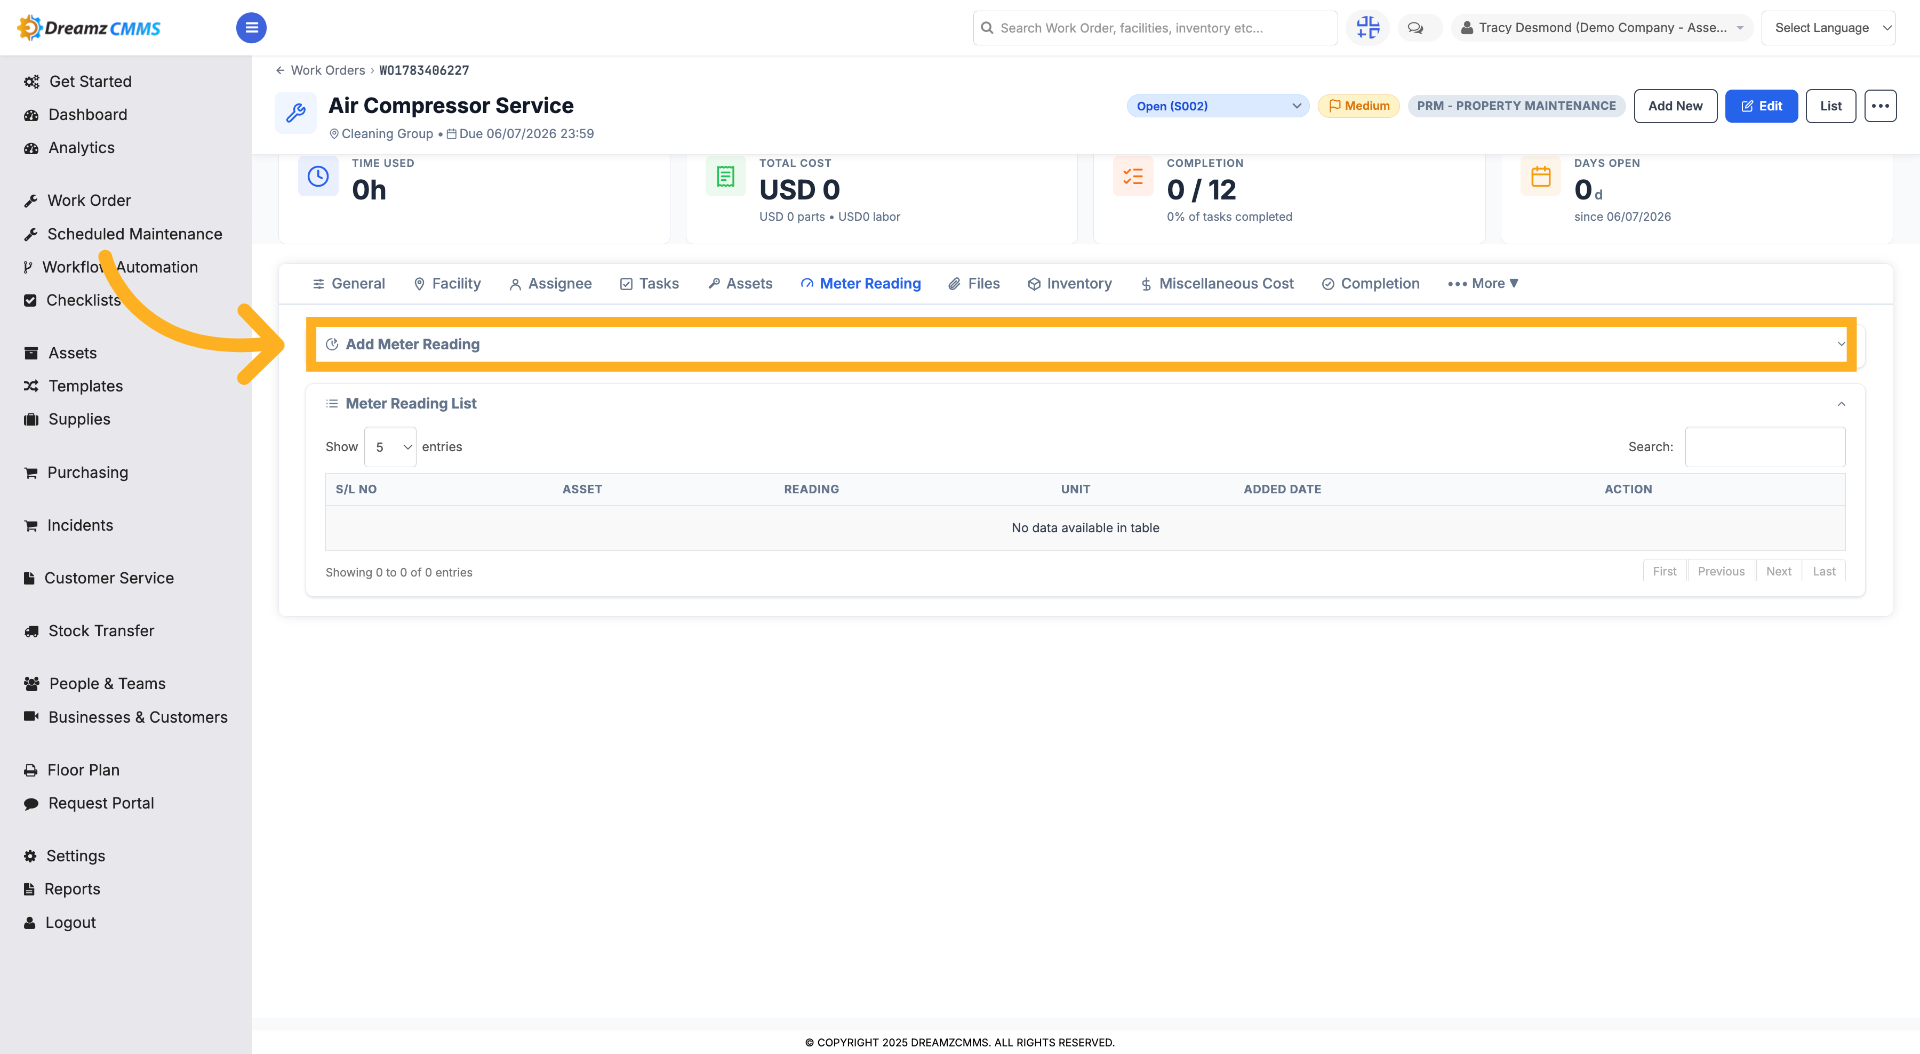
Step 11 – Add New Meter Reading
Click "Add Meter Reading" to input a new meter reading.
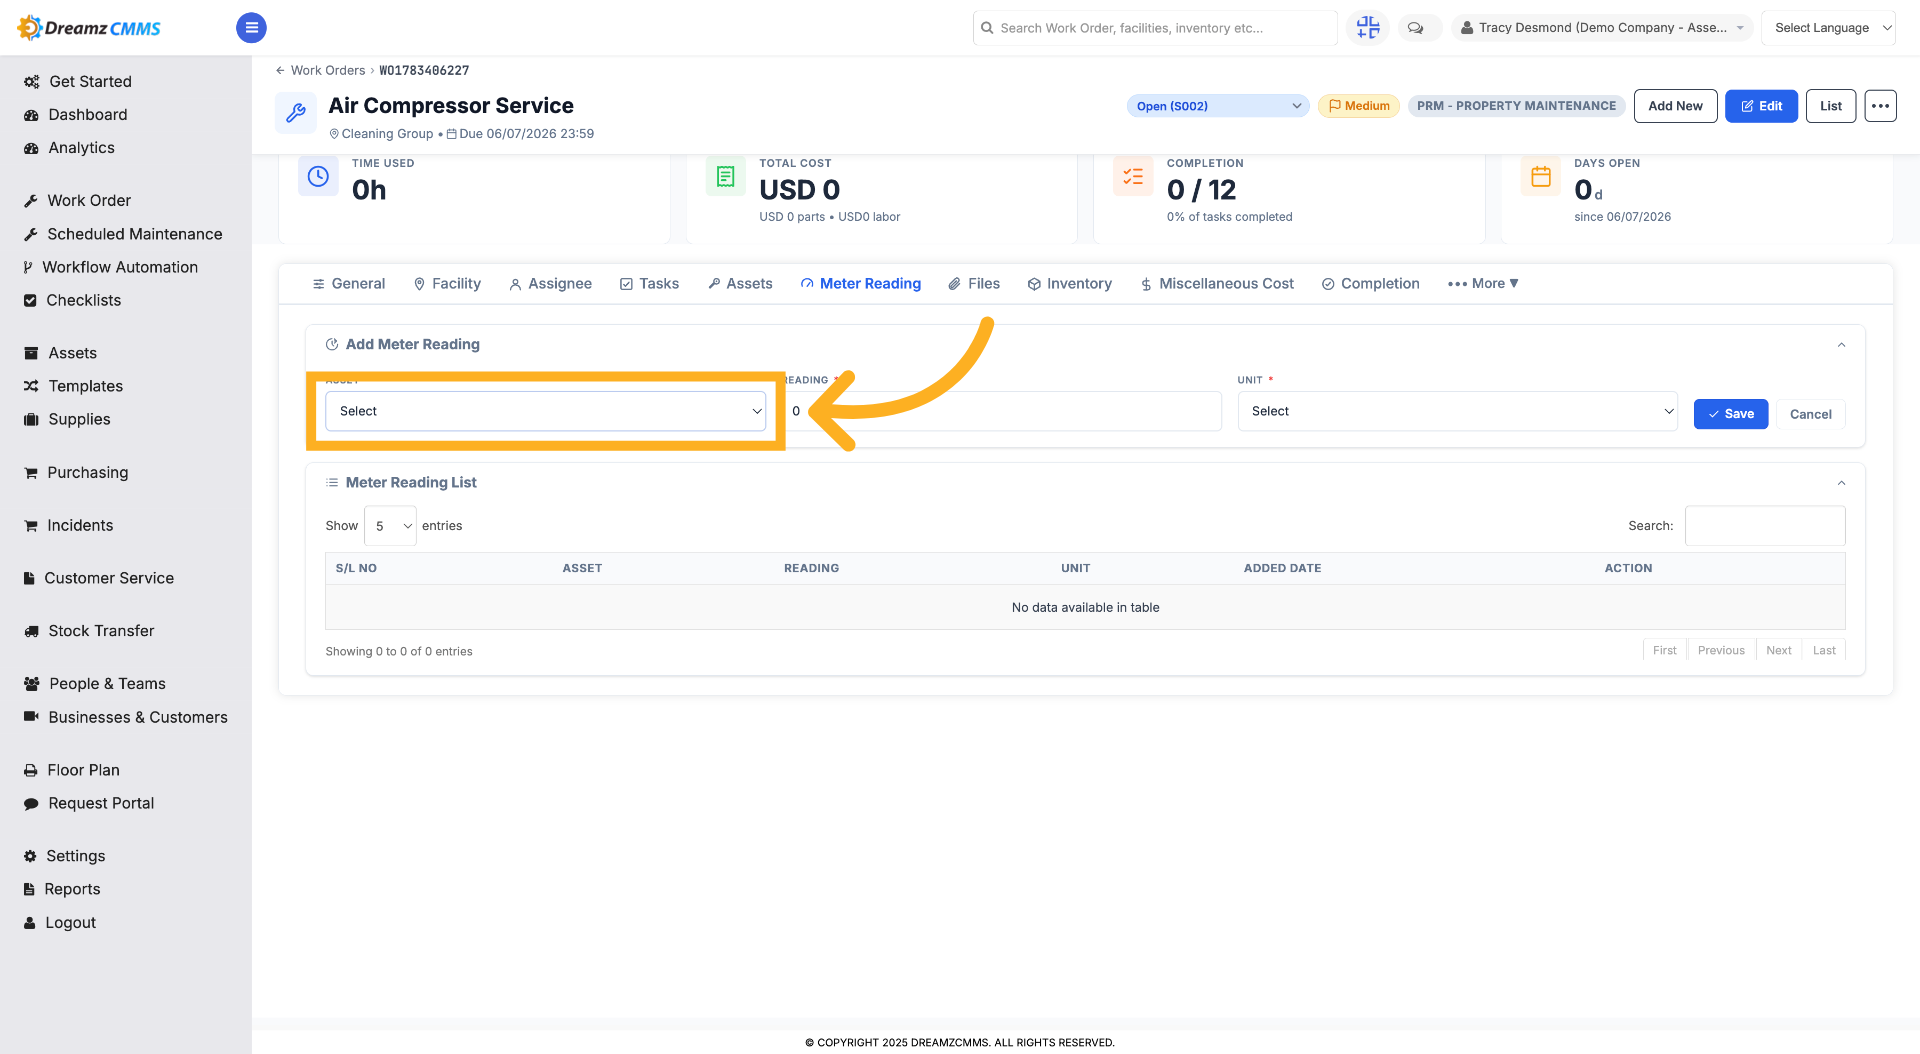
Step 12 – Select Asset for Meter Reading
Select from the assets assigned to this work order to record a meter reading for.
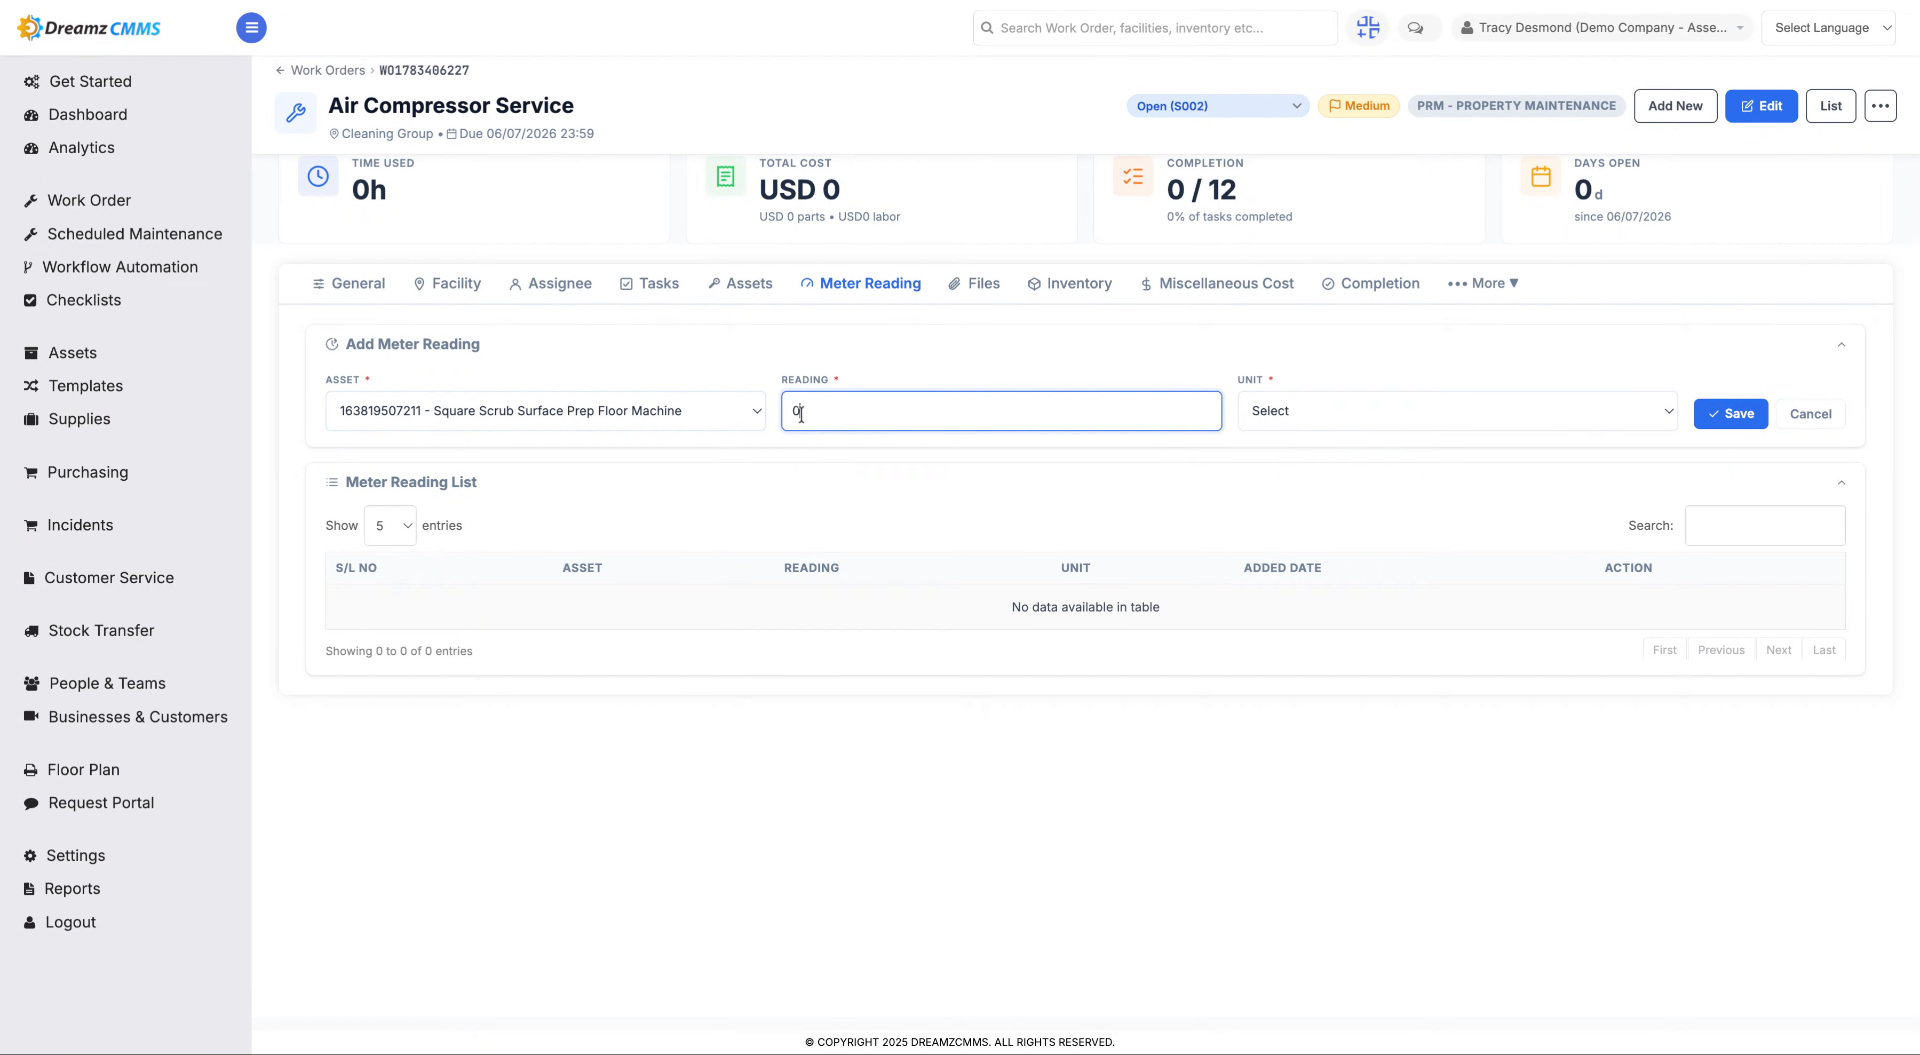
Step 13 – Enter Meter Reading
Fill in the meter reading field (for example, "1500") to record the current reading.
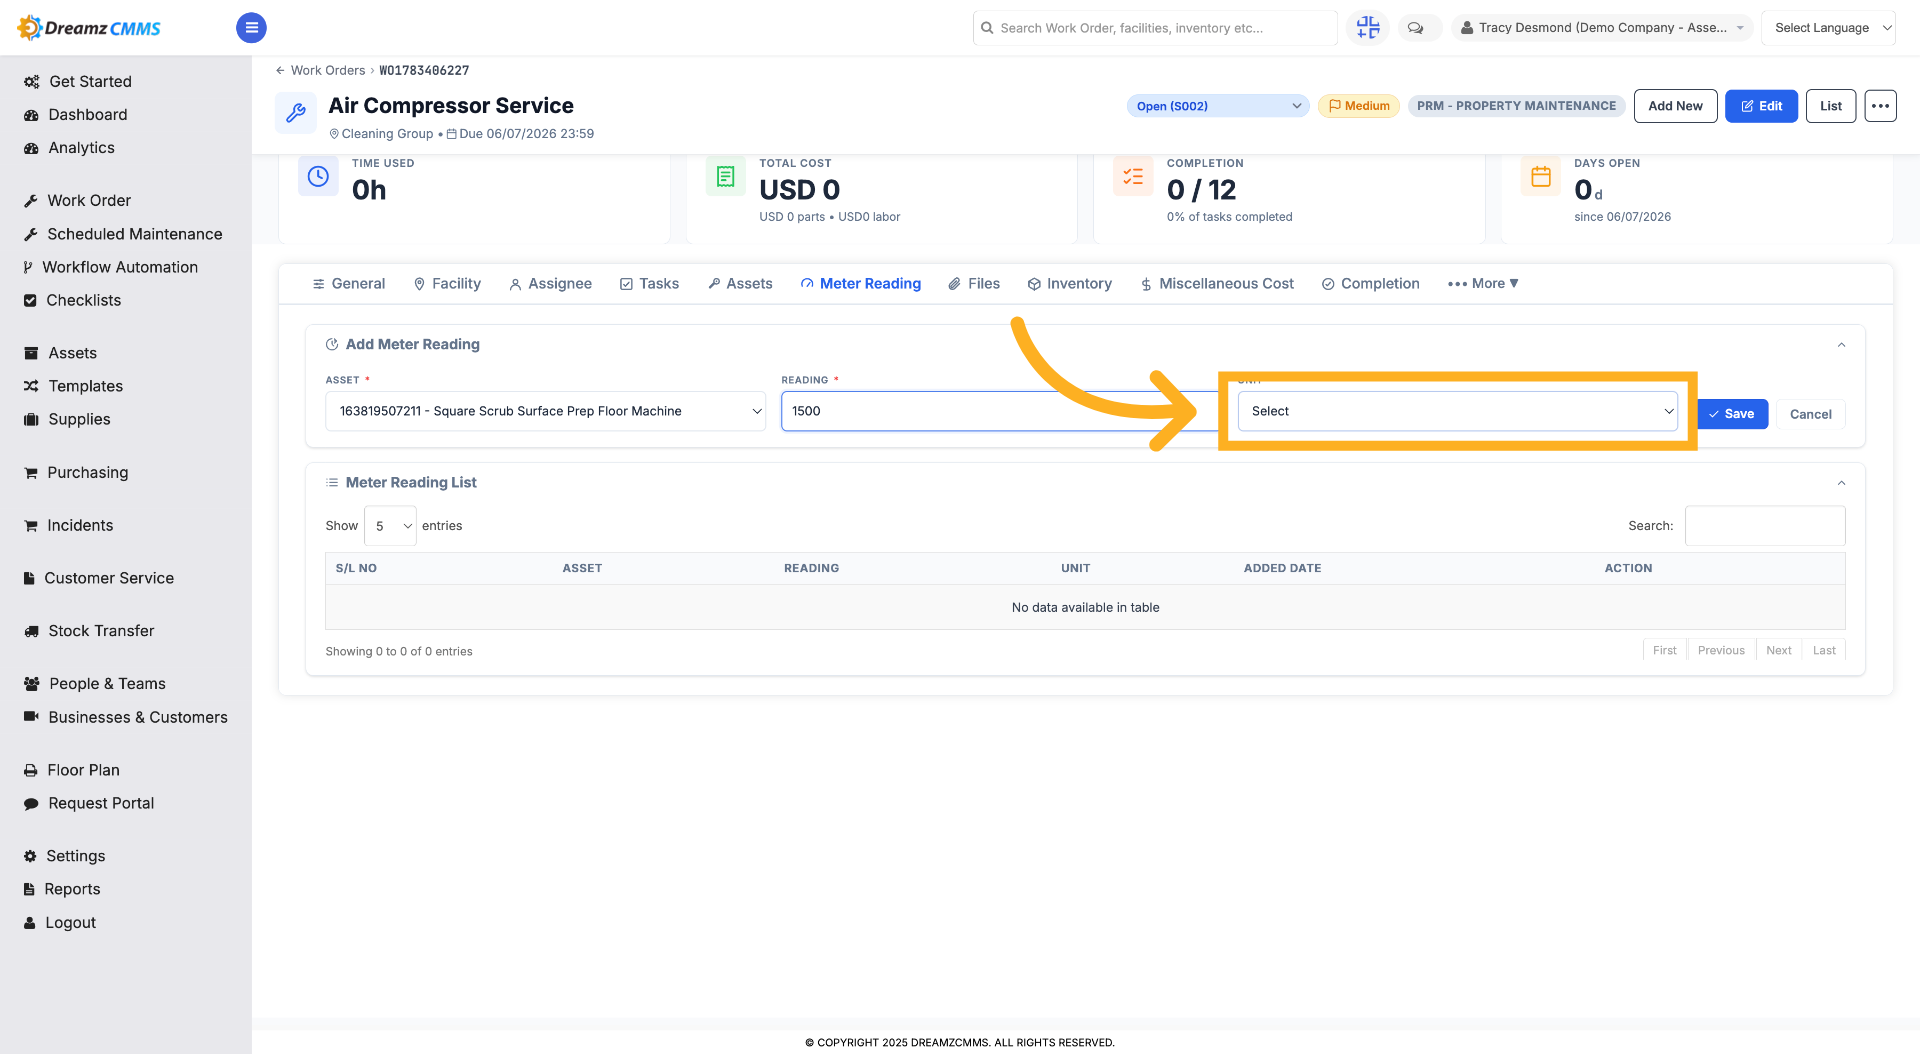
Step 14 – Select Measurement Unit
Select the appropriate unit of measurement for the reading.
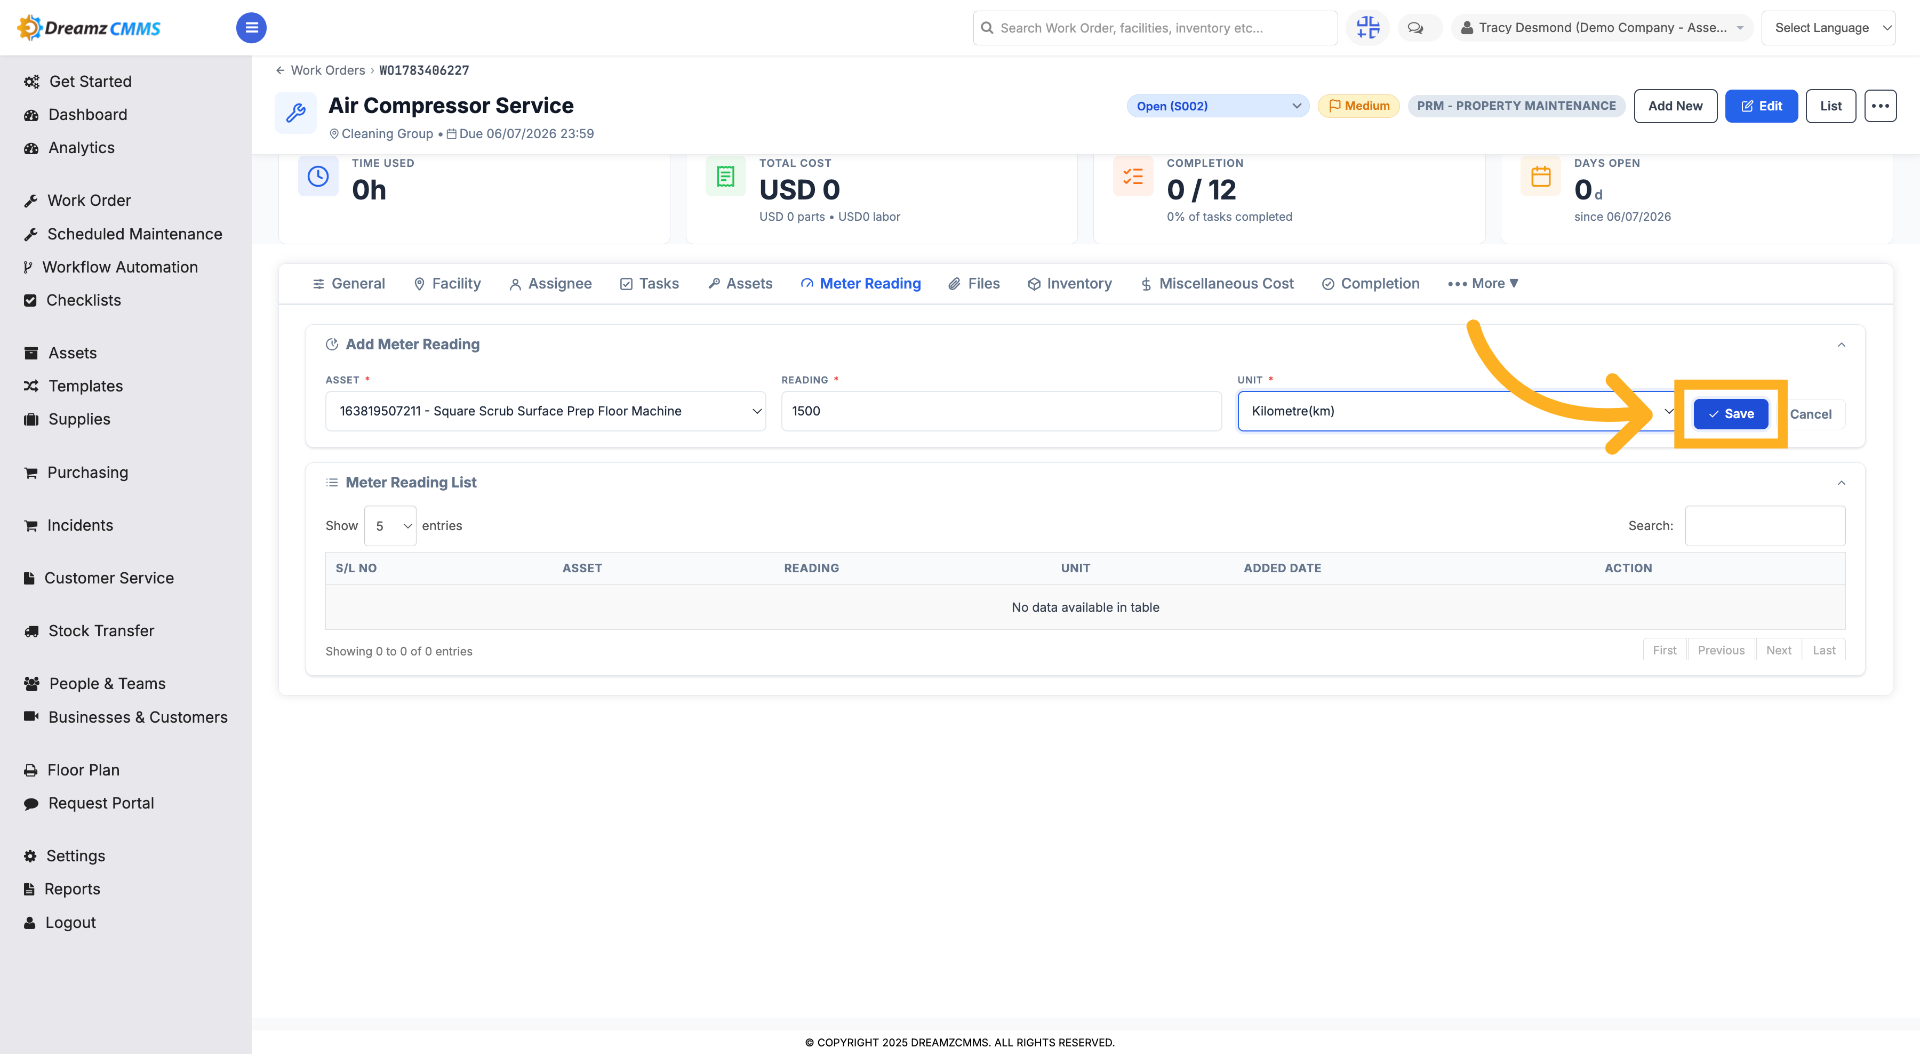
Step 15 – Save Meter Reading
Click "Save" to save the entered meter reading information.
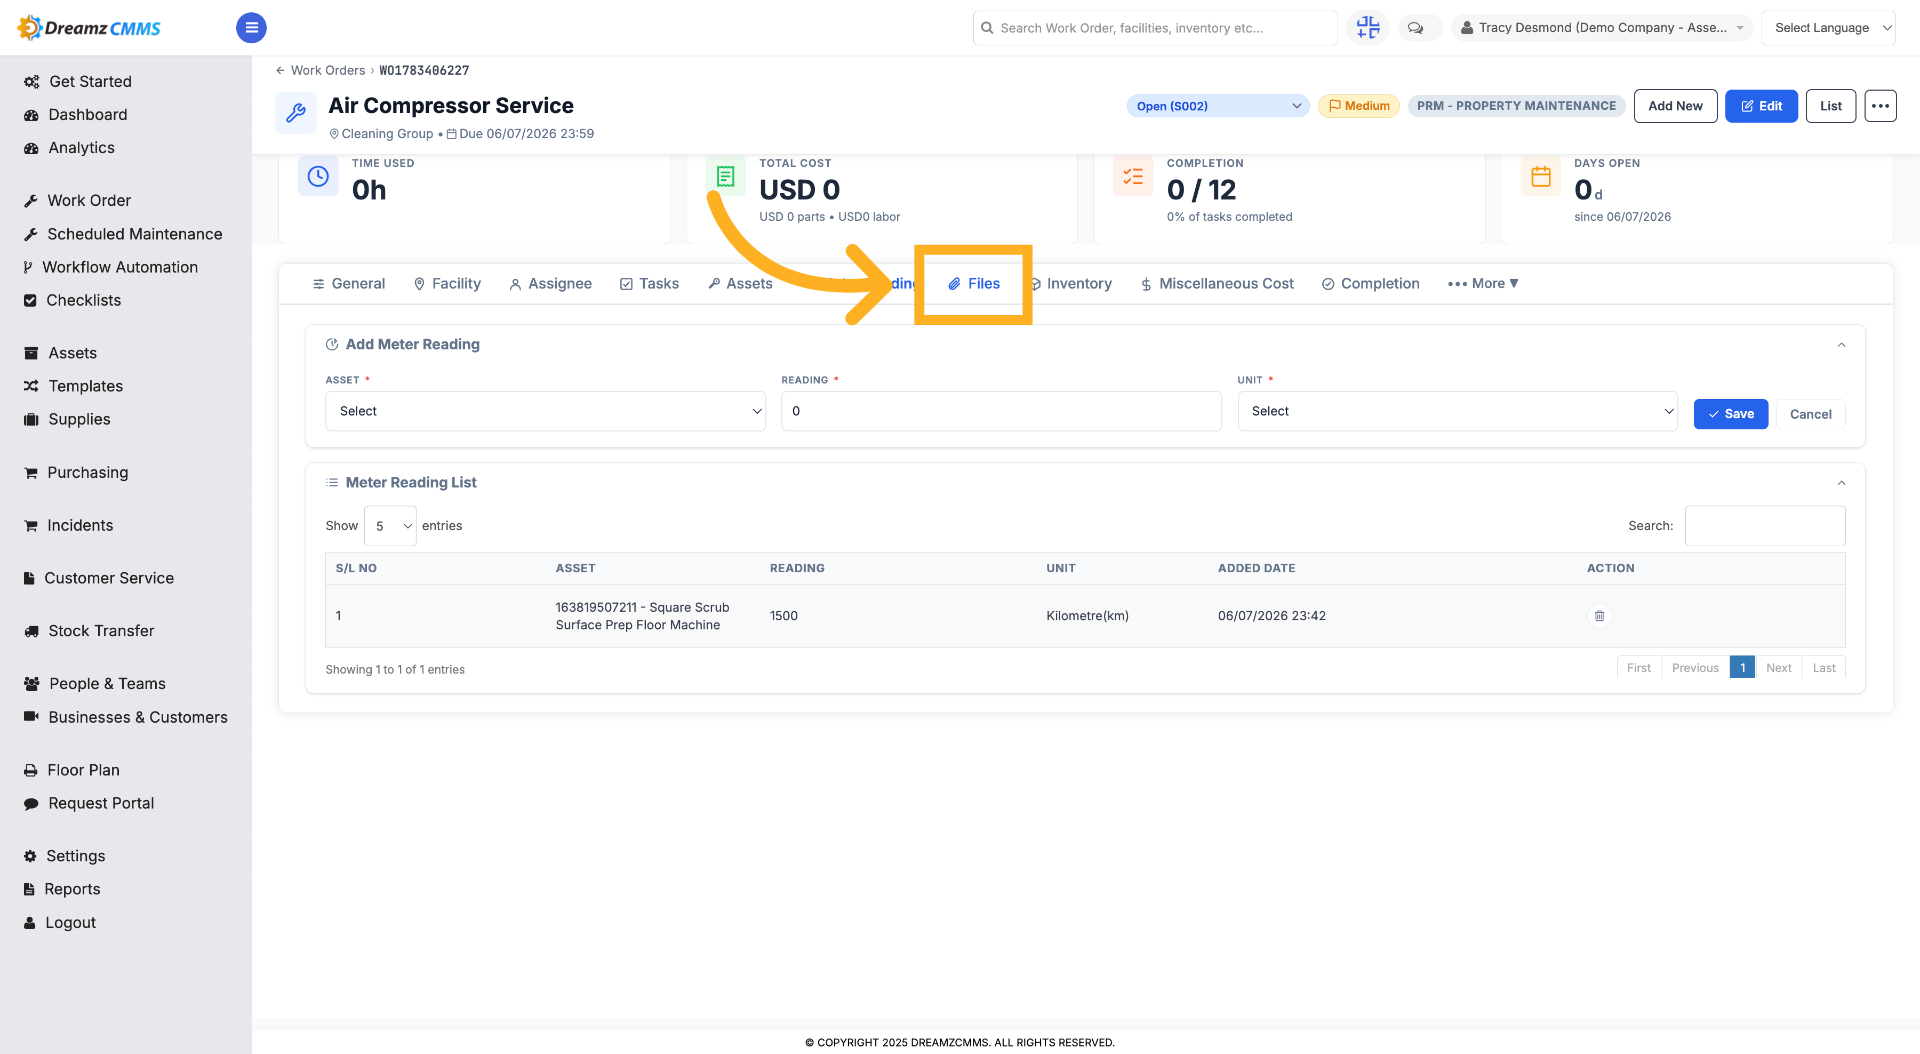
Step 16 – Open Files Section
Click "Files" to manage files related to the work order.
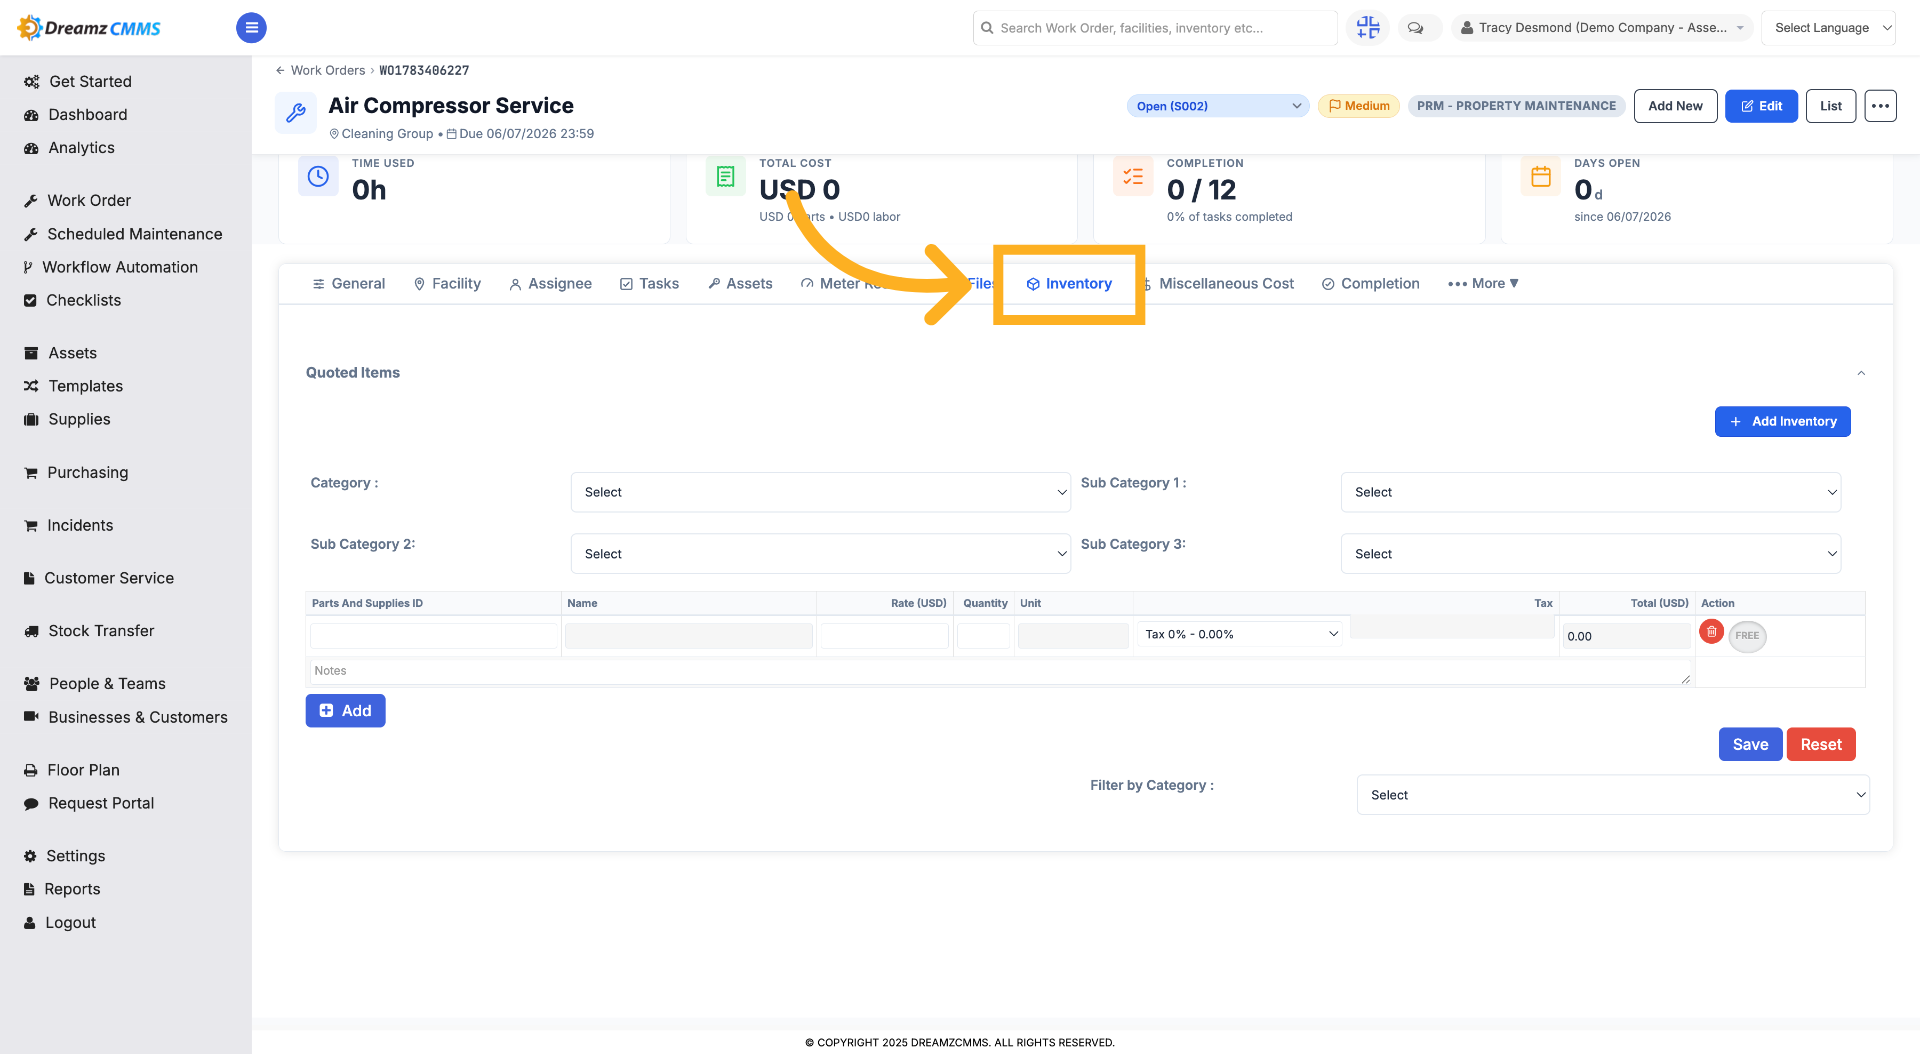
Step 17 – Access Inventory Section
Click "Inventory" to manage inventory items linked to the work order.
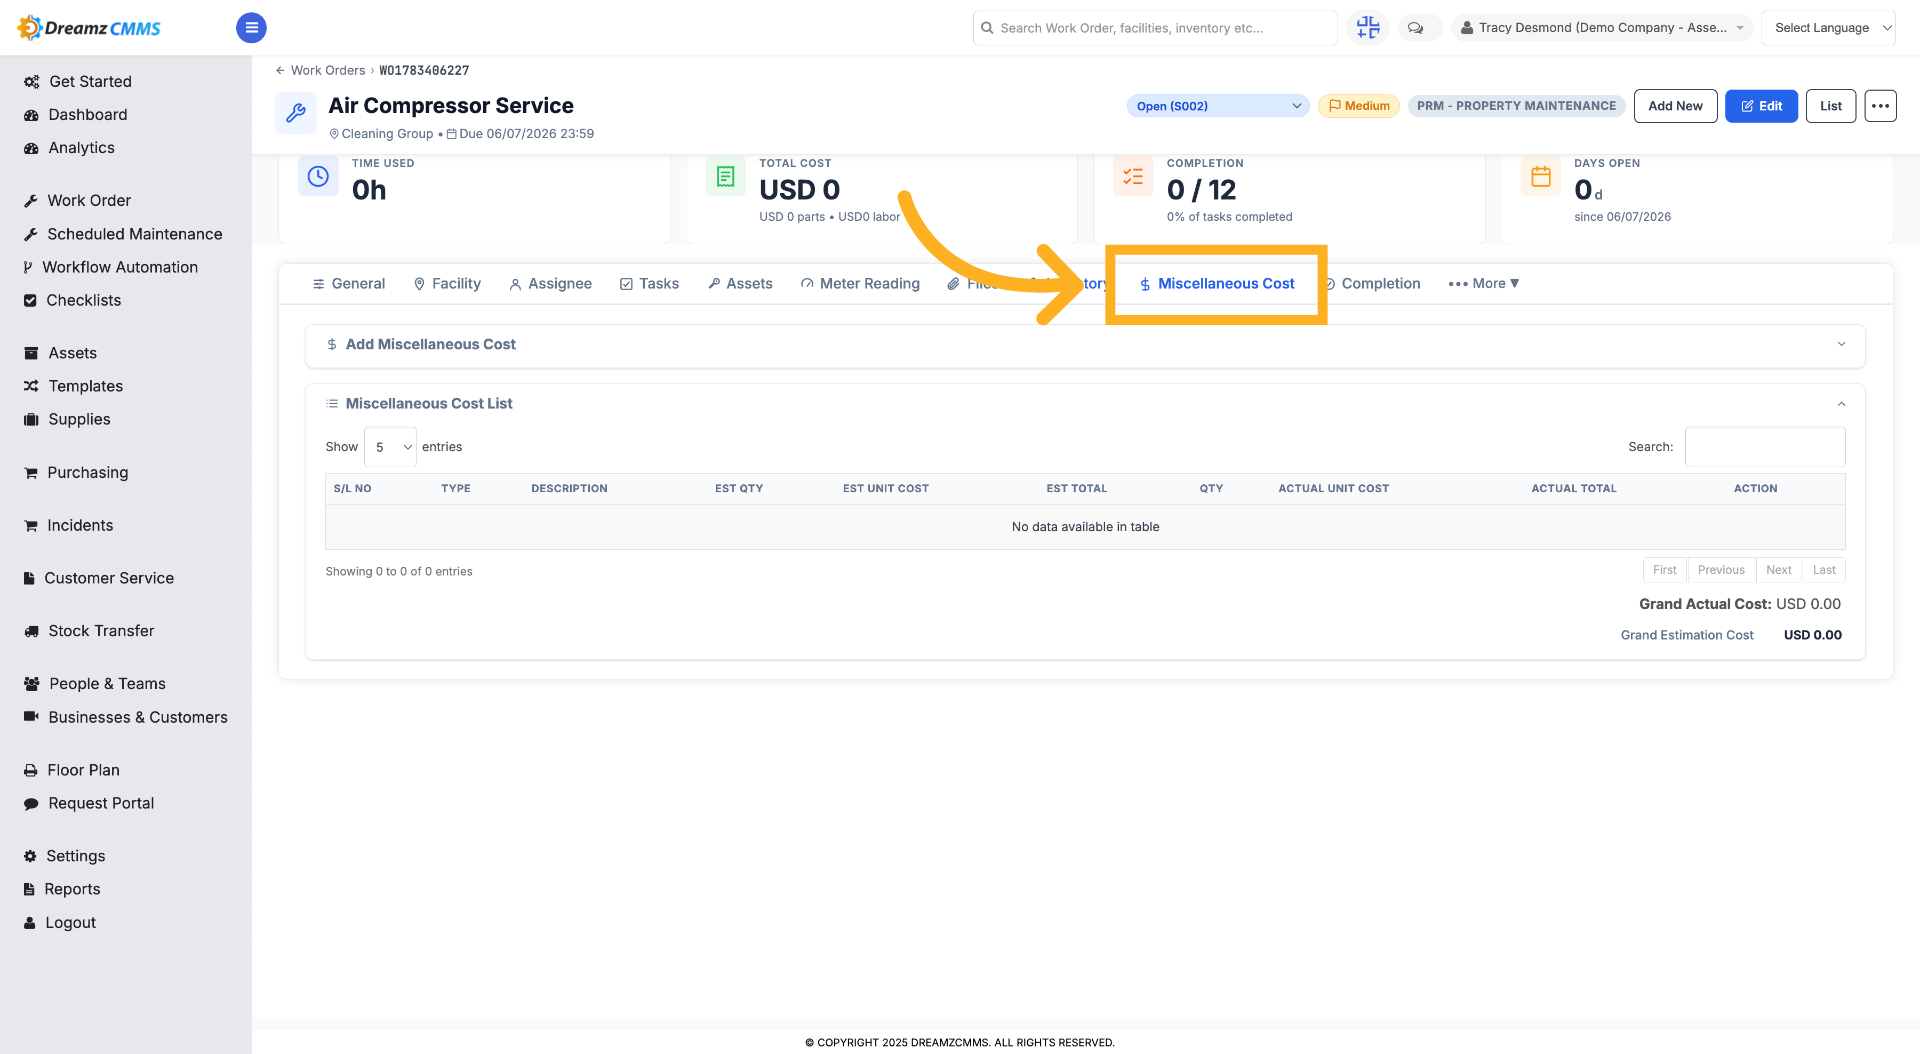
Step 18 – Select Miscellaneous Cost
Click "Miscellaneous Cost" to add or view additional costs.
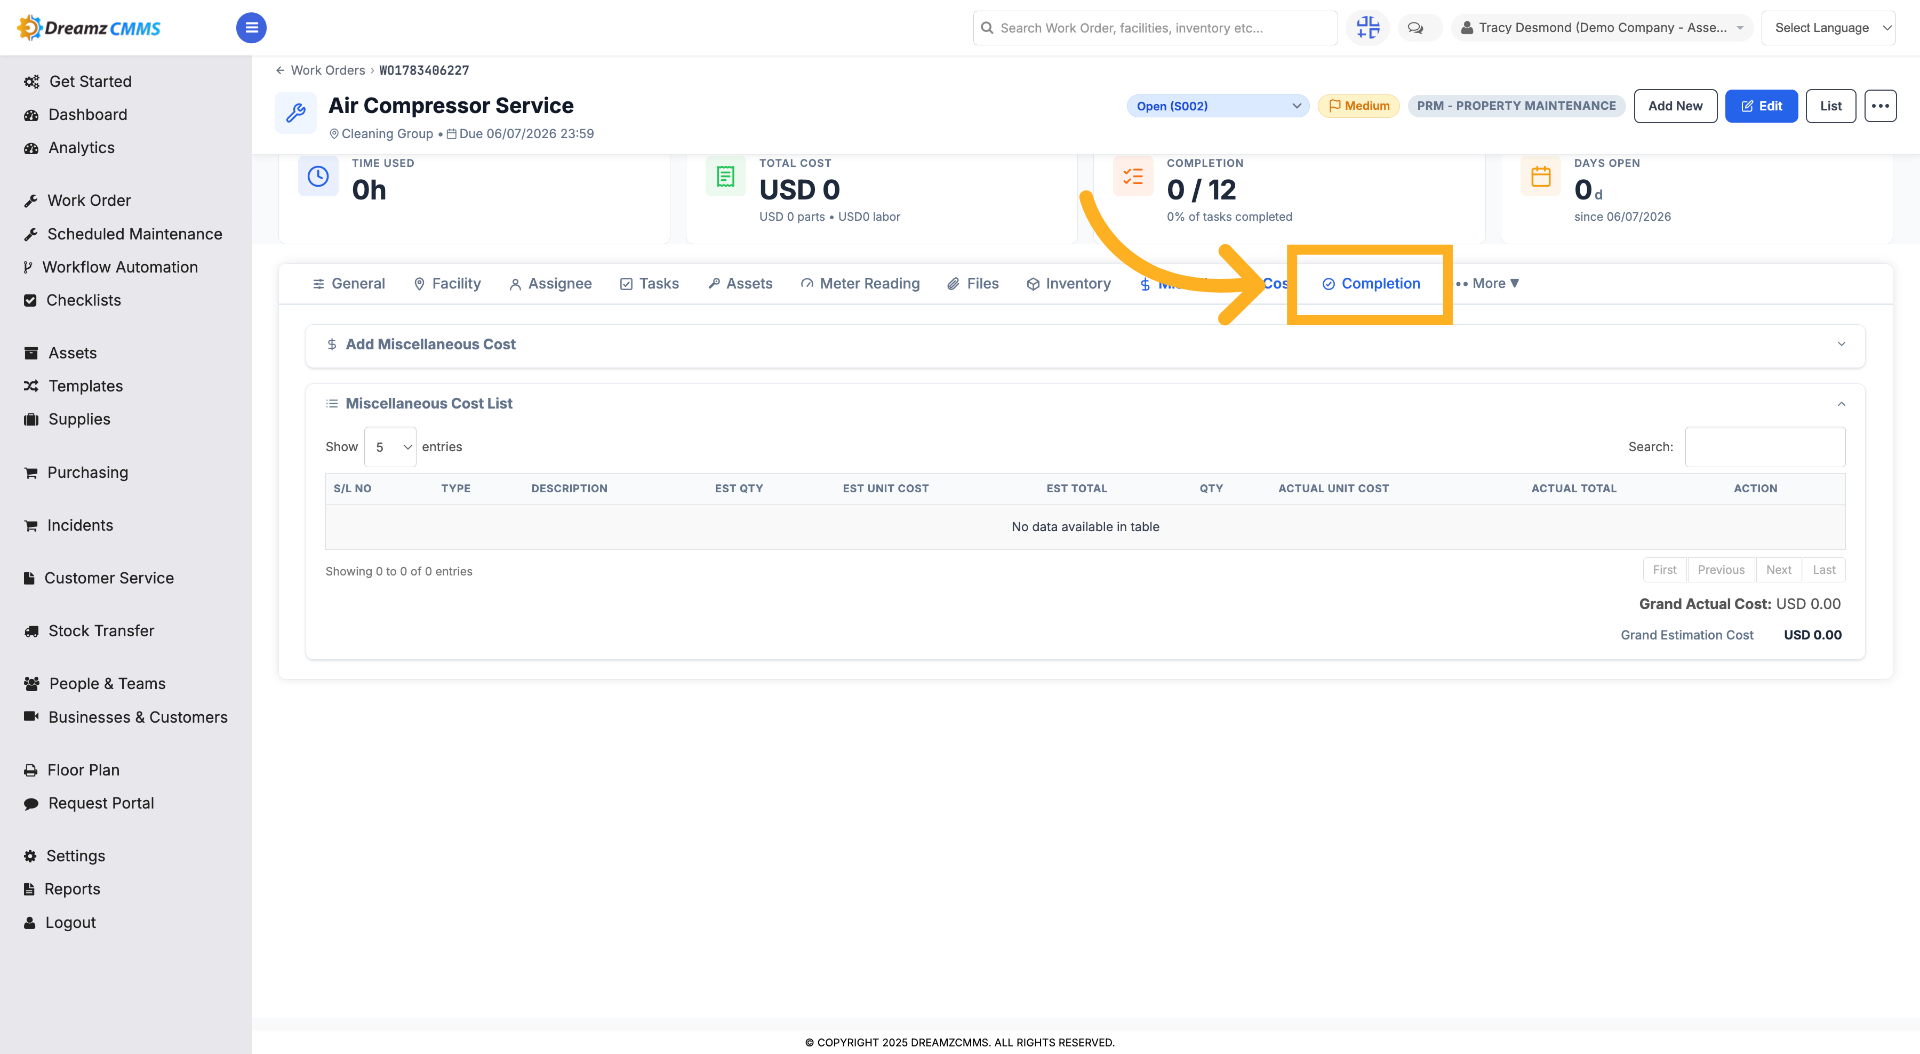
Step 19 – Open Completion Section
Click "Completion" to manage work order completion details.
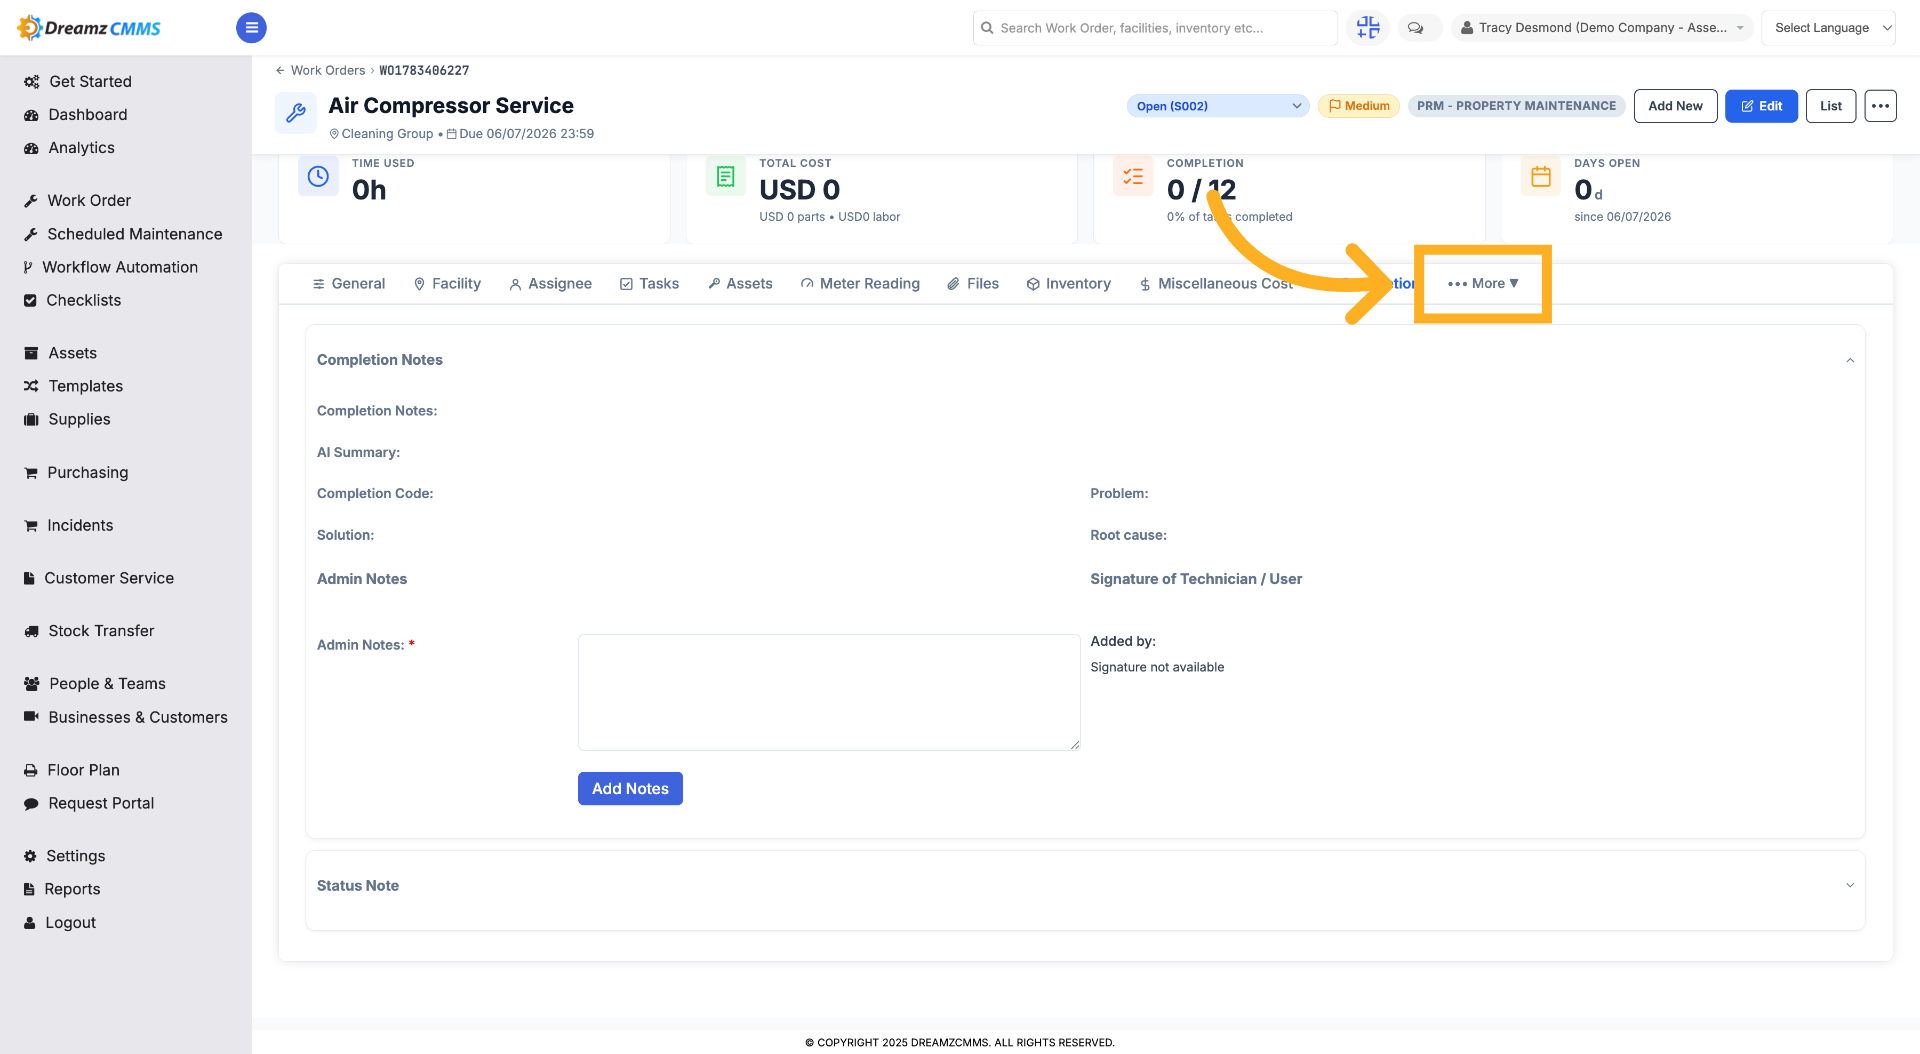
Step 20 – Open More Options
Click "More" to access additional options.
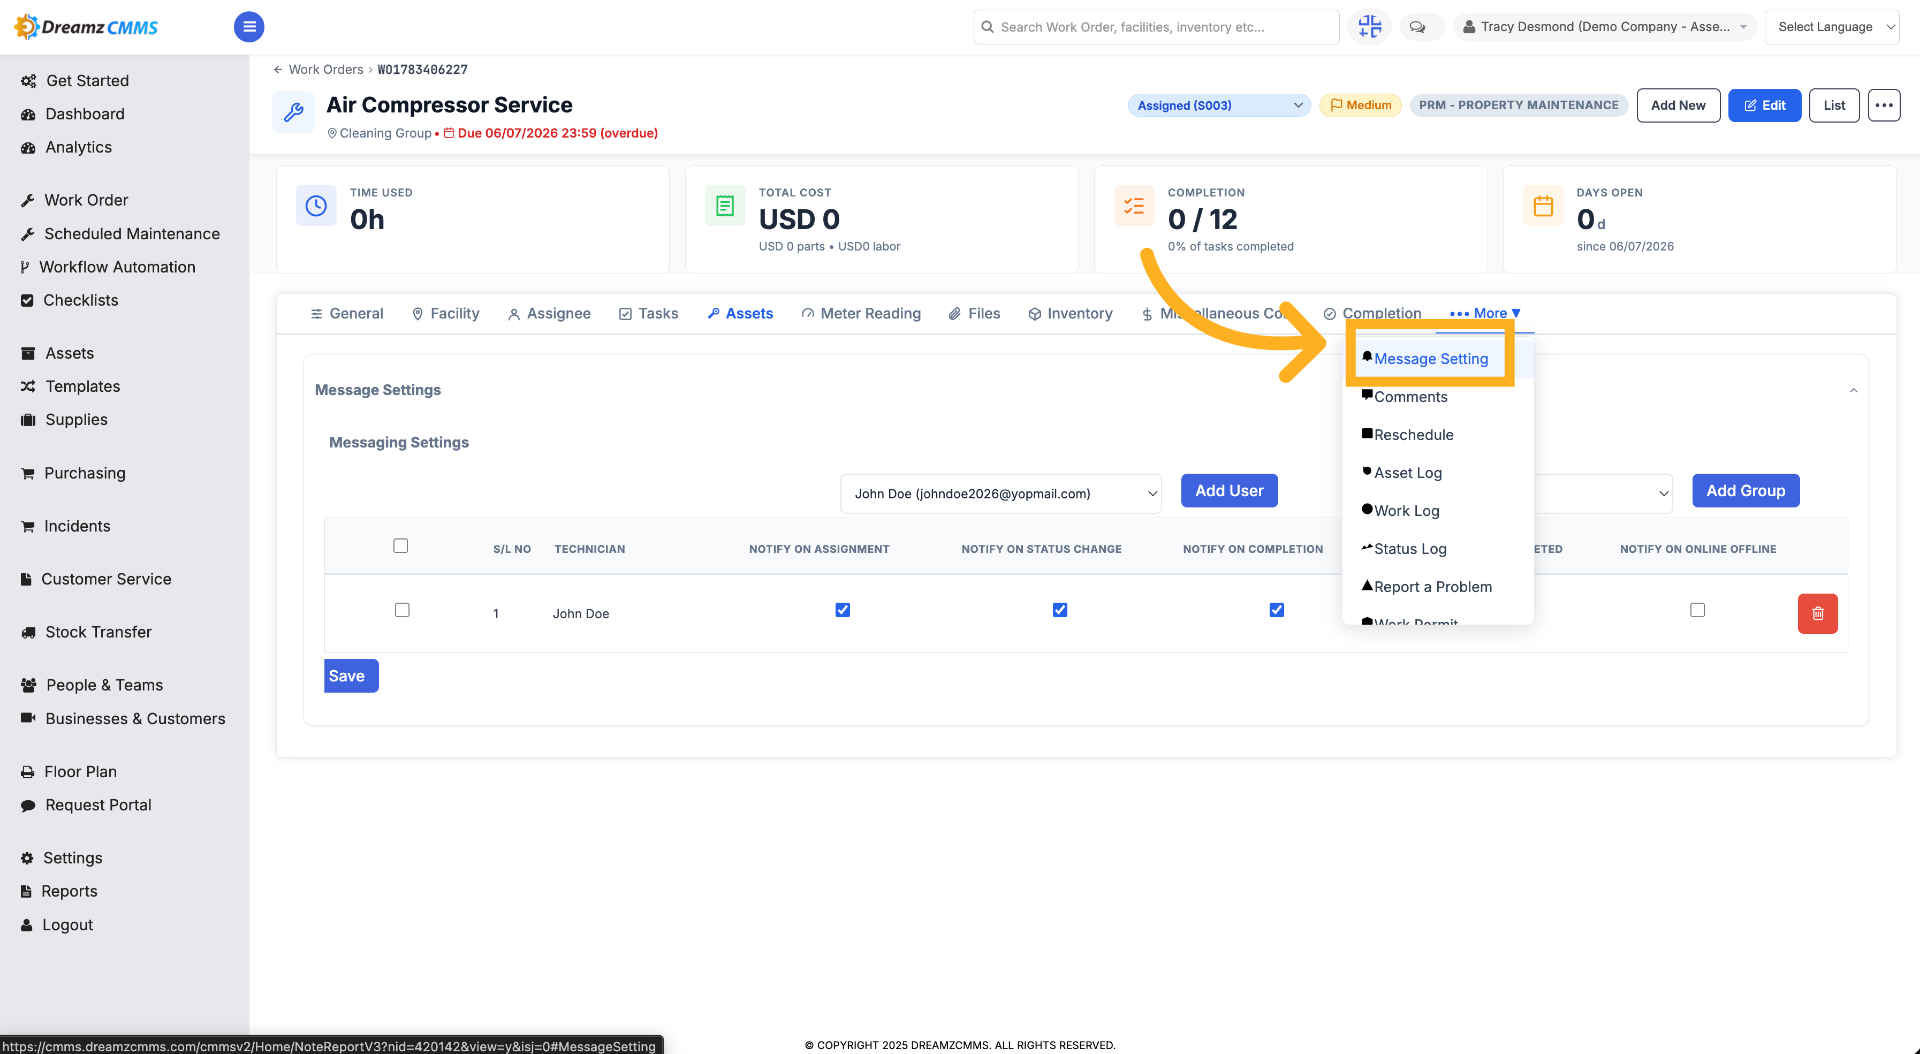
Step 21 – Access Message Settings
Click "Message Setting" to configure message preferences per user — who will be notified when certain actions are taken against this work order.
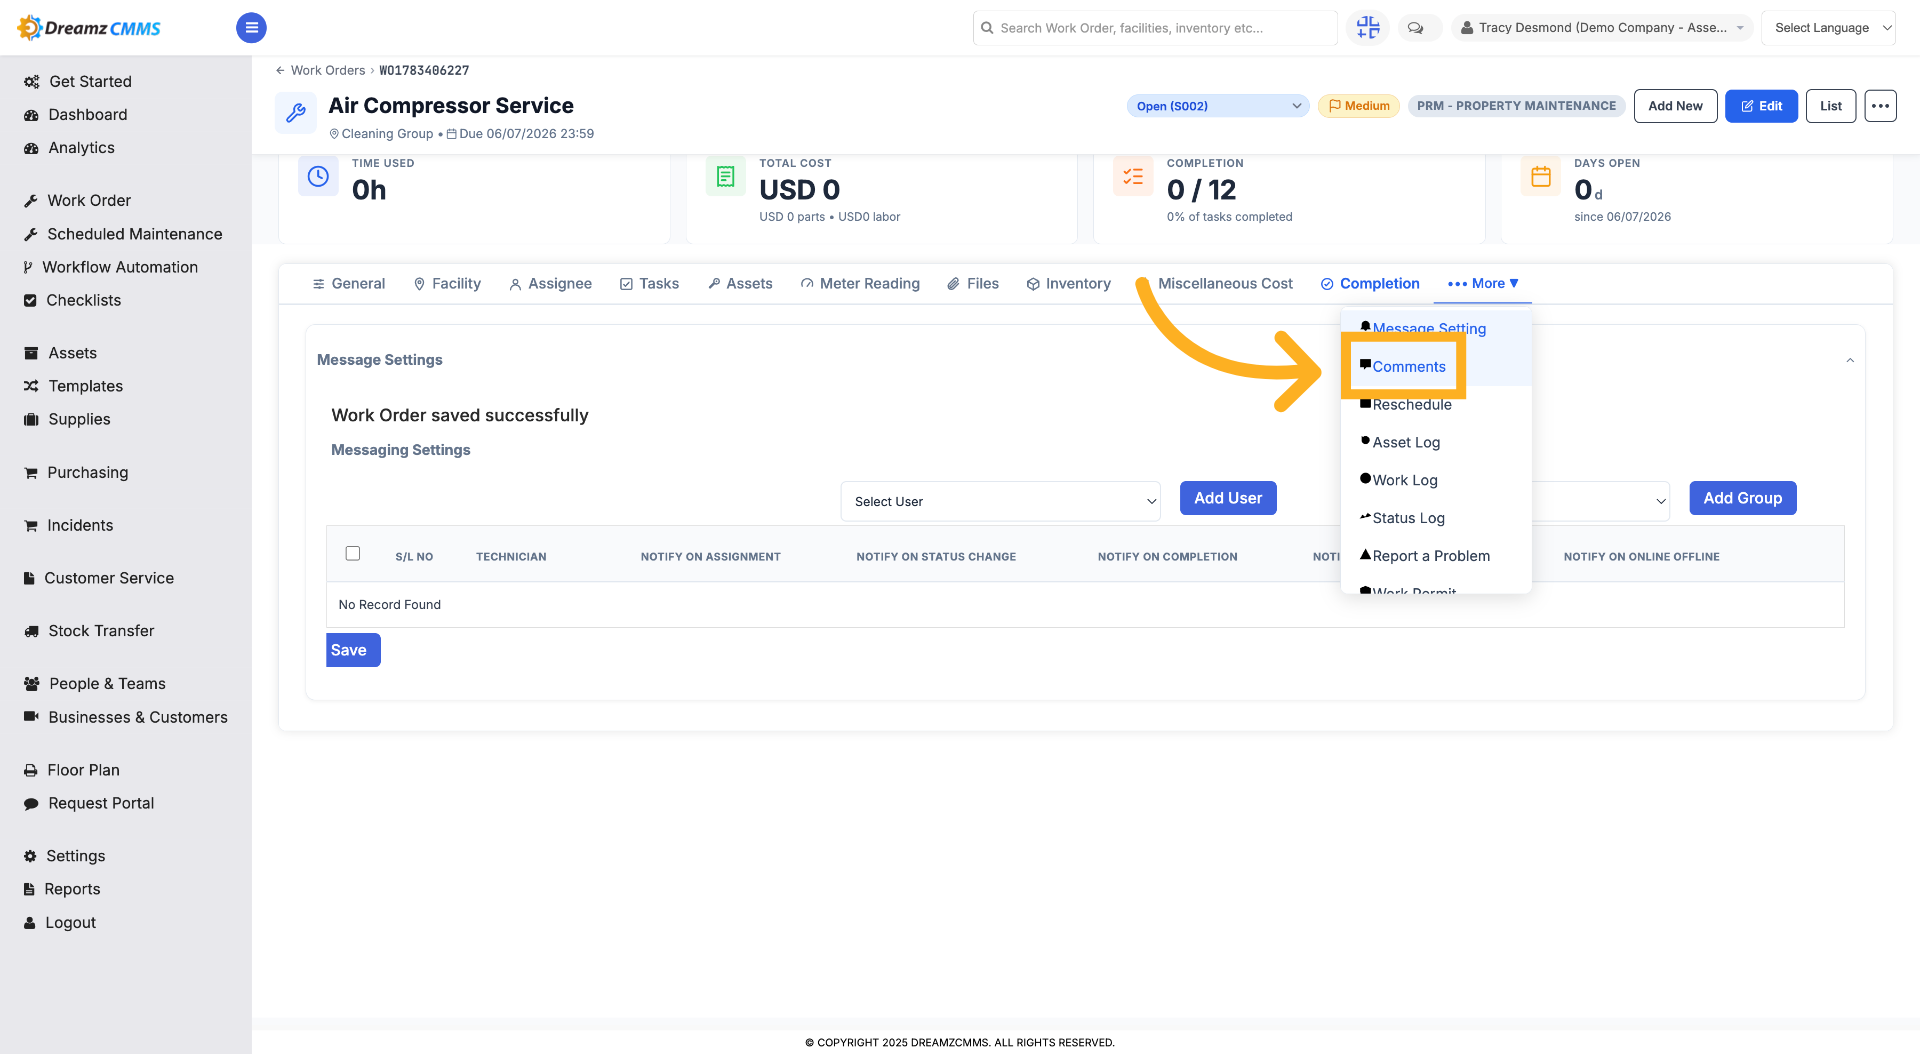
Step 22 – View Comments Section
Click "Comments" to read or add comments to the work order.
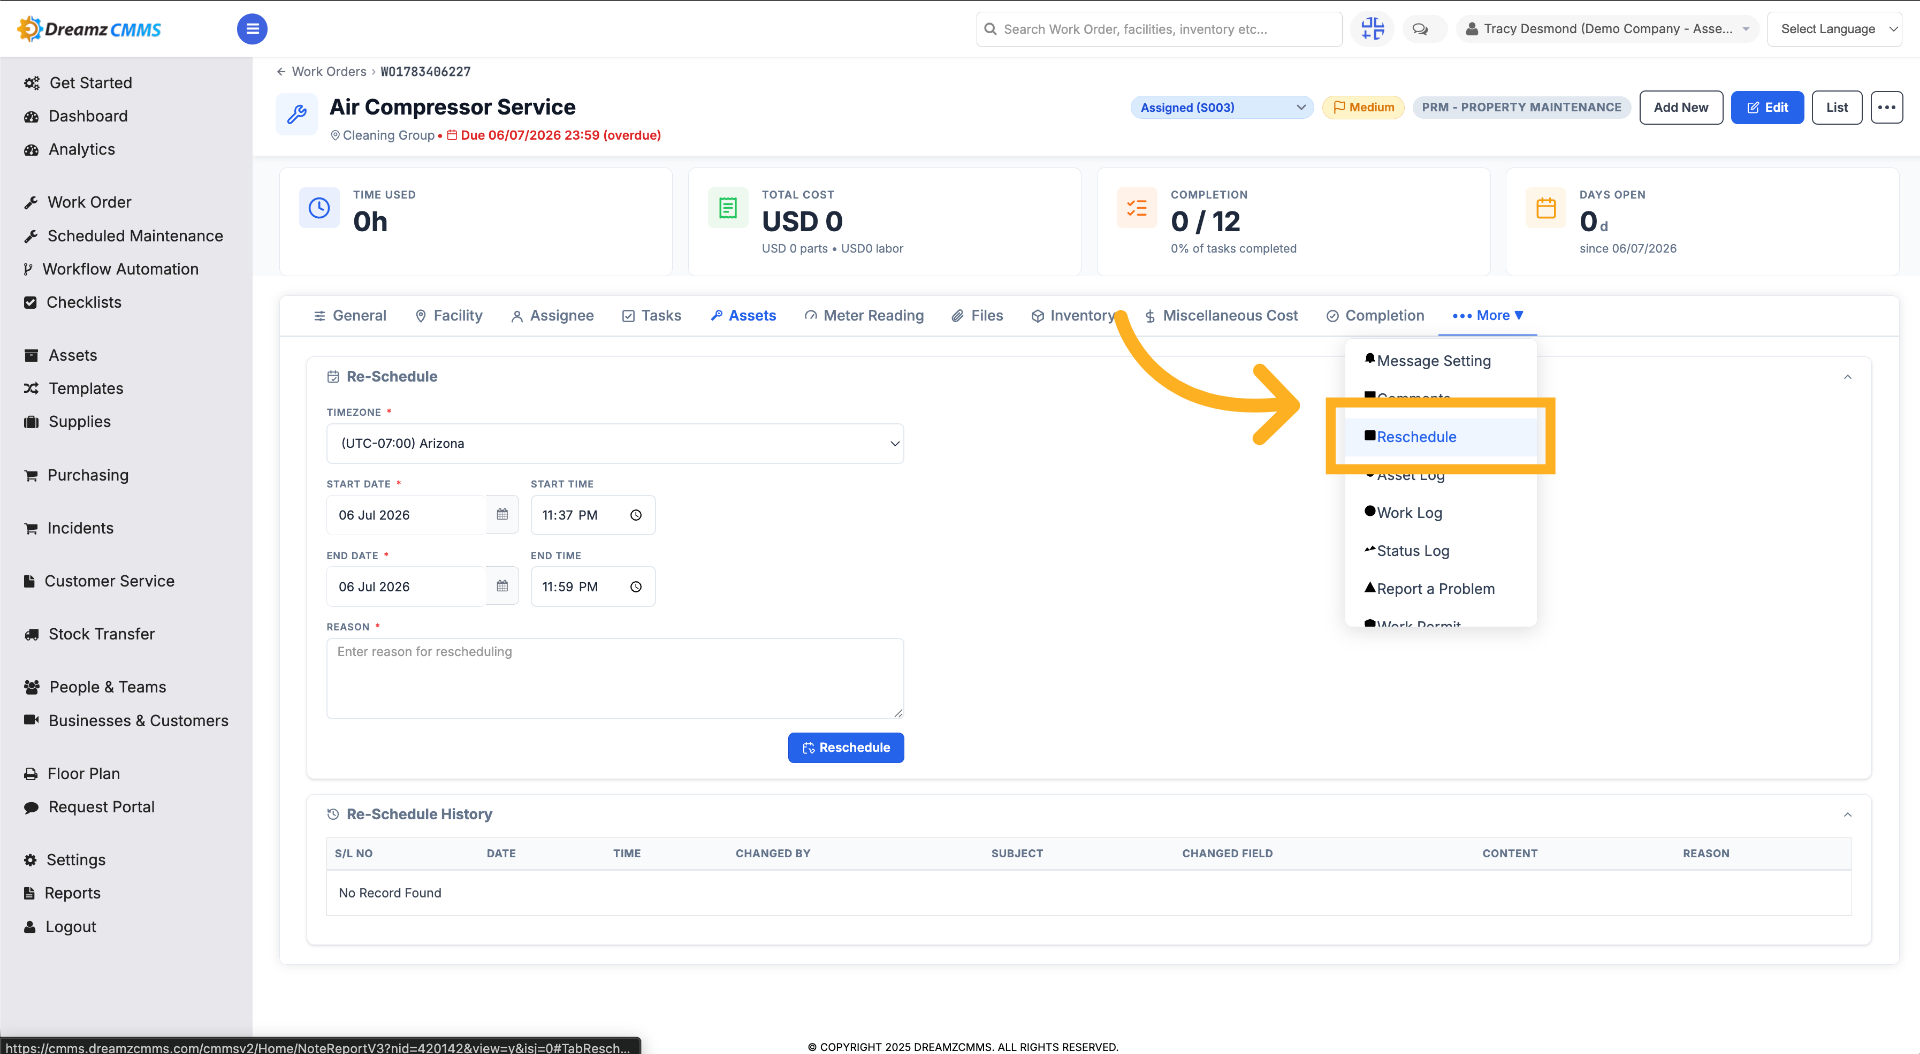
Step 23 – Reschedule Work Order
Click "Reschedule" to change the scheduled date or time of the work order.
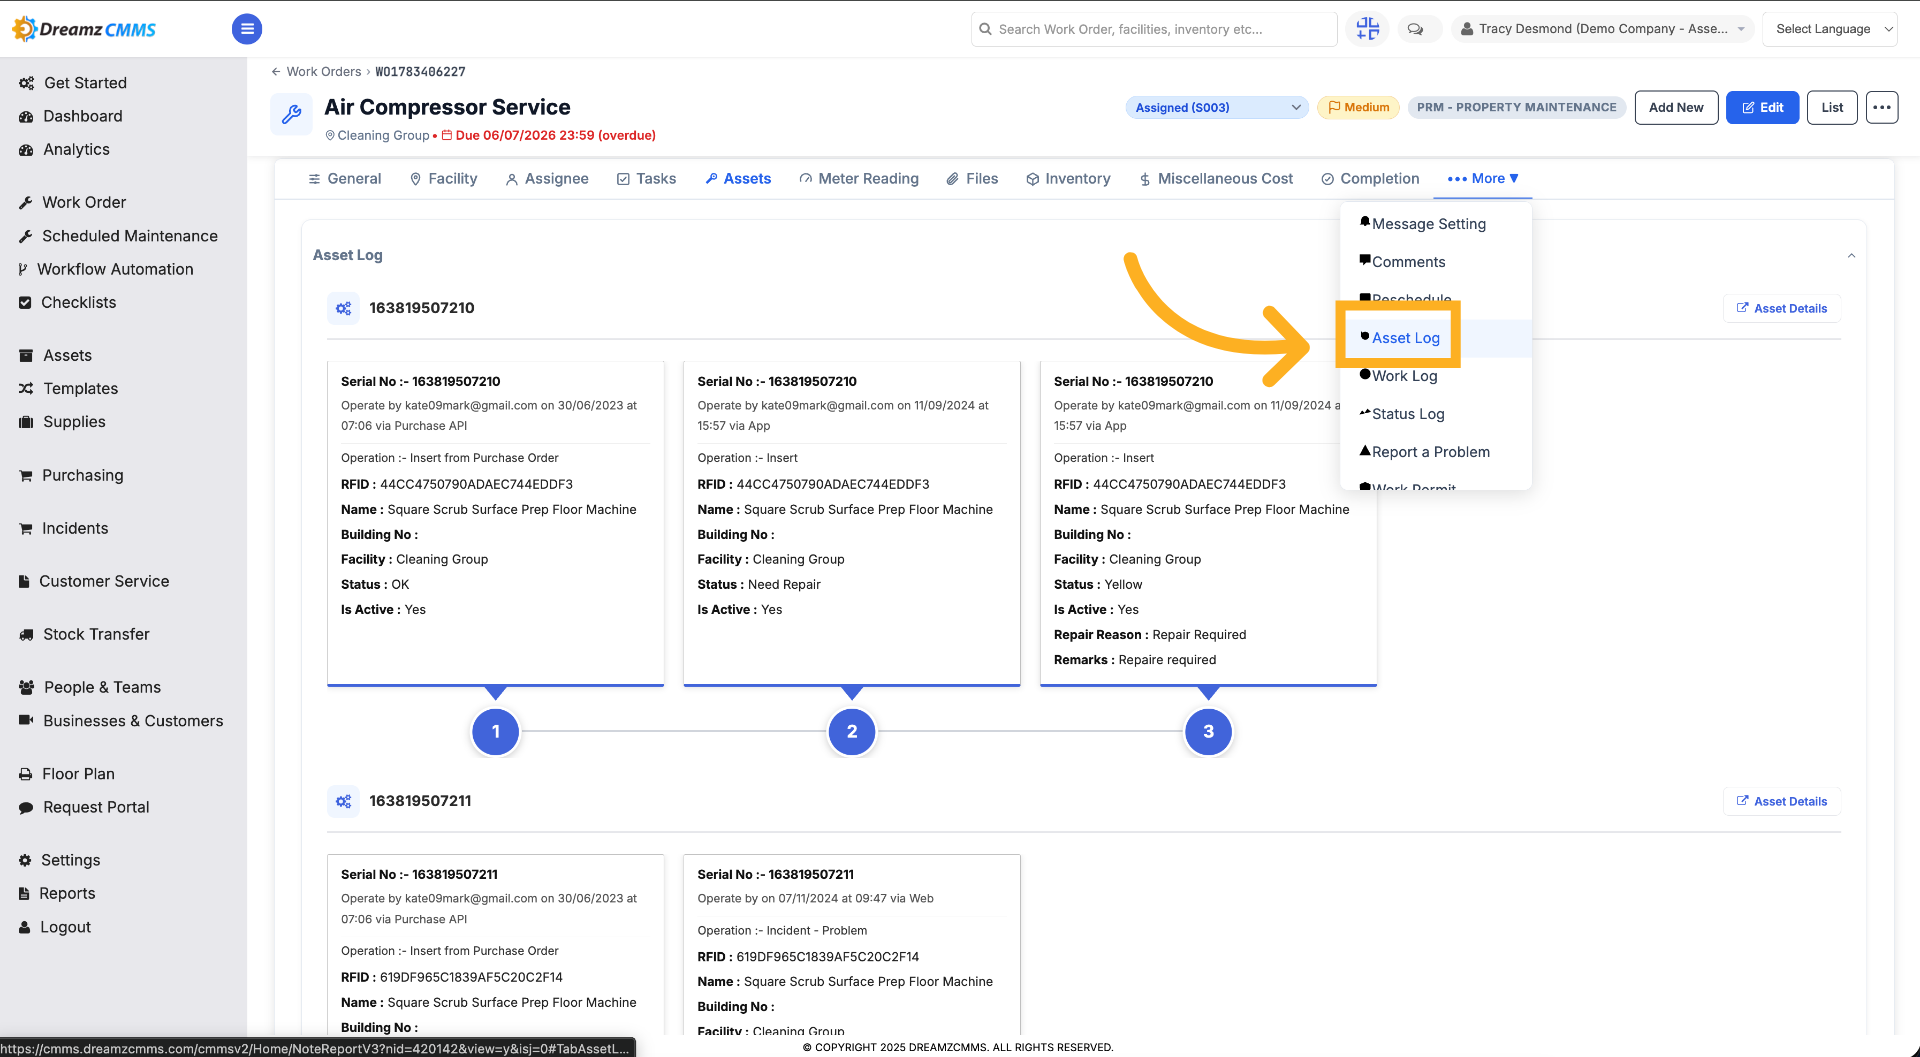
Step 24 – Access Asset Log
Click "Asset Log" to view the history of asset usage.
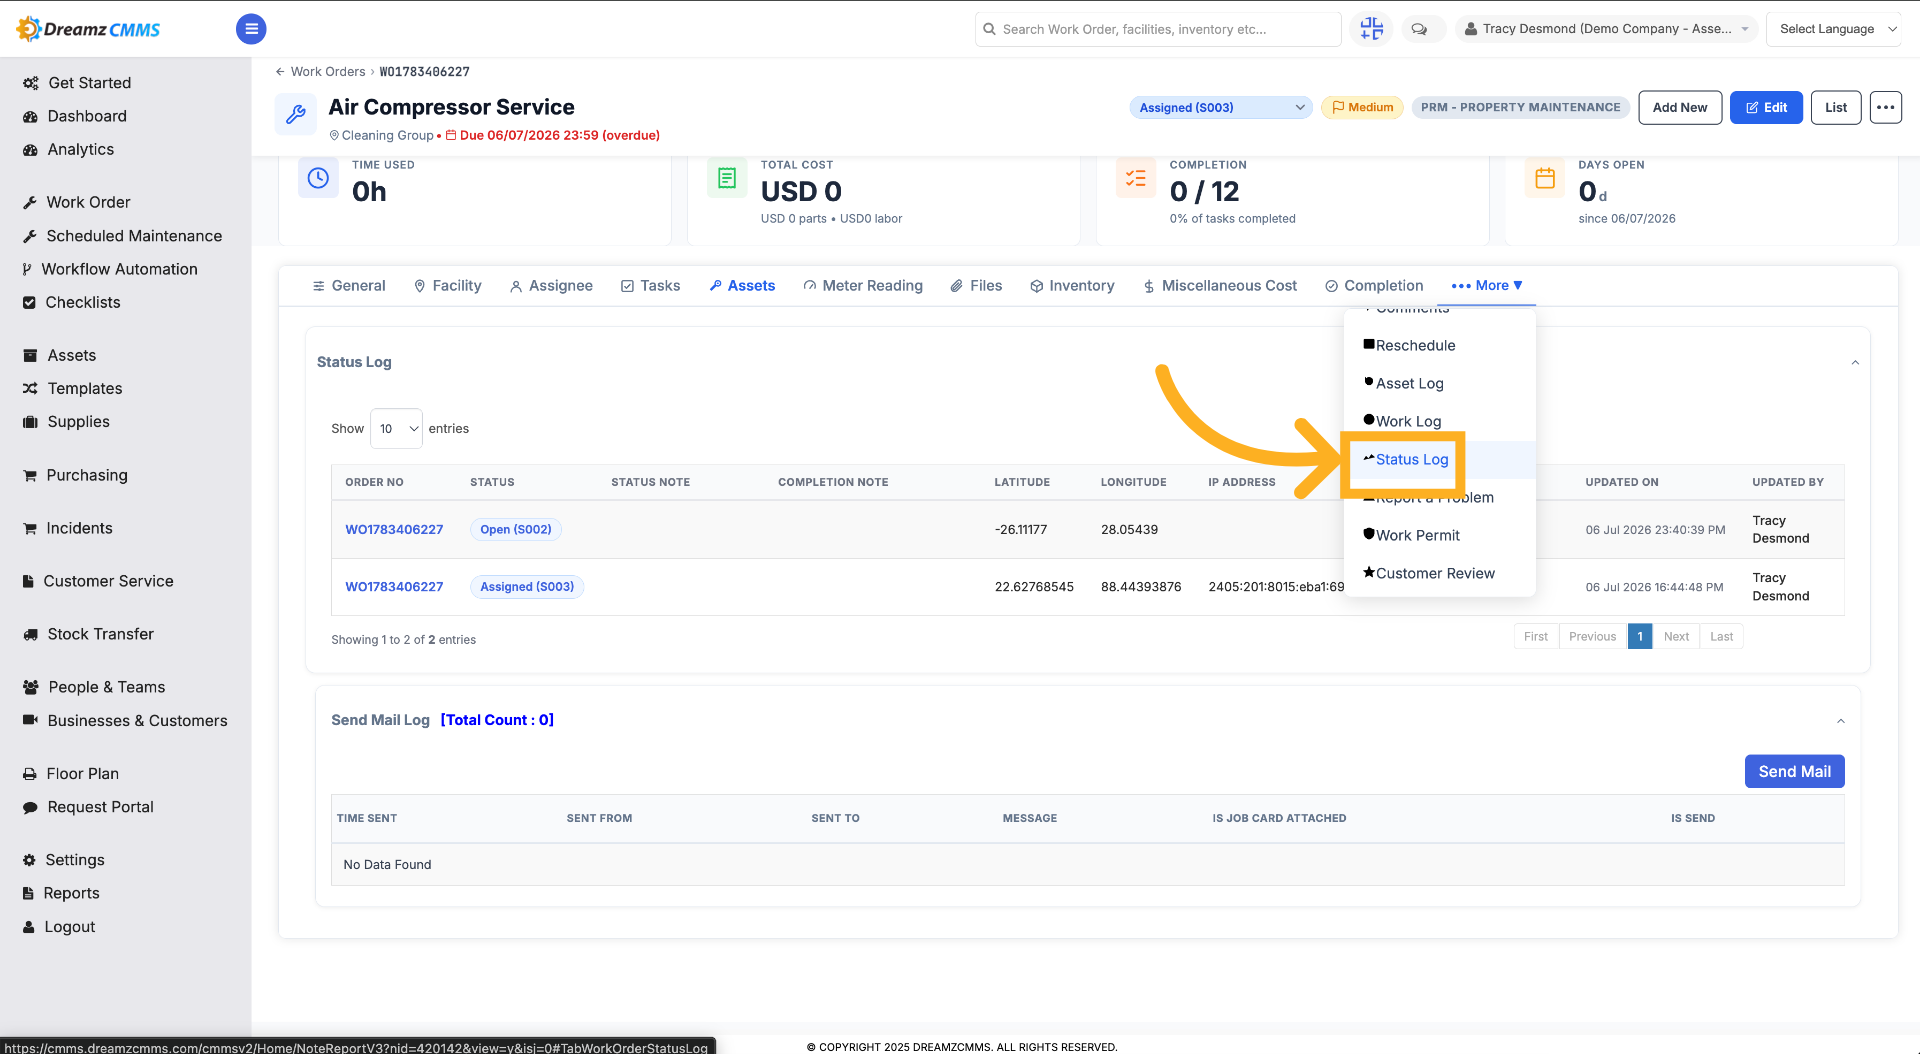
Step 25 – Access Status Log
Click "Status Log" to check the status changes of the work order.
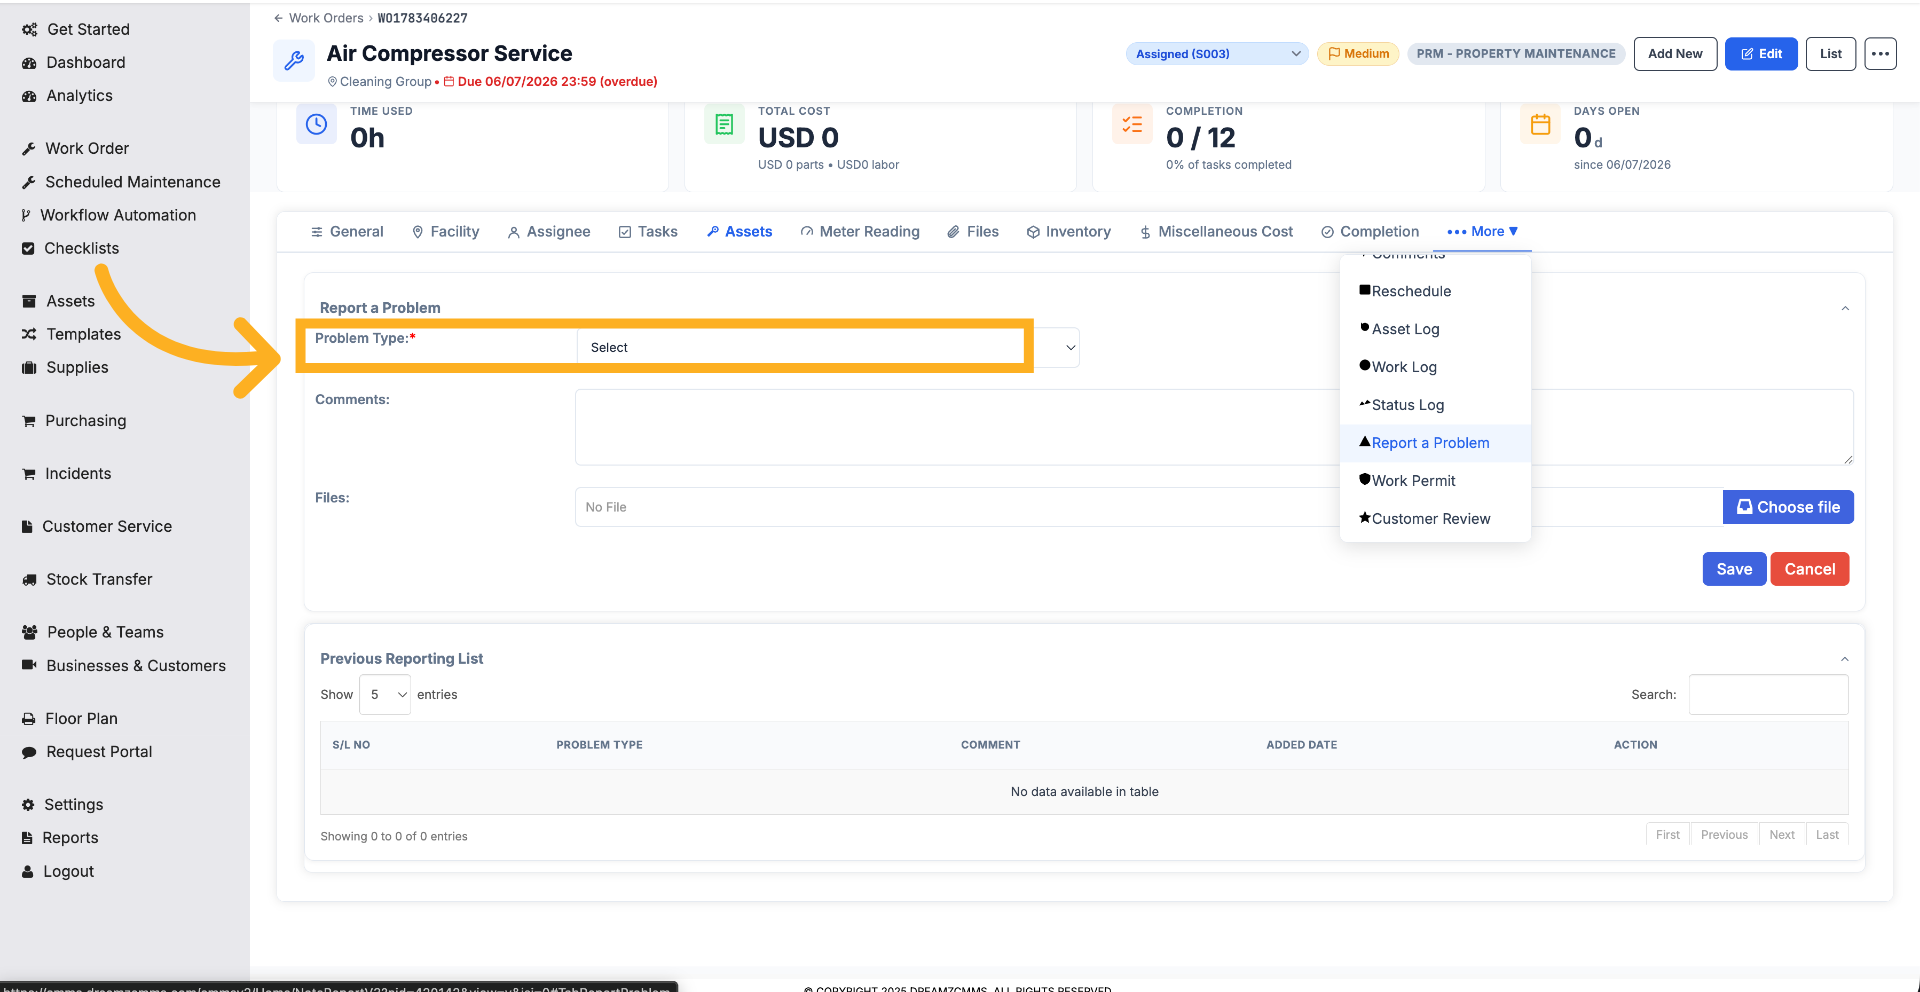
Step 26 – Report a Problem
Click "Report a Problem" to submit a breakdown issue if needed.
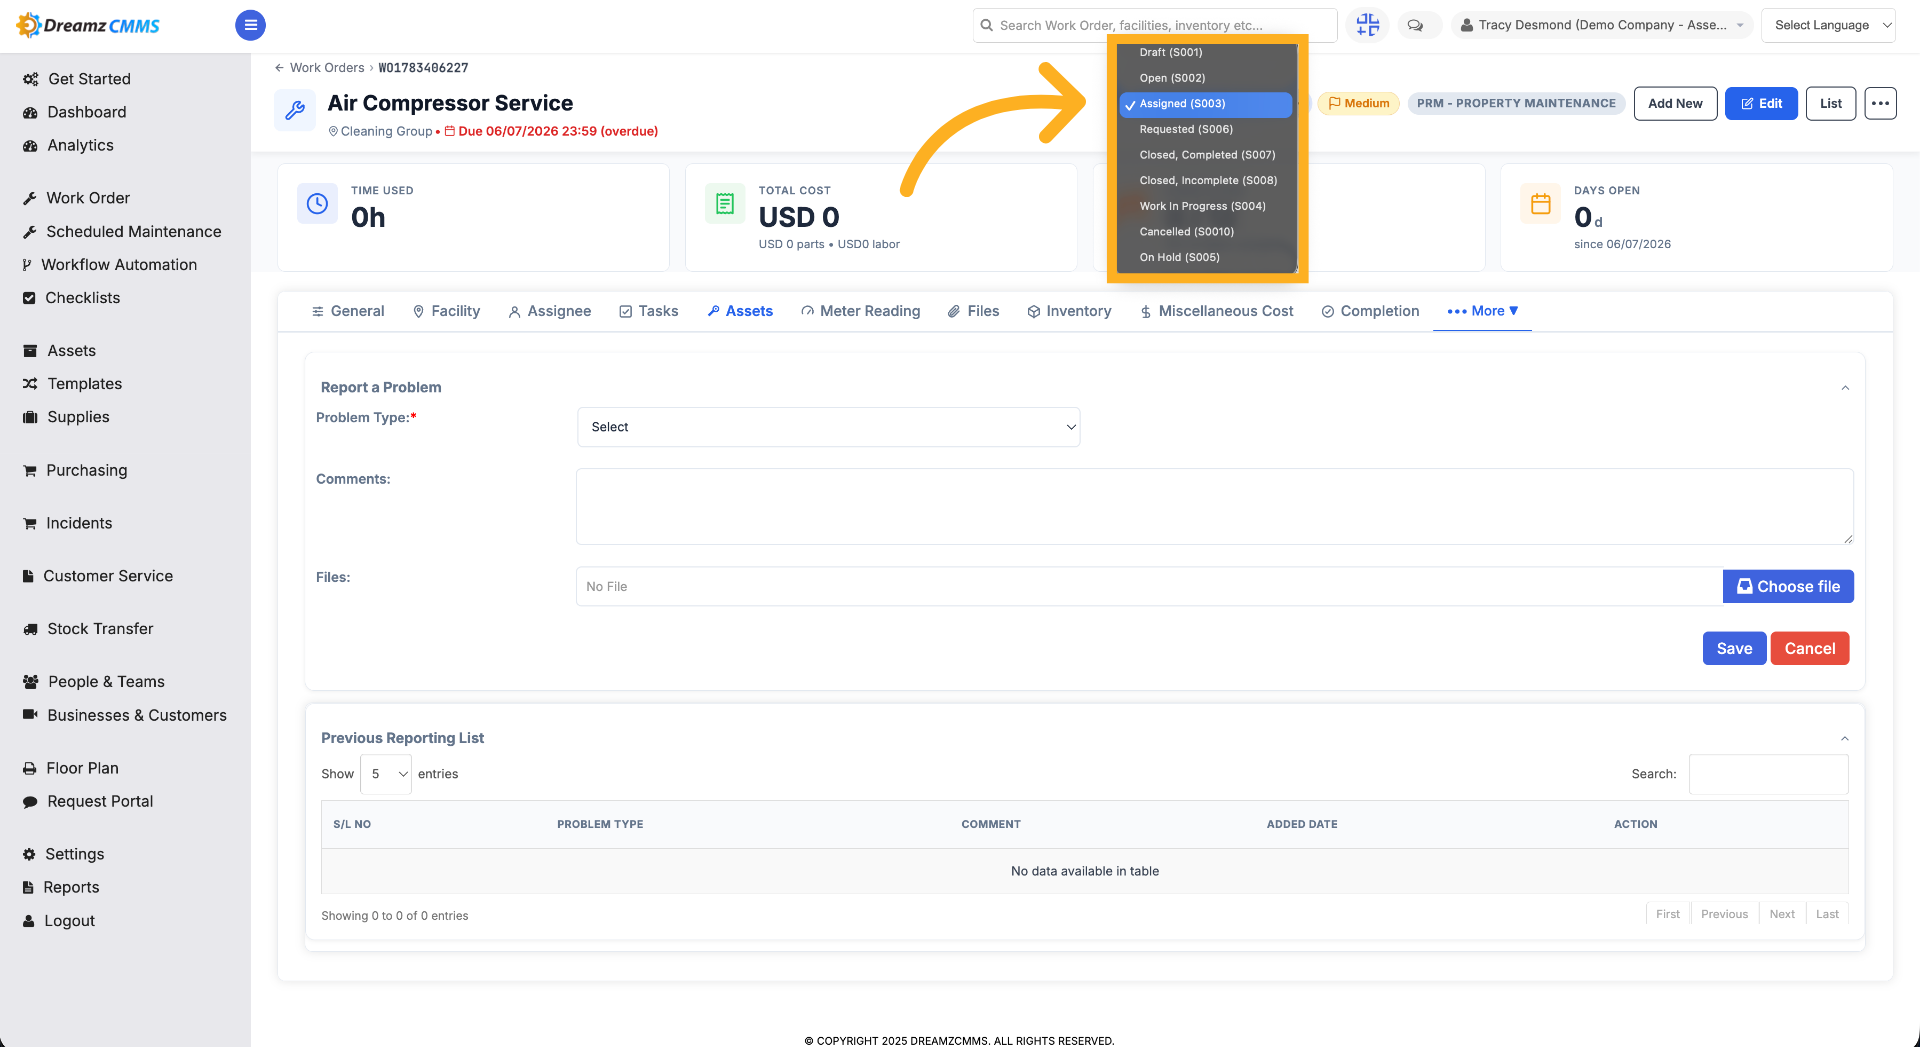
Step 27 – Select Work Order Status
Choose from the available options to change the status of the work order.
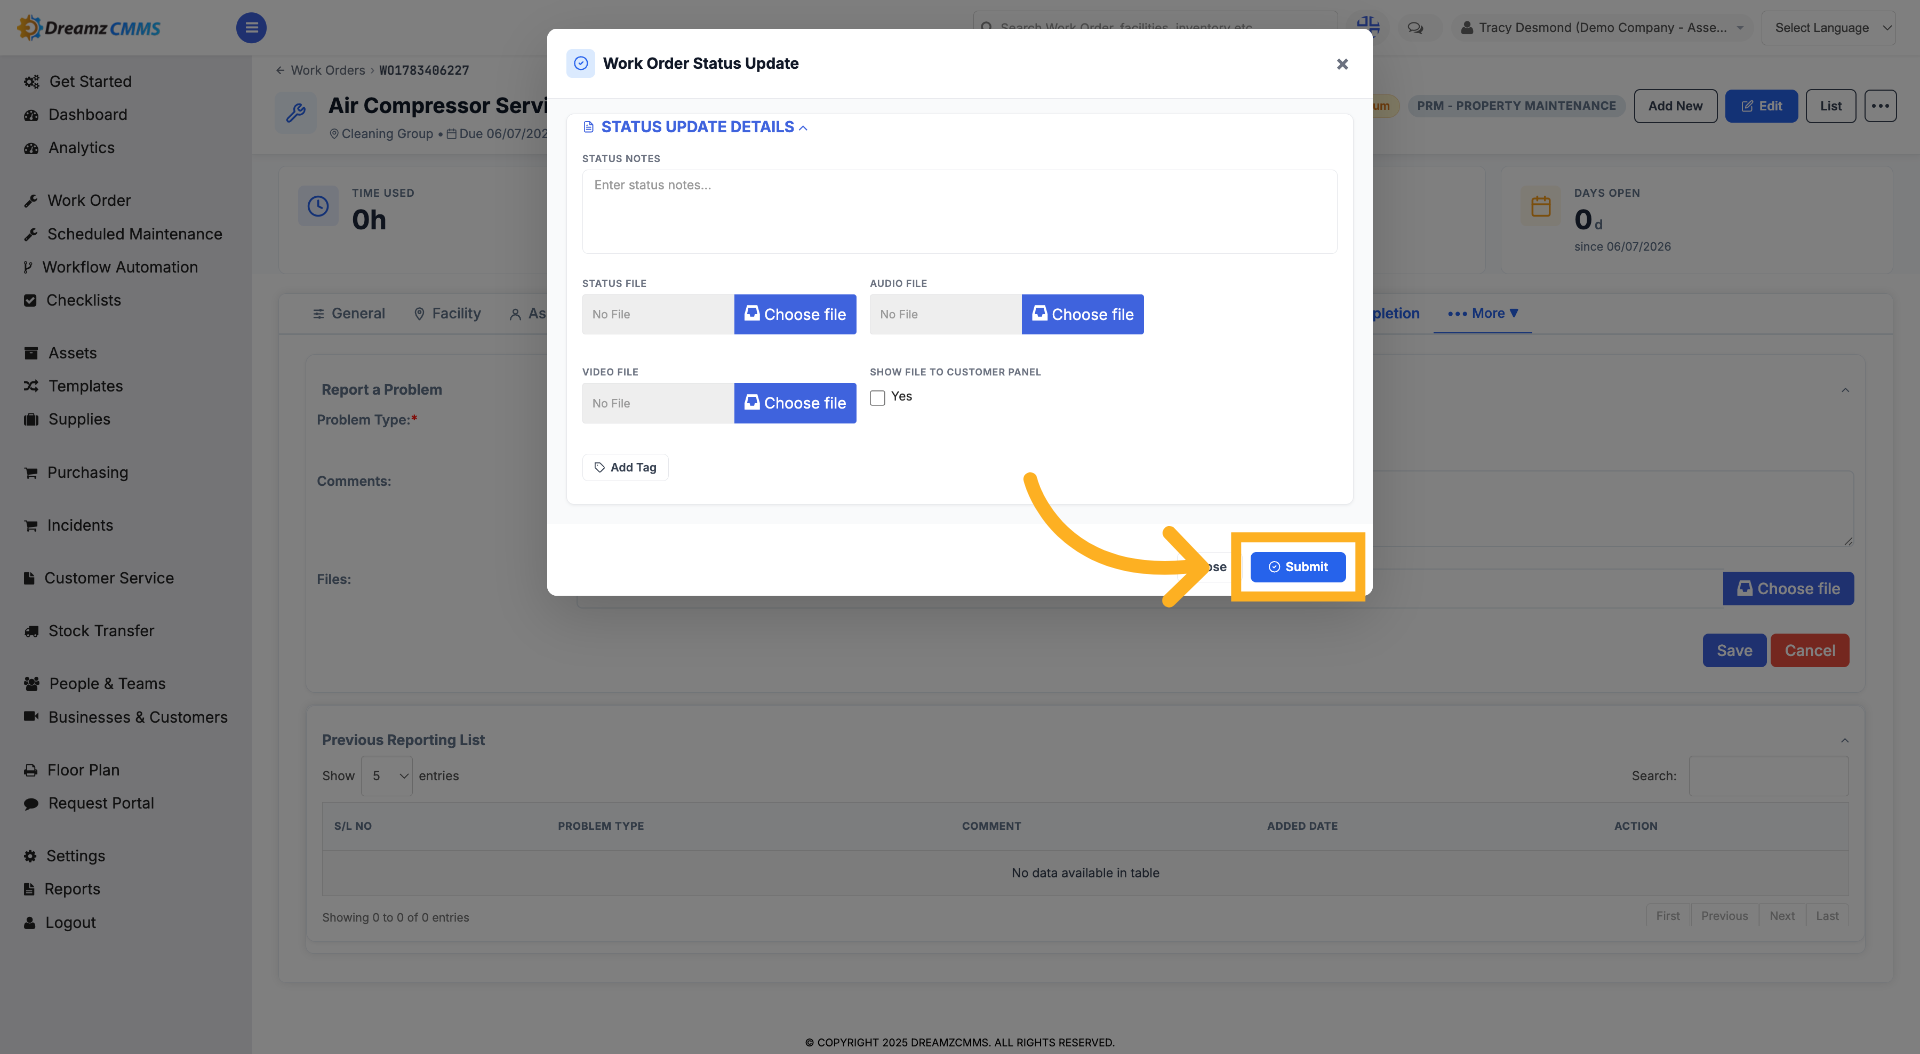
Step 28 – Submit Work Order
After selecting the status, a confirmation popup will open. Click "Submit" to finalize the status change.
How to Edit Work Order Details and Financials
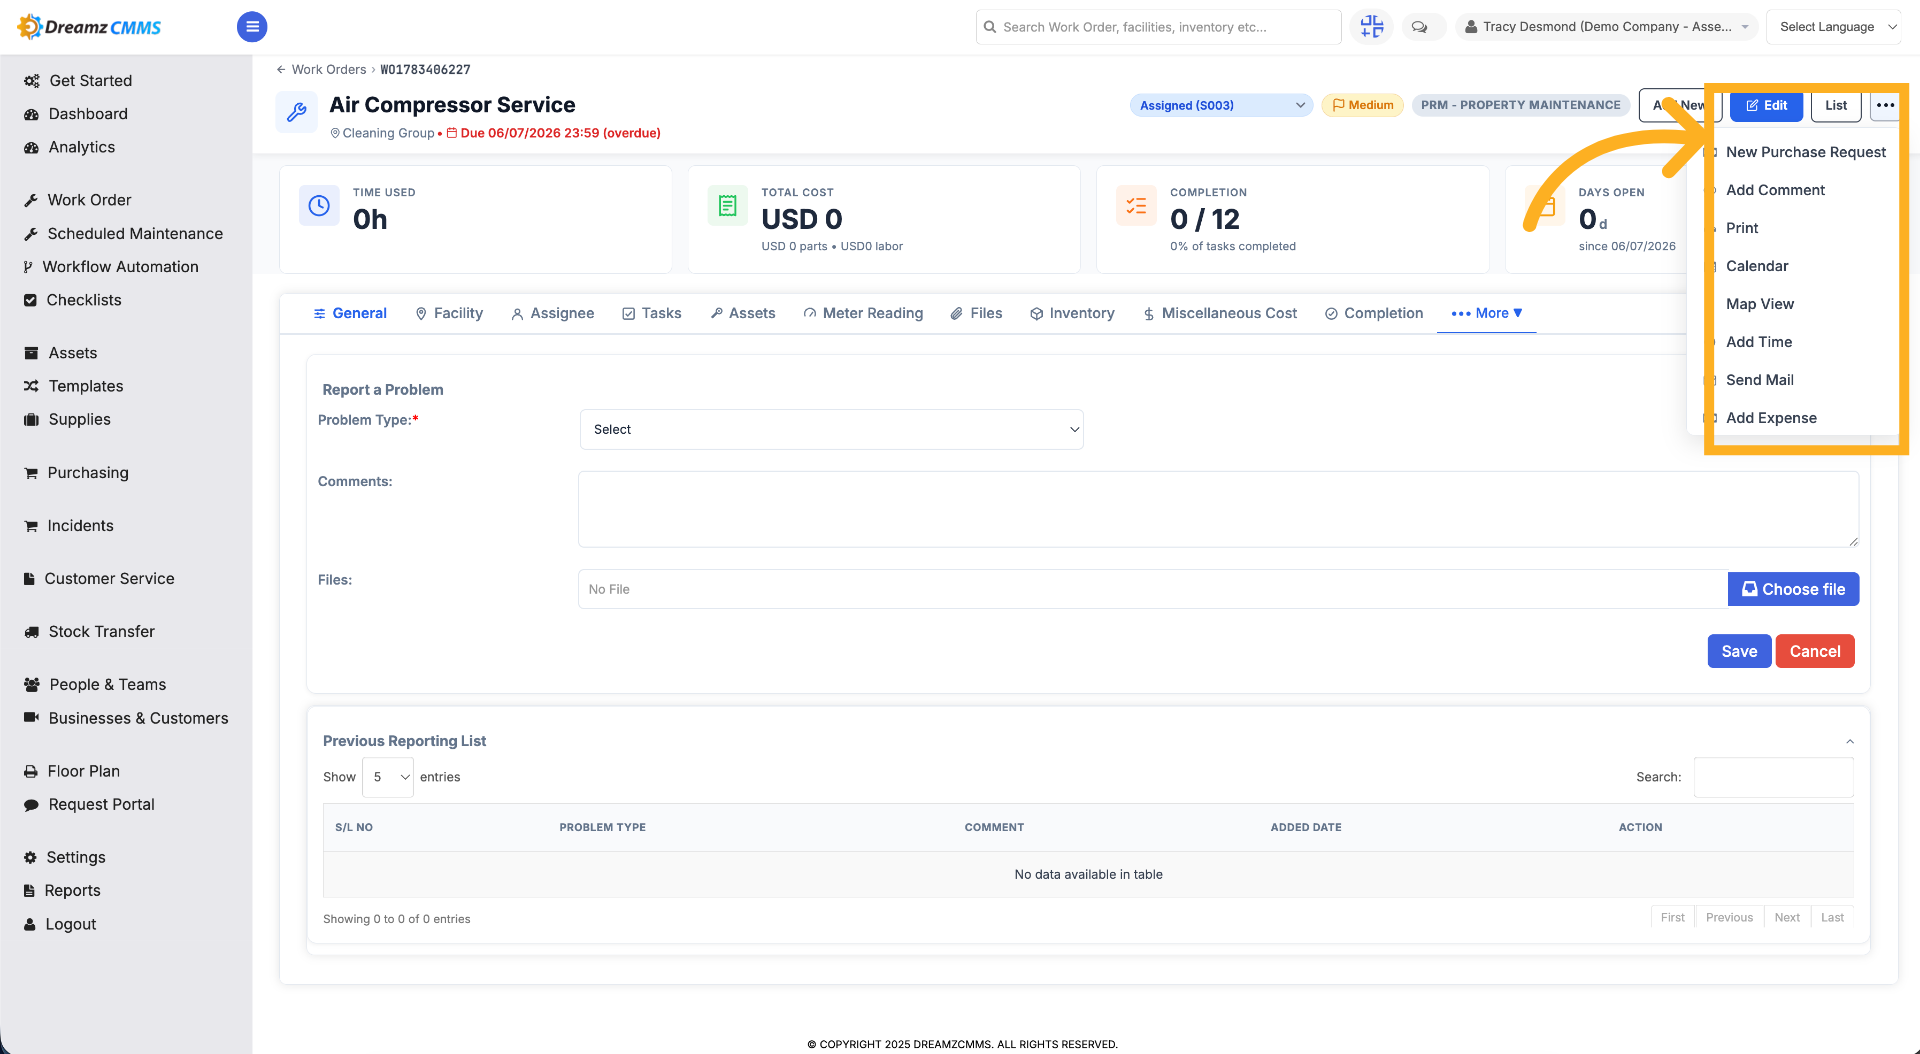
Step 1 – Access Work Order Options
Click the three dots menu to see more actions for this work order, such as creating a new purchase request, adding a comment, printing, etc
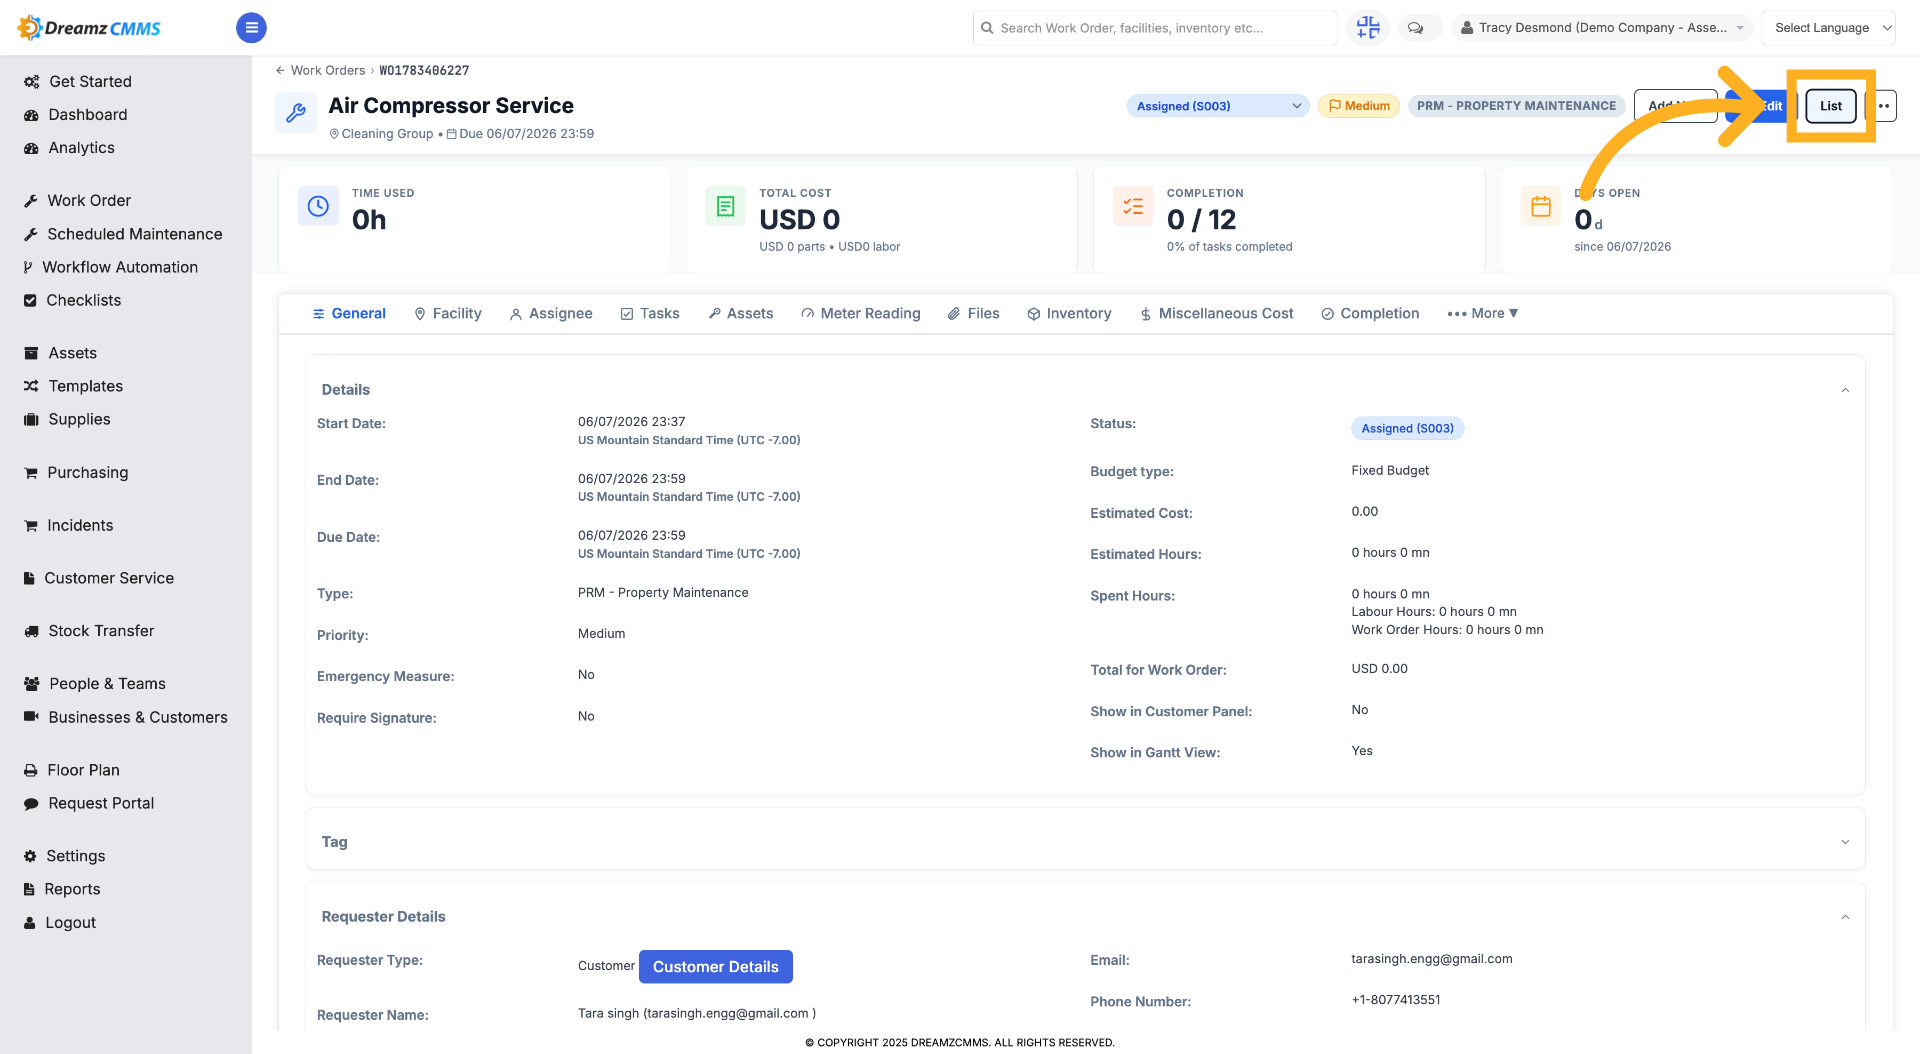
Step 2 – Open Work Order List
Click "List" to return to the list view of all work orders available in the system.
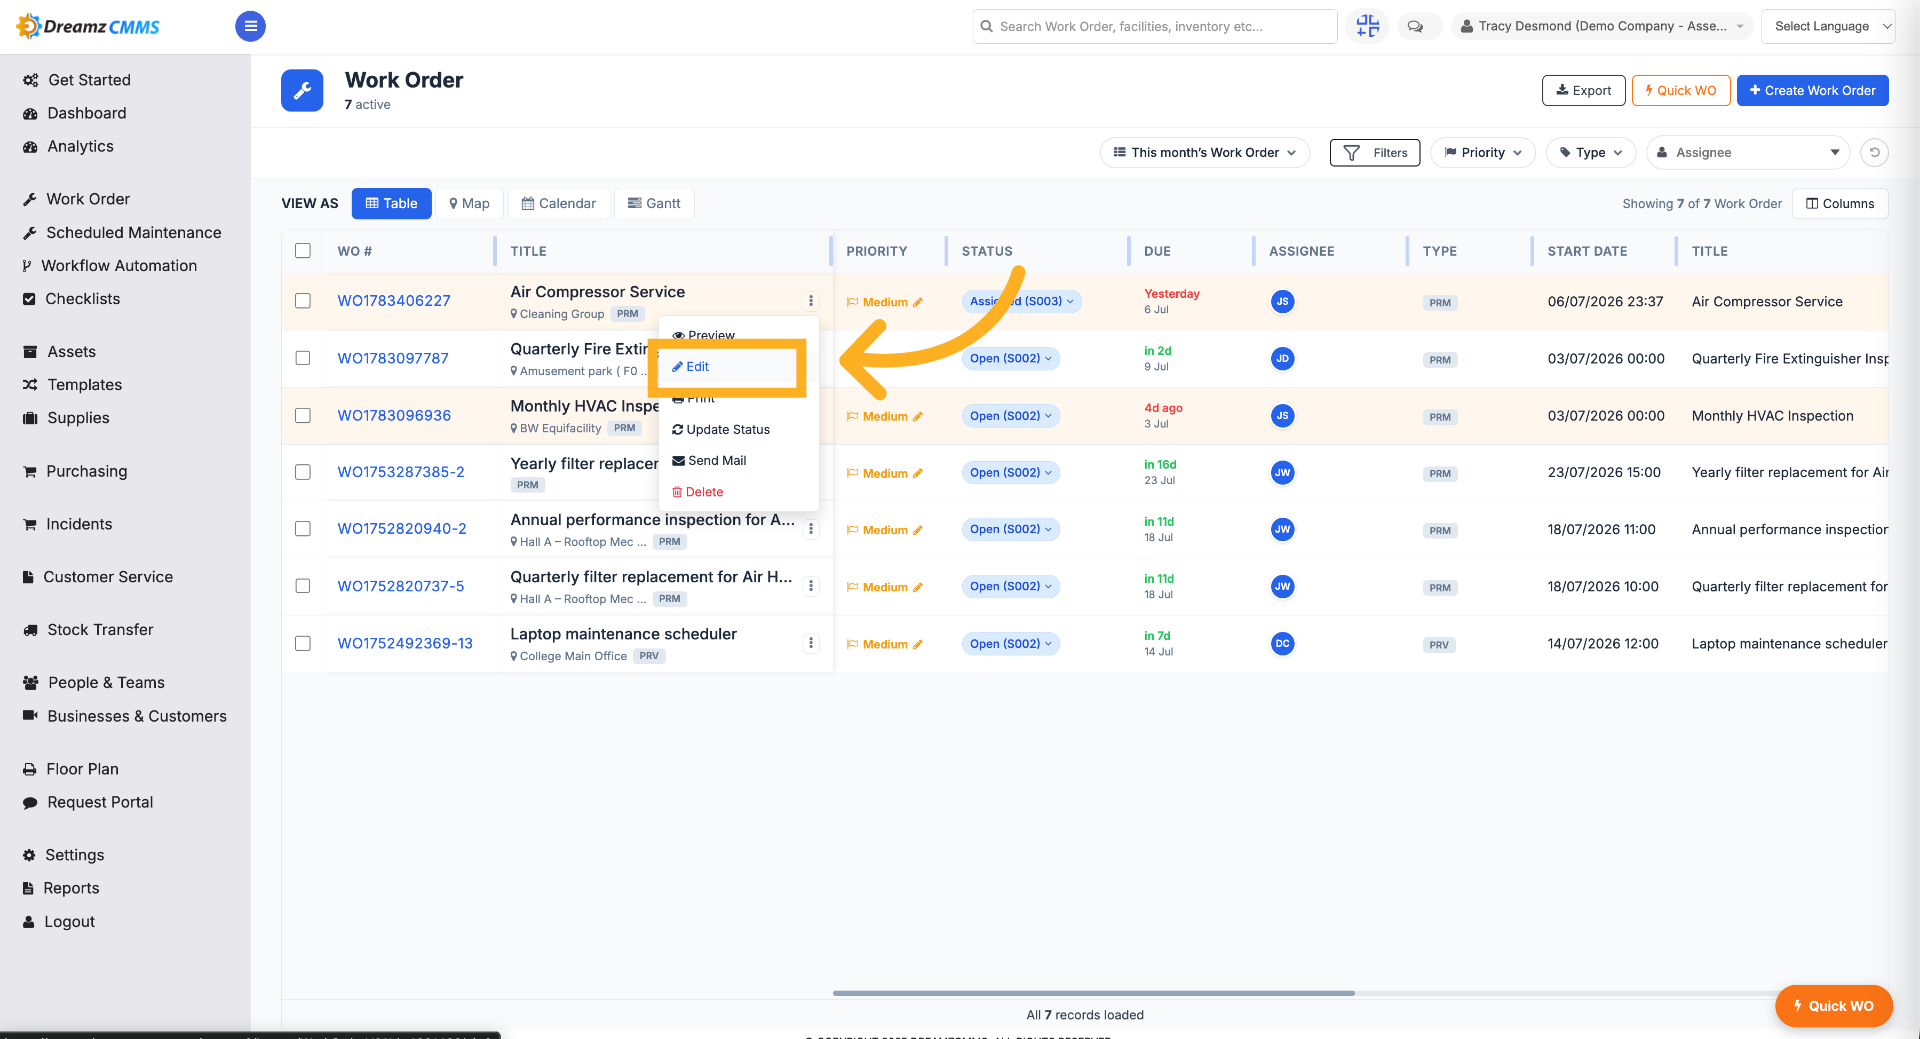
Step 3 – Edit a Work Order from the List
In the list view, click the three dots next to a work order and select Edit to modify it.
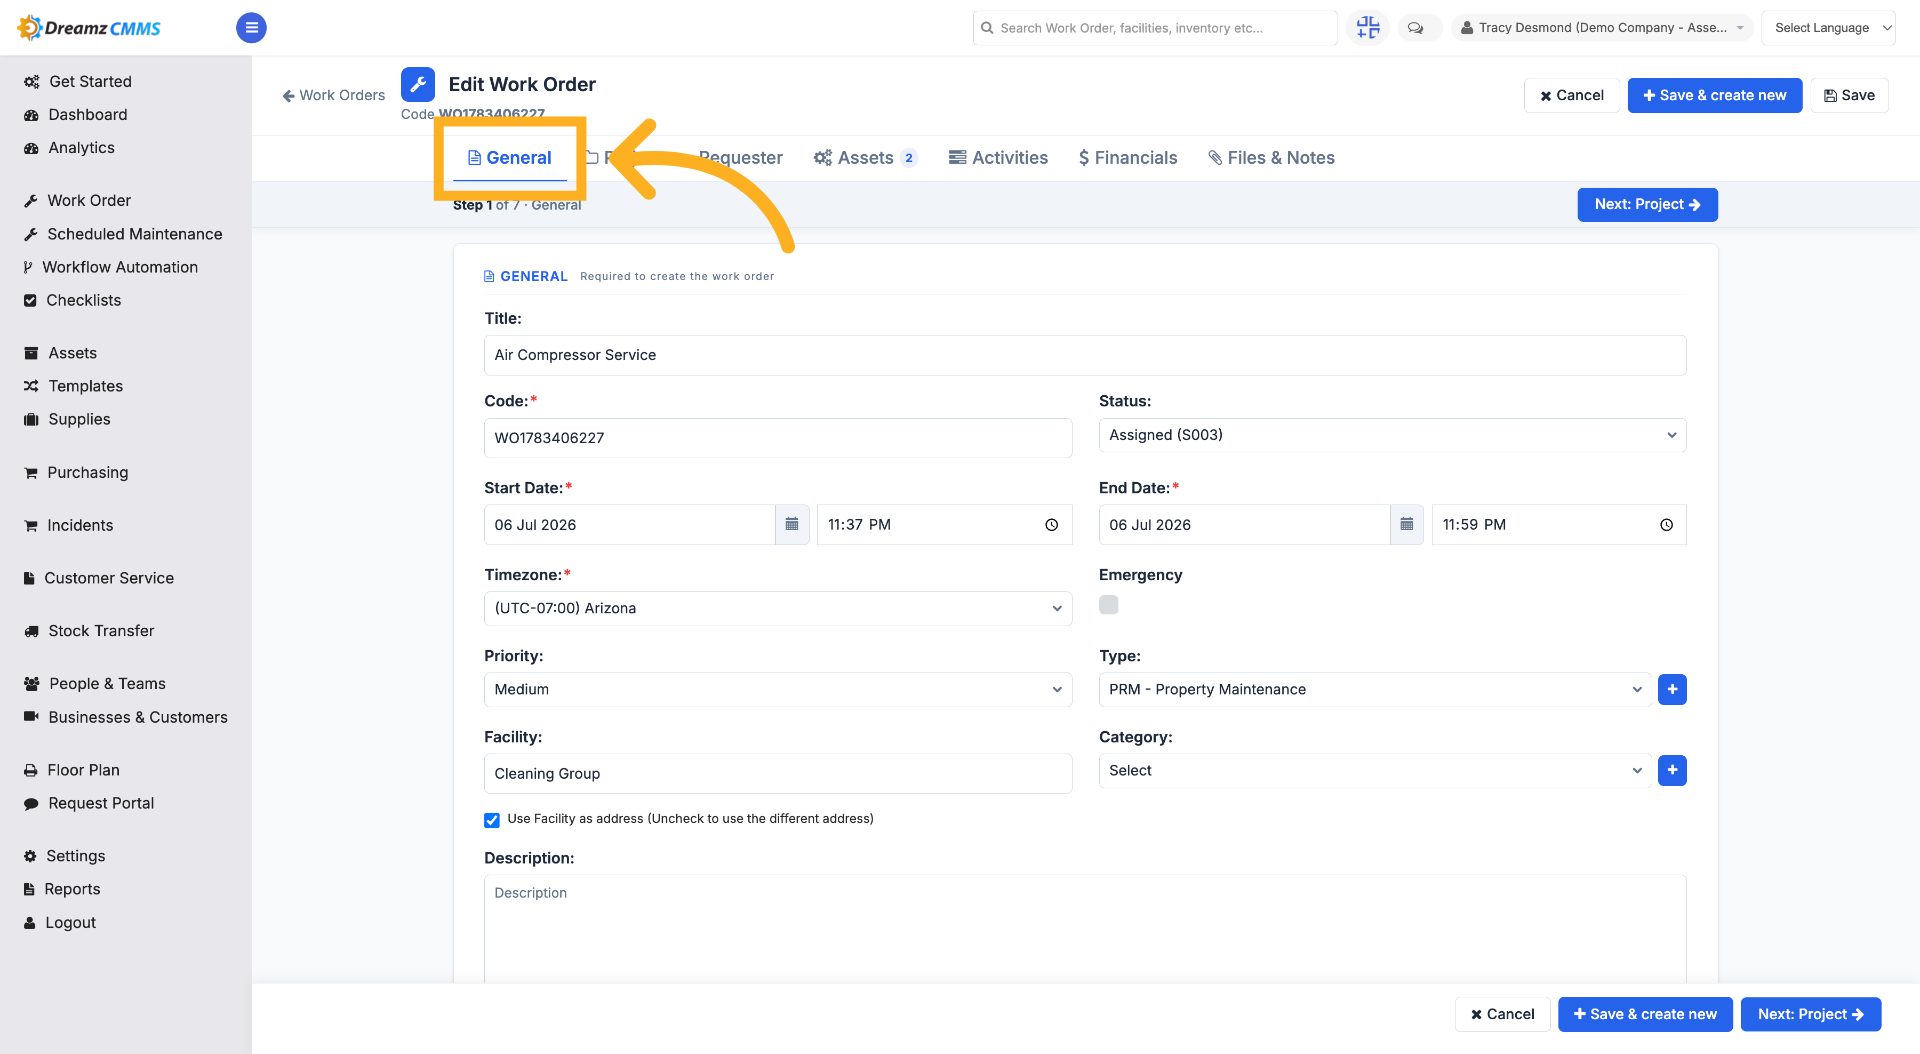
Step 4 – Access General Work Order Settings
Click "General" to view and update general settings related to the work order.
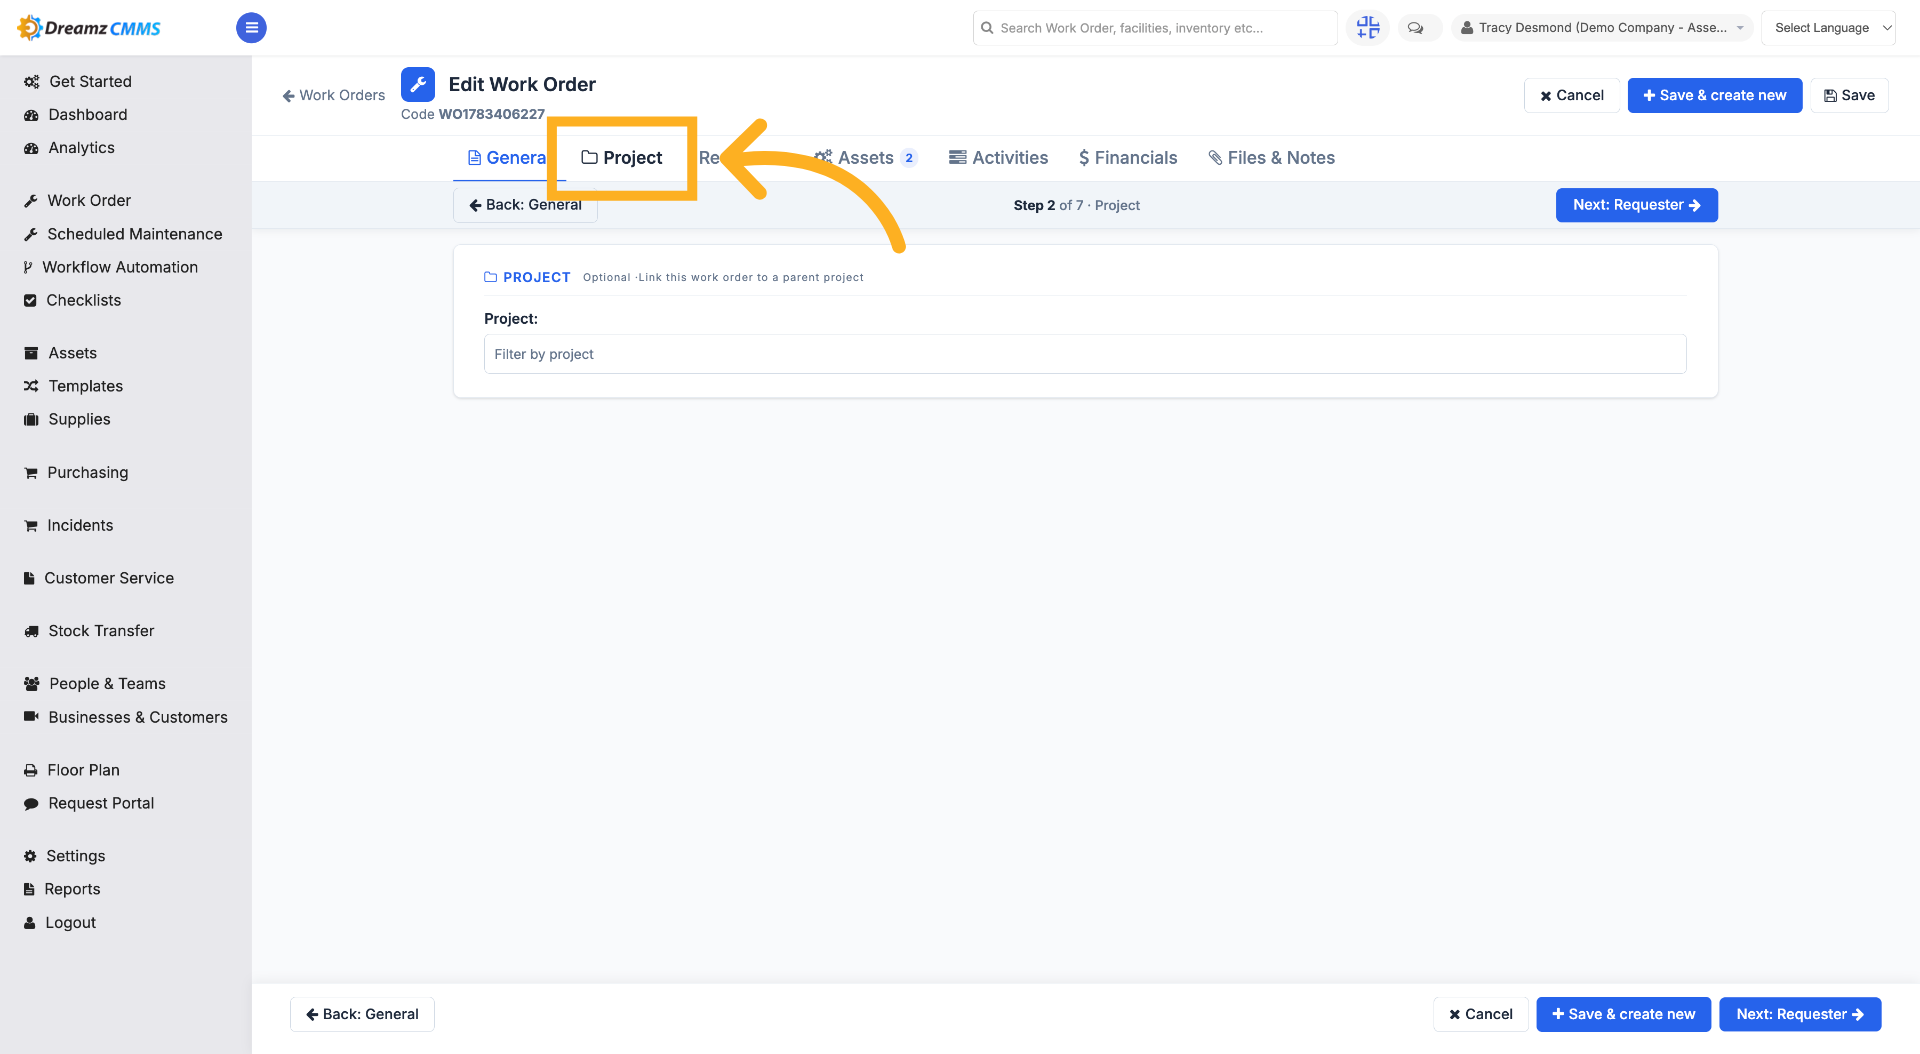
Step 5 – Open Project Tab
Click "Project" to manage project-related information within the work order.
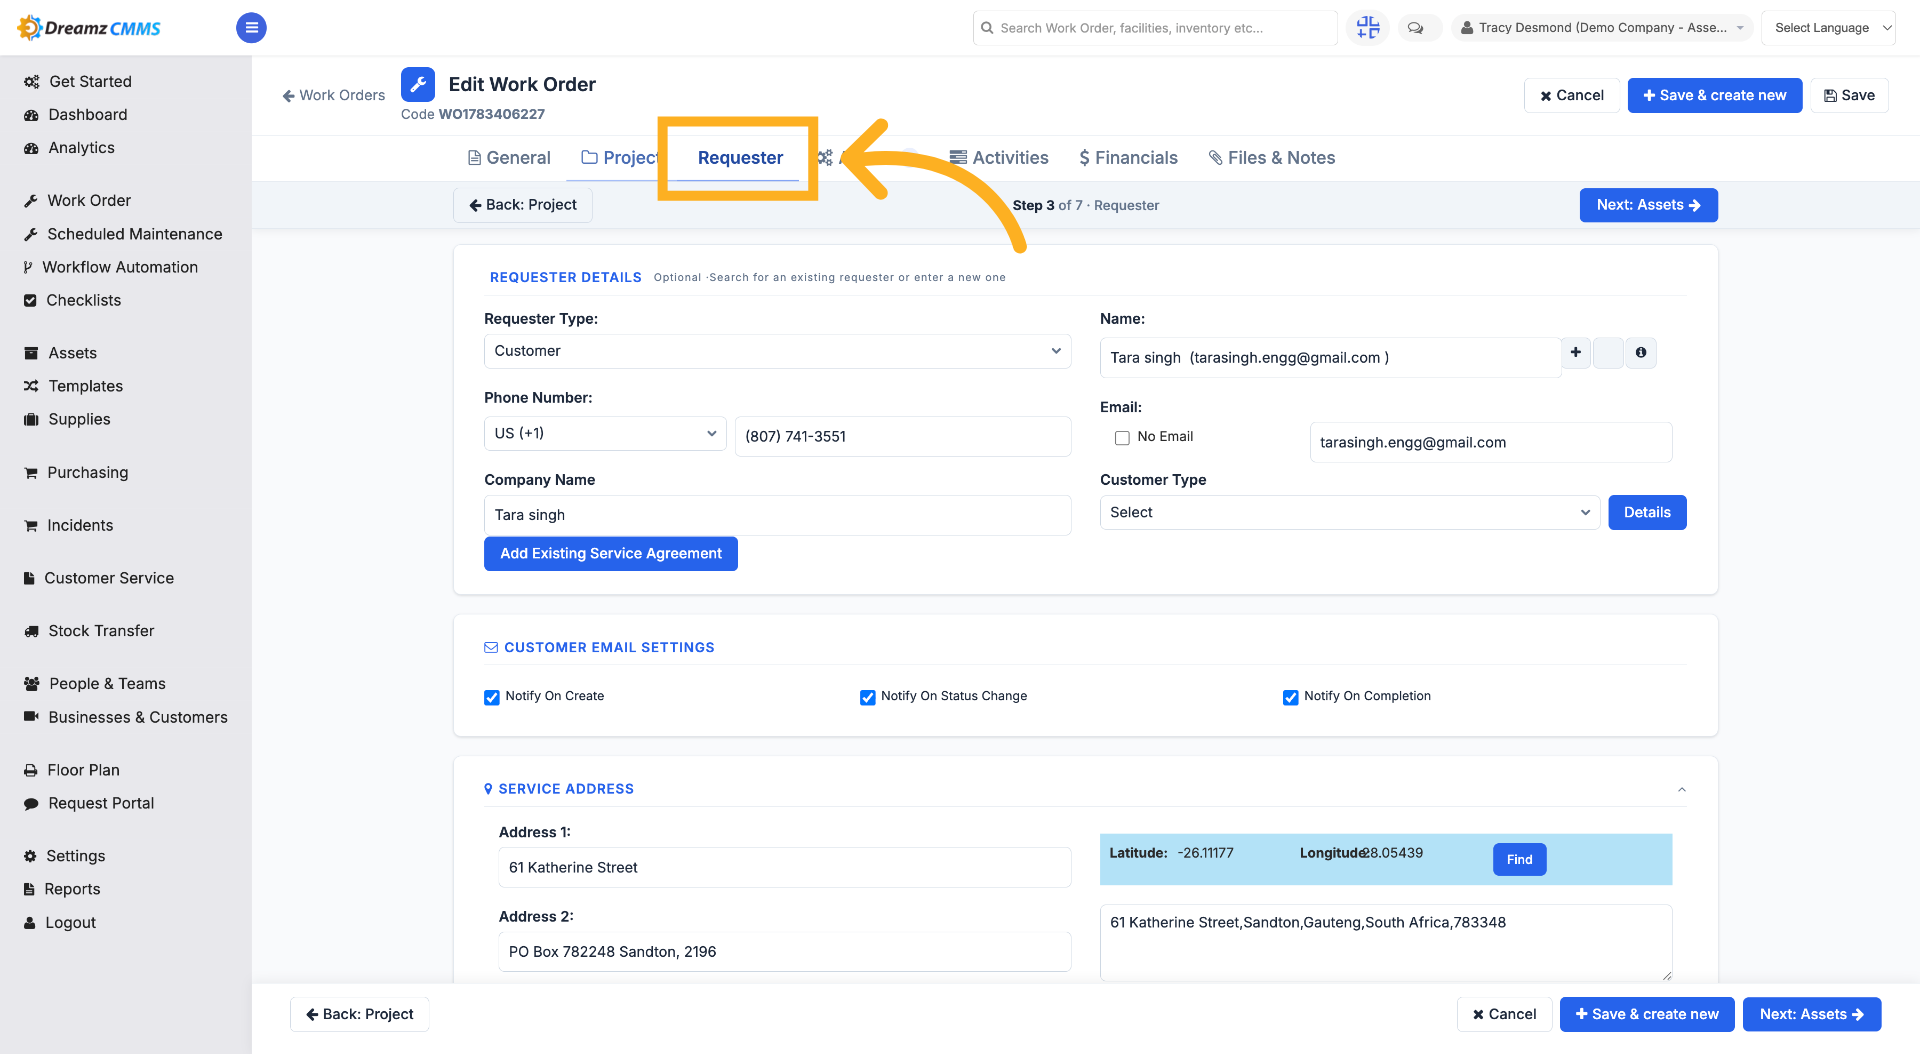
Step 6 – Select Requester Information
Click "Requester" to view or update the requester details for the work order.
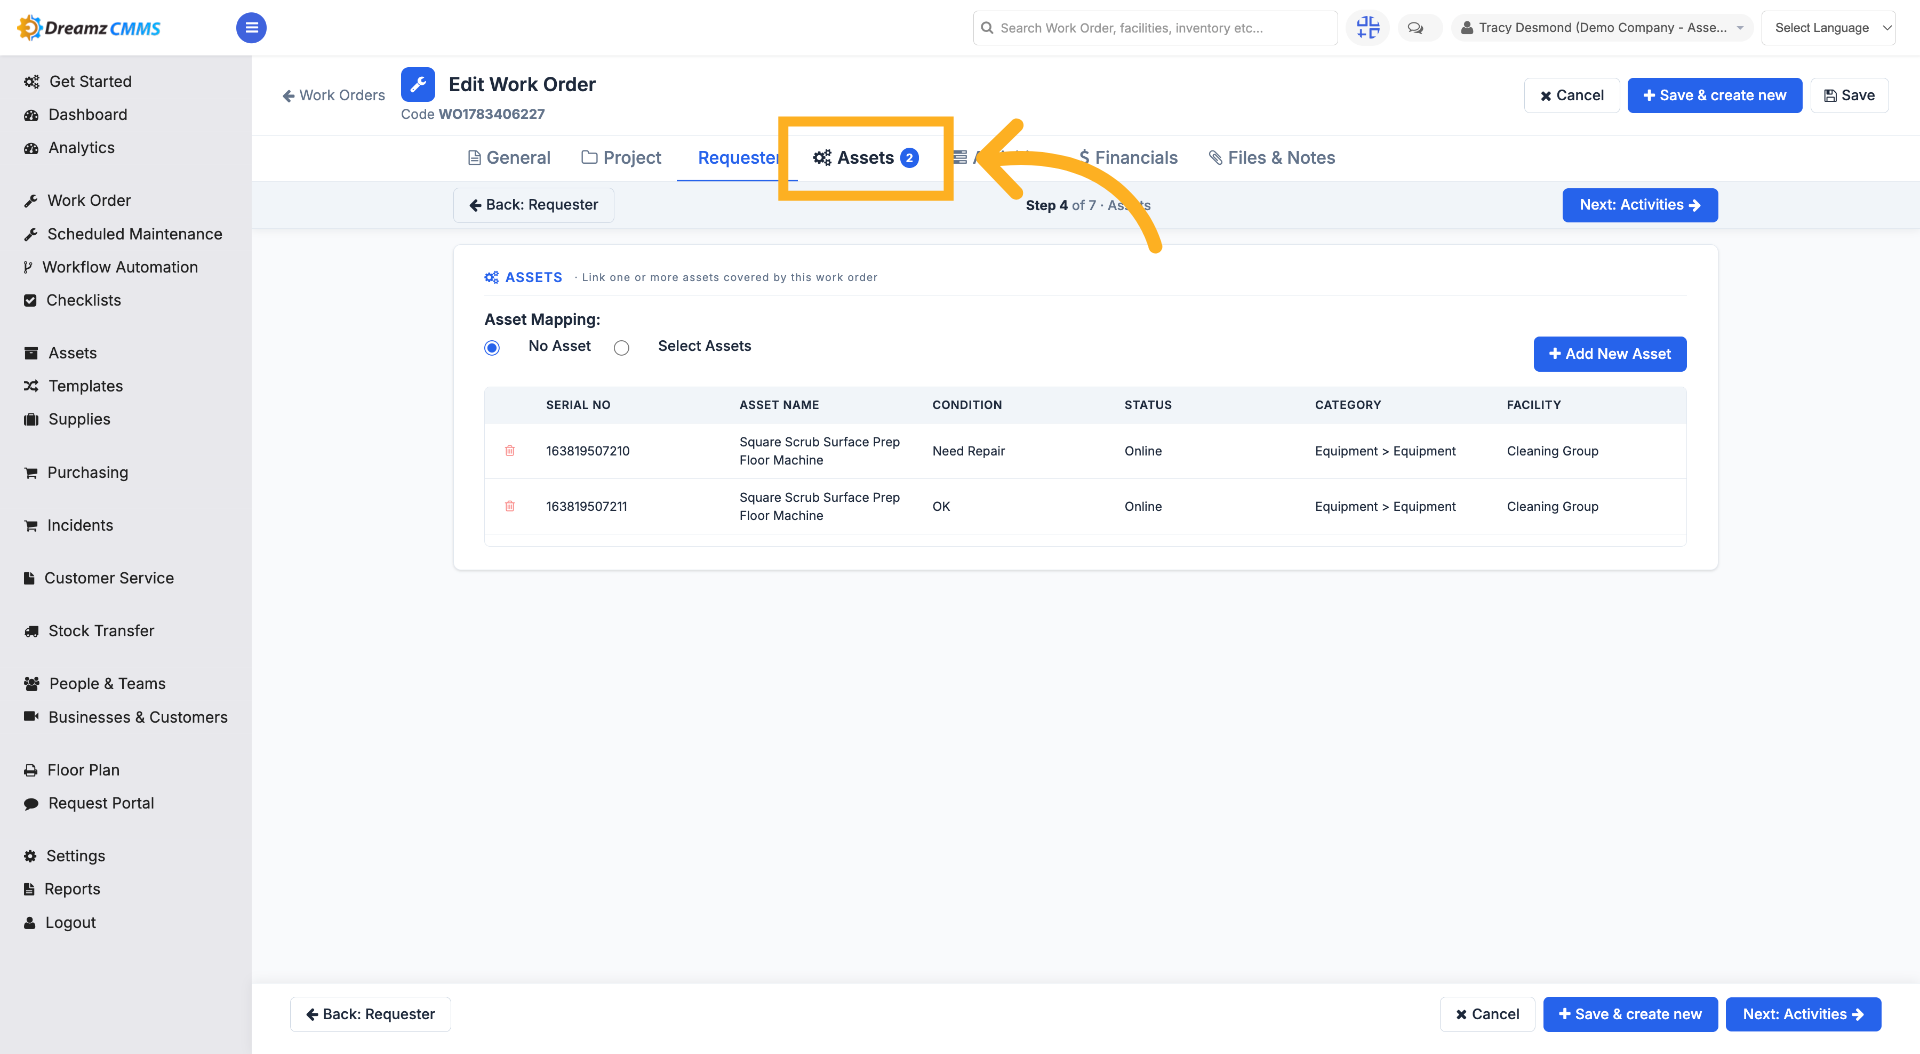
Step 7 – View Associated Assets
Click "Assets" to see the assets linked to this work order.
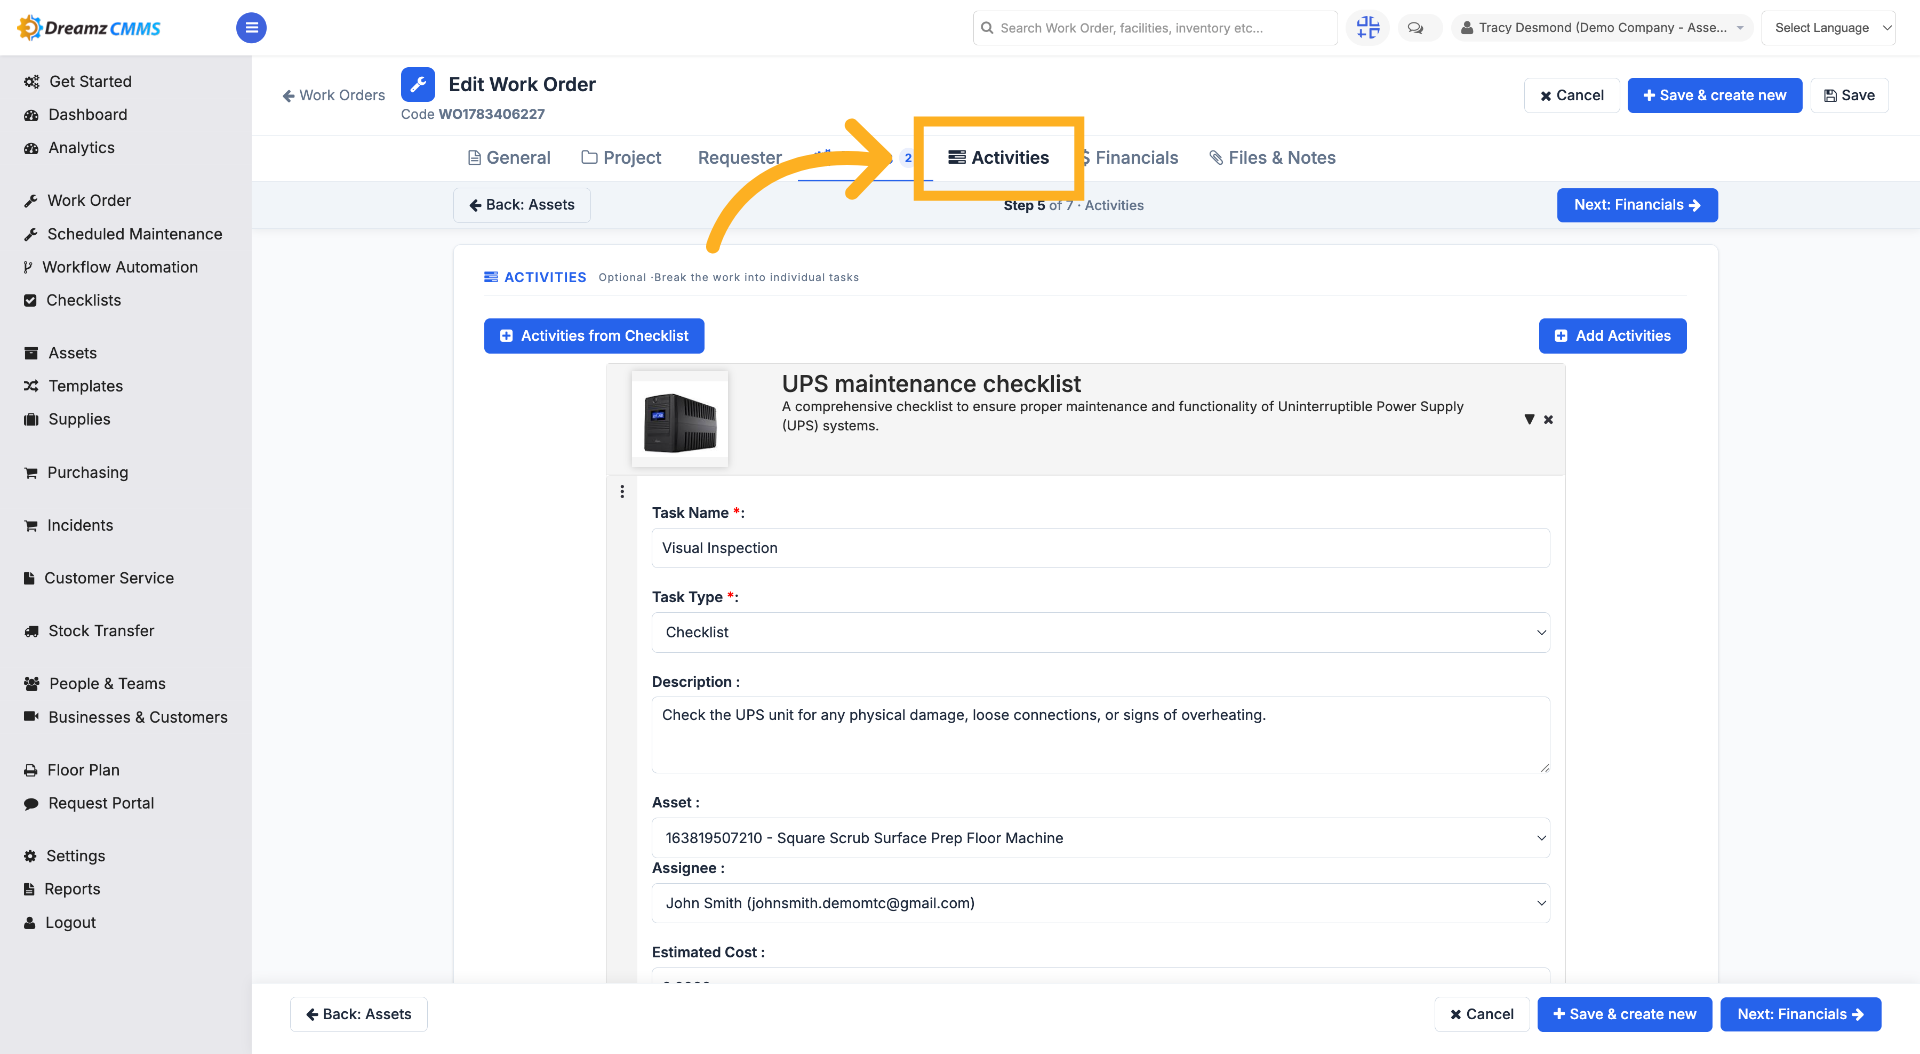
Step 8 – Access Work Order Activities
Click "Activities" to review or add checklists or tasks related to the work order.
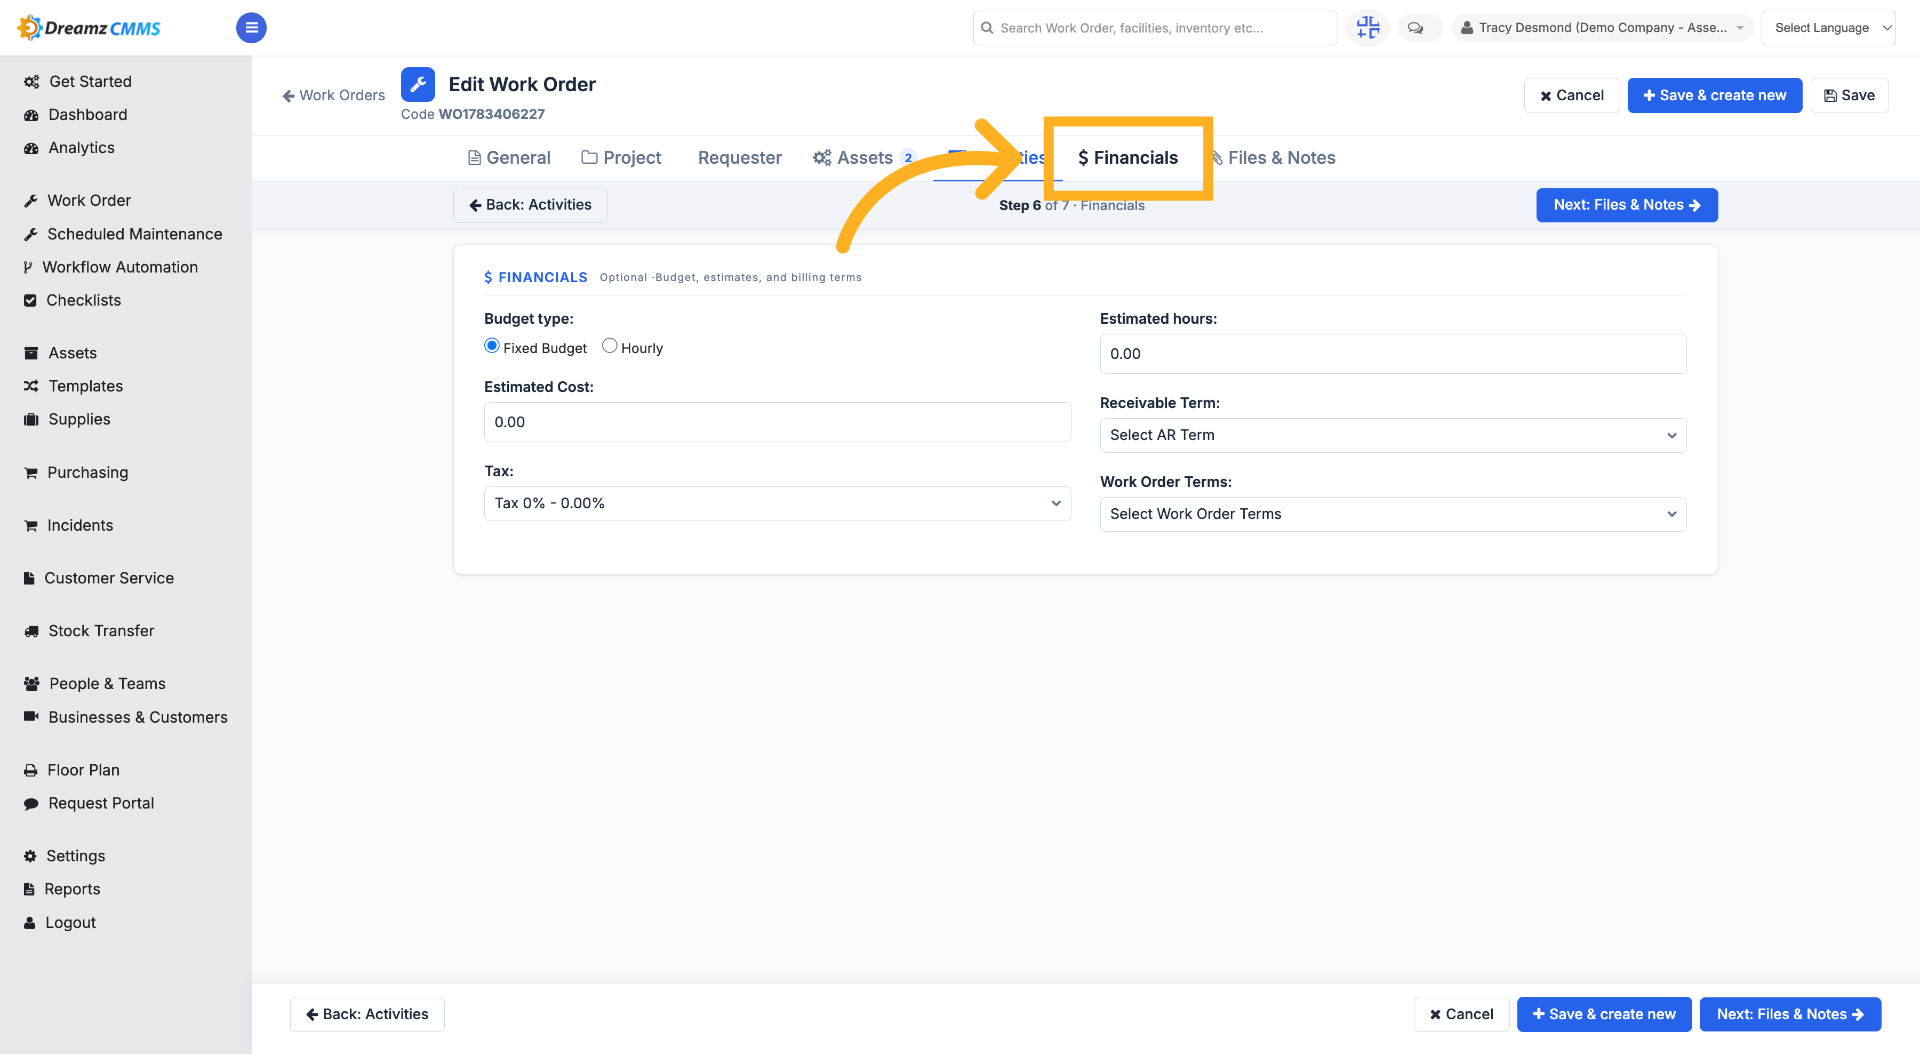
Step 9 – Open Financials Section
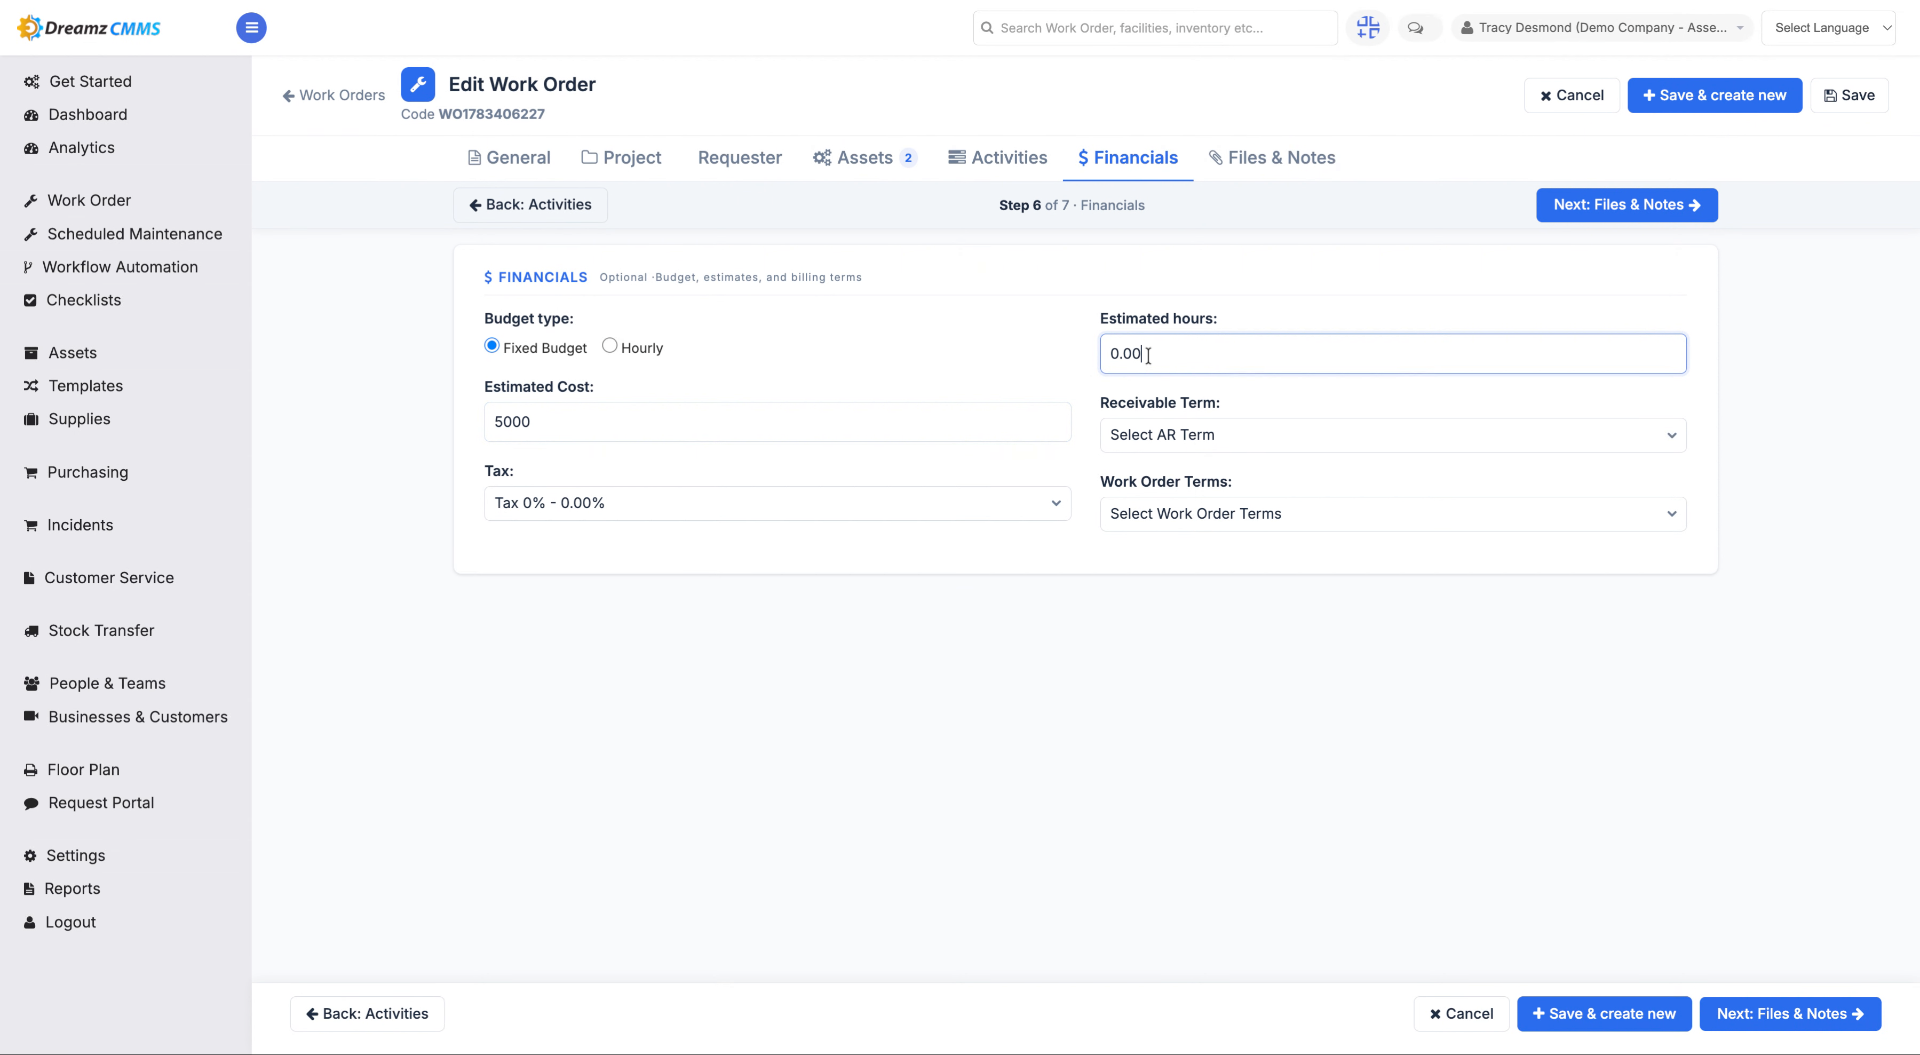
Click "Financials" to manage budget and cost details associated with the work order.
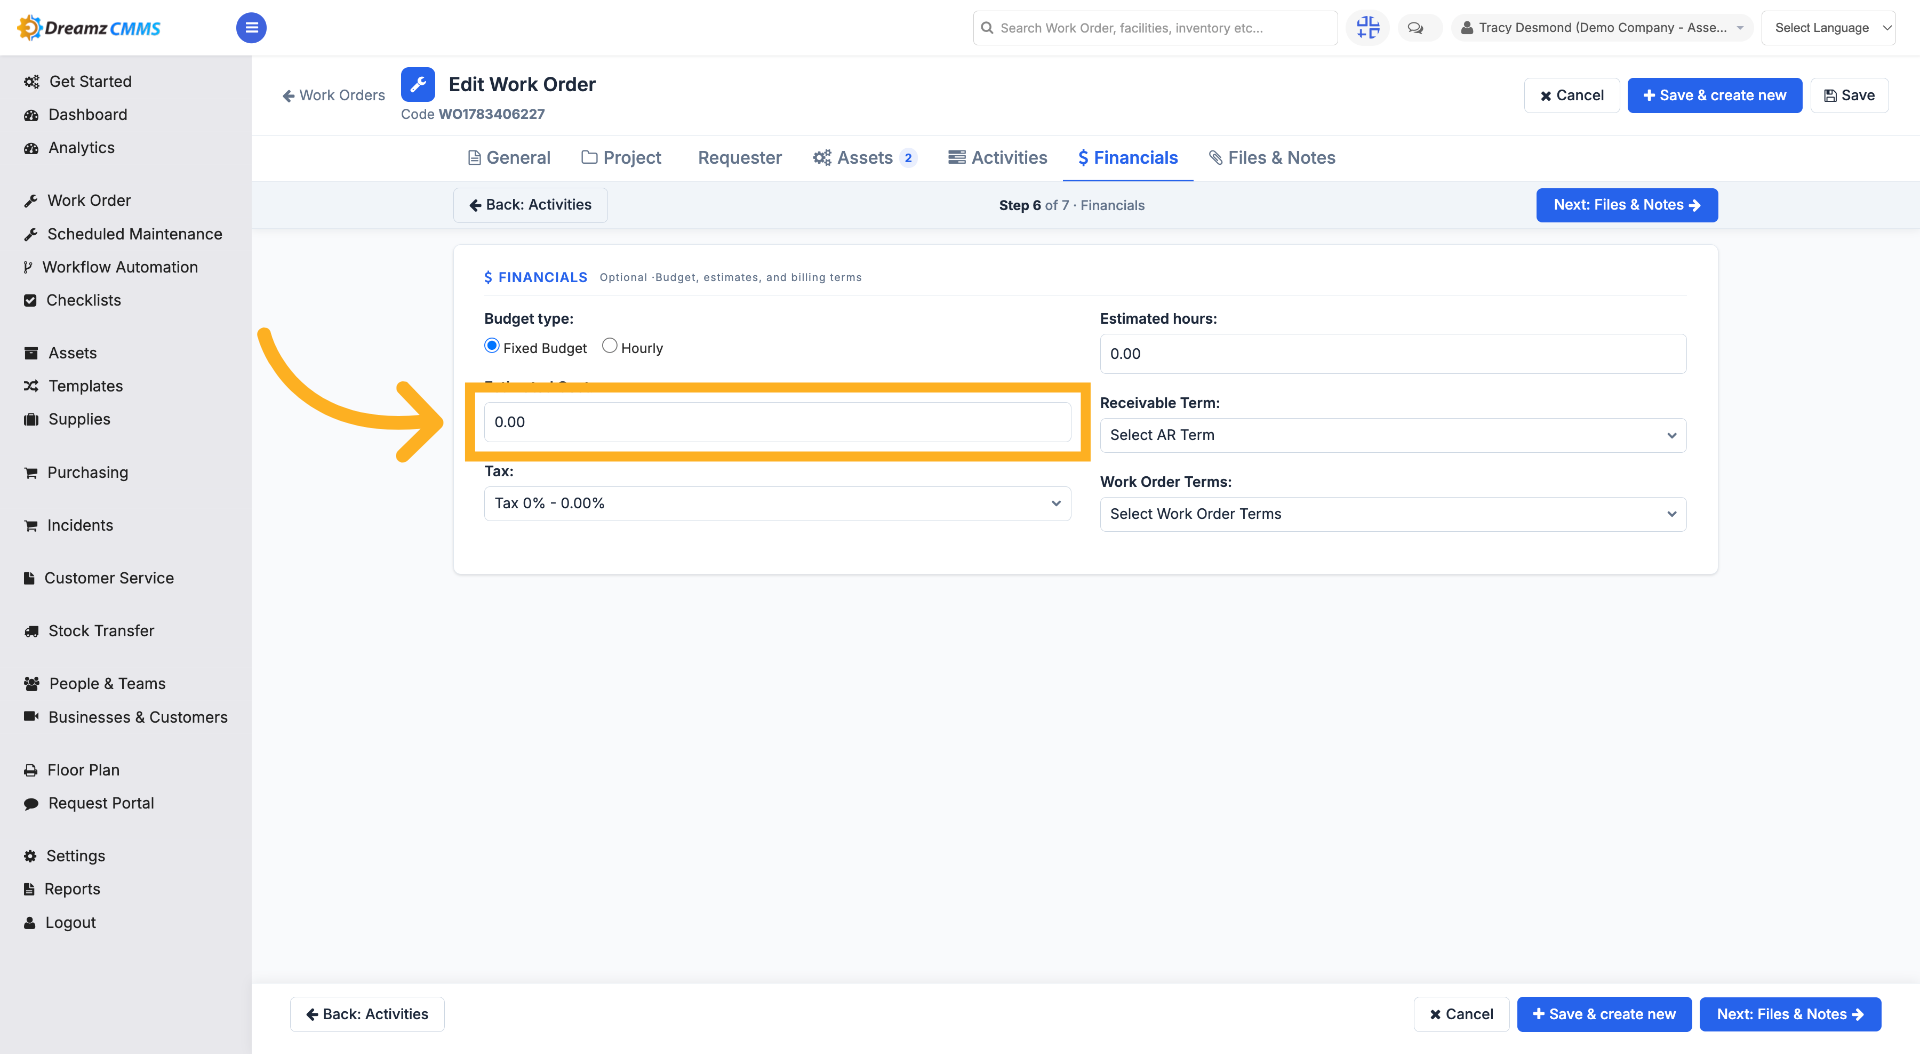
Step 10 – Select Budget Field
Select the budget field to edit the budget amount.
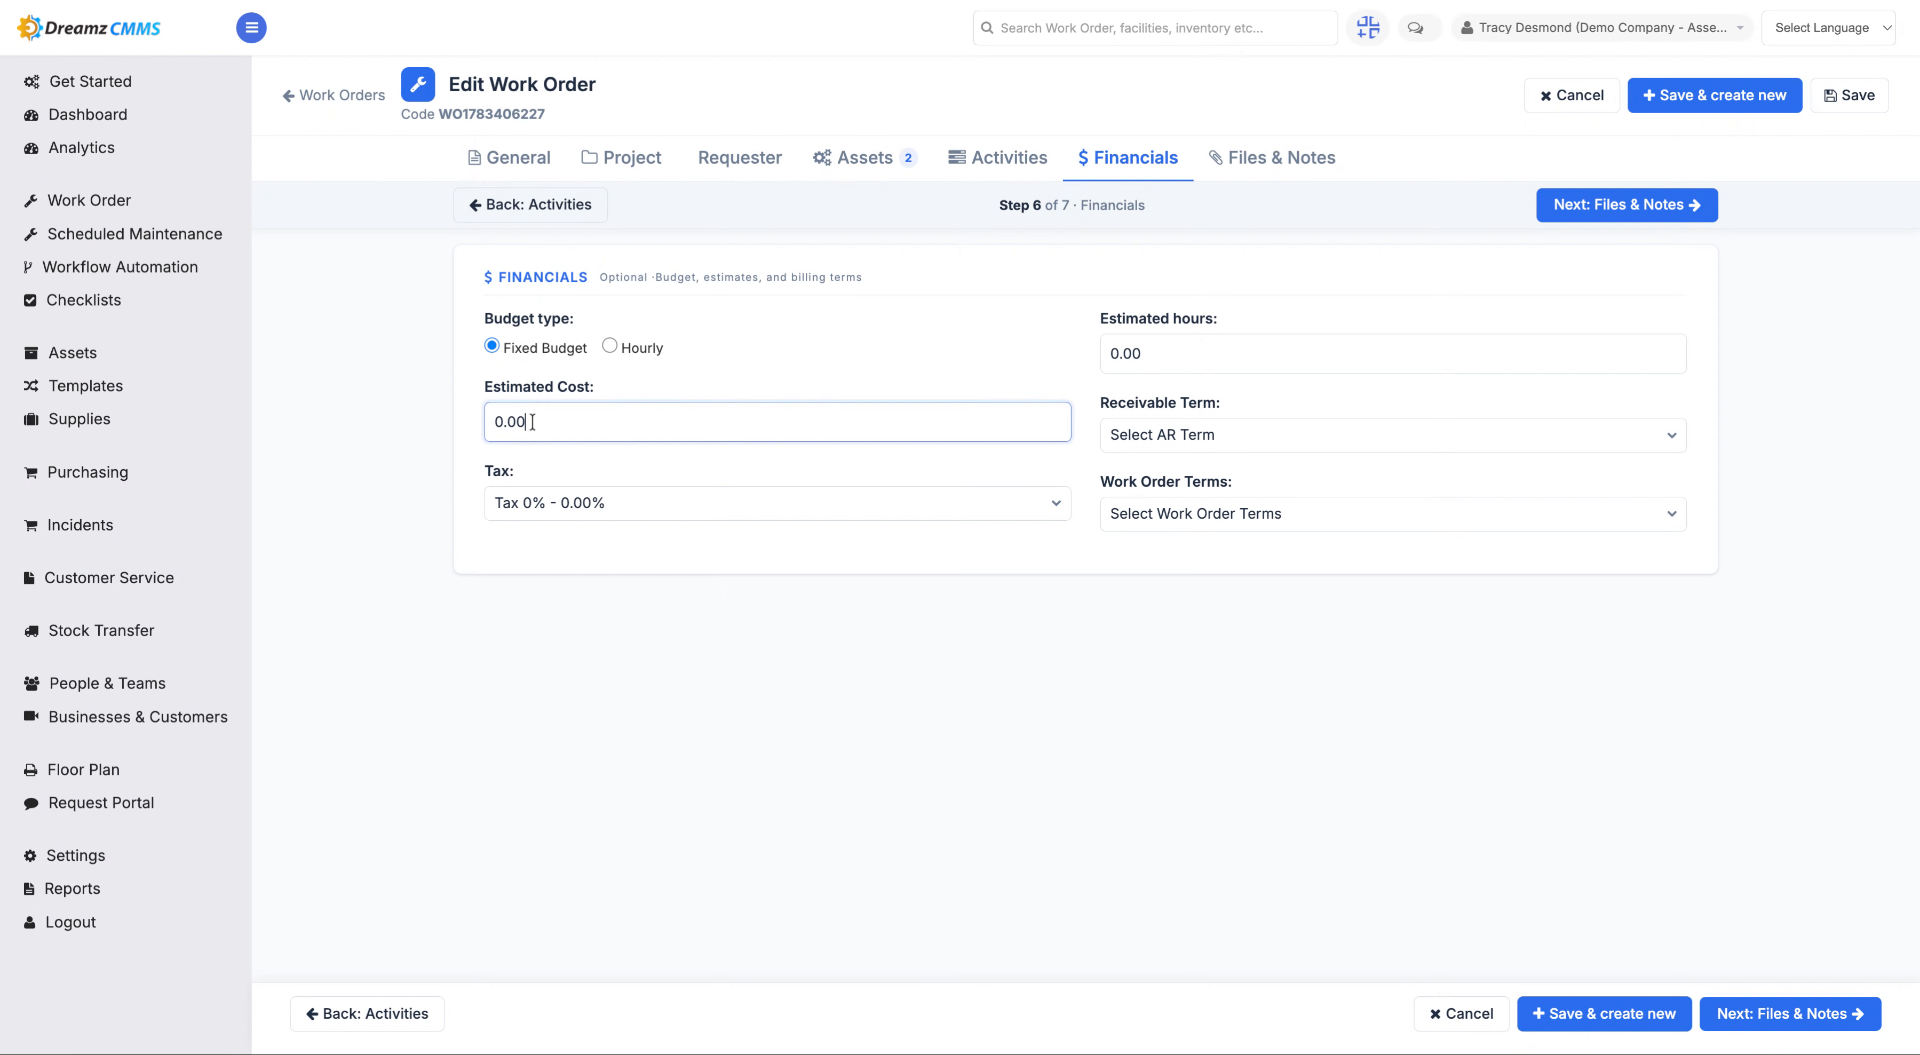
Step 11 – Enter Budget Amount
Fill in the budget value for the work order (for example, "5000").
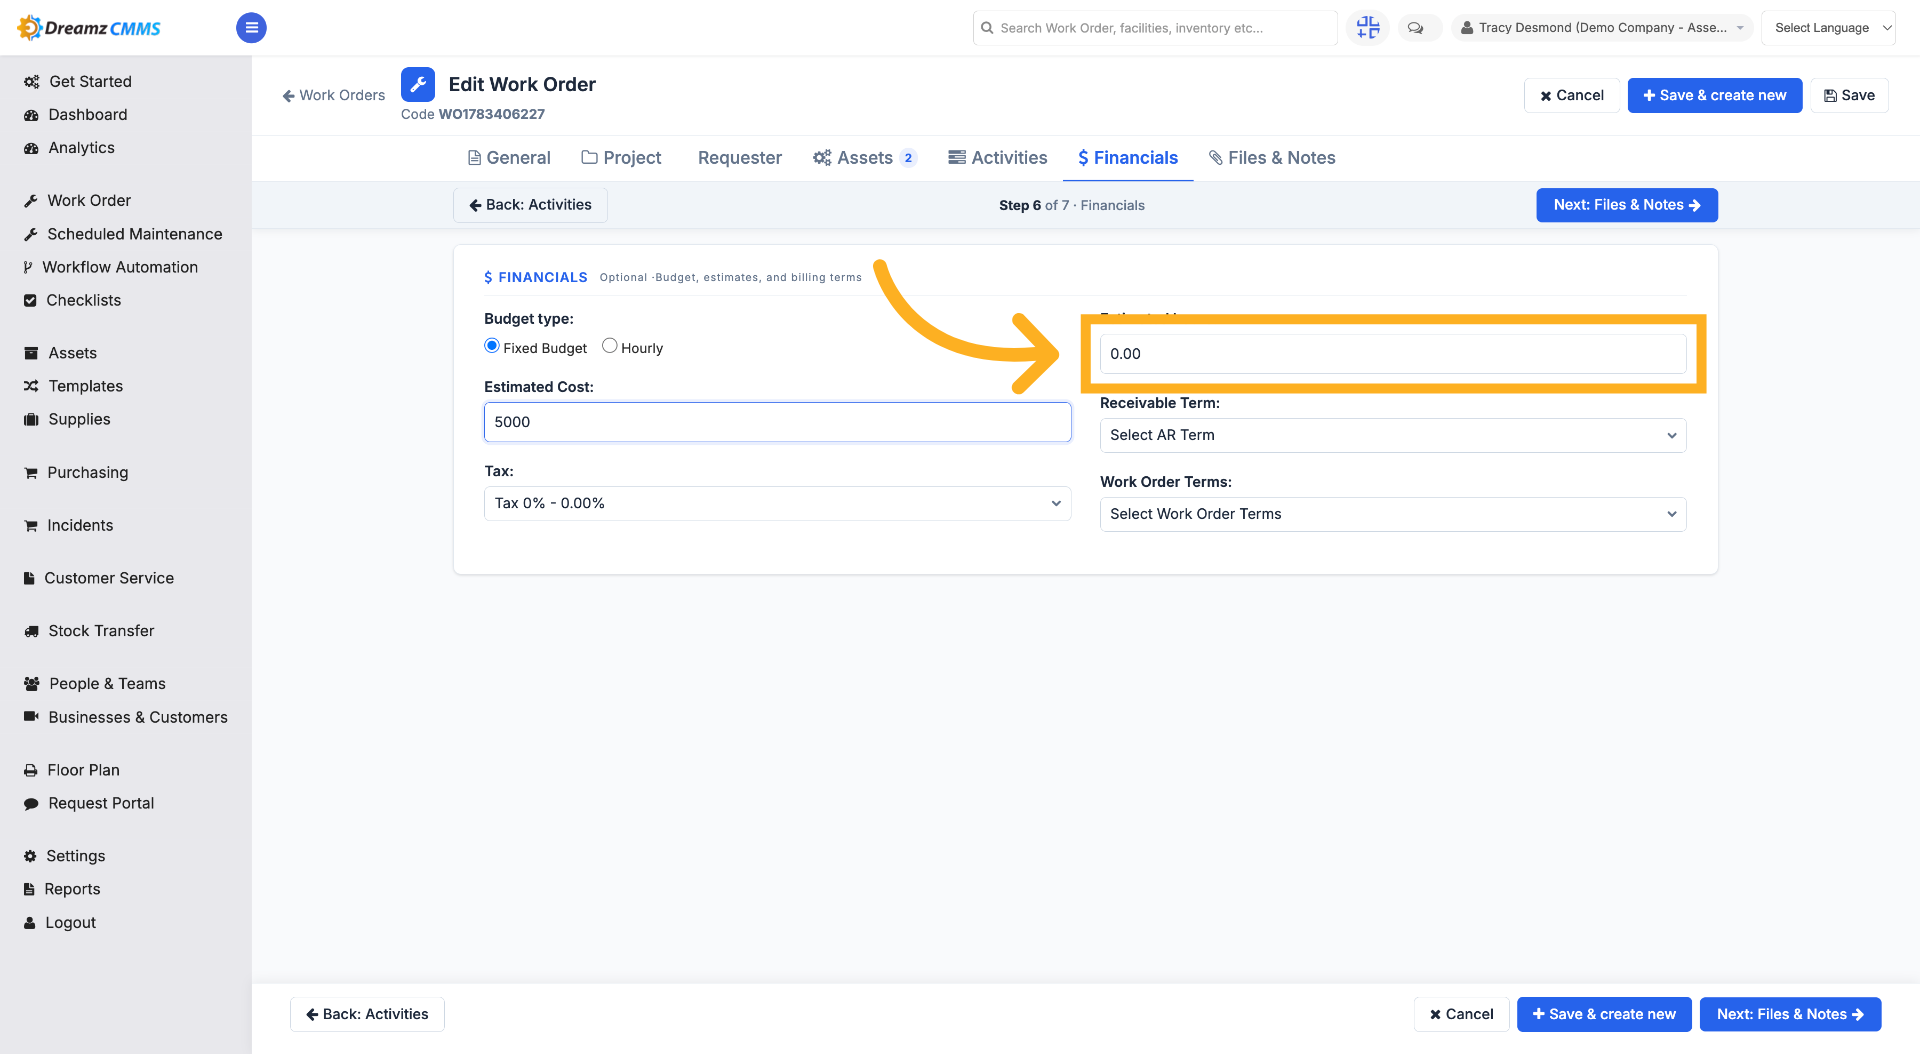
Step 12 – Select Estimated Hours Field
Select the estimated hours field to enter the estimated hour required for this work order.
Step 13 – Enter Estimated Hours
Fill in the estimated hours required (for example, "7").
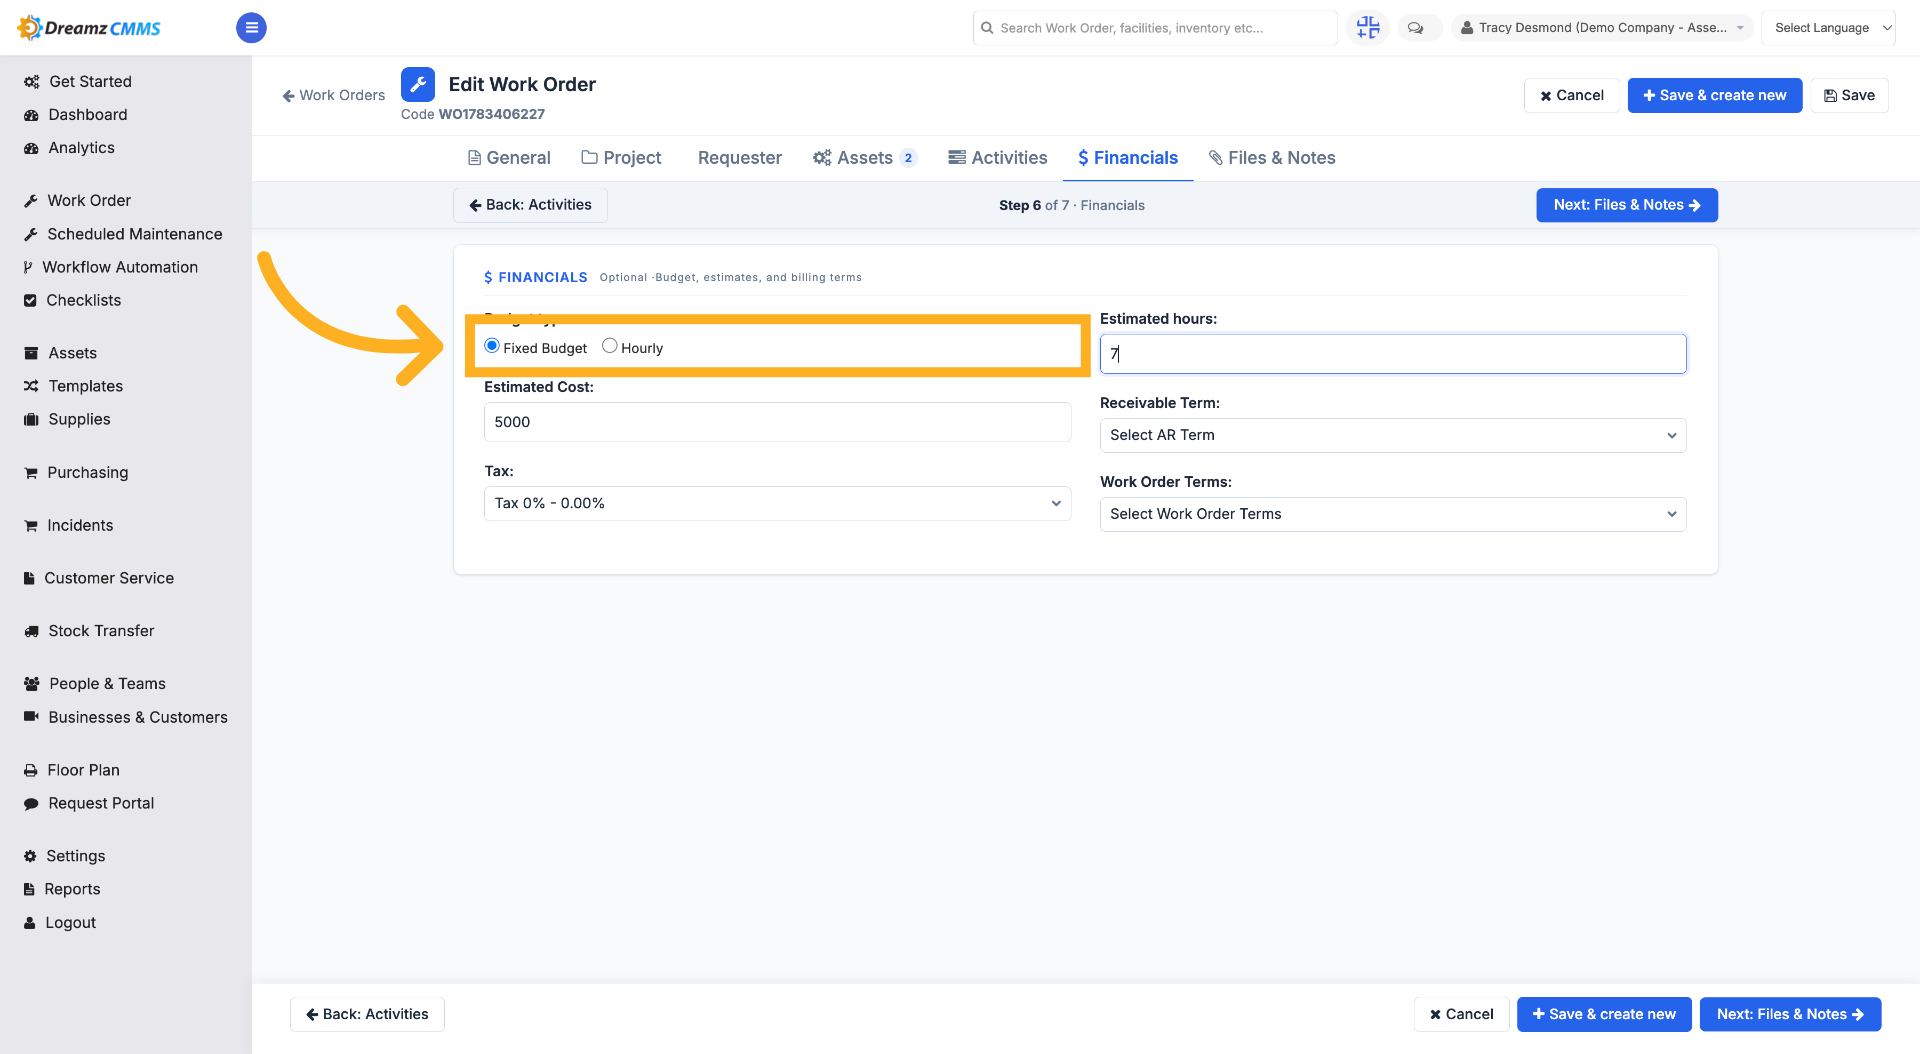
Step 14 – Choose Budget Type
Click "Fixed Budget" or "Hourly" to select the budget type for the work order.
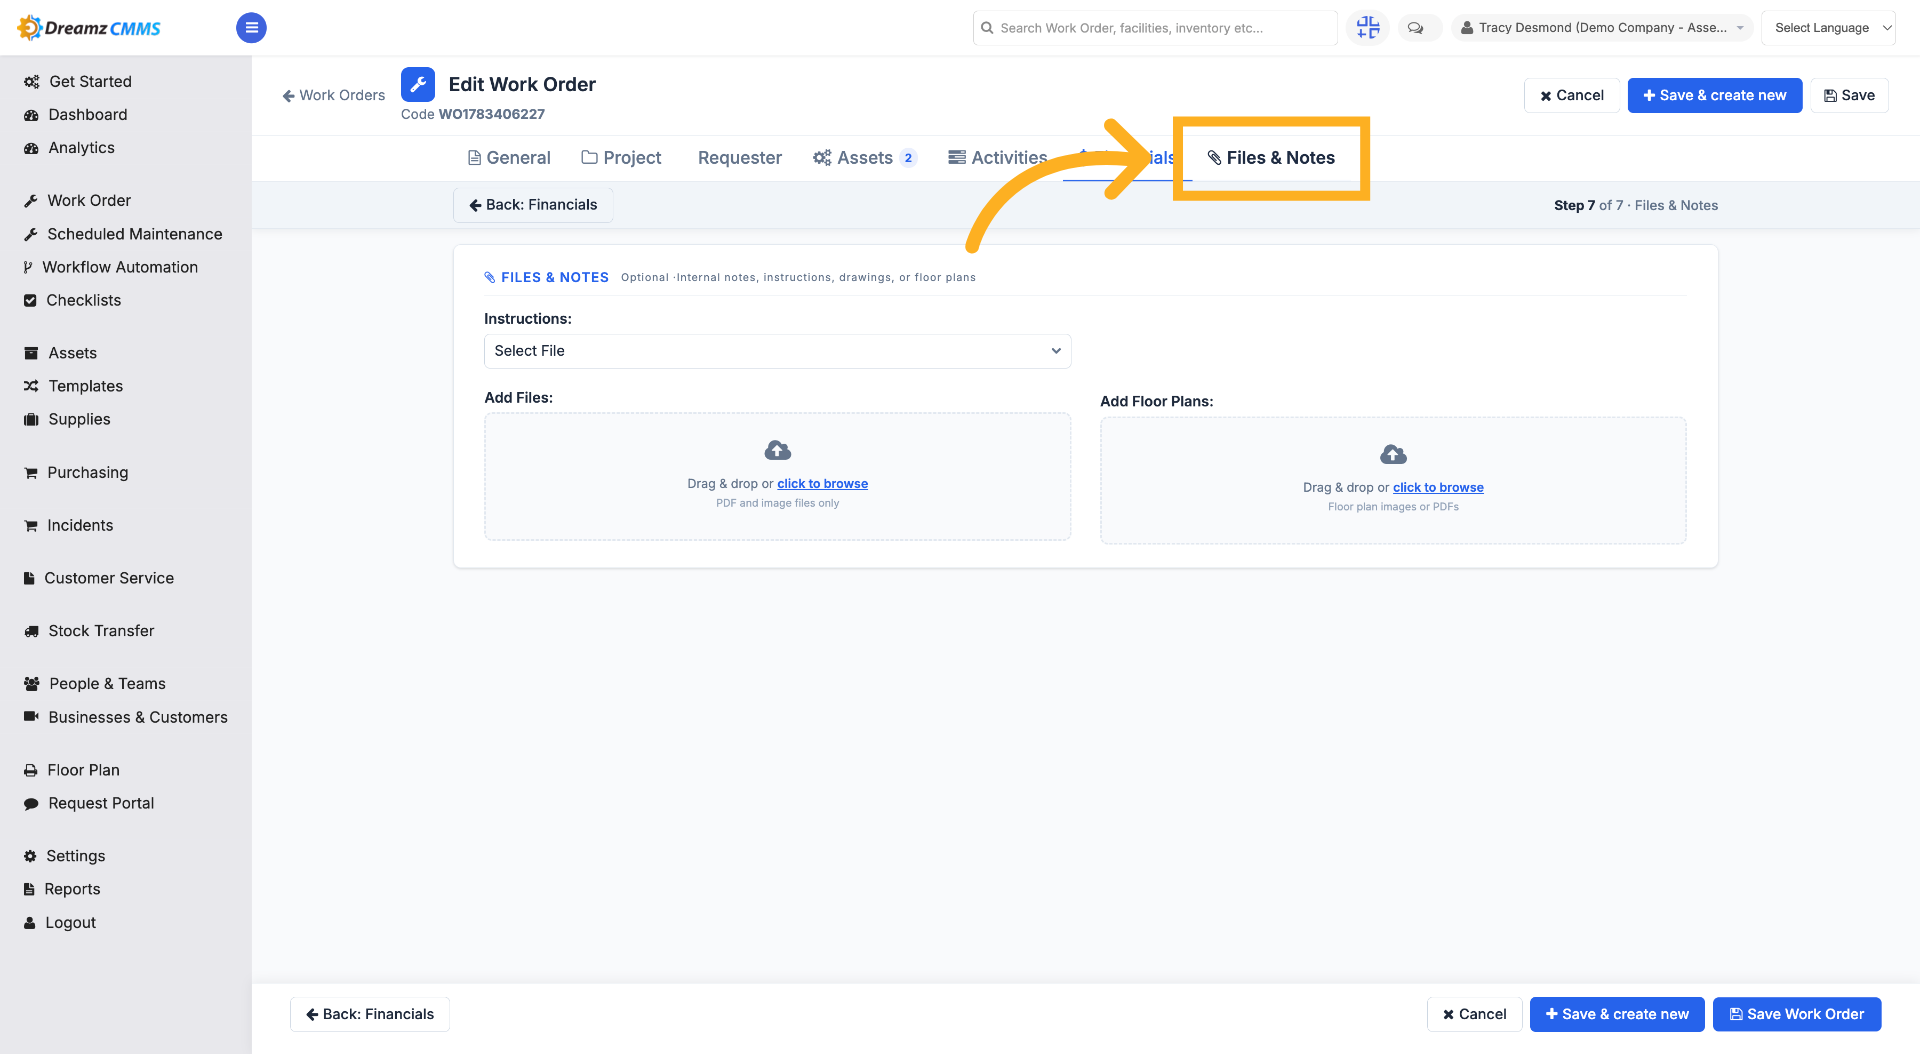
Step 15 – Access Files and Notes
Click "Files & Notes" to add or review attachments and notes related to the work order.
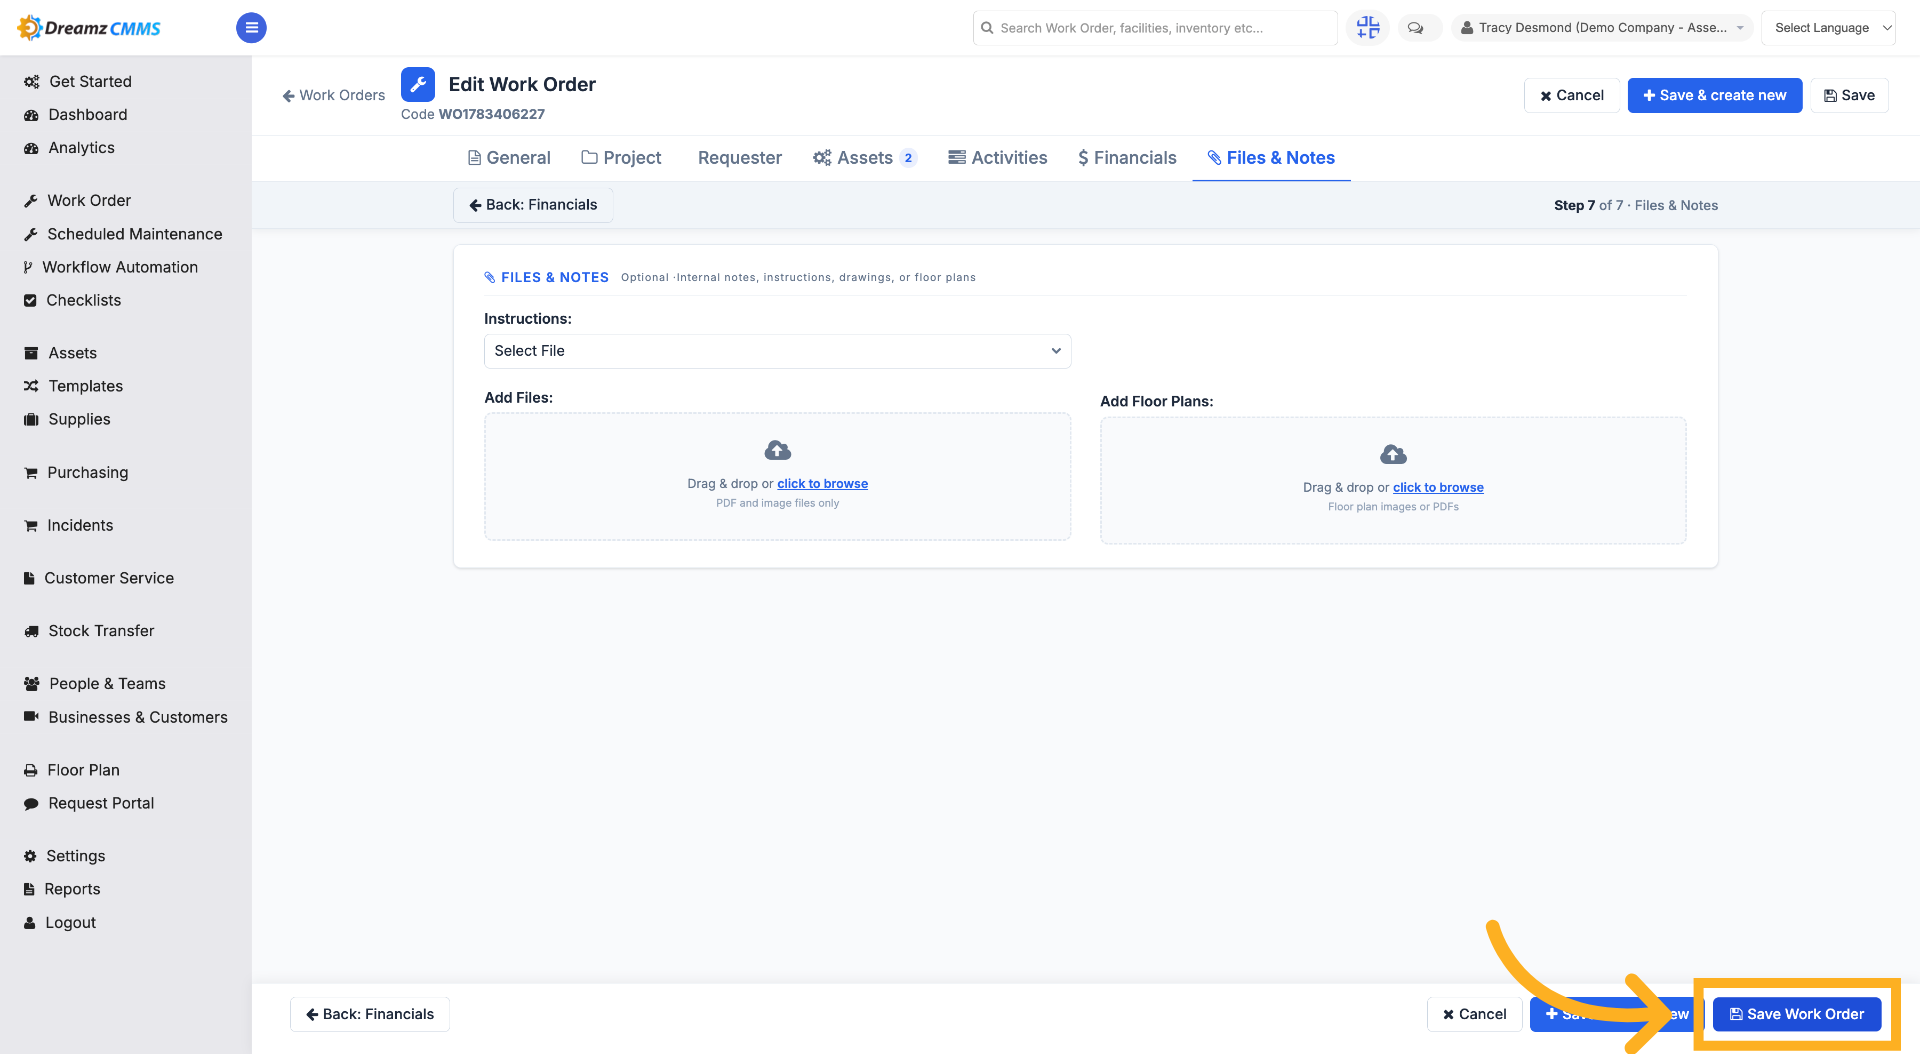
Step 16 – Save Work Order Changes
Click "Save Work Order" to save all modifications made to the work order.
How to View Work Orders in Map, Calendar, and Gantt Views
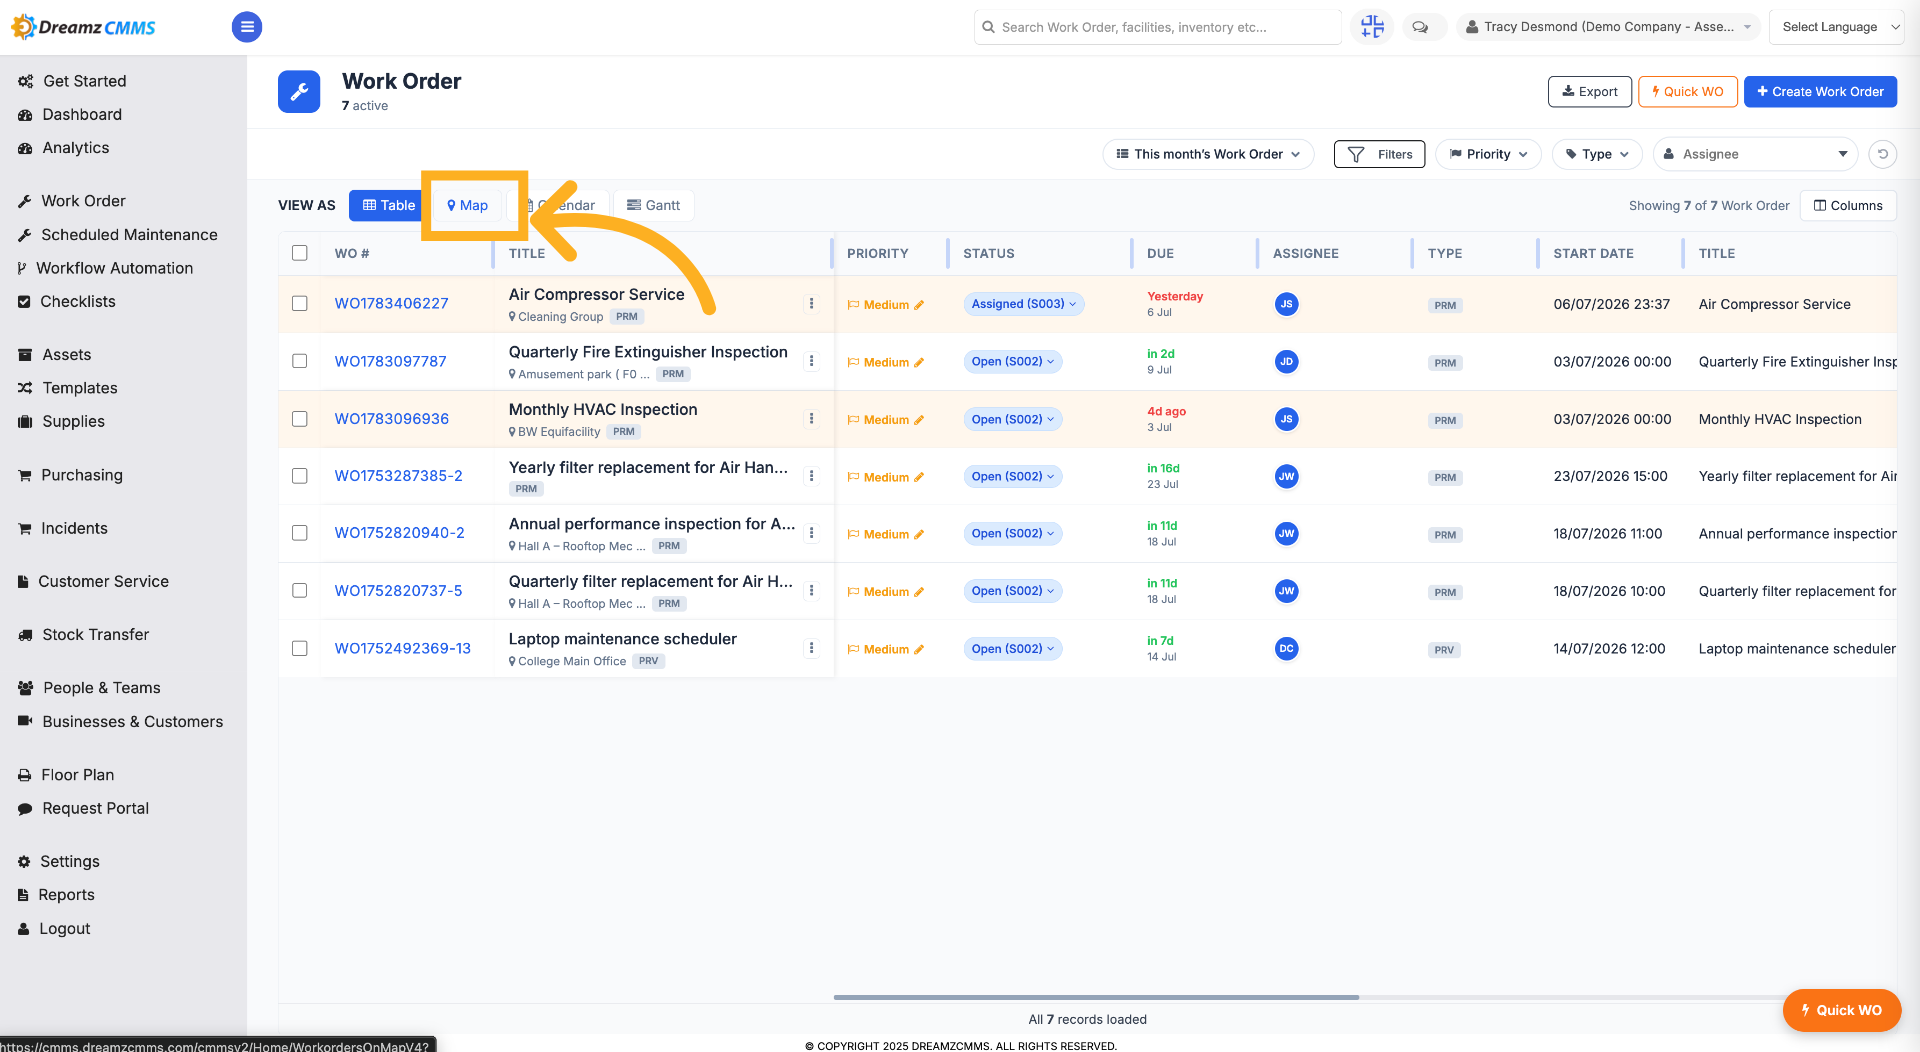
Step 1 – Open Work Order Map View
Click "Map" to visualize work order locations on the map interface.
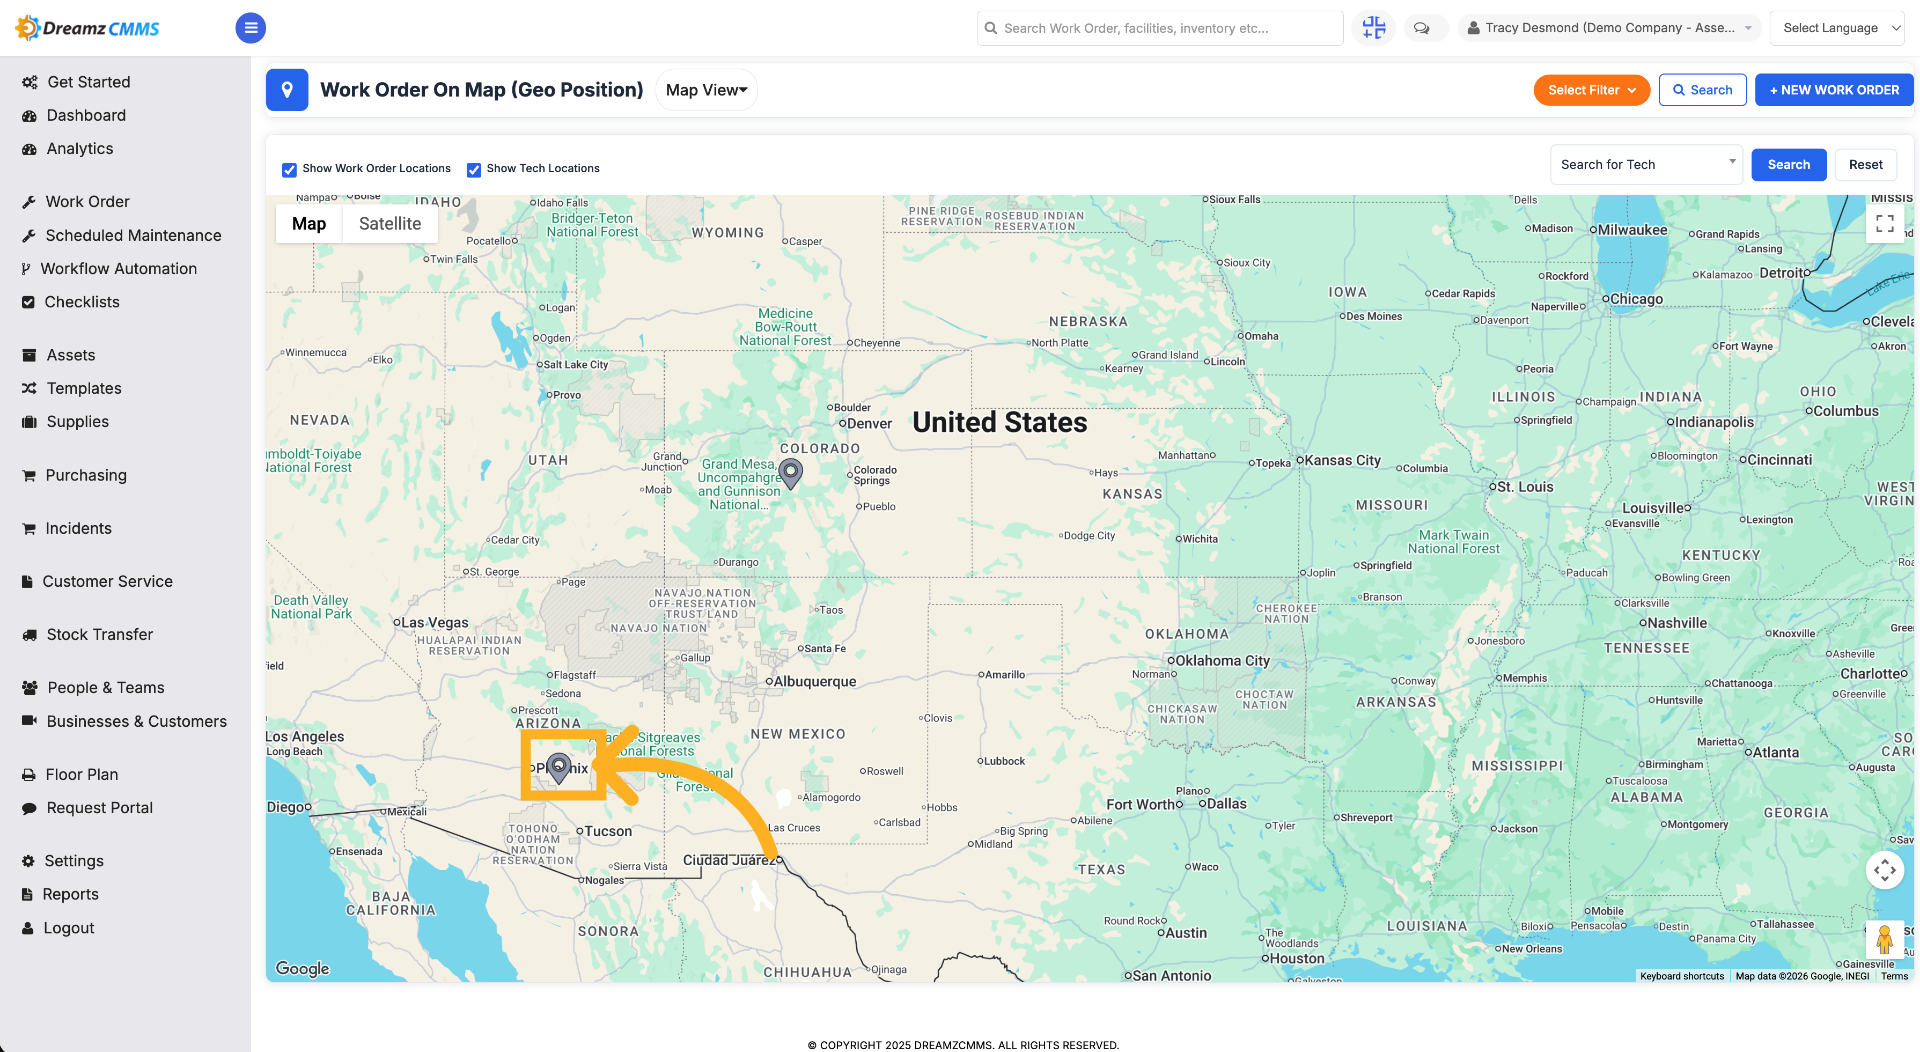
Step 2 – Select a Work Order on the Map
Click "Work Order" to focus on the specific work order within the map view.
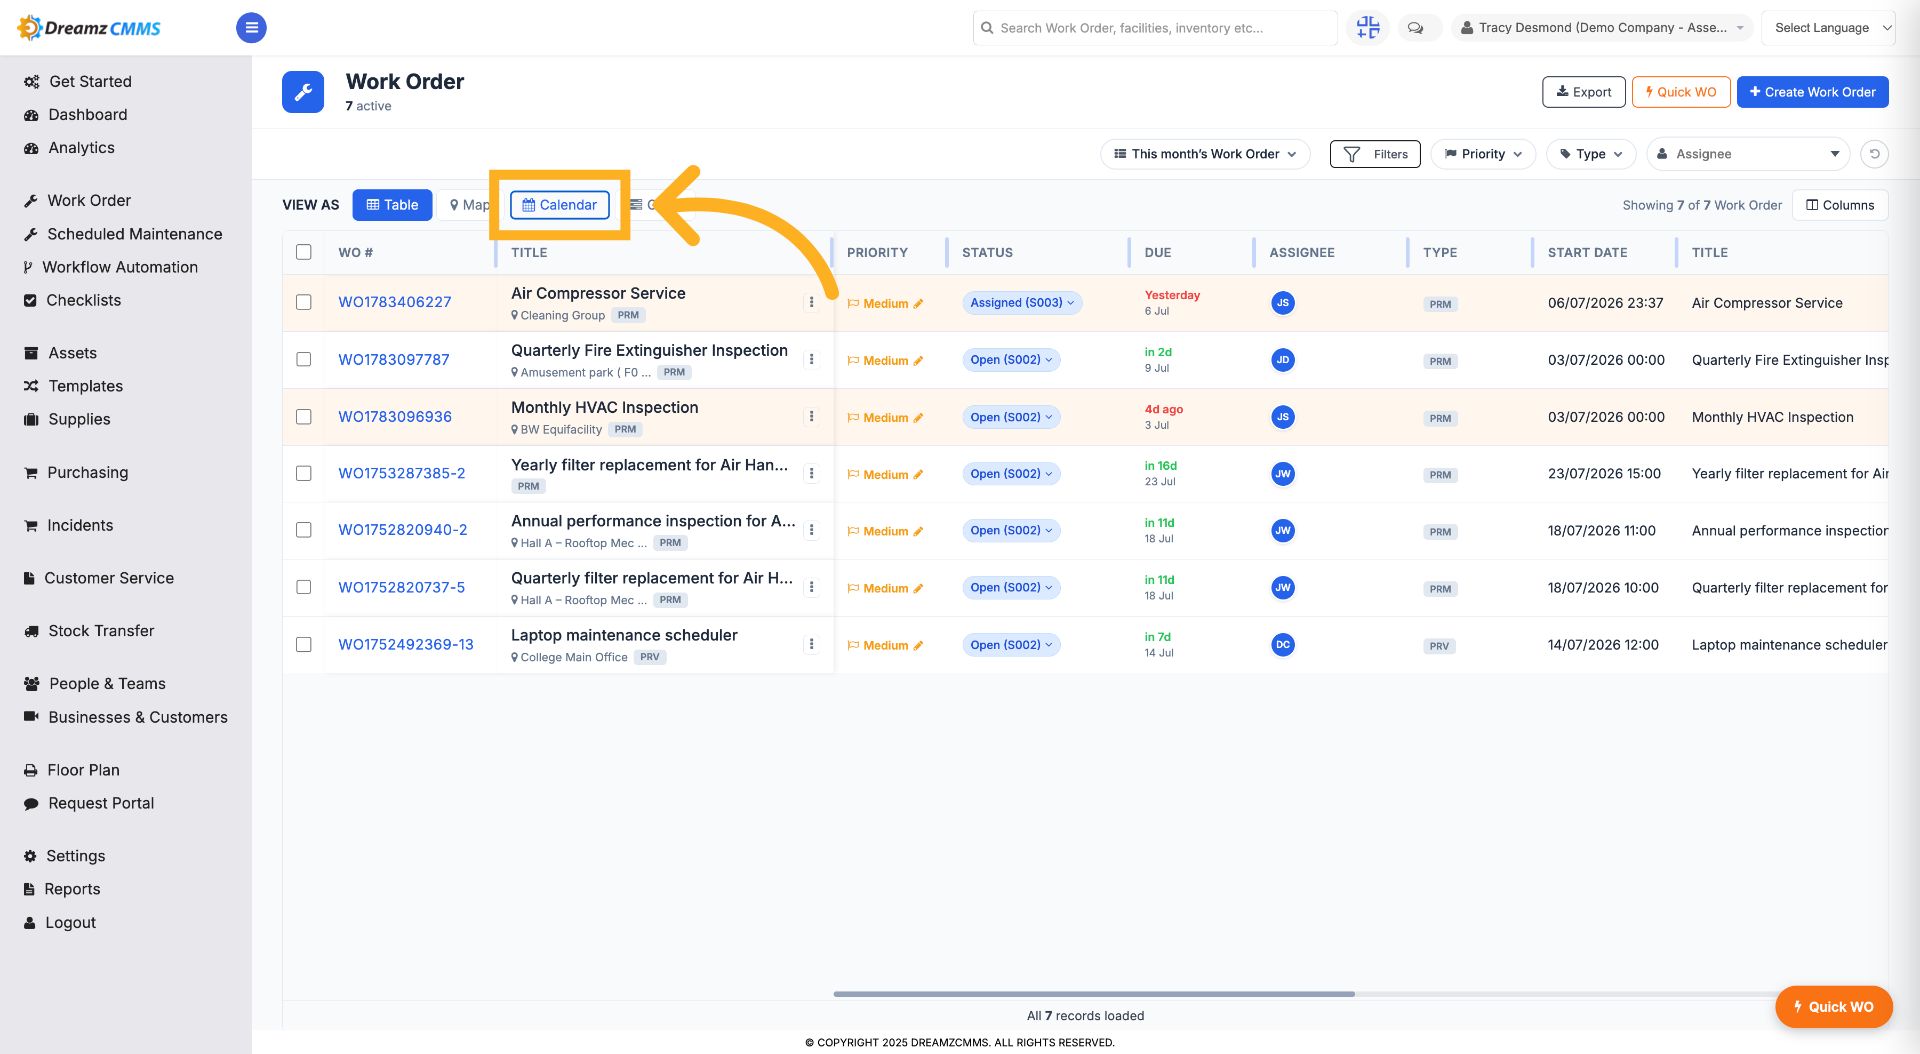
Step 3 – Access Calendar View
Click "Calendar" to see the work orders scheduled on the calendar.
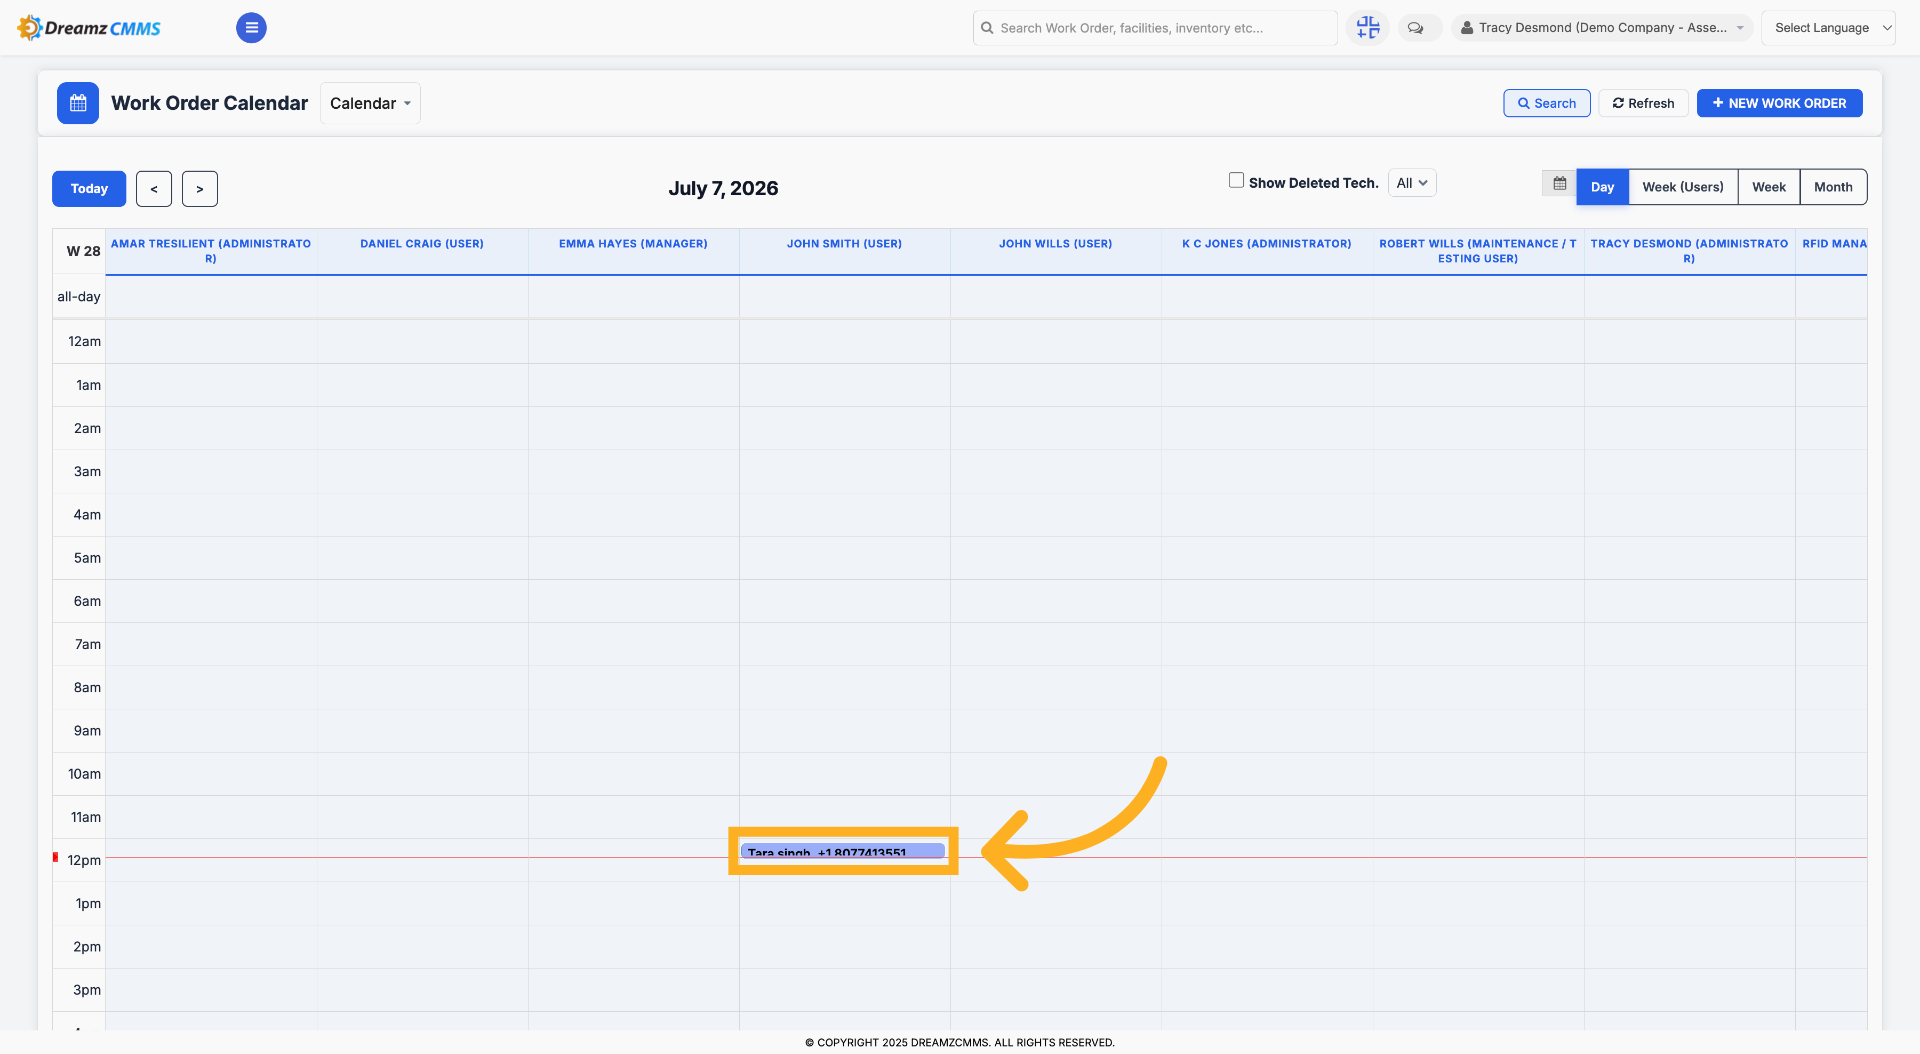
Step 4 – Select a Scheduled Work Order
Click a work order on the calendar to view its details.
Step 5 – Open Work Order Details
Click the work order in the calendar to open its detailed information.
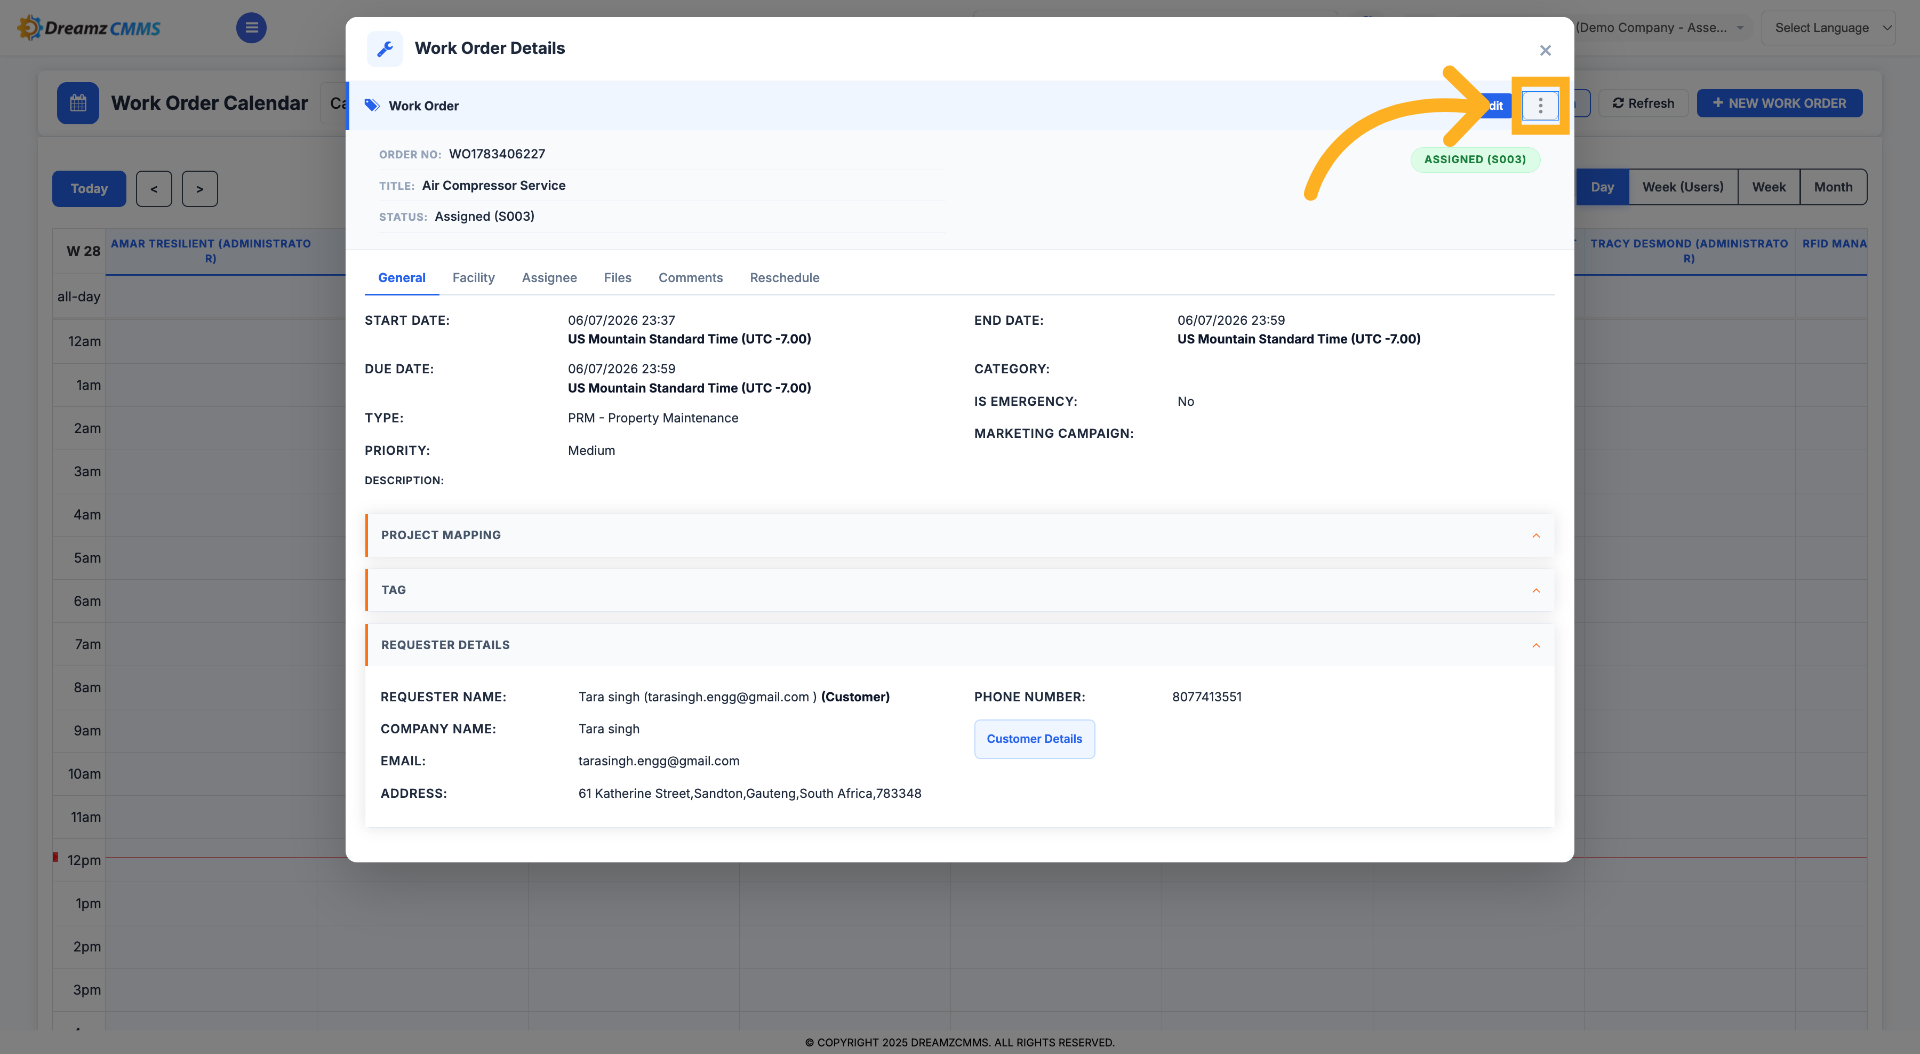
Step 6 – Review Work Order Details in Calendar View
The details show tabs such as General, Facility, and Assignee. Clicking the three dots also gives you access to menus like Update Status, Add Quotation, and Add Invoice, etc
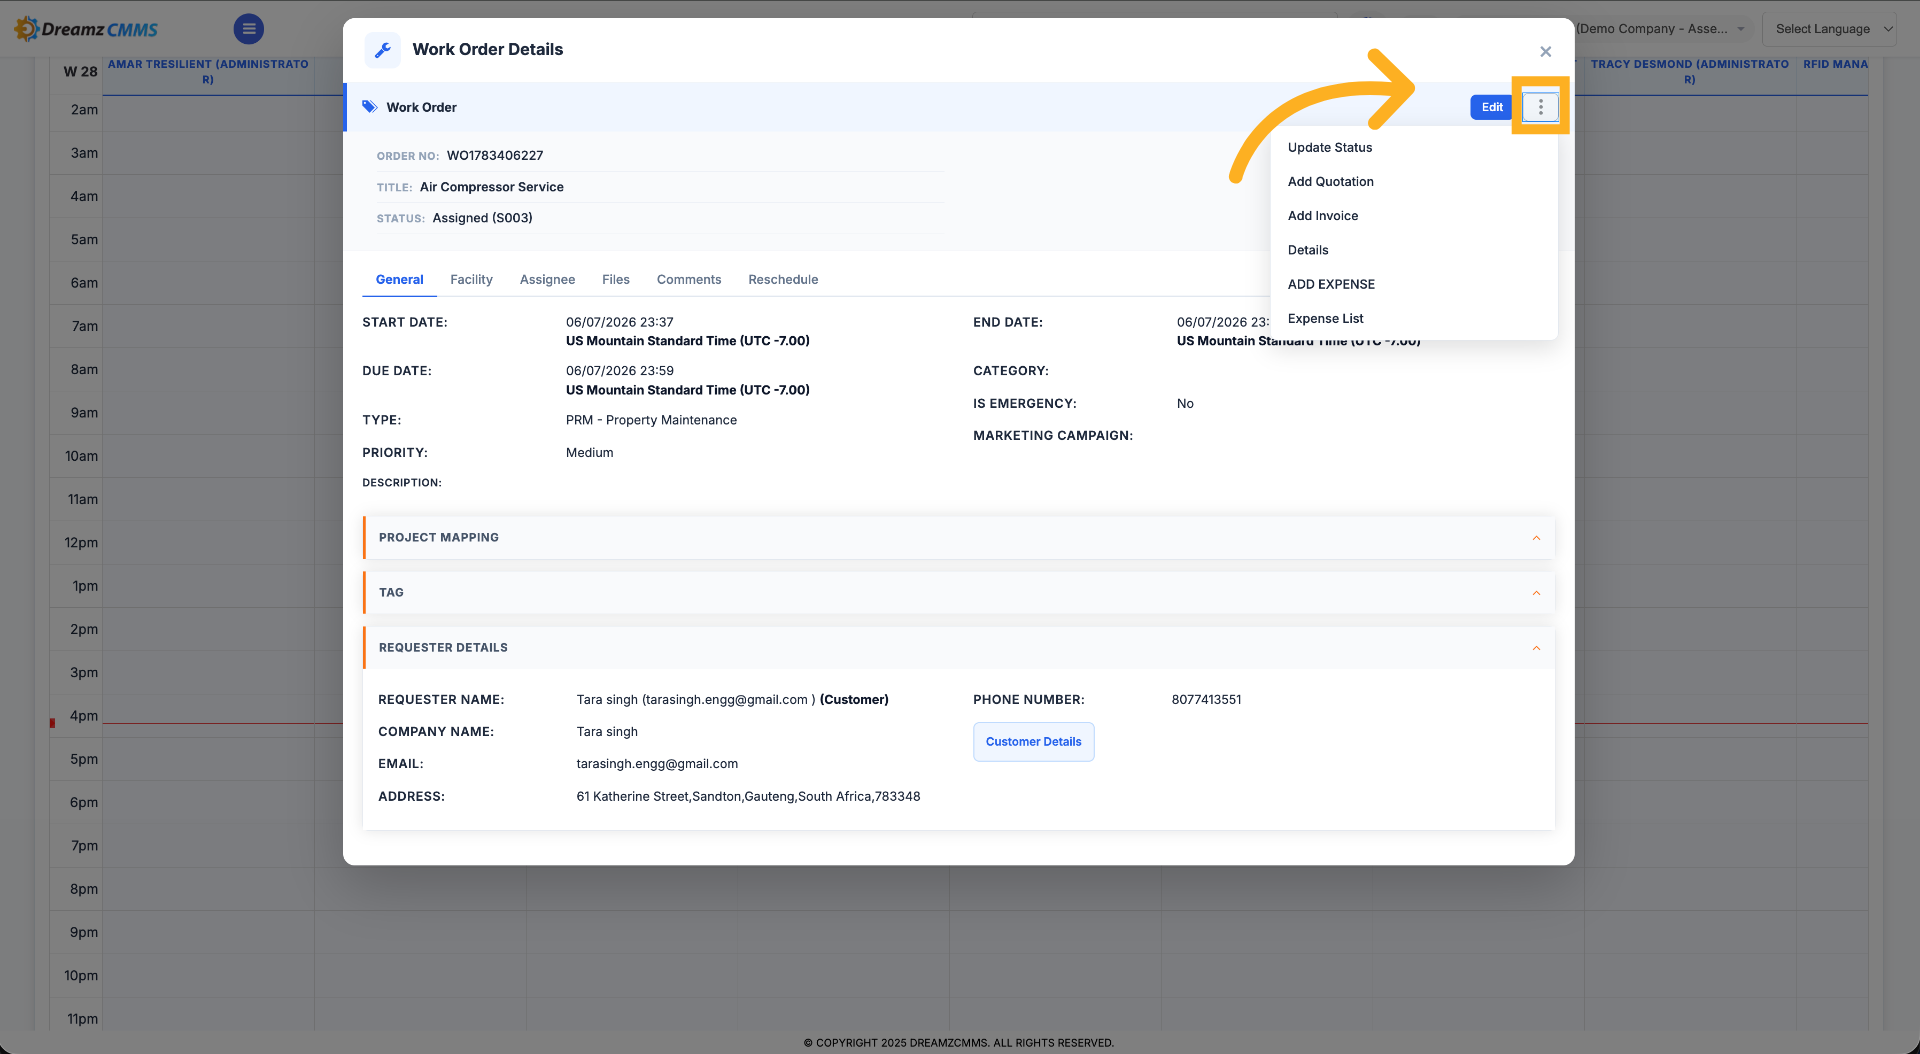
Step 7 – Close Work Order Details
Click "Close" to exit the work order details view in the calendar.
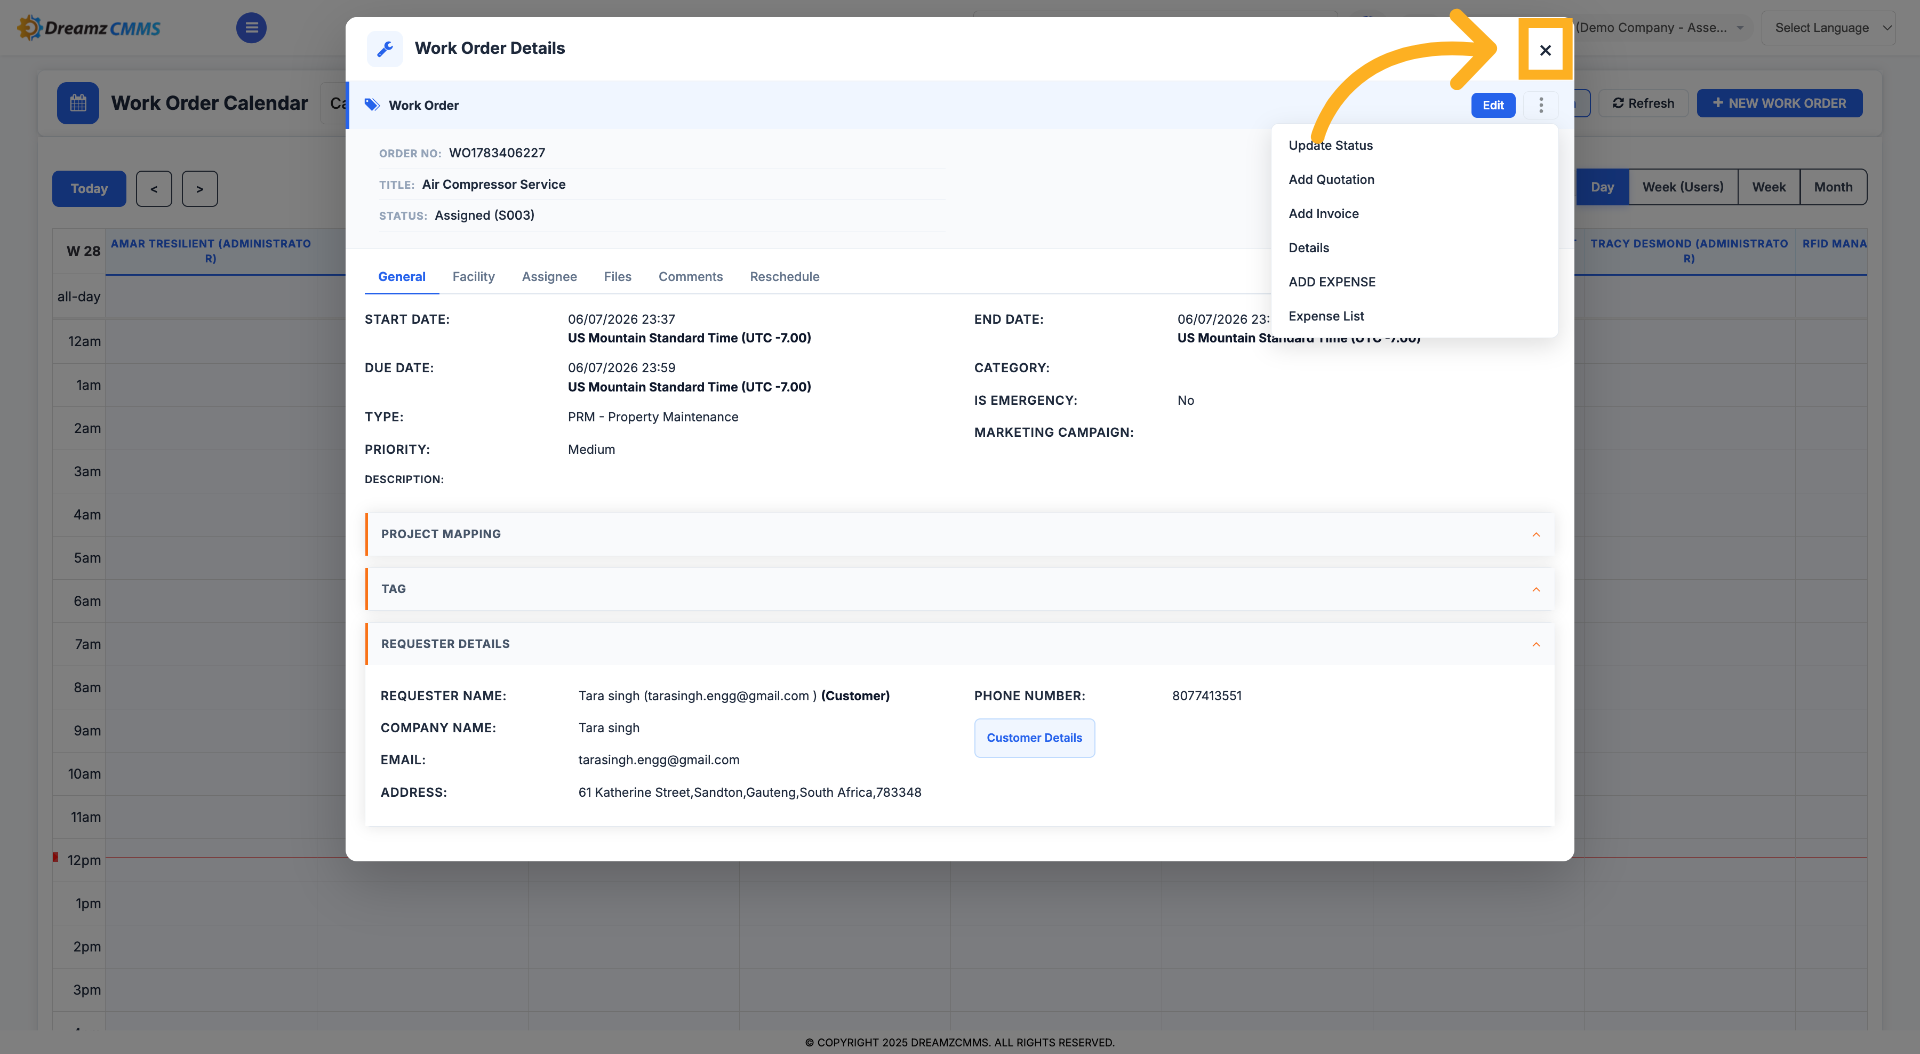
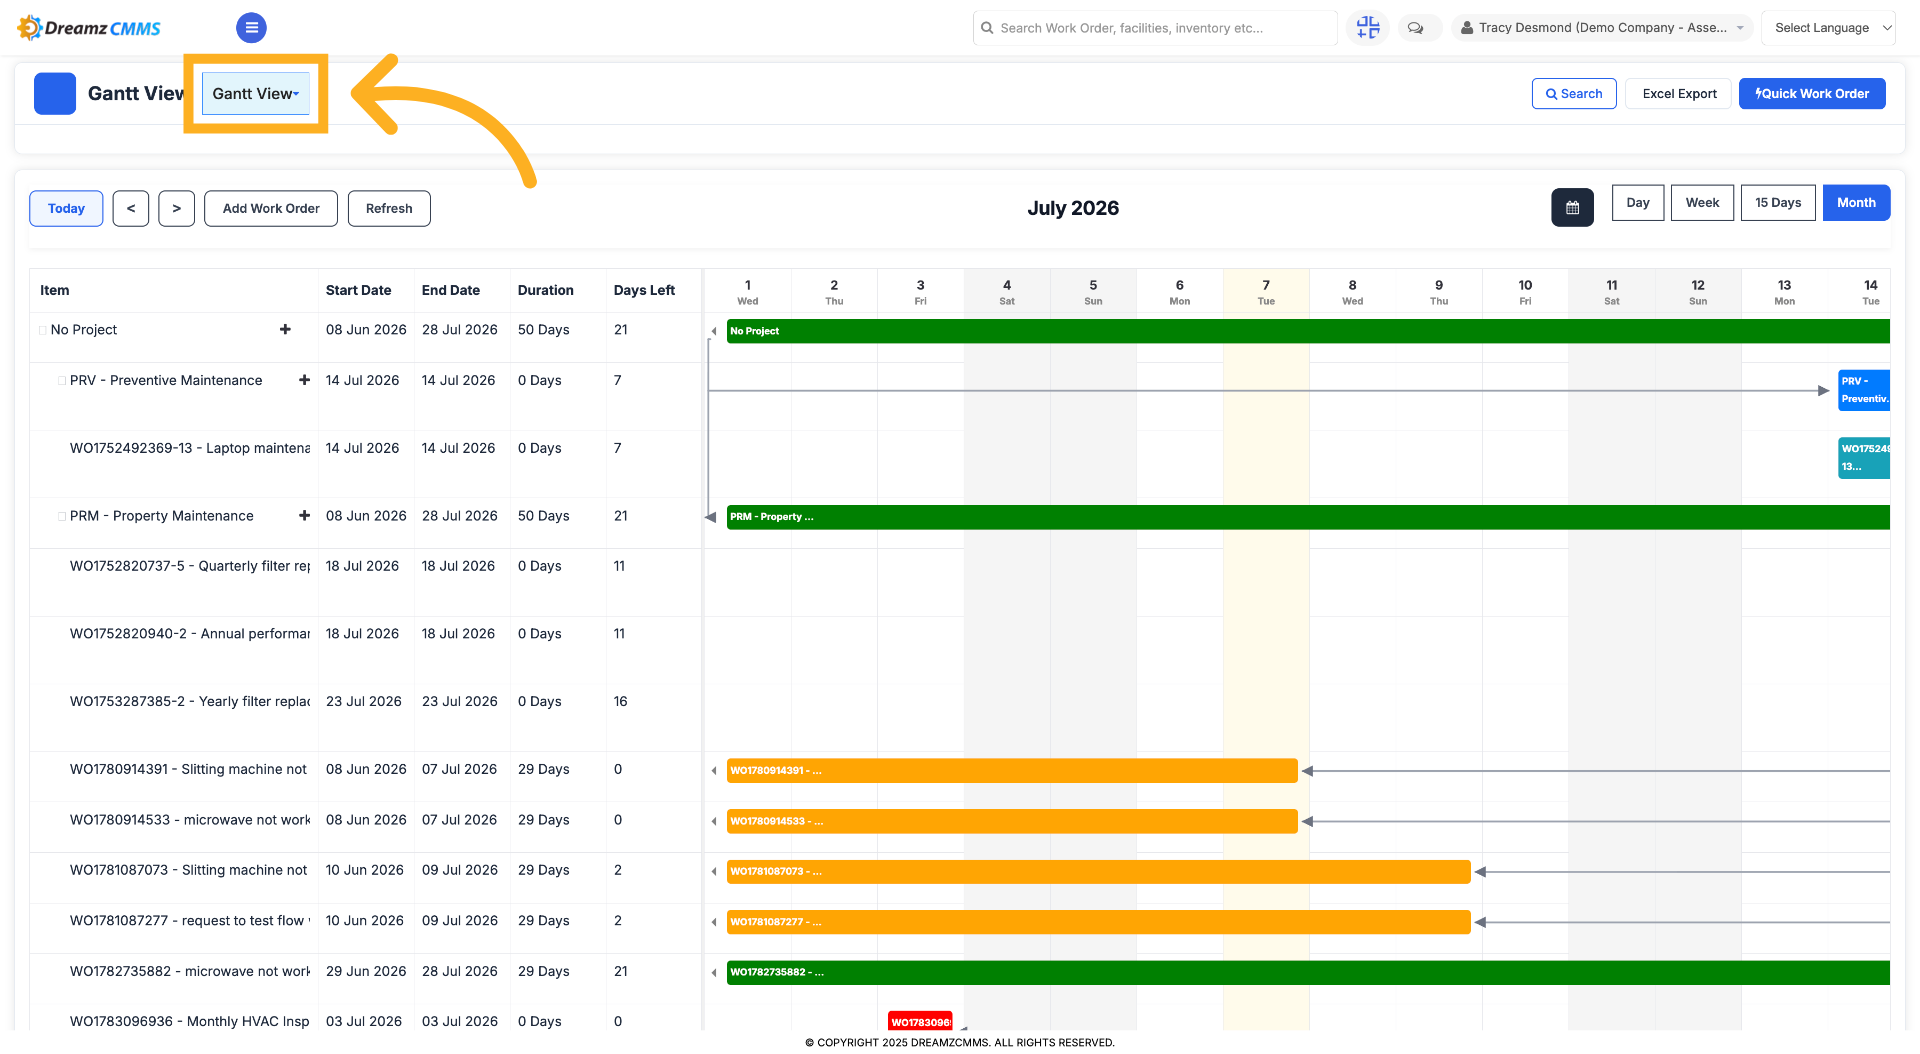
Step 8 – Switch to Gantt View
Click "Gantt View" to visualize work orders in a Gantt chart format.
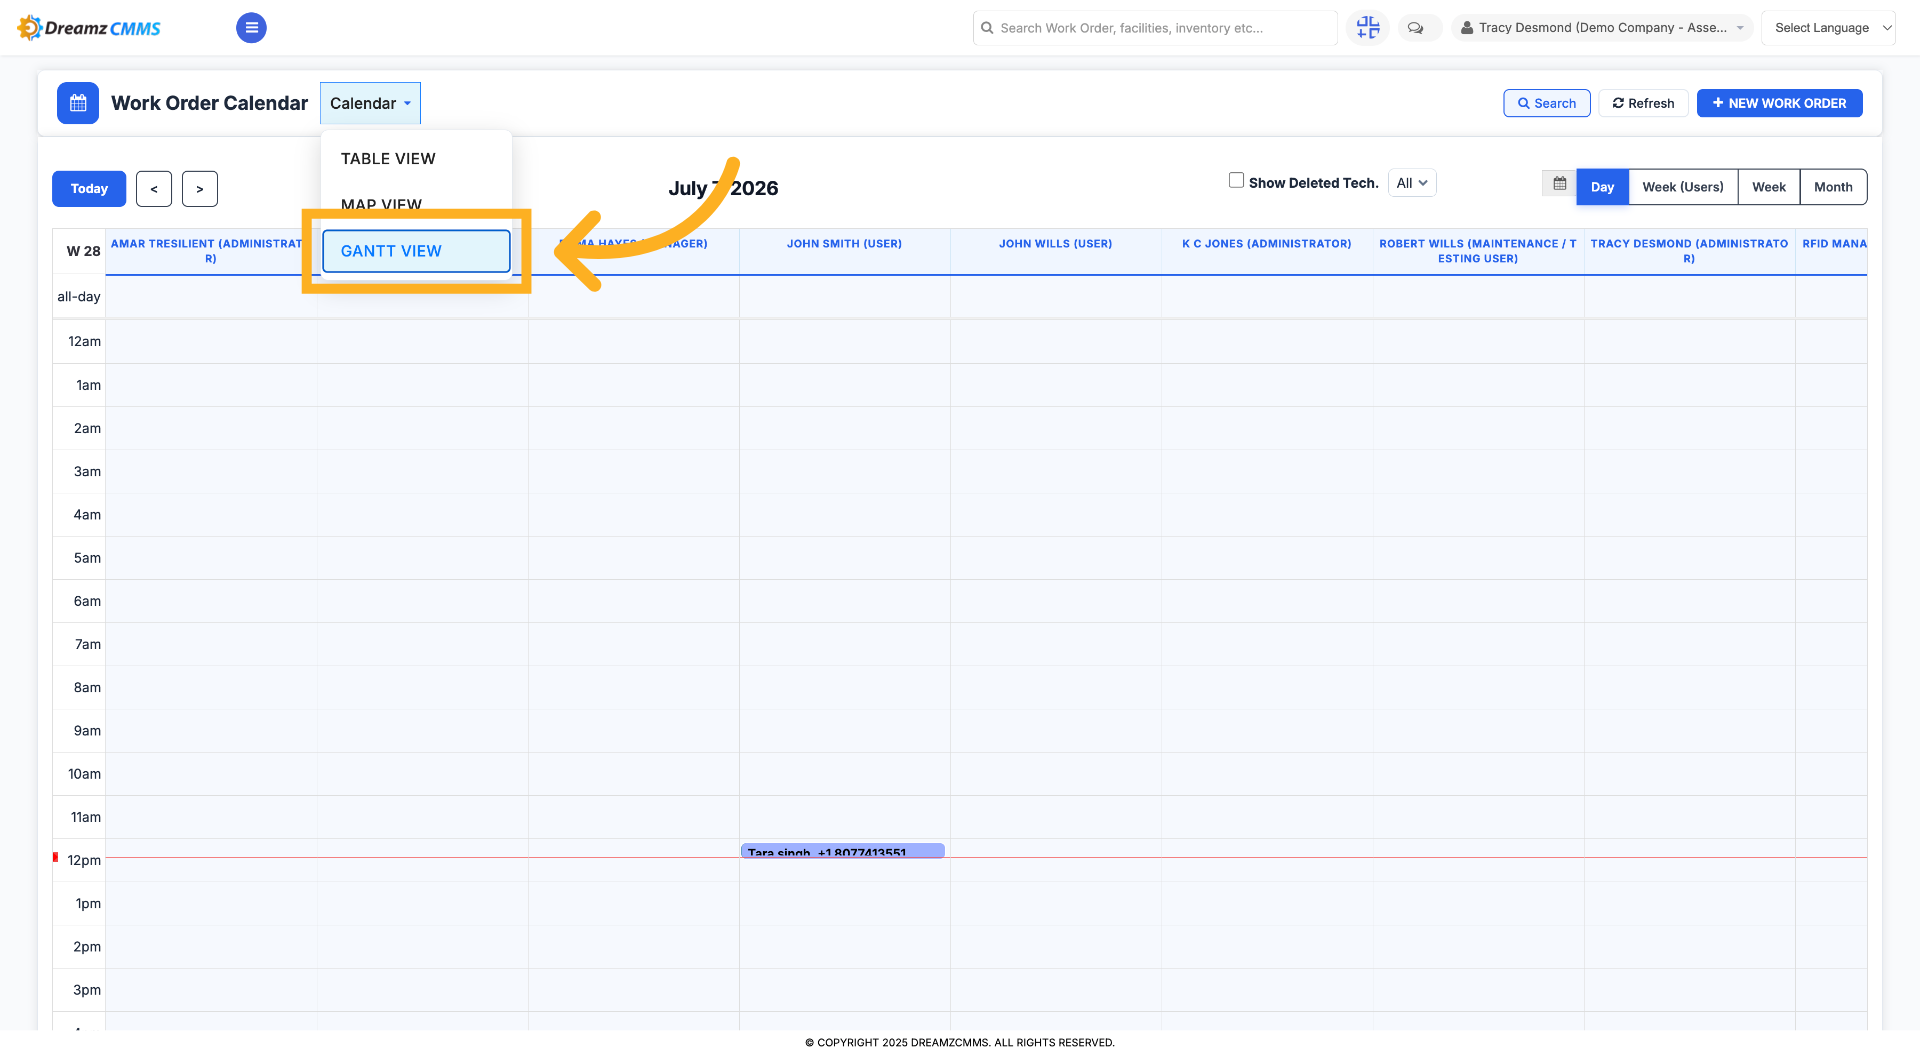
Step 9 – Confirm Gantt View Selection
Click "Gantt View" again to ensure the Gantt chart is displayed.
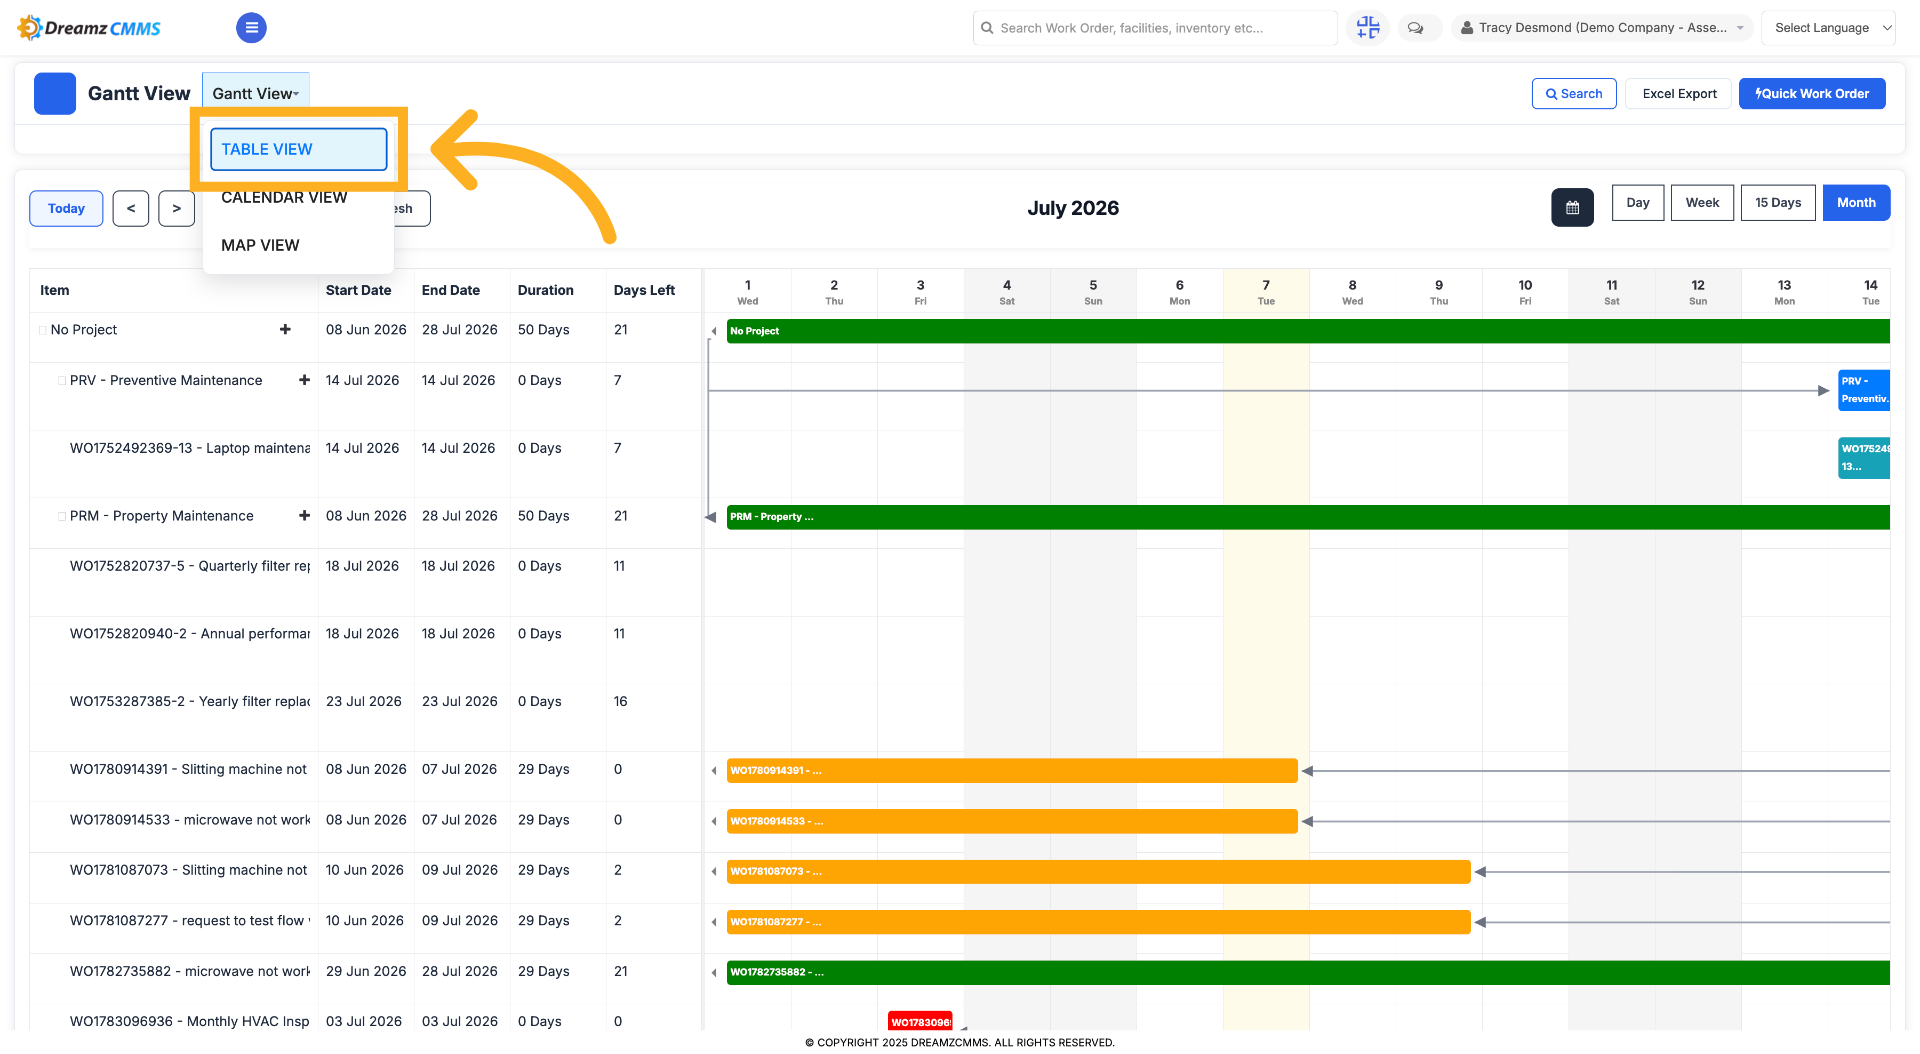
Step 10 – Switch to Table View
Click "Table View" to see work orders in a tabular format for detailed analysis.
How to Select and Manage Multiple Work Orders
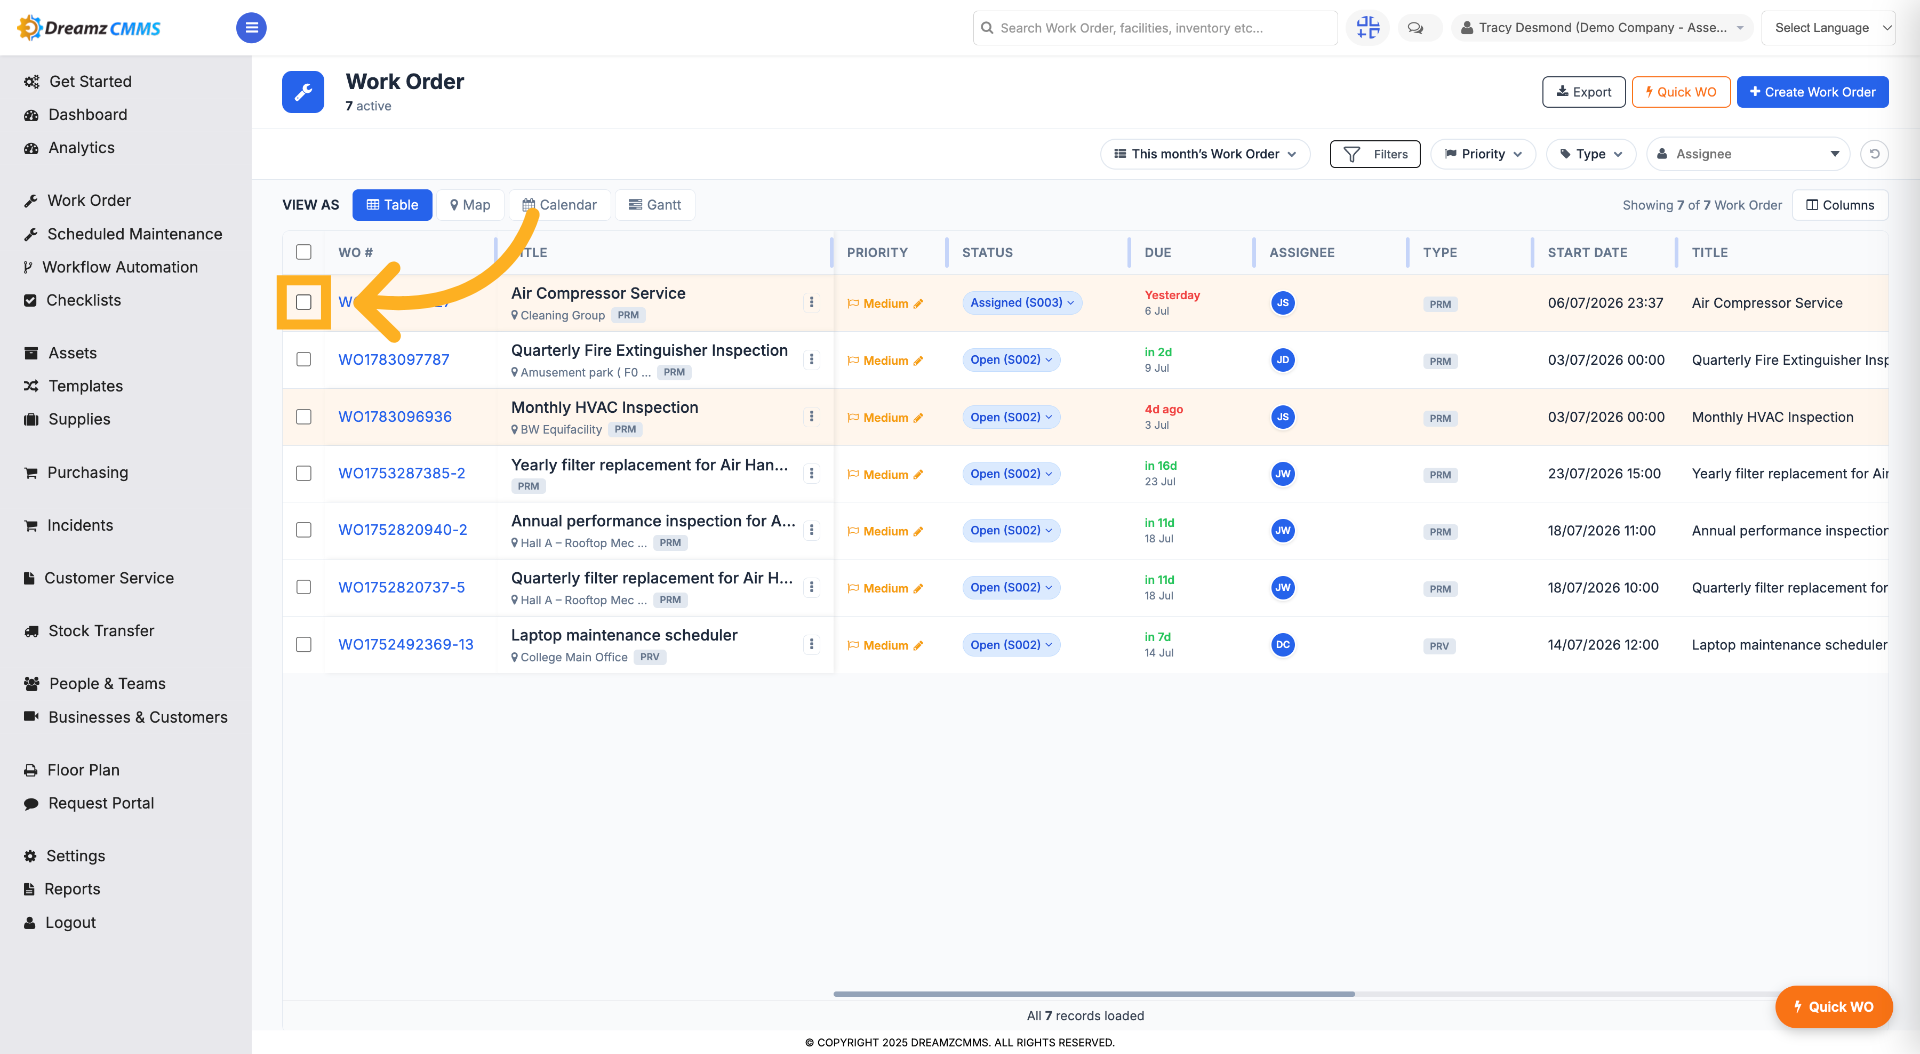
Step 1 – Select a Work Order
Select a work order by checking the checkbox beside the work order number.
Step 2 – Select Another Work Order
Select another work order from the list.
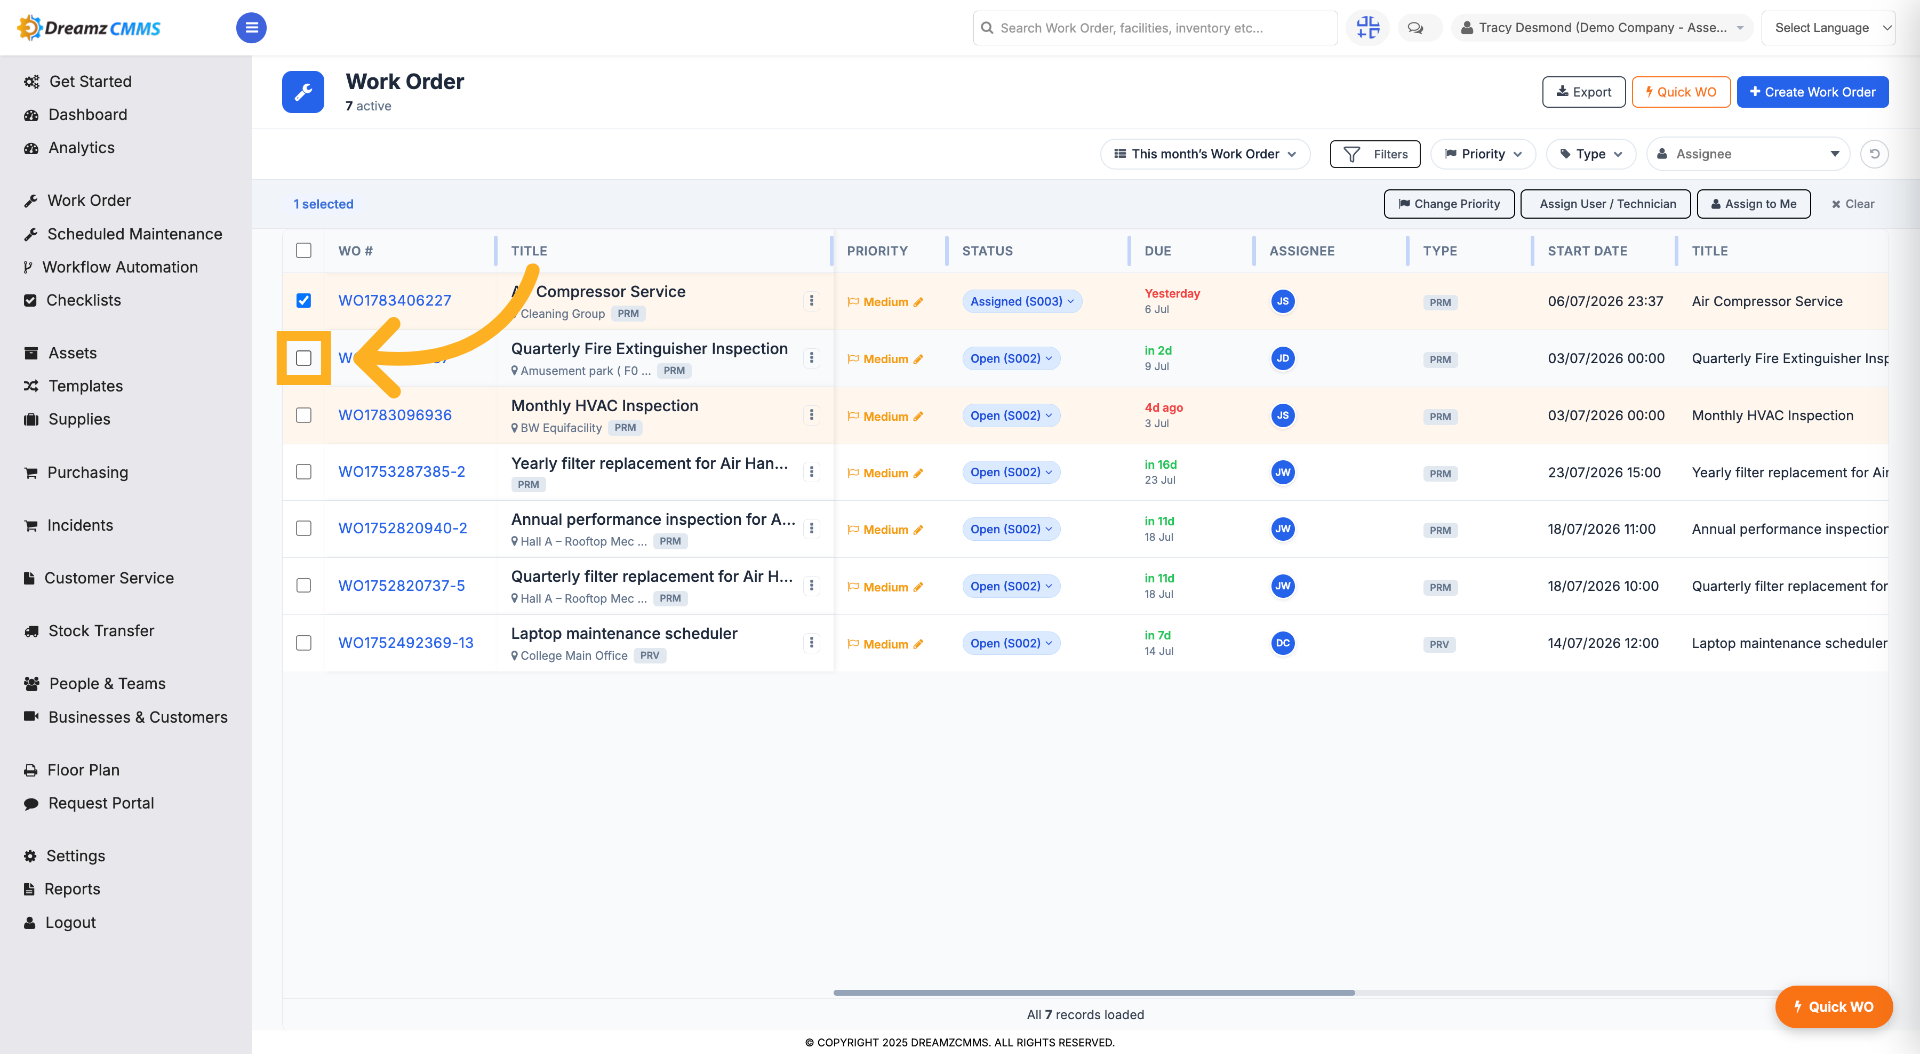
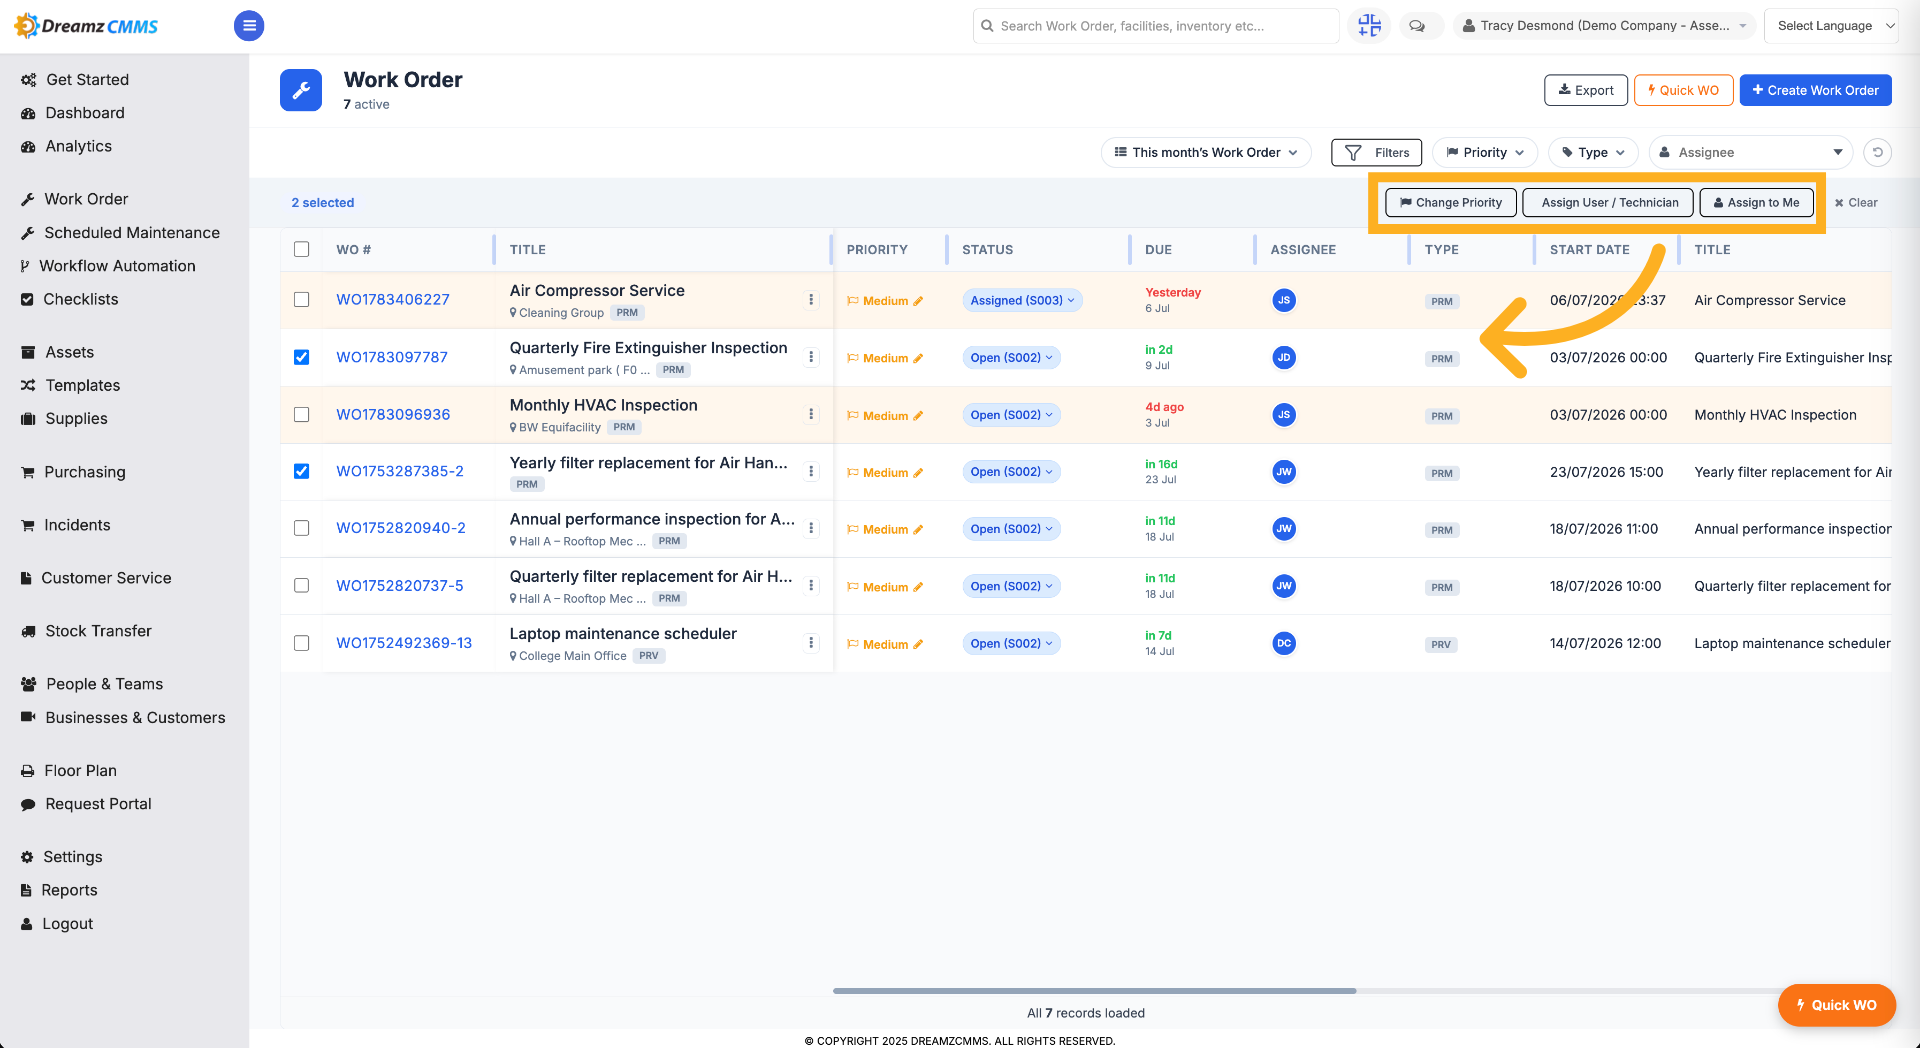
Step 3 – Use Bulk Actions for Multiple Work Orders
When two or more work orders are selected, additional menus appear, such as Change Priorities, Assign User/Technicians, and Self Assign.
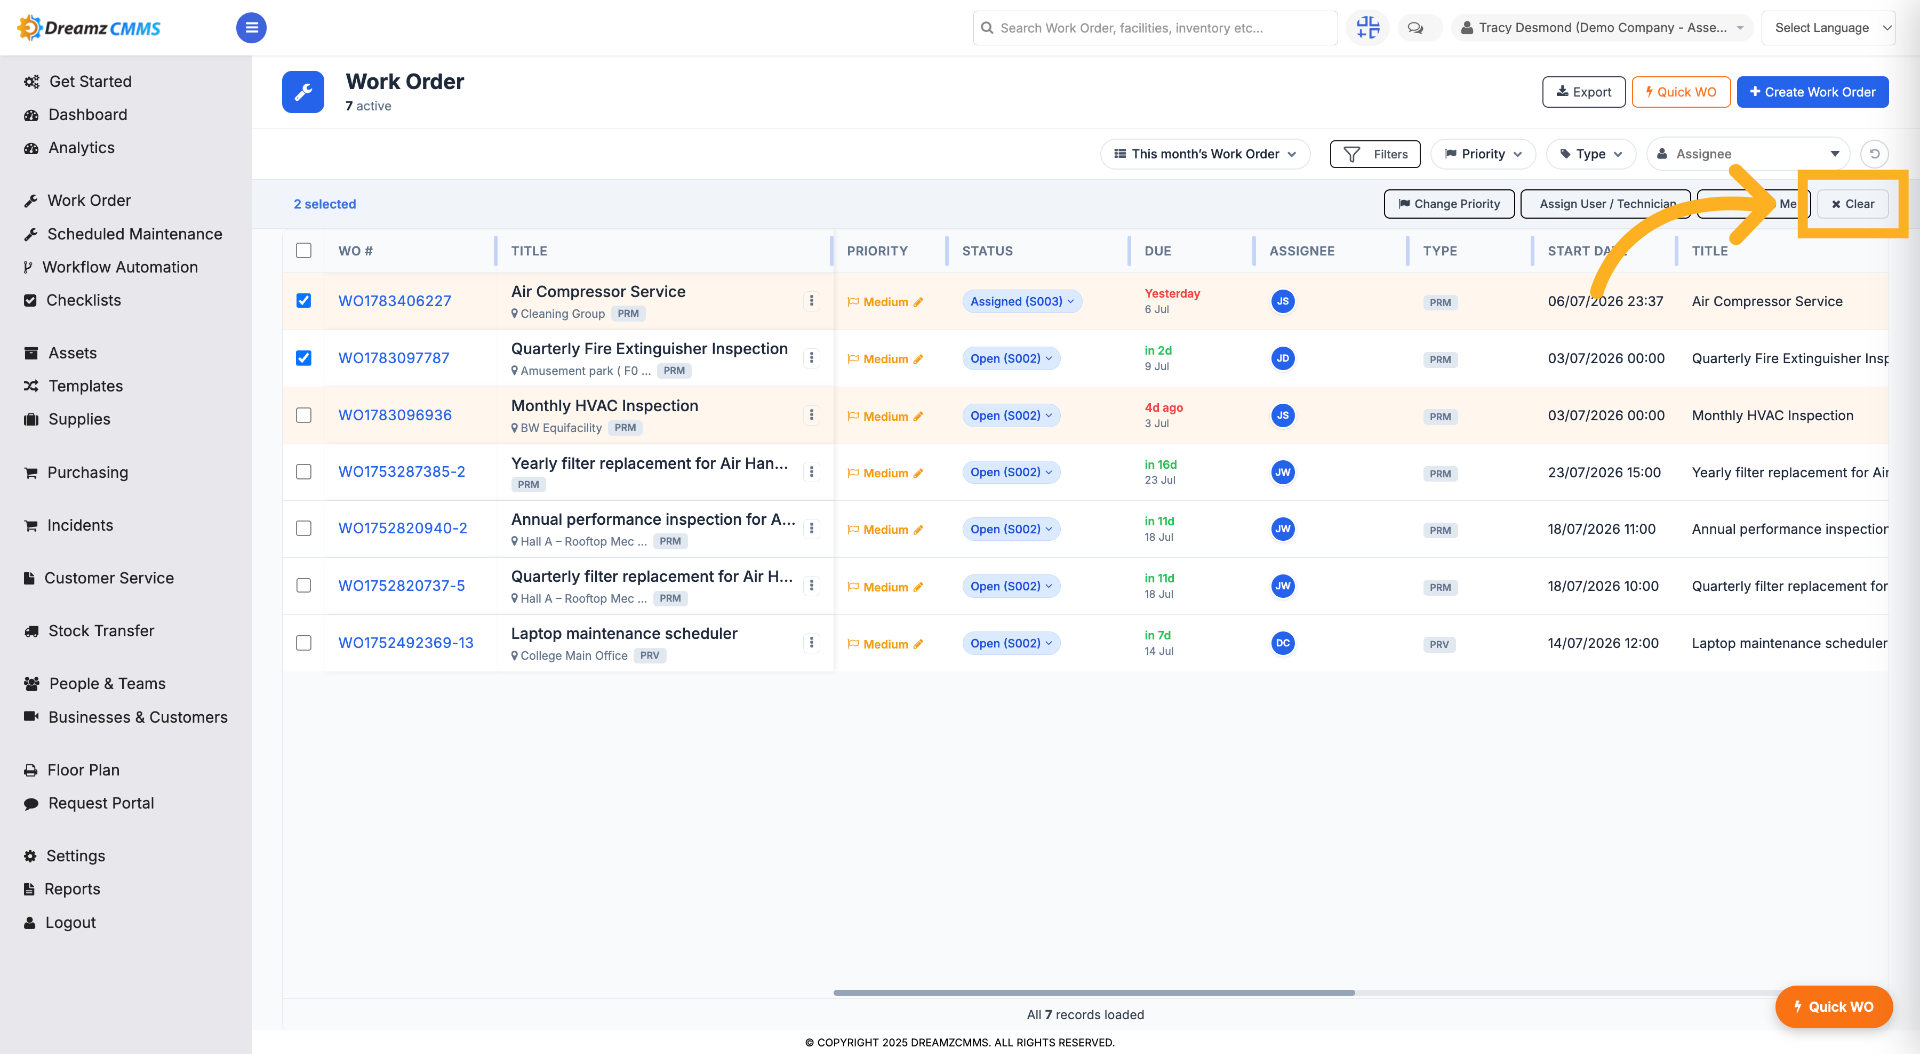
Step 4 – Clear Work Order Selection
Click "Clear" to remove the current work order selection and reset the view.
Tips for Managing Work Orders
- Use the Filters, sort by Priority/Type, and column selection tools to tailor the work order list to how your team works.
- Link assets, checklists, and financial details when creating a work order so it's fully documented from the start.
- Switch between List, Map, Calendar, Gantt, and Table views depending on whether you need a schedule, location, or workload overview.
- Select multiple work orders at once to reassign technicians or change priorities in bulk.
- Use Message Settings to control who gets notified about updates on a specific work order.
Frequently Asked Questions
Can I create a work order quickly without filling in every field?
Yes. Use Quick Work Order for a faster creation flow, or Create Work Order for the full form with assets, checklists, and financials.
Can I view work orders on a map or calendar?
Yes. Use the Map view to see work order locations, or the Calendar view to see them scheduled by date. You can also switch to Gantt or Table view.
Can I update the status of a work order?
Yes. Use the three-dot menu on a work order, choose the new status, and confirm in the popup to finalize the change.
Can I select and update multiple work orders at once?
Yes. Select two or more work orders using their checkboxes to access bulk actions like Change Priorities or Assign Technicians.
Where do I record meter readings for a work order?
Open the work order details and go to the Meter Reading section to add a reading for a linked asset.