Create a Work Order
The work order is the central record in DreamzCMMS that drives maintenance activities — whether it’s a breakdown repair or a scheduled preventive task. By creating work orders, you can assign technicians, schedule work, track progress, and record outcomes efficiently.
Overview
In DreamzCMMS, a work order captures all the key information related to maintenance tasks — including priority, schedule, requester details, assigned staff, relevant assets, labor tasks, and supporting files. Once created, work orders help teams manage and complete maintenance work with clear accountability and communication.
Here is a reference video:
Before You Begin
Ensure you have the appropriate permissions (Manager, Supervisor, or Admin) to create work orders.
Have necessary details ready such as facility/location, maintenance type, assets involved, and any checklists you plan to apply.
How to Create a Work Order
Step 1 — Go to Work Orders
From the left-hand navigation menu, click on Work Orders to open the work order dashboard.


Step 2 — Click “Create Work Order”
Click on the Create Work Order tab to open the work order creation form.

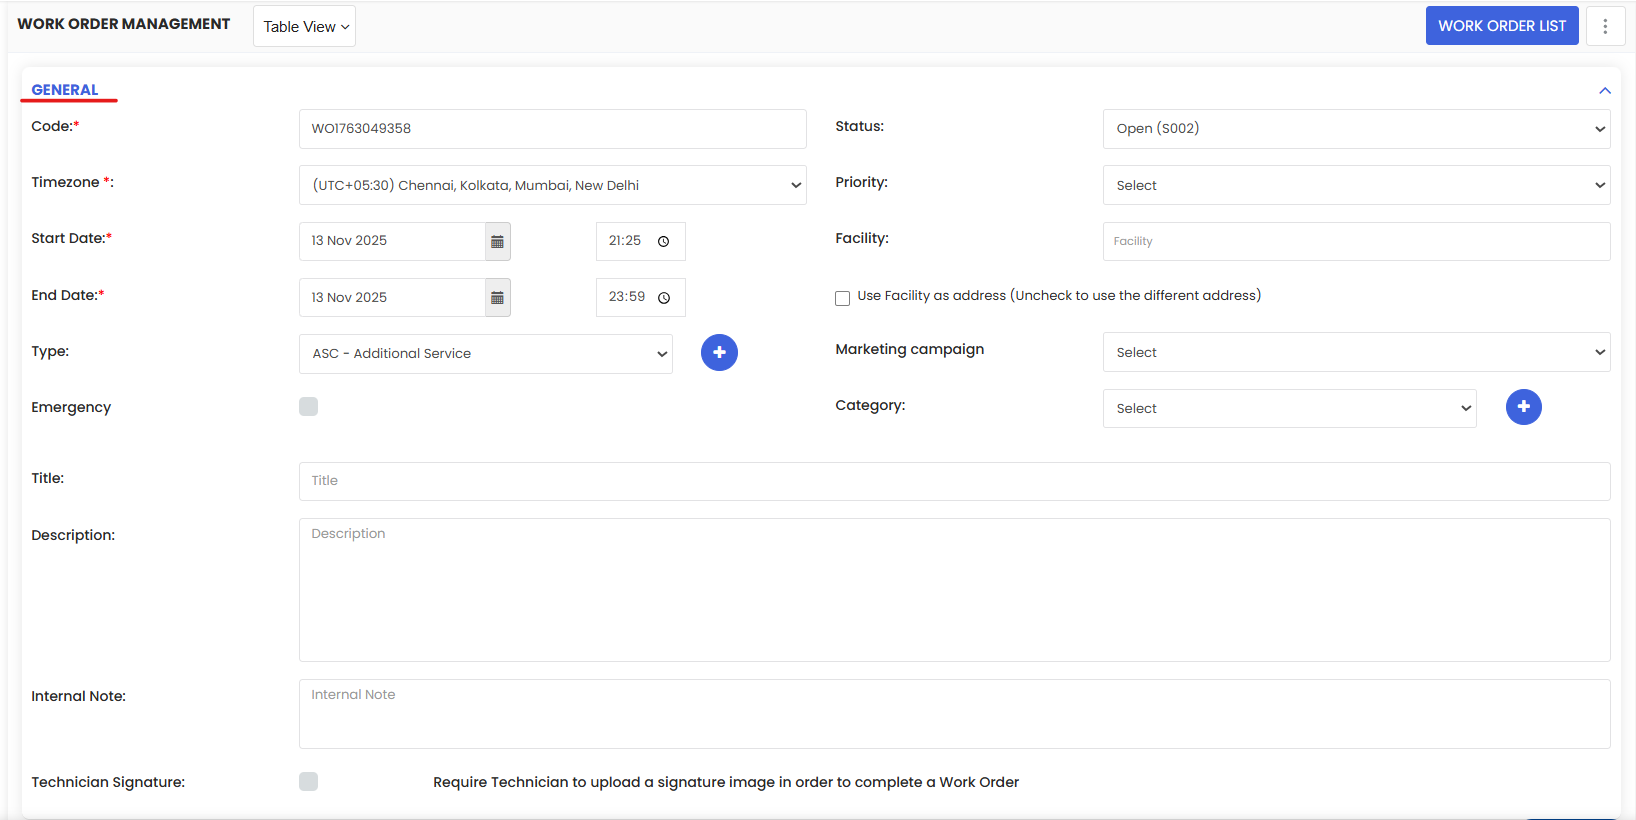
Step 3 — Fill in General Details
On the form, complete the key fields:
Status, Priority & Timezone — These default from system settings but can be changed if needed.
Start & End Date — Set the expected timeframe for work completion.
Facility / Location — Type and select the location where the work is needed.
Maintenance Type — Choose from dropdown or add new via the + icon.
Emergency — Check this box to mark highest priority.
Title & Description — Enter summary and details of the work needed.
Internal Note — Add notes visible only to internal users or technicians.
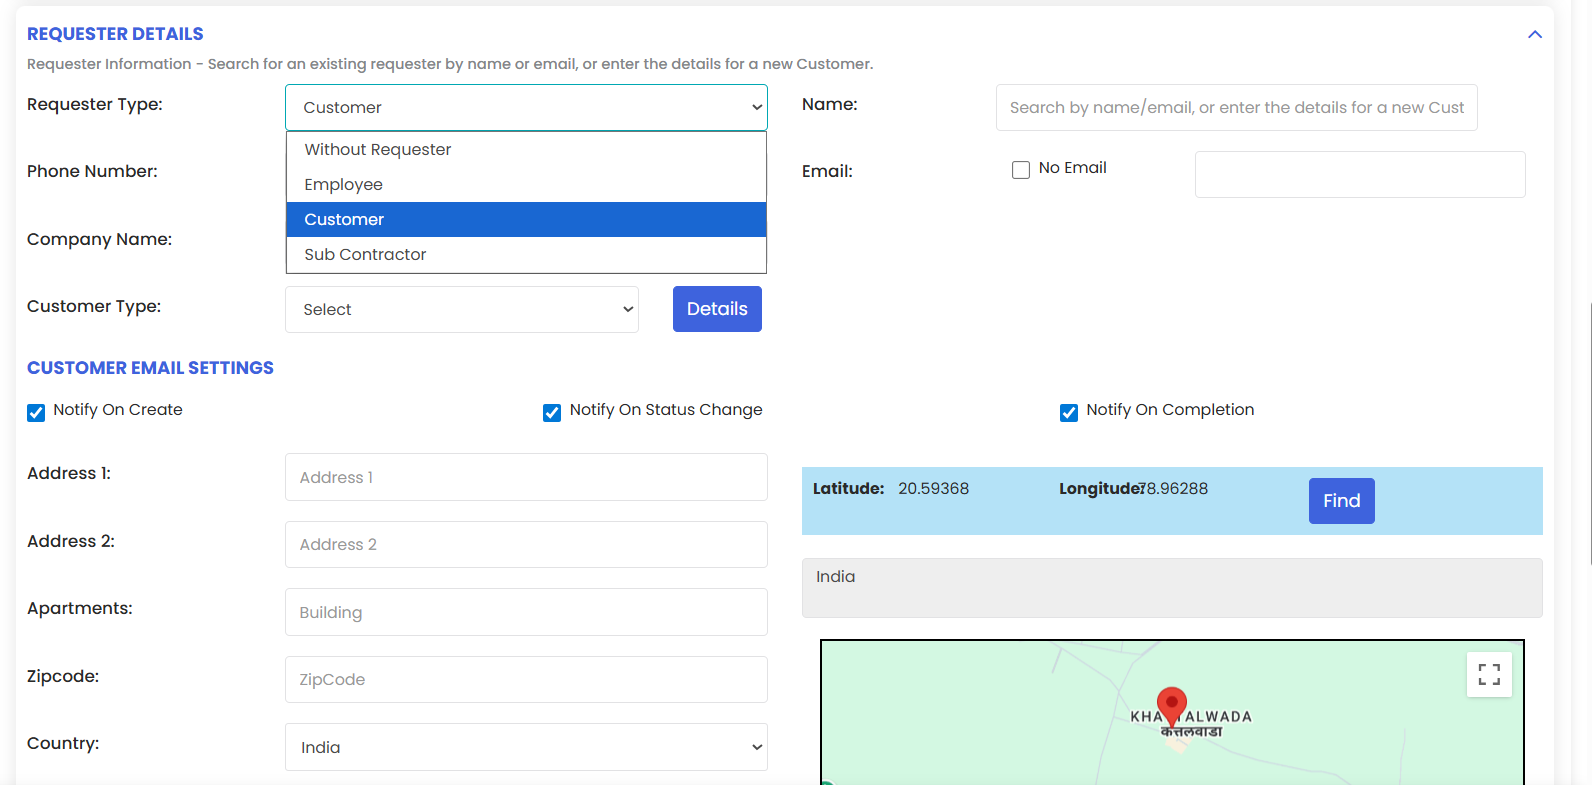
Step 4 — Assign Project and Requester
Project — Select a project (optional) to link this work order to larger initiatives.
Requester — Indicate who reported the issue.

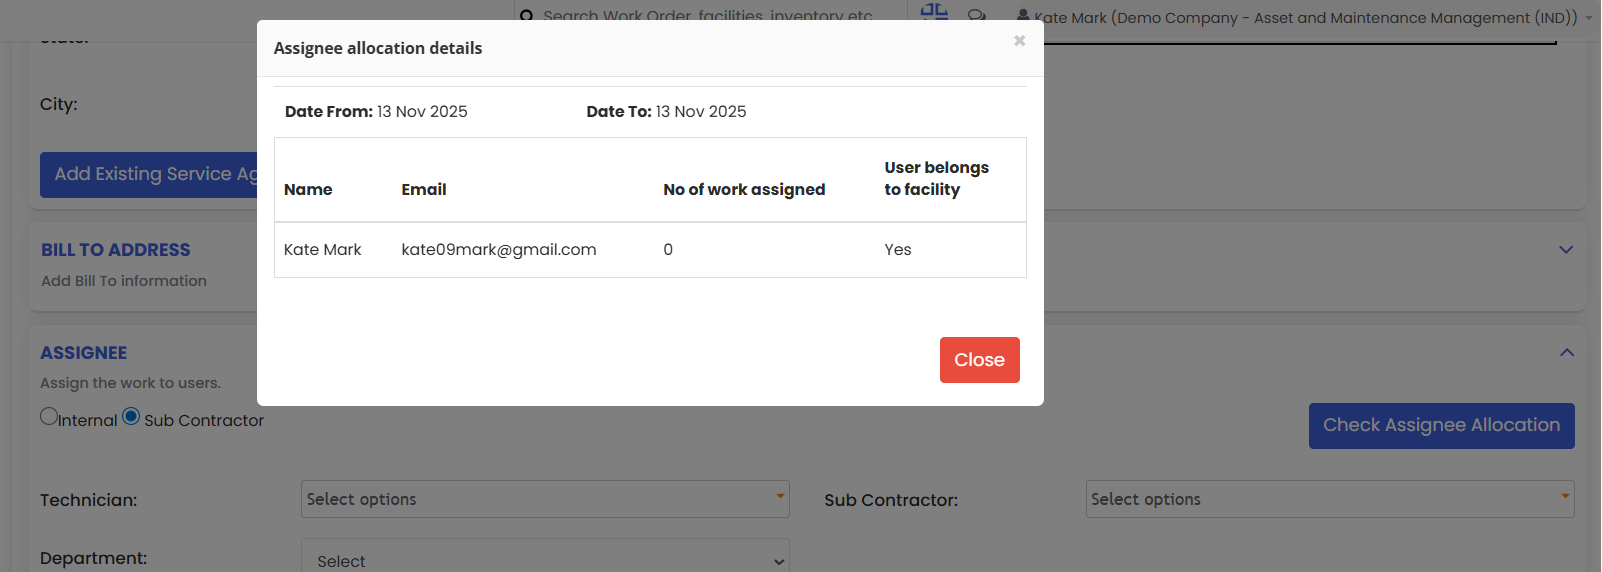
Step 5 — Assign Technician(s)
Choose the technician(s) responsible for completing the work. This may include:
In-house technicians
Subcontractors
You can assign to one or multiple technicians


Click the Assignee Allocation button to view current workload or allocation details.
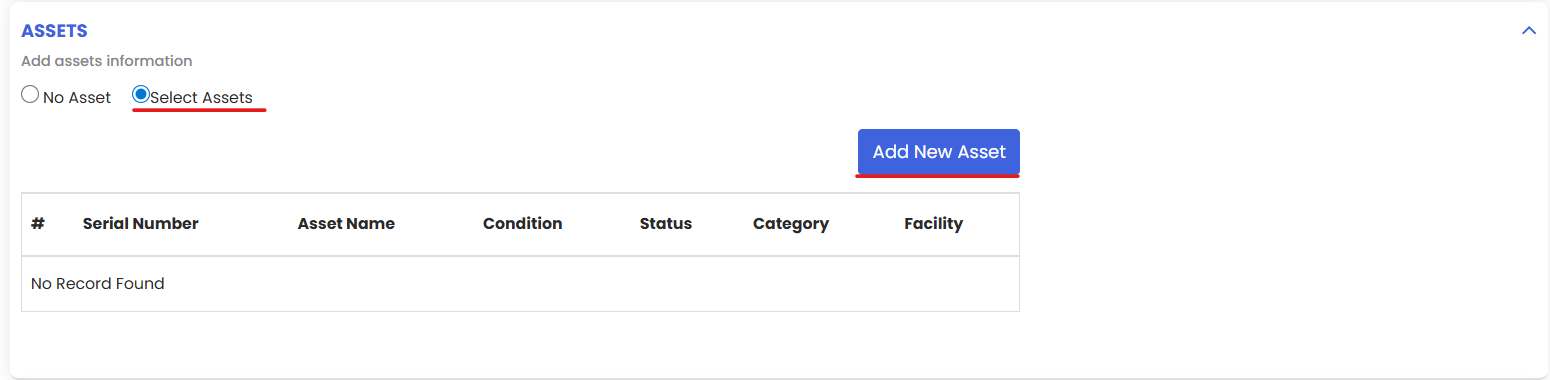
Step 6 — Add Related Assets
In the assets section, click Select Assets then Add New Asset to attach assets involved in this work order. Only assets tied to the selected facility will appear.

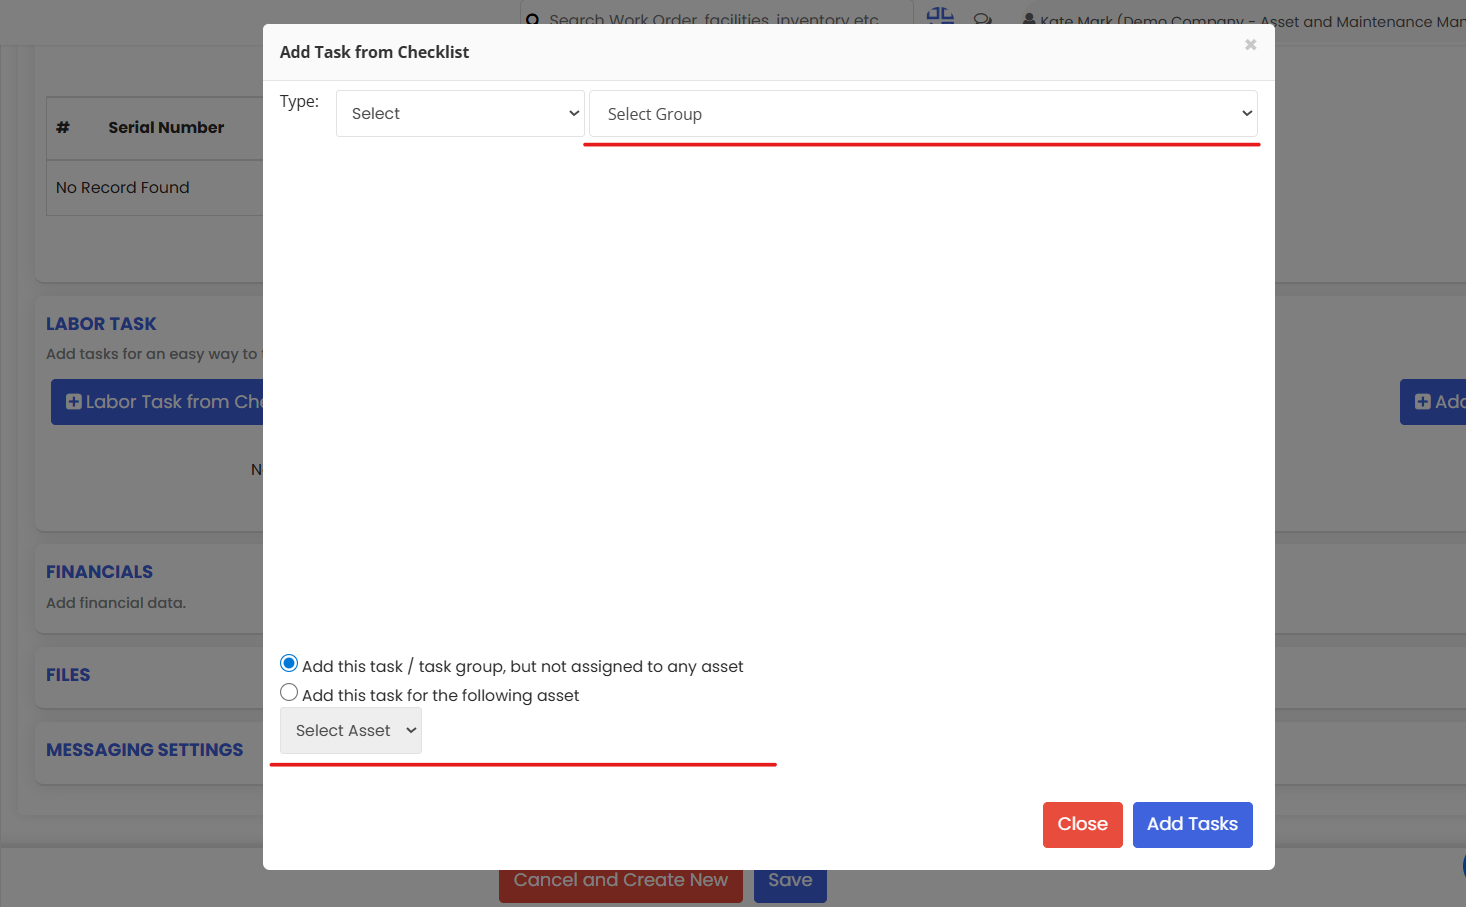
Step 7 — Add Labor Tasks
From the Labor Task / Checklist section:
Click Labor Task from Checklist
Choose a checklist from the library
Select tasks for individual assets
Pick the Hourly option under financials if you want labor hours auto-calculated.


Note: Selecting hourly tasks enables automatic calculation of total estimated hours.
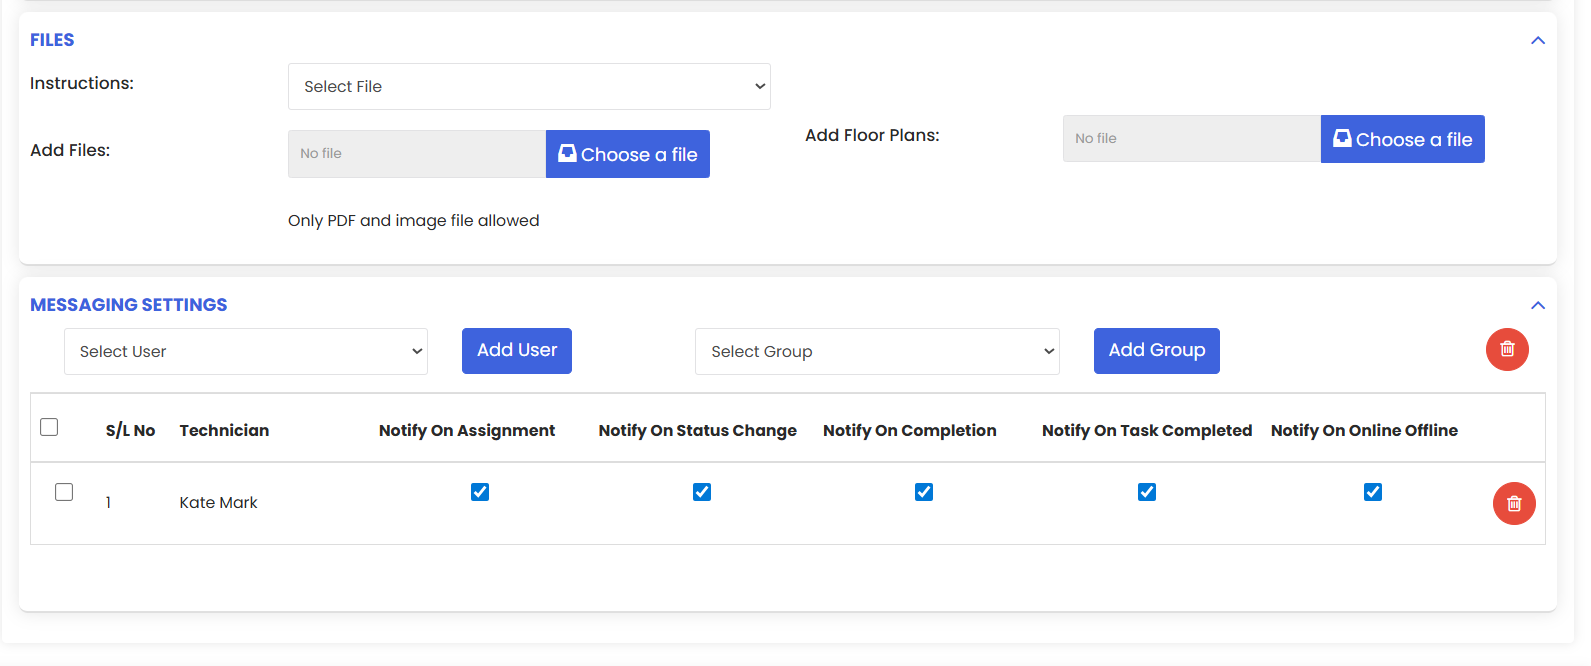
Step 8 — Add Files & Notifications
Files — Upload attachments like manuals, photos, or instructions.
Notifications — Select user notifications for events (e.g., work order creation, assignment, completion).
Save the Work Order
When all required information is entered, click Save to create the work order. Assigned technicians will be notified automatically.
After Saving — What’s Next?
Once the work order is saved:
Track work progress from the Work Orders list
Update status as tasks are completed
Add comments, time logs, and attachments as work proceeds
This helps maintain full visibility and accountability throughout the maintenance lifecycle.
Tips for Effective Work Orders
- Use clear titles and descriptions so technicians understand the task at a glance.
- Attach relevant assets and checklists to streamline work execution.
- Set appropriate priorities to ensure urgent work is handled promptly.
Frequently Asked Questions
1. Can I edit a work order after it’s been created?
Yes — you can update any field in a work order after creation as long as the work order status allows editing. Simply open the work order, make your changes, and click Save to apply updates.
2. What happens if I assign multiple technicians to a work order?
Assigning multiple technicians allows each person to receive notifications and view the work details. They can then update task status, add time logs, and collaborate on completing the work order.
3. How do I attach documents or photos to a work order?
In the Files section of the work order form, click Upload and select the files (PDFs, images, manuals) you want to attach. These files will be available to technicians and stakeholders when viewing the work order.
4. Will technicians receive alerts when a work order is created or updated?
Yes — if notifications are enabled for technicians, they will receive alerts when the work order is created, assigned, updated, or closed, depending on the notification settings chosen in the work order form.