Import/ Manage Customer
Import / Manage Customer in DreamzFSM lets you quickly build and maintain your customer master.
Overview
The Import / Manage Customer feature in DreamzFSM allows you to efficiently create, view, and maintain your customer records. You can manually add individual customers or perform a bulk import from an Excel file. This feature also supports setting up customer login credentials and assigning customer portals for seamless access management.
Here is a reference video:
Steps to Import / Manage Customer
Step 1 – Navigate to the Customer Section
In order to import or manage a customer, click on Customers and then click on the Customers sub-menu.

Step 2 – View the Customer List
Clicking on the customer sub-header will take you to the customer page, where you can view the list of current customers. You can also add a customer using the "Add New Customer" option in the top right corner.

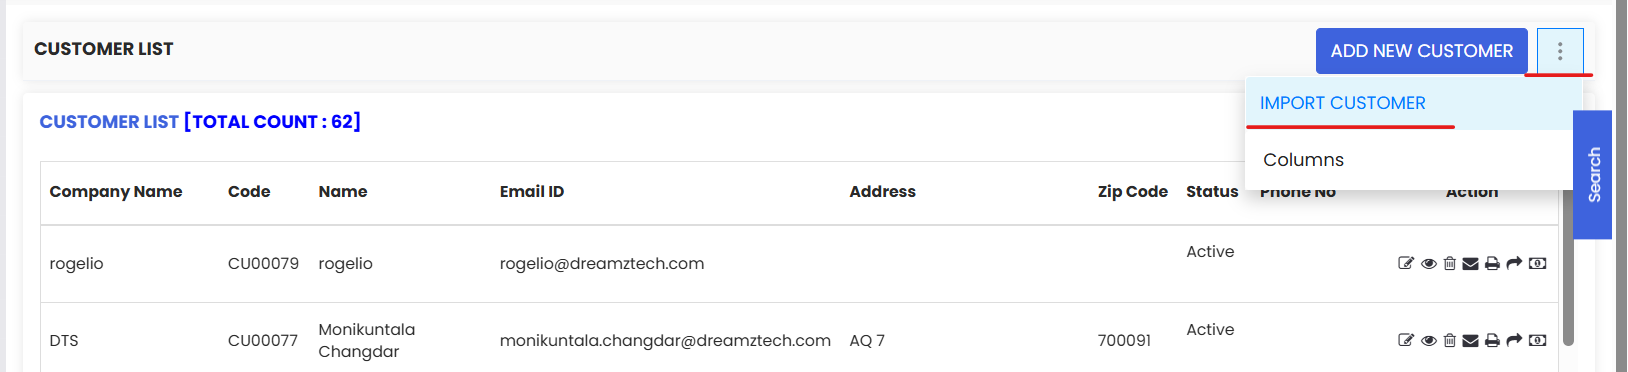
Step 3 – Import Customers from Excel
You can also import customers from Excel. To do that, go to the 3 dots and click on Import Customer.
Step 4 – Download Sample File and Import
You can download the sample file from the link present. Prepare the file in the given format and click on Import.

Step 5 – Excel Format for Bulk Import
Below is the Excel format from which we can import customers at a go through Excel.

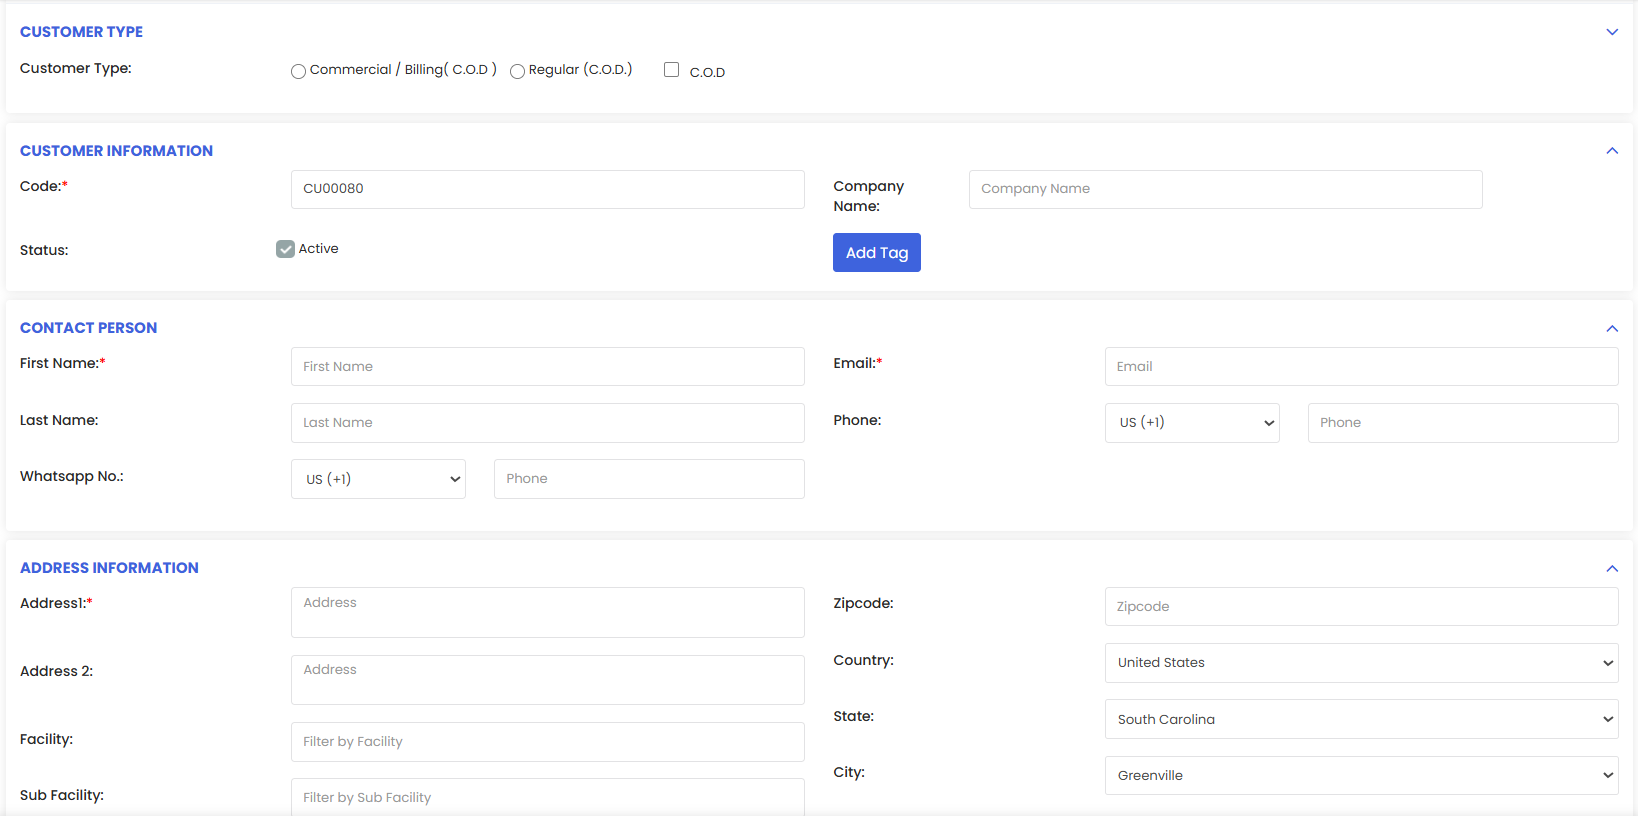
Step 6 – Add a New Customer
When you click on "Add New Customer," you can specify the customer type, company name, contact person details (including setting up WhatsApp notifications), and address information. Clicking the "Customer List" button in the top right corner will return you to the customer listing page.
Step 7 – Complete the Customer Profile and Save
After filling in the details above, complete the sections as shown in the screenshot. You can also create login credentials and assign a portal to the customer. Once done, save the details or save and send email access to the customer.

Tips for Managing Customers
- Use the Import Customer option (via the 3-dot menu) to add multiple customers at once from an Excel file, saving time when onboarding large customer lists.
- Download the sample Excel file and ensure your data matches the required format before importing to avoid errors.
- When adding a new customer manually, make sure to fill in the contact person details accurately, including WhatsApp number if notifications are needed.
- Use the "Save and Send Customer Portal Access Email" option to immediately grant portal access to the customer after saving their profile.
- Assign the correct customer type during creation to ensure proper categorization and reporting across the system.
Frequently Asked Questions
How do I navigate to the Customer section in DreamzFSM?
Click on the Customers menu from the main navigation and then select the Customers sub-menu to access the customer listing page.
Can I import multiple customers at once?
Yes. Click on the 3-dot menu on the Customer List page and select Import Customer. Download the sample Excel file, fill in your customer data in the correct format, and click Import to bulk-upload customers.
What information can I add when creating a new customer?
When adding a new customer, you can specify the customer type, company name, contact person details (including WhatsApp notifications), address information, ship-to and service address, account settings, personnel, login credentials, and portal assignment.
How do I give a customer access to the portal?
After filling in the customer details, use the Login Credential section to create access credentials, then click "Save and Send Customer Portal Access Email" to notify the customer with their login details.
What file format is supported for customer import?
Customer imports support .xlsx and .xls Excel file formats. Download the sample file from the Import Customer screen to ensure your data is structured correctly before uploading.
Related Articles
- How to Create and Manage Customer Contacts
- How to Assign a Customer Portal
- How to Create Jobs
- Invoicing from App
- How to Use the Customer List View