Invoice Creation and List
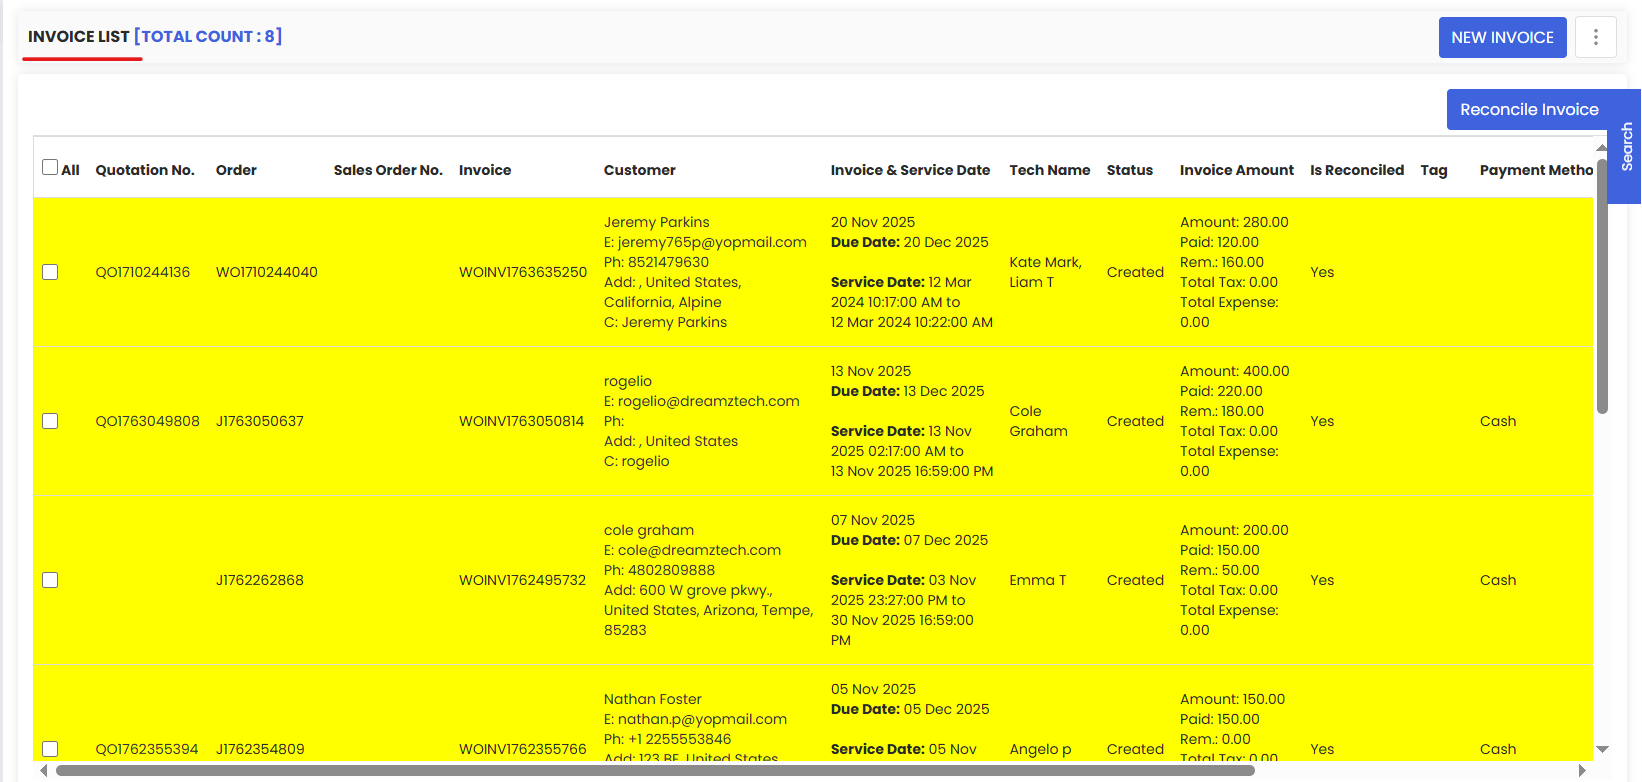
The Invoice List in DreamzFSM gives you a centralized view of all customer invoices with key details like invoice number, customer, service & due dates, technician, status, amount, reconciliation flag, tags, and payment method. From here you can:
- Create a new invoice with the New Invoice button.
- Filter by facility or switch time scopes to quickly narrow results.
- Review status & balances (Amount, Paid, Remaining, Tax, Expense) directly in-line.
- Track operations: see whether an invoice is Reconciled and which Payment Method was used.
- Act per row via the action menu (view/preview, edit, comment, print/email, delete, etc.).
- Bulk select invoices for batch actions and use Reconcile Invoice to post finance reconciliation.
It's your one-stop hub to audit billing progress, chase due payments, and keep finance tidy.
Overview
Invoices in DreamzFSM are linked directly to work orders, which means all relevant job and customer information is pulled in automatically when you create a new invoice. This eliminates manual data entry and ensures billing accuracy. Once created, invoices are tracked through their full lifecycle — from issuance through payment and reconciliation — all from the Invoice List.
Here is a reference video:
How to Access the Invoice List
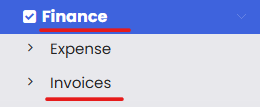
From the main menu, click Financials, then click Invoice. This opens the Invoice listing page showing all existing invoices.

How to Create a New Invoice
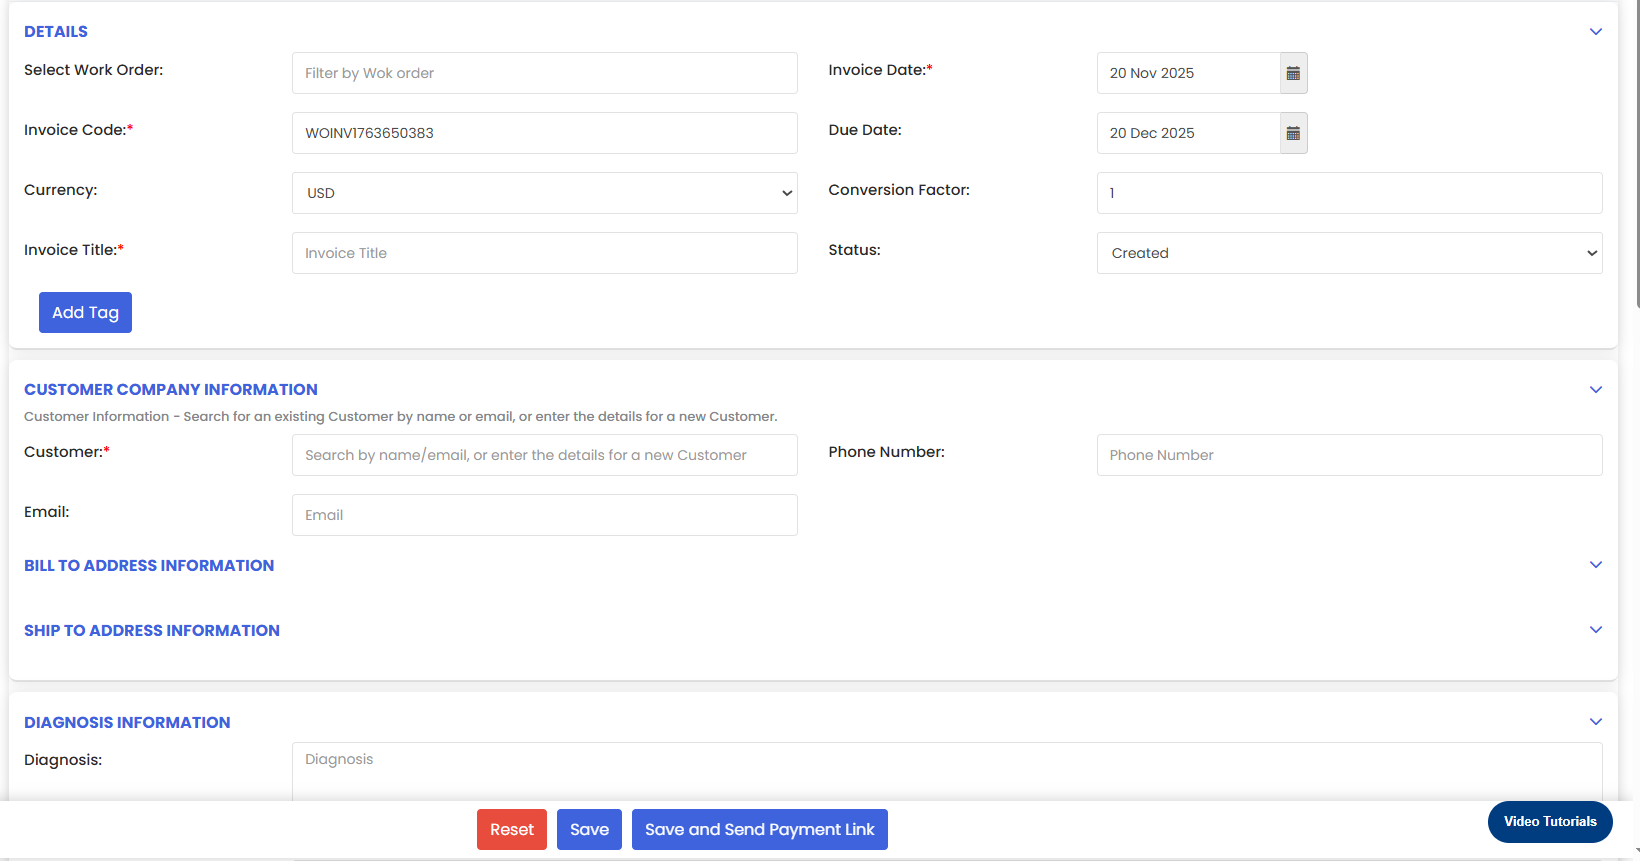
Step 1 – Click "New Invoice"
From the Invoice listing page, click the New Invoice button in the top right corner. This opens the invoice creation form.
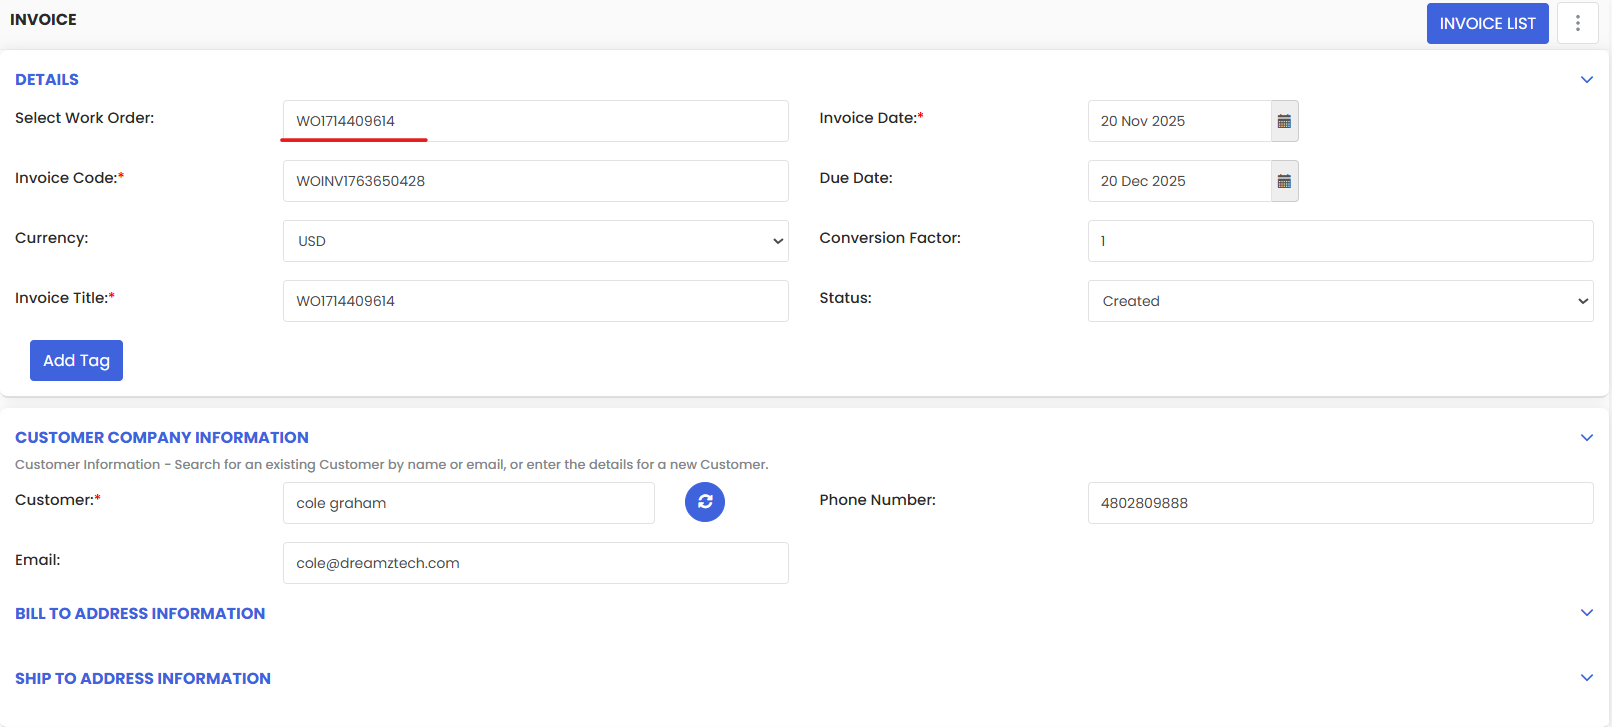
Step 2 – Enter the Work Order Number
Enter the Work Order number in the designated field. This will automatically populate all related fields including customer information, job details, and site information linked to that work order.
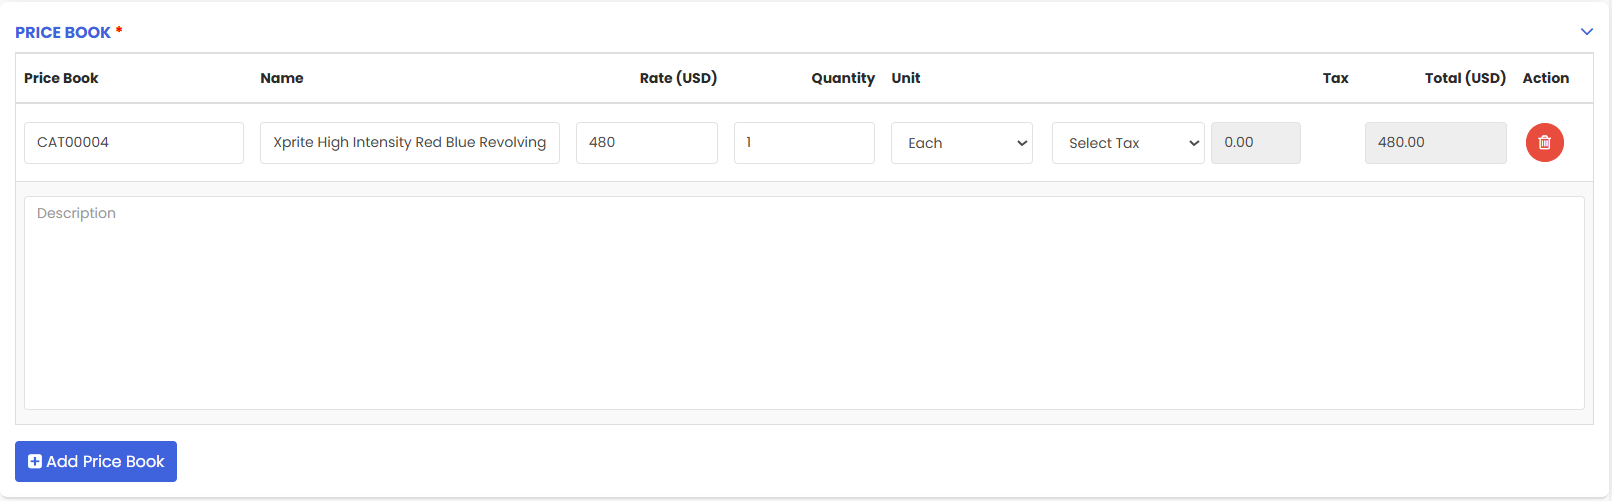
Step 3 – Select Items from the Price Book
Navigate to the Price Book section and select the relevant items to be added to the invoice. These items represent the services or parts billed to the customer.
Step 4 – Add Payment Details
Under the Add New Payment section, select the payment method for the invoice and enter the payment amount.

Step 5 – Add Notes and Summary
In the Notes and Summary section, you can add any relevant notes or recommendations. You also have the option to:
- Select persons to notify by email when the invoice is generated.
- Enable the checkbox to show the invoice to the customer on their panel.

Step 6 – Save the Invoice
Click the Save button to generate the invoice. Once saved, the invoice will be created and added to the Invoice List, ready for tracking and payment management.
After Creating an Invoice — Managing Payments and Expenses
Updating Payment Status
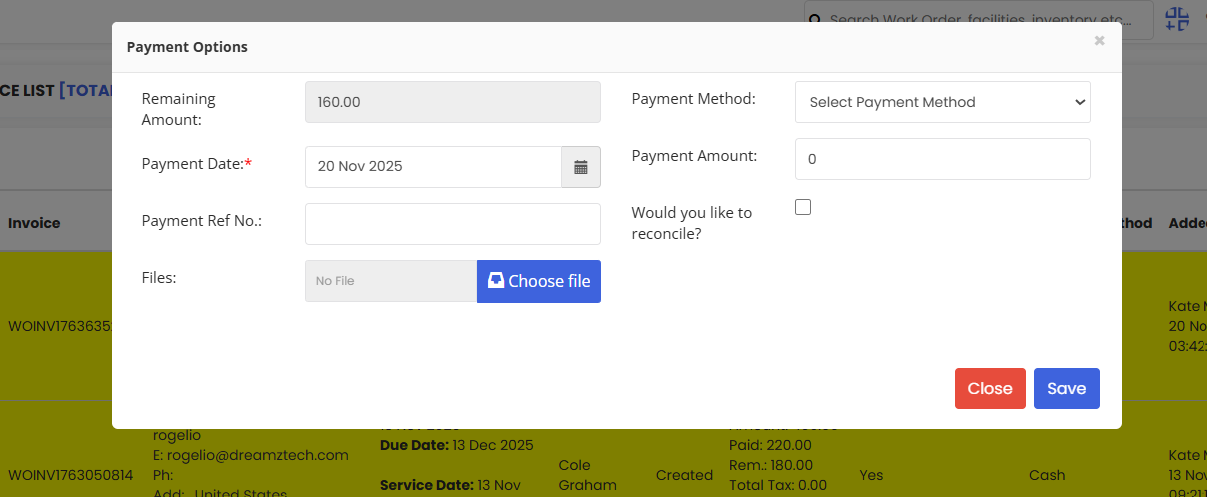
Once the invoice is created and added to the Invoice List, you can update the payment status at any time. Click the Payment Options button under the Action column for the relevant invoice.
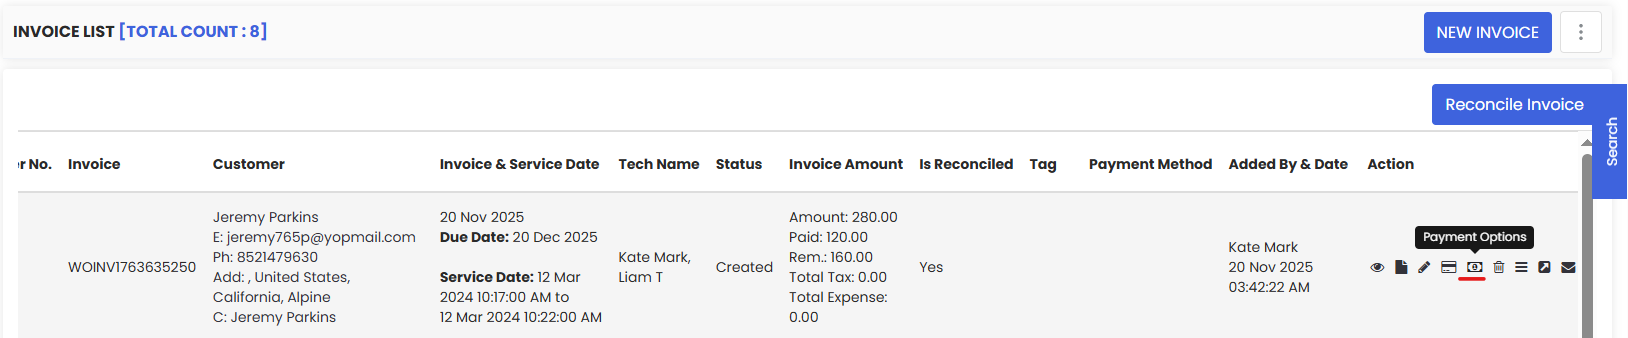
A pop-up will appear where you can fill in the payment details and reconcile the invoice to mark the payment as settled.
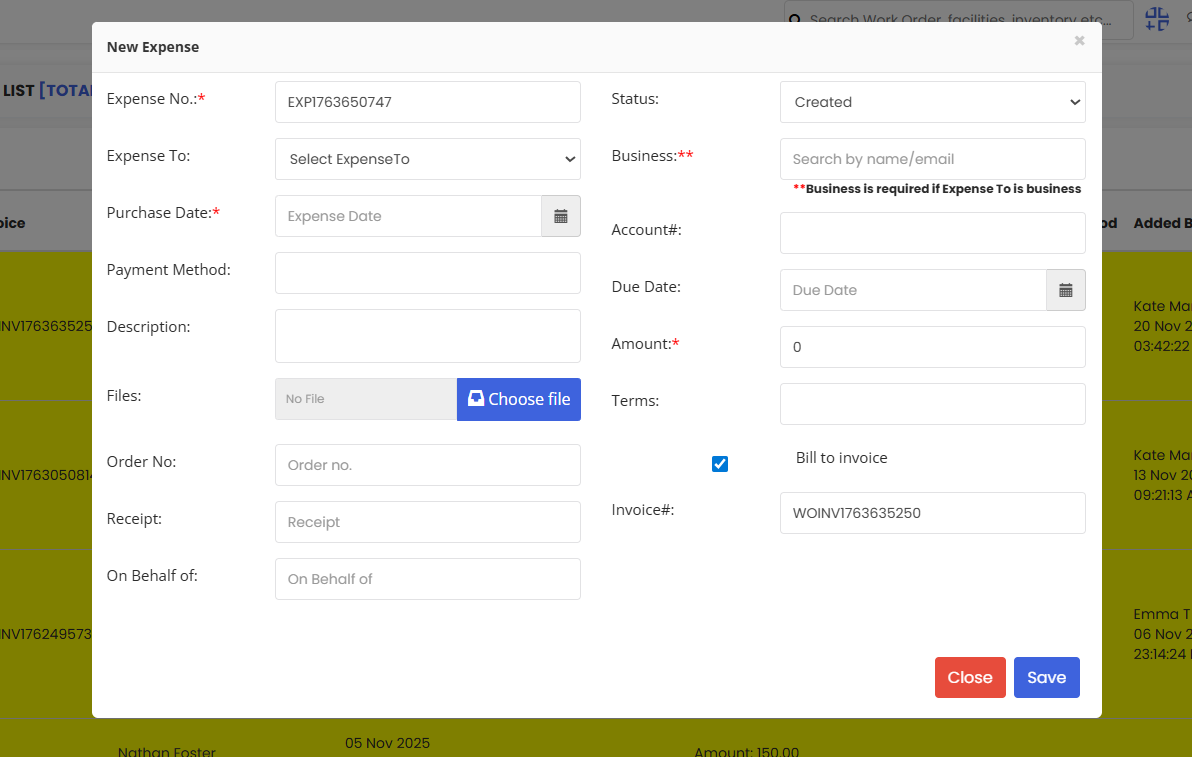
Adding Additional Expenses
If there is an additional expense incurred during the job, click the New Expense tab in the far right column of the listed job on the Invoice List.

A pop-up will appear where you can fill in the expense details. These additional expenses will be added to the invoice automatically.
Tips for Managing Invoices
- Always link your invoice to a Work Order number to auto-populate customer and job details — this avoids manual entry errors and saves time.
- Use the filter by facility and time scope options on the Invoice List to quickly find specific invoices during audits or reporting.
- Reconcile invoices promptly once payment is received to keep your financial records accurate and up to date.
- Use the Notes and Summary section to add any important billing context that may be useful for the customer or your finance team.
- Enable the show customer on panel checkbox to give customers visibility of their invoice directly through the customer portal.
Frequently Asked Questions
Does entering a Work Order number automatically fill in customer details?
Yes. When you enter a valid Work Order number, DreamzFSM automatically populates all related fields including customer information, job details, and site information linked to that work order.
Can I add expenses to an invoice after it has been created?
Yes. You can add additional expenses to an invoice at any time by clicking the New Expense tab in the Action column of the Invoice List. The expenses will be appended to the existing invoice.
What does reconciling an invoice mean?
Reconciling an invoice confirms that the payment has been received and matches the invoiced amount. It marks the invoice as settled in the system and updates the financial records accordingly.
Can I notify customers when an invoice is generated?
Yes. In the Notes and Summary section, you can select specific people to notify by email when the invoice is saved. You can also enable the option to display the invoice on the customer's panel.
Can I perform bulk actions on invoices?
Yes. The Invoice List supports bulk selection of invoices, allowing you to perform batch actions including bulk reconciliation using the Reconcile Invoice option.
Related Articles
- How to Create Jobs
- Job Views in DreamzFSM
- Assign Jobs to Technicians
- Sub-Contractor Creation & List
- Create User/Employee